| 70-mm magazine Q - AS11-39-5737 to 5843 |
Photography Index | 70-mm magazine P - AS11-41-5971 to 6159 |
No copyright is asserted for NASA photographs. If a recognizable person appears in a photo, use for commercial purposes may infringe a right of privacy or publicity. Photos may not be used to state or imply the endorsement by NASA or by any NASA employee of a commercial product, process or service, or used in any other manner that might mislead. Accordingly, it is requested that if a NASA photograph is used in advertising and other commercial promotion, layout and copy be submitted to NASA prior to release.
NASA photos reproduced from this archive should include photo credit to "NASA" or "National Aeronautics and Space Administration" and should include scanning credit to the appropriate individuals or agencies as noted in the captions.

|
AS11-40-5844 Browse or print resolution. Crater Hartmann, and beyond it, crater Green from the LM. Image credit: Image Science and Analysis Laboratory, NASA-Johnson Space Center. |

|
AS11-40-5845 Browse or print resolution. Earth taken during lunar orbit from the LM. Image credit: Image Science and Analysis Laboratory, NASA-Johnson Space Center. |

|
AS11-40-5846 Browse or print resolution. Mare Fecunditatis and, in the distance, Messier and Messier A - from the LM. Image credit: Image Science and Analysis Laboratory, NASA-Johnson Space Center. |
|
AS11-40-5847 Browse or print resolution. Tranquillity Base from CDR window. Image credit: Image Science and Analysis Laboratory, NASA-Johnson Space Center. |

|
AS11-40-5848 Browse or print resolution. Tranquillity Base from CDR window. Image credit: Image Science and Analysis Laboratory, NASA-Johnson Space Center. |
|
AS11-40-5849 Browse or print resolution. Tranquillity Base near field and LM shadow seen out LMP window. Image credit: Image Science and Analysis Laboratory, NASA-Johnson Space Center. |
|
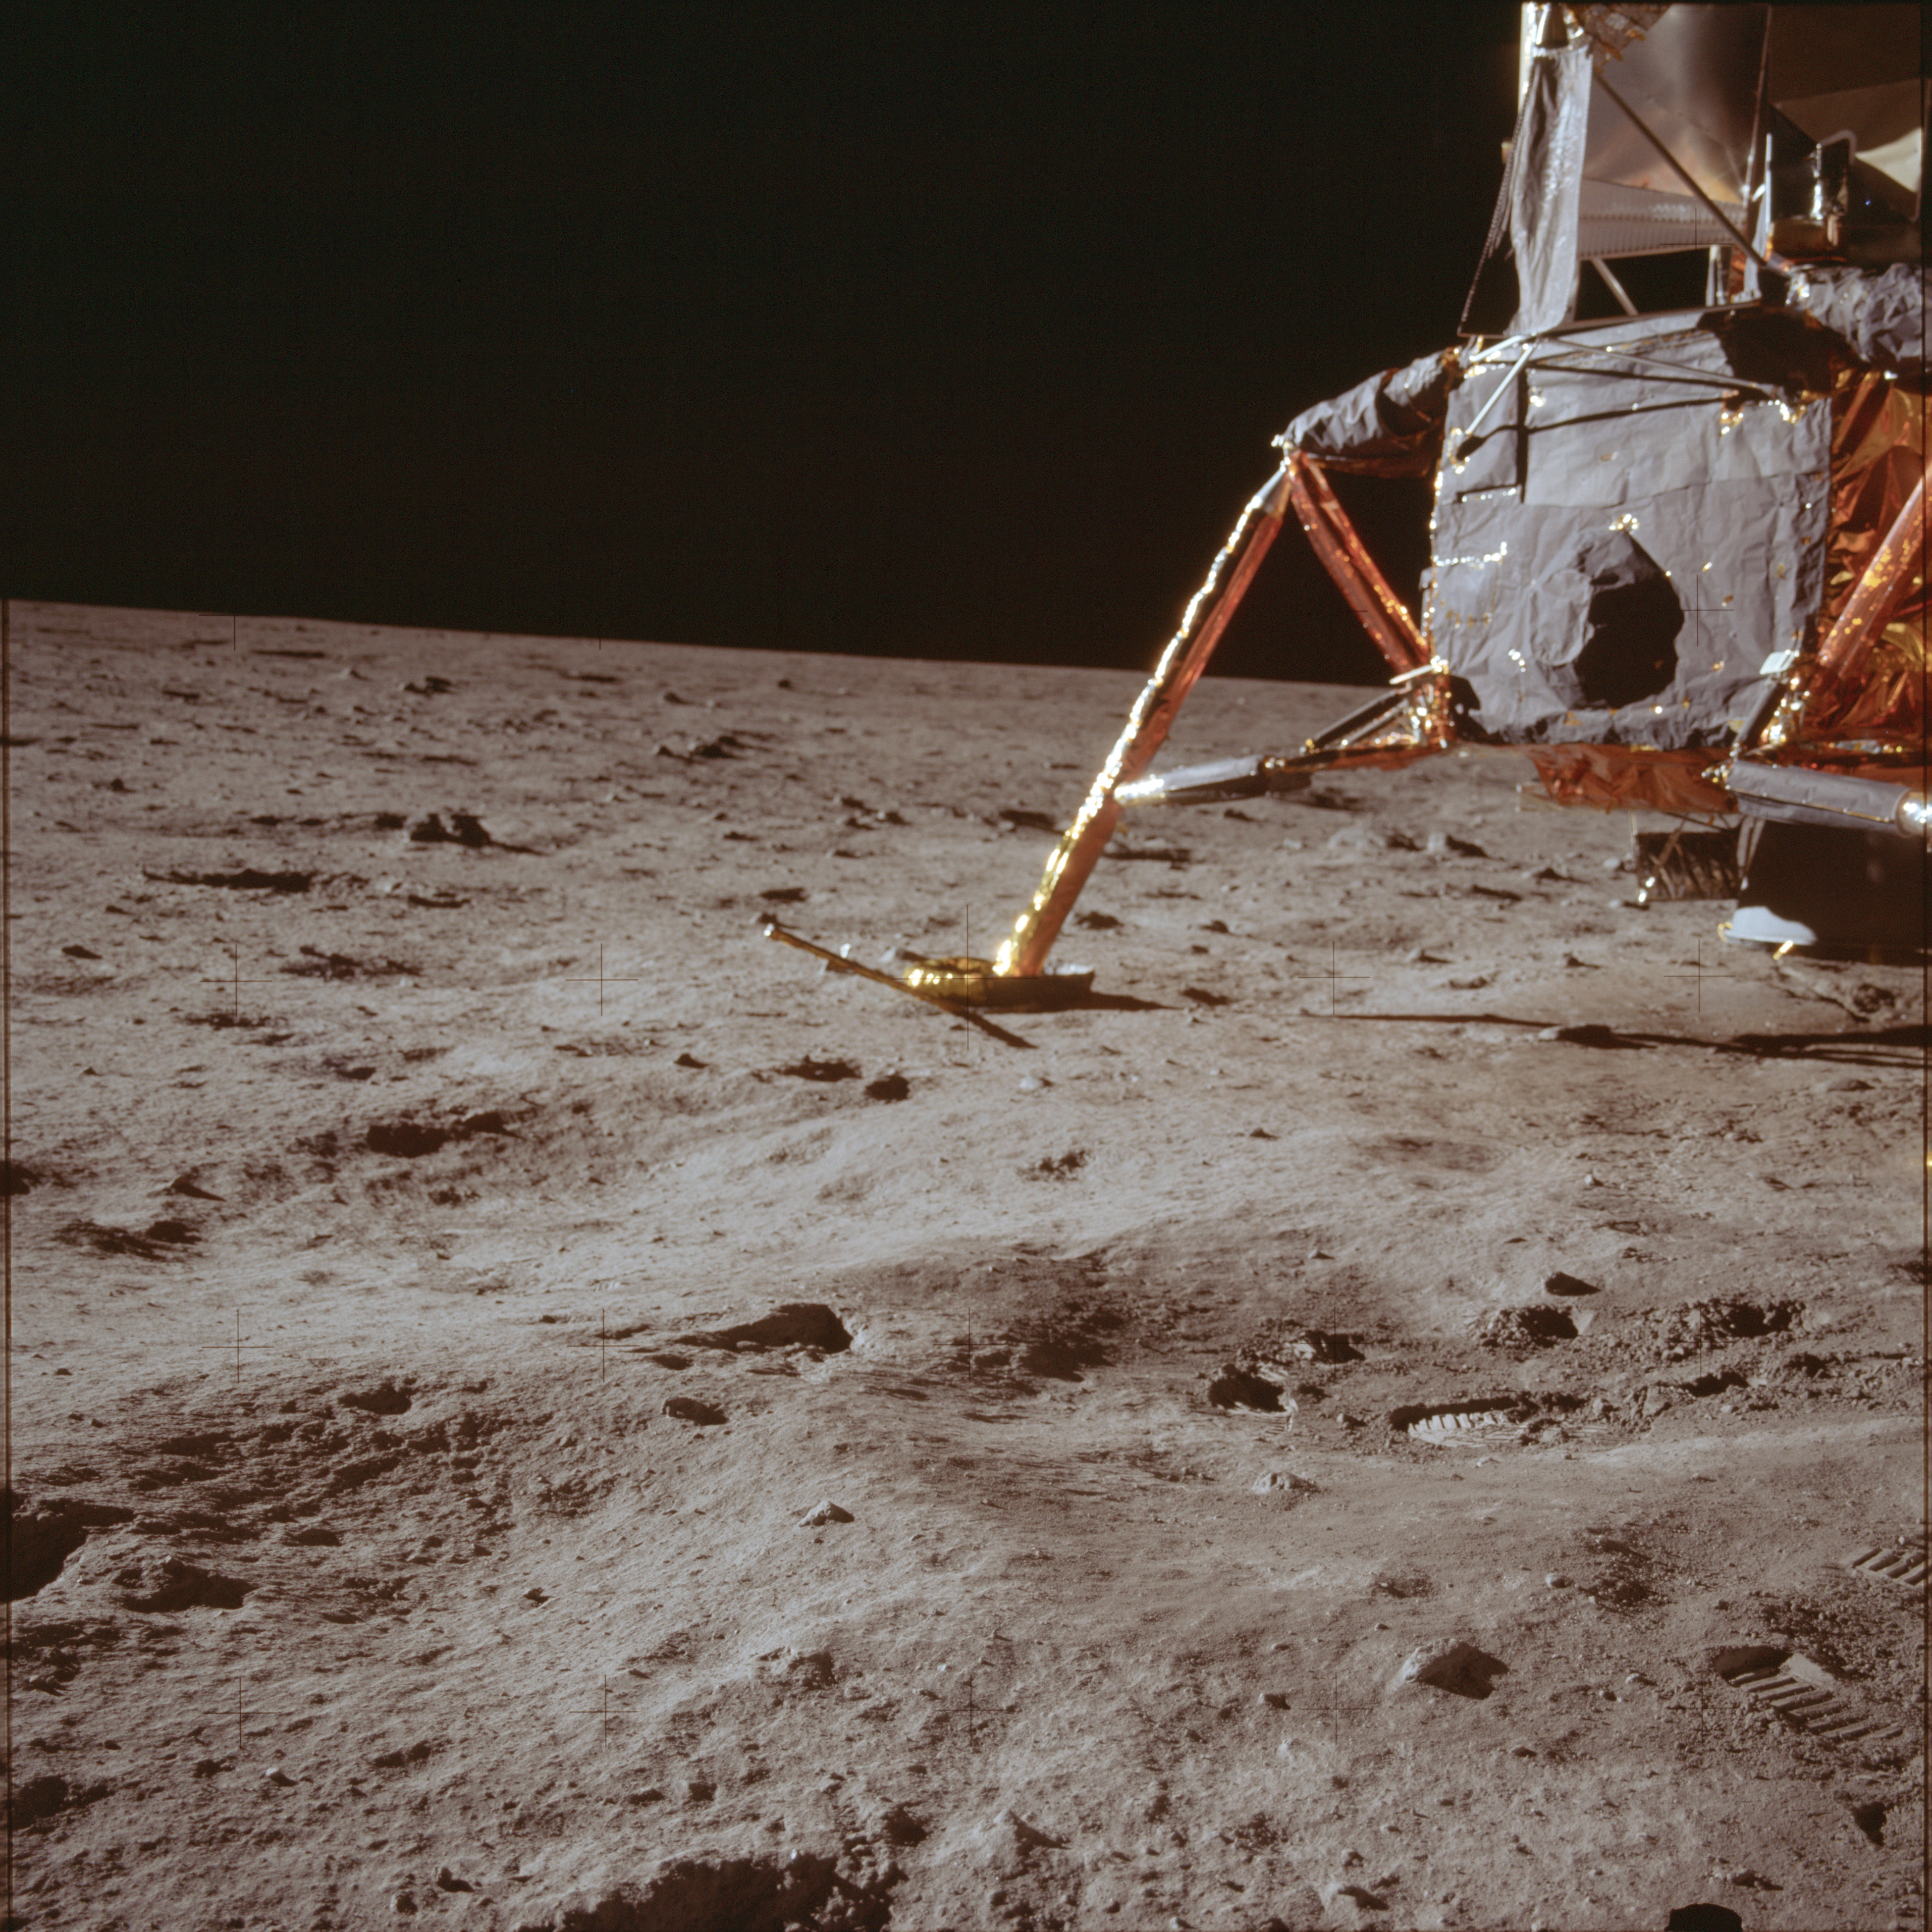
AS11-40-5850 Browse or print resolution. LM descent stage and south landing gear. Image credit: Image Science and Analysis Laboratory, NASA-Johnson Space Center. |
|
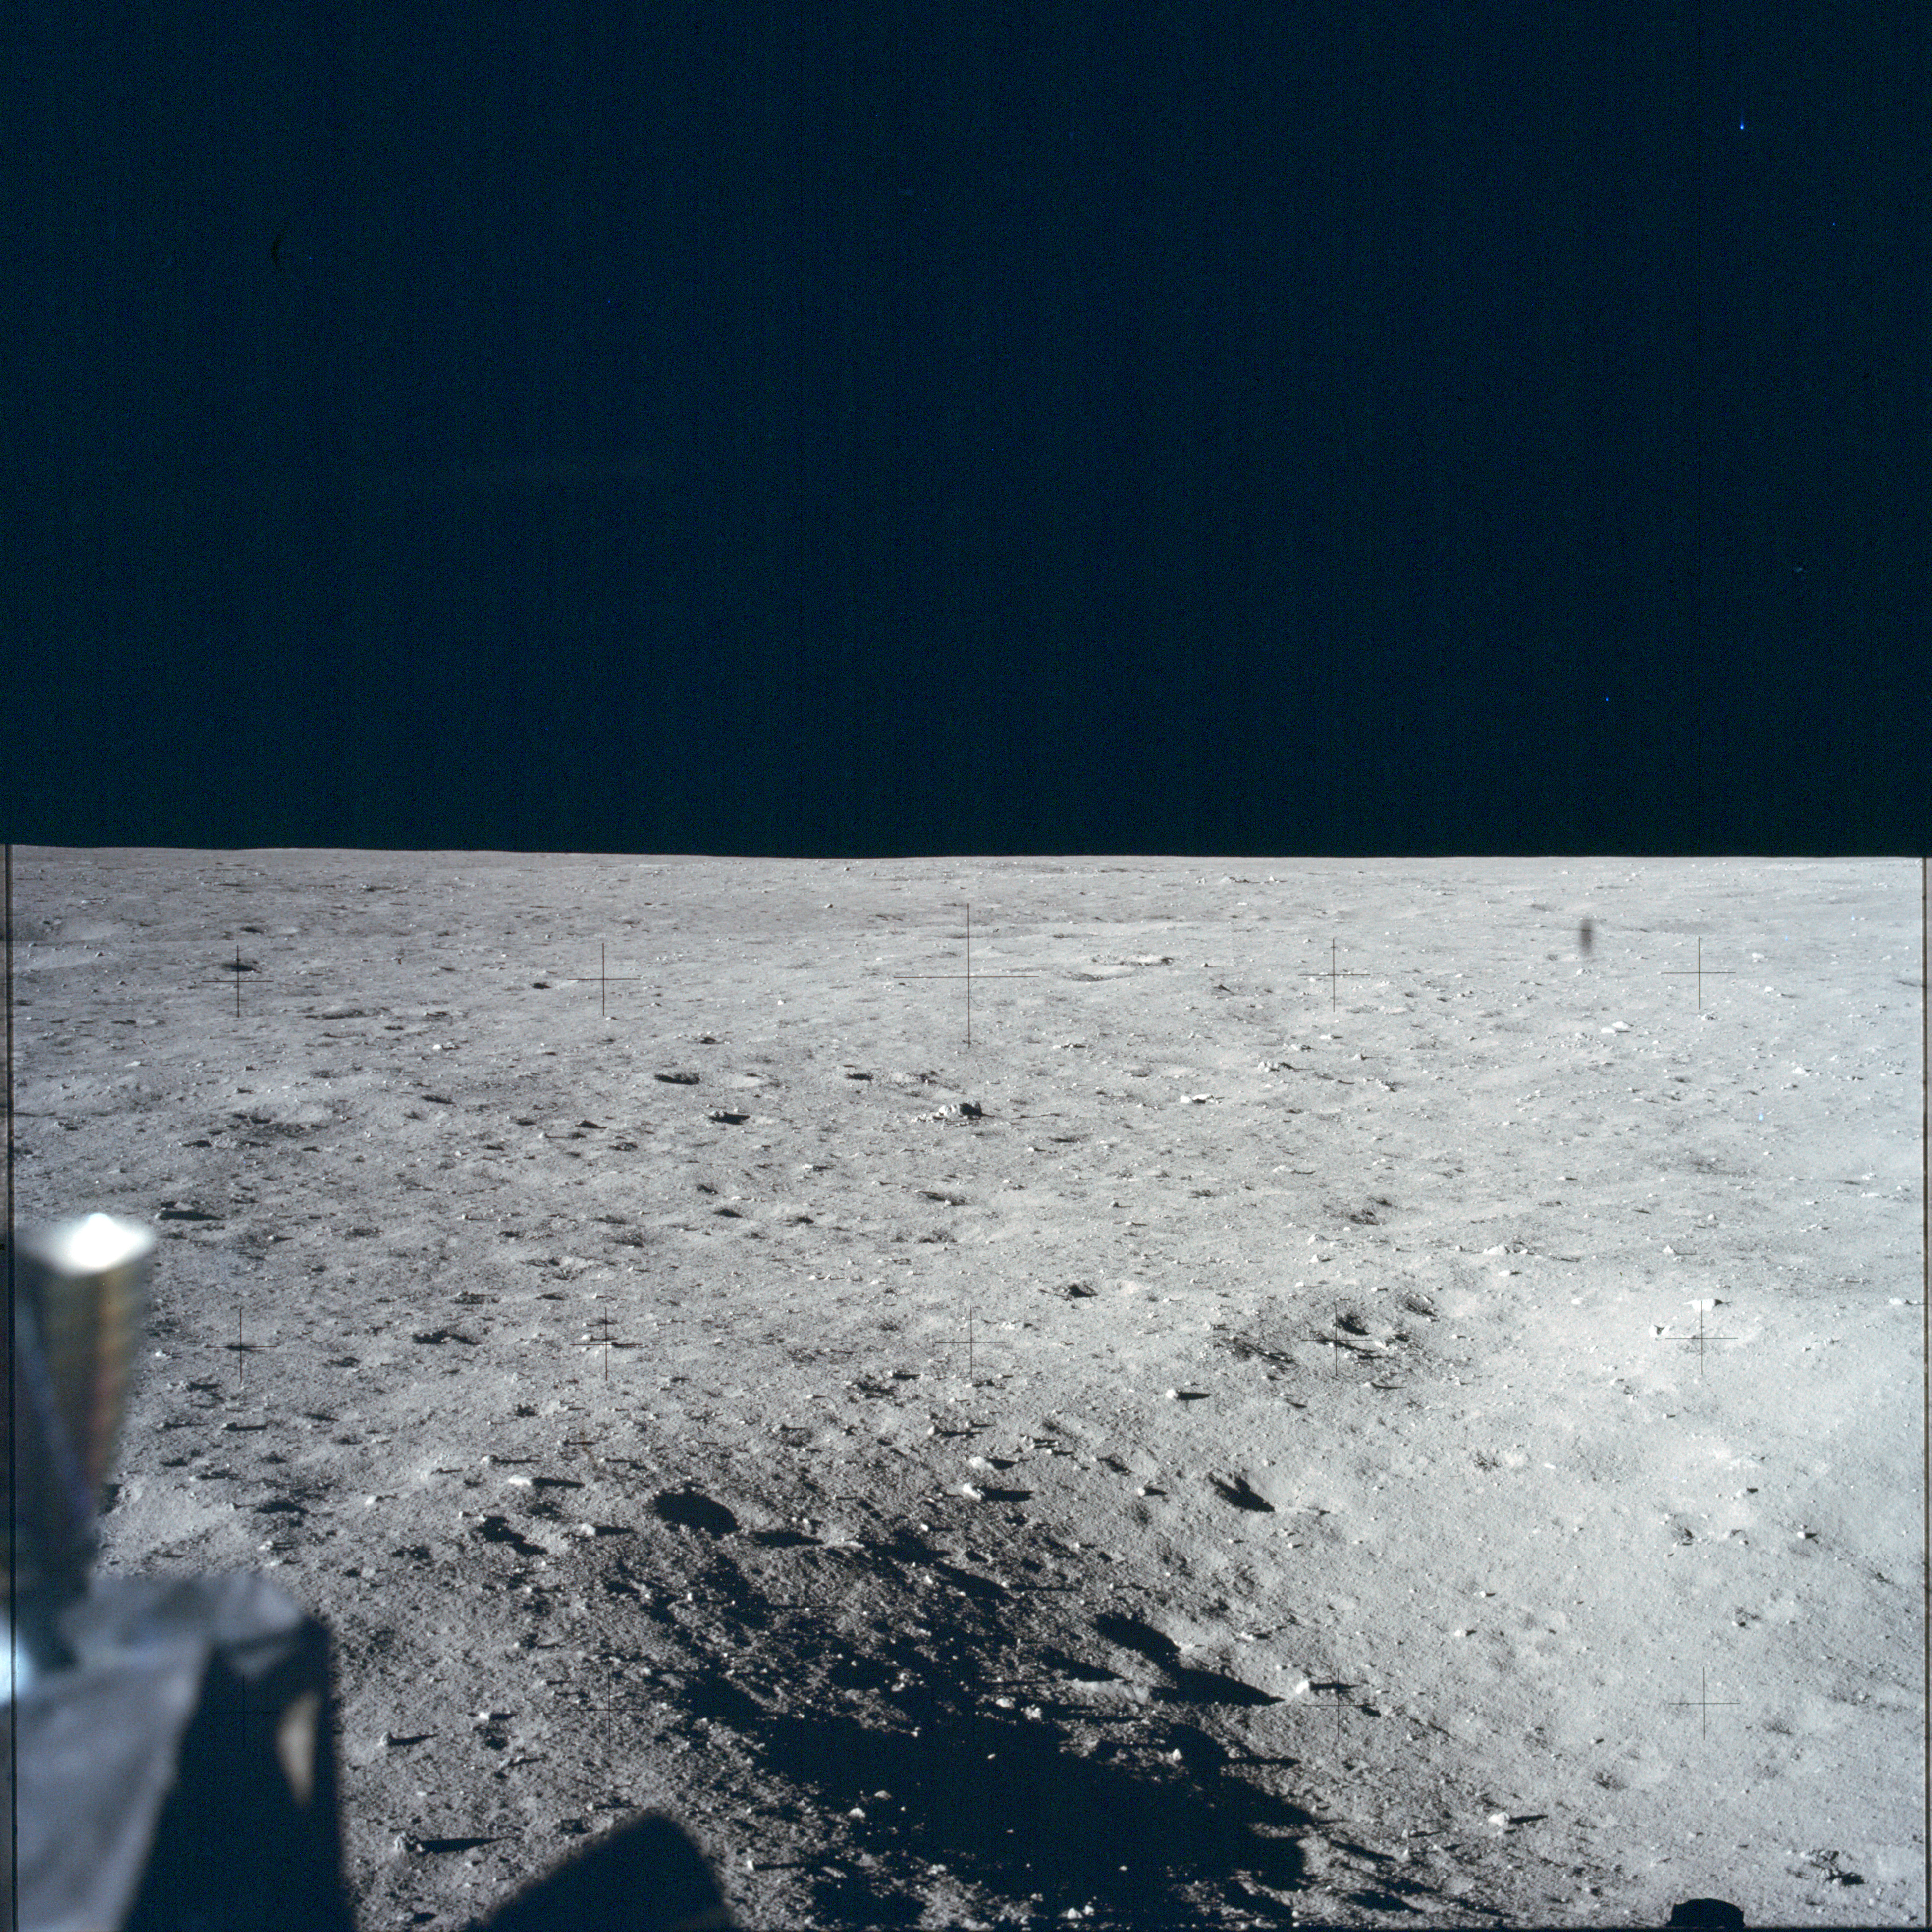
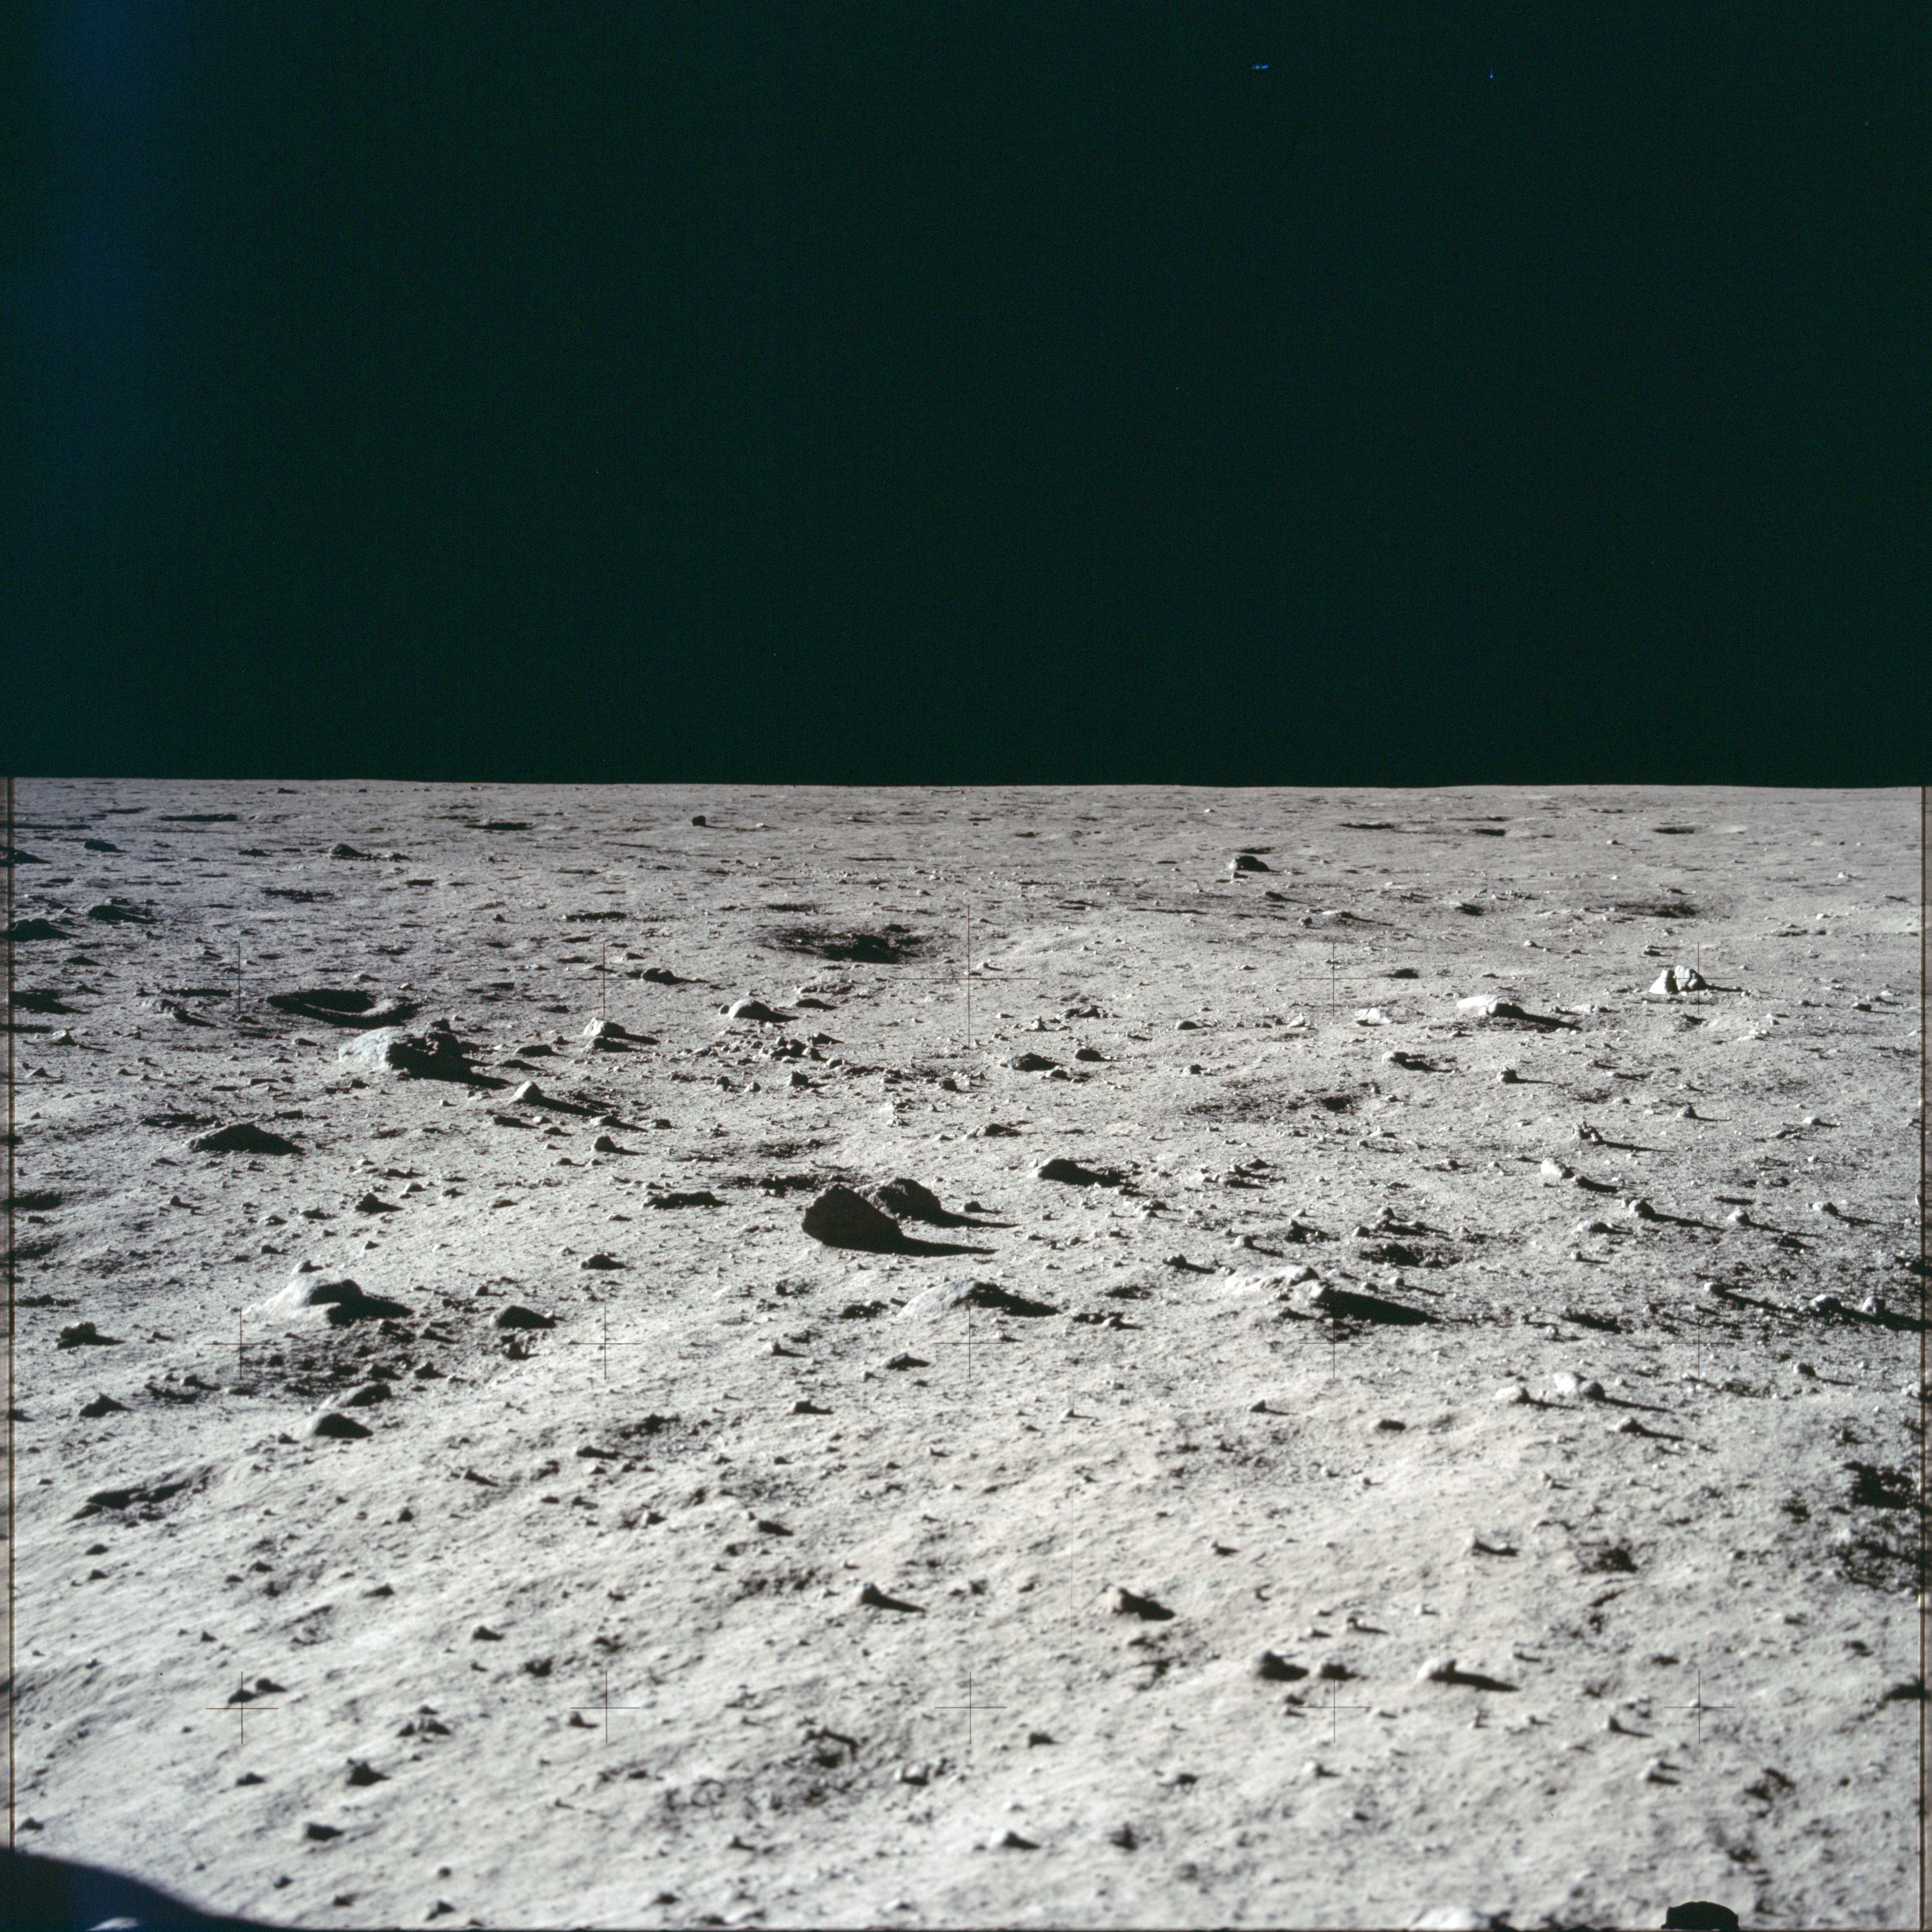
AS11-40-5851 Browse or print resolution. Tranquillity Base looking south. Image credit: Image Science and Analysis Laboratory, NASA-Johnson Space Center. |
|
AS11-40-5852 Browse or print resolution. Tranquillity Base looking south. Image credit: Image Science and Analysis Laboratory, NASA-Johnson Space Center. |
|
AS11-40-5853 Browse or print resolution. Tranquillity Base looking south. Image credit: Image Science and Analysis Laboratory, NASA-Johnson Space Center. |

|
AS11-40-5854 Browse or print resolution. Tranquillity Base and LM shadow. Image credit: Image Science and Analysis Laboratory, NASA-Johnson Space Center. |
|
AS11-40-5855 Browse or print resolution. Tranquillity Base looking north and LM shadow. Image credit: Image Science and Analysis Laboratory, NASA-Johnson Space Center. |

|
AS11-40-5856 Browse or print resolution. Tranquillity Base looking north and LM shadow. Image credit: Image Science and Analysis Laboratory, NASA-Johnson Space Center. |

|
AS11-40-5857 Browse or print resolution. Tranquillity Base looking north and LM shadow. Image credit: Image Science and Analysis Laboratory, NASA-Johnson Space Center. |

|
AS11-40-5858 Browse or print resolution. Tranquillity Base and LM north landing gear. Image credit: Image Science and Analysis Laboratory, NASA-Johnson Space Center. |

|
AS11-40-5859 Browse or print resolution. View south past east landing gear. Image credit: Image Science and Analysis Laboratory, NASA-Johnson Space Center. |

|
AS11-40-5860 Browse or print resolution. View south past east landing gear. Image credit: Image Science and Analysis Laboratory, NASA-Johnson Space Center. |

|
AS11-40-5861 Browse or print resolution. View south past east landing gear. Image credit: Image Science and Analysis Laboratory, NASA-Johnson Space Center. |

|
AS11-40-5862 Browse or print resolution. Aldrin exiting LM. Image credit: Image Science and Analysis Laboratory, NASA-Johnson Space Center. |

|
AS11-40-5863 Browse or print resolution. Aldrin exiting LM. Image credit: Image Science and Analysis Laboratory, NASA-Johnson Space Center. |
|
AS11-40-5864 Browse or print resolution. LM descent stage and area of soil beneath. Image credit: Image Science and Analysis Laboratory, NASA-Johnson Space Center. |

|
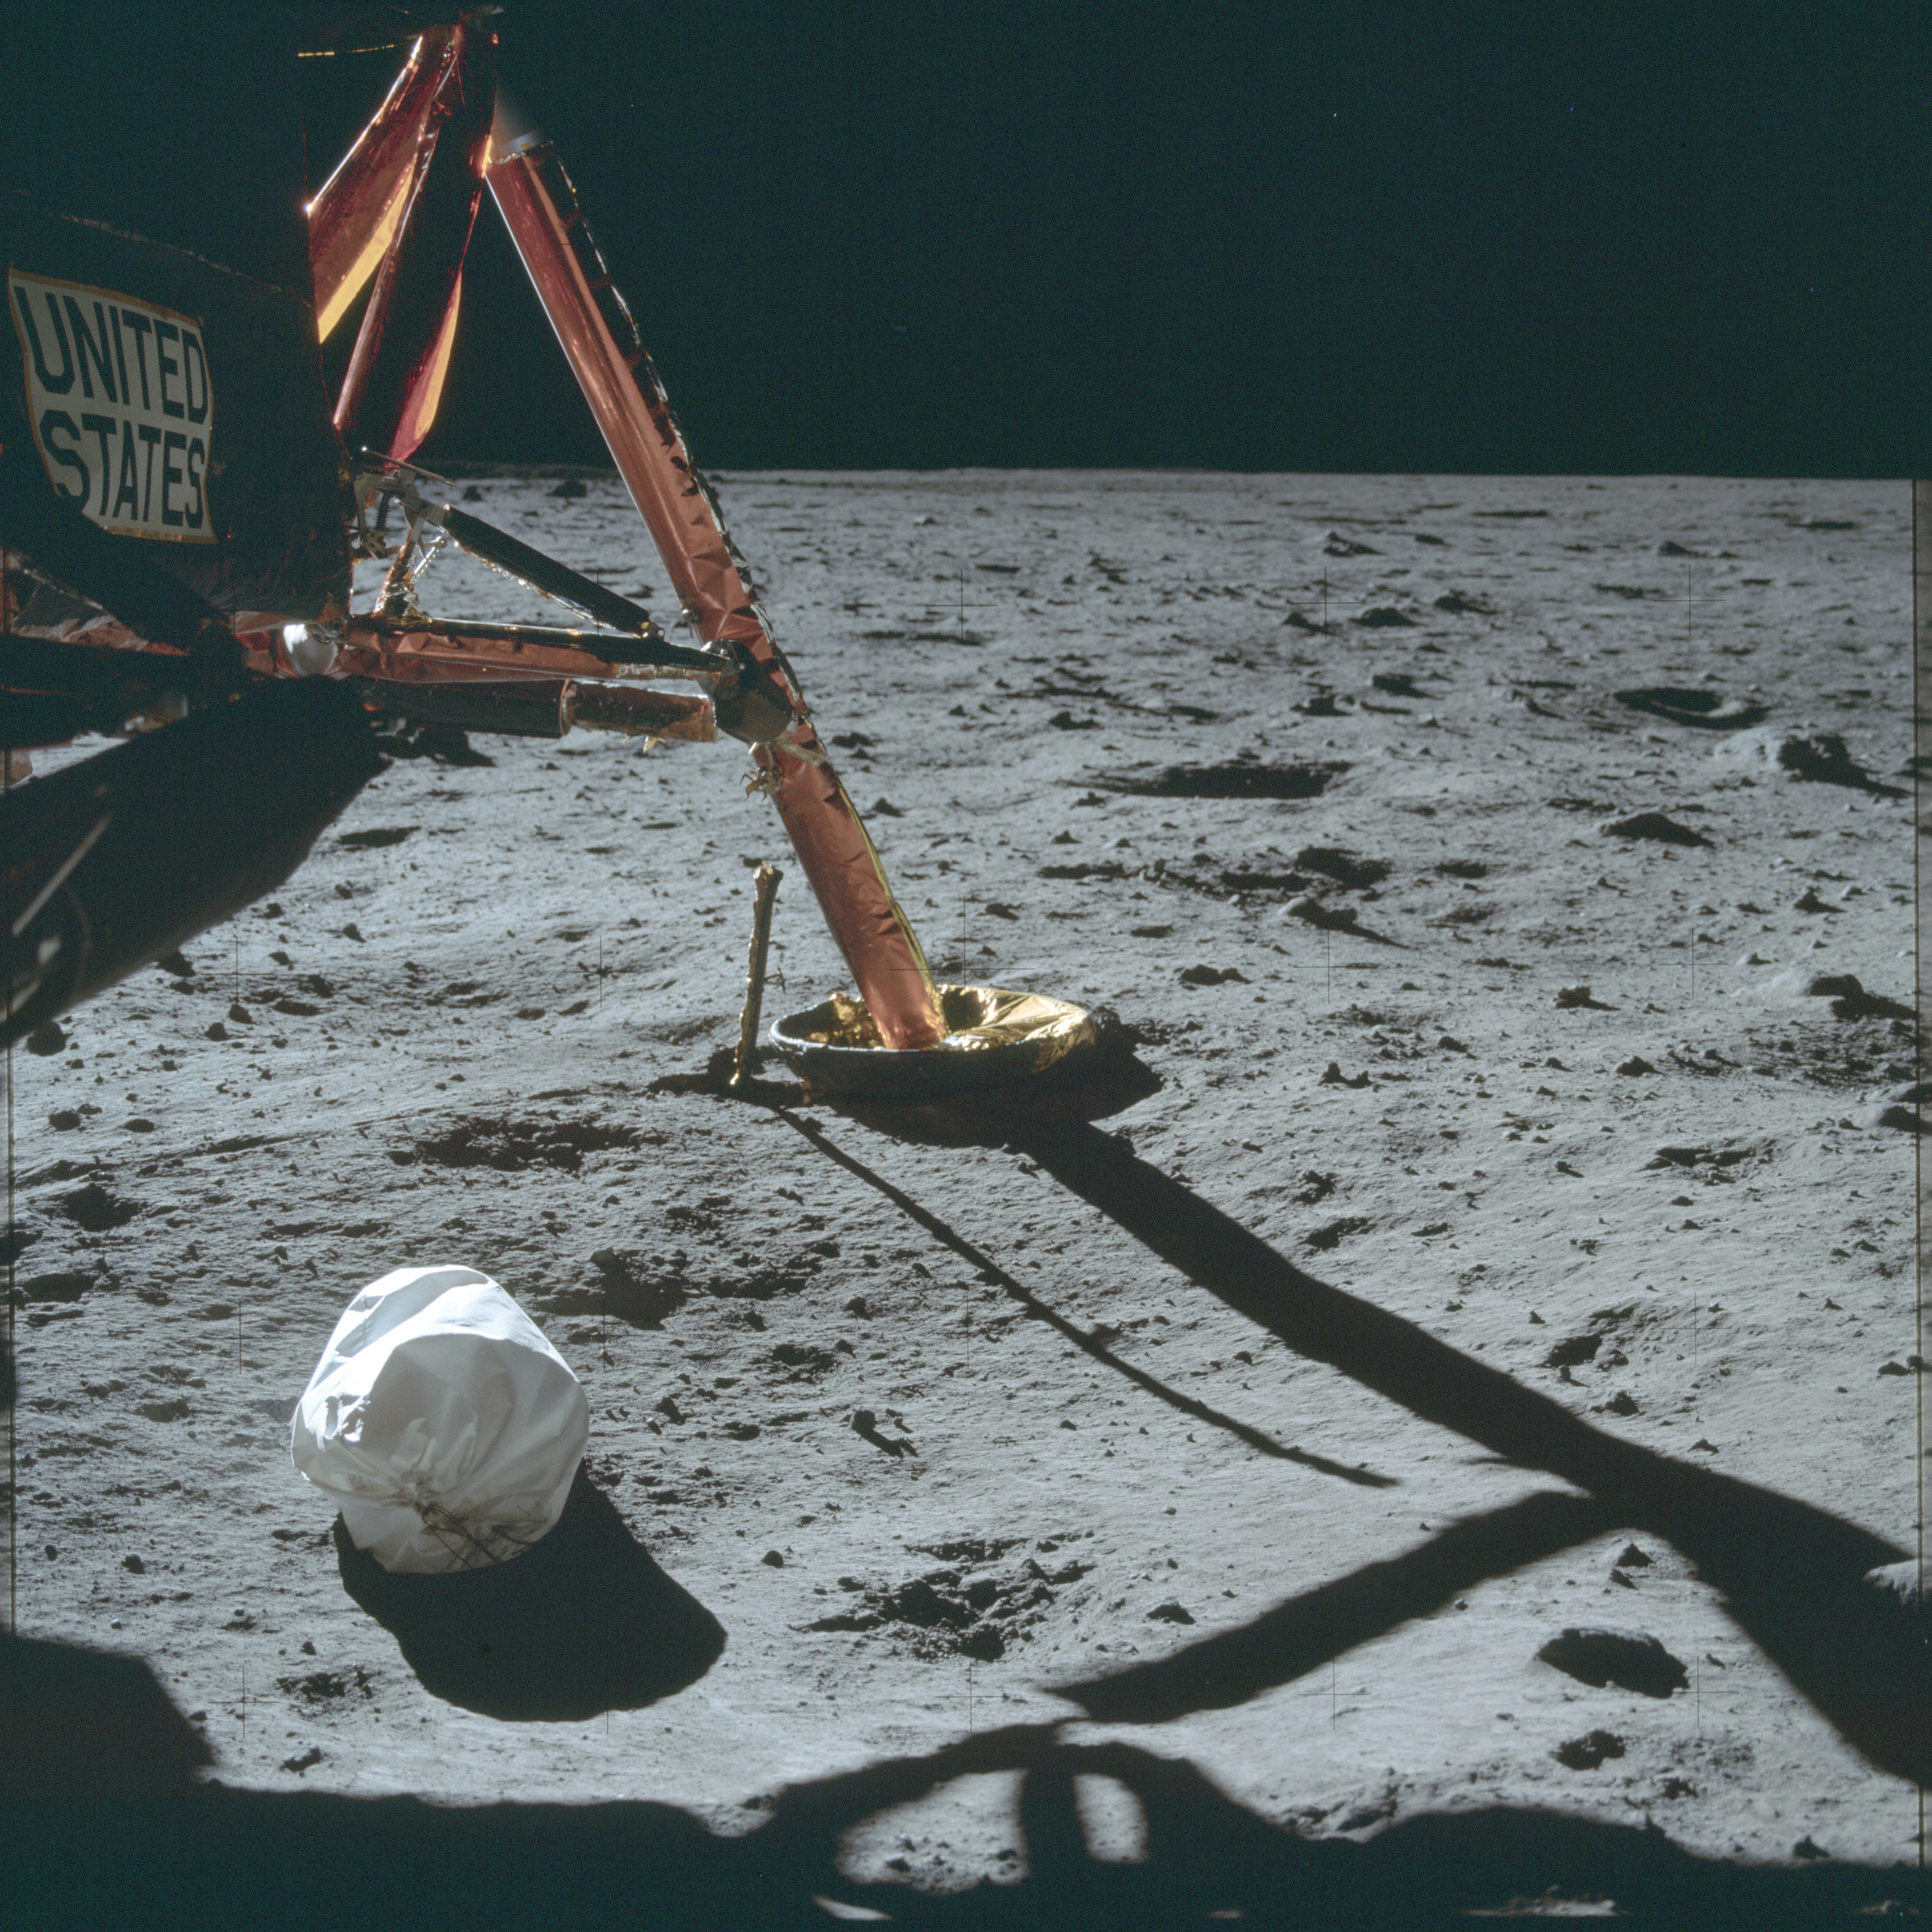
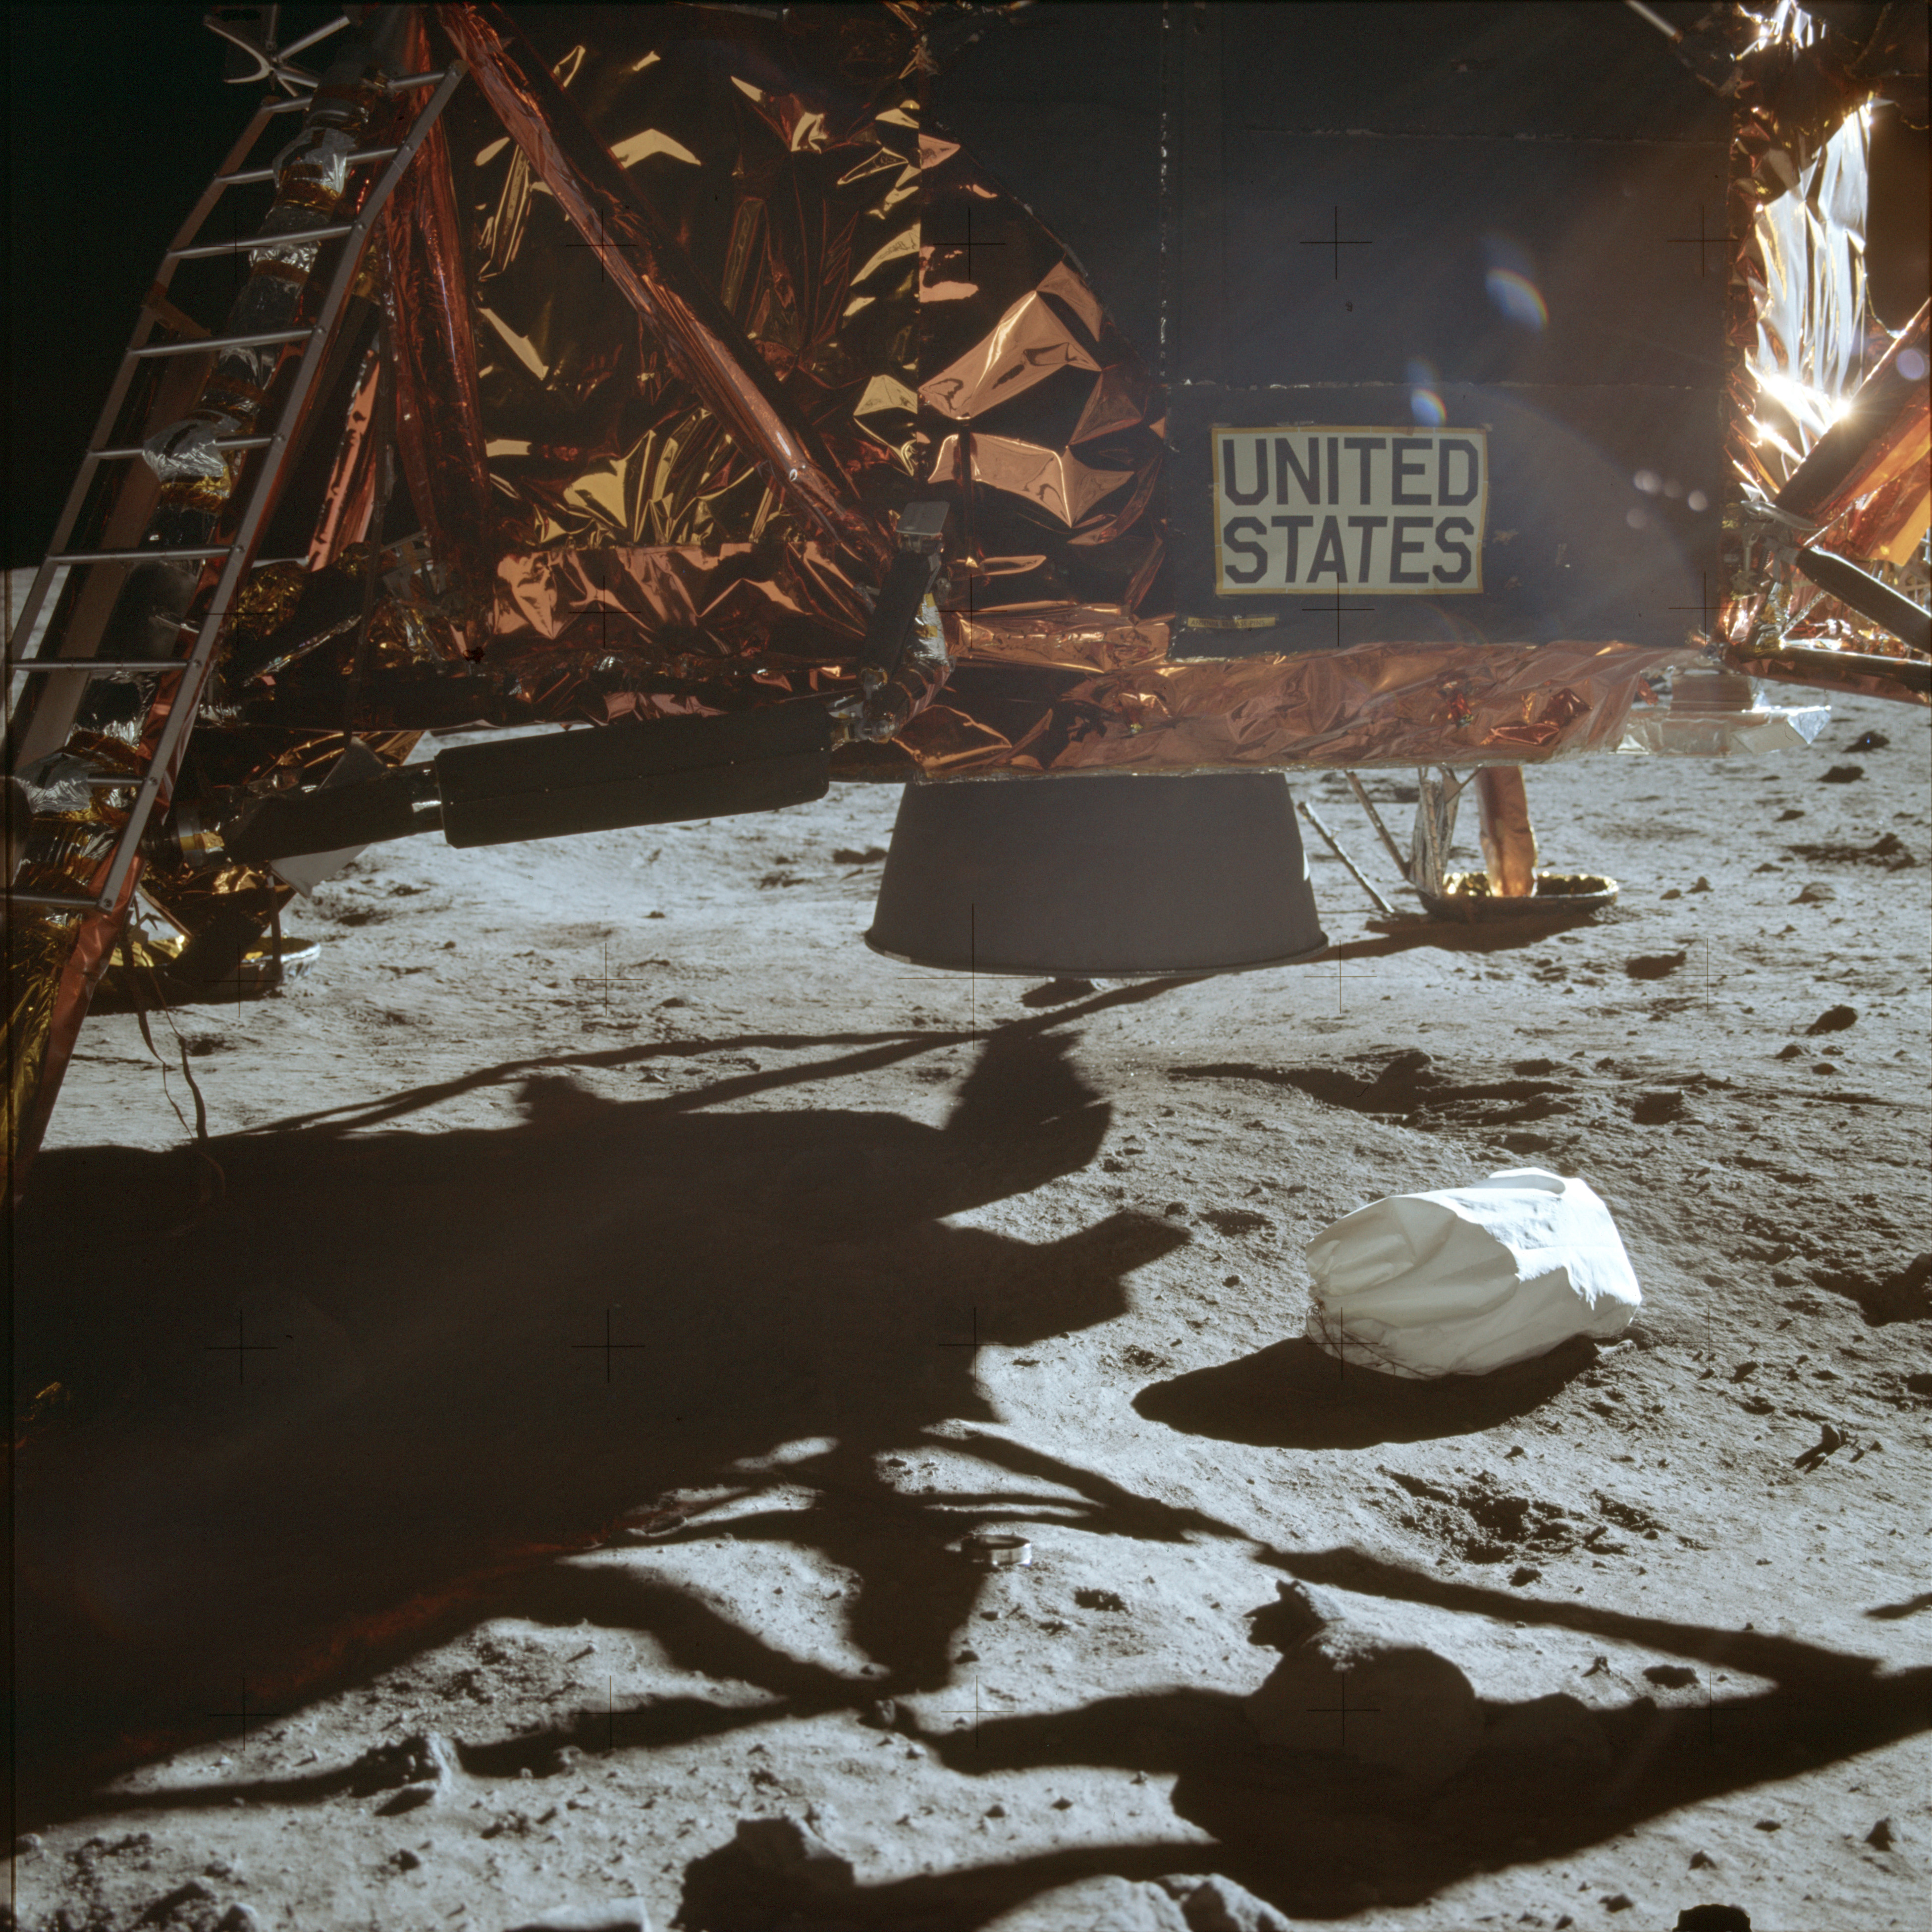
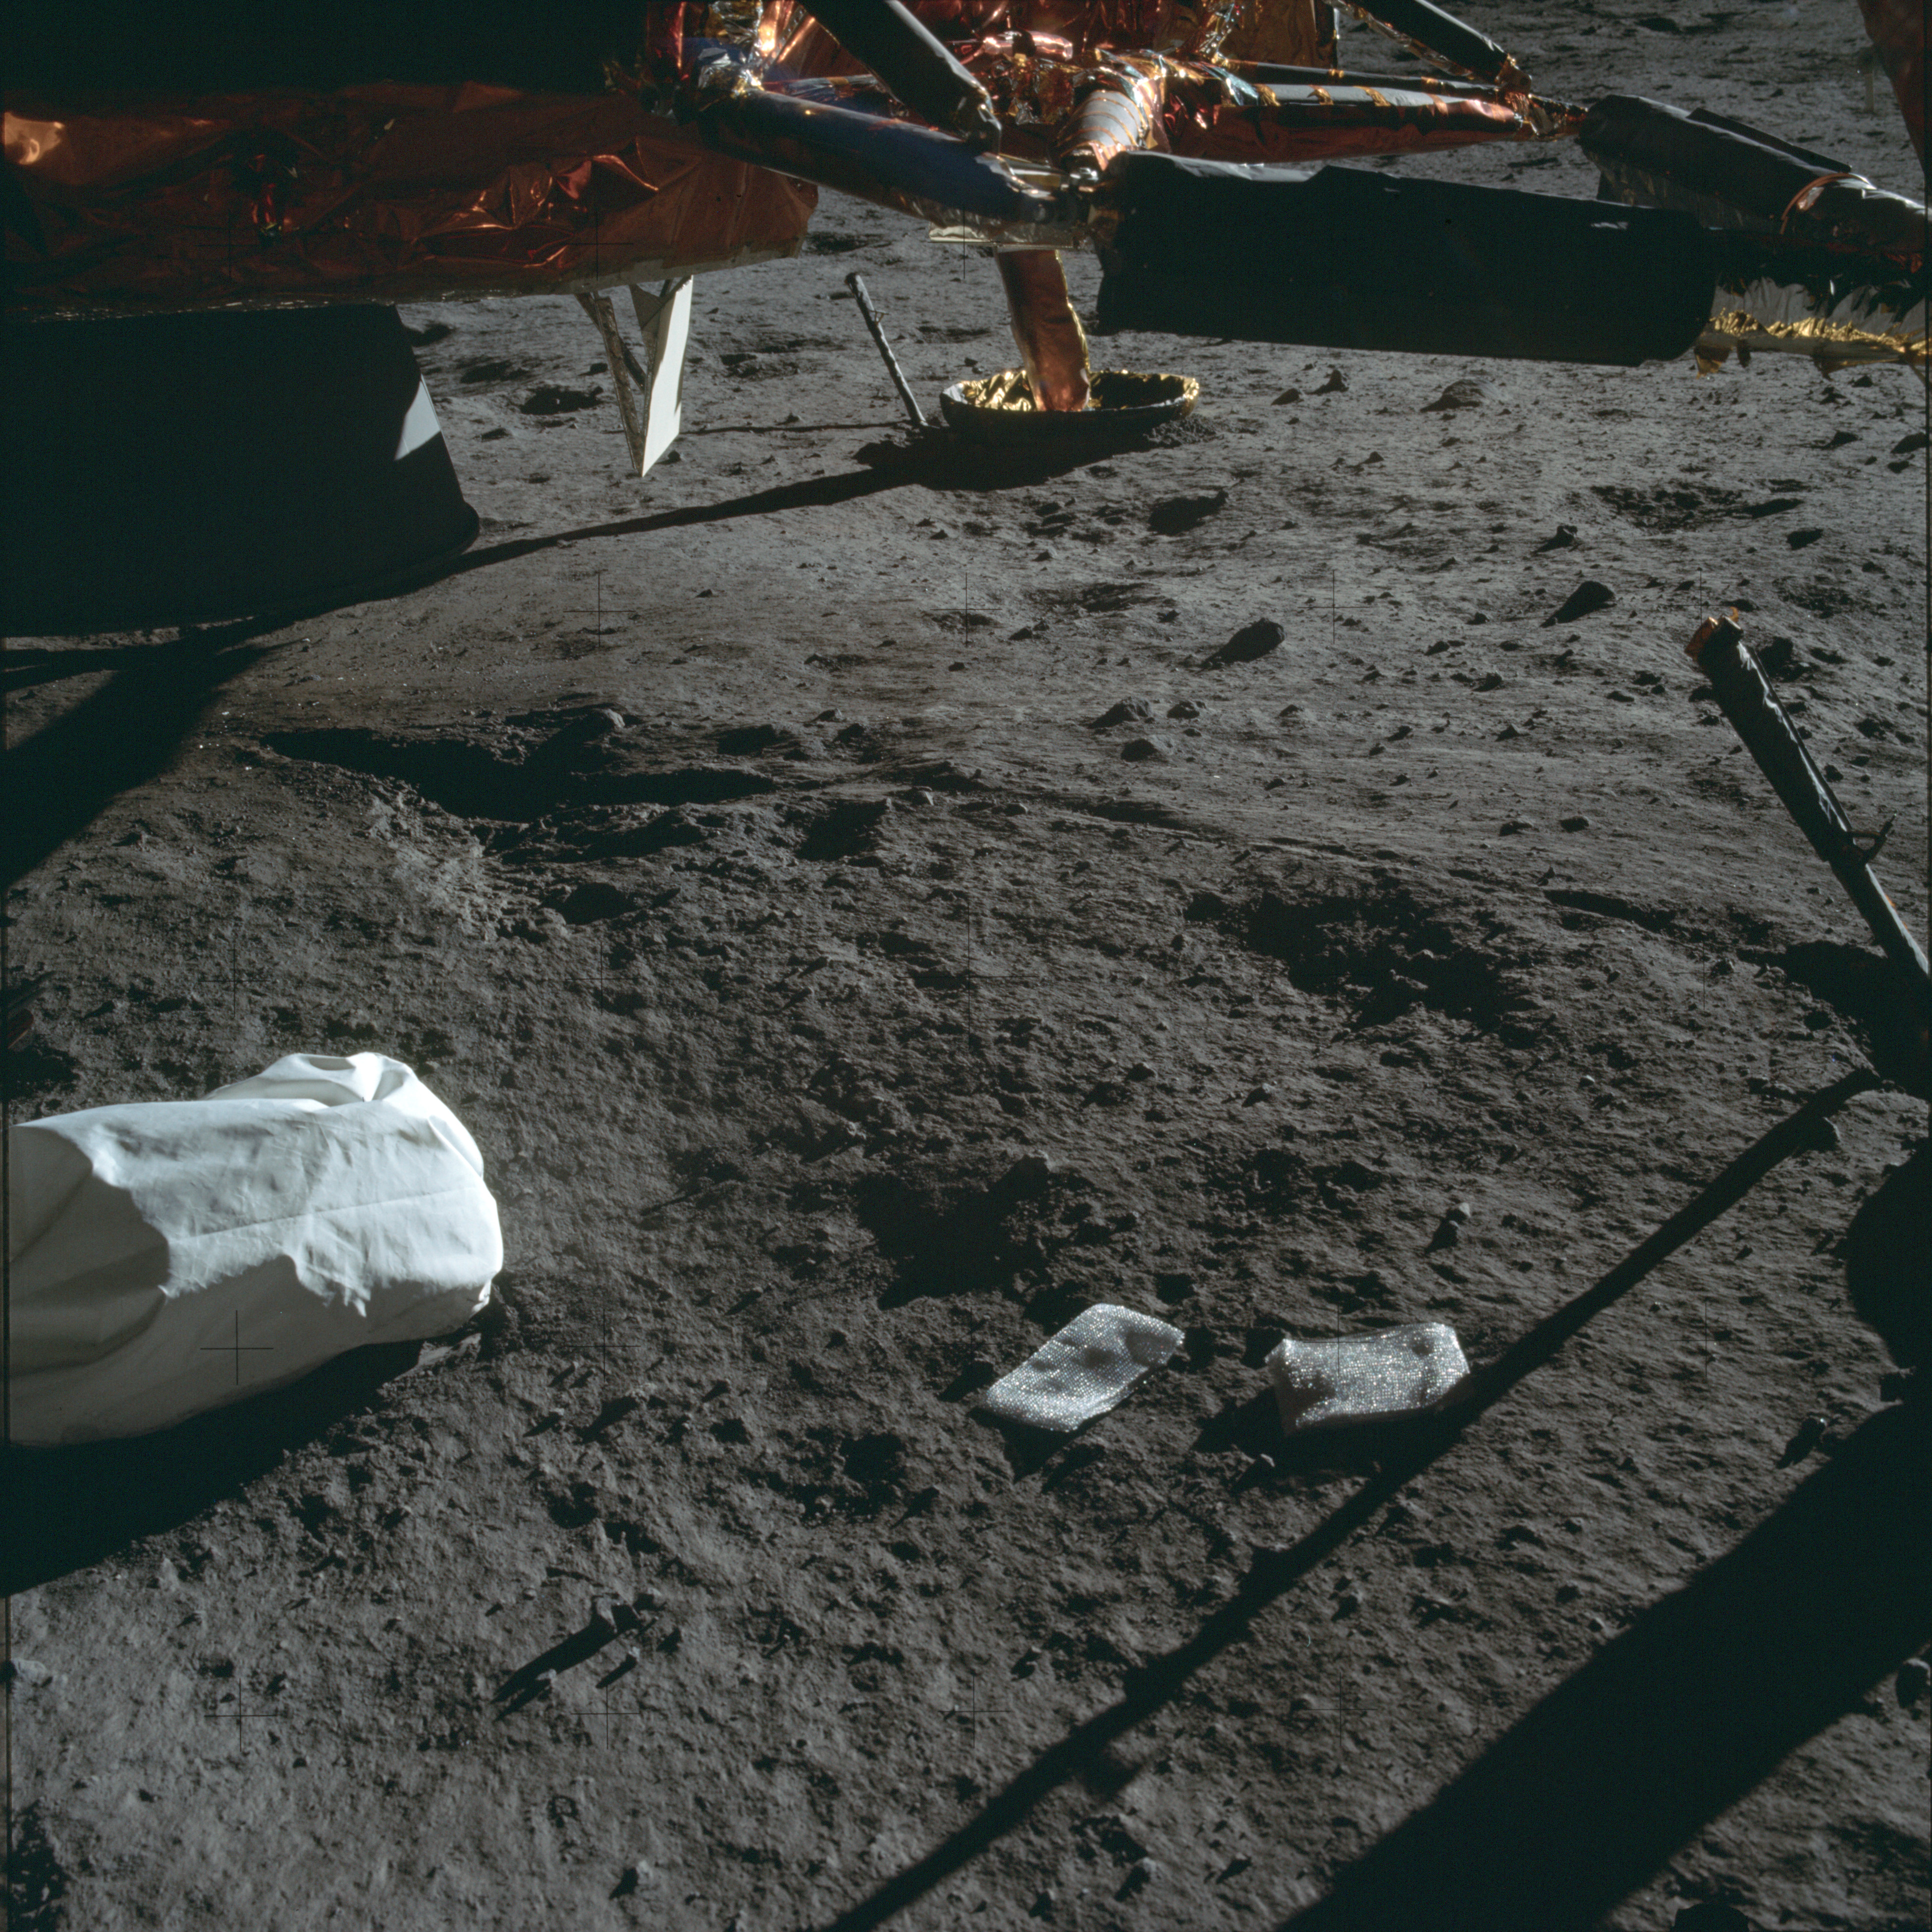
AS11-40-5865 Browse or print resolution. South footpad. Jettison bag to left. Image credit: Image Science and Analysis Laboratory, NASA-Johnson Space Center. |
|
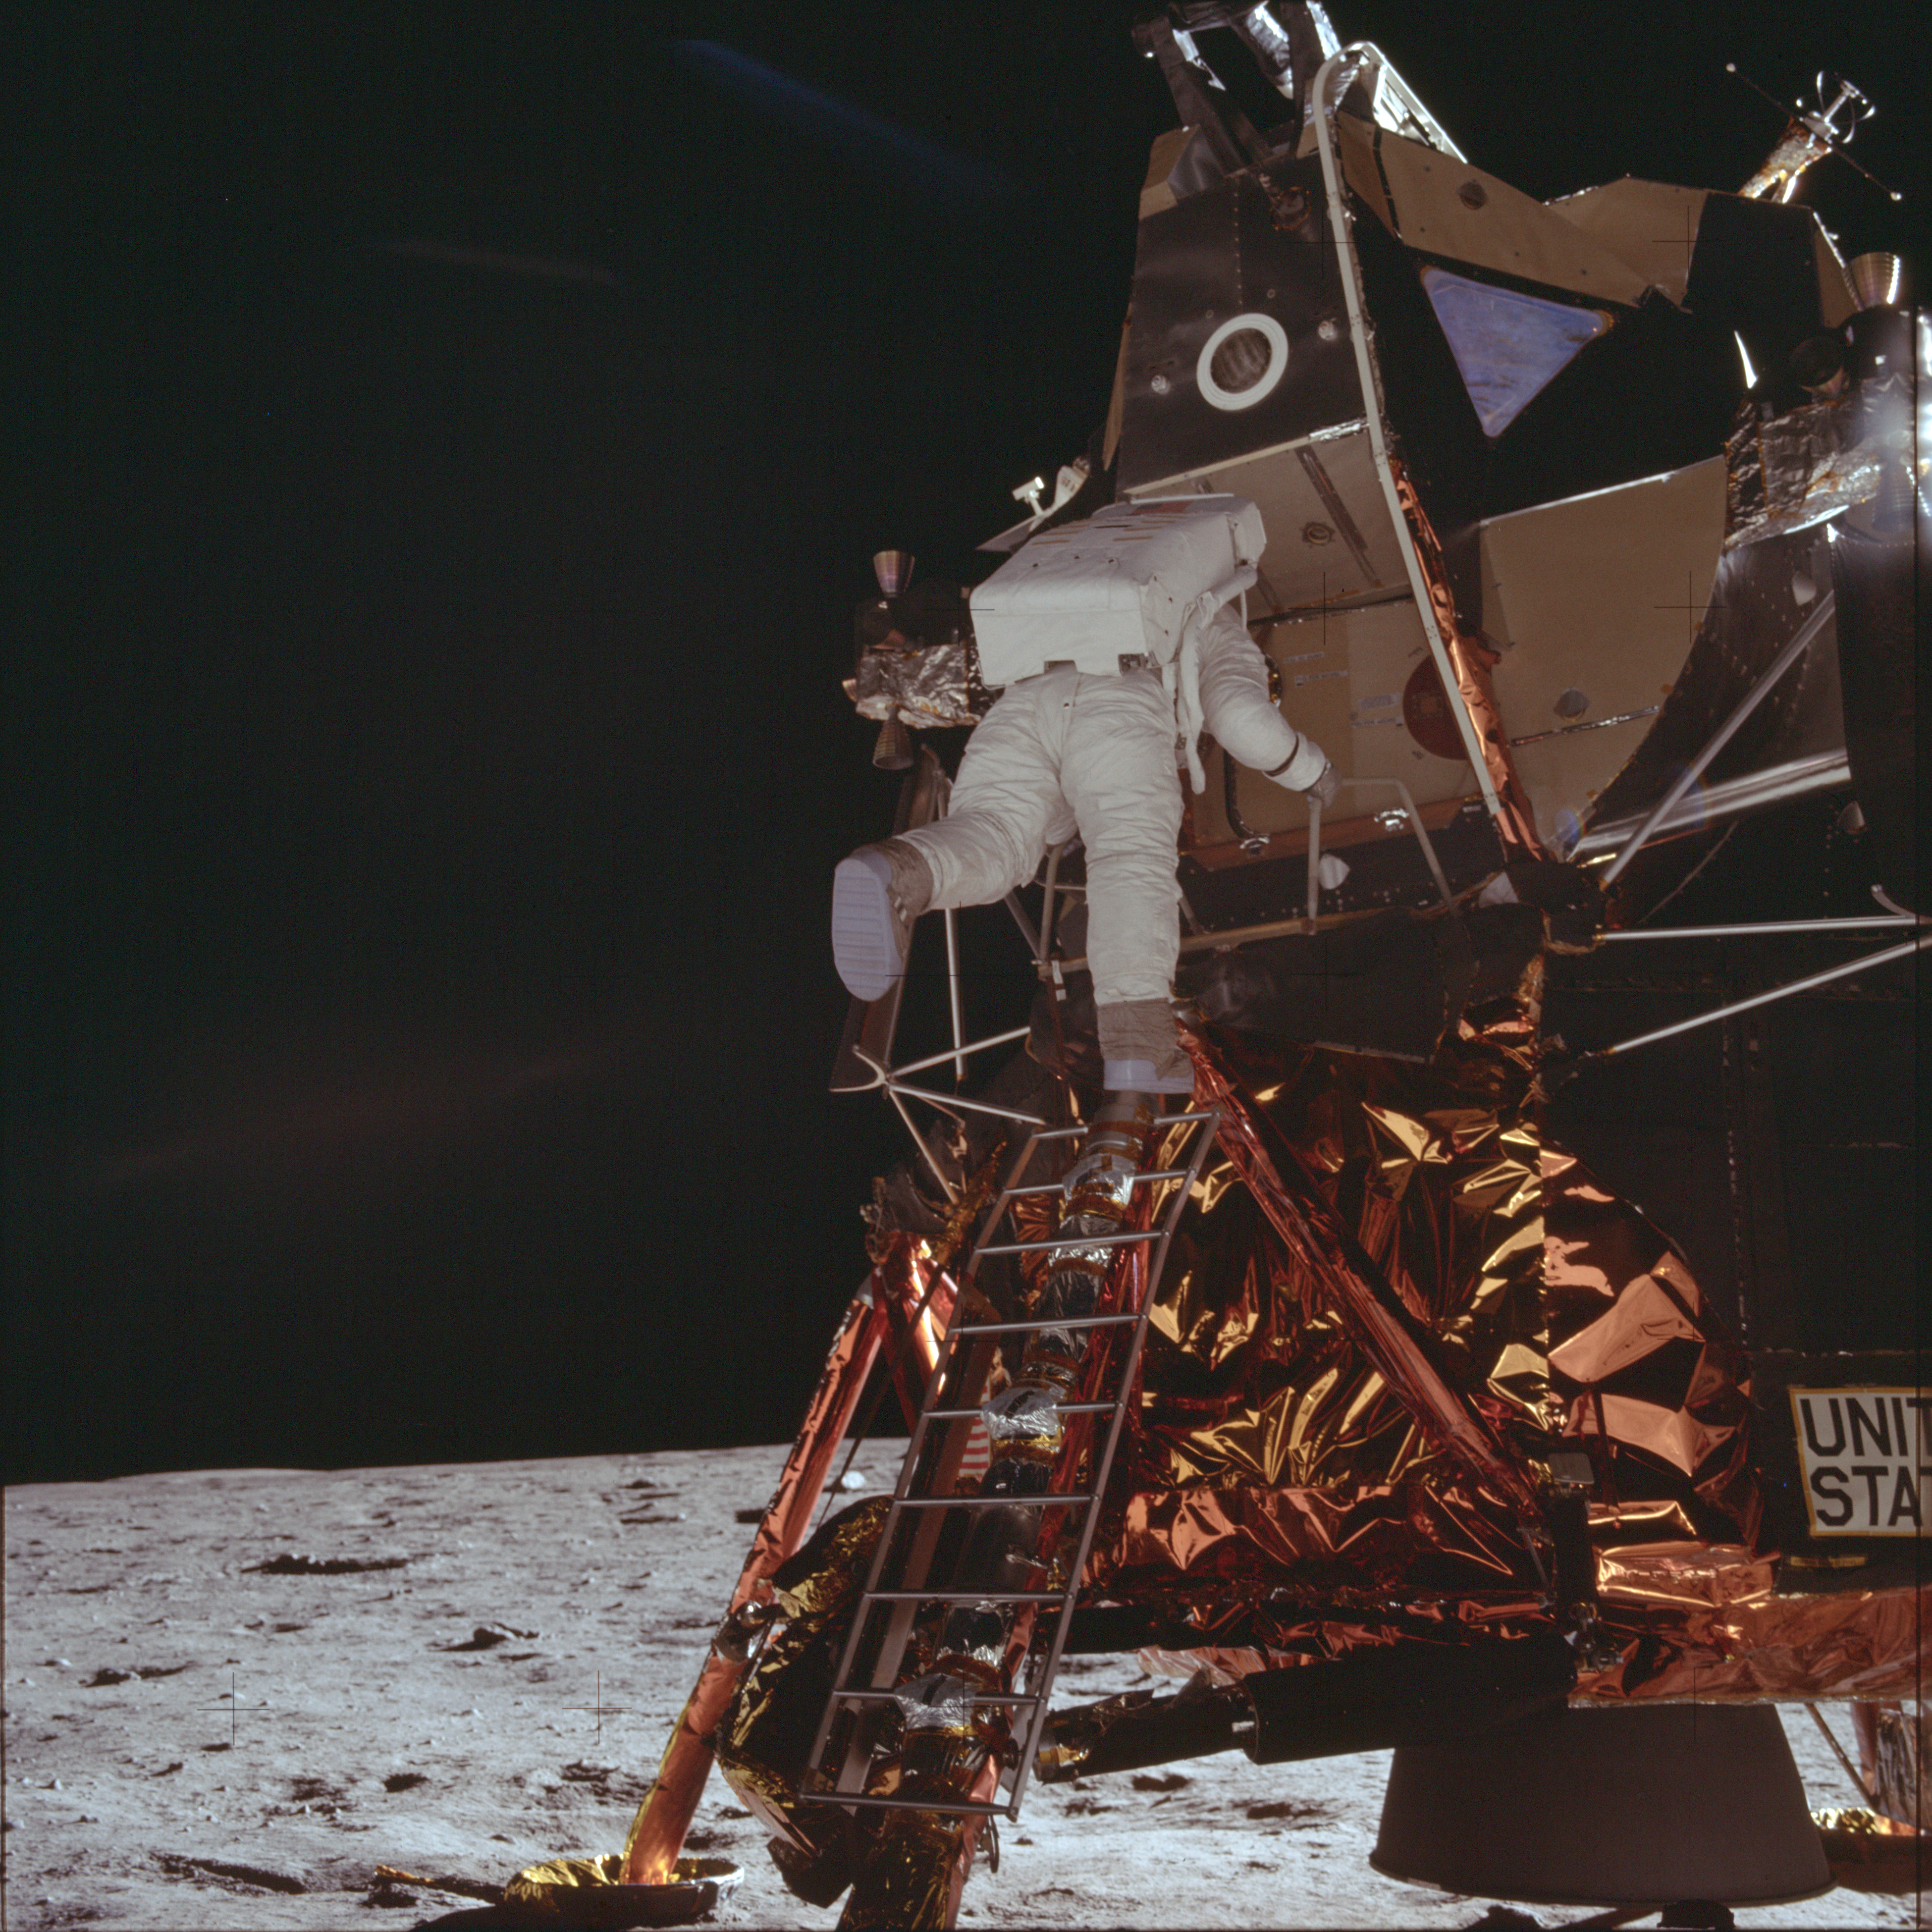
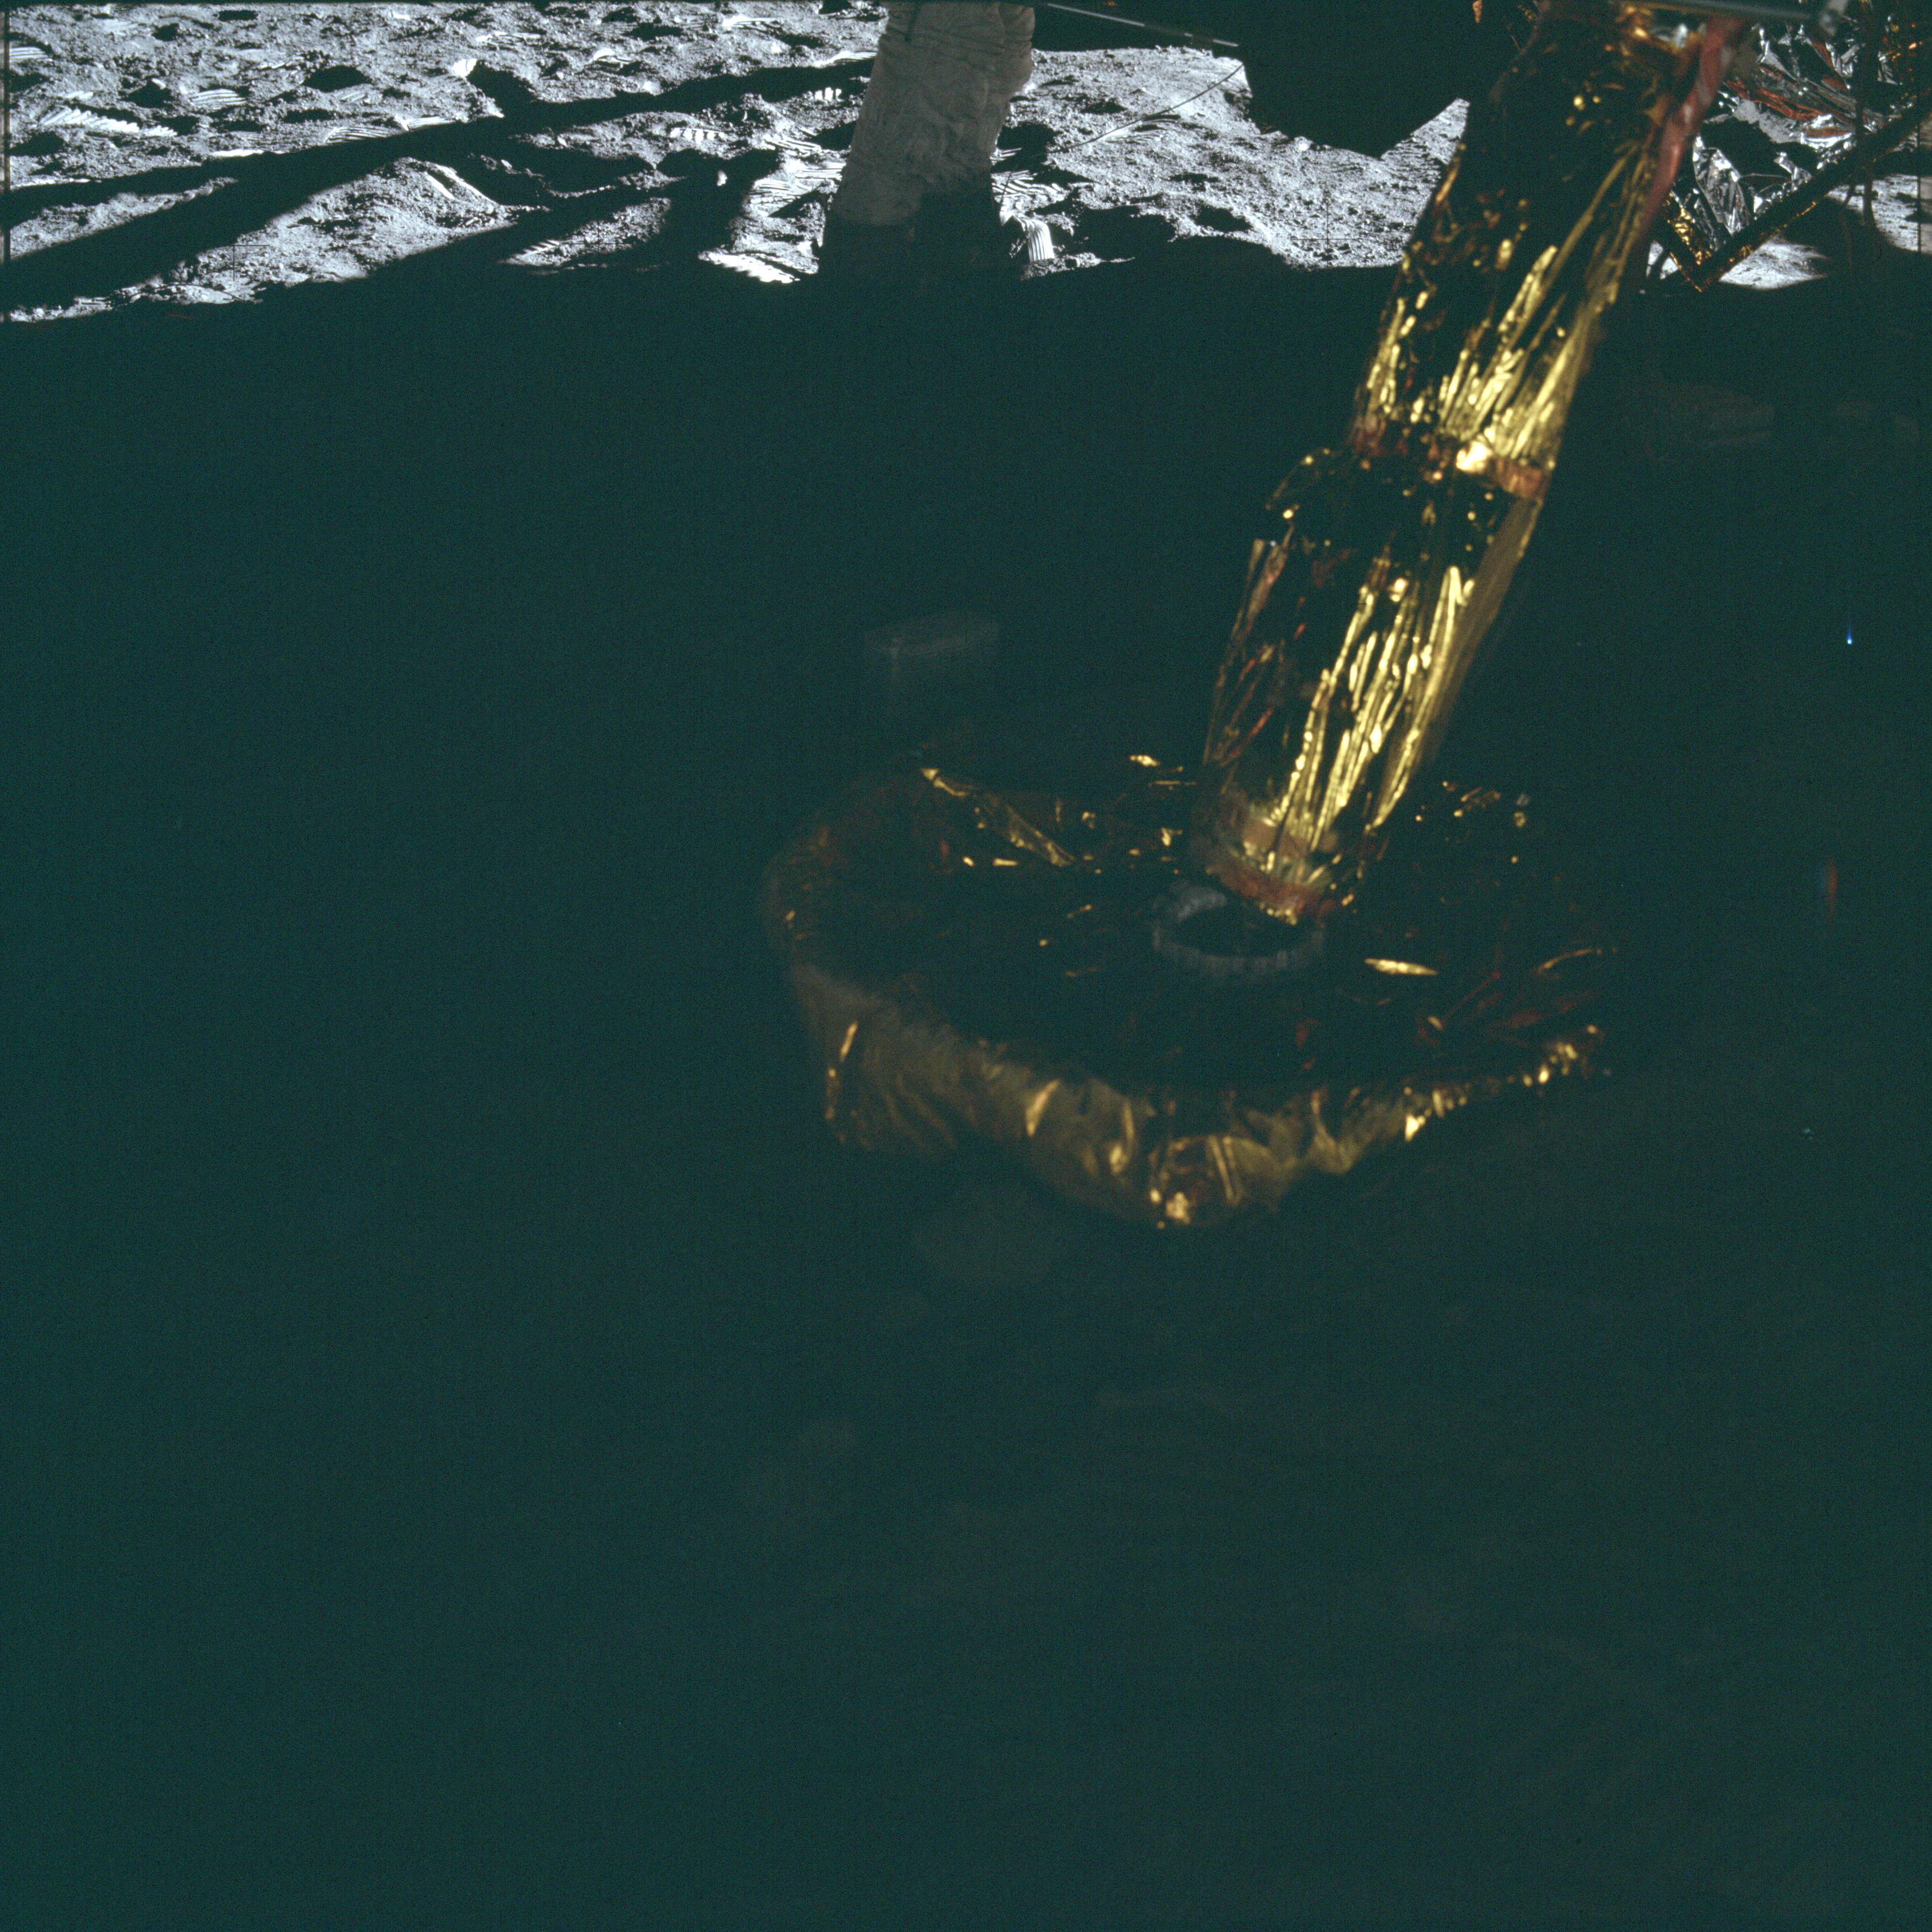
AS11-40-5866 Browse or print resolution. Aldrin descending ladder. Image credit: Image Science and Analysis Laboratory, NASA-Johnson Space Center. |

|
AS11-40-5867 Browse or print resolution. Aldrin descending ladder. Image credit: Image Science and Analysis Laboratory, NASA-Johnson Space Center. |

|
AS11-40-5868 Browse or print resolution. Aldrin descending ladder. Image credit: Image Science and Analysis Laboratory, NASA-Johnson Space Center. |
|
AS11-40-5869 Browse or print resolution. Aldrin descending ladder. Image credit: Image Science and Analysis Laboratory, NASA-Johnson Space Center. |

|
AS11-40-5870 Browse or print resolution. North landing gear and footpad. Image credit: Image Science and Analysis Laboratory, NASA-Johnson Space Center. |

|
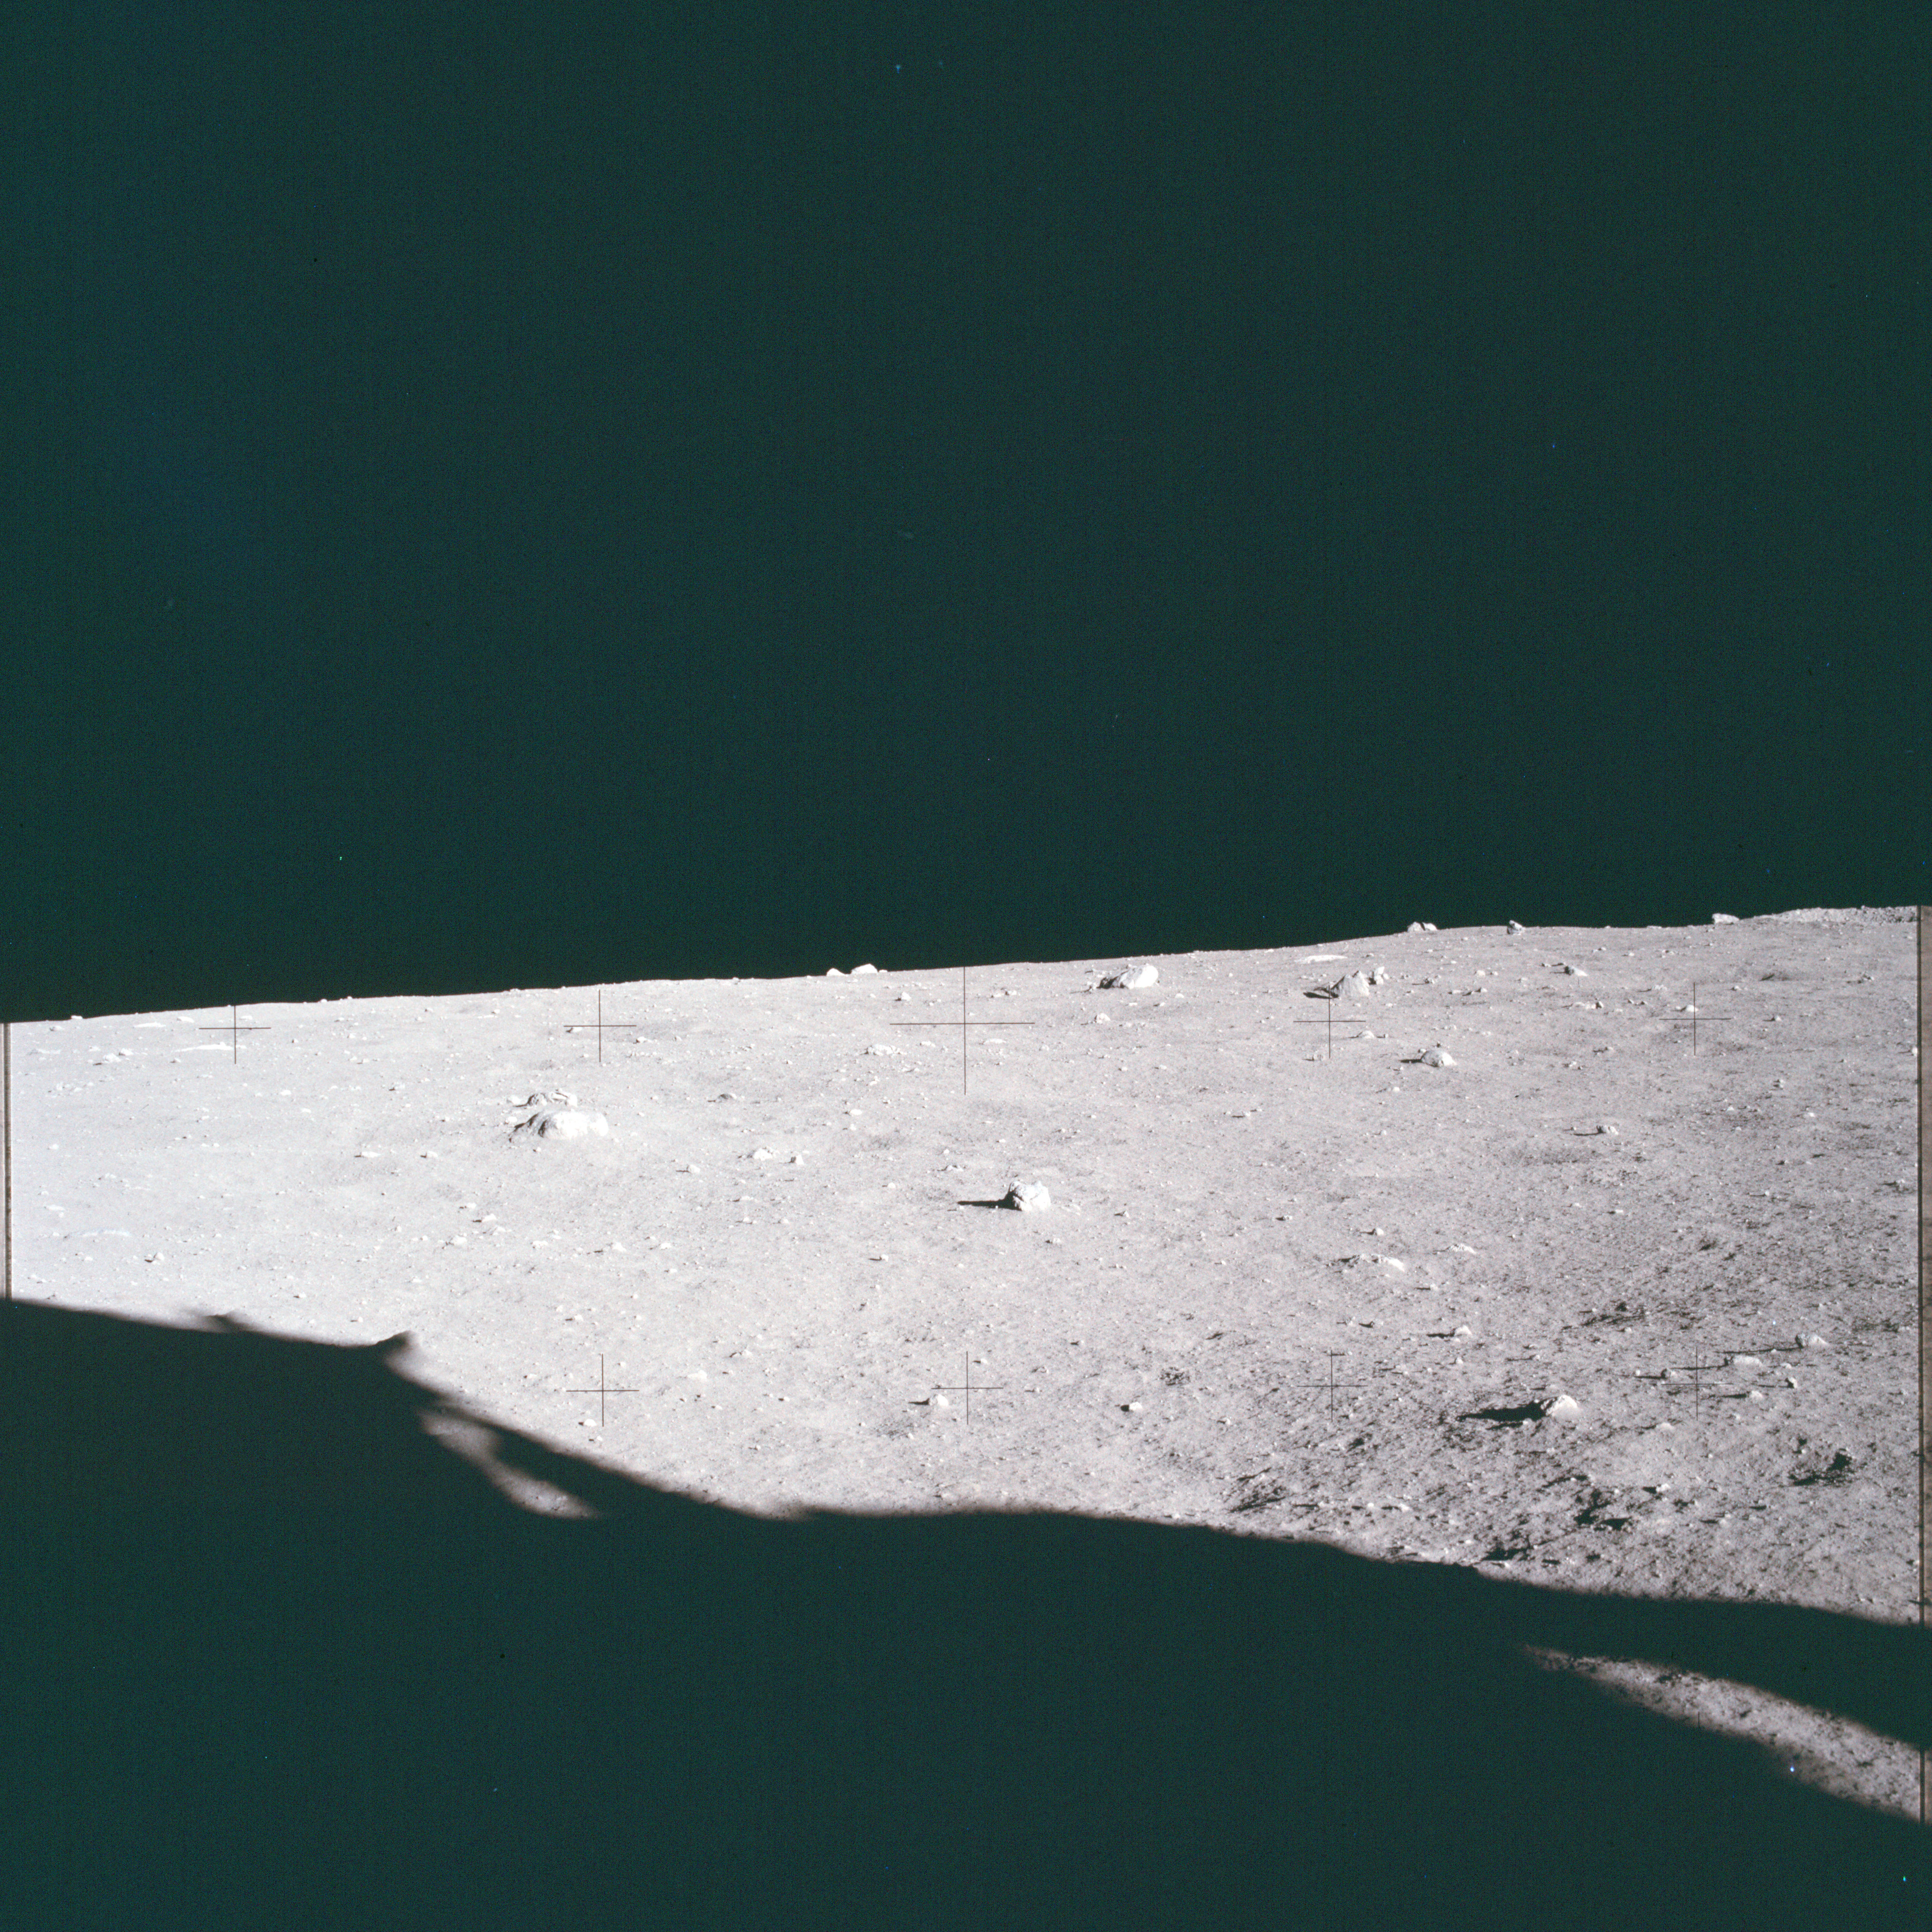
AS11-40-5871 Browse or print resolution. Shadowed area behind ladder. Image credit: Image Science and Analysis Laboratory, NASA-Johnson Space Center. |
|
AS11-40-5872 Browse or print resolution. Aldrin working at solar wind experiment. Image credit: Image Science and Analysis Laboratory, NASA-Johnson Space Center. |

|
AS11-40-5873 Browse or print resolution. Aldrin standing next to solar wind experiment. Image credit: Image Science and Analysis Laboratory, NASA-Johnson Space Center. |

|
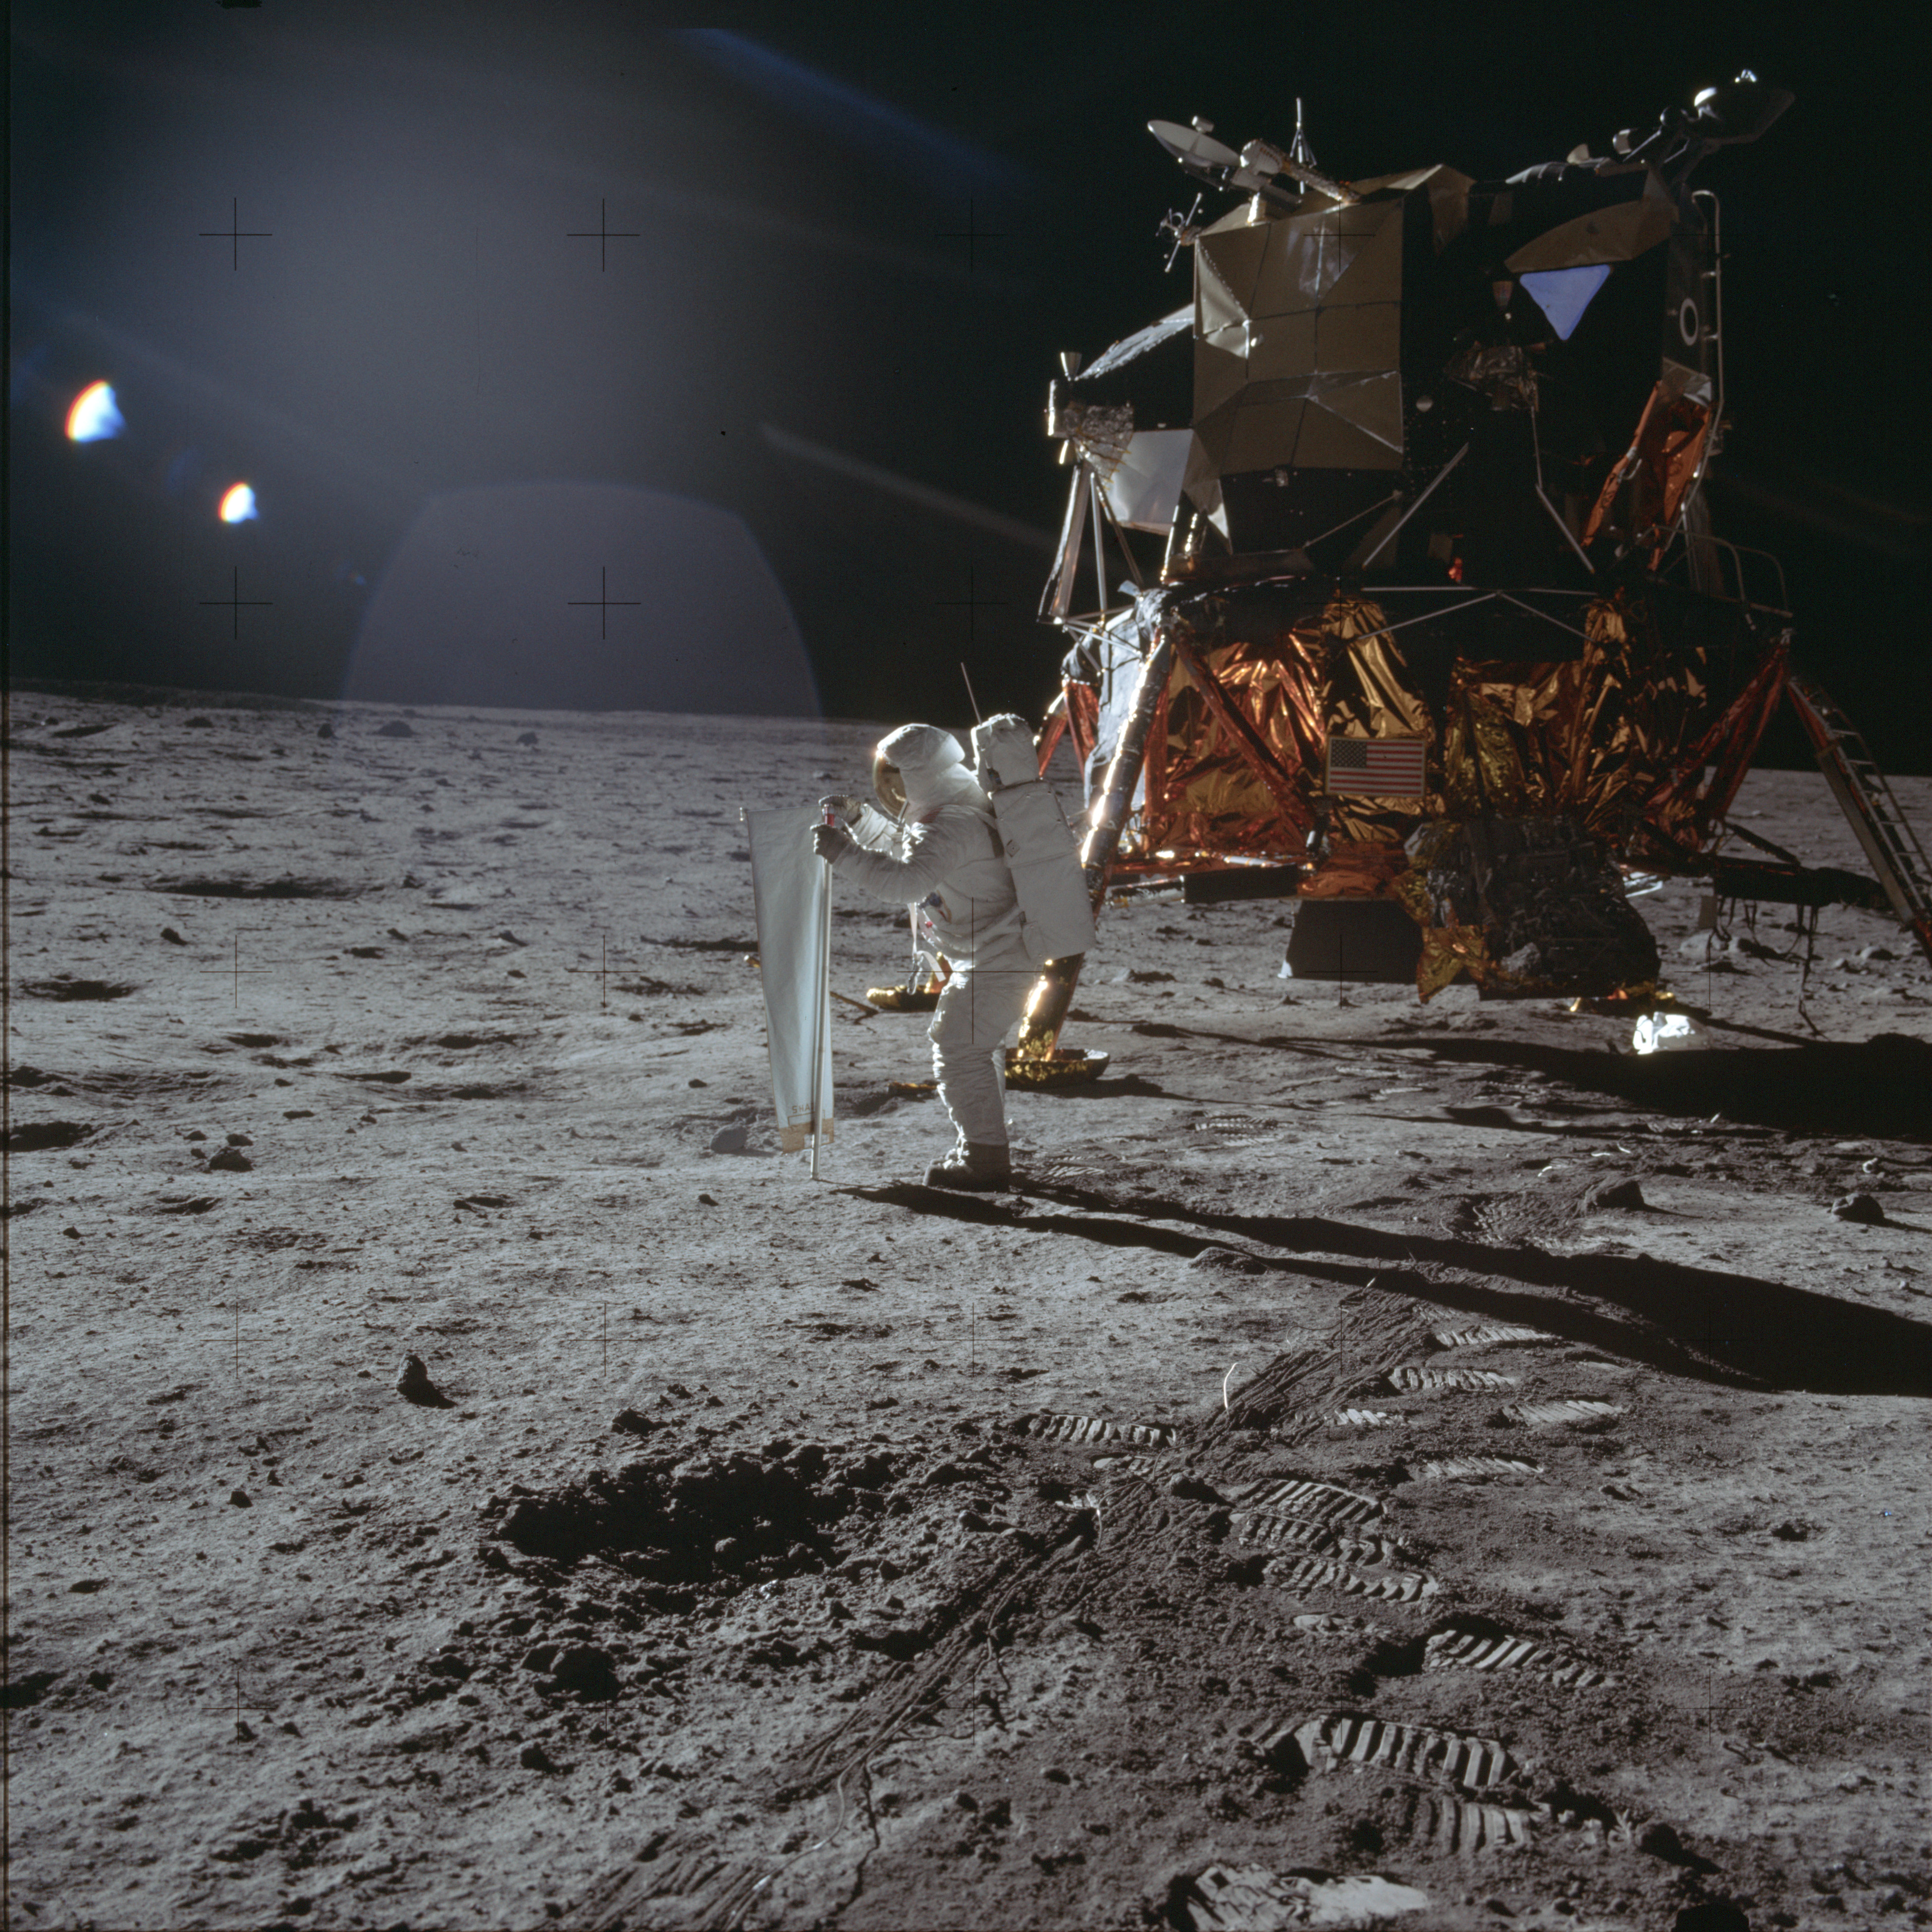
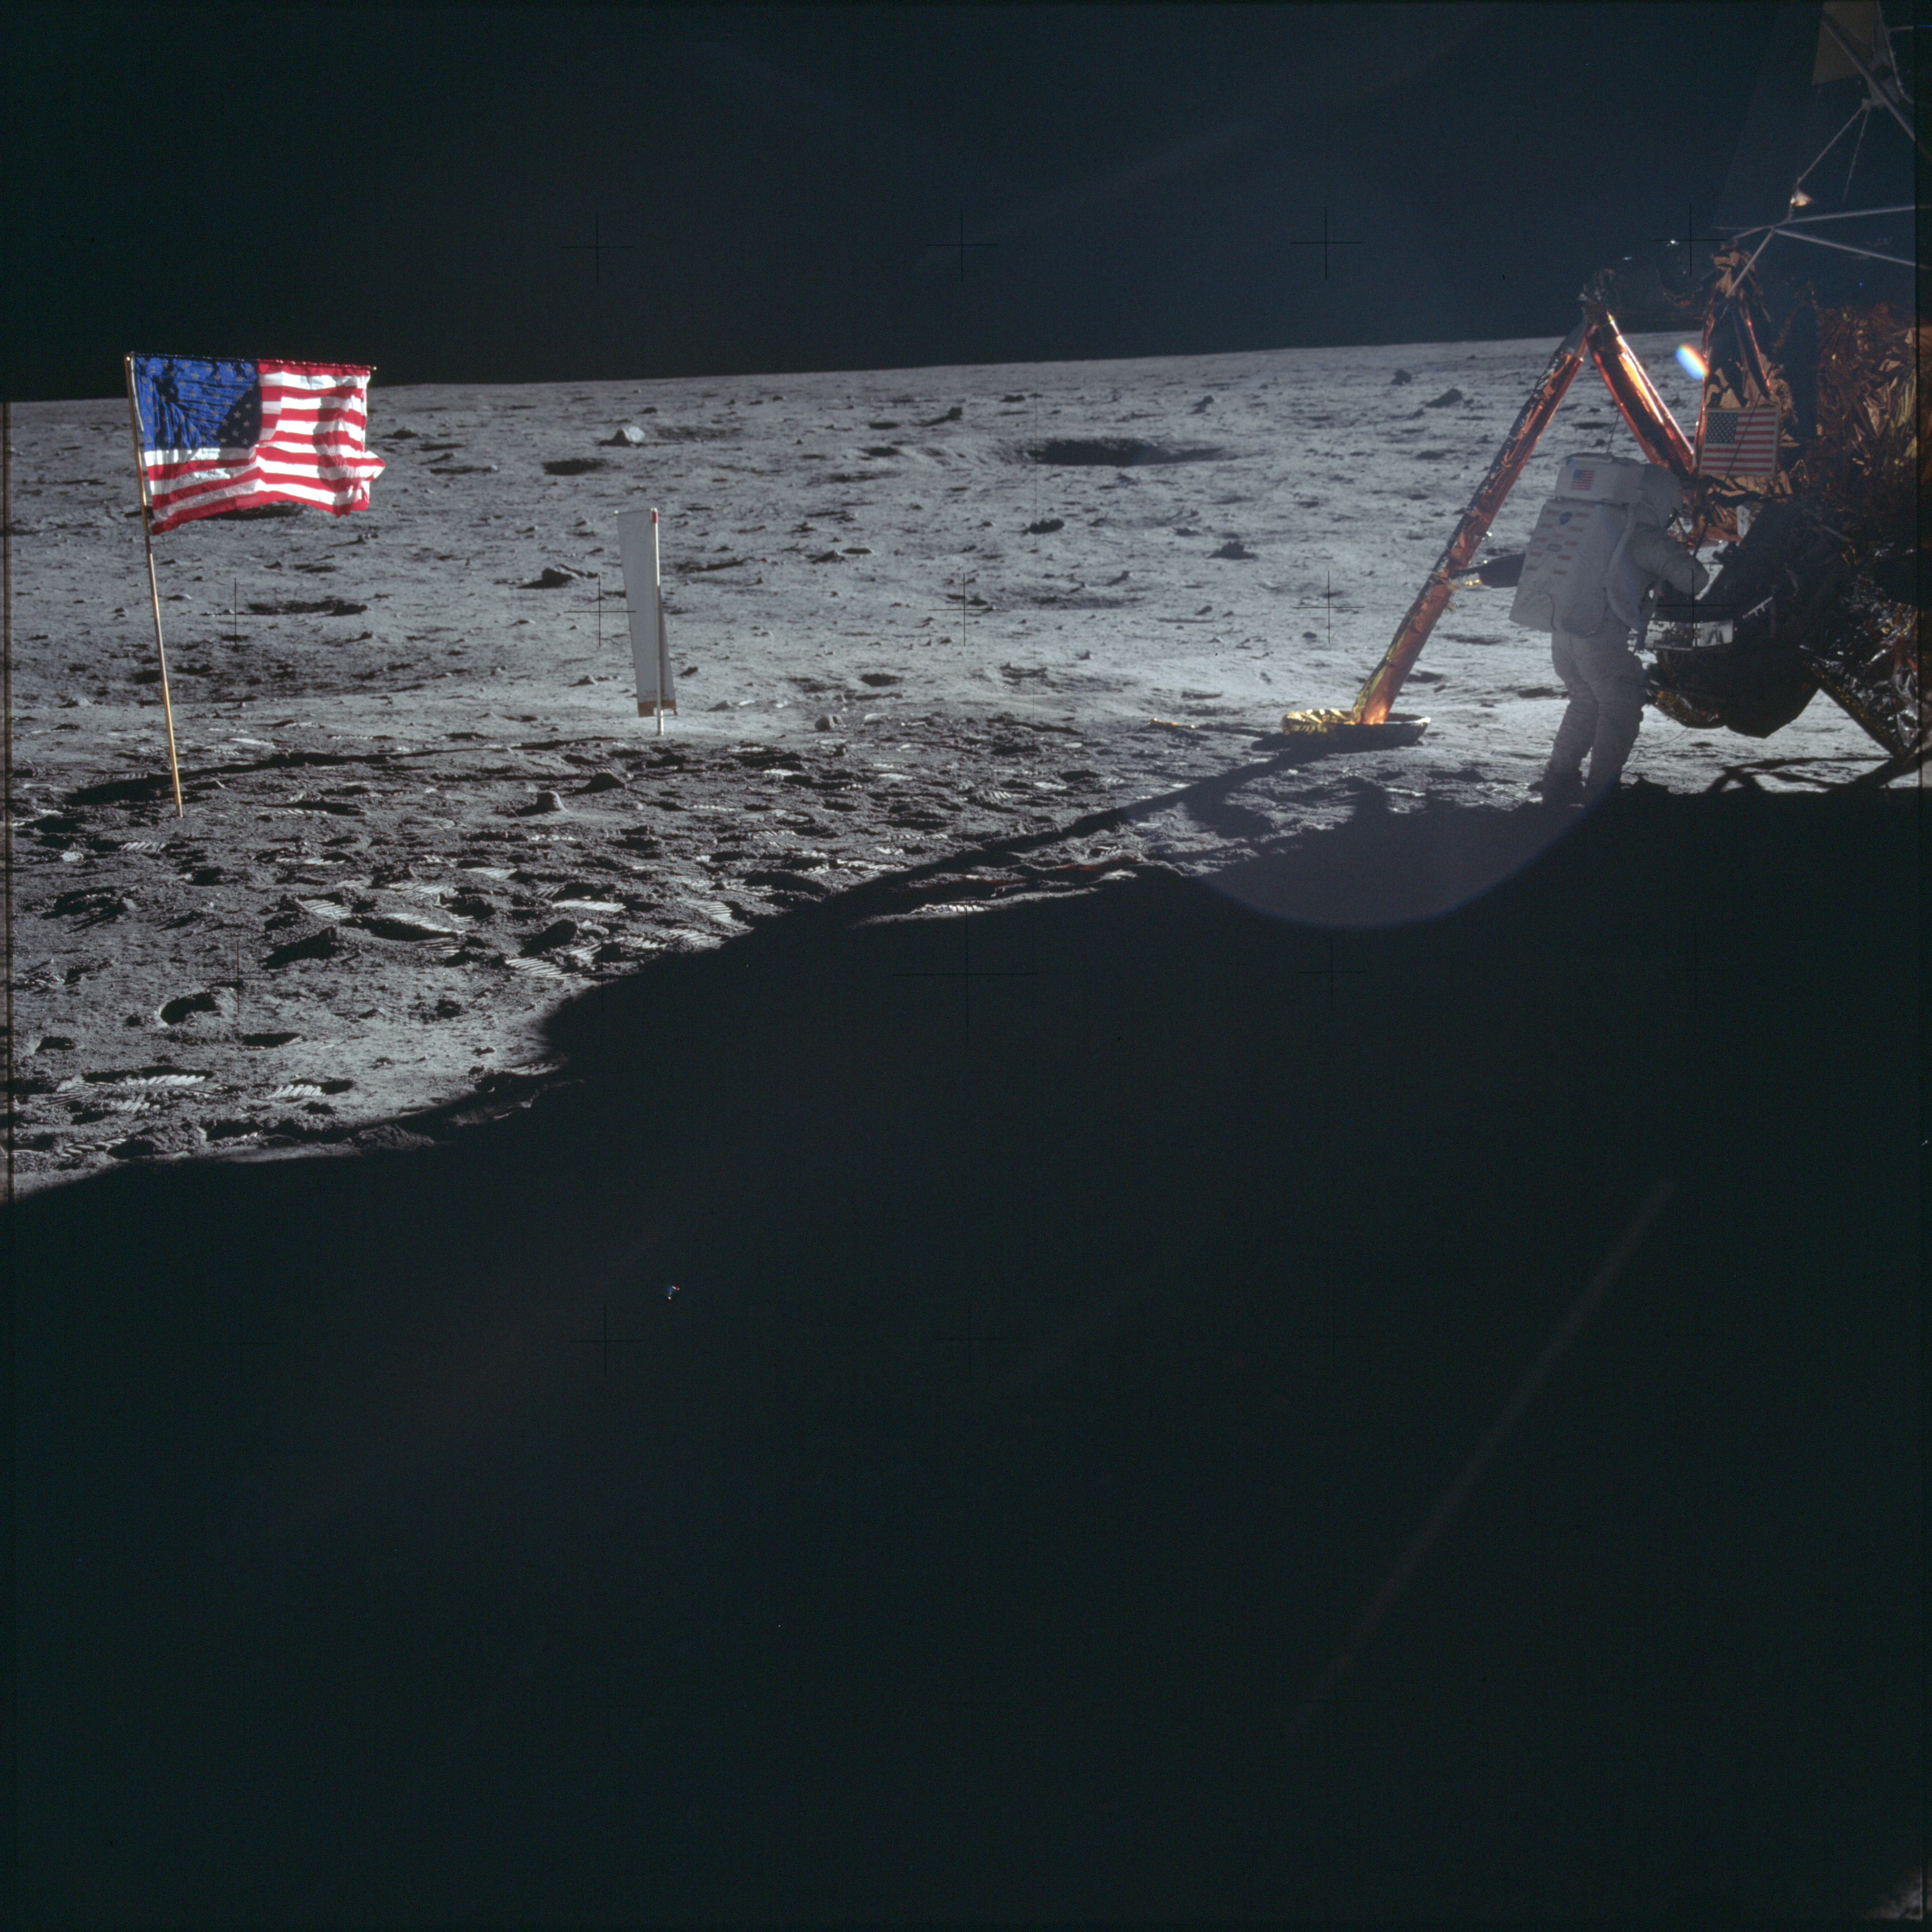
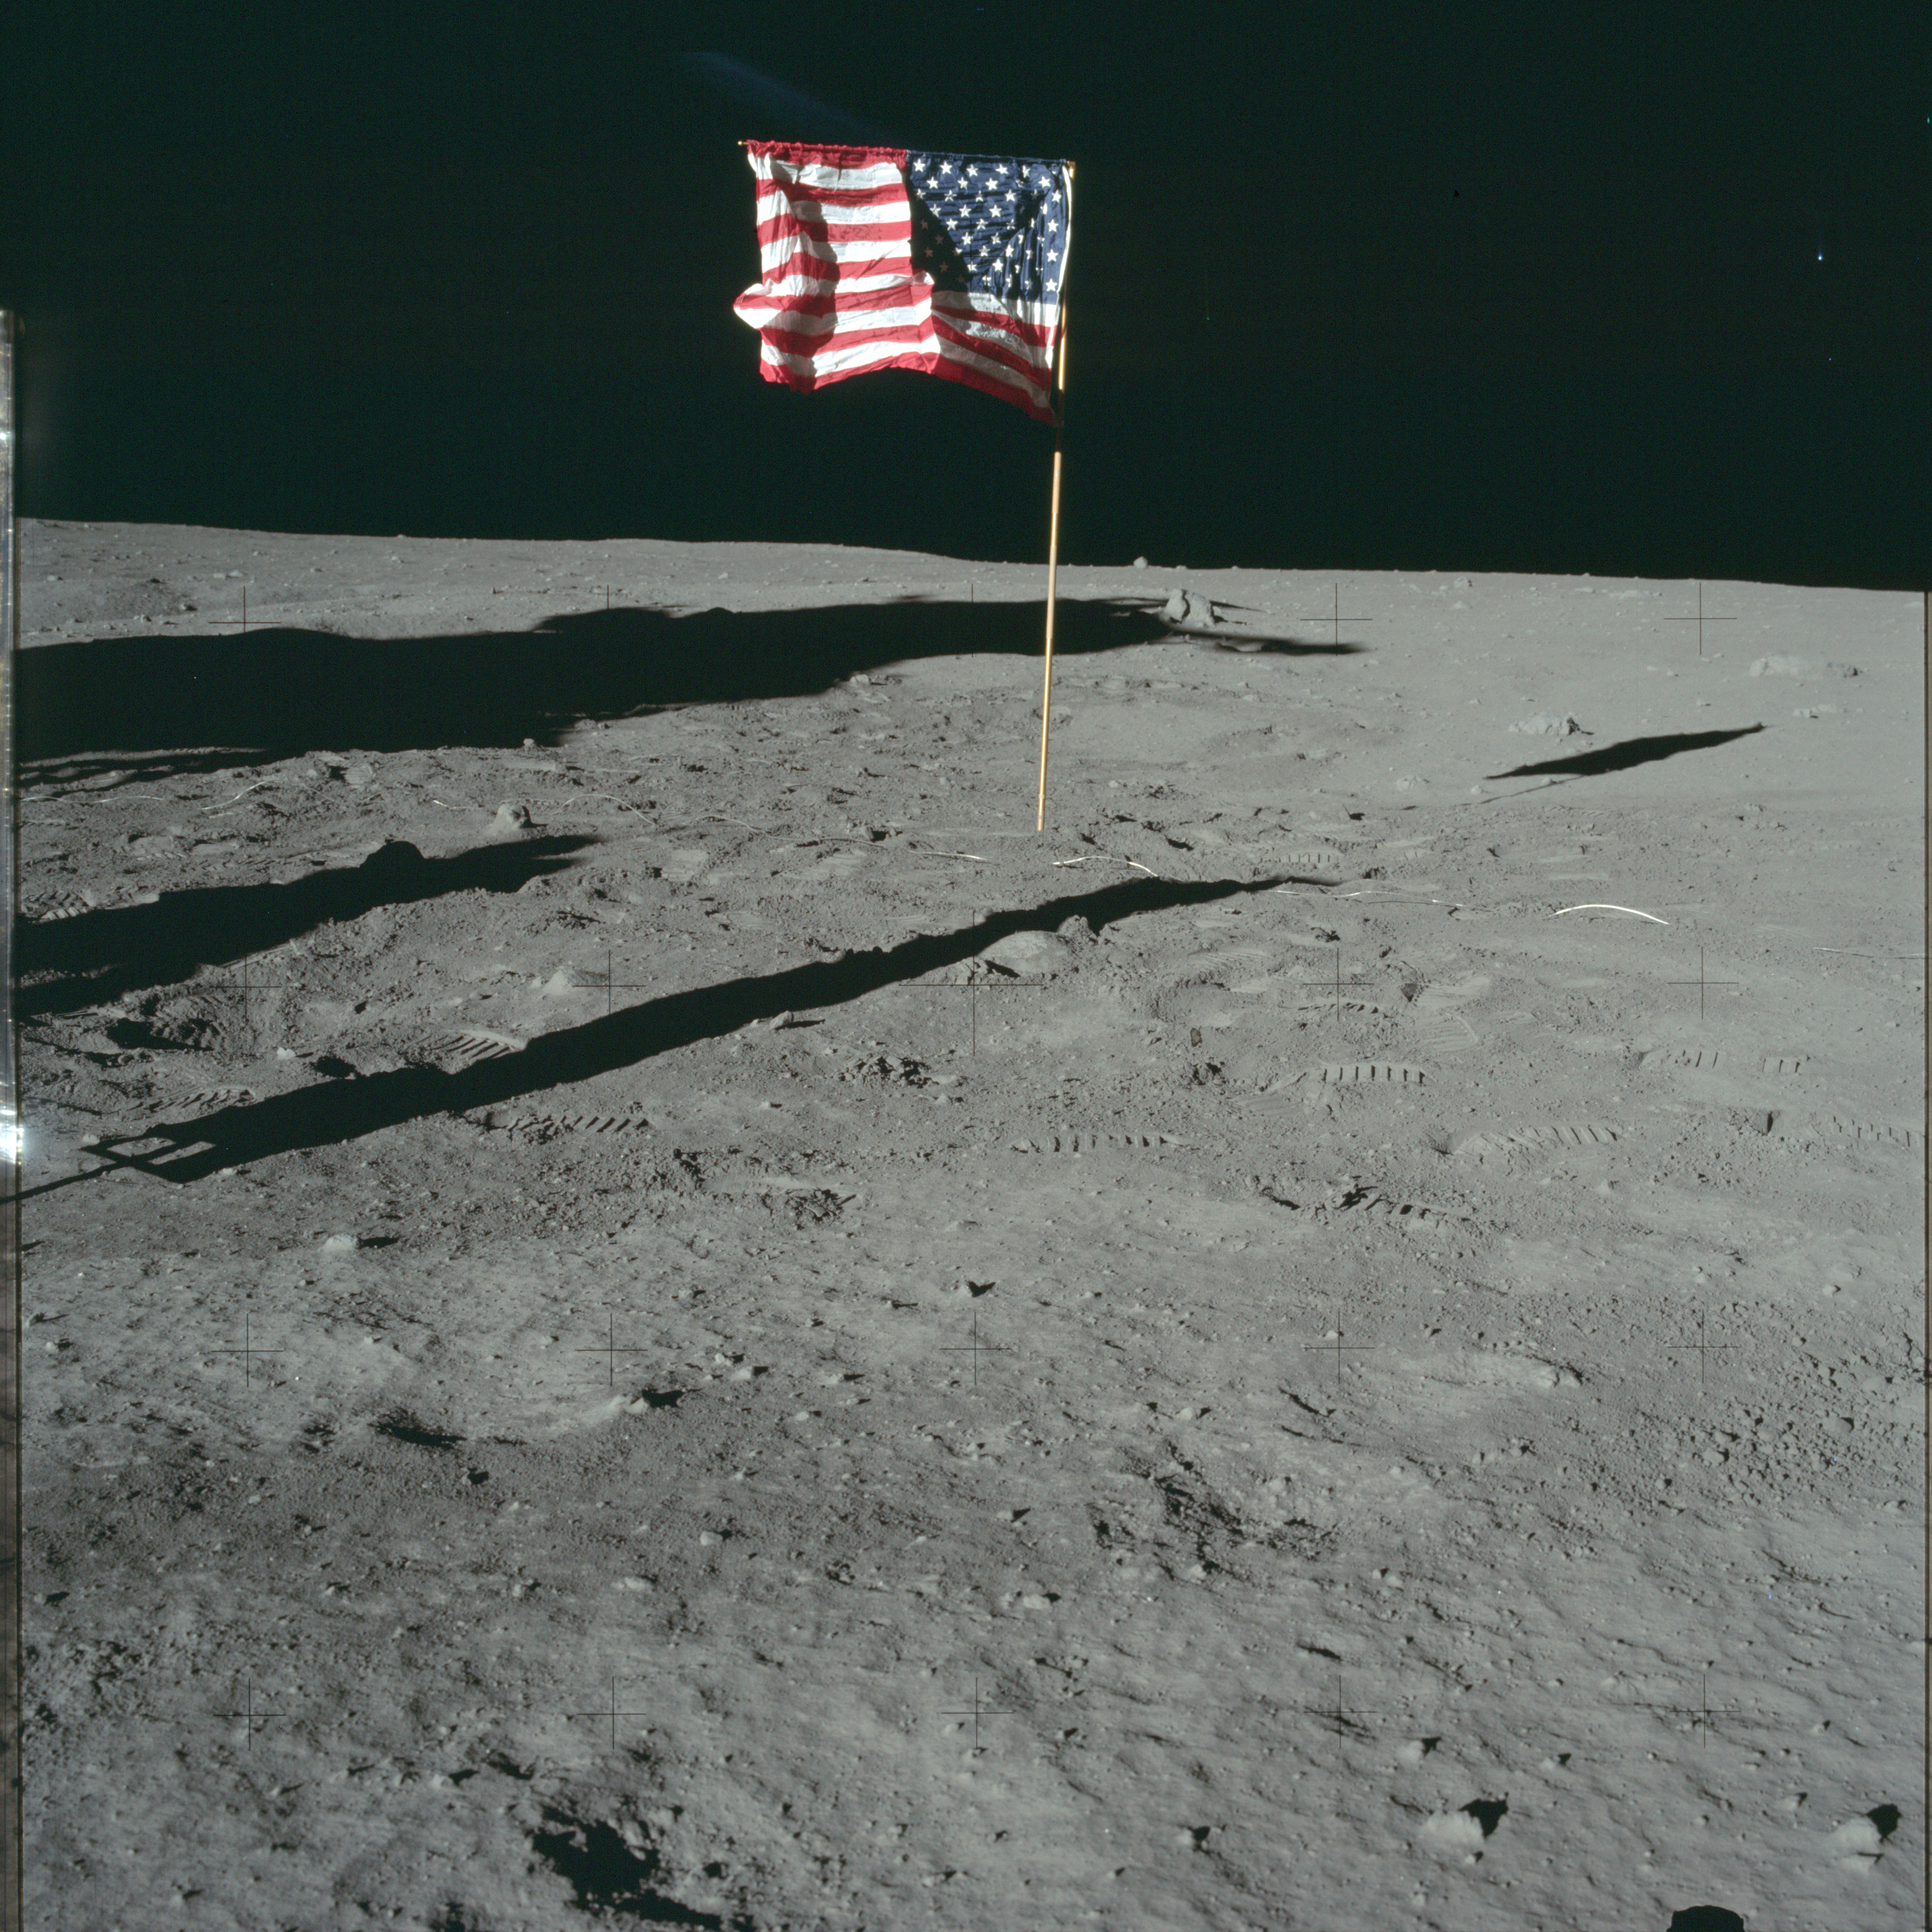
AS11-40-5874 Browse or print resolution. Aldrin standing next to flag. Image credit: Image Science and Analysis Laboratory, NASA-Johnson Space Center. |

|
AS11-40-5875 Browse or print resolution. Aldrin standing next to flag. Image credit: Image Science and Analysis Laboratory, NASA-Johnson Space Center. |

|
AS11-40-5876 Browse or print resolution. Area of soil prior to Aldrin making a bootprint. Image credit: Image Science and Analysis Laboratory, NASA-Johnson Space Center. |
|
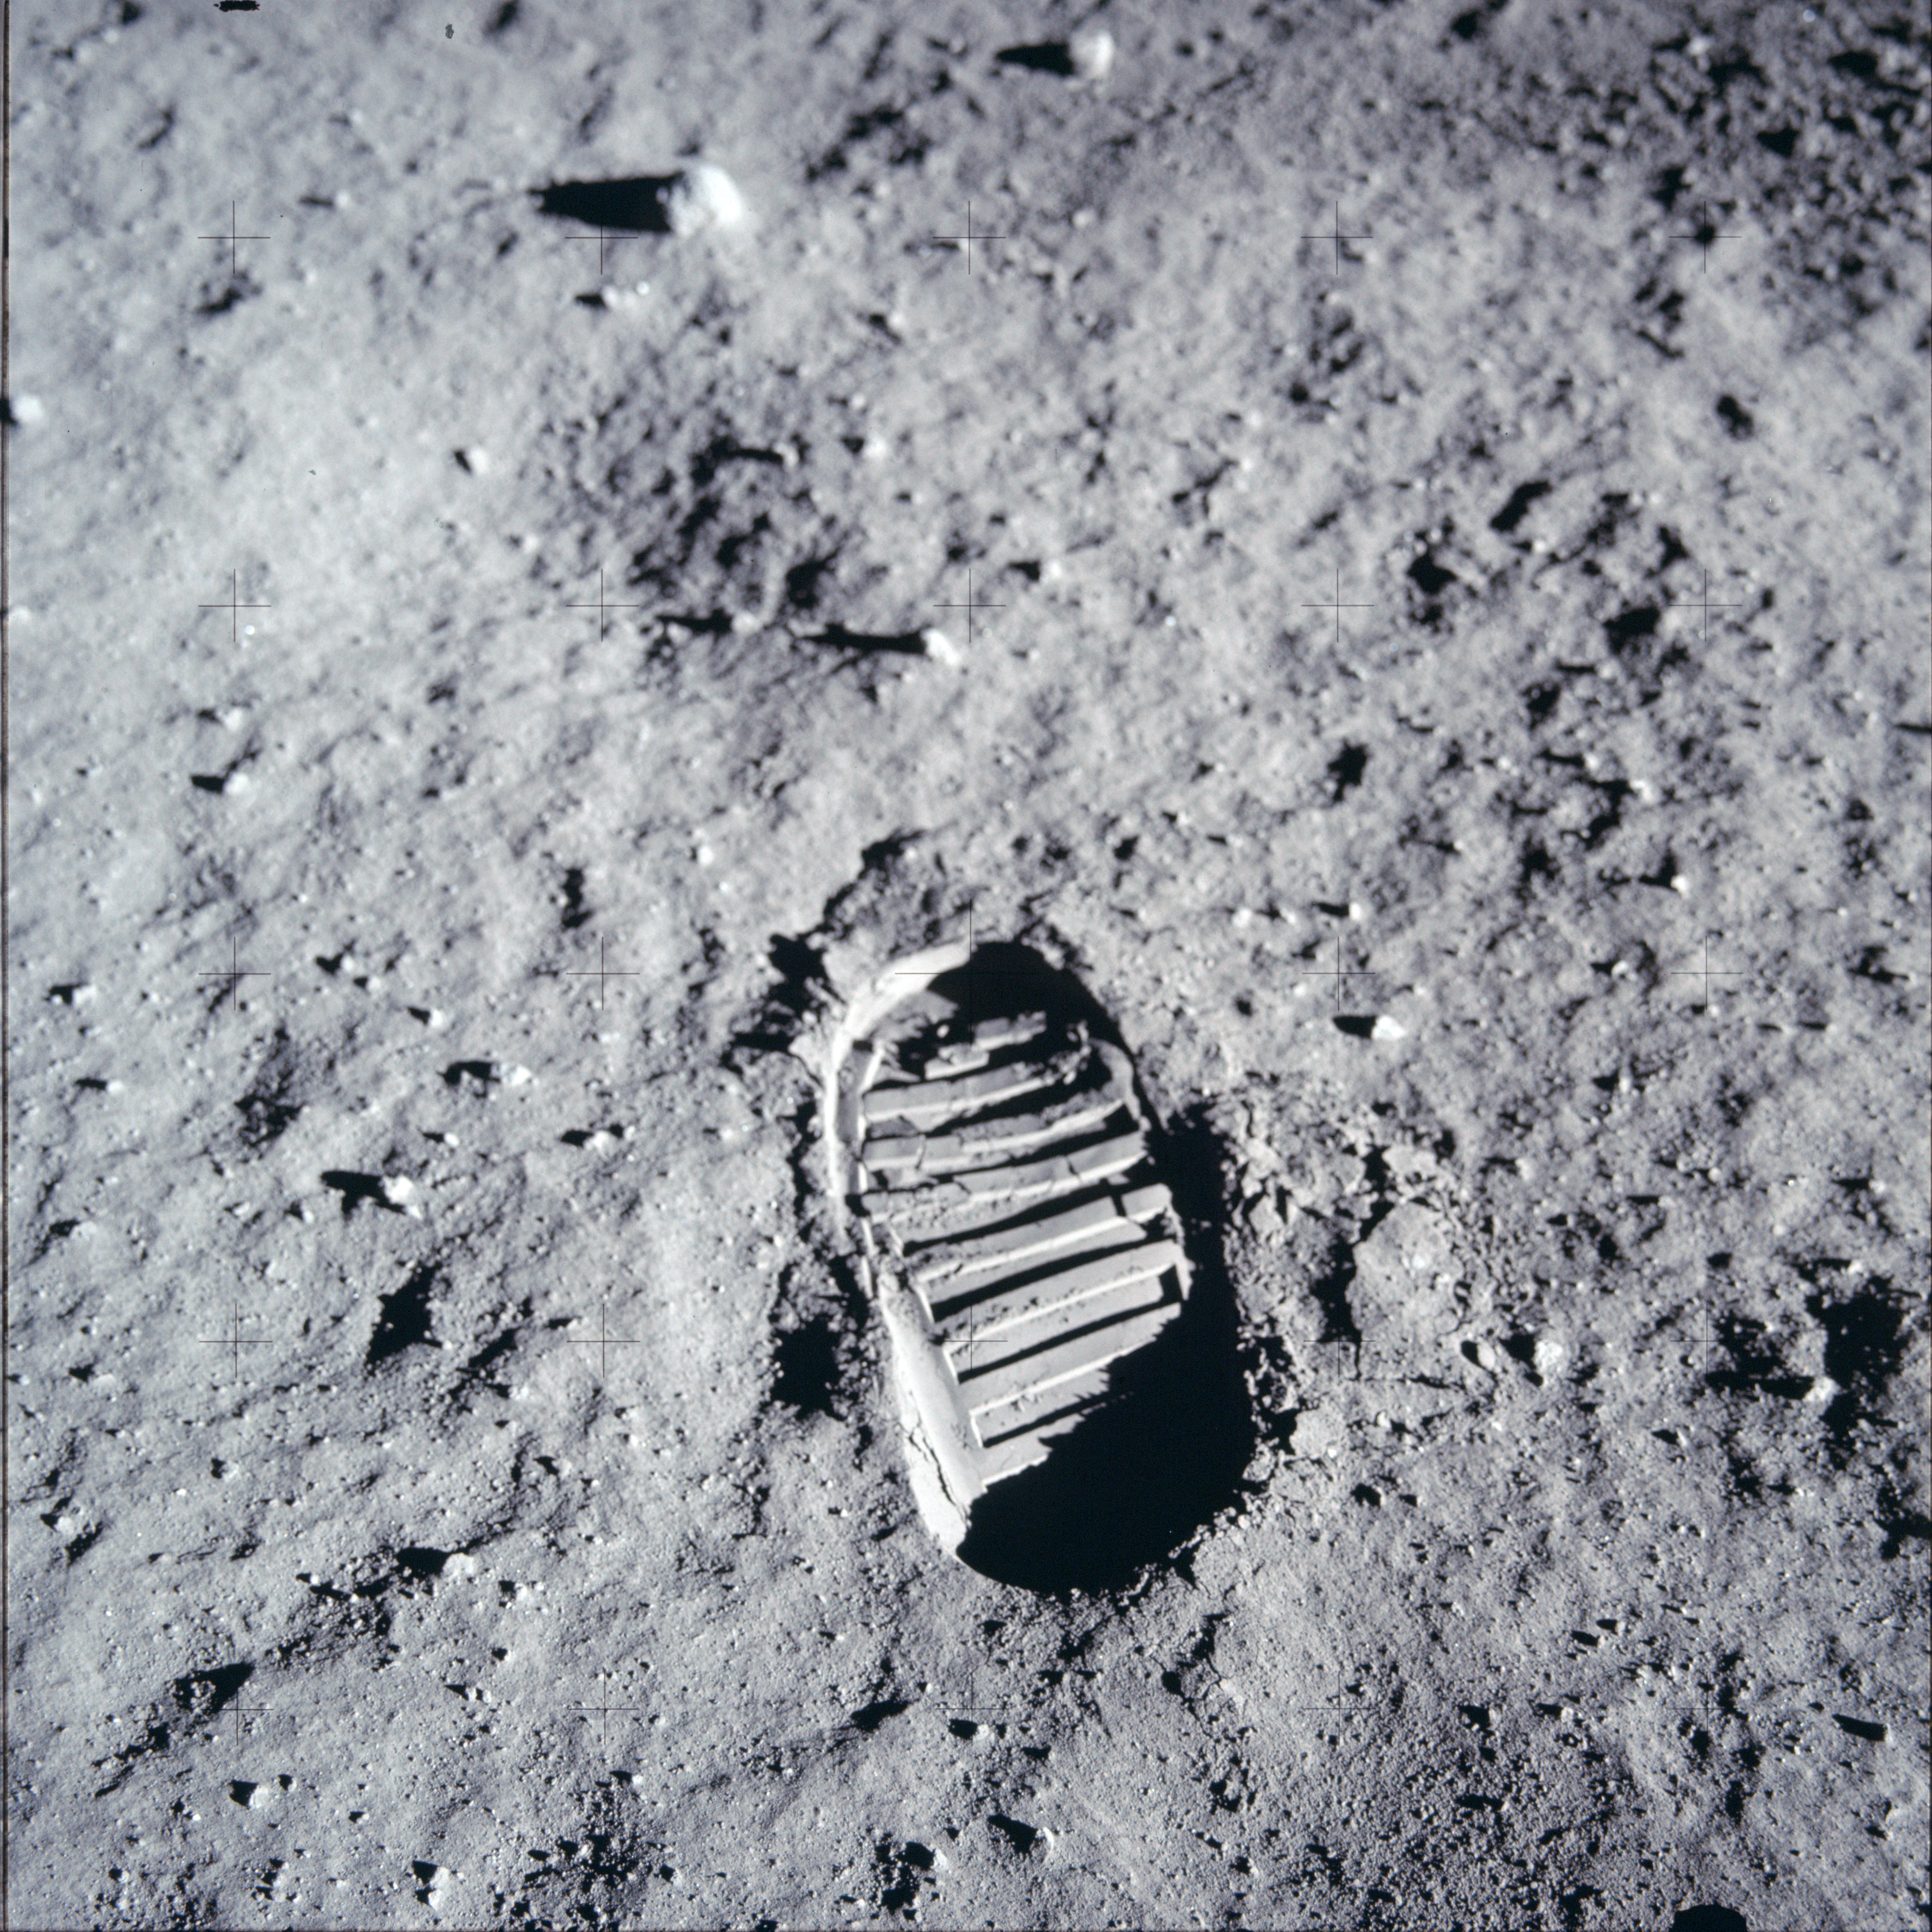
AS11-40-5877 Browse or print resolution. Aldrin's bootprint. Image credit: Image Science and Analysis Laboratory, NASA-Johnson Space Center. |
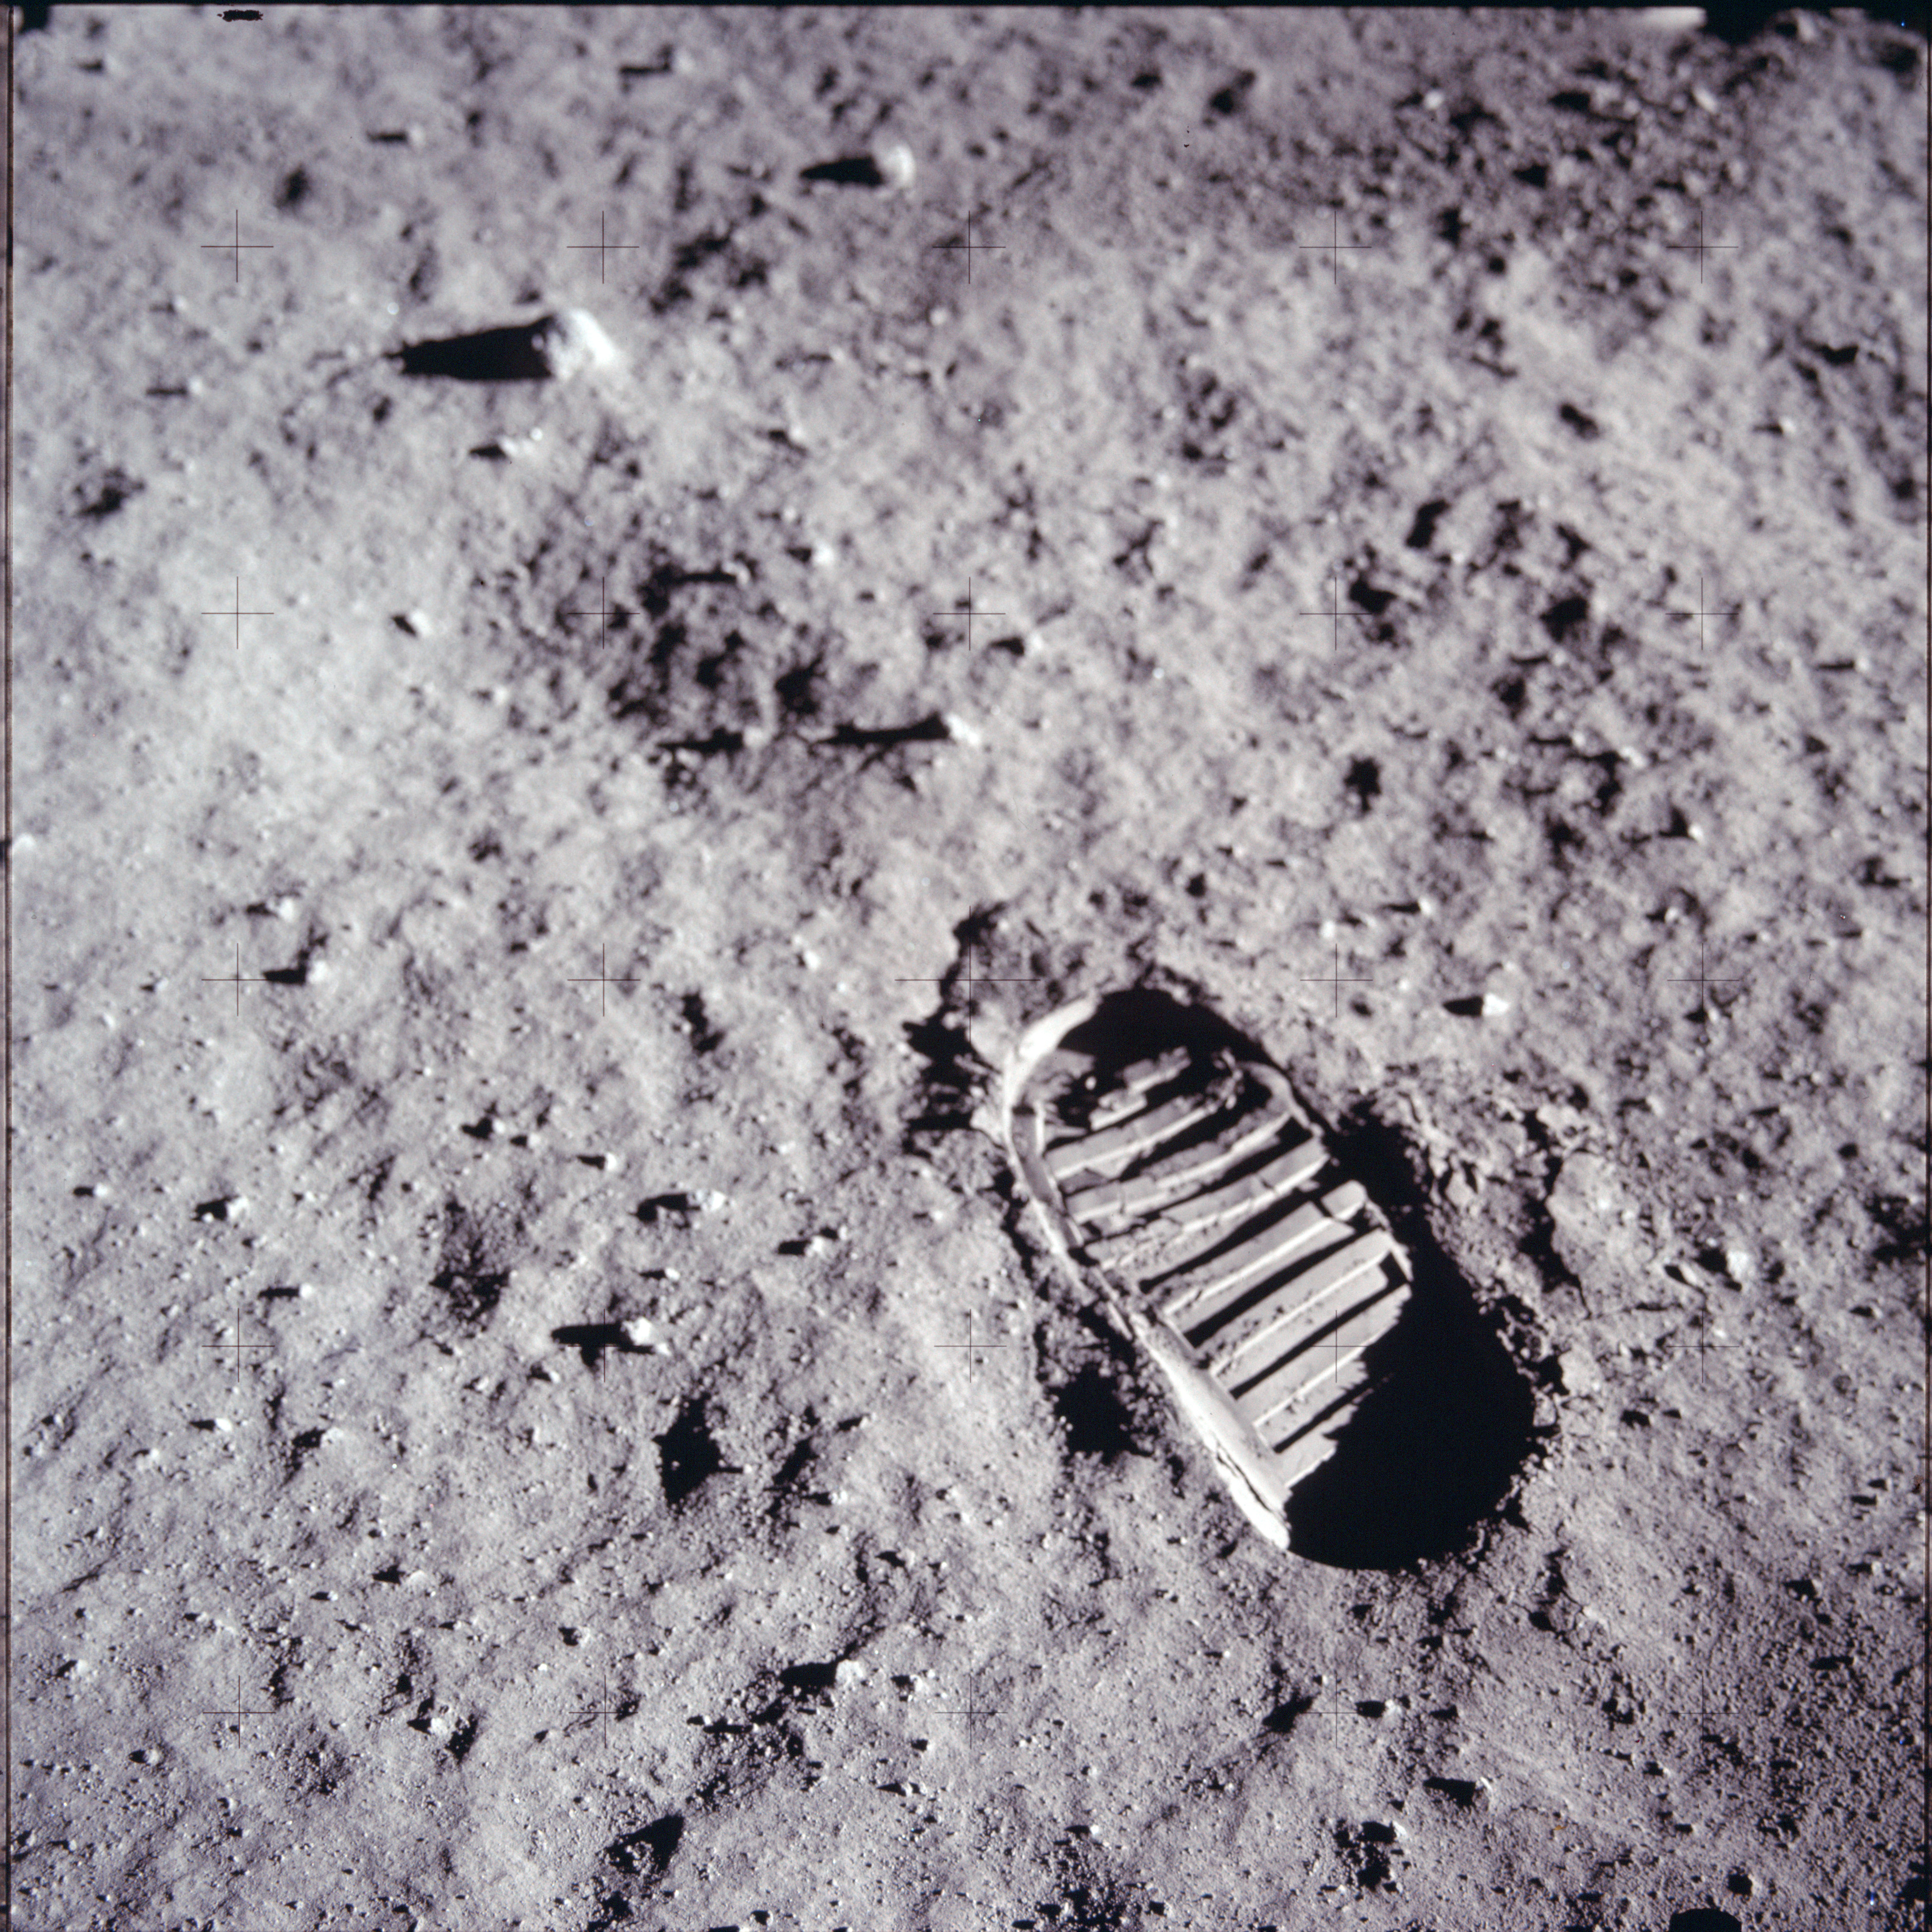
|
AS11-40-5878 Browse or print resolution. Aldrin's bootprint. Image credit: Image Science and Analysis Laboratory, NASA-Johnson Space Center. |

|
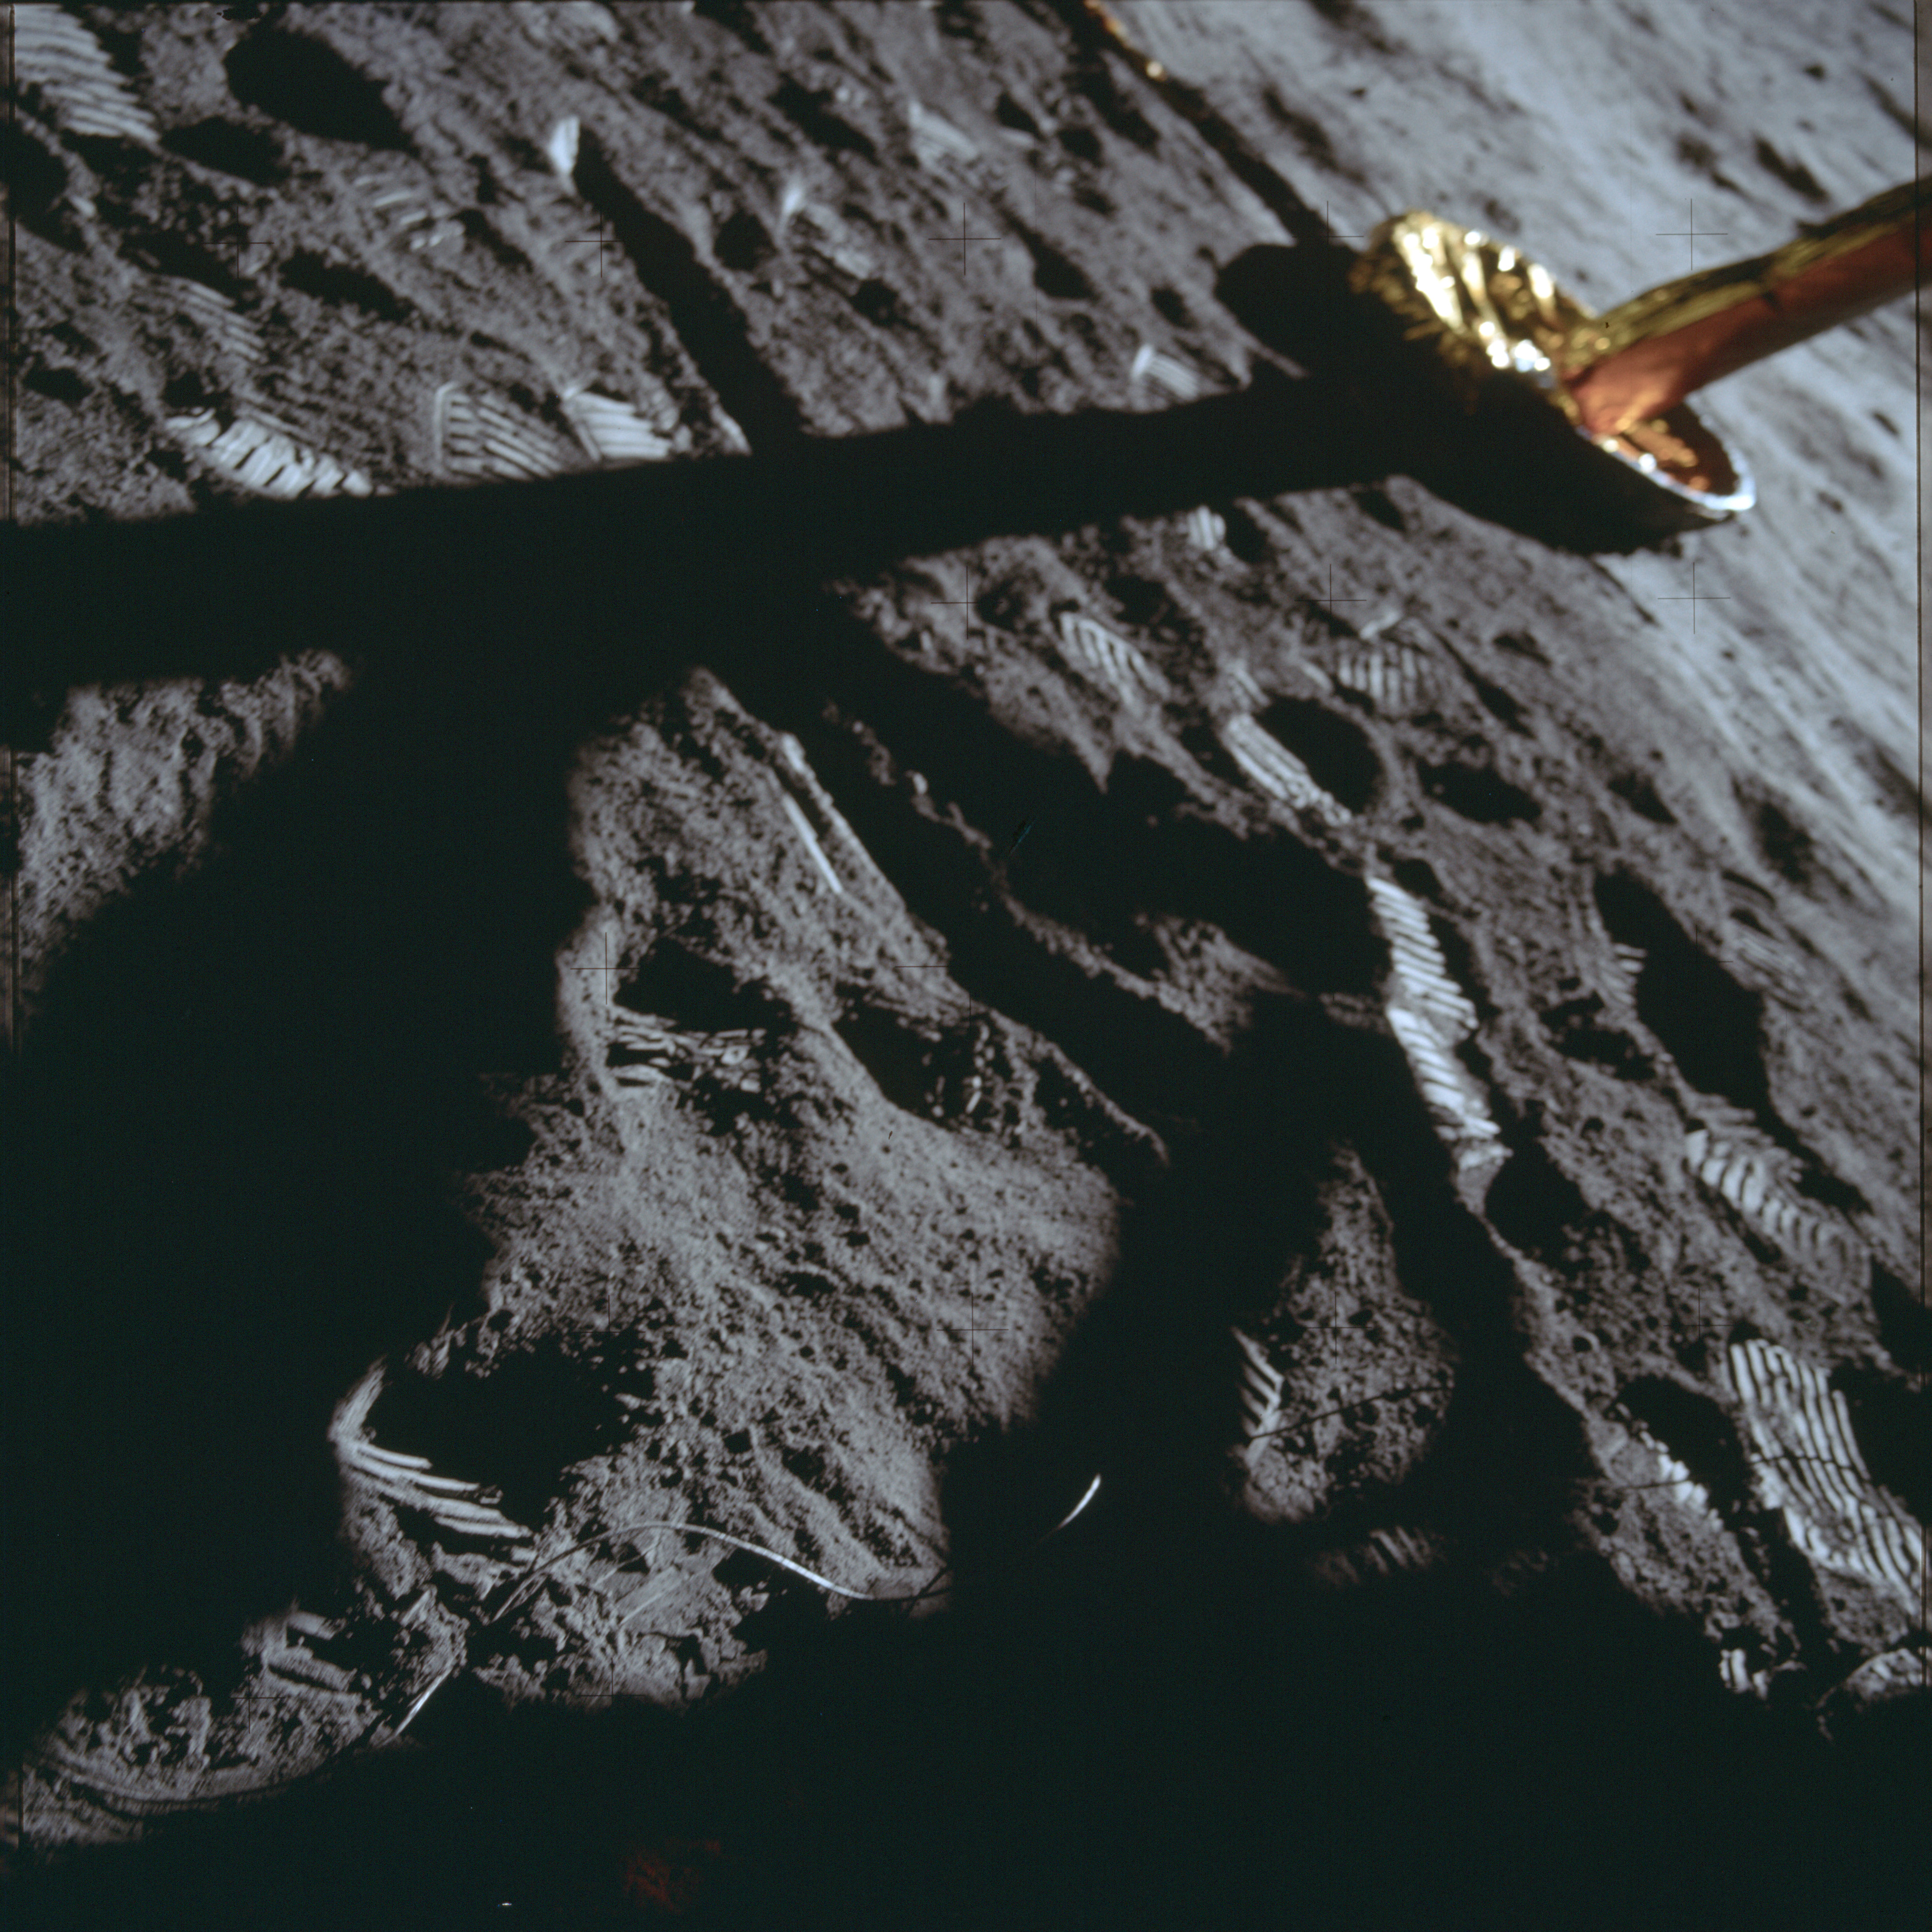
AS11-40-5879 Browse or print resolution. Close-up of soil during Aldrin's soil mechanics test. Toe of Aldrin's boot at lower right. Image credit: Image Science and Analysis Laboratory, NASA-Johnson Space Center. |

|
AS11-40-5880 Browse or print resolution. Aldrin's boot during soil mechanics test. Image credit: Image Science and Analysis Laboratory, NASA-Johnson Space Center. |

|
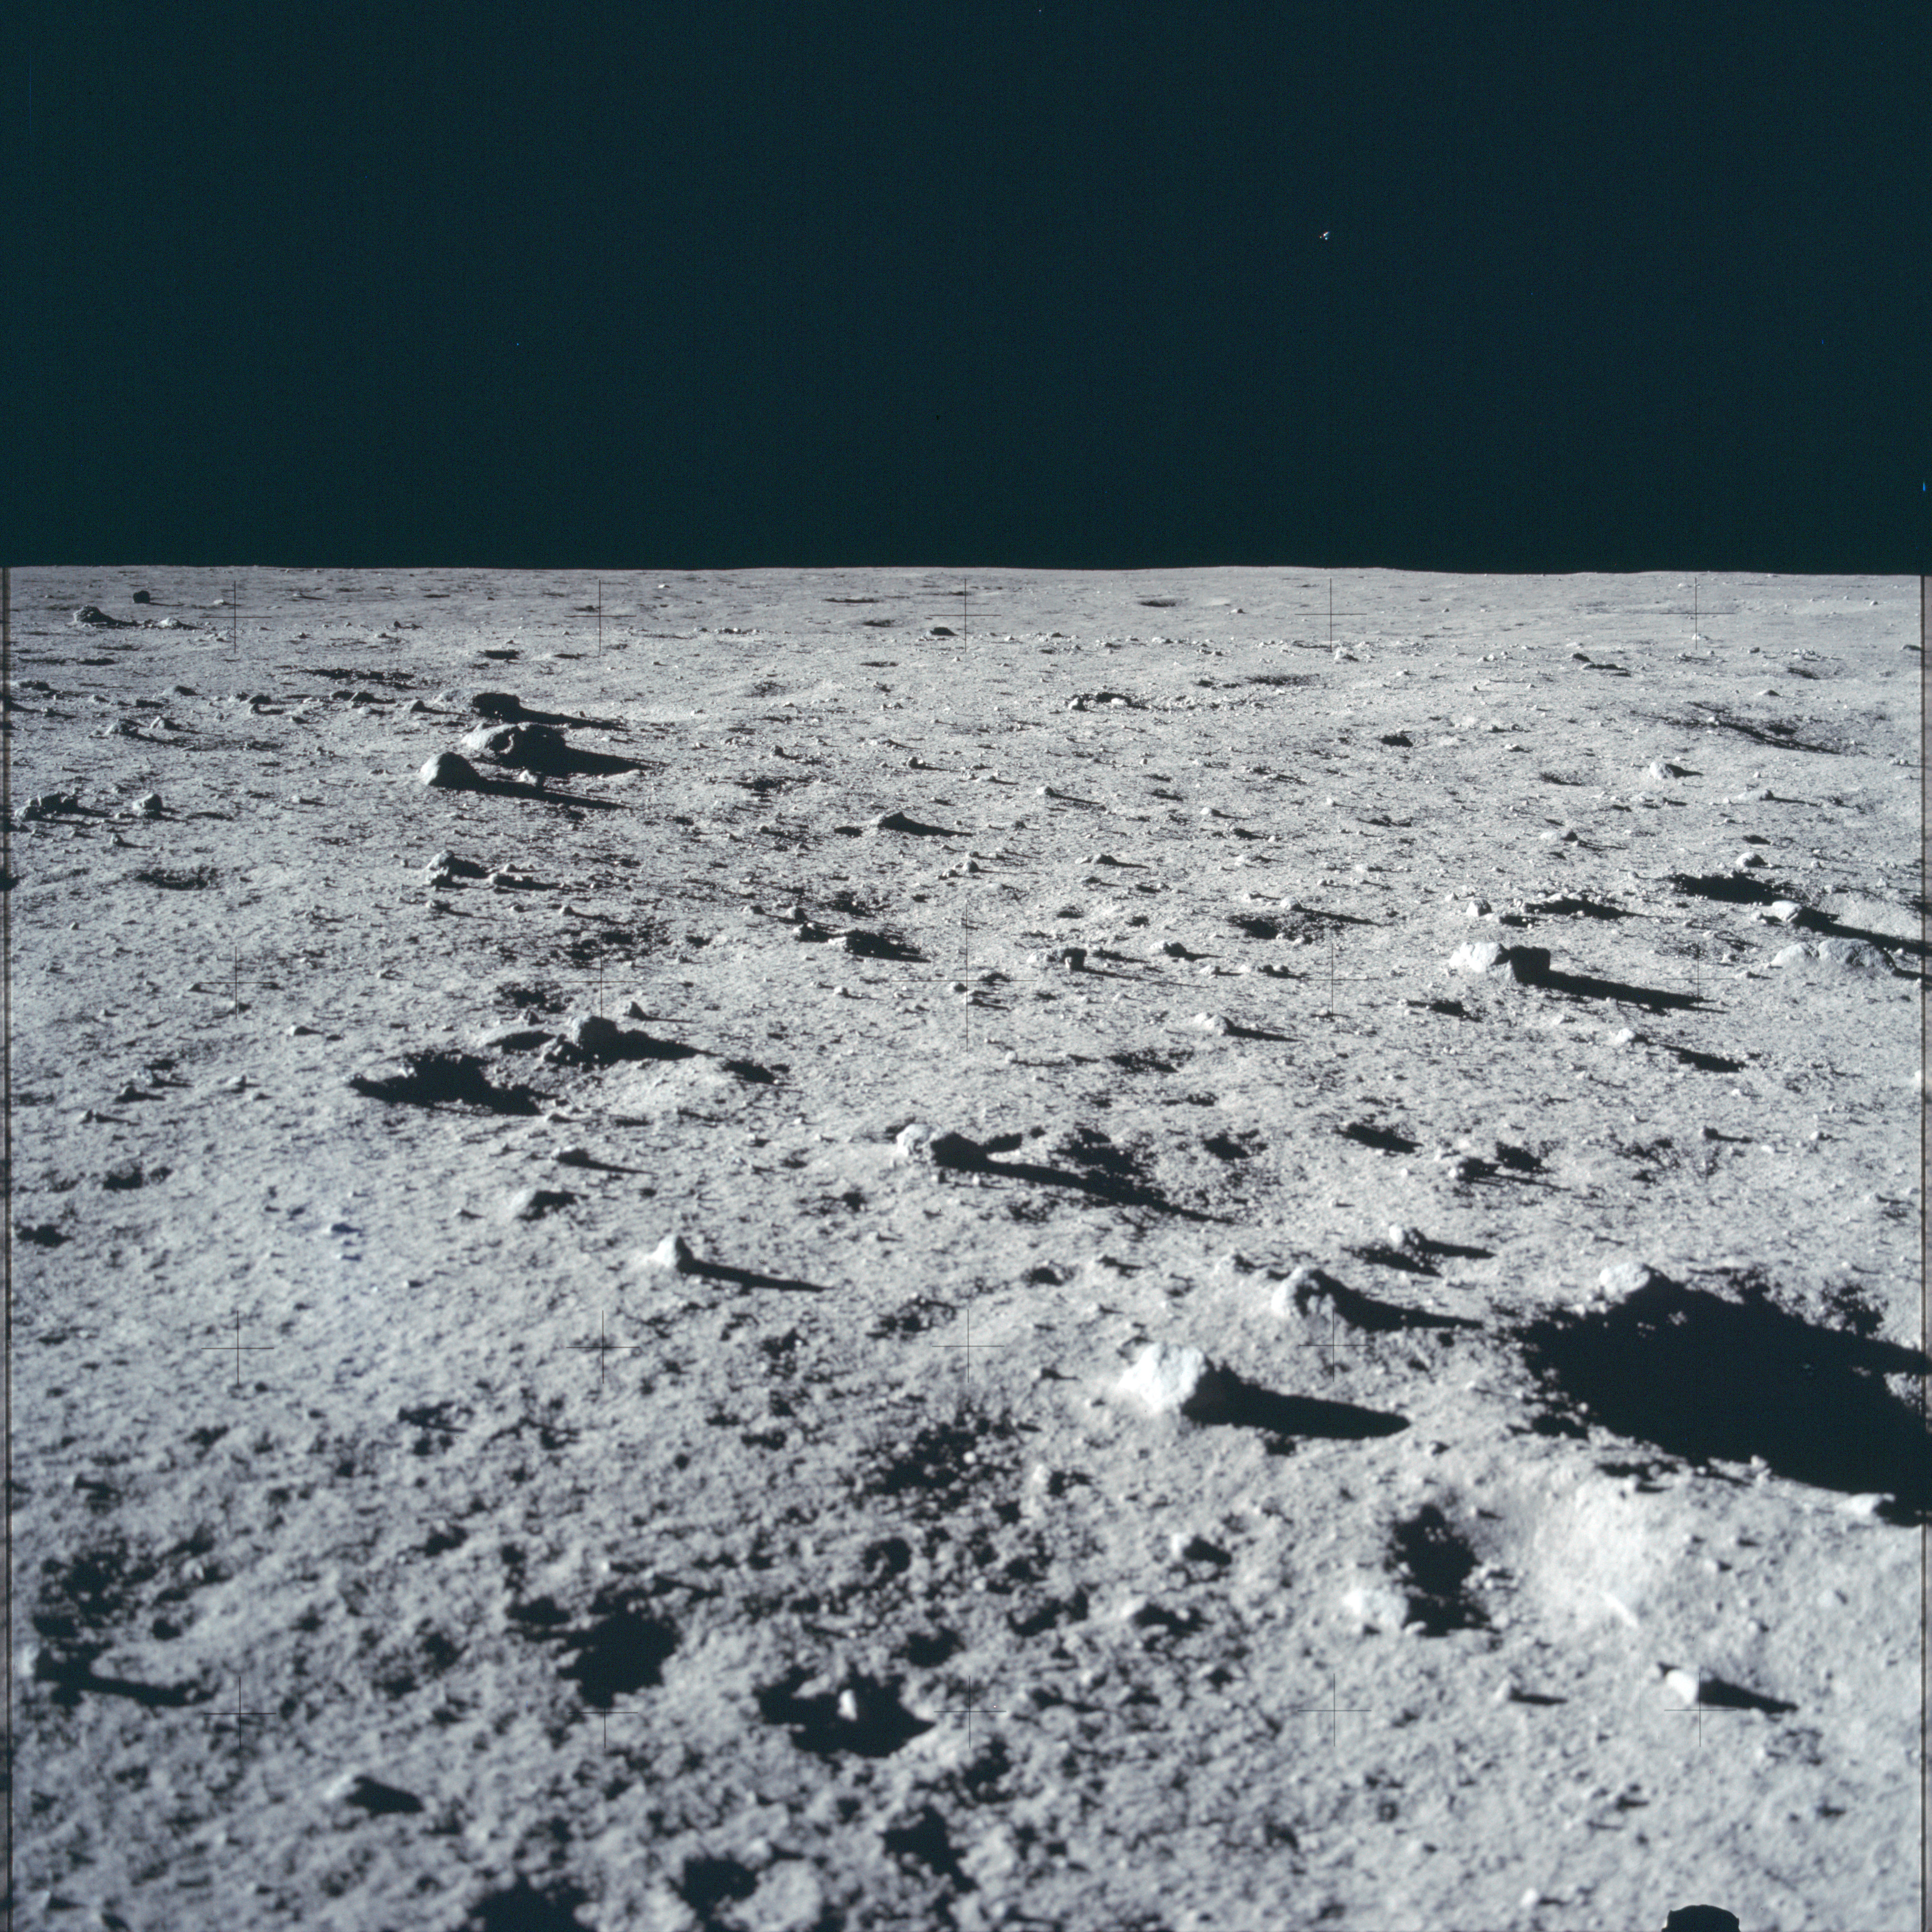
AS11-40-5881 Browse or print resolution. Part of Aldrin's panorama west of the LM. Image credit: Image Science and Analysis Laboratory, NASA-Johnson Space Center. |
|
AS11-40-5882 Browse or print resolution. Part of Aldrin's panorama west of the LM. Image credit: Image Science and Analysis Laboratory, NASA-Johnson Space Center. |

|
AS11-40-5883 Browse or print resolution. Part of Aldrin's panorama west of the LM. Image credit: Image Science and Analysis Laboratory, NASA-Johnson Space Center. |

|
AS11-40-5884 Browse or print resolution. Part of Aldrin's panorama west of the LM. Image credit: Image Science and Analysis Laboratory, NASA-Johnson Space Center. |
|
AS11-40-5885 Browse or print resolution. Part of Aldrin's panorama west of the LM including flag. Image credit: Image Science and Analysis Laboratory, NASA-Johnson Space Center. |
|
AS11-40-5886 Browse or print resolution. Part of Aldrin's panorama west of the LM including flag. Armstrong at MESA on right of picture. Image credit: Image Science and Analysis Laboratory, NASA-Johnson Space Center. |

|
AS11-40-5887 Browse or print resolution. Part of Aldrin's panorama west of the LM. Image credit: Image Science and Analysis Laboratory, NASA-Johnson Space Center. |

|
AS11-40-5888 Browse or print resolution. Part of Aldrin's panorama west of the LM. Image credit: Image Science and Analysis Laboratory, NASA-Johnson Space Center. |
|
AS11-40-5889 Browse or print resolution. Part of Aldrin's panorama west of the LM. Image credit: Image Science and Analysis Laboratory, NASA-Johnson Space Center. |

|
AS11-40-5890 Browse or print resolution. Part of Aldrin's panorama west of the LM. Image credit: Image Science and Analysis Laboratory, NASA-Johnson Space Center. |

|
AS11-40-5891 Browse or print resolution. Part of Aldrin's panorama west of the LM. Image credit: Image Science and Analysis Laboratory, NASA-Johnson Space Center. |
|
AS11-40-5892 Browse or print resolution. Area underneath LM. Descent engine to upper-left. Image credit: Image Science and Analysis Laboratory, NASA-Johnson Space Center. |

|
AS11-40-5893 Browse or print resolution. Southwest aspect of LM. Image credit: Image Science and Analysis Laboratory, NASA-Johnson Space Center. |
|
AS11-40-5894 Browse or print resolution. Close-up of LM descent stage. Armstrong at bottom left. Image credit: Image Science and Analysis Laboratory, NASA-Johnson Space Center. |

|
AS11-40-5895 Browse or print resolution. Close-up of east footpad. Image credit: Image Science and Analysis Laboratory, NASA-Johnson Space Center. |
|
AS11-40-5896 Browse or print resolution. Close-up of east footpad. Image credit: Image Science and Analysis Laboratory, NASA-Johnson Space Center. |
|
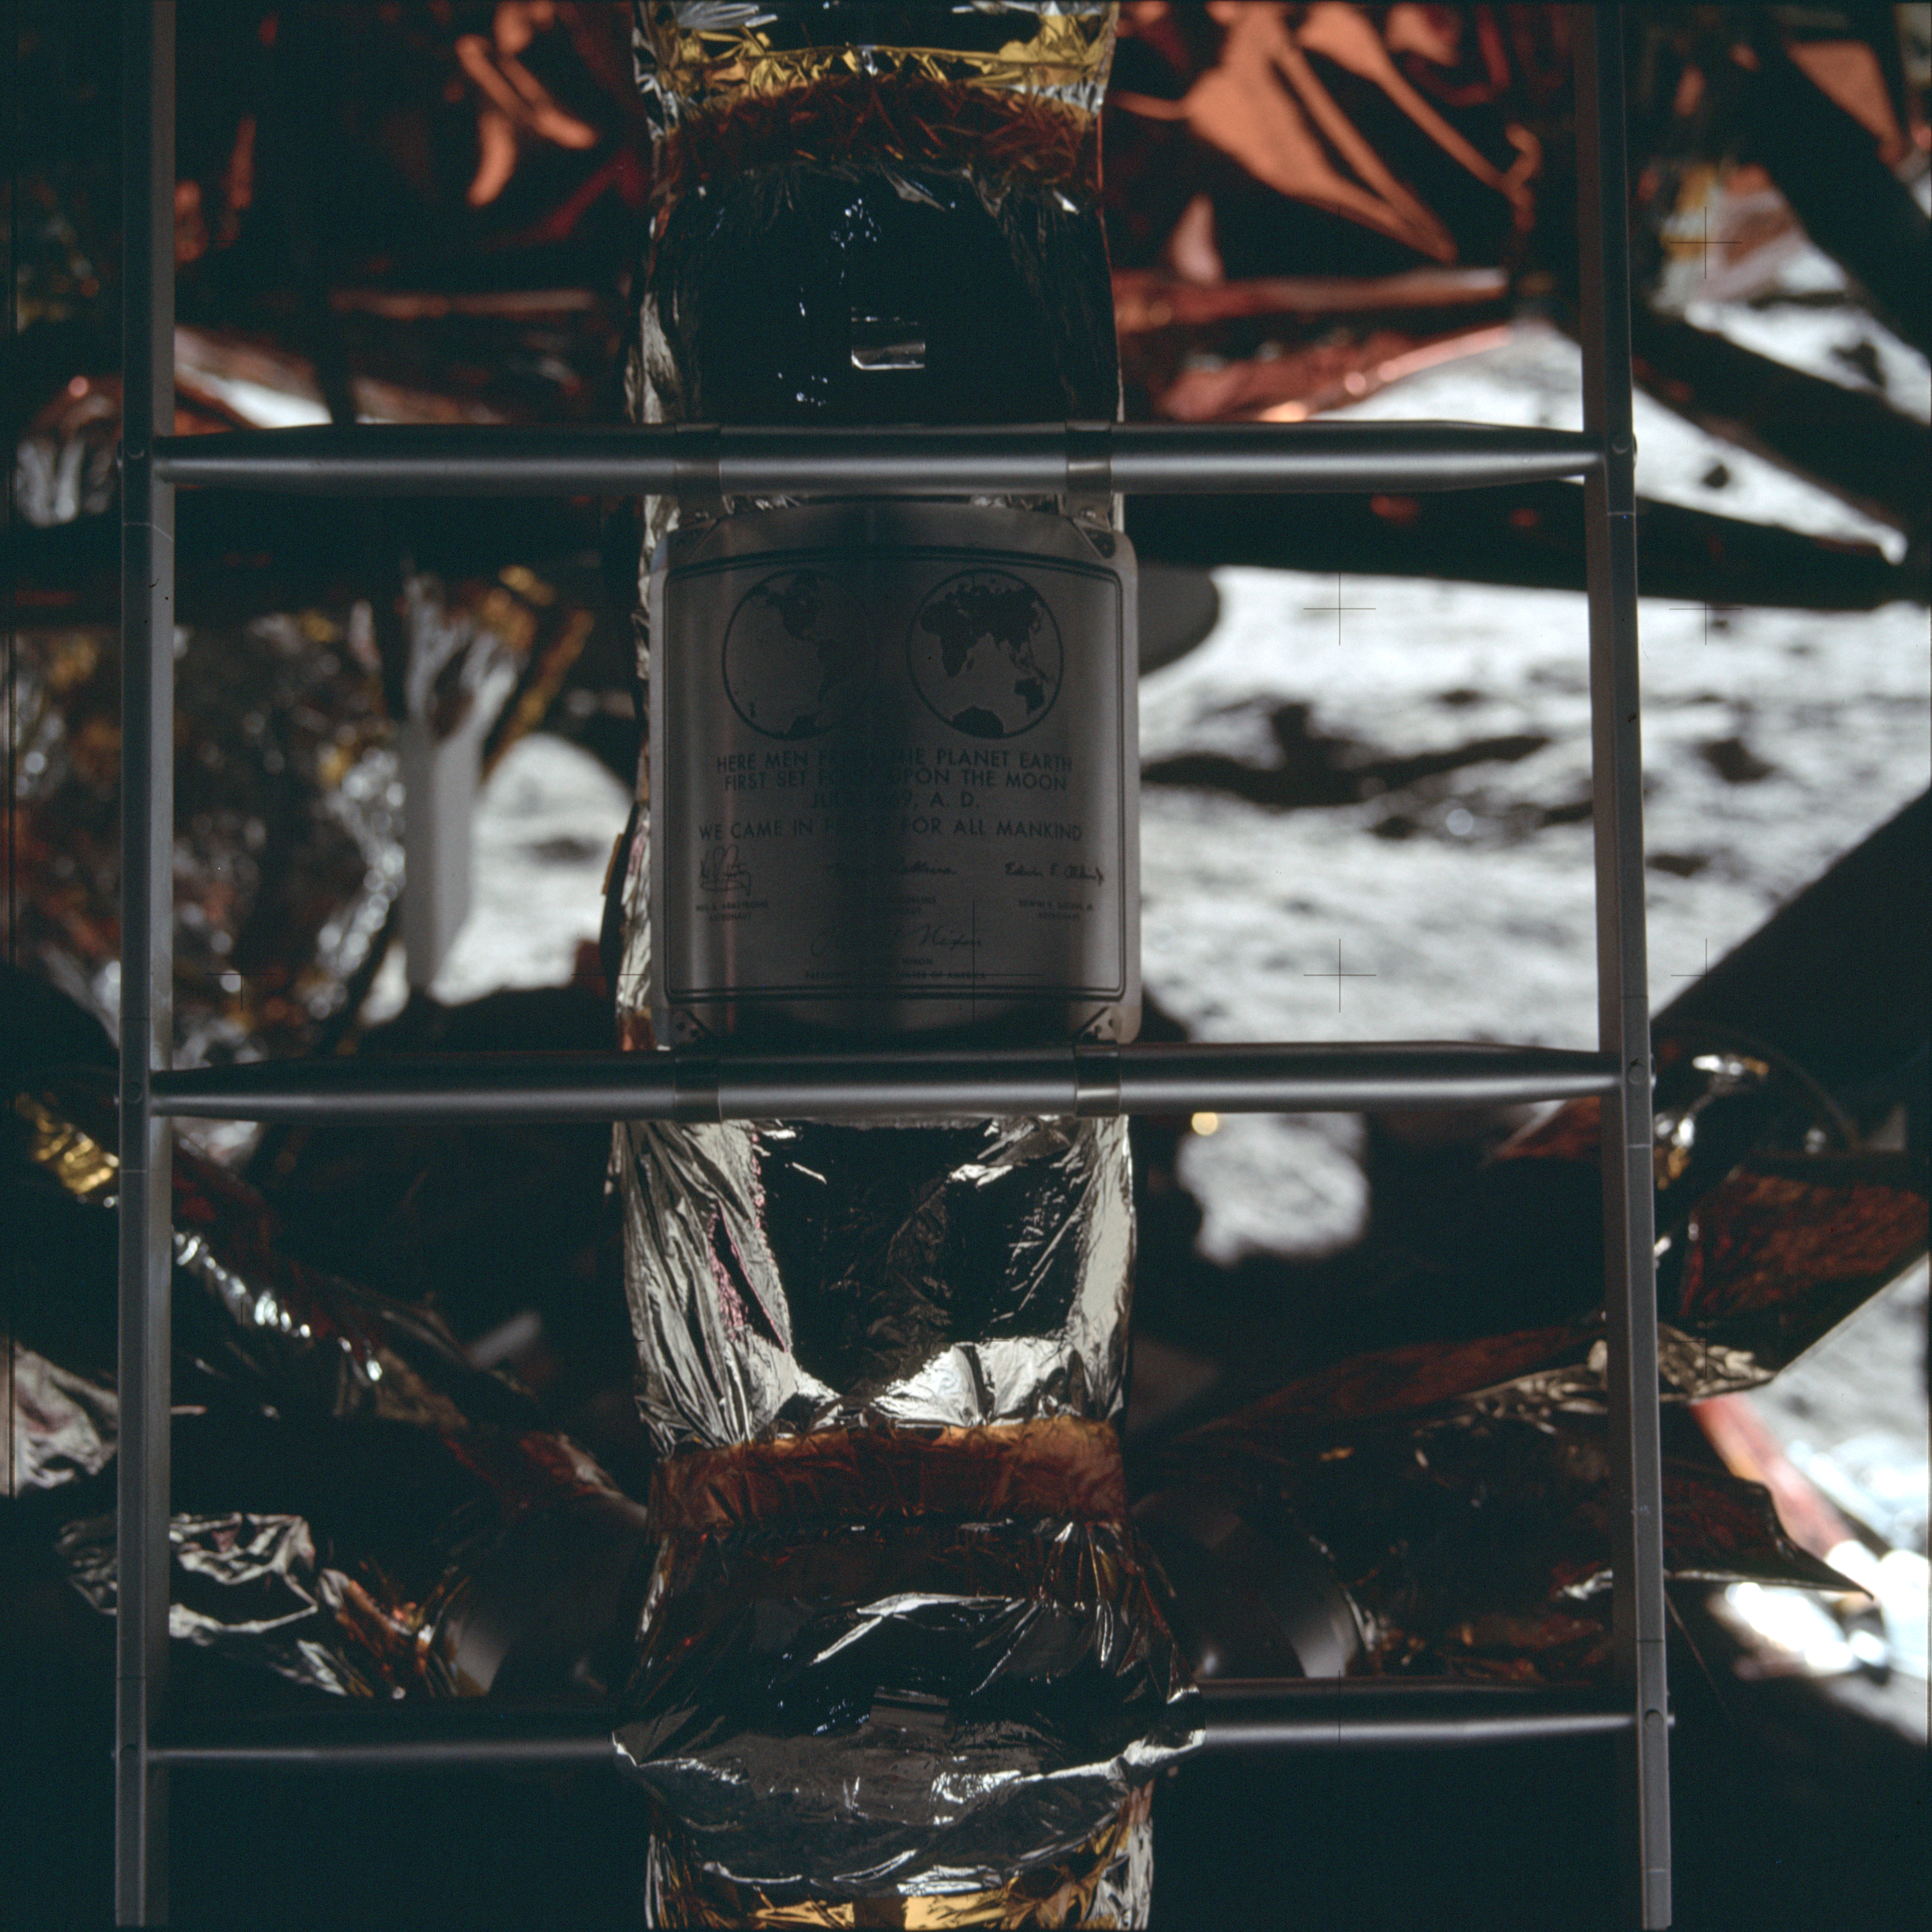
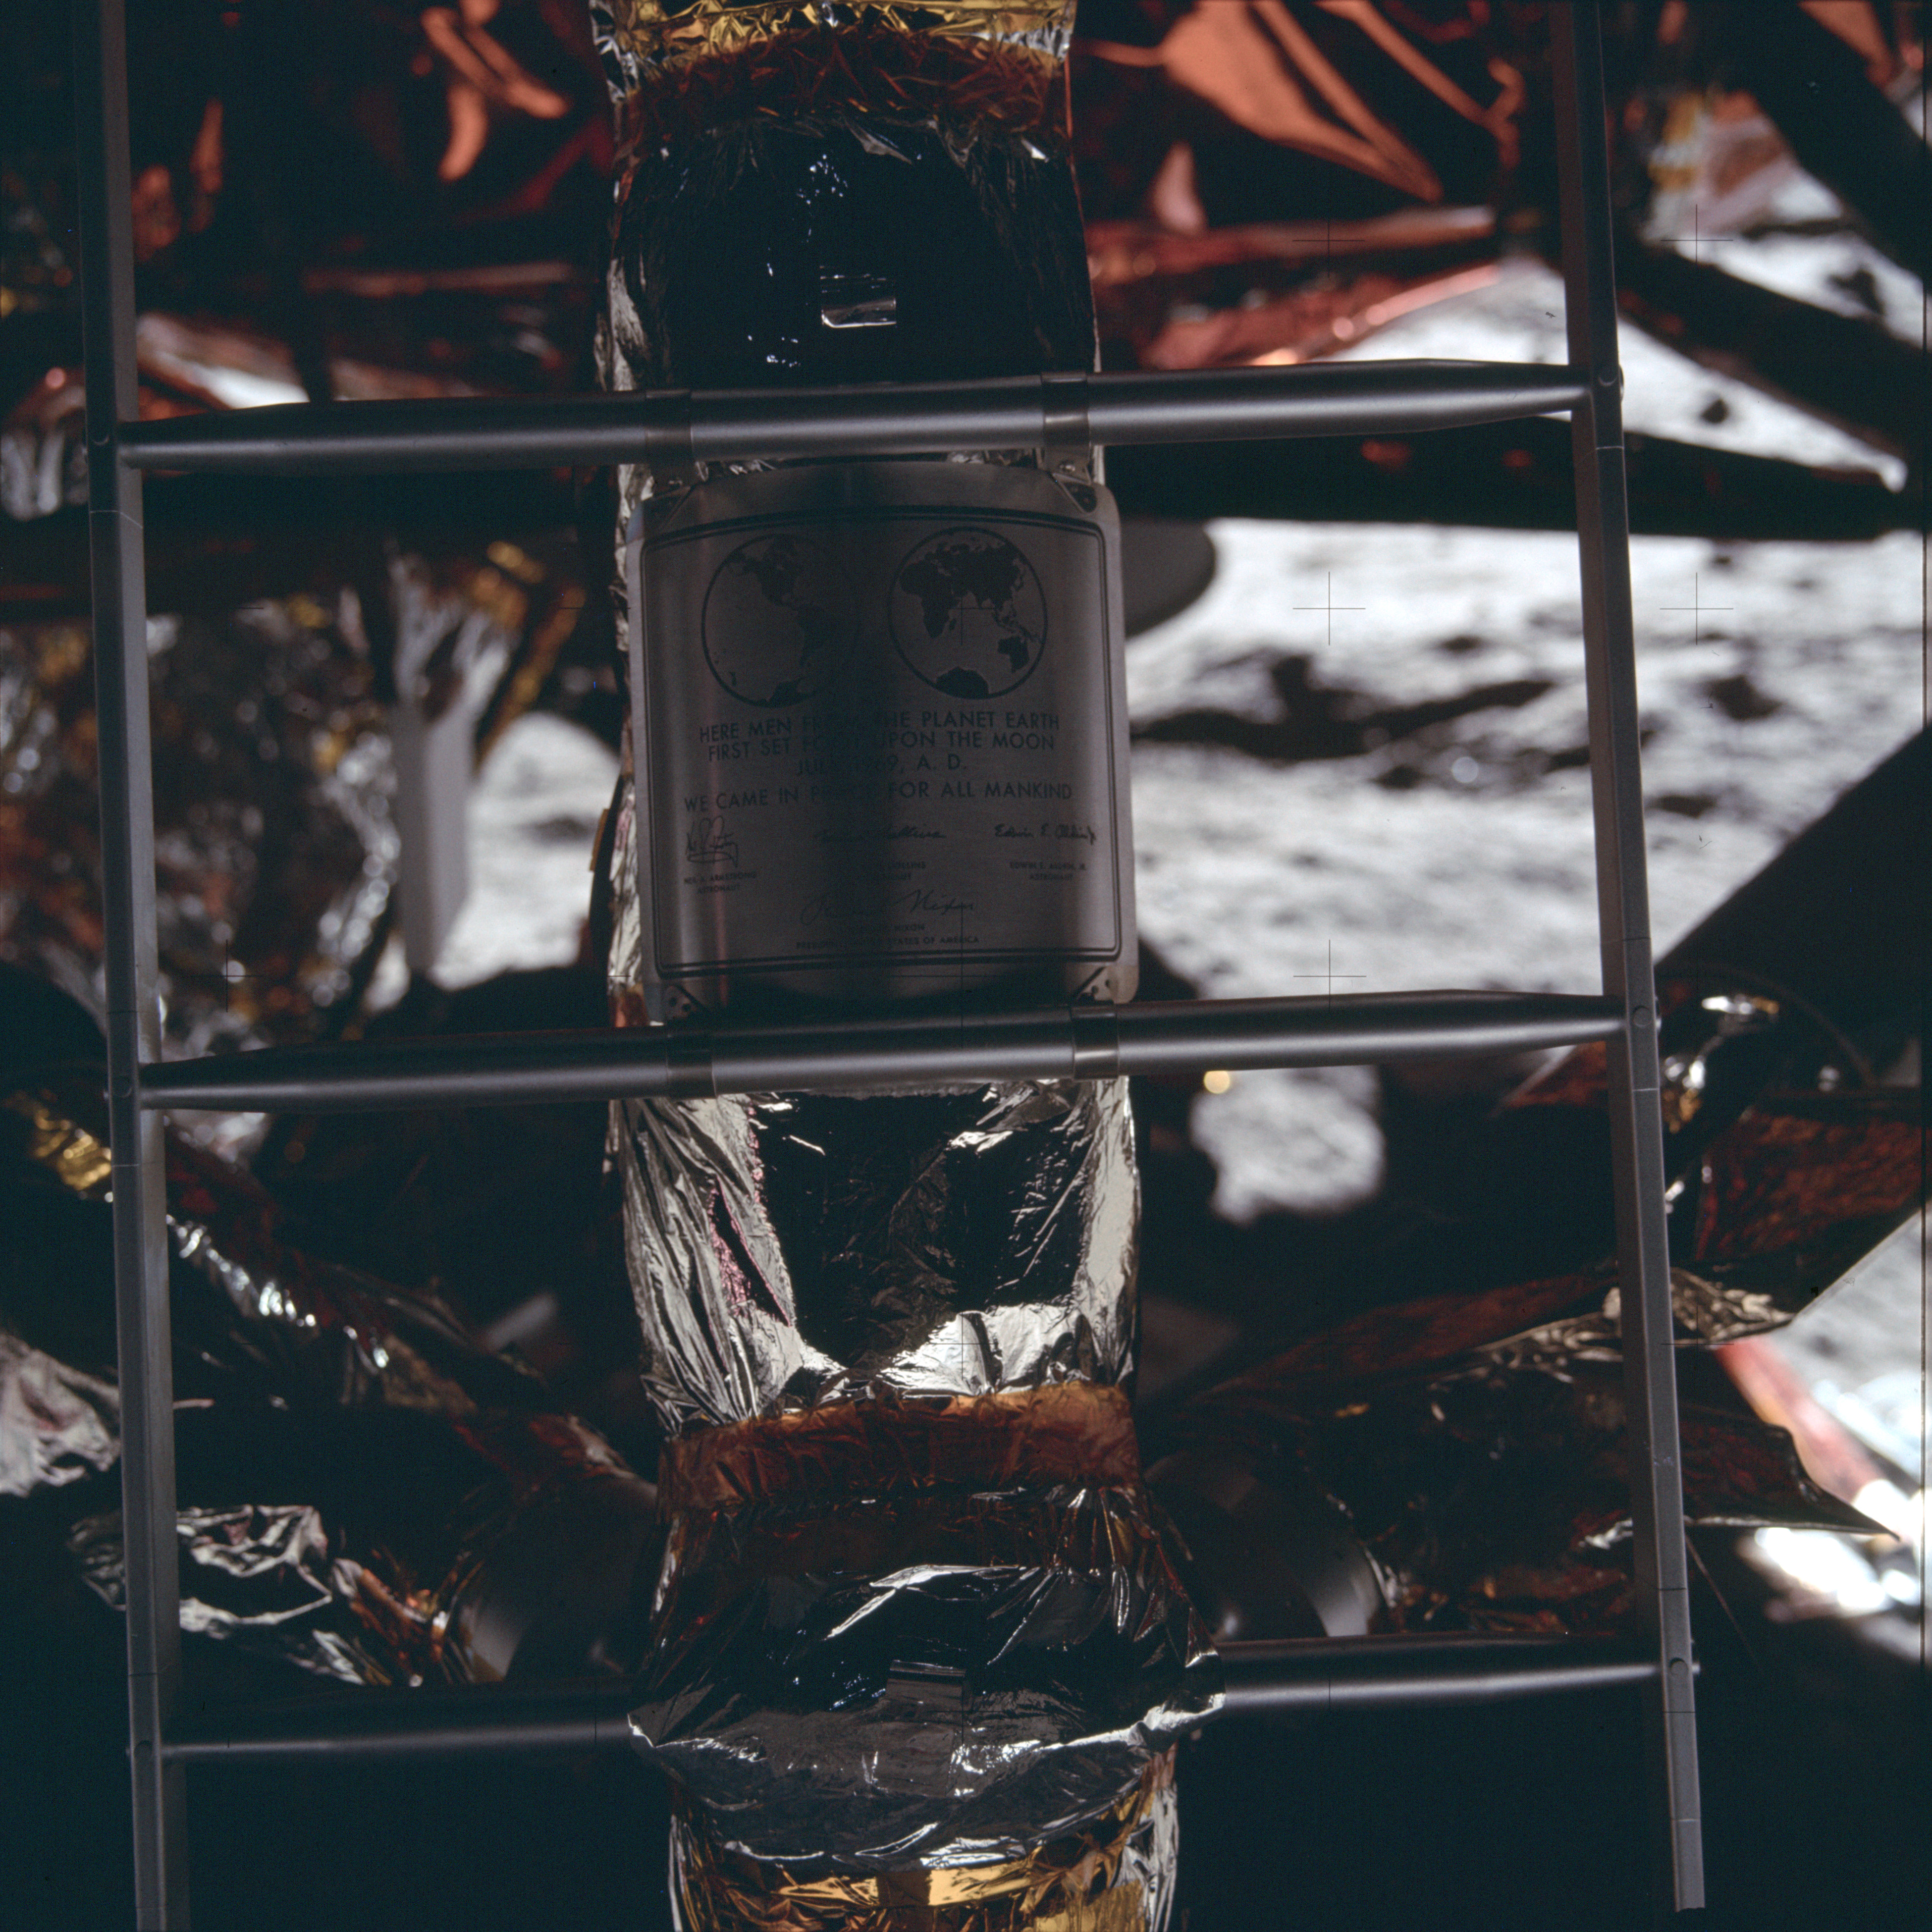
AS11-40-5897 Browse or print resolution. Ladder and plaque. Image credit: Image Science and Analysis Laboratory, NASA-Johnson Space Center. |
|
AS11-40-5898 Browse or print resolution. Ladder and plaque. Image credit: Image Science and Analysis Laboratory, NASA-Johnson Space Center. |

|
AS11-40-5899 Browse or print resolution. Ladder and plaque. Image credit: Image Science and Analysis Laboratory, NASA-Johnson Space Center. |

|
AS11-40-5900 Browse or print resolution. Ladder. Image credit: Image Science and Analysis Laboratory, NASA-Johnson Space Center. |
|
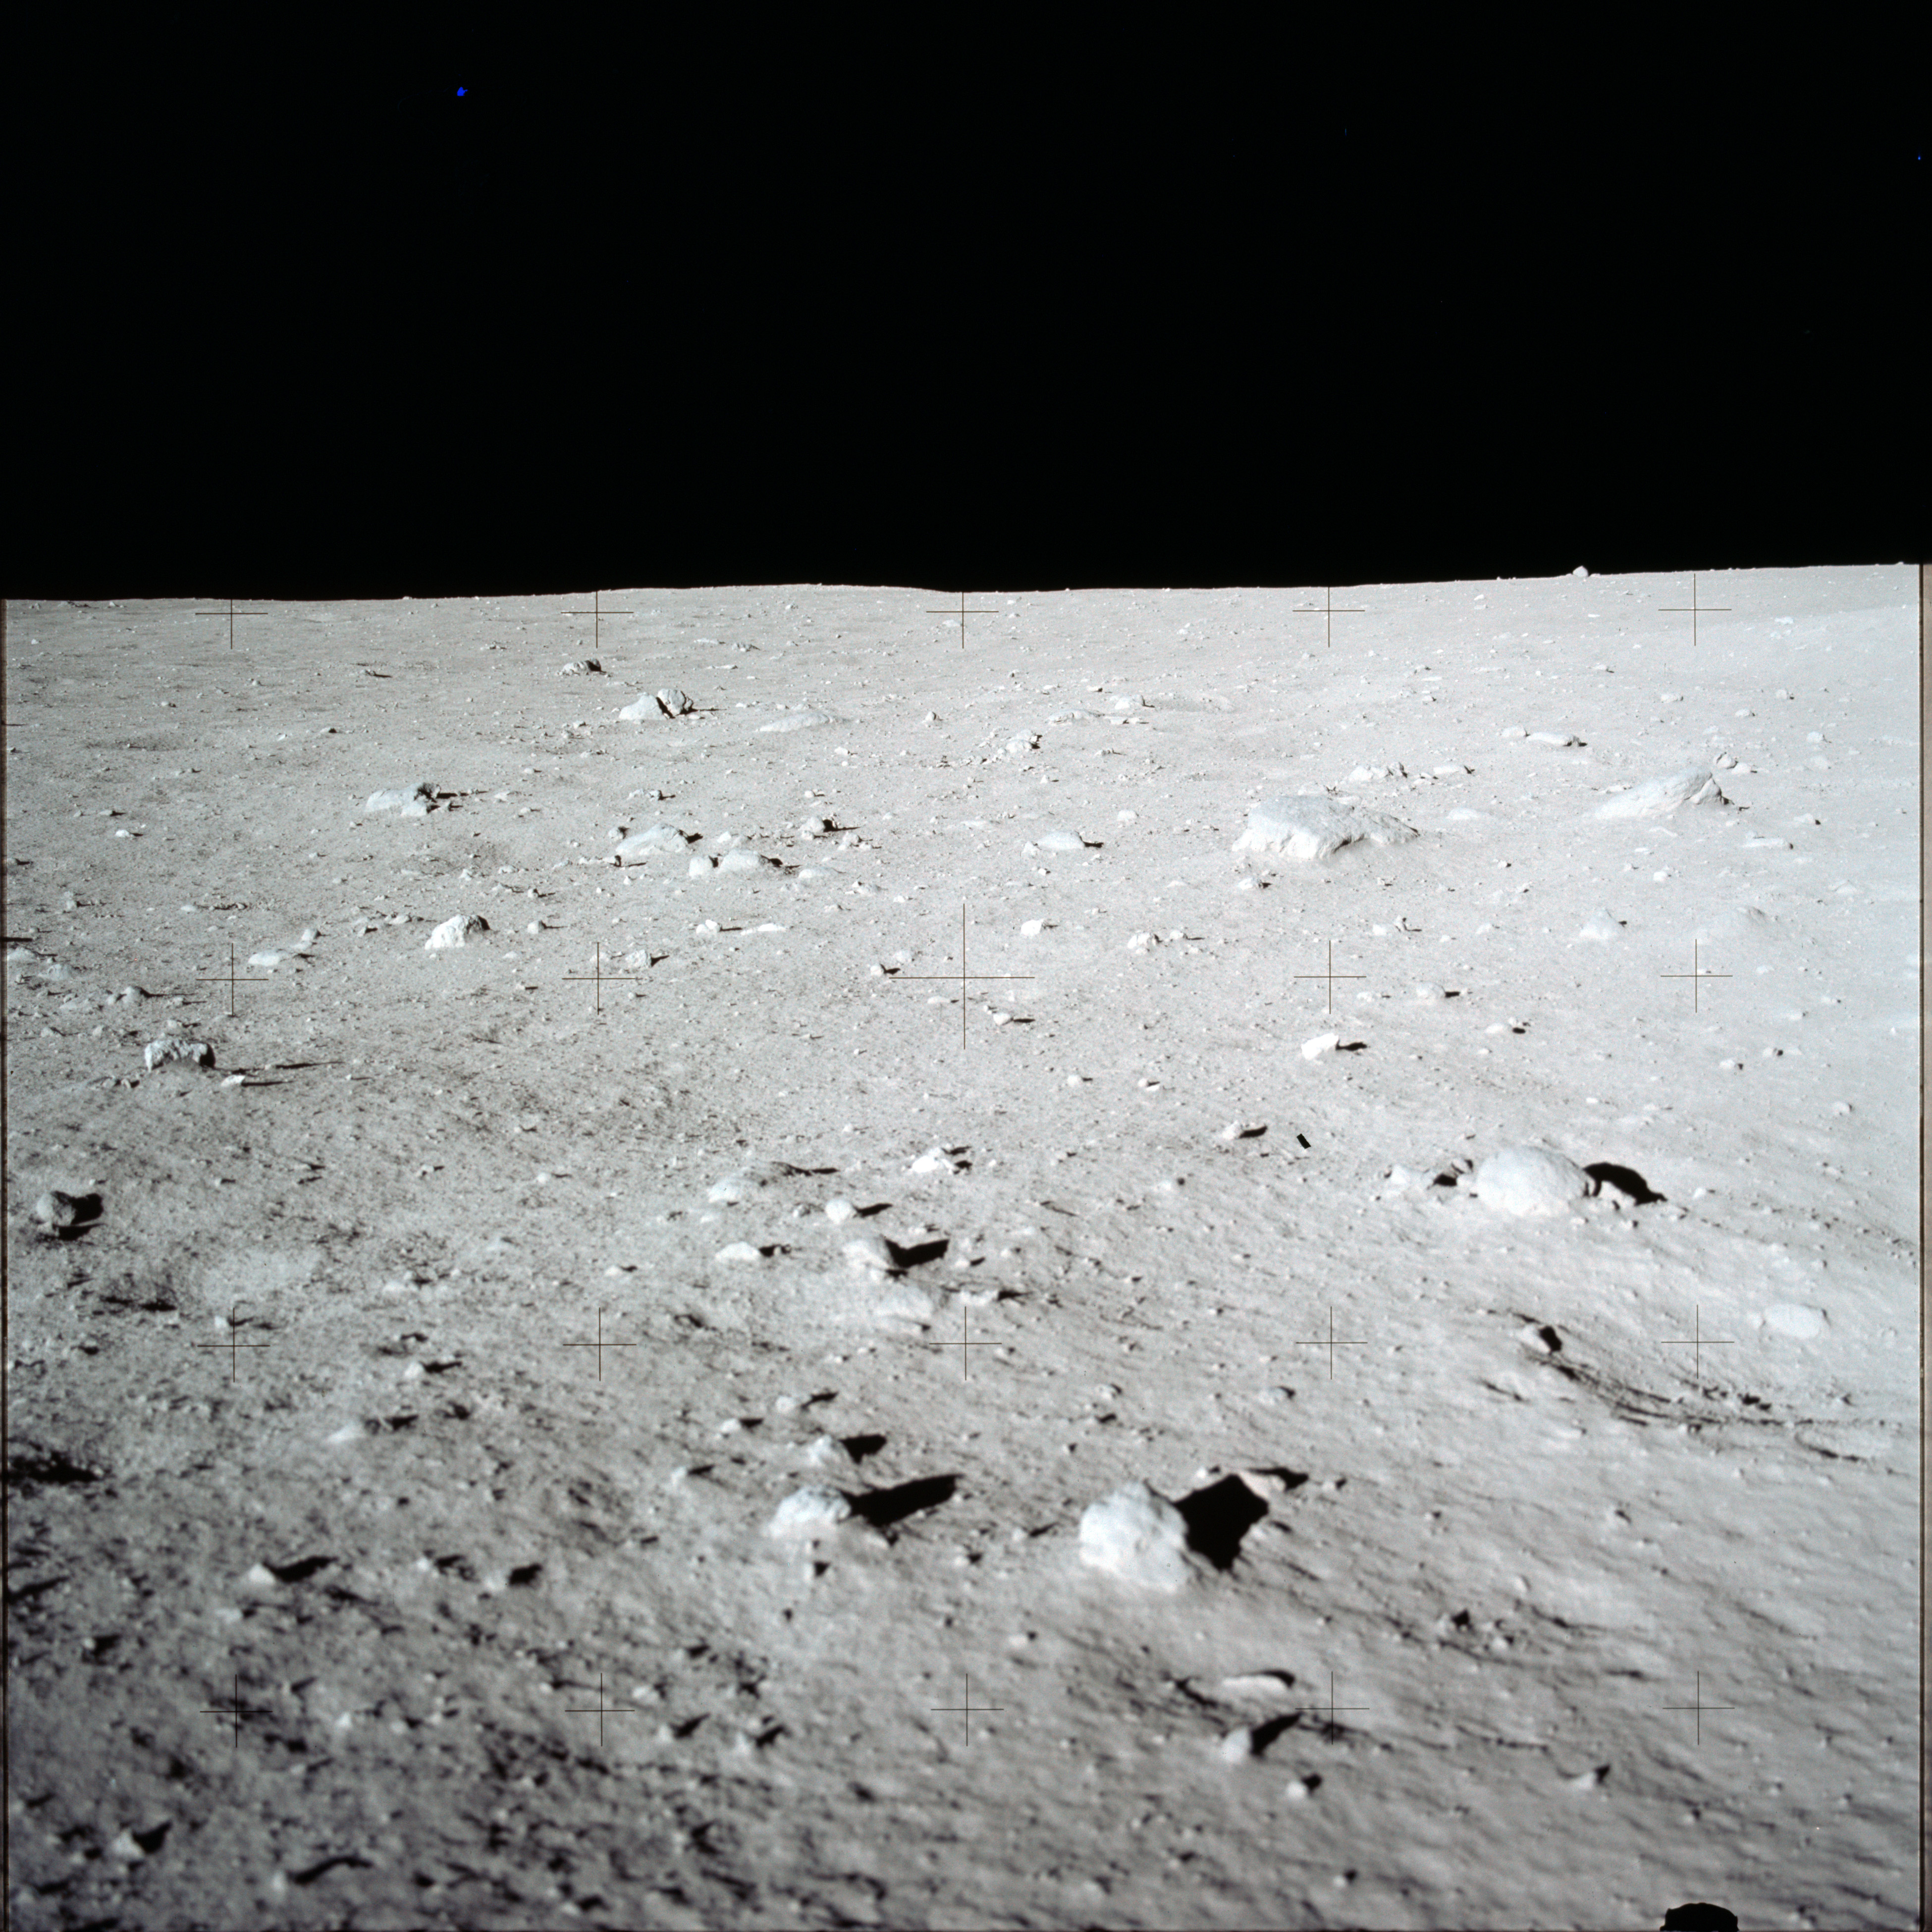
AS11-40-5901 Browse or print resolution. Area adjacent to north footpad. Image credit: Image Science and Analysis Laboratory, NASA-Johnson Space Center. |
|
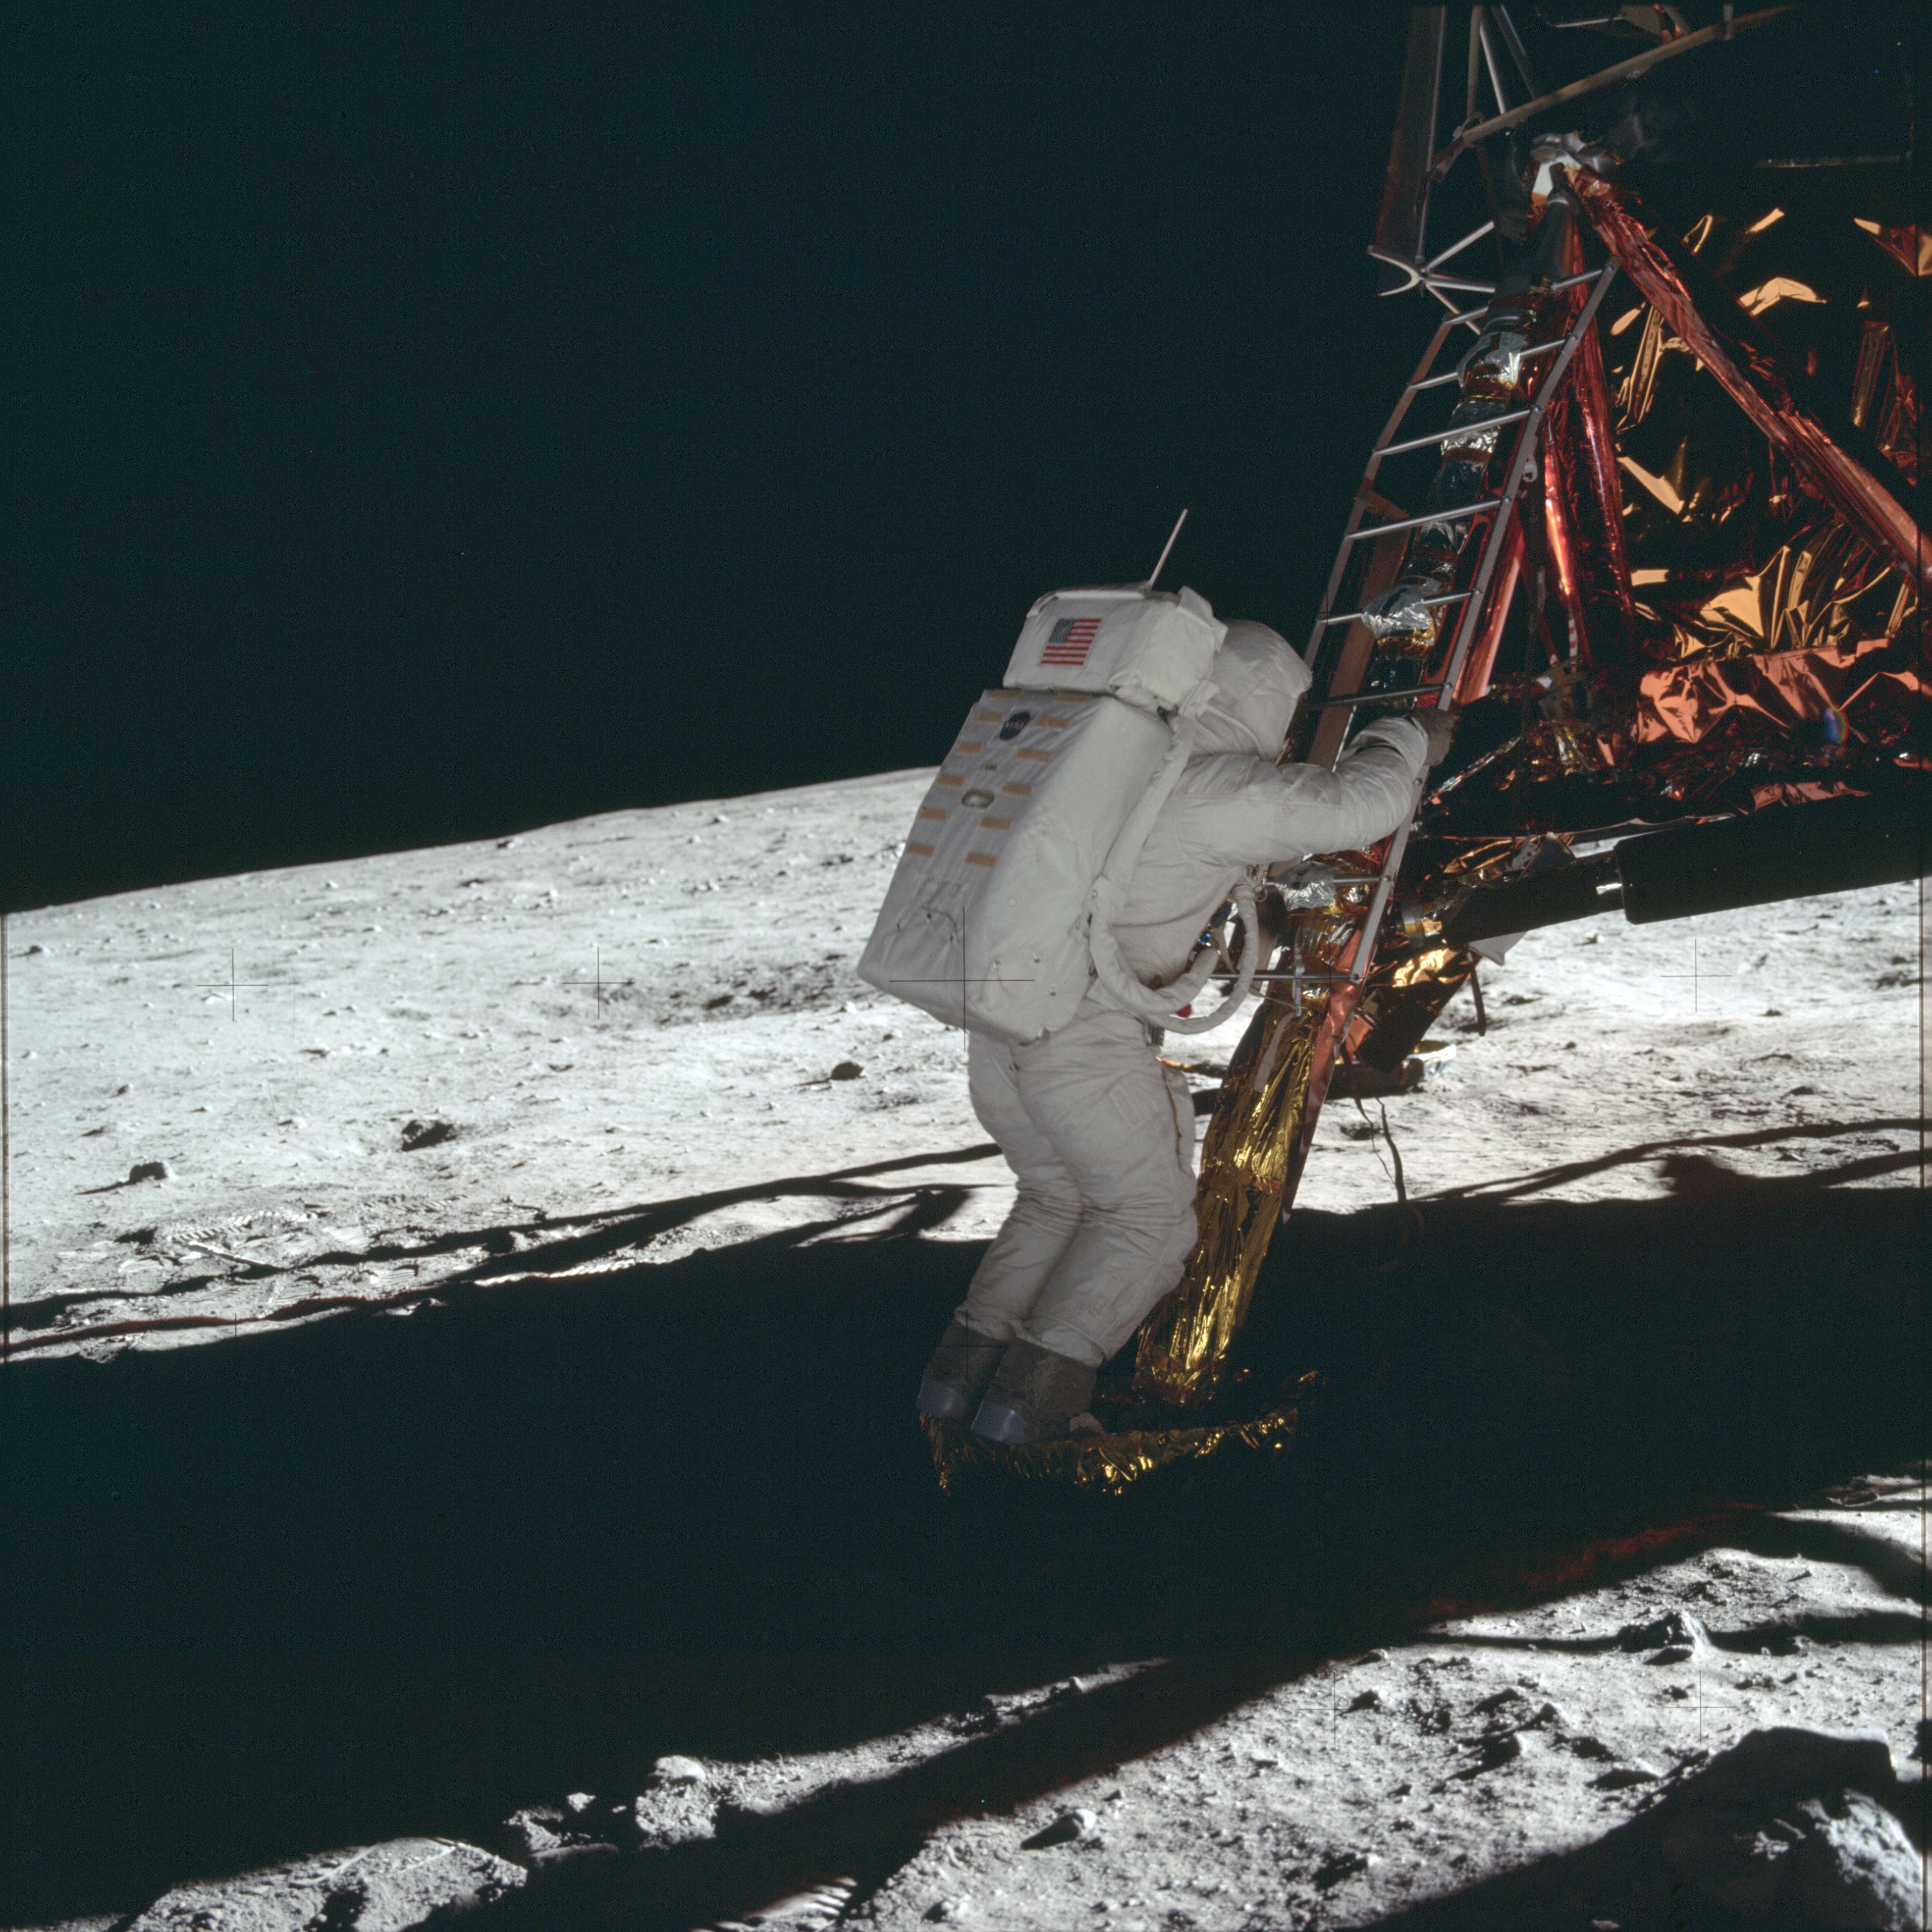
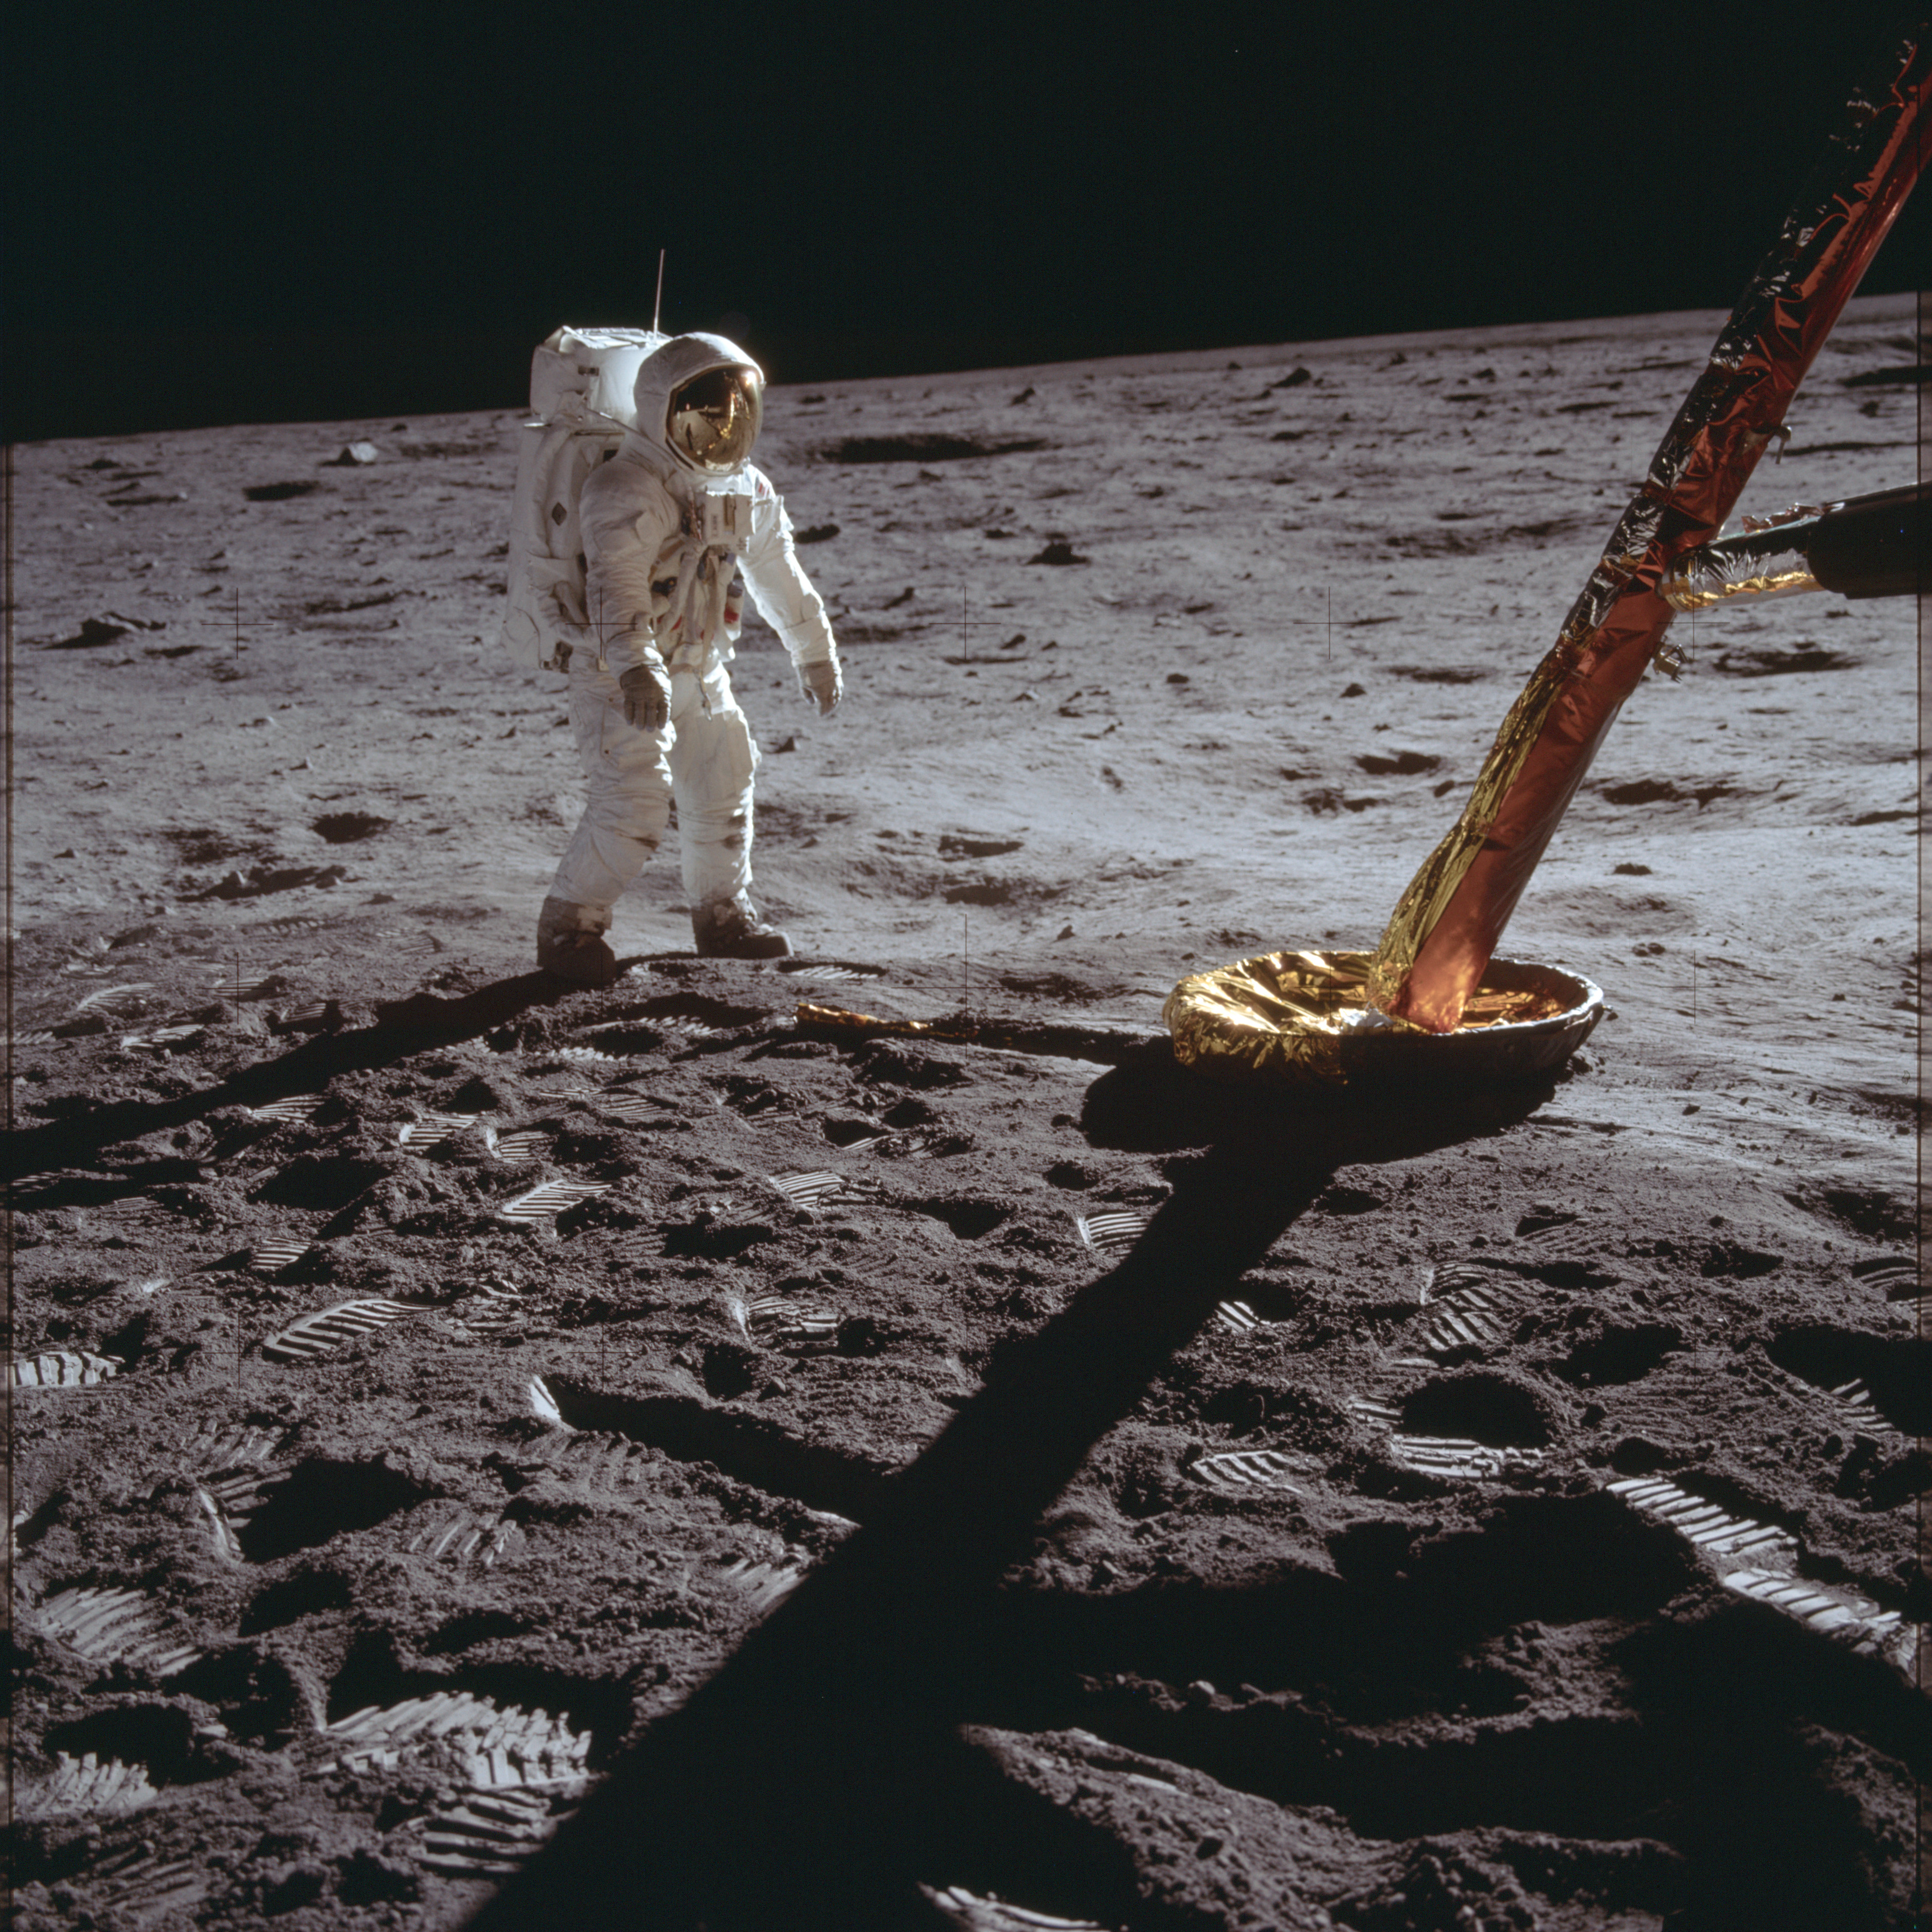
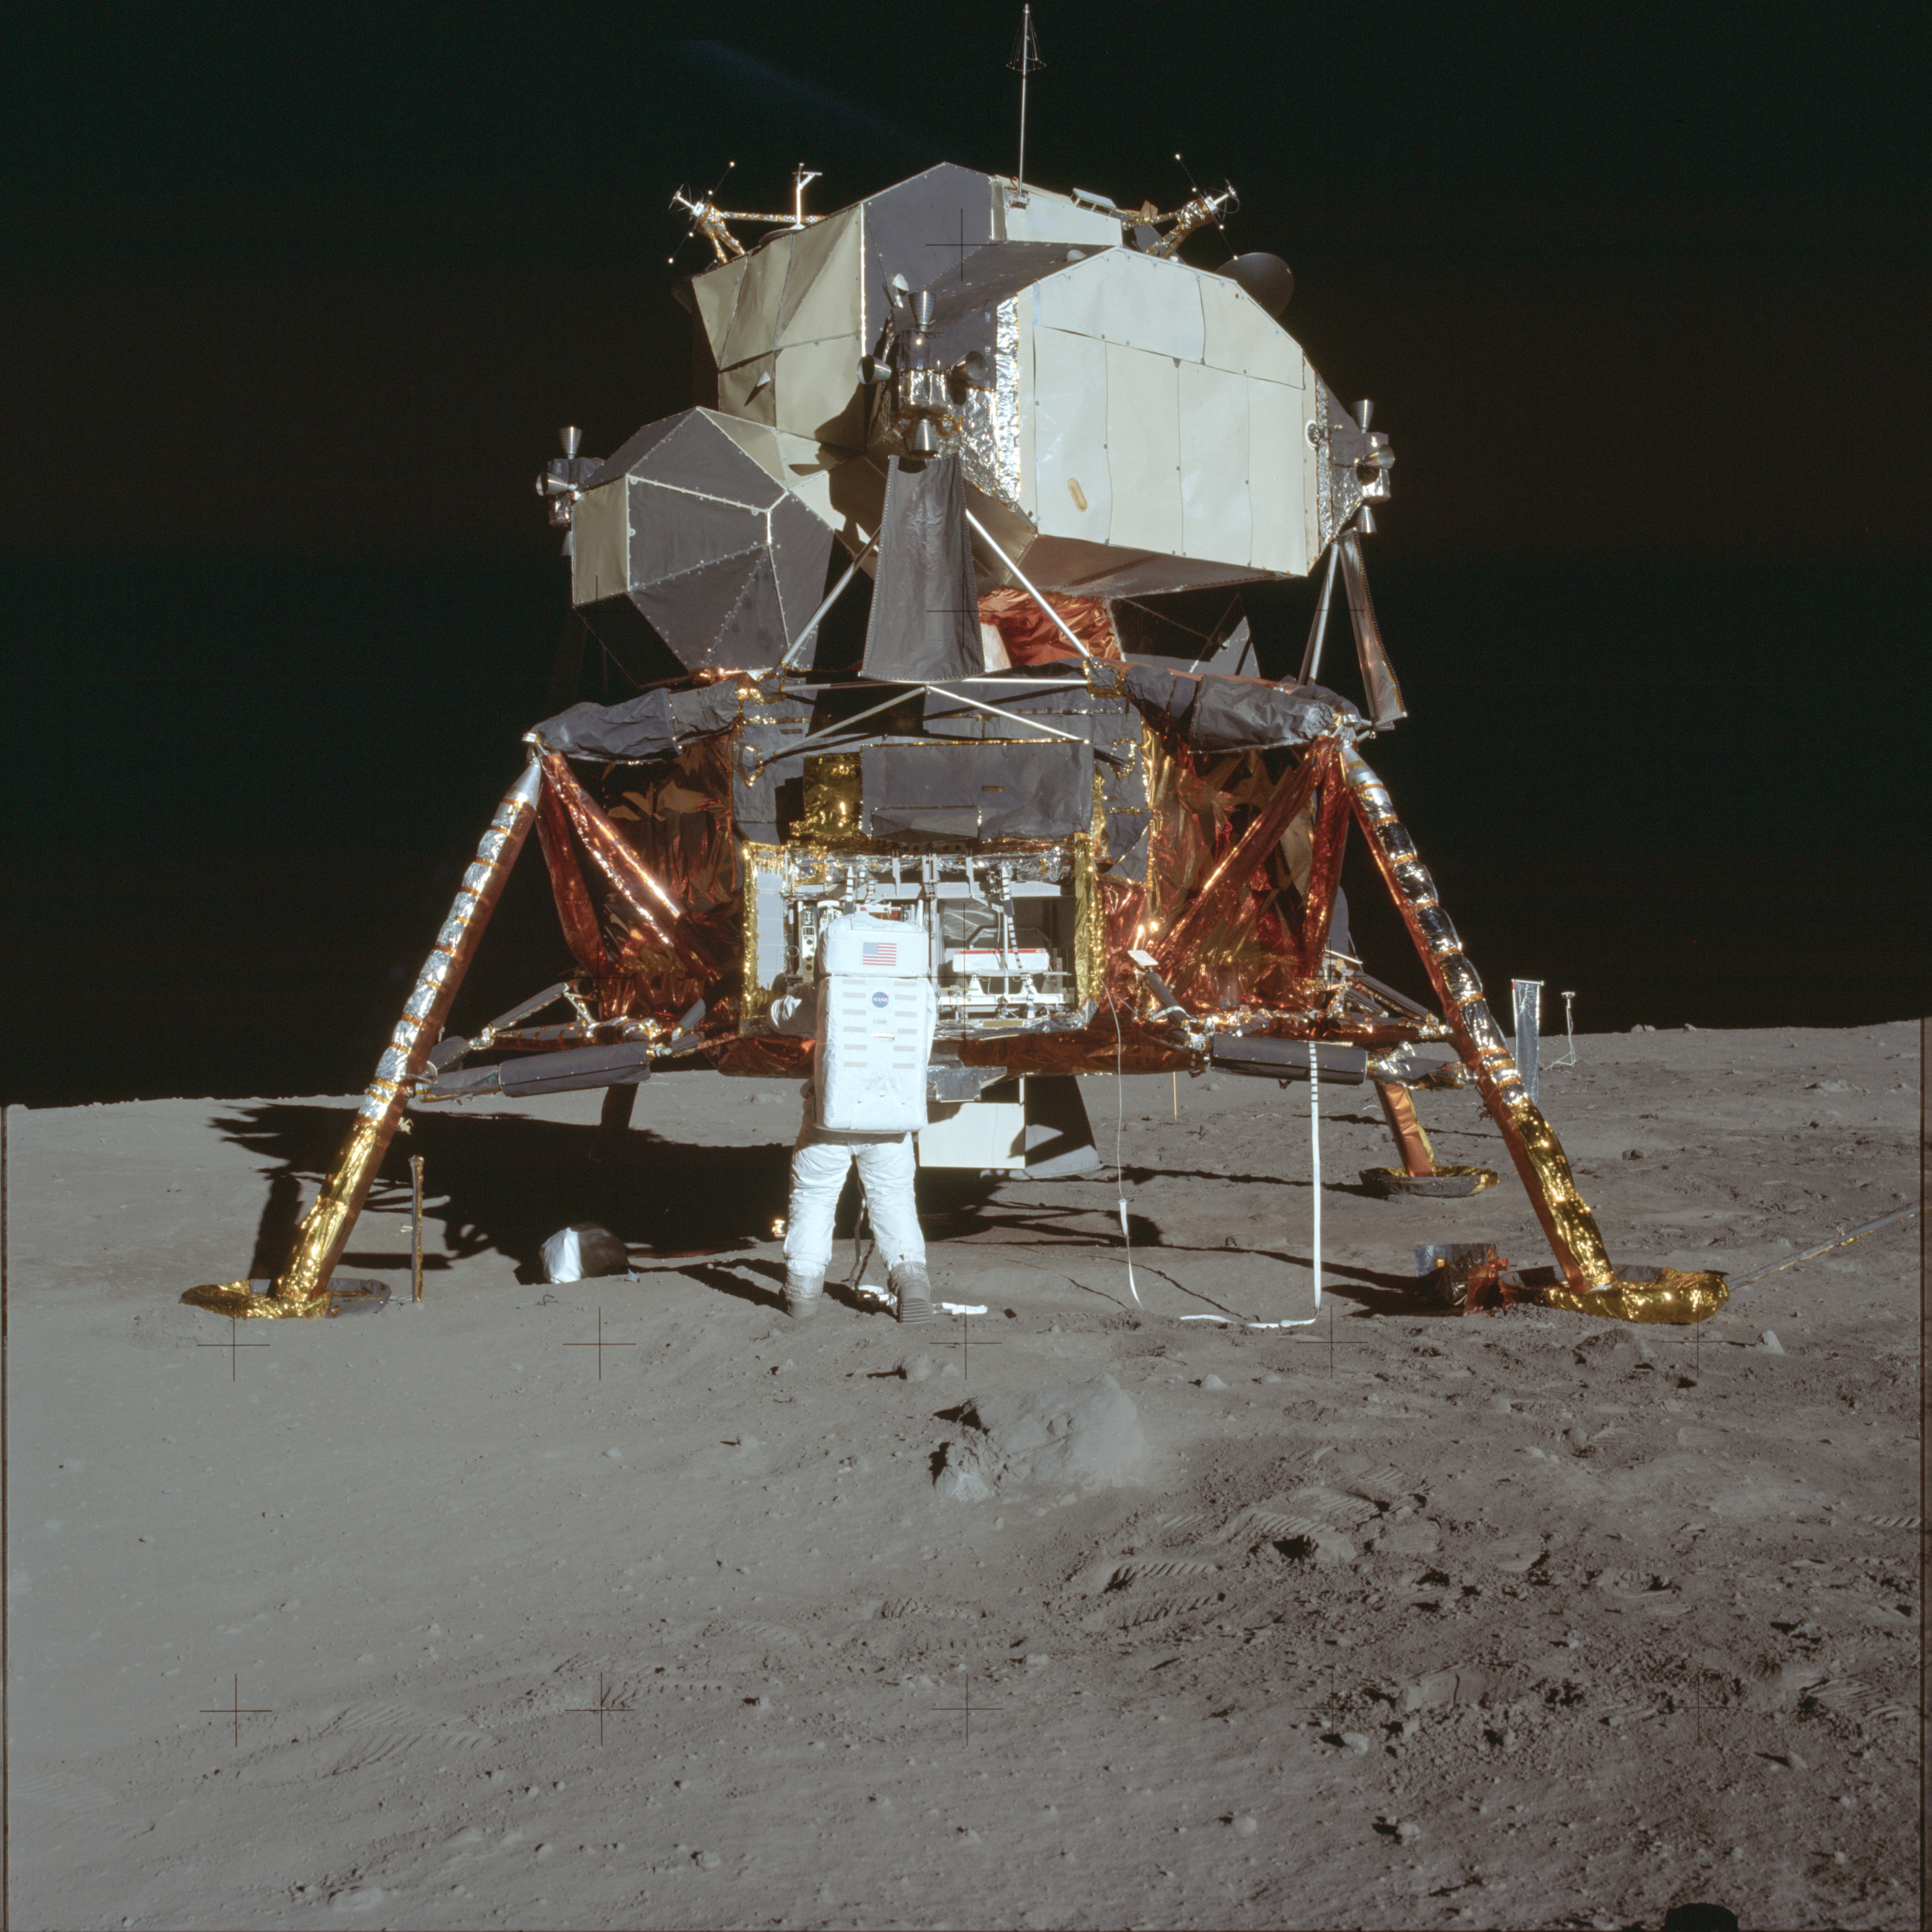
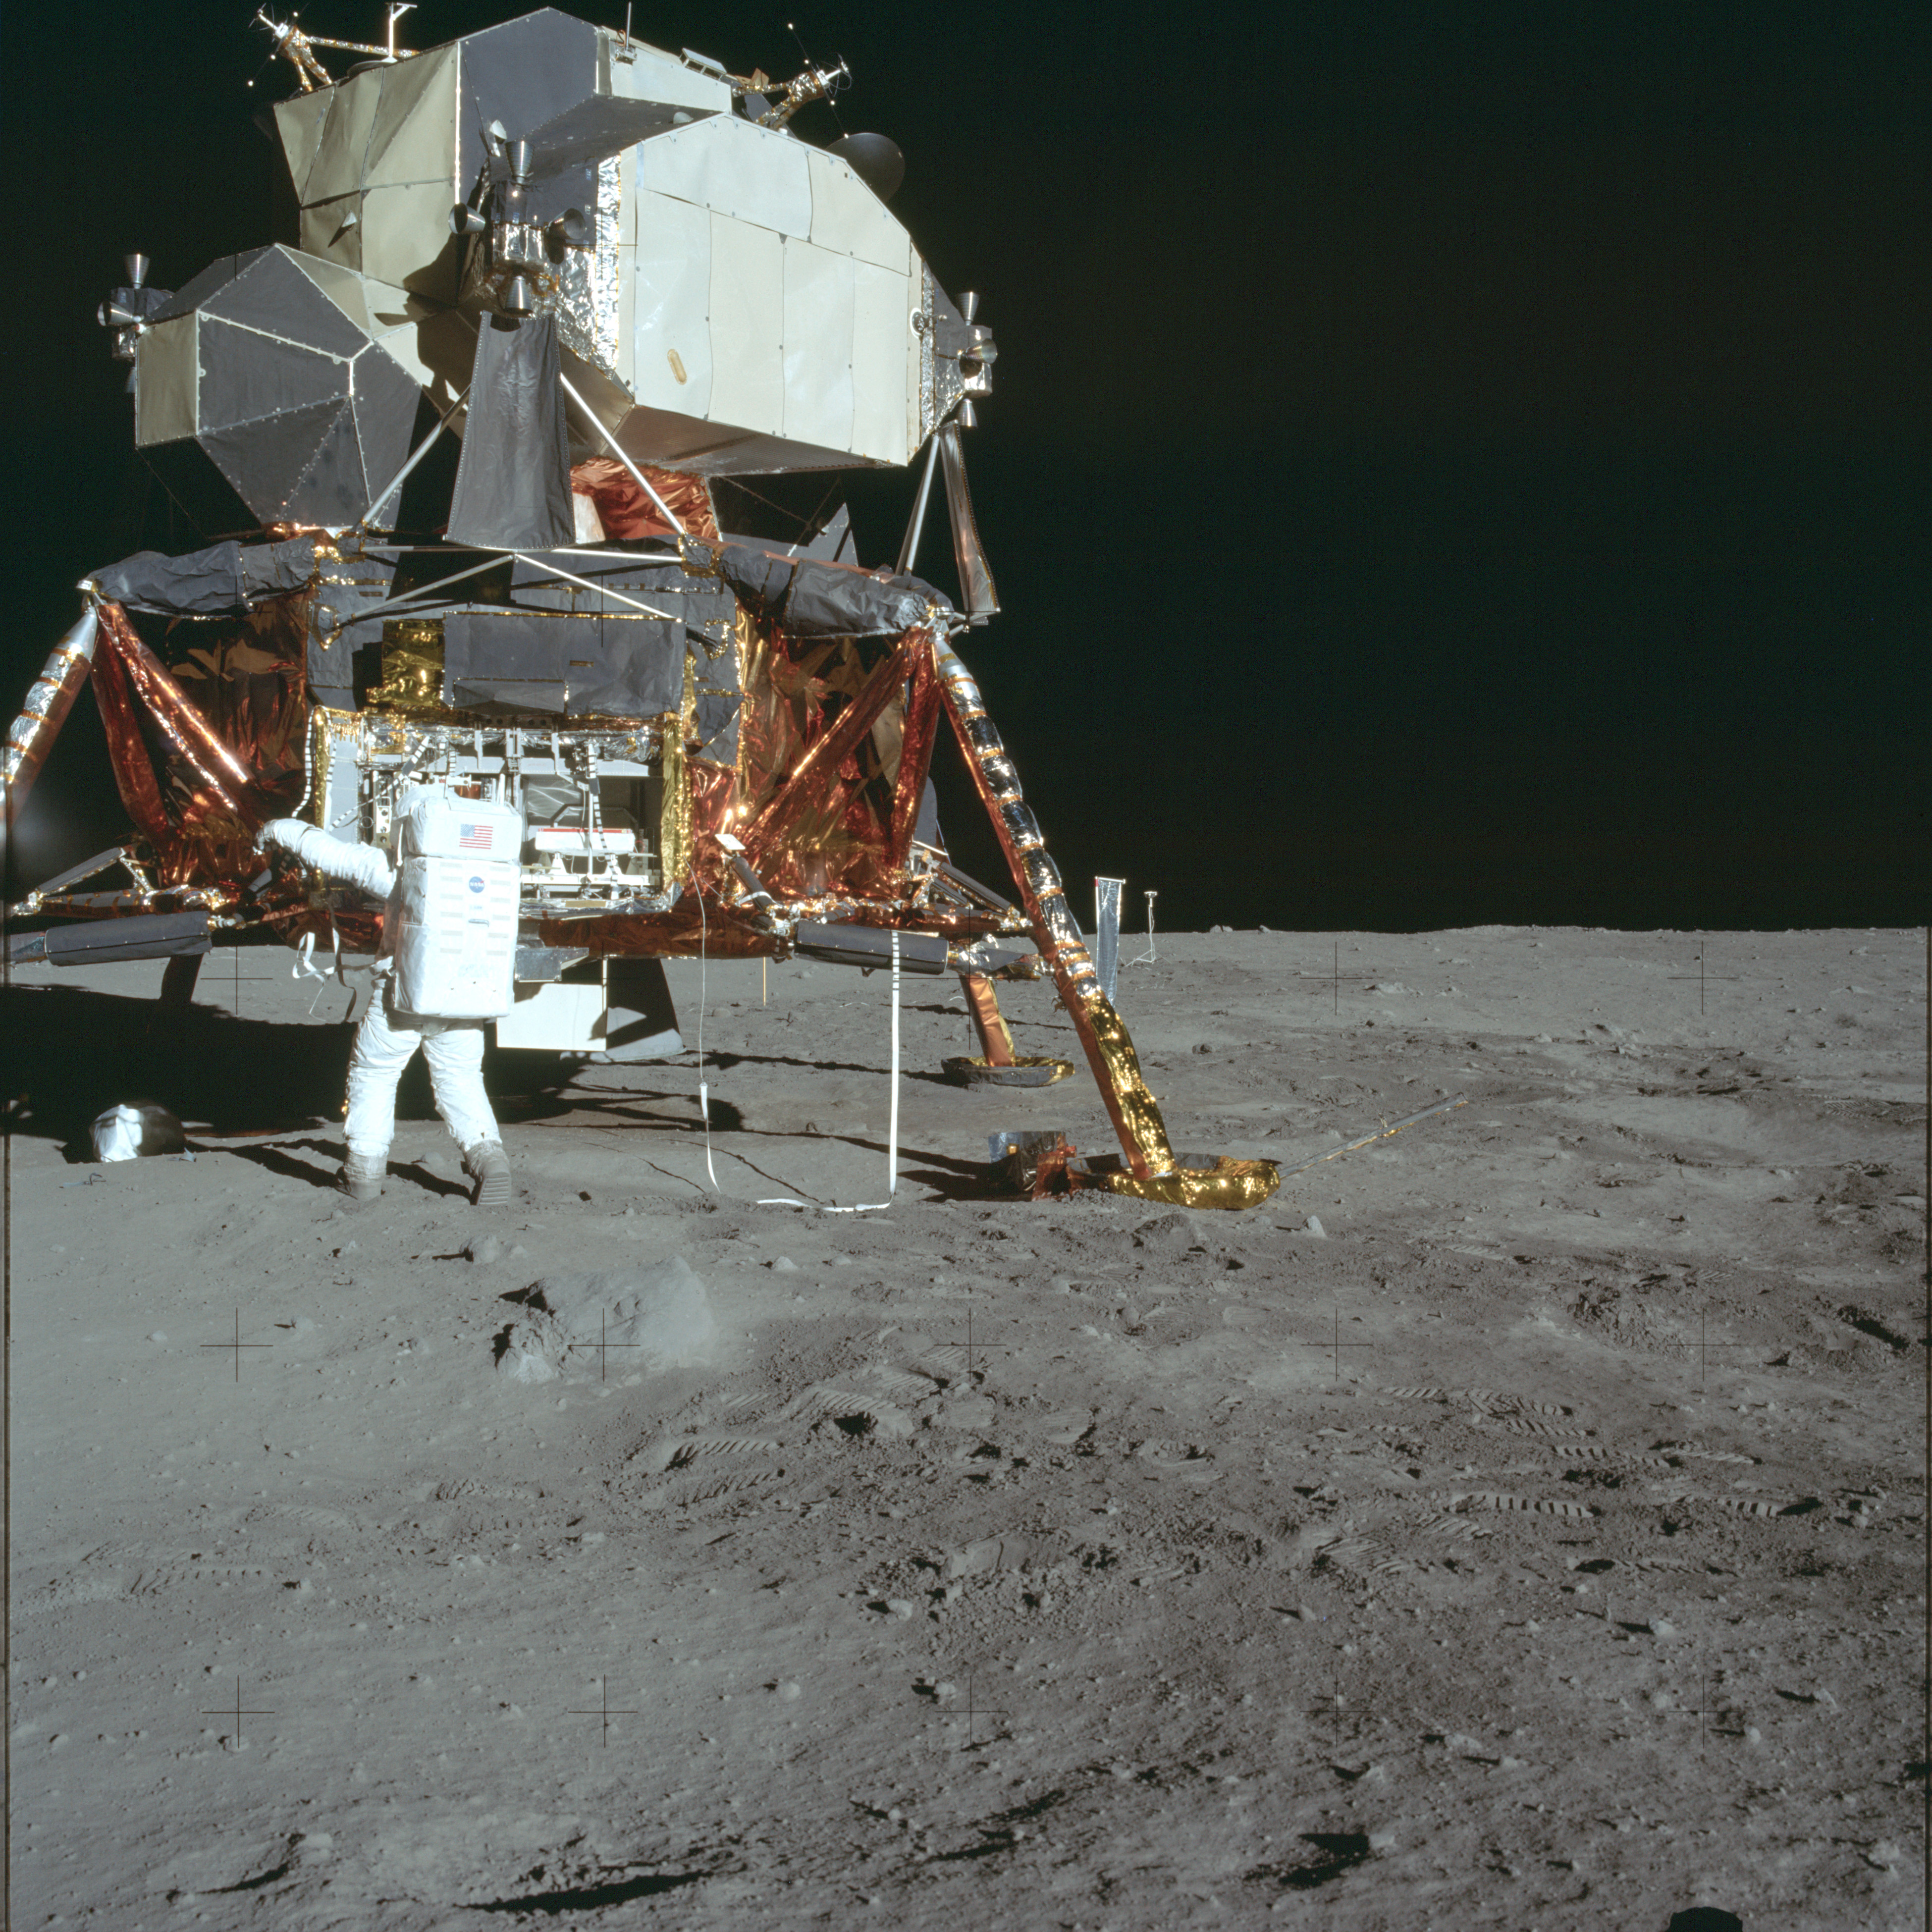
AS11-40-5902 Browse or print resolution. Aldrin near the north footpad. Image credit: Image Science and Analysis Laboratory, NASA-Johnson Space Center. |

|
AS11-40-5903 Browse or print resolution. Aldrin near the north footpad. Image credit: Image Science and Analysis Laboratory, NASA-Johnson Space Center. |
|
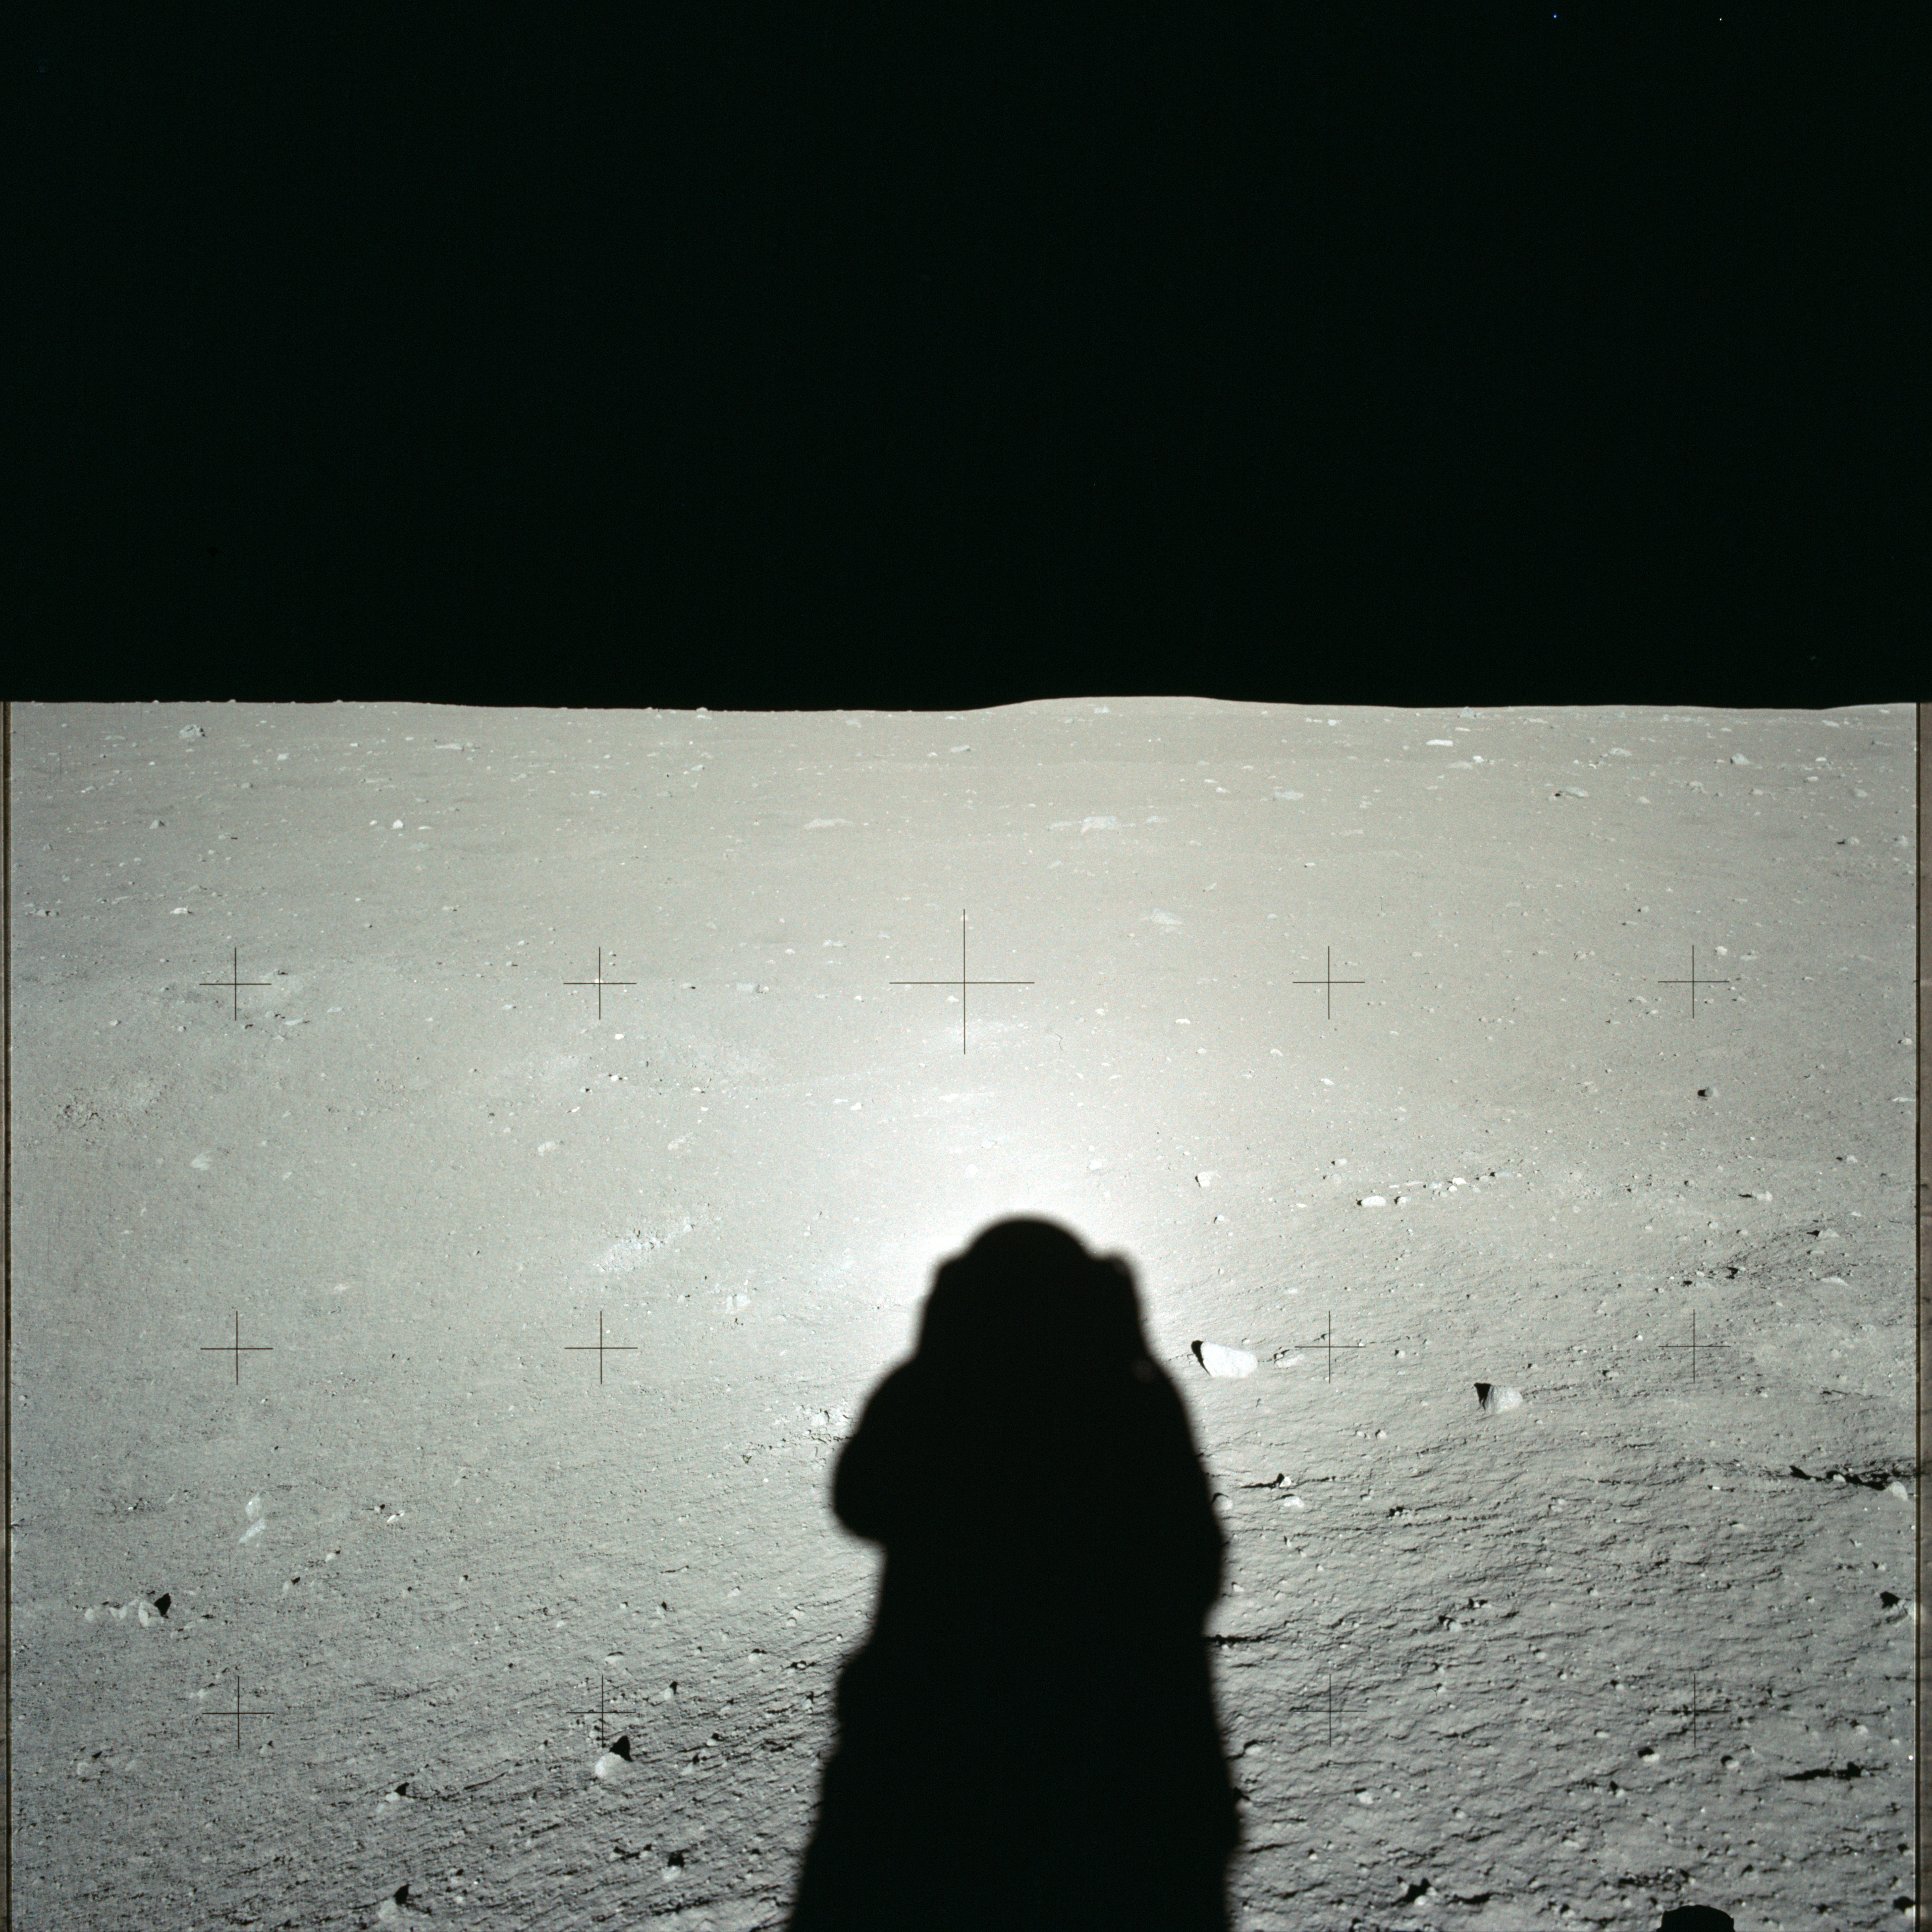
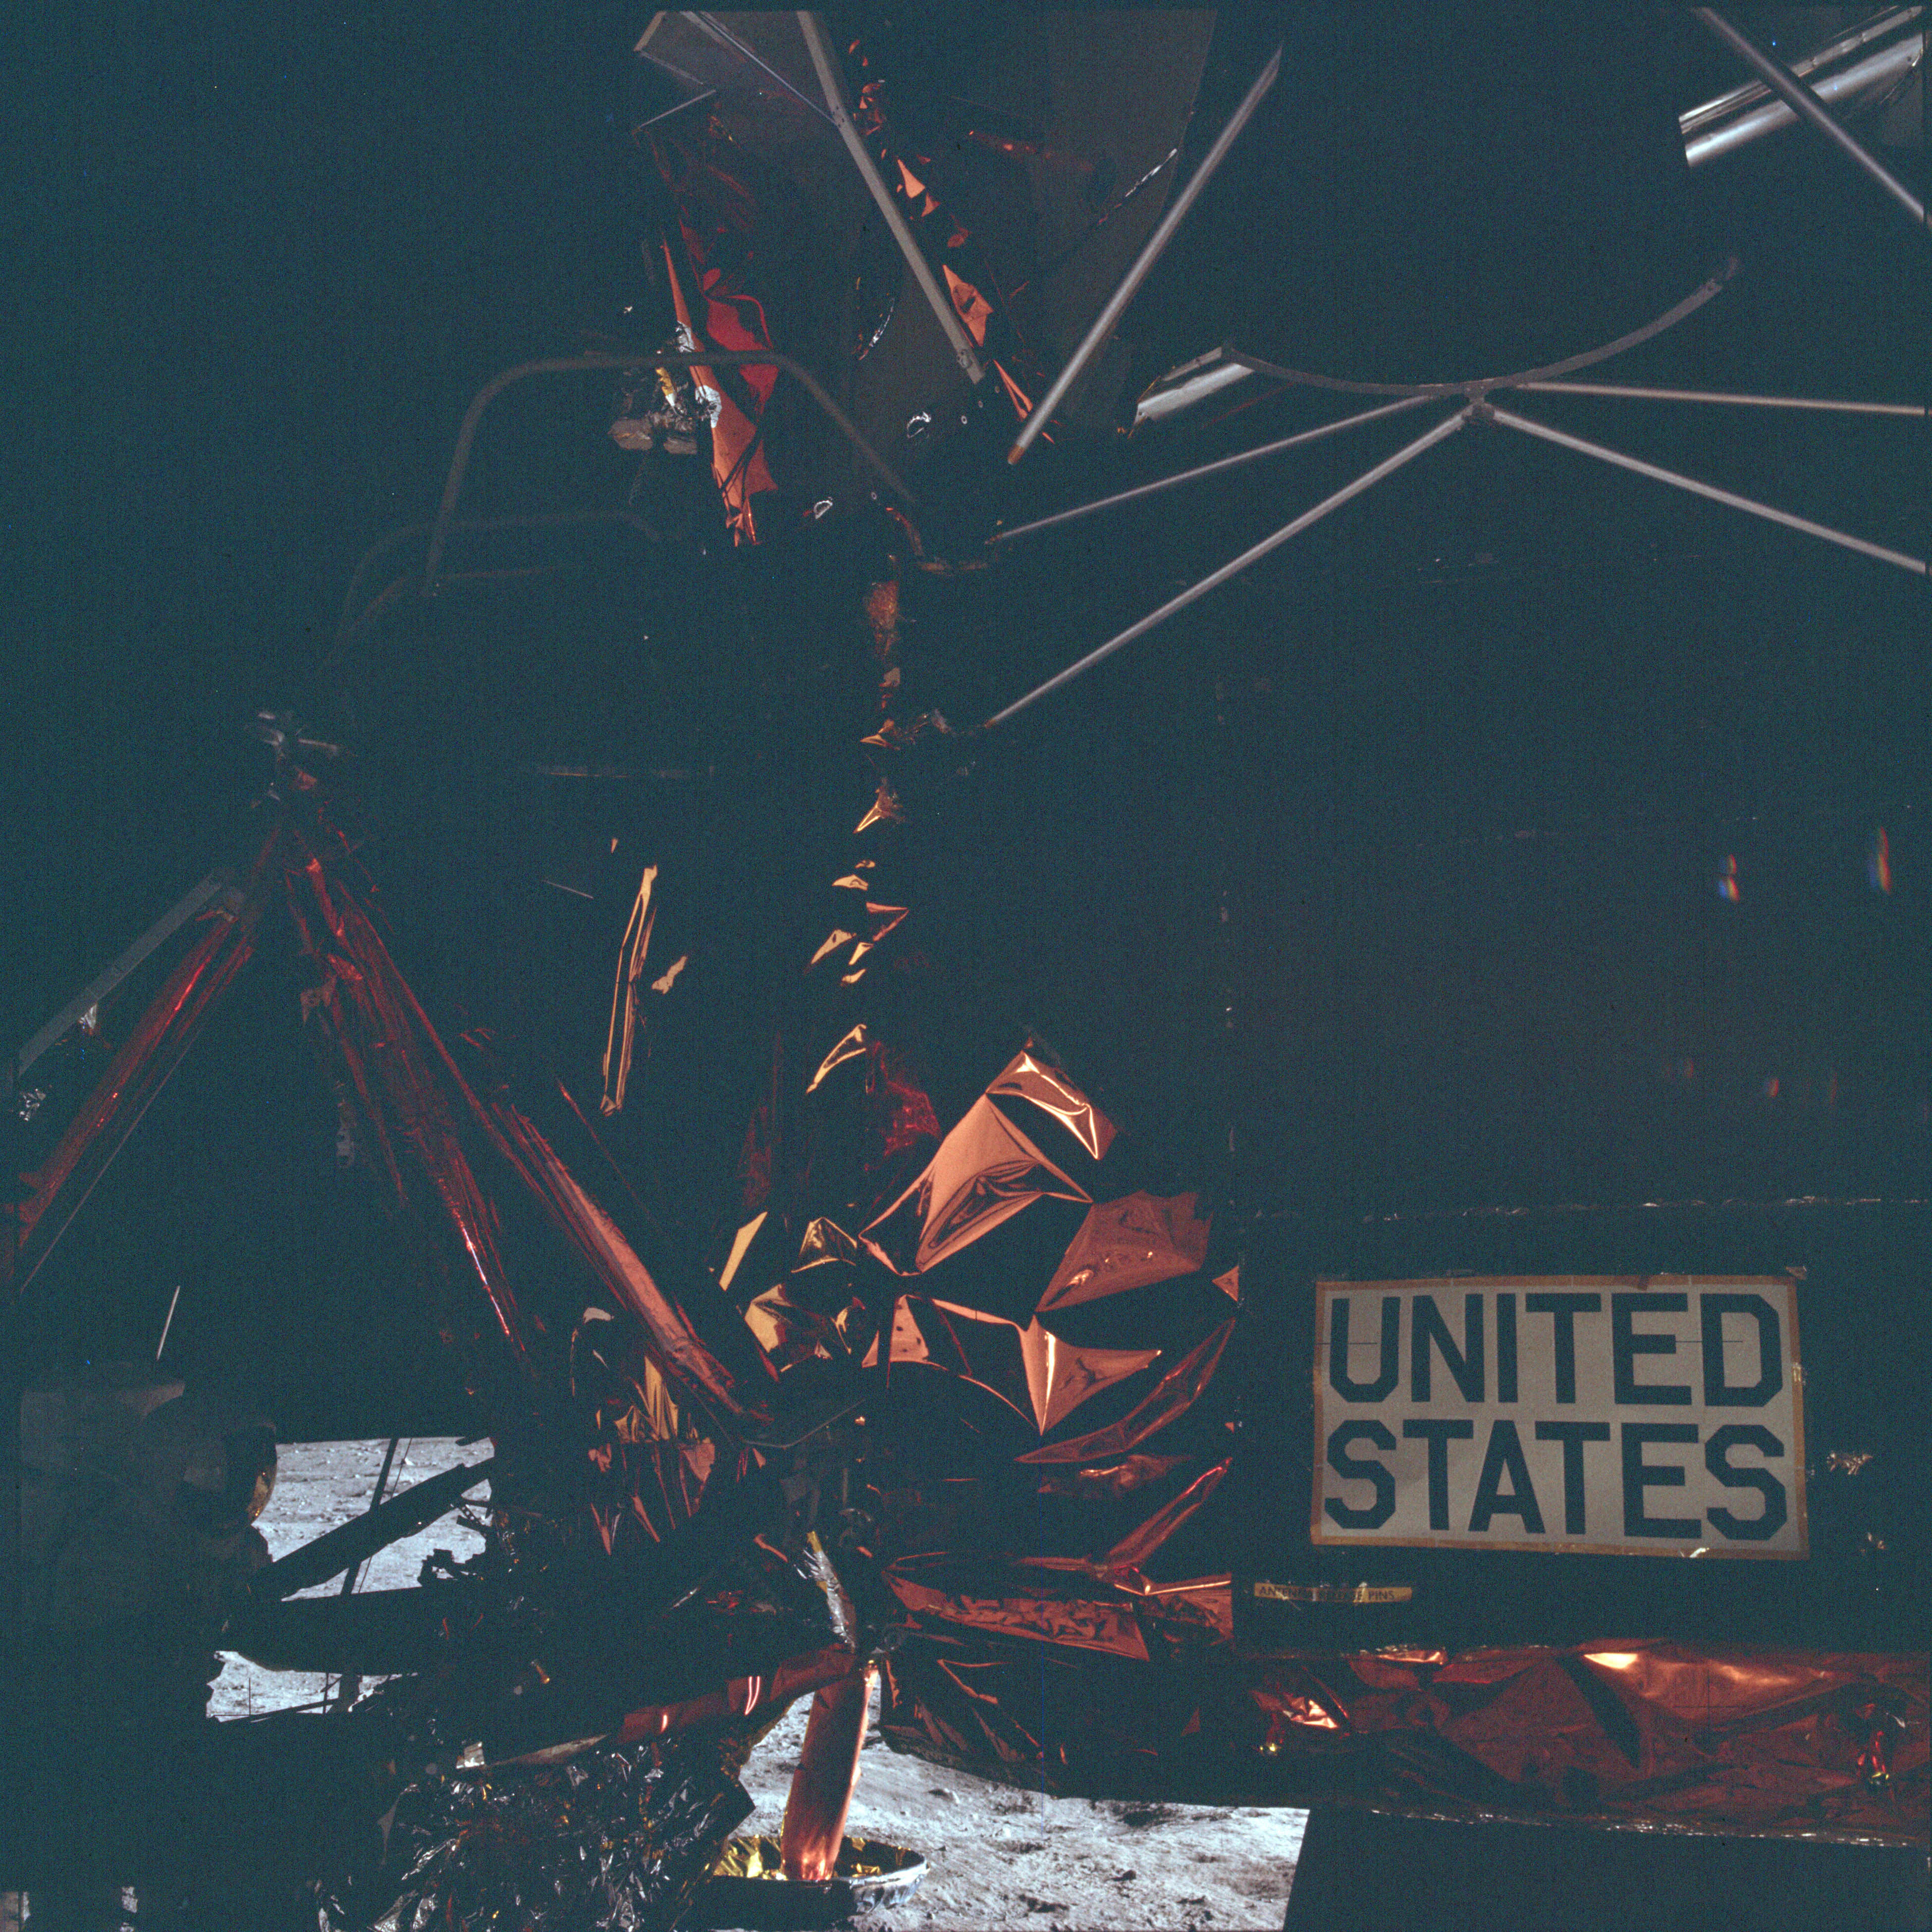
AS11-40-5904 Browse or print resolution. Unintentional photograph of suit. Image credit: Image Science and Analysis Laboratory, NASA-Johnson Space Center. |
|
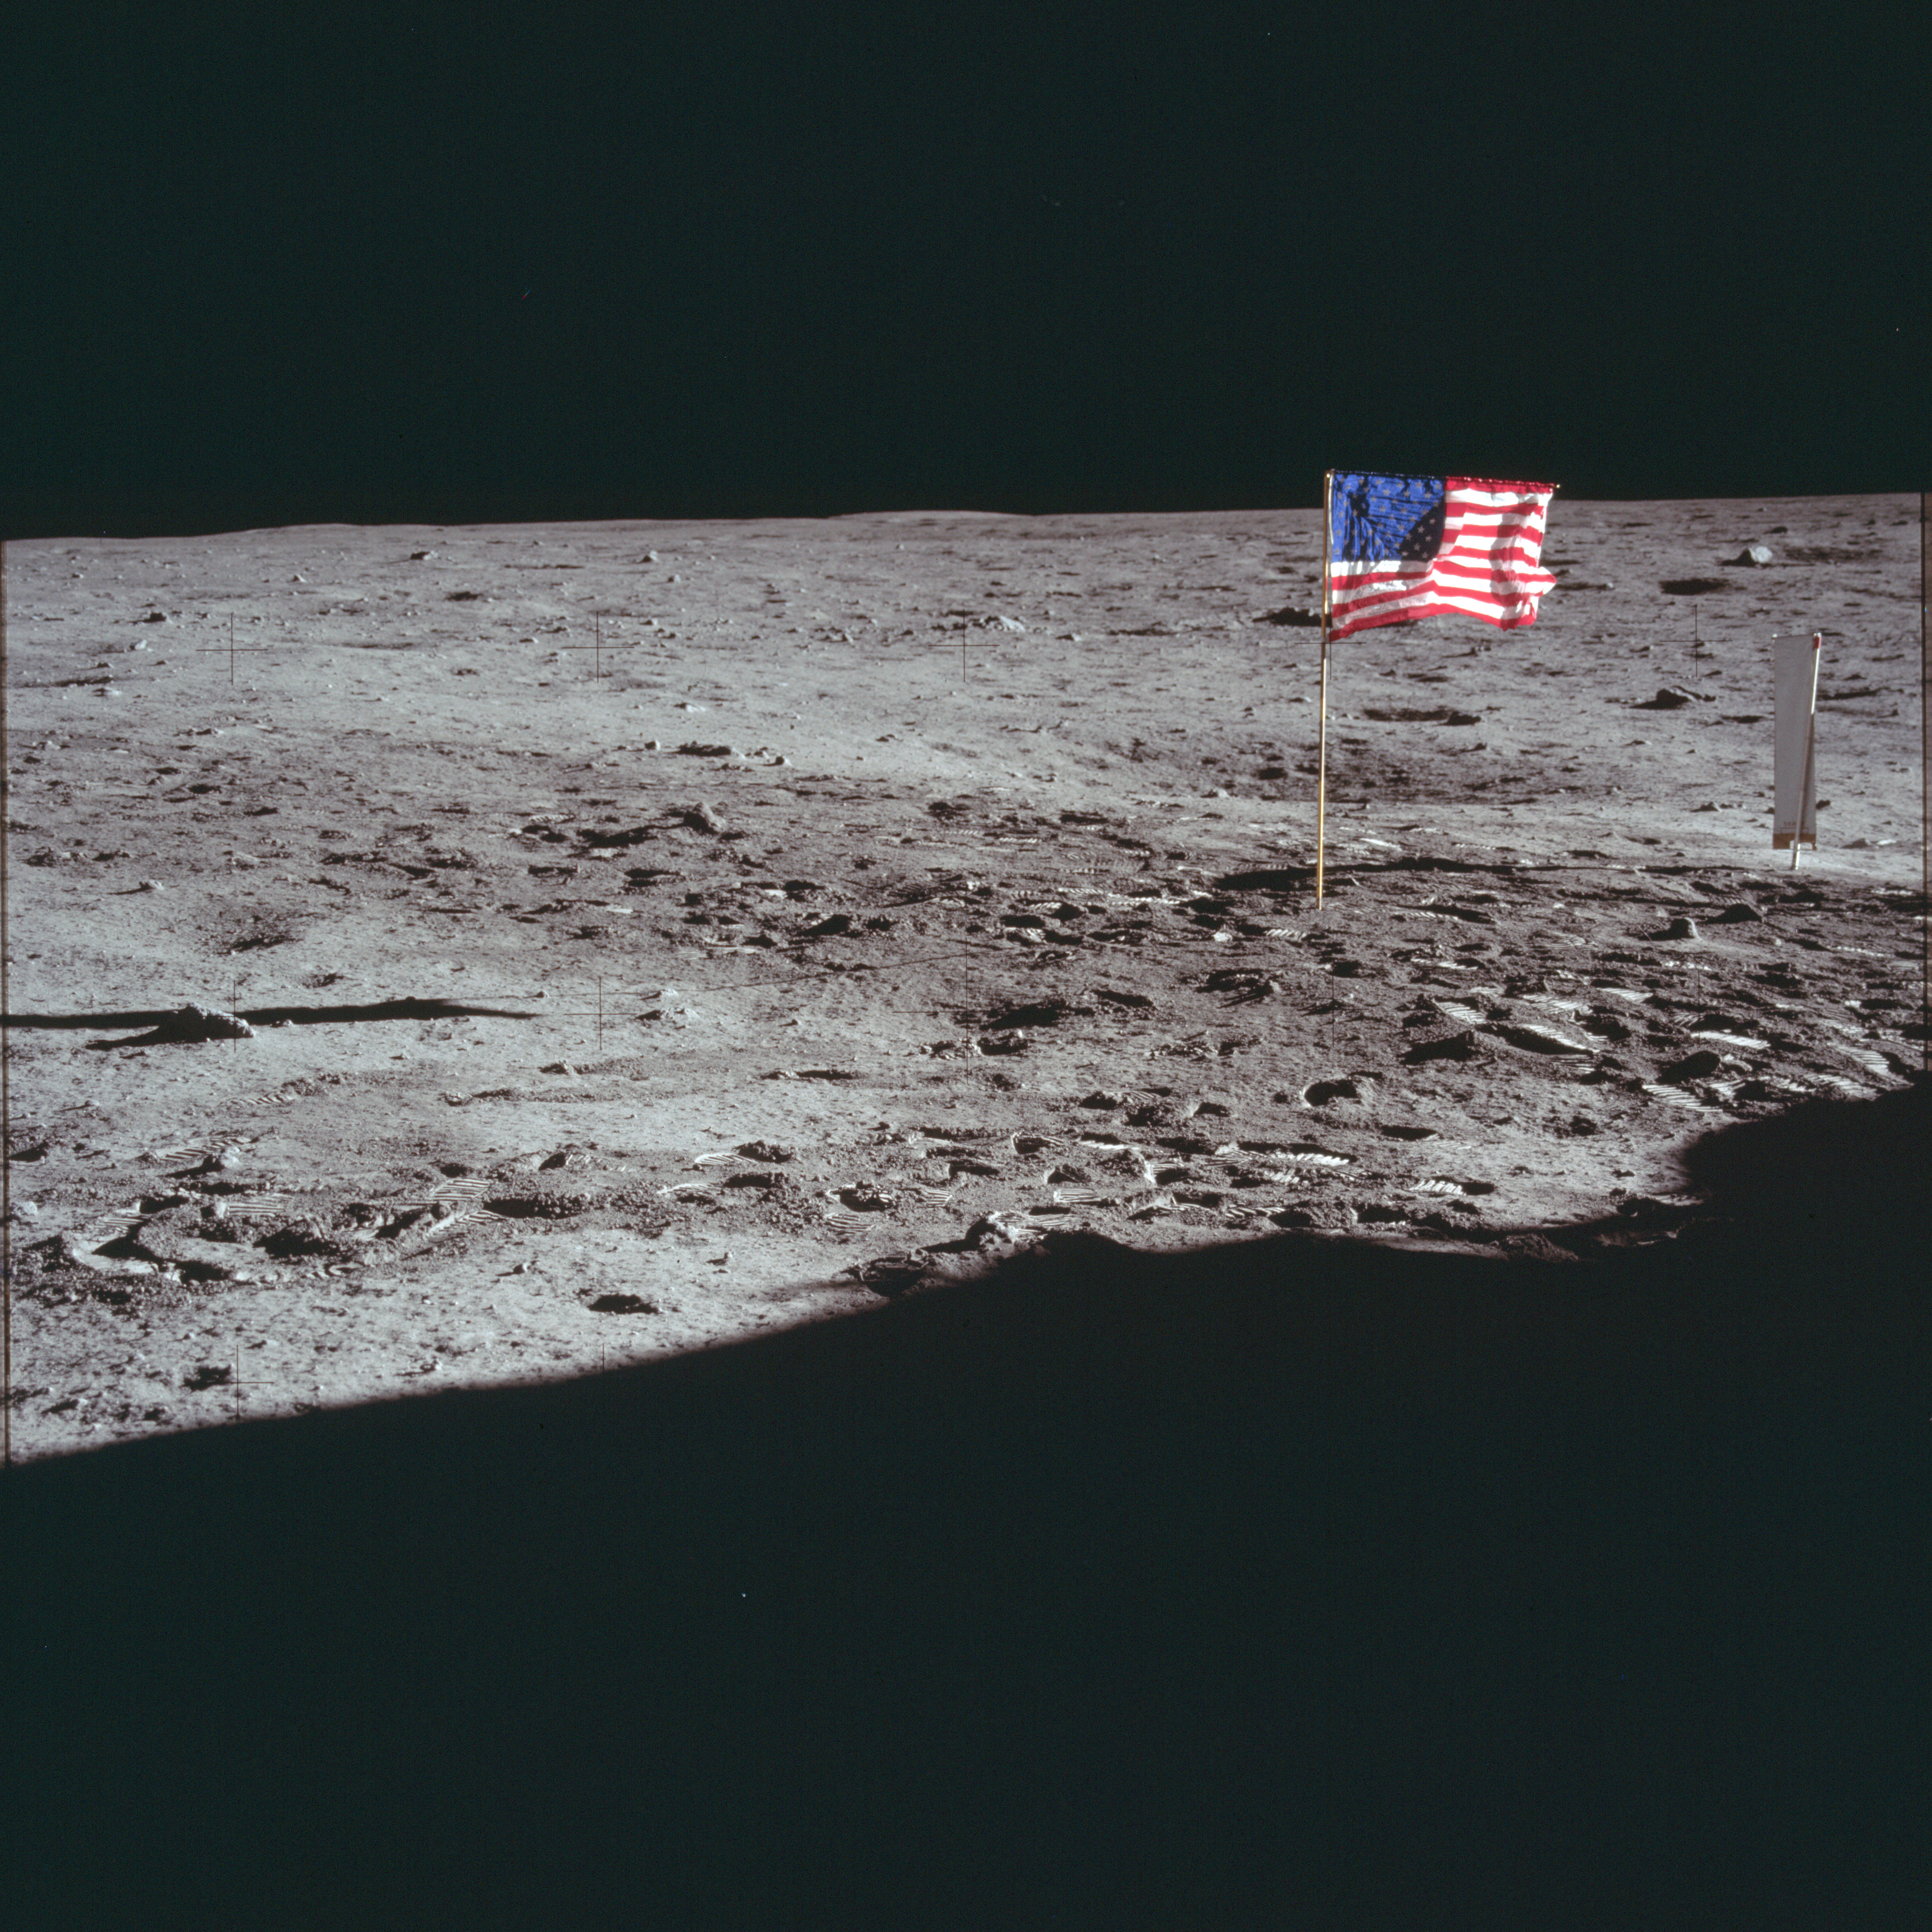
AS11-40-5905 Browse or print resolution. Part of Aldrin's panorama north of LM. Includes flag. Image credit: Image Science and Analysis Laboratory, NASA-Johnson Space Center. |
|
AS11-40-5906 Browse or print resolution. Part of Aldrin's panorama north of LM. Image credit: Image Science and Analysis Laboratory, NASA-Johnson Space Center. |

|
AS11-40-5907 Browse or print resolution. Part of Aldrin's panorama north of LM. Image credit: Image Science and Analysis Laboratory, NASA-Johnson Space Center. |
|
AS11-40-5908 Browse or print resolution. Part of Aldrin's panorama north of LM. Image credit: Image Science and Analysis Laboratory, NASA-Johnson Space Center. |

|
AS11-40-5909 Browse or print resolution. Part of Aldrin's panorama north of LM. Image credit: Image Science and Analysis Laboratory, NASA-Johnson Space Center. |
|
AS11-40-5910 Browse or print resolution. Part of Aldrin's panorama north of LM. Image credit: Image Science and Analysis Laboratory, NASA-Johnson Space Center. |

|
AS11-40-5911 Browse or print resolution. Part of Aldrin's panorama north of LM. Image credit: Image Science and Analysis Laboratory, NASA-Johnson Space Center. |

|
AS11-40-5912 Browse or print resolution. Part of Aldrin's panorama north of LM. Image credit: Image Science and Analysis Laboratory, NASA-Johnson Space Center. |
|
AS11-40-5913 Browse or print resolution. Part of Aldrin's panorama north of LM. Image credit: Image Science and Analysis Laboratory, NASA-Johnson Space Center. |
|
AS11-40-5914 Browse or print resolution. Part of Aldrin's panorama north of LM. Image credit: Image Science and Analysis Laboratory, NASA-Johnson Space Center. |

|
AS11-40-5915 Browse or print resolution. Part of Aldrin's panorama north of LM. Image credit: Image Science and Analysis Laboratory, NASA-Johnson Space Center. |
|
AS11-40-5916 Browse or print resolution. Solar wind experiment. Armstong on left Image credit: Image Science and Analysis Laboratory, NASA-Johnson Space Center. |

|
AS11-40-5917 Browse or print resolution. Close-up of north footpad. Image credit: Image Science and Analysis Laboratory, NASA-Johnson Space Center. |
|
AS11-40-5918 Browse or print resolution. Close-up of north footpad. Image credit: Image Science and Analysis Laboratory, NASA-Johnson Space Center. |
|
AS11-40-5919 Browse or print resolution. Close-up of north footpad. Image credit: Image Science and Analysis Laboratory, NASA-Johnson Space Center. |
|
AS11-40-5920 Browse or print resolution. Close-up of north footpad. Solar wind experiment beyond Image credit: Image Science and Analysis Laboratory, NASA-Johnson Space Center. |
|
AS11-40-5921 Browse or print resolution. LM descent engine. Image credit: Image Science and Analysis Laboratory, NASA-Johnson Space Center. |
|
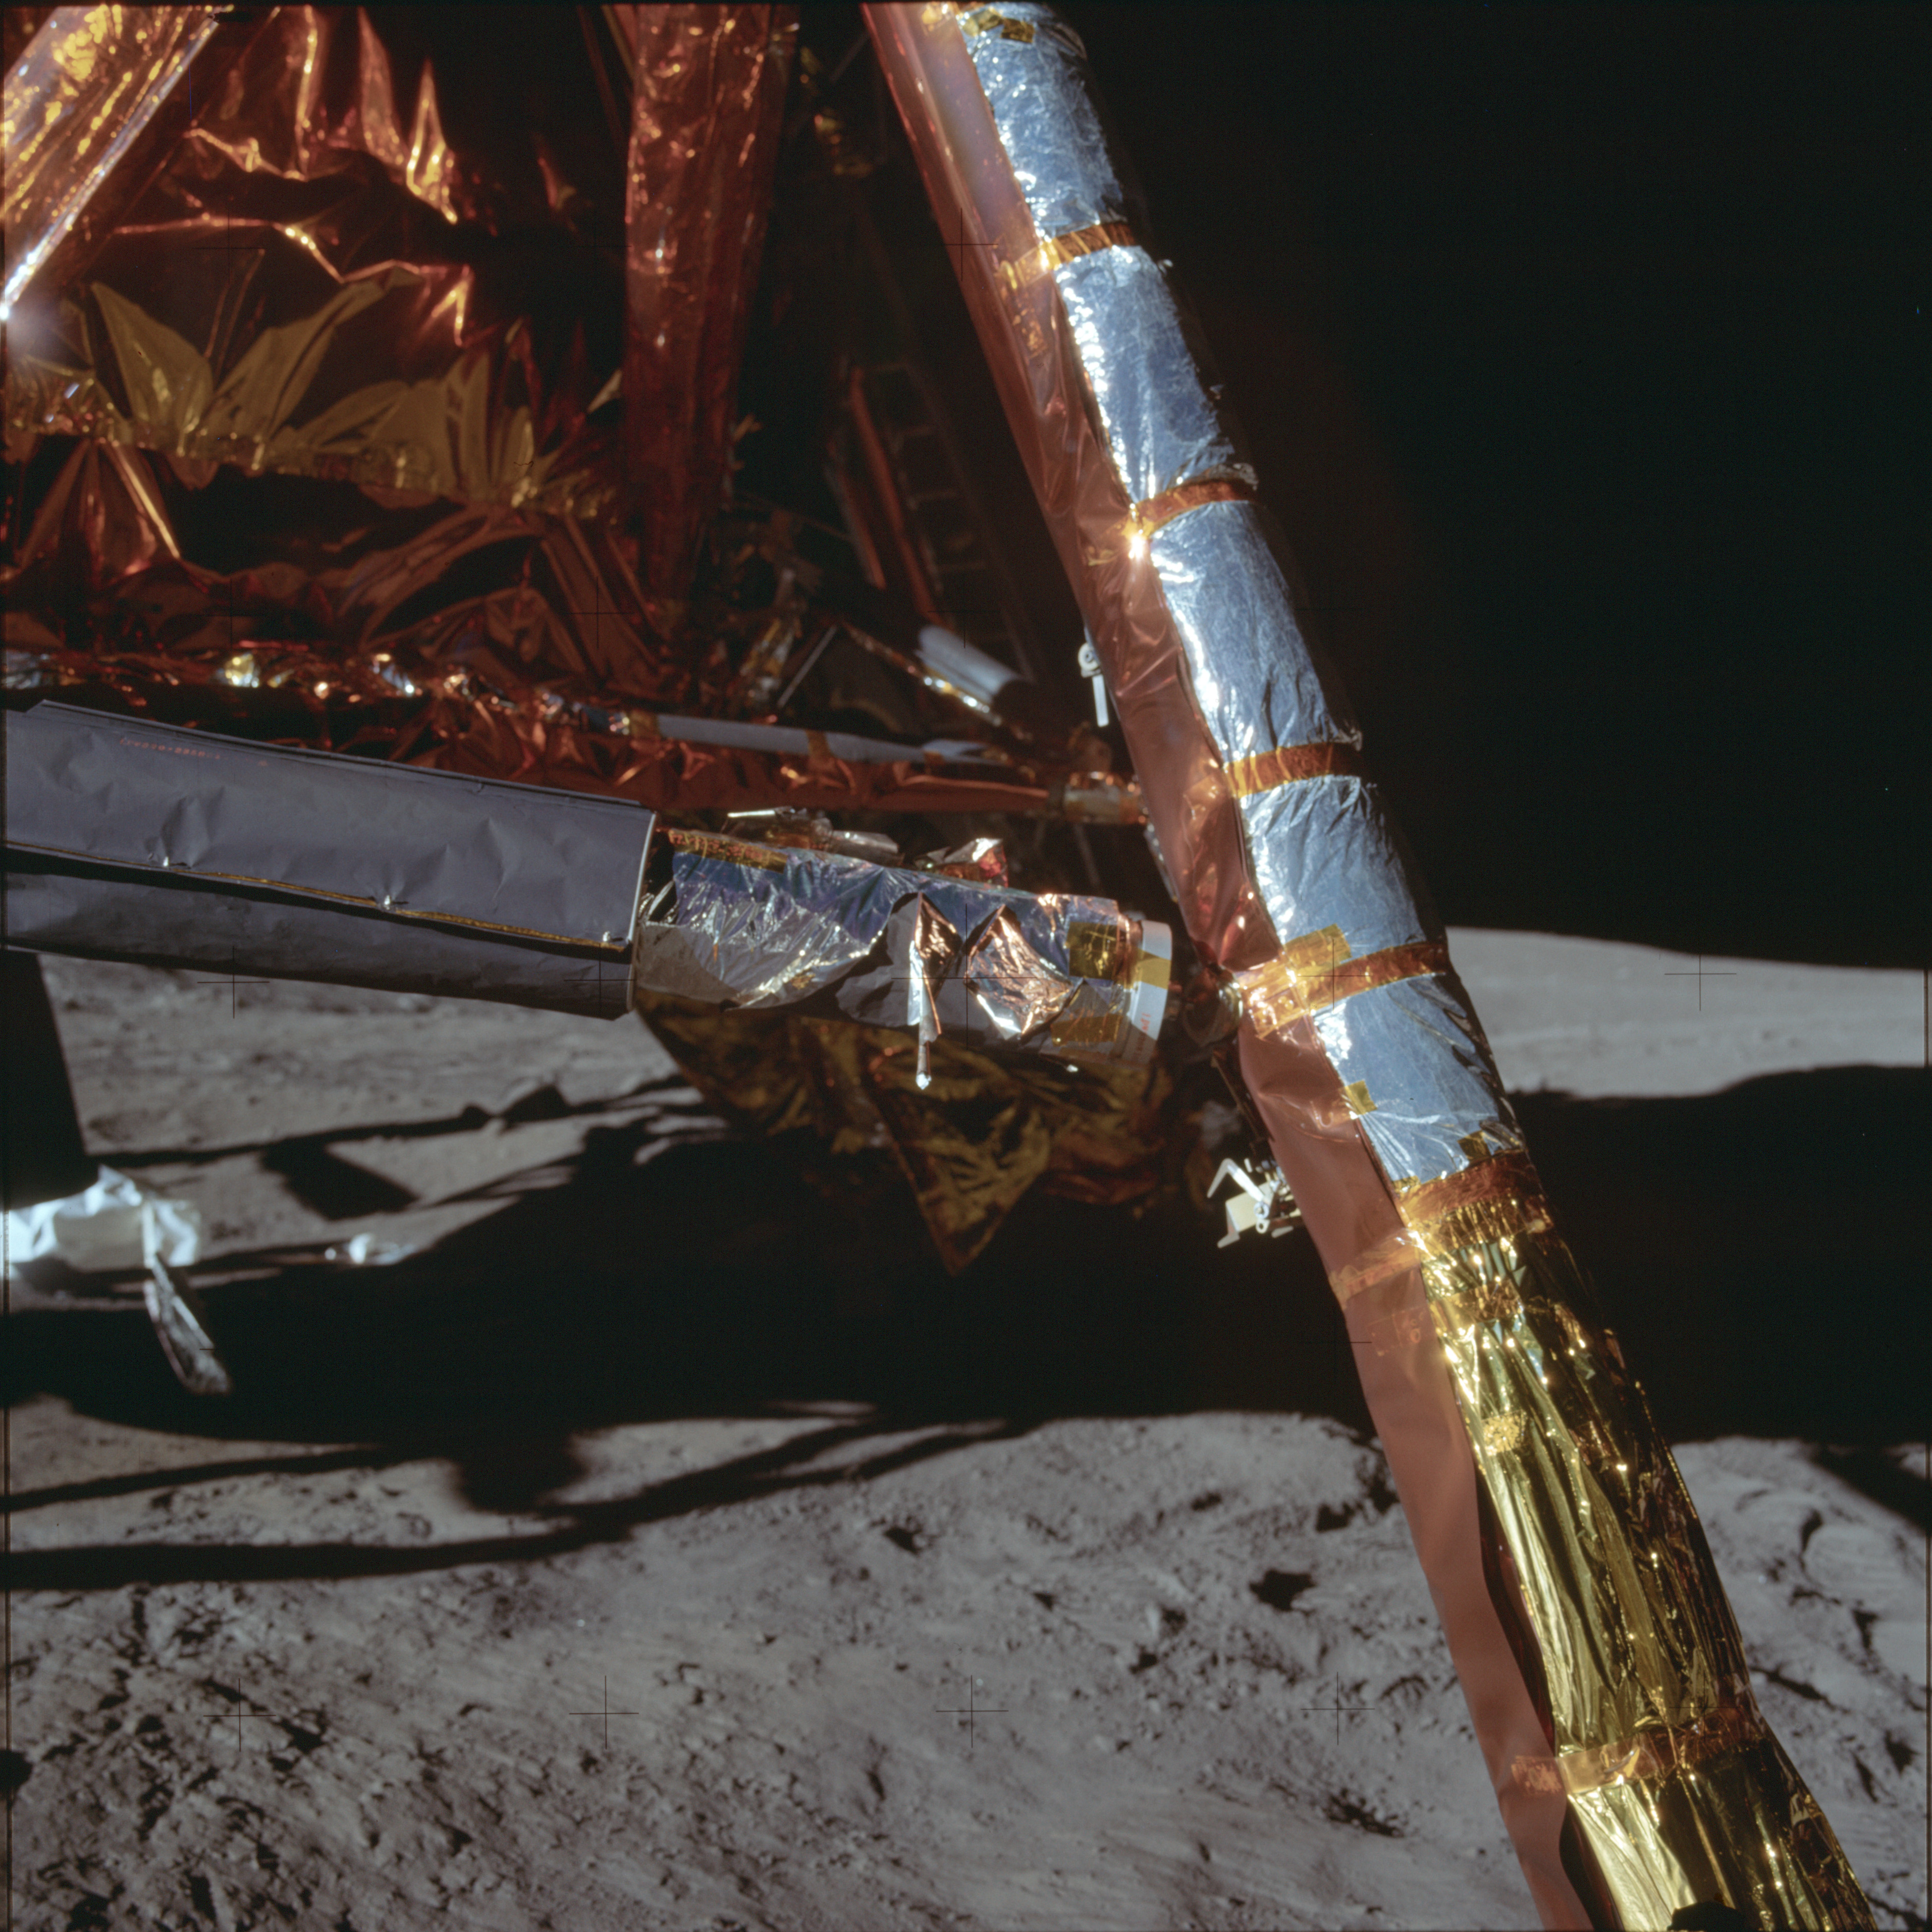
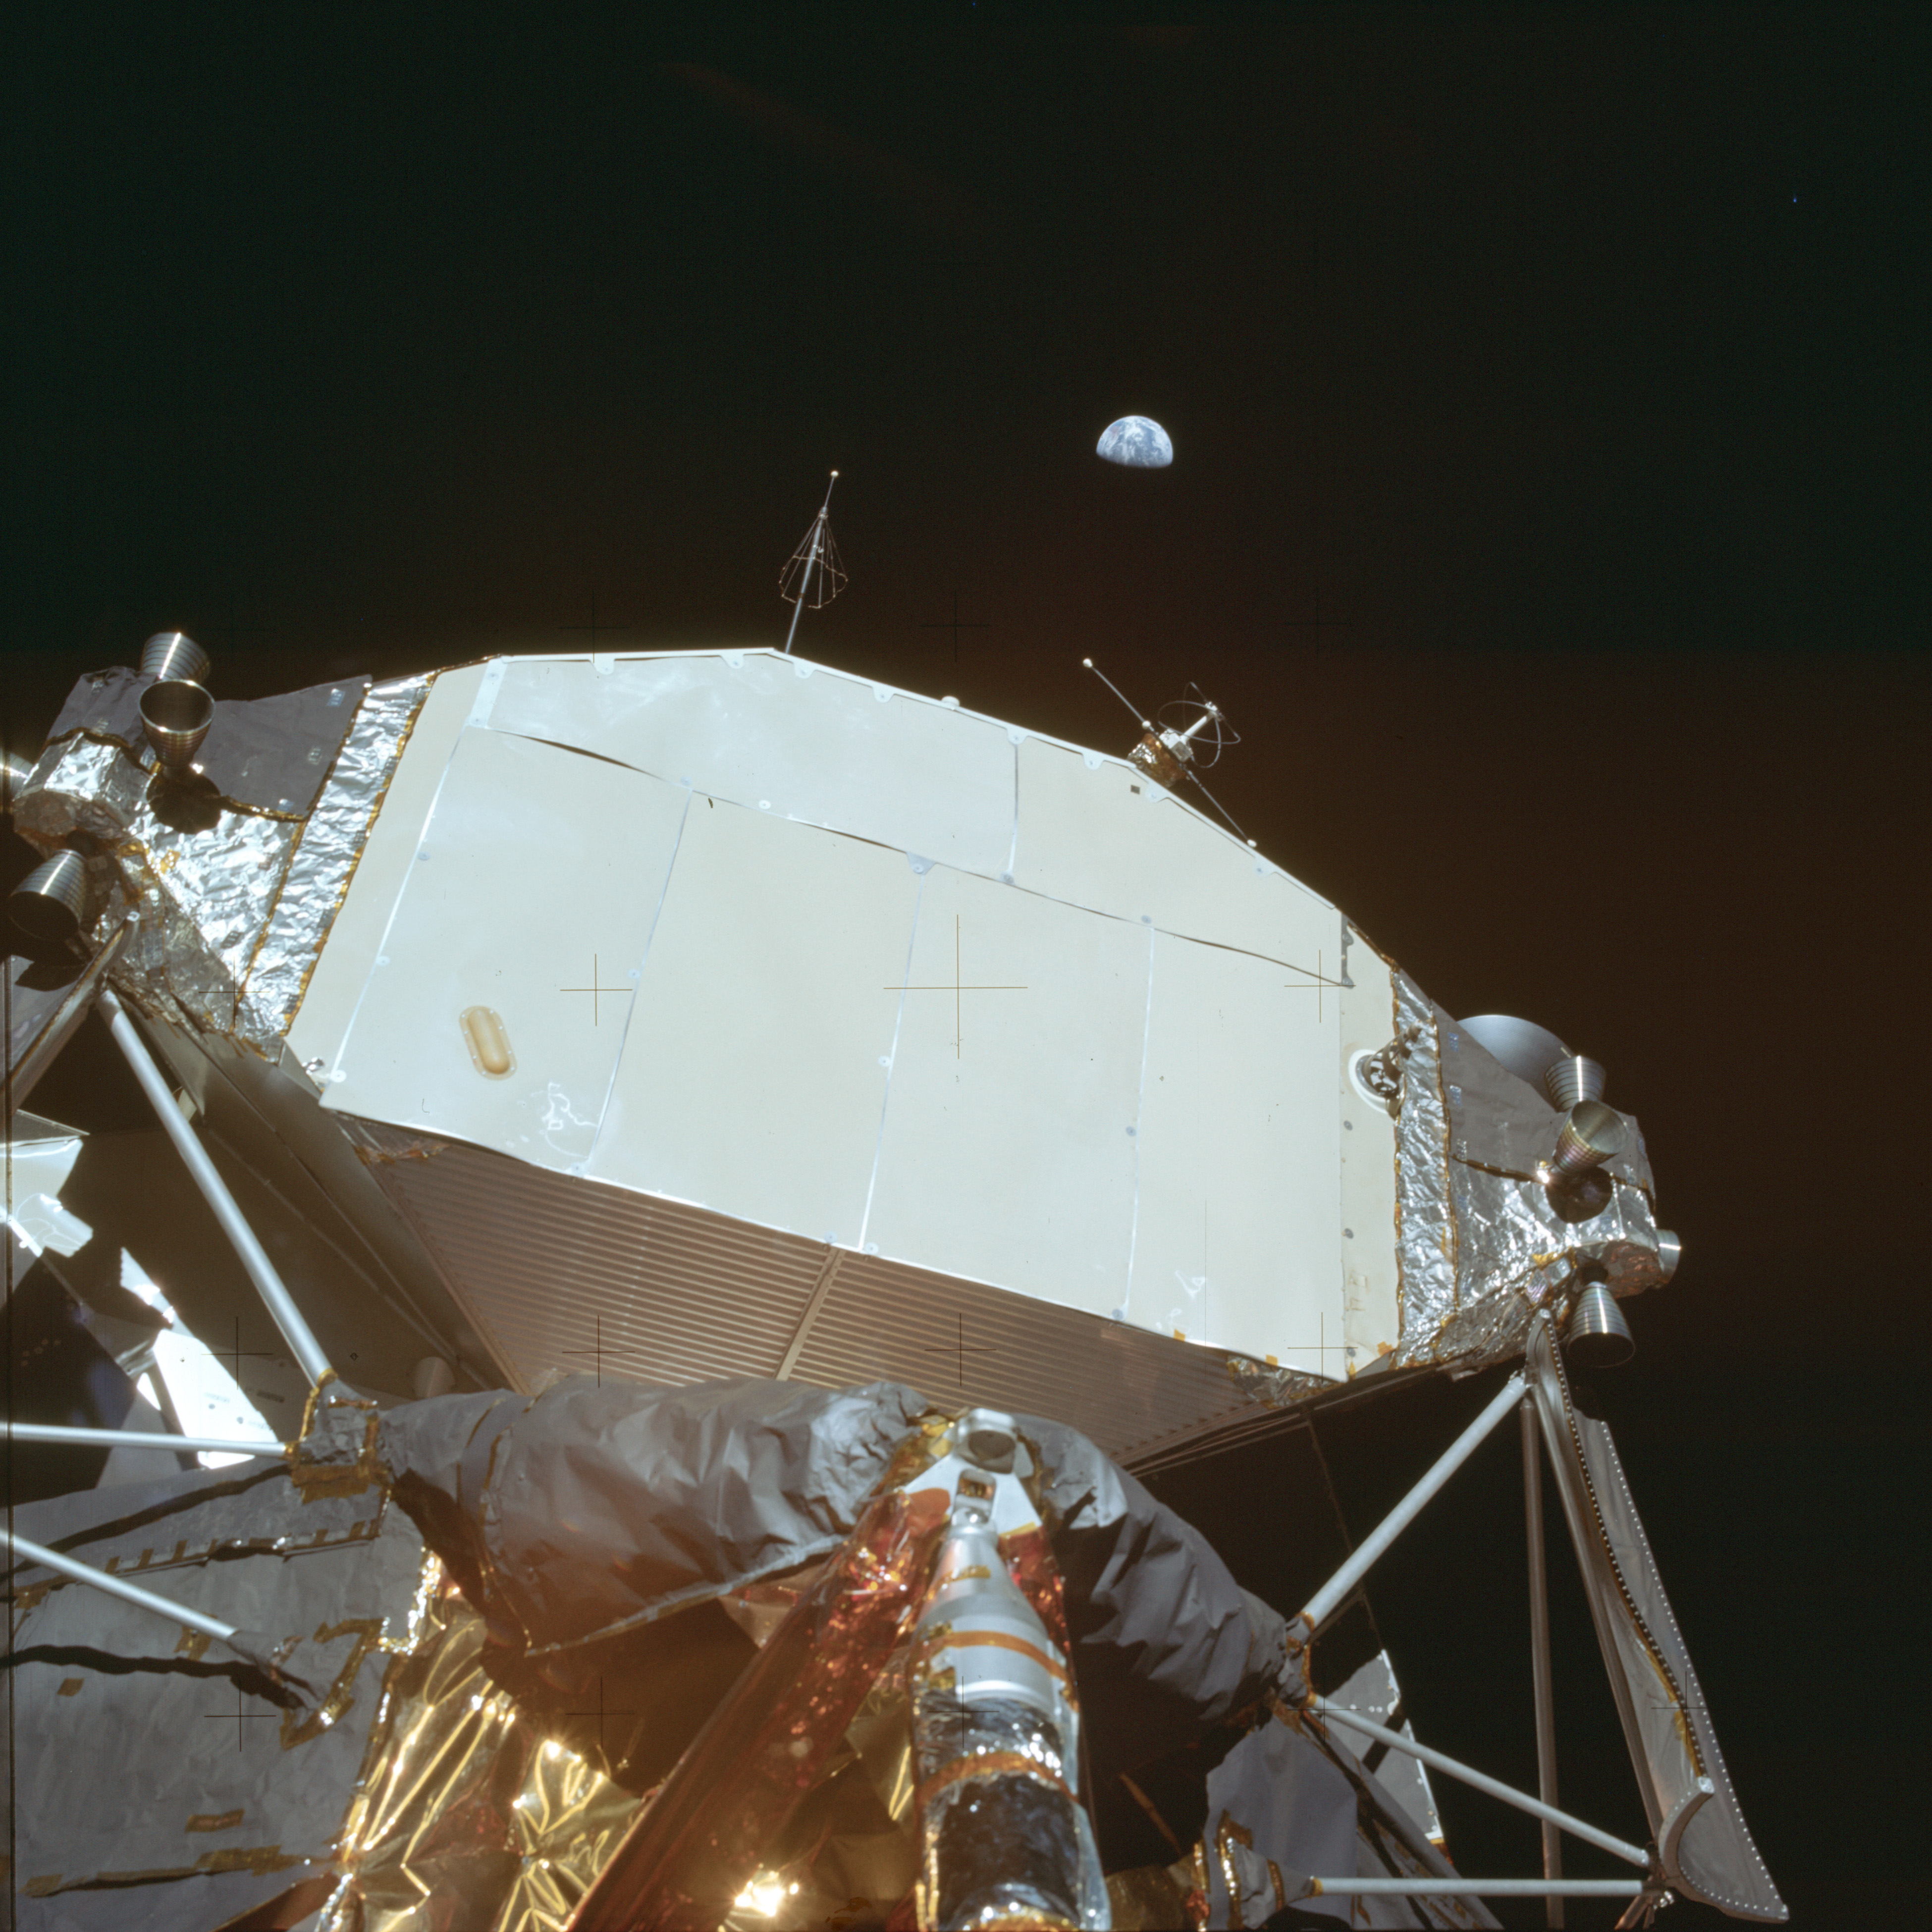
AS11-40-5922 Browse or print resolution. Northeast aspect of LM. Image credit: Image Science and Analysis Laboratory, NASA-Johnson Space Center. |

|
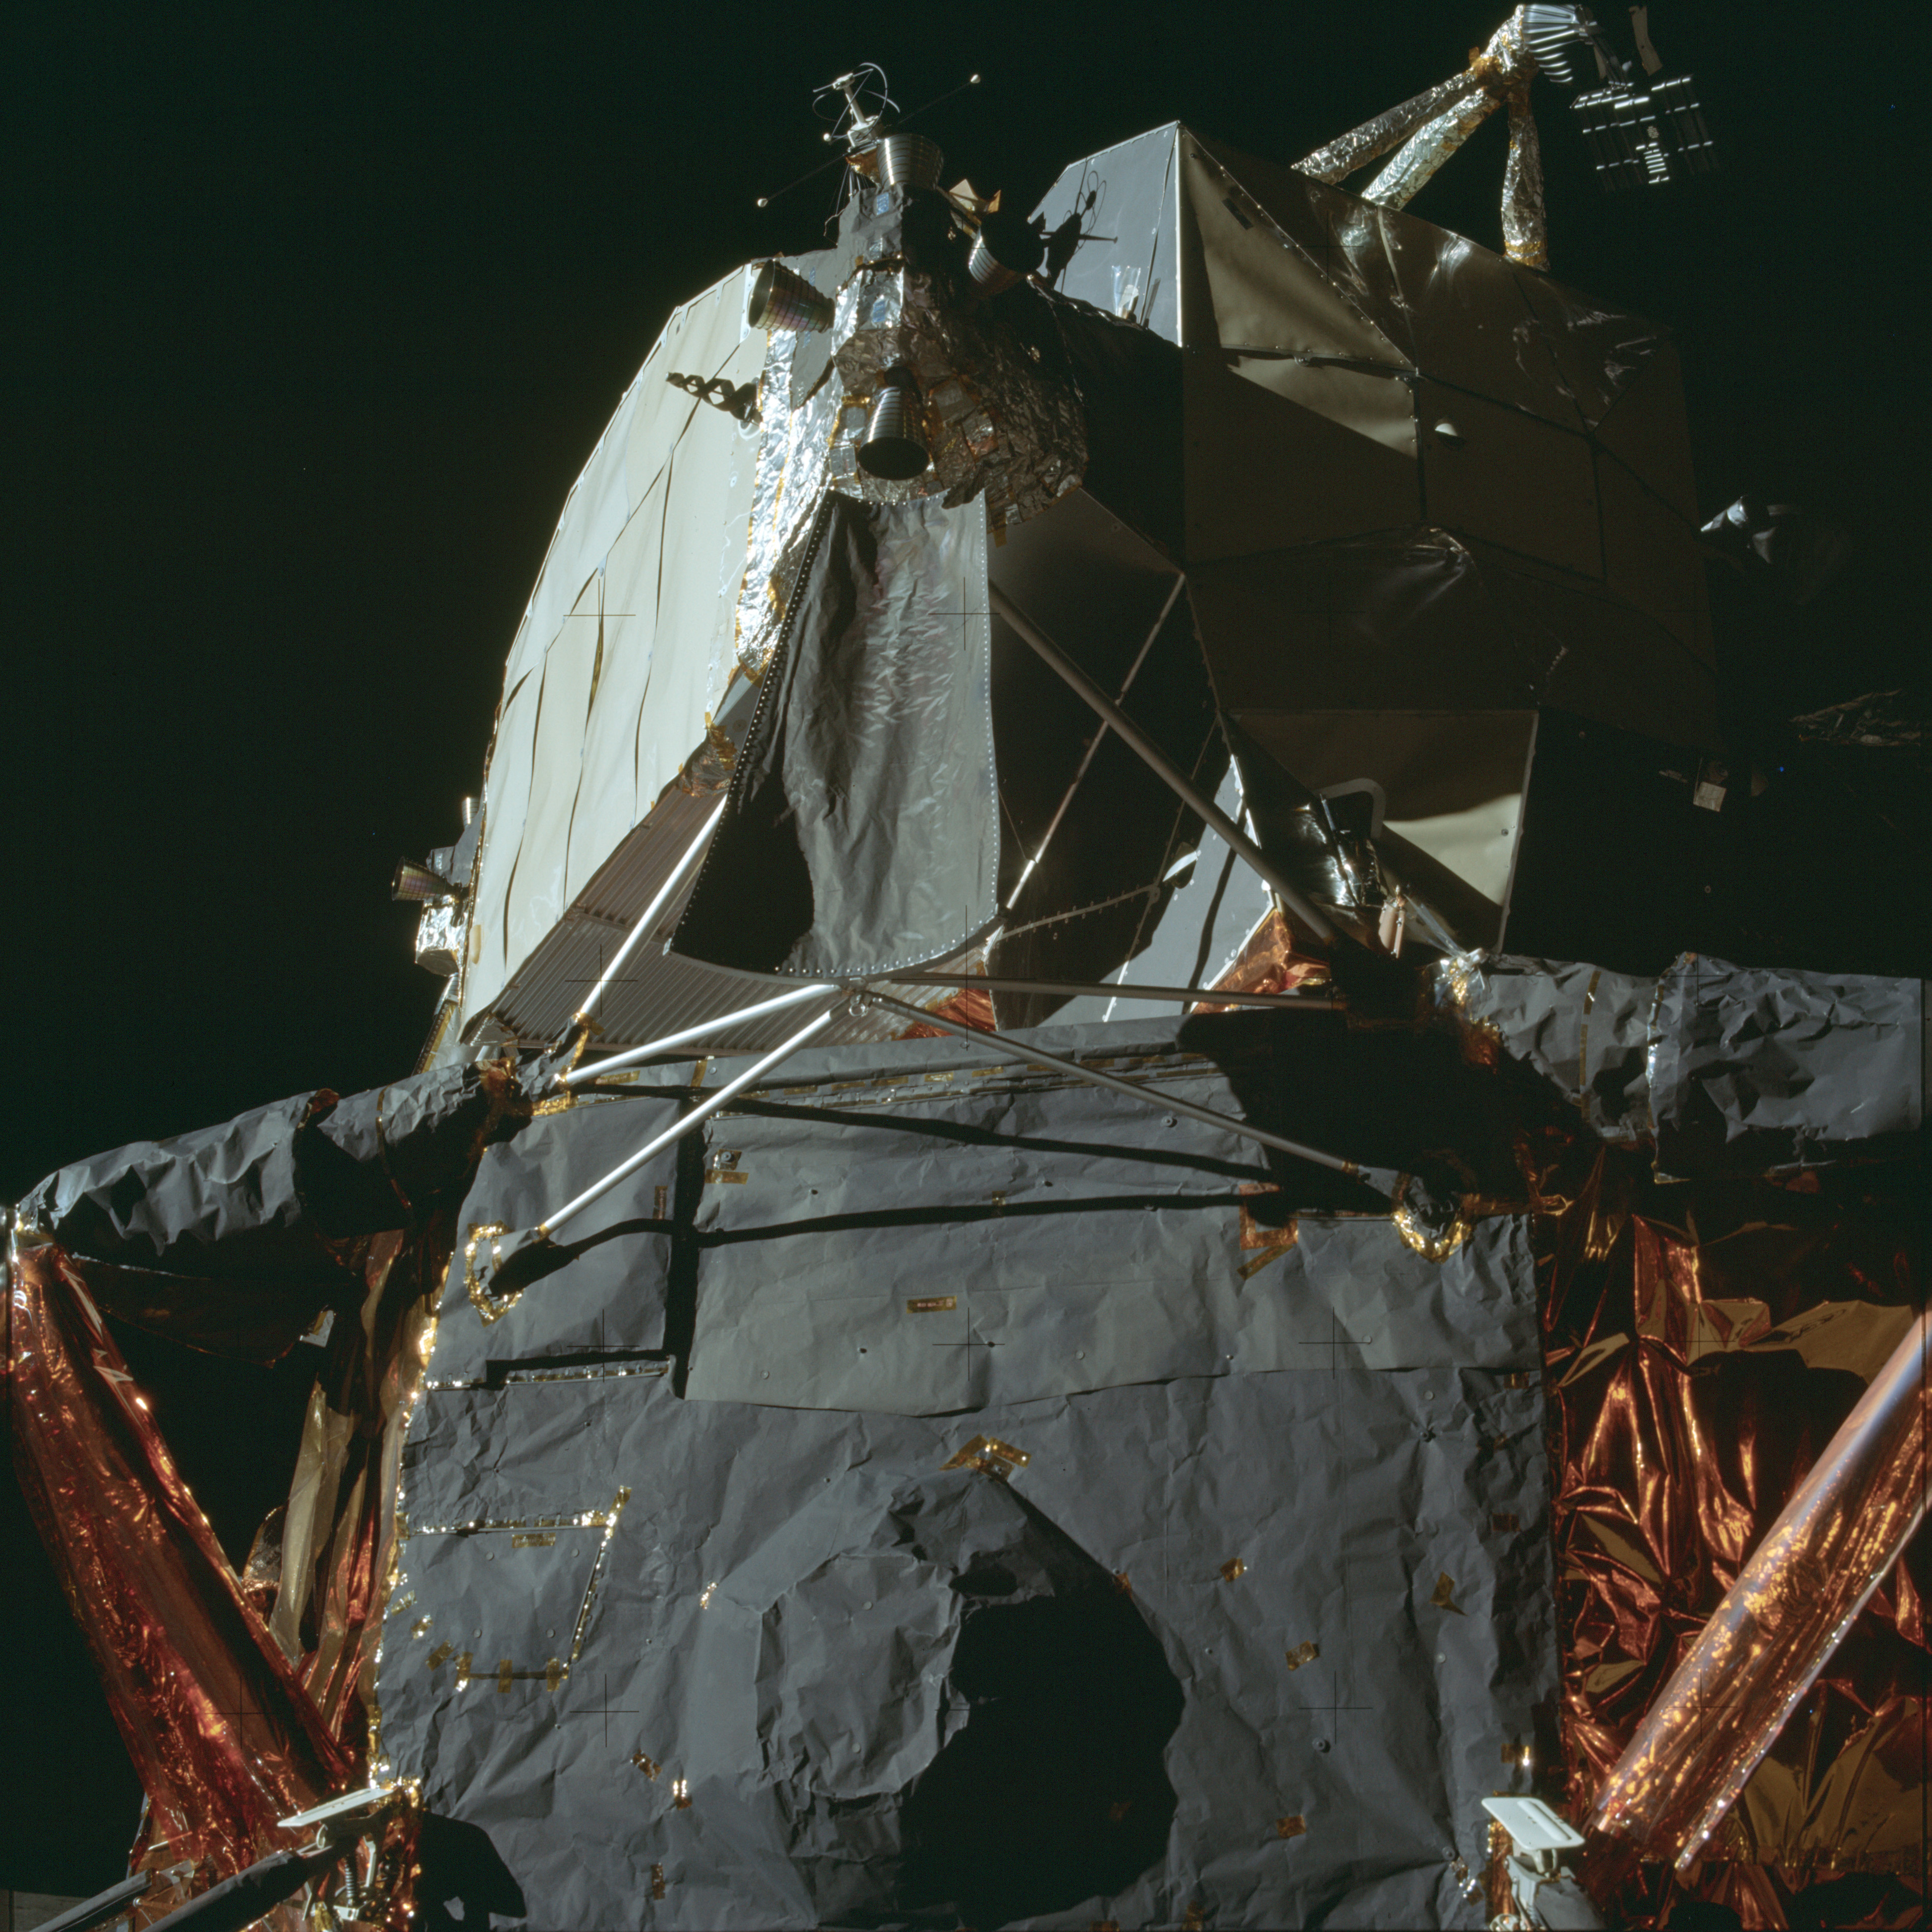
AS11-40-5923 Browse or print resolution. Rear of LM ascent stage and Earth beyond. Image credit: Image Science and Analysis Laboratory, NASA-Johnson Space Center. |
|
AS11-40-5924 Browse or print resolution. Rear of LM ascent stage and Earth beyond. Image credit: Image Science and Analysis Laboratory, NASA-Johnson Space Center. |

|
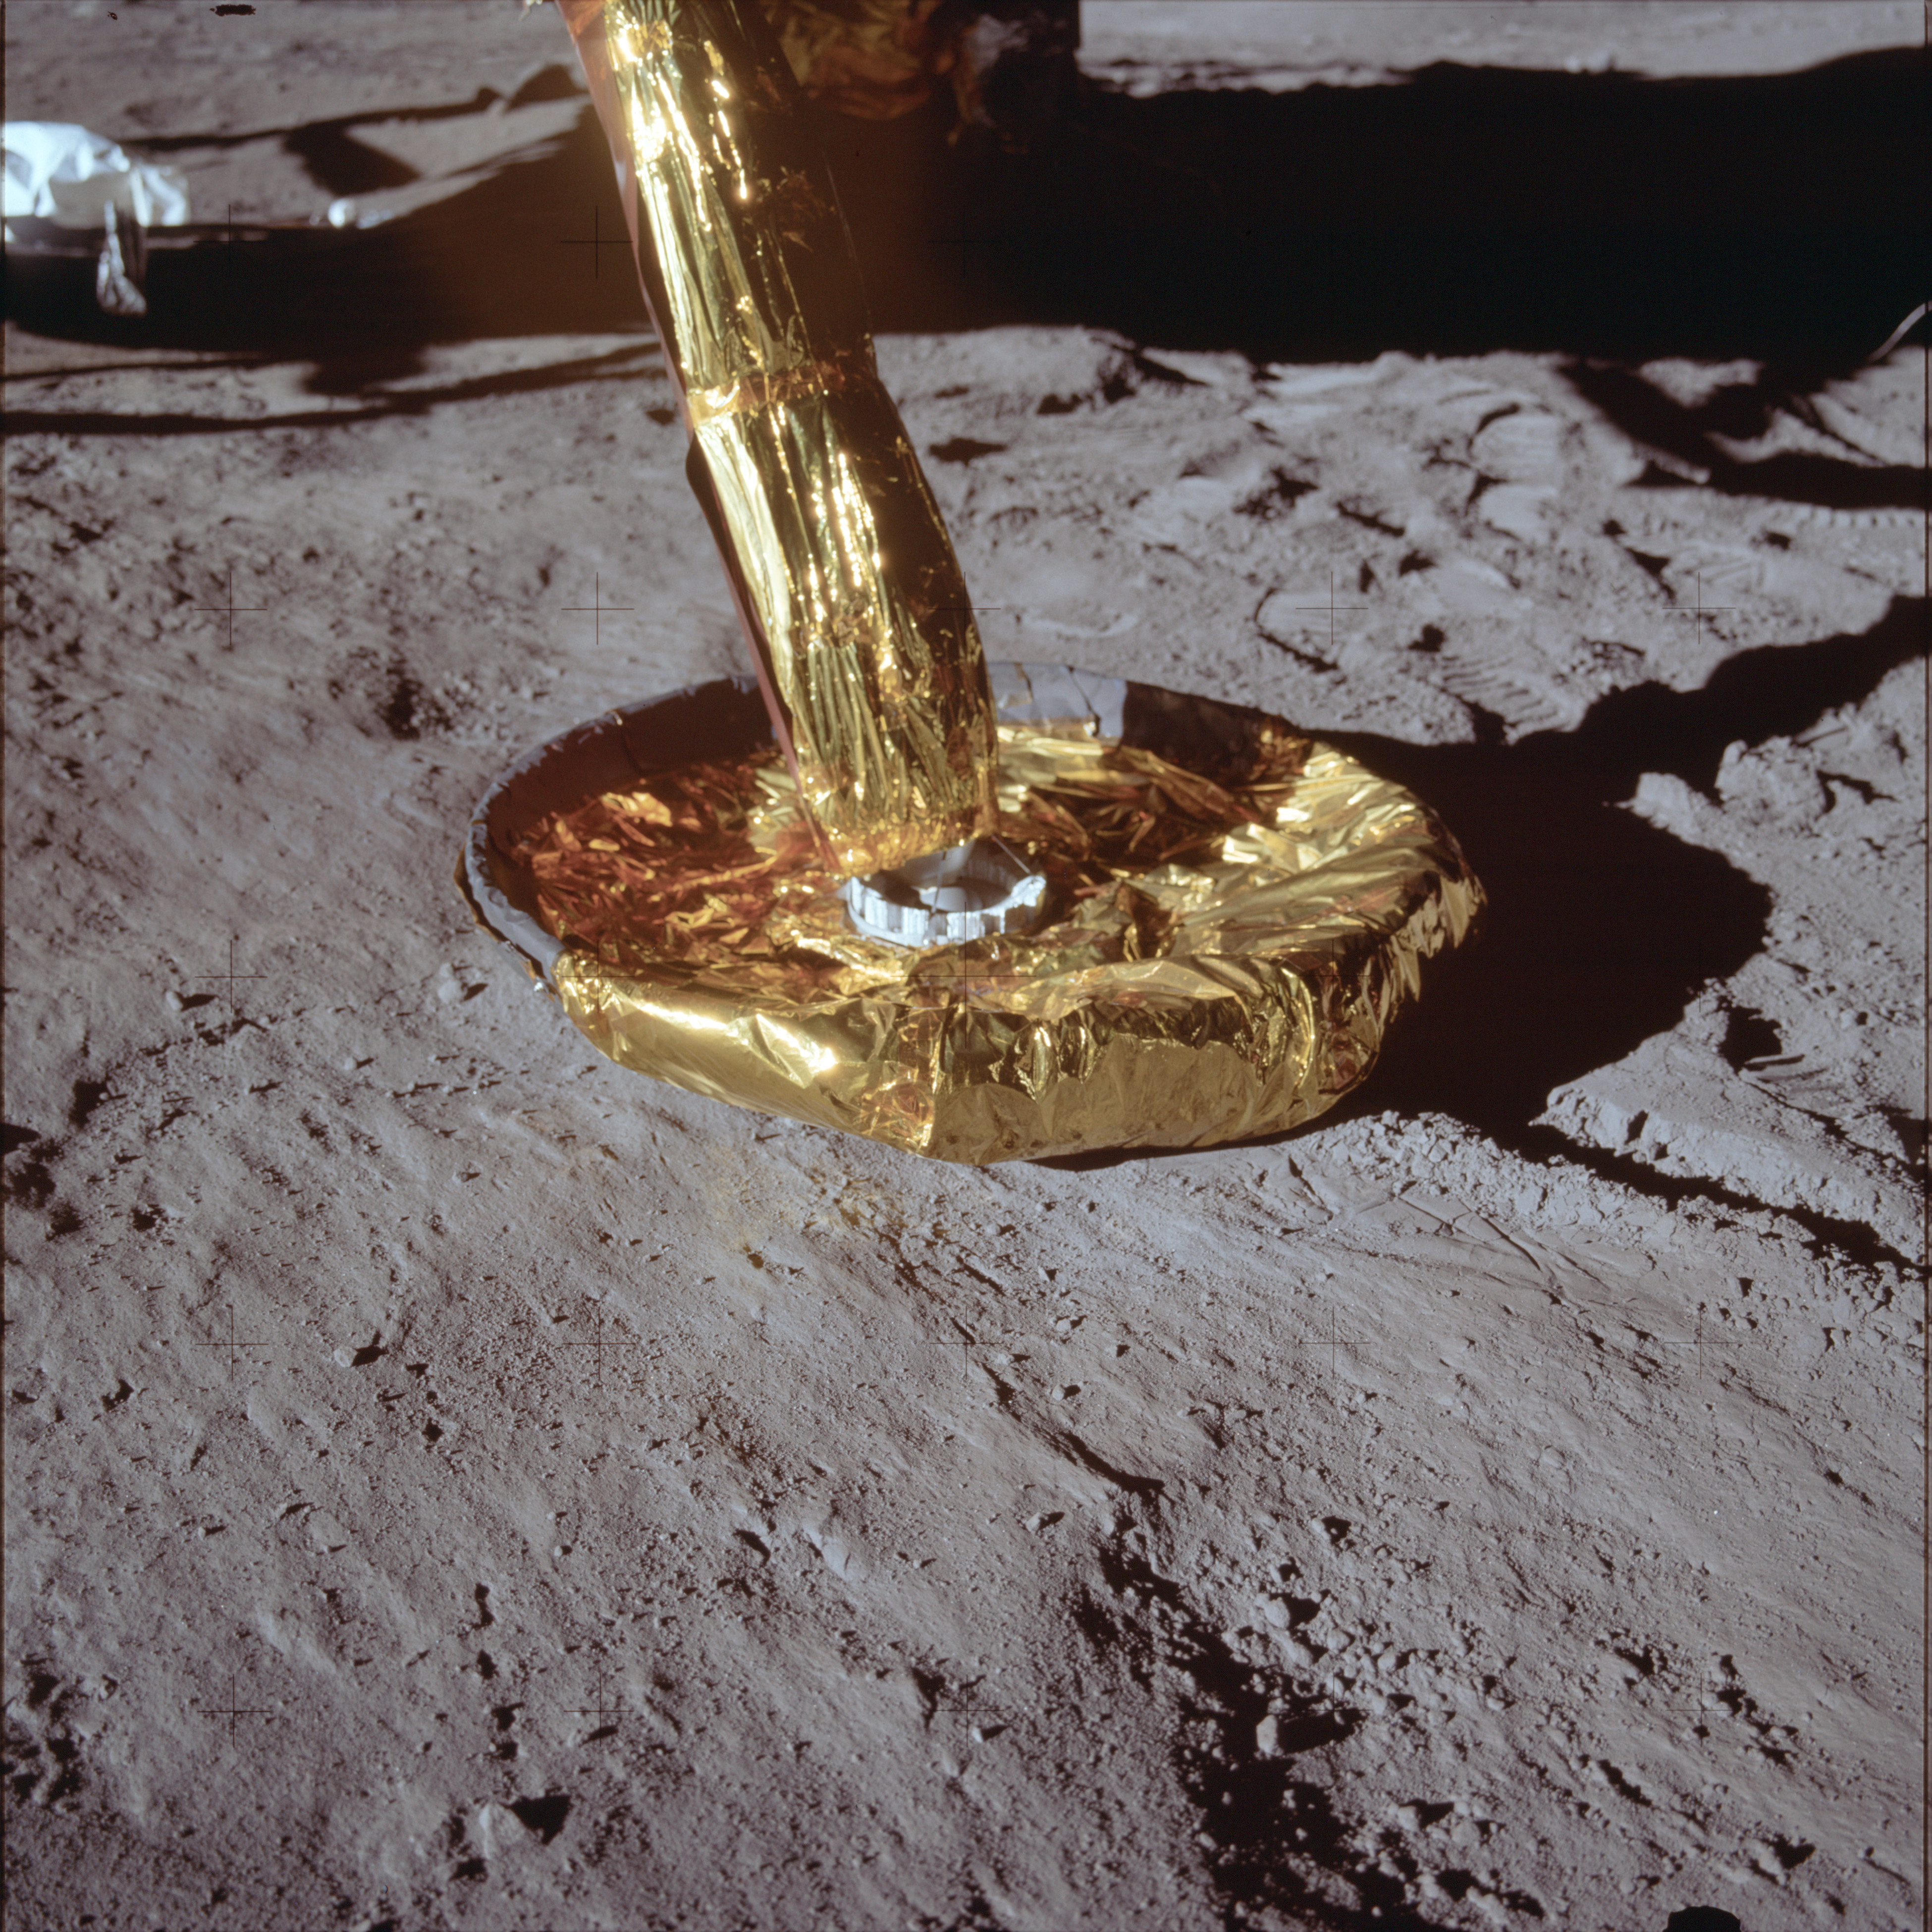
AS11-40-5925 Browse or print resolution. Close-up of LM east footpad. Image credit: Image Science and Analysis Laboratory, NASA-Johnson Space Center. |
|
AS11-40-5926 Browse or print resolution. Close-up of LM east footpad. Image credit: Image Science and Analysis Laboratory, NASA-Johnson Space Center. |
|
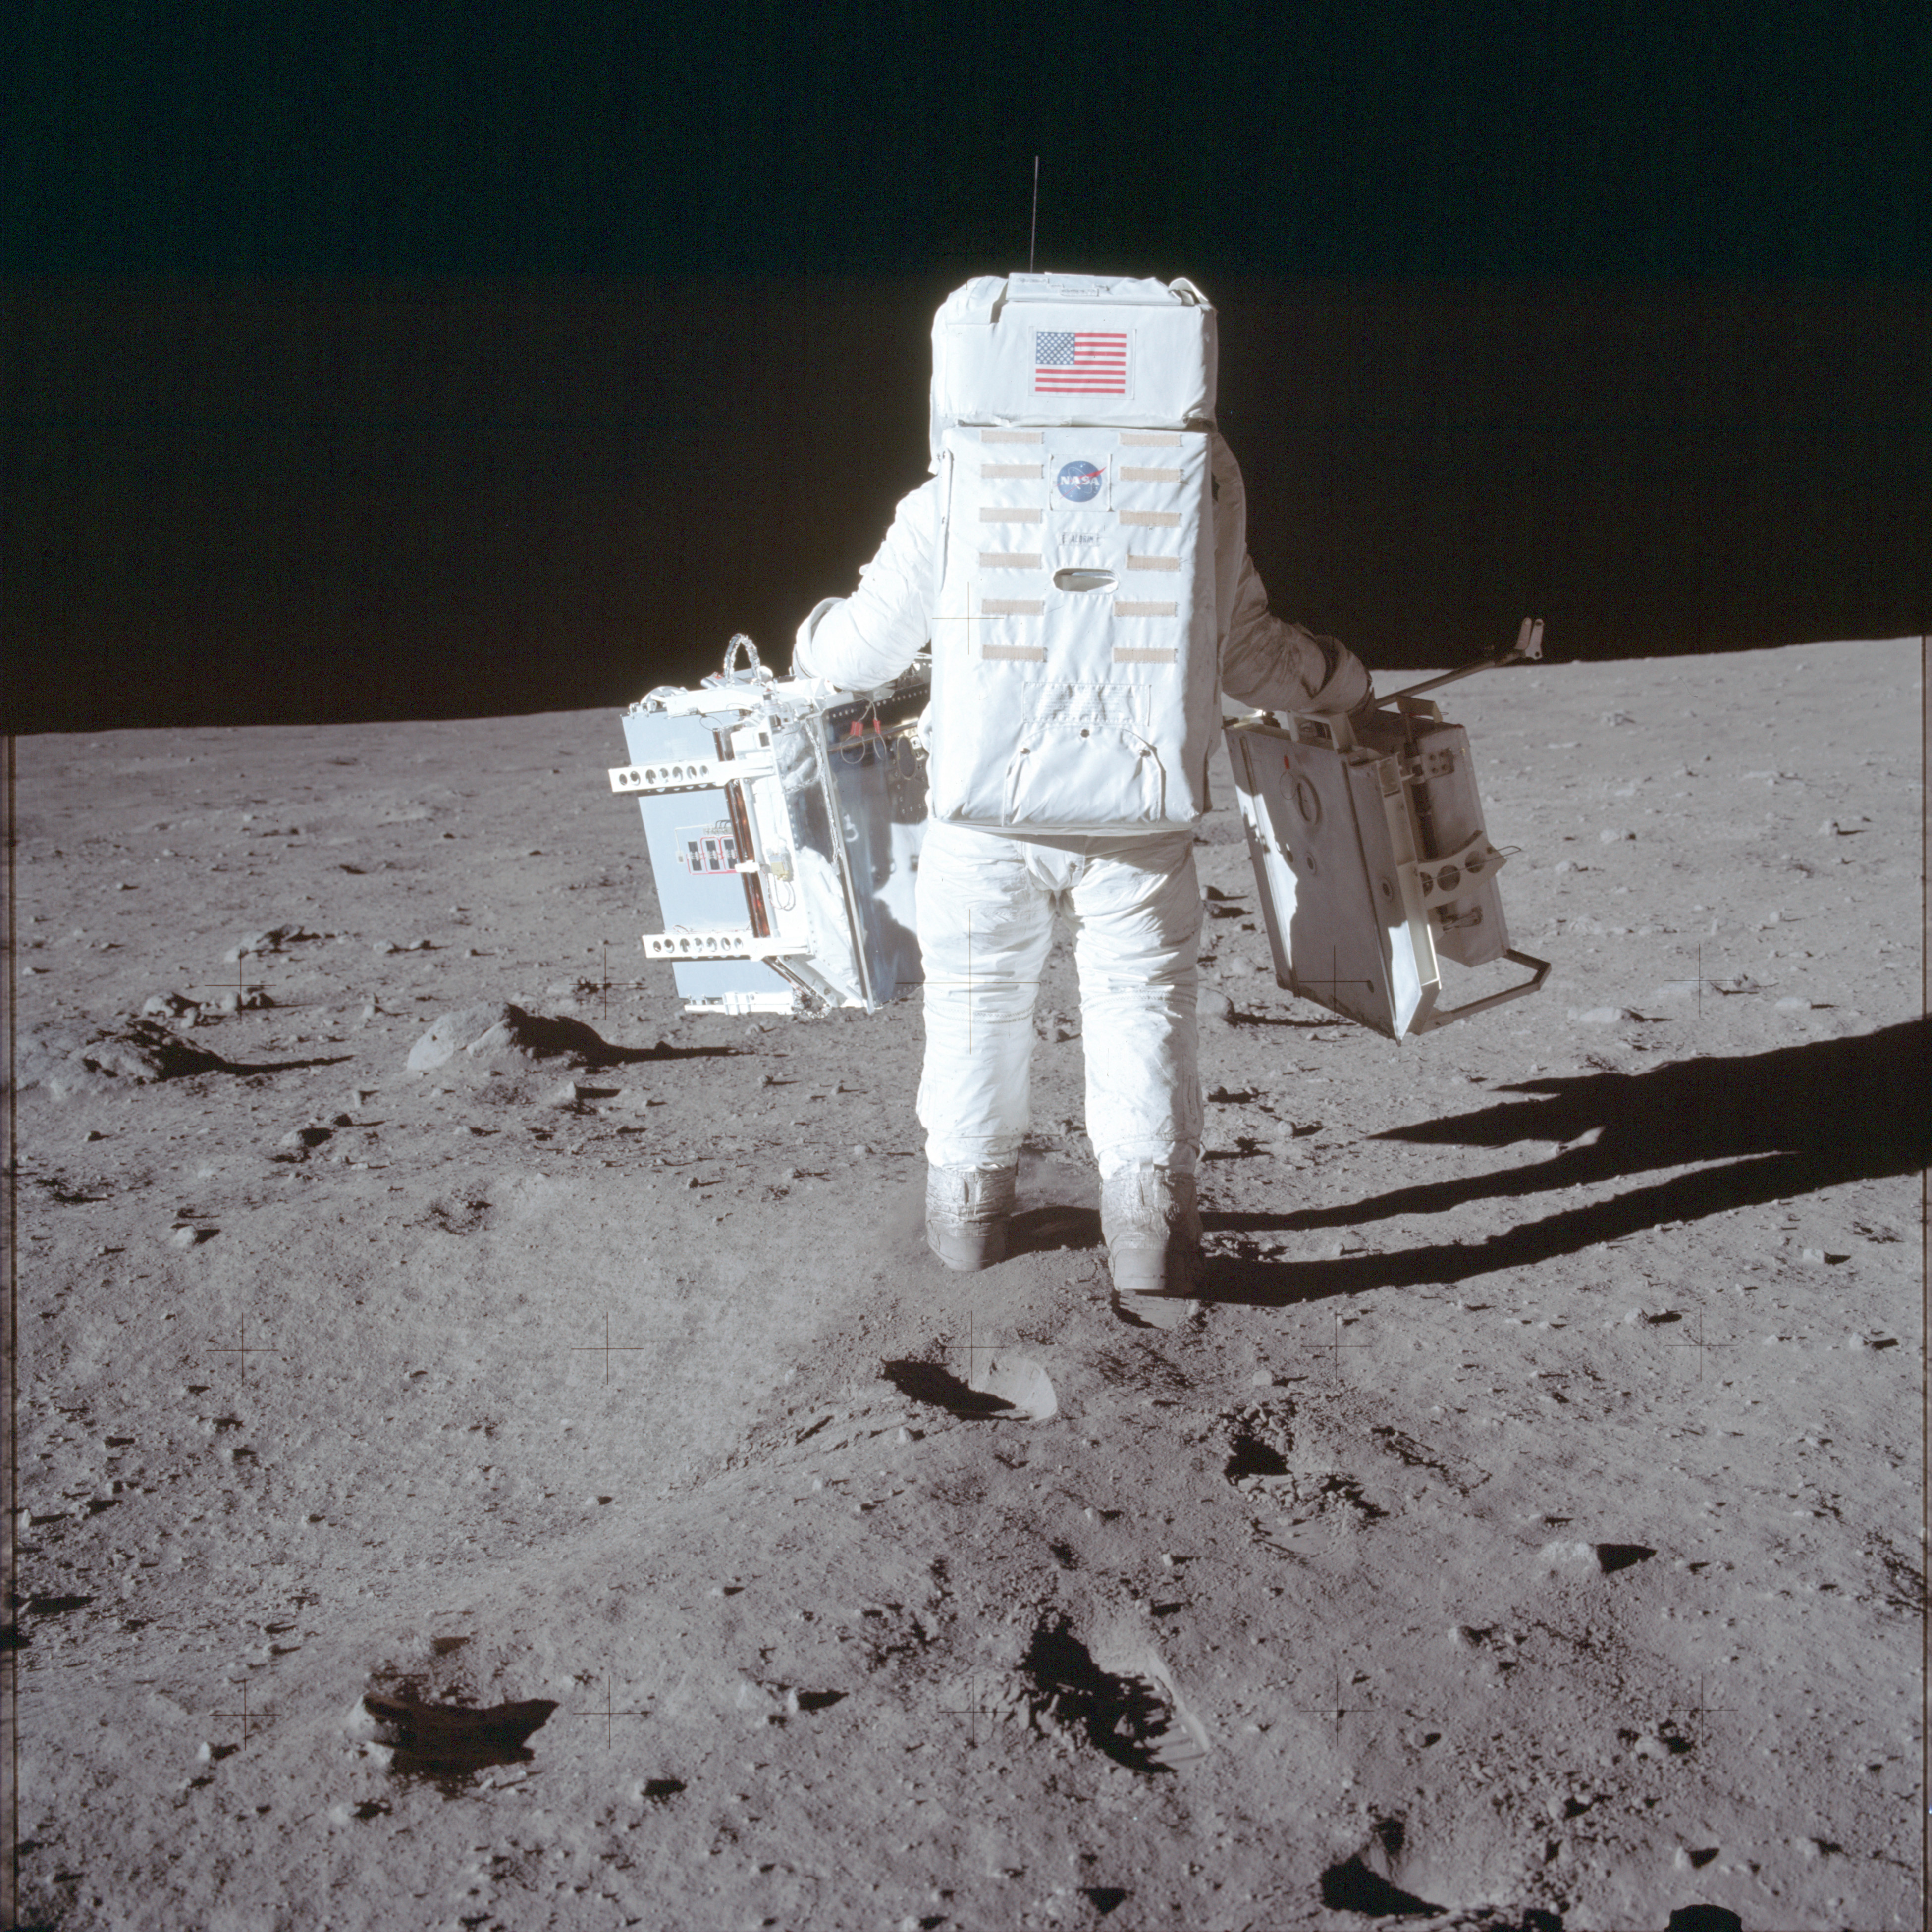
AS11-40-5927 Browse or print resolution. Aldrin removing science packages from the MESA. Image credit: Image Science and Analysis Laboratory, NASA-Johnson Space Center. |

|
AS11-40-5928 Browse or print resolution. Aldrin removing science packages from the MESA. Image credit: Image Science and Analysis Laboratory, NASA-Johnson Space Center. |
|
AS11-40-5929 Browse or print resolution. Aldrin removing science packages from the MESA. Image credit: Image Science and Analysis Laboratory, NASA-Johnson Space Center. |

|
AS11-40-5930 Browse or print resolution. Part of Armstrong's panorama southeast of LM. Image credit: Image Science and Analysis Laboratory, NASA-Johnson Space Center. |

|
AS11-40-5931 Browse or print resolution. Part of Armstrong's panorama southeast of LM including Aldrin removing science packages from the MESA. Gold camera in foreground. Image credit: Image Science and Analysis Laboratory, NASA-Johnson Space Center. |

|
AS11-40-5932 Browse or print resolution. Part of Armstrong's panorama southeast of LM. Image credit: Image Science and Analysis Laboratory, NASA-Johnson Space Center. |
|
AS11-40-5933 Browse or print resolution. Part of Armstrong's panorama southeast of LM. Image credit: Image Science and Analysis Laboratory, NASA-Johnson Space Center. |

|
AS11-40-5934 Browse or print resolution. Part of Armstrong's panorama southeast of LM. Image credit: Image Science and Analysis Laboratory, NASA-Johnson Space Center. |
|
AS11-40-5935 Browse or print resolution. Part of Armstrong's panorama southeast of LM. Image credit: Image Science and Analysis Laboratory, NASA-Johnson Space Center. |

|
AS11-40-5936 Browse or print resolution. Part of Armstrong's panorama southeast of LM. Image credit: Image Science and Analysis Laboratory, NASA-Johnson Space Center. |
|
AS11-40-5937 Browse or print resolution. Part of Armstrong's panorama southeast of LM. Image credit: Image Science and Analysis Laboratory, NASA-Johnson Space Center. |
|
AS11-40-5938 Browse or print resolution. Part of Armstrong's panorama southeast of LM. Image credit: Image Science and Analysis Laboratory, NASA-Johnson Space Center. |

|
AS11-40-5939 Browse or print resolution. Part of Armstrong's panorama southeast of LM. Image credit: Image Science and Analysis Laboratory, NASA-Johnson Space Center. |
|
AS11-40-5940 Browse or print resolution. Part of Armstrong's panorama southeast of LM. Image credit: Image Science and Analysis Laboratory, NASA-Johnson Space Center. |

|
AS11-40-5941 Browse or print resolution. Part of Armstrong's panorama southeast of LM. Image credit: Image Science and Analysis Laboratory, NASA-Johnson Space Center. |
|
AS11-40-5942 Browse or print resolution. Aldrin carries the packages of the Early Apollo Scientific Experiment Package (EASEP) to their deployment site. Image credit: Image Science and Analysis Laboratory, NASA-Johnson Space Center. |
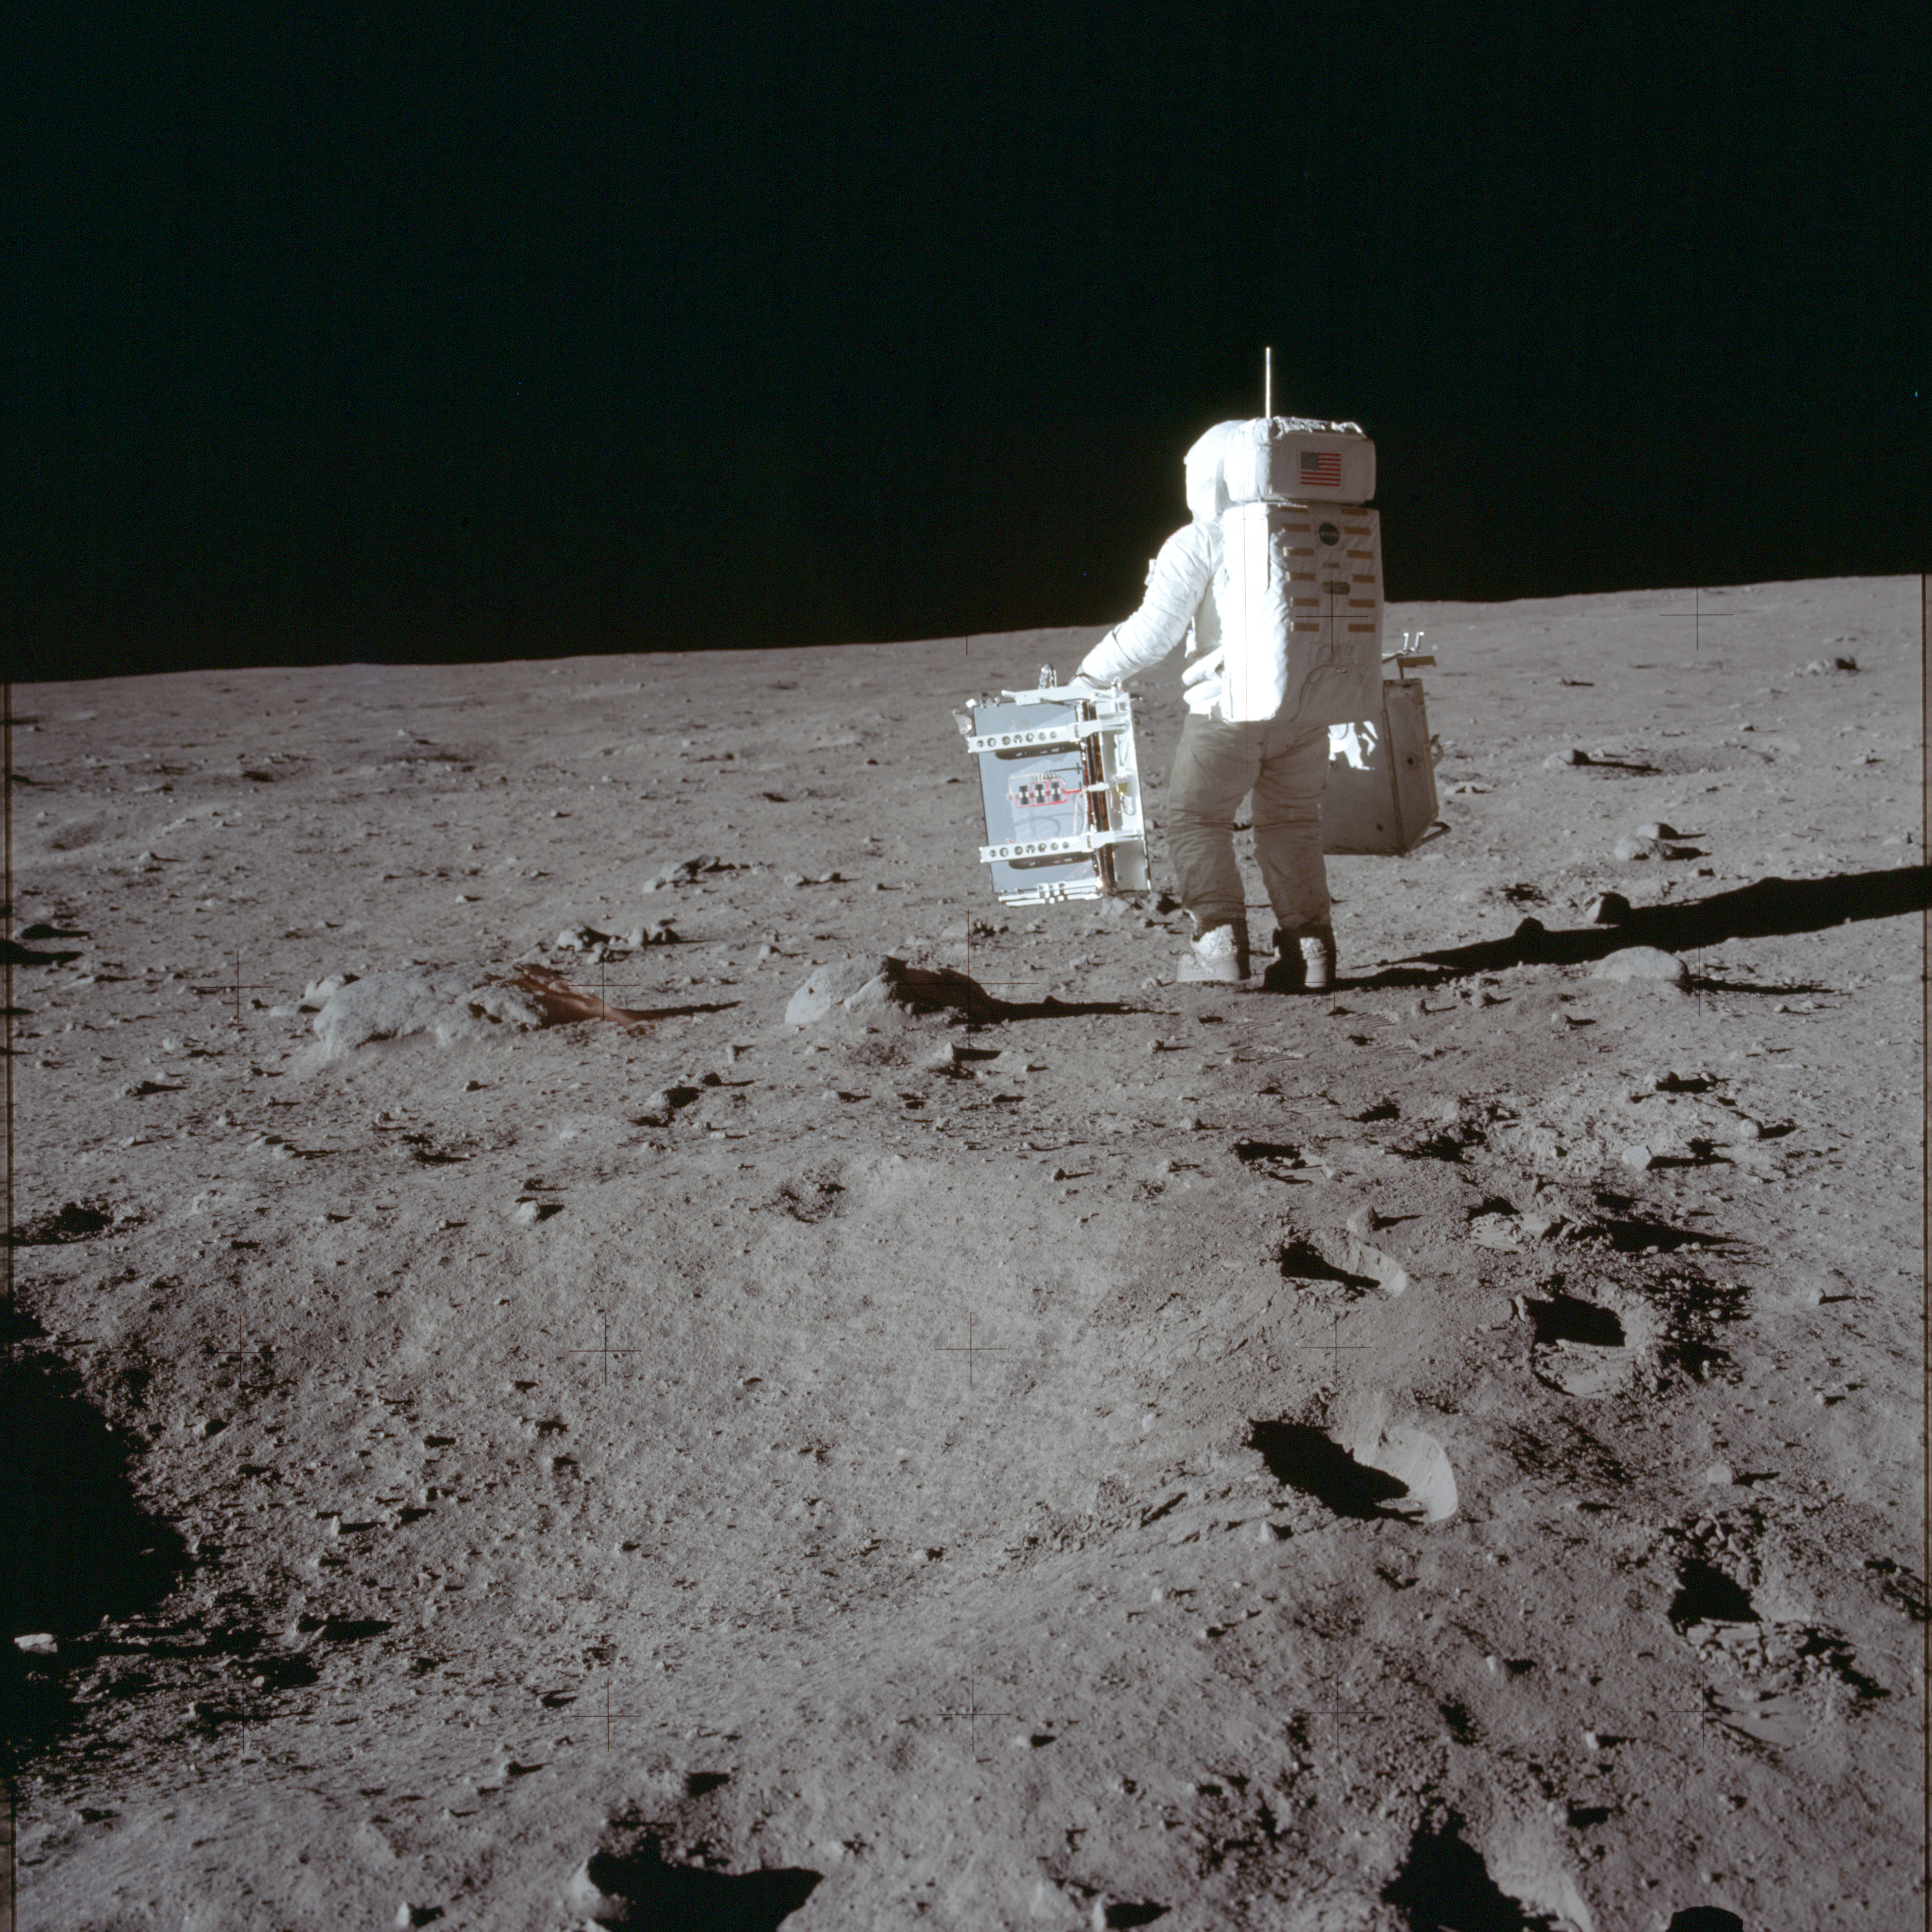
|
AS11-40-5943 Browse or print resolution. Aldrin carries the packages of the Early Apollo Scientific Experiment Package (EASEP) to their deployment site. Image credit: Image Science and Analysis Laboratory, NASA-Johnson Space Center. |

|
AS11-40-5944 Browse or print resolution. Aldrin carries the packages of the Early Apollo Scientific Experiment Package (EASEP) to their deployment site. Image credit: Image Science and Analysis Laboratory, NASA-Johnson Space Center. |
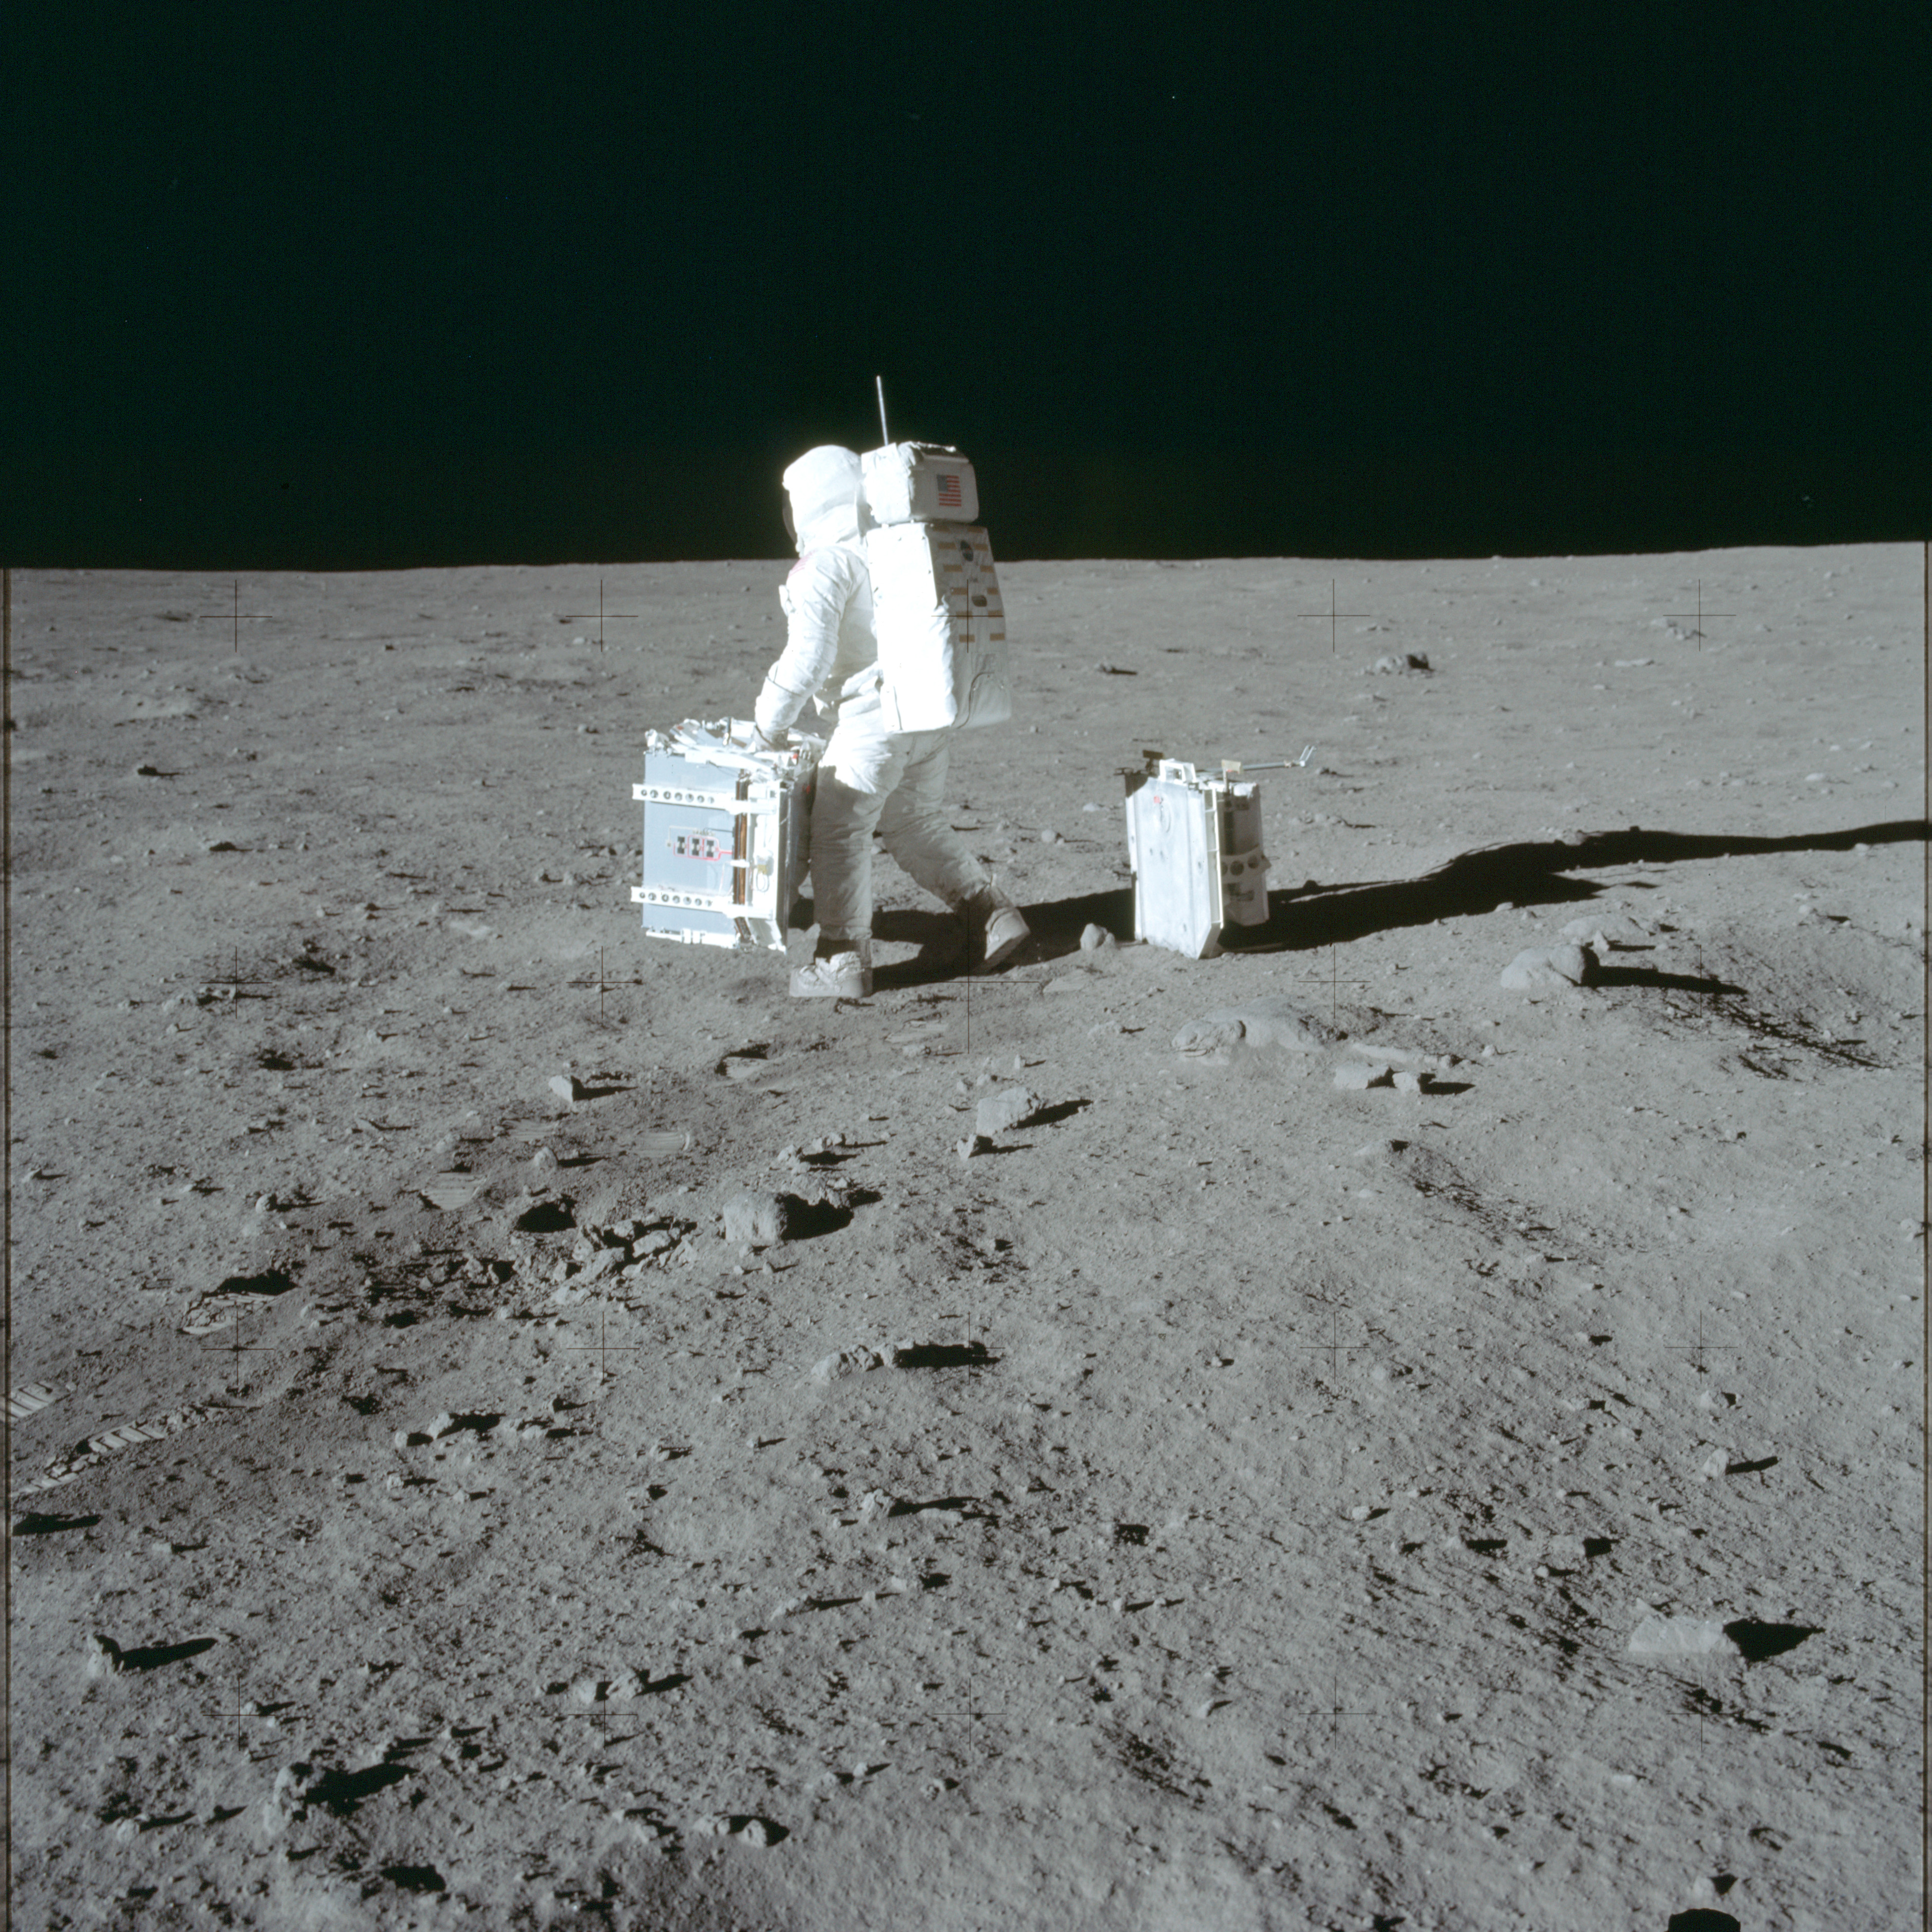
|
AS11-40-5945 Browse or print resolution. Aldrin lays out packages of the Early Apollo Scientific Experiment Package (EASEP). Image credit: Image Science and Analysis Laboratory, NASA-Johnson Space Center. |
|
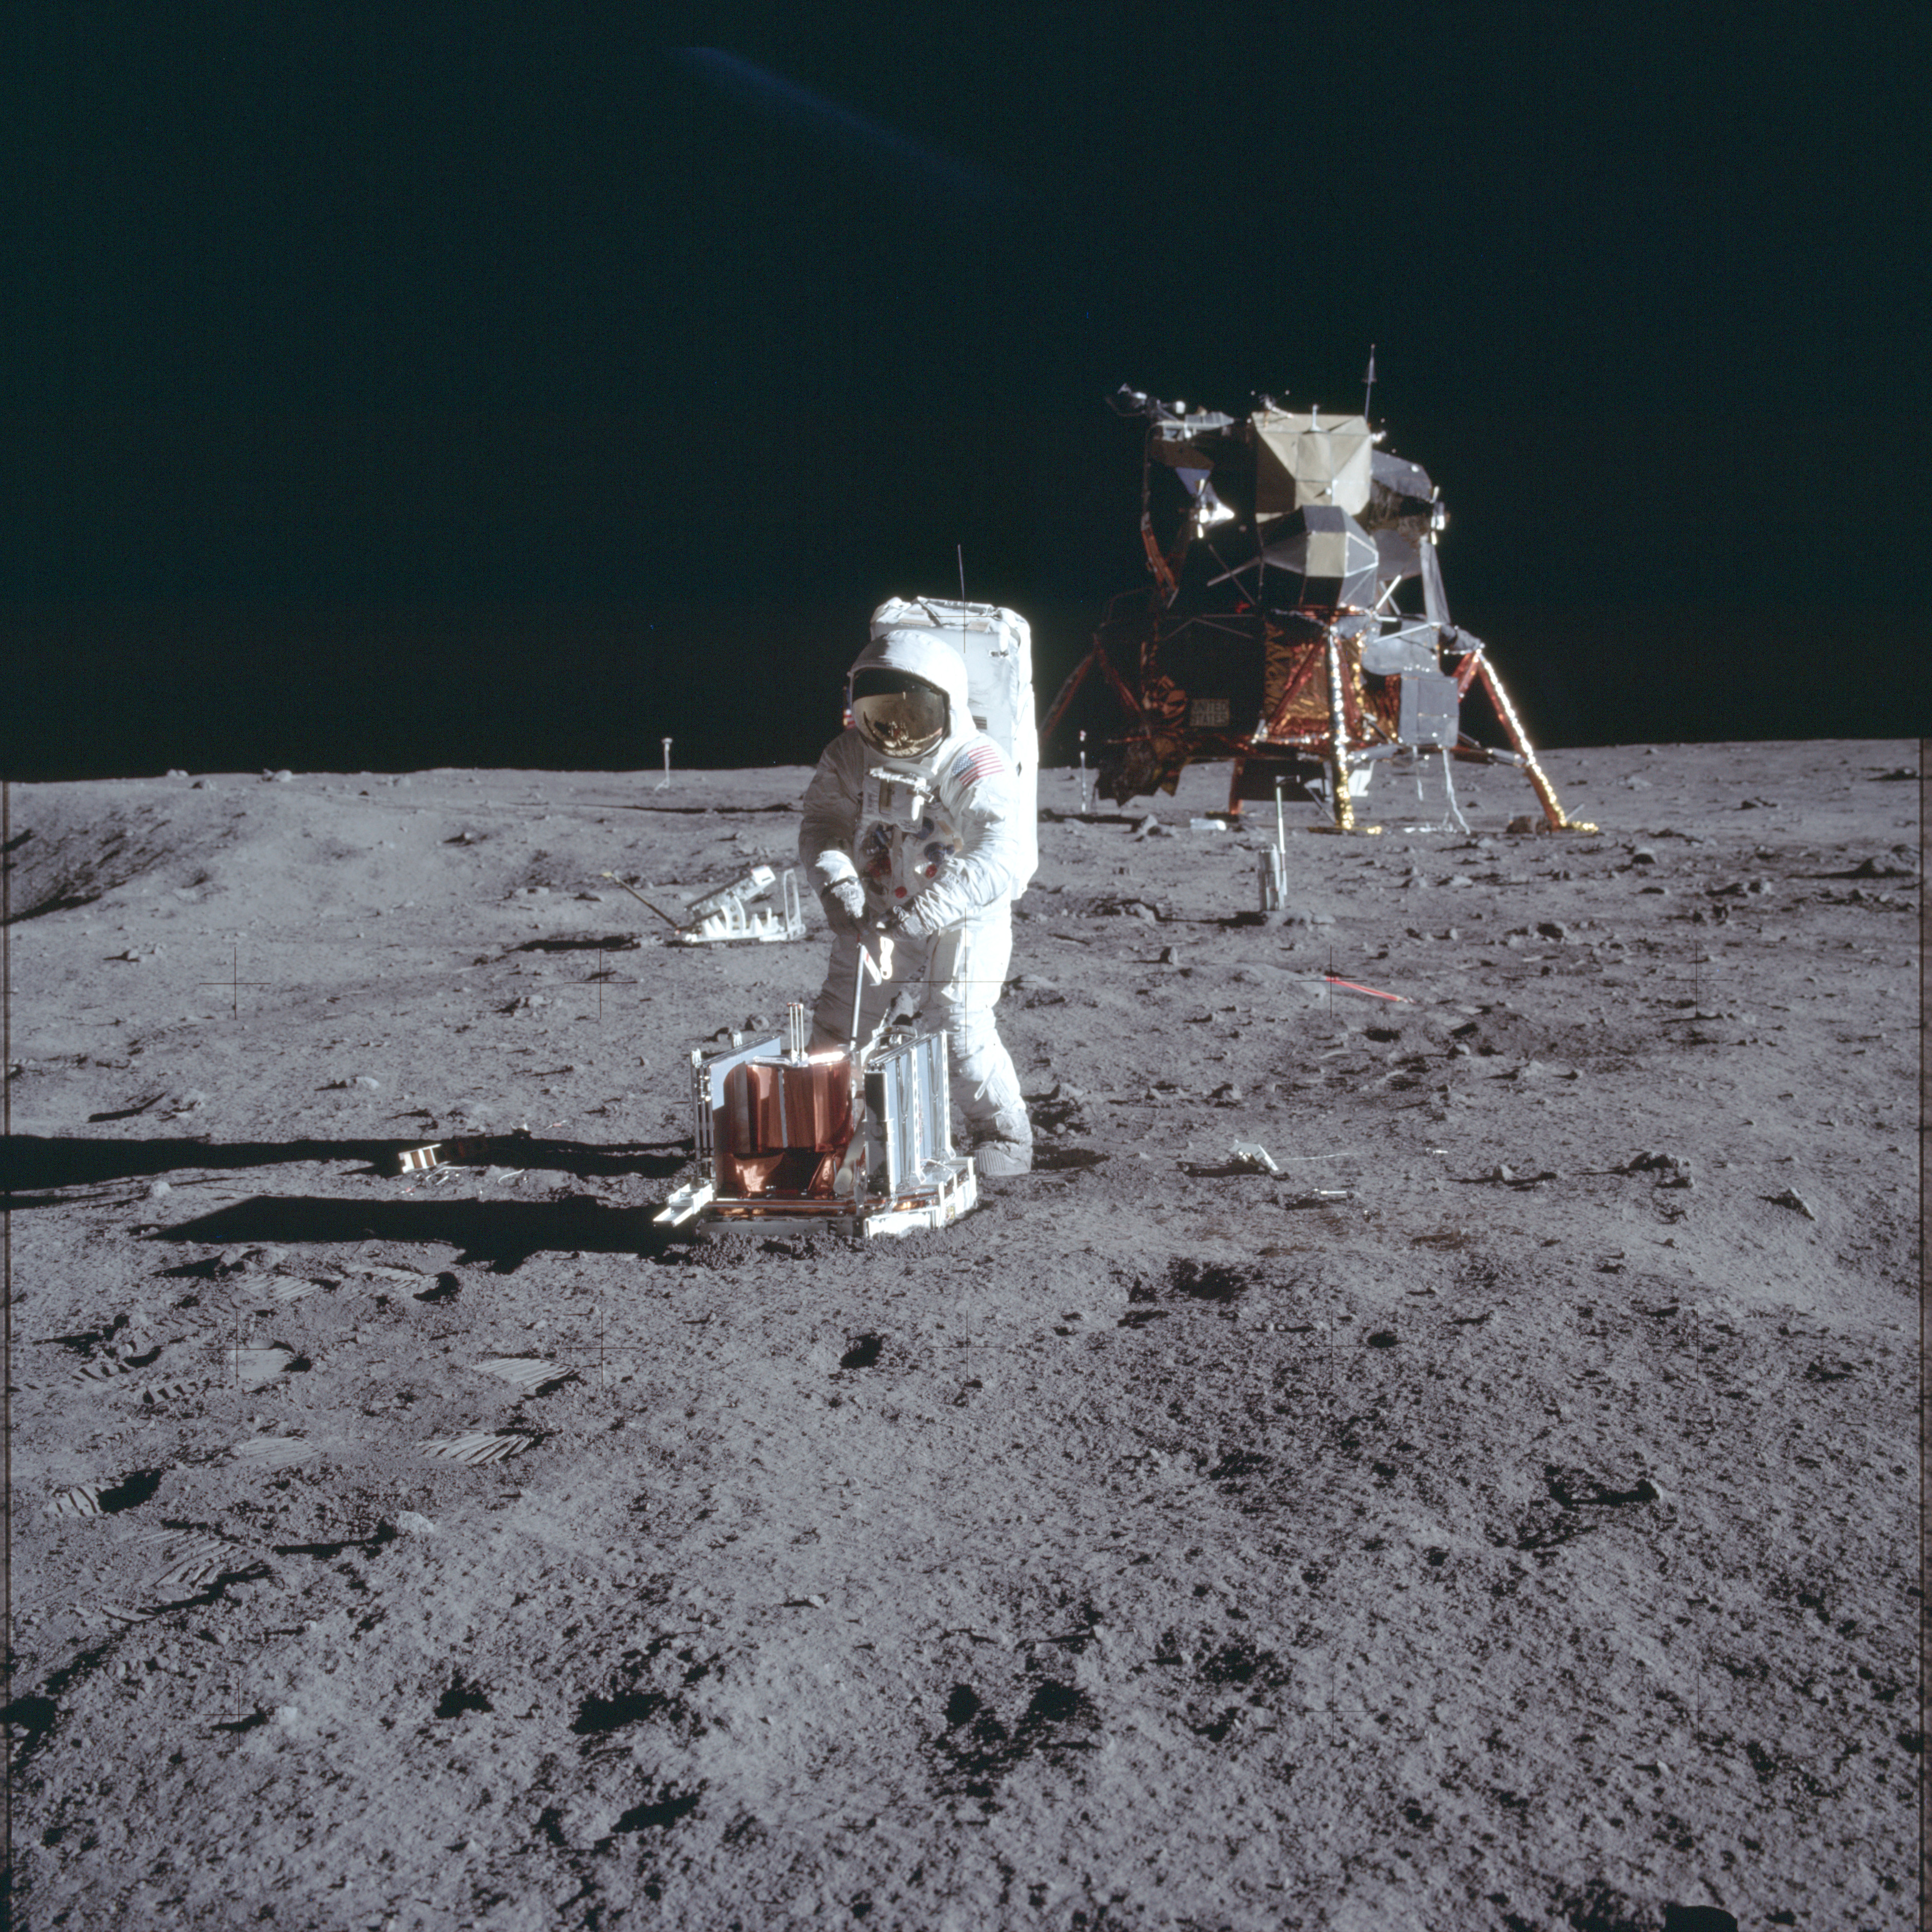
AS11-40-5946 Browse or print resolution. Aldrin deploys Passive Seismic Experiment (PSE). Image credit: Image Science and Analysis Laboratory, NASA-Johnson Space Center. |

|
AS11-40-5947 Browse or print resolution. Aldrin deploys the Passive Seismic Experiment (PSE). Image credit: Image Science and Analysis Laboratory, NASA-Johnson Space Center. |

|
AS11-40-5948 Browse or print resolution. Aldrin with the Passive Seismic Experiment (PSE). Image credit: Image Science and Analysis Laboratory, NASA-Johnson Space Center. |
|
AS11-40-5949 Browse or print resolution. Aldrin deploys the Passive Seismic Experiment (PSE). Image credit: Image Science and Analysis Laboratory, NASA-Johnson Space Center. |

|
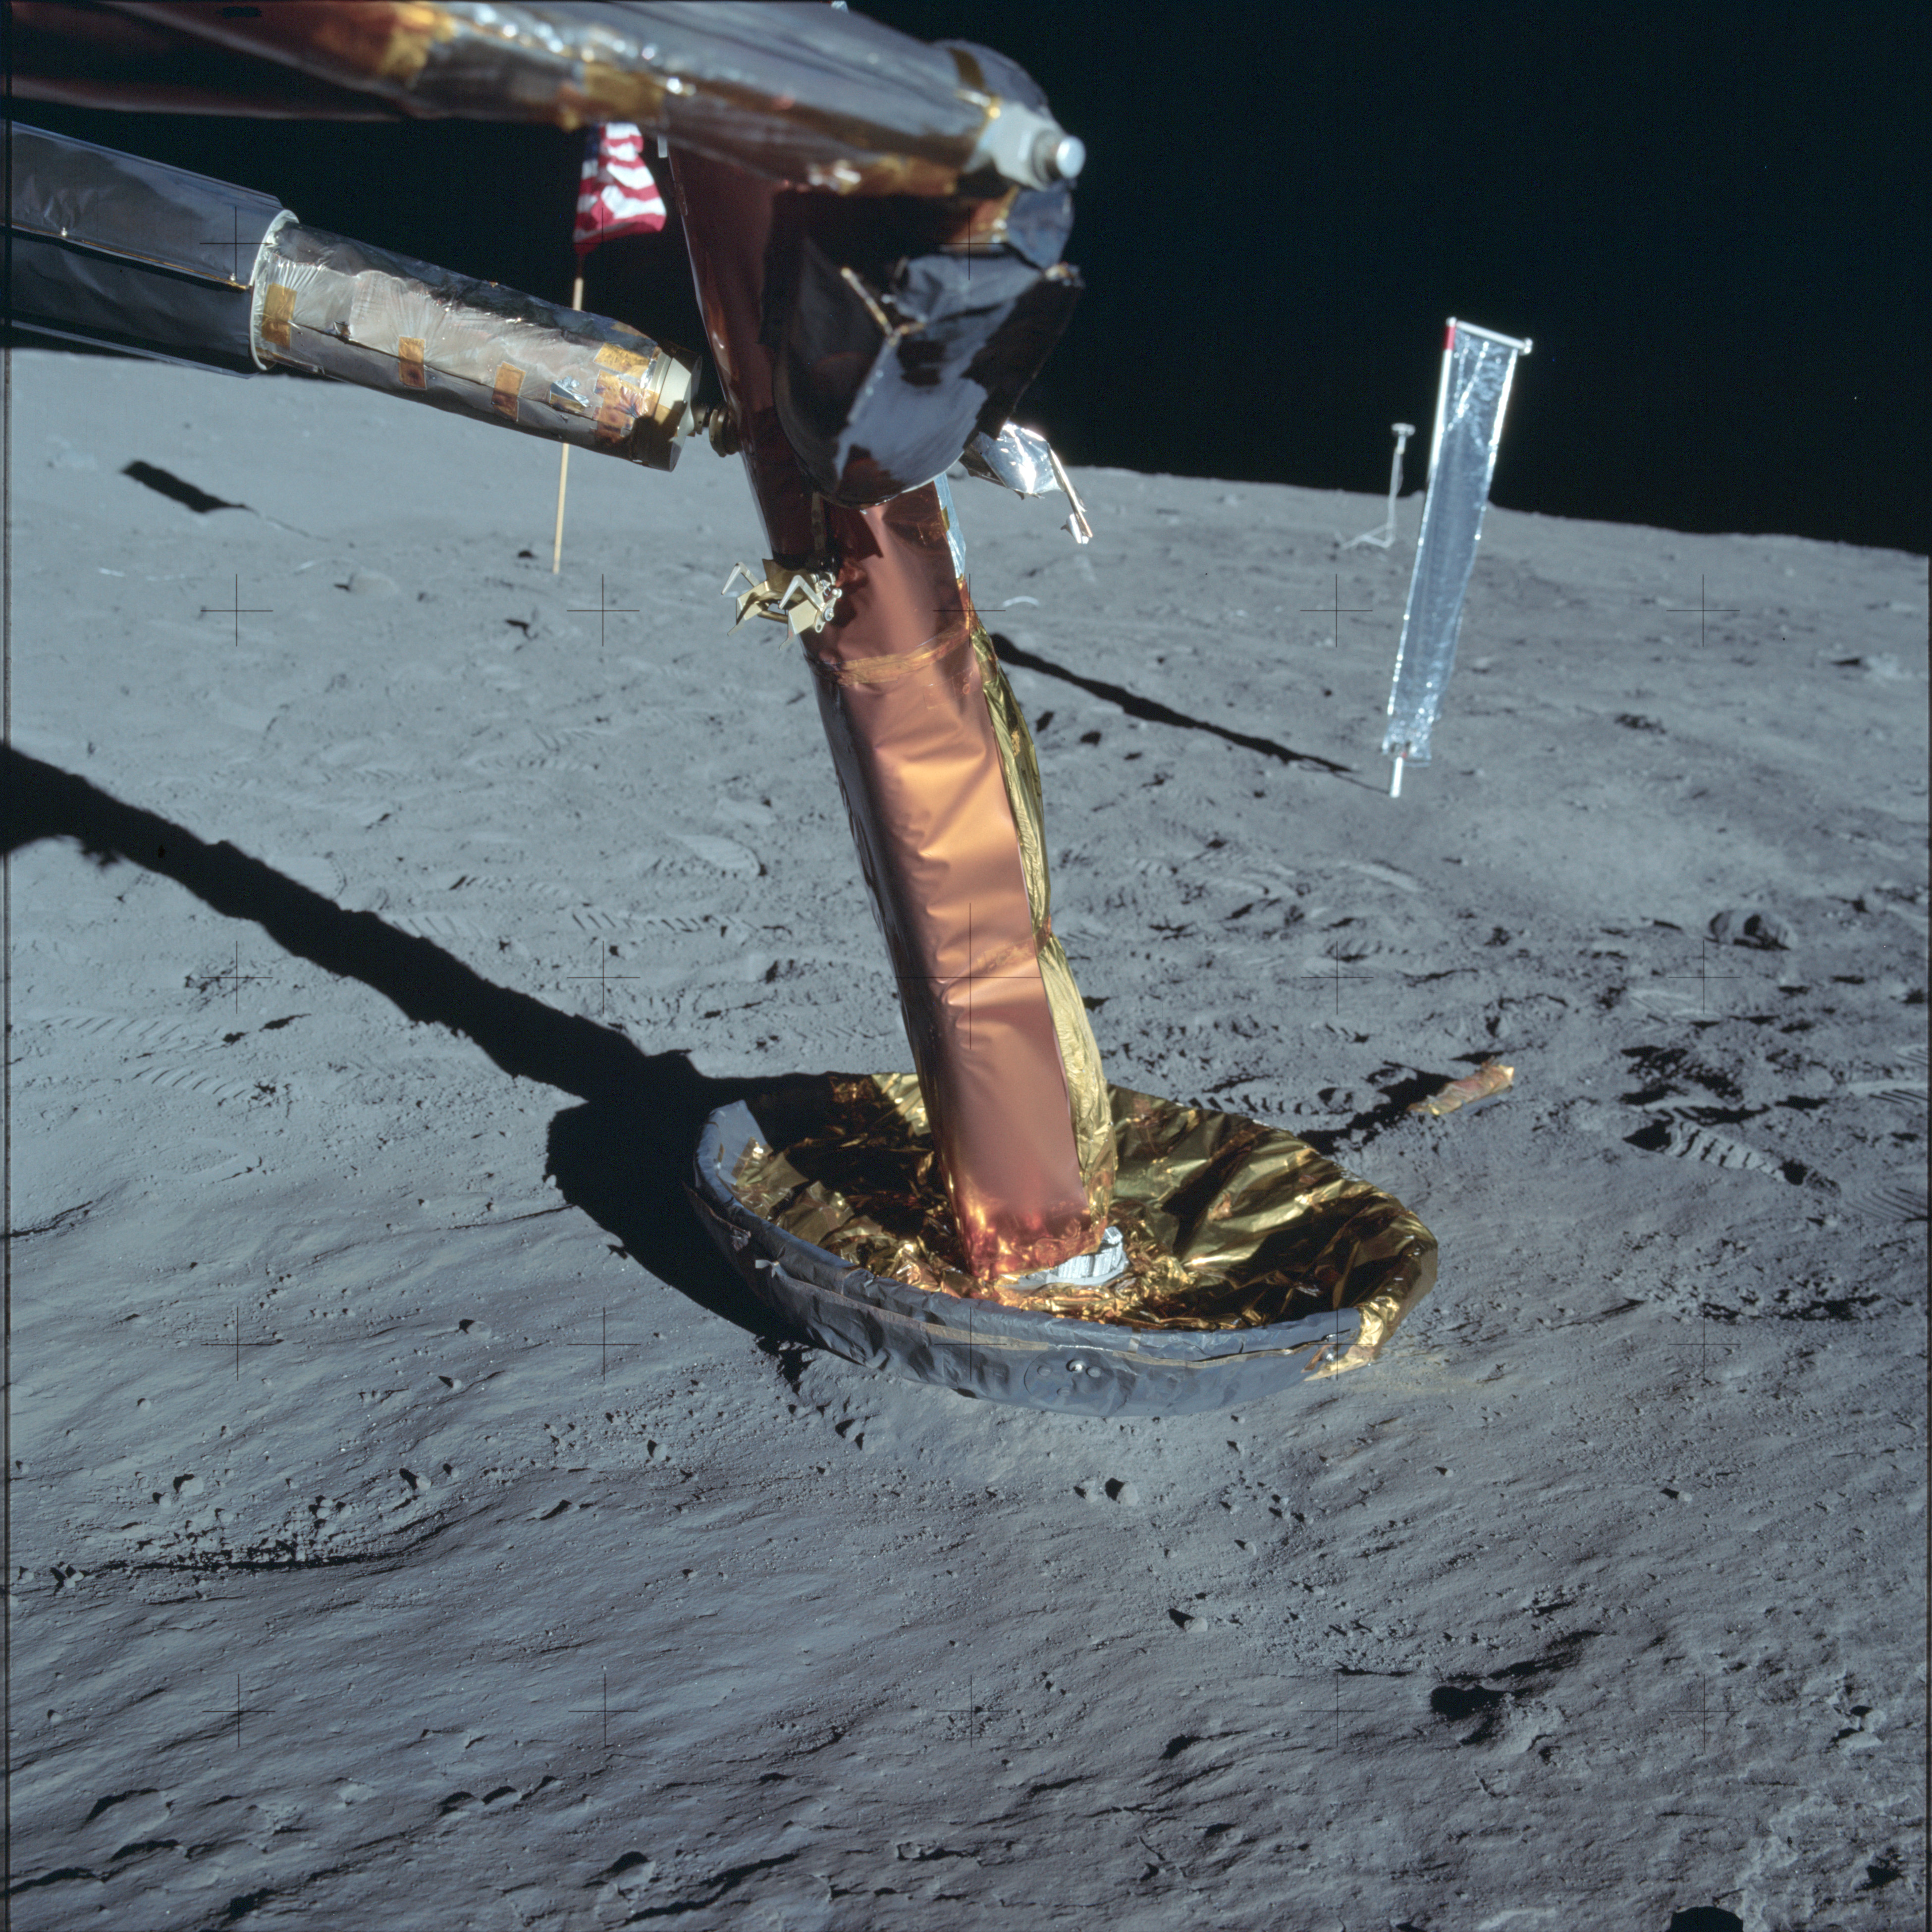
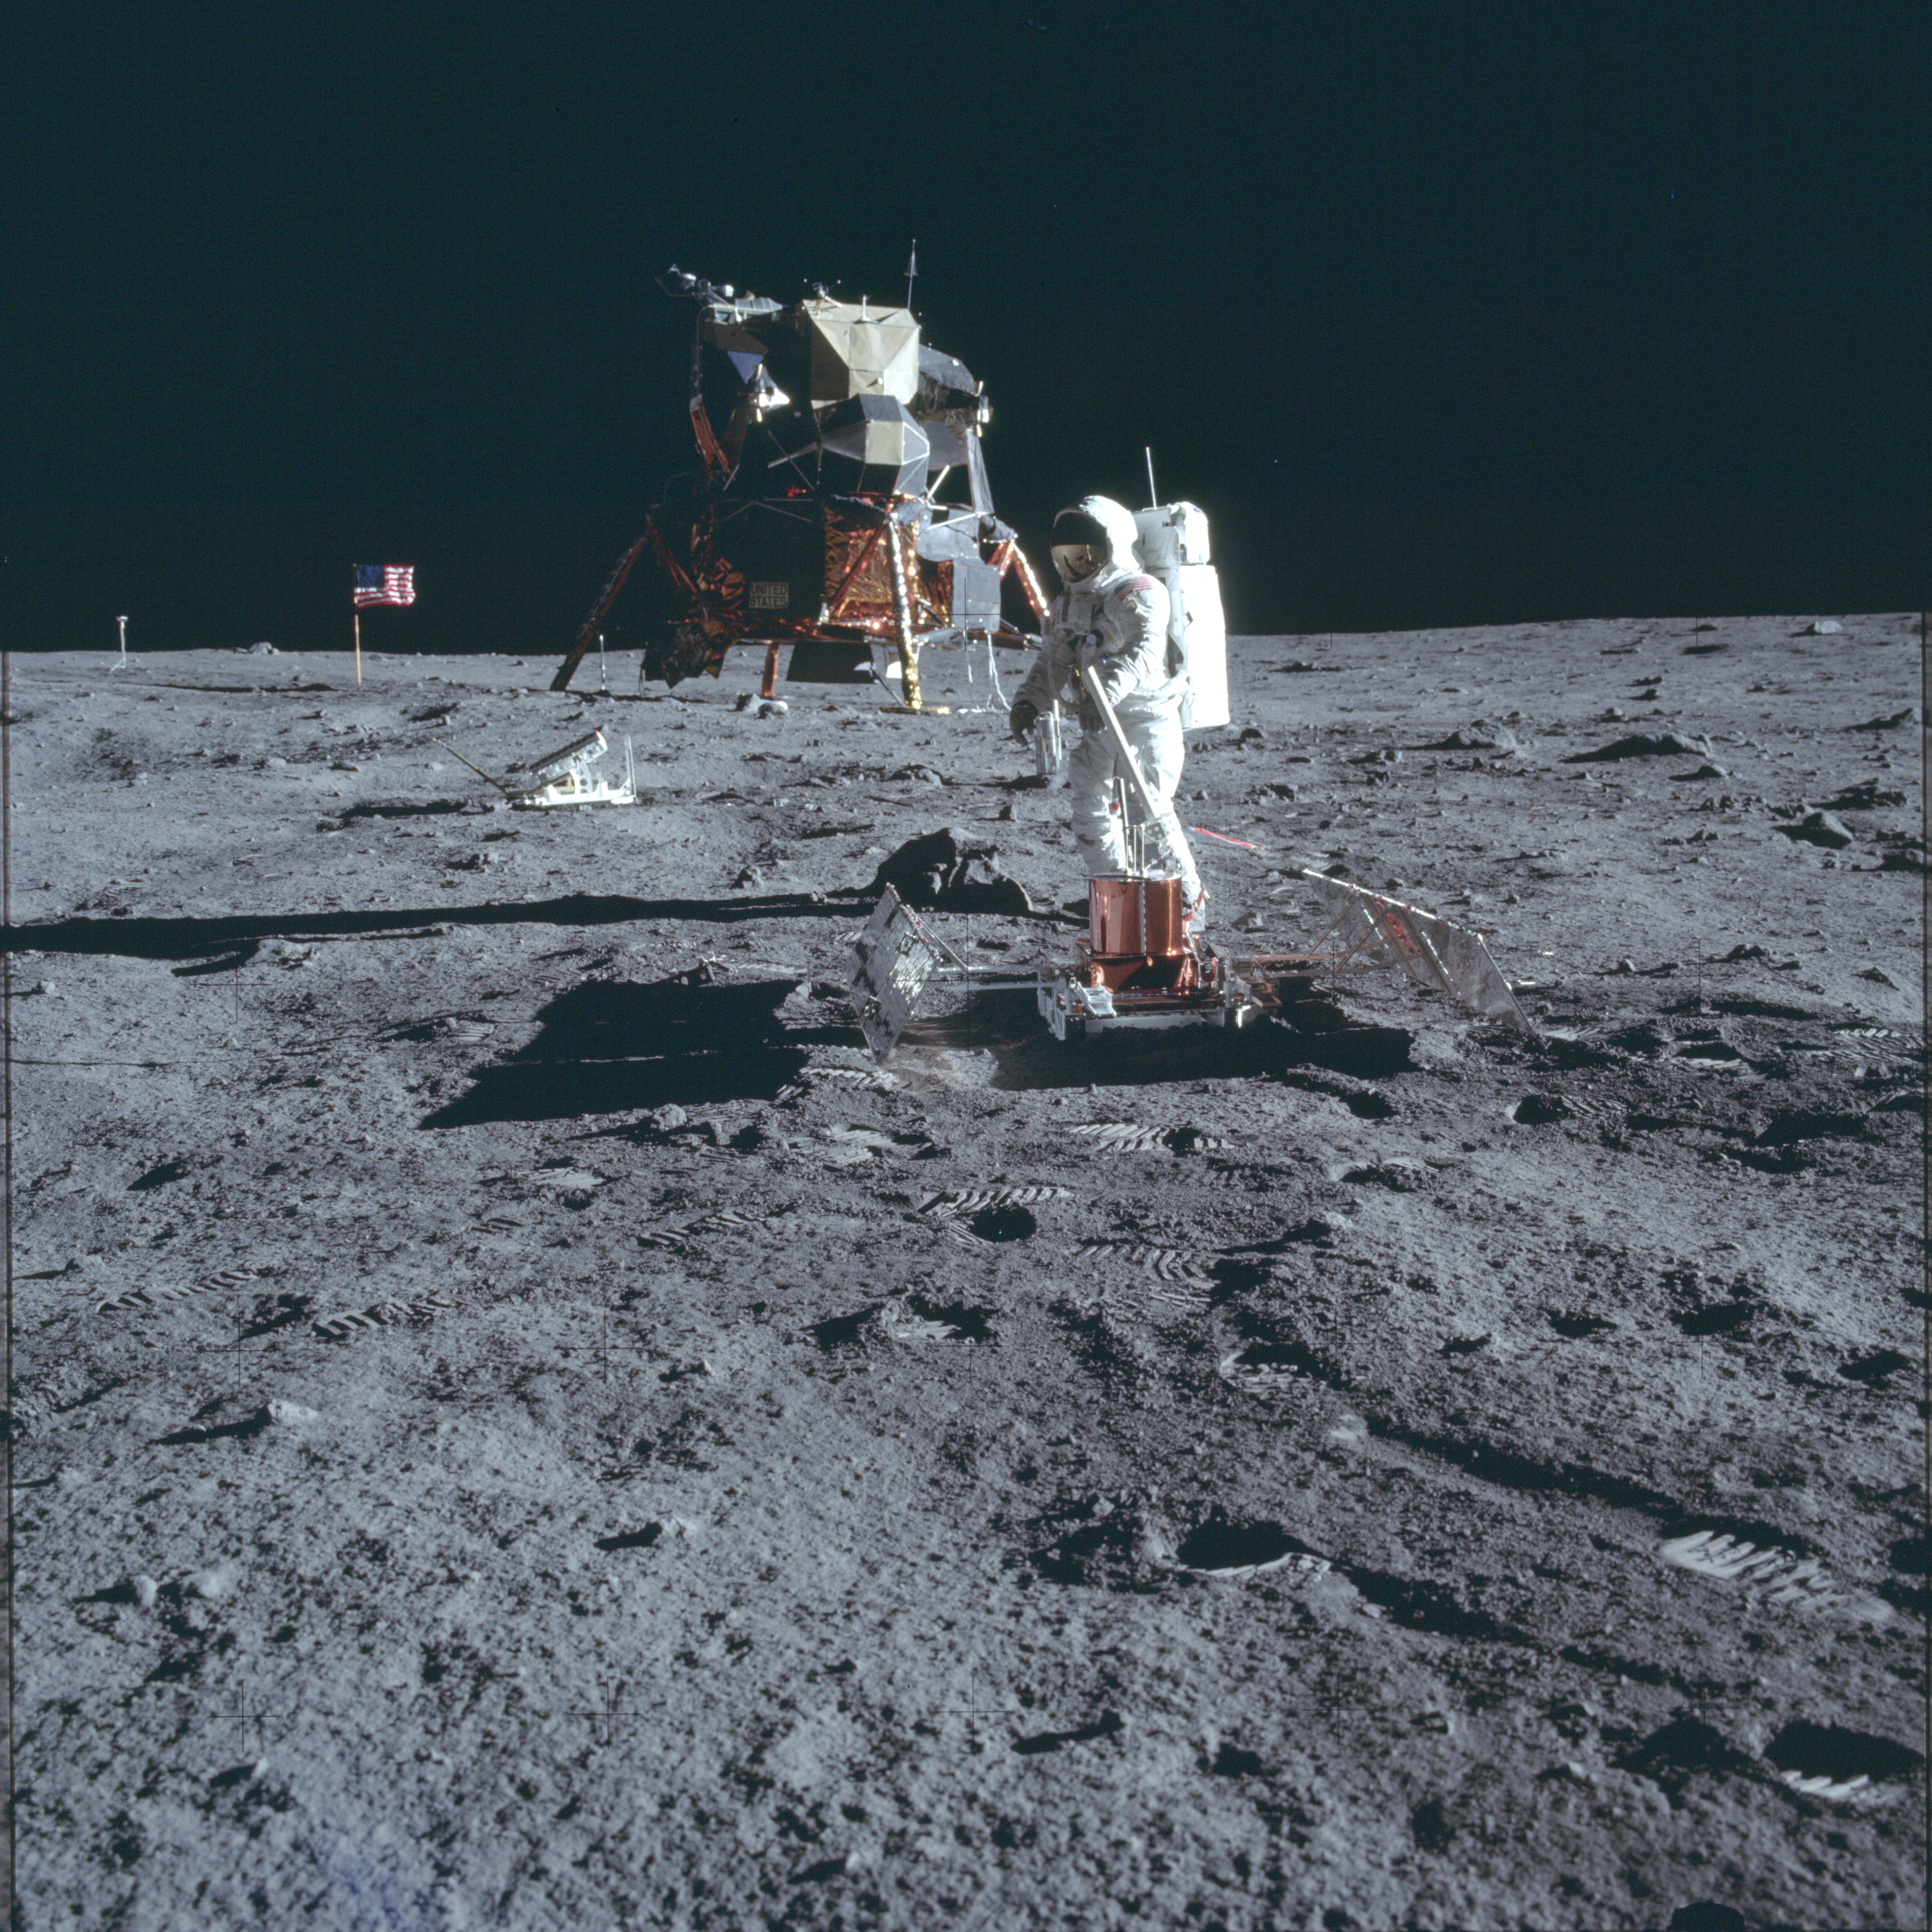
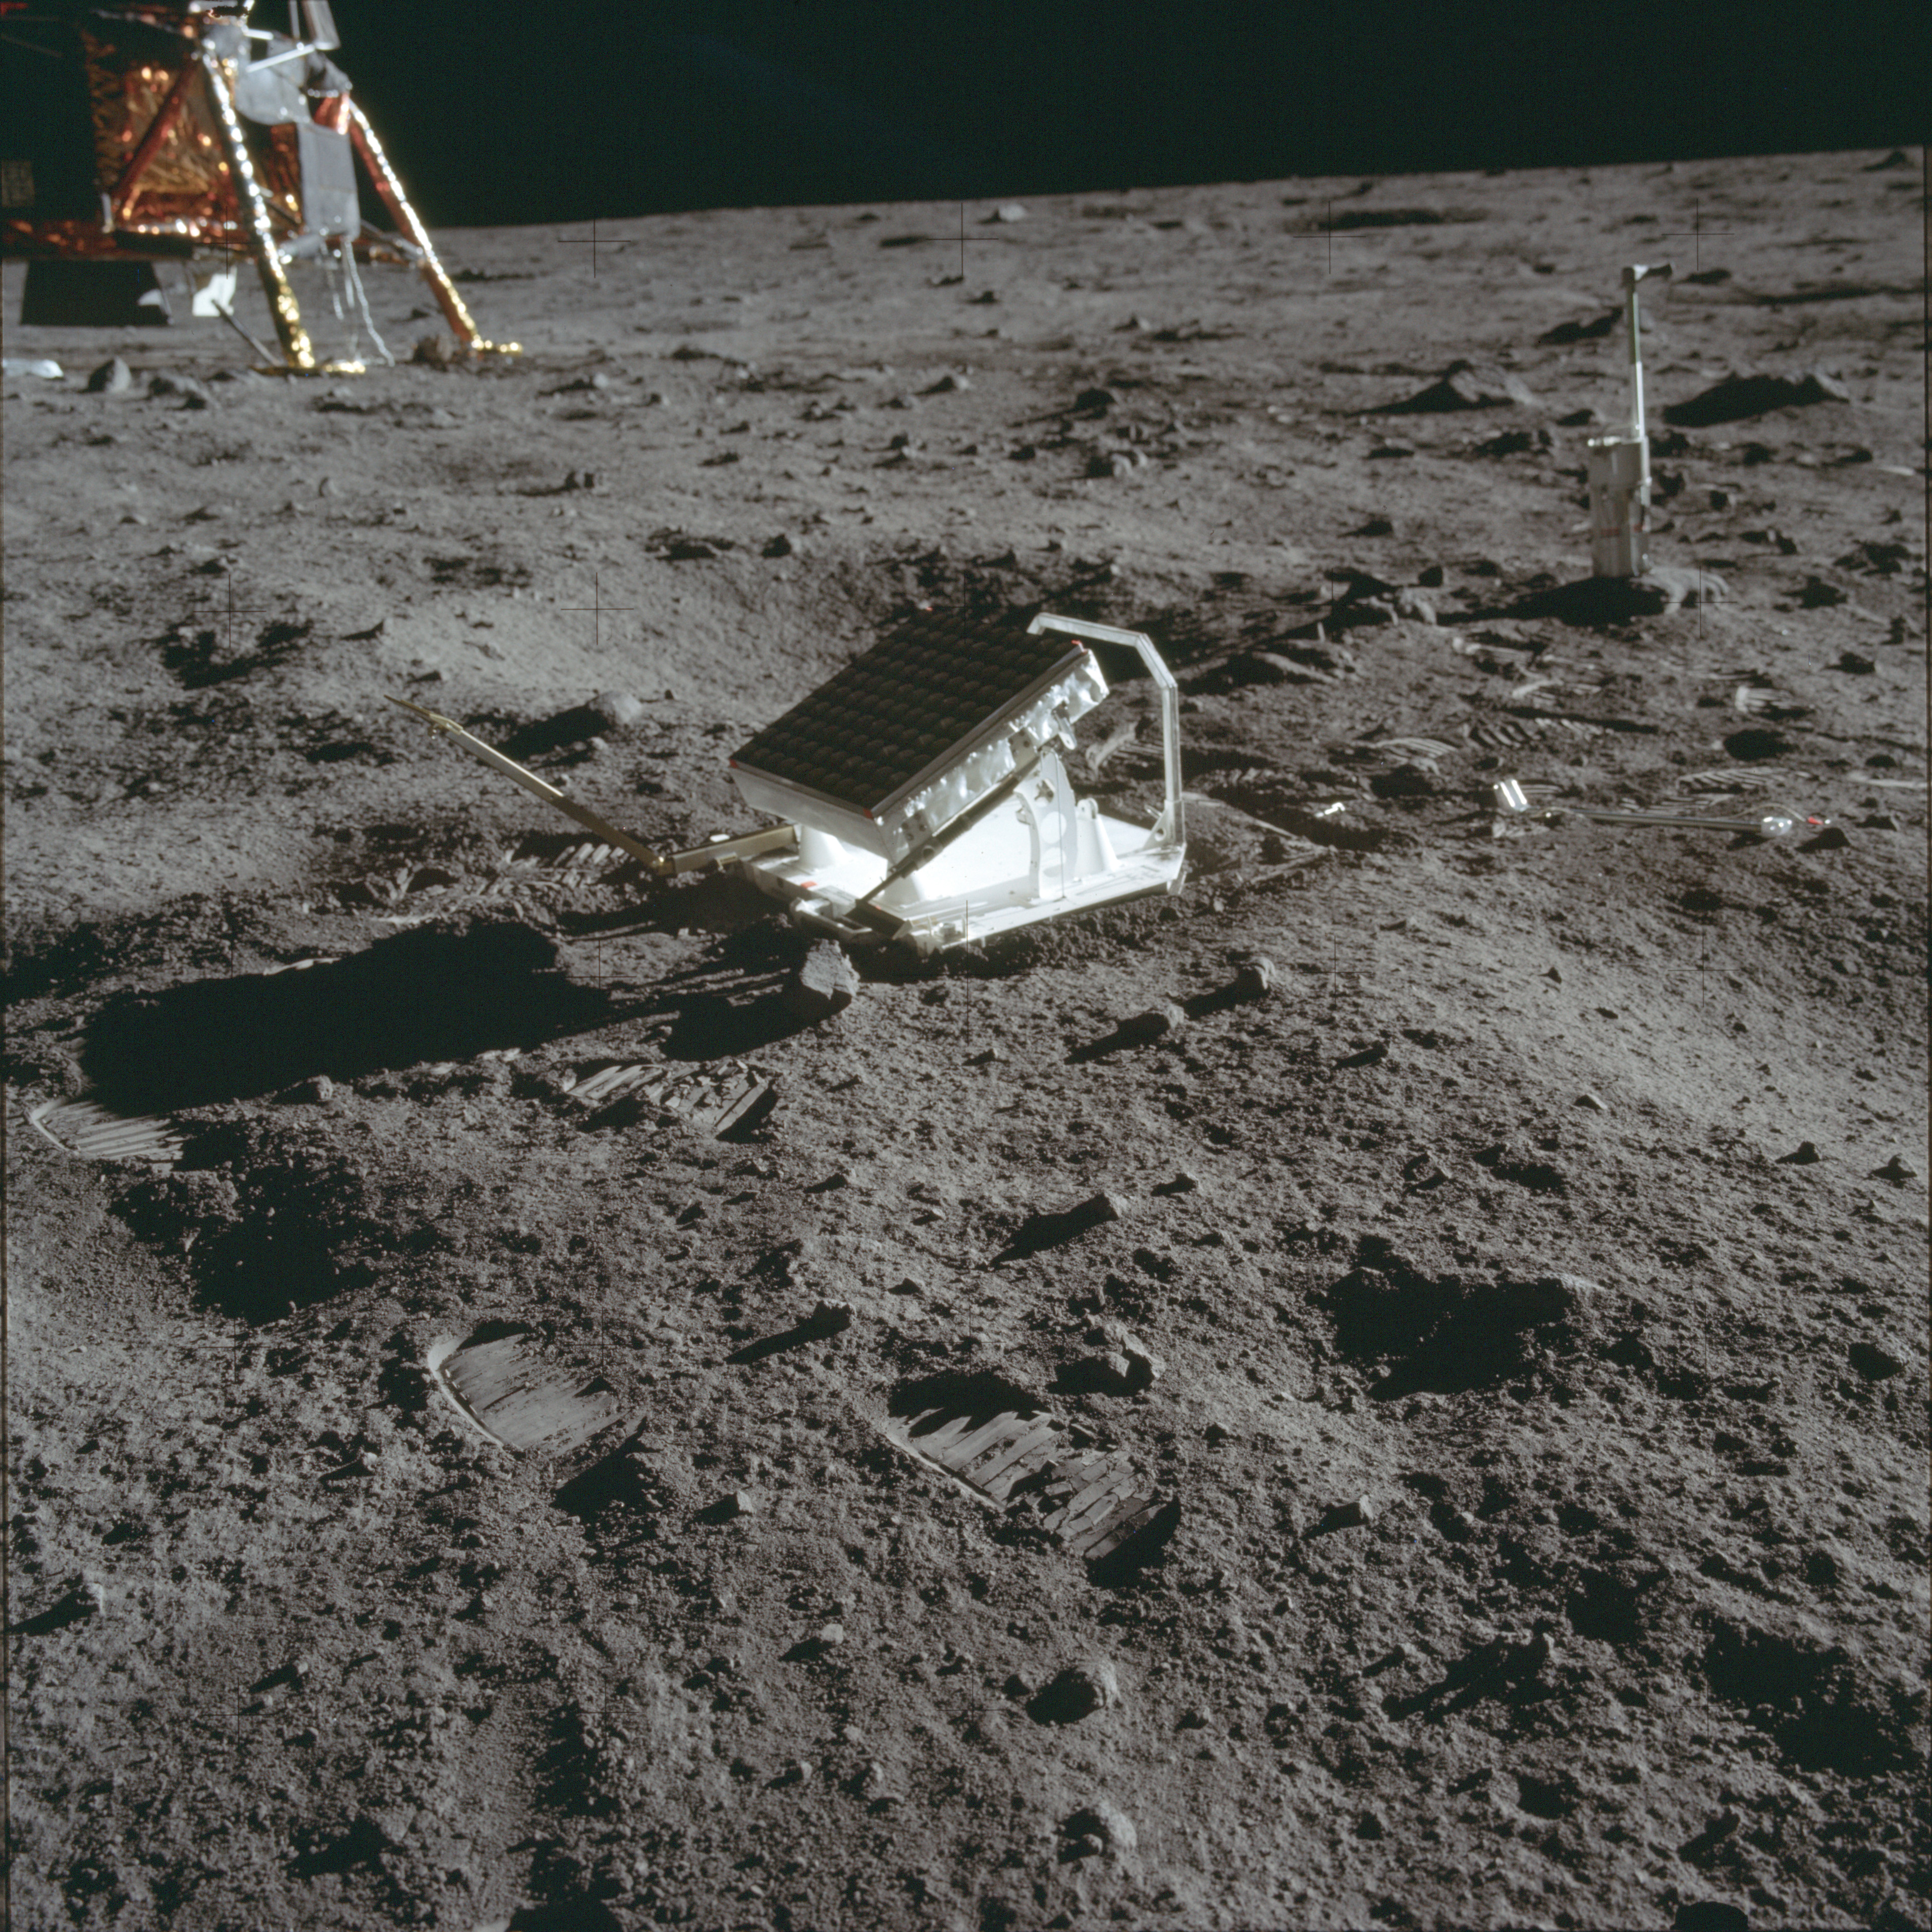
AS11-40-5950 Browse or print resolution. View past Passive Seismic Experiment (PSE) and Laser Ranging Retro-Reflector (LRRR) towards LM. Image credit: Image Science and Analysis Laboratory, NASA-Johnson Space Center. |

|
AS11-40-5951 Browse or print resolution. Aldrin deploys the Passive Seismic Experiment (PSE). Image credit: Image Science and Analysis Laboratory, NASA-Johnson Space Center. |
|
AS11-40-5952 Browse or print resolution. Laser Ranging Retro-Reflector (LRRR) deployed on lunar surface. Image credit: Image Science and Analysis Laboratory, NASA-Johnson Space Center. |

|
AS11-40-5953 Browse or print resolution. Detail of Passive Seismic Experiment (PSE). Image credit: Image Science and Analysis Laboratory, NASA-Johnson Space Center. |

|
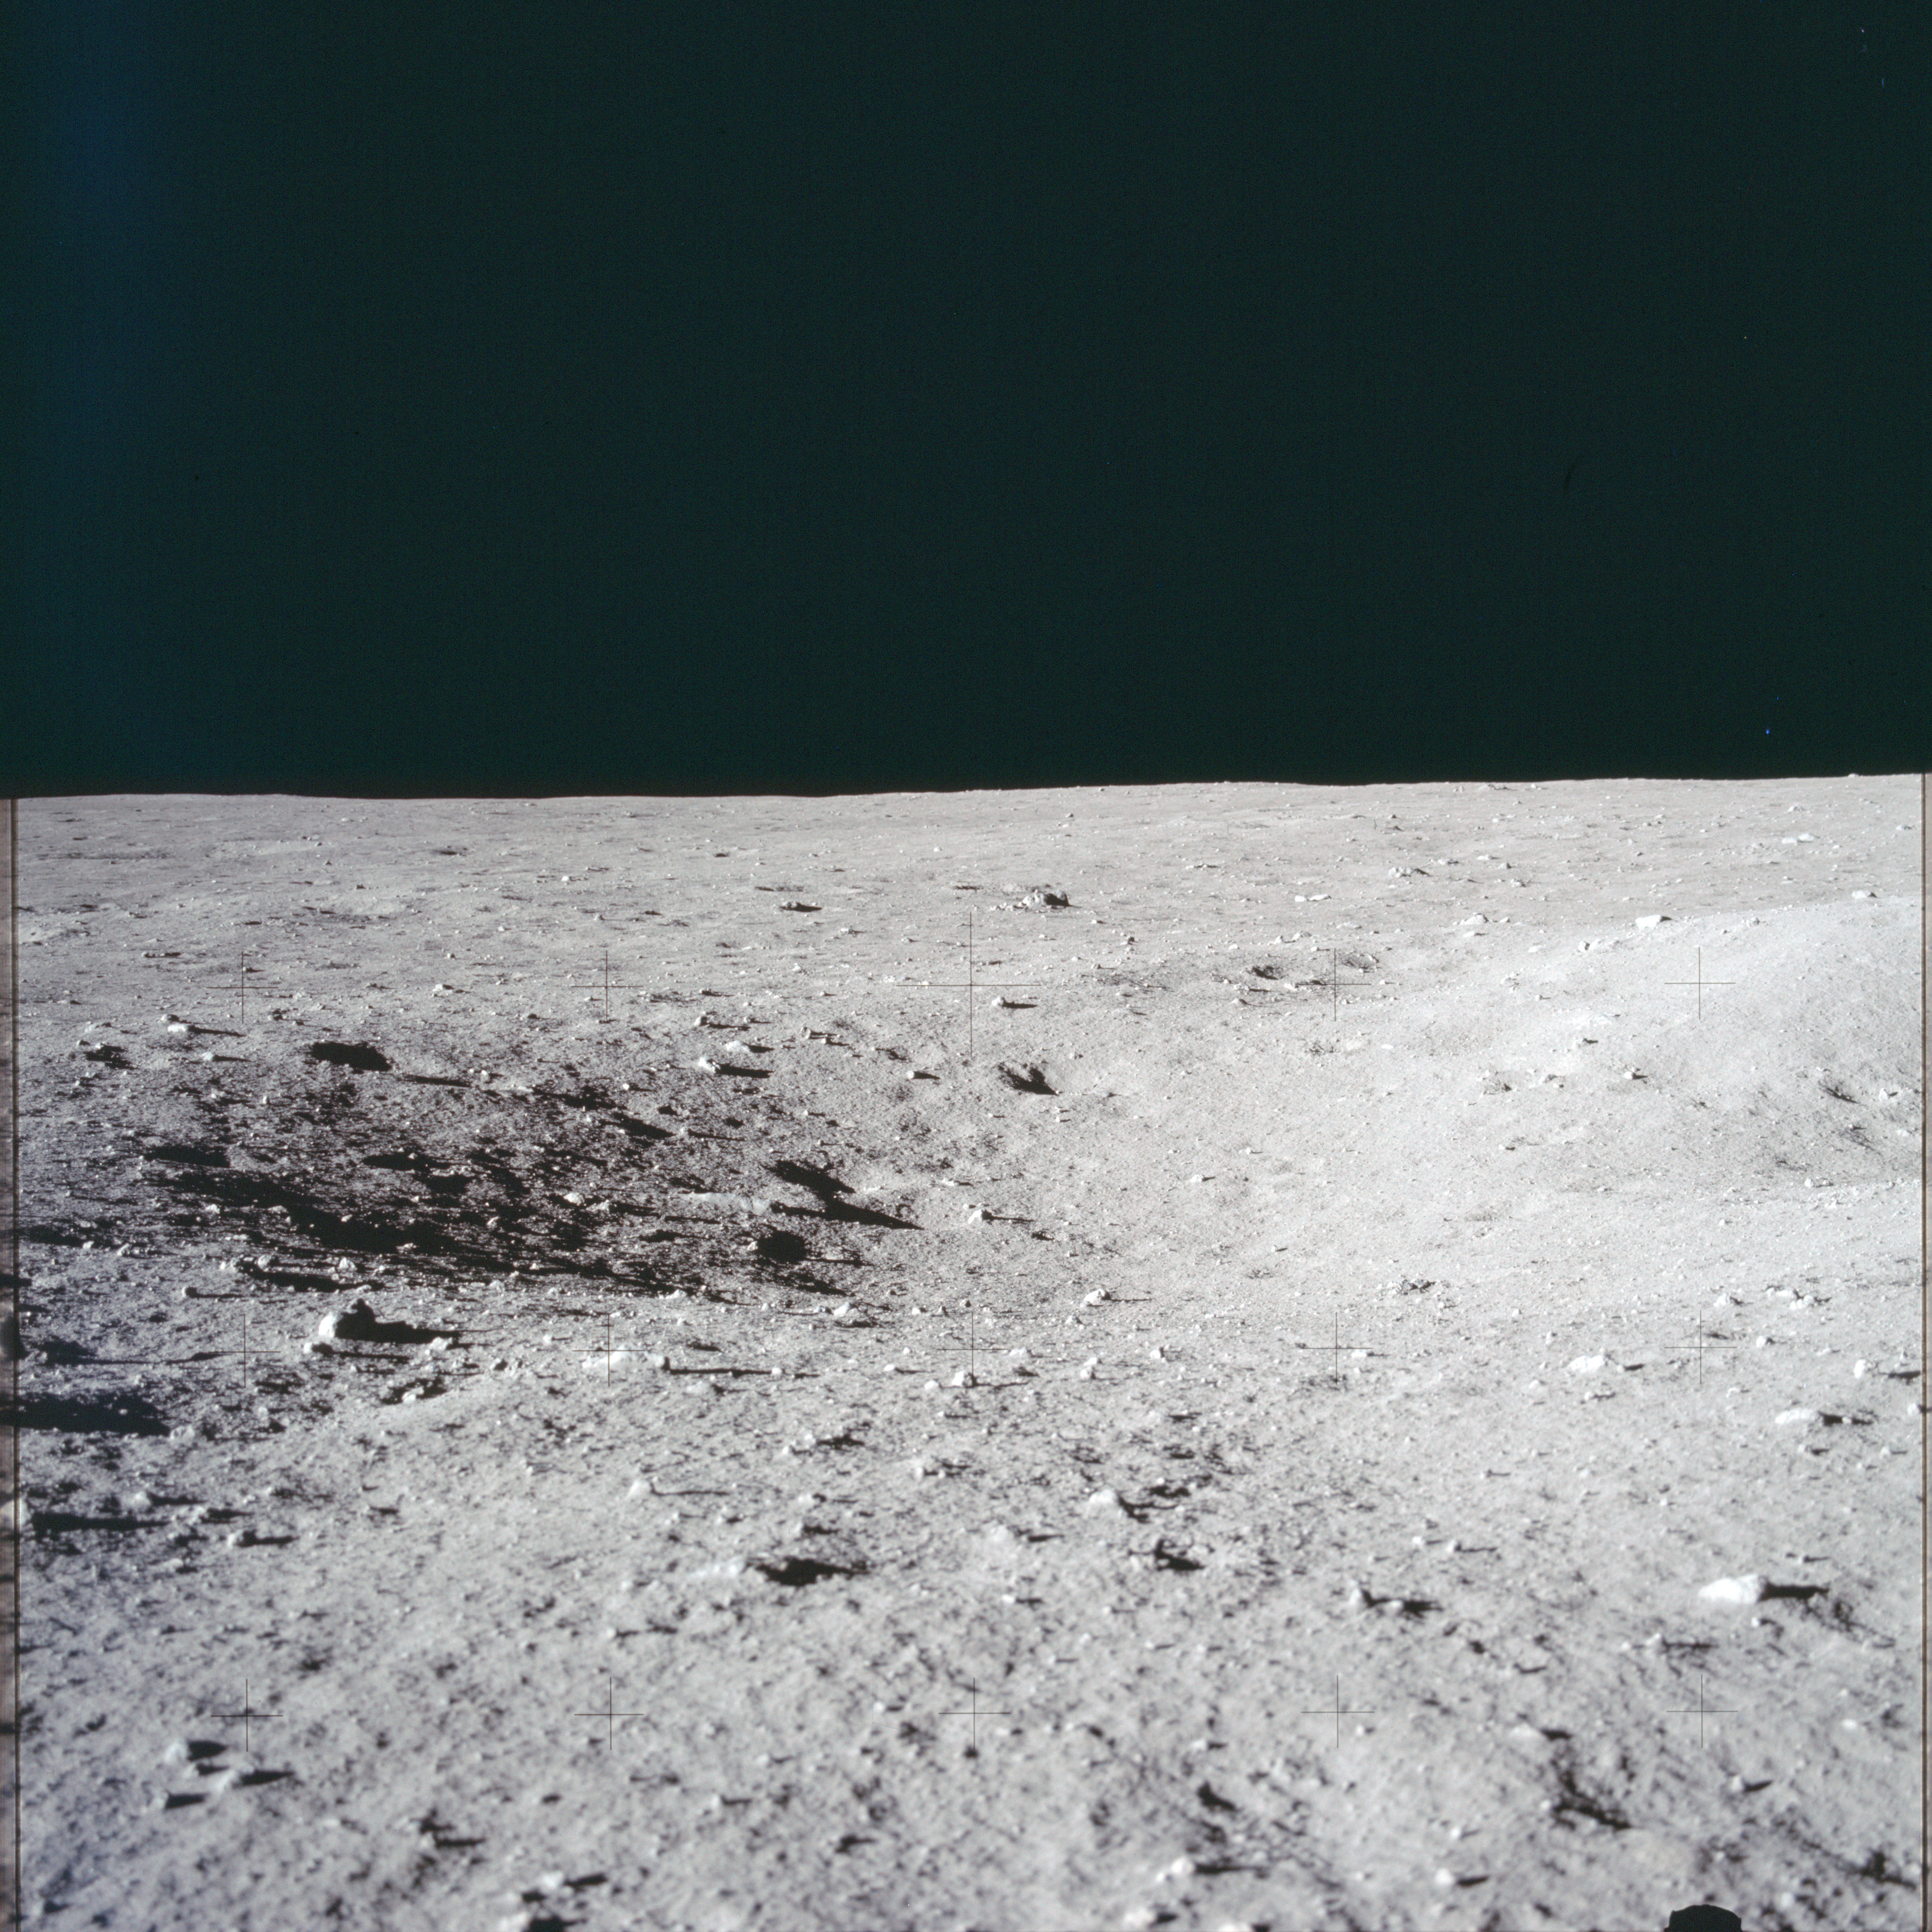
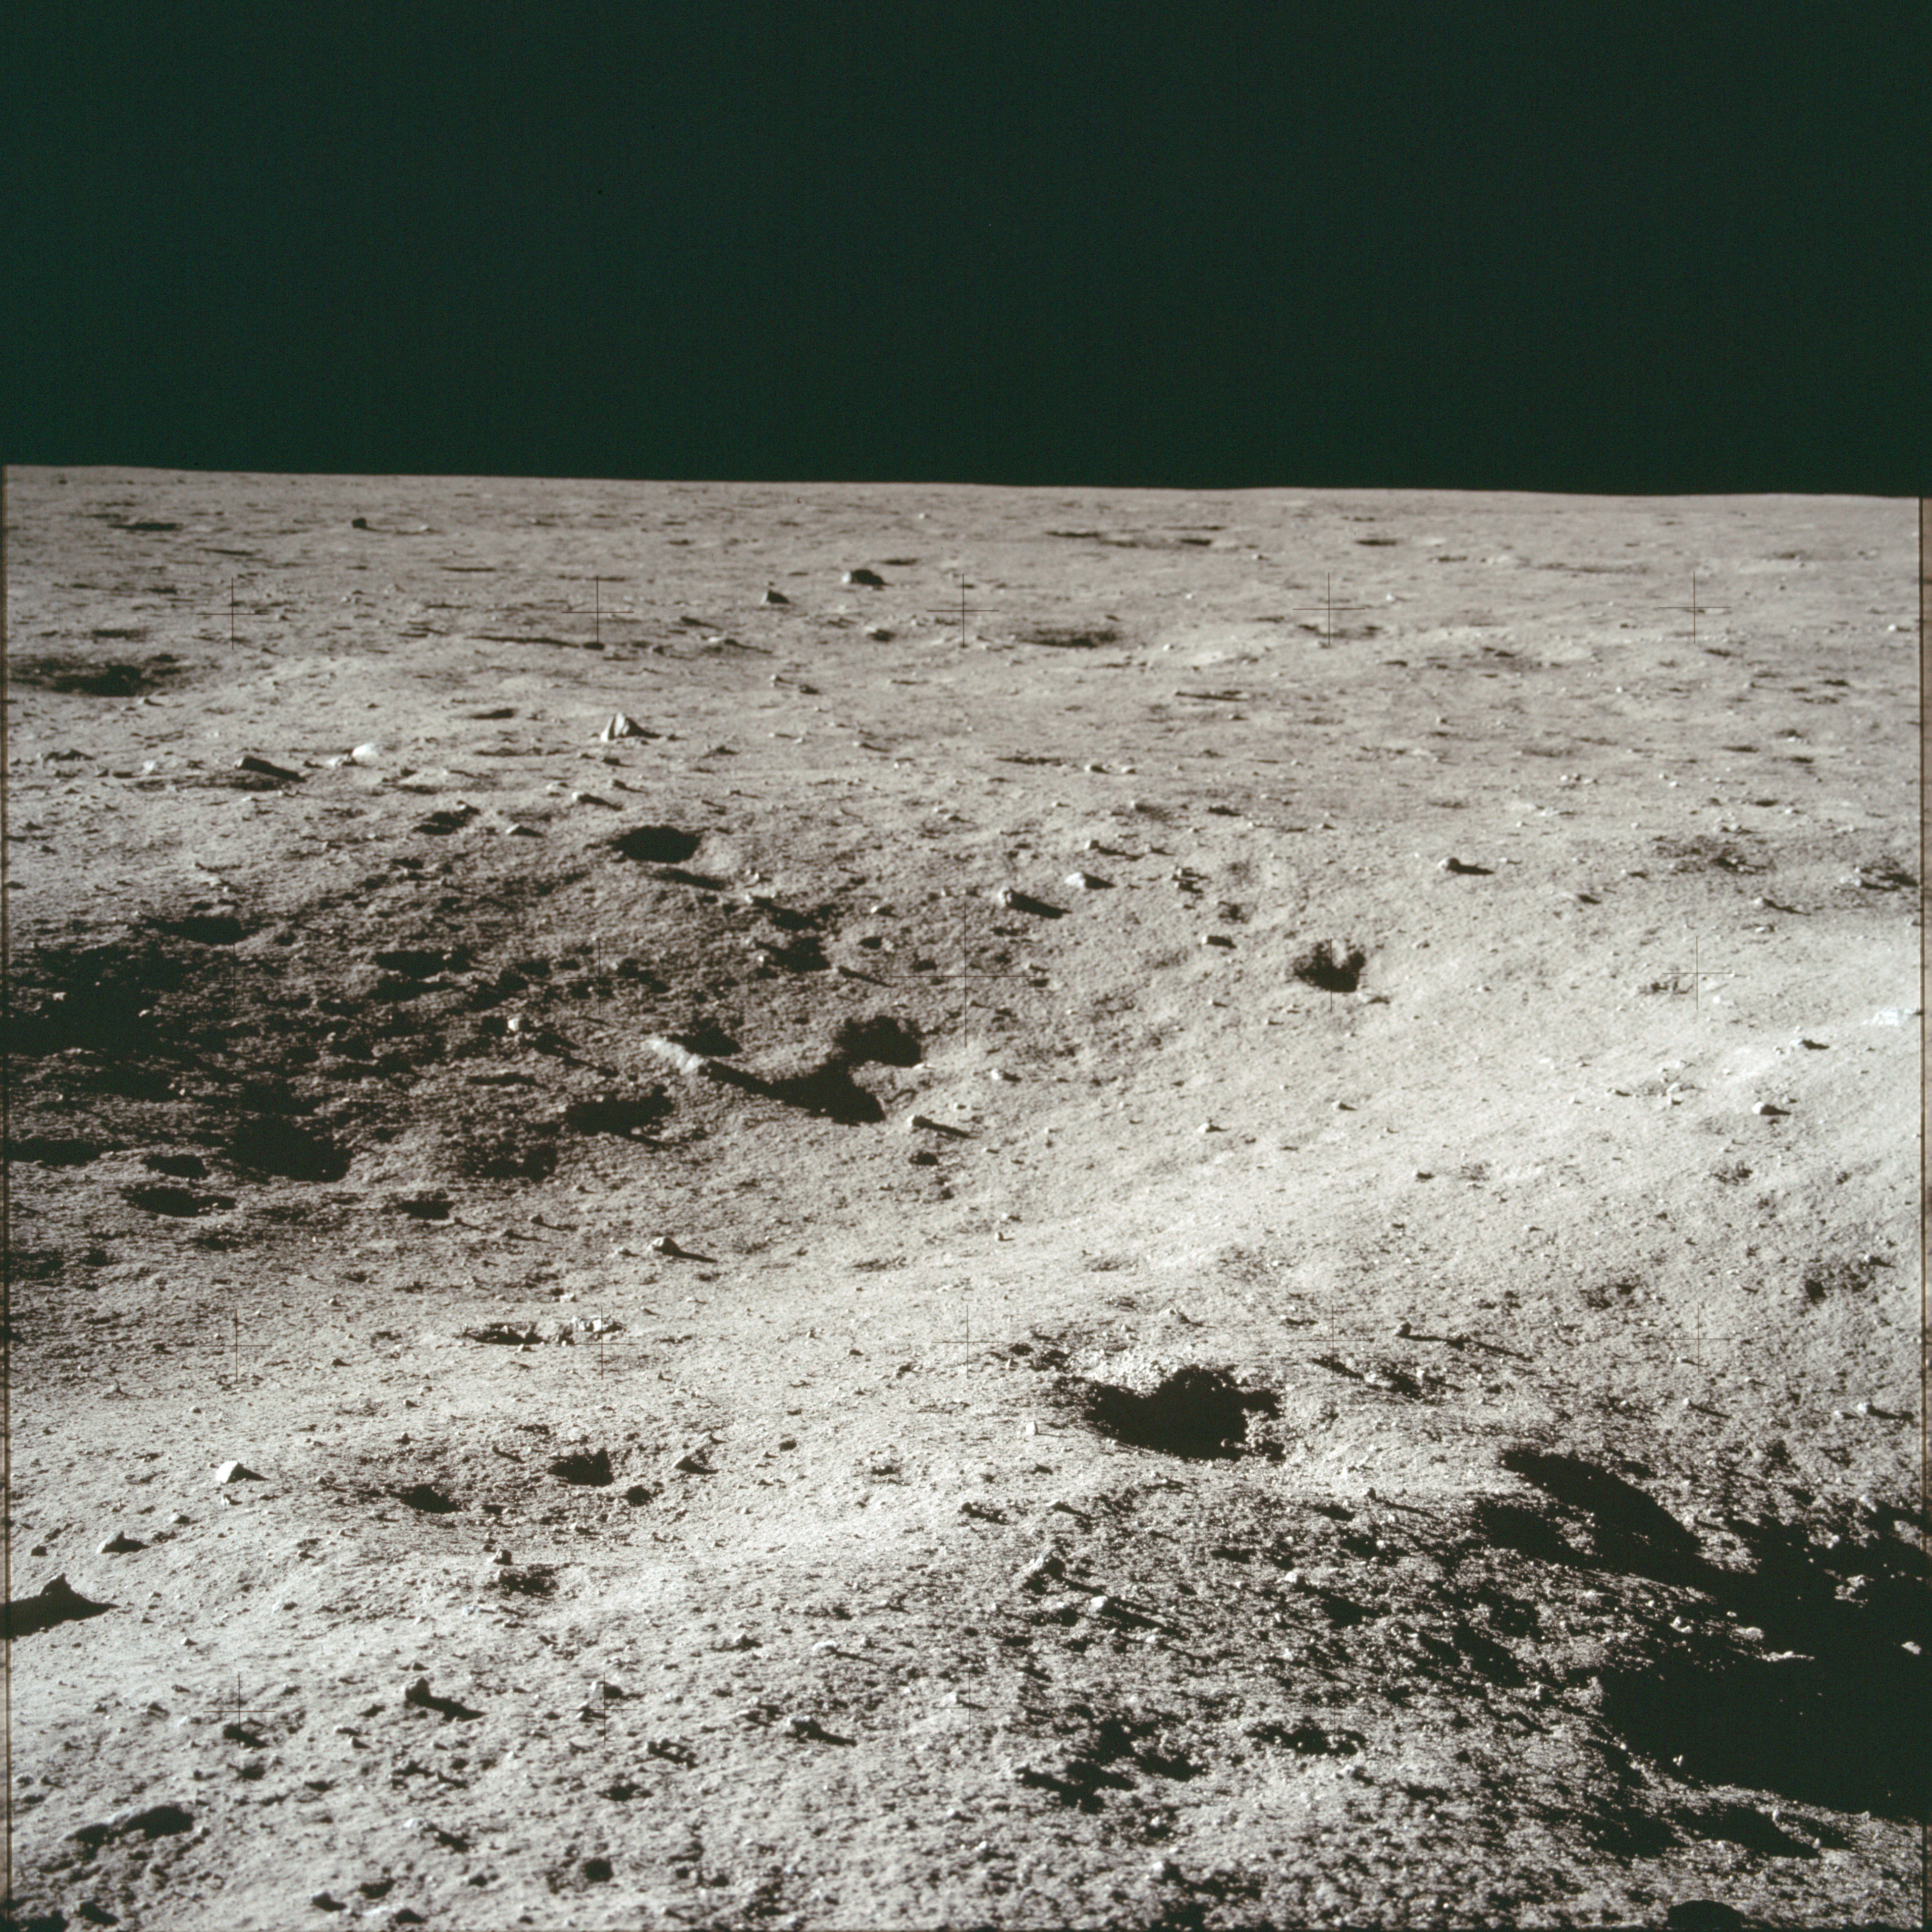
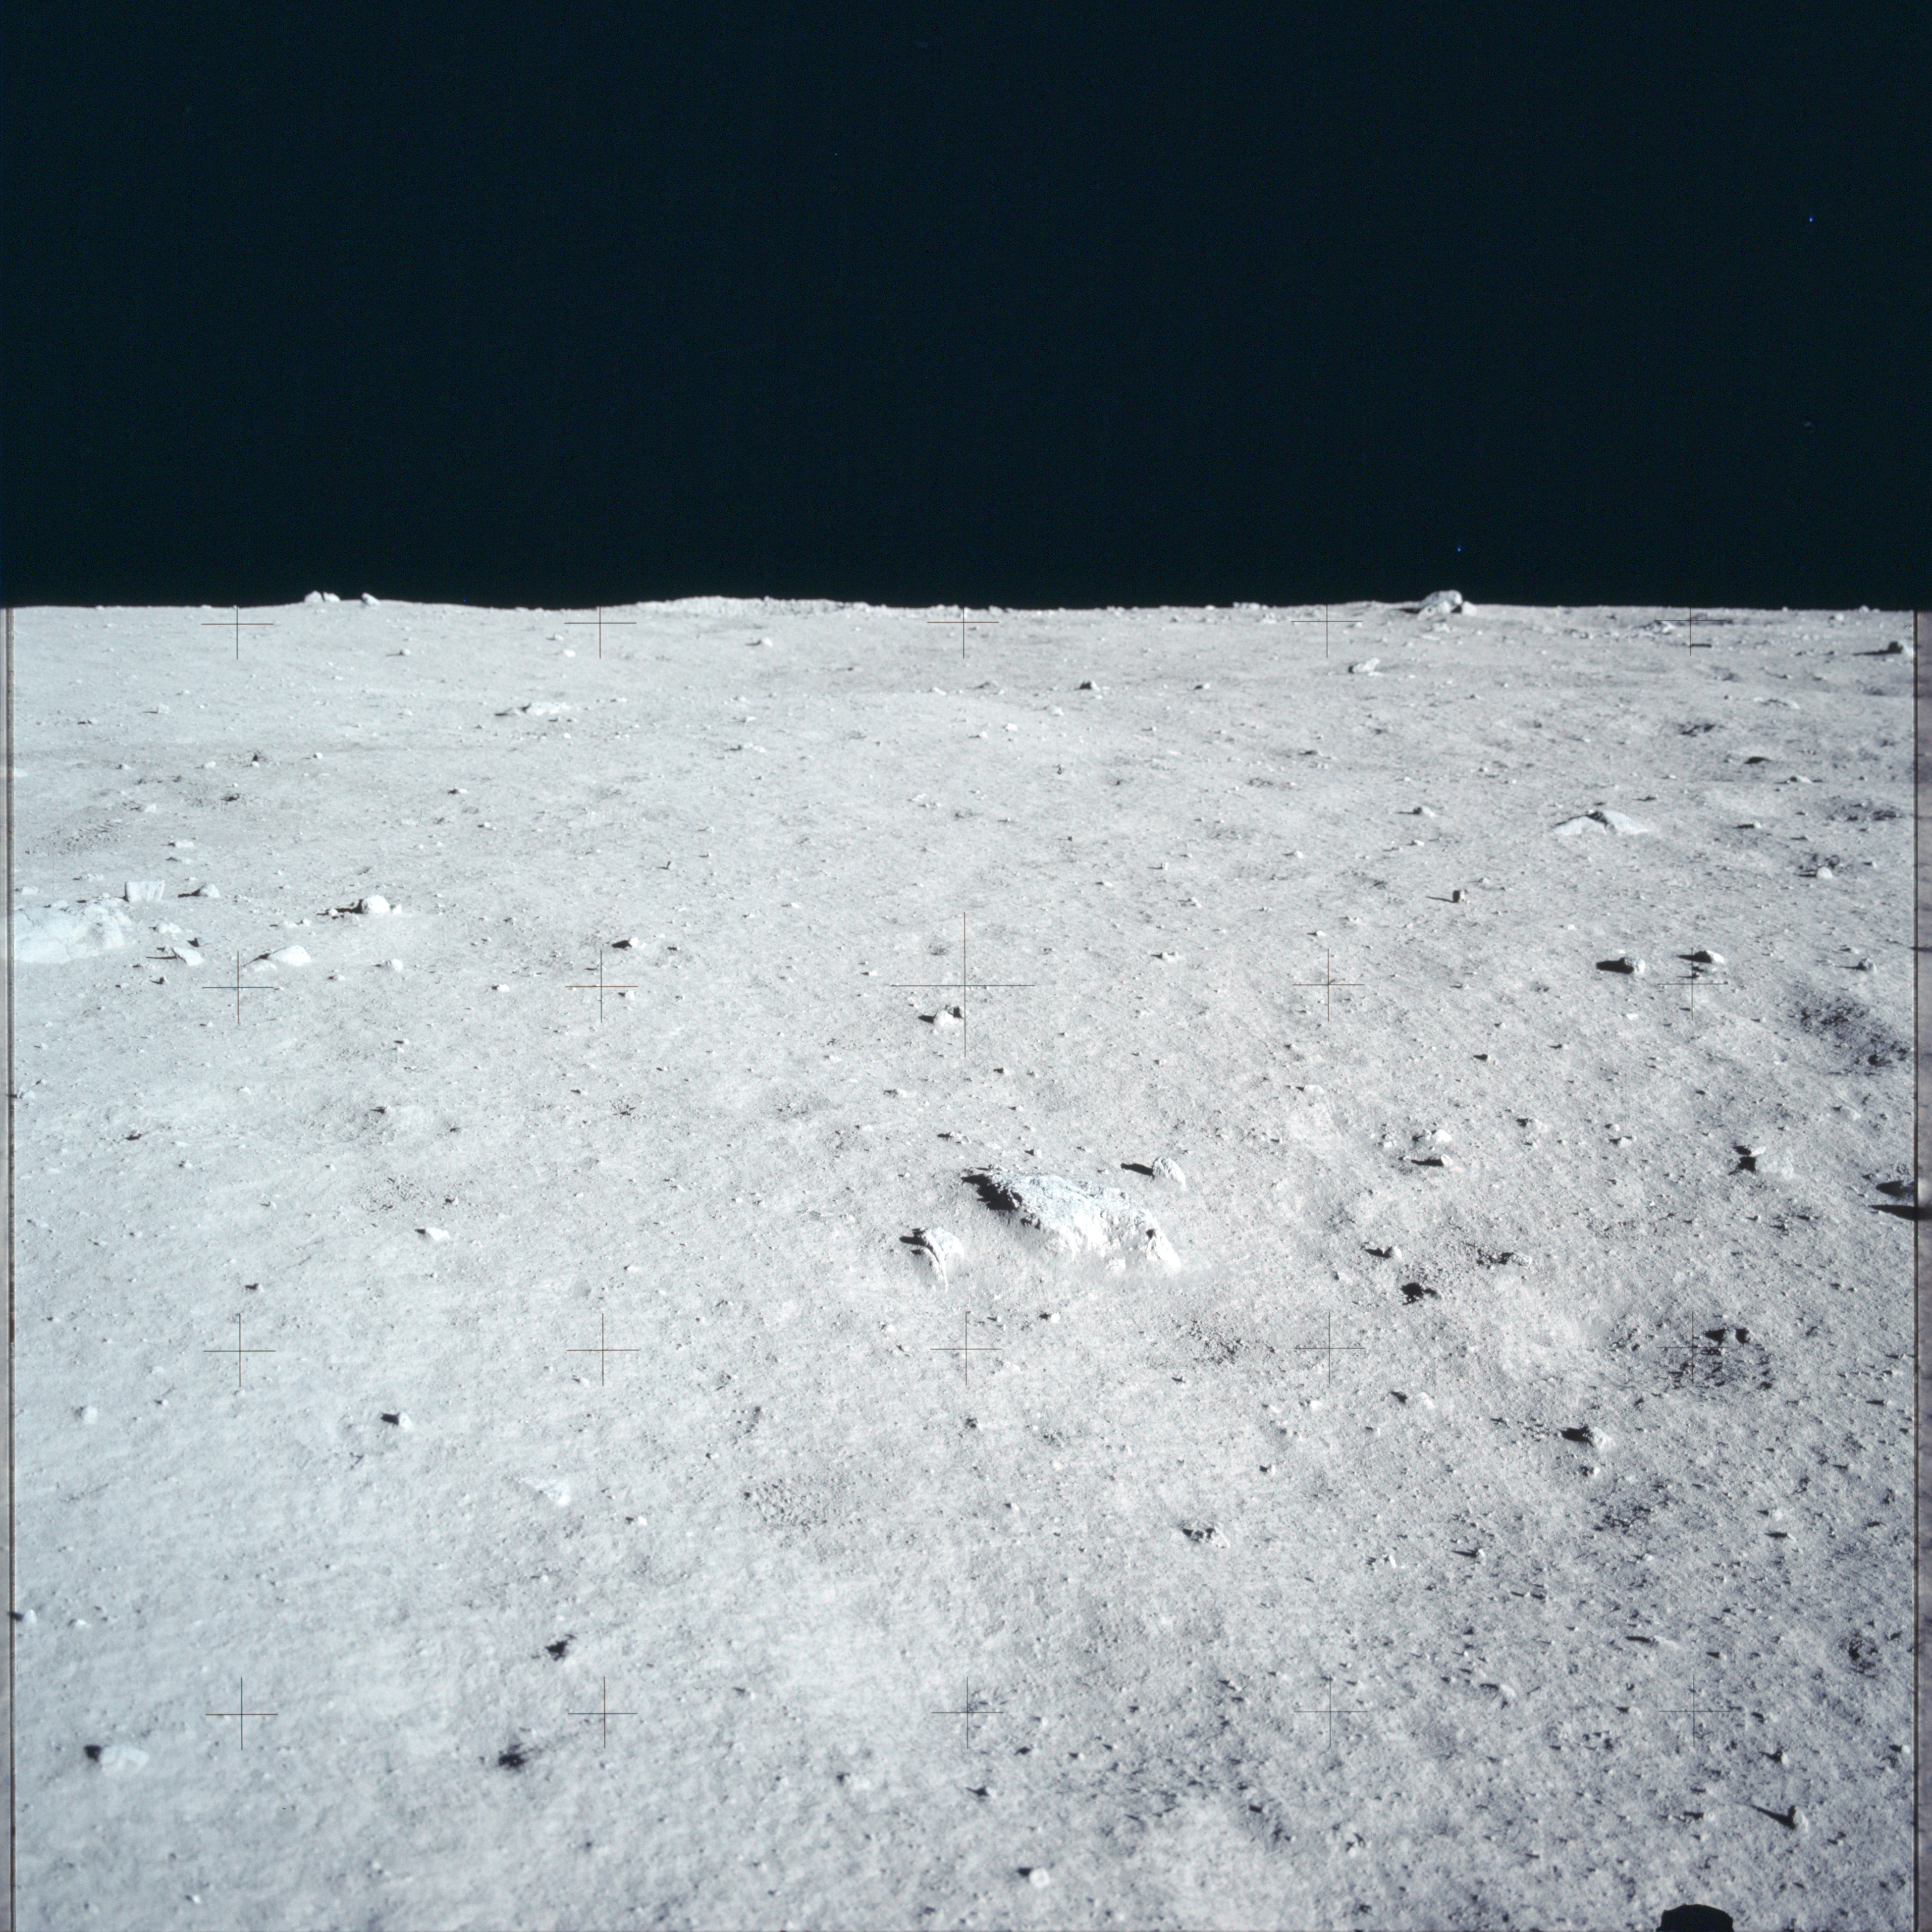
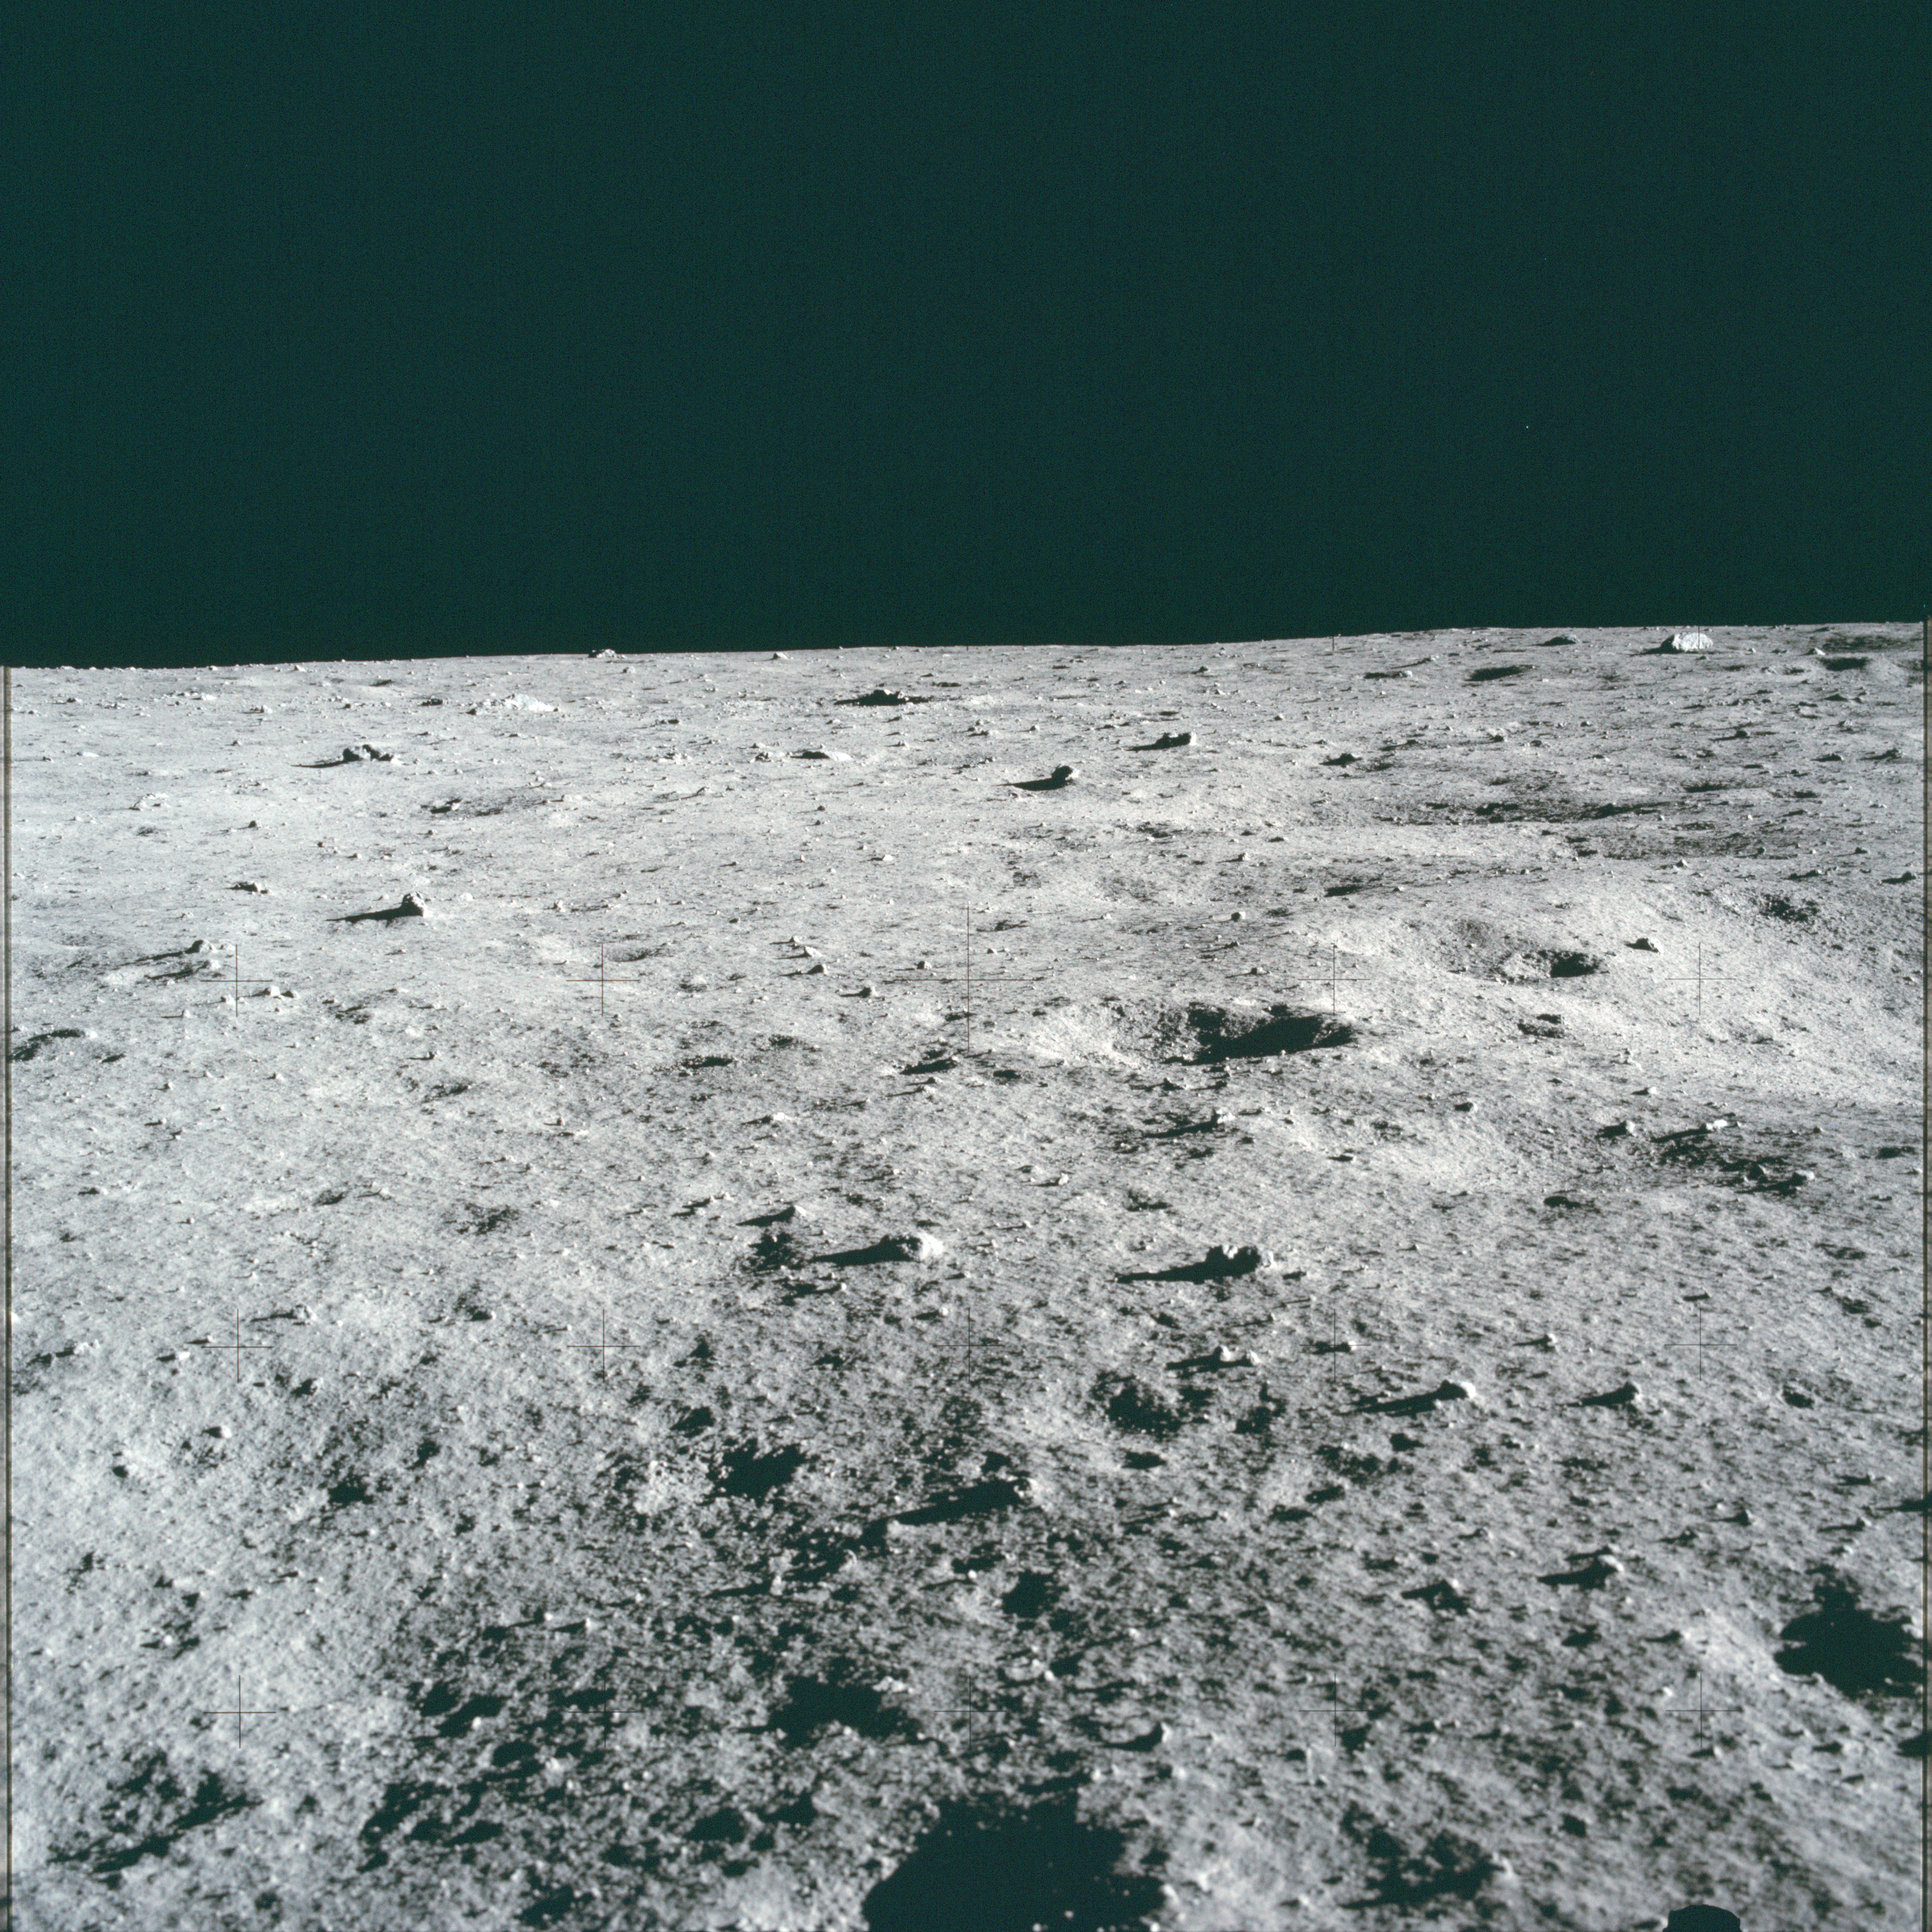
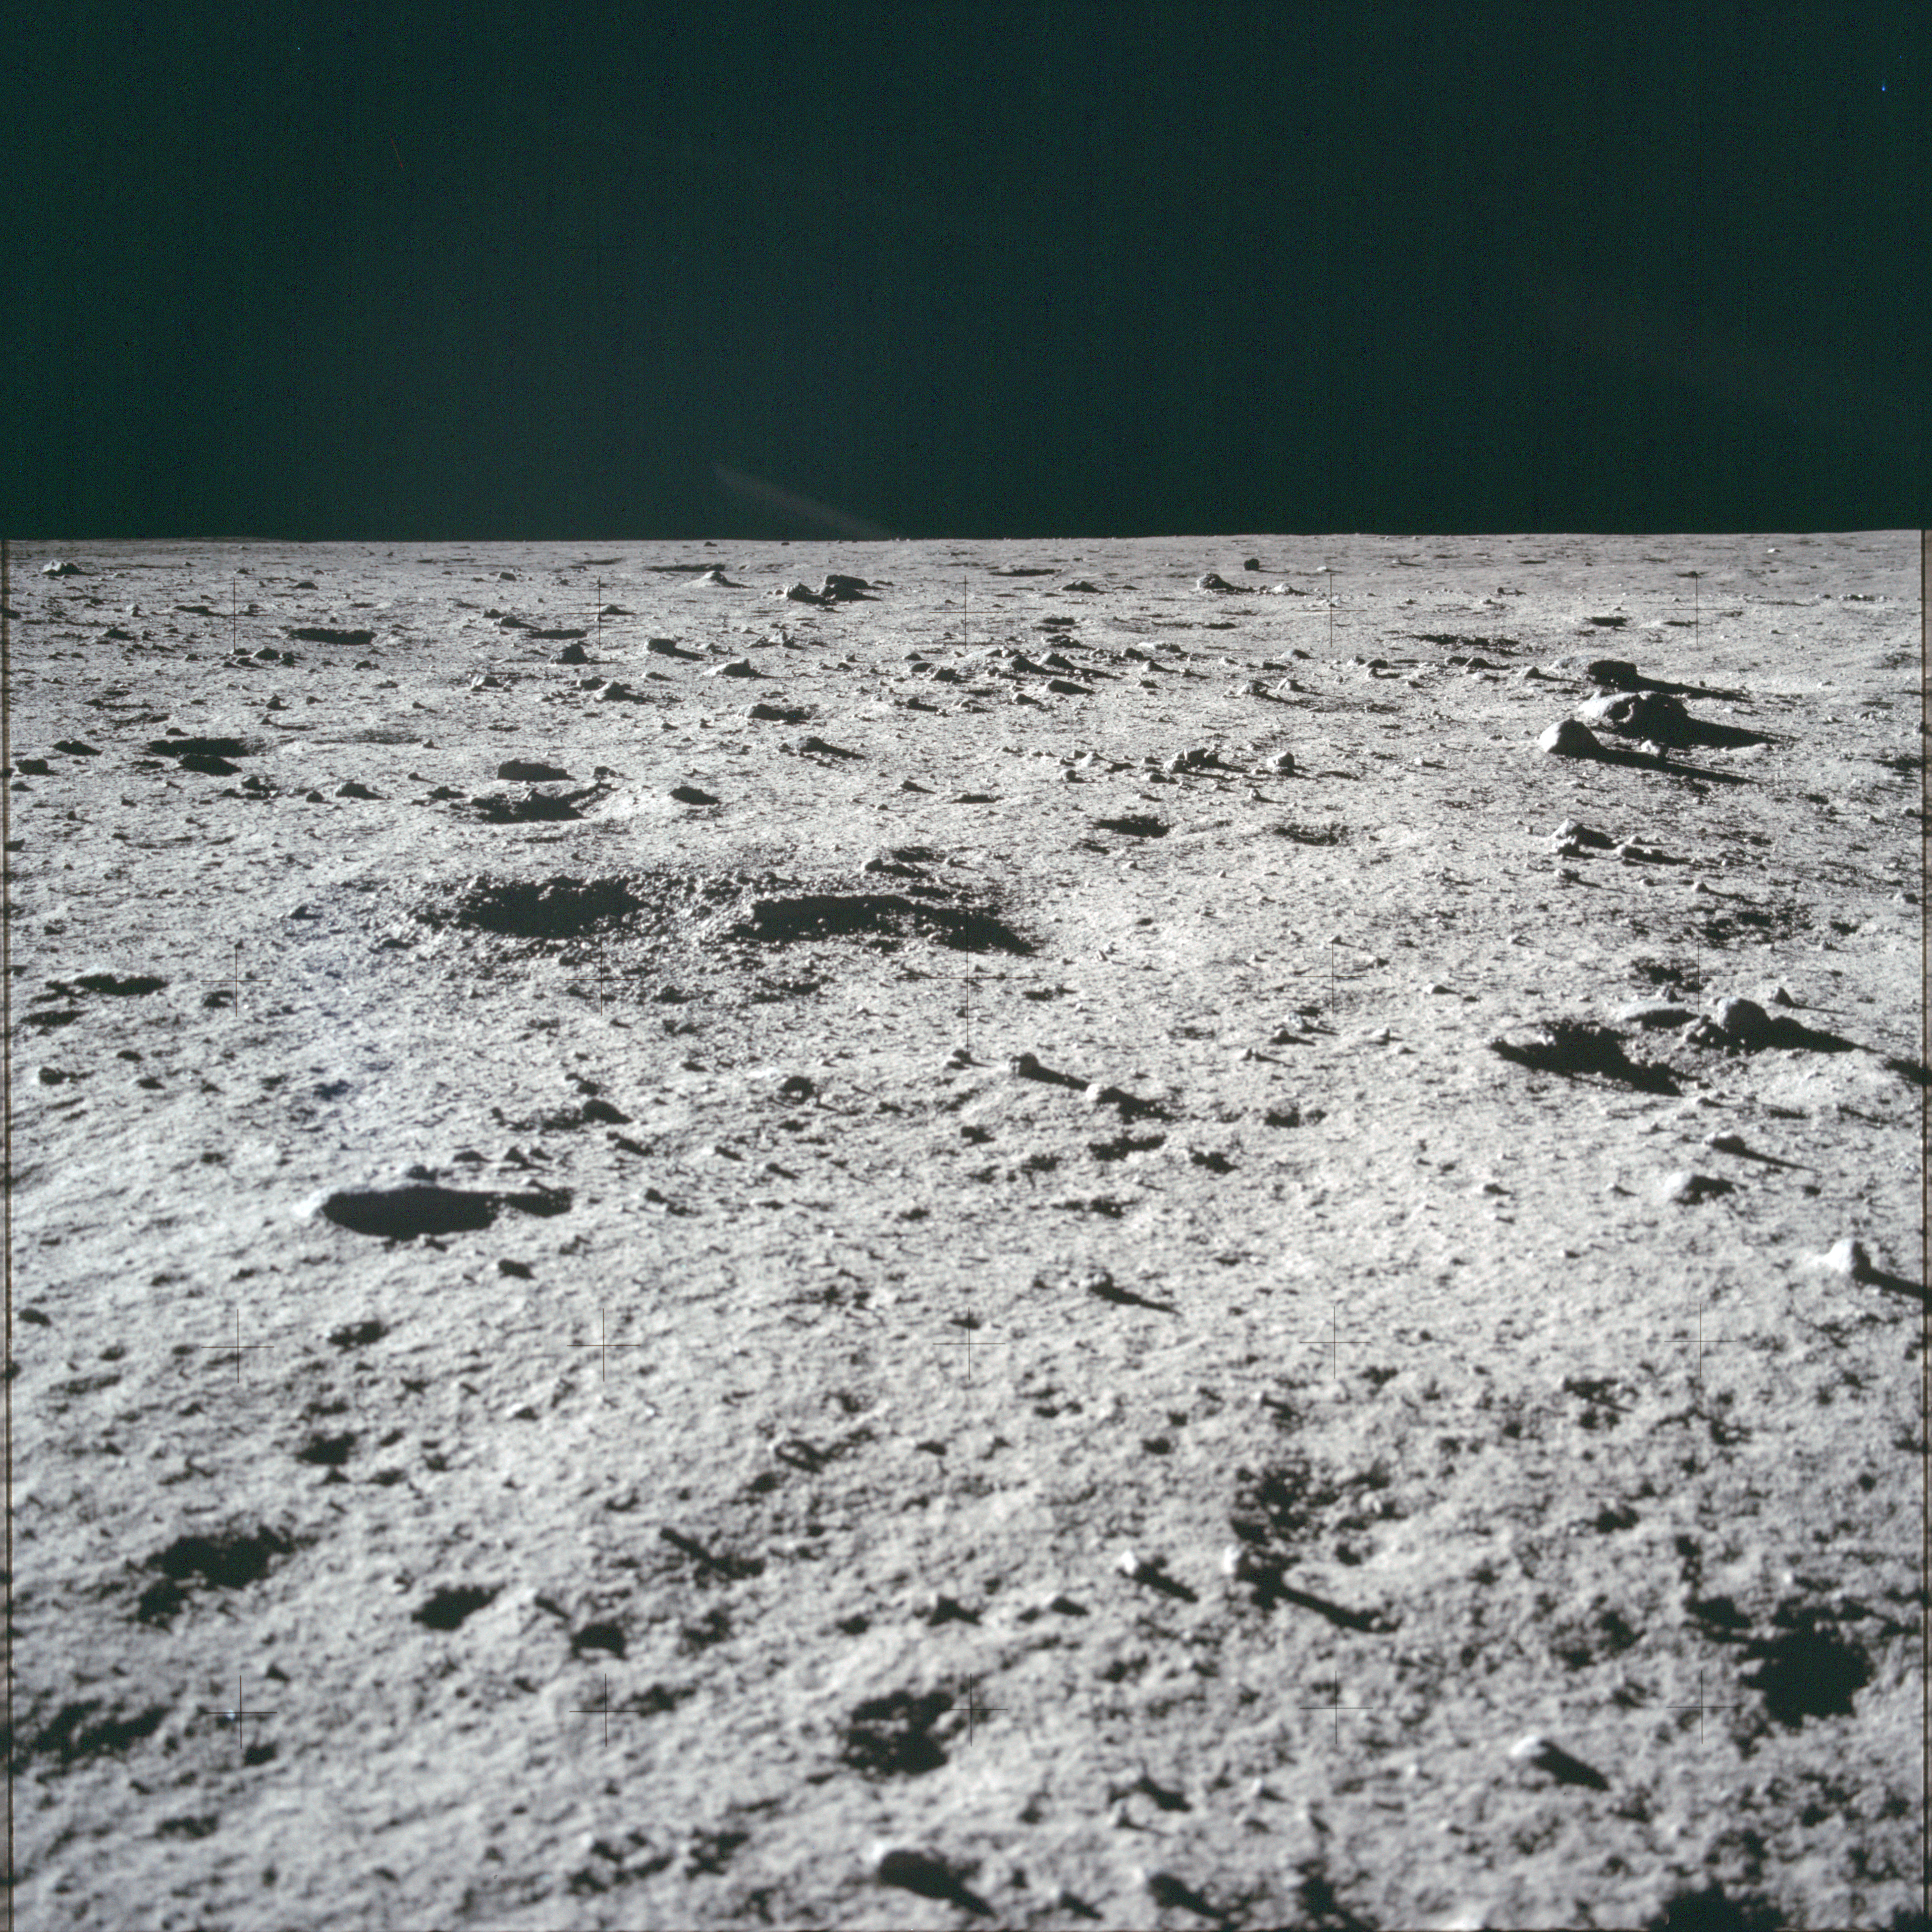
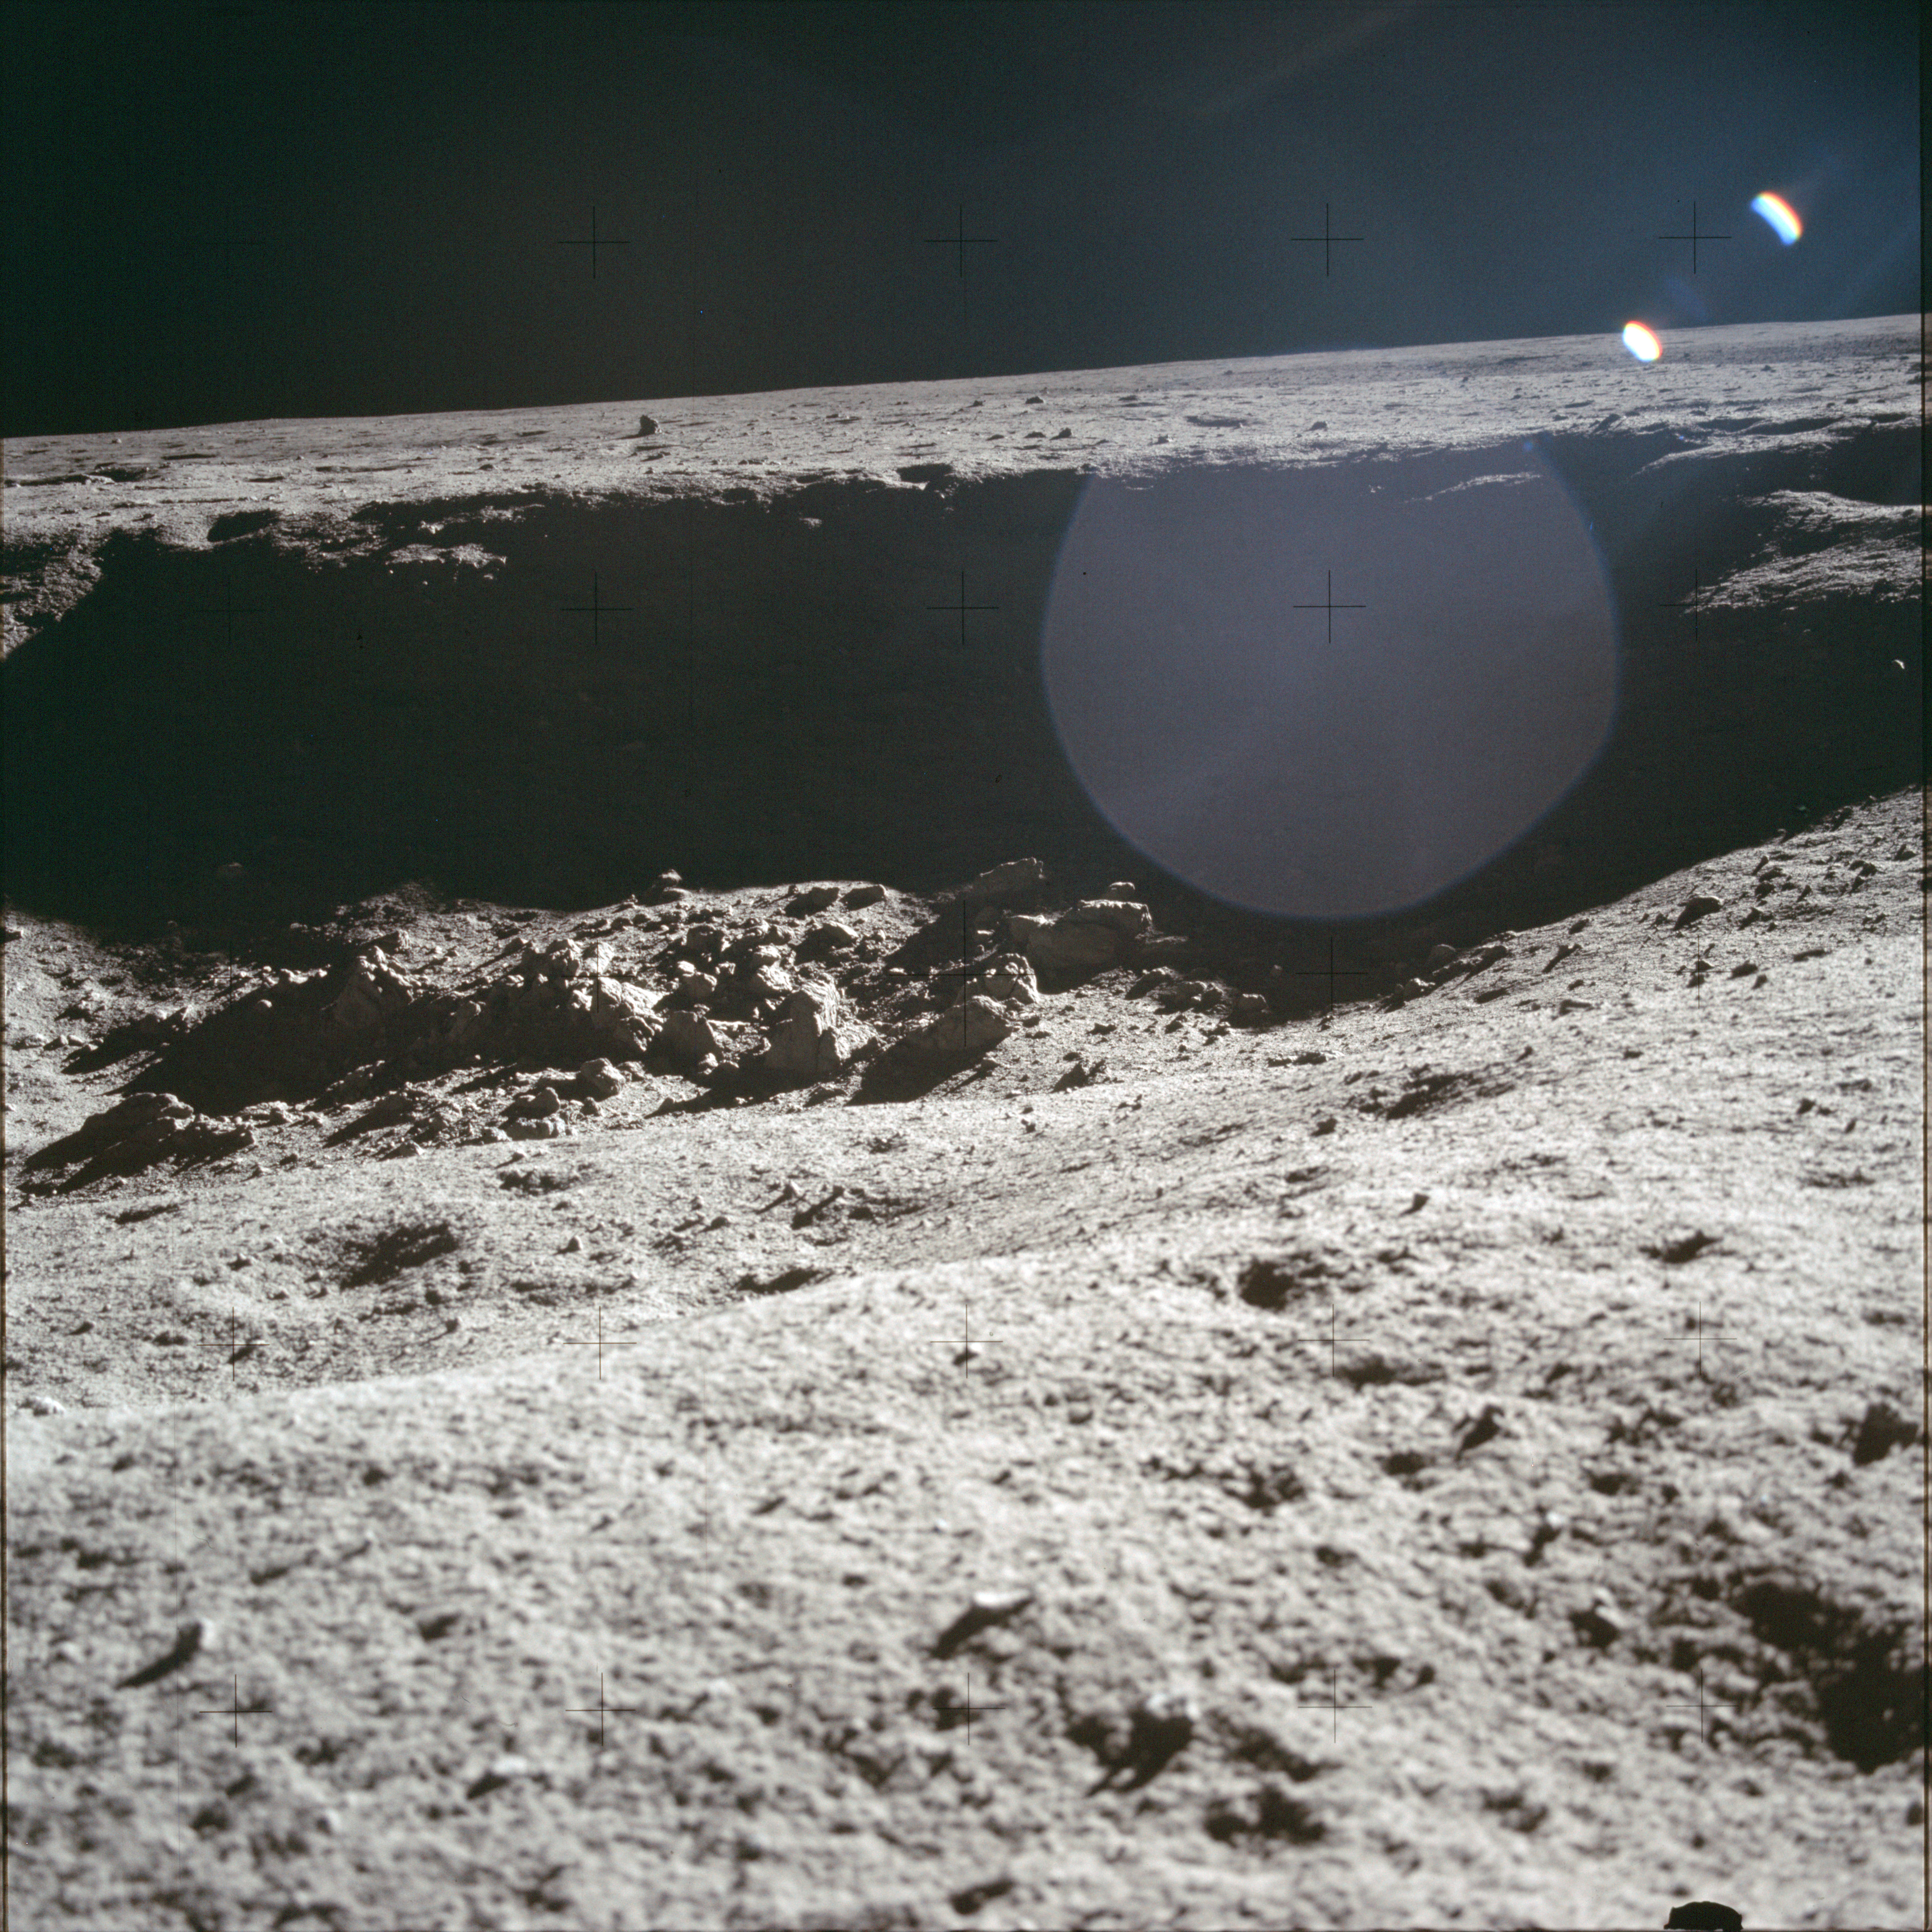
AS11-40-5954 Browse or print resolution. Interior of East Crater (Little West Crater). Image credit: Image Science and Analysis Laboratory, NASA-Johnson Space Center. |
|
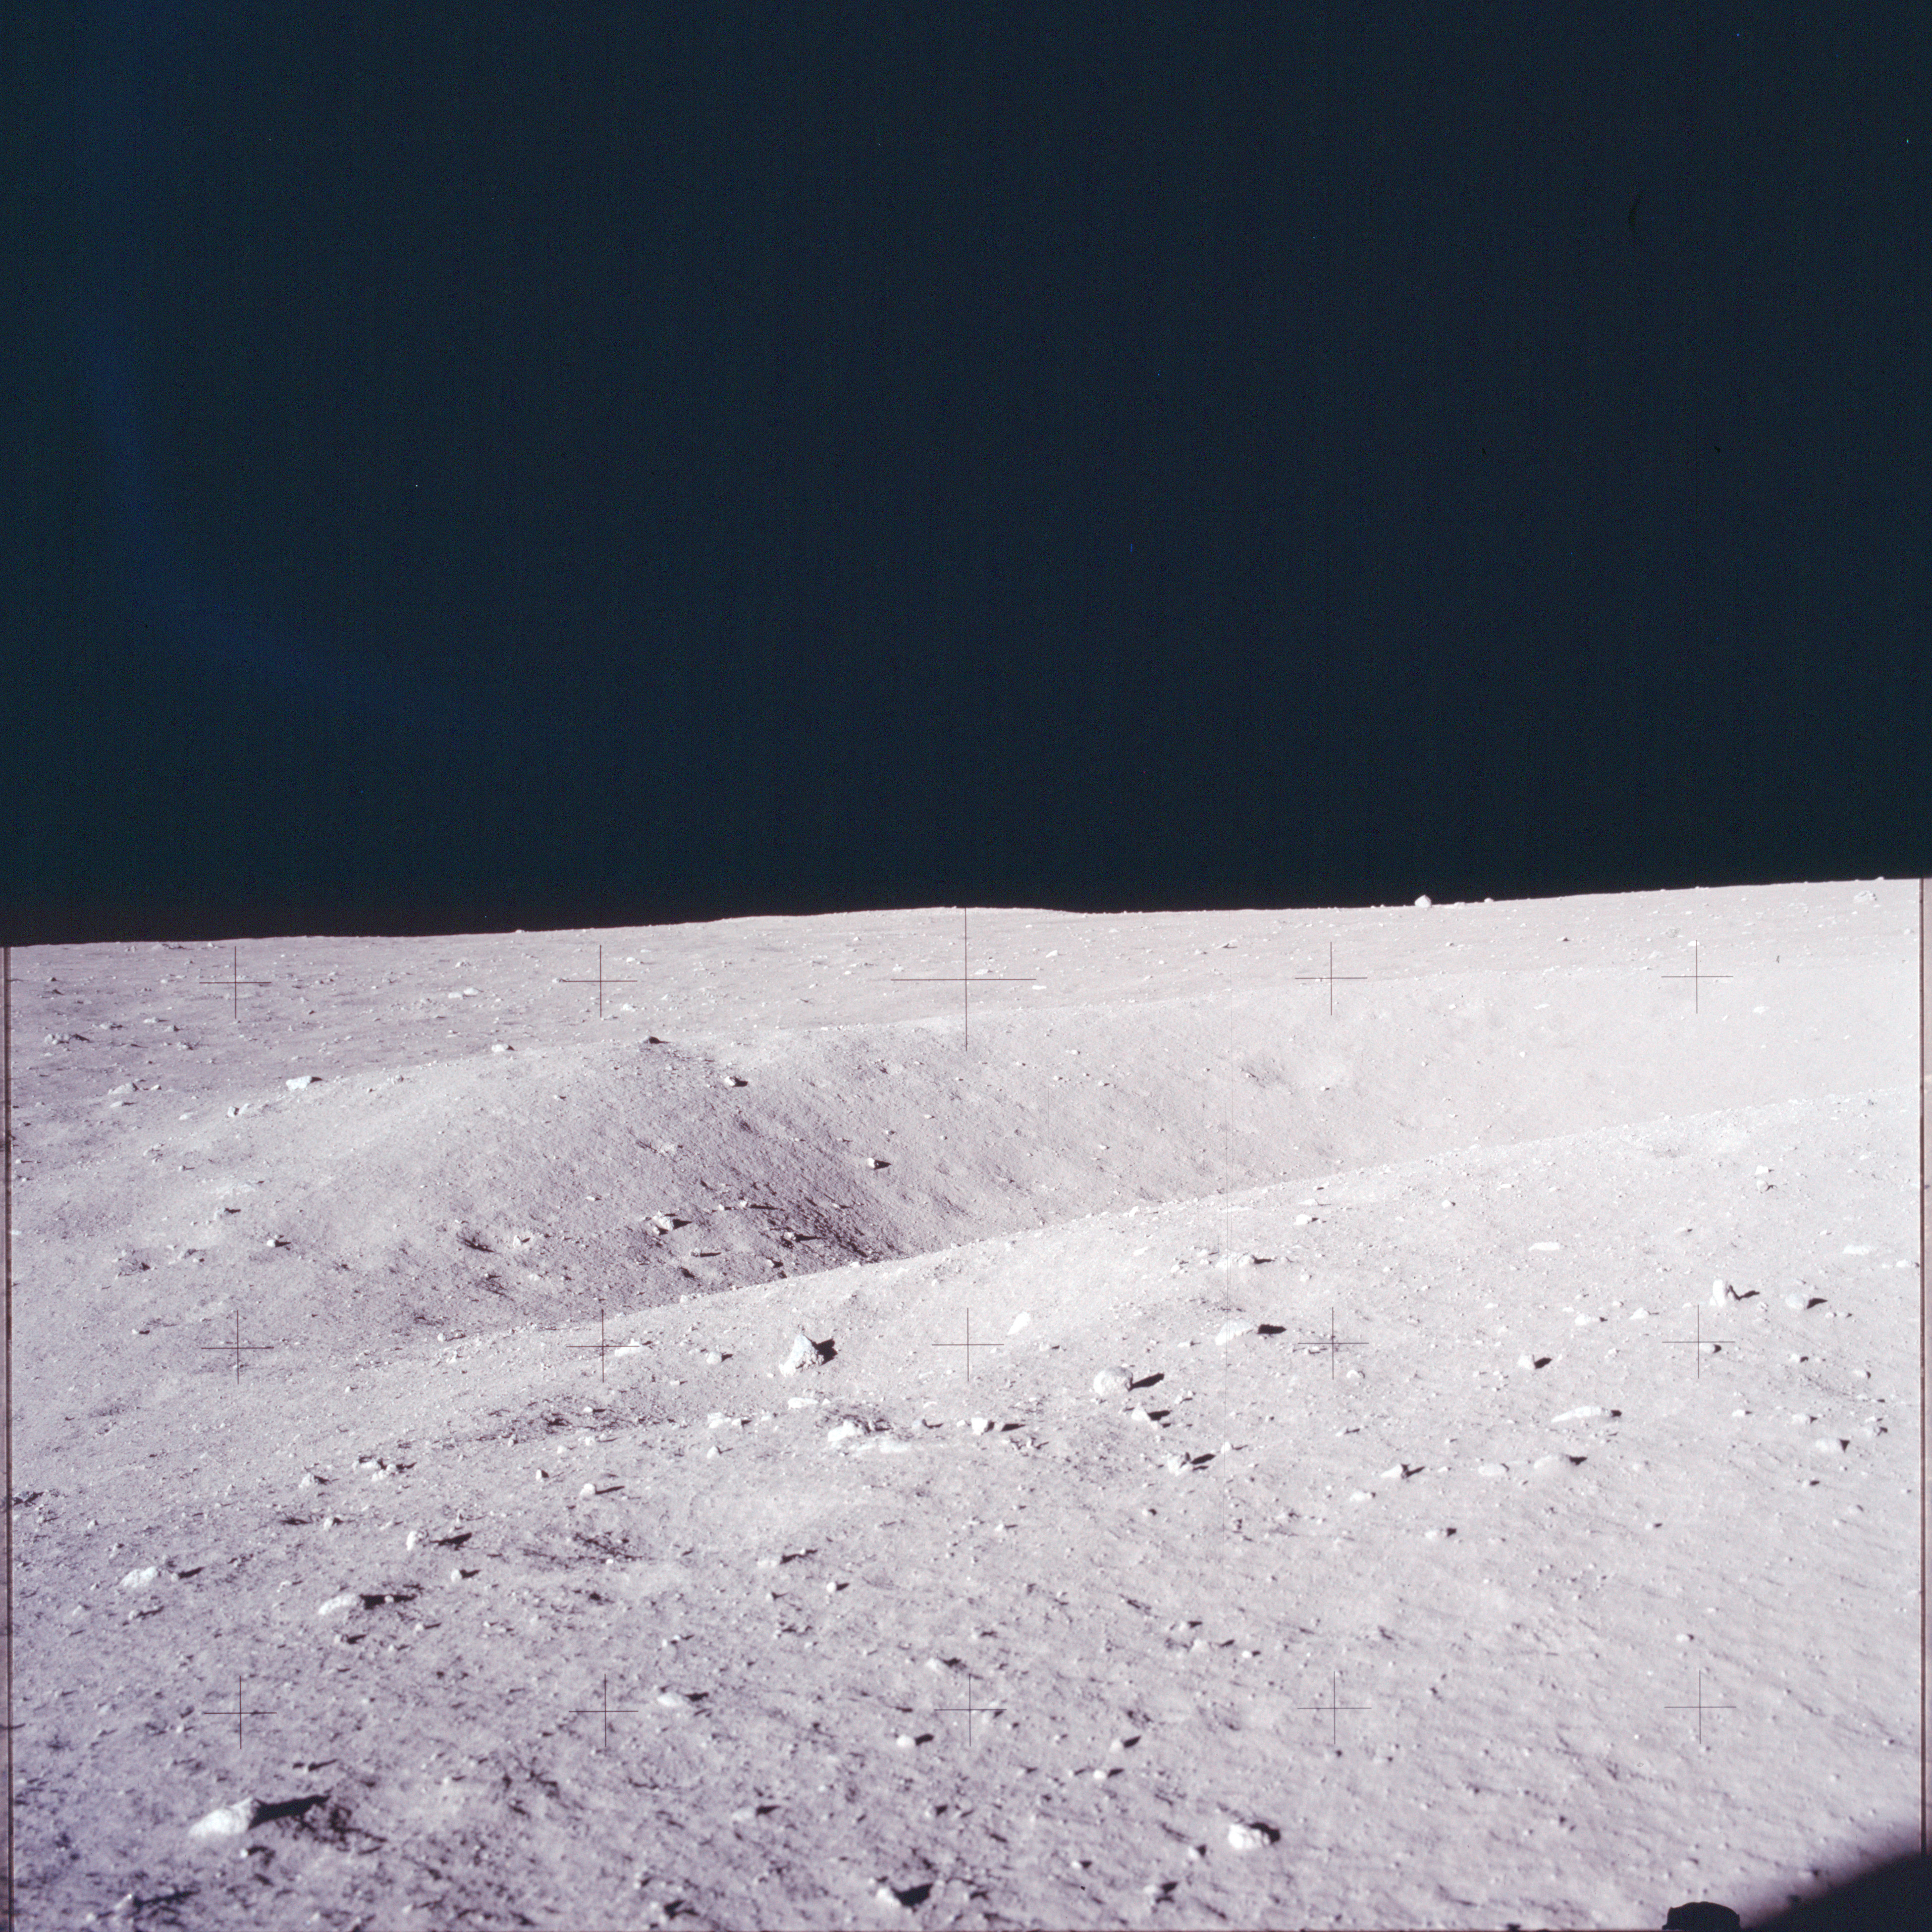
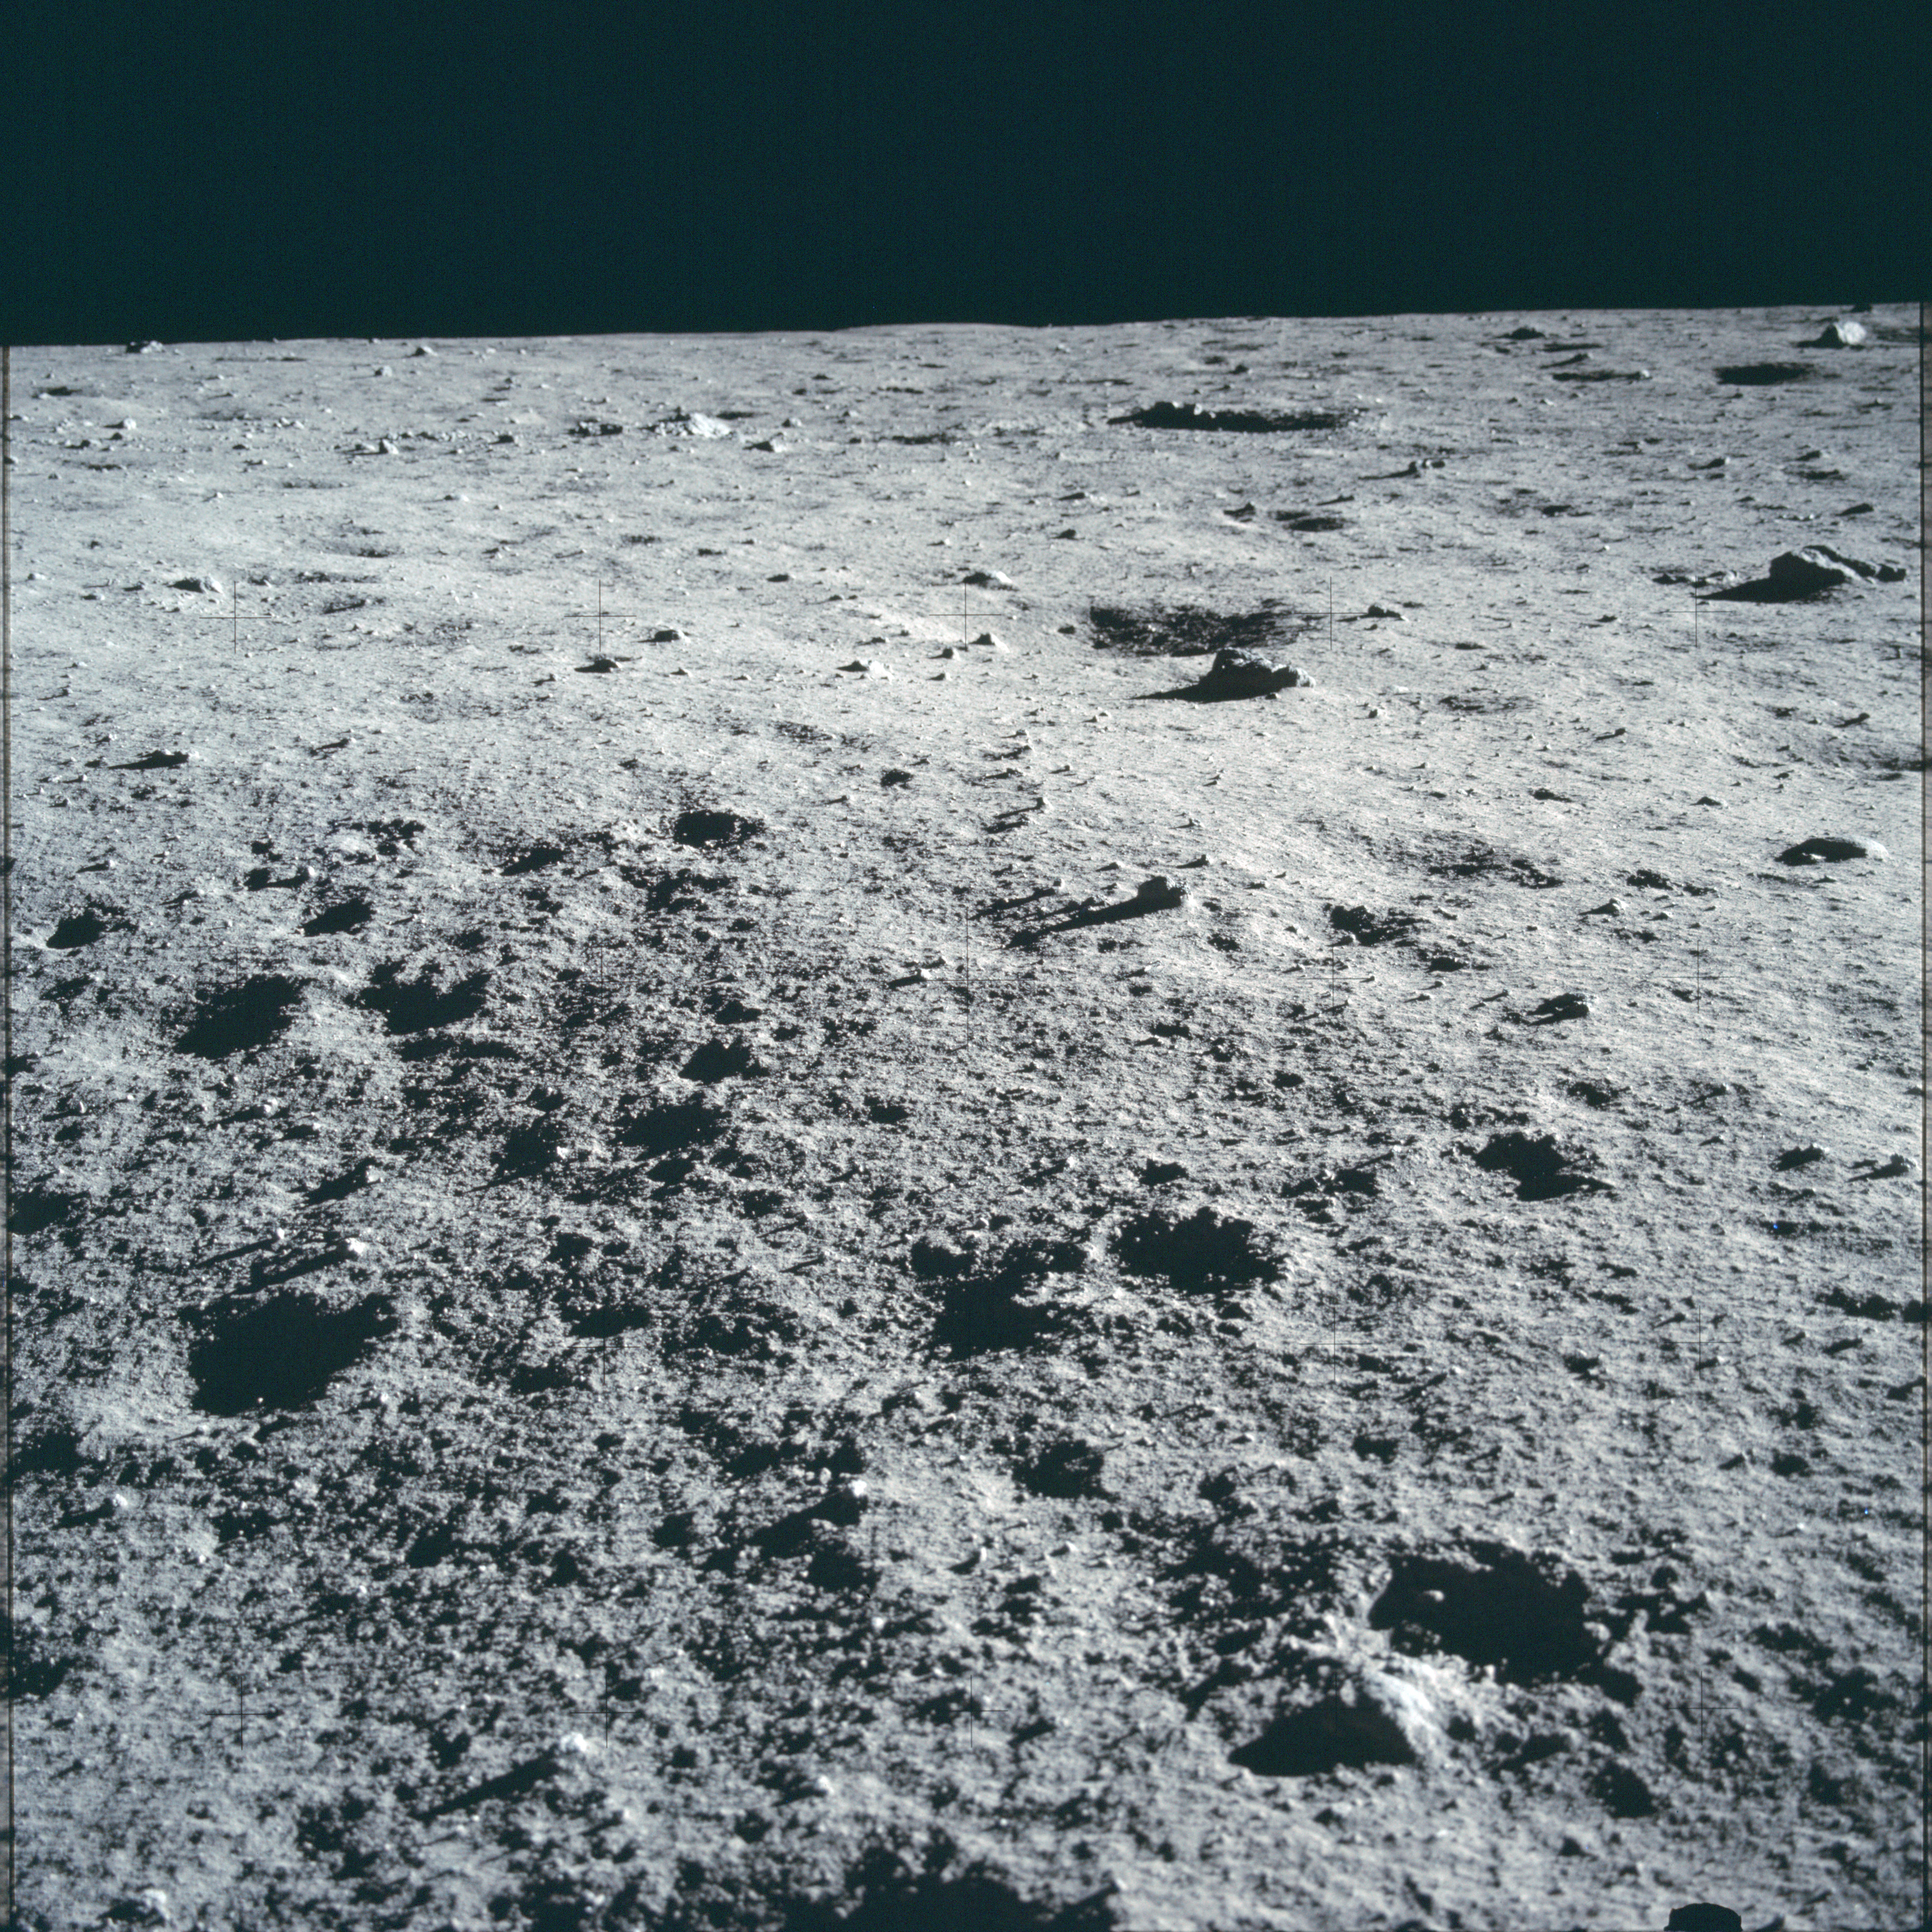
AS11-40-5955 Browse or print resolution. Part of Armstrong's panorama of East Crater (Little West Crater). Image credit: Image Science and Analysis Laboratory, NASA-Johnson Space Center. |

|
AS11-40-5956 Browse or print resolution. Part of Armstrong's panorama of East Crater (Little West Crater). Image credit: Image Science and Analysis Laboratory, NASA-Johnson Space Center. |
|
AS11-40-5957 Browse or print resolution. Part of Armstrong's panorama of East Crater (Little West Crater). Image credit: Image Science and Analysis Laboratory, NASA-Johnson Space Center. |

|
AS11-40-5958 Browse or print resolution. Part of Armstrong's panorama of East Crater (Little West Crater). Image credit: Image Science and Analysis Laboratory, NASA-Johnson Space Center. |

|
AS11-40-5959 Browse or print resolution. Part of Armstrong's panorama of East Crater (Little West Crater). Image credit: Image Science and Analysis Laboratory, NASA-Johnson Space Center. |

|
AS11-40-5960 Browse or print resolution. Part of Armstrong's panorama of East Crater (Little West Crater). Image credit: Image Science and Analysis Laboratory, NASA-Johnson Space Center. |
|
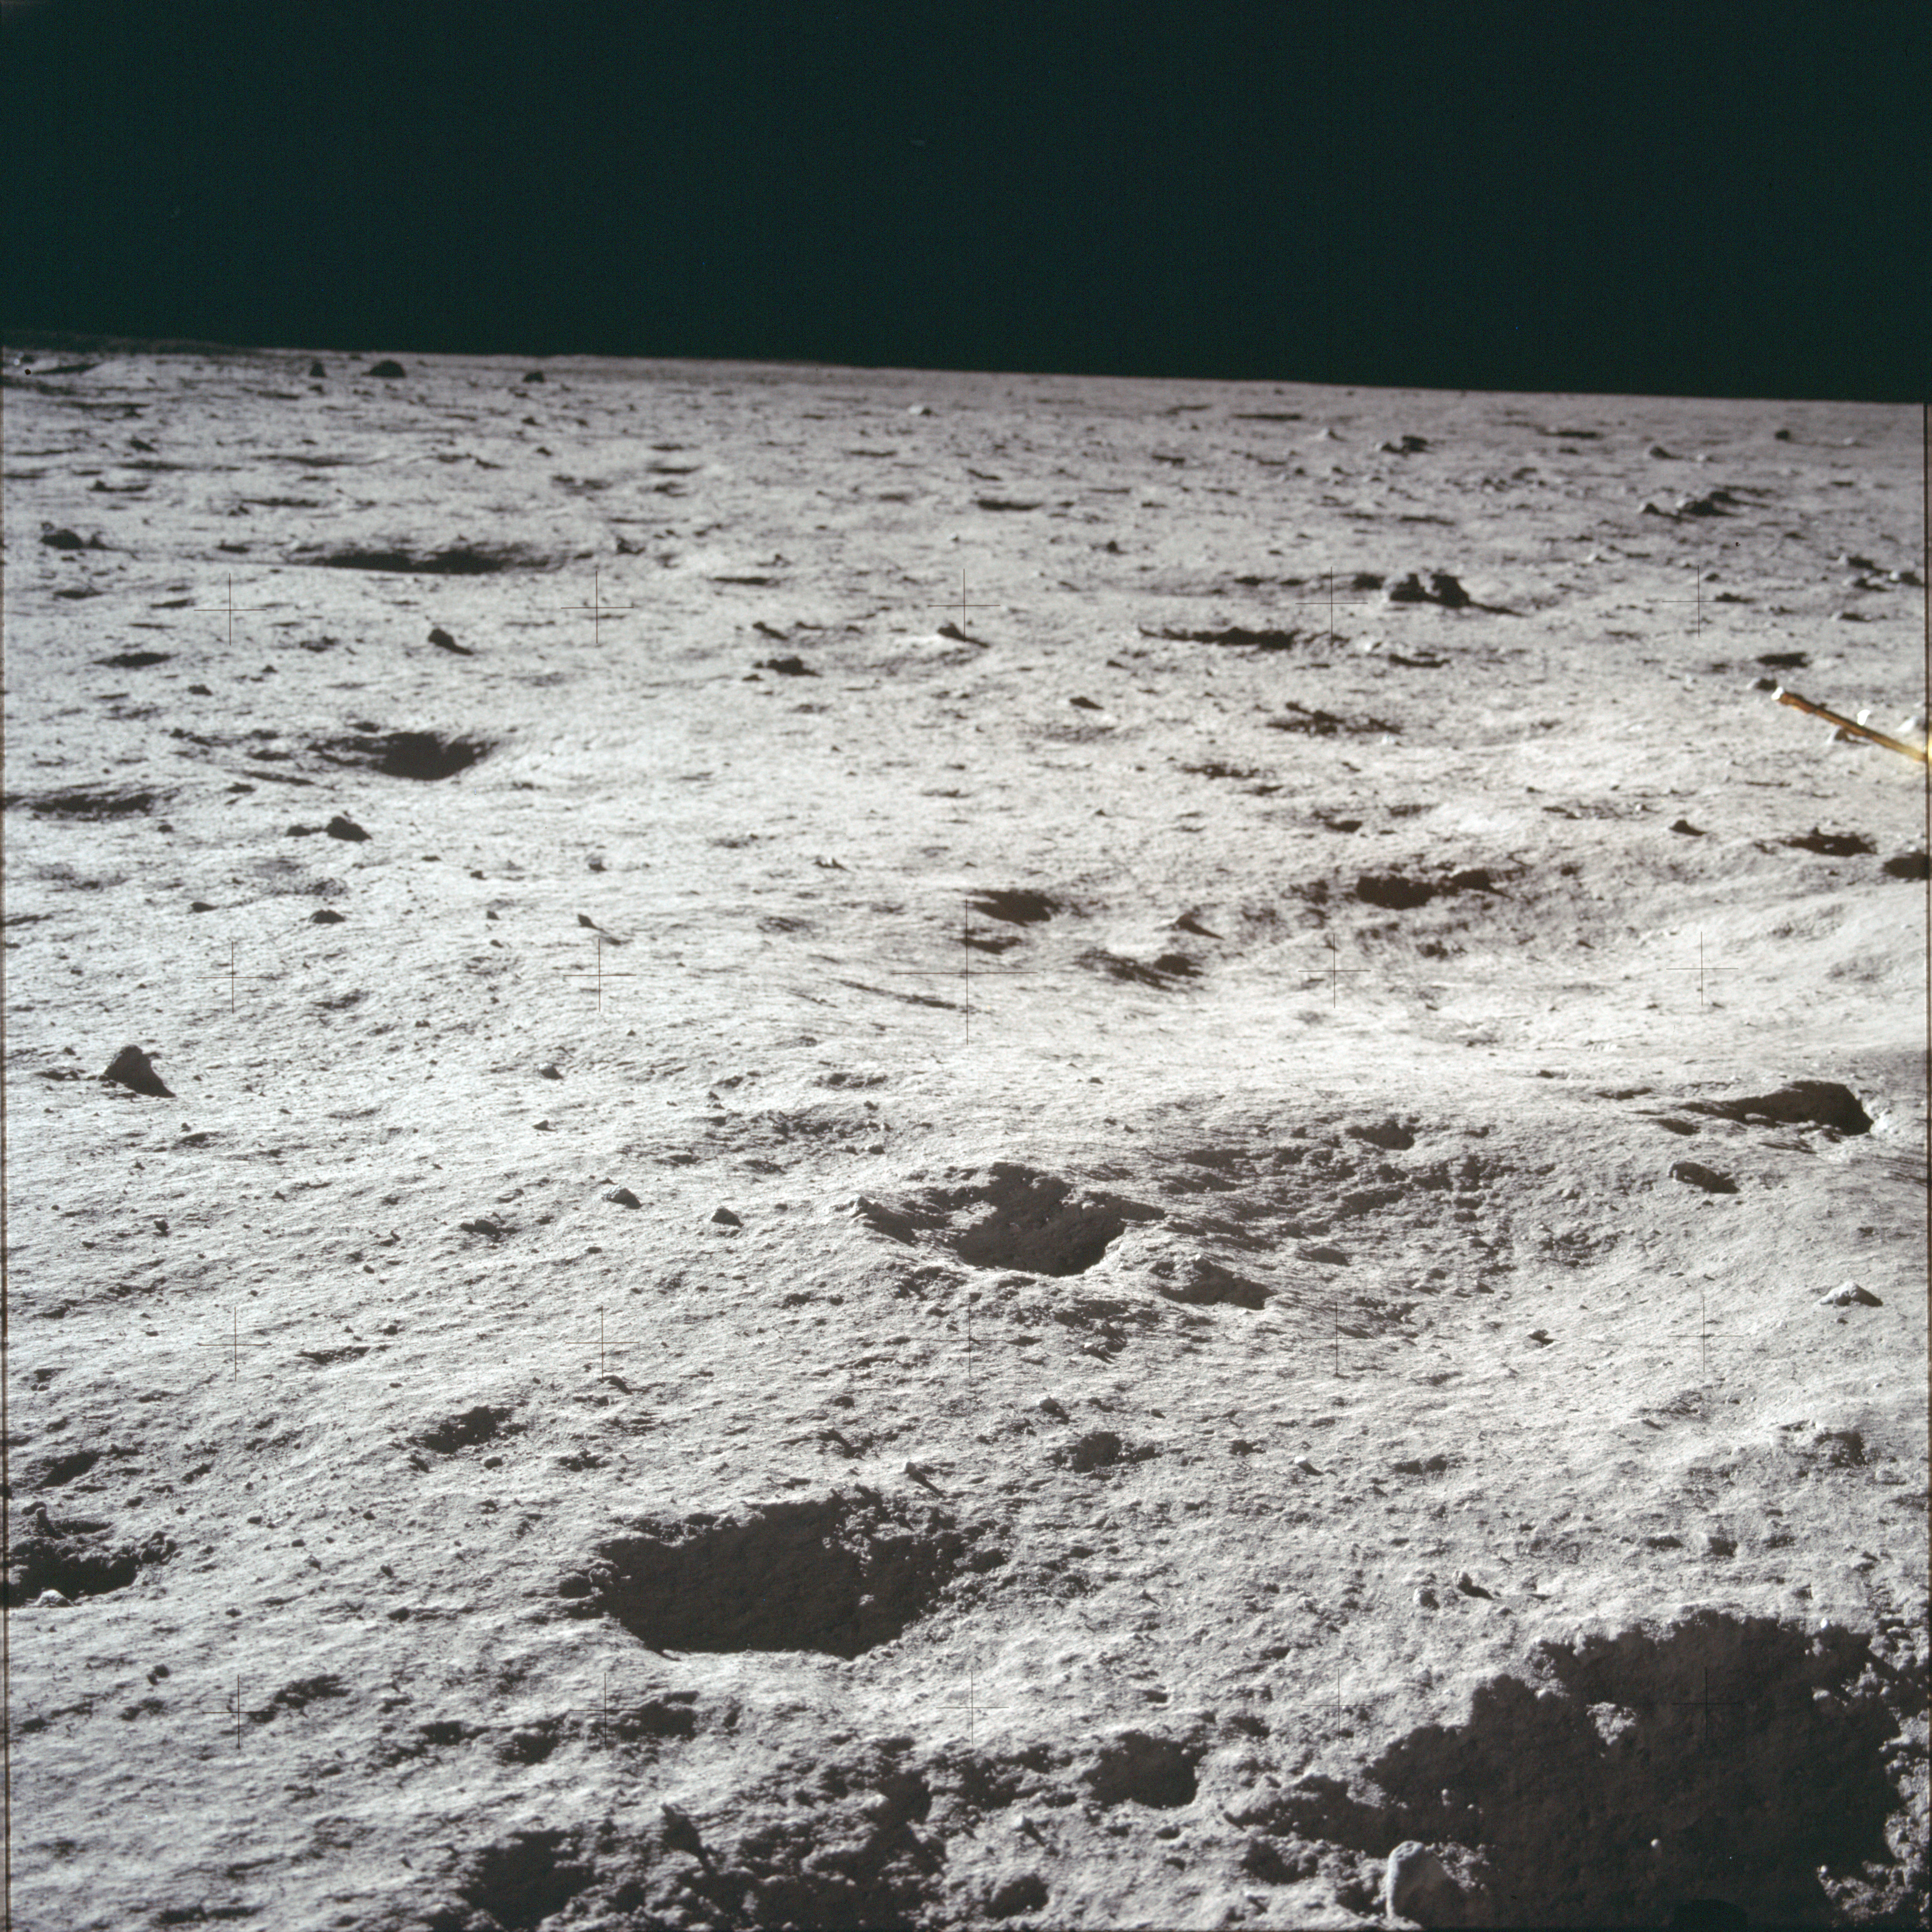
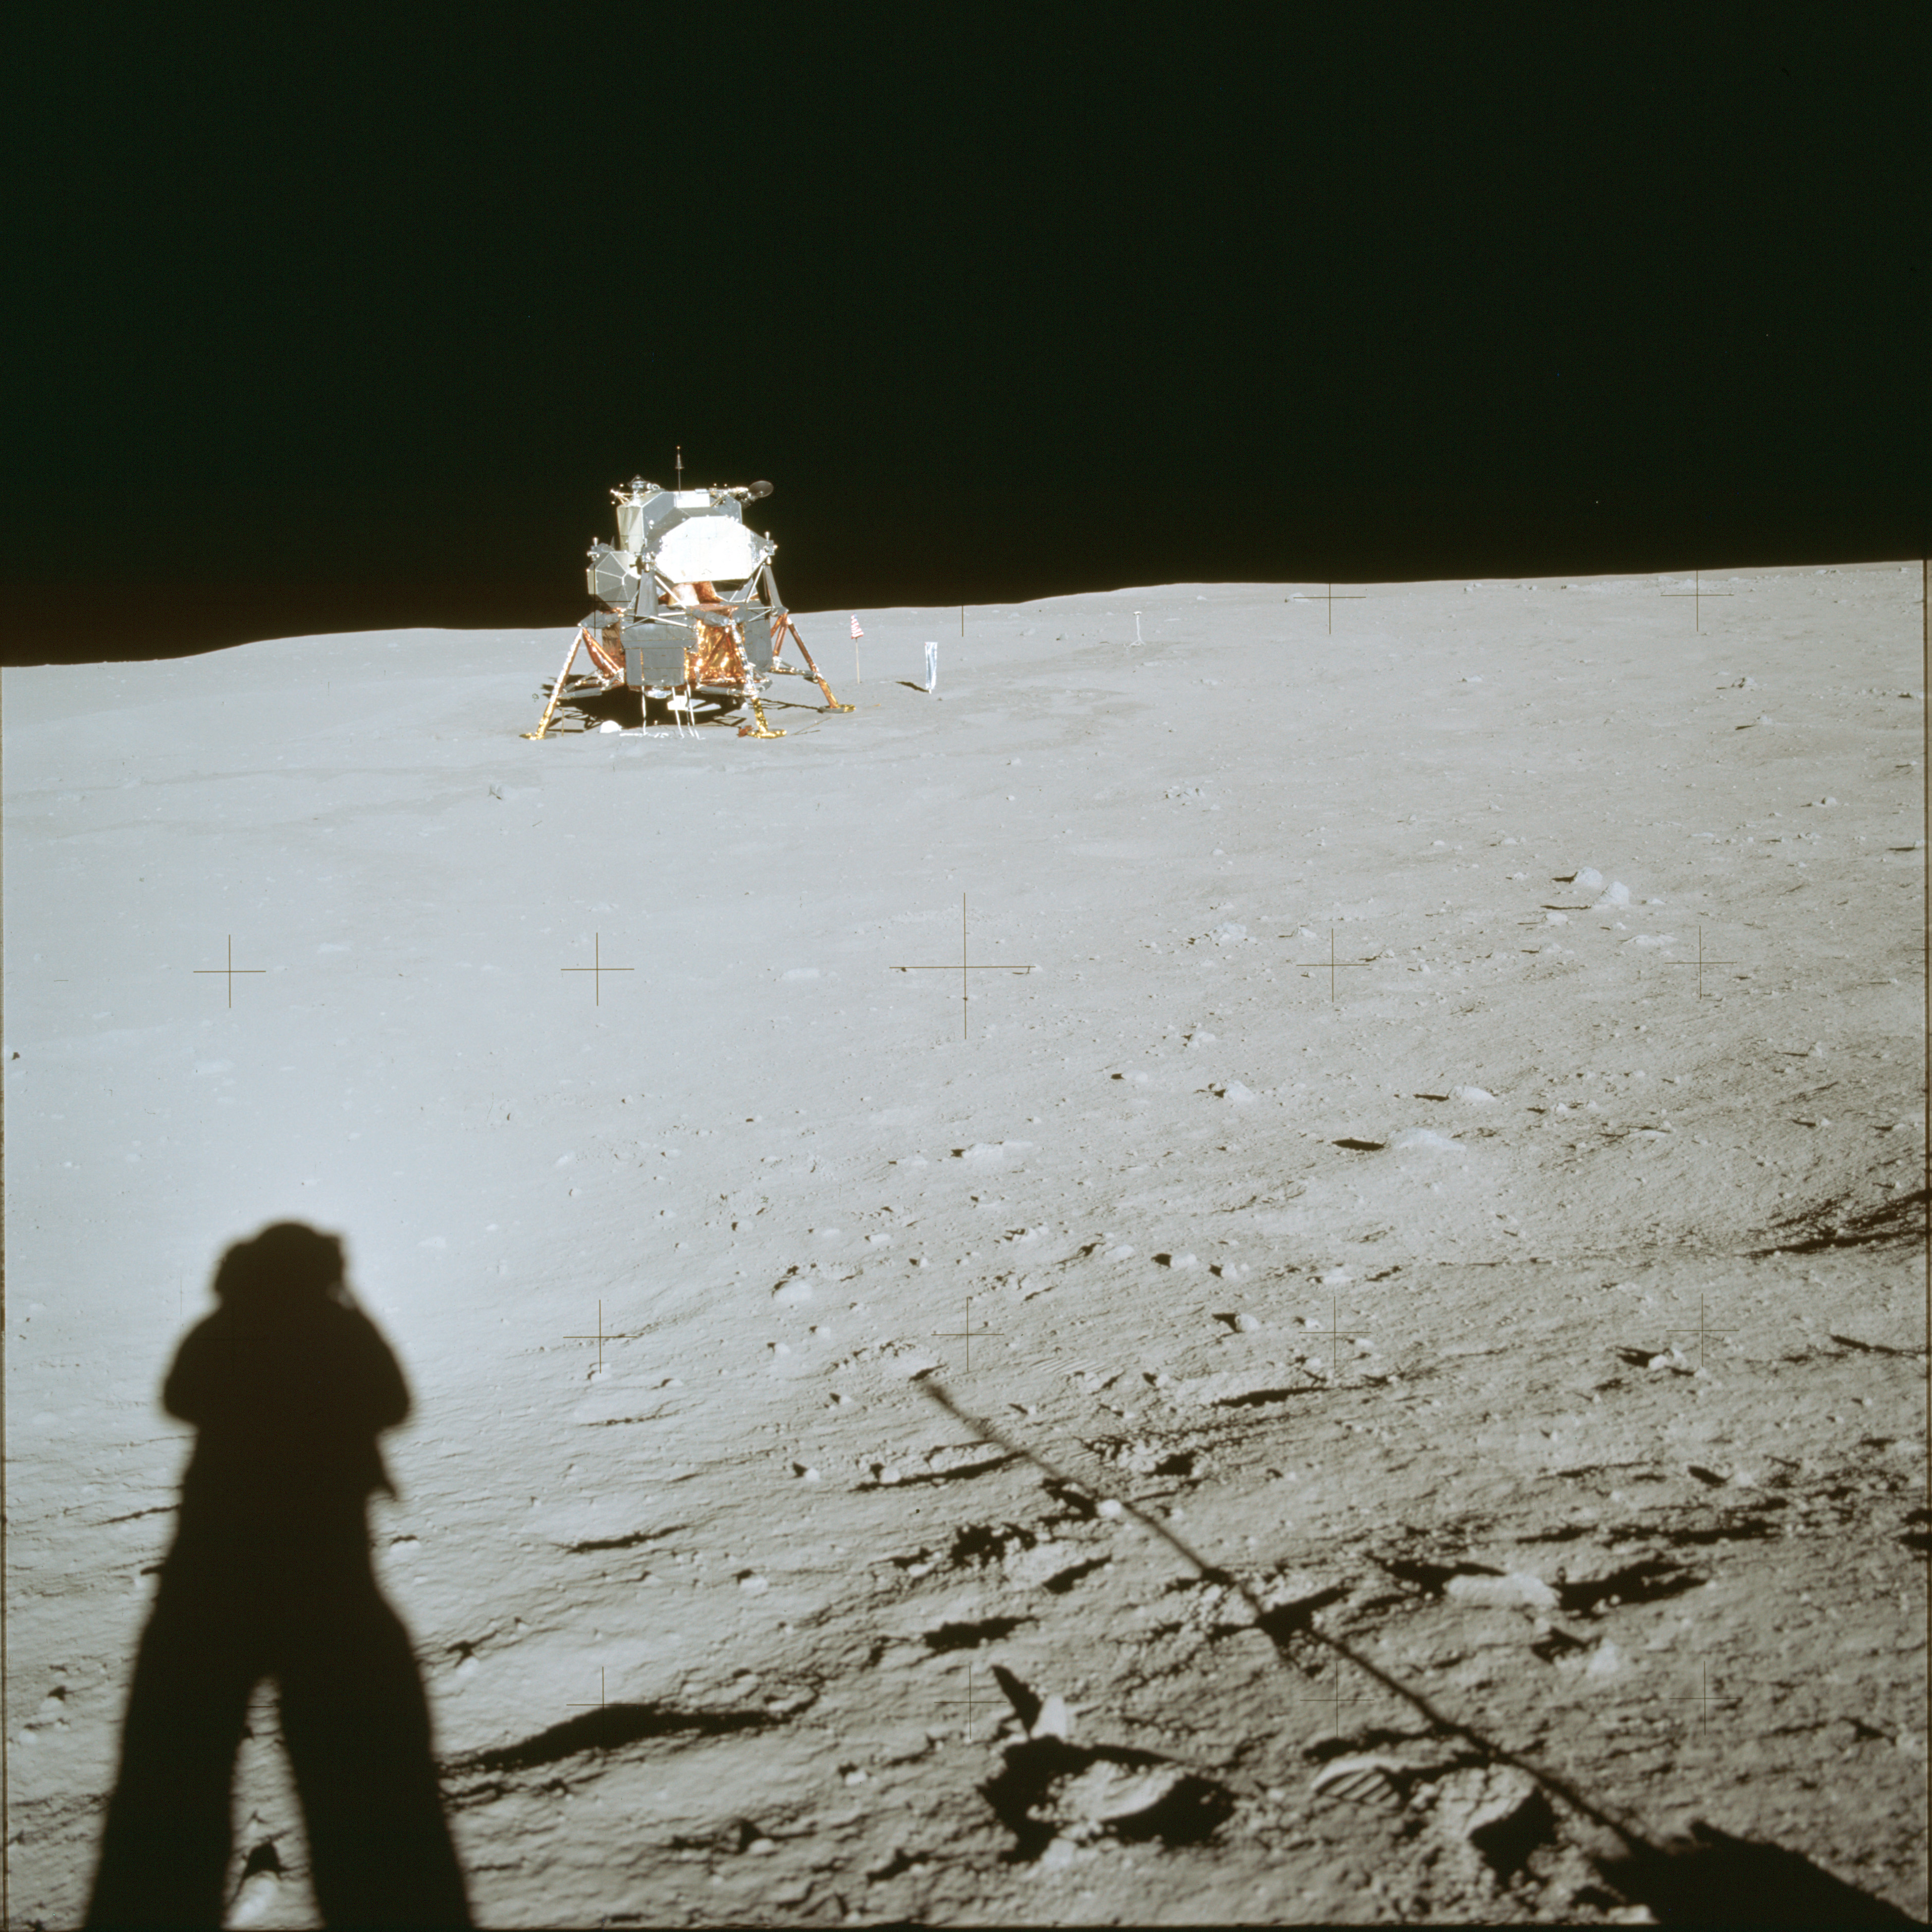
AS11-40-5961 Browse or print resolution. LM from East Crater (Little West Crater). Image credit: Image Science and Analysis Laboratory, NASA-Johnson Space Center. |

|
AS11-40-5962 Browse or print resolution. LM from near East Crater (Little West Crater). Image credit: Image Science and Analysis Laboratory, NASA-Johnson Space Center. |
|
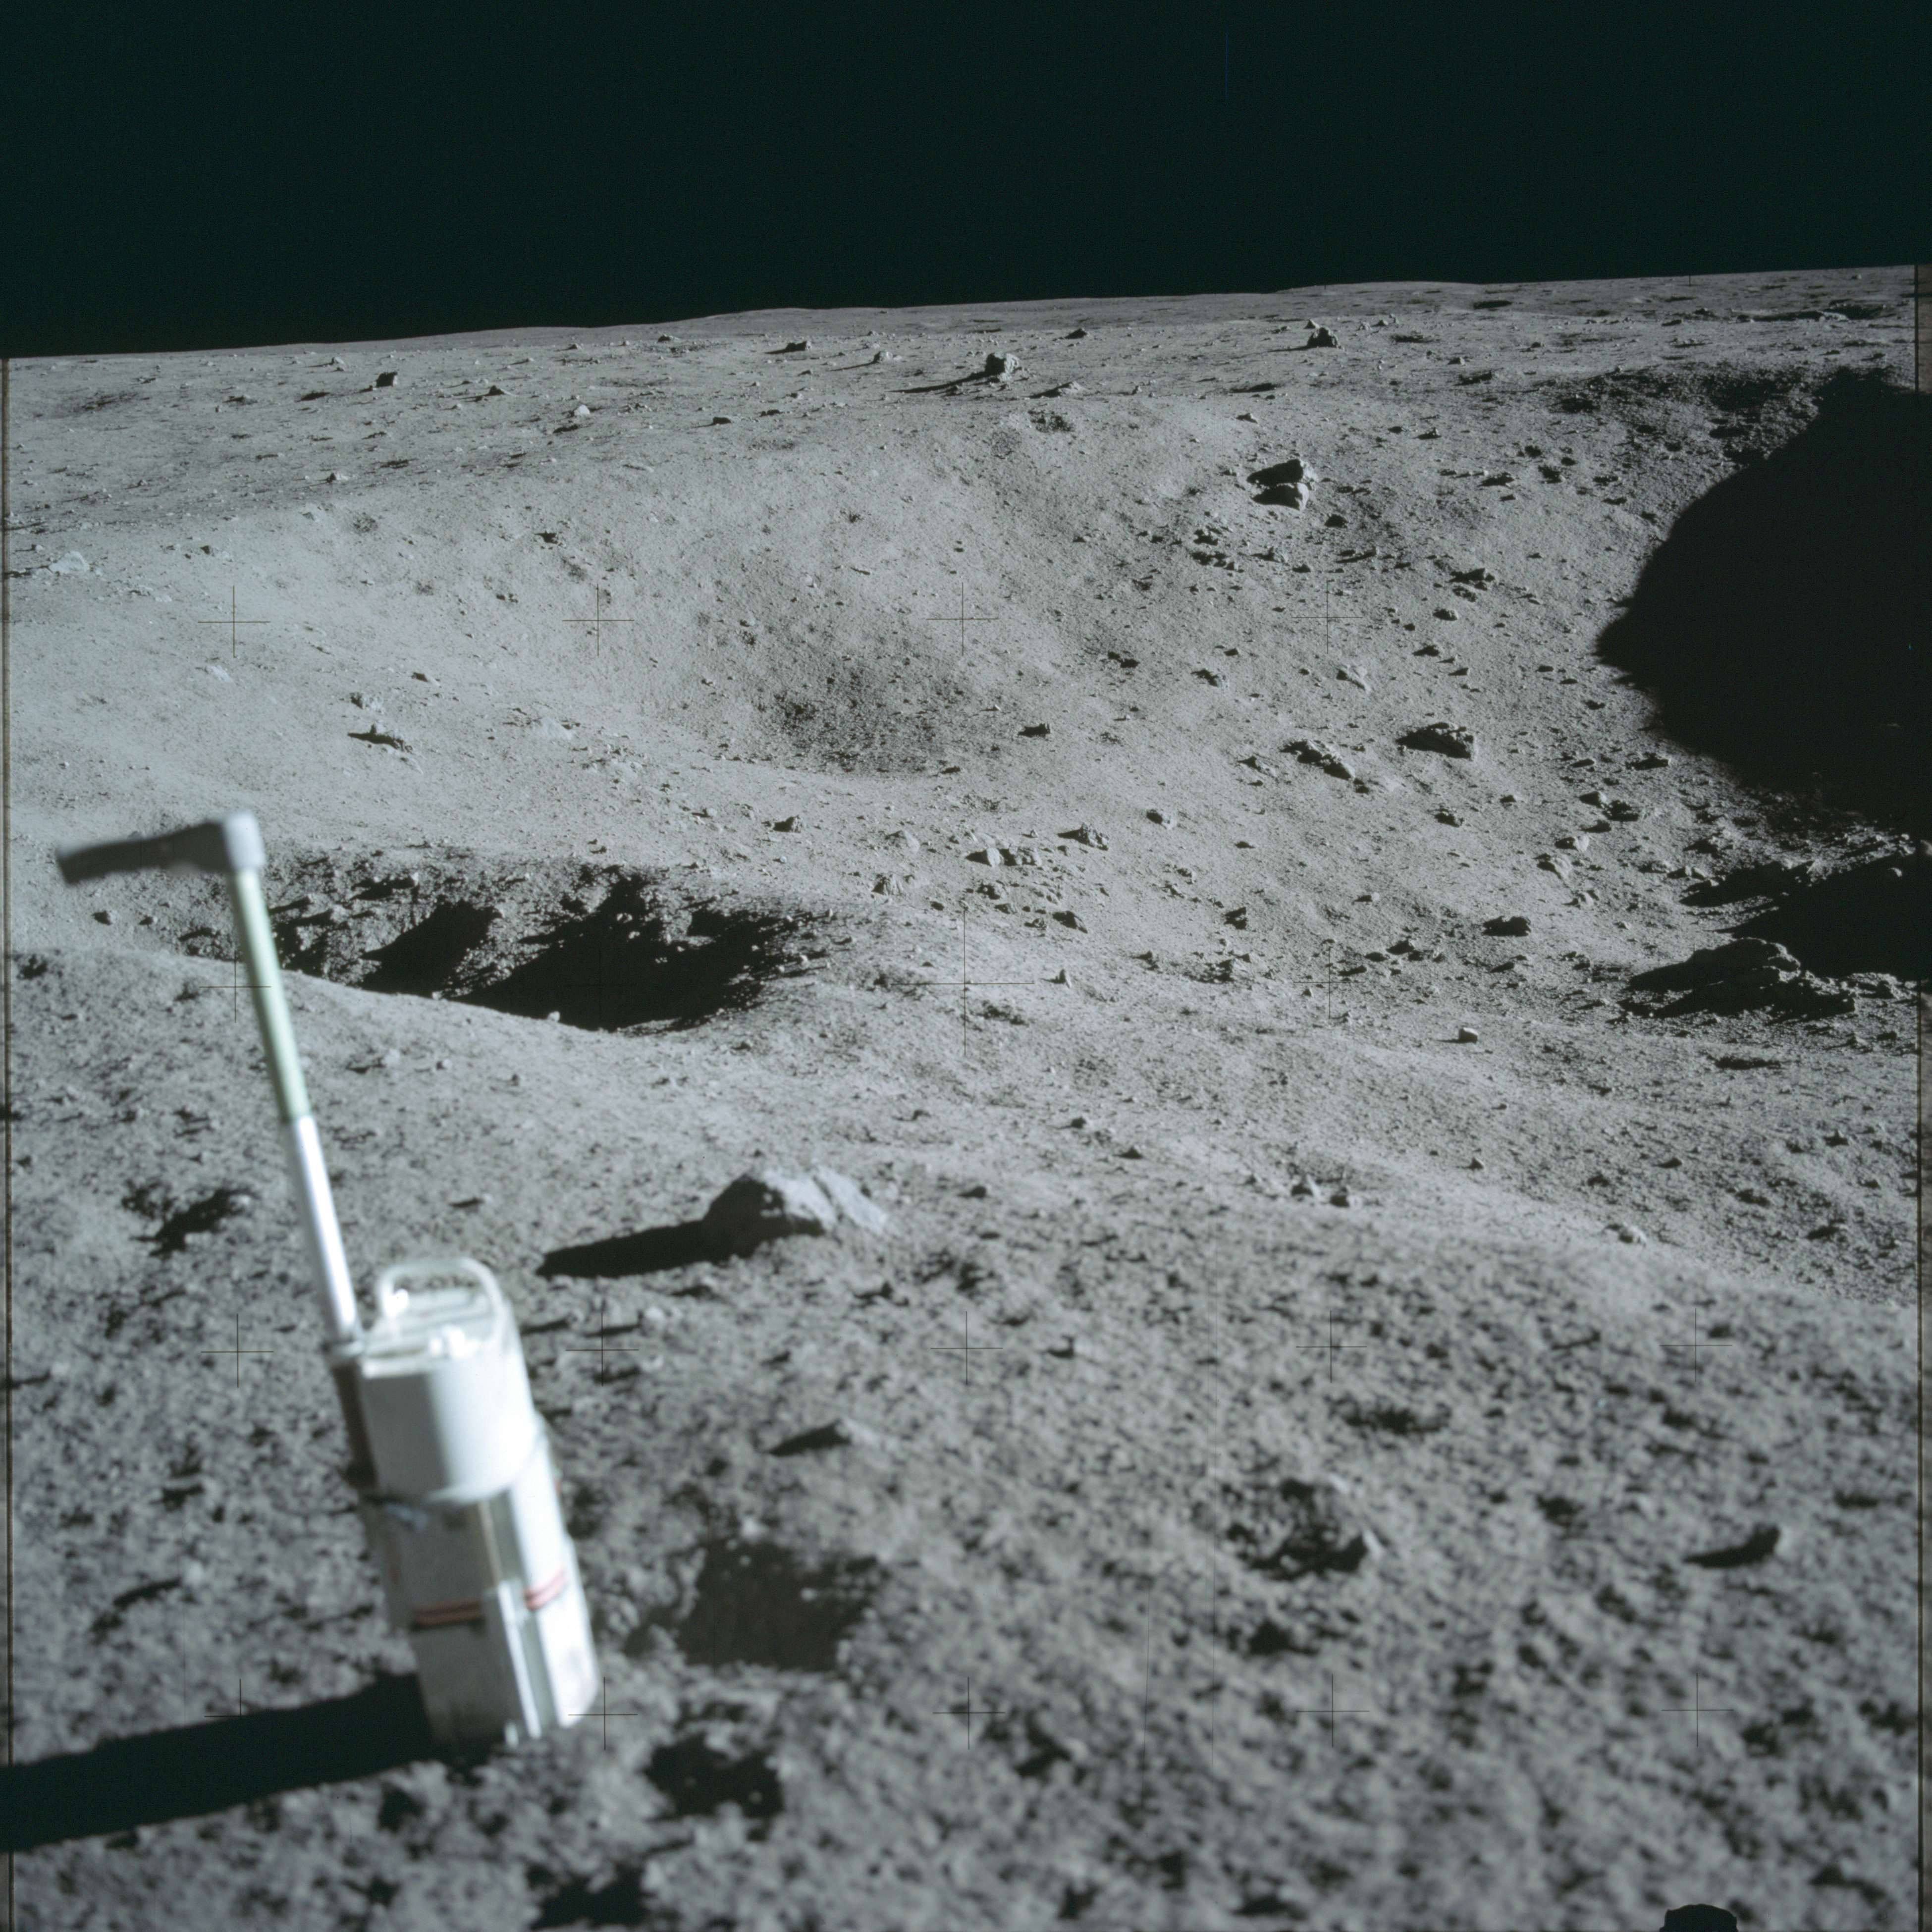
AS11-40-5963 Browse or print resolution. Aldrin driving in core tube. Image credit: Image Science and Analysis Laboratory, NASA-Johnson Space Center. |
|
AS11-40-5964 Browse or print resolution. Aldrin driving in core tube. Image credit: Image Science and Analysis Laboratory, NASA-Johnson Space Center. |

|
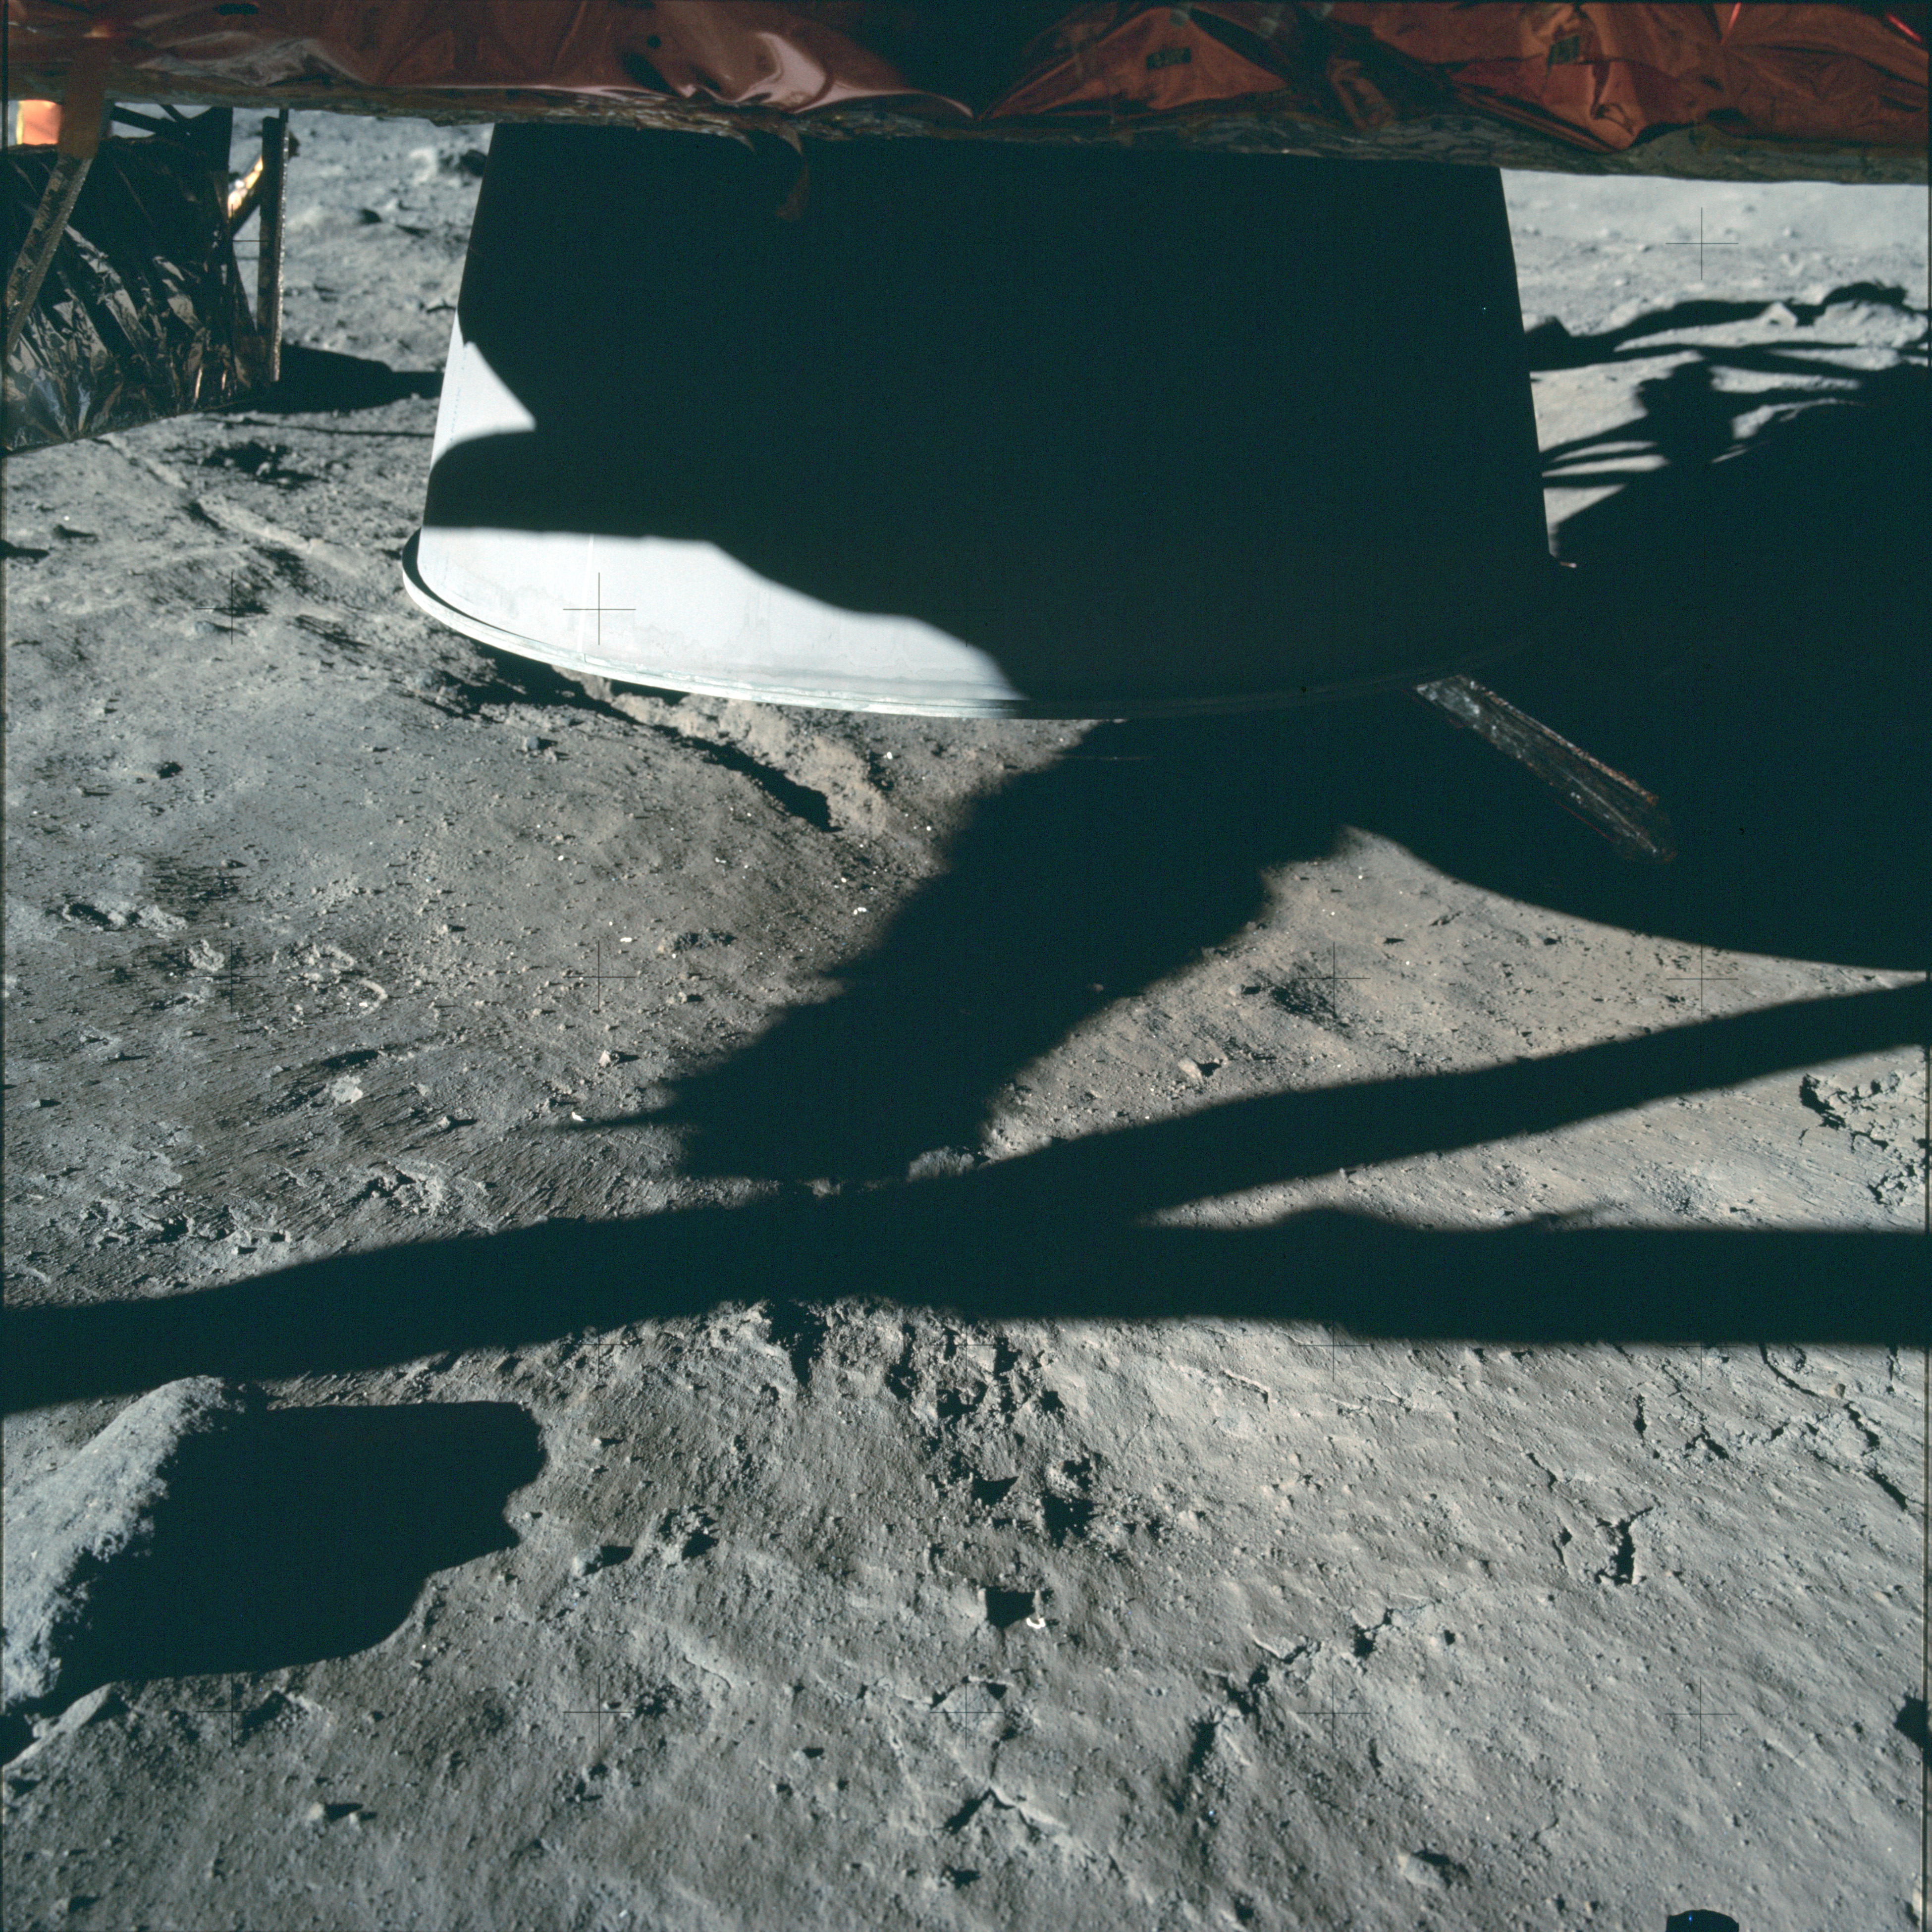
AS11-40-5965 Browse or print resolution. MESA shadow. Image credit: Image Science and Analysis Laboratory, NASA-Johnson Space Center. |

|
AS11-40-5966 Browse or print resolution. MESA shadow. Image credit: Image Science and Analysis Laboratory, NASA-Johnson Space Center. |

|
AS11-40-5966A Browse or print resolution. MESA shadow. Image credit: Image Science and Analysis Laboratory, NASA-Johnson Space Center. |

|
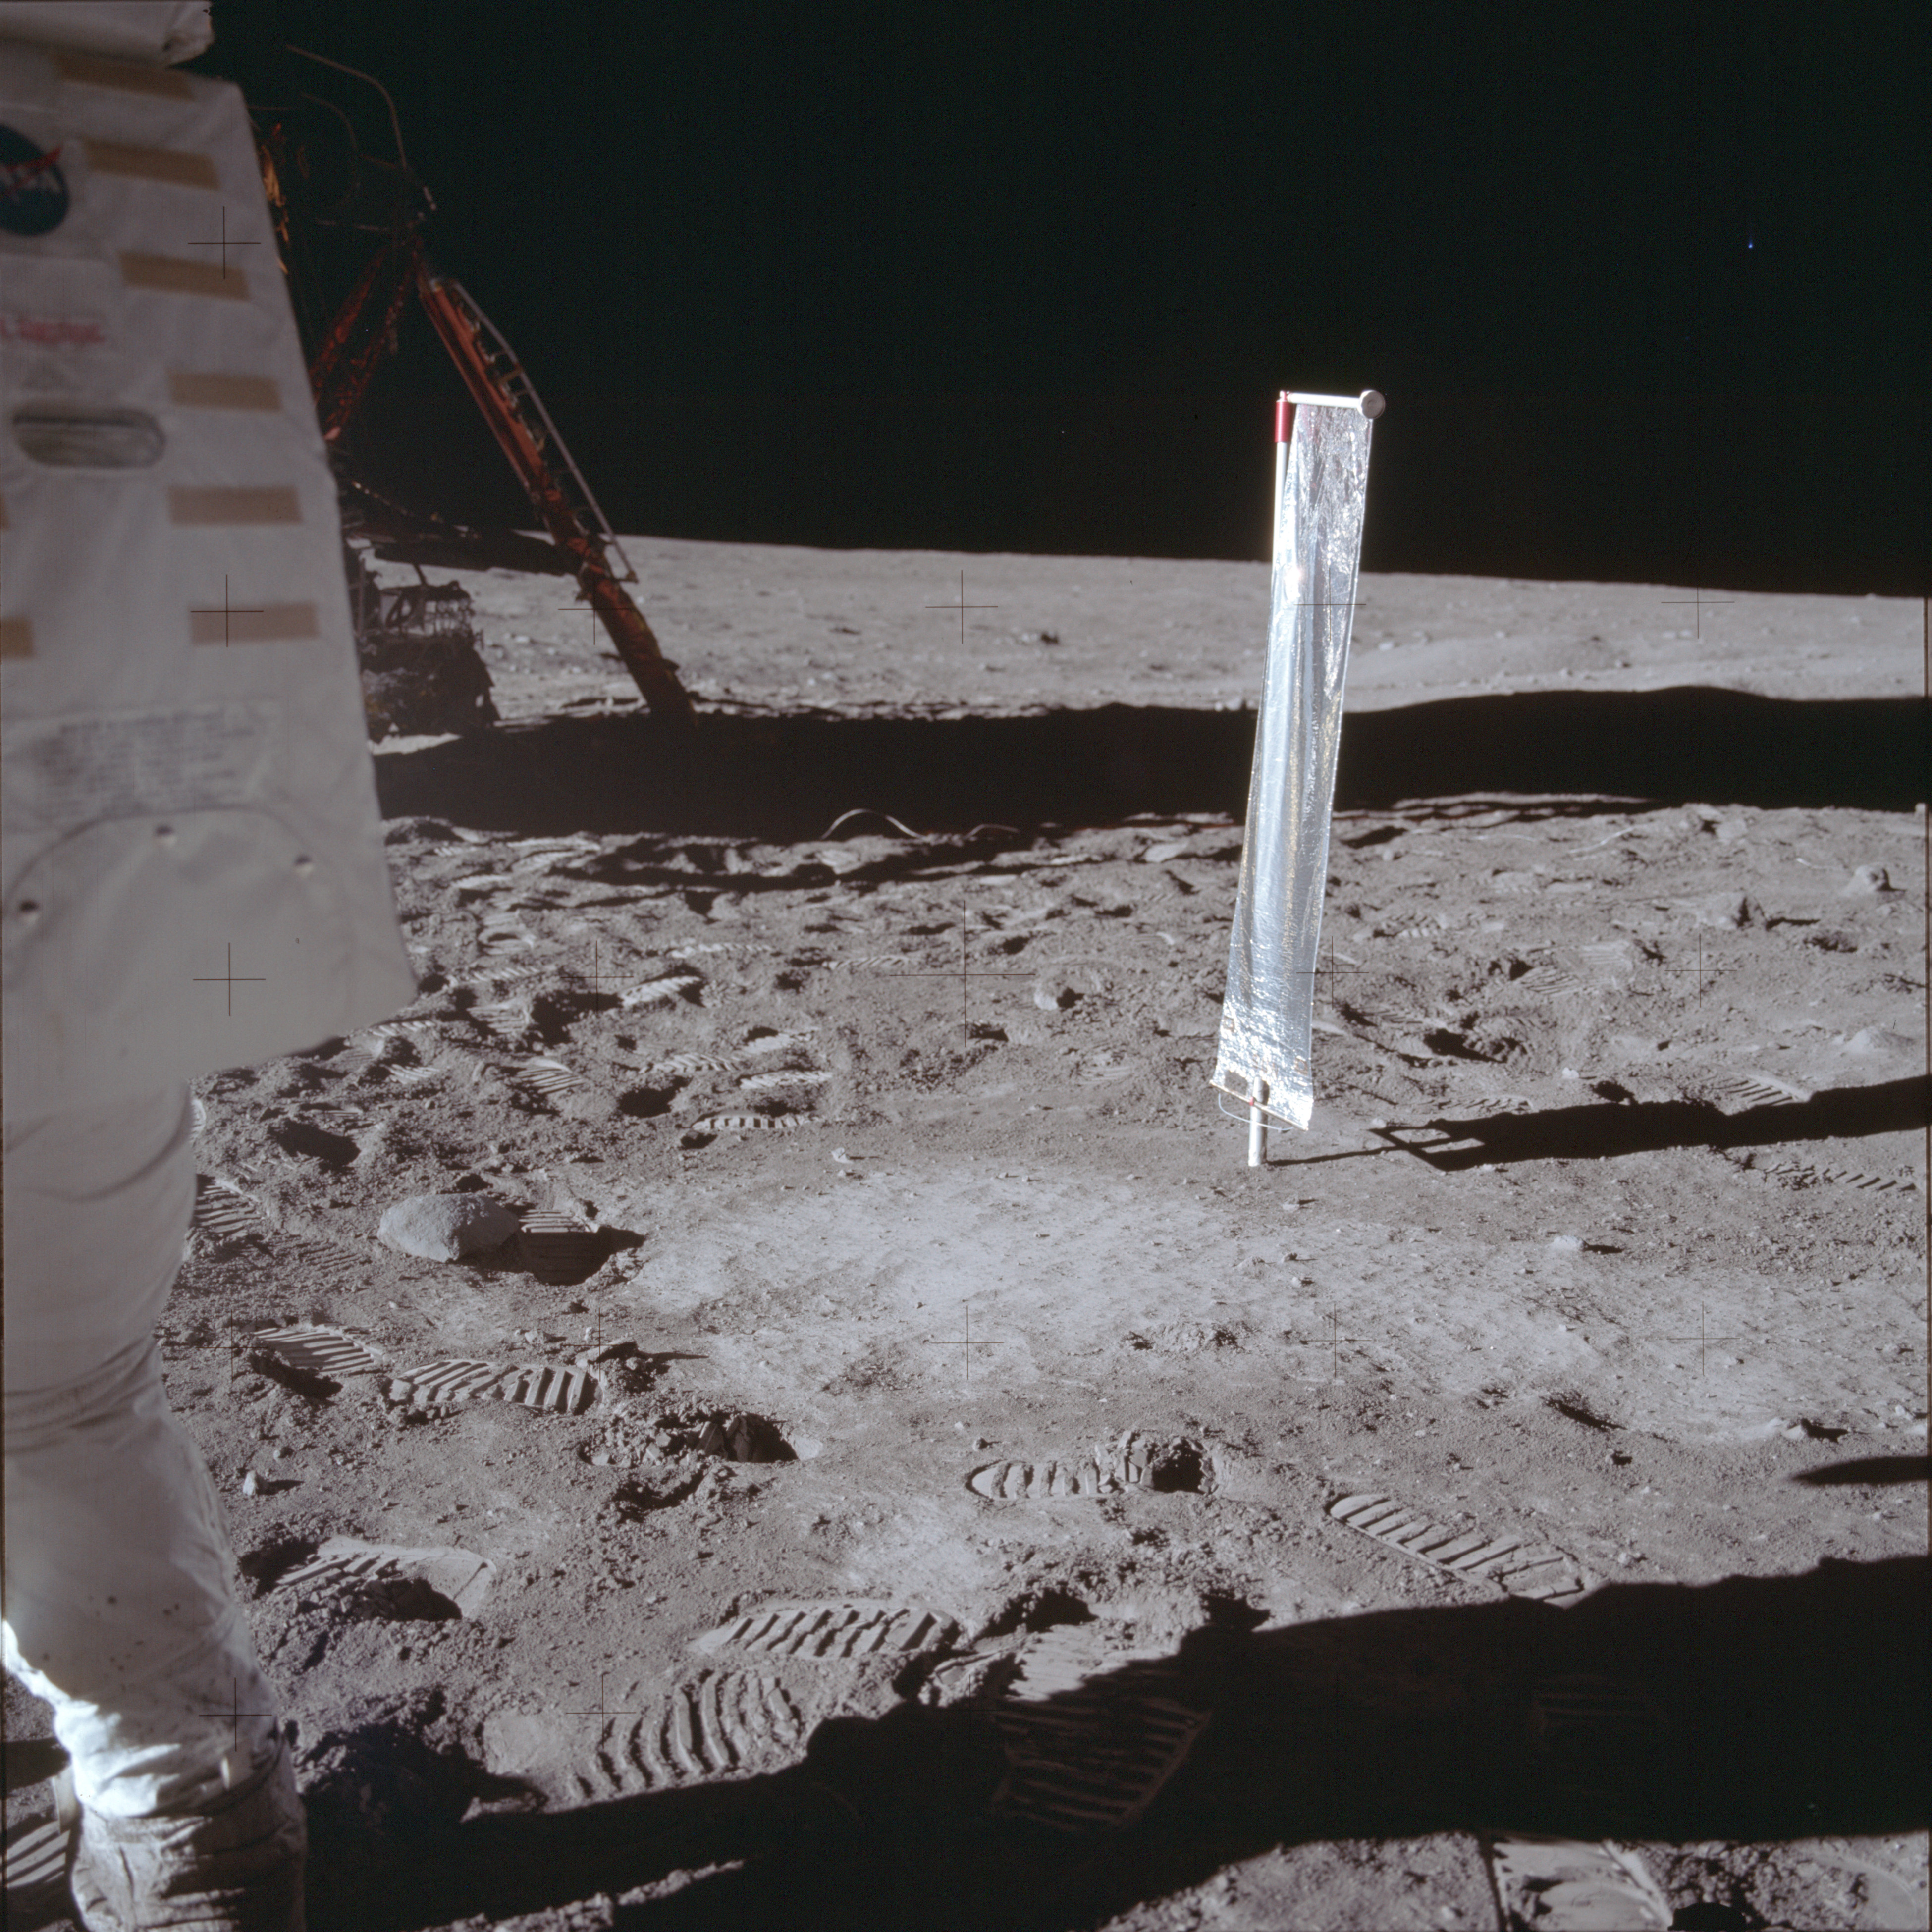
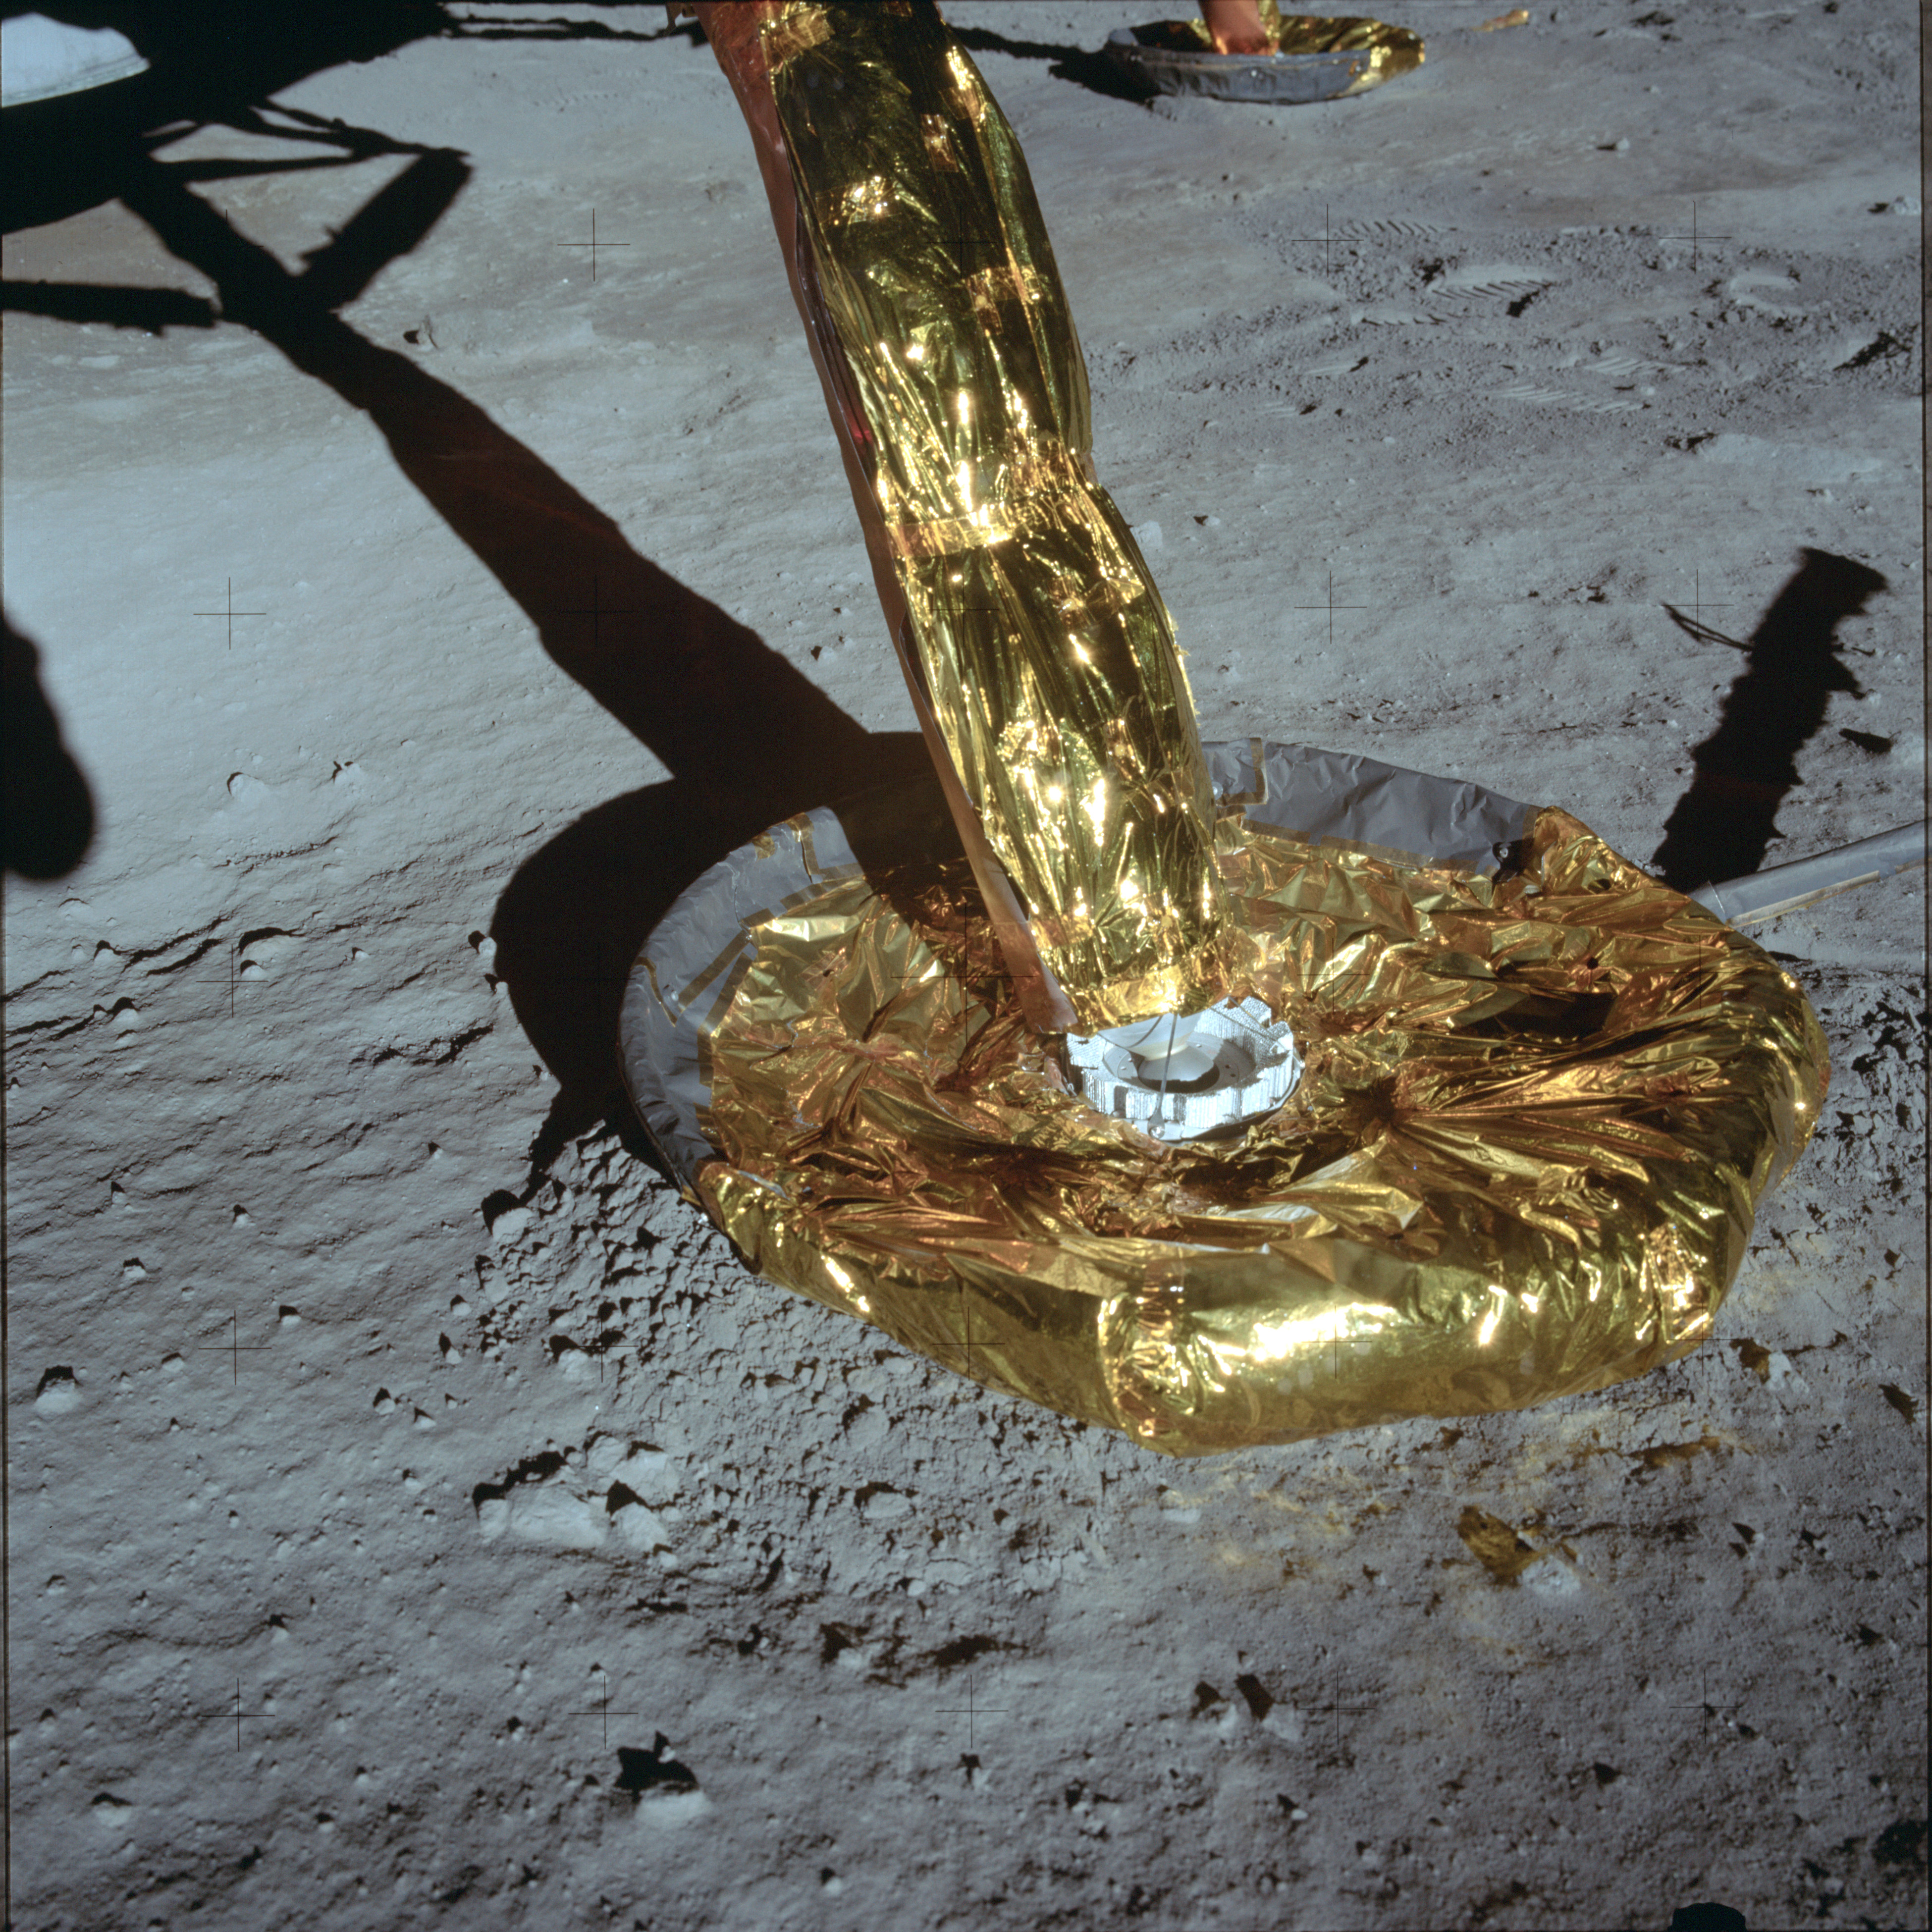
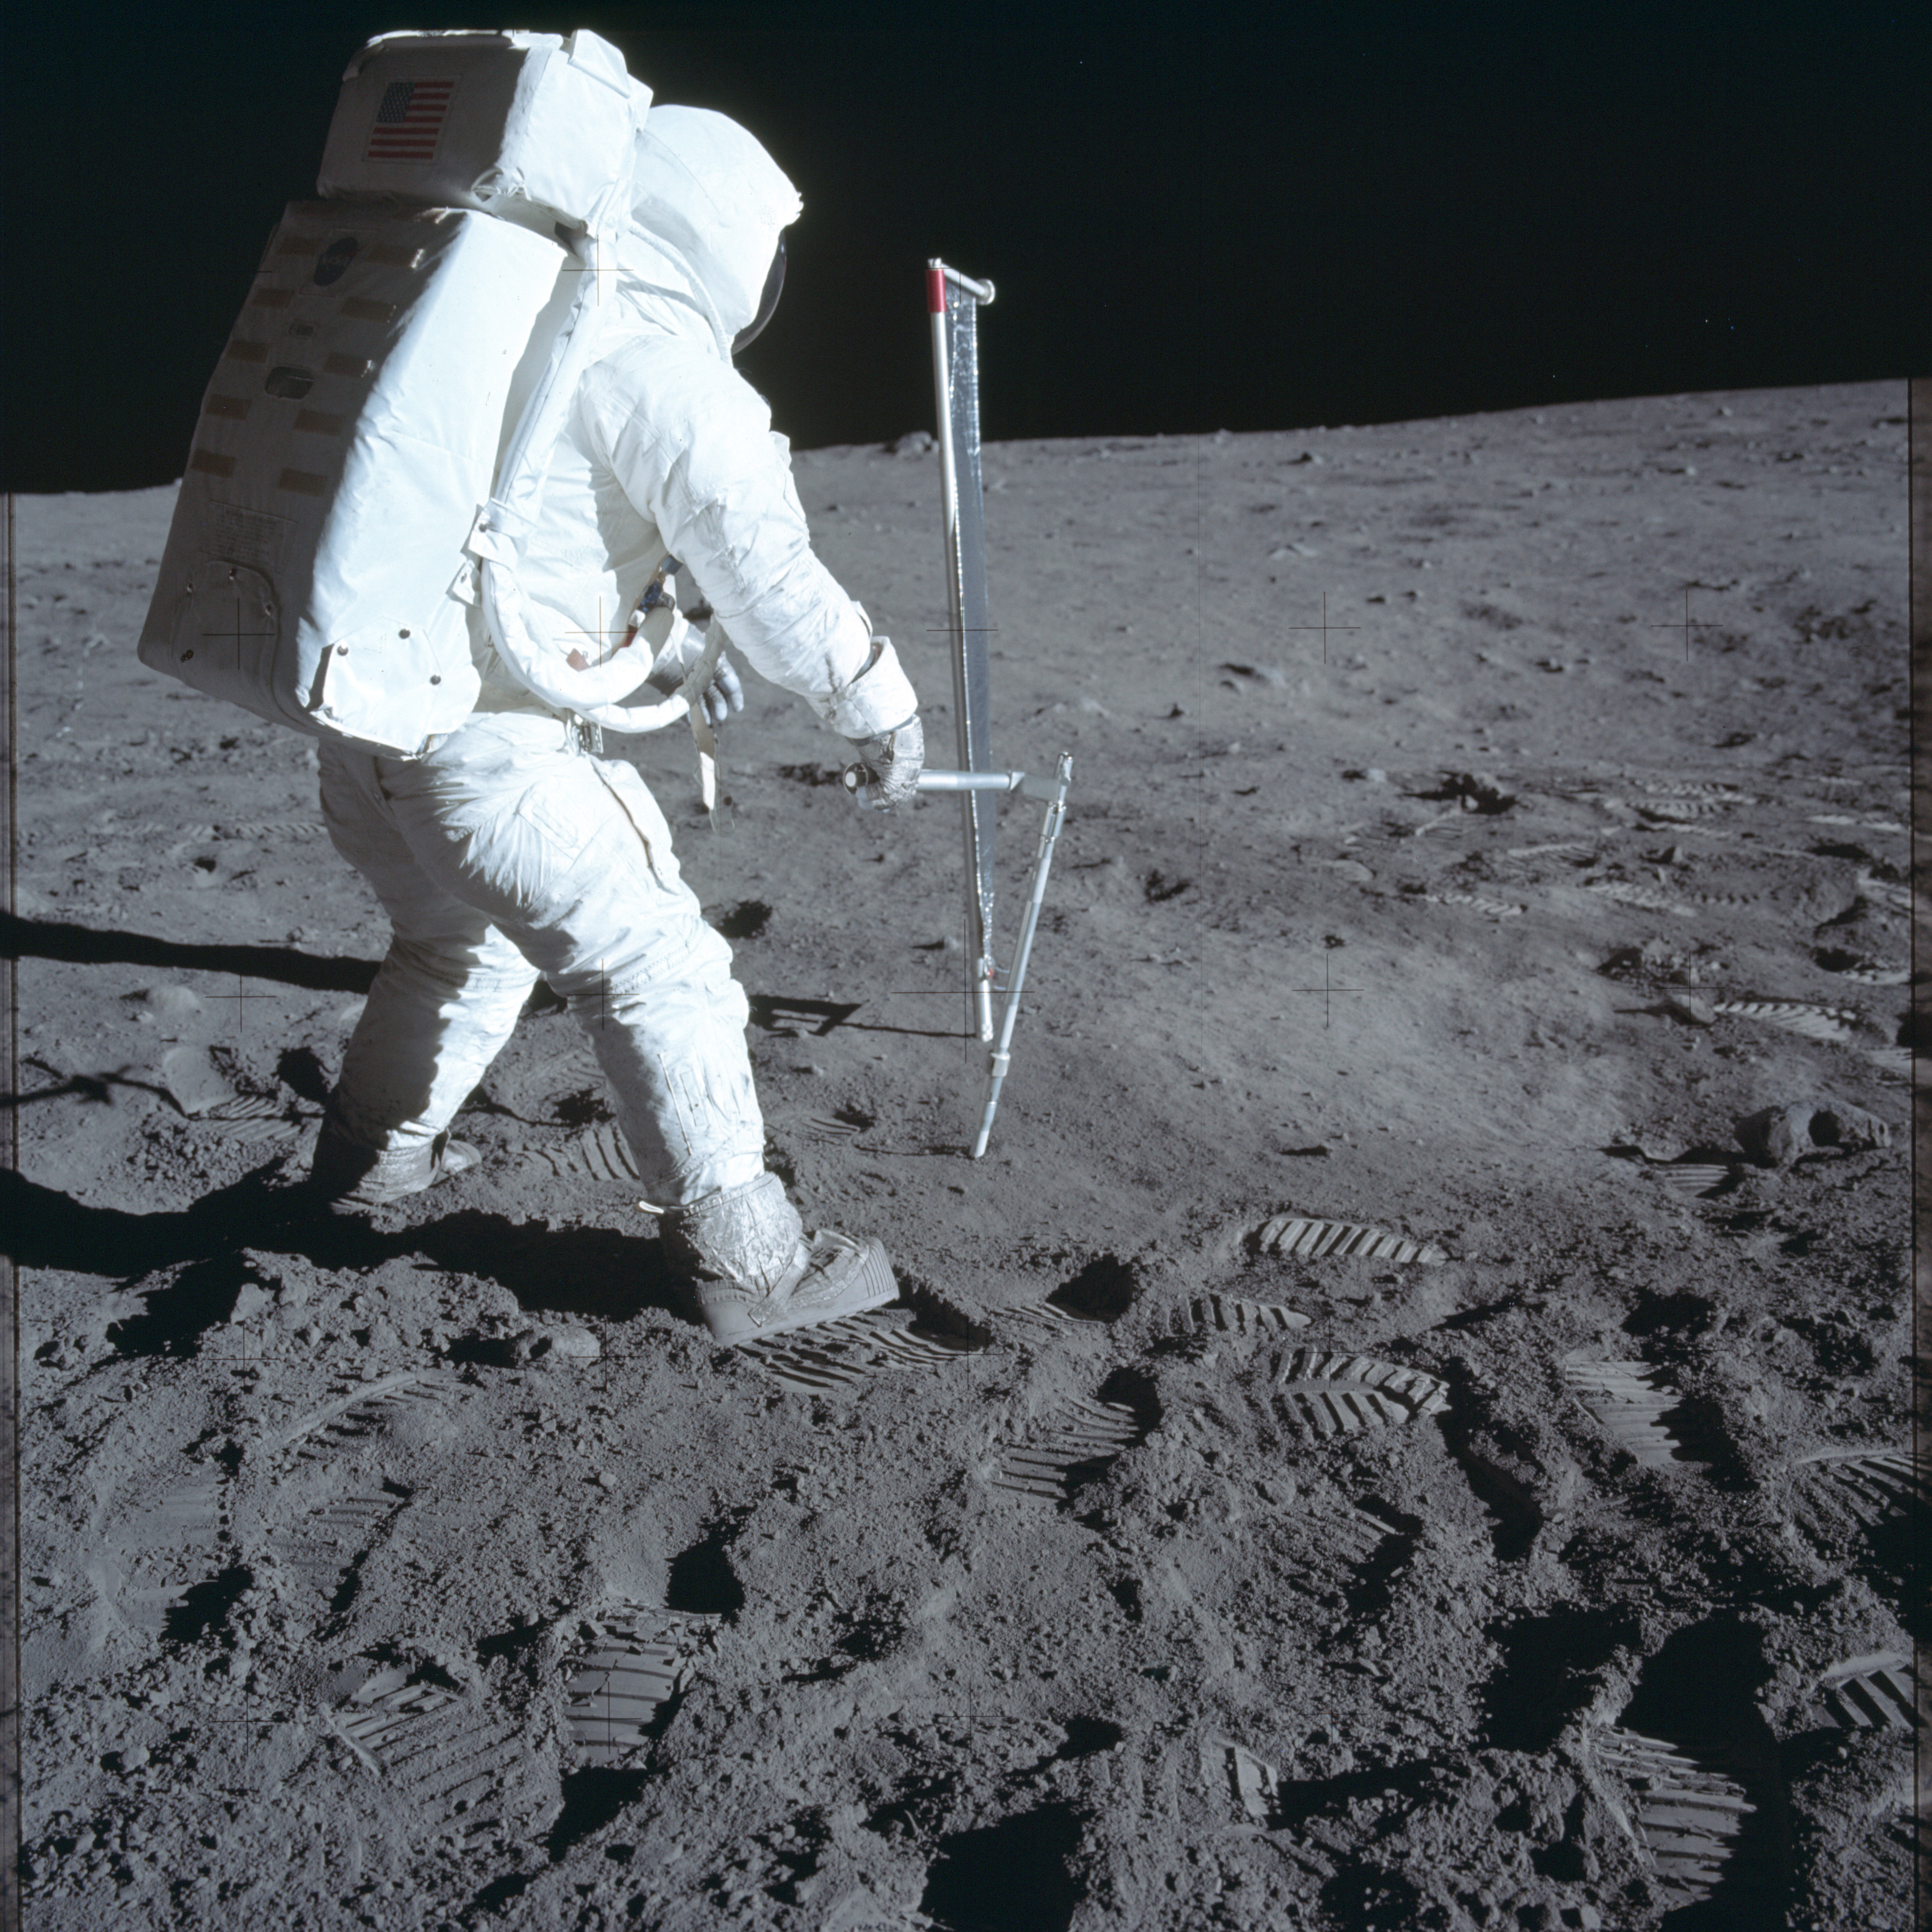
AS11-40-5967 Browse or print resolution. SWC pole. Image credit: Image Science and Analysis Laboratory, NASA-Johnson Space Center. |

|
AS11-40-5968 Browse or print resolution. SWC pole. Image credit: Image Science and Analysis Laboratory, NASA-Johnson Space Center. |

|
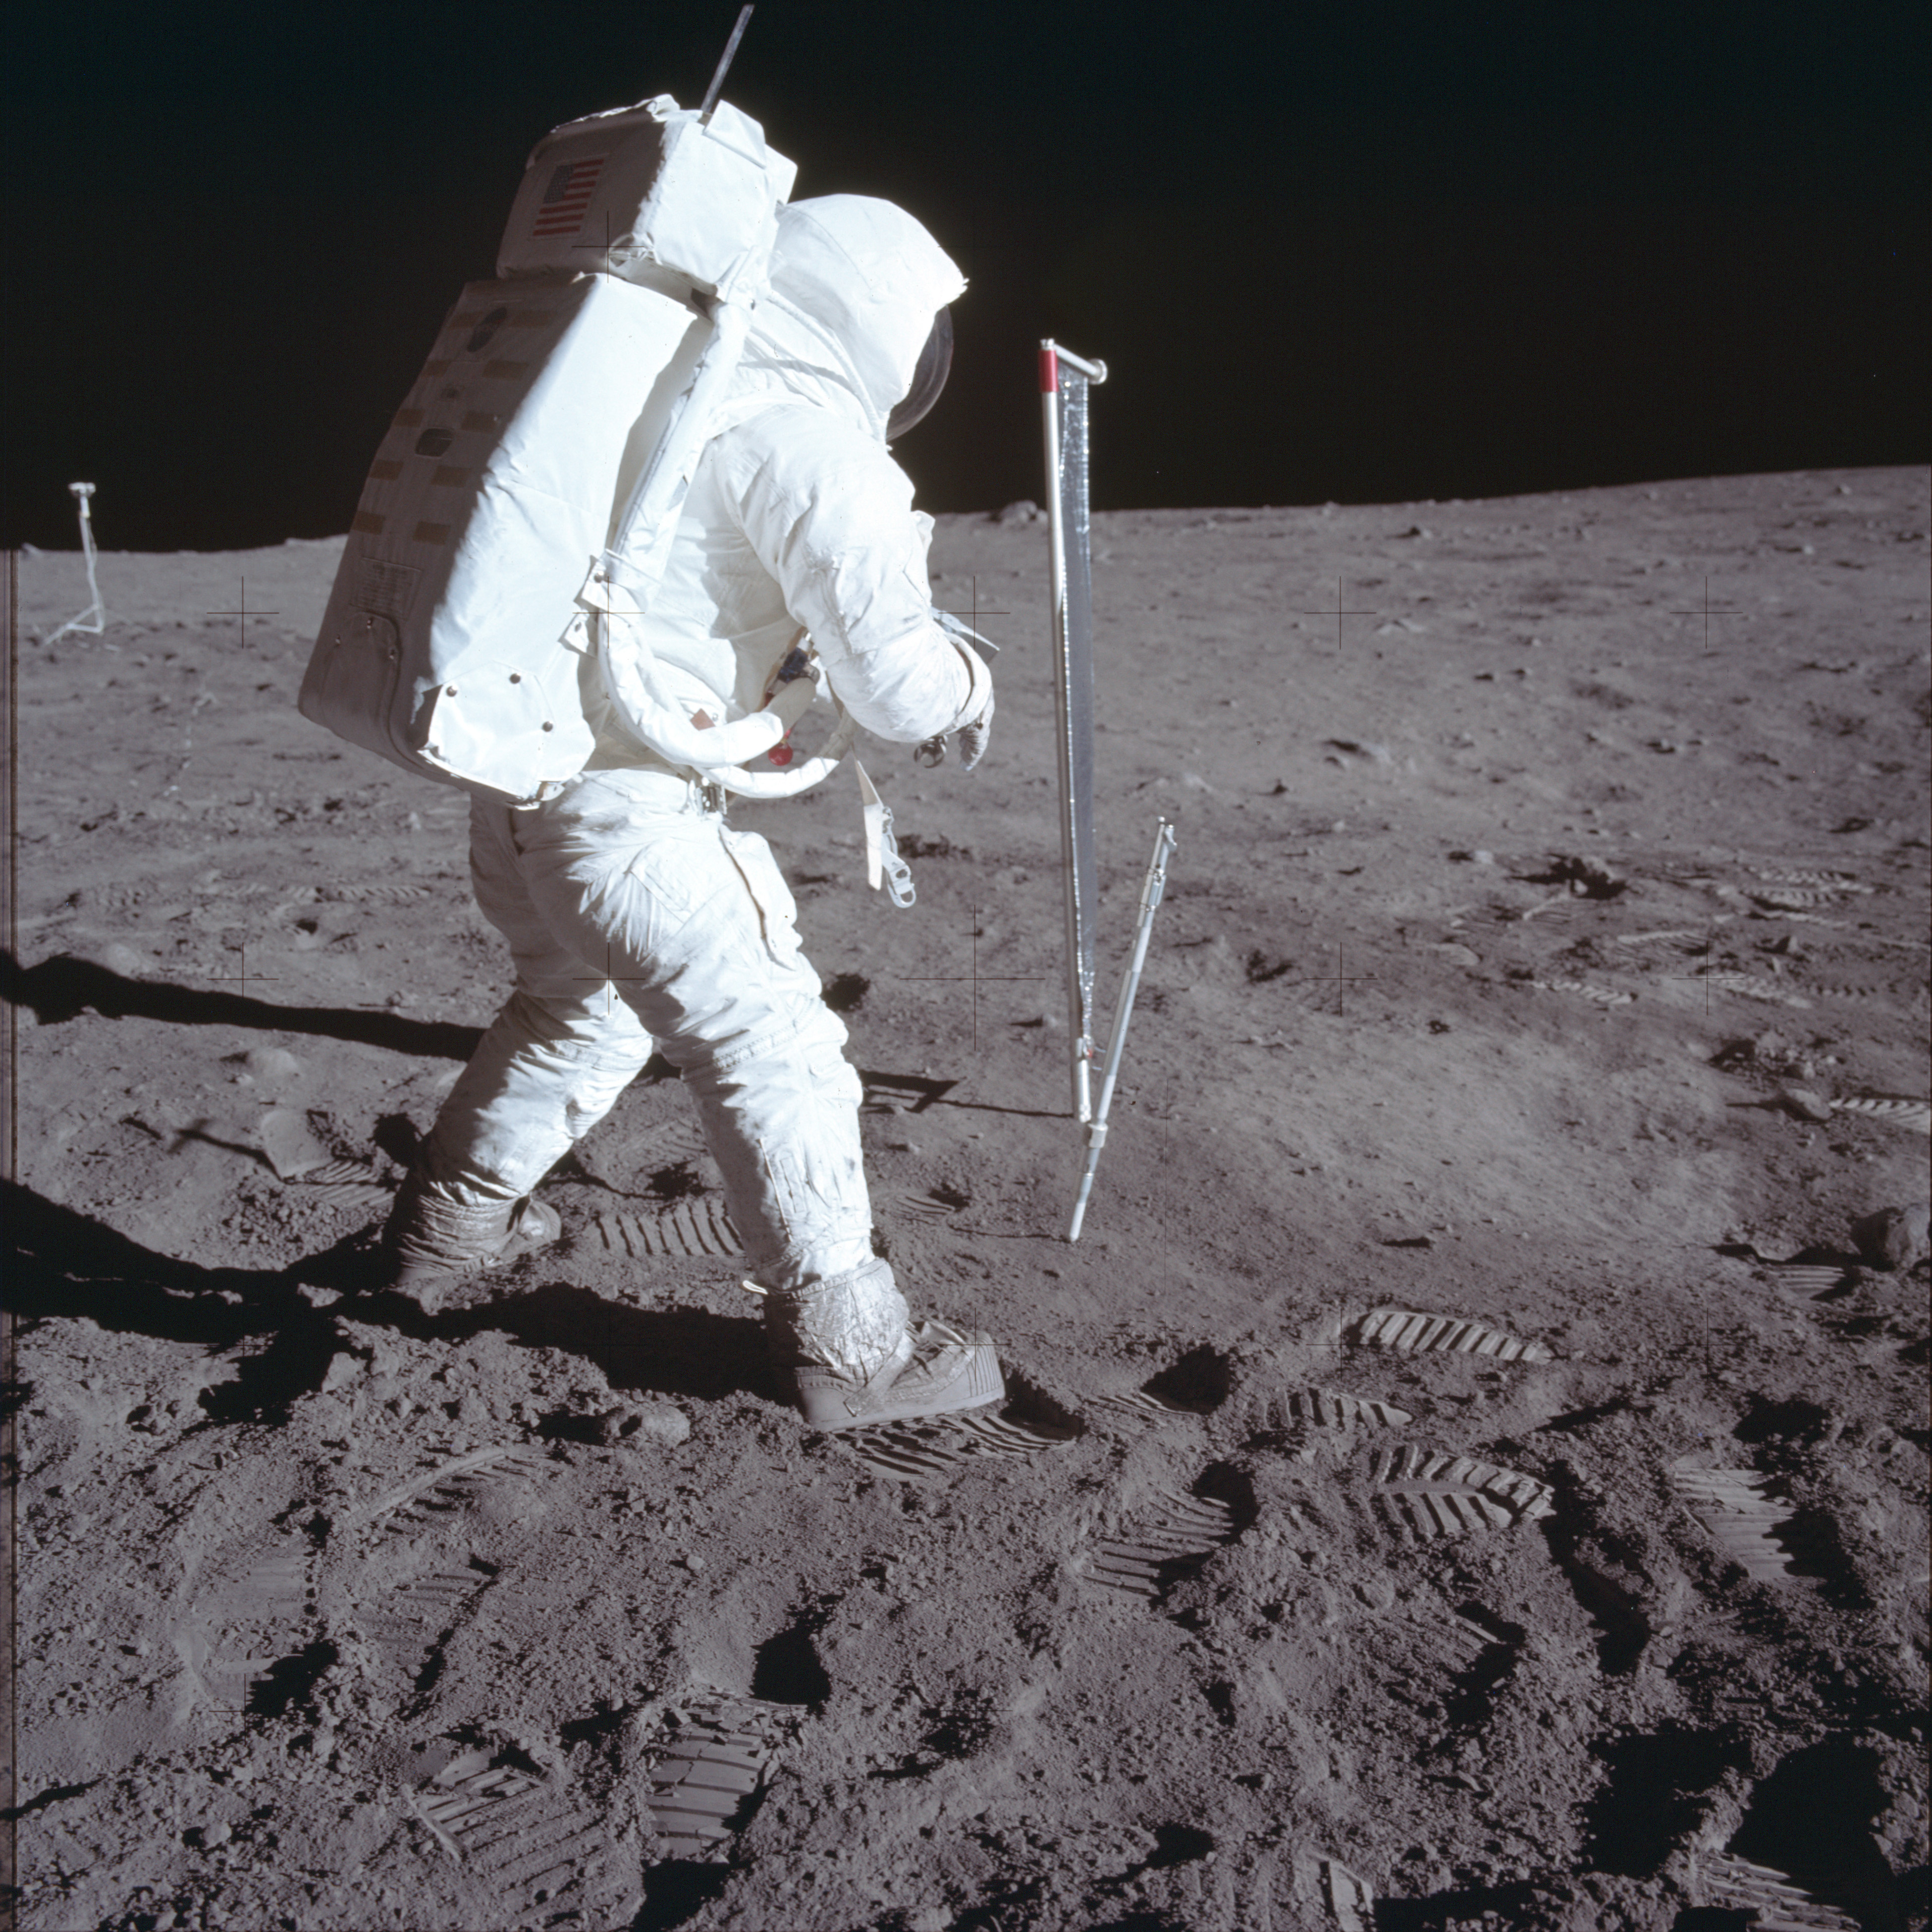
AS11-40-5969 Browse or print resolution. SWC pole with Armstrong in foreground on left. Image credit: Image Science and Analysis Laboratory, NASA-Johnson Space Center. |
|
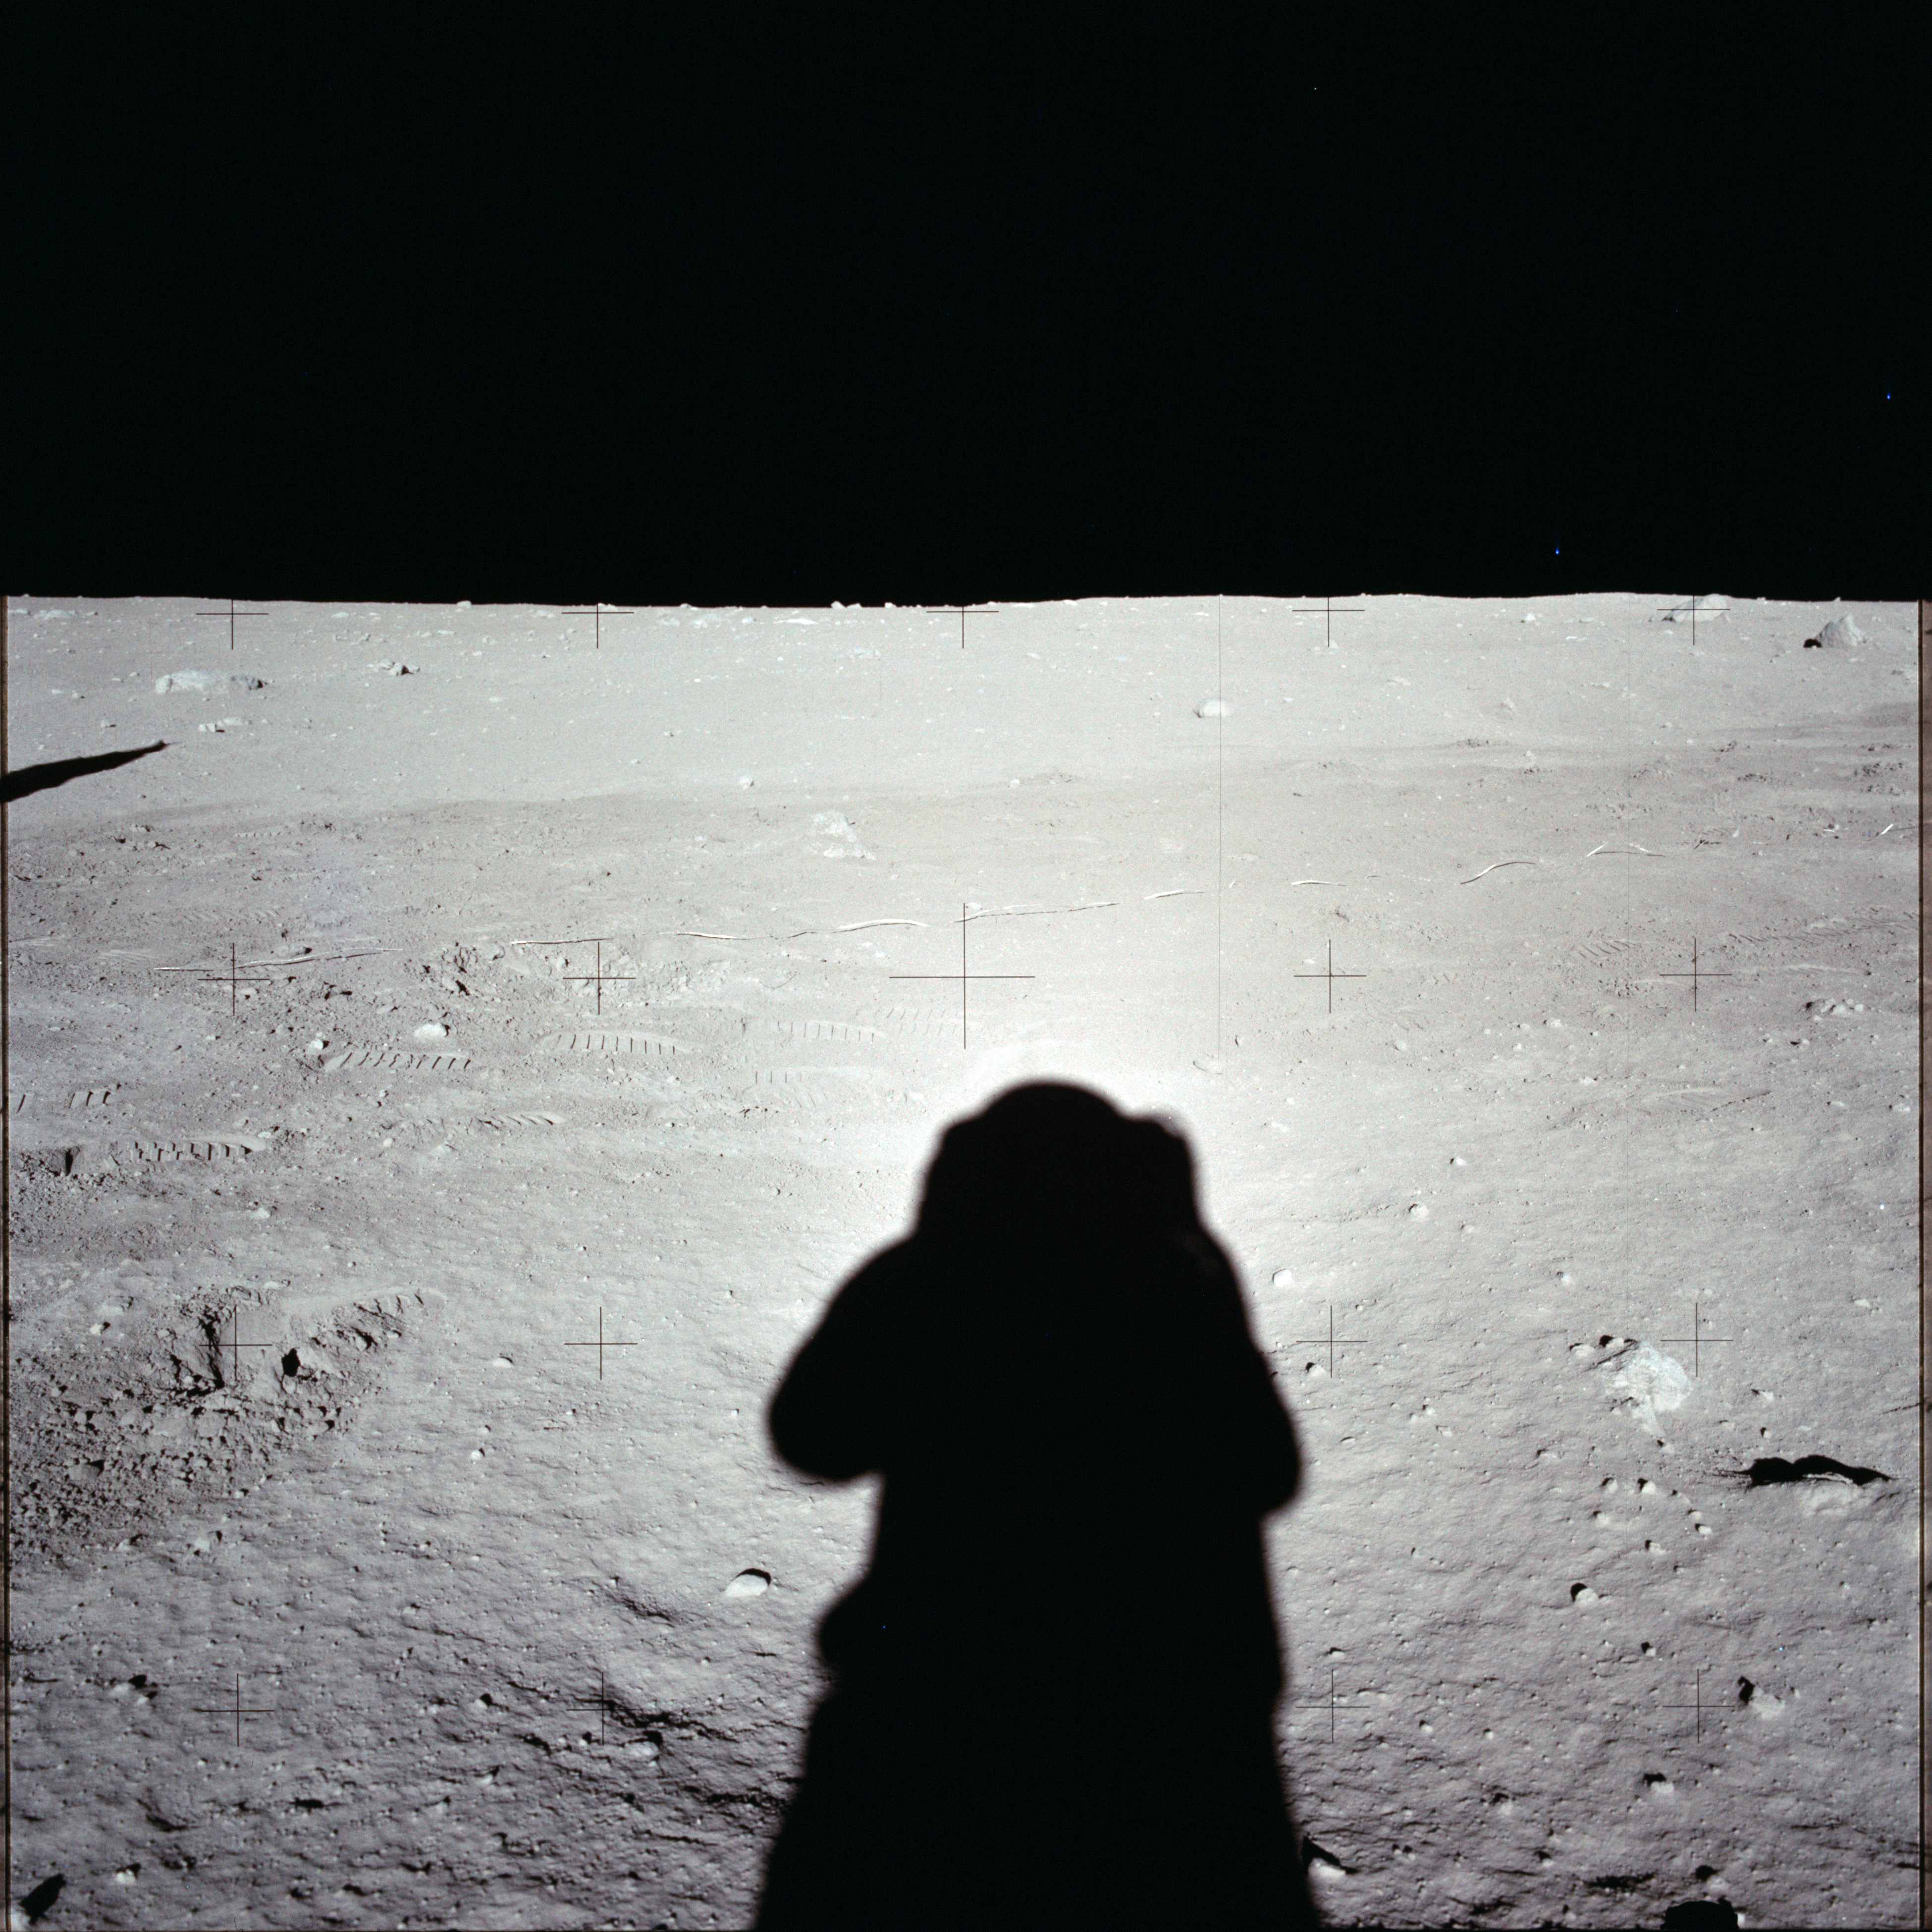
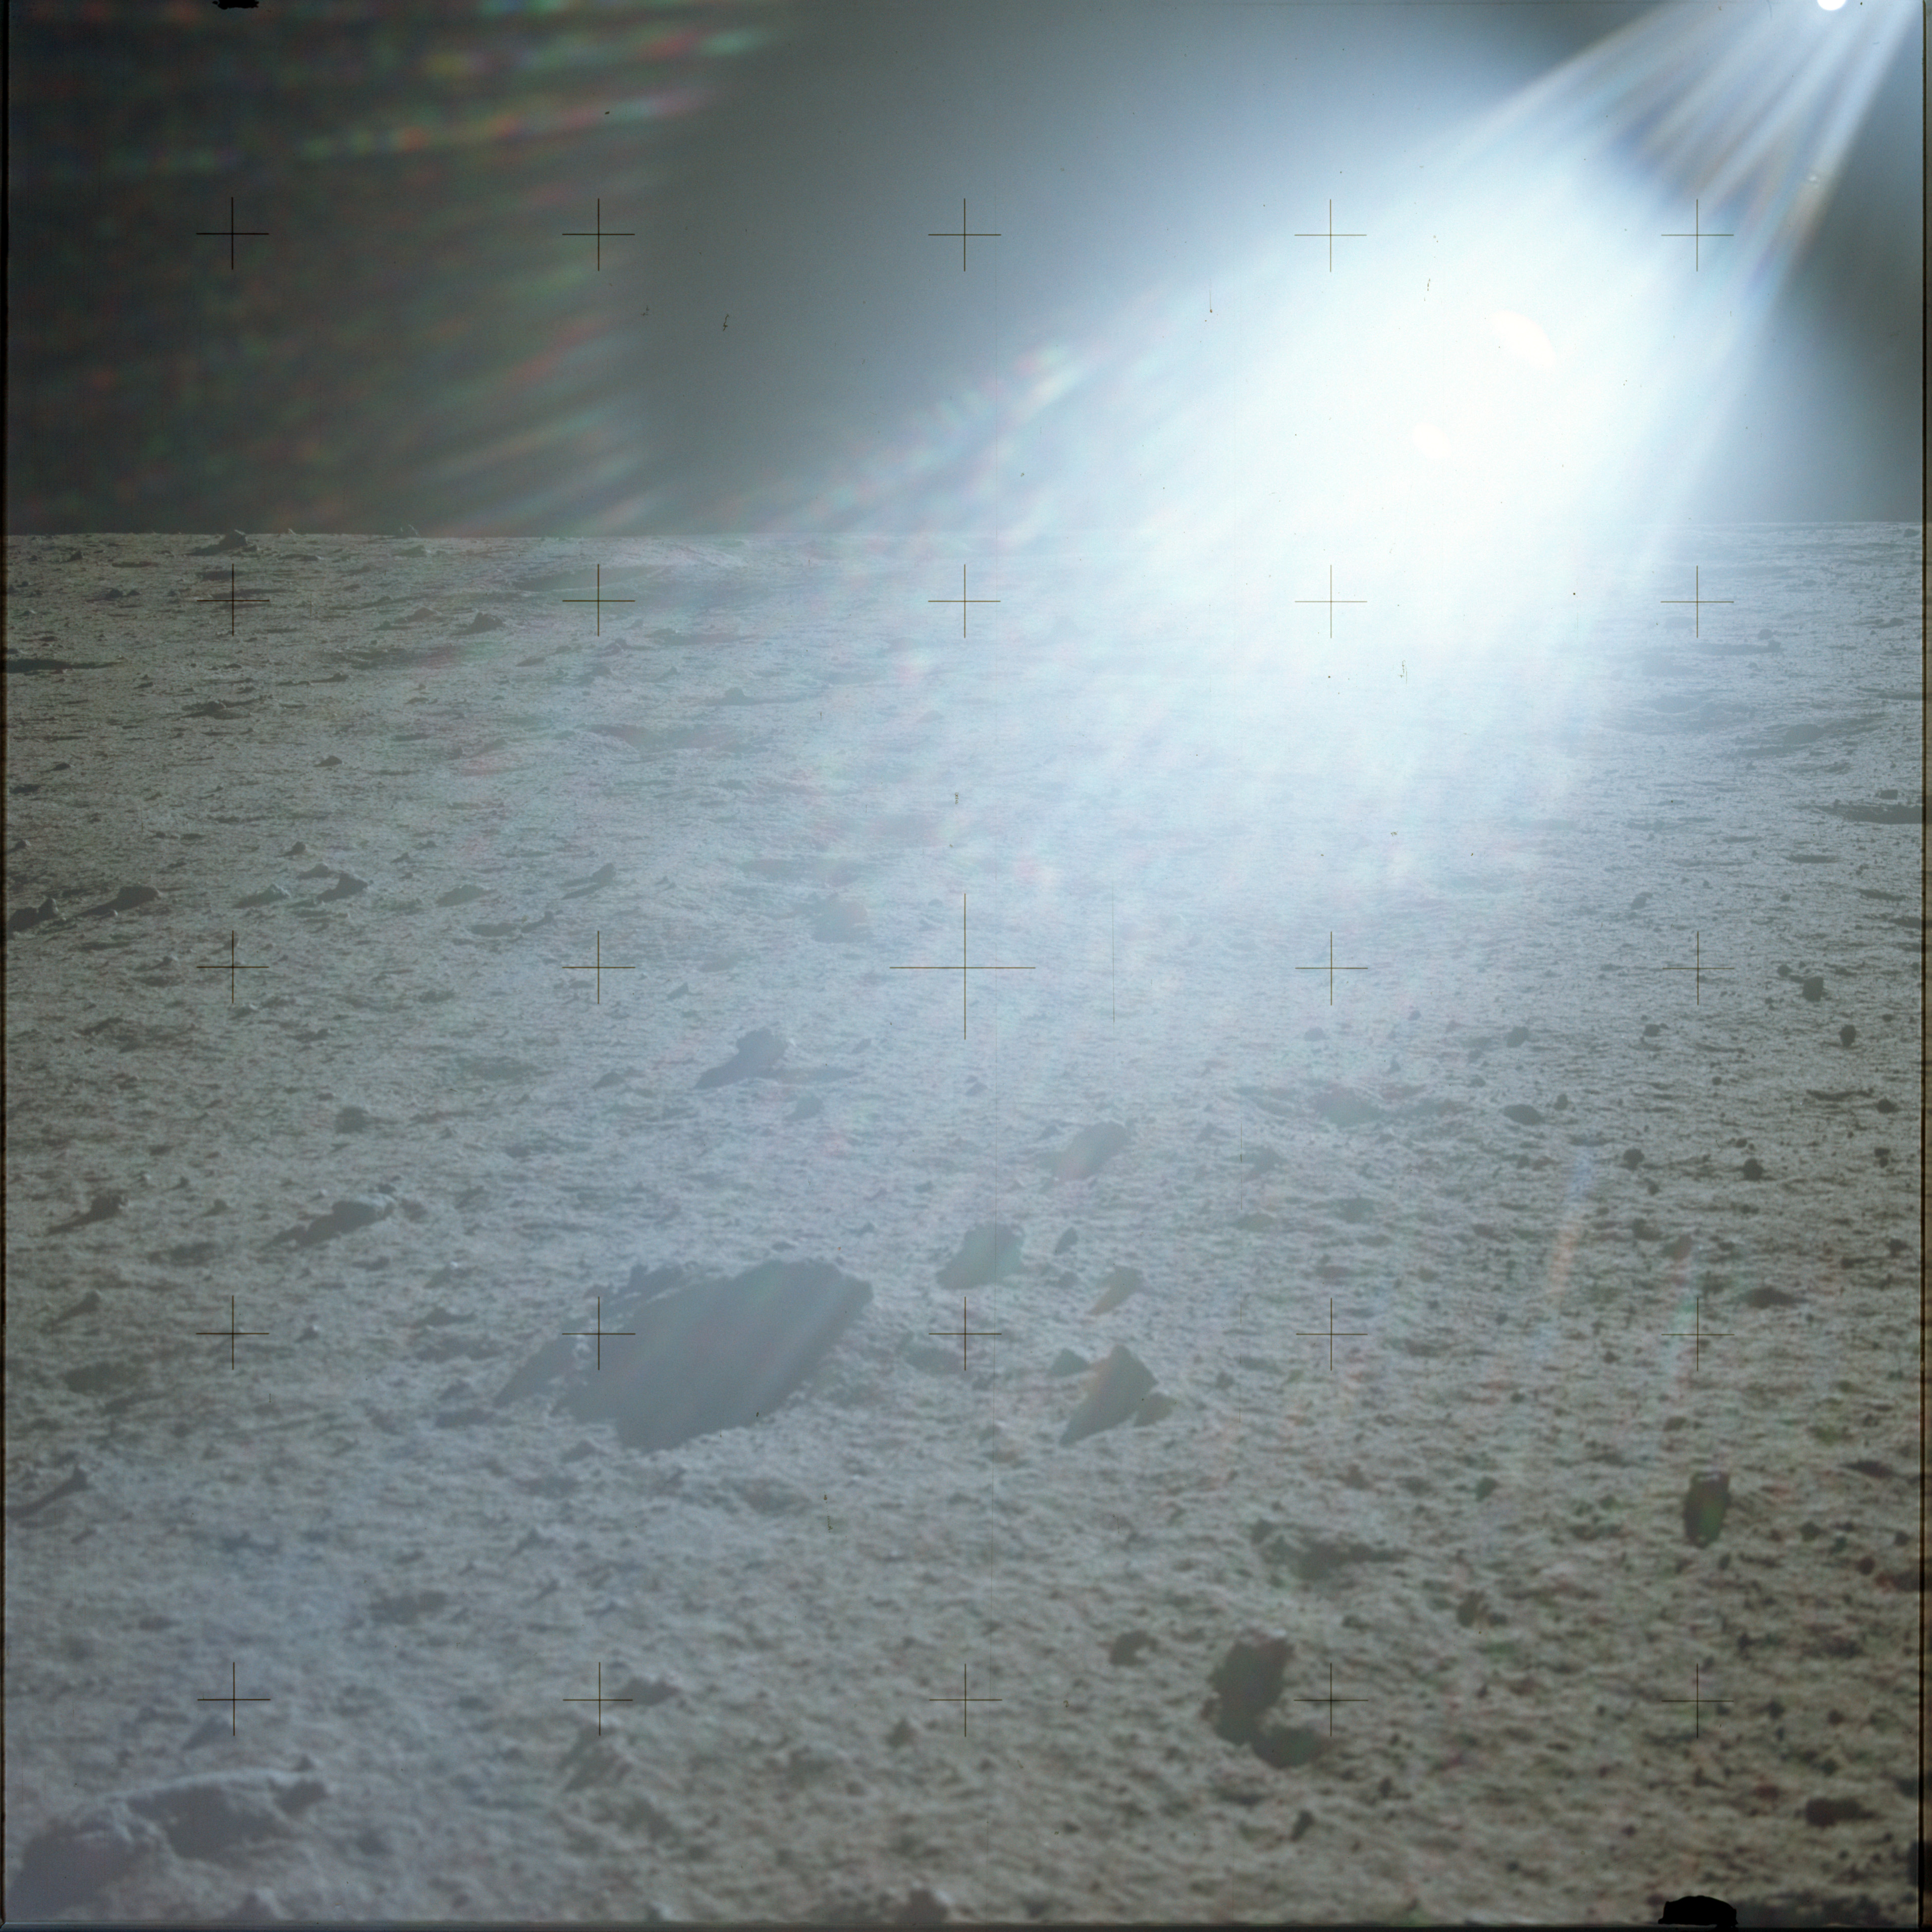
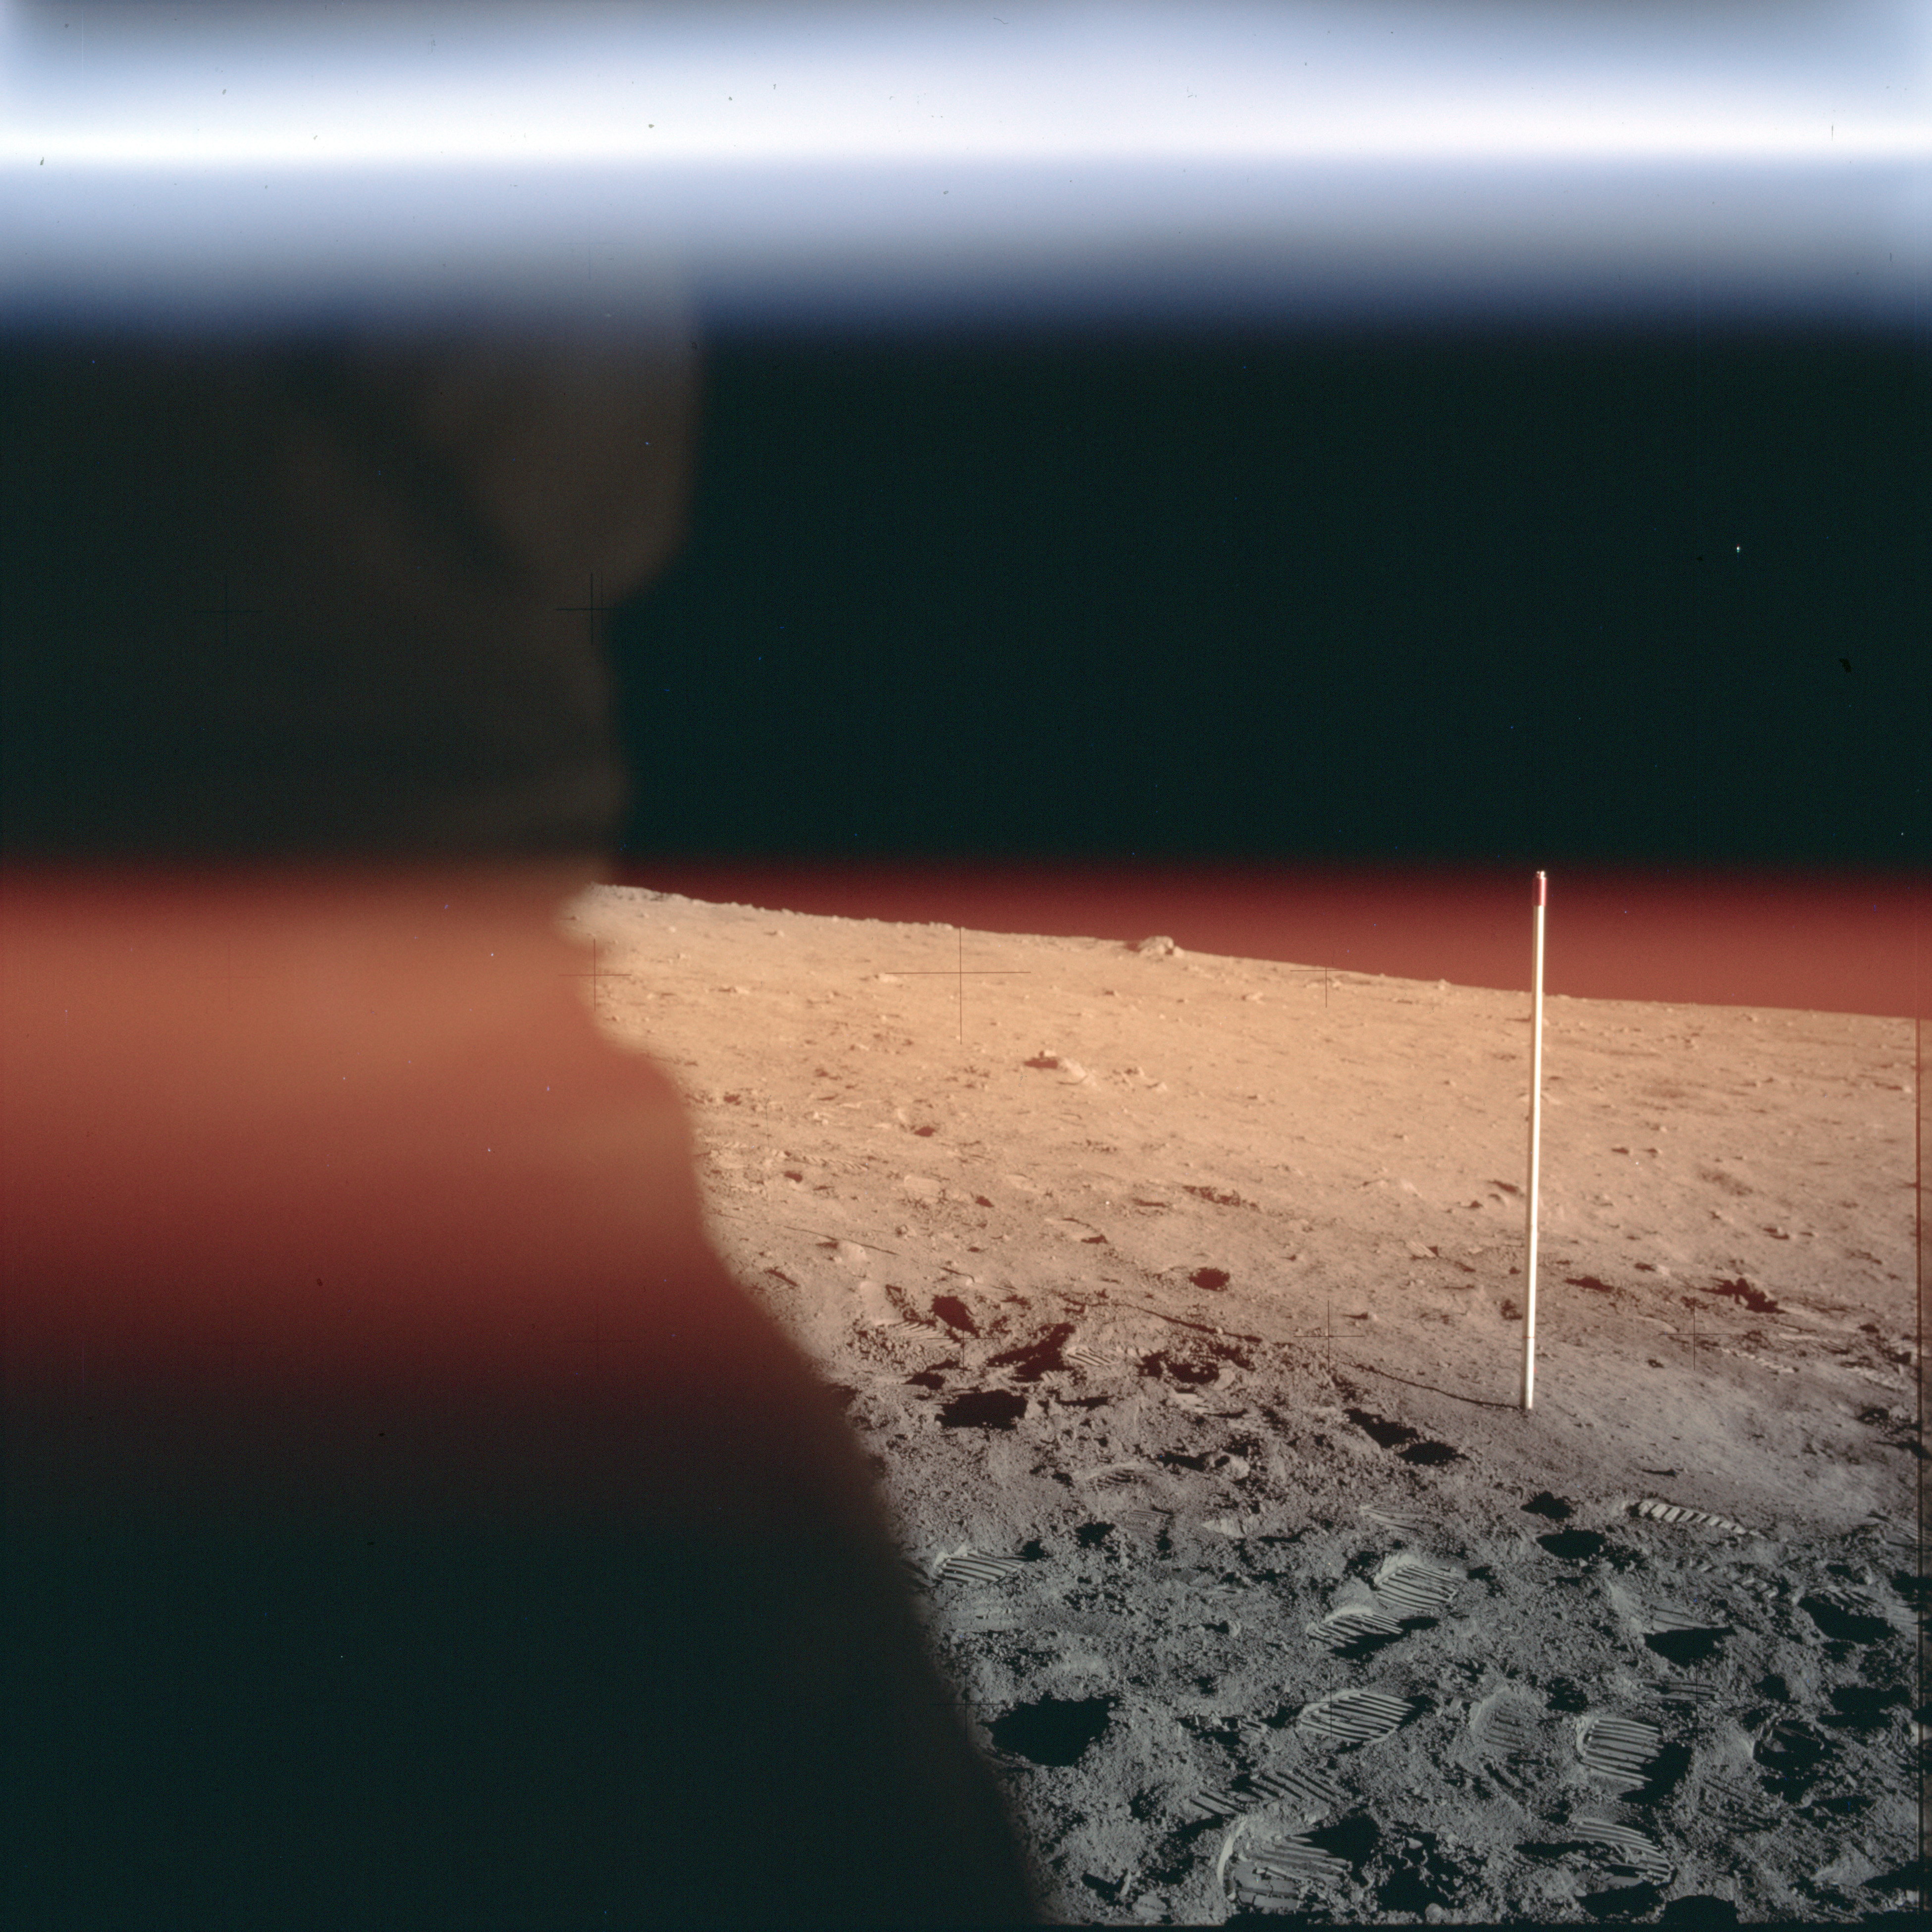
AS11-40-5970 Browse or print resolution. Sunstruck image of SWC pole. Armstrong in foreground on left. Image credit: Image Science and Analysis Laboratory, NASA-Johnson Space Center. |
| 70-mm magazine Q - AS11-39-5737 to 5843 |
Photography Index | 70-mm magazine P - AS11-41-5971 to 6159 |