Apollo 13

Day 4, part 5: Checking Odyssey
Corrected Transcript and Commentary Copyright ©2019-2020 by W. David Woods, Johannes Kemppanen, Frank O'Brien, Alexander Turhanov and Lennox J. Waugh. All rights reserved.
Last updated 2020-04-21

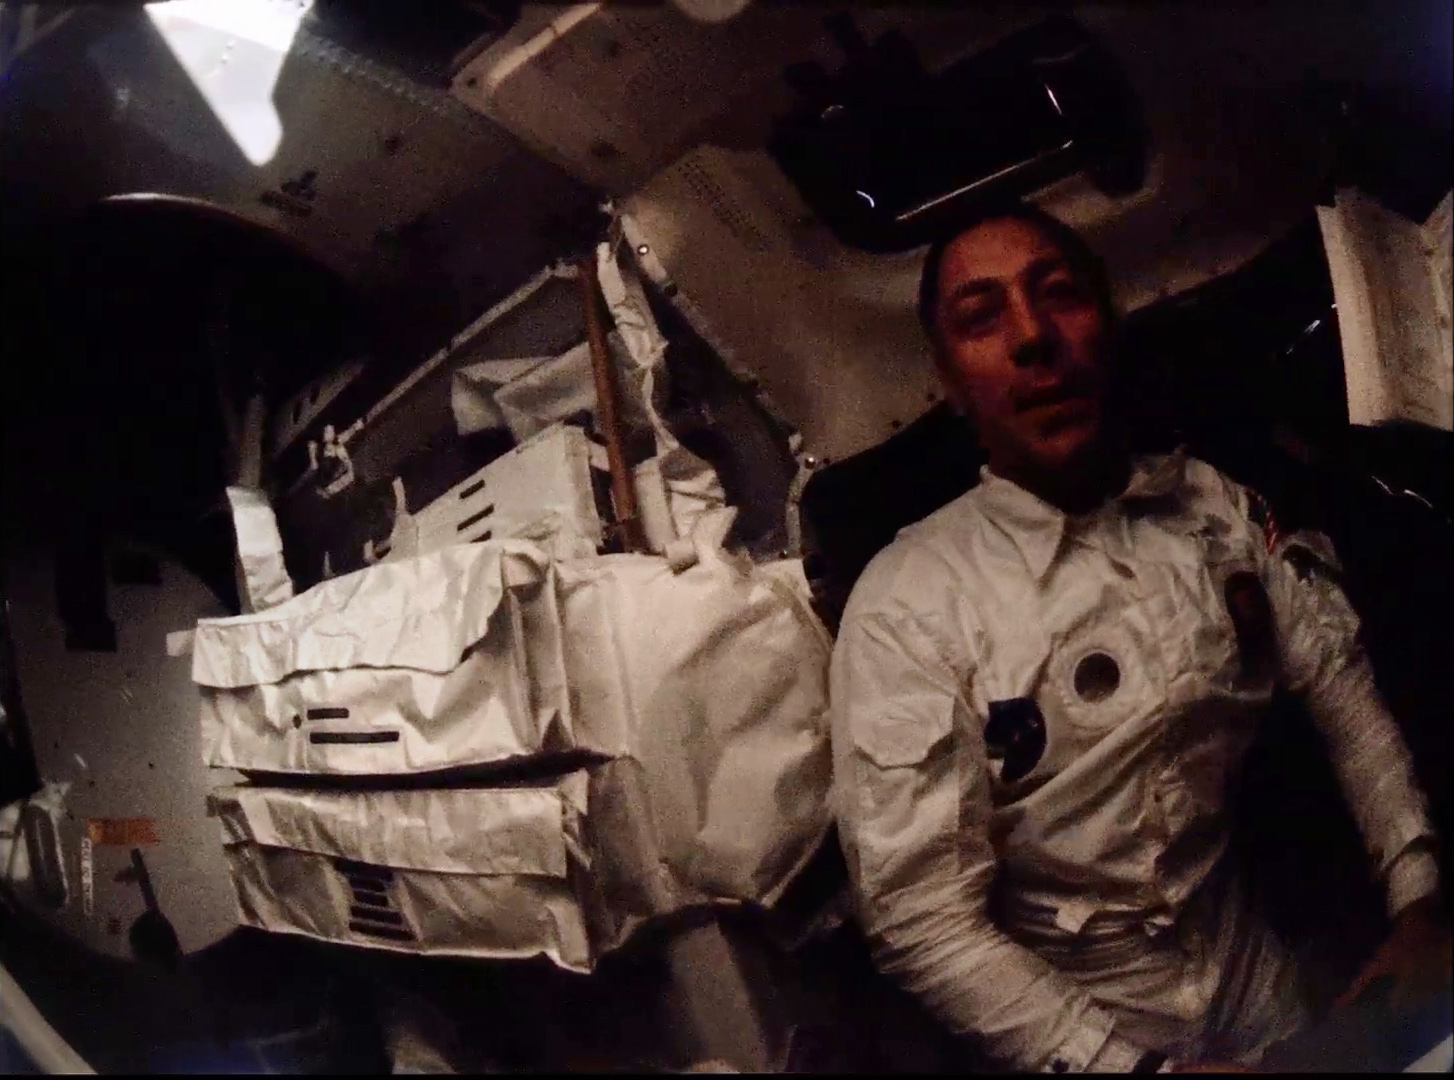
Jack Swigert in the LM. In-flight 16mm DAC film capture. JSC.
094:00:16 Kerwin: Roger, Jack. That completes that procedure, and the next thing I've got for you is a procedure for going back into the Command Module and powering up the main buses temporarily using the Bus Tie switches. We want to do this for two reasons: first of all, we want it absolutely verified that there are no loads on the main buses, that we've got: everything off and that the buses look good; and the second thing we want to do is to power the bus - the main buses, with the Bus Tie motor switches, and then depower them by pulling the circuit breakers, leaving the Main Bus Tie switches in the On position, just to assure that they'll be there when we need them, whether the batteries get cold or not. Over.
094:01:11 Swigert: [garble] [Long pause.]
094:01:33 Swigert: Okay, Joe. How you read?
094:01:36 Kerwin: Better now, Jack. Satisfactory. Did you copy my rationale for the main bus powerup?
094:01:45 Swigert: Yes, I did. You want to remove - You want to power up both buses, with the Bus Tie motor switches; first of all, to see that there are no loads on the buses, and second, and then depower the buses by pulling the circuit breakers to insure that the motor switches don't - that the Bus Ties stay on so that they're there when we need them.
094:02:09 Kerwin: That's correct, Jack. Are you ready to copy the procedure?
094:02:15 Swigert: Okay. Go ahead.
094:02:16 Kerwin: Okay. As the first step, I have one change to the basic configuration that we gave you, and it's two more circuit breakers that we want open. On panel 225 - Are you ready to write that down? Over.
094:02:35 Swigert: Yes. I'm all ready, Joe. Go ahead. [Pause.]
094:02:48 Swigert: Joe, I'm all ready. Go ahead.
094:02:50 Kerwin: Okay. On panel 225, we want the Rendezvous Transponder Flight Bus circuit breaker open, and the S-Band FM Transmitter/DSE Flight Bus circuit breaker open. Over. [Long pause.]
094:03:24 Swigert: Okay. TV Rendezvous Transponder Flight Bus, open; TV S-Band Transmitter/DSE Flight Bus open on panel 225.
Bus Tie Procedure
094:03:35 Kerwin: Okay. That's correct, Jack. And now we'll go into the main bus power up procedure. And the first step there, is on panel 5. We want the Bat Charger Bat A Charge circuit breaker closed, and the Bat Charger Bat B Charge circuit breaker closed. Over. [Long pause.]
094:04:15 Swigert: Okay. That's Bat Charger Bat A Charge, Bat Charger Bat B Charge, both closed on panel 5.
094:04:25 Kerwin: That's affirmative. We need them closed to power the switches. Next on panel 5, we want the EPS Sensor Signal Main A and Main B circuit breakers closed. Over. [Long pause.]
094:04:52 Swigert: Okay. Panel 5, CB EPS sensor's signals Main A and Main B closed.
094:05:00 Kerwin: Okay. That's affirmative. We need them closed so that you can read out your volts and amps. Next step, on panel 250, we want circuit breaker Bat A Power Entry and Postlanding and Bat B Power Entry and Postlanding, closed. Over. [Long pause.]
094:05:35 Swigert: Okay on panel 250, CB Bat A Power, Entry and Postlanding, closed; Bat B Power Entry and Postlanding, closed.
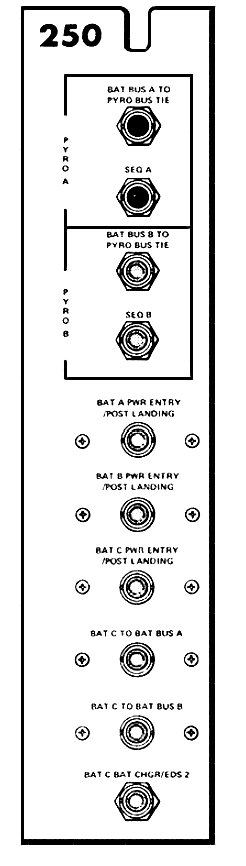
Circuit breaker panel 250
094:05:50 Kerwin: That's affirmative. And at that point, we'd like you to check the Bat bus voltages on both Bat buses to make sure we don't have any shorts. Over. [Pause.]
094:06:09 Swigert: Okay. Read the Bat bus voltages on Bat Bus A and Bat Bus B.
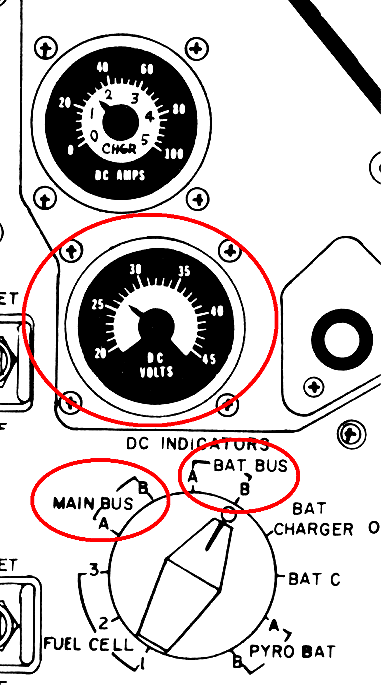
The voltage meter on the MDC and the Bus selector highlighted. Scan via heroicrelics.
094:06:13 Kerwin: That's affirmative. The next step on panel 275: circuit breaker Main A, Bat Bus A, closed, and circuit breaker Main B, Bat Bus B, closed. Over. [Long pause.]
094:06:44 Swigert: Okay. On 275, circuit breakers Main A, Bat Bus A, closed; Main B, Bat Bus B, closed.
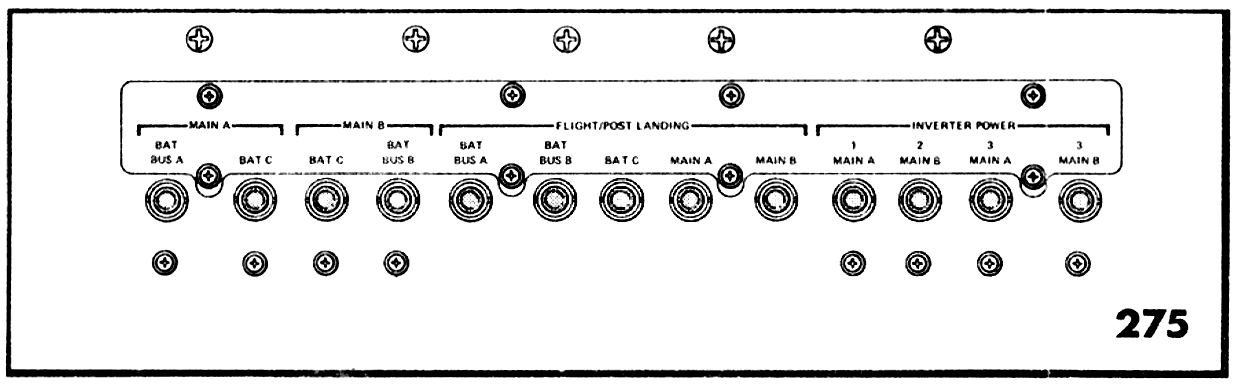
Panel 275, main battery breakers.
094:06:56 Kerwin: That's affirmative. The next step on panel 5: we want the Main Bus Tie A/C switch to the Bat A/C position, and verify proper voltage on Main Bus A, and read the amps on Bat A to make sure we don't have a short. Over. [Long pause.]
094:07:29 Swigert: Okay. [garble] [Pause.]

Battery Bus Tie switches on Panel 5. Original scan via heroicrelics.org
094:07:46 Kerwin: Okay, Jack, Houston. We're in bad comm again; let's wait a minute. [Long pause.]
094:08:03 Swigert: Okay. How do you read?
094:08:04 Kerwin: That's better, Jack. Go ahead with your readback.
094:08:10 Swigert: Okay. Place Main Bus Tie A/C, on, read Main Bus A current and voltage.
094:08:19 Kerwin: Okay. That's affirmative. The next step will be the Main Bus Tie B/C switch to the On position and read Main B voltage and battery B amperage as above. Over. [Long pause.]
094:08:49 Swigert: Okay, Main Bus Tie B/C on; read Main B voltage and current.
094:08:55 Kerwin: Okay. That is correct. Then to reconfigure from this configuration, Jack, we want you to leave the Main Bus Tie switches in the On position and pull the circuit breakers out in reverse order that we had you close them. Over; and do you want me to read them up individually?
094:09:17 Swigert: No, let me see if I've got it here. I go down to panel 275, open CB Main A, Bat Bus A and CB Main B, Bat Bus B. Then I go down to 250, and pull CB Bat A Power Entry/Postlanding and Bat B Power Entry/Postlanding and then up on panel 5, pull EPS Sensor Signal Main A, Sensor Signal Main B, Battery Charger Bat B Charge, Battery Charger Bat A Charge. And then close - I don't know whether you want me to close the Rendezvous Radar Transponder Flight Bus and S-Band Transmitter/DSE Flight Bus.
094:10:03 Kerwin: Okay, Jack. We don't want you to close those last two. Those are changes to your basic configuration, and we want to leave them open for now. Over.
094:10:15 Swigert: Okay. I'll do that. Was the rest of the readback okay?
094:10:17 Kerwin: That's correct. Readback was 100 per cent, and we'll wait to hear from you. [Pause.]
094:10:32 Swigert: Okay, Joe. And just for confirmation, I went through the switch list you gave me. We are in exactly that configuration with one exception, and that is over on panel 382. I have not, the a - H
2O Accumulator is in the Off position so that if we need any more water, we can get it.
094:11:05 Kerwin: Okay. Roger, Jack. Copy that. On panel 382, you've left the H
2O Accumulator valves in the Off position, and we concur.
094:11:16 Swigert: Okay. And there's one other thing that I don't know whether you're aware of. We have no lithium hydroxide canisters in panel two fif - in - canisters now. So when we get ready to power up, you'll have to remind us when you want us to add some.
094:11:38 Kerwin: Okay, Jack. We copy that. That's correct, and I'll add that to our basic checklist so that we won't forget it.
094:11:47 Swigert: Okay. Real fine, Joe, and I'm on my way back into the Command Module.
094:11:51 Kerwin: Good deal.
094:11:53 Swigert: Thank you. [Pause.]
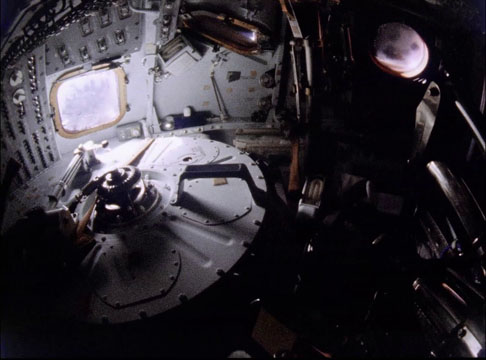
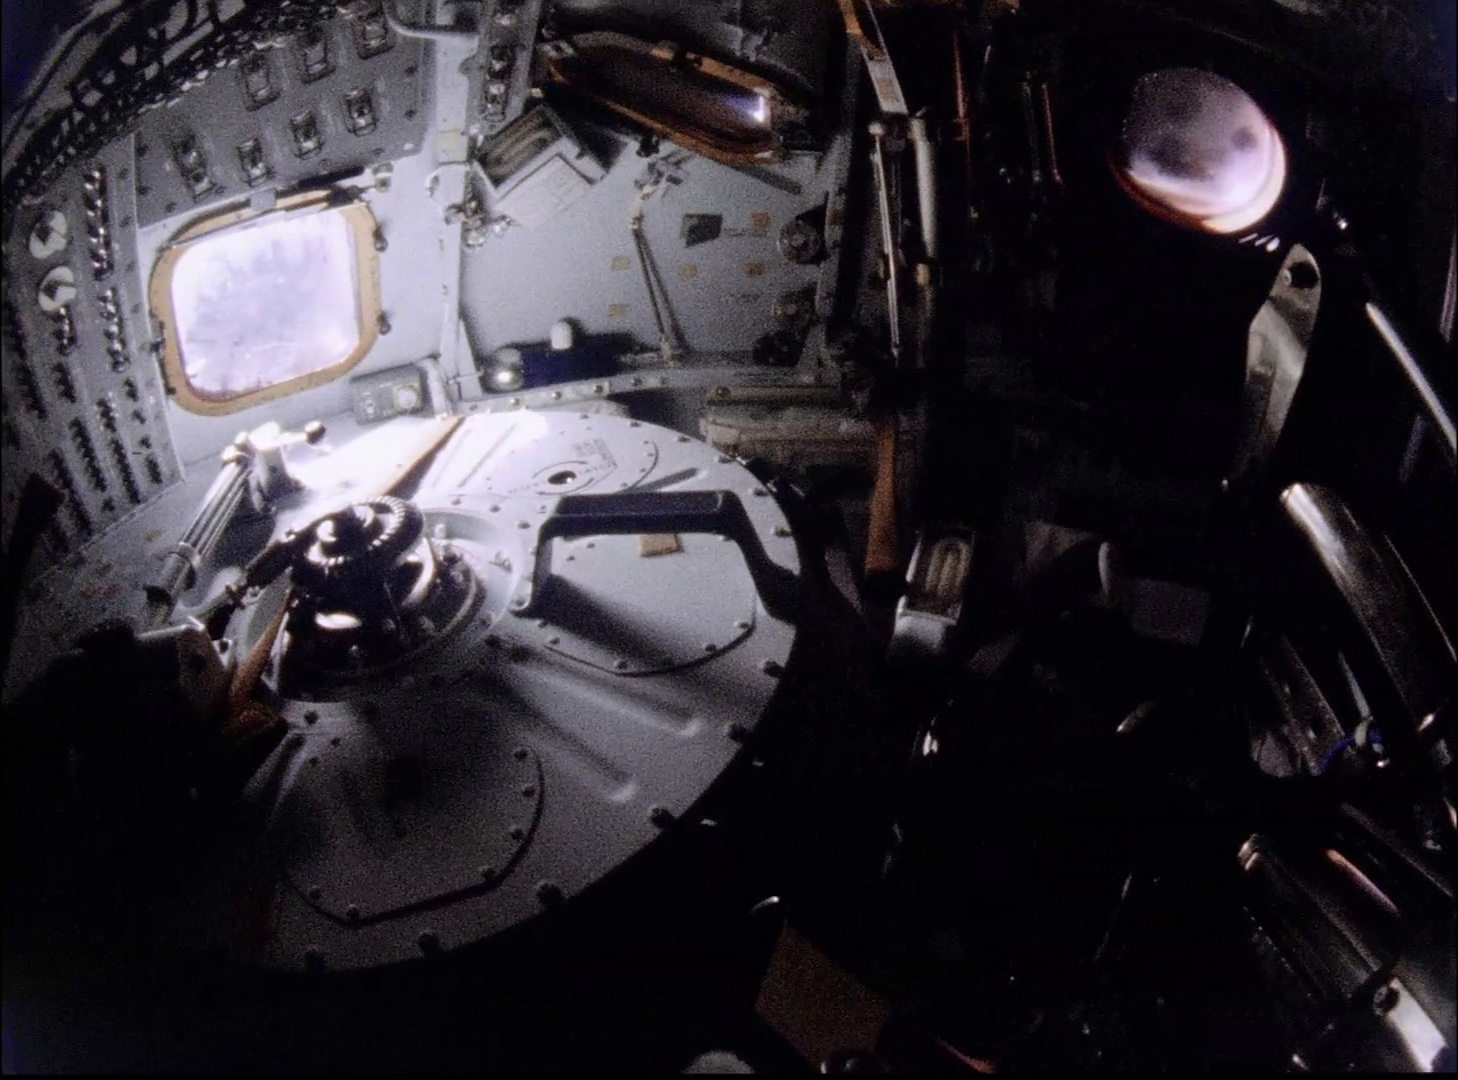
Powered down CM Odyssey cabin. A 16mm film capture. Via NASA.
094:12:04 Haise: How do you read, Joe? [Long pause.]
094:12:19 Haise: And, Joe, how do you read Aquarius?
094:12:23 Kerwin: Aquarius, Houston. Pretty good. Go ahead.
094:12:29 Haise: Okay. I'm back on the line now, but Jack really [Garble], headed back to the upstairs bedroom.
094:12:39 Kerwin: Okay. Roger that, Fred. [Long pause.]
094:13:01 Kerwin: Aquarius, Houston. Over.
094:13:06 Haise: Go ahead.
094:13:07 Kerwin: Okay, Fred. We recommend that you push your Master Alarm circuit breaker in so you'll have audio and visual on that, and, also, we medical types are getting to feel left out down here, and we'd like you to give us BIOMED [garble] position, if you're plugged in for it, and we'll see whether it affects the voice or not. Over.
094:13:36 Haise: Okay. [Long pause.]
094:14:22 Haise: Hey, Houston; Aquarius. On Down Voice Backup S-band, how do you read me?
094:14:28 Kerwin: Aquarius, Houston. Read you now satisfactory.
094:14:36 Haise: Okay. And that's my [Garble]
094:14:39 Kerwin: Okay. Thank you very much, Fred.
094:14:46 Haise: Actually, a good deal of that little power pack heats up and [Garble]
094:14:53 Kerwin: Roger that.
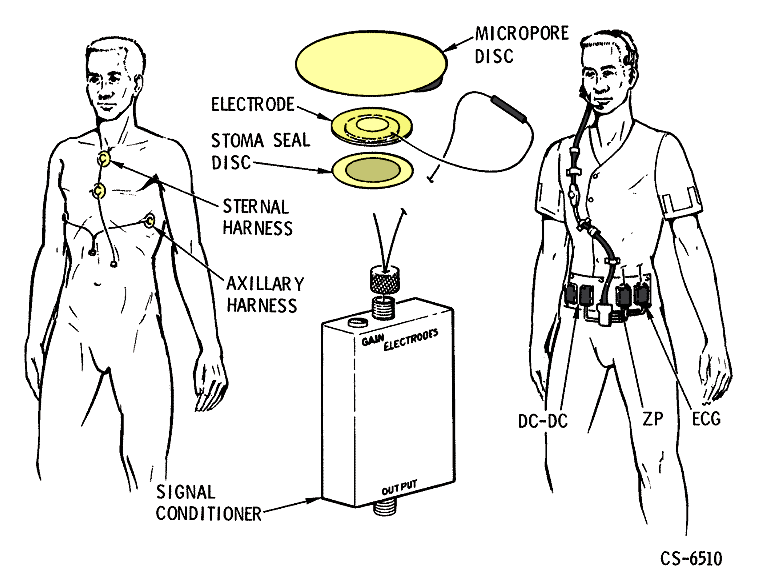
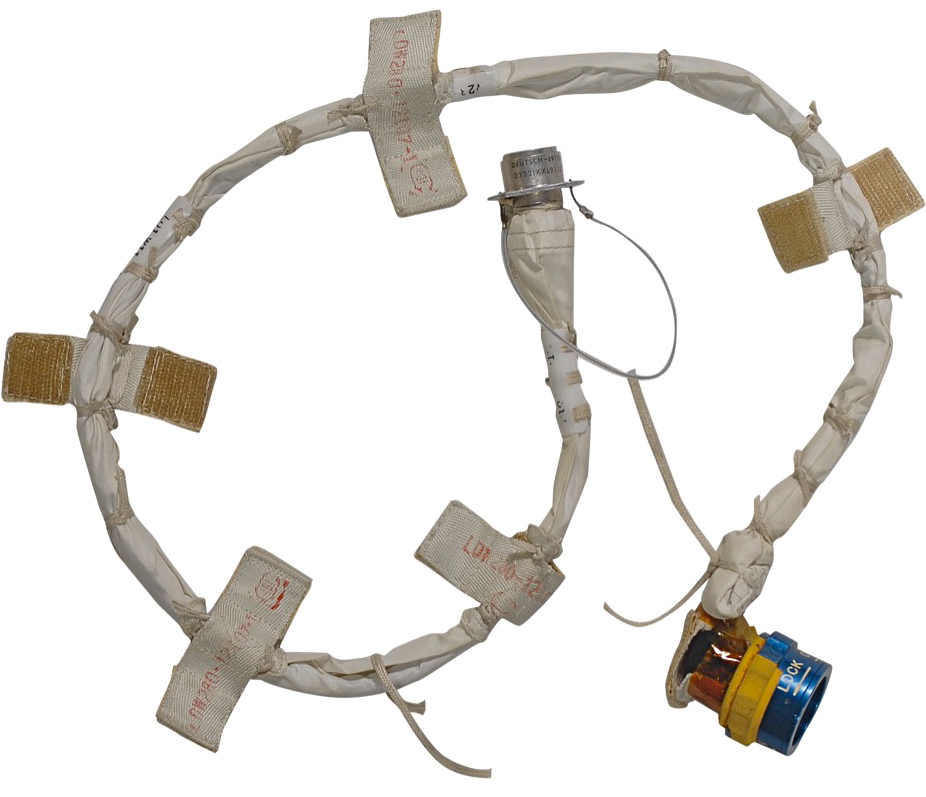
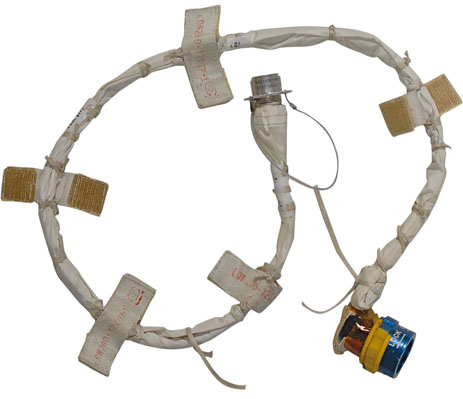
The biomedical instrumentation harness. The biomedical system contains several signal conditioner boxes on a belt worn around the waist. The previously discussed component is the main box which receives power from the communications cable and converts it to 5 volts DC, hence producing heat.
094:19:11 Haise: Houston, Aquarius.
094:19:14 Kerwin: Aquarius, Houston. Go ahead.
094:19:18 Haise: Okay, Jack just [garble] himself back down. And after he put on the 250 Bat A, Bat B breakers, he read Bat bus volts as 32.3 on A, 37.0 on B; he then punched in the 275 breakers, which tied the batteries to the buses, and at that time he read the A bus volts 32.0 on A, zero amps; 37.0 on B, zero amps.
094:19:59 Kerwin: Aquarius, Houston. The comm got noisy there, and I want to make sure we get these numbers right, so I'd like to ask you to repeat them [garble] [Long pause.]
094:21:00 Haise: Okay. How do you read now, Joe?
094:21:01 Kerwin: Okay; probably okay, Fred. Read it nice and slow so we'll be sure to get it. Over.
094:21:10 Haise: Okay. Jack pushed in the 250 Bat A, Bat B entry breakers. He read battery bus volts as 32.3 on A, 37.0 on B. Then he pushed in the 275 breakers tying the BATs to the main buses. In this configuration, Main A is at 32.0 volts, zero amps; Main B is at 37.0 volts, zero amps. So it looks like the buses are okay.
094:21:47 Kerwin: Okay, Fred. Copy those numbers and thank you very much. I assume you got them off all right. [Pause.]
094:22:00 Haise: That's affirm. We got all the breakers pulled again.
094:22:03 Kerwin: Okay. Real fine.
094:32:33 Haise: Hey, Houston; Aquarius. How do you read?
094:32:38 Kerwin: Aquarius, Houston. Go ahead.
094:32:43 Haise: Okay. How did our [garble] configurations appear to be working down there?
094:32:54 Kerwin: I'm sorry, Fred, but we got noisy again there. [Pause.]
094:33:02 Haise: Okay. Let me know when you want me to try it.
094:33:05 Kerwin: Okay. That sounds better already. Go ahead.
094:33:11 Haise: Okay. I'd just like to [garble] how's - how's our lith-o cartridge setup [garble] appear to be working down there.
094:33:21 Kerwin: We are reading 0.2 on our CO
2 sets here, and we're all delighted. It seems to be working fine.
094:33:31 Haise: Boy, that is great. [Pause.]
094:33:40 Kerwin: And Fred, Houston. In a little while here, I'm going to have a procedure that I want to read up to you and have you copy down for future use. It's a procedure for powering the Command Module main bus off the LM, and it's something that we feel that's going to come in real handy later on for such things as topping off the Command Module entry batteries, and also possibly for doing some preheating and preliminary powering up of the Command Module before we get rid of the LM. We'll have that for you in probably 10 or 15 minutes. Over.
094:34:25 Haise: Okay, okay, Joe. That's good. Sounds good.
094:36:11 Kerwin: Aquarius, Houston.
094:36:16 Haise: Go ahead.
094:36:18 Kerwin: Okay, Fred. Our procedure-generating mill has generated another very short one for you here. It's a procedure for getting an onboard read-out ...
094:36:27 Haise: Stand by 1, Joe.
094:36:38 Kerwin: Okay. [Long pause.]
094:37:02 Haise: Okay, Joe. Go ahead.
094:37:05 Kerwin: Okay, Fred. This is a procedure for getting a read-out of the descent propellant tank temps. It's no big problem, but our LM people say that the bottom of the descent stage is probably cooling off, and we just want to verify that the descent water tank will be okay. Right now, it looks as though it won't freeze until several hours after it's empty, but we want to have you read these temperatures out to us so we can see how good our predictions are. The procedure is, on panel 16, close the Propellant Display/Engine Override Logic circuit breaker. Over. [Long pause.]

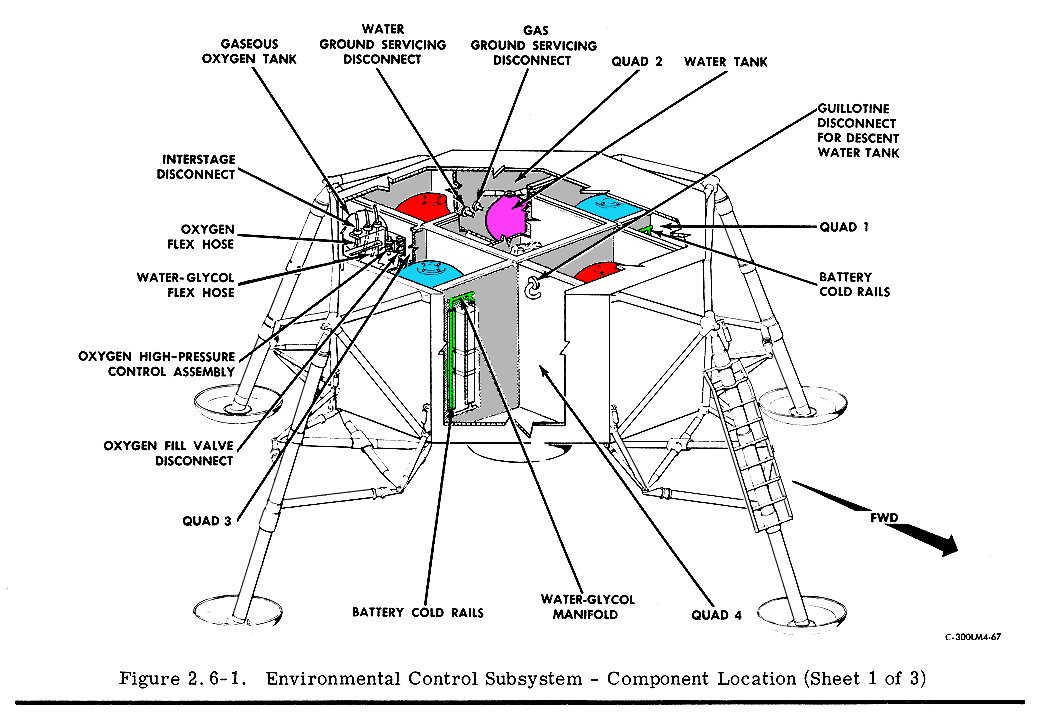
LM Descent Stage with the fuel tanks and the Environmental Control System components highlighted.
094:38:12 Haise: Okay. The Propellant Display Override circuit breakers are closed. [garble] the propellant. [Pause.]
094:38:21 Kerwin: Right, Fred. The next step is simply to turn the Propellant Temp Press Monitor switch to Descent 1, read the fuel and Ox temps, turn it to Descent 2, read the fuel and Ox temps; tell us what they are. [Pause.]
094:38:44 Haise: Okay. On Descent 1, I get a fuel temp of 66.5 degrees, Ox [garble] on Descent 2, I get [garble] [Pause.]
094:39:05 Kerwin: Okay, Fred. We're in noisy comm here; I got Descent 1 fuel 66.5; stand by a second. [Long pause.]
094:39:35 Haise: Okay. How do you read, now [Garble]?
094:39:37 Kerwin: That's better. Go ahead.
094:39:47 Haise: Okay. You got 66.5 on Descent 1 fuel temp, oxidizer temp is 66 degrees.
094:39:53 Kerwin: Okay. Copy ...
094:39:54 Haise: On Descent TANK 2, fuel is reading 60 - Okay. Descent 2 fuel is reading 68 degrees; oxidizer, 65 degrees.
094:40:03 Kerwin: Okay. Copy that, Fred. Thank you. We'd like you to pull the circuit breaker, and we'll probably come to you again in 5 or 6 hours for another check.
094:40:14 Haise: Okay. The panel 16 [garble] [garble] Engine [garble] Override is open.
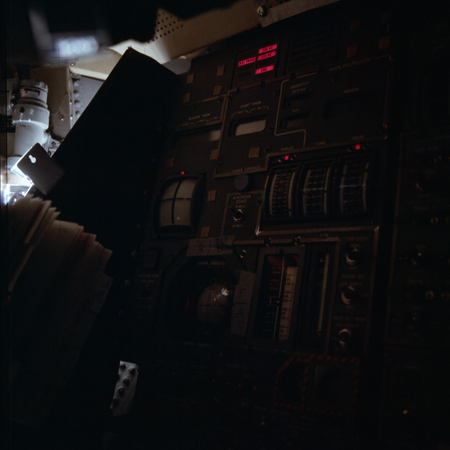
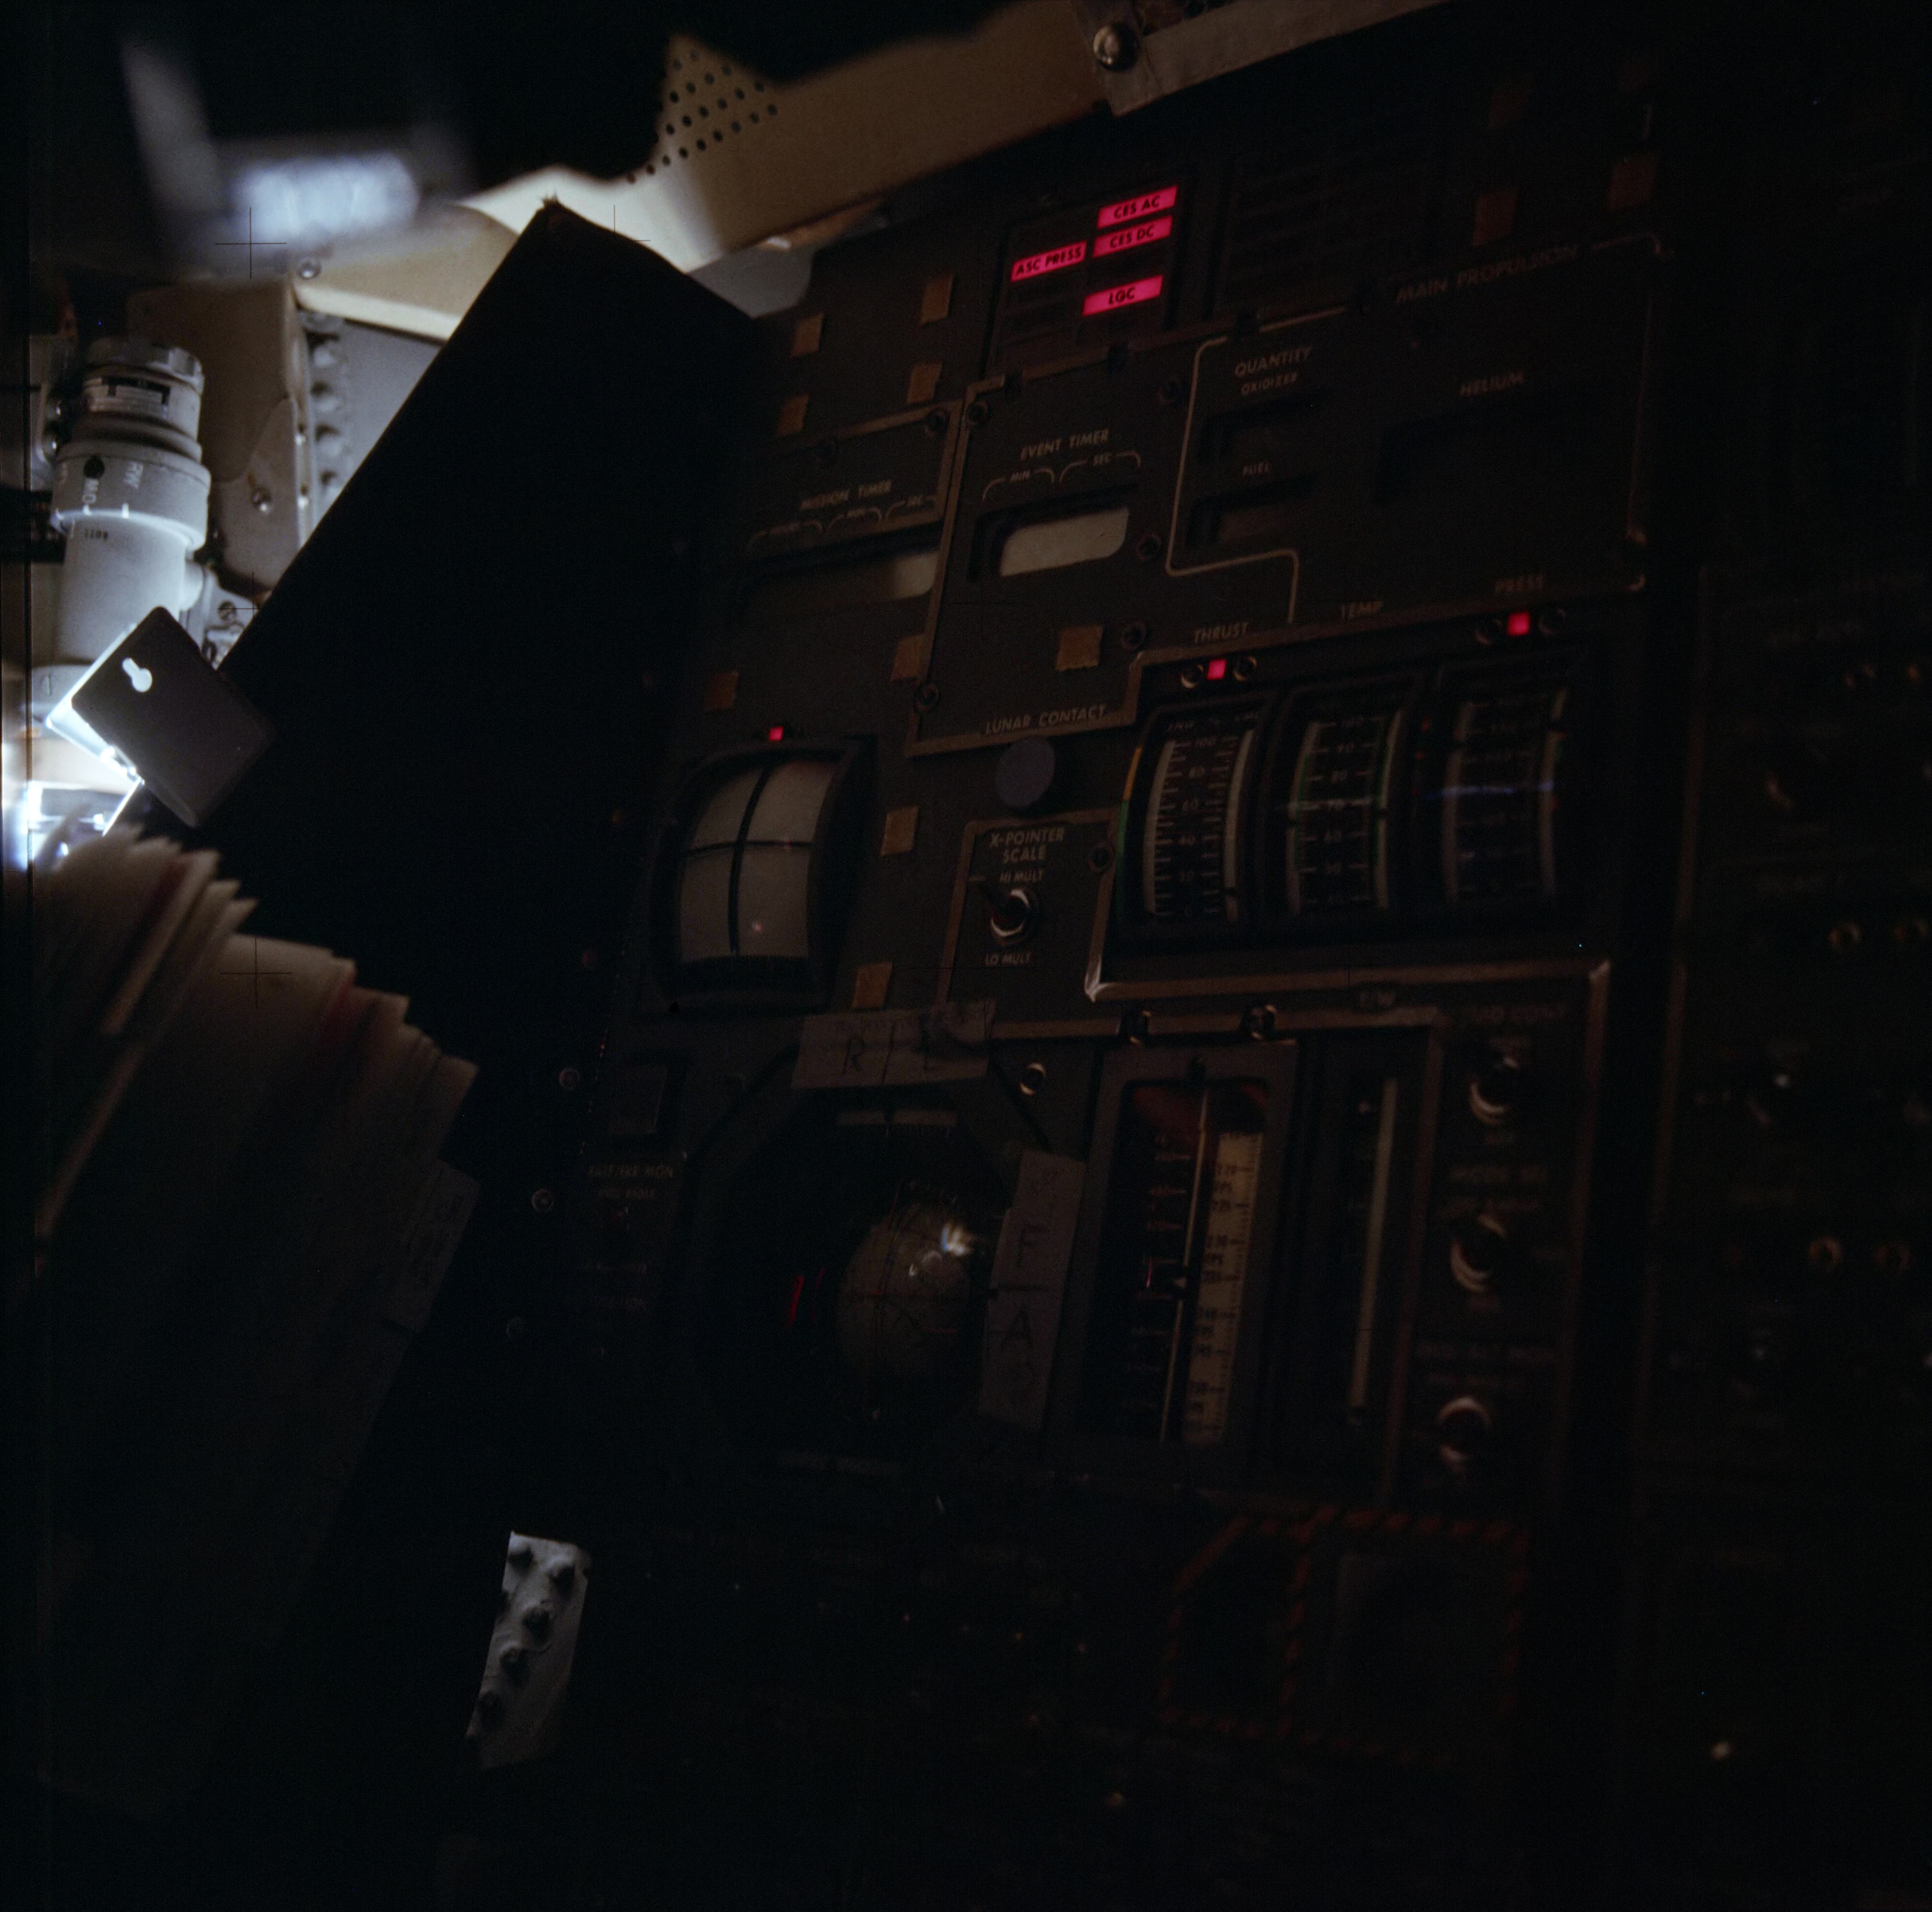
Darkened LM cabin. Color balancing and photo correction by David Woods.
This is Apollo Control at 94 hours, 41 minutes Ground Elapsed Time. Position and velocity now showing 178,274 nautical miles [330,163 km] out from Earth. Velocity, 3,982 feet per second [1,214 m/s]. Spacecraft weight still hovering around 87,942 pounds [39,890 kg]. 94 hours, 42 minutes Ground Elapsed Time and standing by; this is Apollo Control.
094:46:28 Kerwin: Aquarius, Houston. Over. [Long pause.]
094:46:59 Kerwin: Aquarius, Houston. Over.
094:47:05 Haise: Go ahead.
094:47:10 Kerwin: Okay. We're chasing a small glitch that we saw a while ago in the O
2 flow rate which is now normal again, but what we'd like you to do is, first of all, to tell us whether, during that canister procedure, you moved O
2 Demand Reg A to any position other than Cabin, and then we'd like you to move it to Off momentarily and back to Cabin for us. [Long pause.]
094:47:39 Haise: Okay. To answer your question, Joe, it's no. I checked the Cabin all the time. Qualitatively, when we switched to this configuration, it didn't seem like the frequency or the suit fan noise [garble] decreased [garble] logged down a little bit, but I'll follow your procedure. You want me to take Reg A, go to close and back to Cabin; is that correct?
094:48:10 Kerwin: That's correct, Fred.
094:48:15 Haise: Okay. We're in close.
094:48:22 Haise: Now, I'm back to Cabin.
094:48:24 Kerwin: Okay. Thank you very much, Fred. I'll get back to you if we see anything.
094:50:17 Music (The Age of Aquarius) [Long pause.]
094:50:42 Haise: [garble] Thank you.
094:50:47 Kerwin: Hey, have you guys got a woman on board? [Pause.]
094:50:57 Haise: No way I could handle that. [Long pause.]
094:51:30 Haise: And, Joe, do you have the [garble] out for the [Garble]?
094:51:39 Kerwin: I'm not sure I copied that, Fred. If you asked me whether I had that powerup procedure, I don't have it for you, yet. Over. [Pause.]
094:51:54 Haise: No. The question was, do you have a [garble] from the Moon burn.
094:52:04 Kerwin: Still didn't understand, Fred. I'm sorry.
094:52:08 Haise: Okay. We'll be able to get better comm.
094:52:09 Kerwin: Roger. [Long pause.]
094:53:00 Haise: Okay. [Long pause.]
094:53:55 Kerwin: Fred, Houston. You want to try it, now? [Long pause.]
094:54:12 Haise: How do you read, Houston?
094:54:14 Kerwin: That's pretty good, Fred.
094:54:19 Haise: Okay. Two things: first of all, we noticed a [Garble]
094:54:30 Kerwin: Gol darn it. Just as you started talking, it got noisy again, Fred; try it again.
094:54:37 Haise: Okay. [Pause.]
094:54:45 Kerwin: Try it now, loud and slow.
094:54:51 Haise: Okay. Jack had a question on how far out from the Moon are we now? [Pause.]
094:55:04 Kerwin: On how far out what?
094:55:08 Haise: From the Moon we are now?
094:55:10 Kerwin: Oh. Our little plot shows you just touching the 180-thousand-mile line. So you're about 40 K out from the Moon.
094:55:20 Haise: Okay. Okay. And the other thing is, we've noticed some fresh new particles floating around outside, so possibly the Service Module is starting to vent a little bit again.
094:55:39 Kerwin: Okay. Copy that, Fred. On the O
2 flow thing, we clearly saw the Demand Regulator go to Off and back to Cabin. TELMU thinks that it's no big thing that you've seen a little change in flow due to the different resistance we've got in the circuit.
094:56:01 Haise: Roger. [Long pause.]
094:56:28 Kerwin: Aquarius, Houston.
094:56:33 Haise: Go ahead.
094:56:35 Kerwin: Okay, Fred. Recommend you go to Off on the Biomed switch. We never did get any Biomed and it might clear up the comm a little bit. [Pause.]
094:56:49 Haise: Okay. How you read now?
094:56:52 Kerwin: Okay, Fred. That might be a little better. [Long pause.]
094:57:41 Haise: We're on the 180 - K line, right now.
094:57:44 Haise: From Earth.
094:57:47 Haise: We're about 40 050. [Long pause.]
094:58:04 Swigert: [garble] It's 550 over there.
094:58:11 Haise: Okay. It's [garble] there.
094:58:16 Swigert: Just split the difference.
094:58:21 Haise: Okay. I got a copy of the [garble] K [Garble]
094:58:25 Swigert: Is that right?
094:58:26 Haise: EECOM. [Pause.]
094:58:35 Swigert: That midcourse should be interesting. You know, the mode we're going to do it in.
094:58:42 Haise: Manual AGS [garble] DPS burn. We're controlling [garble] TTCA attitude. [Garble]
094:58:49 Swigert: [garble] down under [Garble]
094:58:52 Haise: Fortunately.
094:58:54 Swigert: We can't help them too much. Actually it isn't bad [garble] but [garble] [garble] goddamned unfortunate. In part, I get a feeling [garble] now when I get [garble] Just before [garble] goes to zero in 1 second I'm going to pull them out [Garble]
094:59:35 Swigert: Another burn that's never been done. [Pause.]
094:59:43 Haise: Go to the - Go to the technique for a lash and [garble] it's the burn technique. [Long pause.]
095:00:02 Haise: I'm sure they got something written out, maybe [Garble]
095:00:09 Swigert: A what?
095:00:13 Haise: Well, hell, Jack. All you - you don't use a very good one [garble] Just if you'll go [garble] at your attitude reference for [garble] and the g-meter backup. Because, really, you can almost [garble] The Command Module and your odds are 60 to 40 that you're going to hit Earth blunt-end first, without any reference.
095:00:38 Swigert: [garble] I didn't realize that. That proves you've got a little bit above 50-percent odds that you're going to enter blunt end, and...
095:00:49 Haise: We made an entry like that in Apollo 8 in a [garble] with Houston, ol' Buzz went and turned on the Command Module heaters and left them on. The activators, they went, "Shooo!" both tanks; we had no gas. Just had a real slow rate [garble] We actually went out in the console and started debriefing, but left it running and watched it; and the son of a bitch did a hop-skipout, a hopout, underneath [Garble], but not much, and then we did a long hop [garble] but - The second reentry, also, it did one [garble] both times. It lucked out twice and made a real peculiar [garble] They went to zero g [Garble]
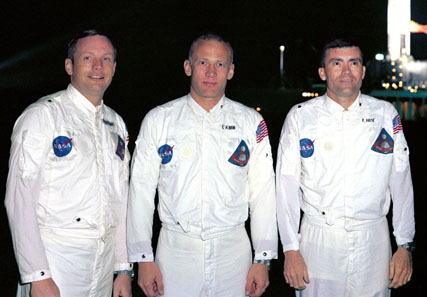
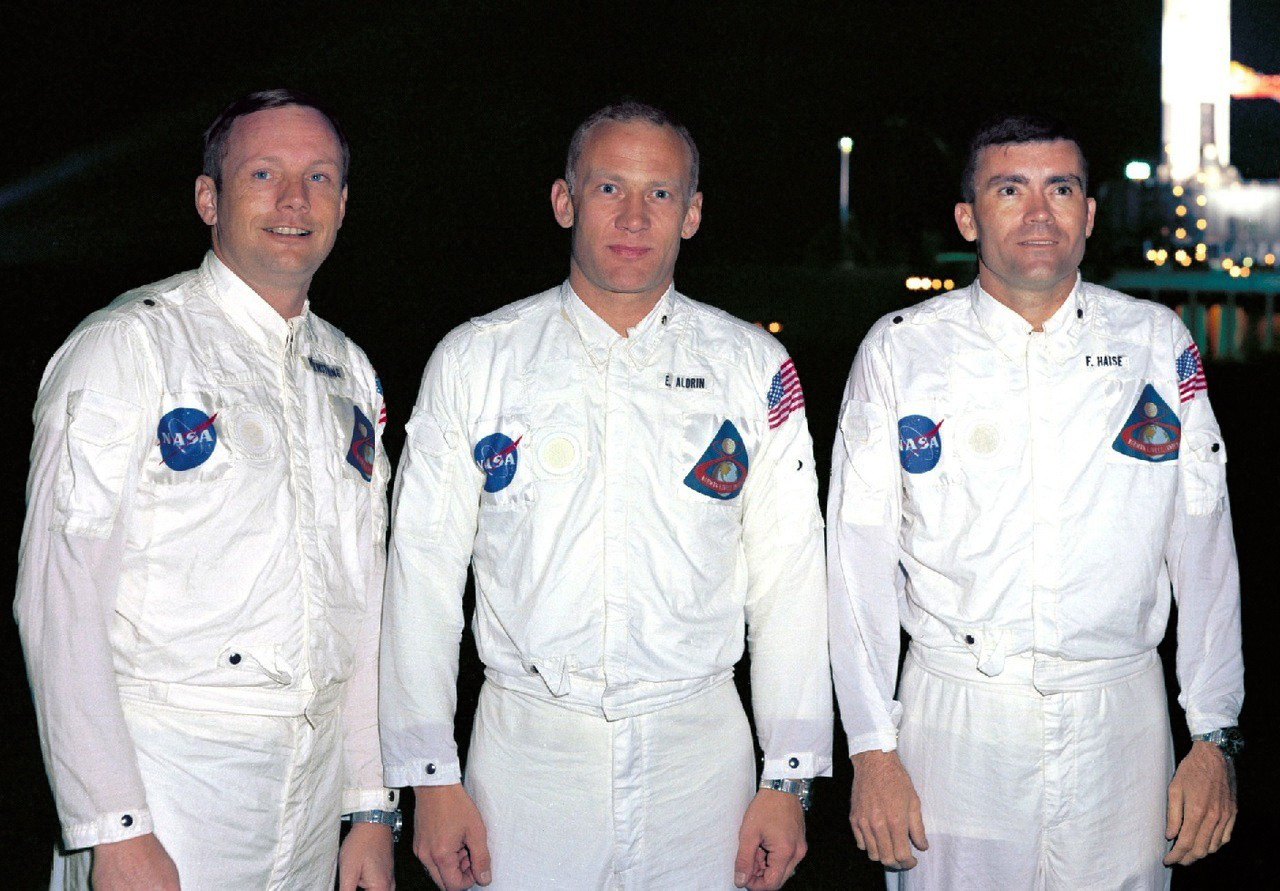
This photo shows the backup crew of Apollo 8 posing with the brilliantly lit Saturn V on the background. Edwin Aldrin occupied the Command Module Pilot's position in the crew, instead of the more familiar LMP he served as for Apollo 11.
095:01:45 Swigert: Yes. [Long pause.]
095:02:01 Haise: Yes, we did, Jack. [Garble].
095:03:36 Swigert: [Garble] But we're in this wobble.
095:03:40 Haise: [Garble] pass [garble] then it'll come back down.
095:06:02 Haise: Hey, Houston; Aquarius. How do you read me?
095:06:04 Kerwin: Aquarius, Houston. Okay. Go ahead.
095:06:11 Haise: Okay, Joe. It - Our wobble in this PTC has picked up where the Moon is running by pretty high in the window and the Earth pretty low; so I expect - On the side where the Moon's present, we're having a little bit of trouble with the comm [garble] breakout there in a couple of places.
095:06:37 Kerwin: Okay. Roger that, Fred.
095:08:33 Haise: [Garble] pressure gage as far as the noise [garble] get the thing from the AFT. [garble] [Long pause.]
095:09:10 Swigert: Houston, Aquarius.
095:09:13 Kerwin: Aquarius, Houston. Go.
095:09:20 Swigert: Okay, Joe. I'm all set to copy that procedure for powering up the Command Module from the LM, whenever you want to give it to me. When did you, I guess you want to put Battery A out of the Charge, huh?
095:09:32 Kerwin: Jack, we're not certain when the best time is to implement this procedure, and what we want to do at this time is read it up to you, so you'll have it and understand it and we'll - We'll be able to do it quickly when the time comes. And I don't have it for you quite yet. Over.
095:09:56 Swigert: (Laughter) Okay. All right. I'll be standing by to copy it whenever you get it.
095:10:03 Kerwin: Okay, Jack.
095:11:34 Kerwin: Aquarius, Houston. Over. [Pause.]
095:11:42 Swigert: Joe, I got to switch antennas here. Okay, Joe. I read you on the Forward antenna.
095:11:52 Kerwin: Okay, Jack, I have the procedure now to read up to you. Before I do, I want to mention something that will be of interest to Fred. We are looking at the SHe tank pressure rise and we expect it to blow. We don't know exactly what time it will go, somewhere around 105 hours or perhaps later than that. We've got plenty of blowdown capability. We just thought you ought to be informed. Over.
095:12:23 Swigert: Okay. Stand by. I'll tell him, now.
095:12:28 Swigert: Fred, they said they're looking at the SHe tank pressure rise, and they expect it to blow somewhere around 105 hours [garble] Okay. Fred thought they did. [Garble]
095:12:48 Kerwin: Okay. Real fine. Are you ready for the procedure, now, Jack?
095:12:55 Swigert: Yes. Joe, how long is it? Is it a big long one, or a short one, or a medium sized [garble] about how many pages?
095:13:01 Kerwin: It's about - I'd say 15 to 20 steps, Jack. Some of it is LM stuff, and the rest of it is in CSM.
095:13:15 Swigert: Okay. I got a fresh page here, and I'm ready to copy.
Lunar Module to Command Module Power Transfer Procedure
095:13:18 Kerwin: Okay. I'll give you the LM steps first. They have to be done first, and the first step is on panels 11 and 16, circuit breakers Ascent ECA, ASC ECA, two to close. Over. [Pause.]
095:13:42 Swigert: Okay. Panels 11 and 16 CBs Ascent ECA to closed.
095:13:50 Kerwin: Okay. Next step: panels 11 and 16 CB Ascent ECA Control, two, to close. Over. [Pause.]
095:14:11 Swigert: Okay. On 11 and 16 CBs Ascent ECA Controls to close.
095:14:19 Kerwin: Okay. That's correct. The next step is Bat 5 and 6 Normal Feed to high; those are switches. [Long pause.]
095:14:41 Swigert: Okay. Bats 5 and 6 Normal Feed, On.
095:14:46 Kerwin: That's correct. Next step: Bats 1 and 3 to Off/Reset. Over. [Pause.]
095:15:05 Swigert: Bats 1 and 3 to Off/Reset.
095:15:09 Kerwin: That's correct. Next step: wait 30 minutes for preconditioning. Over. [Pause.]
095:15:23 Swigert: Okay. That's wait 30 minutes for preconditioning.
095:15:29 Kerwin: That's correct, and the last LM step for now is Bats 2 and 4 to Off/Reset. Over. [Long pause.]
095:15:50 Swigert: Okay. Bats 2 and 4 to Off/Reset.
095:15:55 Kerwin: That's correct. Now we'll go to the CSM, and the first step there is connect LM/CSM umbilical. Over. [Pause.]
095:16:13 Swigert: Okay. Connect LM/CSM umbilical.
The LM/CSM umbilical, from Apollo 15. Photo via the private collection of Steve Jurvetson, and used with his permission.
095:16:17 Kerwin: Okay. The next step on panel 5, CB LM Power-1 Main B and LM Power-2 Main B, both, closed. Over. [Pause.]
095:16:43 Swigert: Okay. On panel 5, CB LM Power-1 Main B and 2 Main B, both, closed.
095:16:52 Kerwin: That's correct. On panel 5, CB EPS Sensor Signal Main B to close. Over. [Pause.]
095:17:11 Swigert: EPS Sensor Signal Main B closed on panel 5.
095:17:16 Kerwin: That's correct. Next step, panel 250: CB Bat B Power Entry/Postlanding; closed. Over. [Long pause.]
095:17:40 Swigert: Okay. On panel 250: CB Bat B Power Entry/Postlanding; closed. Over.
095:17:50 Kerwin: That's Charlie. Verify Main Bus voltage; then, LM Power switch on panel 2 to CSM. Over. [Long pause.]
095:18:14 Swigert: Okay. That's verify the Main Bus voltage, and switch LM Power to CSM.
095:18:23 Kerwin: Okay. That's correct. Then go back to 275, CB Main B Bat Bus B to open. Hey, Jack, that's the step I skipped for you, I'm afraid. Before verifying Main Bus voltage, you have to, on panel 275, close CB Main B Bat Bus B. Over. [Long pause.]
095:19:07 Swigert: Okay, Joe. How are you reading on the Aft Omni.
095:19:11 Kerwin: You're okay now. Go ahead.
095:19:15 Swigert: Okay. After putting the Battery B Power Entry/Postlanding On, then I want to push the - on panel 275 Main B to Bat Bus B in, huh? [Pause.]
095:19:38 Kerwin: That's right. Then you go to verify Main Bus voltage, LM Power to CSM, and then, on panel 275, circuit breaker Main B Bat Bus B to open. Over.
095:19:53 Swigert: Okay. After verifying the Main Bus voltage connecting the LM Power to CSM I want to pull Main B Bat Bus B, or Main B to Bat Bus B, open.
095:20:06 Kerwin: That's correct. And then on panel 250, circuit breaker Bat B Power Entry/Postlanding to open, and verify Main Bus B voltage. [Long pause.]
095:20:37 Swigert: Okay. Panel 250 Bat B Power Entry/Postlanding open, and then verify the Main Bus voltage.
095:20:44 Kerwin: Okay. That's correct. The last, steps are to get LM back to descent batteries. The first step is Bats 1, 2, 3 and 4, Hi Voltage, On, Over. [Long pause.]
095:21:12 Swigert: Okay. Then the next step is a LM step, Bats 1, 2, 3 and 4, Hi Voltage, On.
095:21:19 Kerwin: That's correct, and the last step in LM, Bats 5 and 6 to Off. Over. [Pause.]
095:21:33 Swigert: Okay. Say again you cut out there, Joe.
095:21:36 Kerwin: Okay, Jack. The last step in LM, Batteries 5 and 6 to Off. Over.
095:21:47 Swigert: Okay, Bats 5 and 6 to Off.
095:21:51 Kerwin: That's correct. That should configure you. Note that circuit-breakers, protection on that circuit limits the available current to 15 amps. We think we can do quite a bit with it though. And the LM/CSM umbilical will be hot and Main Bus voltage may be monitored by selecting Main B on the gage. Over.
095:22:16 Swigert: Okay. Real fine.
095:22:18 Kerwin: Good deal, Jack.
095:22:22 Swigert: Okay. And I'll be ready to implement this whenever you call it up.
095:22:26 Kerwin: Roger that. [Long pause.]
095:22:54 Haise: And how do you read, Joe?
095:22:56 Kerwin: Pretty good, Fred.
095:23:00 Haise: Okay. While Jack was on comm, I was looking out the docking window here, and I could see another good shower off particles coming out of the Service Module. And the position this time appears to be on the other side. Before, we'd always seen them out of window 1, and where I'm looking at it from here, it looks like it'd be down below window 6 somewhere in the Service Module. Jack's going upstairs to see what it looks like up there.
095:23:33 Kerwin: Okay. Good deal. We copy that, Fred. And to show you how relaxed we are about the entry, Ken is looking at - giving you guys a chance to - prior to going into entry, Prep to snap a few pictures of the Service Module. [Pause.]
095:23:56 Haise: Ken is, huh? (Laughter)
095:24:02 Kerwin: Yes, he's got all that film up there, and he doesn't want to waste it.
095:24:06 Haise: Oh, I thought maybe you'd want me to do a PLSS EVA to go shoot pictures or something.
095:24:11 Kerwin: Okay, okay. [Pause.]
095:24:22 Haise: You're right; we got a lot of pictures. [Pause.]
095:24:34 Haise: I guess I agree it surely would be nice to document it someway if we can, but it doesn't look like [Garble].
095:24:45 Kerwin: Yes, we think it'd be a lot of help. [Long pause.]
095:25:41 Haise: Joe, how do you read me?
095:25:45 Kerwin: Aquarius, Houston. Go ahead.
095:25:50 Haise: Okay. The condensate transfer worked great.
095:25:57 Kerwin: Stand by a minute, Fred. We're in a bad comm mode.
095:26:00 Haise: Okay. [Long pause.]
095:26:16 Haise: Okay. How's that?
095:26:17 Kerwin: That's better.
095:26:21 Haise: Okay. The waste transfer into the condensate can works real well, Joe.
095:26:29 Kerwin: Okay. Good deal.
095:26:33 Haise: So, I guess we can keep FIDO happy with no overboard dumps.
095:26:39 Kerwin: Roger that. (Long pause.)
095:27:14 Haise: Yes, that brings up one more possibility, Joe.
095:27:19 Kerwin: Say again, Fred.
095:27:23 Haise: Brings up another possibility. Now that we've got all of that stowed into the bags and the condensate can, we could probably blow all of that through the PLSS [Garble], I wonder how the sublimator would work on waste water.
095:27:39 Kerwin: It might work if we had to do it, Fred. Right now we're looking at a comfortable excess of water through the sublimator. We were talking among ourselves this morning about having you try out the PLSS to ascent tank water-transfer situation and we decided not to do it, not to recommend it, because we figure it'd take us 30 hours to empty one of the ascent tanks, which you have to do in order to get PLSS water to it, and we'd rather use the descent water and we don't think we've gotten any sweat. Over.
095:28:21 Haise: Okay, Joe. I don't think there's any question about it from the plumbing standpoint that we could do that if we had to. [Pause.]
095:28:36 Kerwin: Okay. Copy that.
This is Apollo Control. 95 hours, 30 minutes Ground Elapsed Time. Present thinking on the midcourse correction which would bring Apollo 13 back into the Earth's intercepting corridor, would be a LM maneuver, propulsion maneuver of about 7 feet per second at 104 hours Ground Elapsed Time and would return the spacecraft to entry corridor, shooting for a flight path angle of about minus 6½ degrees on all lunar missions to date, with a few exceptions, during the trans-Earth coast phase some sort of midcourse correction has been necessary to get back on to the corridor depending on the accuracy of the trans-Earth injection. This particular mission is certainly no different. Spacecraft communicator Joe Kerwin is away from the console at the moment, after having read up some additional checklist changes. We are continuing to monitor the air-to-ground. Kerwin returning to the console. If the midcourse correction in this trans-Earth phase is delayed beyond 104 hours to the second one, it's in contention of second time of 118 hours, it would be somewhat greater magnitude more in the neighborhood of 40 feet per second. With the 7-foot-per-second midcourse correction at 104 hours, the vacuum perigee would be around 20 nautical miles [37 km]. Flight path angle of minus 6.51 degrees. At 95 hours, 32 minutes Ground Elapsed Time and standing by; this is Apollo Control.
095:40:35 Haise: And, how do you read, Joe?
095:40:40 Kerwin: Read you pretty good, Fred. Go ahead.
095:40:45 Haise: I think our PTC wobble is growing worse. The Earth now is really up to the top of the window. I have to get way down almost to the floorboards to view it. Conversely, the Moon is way down at the bottom of the window. [Long pause.]
095:41:09 Haise: A lot more wobble.
095:41:10 Kerwin: Roger ...
095:41:11 Haise: Far more wobble than I noticed on my previous watch.
095:41:19 Kerwin: Okay. Copied that, Fred. And our thermal people will be looking at it. One of the things we're talking about relative to the midcourse correction is we'd like not to do it before the SHe tank goes, if it's going to go, just so it won't give us a problem reestablishing PTC. And right now our people think that the burst disk will pop around 106 hours.
095:44:27 Haise: The L-shaped bag is [garble].
095:46:33 Kerwin: Aquarius, Houston. Over.
095:46:39 Haise: Go ahead.
095:46:40 Kerwin: Okay, Fred. Since you went ahead and used the PLSS condensate container, we got the procedure in for using it. I'm not going to read it up to you except that it cautions a little bit about shaking it too much or about filling it too full, because they feel that if you do that the vent valve might unseat and the bag might leak a little bit. Over.
095:47:10 Haise: Okay. We haven't removed it from its stowage spot. We just left it right in place, and just - he mated the tank at the end of the cable and hooked right into that.
095:47:25 Kerwin: Understand. That's satisfactory and recommended that you leave it in the stowage spot. That should help the situation.
095:47:37 Haise: Roger. [Long pause.]
095:48:27 Haise: We got a - we got another flow shower going on outside. Particles, seeing them vented against the Service Module. Jack thinks it may be an H
2 vent. [Garble]
095:48:41 Kerwin: Okay. Copy that. What window are you looking at it out of, Fred?
095:48:48 Haise: Out the LM docking window.
095:48:50 Kerwin: The docking window. Roger that. Somebody just handed me your latest consumables status report, and you're using between 11 to 12 amps an hour real steady, and it looks real good. [Long pause.]
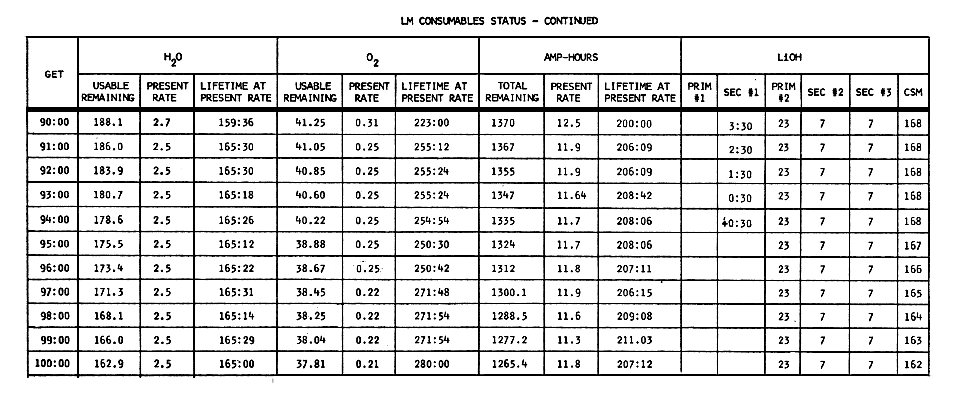
Table of remaining consumables, by Ground Elapsed Time. From the Mission Operations Report.