This chapter covers lunar orbit science activities during rev 71. Date: 4 August 1971. Apollo 15 has just gone behind the Moon and is approaching the end of rev 70. Rev 71 begins in about 20 minutes time. In the meantime, the crew's conversation has been caught on the onboard tape recorder.
215:35:22 Irwin (onboard): [Garble].
215:35:27 Worden (onboard): What?
215:35:28 Irwin (onboard): [Garble].
215:35:30 Worden (onboard): Yes, he'll [garble]. Follow those numbers. As long as we're in Free, it don't really make any difference whether you got P30 running or not, as far as P20 is concerned. Anyway, they don't care about it as long as we don't run it more than a half an hour.
215:36:43 Worden (onboard): No, he wanted to run the P20 through.
215:36:46 Scott (onboard): [Garble].
215:36:49 Worden (onboard): Yes.
215:36:50 Speaker (onboard): [Garble].
215:36:51 Worden (onboard): You want to do a P20 first.
215:36:52 Speaker (onboard): [Garble].
215:36:54 Worden (onboard): Yes, you don't need to do that until - They - they need to have us inertial for a while. Yes. We do that calibration in this attitude. And then at...
215:37:07 Irwin (onboard): [Garble]?
215:37:08 Worden (onboard): Yes. At 55, then we can go ahead and do a P20, and - and get into attitude and then do the P30.
215:37:22 Irwin (onboard): (Yawn) [Garble] time for [garble]?
215:37:27 Worden (onboard): Hey; you know, it is. What time is that thing happening? Not for a while yet, I bet.
215:37:45 Worden (onboard): [Garble] another 3 and a half hours.
215:40:27 Worden (onboard): Yes, [garble].
215:40:33 Irwin (onboard): [Garble]. What [garble] do? Let's see [garble]. We're [garble] that bag [garble]. Put them away - [garble].
215:40:57 Scott (onboard): Stand by and [garble]. Come on. [Garble] Logic [garble].
215:41:02 Irwin (onboard): 8700? The rest of them [garble].
215:41:08 Scott (onboard): [Garble] still too [garble].
215:41:11 Irwin (onboard): Yes, I know.
215:41:13 Scott (onboard): Got to [garble] these goddam [garble].
215:41:18 Irwin (onboard): [Garble].
215:41:22 Scott (onboard): [Garble] this [garble]?
215:41:23 Irwin (onboard): [Garble].
215:41:28 Worden (onboard): Yes, it's not much of a lineup - from a [garble].
215:41:38 Scott (onboard): [Garble].
215:41:41 Irwin (onboard): [Garble]. What are you trying to do? [Garble].
215:41:53 Scott (onboard): Well, if you want to get - well, what I really want to do is make sure we got helmets and gloves [garble]. Be right back.
215:42:00 Irwin (onboard): Where you going?
215:42:01 Scott (onboard): I got to put your - I got to put my helmet [garble] my EV gloves. The rest of your helmet, Jim, will go with my helmet and your [garble].
215:42:21 Irwin (onboard): Yes, put them down there. [Garble].
215:42:32 Scott (onboard): [Garble] out?
215:42:33 Irwin (onboard): [Garble] umbilical and [garble].
215:42:44 Scott (onboard): [Garble] going to do it just like you used to do it with a checklist back when [garble].
215:42:49 Worden (onboard): Try to find that checklist [garble]. It's part of the requirement. [Garble] do. You're going to have to punch all these goddam switches, pardner.
215:42:59 Irwin (onboard): [Garble] for the [garble] switches, let me know.
215:43:16 Worden (onboard): Who doesn't?
215:43:19 Scott (onboard): [Garble].
215:43:28 Irwin (onboard): Just have to see.
215:44:00 Scott (onboard): We'll have to stow this stuff for TEI. [Garble] umbilical. All this stuff for the EVA configuration, [garble] really [garble] trouble.
215:44:20 Scott (onboard): [Garble]...
215:44:21 Worden (onboard): Well, we are going to have to photograph the EVA, too. (Cleared throat)
215:44:42 Worden (onboard): We better not use - use your attitude. [Garble]. The rates are low. [Garble] I think once we get [garble]; otherwise, maybe we could arrange a TEI [garble]. [Laughter.]
215:44:57 Irwin (onboard): Yes.
215:44:58 Worden (onboard): Well, TEI, all we really need to do is [garble].
215:45:05 Scott (onboard): Sounds like you're trying to get out of EVA [garble]. Tomorrow, [garble] take a little...
215:45:10 Worden (onboard): Yes.
215:45:11 Scott (onboard): ...reshuffling. So, if you can go now, [garble] some reasonable point [garble] EVA prep. We can try it, anyhow; because tomorrow, when I'm trying to get things squared away for the EVA prep, by the time we can [garble] the EVA prepping [garble]. It'll be late tomorrow before we even [garble].
215:46:04 Irwin (onboard): Yes. We can get all that stuff done [garble].
215:46:08 Scott (onboard): Yes.
215:46:13 Worden (onboard): Got lots of stuff to be [garble].
215:46:15 Irwin (onboard): [Garble] for these? Oh! [Garble].
215:46:23 Scott (onboard): [Garble]. Yes. Well, we can't really use those on this EVA. [Garble].
215:46:30 Irwin (onboard): Yes.
215:46:34 Worden (onboard): Watch it now. [Garble] coming up [garble].
215:46:40 Scott (onboard): [Garble]. Where will we have to go with - Well, let's put it in this [garble].
215:46:48 Worden (onboard): It's getting [garble].
215:47:02 Scott (onboard): [Garble].
215:47:04 Irwin (onboard): What?
215:47:05 Scott (onboard): I said, "Why don't we [garble]?"
215:47:08 Irwin (onboard): Yes.
215:48:01 Worden (onboard): Well, we got the pan camera figured out for the new whole show, huh?
215:48:04 Irwin (onboard): Really?
215:48:08 Worden (onboard): [Laughter].
215:48:10 Irwin (onboard): Stop laughing, you son of a gun, you [garble].
215:48:12 Worden (onboard): I - I'm happy that it's even ready to come to, it's such a complicated bunch of shit.
215:48:25 Worden (onboard): Okay, these return pictures should come out in the [garble] see what happens [garble].
215:48:57 Worden (onboard): Another - Yes. As soon as we get through this other color, you can hand me that other mag, and I'll get set up for the Earth pictures. I think I'll keep holding it. [Garble] your problem. Why don't...
215:49:12 Irwin (onboard): You know, this thing's [garble] about 30 degrees [garble].
215:49:17 Scott (onboard): That right?
215:49:21 Worden (onboard): [Garble] that thing somewhere.
215:49:28 Irwin (onboard): [Garble].
215:49:41 Irwin (onboard): [Garble] would you hold that thing?
215:49:43 Scott (onboard): Damn right. Just sitting there, looking at the Moon.
215:50:12 Scott (onboard): [Garble].
215:50:19 Worden (onboard): [Garble] all right? [Garble]. What'd I do with my mag. Here it is.
215:50:27 Scott (onboard): Did you take that cover off?
215:50:29 Worden (onboard): No, not lately. [Garble].
215:50:30 Irwin (onboard): [Garble].
215:50:32 Worden (onboard): Huh?
215:50:33 Irwin (onboard): Take that [garble].
215:50:45 Irwin (onboard): [Garble].
215:50:48 Worden (onboard): Move it up a little.
215:50:51 Irwin (onboard): [Garble].
215:51:00 Worden (onboard): [Garble]. Yes, take these a little bit later.
215:51:11 Worden (onboard): How's that?
215:51:13 Irwin (onboard): That's about the only way you can get them.
215:51:15 Worden (onboard): [Garble].
215:51:21 Irwin (onboard): Try to move them.
215:51:25 Worden (onboard): What?
215:51:26 Irwin (onboard): Try to move them up one.
215:51:28 Worden (onboard): Yes. No?
215:51:37 Irwin (onboard): Just going to leave these tied down.
215:51:45 Worden (onboard): [Garble] vertical?
215:51:57 Scott (onboard): Hey, watch the [garble]. Be sure you don't get any of the crap out of that one.
215:52:06 Worden (onboard): Yes.
215:52:07 Scott (onboard): You [garble]?
215:52:10 Worden (onboard): Yes, that was my Hasselblad pack right here.
215:52:12 Scott (onboard): Well, that wouldn't [garble].
215:52:18 Irwin (onboard): Really need to take a Hasselblad mag with you.
215:52:20 Worden (onboard): Yes, give me a Hasselblad mag [garble].
215:52:24 Irwin (onboard): [Garble].
215:52:29 Worden (onboard): Yes, you're right.
215:52:30 Irwin (onboard): [Garble].
215:52:43 Irwin (onboard): [Garble].
215:52:46 Worden (onboard): Yes.
215:53:03 Worden (onboard): [Garble].
215:53:08 Irwin (onboard): All you really need [garble].
215:53:12 Worden (onboard): [Garble].
215:53:14 Irwin (onboard): Yes.
215:53:15 Worden (onboard): Okay.
215:53:25 Irwin (onboard): Mine's here. [Garble].
215:53:31 Worden (onboard): Here are mine, okay. [Garble].
215:53:37 Irwin (onboard): [Garble].
215:53:40 Worden (onboard): I'll take them.
215:53:47 Irwin (onboard): [Garble].
215:53:50 Worden (onboard): How you like them? Okay?
215:53:52 Irwin (onboard): [Garble].
215:53:59 Worden (onboard): Look for yours, pal.
215:54:00 Irwin (onboard): [Laughter.].
215:54:04 Worden (onboard): You should be proud - you should be proud of yourself, Jim.
215:54:16 Worden (onboard): Do you intend ignoring that question? Are you a naive [garble]?
215:54:24 Irwin (onboard): I answered it. Hey, you got to get your...
215:54:26 Worden (onboard): God! What a posthole digger.
215:54:29 Irwin (onboard): Chief priority. Time to do the P20. [Garble] do it?
215:54:37 Worden (onboard): [Garble].
215:54:44 Irwin (onboard): Oh. [Garble].
215:55:17 Irwin (onboard): [Garble].
215:55:25 Worden (onboard): Jim, how long has it been since weight? [Garble] says part 1 - part 2, part 2. All the rest of you ready?
215:55:36 Irwin (onboard): Yes.
215:55:38 Worden (onboard): DAC should be set for right now. Got to notify the [garble].
215:55:50 Irwin (onboard): [Garble].
Rev 71 begins at about 215:56.
215:56:07 Worden (onboard): Y'all noticing that all that noise is gone?
215:56:11 Irwin (onboard): What?
215:56:12 Scott (onboard): I don't know if [garble].
215:57:13 Worden (onboard): You ignoring that Flight Plan?
215:57:15 Irwin (onboard): Cut it.
215:57:17 Worden (onboard): Aw, you ain't that bad. Catch it, son.
215:57:23 Irwin (onboard): [Garble] won't come down. Help me?
215:57:45 Worden (onboard): All right, God damn you, come help me.
215:57:49 Scott (onboard): Boy, oh, boy.
215:57:51 Irwin (onboard): All these mags [garble] 2 and a half by 2 millimeter. [Garble].
215:58:01 Worden (onboard): [Garble] bracket.
215:58:03 Irwin (onboard): Got a [garble] bracket.
215:58:04 Worden (onboard): That's 80 millimeter [garble] up there.
215:58:10 Irwin (onboard): No. [Garble] I gave it to you.
215:58:33 Worden (onboard): Hope you don't roll the [garble] back in there.
215:58:38 Irwin (onboard): Can't believe it.
215:58:42 Worden (onboard): Ah! Okay, 2.8, 1/500th, and click one off - which I just blew.
215:59:00 Worden (onboard): Okay .
215:59:14 Scott (onboard): Hey, what time did...
215:59:17 Worden (onboard): Yes.
215:59:18 Scott (onboard): Got that one?
215:59:19 Worden (onboard): Yes, that at the - T-start time, yes.
215:59:21 Scott (onboard): Yes.
215:59:26 Worden (onboard): That solar corona is kind of interesting. You might watch it out the window there. You - you can really - you can really see it.
215:59:42 Worden (onboard): That's right.
215:59:44 Scott (onboard): Are you going [garble] from here?
215:59:46 Worden (onboard): Well, Enter. That doesn't work right. Oh, you're trying to Enter on Noun 18.
216:00:00 Scott (onboard): Oh, my. I've got to have a Noun.
216:00:09 Worden (onboard): Noun 18 is attitude. Gimbal angles. There's time.
216:00:19 Scott (onboard): Well, [garble].
216:00:20 Worden (onboard): You loaded - you loaded gimbal angles, to drive to, for some reason.
216:00:25 Scott (onboard): [Garble].
216:00:27 Worden (onboard): Is it going there? You changed the gimbal angles in - in P20.
216:00:33 Scott (onboard): Why didn't I get a P50?
216:00:38 Worden (onboard): Because you were probably already - you were probably just getting to the P20 attitude.
216:00:41 Scott (onboard): [Garble] each time. Why don't we both do 20? You've taken up enough pictures.
216:00:48 Worden (onboard): Did you Enter on the re - Did you Enter on it when you got to the attitude?
216:00:54 Scott (onboard): No.
216:00:55 Worden (onboard): Well, that - Okay. Call up P20 again and go
through that. Okay.
216:01:03 Scott (onboard): I get a Noun 18 [garble] Noun 78. [Garble] Noun 18.
216:01:12 Worden (onboard): What'd you do?
216:01:13 Scott (onboard): [Garble] option 5?
216:01:16 Worden (onboard): Yes. Option 5. Yes.
216:01:24 Scott (onboard): You [garble] another 20?
216:01:26 Worden (onboard): Okay? Go.
216:01:28 Scott (onboard): 5.1. [Garble]?
216:01:29 Worden (onboard): Yes...
216:01:30 Scott (onboard): ...[garble]? 5.2?
216:01:31 Worden (onboard): That's good.
216:01:32 Scott (onboard): [Garble]?
216:01:37 Worden (onboard): Oh, it wasn't to the attitude yet, Dave. No wonder. You're in - you're in Hold over there.
216:01:46 Scott (onboard): Sure enough.
216:01:48 Worden (onboard): Oh! Blew it!
216:01:53 Scott (onboard): Well, all I know is I got that needle.
216:01:54 Worden (onboard): Sure. We're in Low Rate.
216:01:58 Scott (onboard): [Garble] needle [garble].
216:02:09 Irwin (onboard): All I know is...
216:02:10 Scott (onboard): Can I load P30 now?
216:02:11 Worden (onboard): No.
216:02:12 Scott (onboard): [Garble].
216:02:13 Worden (onboard): No. Not when we're in maneuver. They won't let you in.
216:02:22 Scott (onboard): So that's what I did wrong.
216:02:24 Worden (onboard): Yes. That's why you - that's why you loaded...
216:02:25 Scott (onboard): I heard...
216:02:26 Worden (onboard): ...the Noun 18.
216:02:27 Scott (onboard): Well, I thought you said...
216:02:28 Worden (onboard): It'll come up in a major mode but you won't get...
216:02:29 Scott (onboard): Oh, I thought...
216:02:30 Worden (onboard): ...You won't get a time display. Yes. You can't; it shuts off the power to display, like a Noun 18.
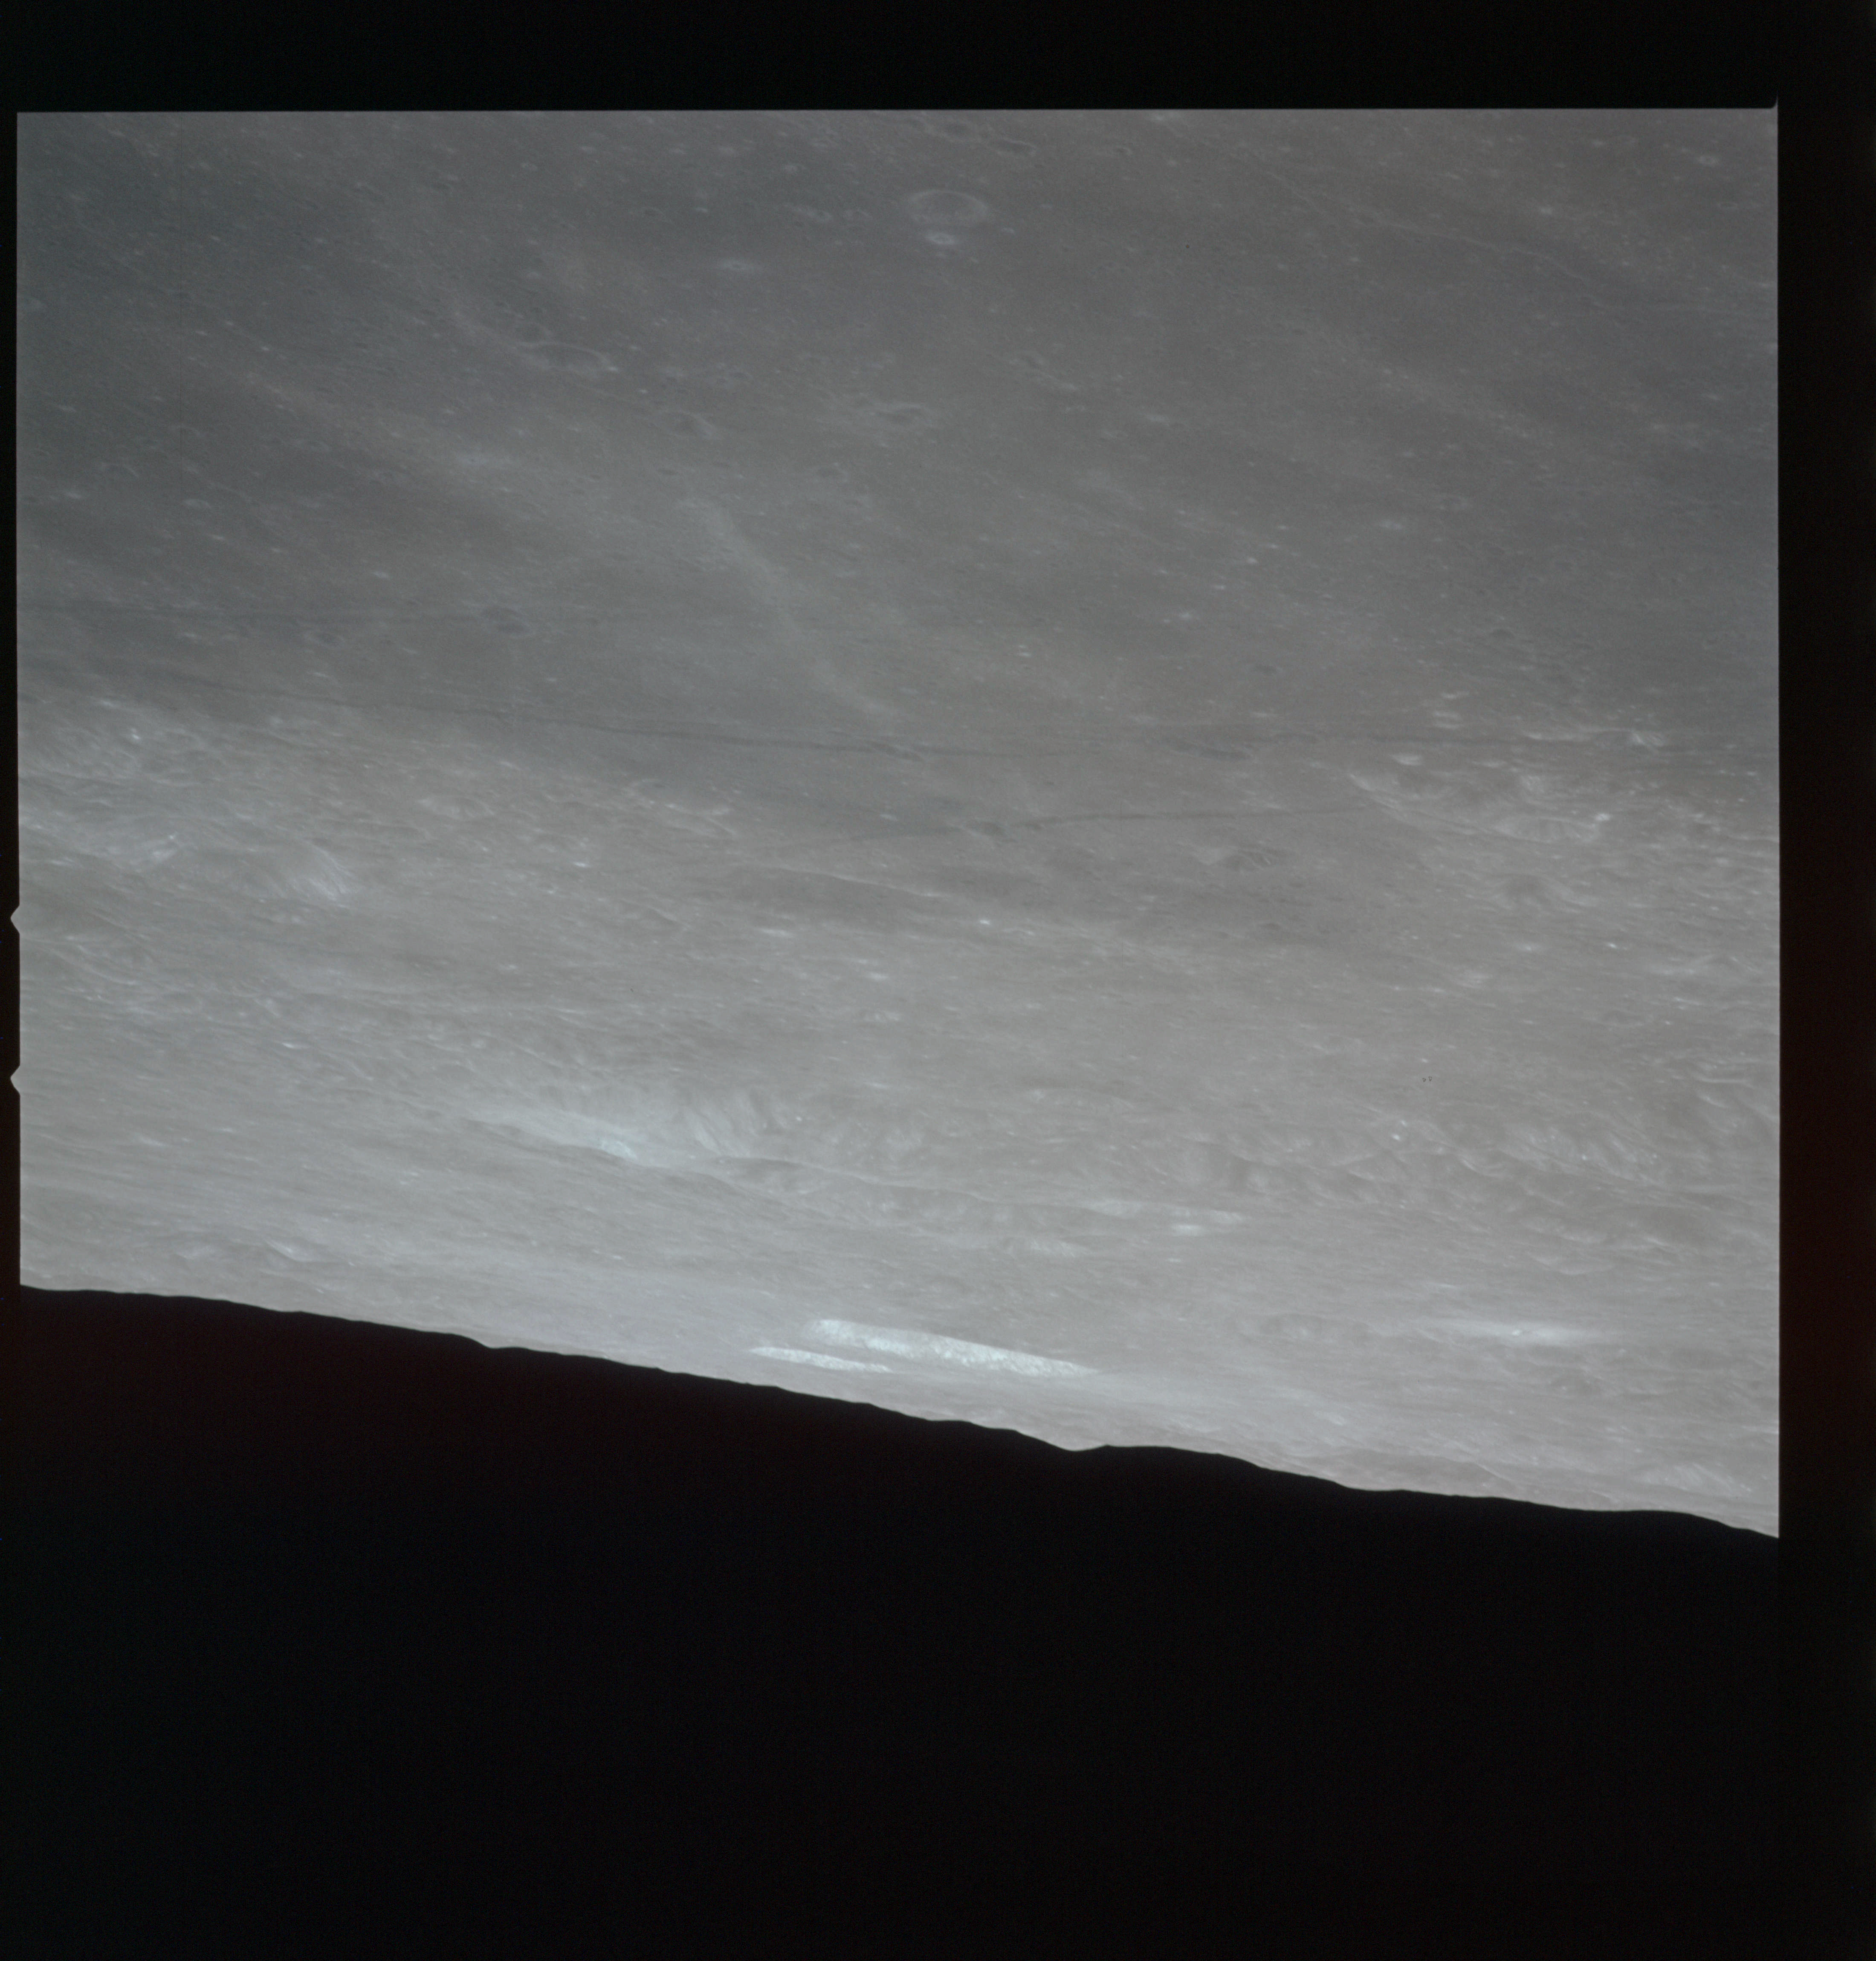
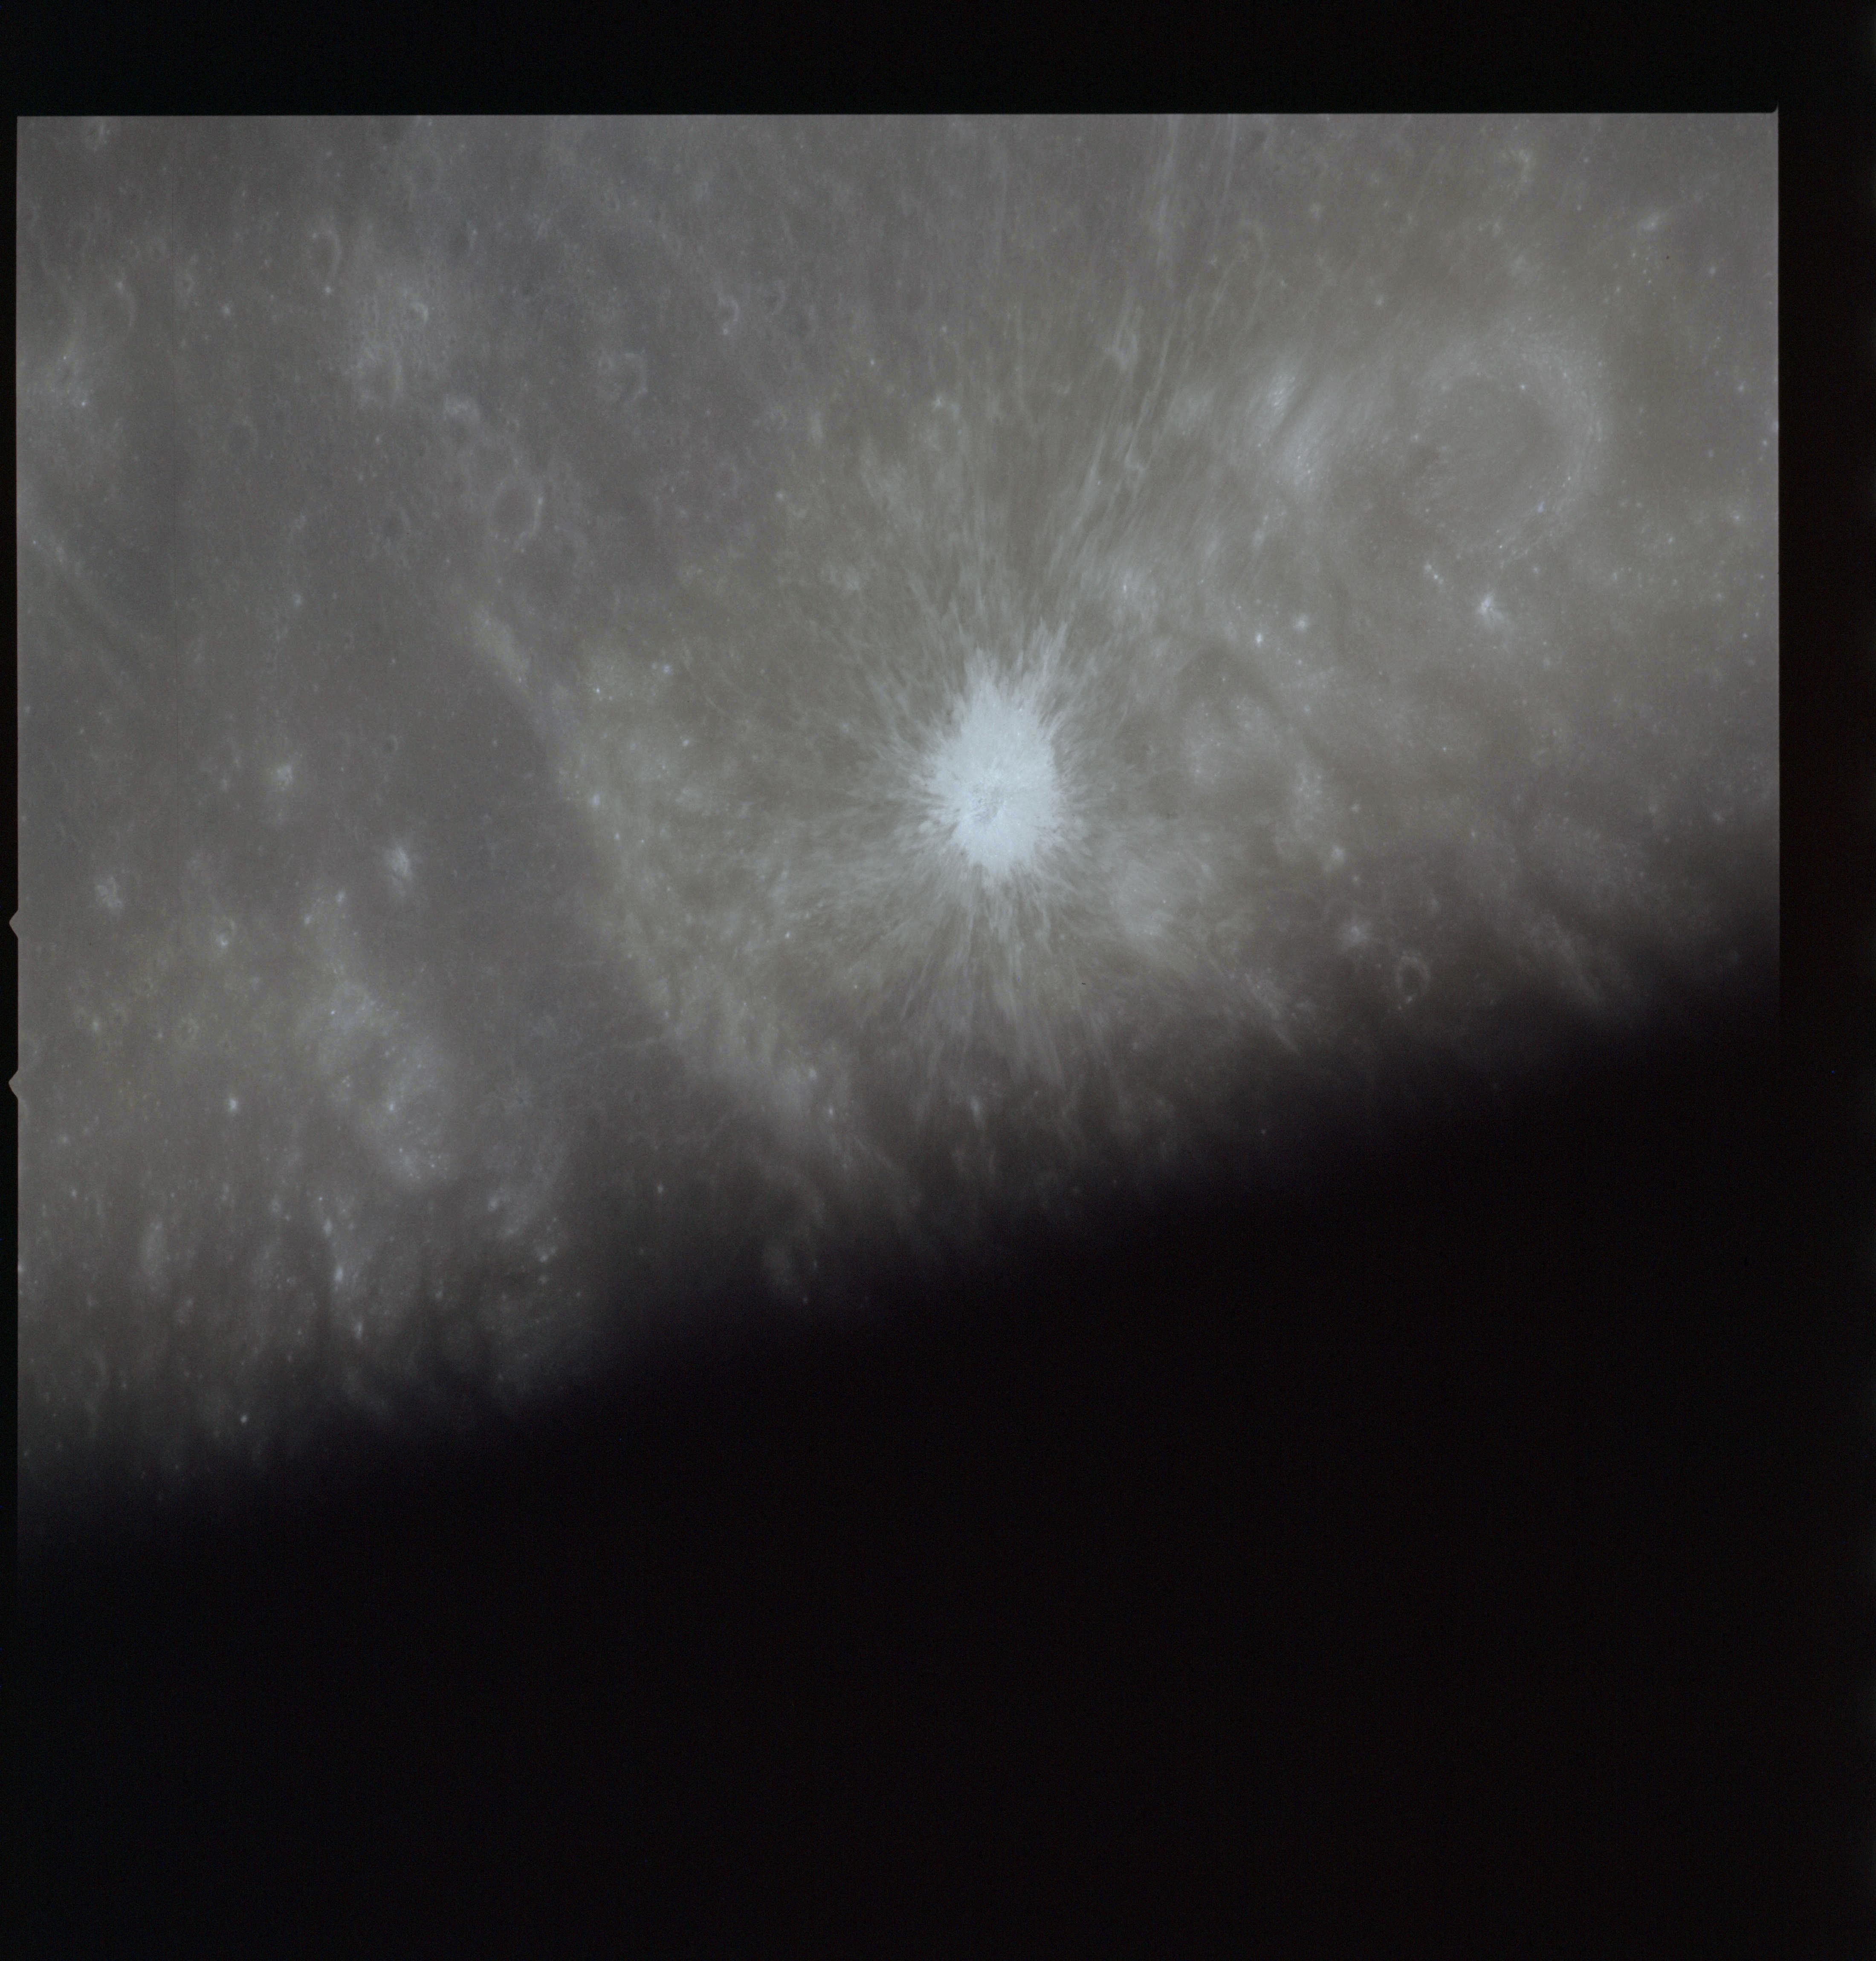
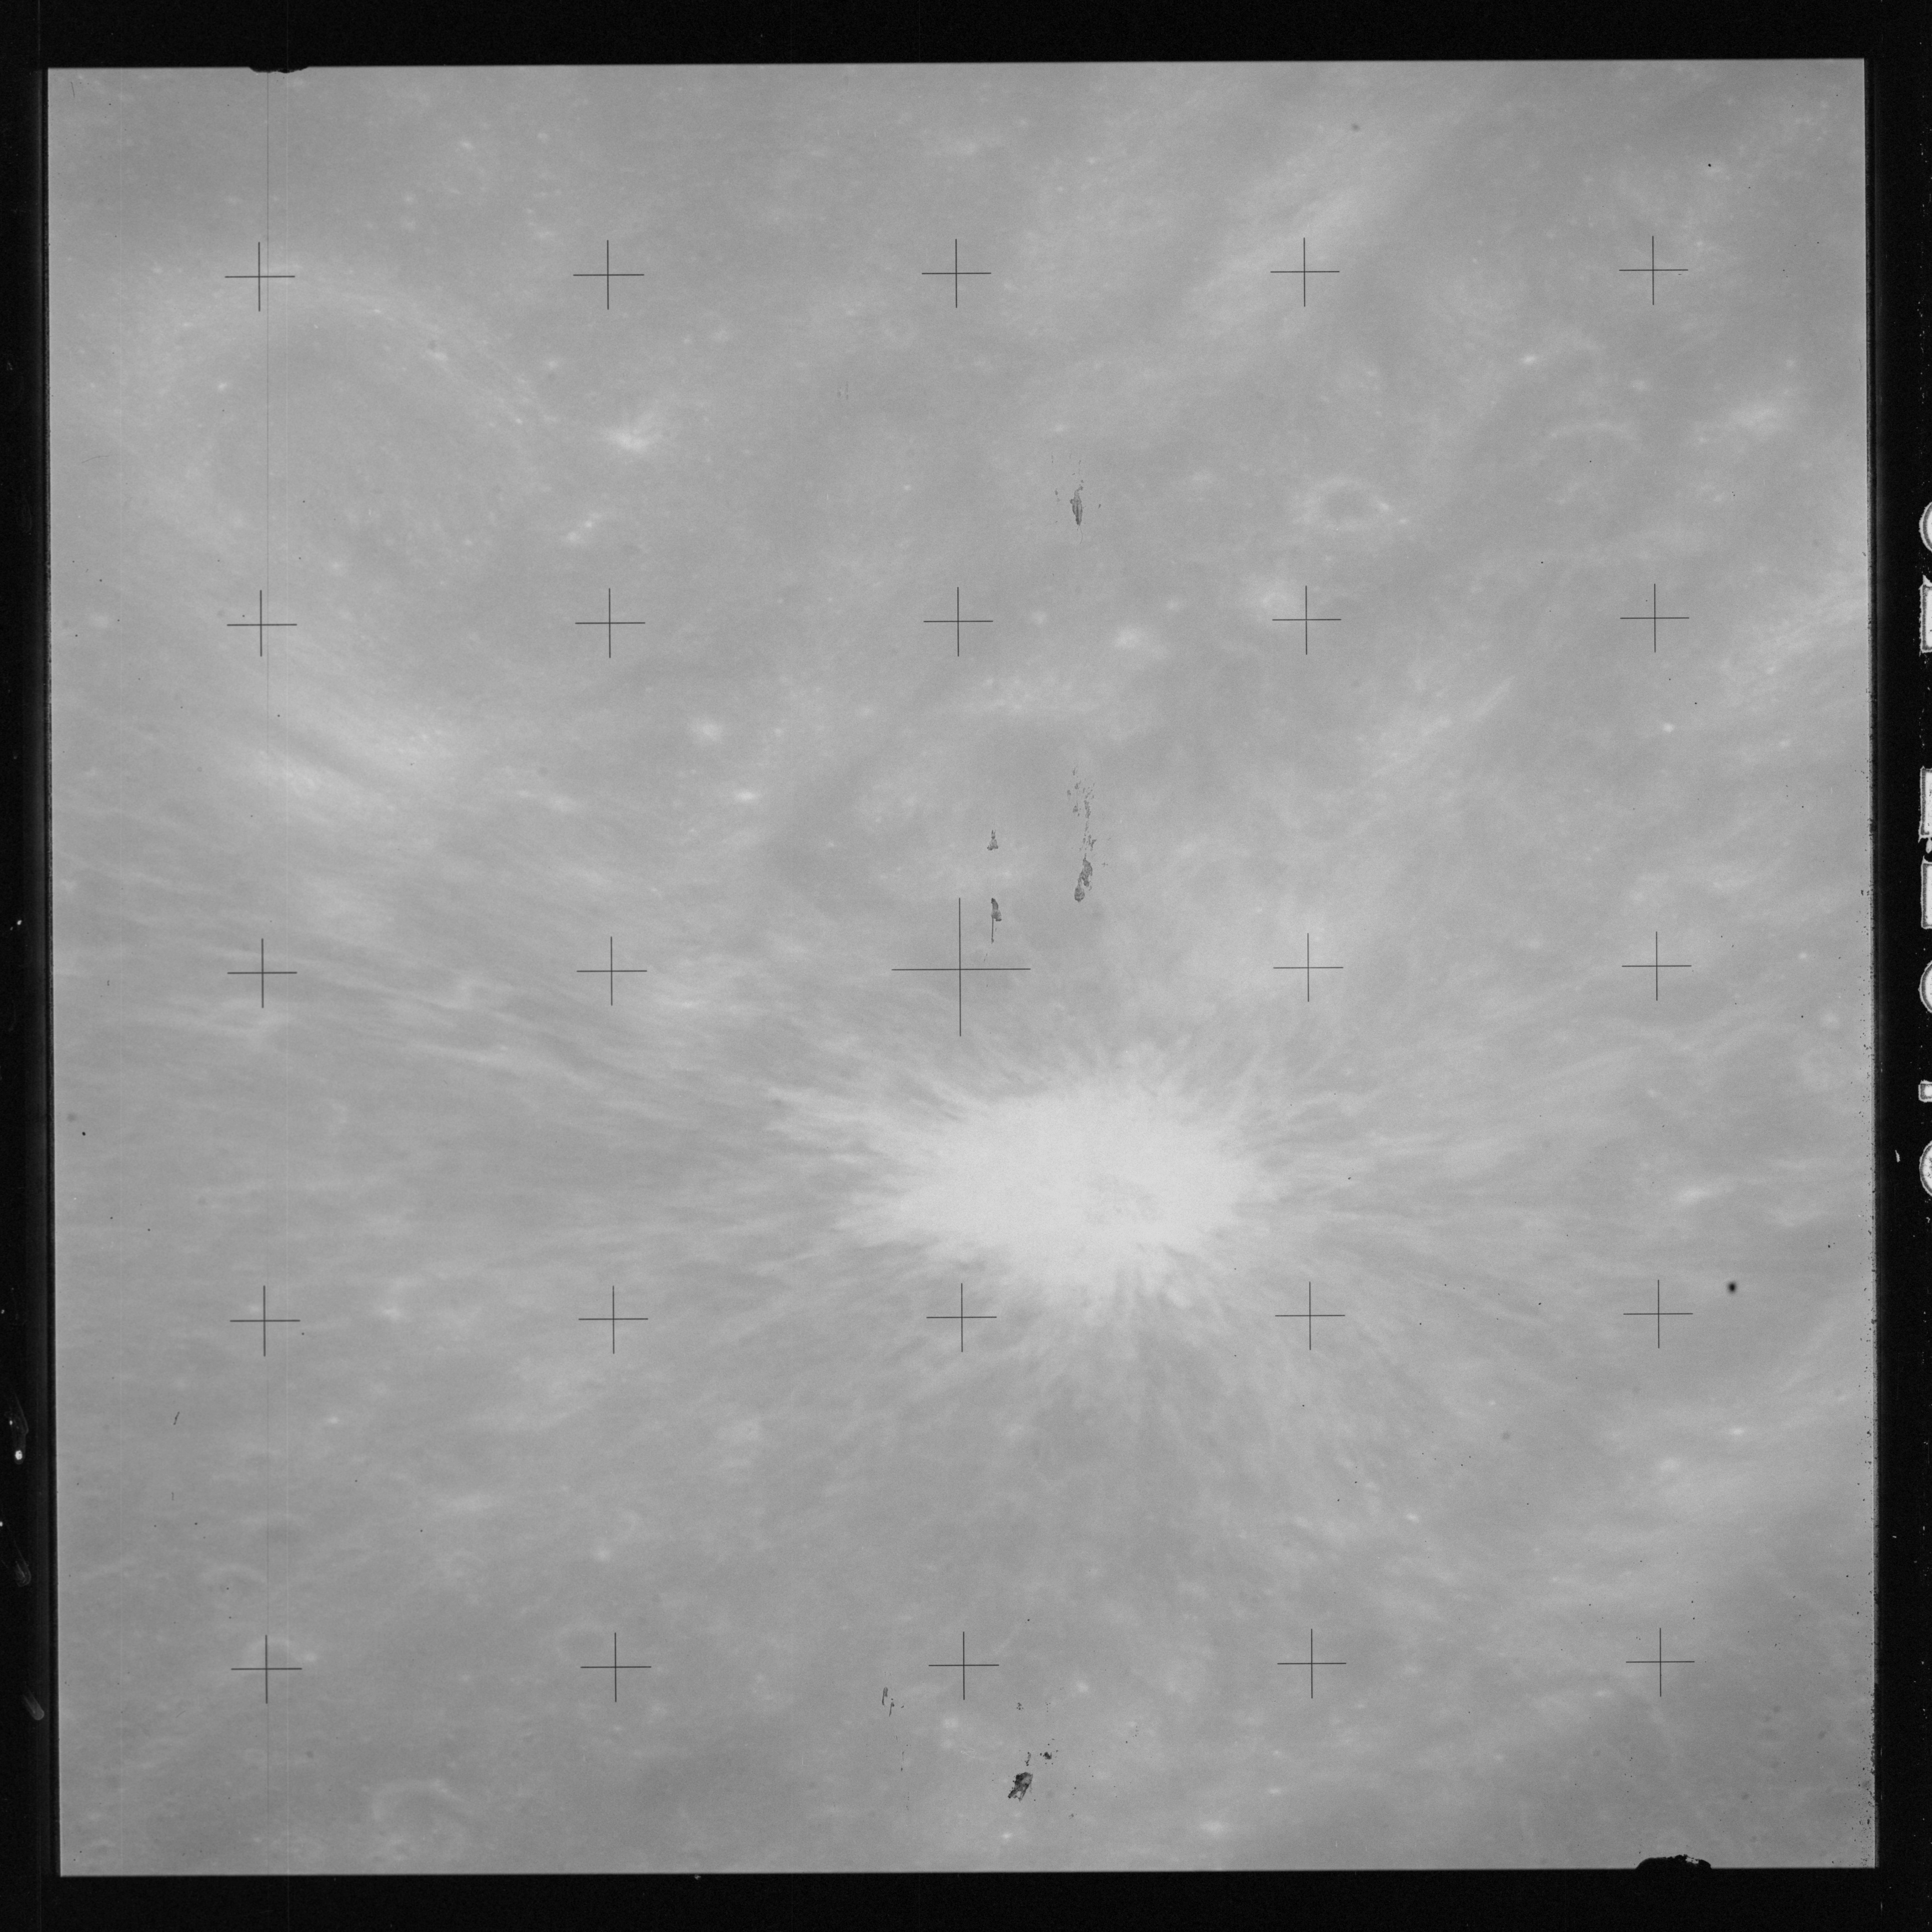
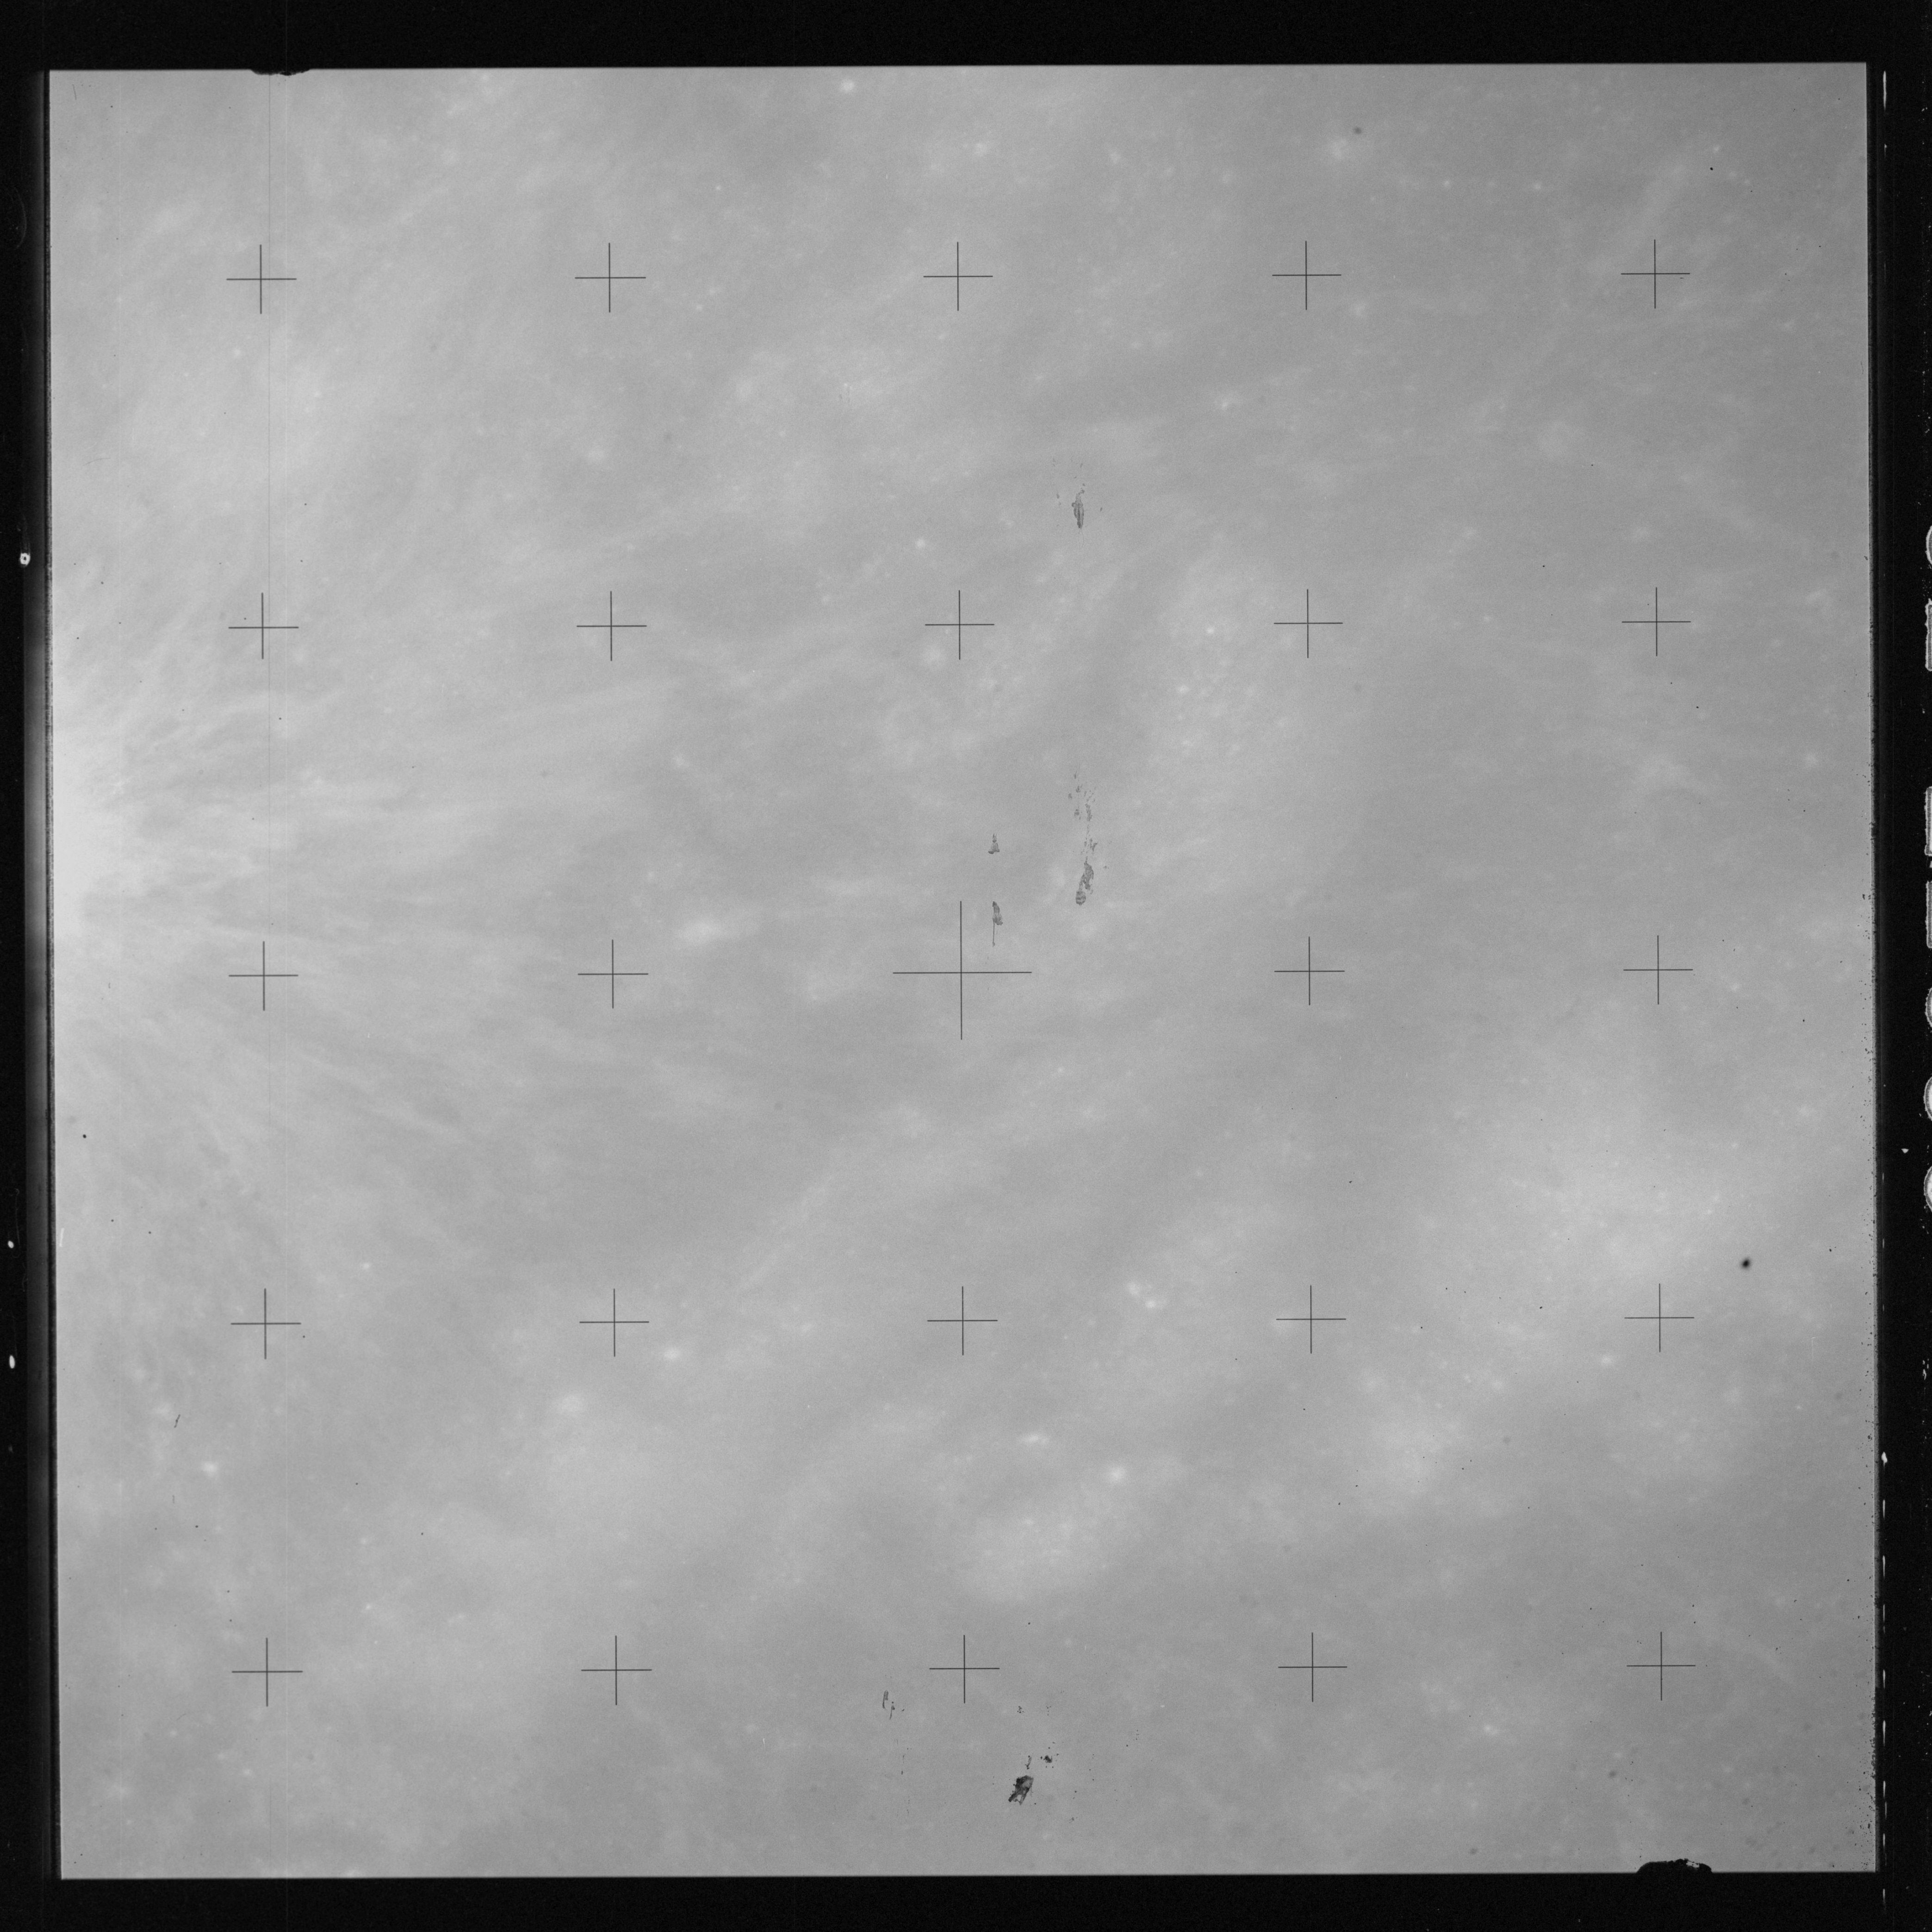
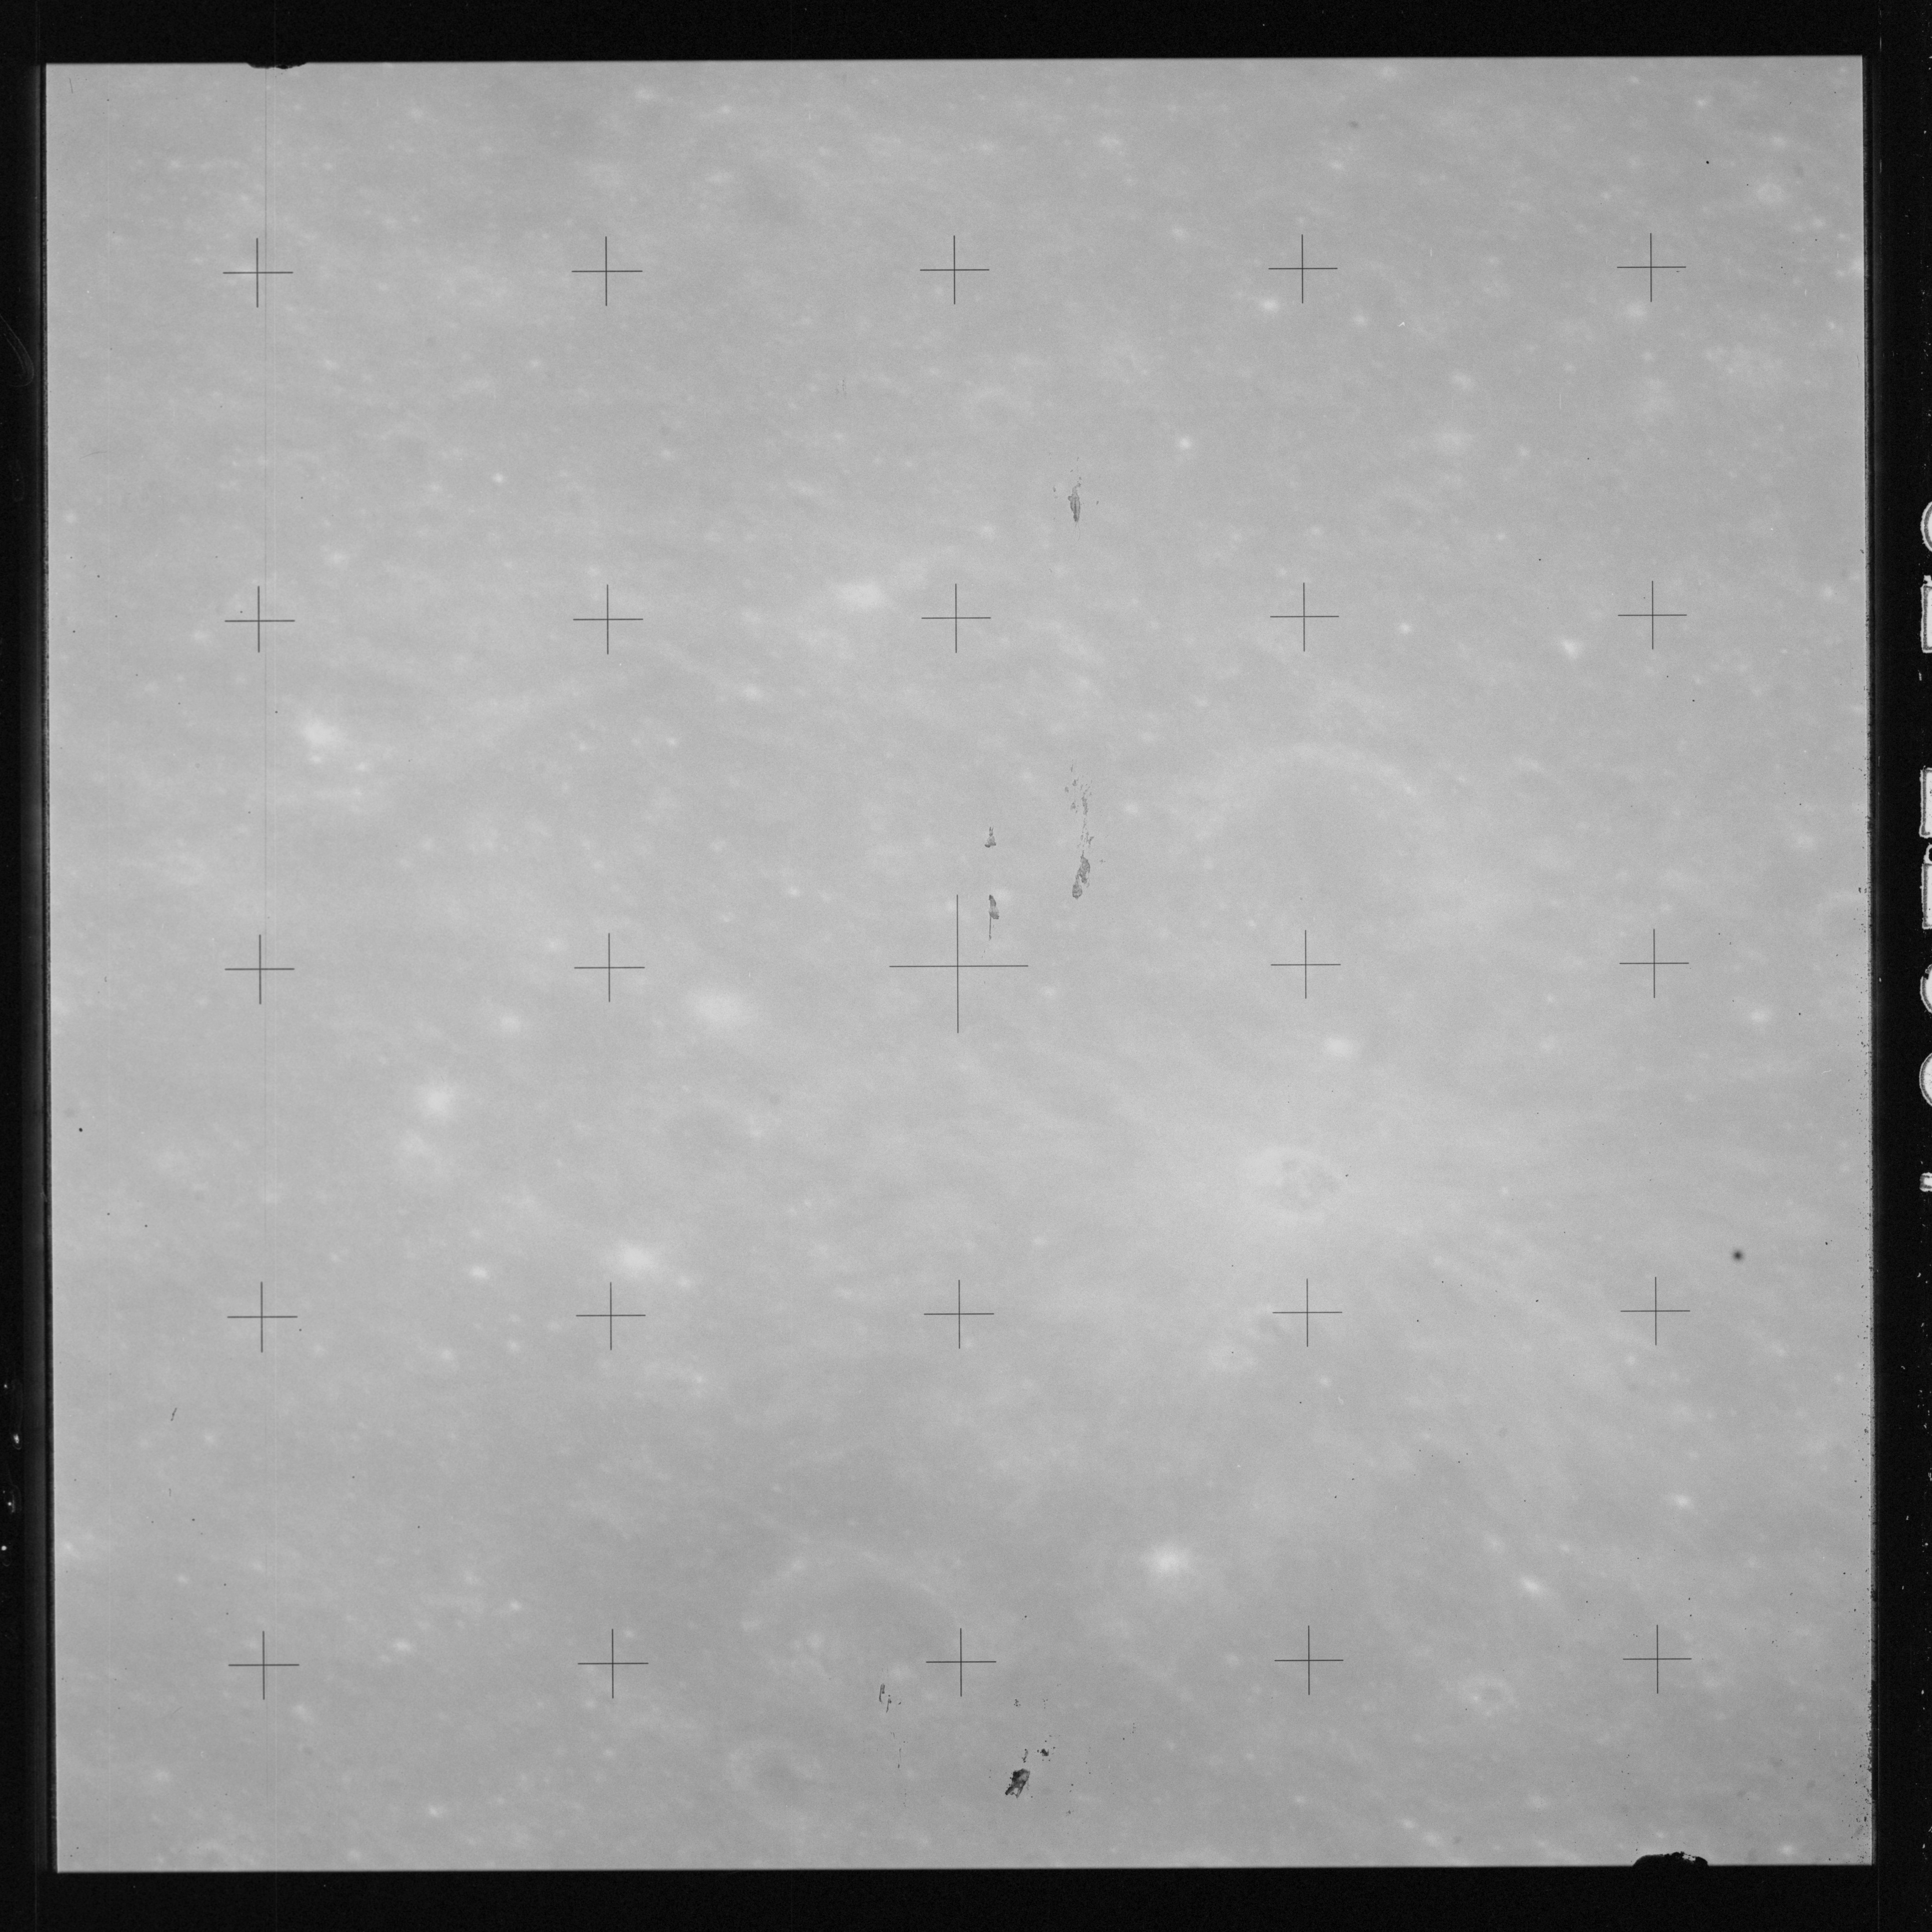
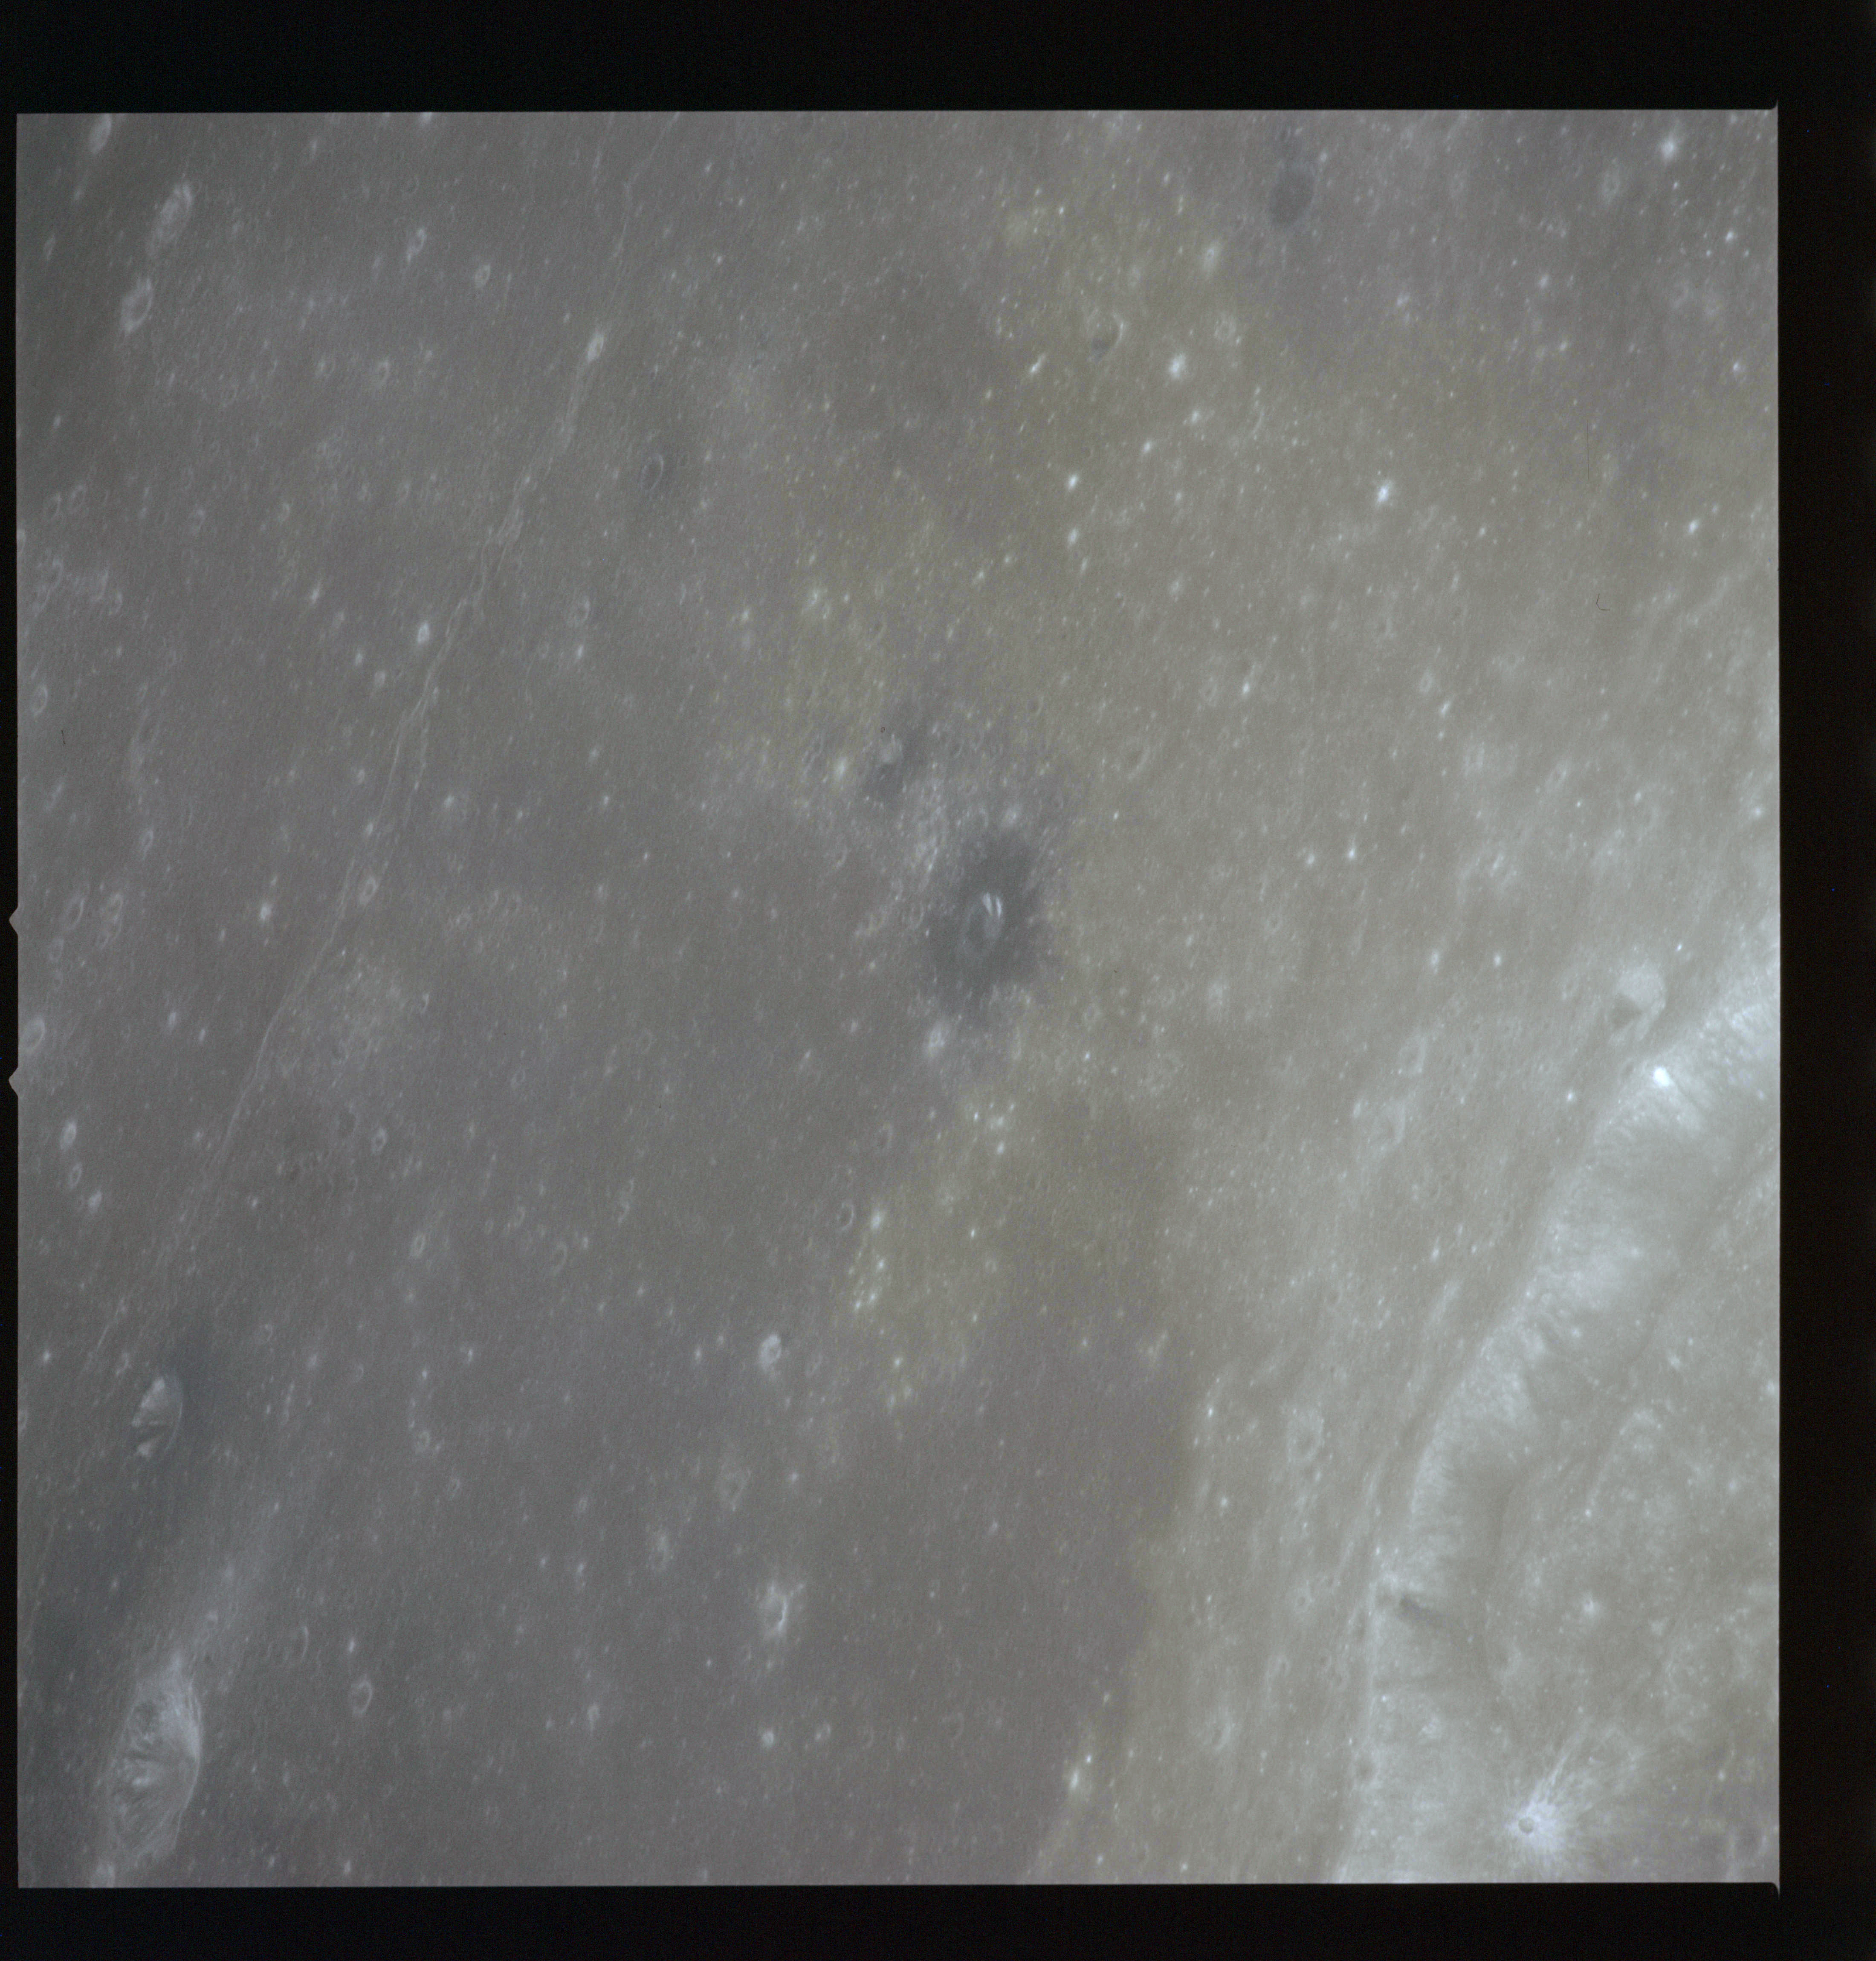
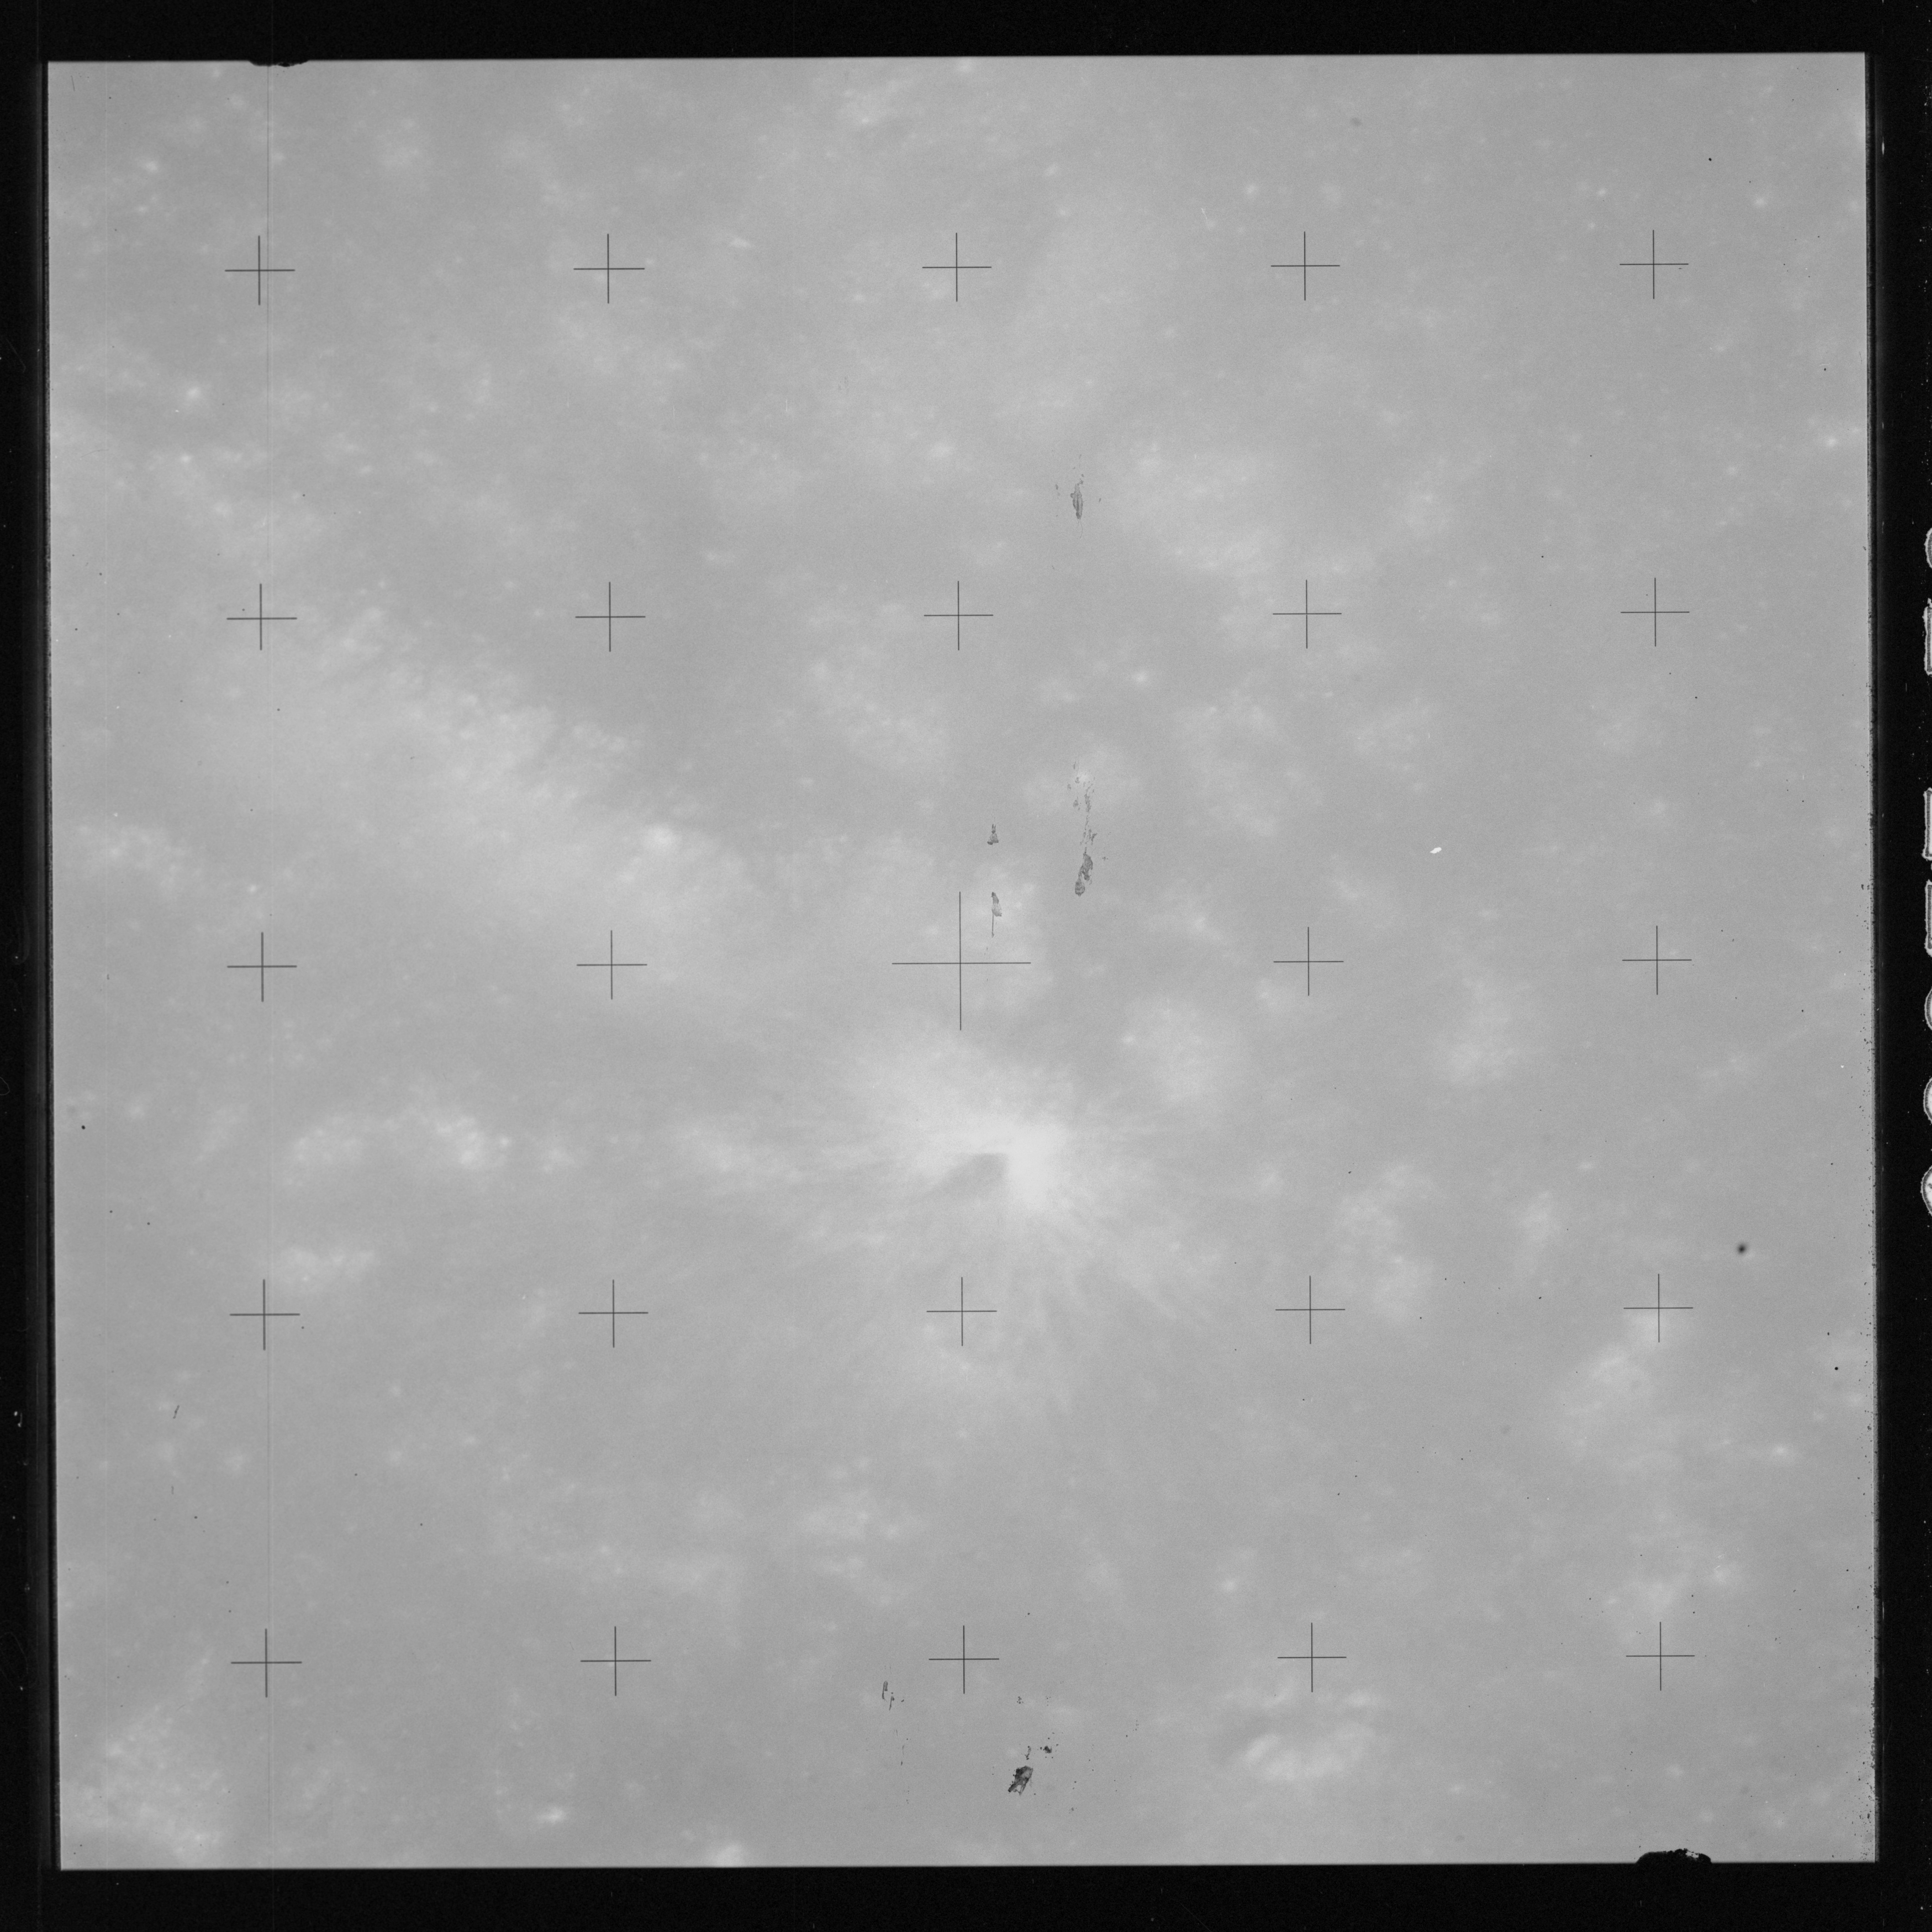
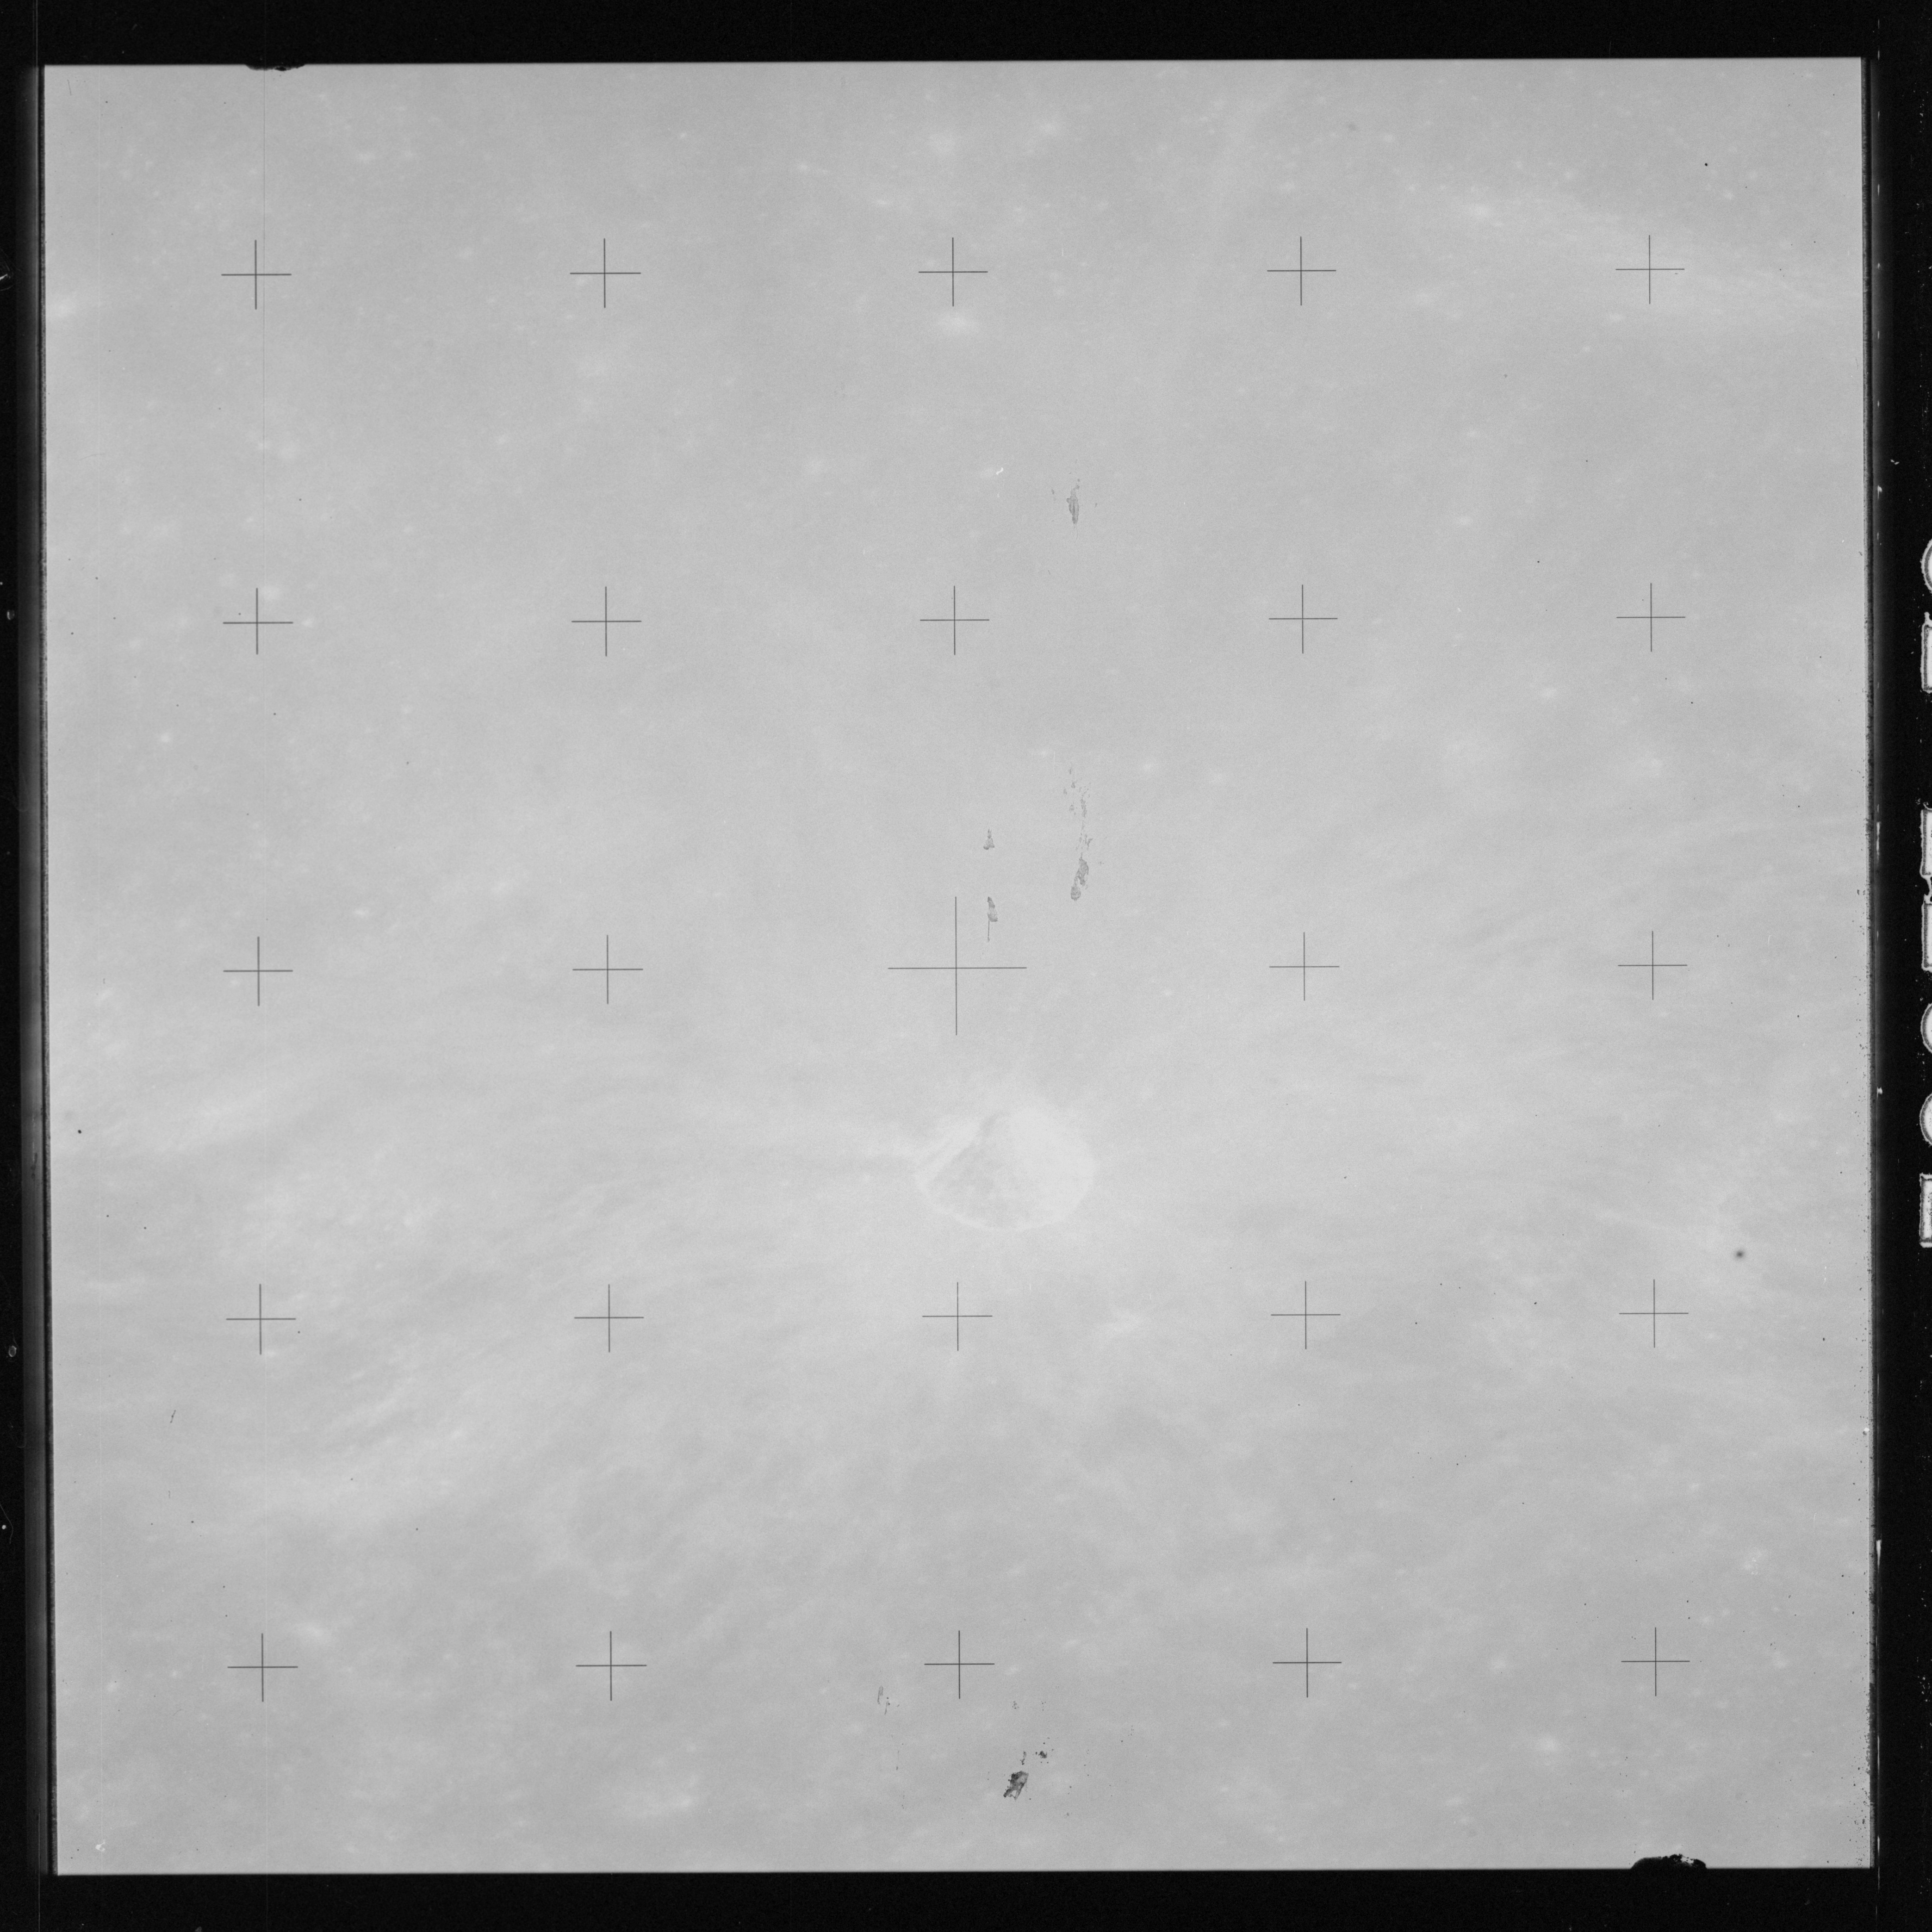
While Endeavour is in the darkness of lunar night, two cameras are prepared with very high speed black and white film for photography of the solar corona as it appears just prior to sunlight. The DAC with magazine H and a Hasselblad with magazine R are mounted in brackets looking out of window 4, the right hand rendezvous window.
At 216:03:55, the mission timer is started which will provide a reference for taking shots. When it reaches 5 minutes, the DAC is started at 1 frame per second and a shutter speed of 1/125th of a second. At 6:40 on the timer, its shutter speed is changed to 1/500th. At 6:50 and every 10 seconds thereafter, a frame is taken on the Hasselblad starting at 1 second exposure, then 1/4 then reducing the exposure by one stop with every frame until they get to 1/500th. At 8 minutes on the timer, the DAC is stopped, both cameras are cycled to fresh film and the Hasselblad prepared for colour photography during the coming daylit pass. Thirteen images, AS15-98-13374 to 13386, are catalogued in the Apollo 15 Hasselblad Index but the first three do not appear to carry any useful imagery. Nine images, AS15-98-13377 to 13385, do show the solar corona while 13386 seems to be a deliberately blank frame fired off to provide protection to the very sensitive film. These photos will be presented at approximately the correct place in the transcript.
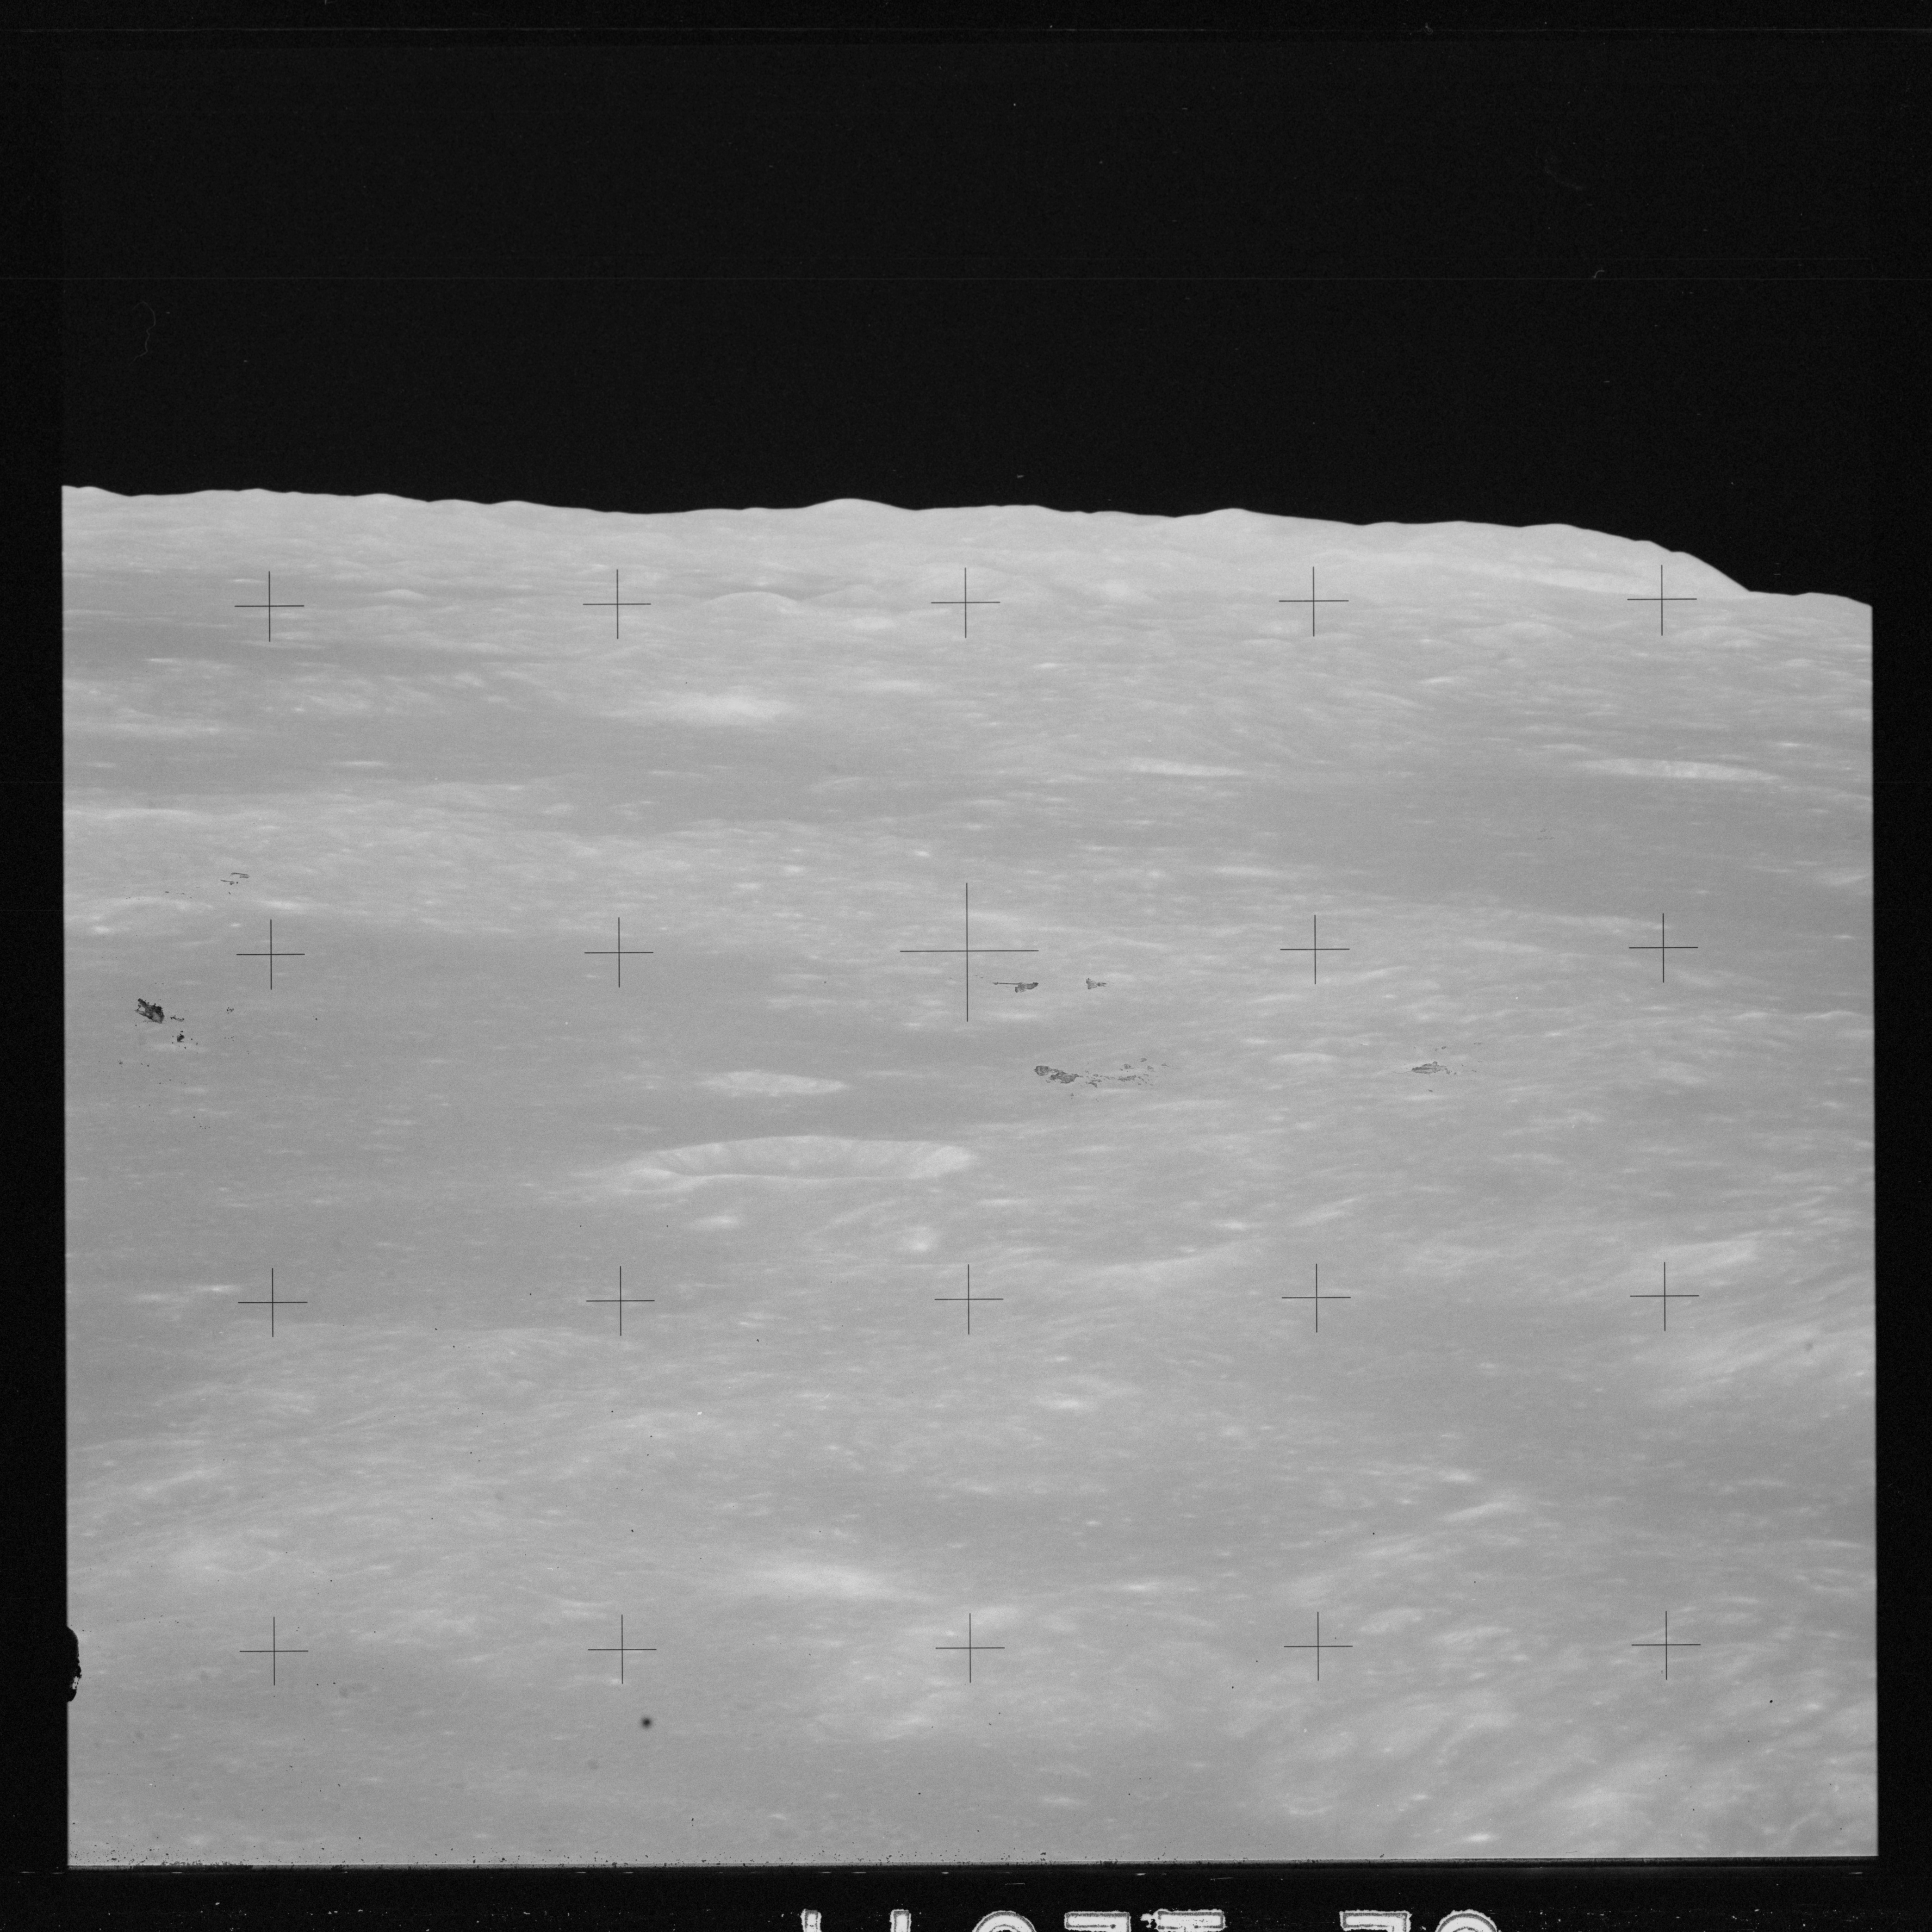
Orbit 71 begins about 23 minutes before AOS at about 215:56 and the spacecraft meets the sunlight 14 minutes later. At 216:18:30, as the spacecraft crosses the terminator, the Mapping Camera begins an hour-long period of photography looking to the south, 40° away from vertical.
216:03:01 Worden (onboard): That T-start is right now, too.
216:03:04 Scott (onboard): [Garble].
216:03:07 Worden (onboard): Uh...
216:03:12 Scott (onboard): 216.
216:03:14 Worden (onboard): 216:03. That's right.
216:03:16 Scott (onboard): We have 15 minutes.
216:03:18 Worden (onboard): No, we're at 216:03 right now.
216:03:23 Scott (onboard): [Garble]. We'll never complete [garble].
216:03:28 Worden (onboard): Yes, we will. That's been all - Well, let's see. Let's get the stick and put in a higher rate in the DAP. Jim?
216:03:35 Irwin (onboard): Get the stick?
216:03:36 Worden (onboard): Yes.
216:03:50 Worden (onboard): What the hell's that [garble] 111. Okay.
216:04:03 Worden (onboard): Okay. I think that does it. I should have played a 3 while I was at it. Huh.
216:04:12 Irwin (onboard): What?
216:04:13 Worden (onboard): I should have put in a 3 and really zapped it around.
216:04:26 Scott (onboard): Three [garble].
216:04:28 Worden (onboard): Yes.
216:04:29 Scott (onboard): Three is a what? [Garble]?
216:04:31 Worden (onboard): Three is 2 degrees per second. We better do it.
216:04:34 Scott (onboard): [Garble].
216:04:35 Worden (onboard): I don't know if I can hit the stick again, only...
216:04:41 Scott (onboard): How about the boom? Is that extended?
216:04:43 Worden (onboard): We got the boom now?
216:04:44 Scott (onboard): I don't know.
216:04:46 Worden (onboard): Well, what's the Flight Plan say?
216:04:51 Scott (onboard): Yes, better not.
216:04:52 Worden (onboard): Better not. Yes.
216:04:54 Scott (onboard): You want the [garble], don't you? [Garble].
216:04:58 Worden (onboard): Yes, we're almost there.
216:05:00 Scott (onboard): Okay.
216:05:01 Worden (onboard): Yes, we don't have to start here until - Got 5 minutes left - 80 - 8:55.
216:05:11 Scott (onboard): Why is that coming up? Why didn't it come down?
216:05:14 Irwin (onboard): Because the mission timer starts. [Garble]. Flight Plan [garble].
216:05:18 Worden (onboard): Yes, because - yes, because of that one.
216:05:20 Scott (onboard): [Garble]?
216:05:21 Worden (onboard): No, this is the mission timer. That - this was - this - Yes?
216:05:26 Scott (onboard): Mission timer, do you set the start and T-stop [garble]?
216:05:29 Worden (onboard): That's right. No. We're not doing it because we're using P30 instead.
216:05:33 Scott (onboard): Be cool if we set the mission timer anyway.
216:05:35 Worden (onboard): Oh, yes. Sure.
216:05:37 Scott (onboard): And use our GET?
216:05:38 Worden (onboard): You can get it off the DSKY. Hell, the goddam thing's already stopped twice - on its own.
216:05:45 Scott (onboard): What? This one stopped twice?
216:05:46 Worden (onboard): Yes.
216:05:47 Scott (onboard): Really?
216:05:48 Worden (onboard): Yes.
216:06:03 Worden (onboard): You can't read that DET from over here.
216:06:06 Scott (onboard): What?
216:06:07 Worden (onboard): You can't read it from over here to begin with.
216:06:14 Irwin (onboard): I got a good idea.
216:06:16 Scott (onboard): [Garble] fails if you move.
216:06:21 Worden (onboard): Well, you - you got the date.
216:06:24 Scott (onboard): [Garble].
216:06:26 Worden (onboard): Yes. You tried G&N and comp fail?
216:06:30 Scott (onboard): Yes.
216:06:31 Worden (onboard): You tried G&N and comp fail? You're screwed anyway.
216:06:36 Scott (onboard): Better start getting our [garble] TEI.
216:06:43 Worden (onboard): Well, I think that's - kind of pushing the rules.
216:06:56 Irwin (onboard): Y'all are getting freaked up.
216:06:58 Worden (onboard): Yes. We might.
216:07:05 Scott (onboard): Need a piece of tape. Ought to be a piece of tape around here somewhere.
216:07:13 Irwin (onboard): Yes.
216:07:14 Scott (onboard): Okay.
216:07:15 Worden (onboard): Are you there?
216:07:16 Scott (onboard): Okay.
216:07:17 Worden (onboard): Yes, call up P30 and put those numbers in the -
216:07:45 Scott (onboard): Yes [garble] zero.
216:07:47 Worden (onboard): I'd just - Yes, I'd just leave all those in there or just load it zero. Okay. [Garble]. Doesn't make any difference.
216:08:12 Scott (onboard): Got 417.
216:08:16 Irwin (onboard): [Garble] Free? You want to let it be for a while?
216:08:20 Worden (onboard): Yes, we should. On, no, wait. No, that's okay. Those maniacs can wait on Dave. It won't damp.
216:08:28 Scott (onboard): Huh?
216:08:29 Worden (onboard): It won't damp because we're in Orb Rate.
216:08:31 Scott (onboard): You want to go Free?
216:08:32 Worden (onboard): Yes. Okay. Okay, now - look at those times and remember them, Dave.
216:08:43 Scott (onboard): Okay.
216:08:44 Worden (onboard): It starts - Well, the first one's at 5 minutes and then we go 6:40 and every 10 seconds after that. Okay?
216:08:51 Scott (onboard): You [garble] for that?
216:08:52 Worden (onboard): Yes.
216:08:55 Scott (onboard): Got it.
216:08:56 Worden (onboard): Okay, you ready? Okay.
The DAC should be started at this time.
216:08:59 Scott (onboard): Mark. One cycle.
216:09:35 Scott (onboard): Oh!
216:09:40 Worden (onboard): Now turn out all the MDC lights, and just let - watch the DSKY LEB - if - if you can find one down there.
216:09:48 Scott (onboard): Mark. Forty.
216:09:50 Worden (onboard): Yes.
216:10:15 Scott (onboard): Forty.
216:10:16 Worden (onboard): Okay.
216:10:24 Scott (onboard): Thirty.
216:10:34 Worden (onboard): Okay.
216:10:35 Scott (onboard): Mark.
The DAC's exposure should be set to 1/500th at this time.
216:10:36 Worden (onboard): Okay, I got the time. You can watch, if you want.
216:10:41 Scott (onboard): You want a mark at 2:50?
216:10:42 Worden (onboard): Yes. No, I'll - I'll get it. Just watch out the window.
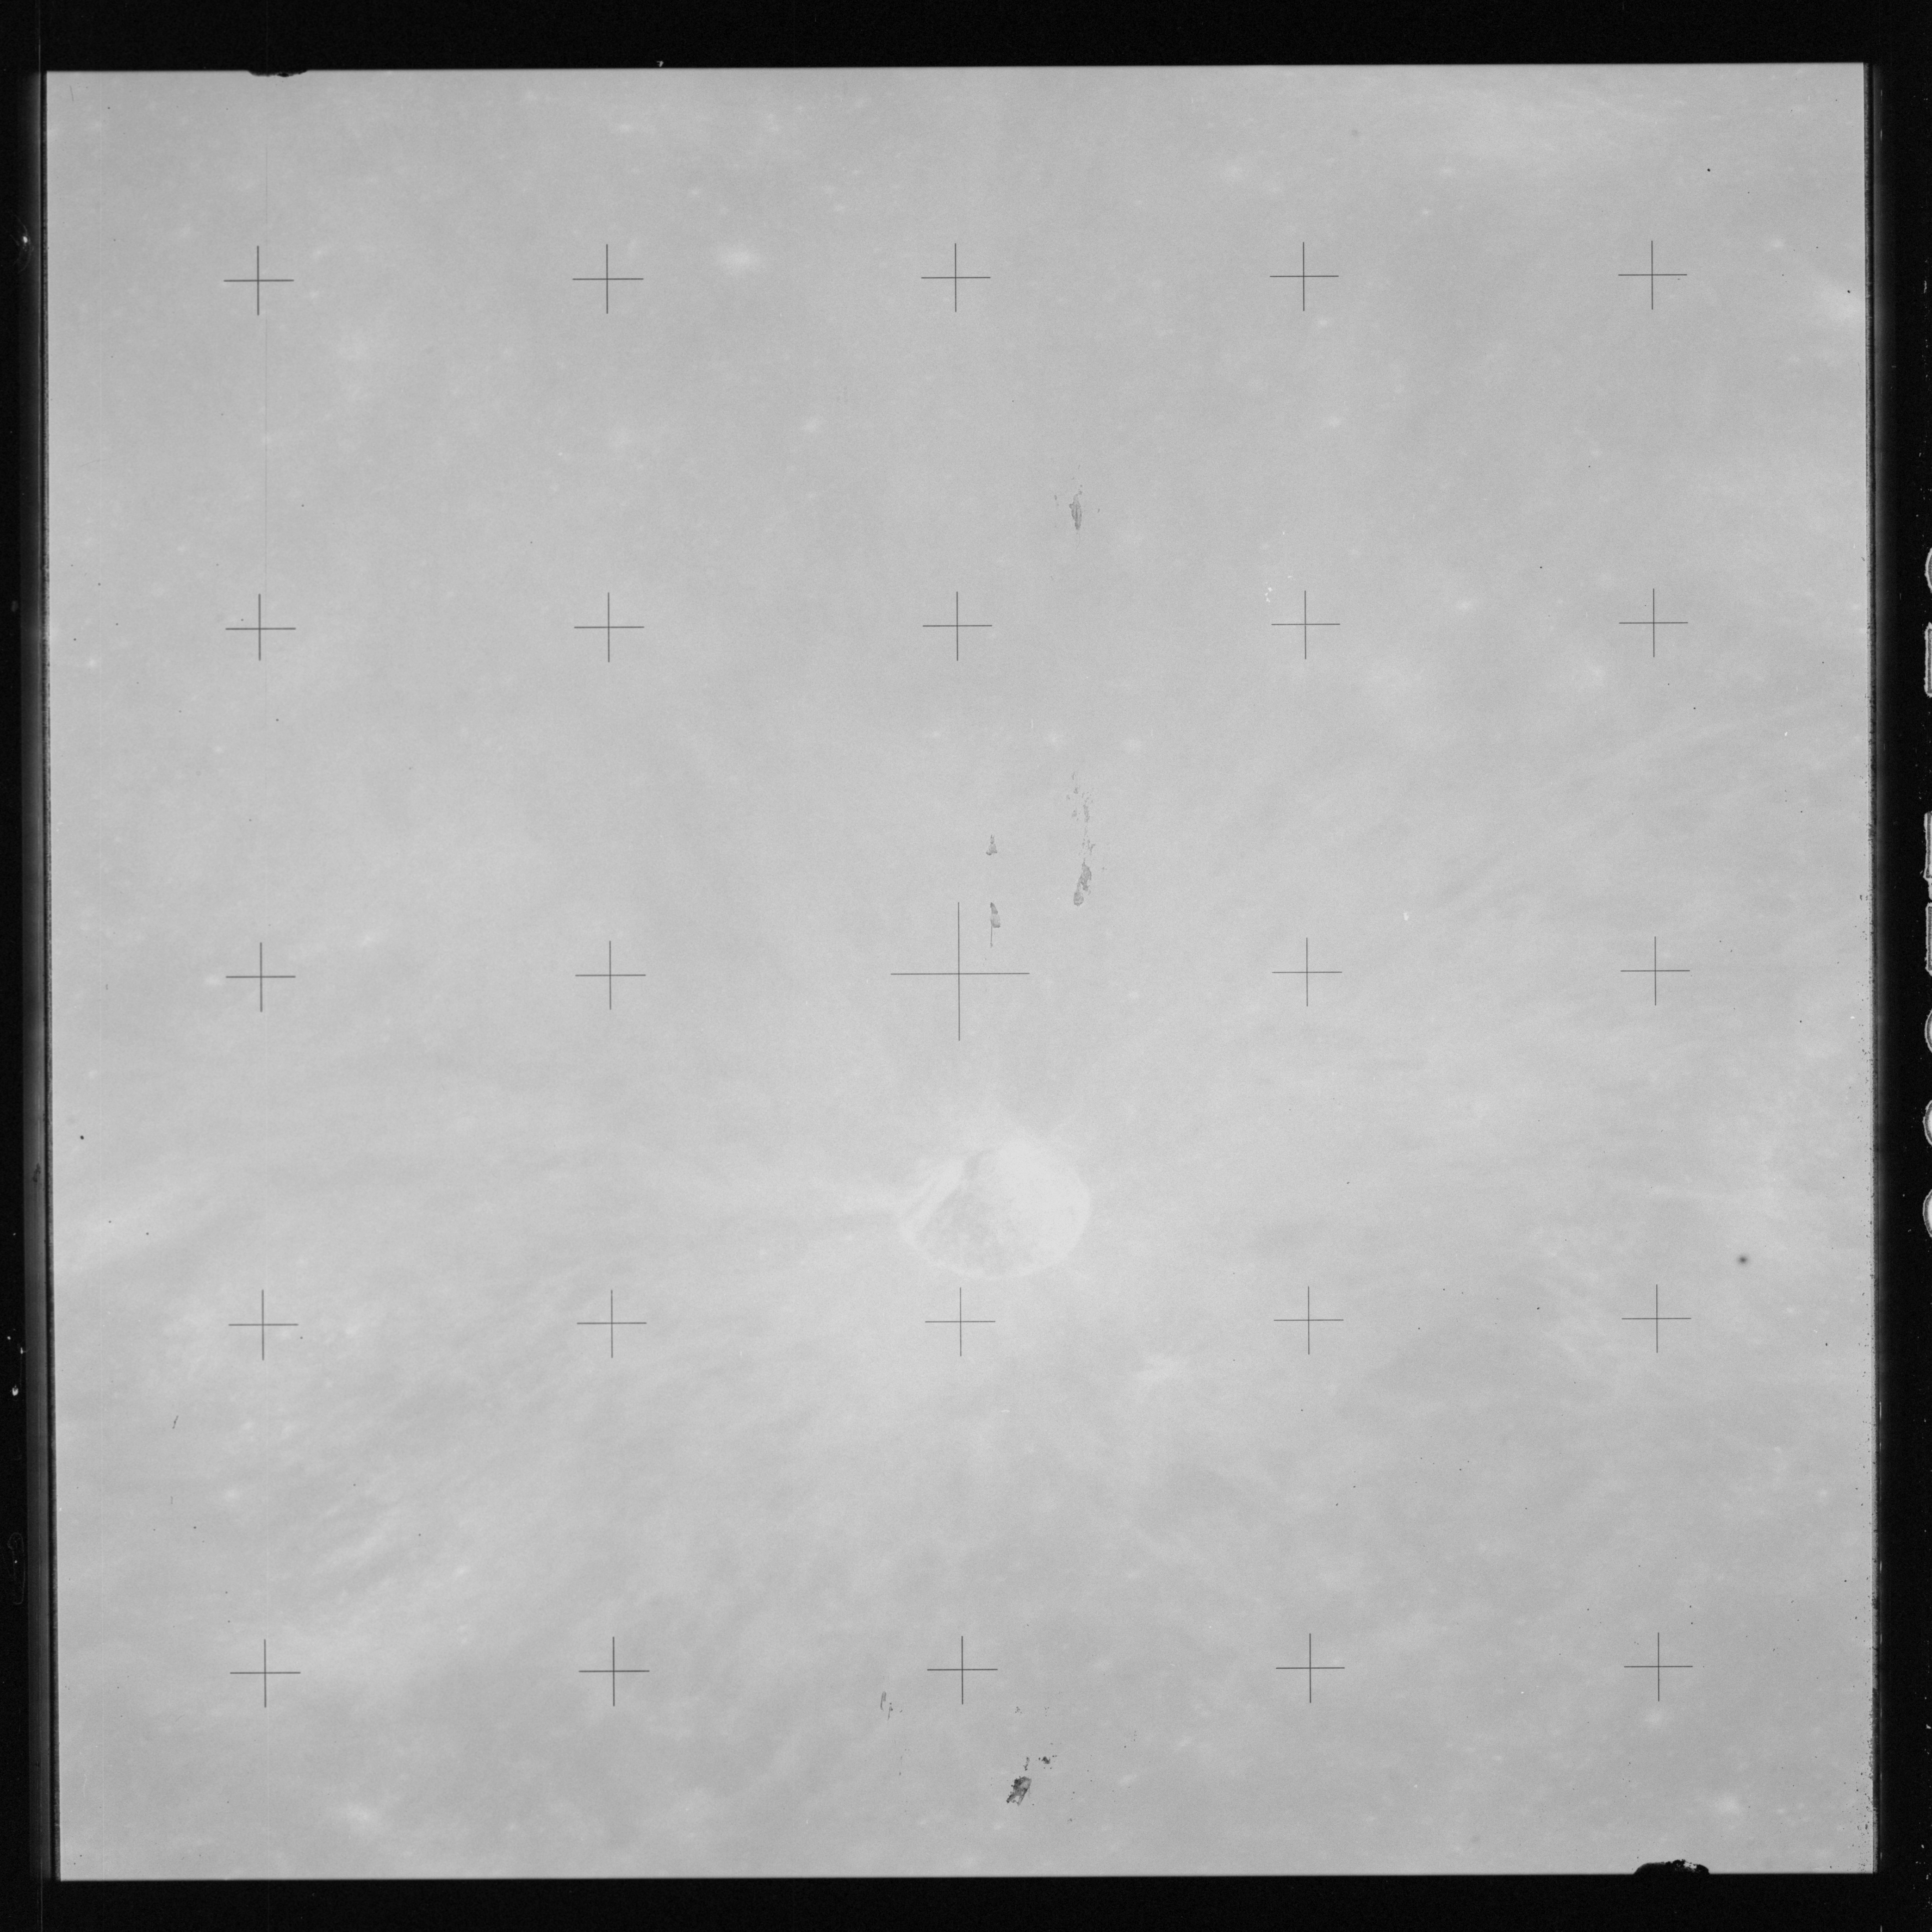
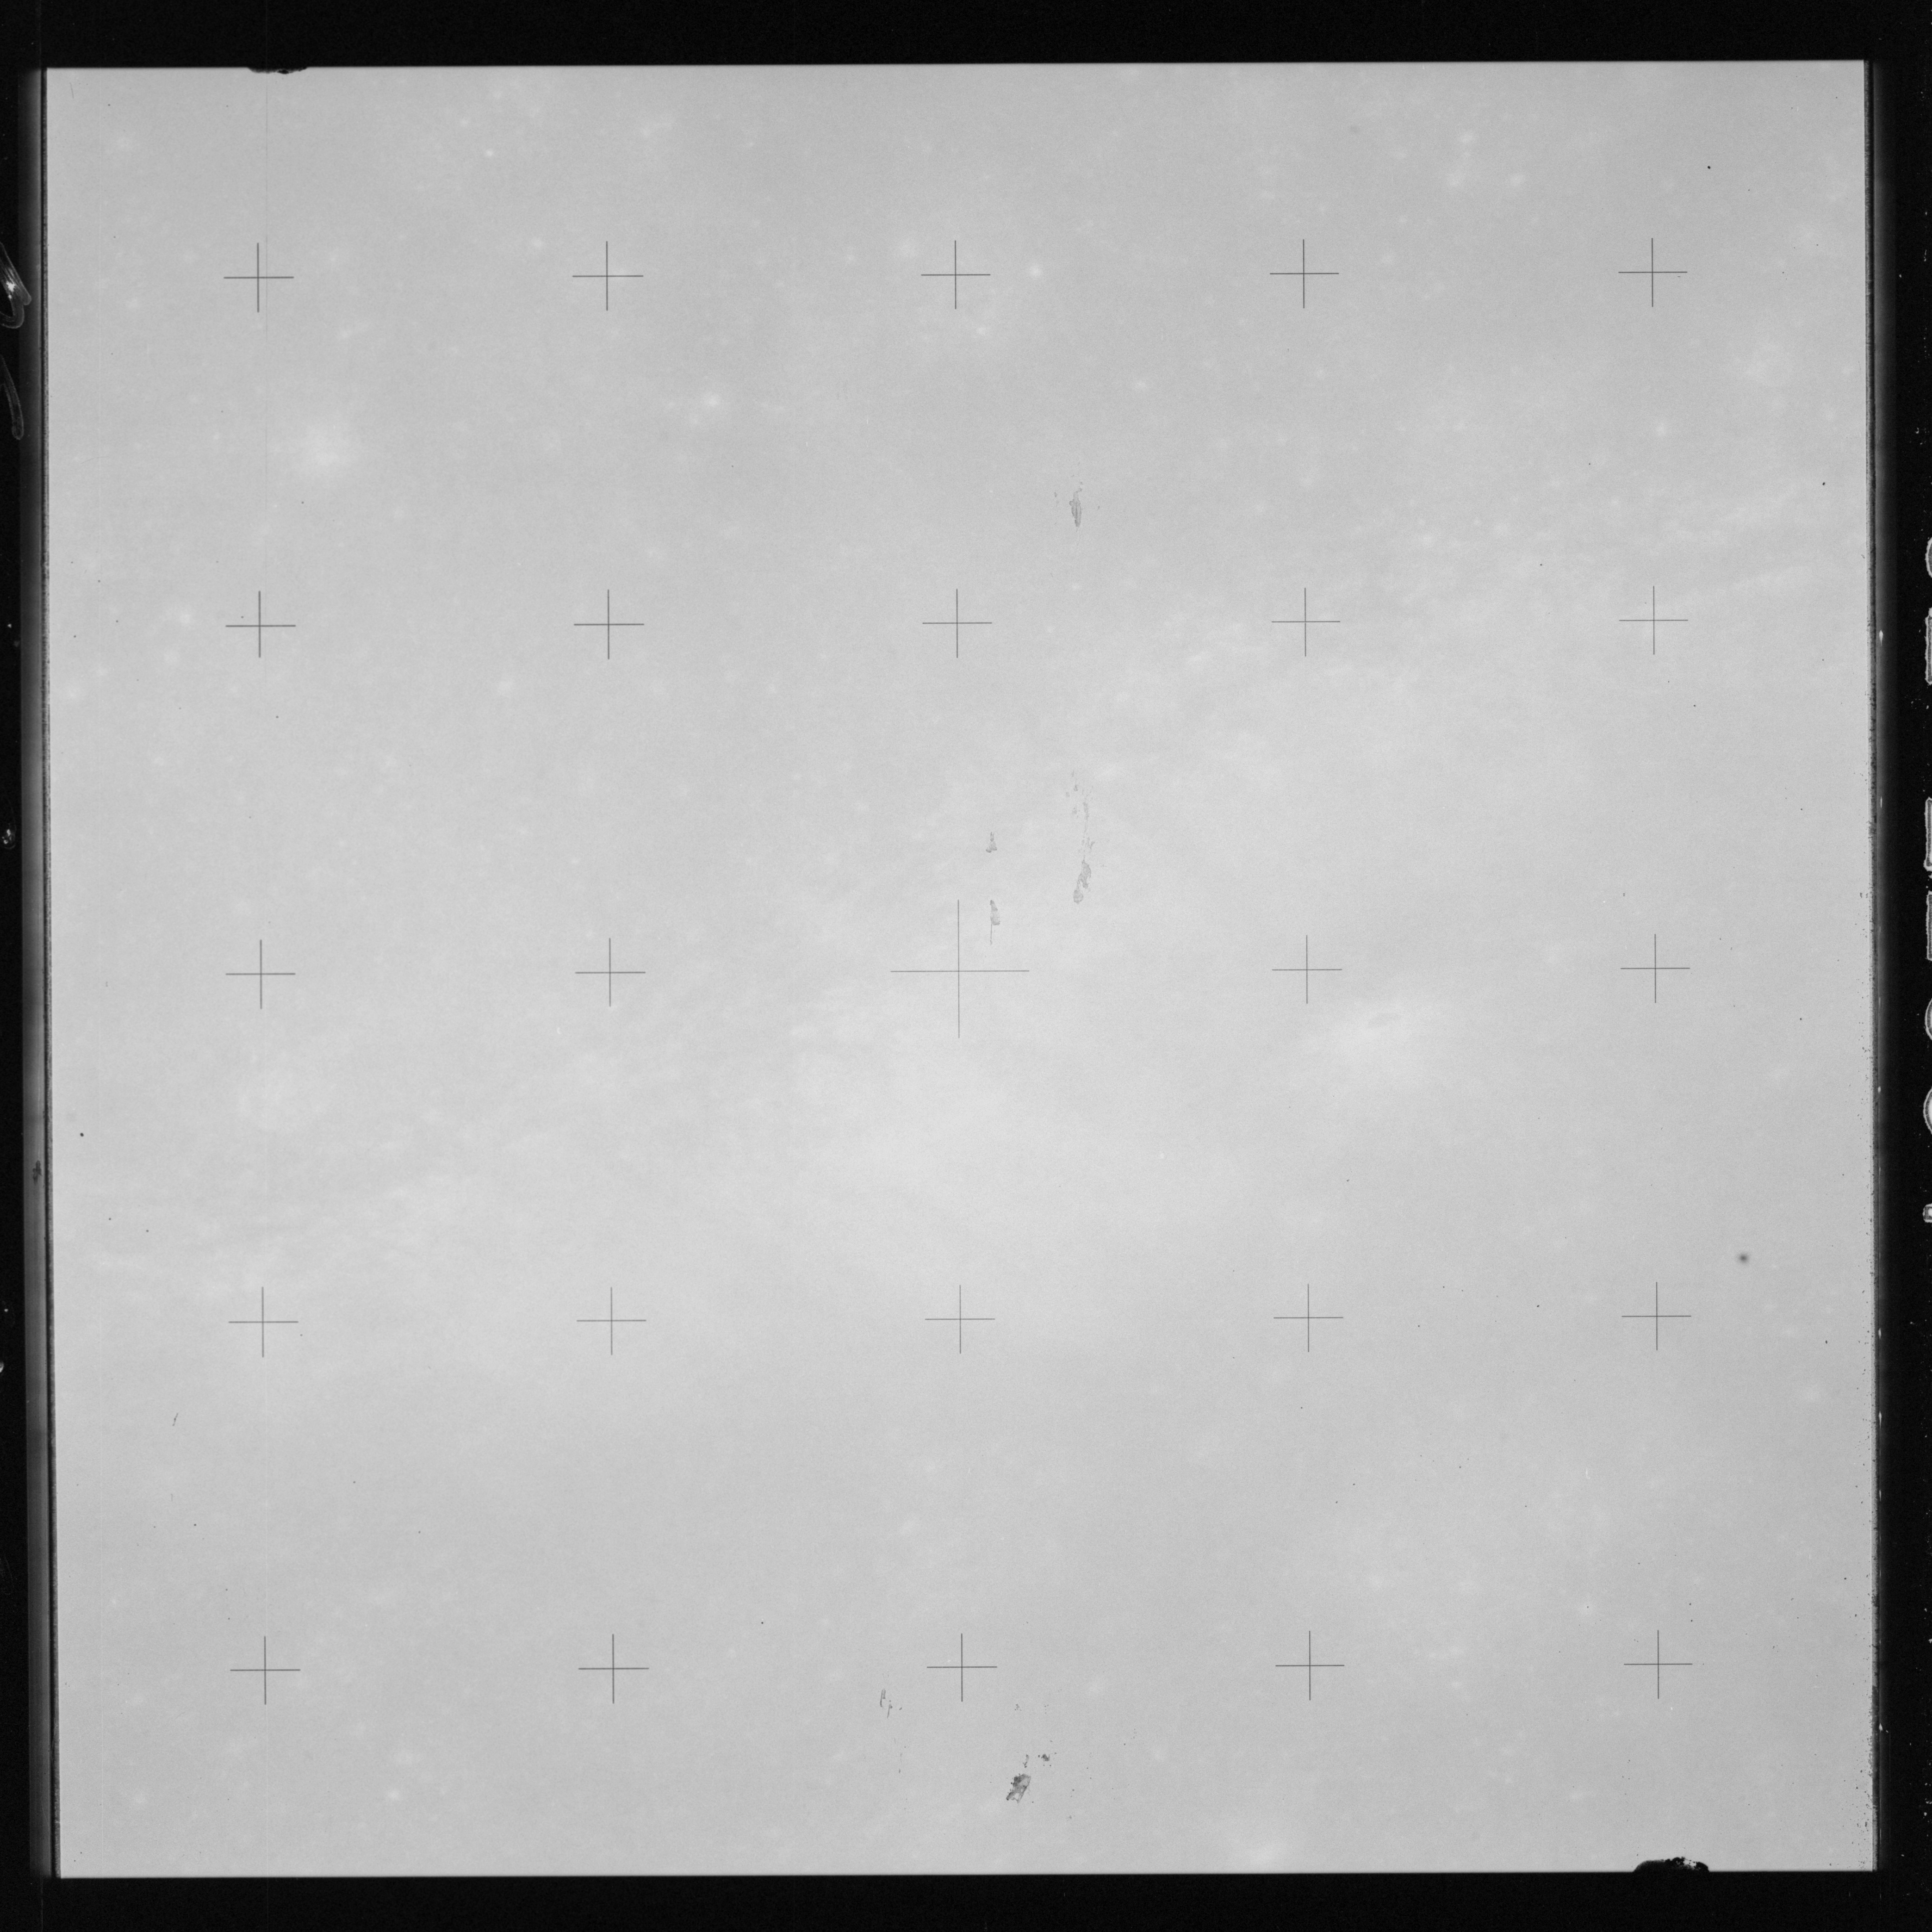
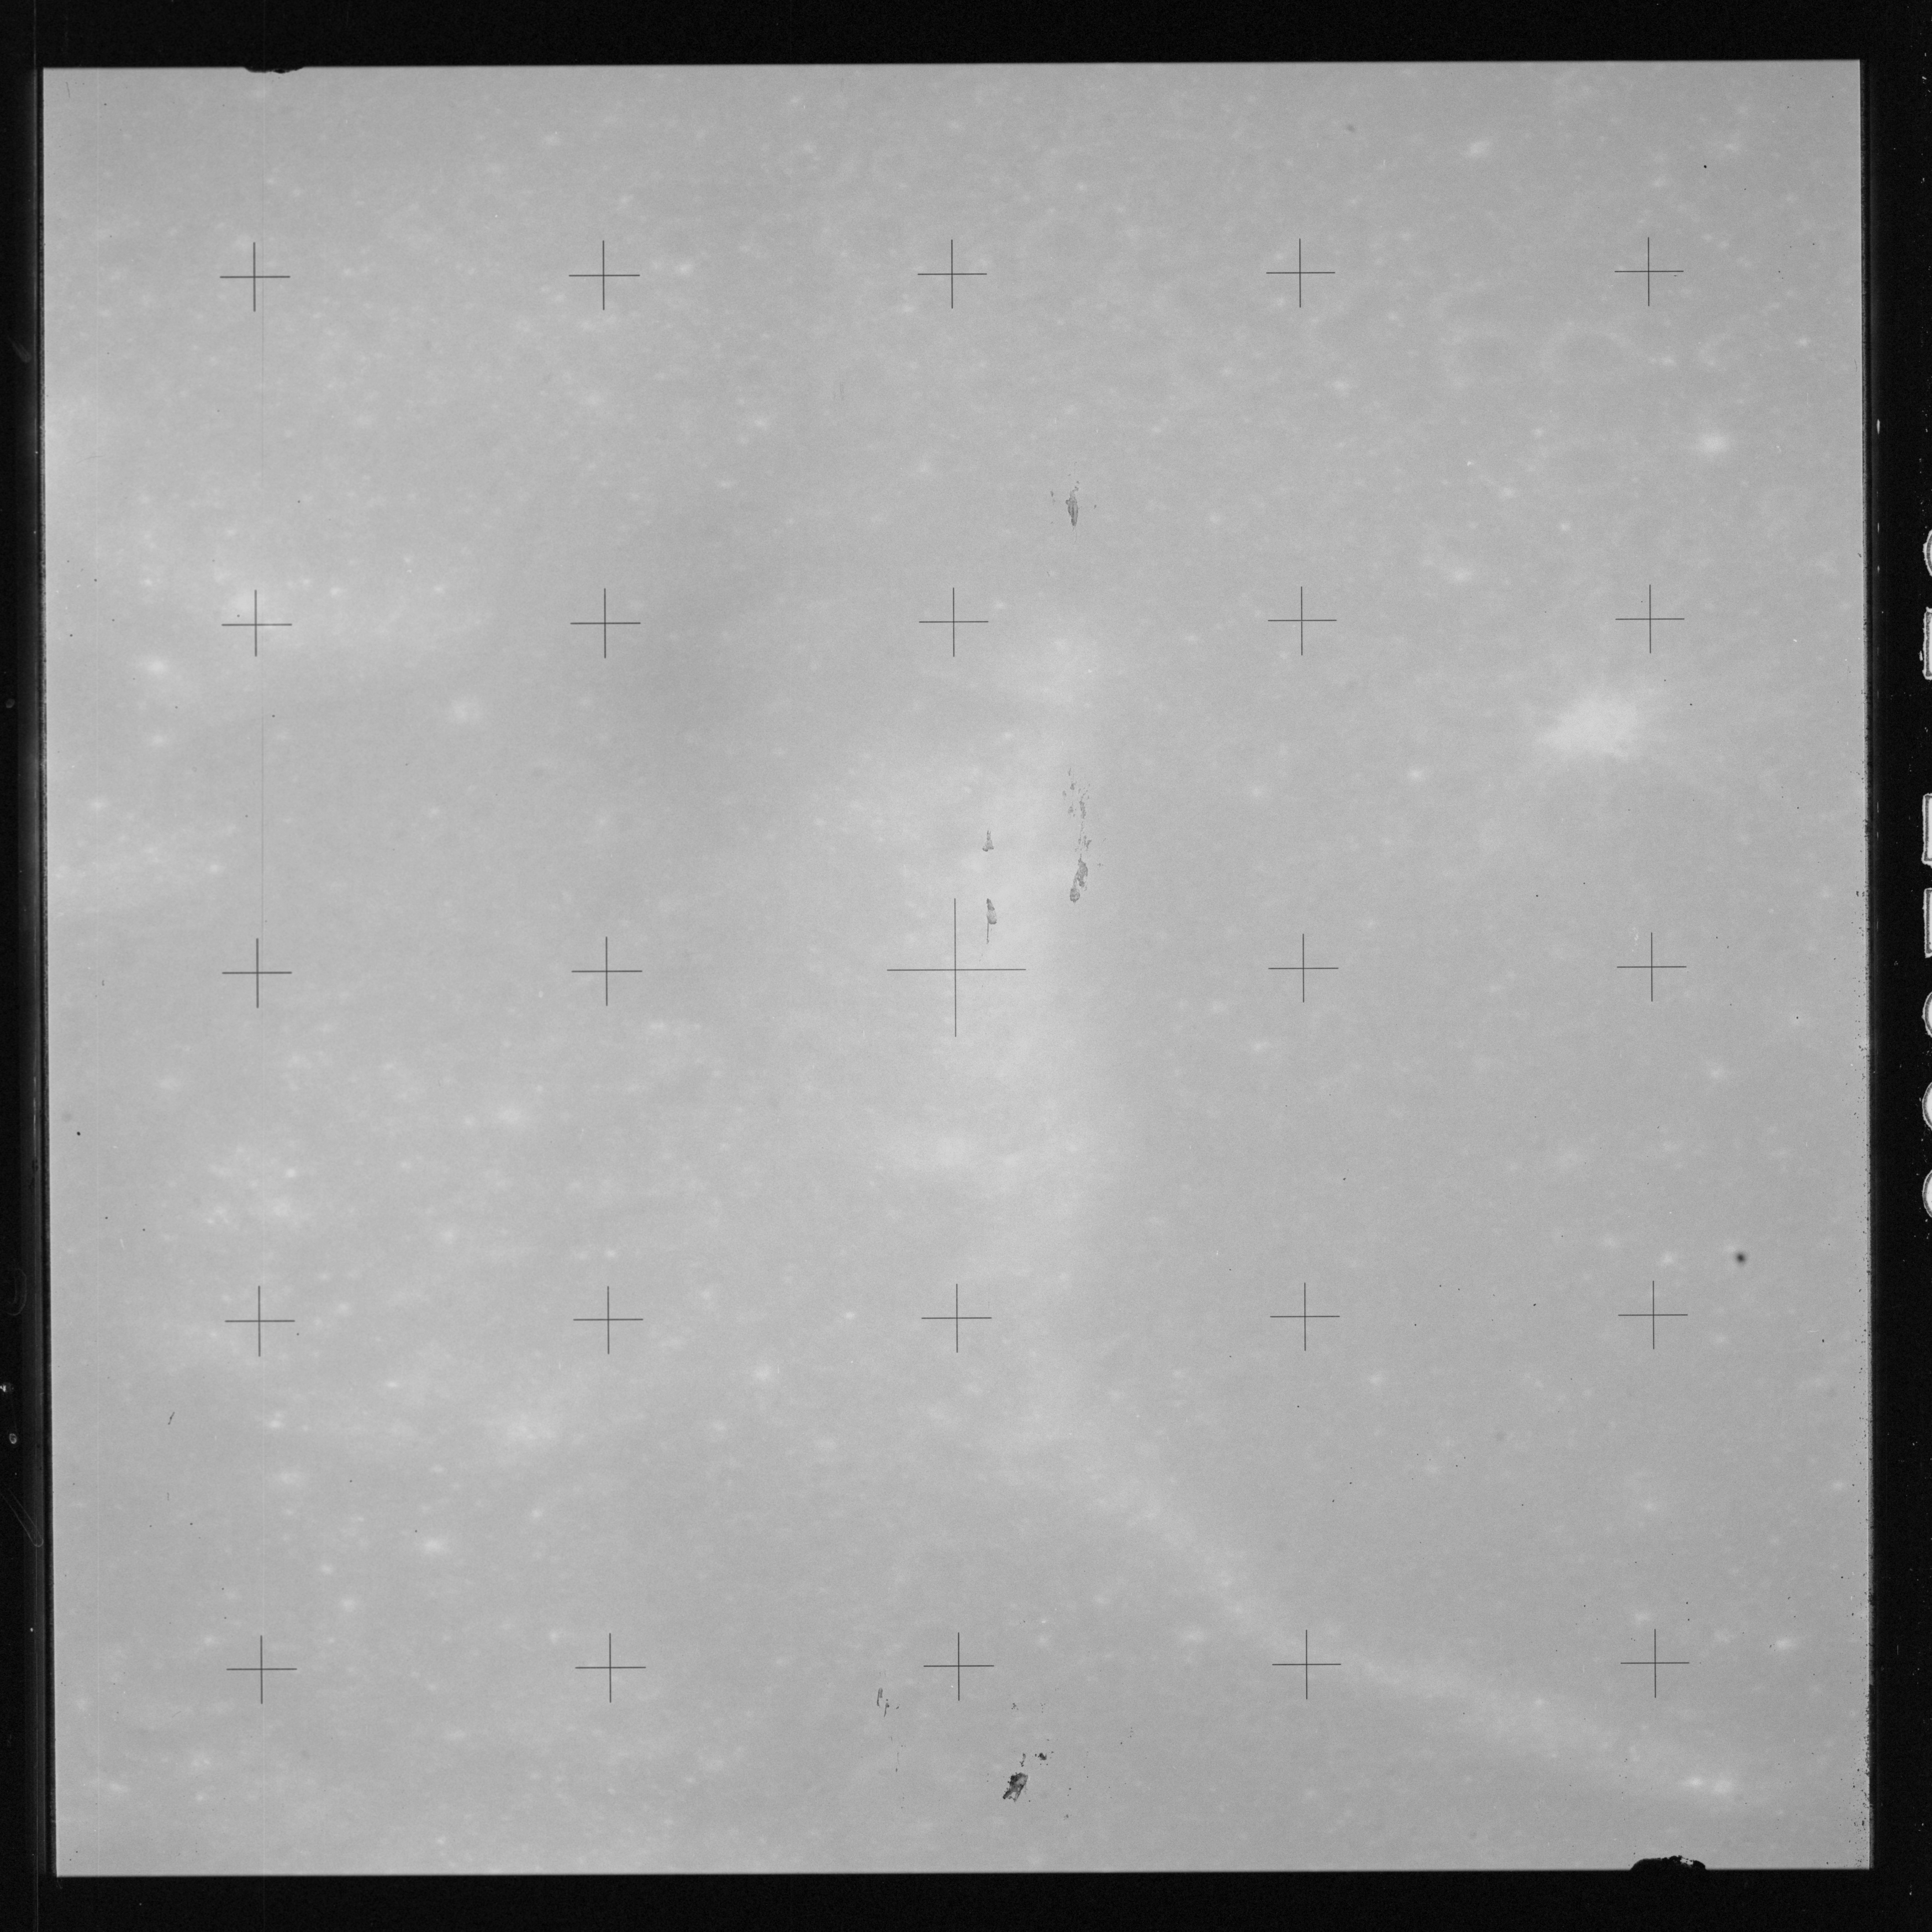
Three frames on magazine R prior to the solar corona photos appear to carry no useful imagery.
AS15-98-13374 - No useful imagery - Image by NASA/Johnson Space Center via National Archives.
AS15-98-13375 - No useful imagery - Image by NASA/Johnson Space Center via National Archives.
AS15-98-13376 - No useful imagery - Image by NASA/Johnson Space Center via National Archives.
216:10:45 Scott (onboard): Mark. 2:50.
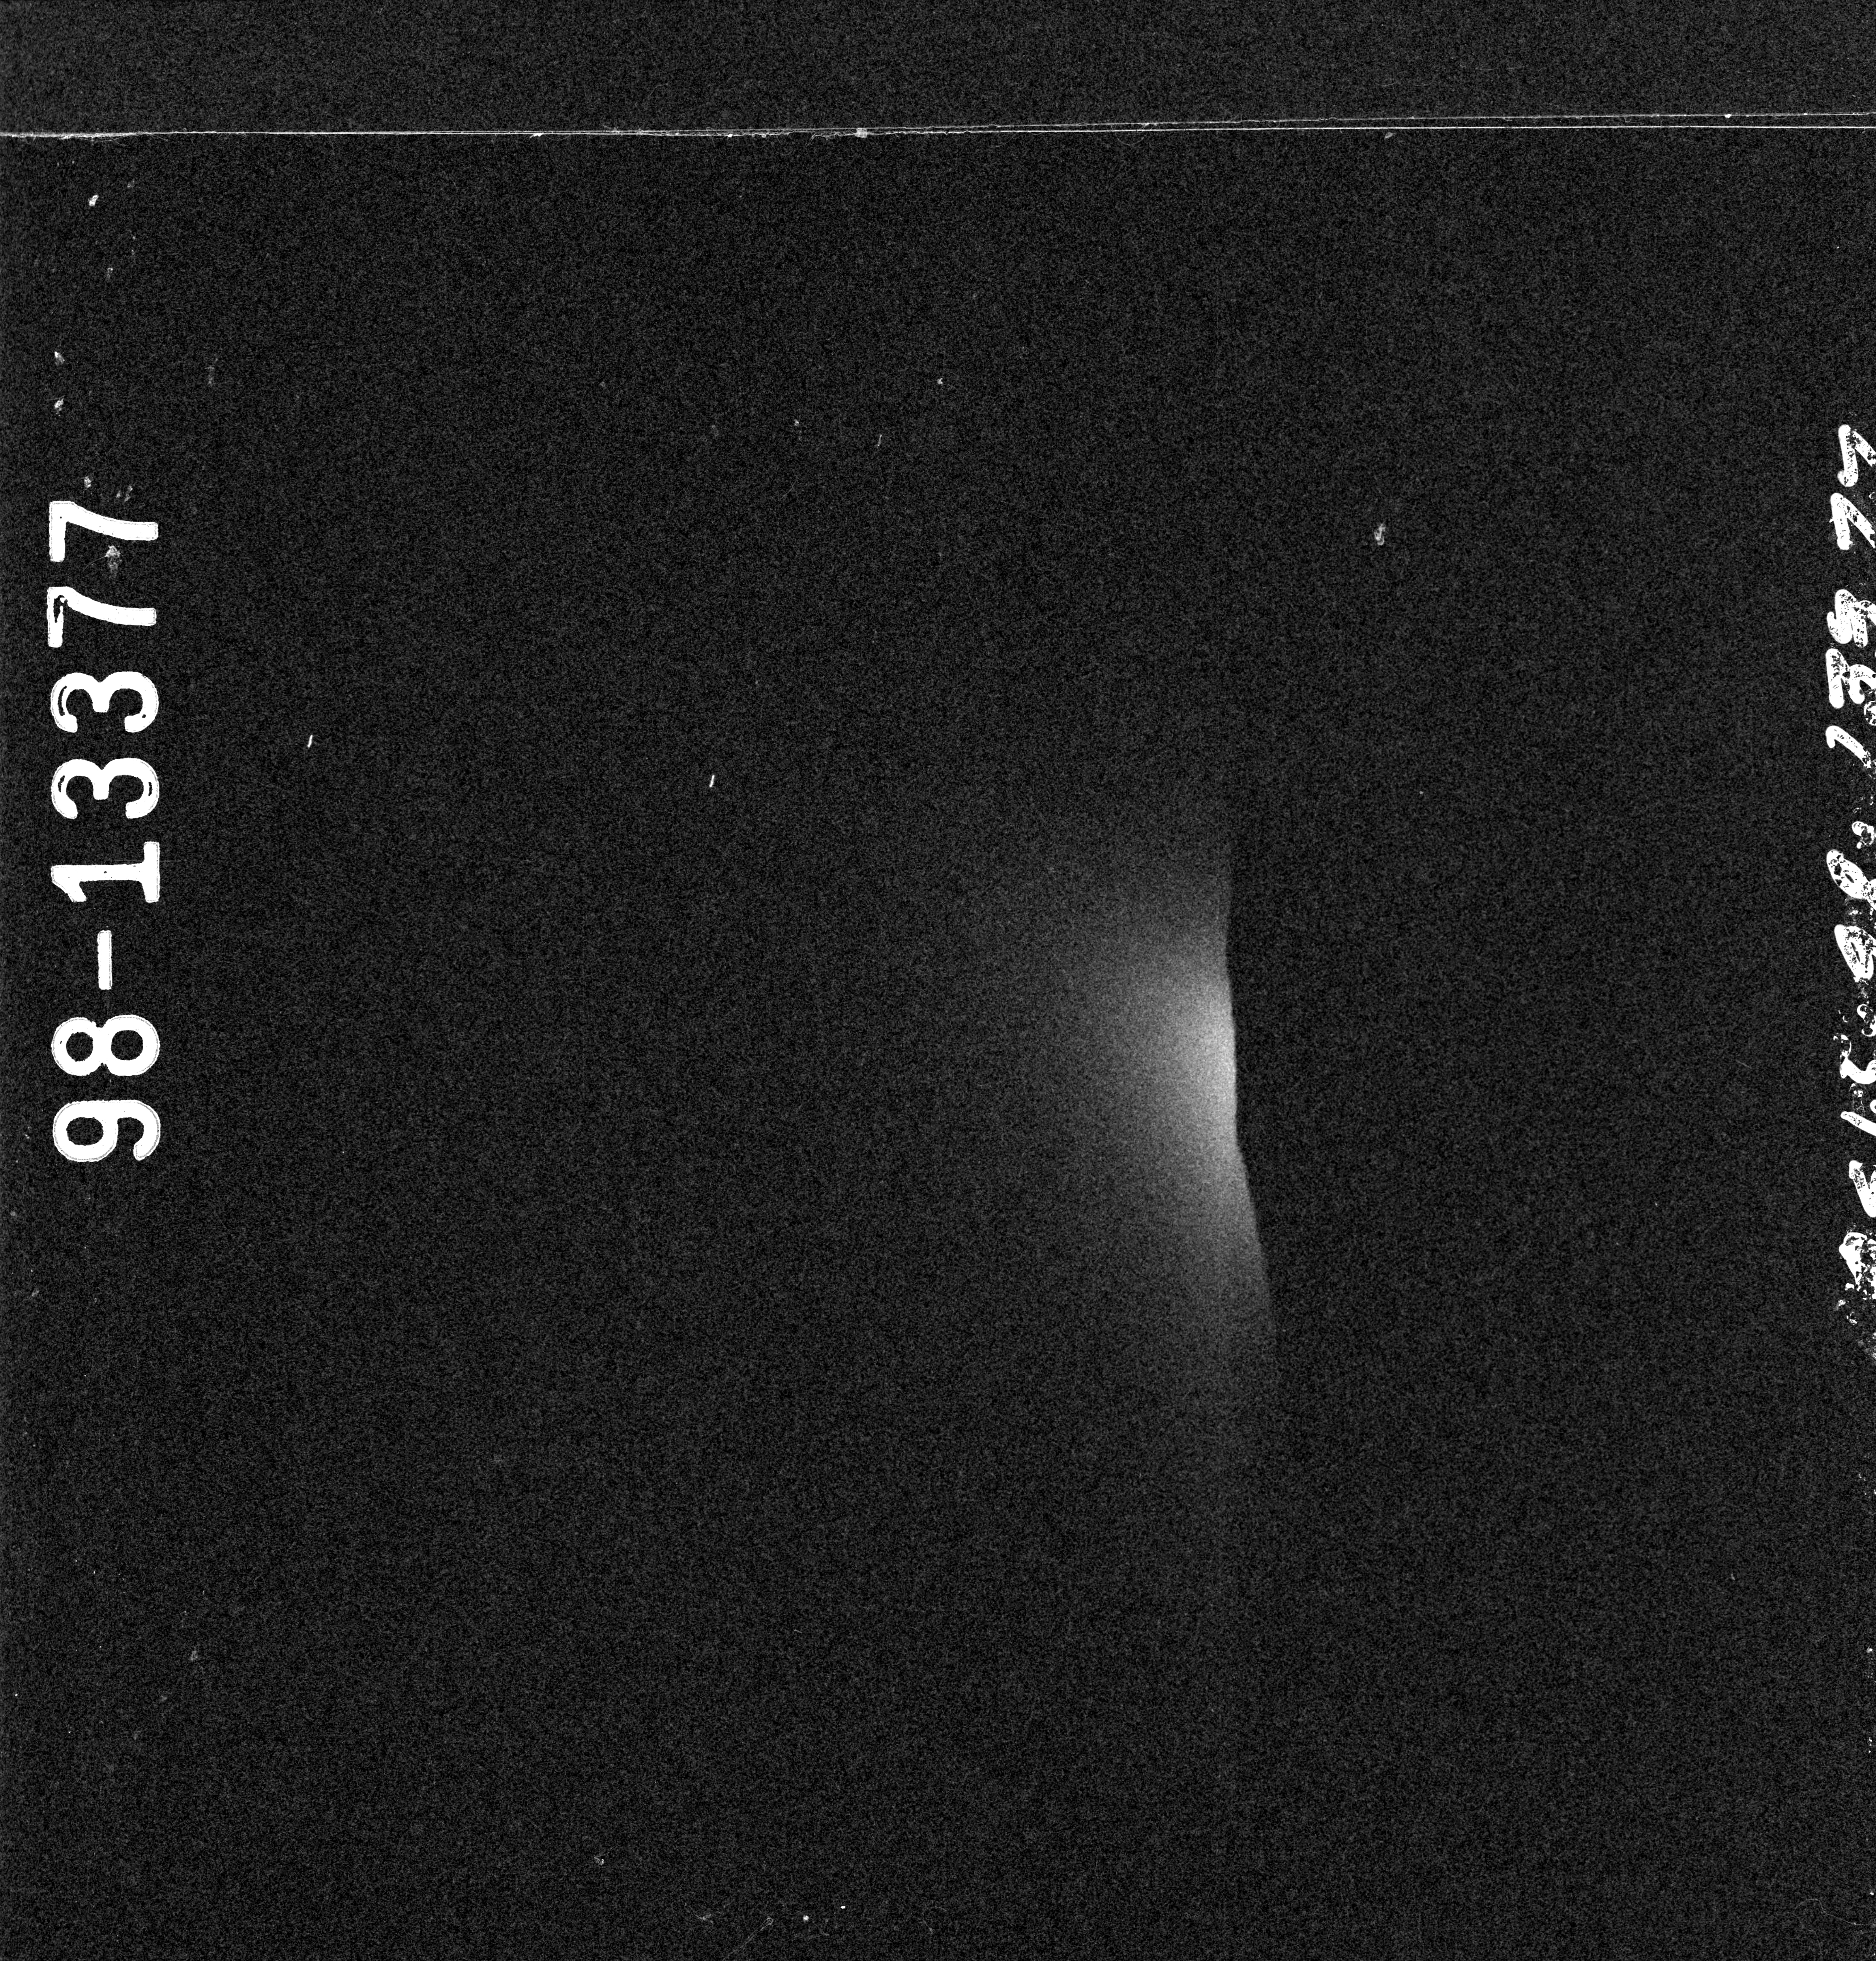
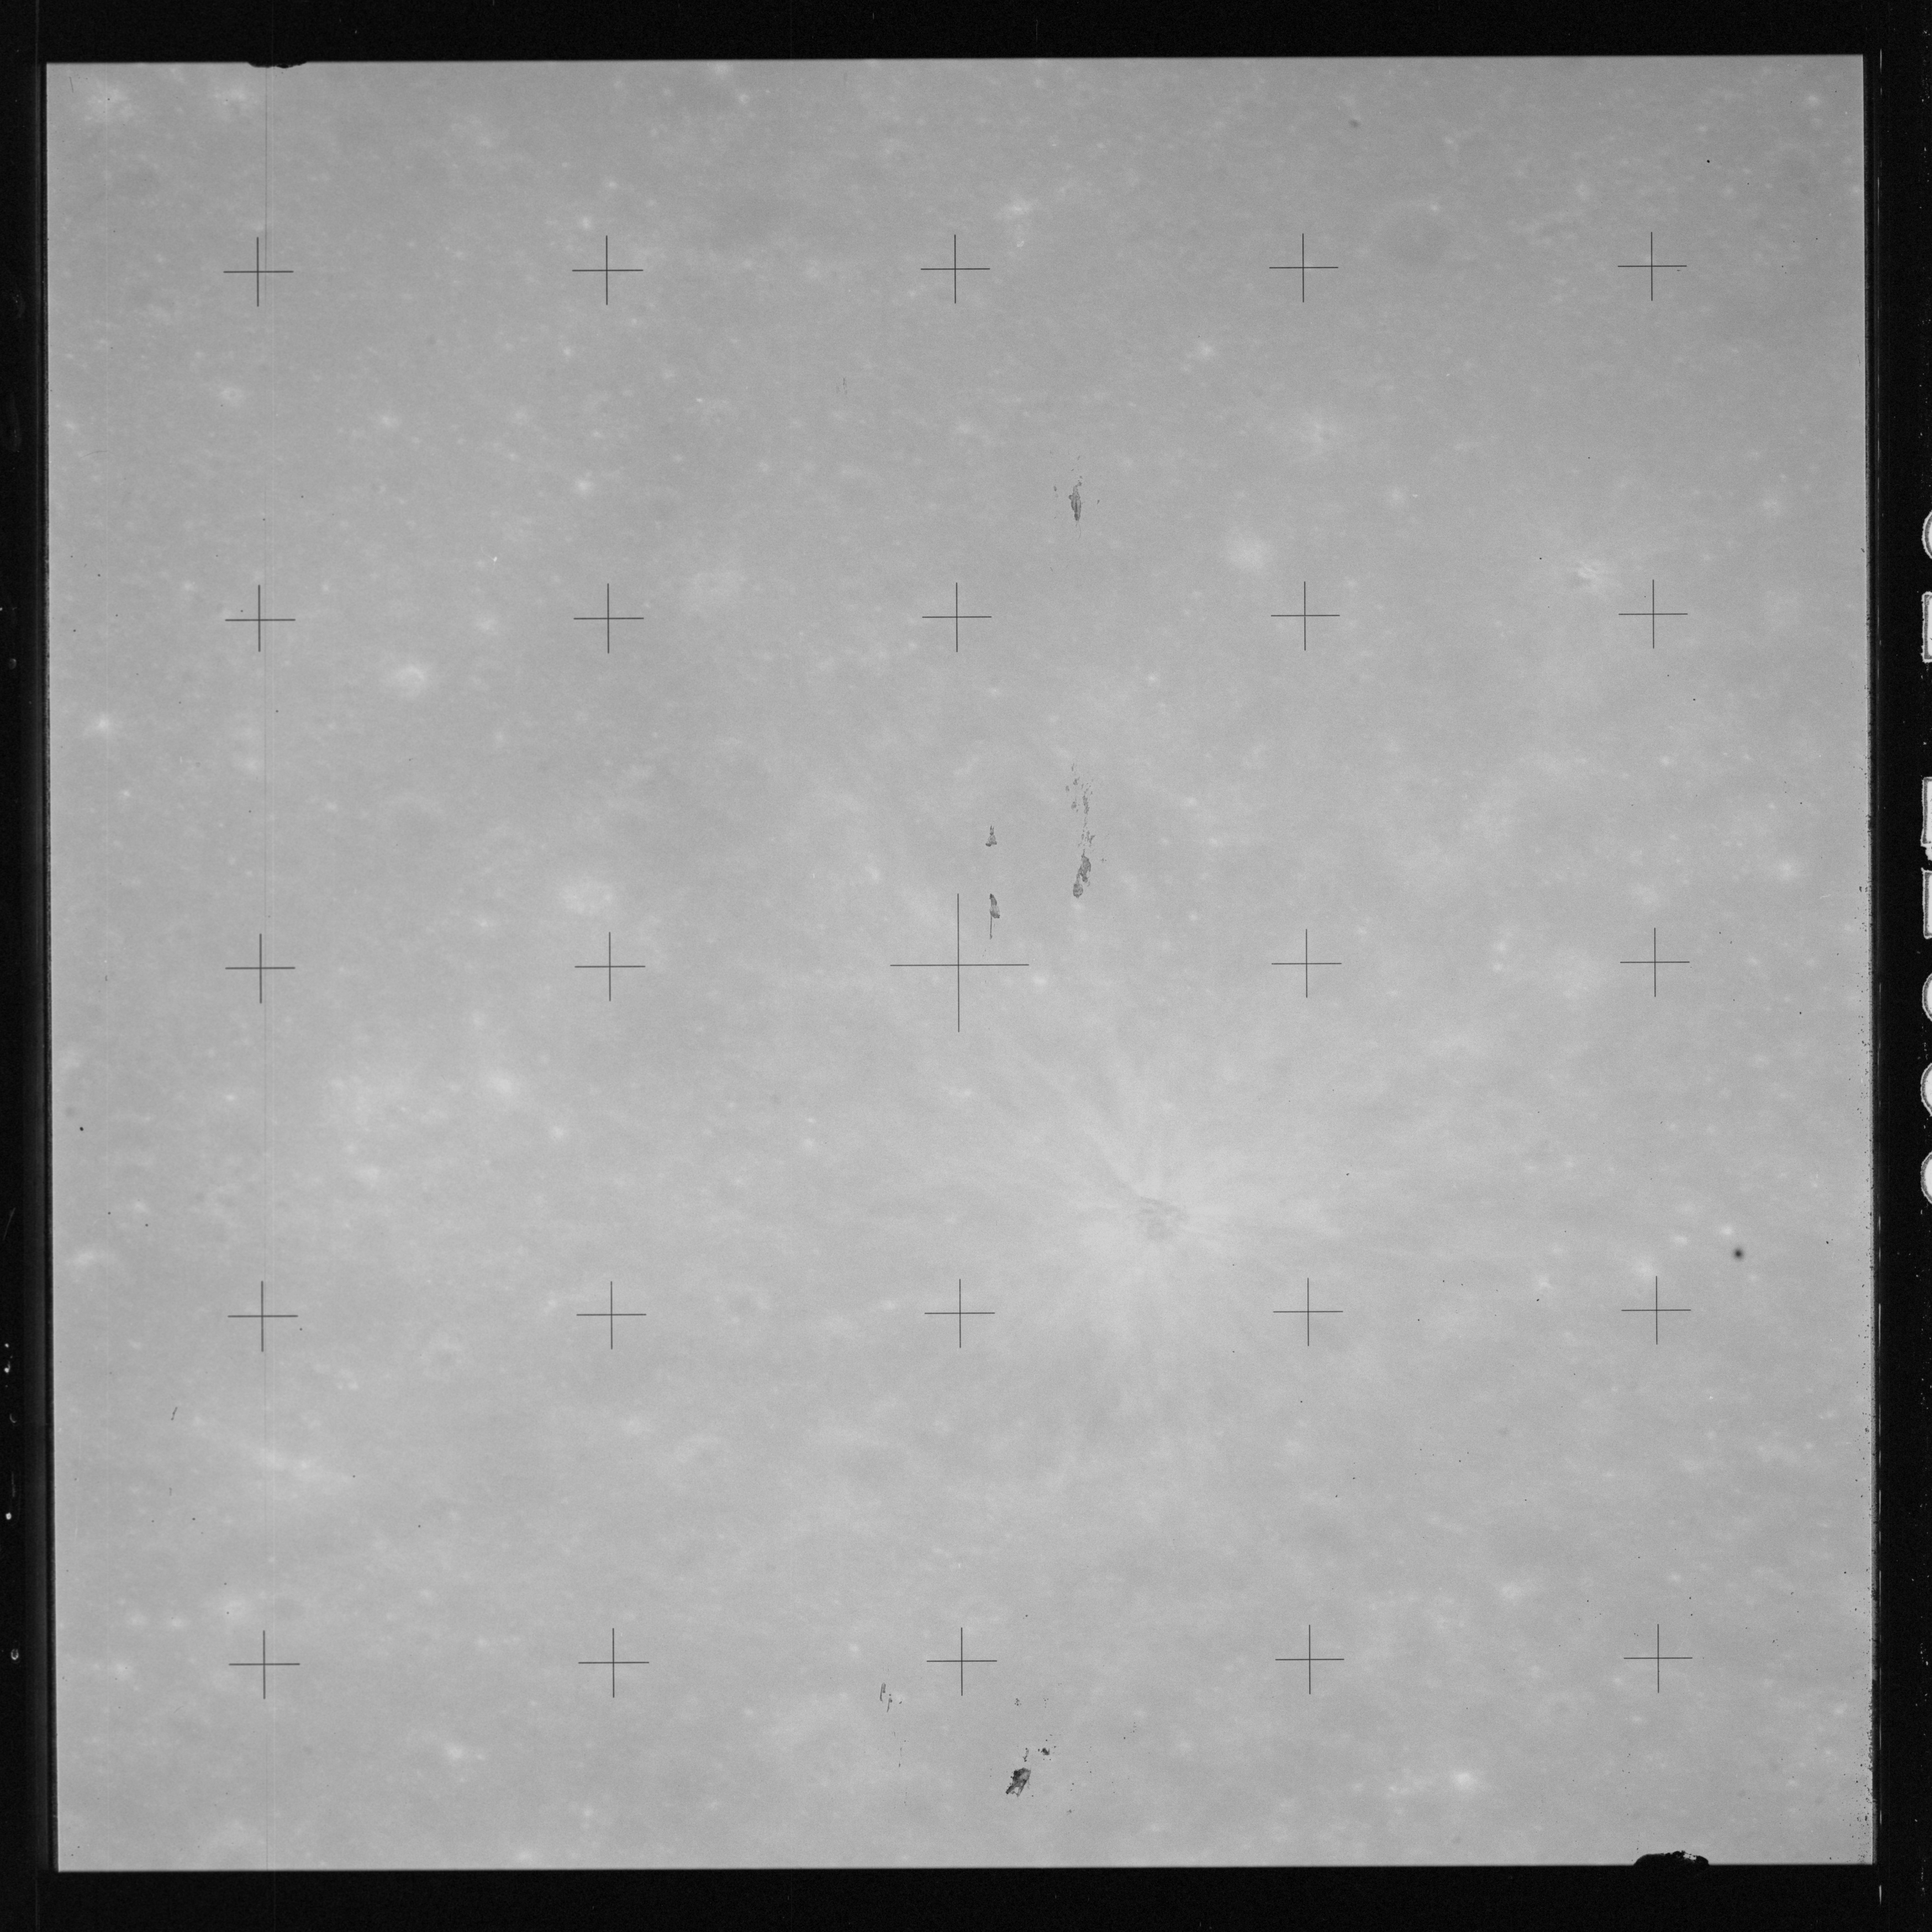
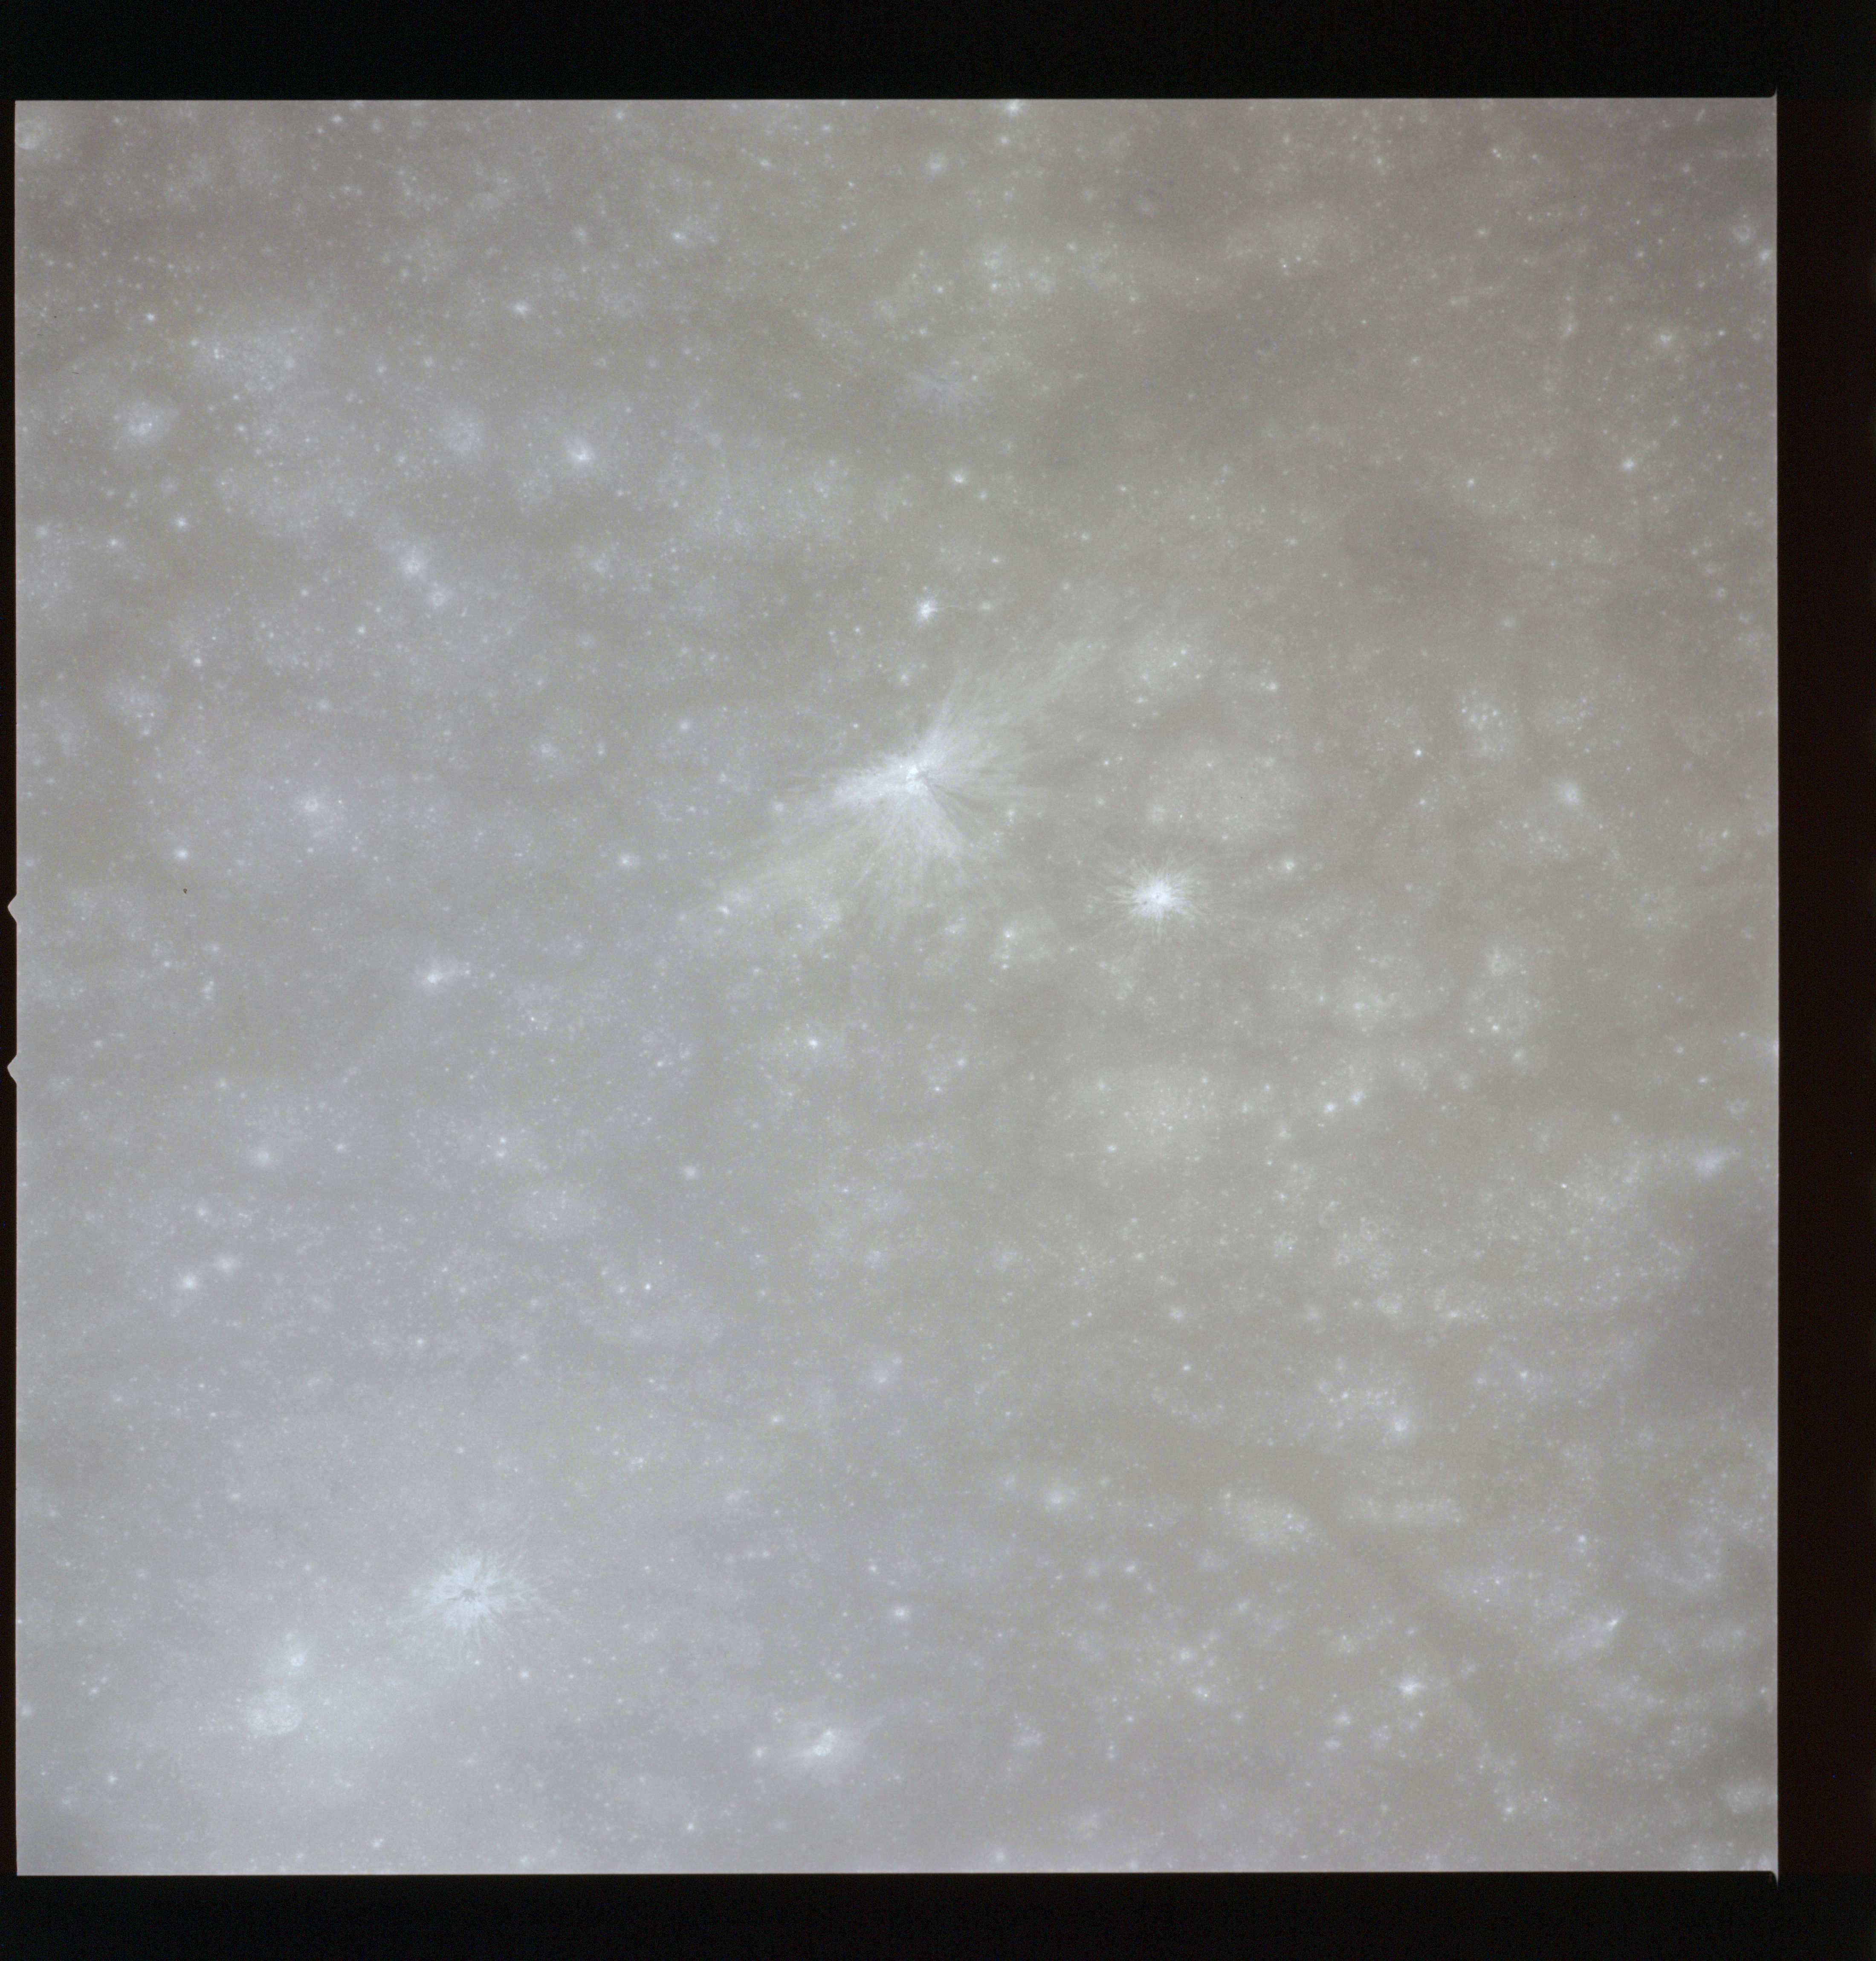
At this time, the first of a series of Hasselblad photos of the solar corona is taken. This is the first of nine such images on magazine R and should be for an exposure time of 1 second.
AS15-98-13377 - Solar corona with an exposure time of 1 second - Image by NASA/Johnson Space Center via National Archives.
216:10:46 Worden (onboard): Enjoy the scenery.
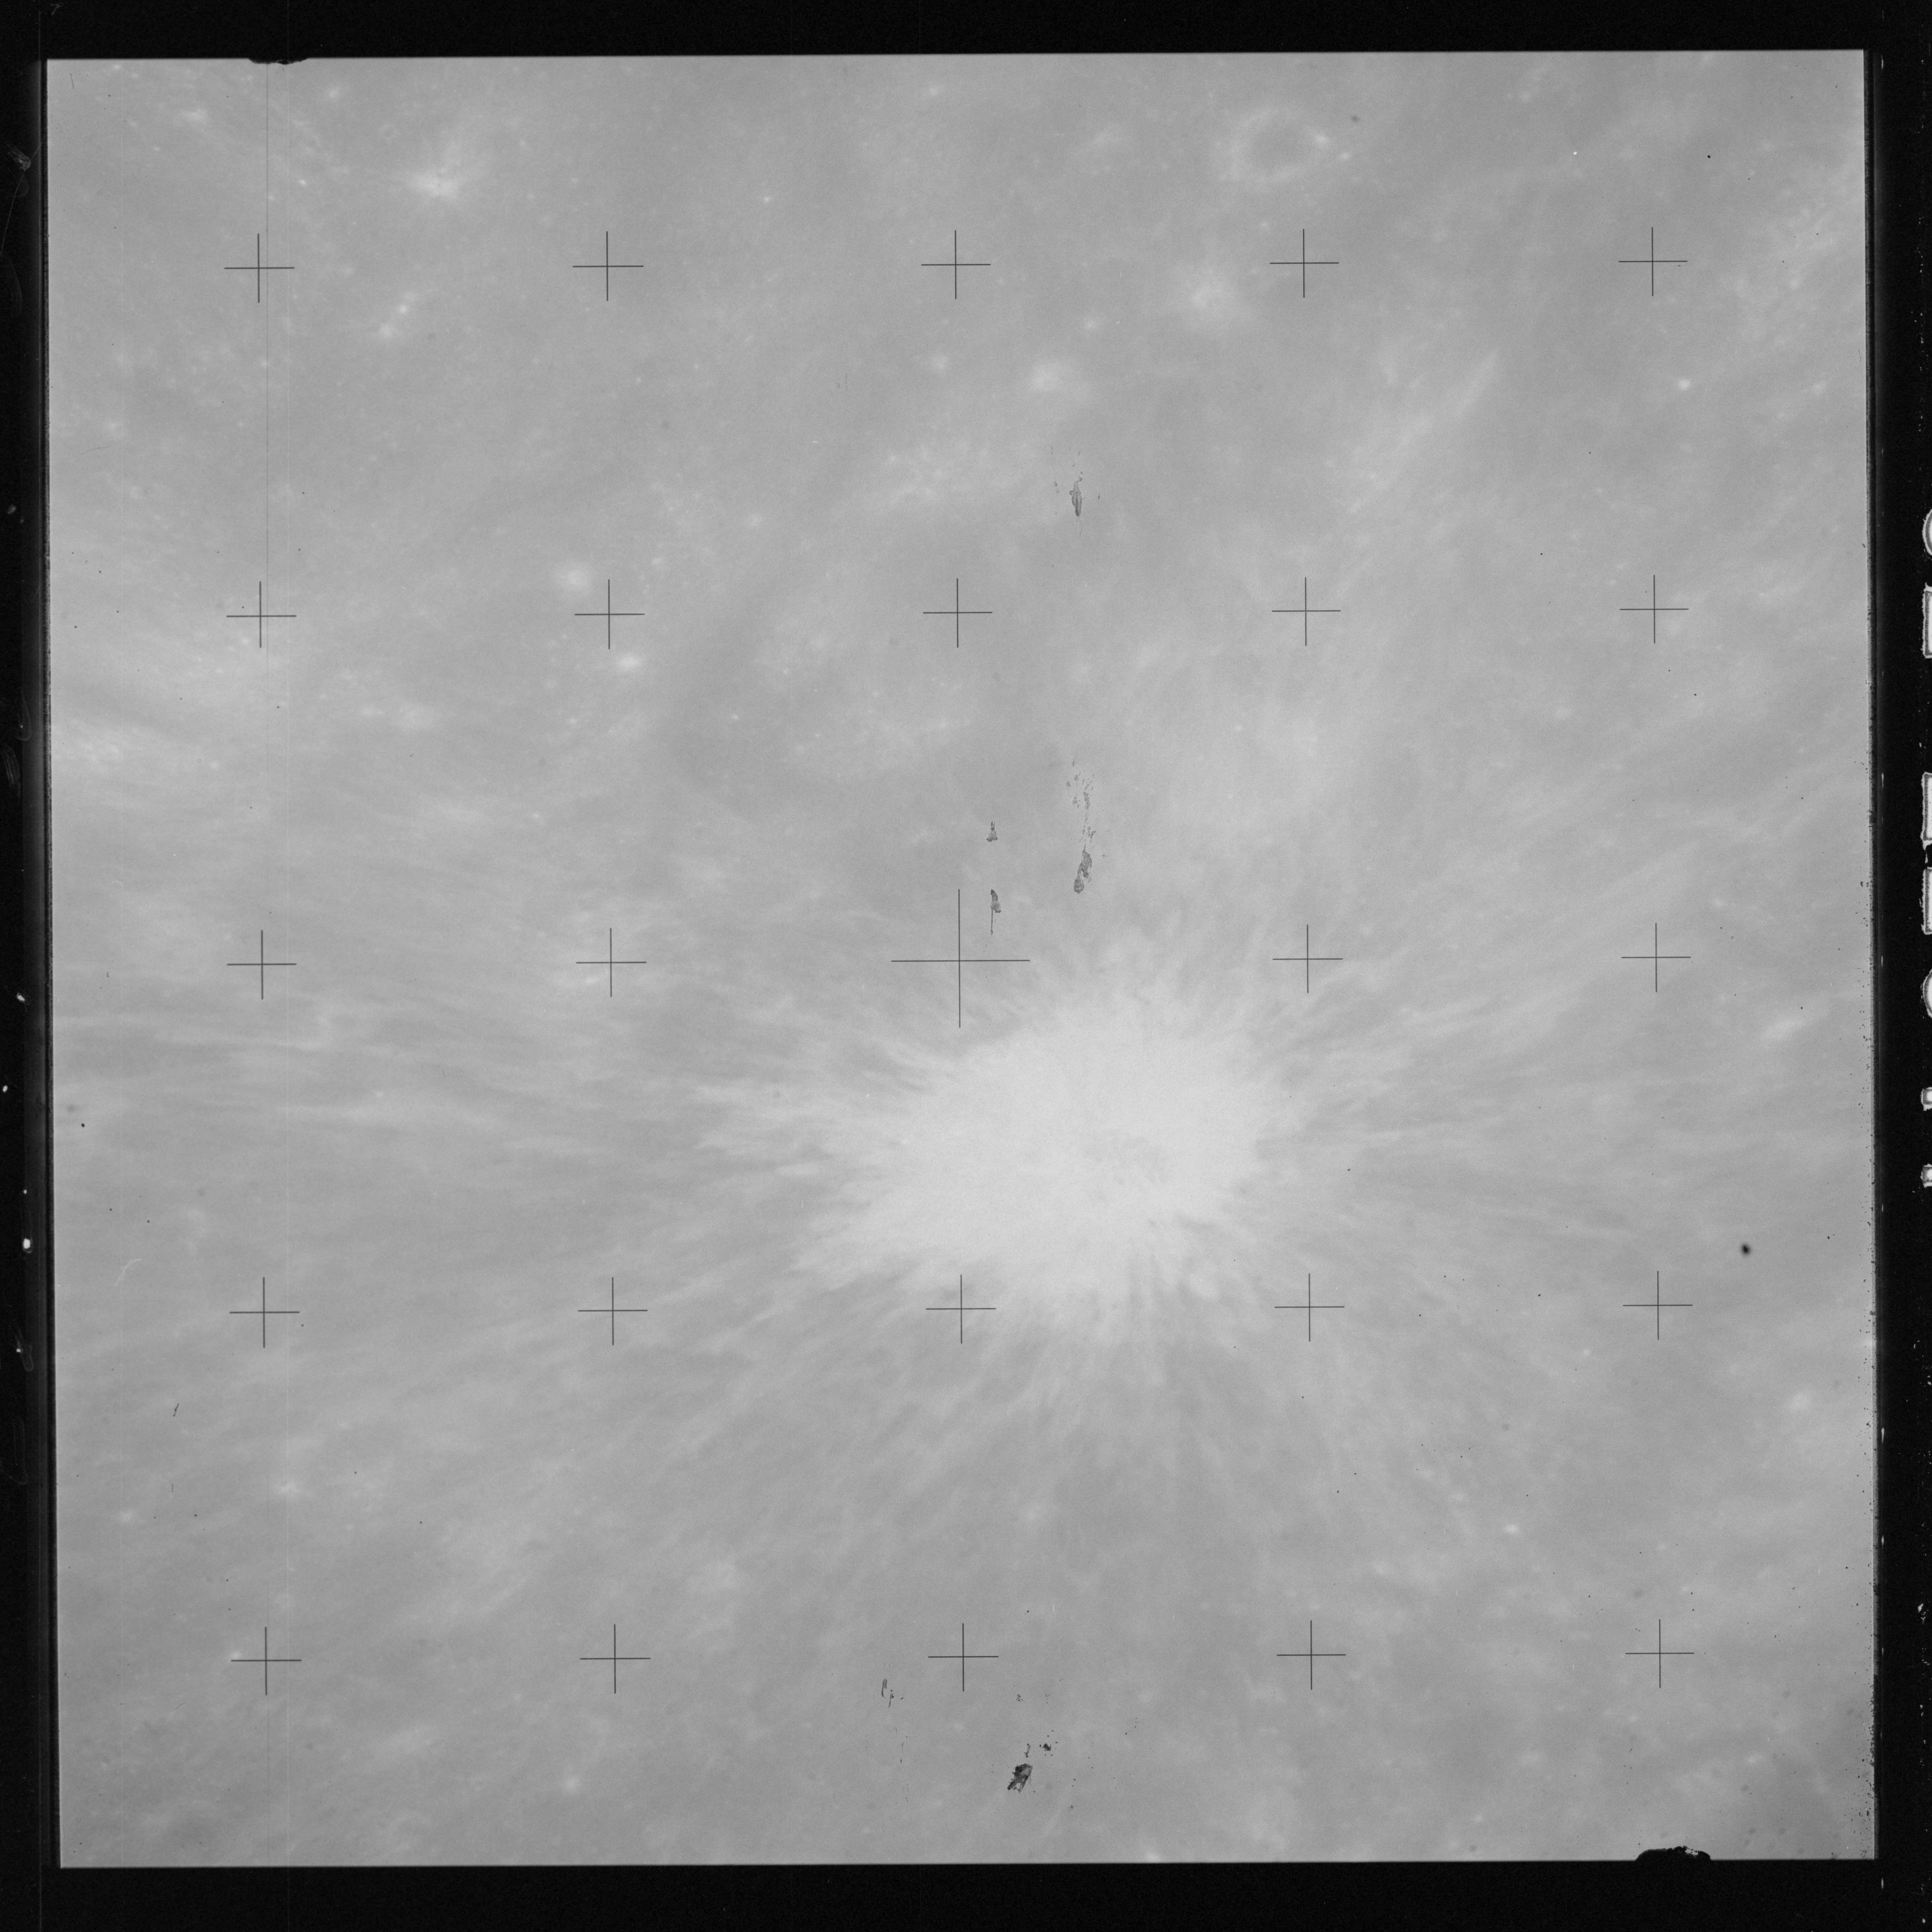
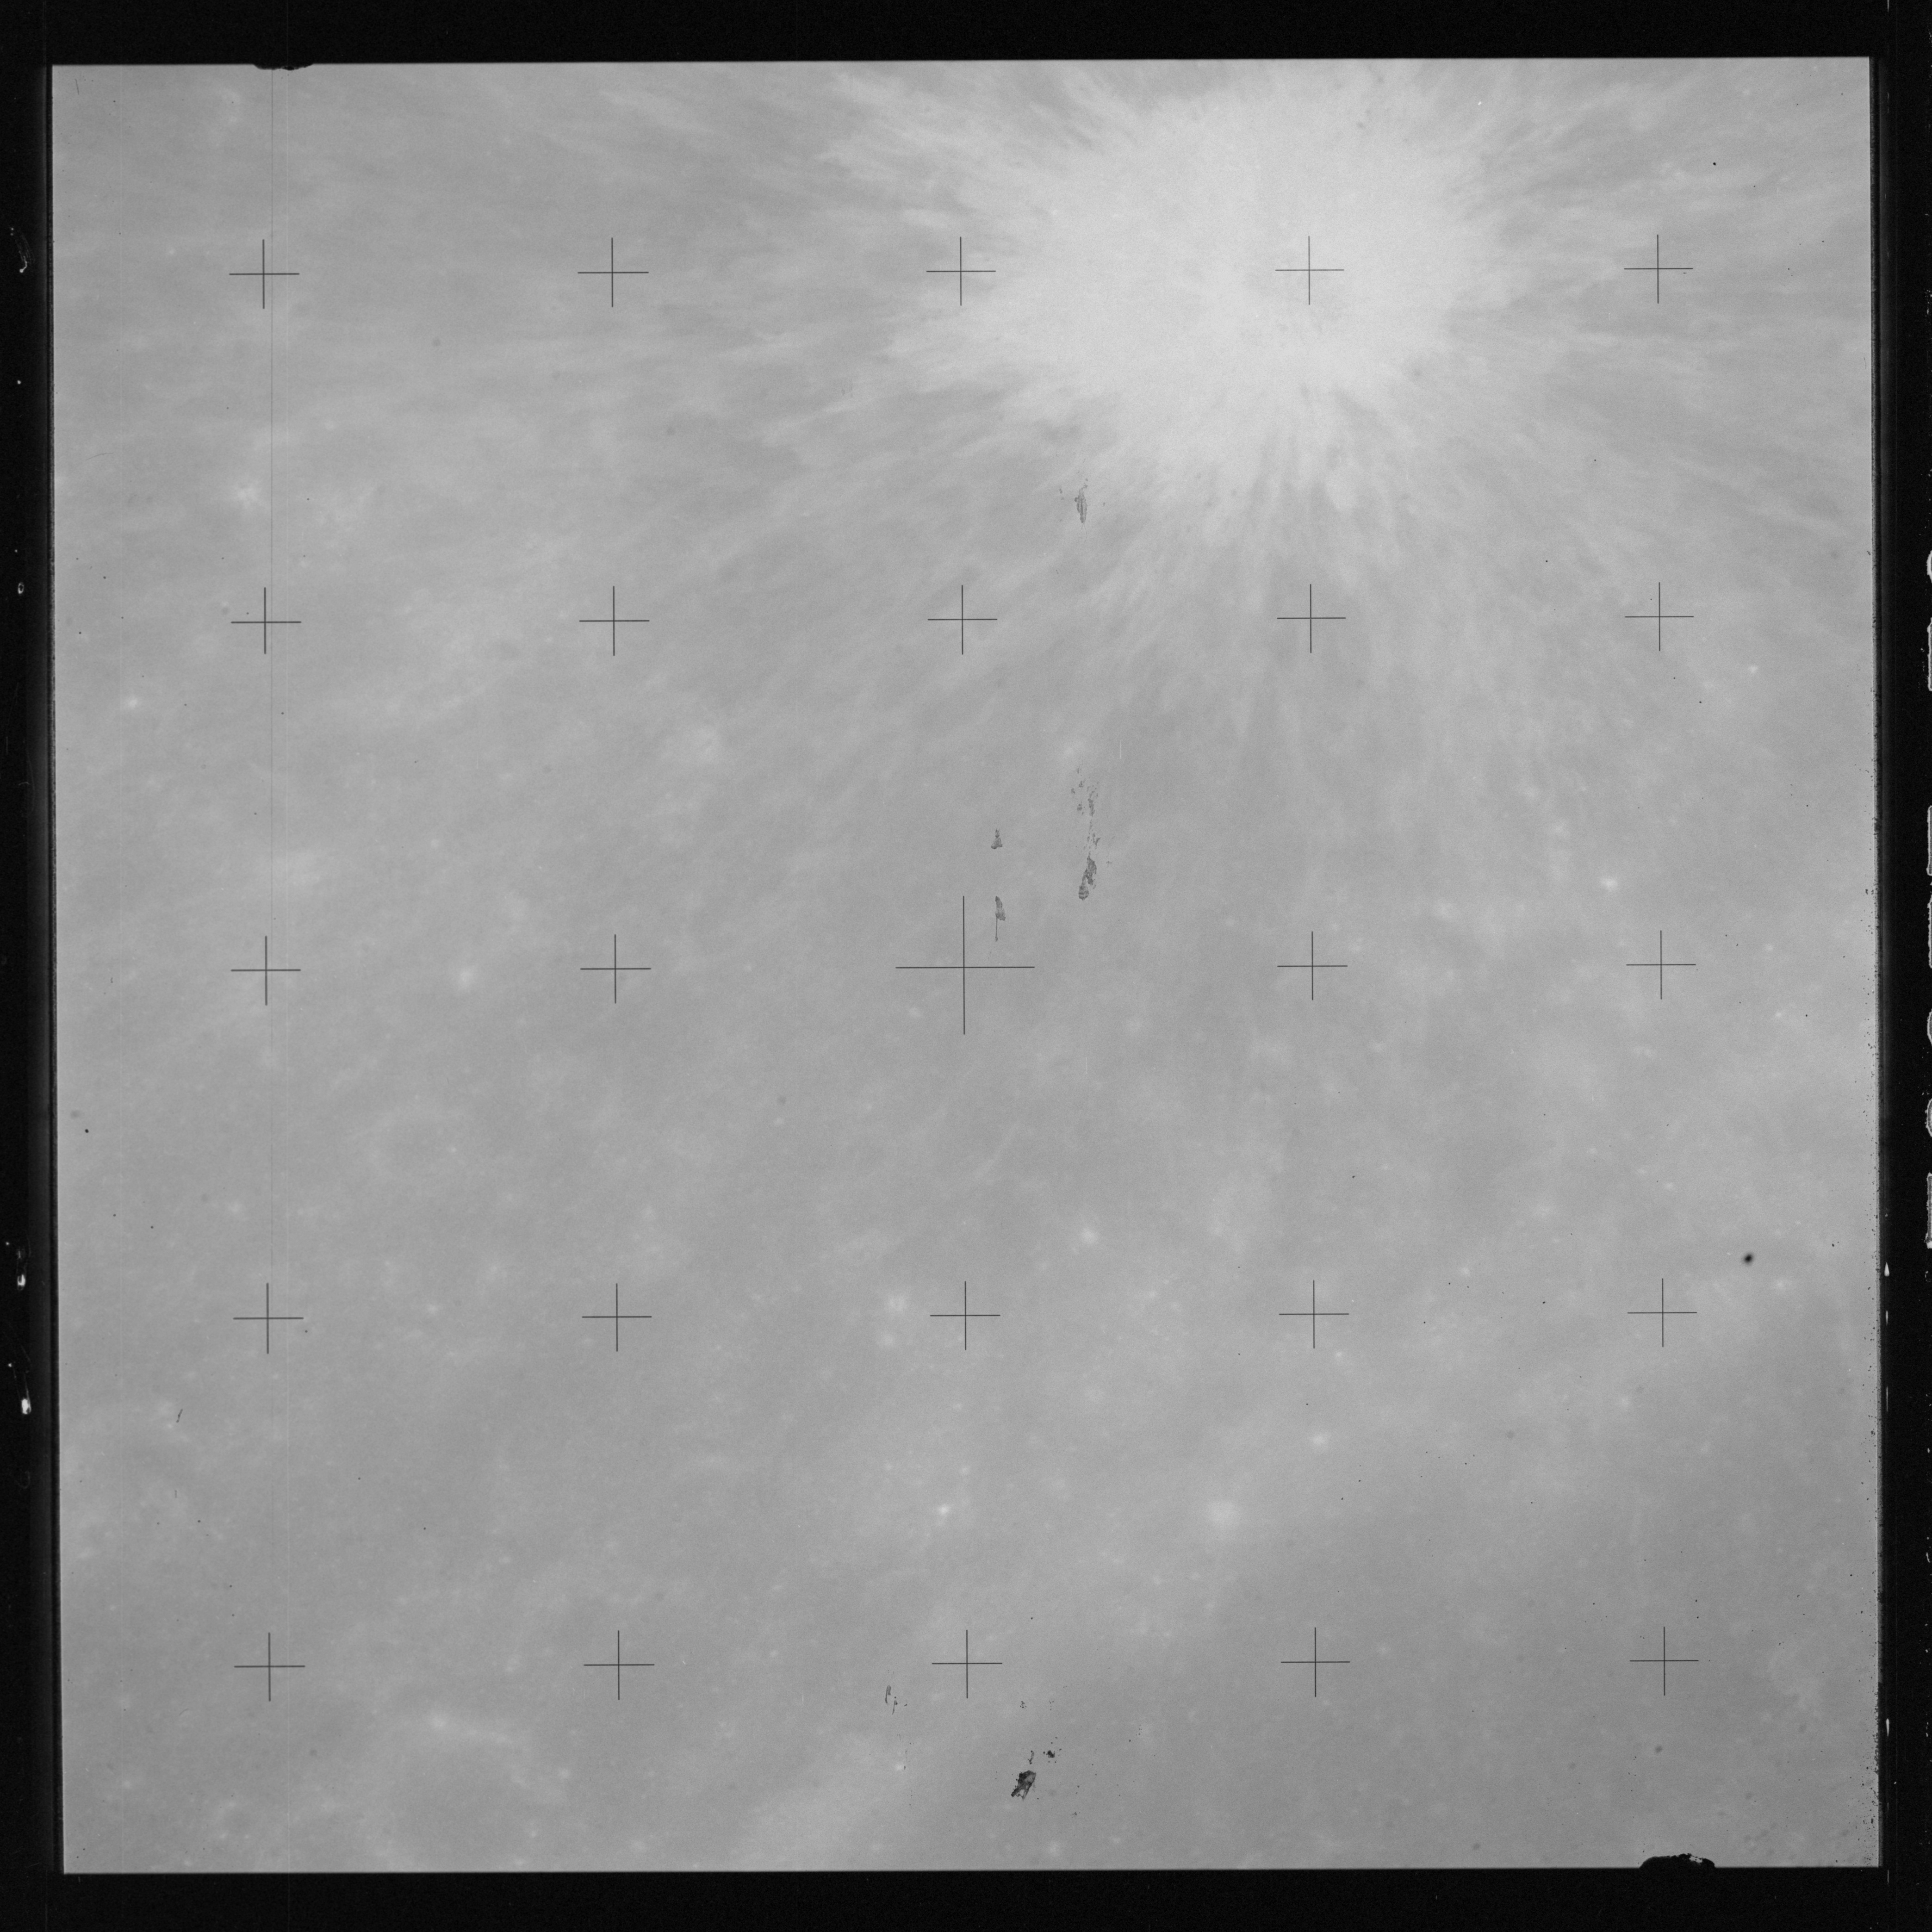
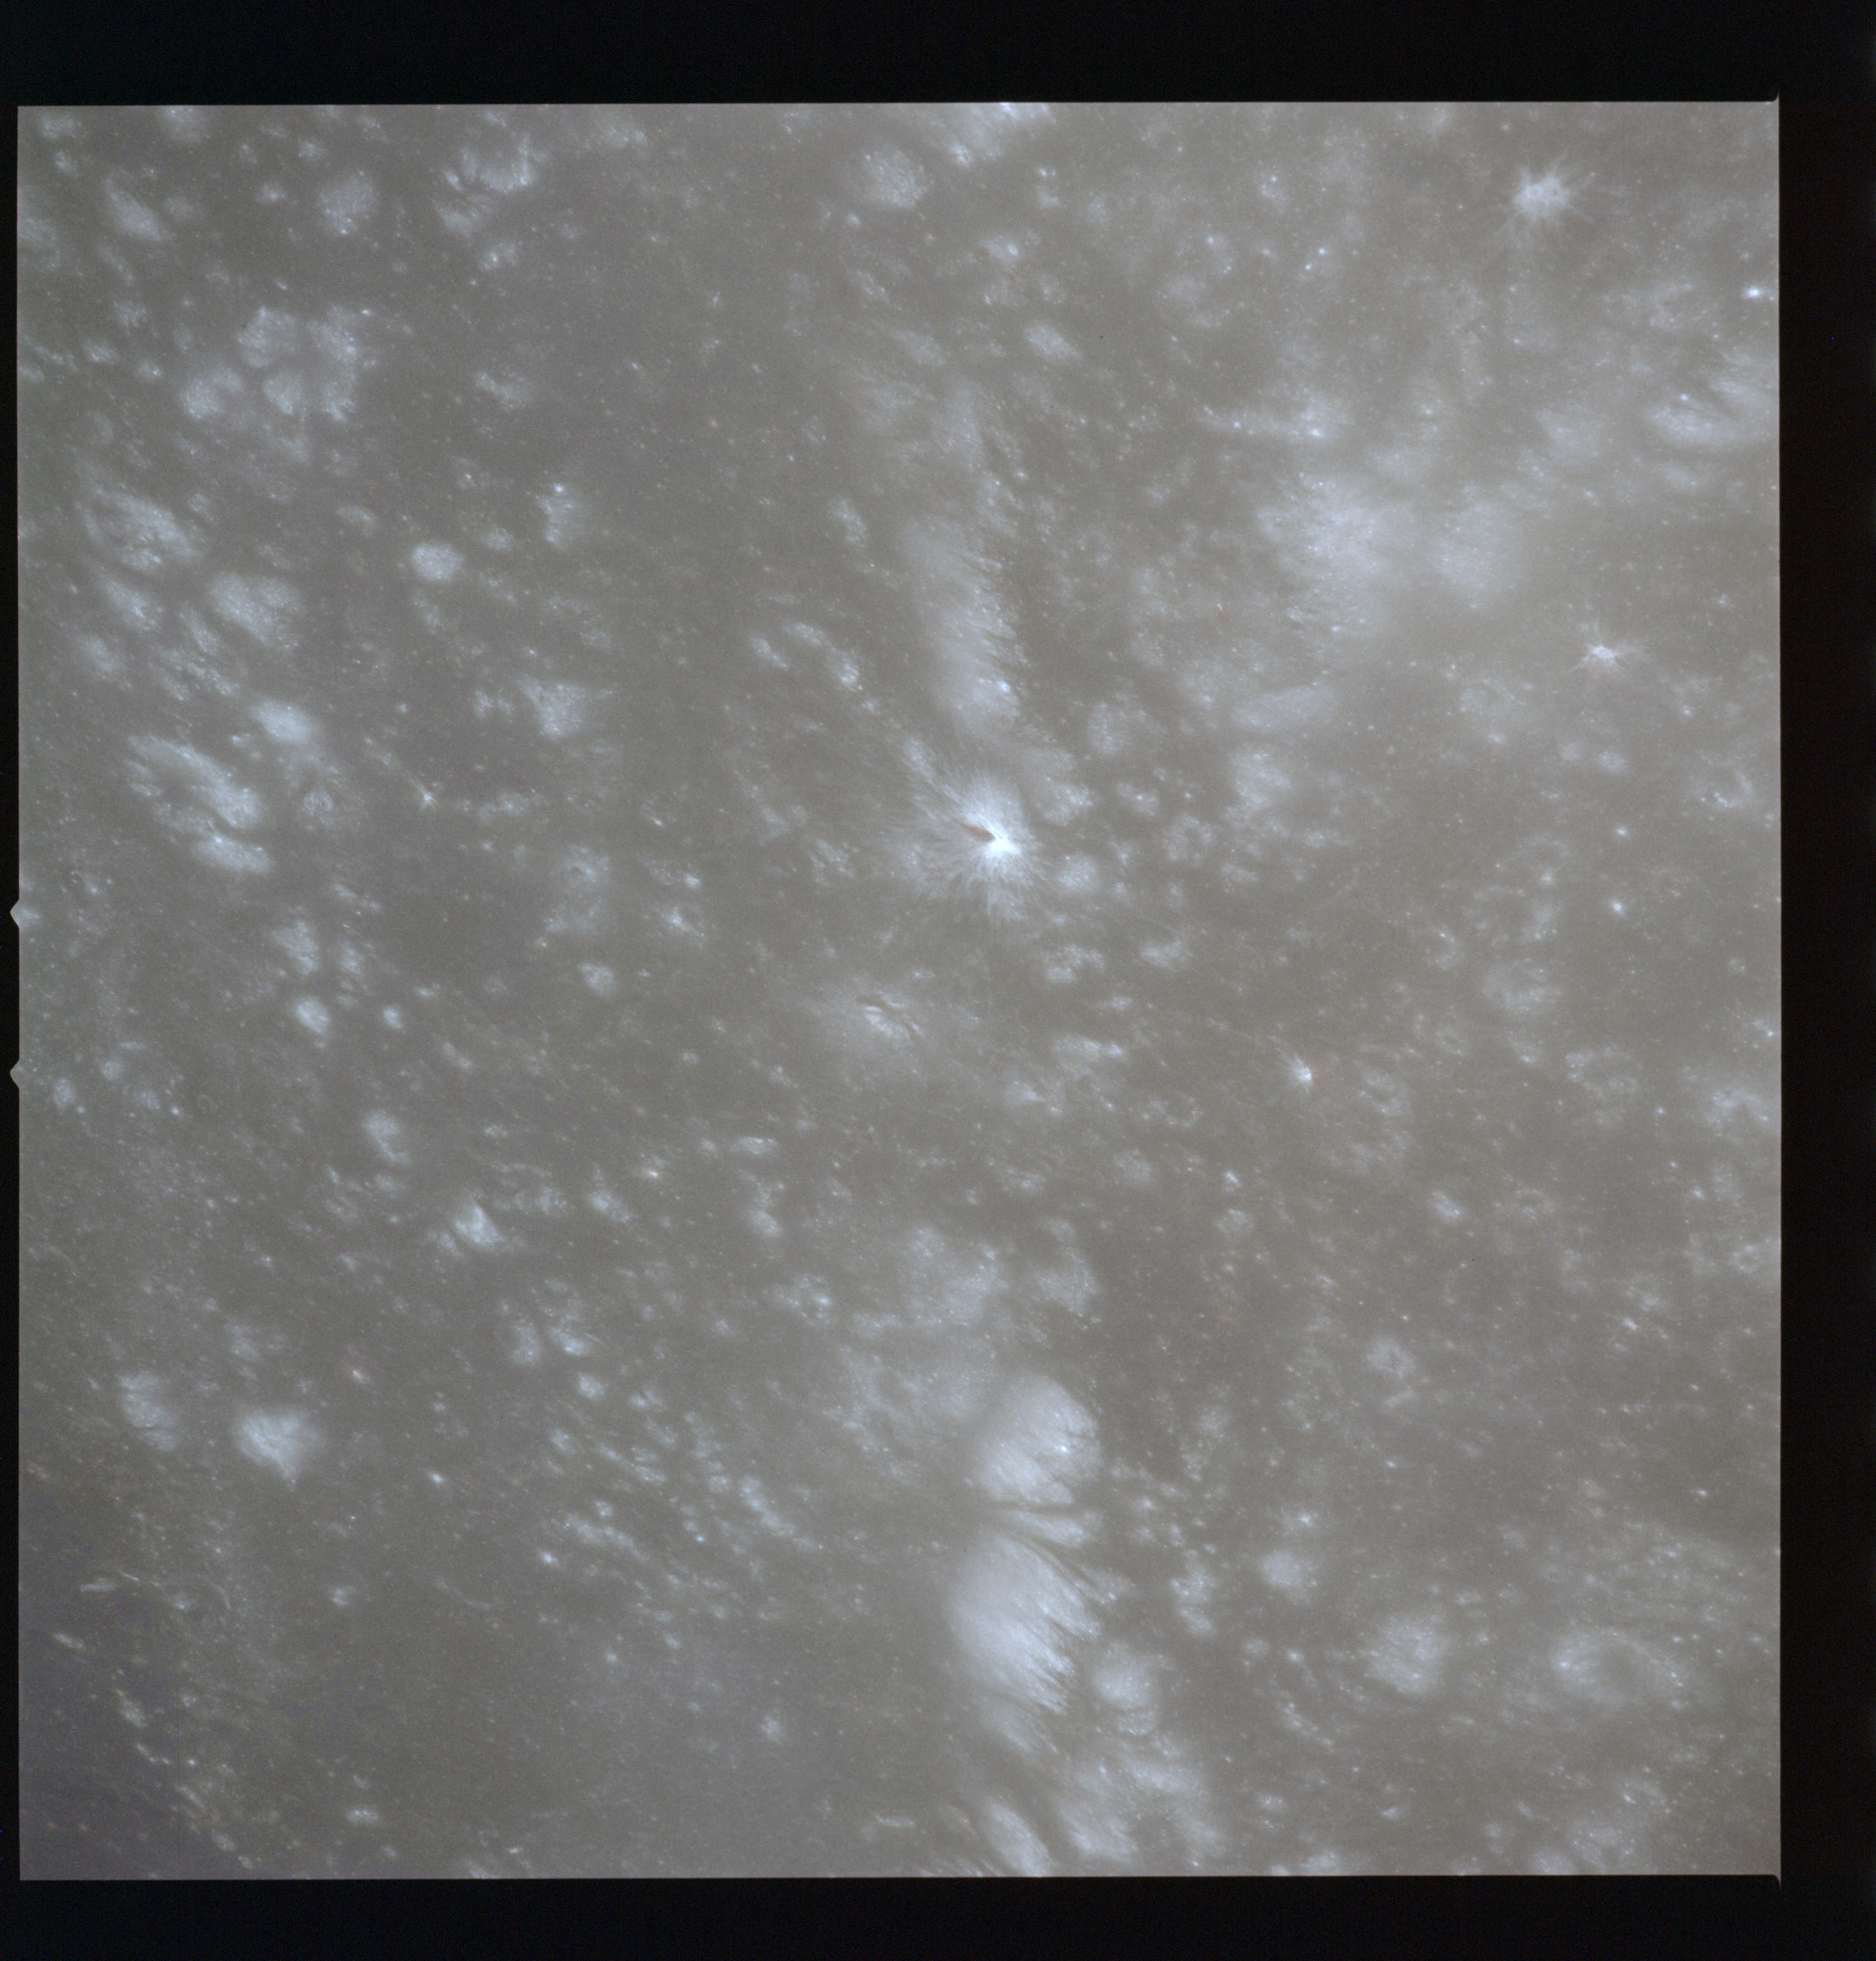
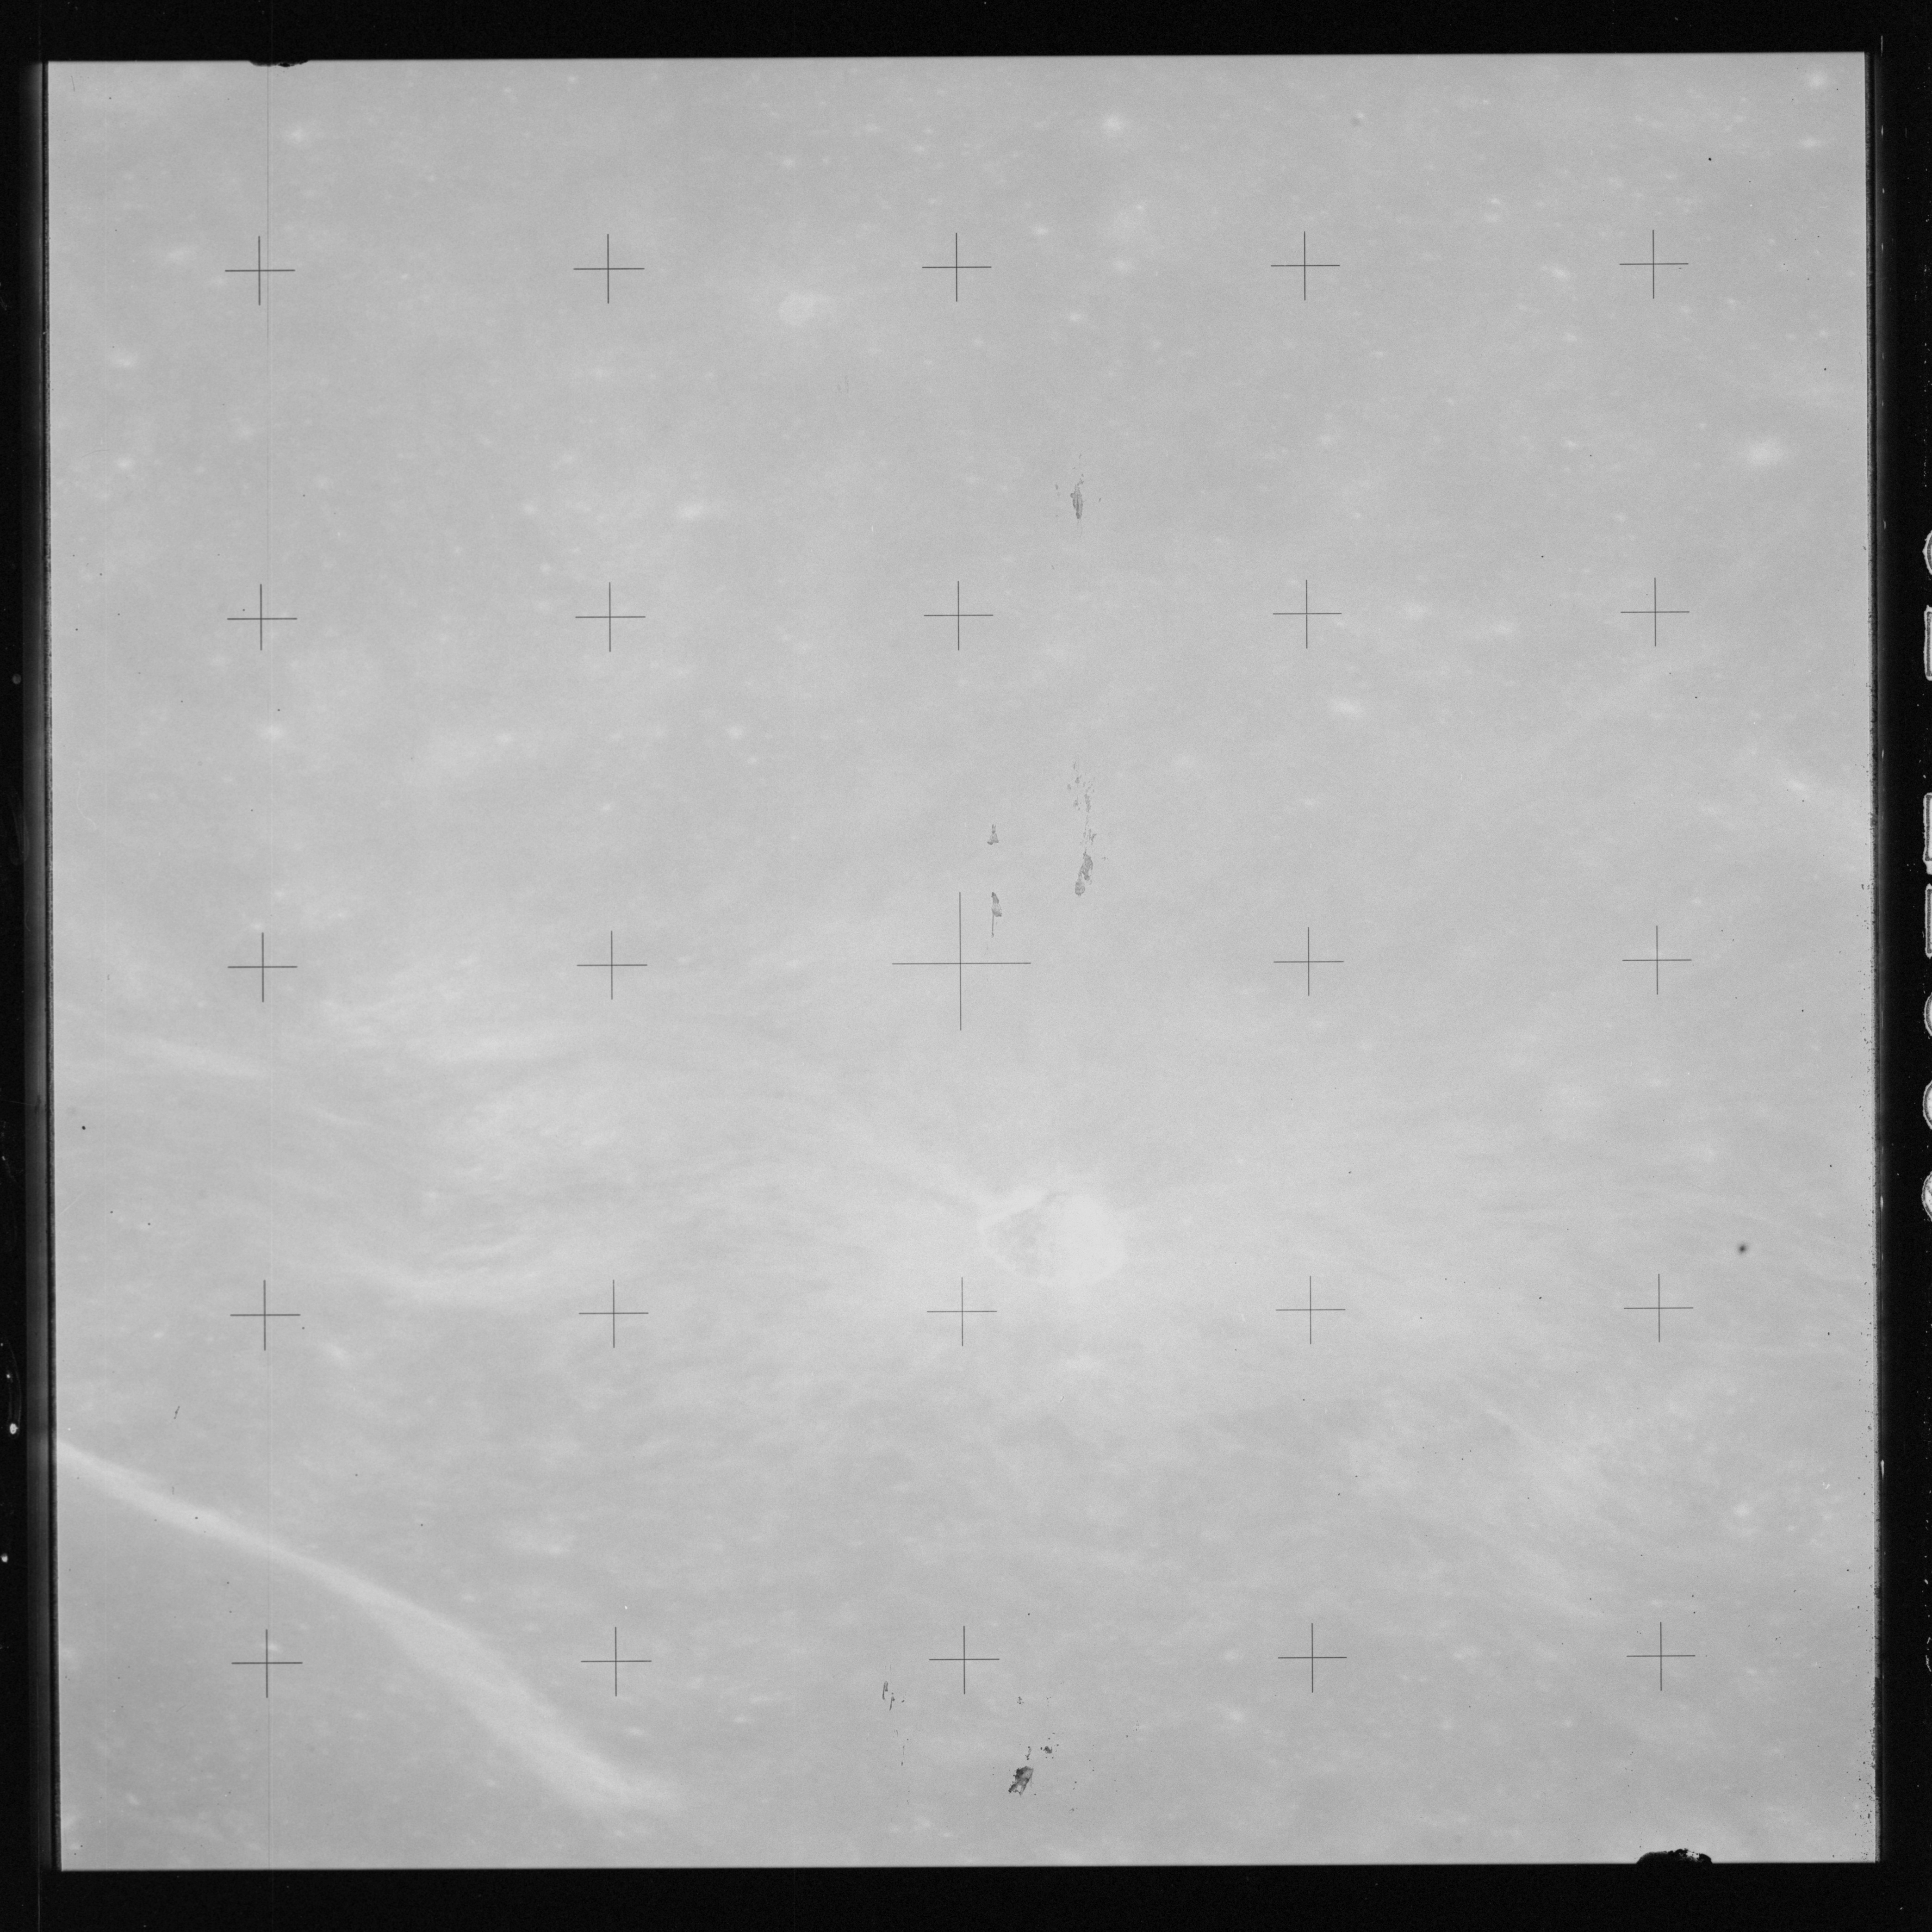
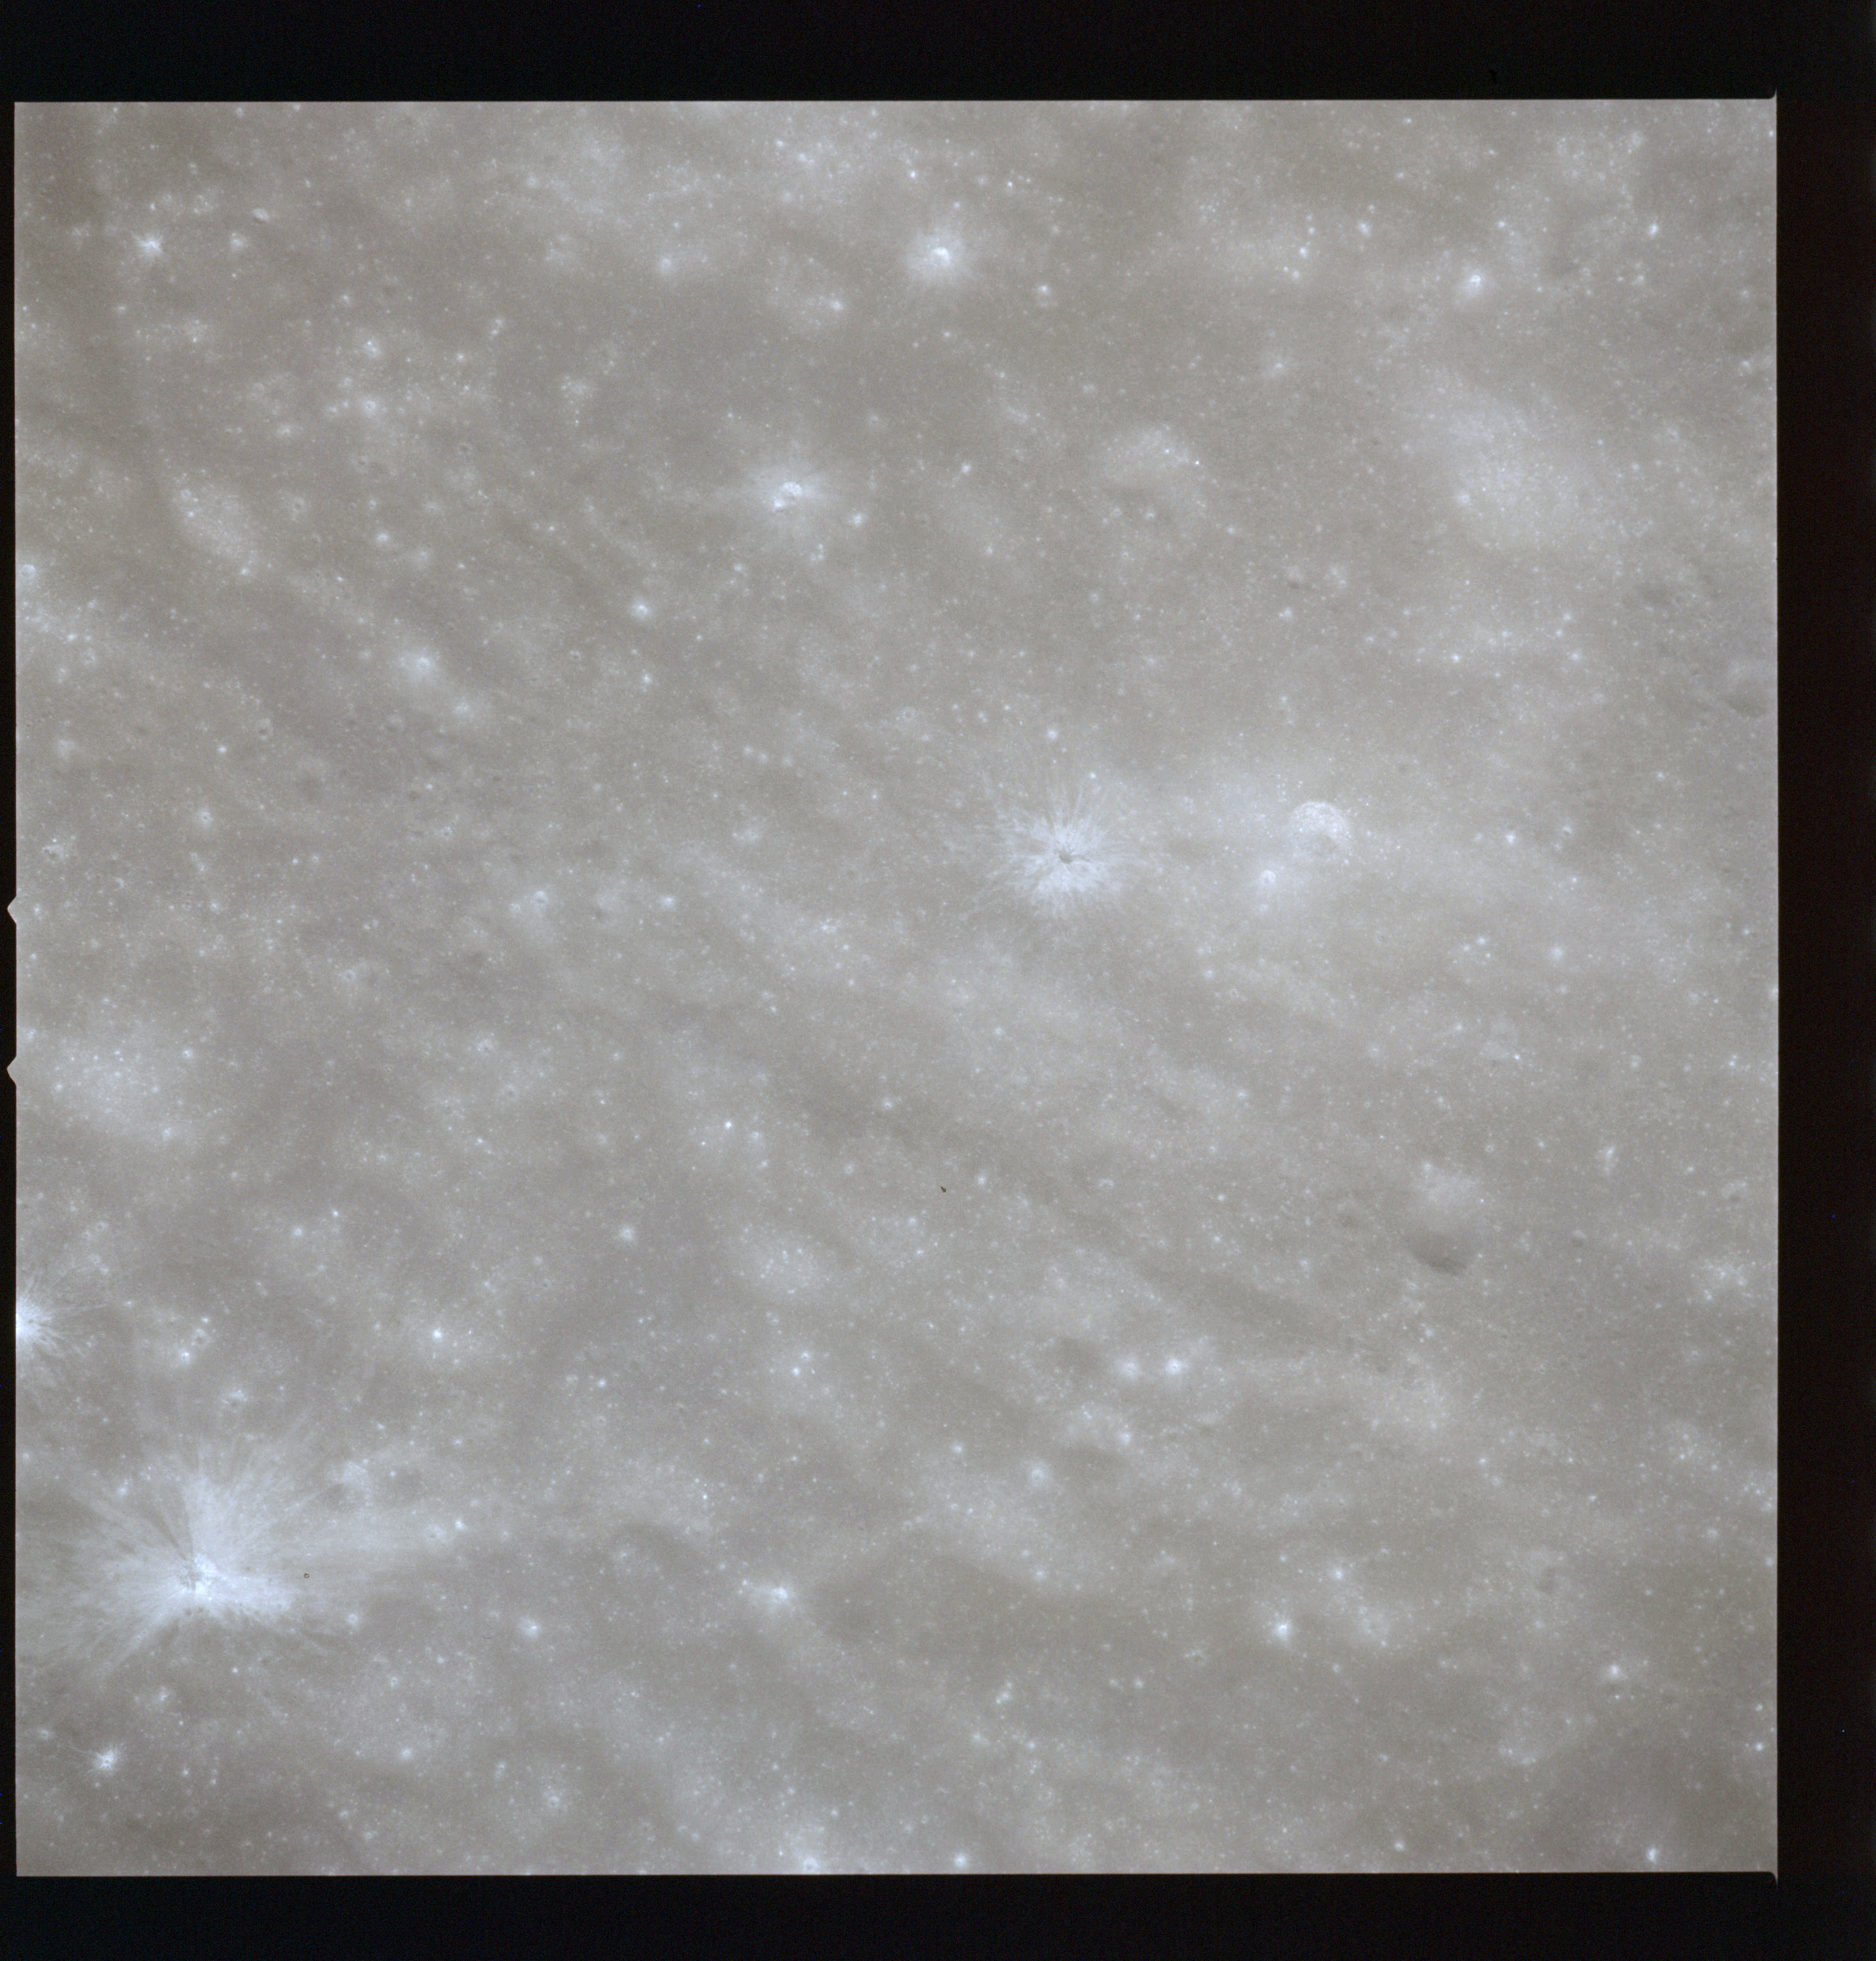
The next solar corona exposure is for 0.25 seconds, with each subsequent shot reducing the exposure by a stop.
AS15-98-13378 - Solar corona at ¼-second exposure - Image by NASA/Johnson Space Center via National Archives.
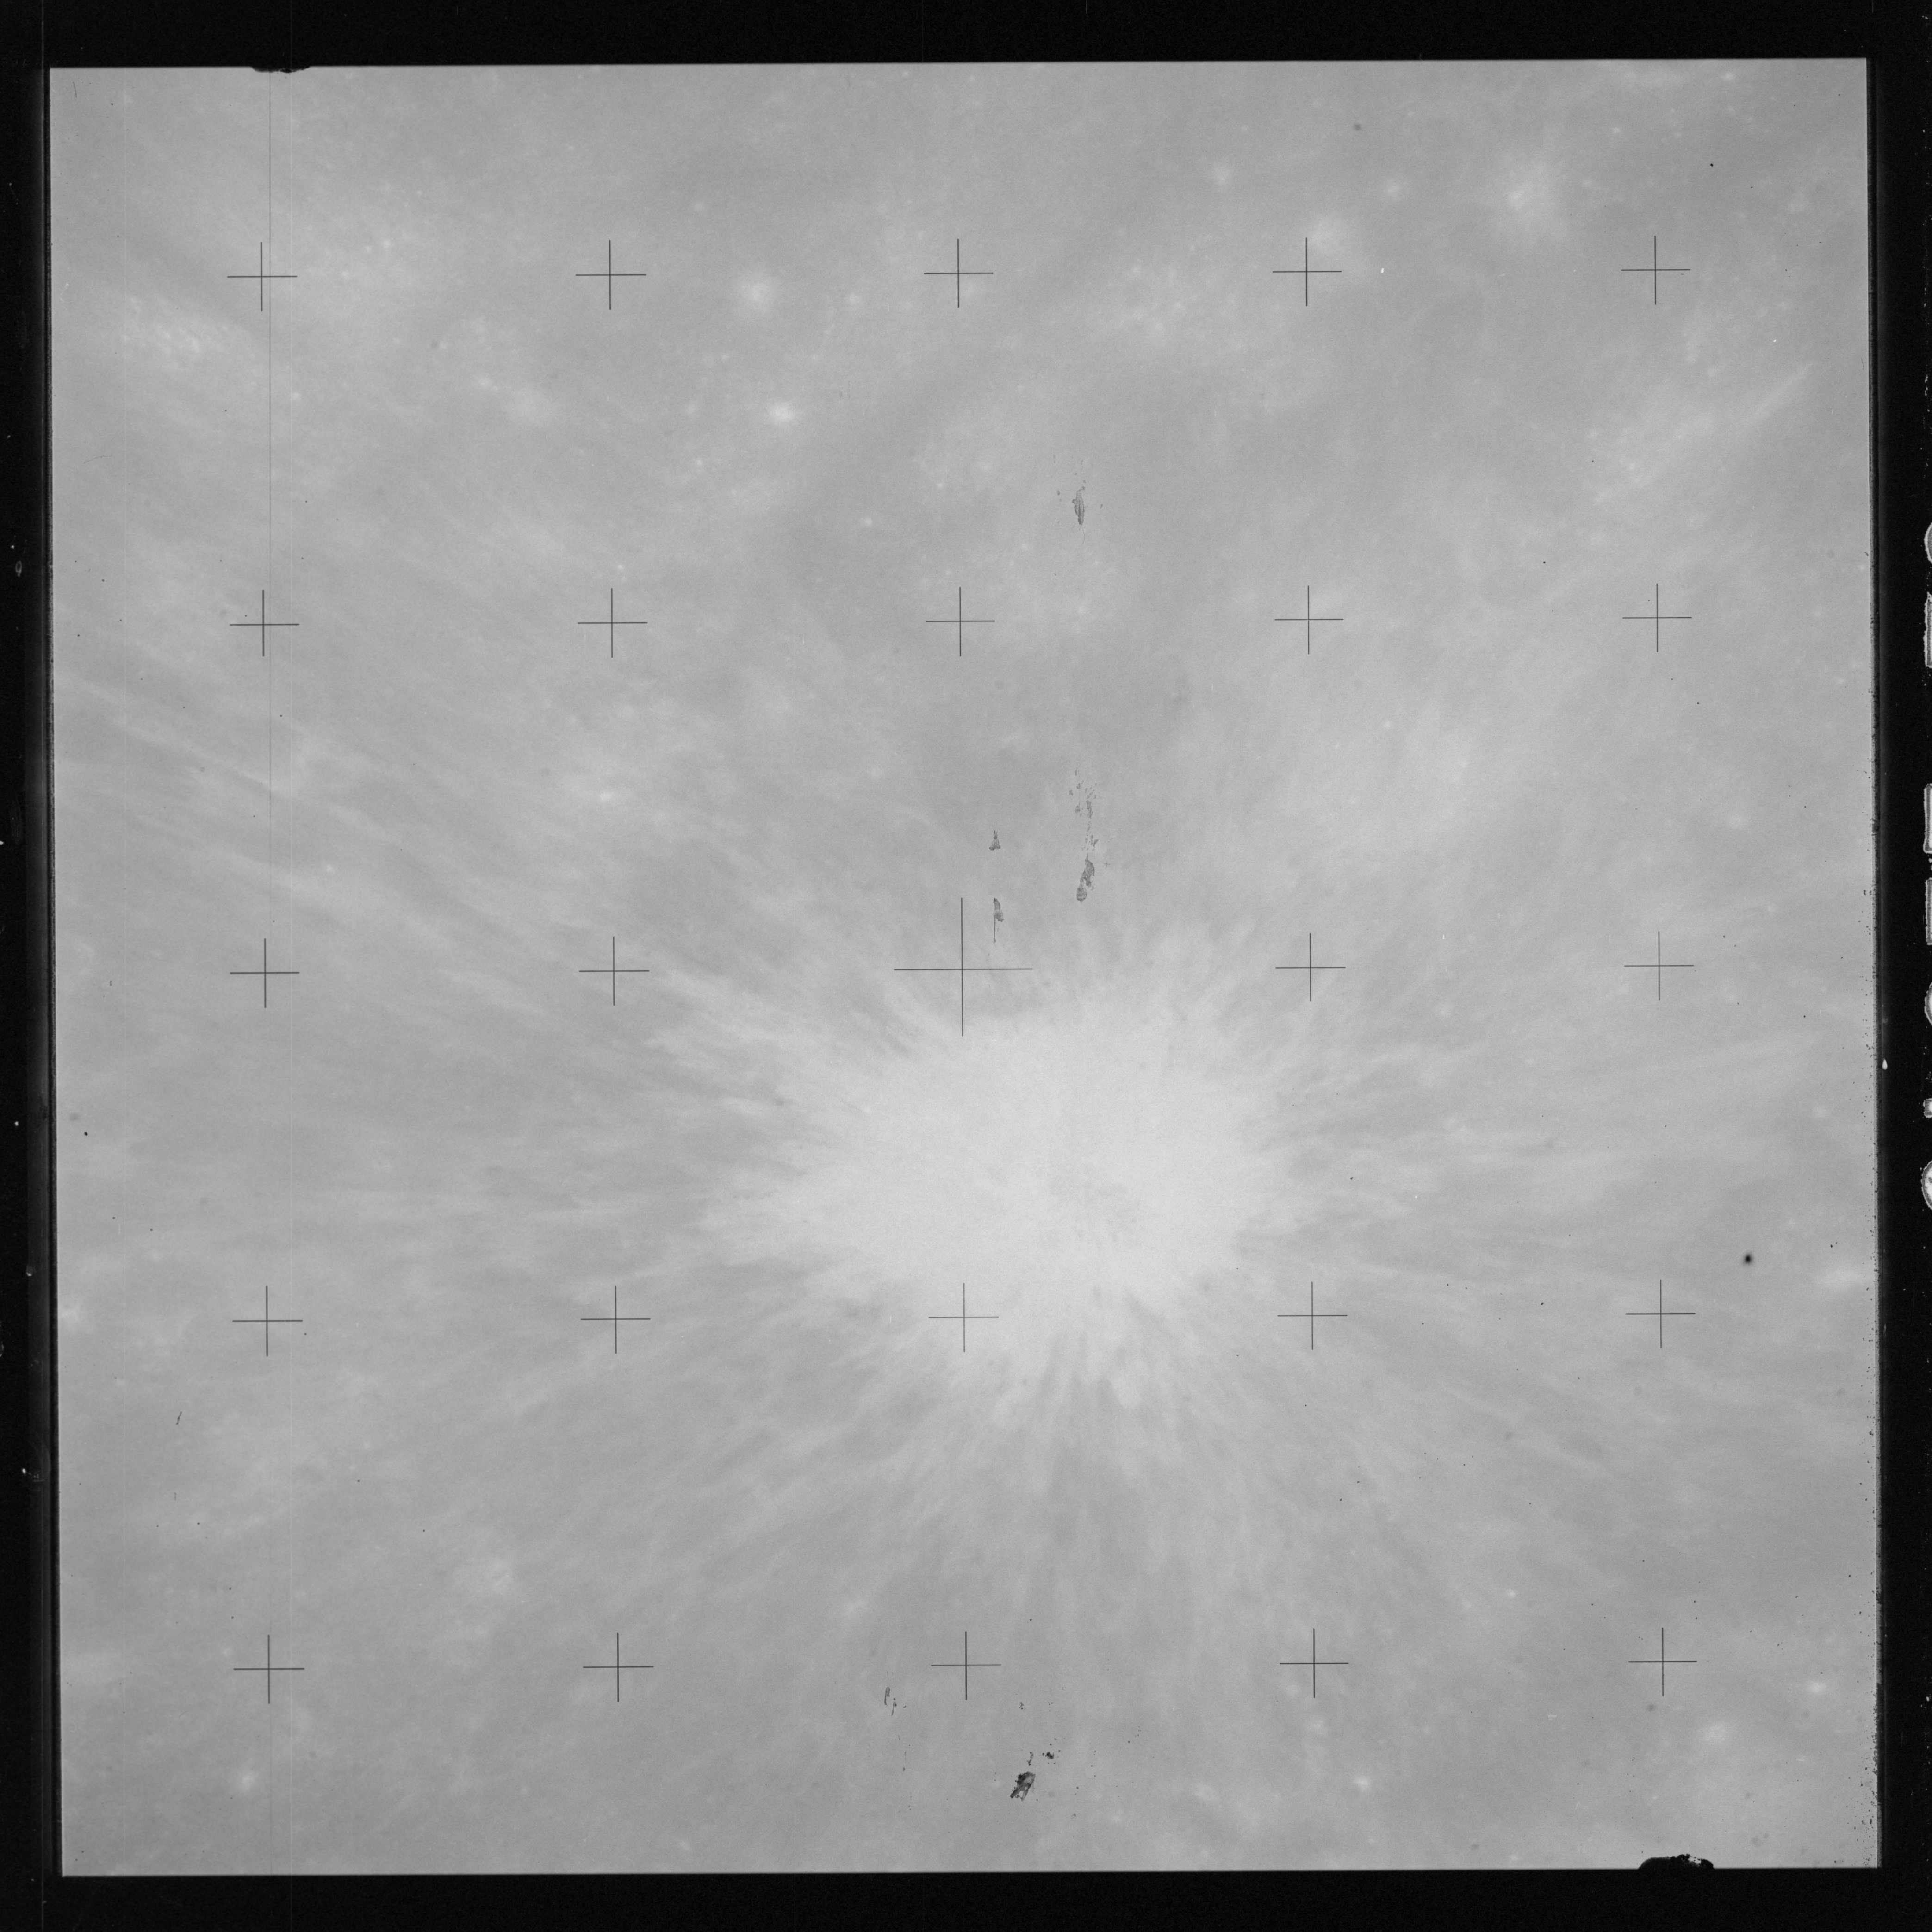
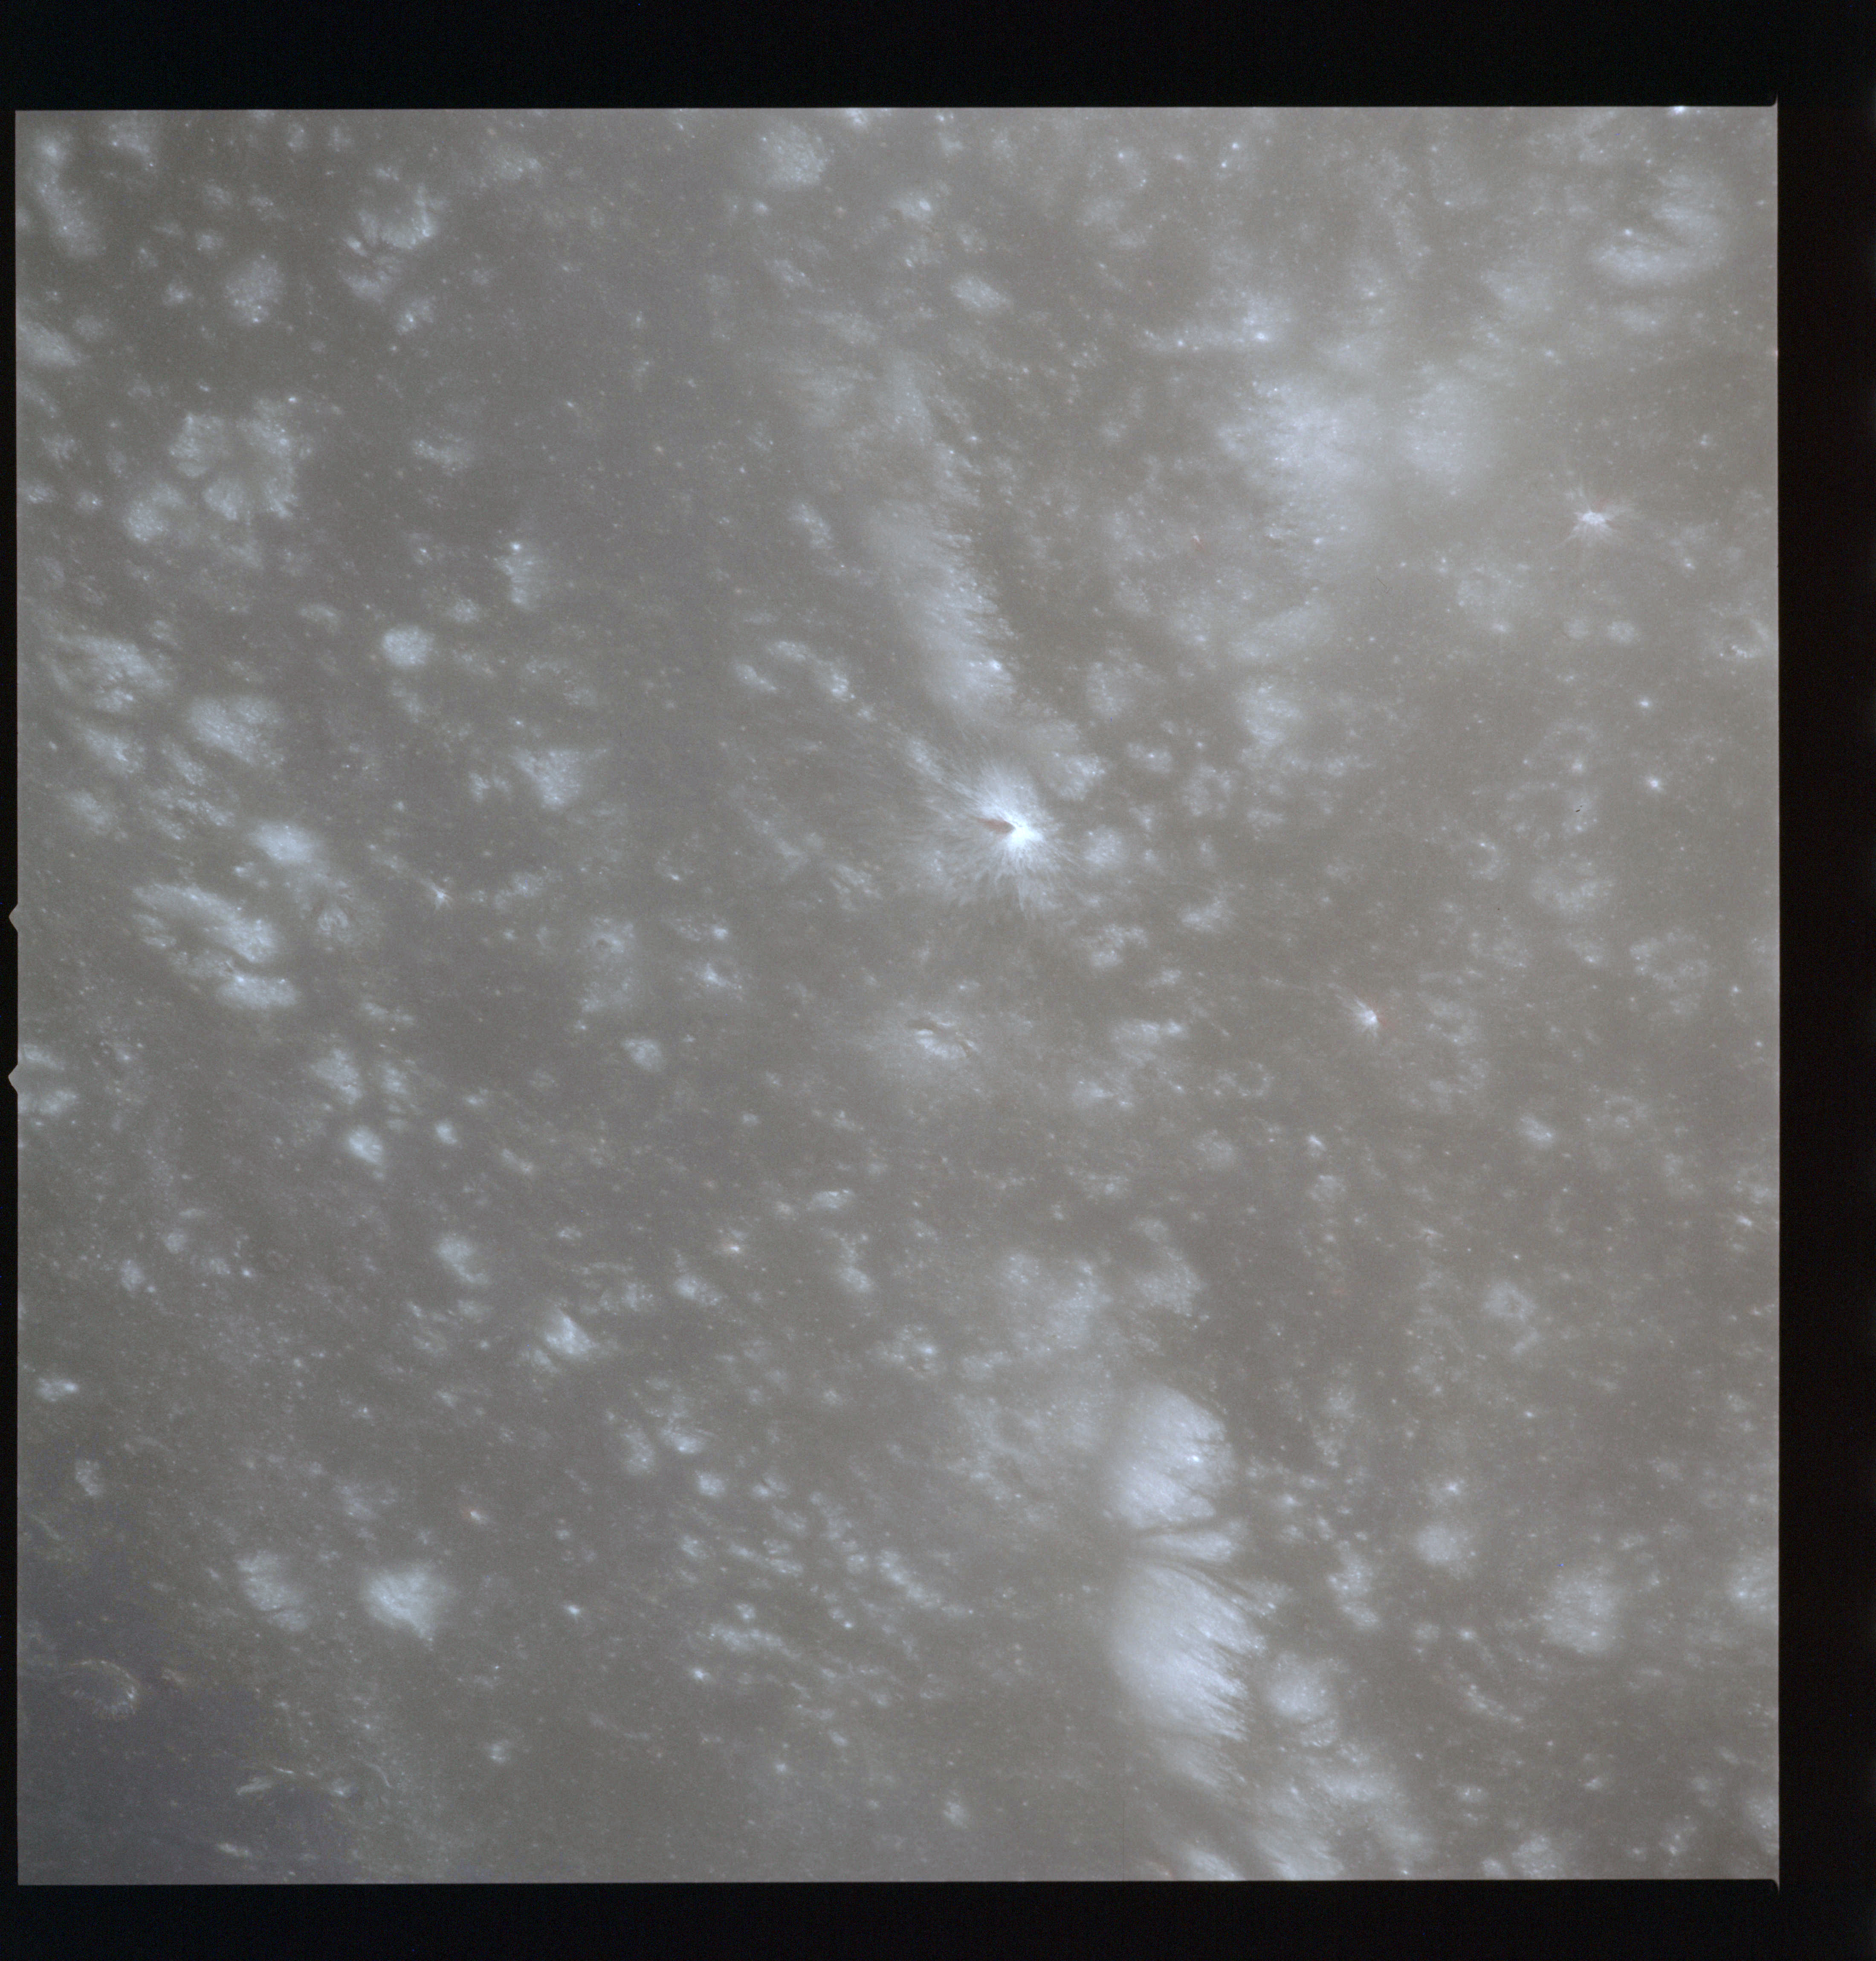
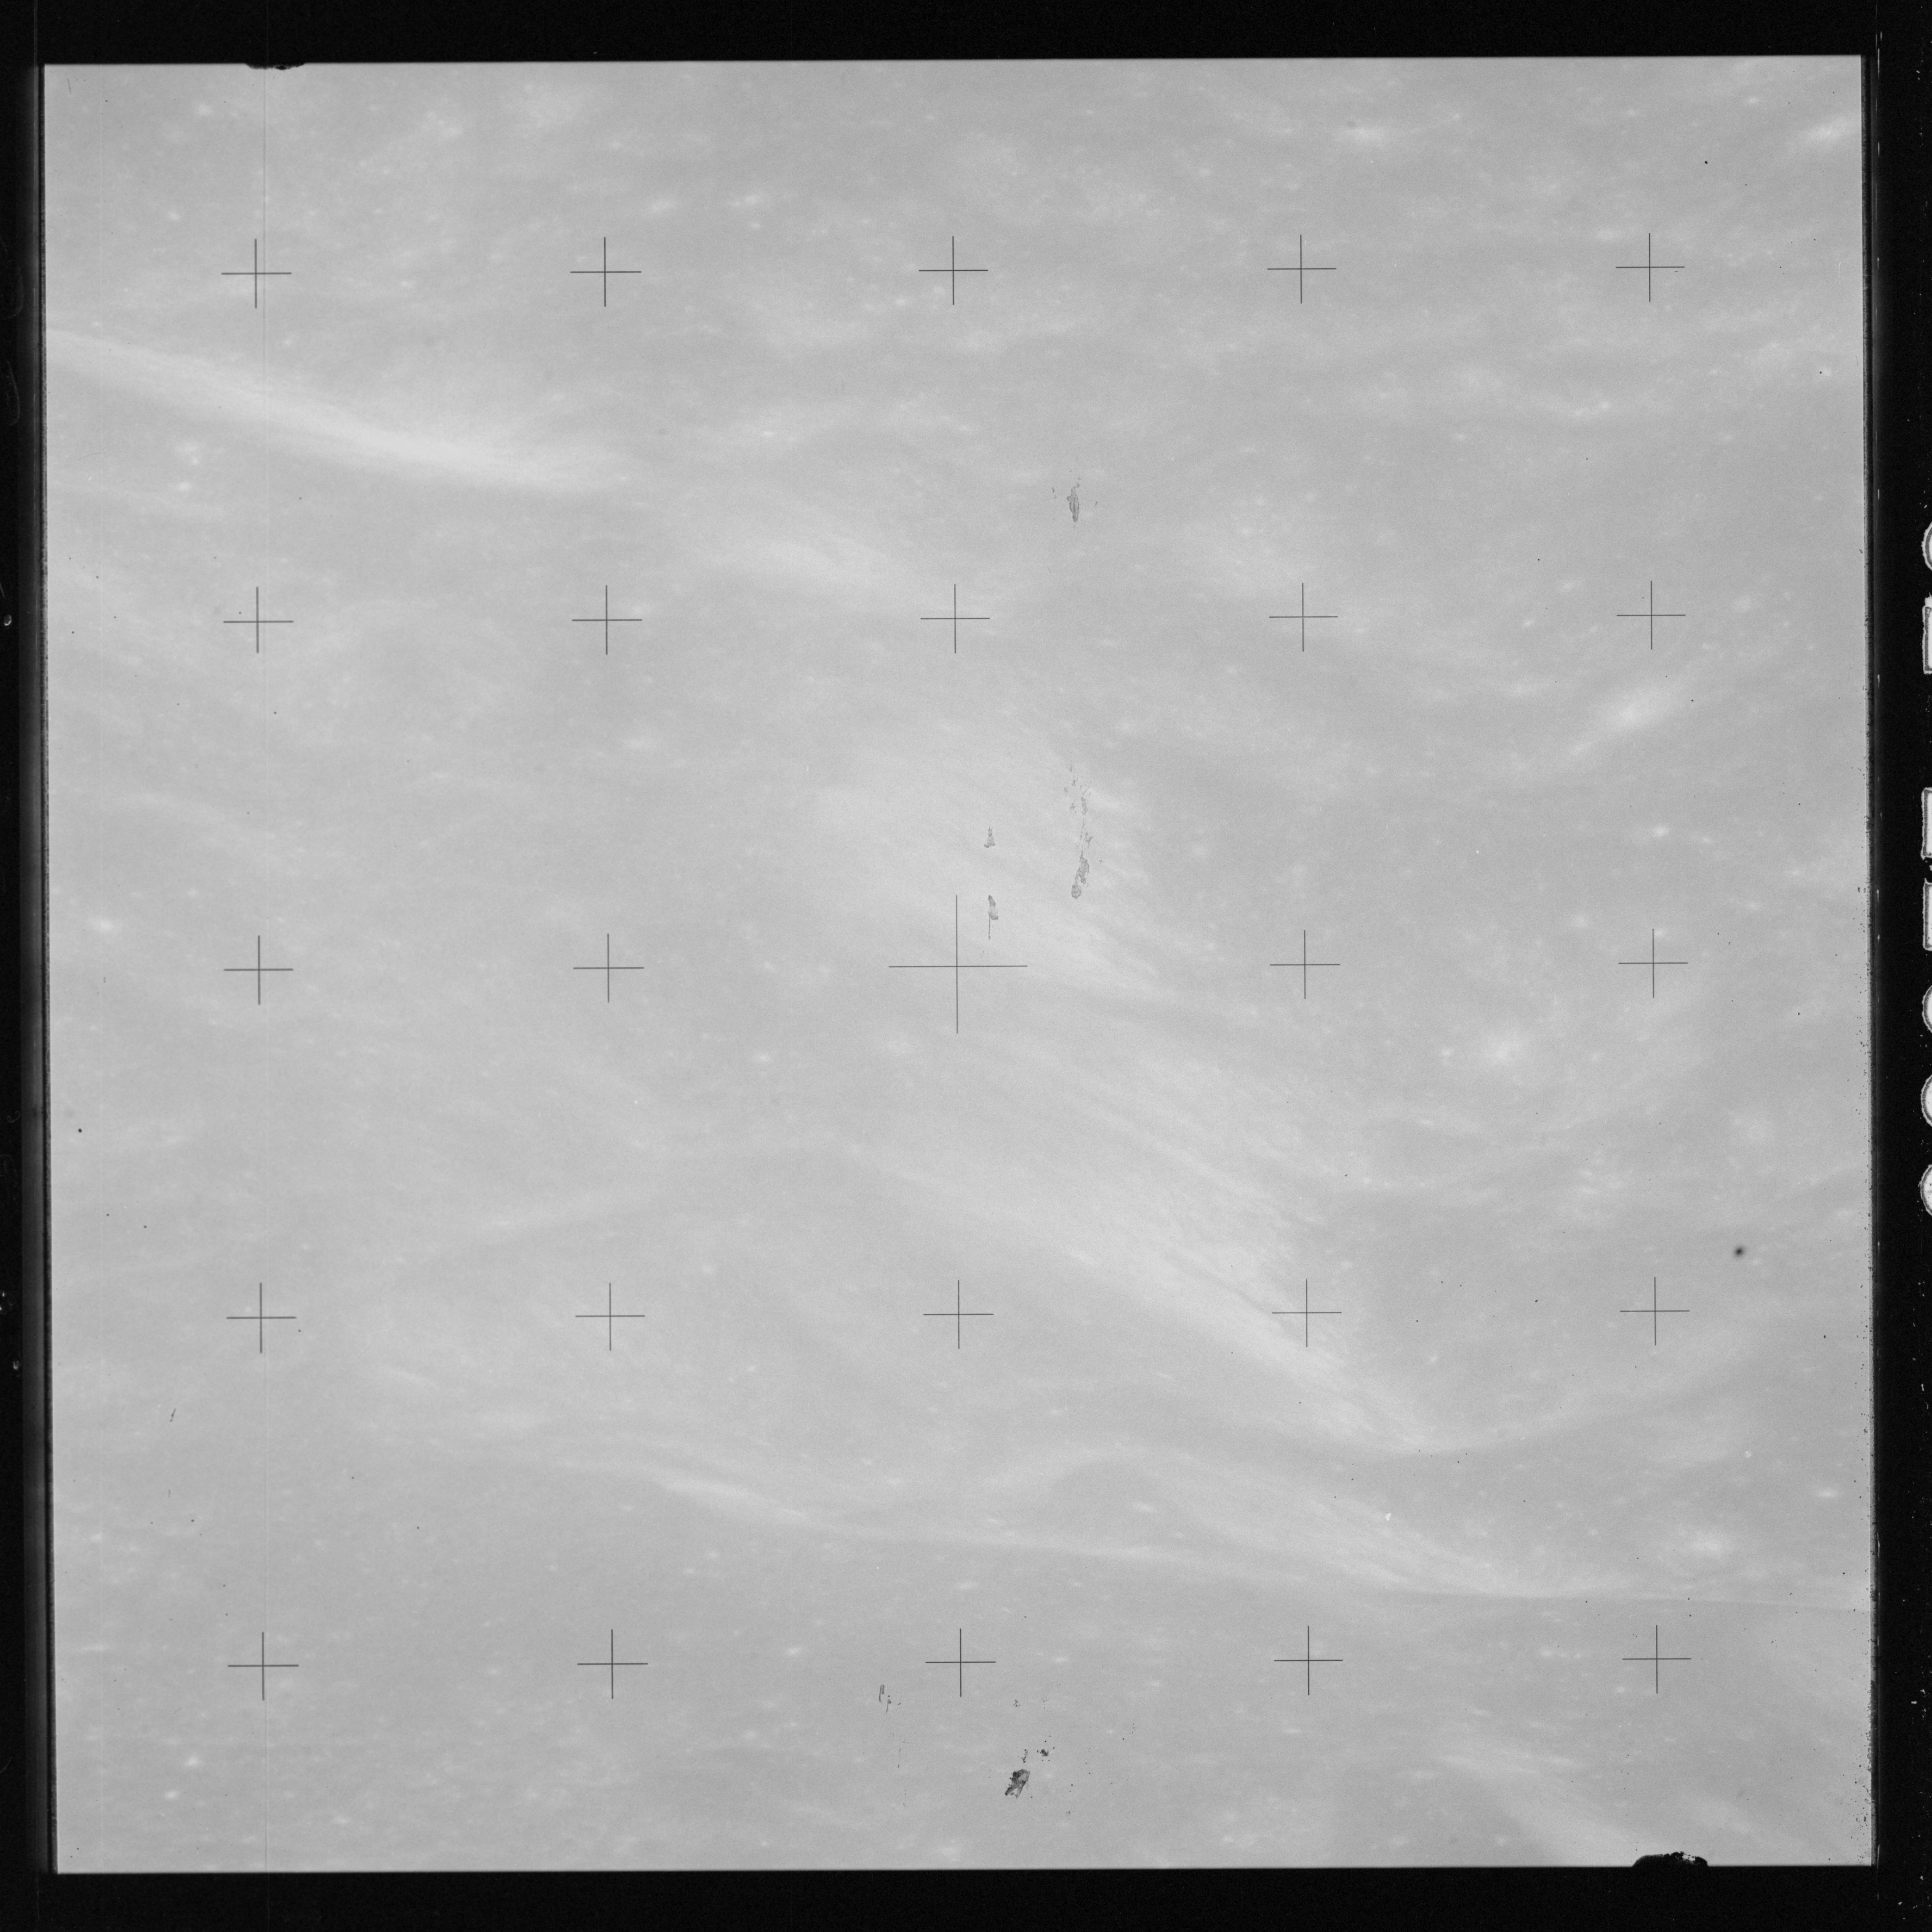
AS15-98-13379 - Solar corona at 1/8th-second exposure - Image by NASA/Johnson Space Center via National Archives.
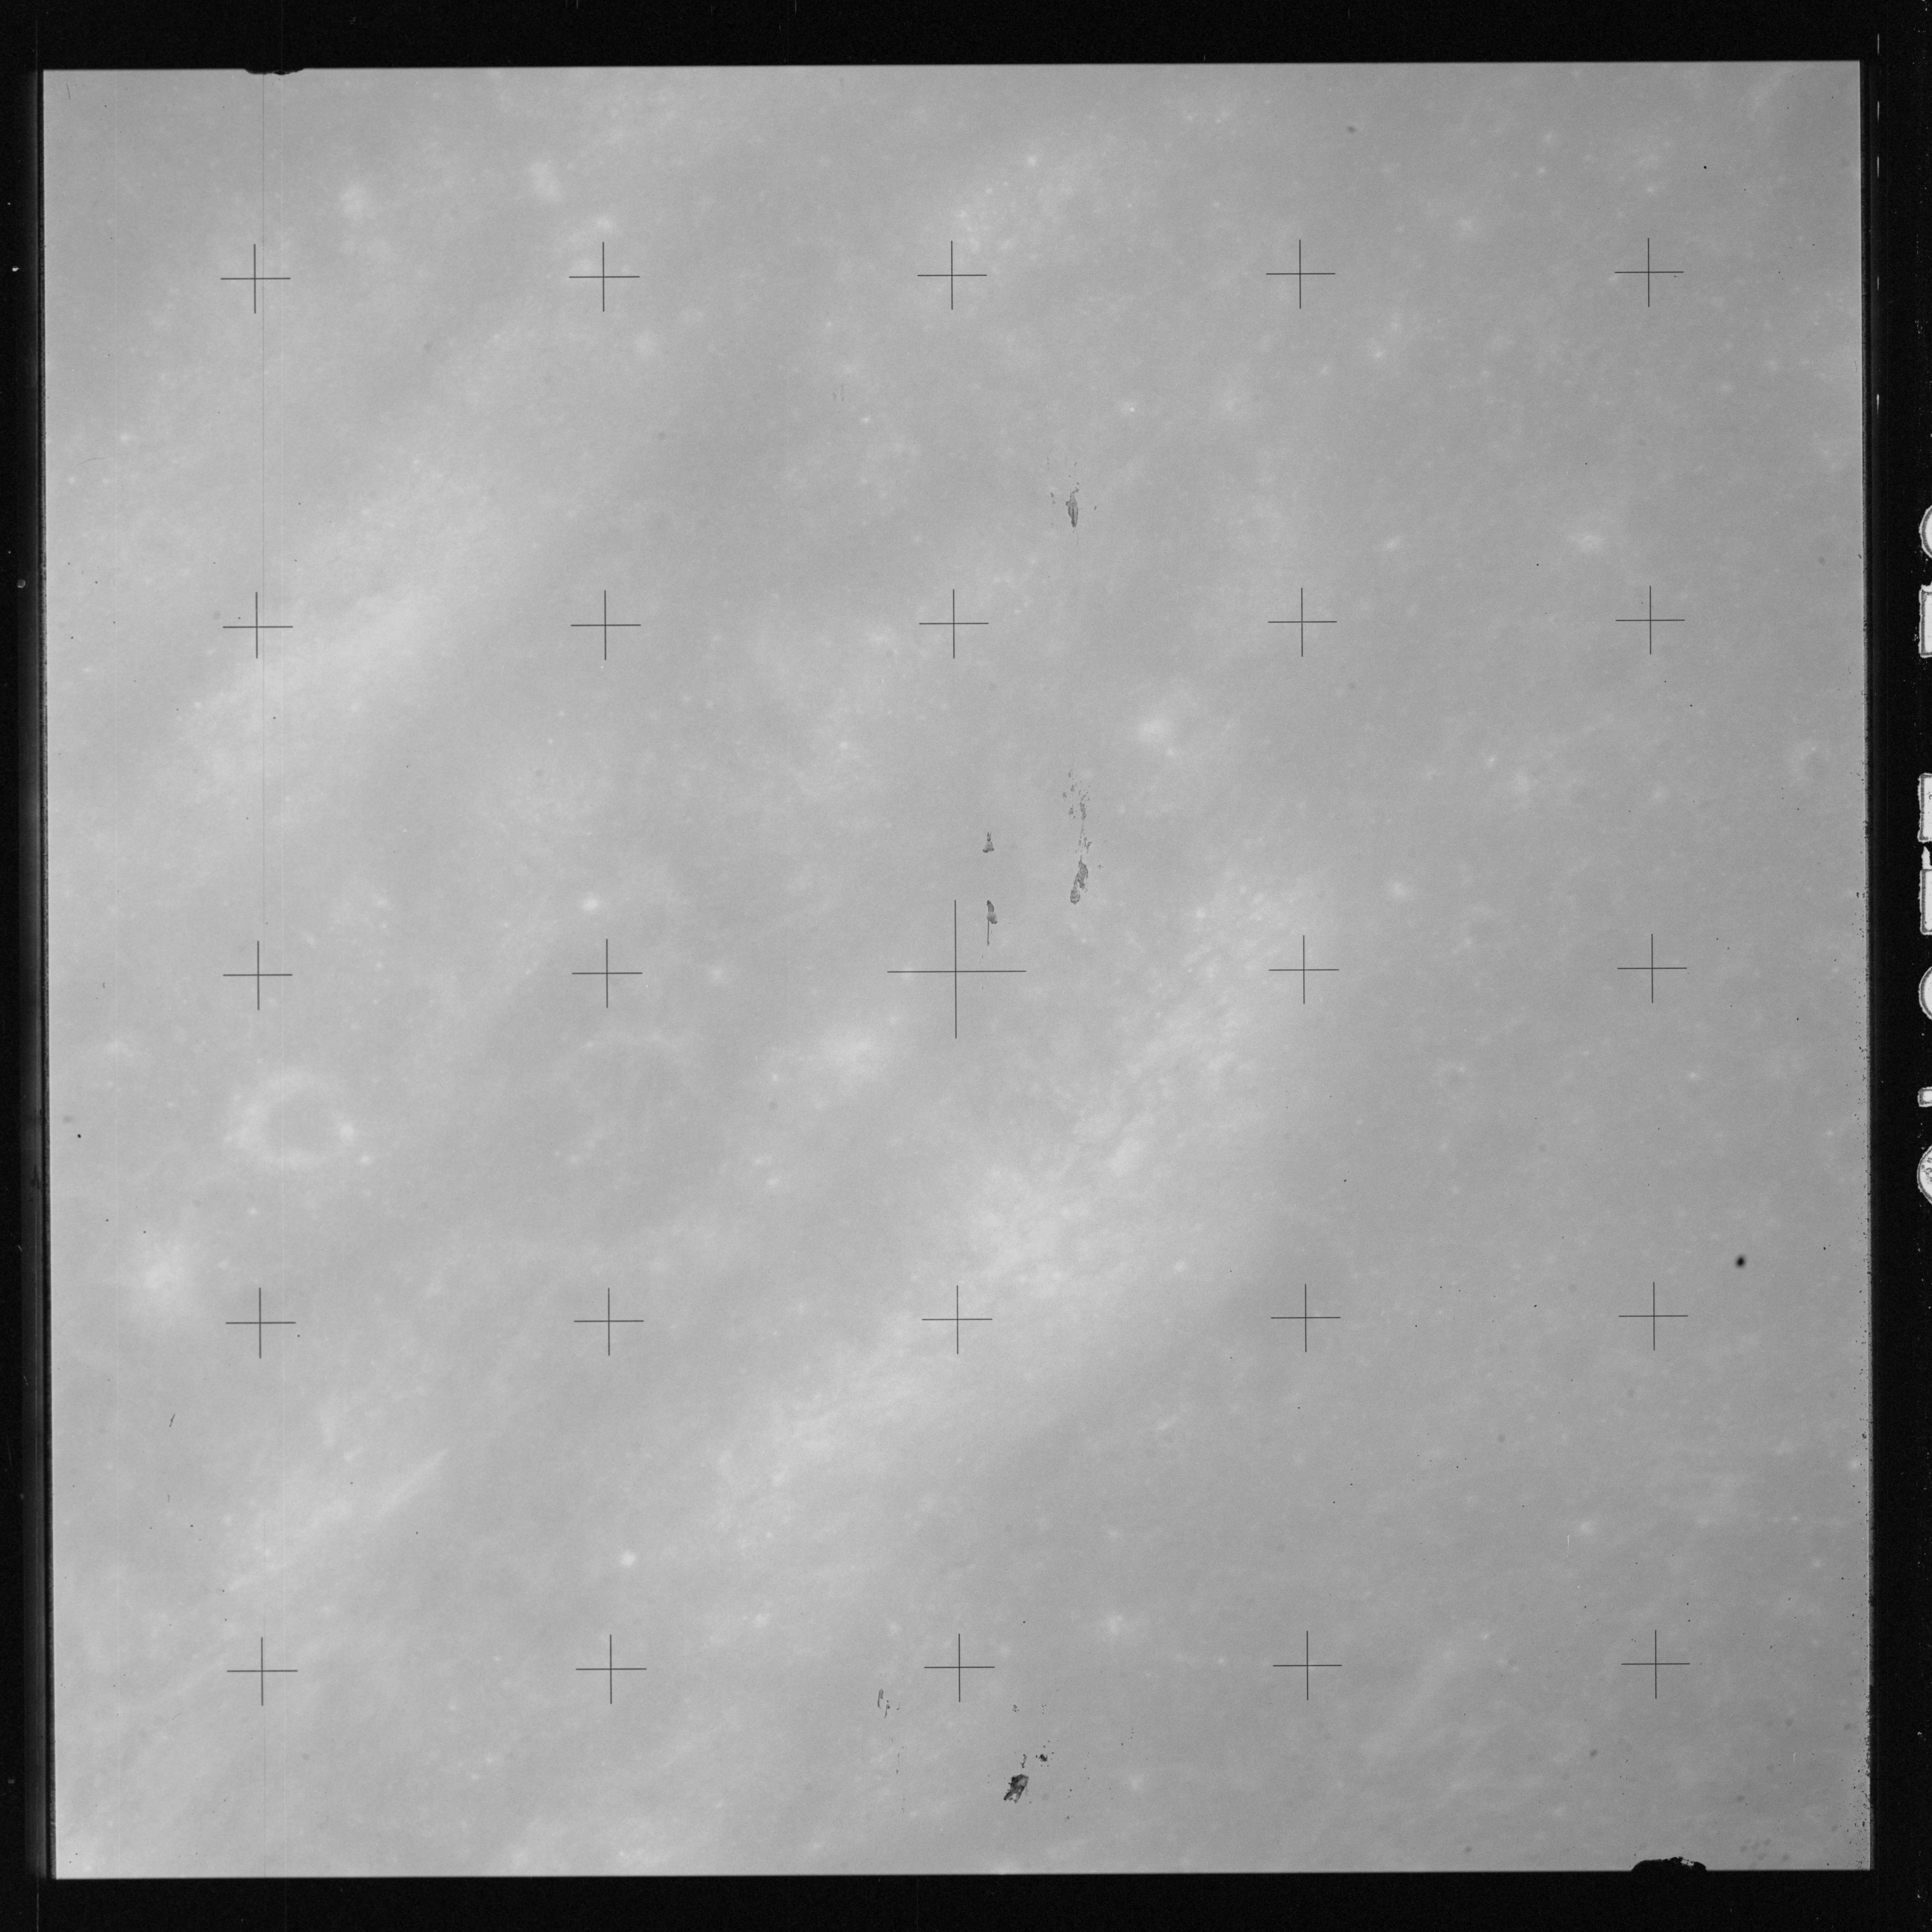
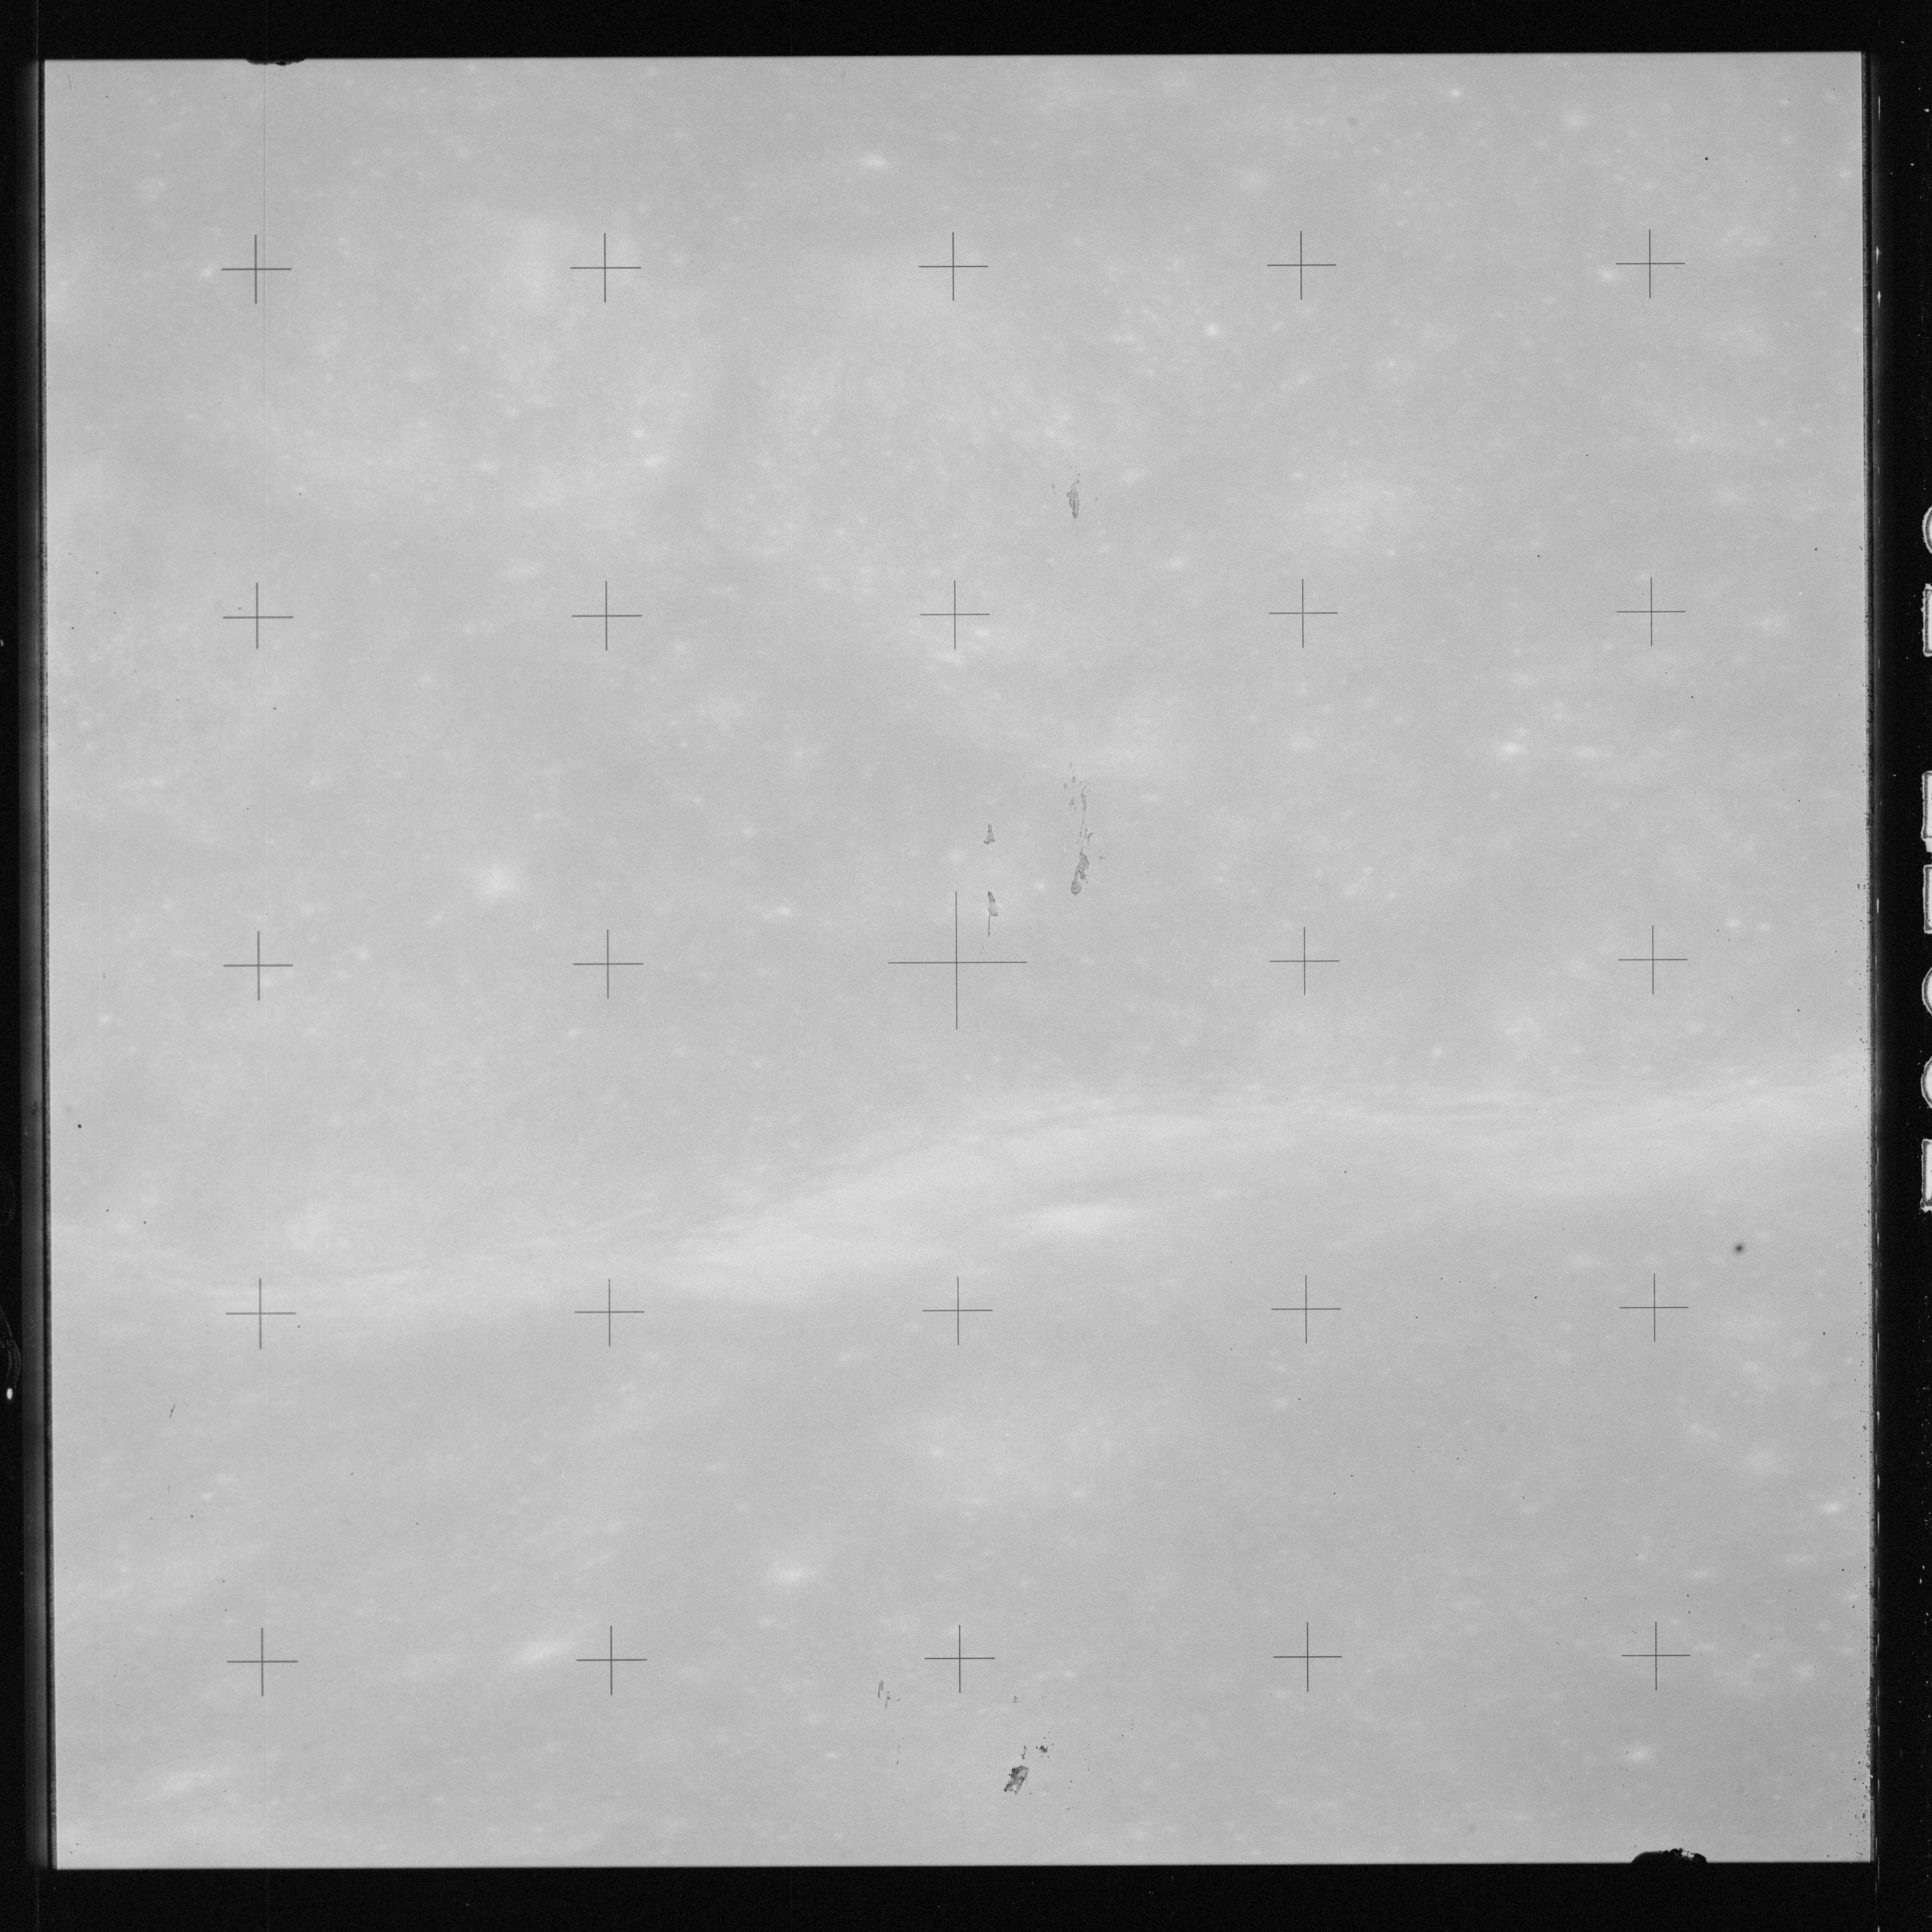
AS15-98-13380 - Solar corona at 1/15th-second exposure - Image by NASA/Johnson Space Center via National Archives.
AS15-98-13381 - Solar corona at 1/30th-second exposure - Image by NASA/Johnson Space Center via National Archives.
AS15-98-13382 - Solar corona at 1/60th-second exposure - Image by NASA/Johnson Space Center via National Archives.
AS15-98-13383 - Solar corona at 1/125th-second exposure - Image by NASA/Johnson Space Center via National Archives.
216:11:46 Worden (onboard): If that time is good enough, boy, you wait. At 8 minutes, the Sun'll show.
216:11:51 Scott (onboard): Fifty-five.
216:11:52 Worden (onboard): Yes.
216:11:53 Scott (onboard): Ga! Boy!
216:11:55 Worden (onboard): Isn't that something?
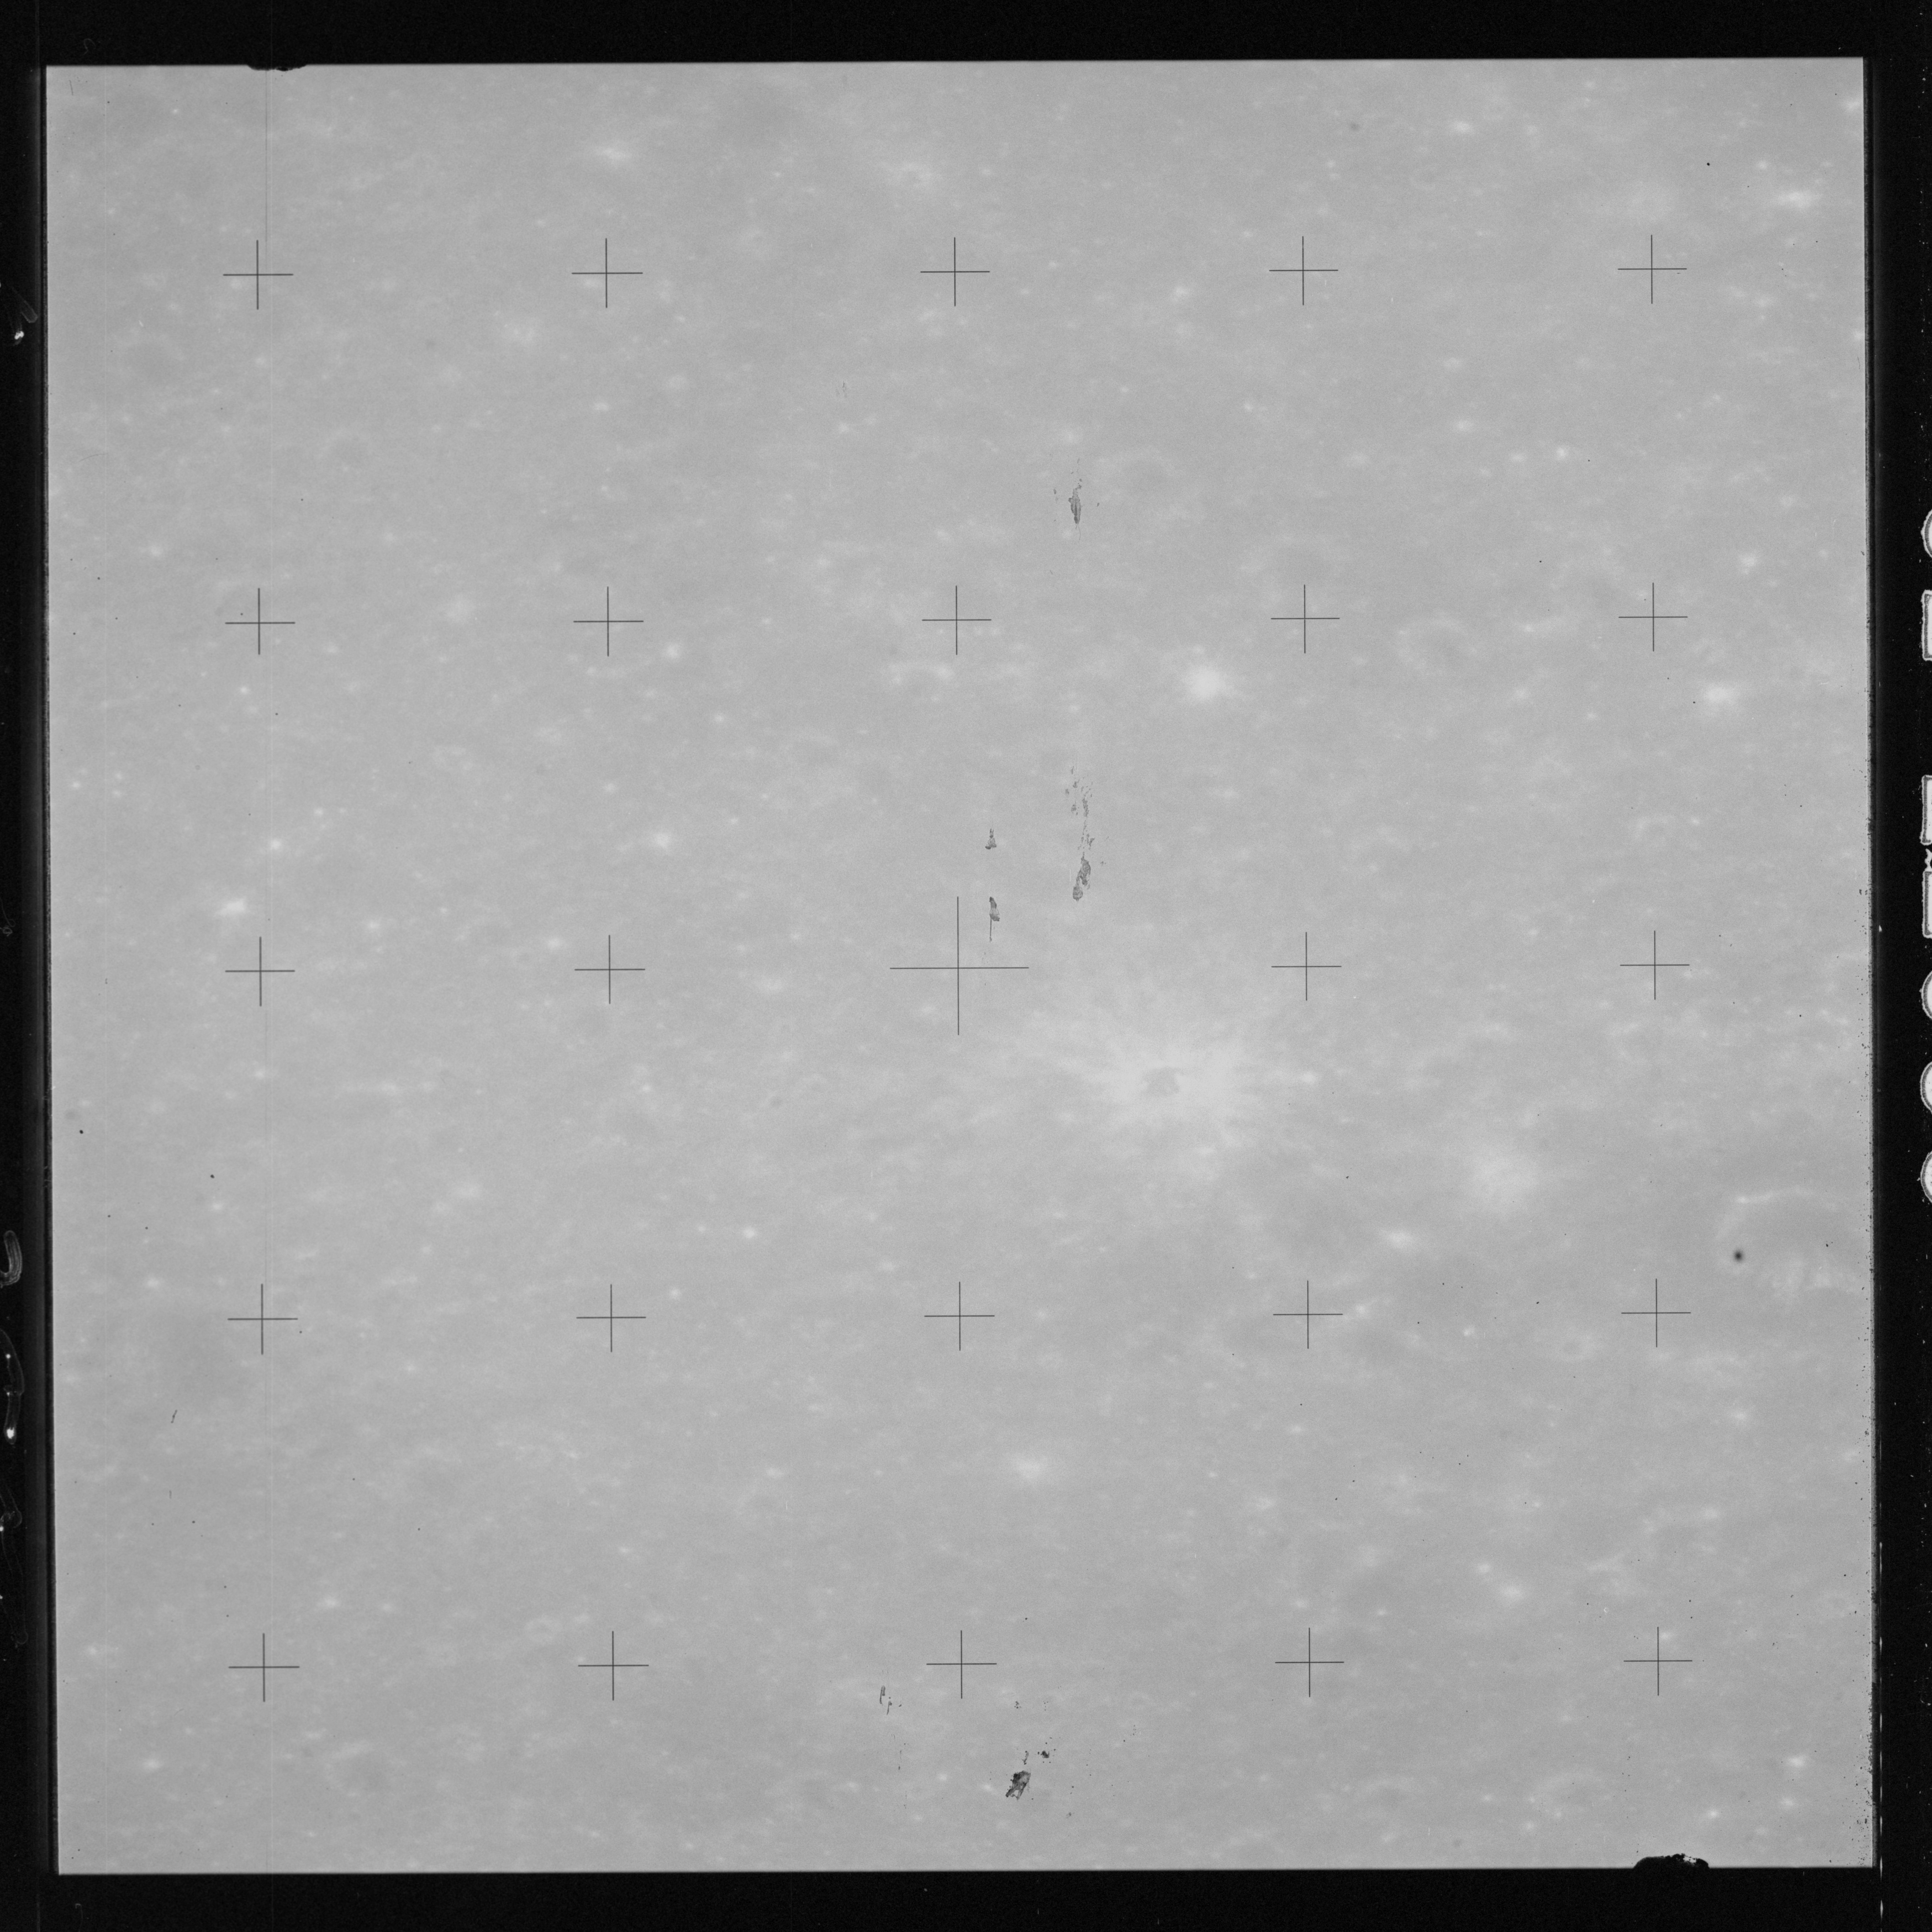
AS15-98-13384 - Solar corona at 1/250th-second exposure - Image by NASA/Johnson Space Center via National Archives.
216:11:56 Scott (onboard): Woo-hooo!
216:11:57 Worden (onboard): Isn't that something?
216:11:58 Scott (onboard): Yes, man!
216:11:59 Worden (onboard): [Laughter.]
216:12:00 Scott (onboard): Woo-hoo-hooo!
216:12:01 Worden (onboard): I thought you'd like that. [Laughter.]
216:12:02 Scott (onboard): That's something again! [Laughter.] Wheee!
216:12:04 Worden (onboard): Okay - DAC off.
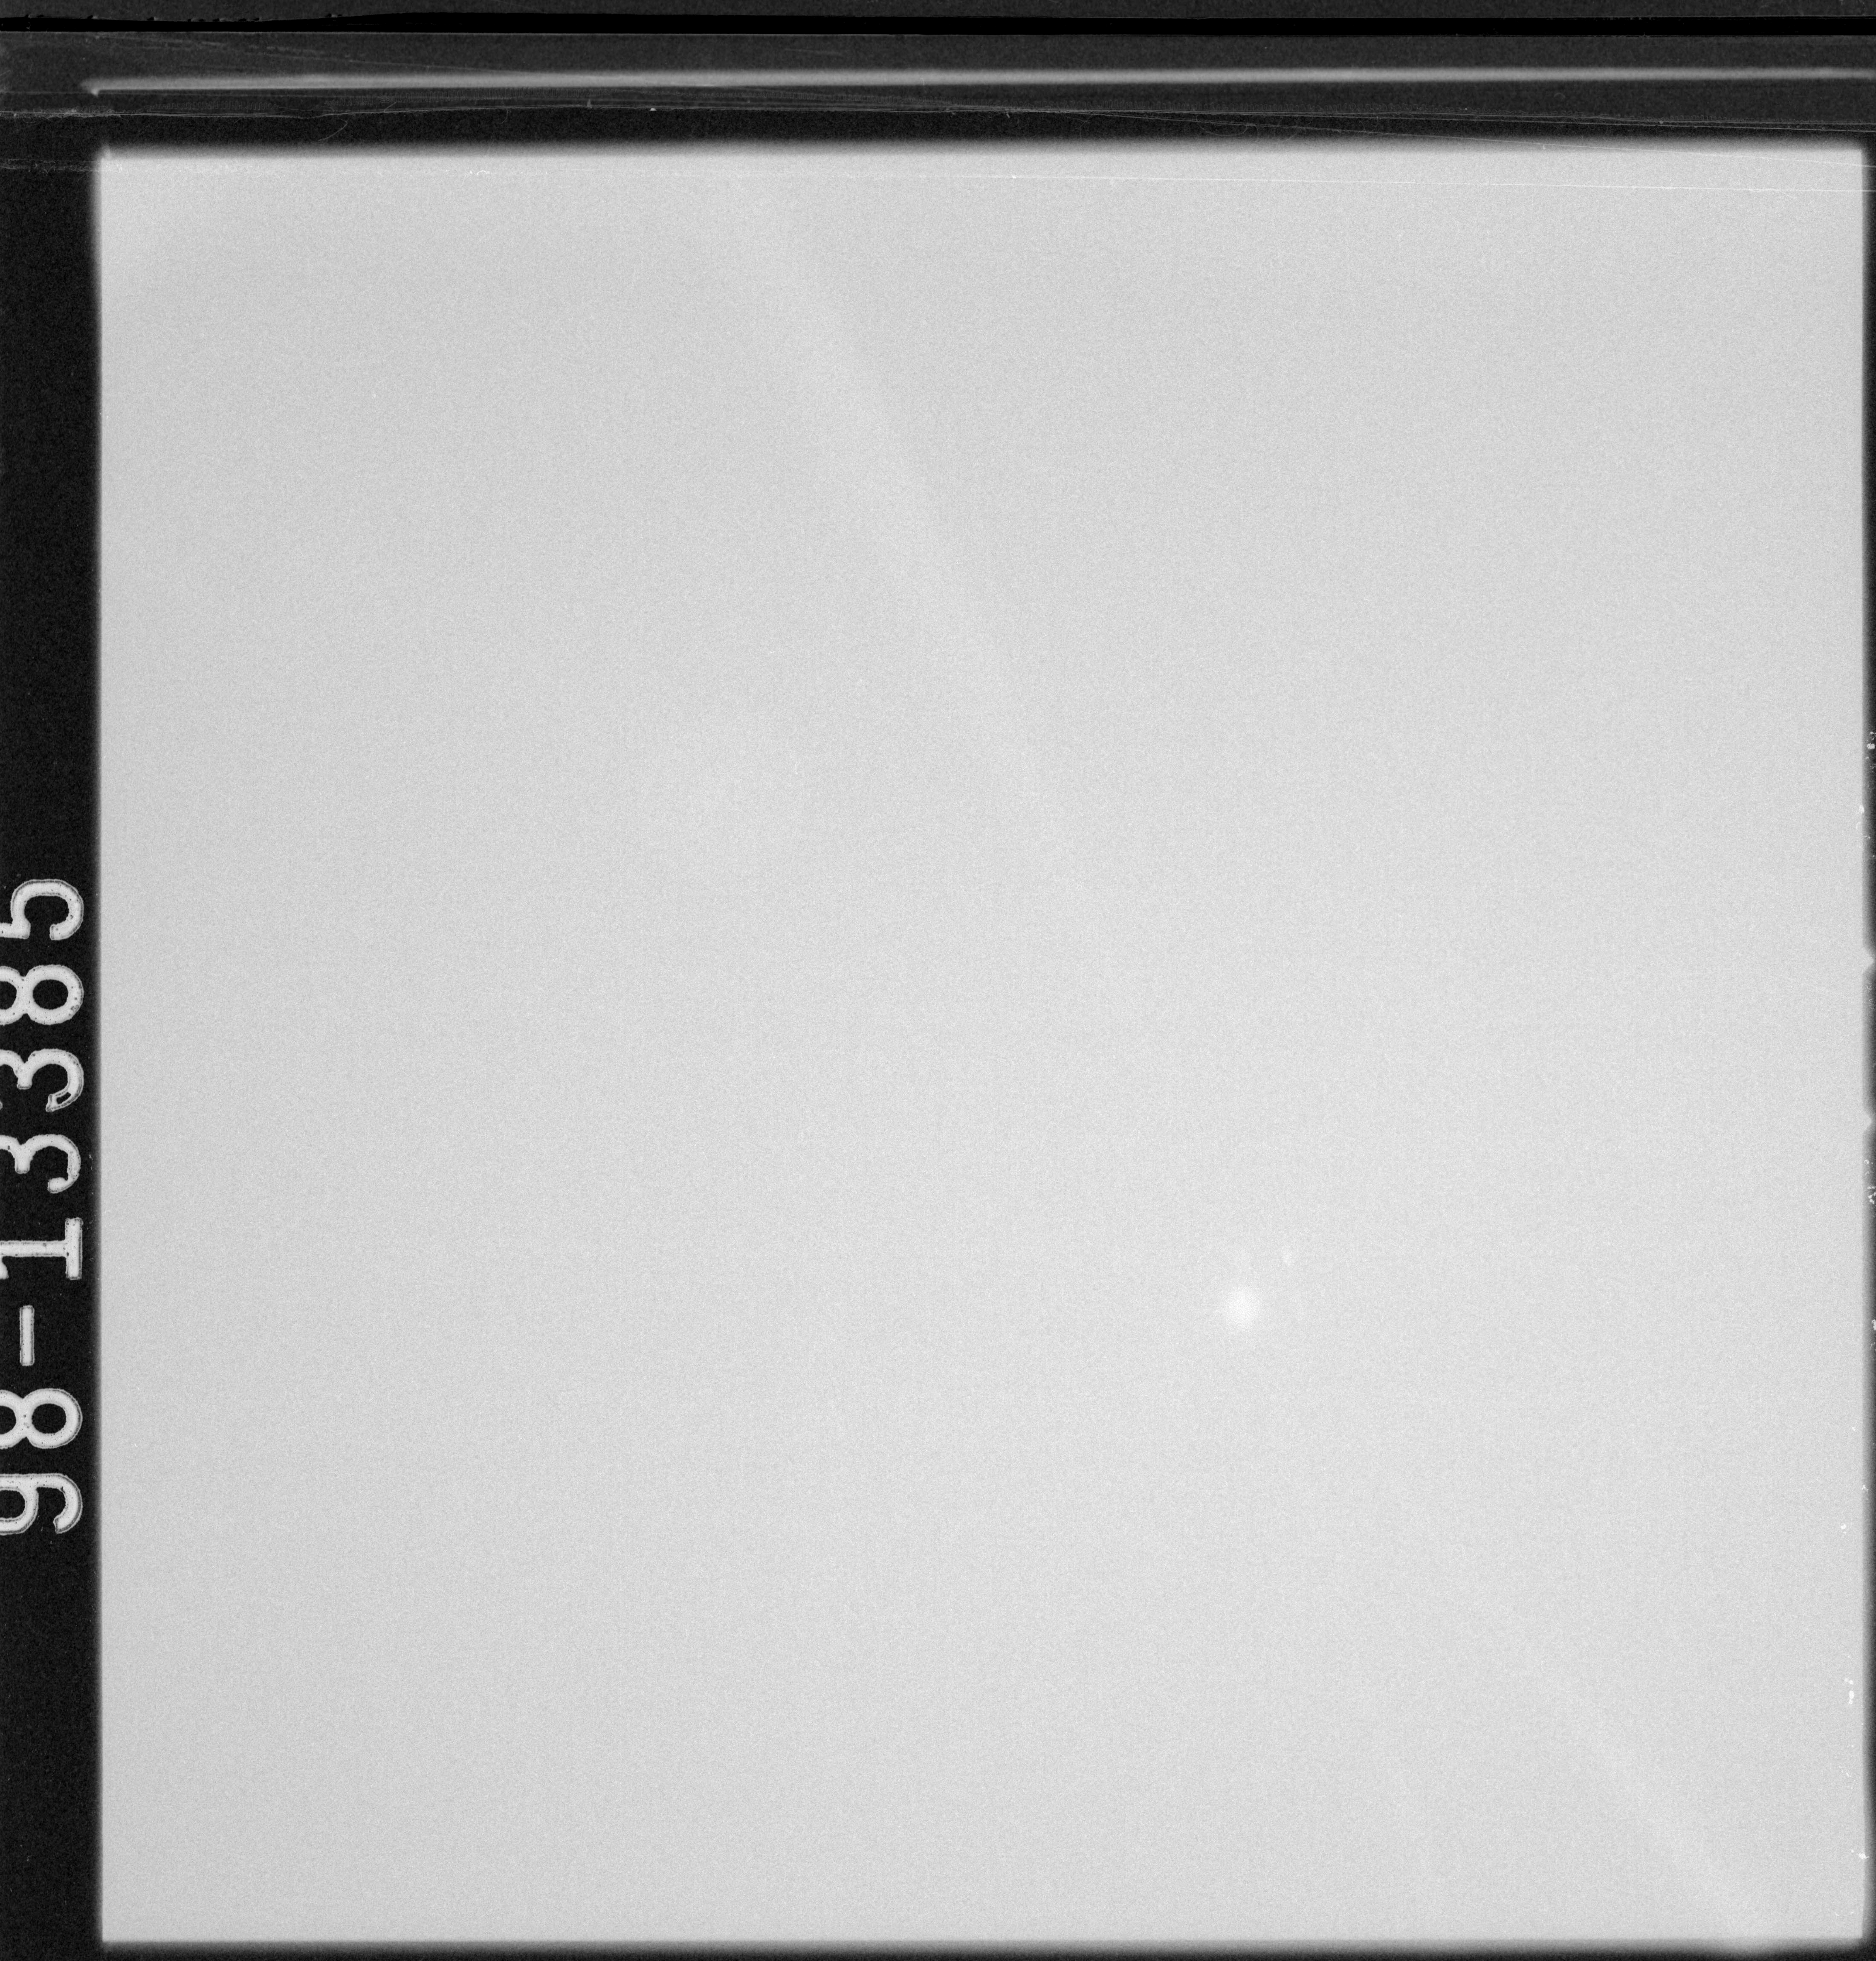
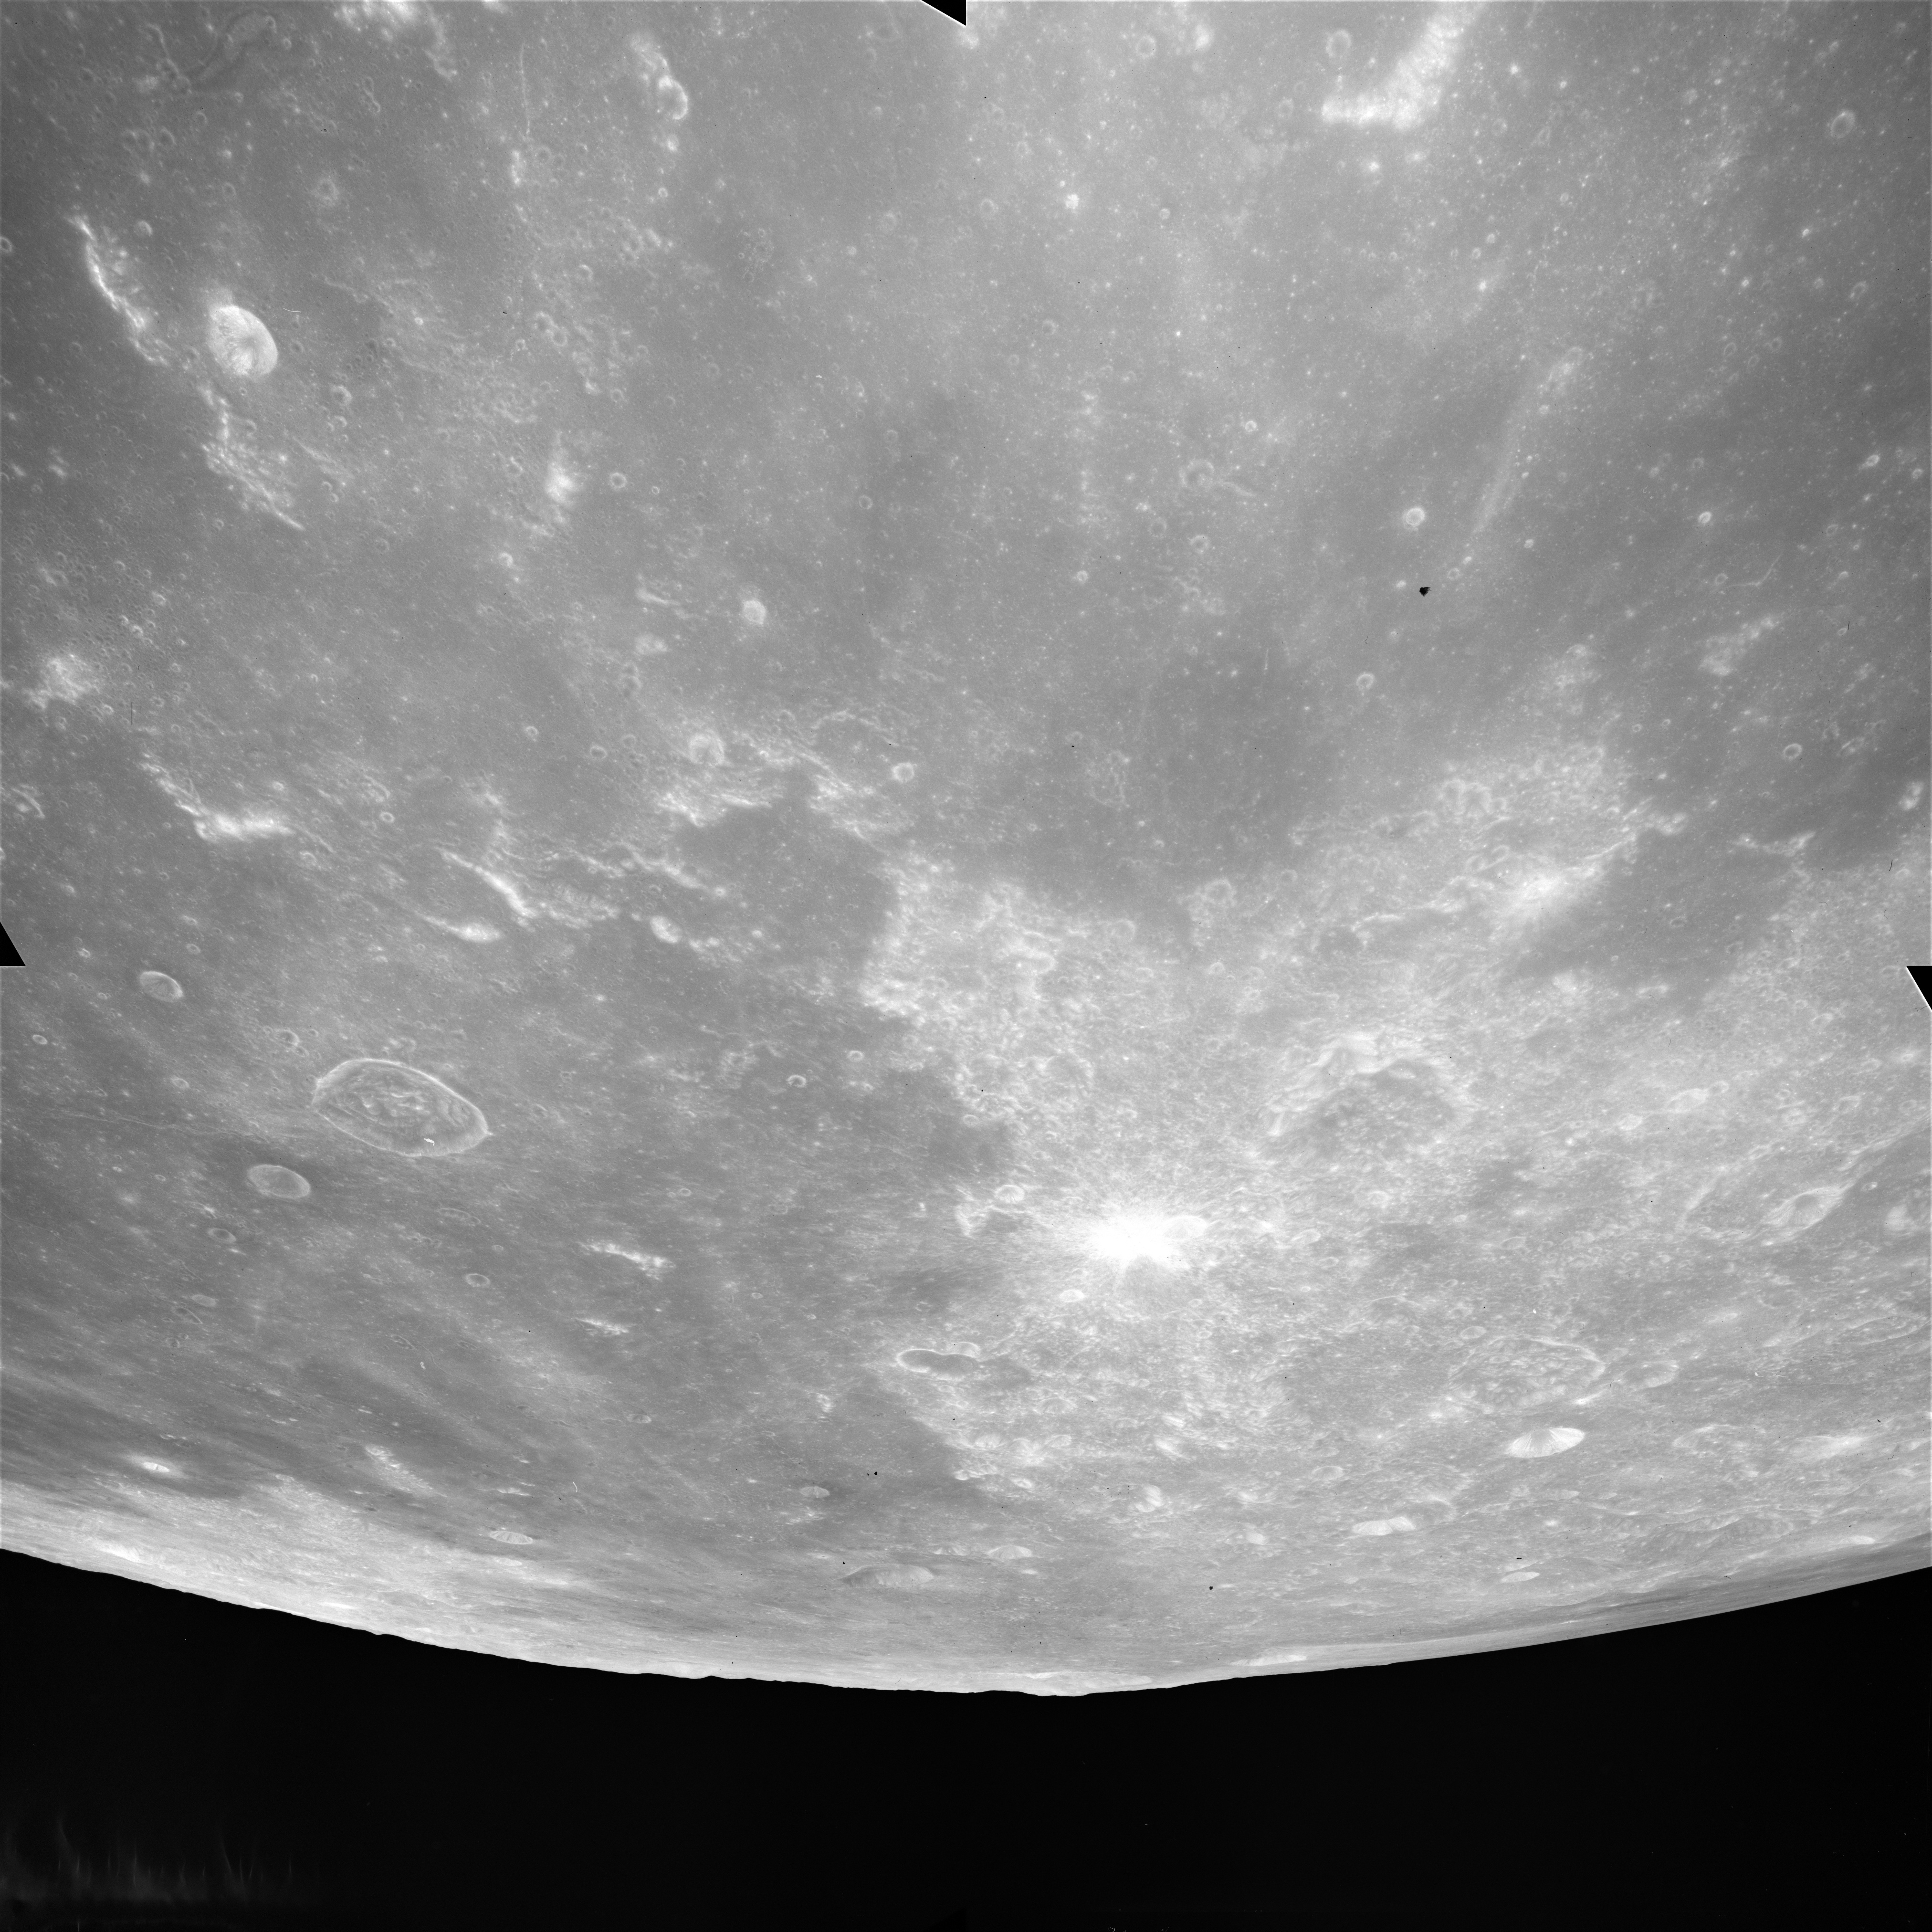
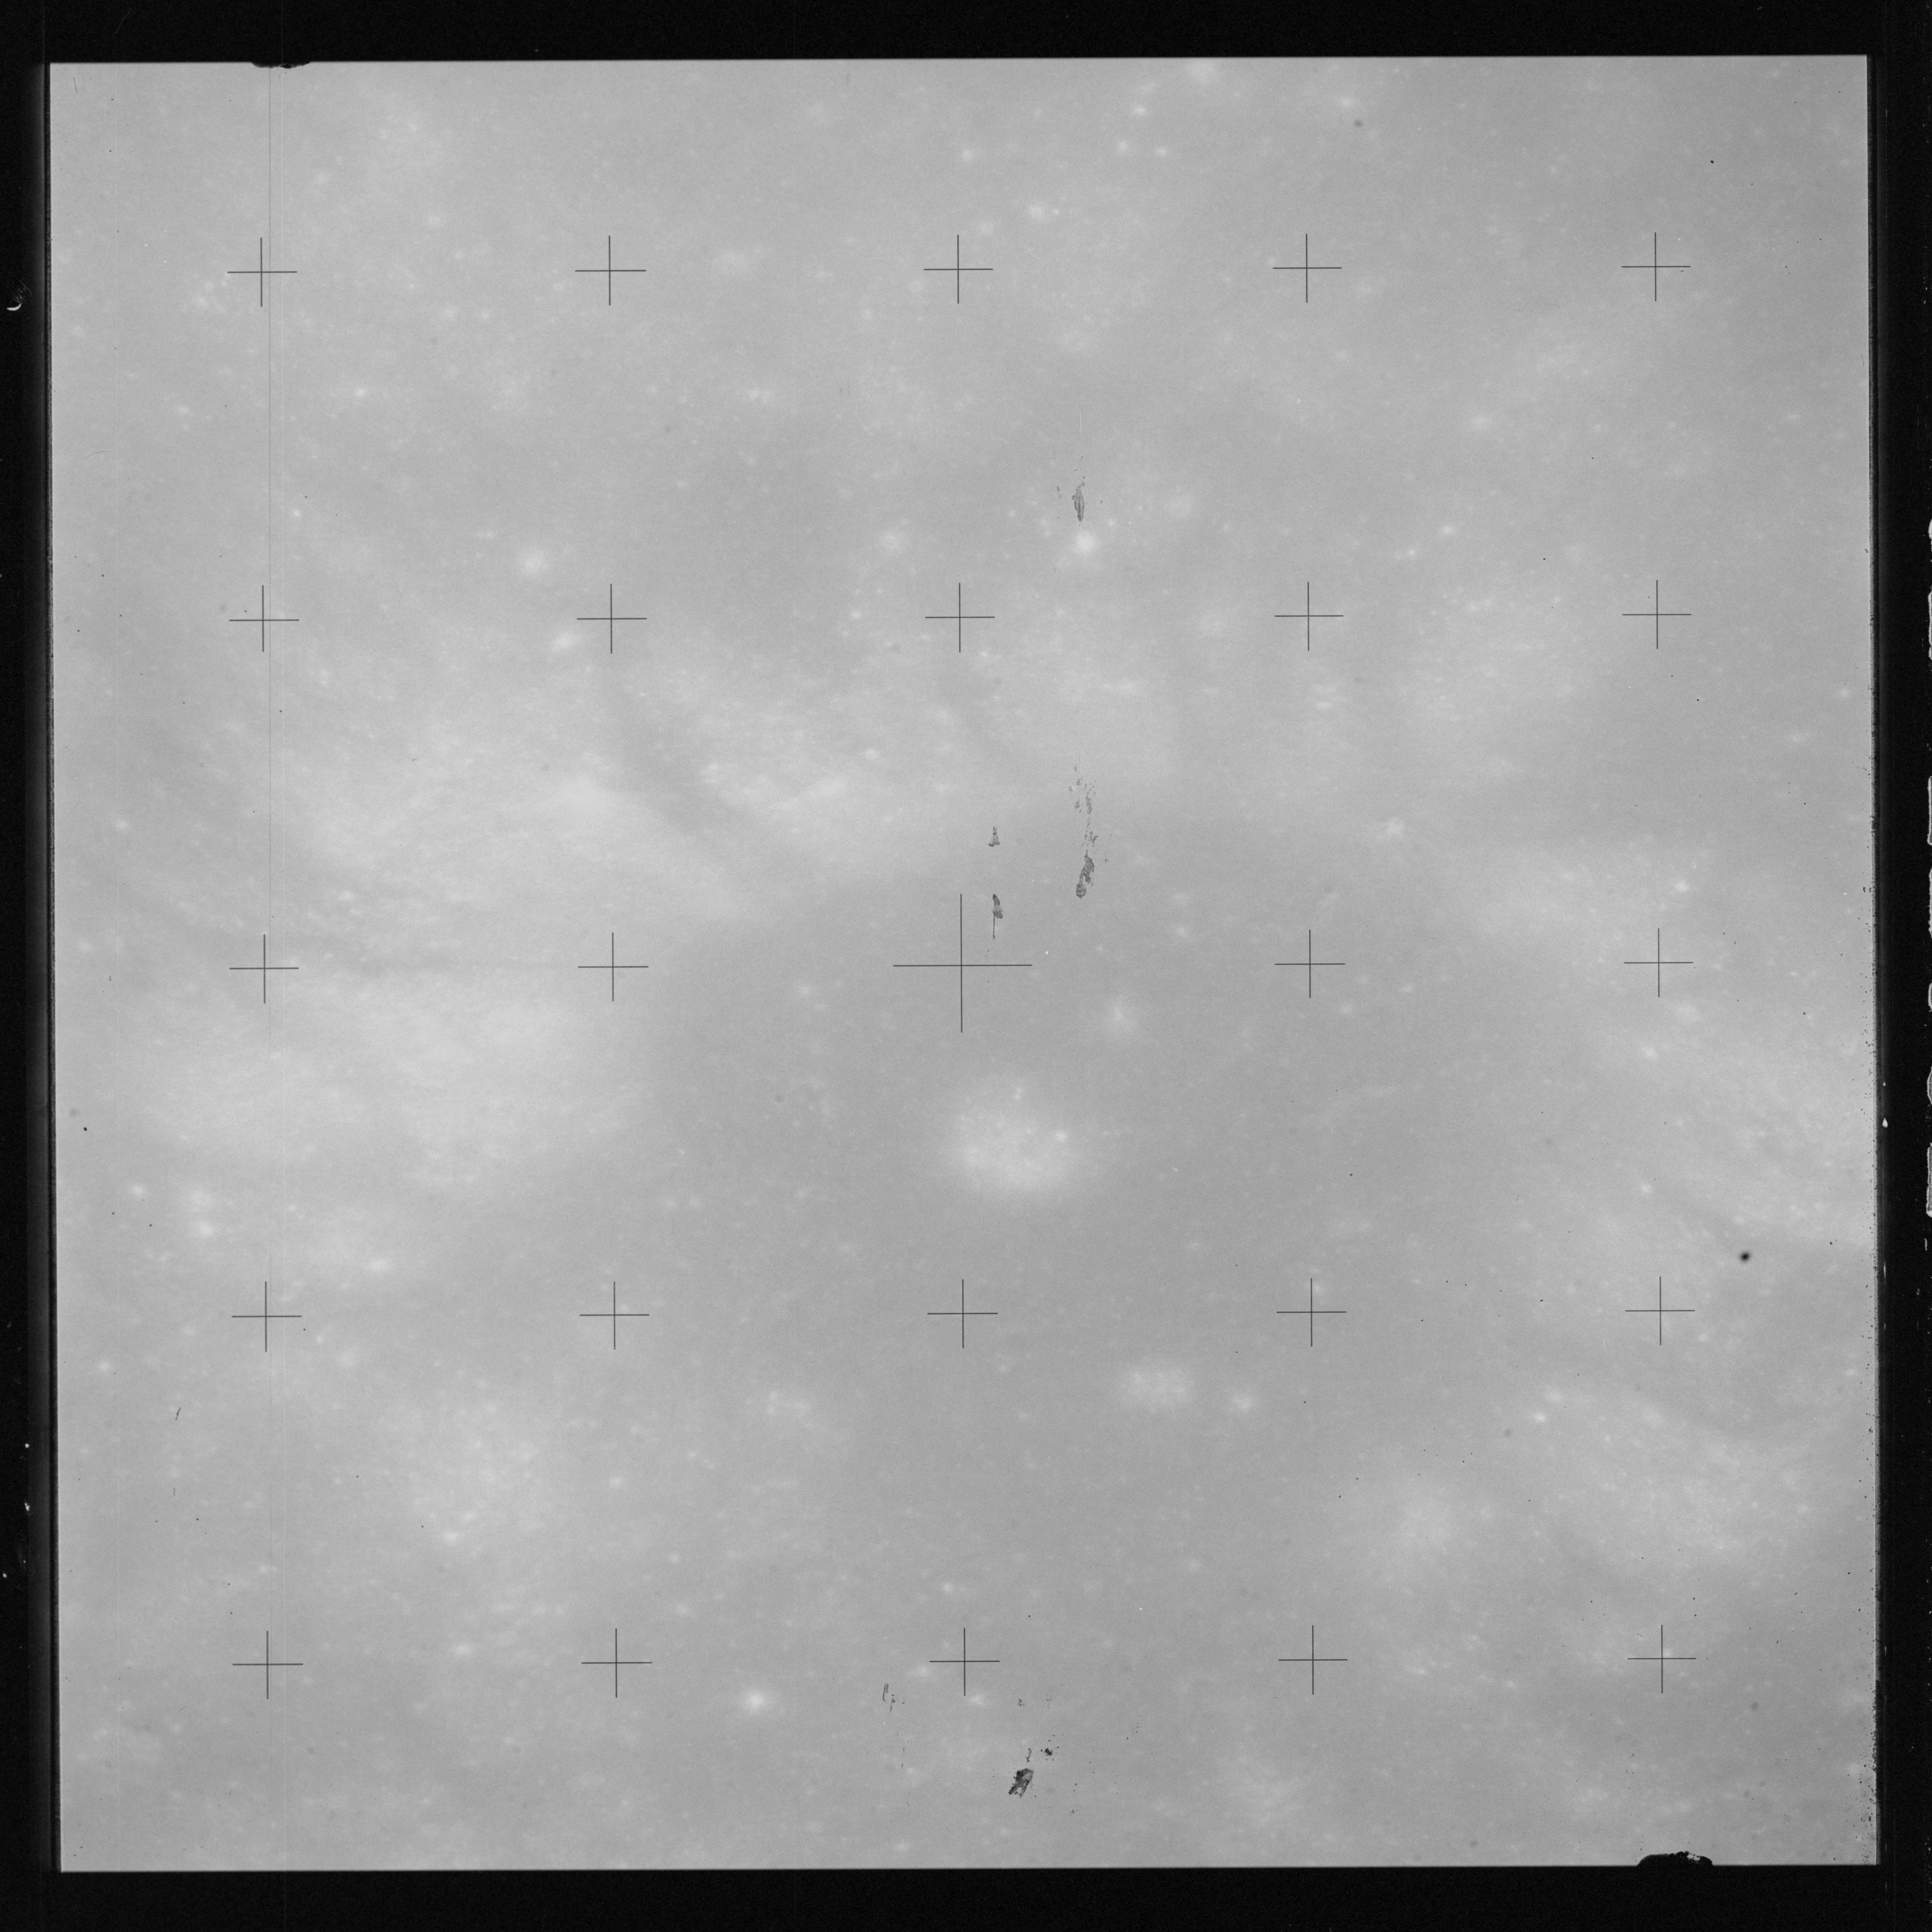
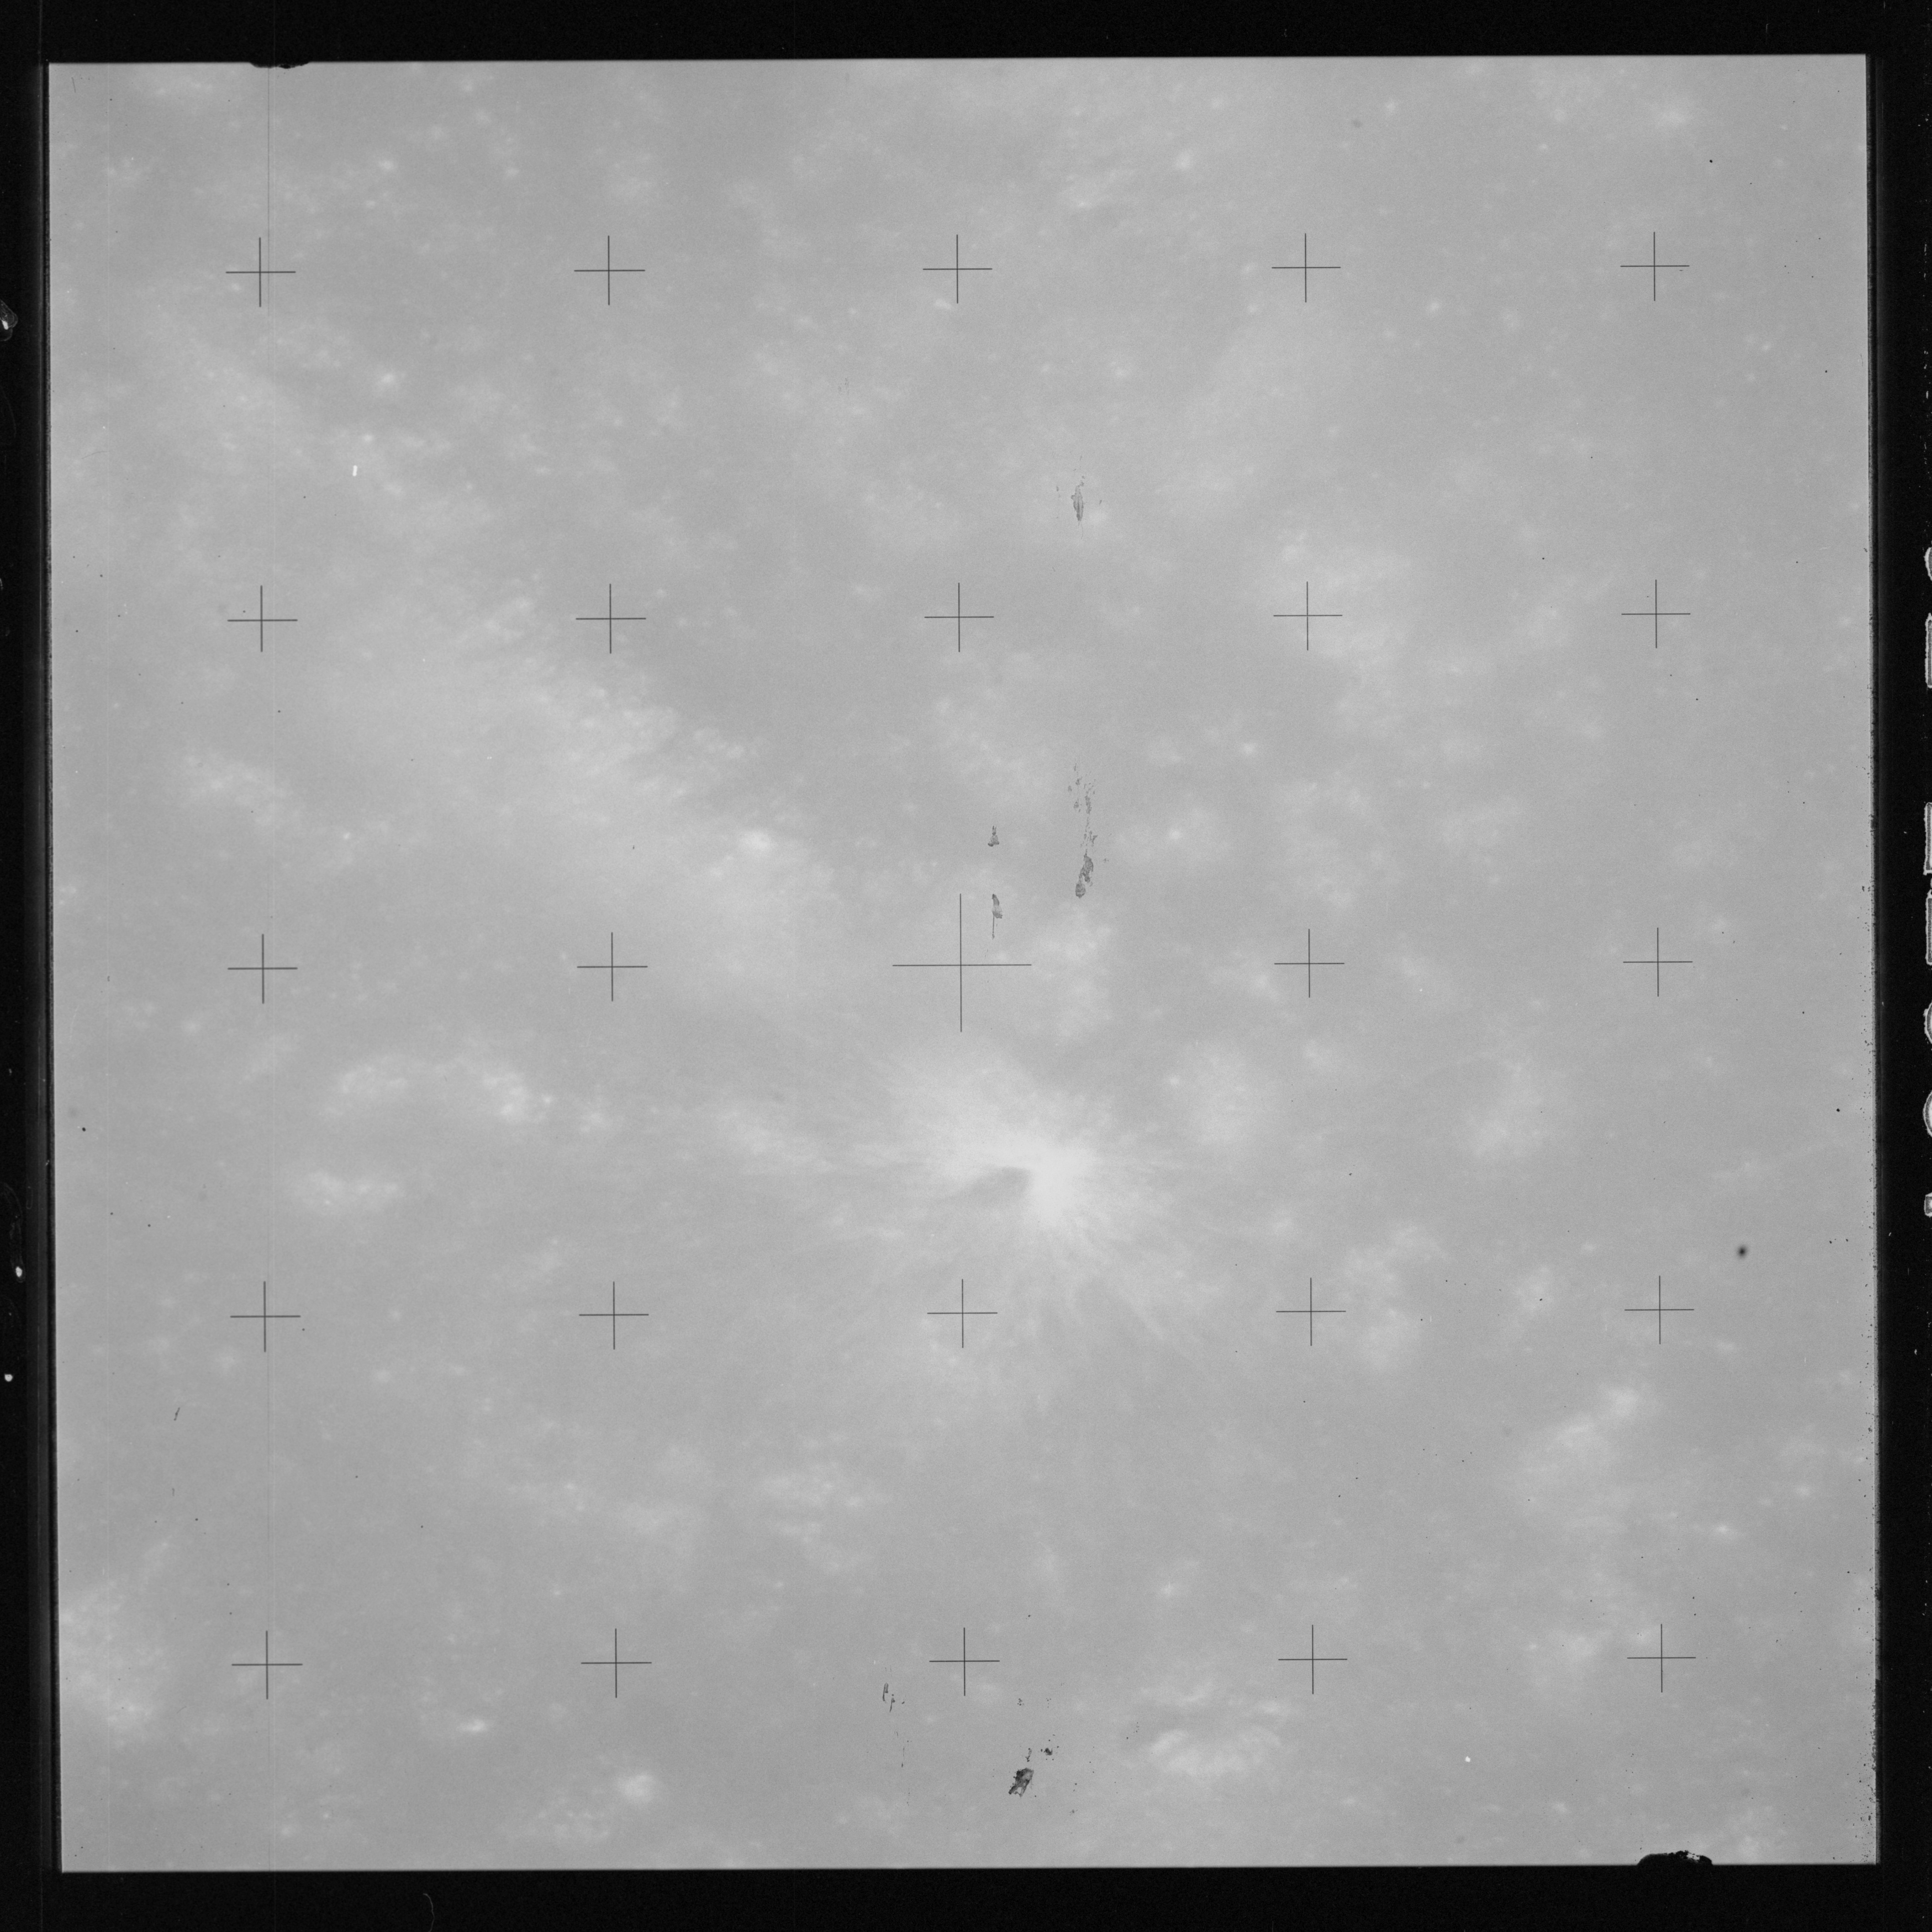
The last in the solar corona series, AS15-98-13385, appears to have been taken after the first sliver of the Sun has appeared over the Moon's horizon.
AS15-98-13385 - Solar corona at 1/500th-second exposure - Image by NASA/Johnson Space Center via National Archives.
216:12:07 Scott (onboard): That's something [garble].
216:12:09 Irwin (onboard): [Garble]. Cycle one frame.
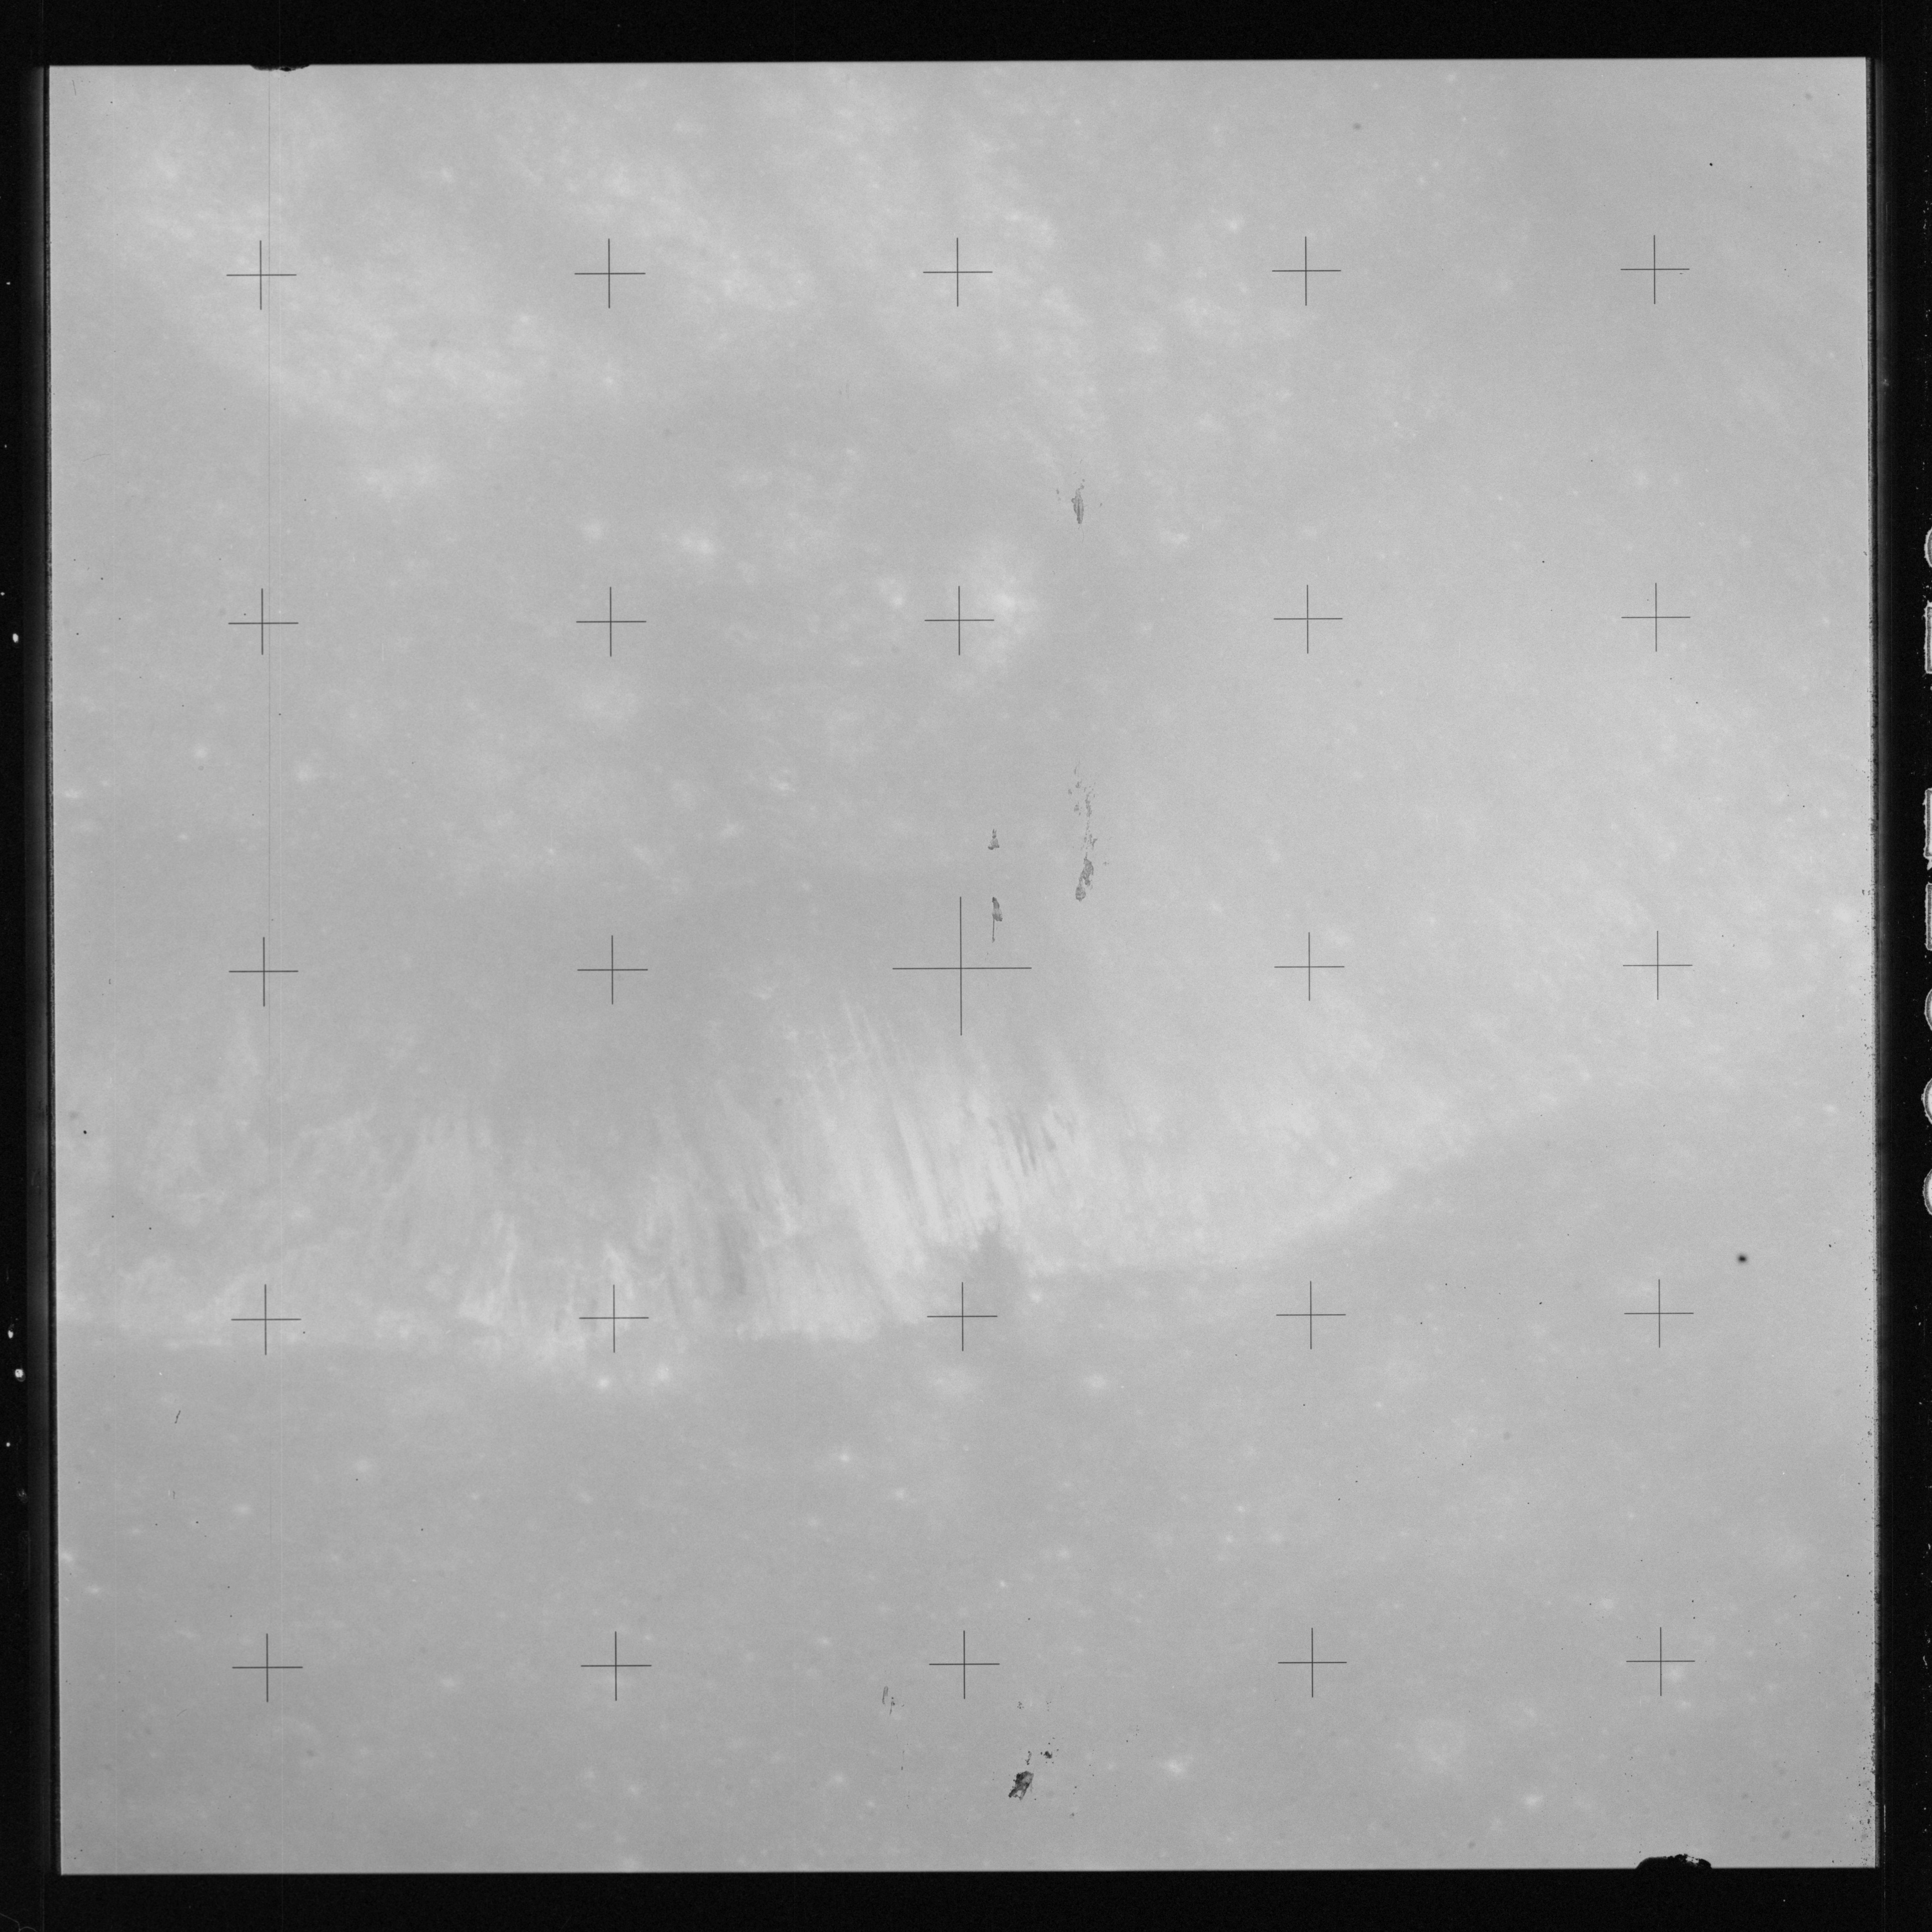
This extra frame would appear to be AS15-98-13386 which, as is to be expected, is completely blank.
AS15-98-13386 - Blank frame - Image by NASA/Johnson Space Center via National Archives.
216:12:11 Scott (onboard): Okay [laughter]. Boy, I love stuff like that.
216:12:19 Worden (onboard): Now that's pretty spectacular.
216:12:21 Scott (onboard): It sure is. That's just right between the eyeballs.
216:12:23 Worden (onboard): Yes. You don't expect it. Oh, yes! Okay. Okay, lift the ... away. Oh, we got - we got a little time. No - there's no big rush.
216:12:46 Irwin (onboard): Okay, remove DAC from window, cover lens, and run at 24 frames per second.
216:12:49 Worden (onboard): Yes.
216:12:51 Irwin (onboard): Shutter speed, 1/500th, for 2 seconds.
216:12:54 Worden (onboard): Yes.
216:13:04 Irwin (onboard): Cover lens?
216:13:05 Worden (onboard): Yes.
216:13:12 Irwin (onboard): CMC Mode, Auto. Record the mag.
216:13:25 Worden (onboard): Okay, we're down to about - oh, 60 percent of the frame, I guess.
216:13:33 Irwin (onboard): Sixty percent?
216:13:34 Worden (onboard): Sixty percent of the MAG, yes.
216:13:35 Irwin (onboard): How about your frame?
216:13:46 Worden (onboard): 100.
216:13:49 Irwin (onboard): Okay.
216:13:56 Worden (onboard): Yes.
216:13:58 Irwin (onboard): [Garble] what?
216:14:00 Worden (onboard): Now, which one you want to use? Use this one?
216:14:27 Worden (onboard): Okay, we got 1/125th, got...
216:14:29 Irwin (onboard): What's your mag number? Need that.
216:14:31 Worden (onboard): [Garble]. Yes.
216:15:18 Worden (onboard): Okay [garble] get it up there and get it going, we'll be all right. [Garble]. Why don't you run one across this way? Now hold it.
216:15:58 Worden (onboard): Okay, I want back [garble]. Yes, that ought to do it. Run this one down through here.
216:16:05 Irwin (onboard): [Garble].
216:16:08 Worden (onboard): What?
216:16:09 Irwin (onboard): I don't think you guys'll make it, frankly.
216:16:11 Worden (onboard): No (grunt).
216:16:35 Worden (onboard): [Garble] back it off. Oh, yes, that's right. We don't move now, anyway.
216:16:52 Worden (onboard): Okay.
216:17:10 Irwin (onboard): [Garble].
216:17:15 Worden (onboard): Did you let the [garble] down?
216:17:18 Scott (onboard): No.
216:17:21 Irwin (onboard): [Garble]...
216:17:22 Worden (onboard): Yes.
216:17:23 Irwin (onboard): ...[garble].
216:17:24 Worden (onboard): Huh! (Sigh) Okay.
216:17:44 Irwin (onboard): [Garble].
216:17:46 Worden (onboard): Yes, we got it. Is that what you got on there?
216:18:00 Scott (onboard): [Garble].
216:18:07 Worden (onboard): Rate's down.
216:18:13 Scott (onboard): [Garble].
216:18:17 Worden (onboard): Yes. That's - that's about right, Dave.
216:18:21 Scott (onboard): [Garble].
216:18:22 Worden (onboard): Huh?
216:18:24 Scott (onboard): [Garble].
216:18:35 Worden (onboard): Yes. Okay.
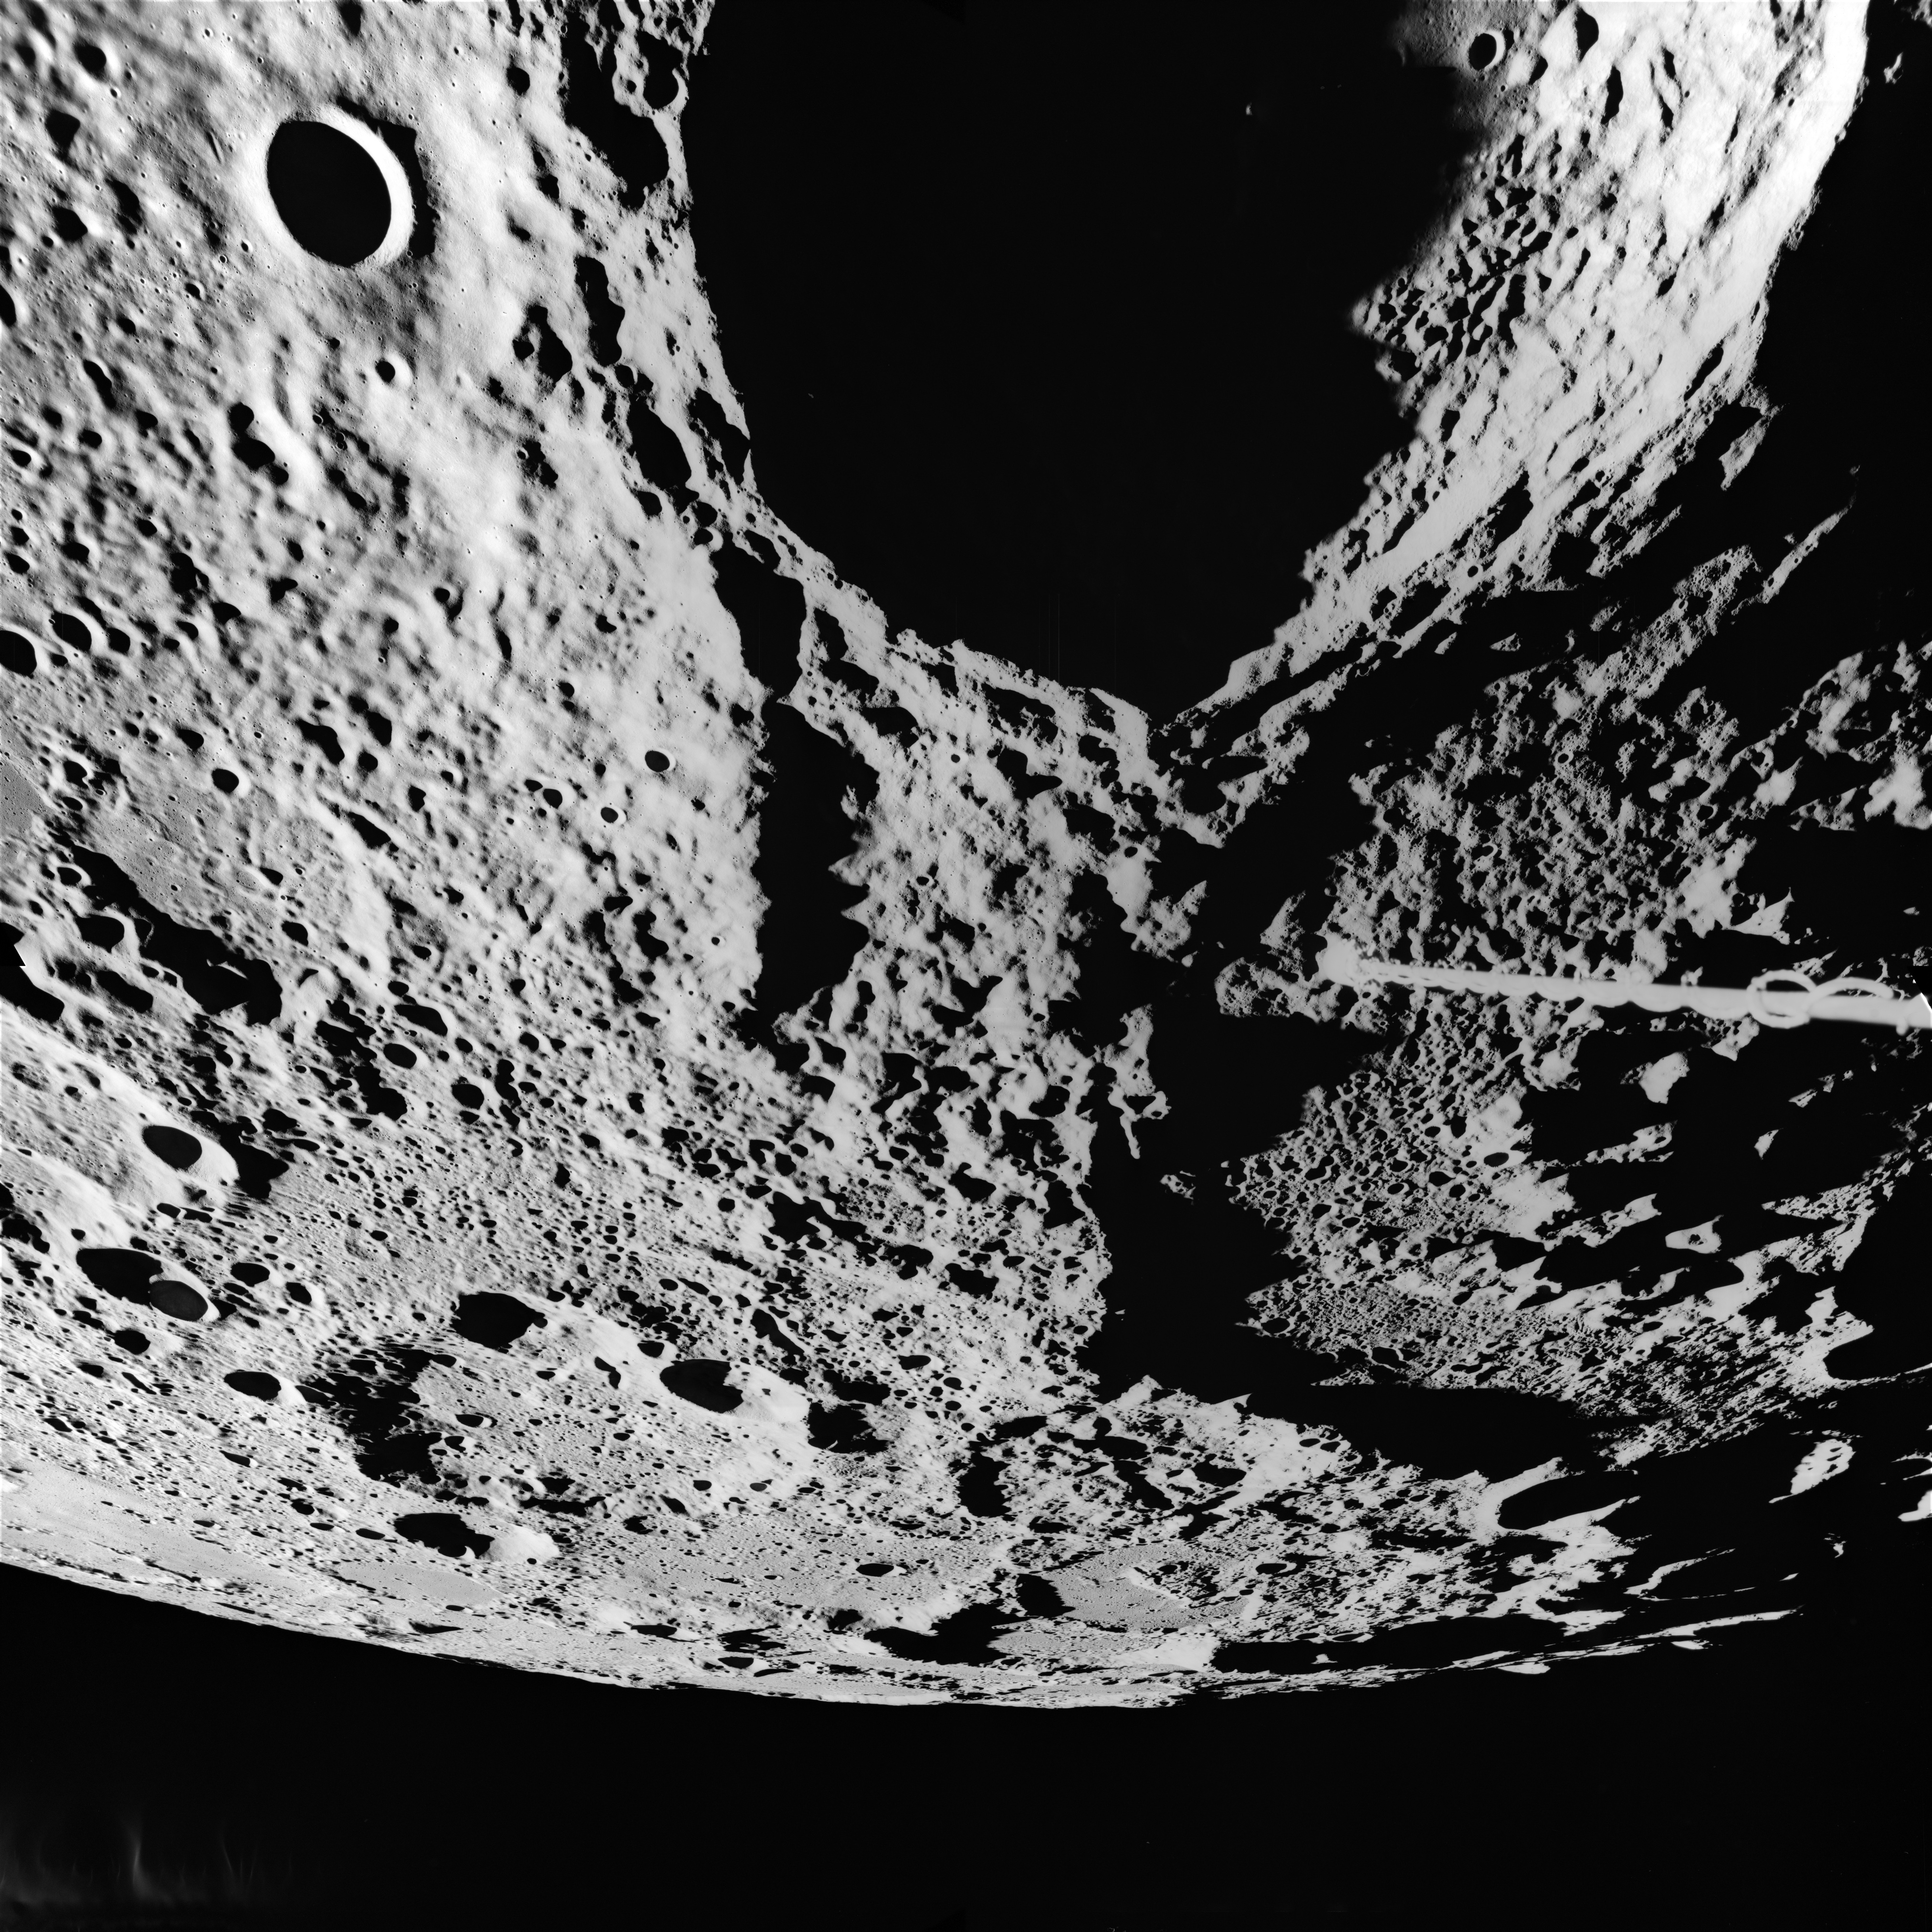
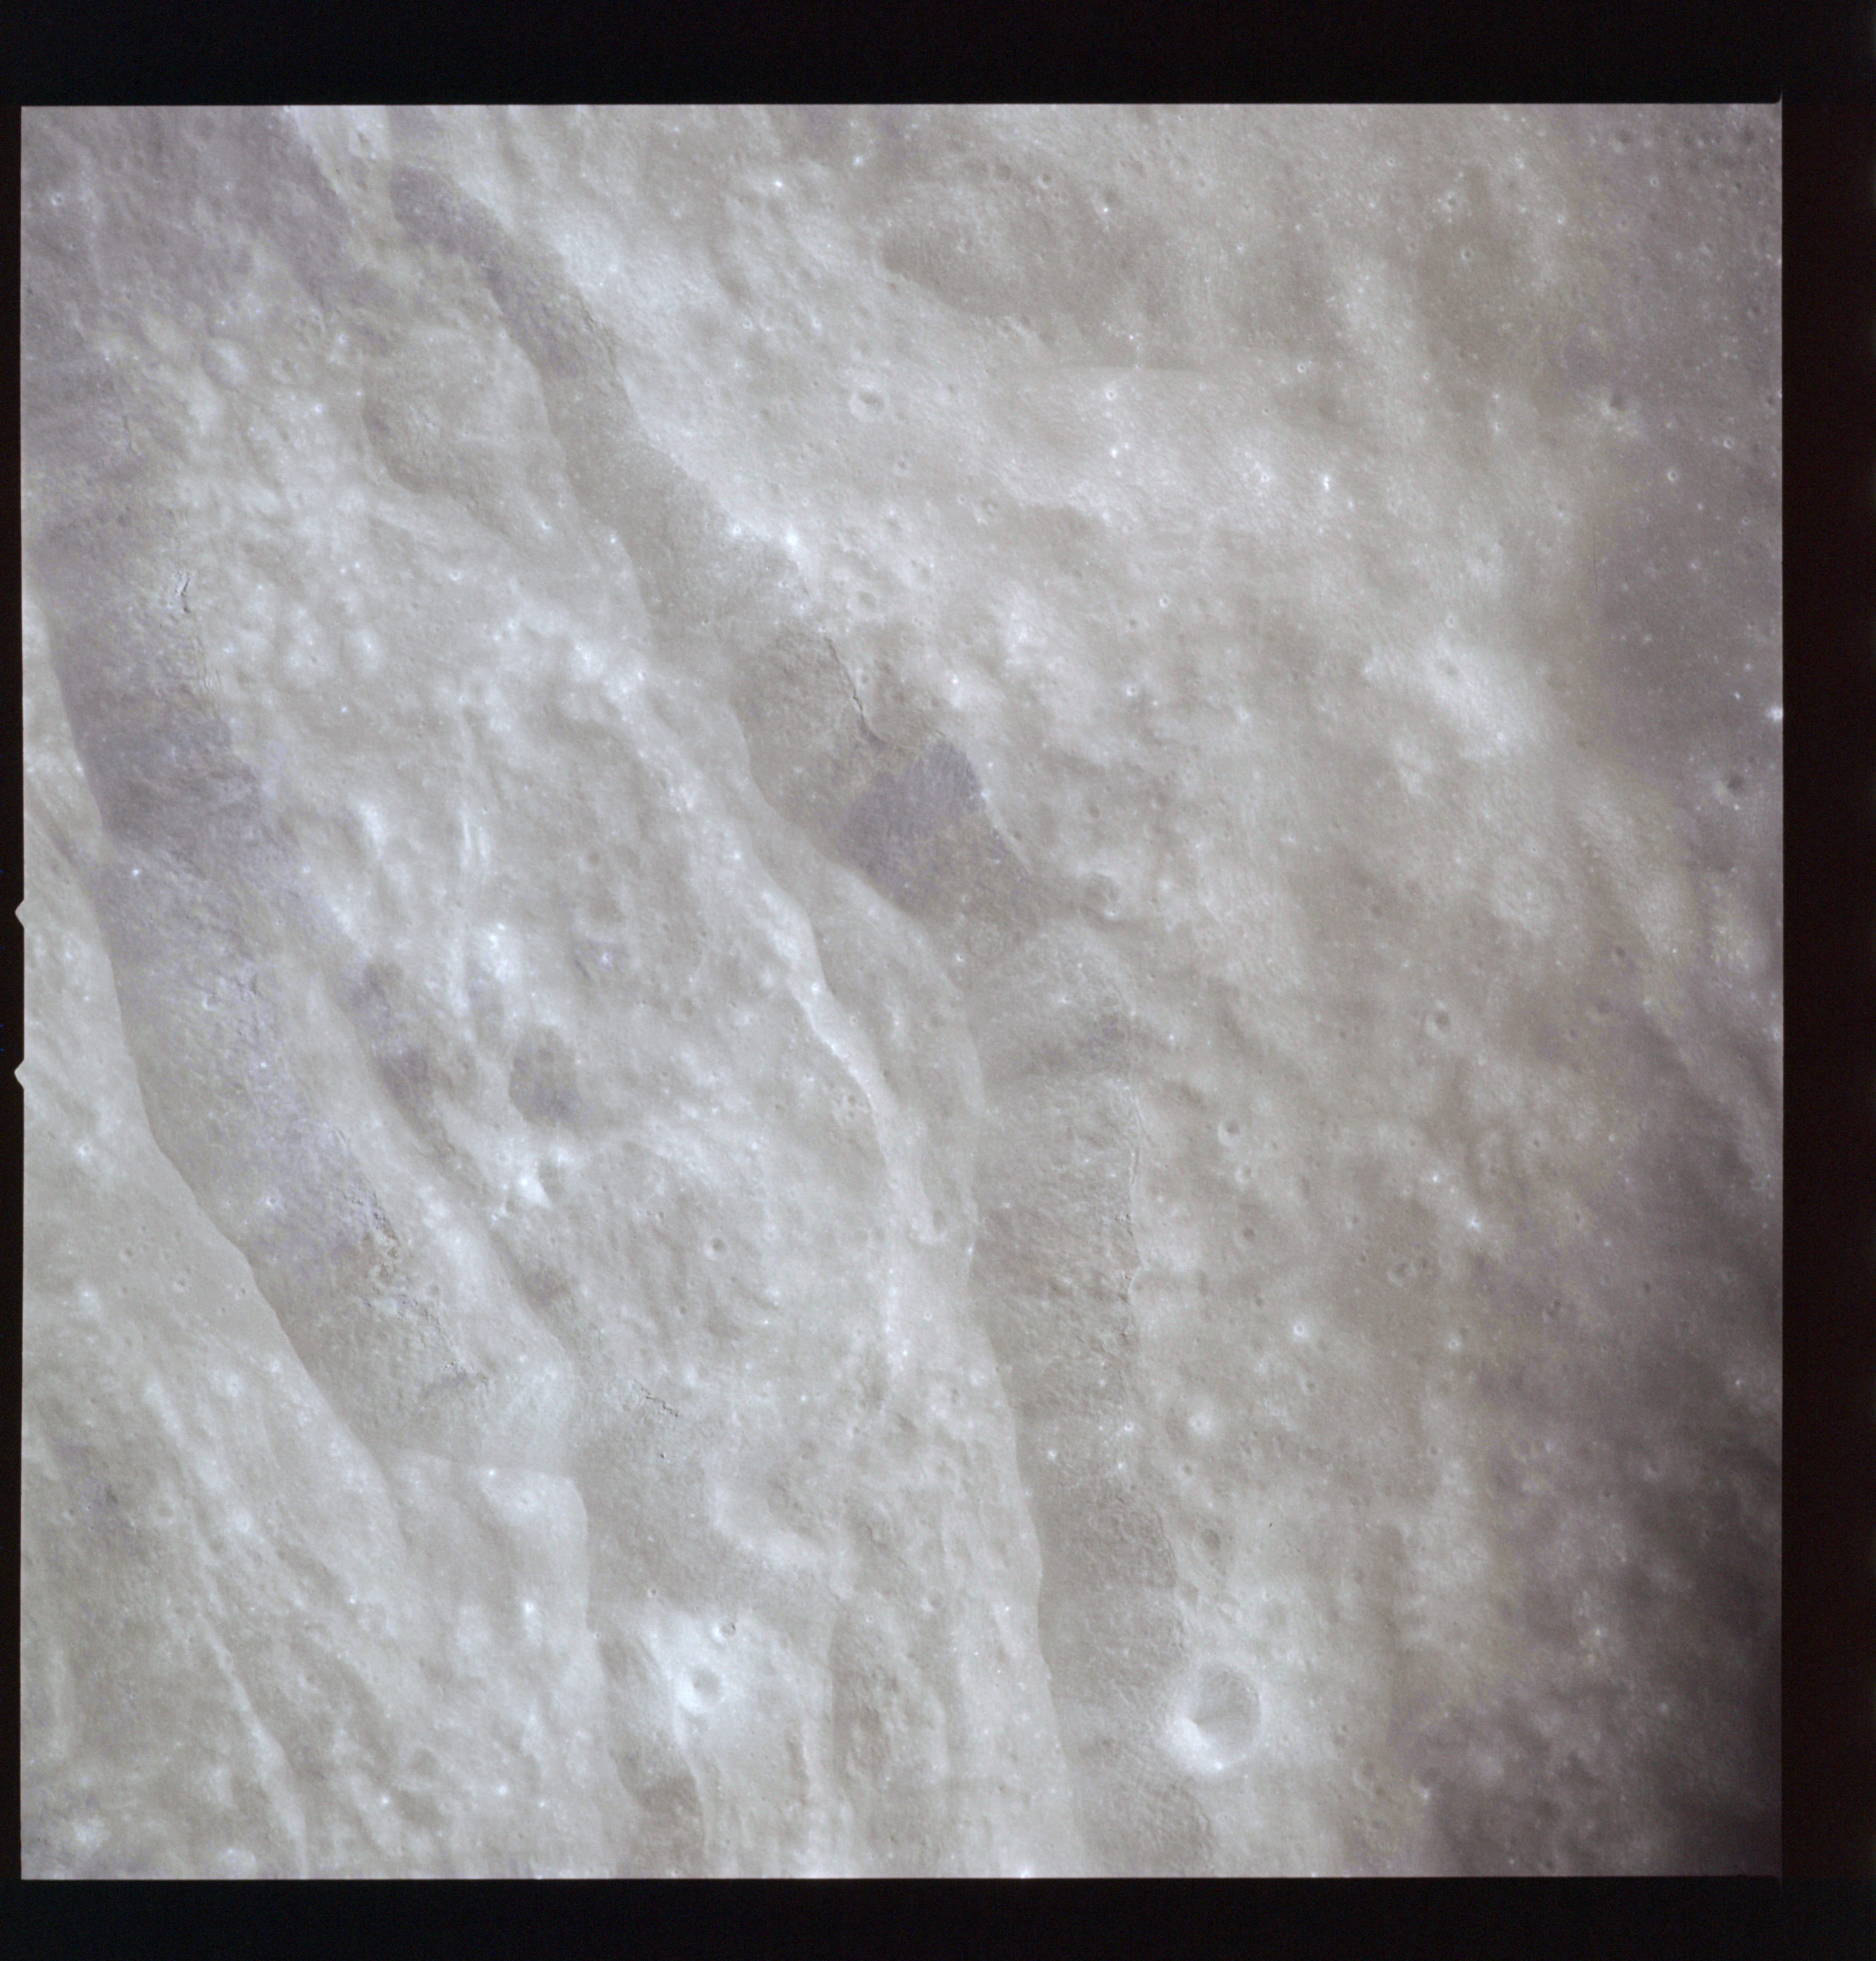
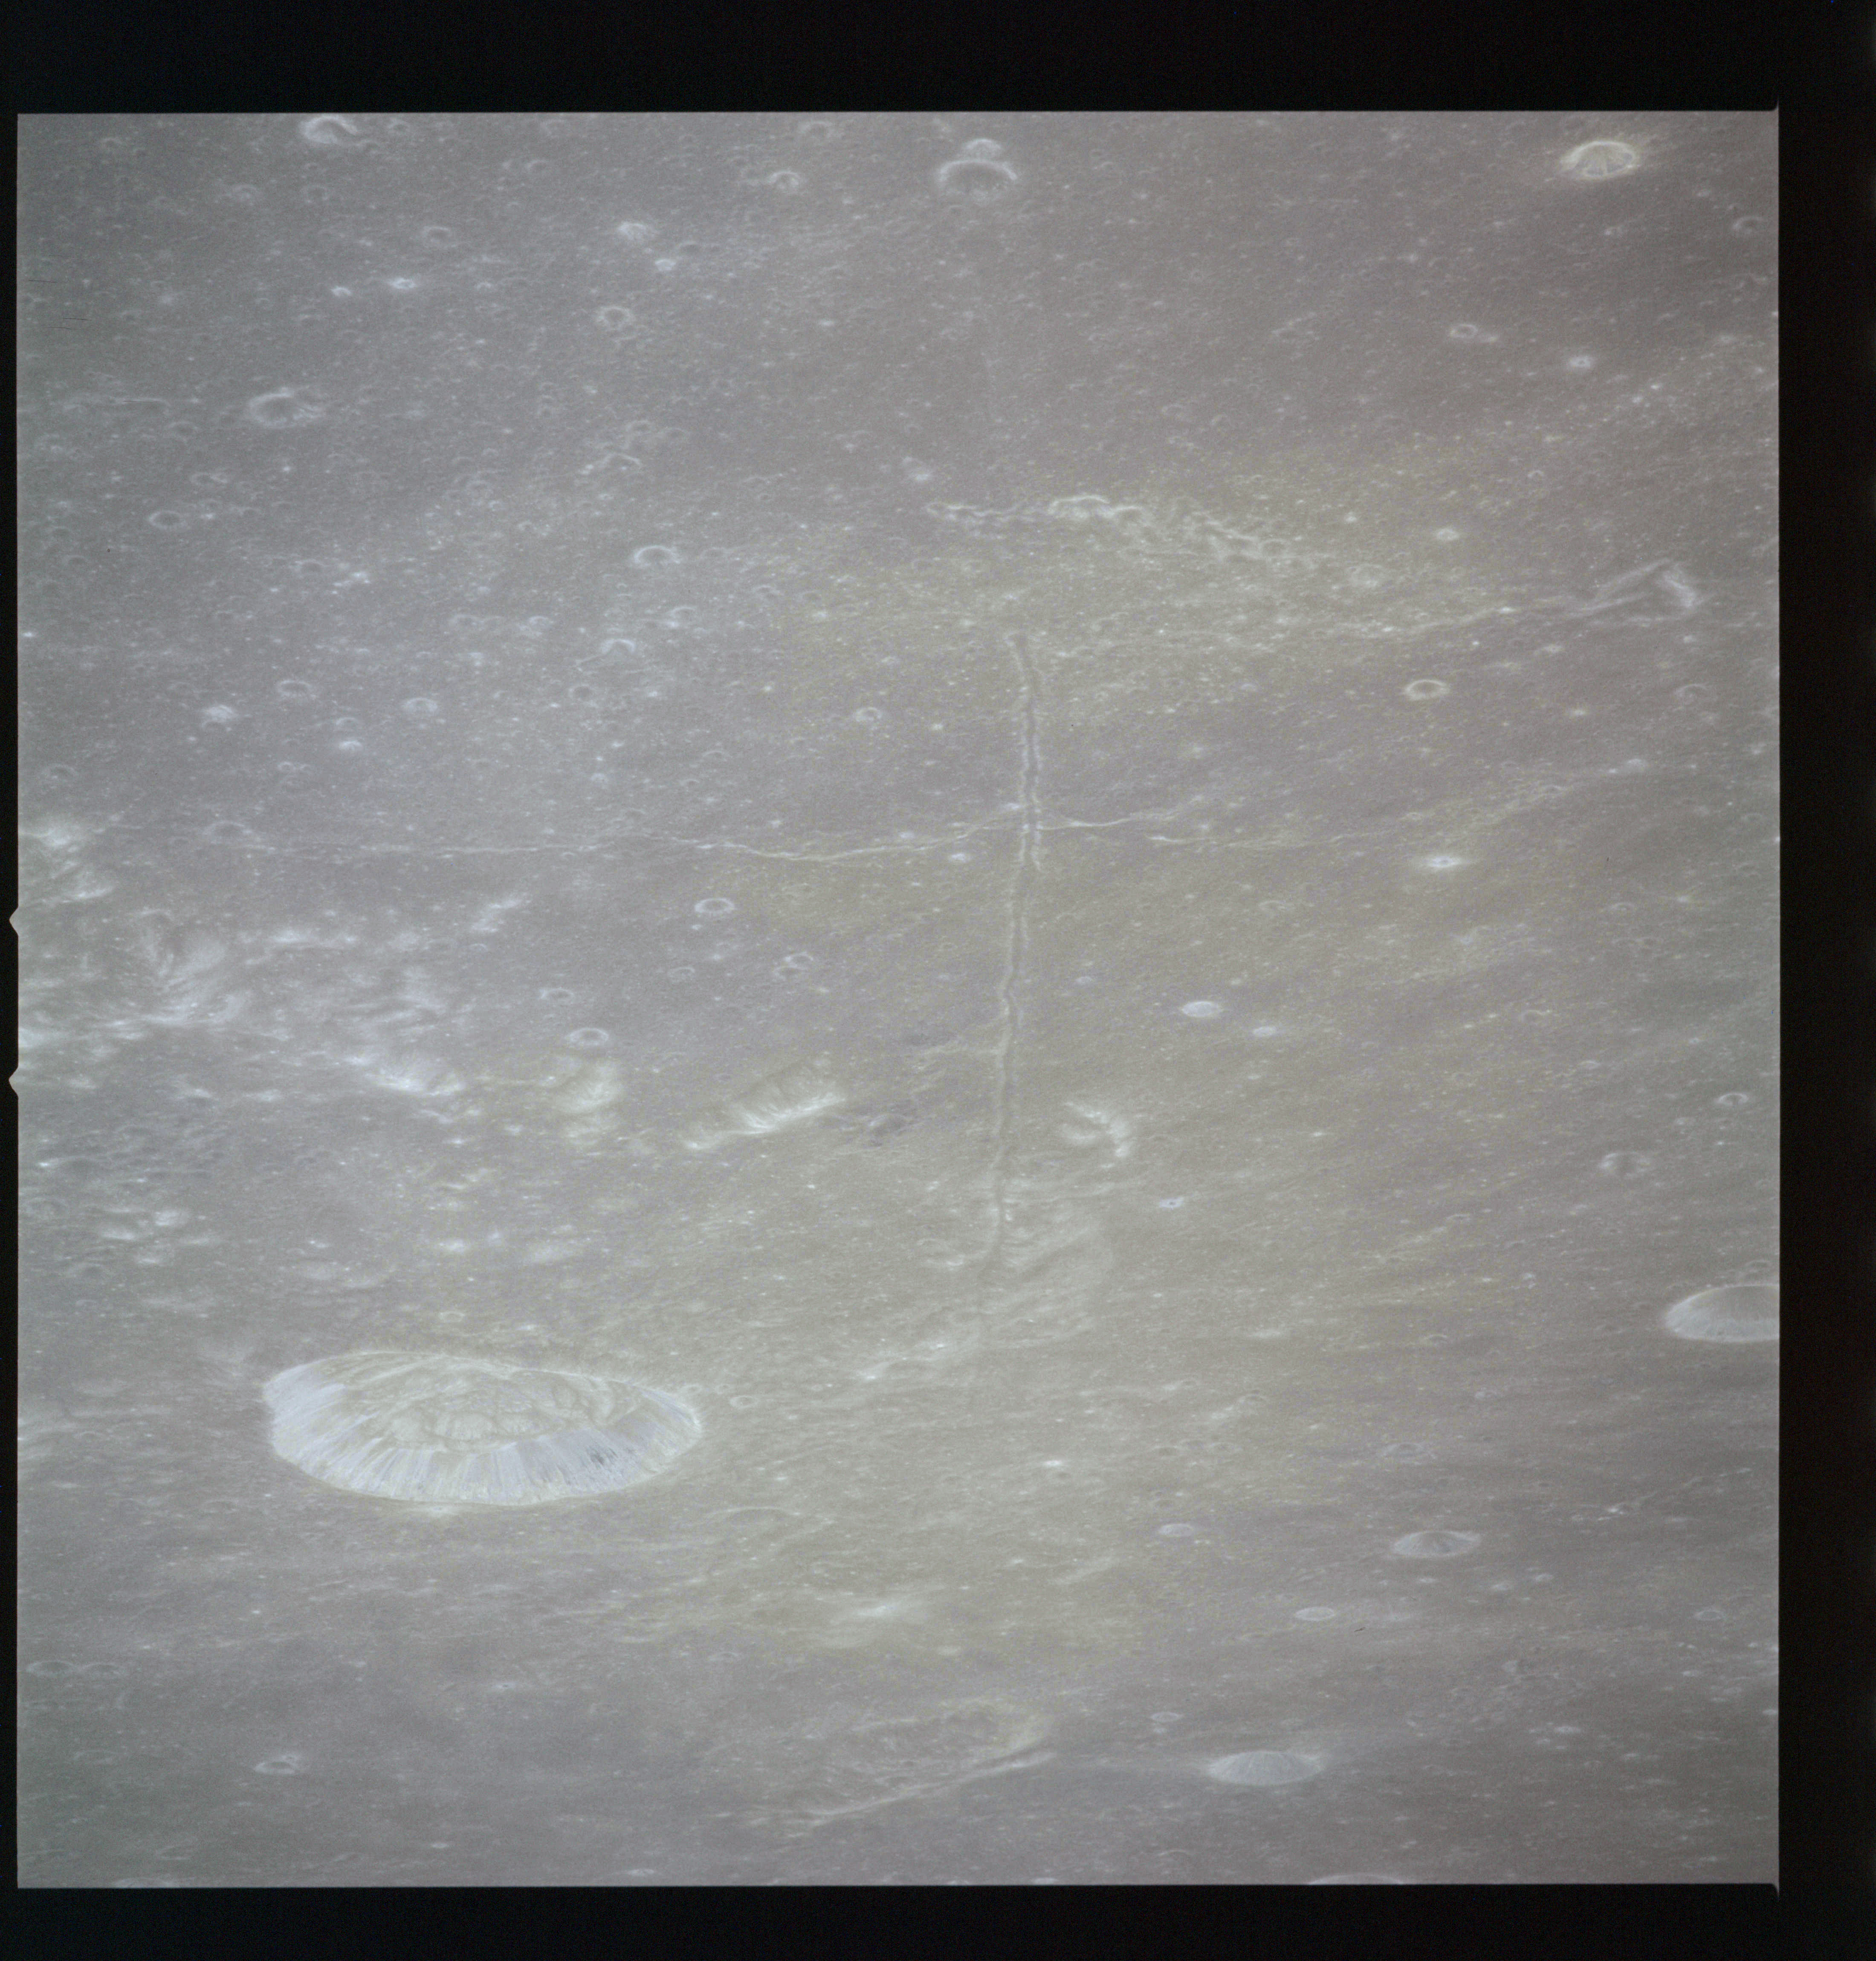
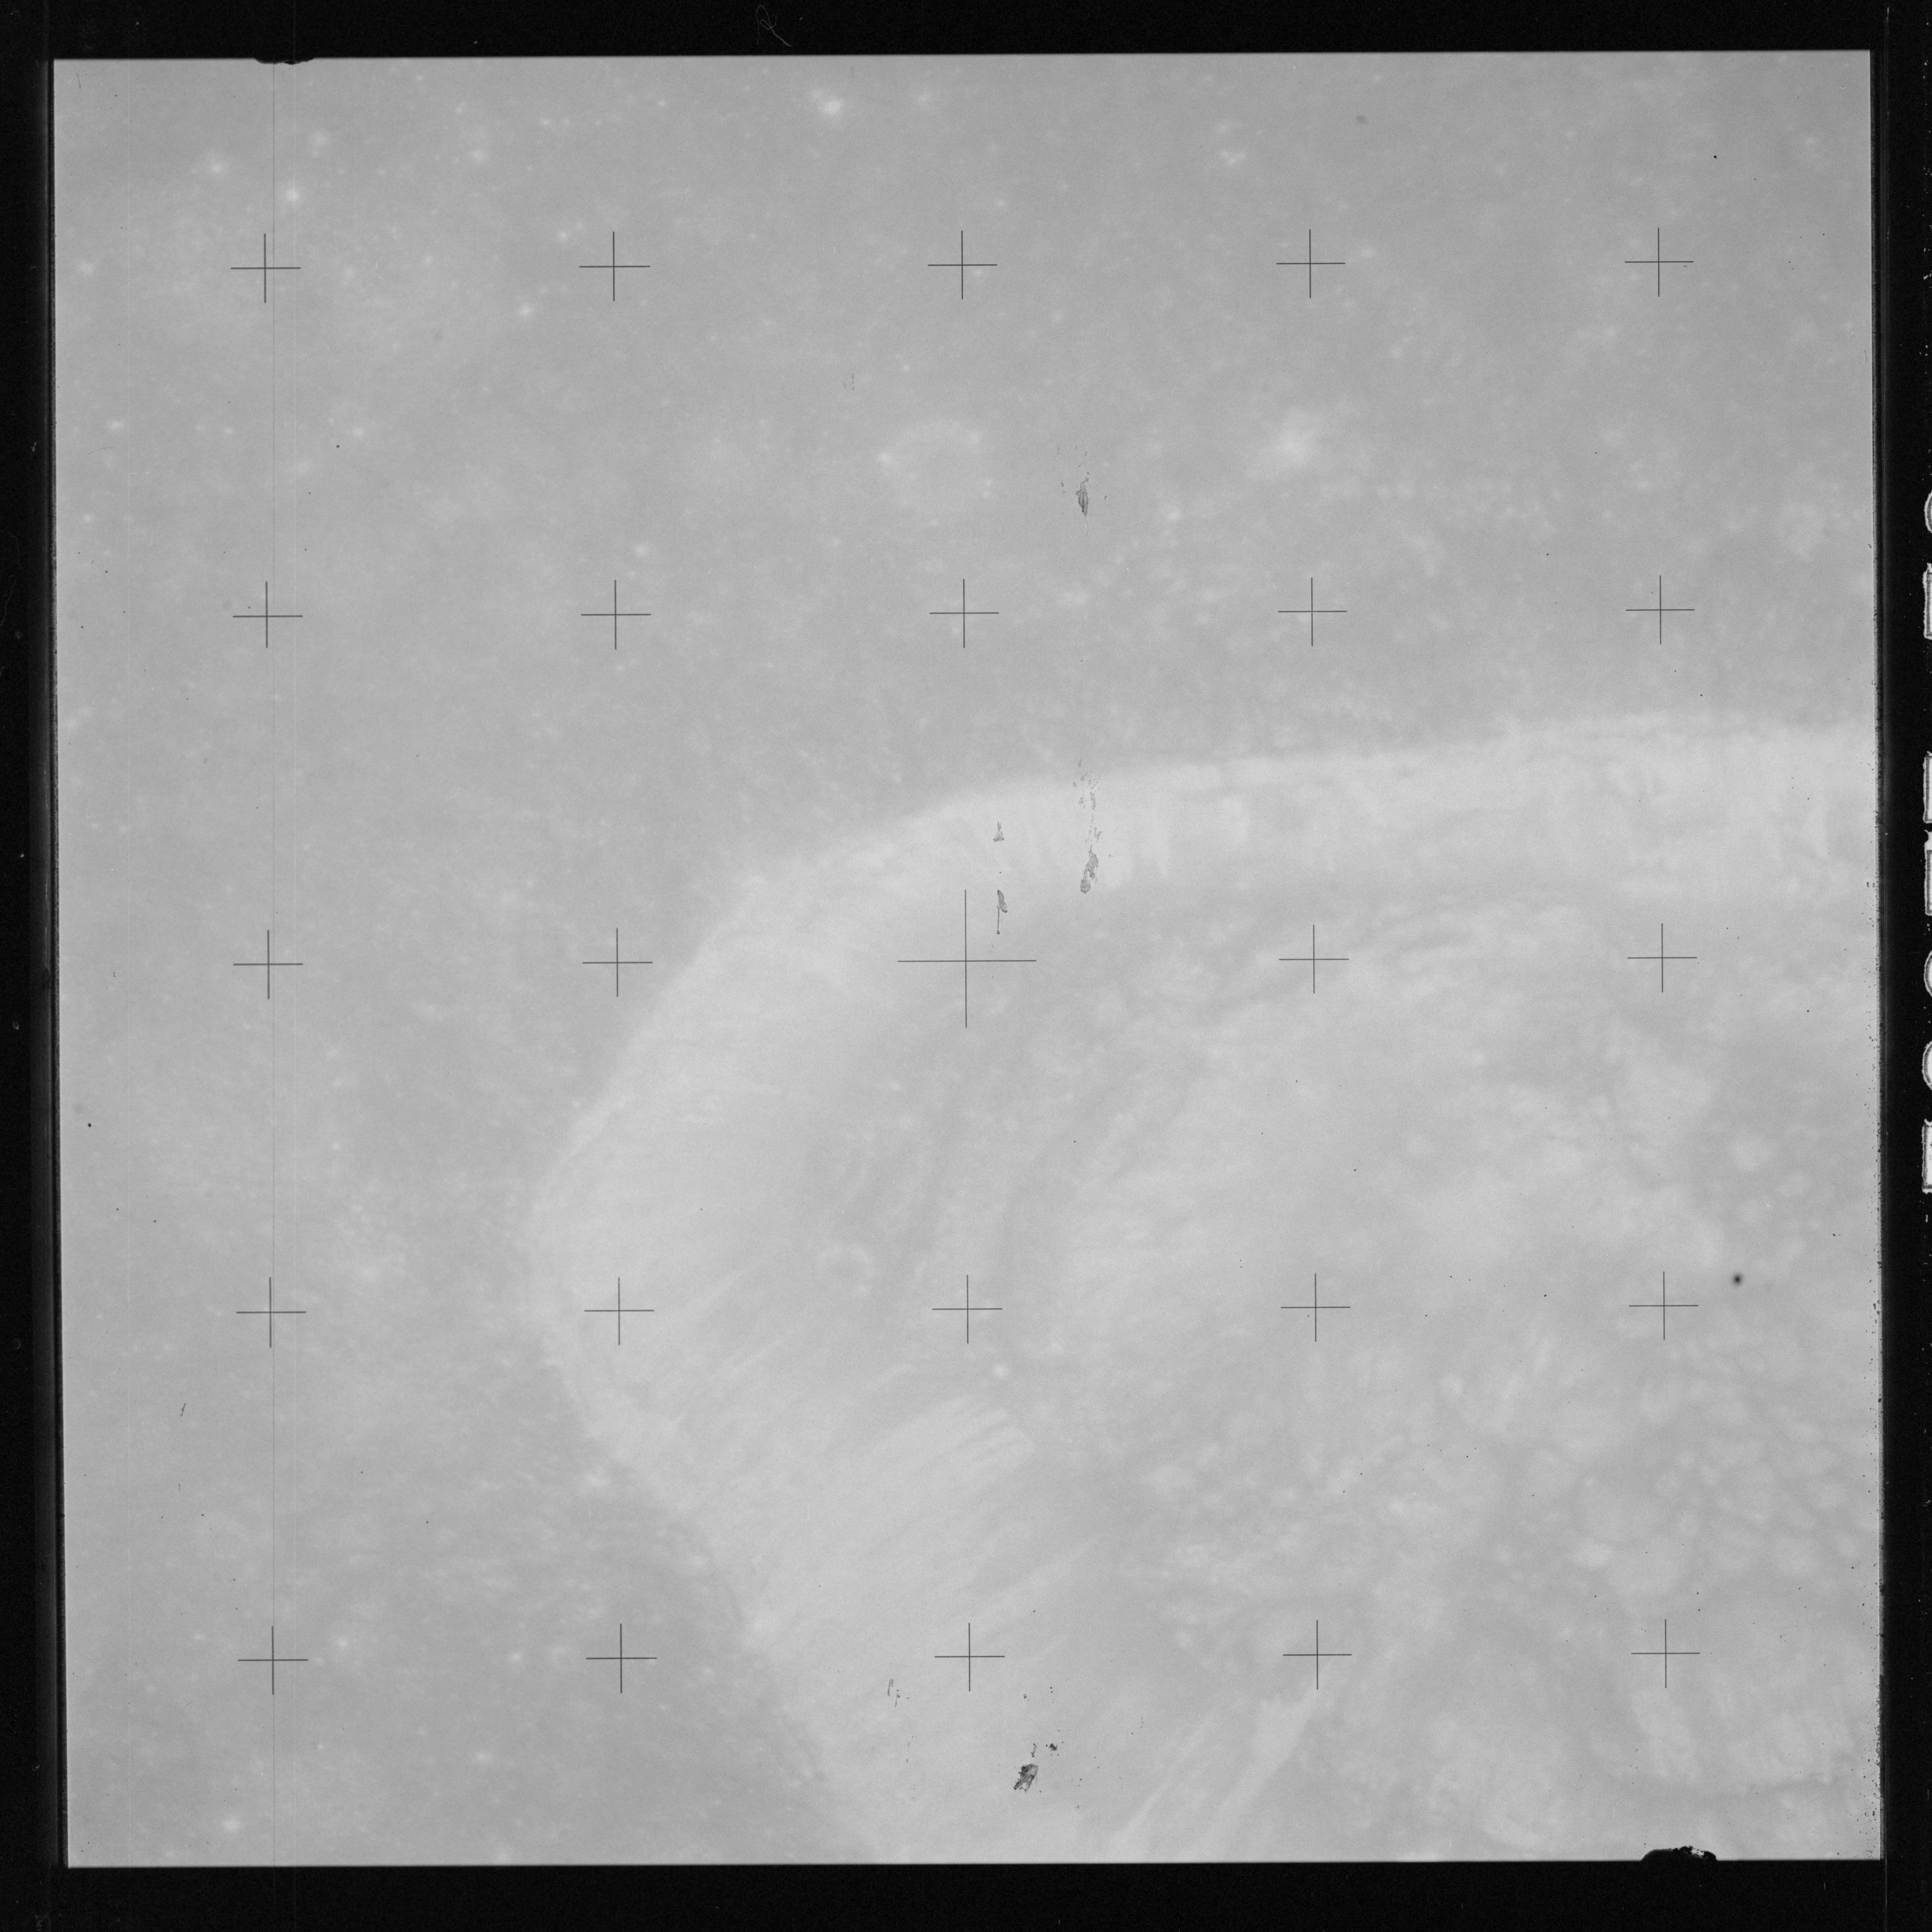
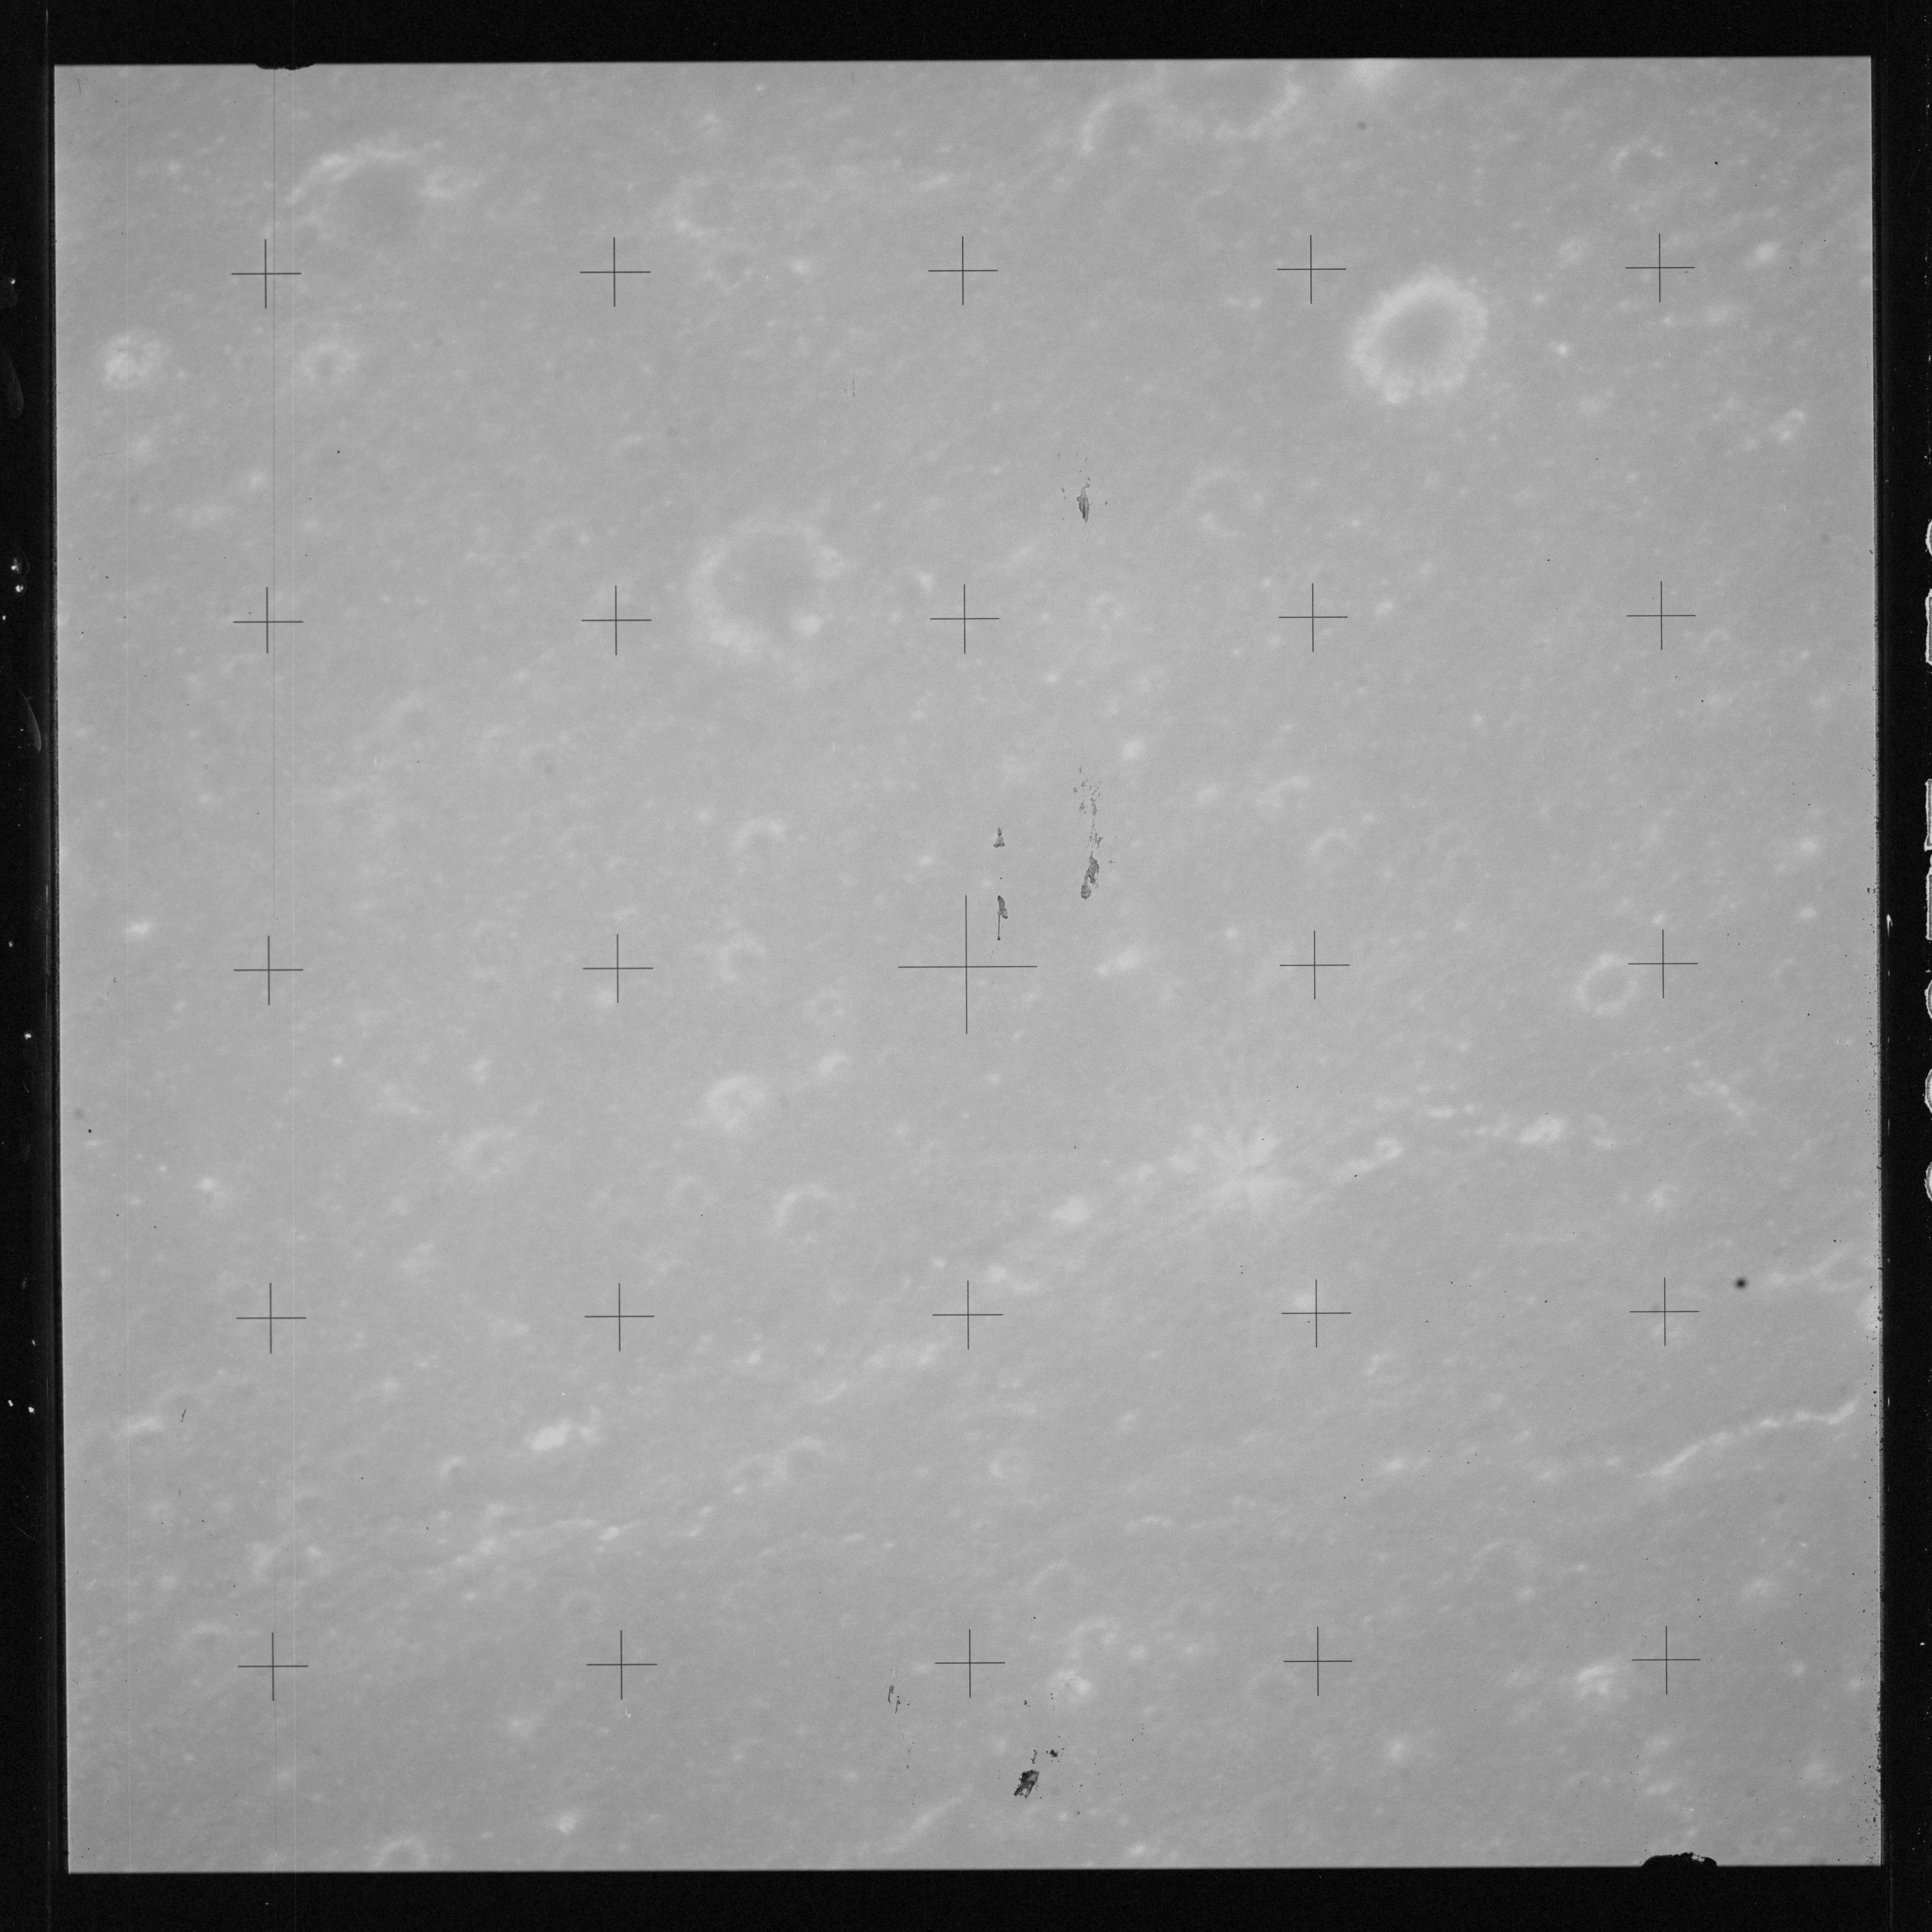
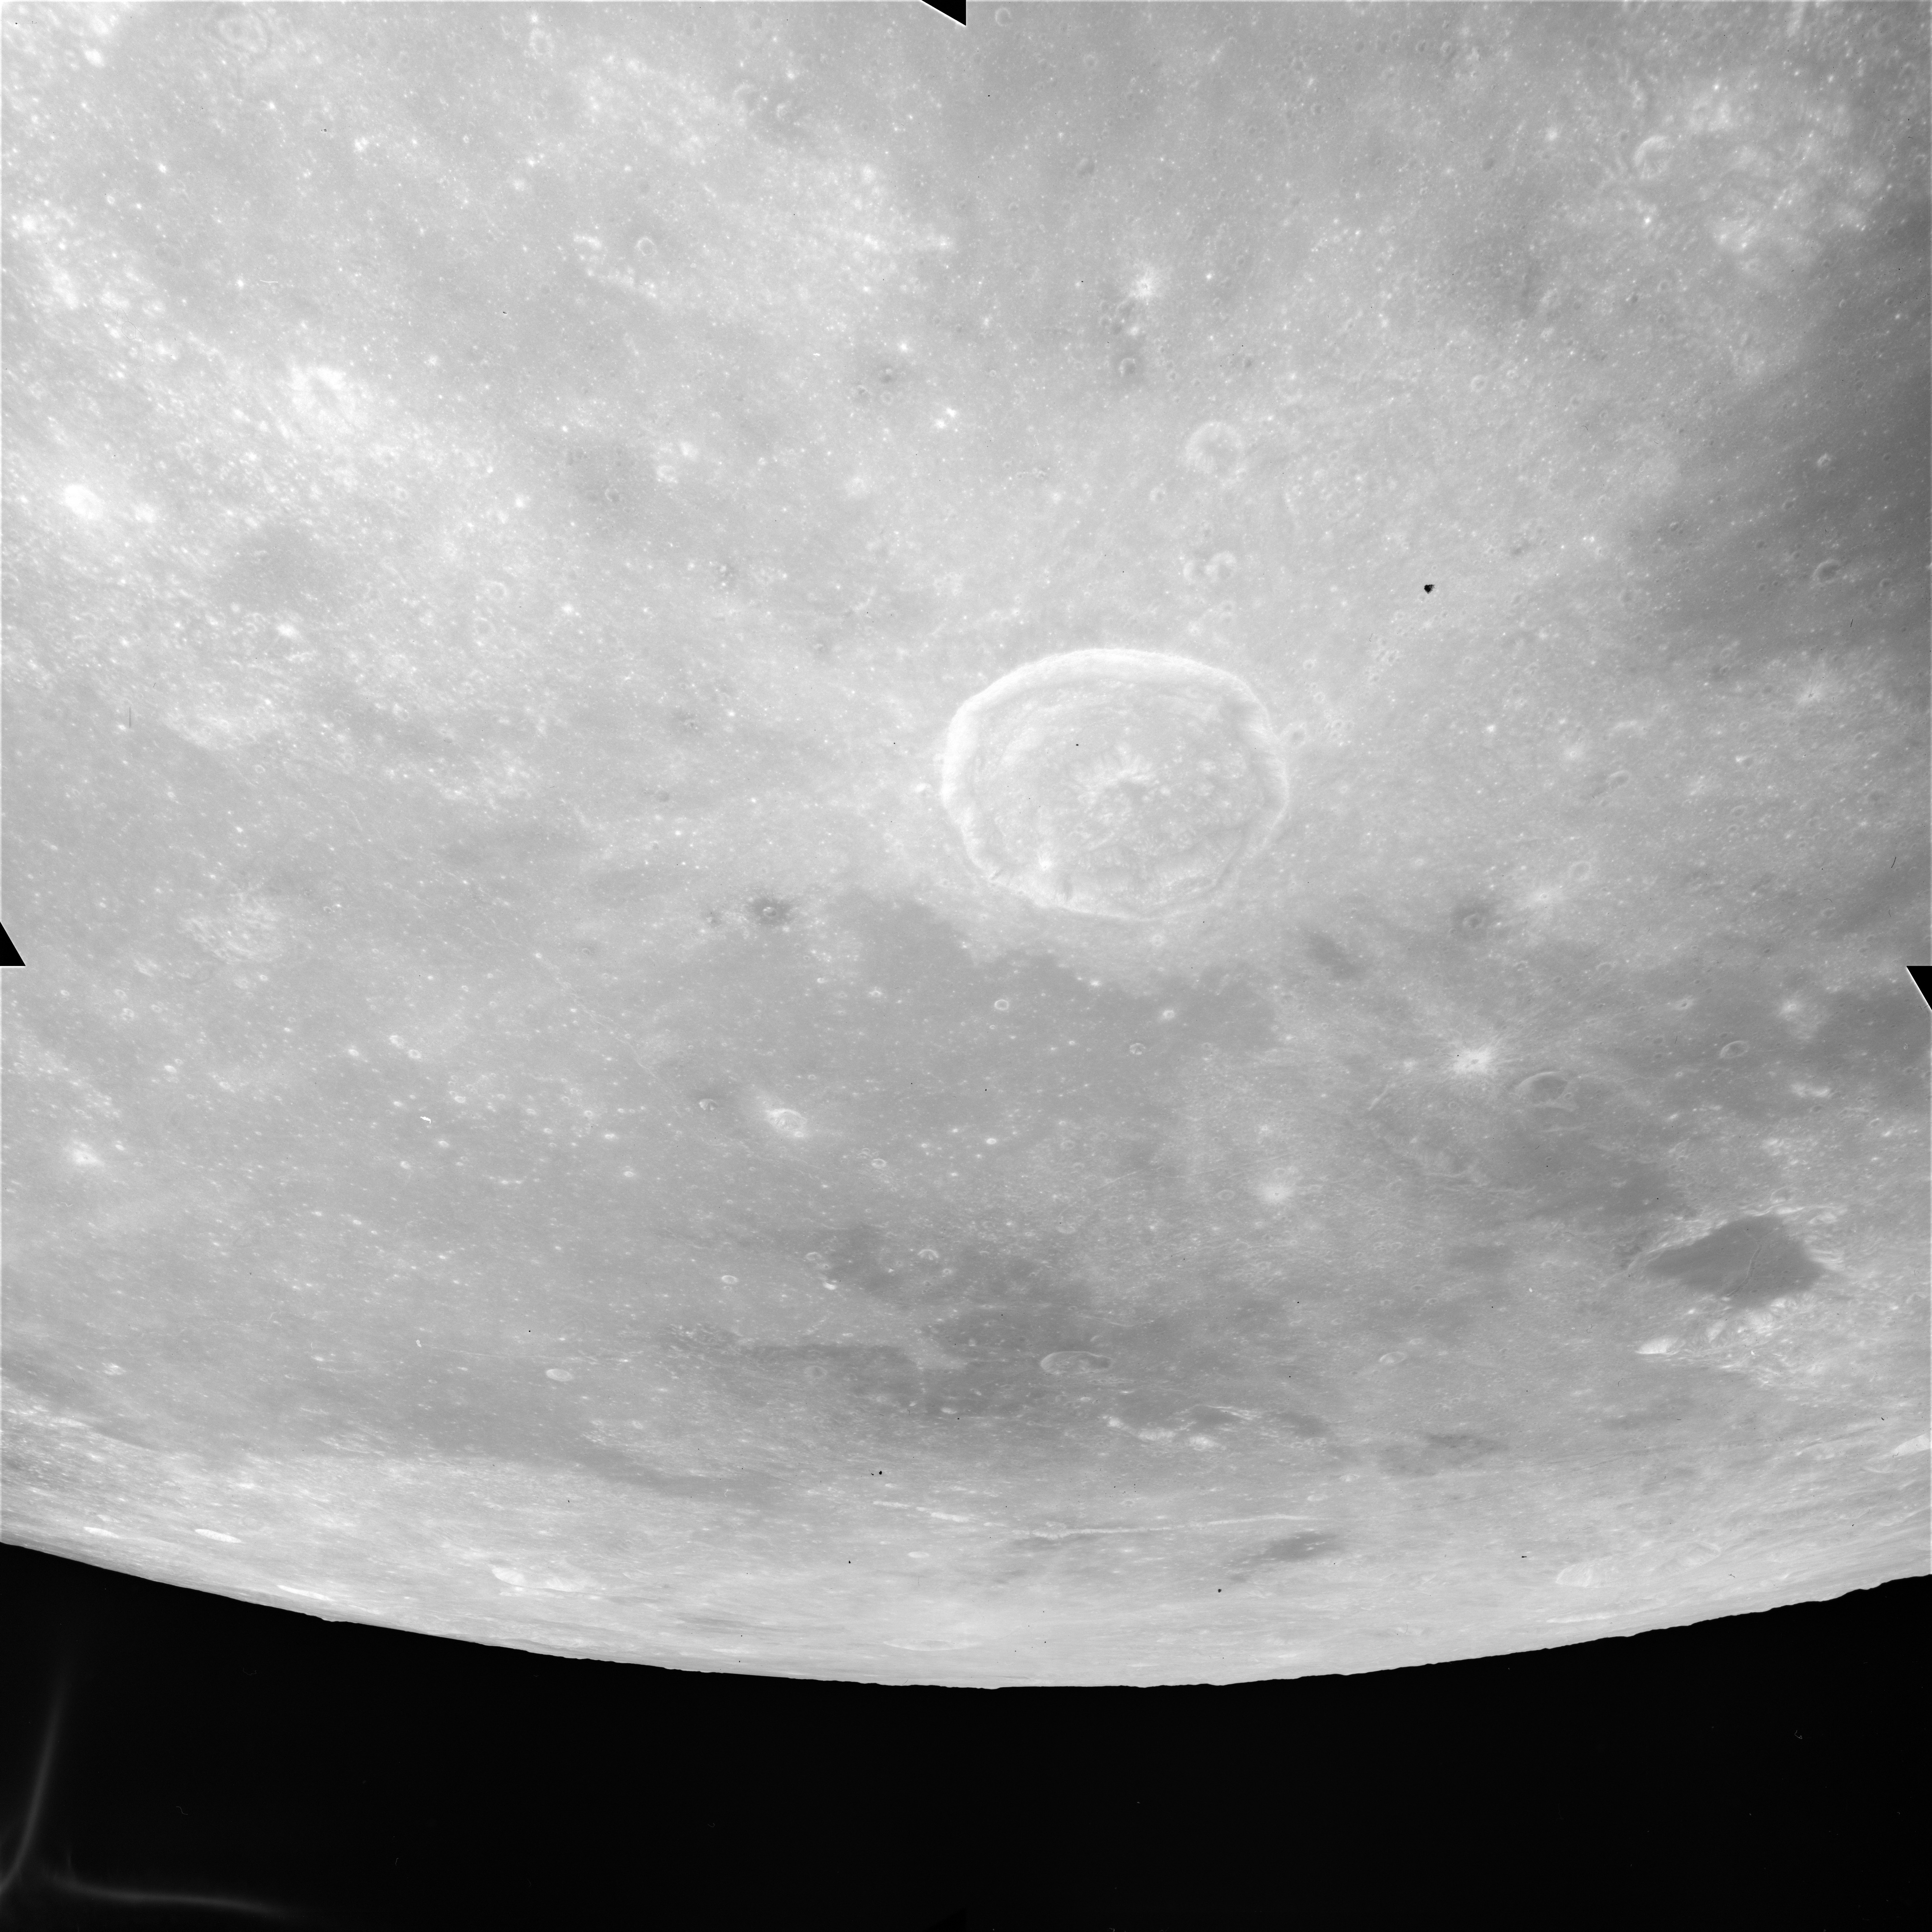
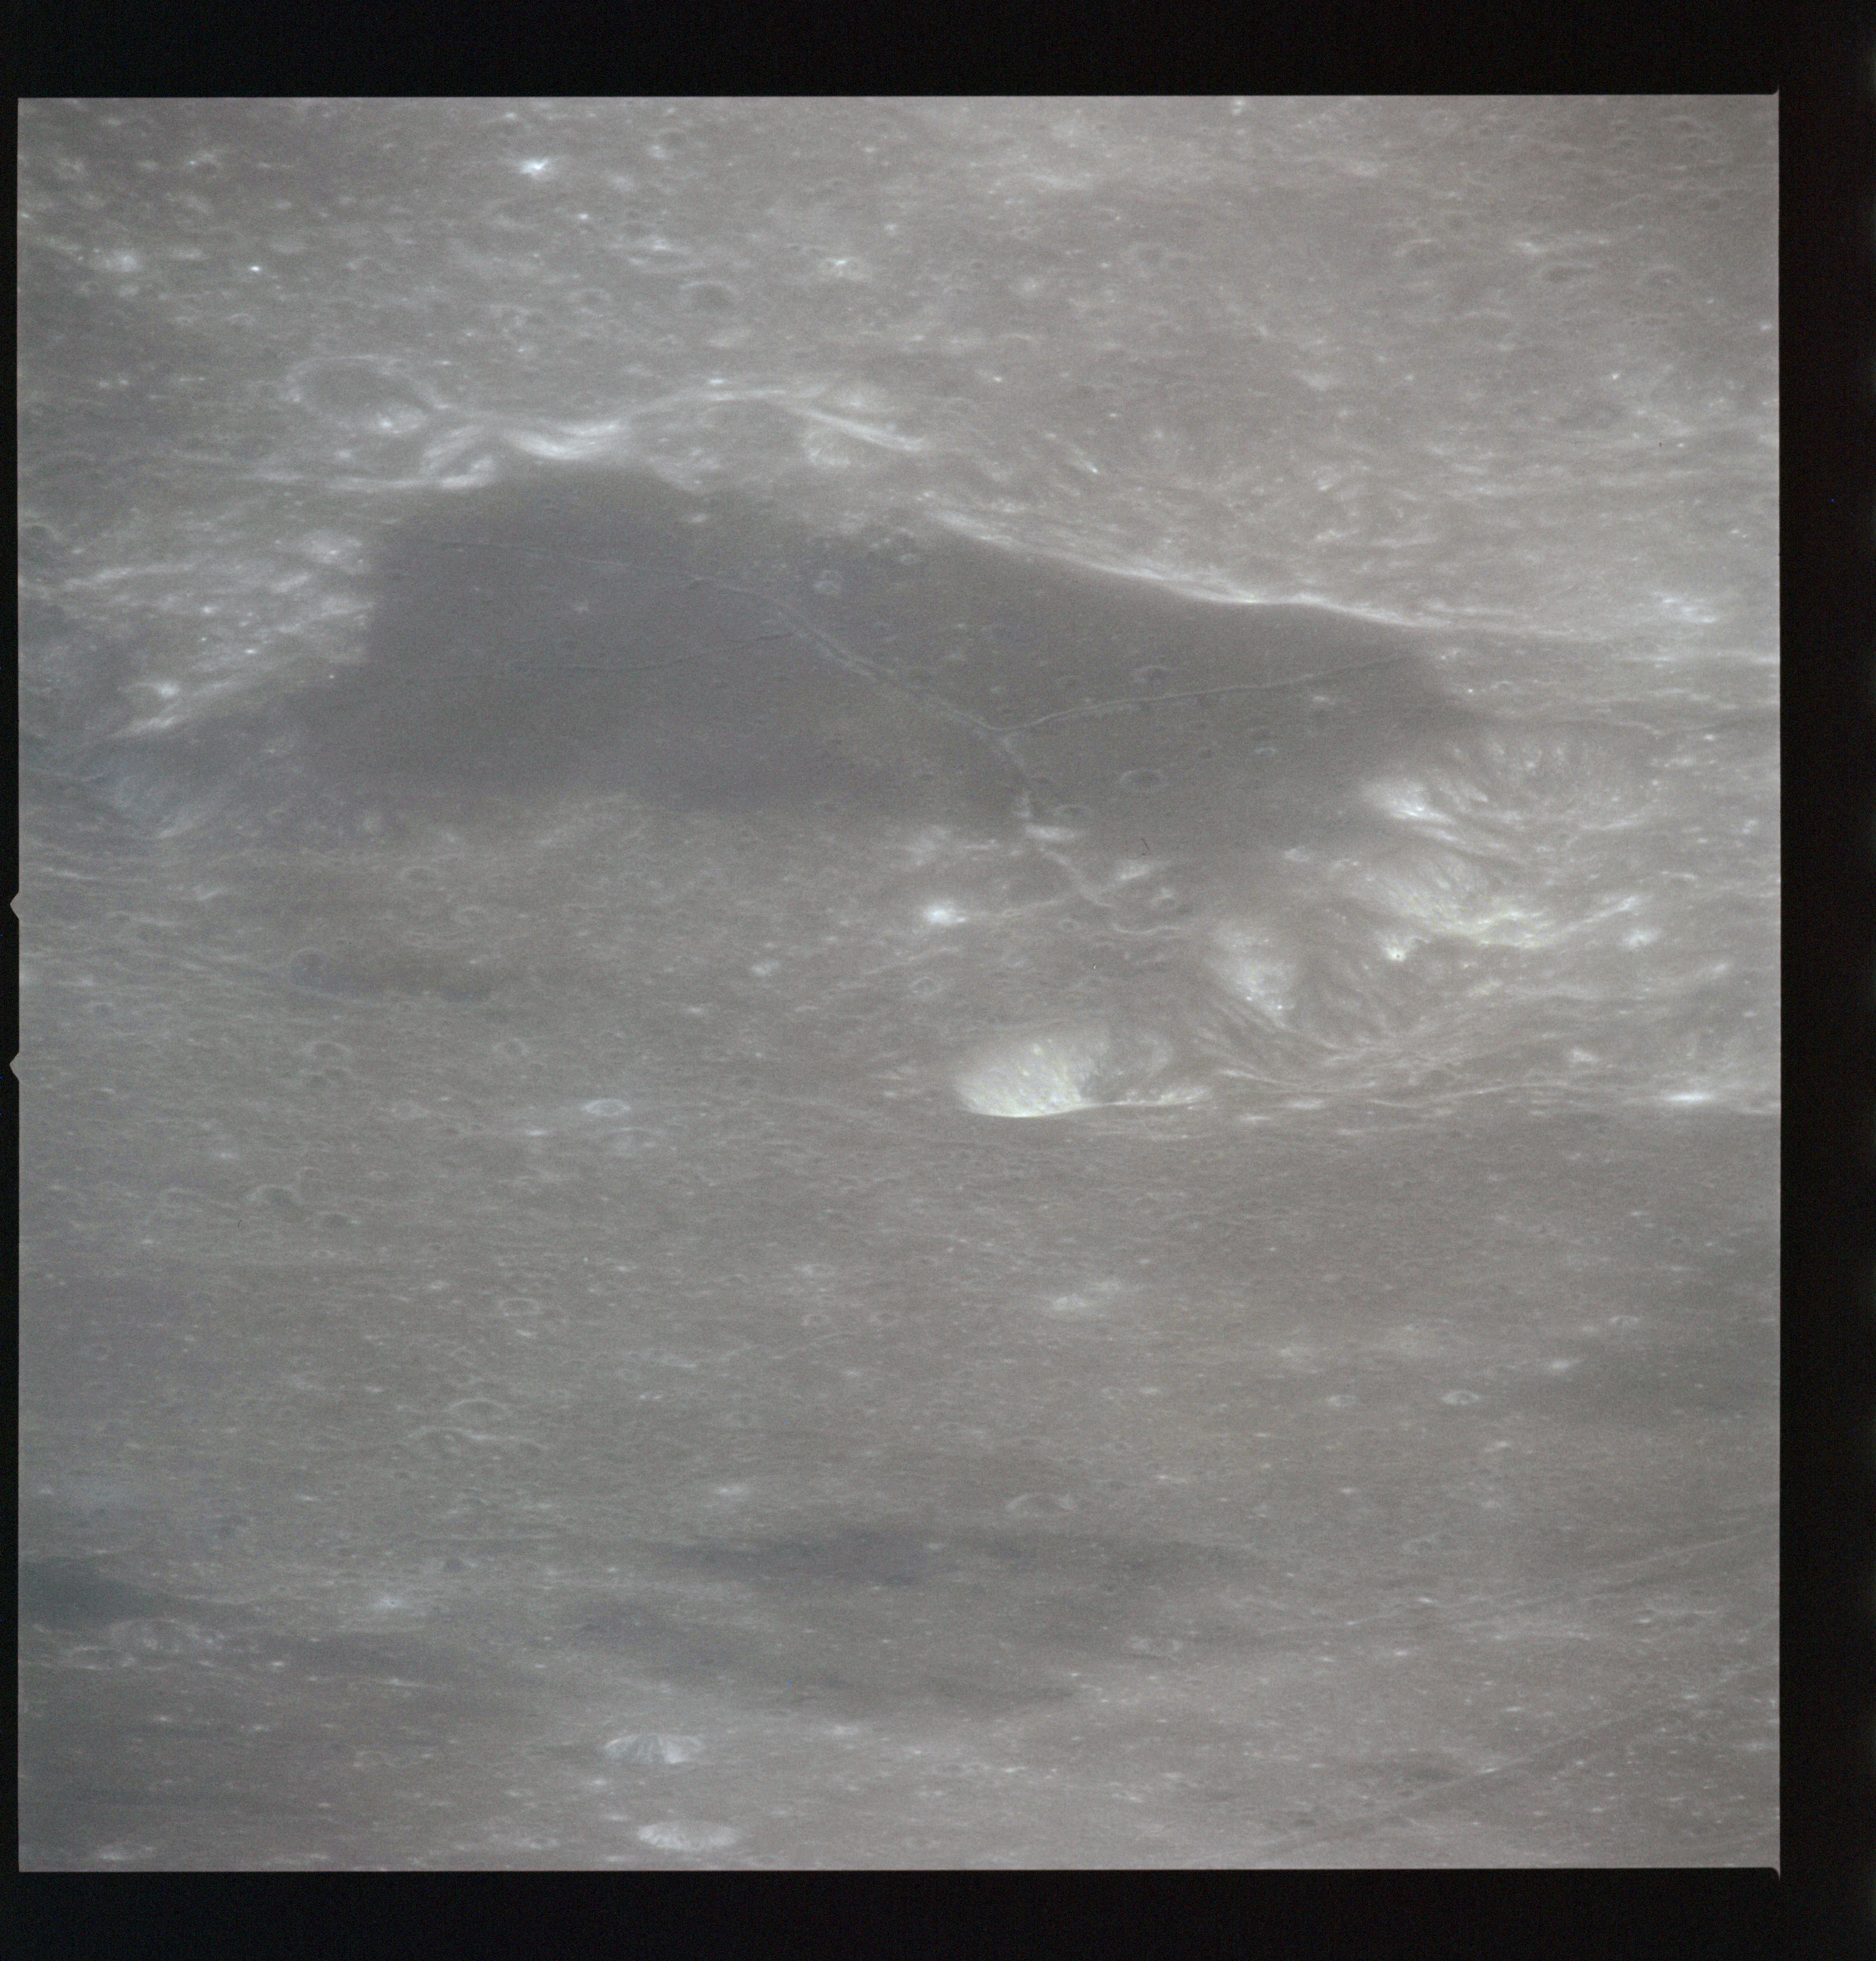
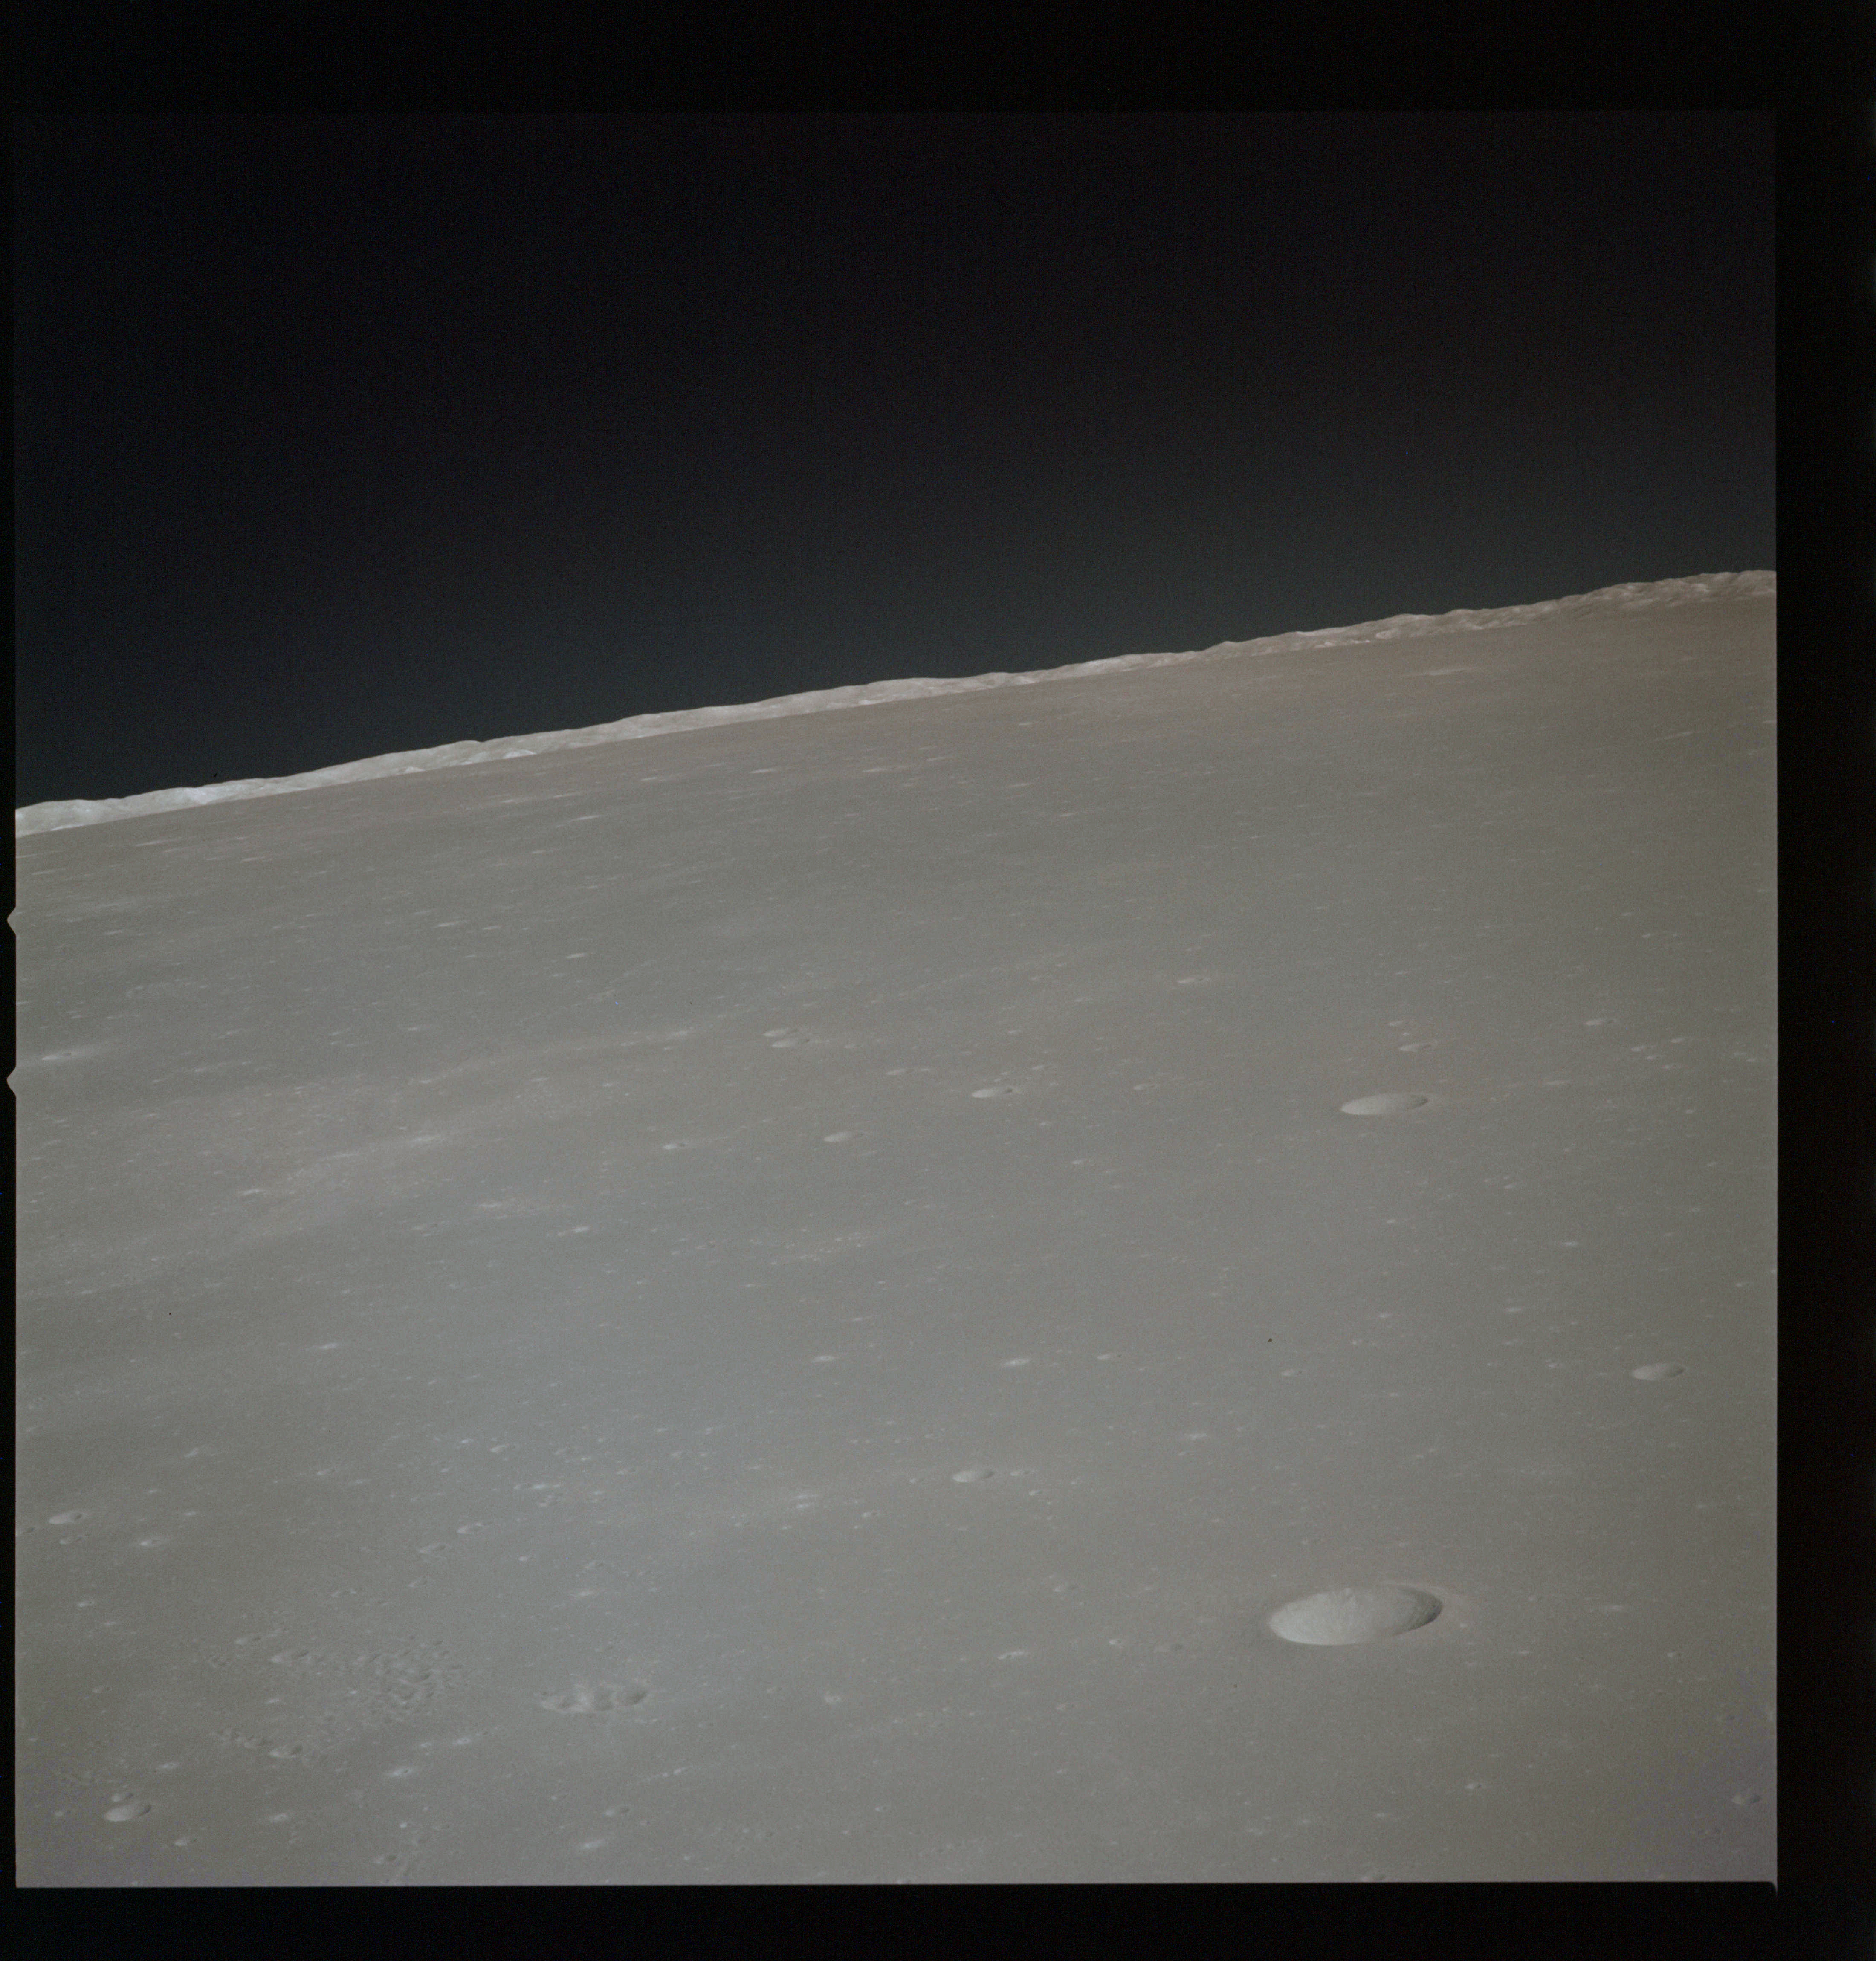
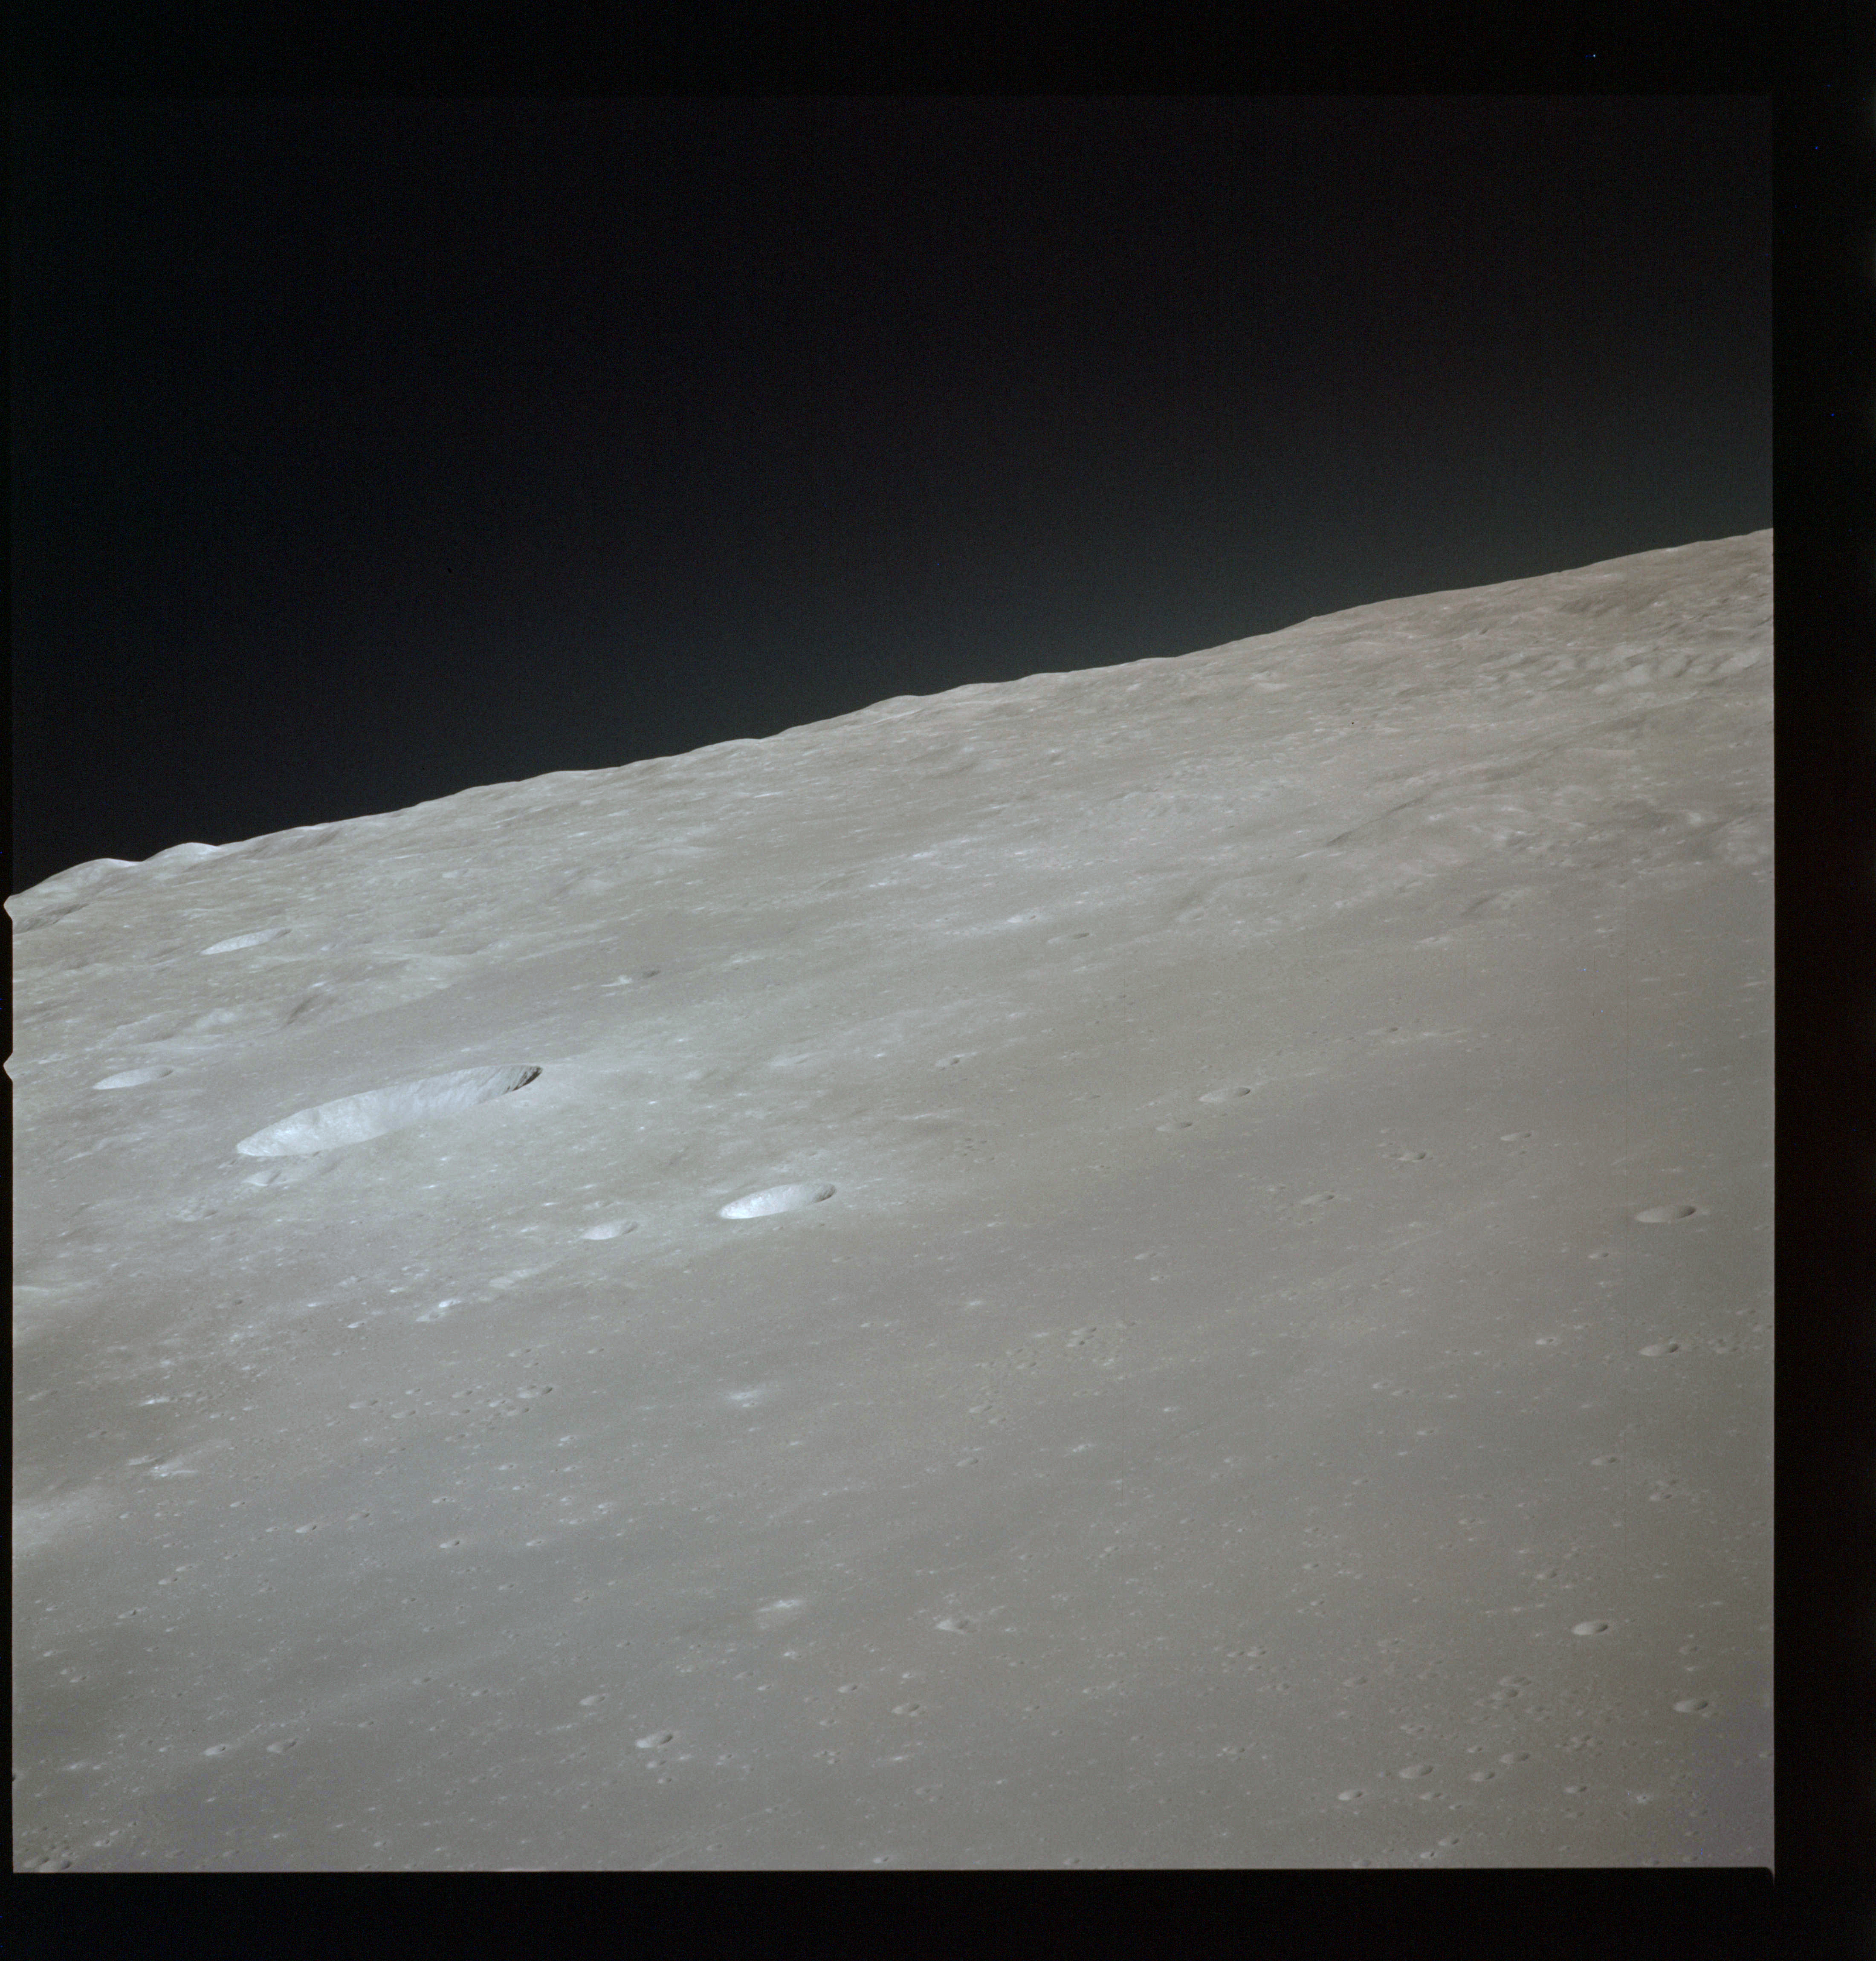
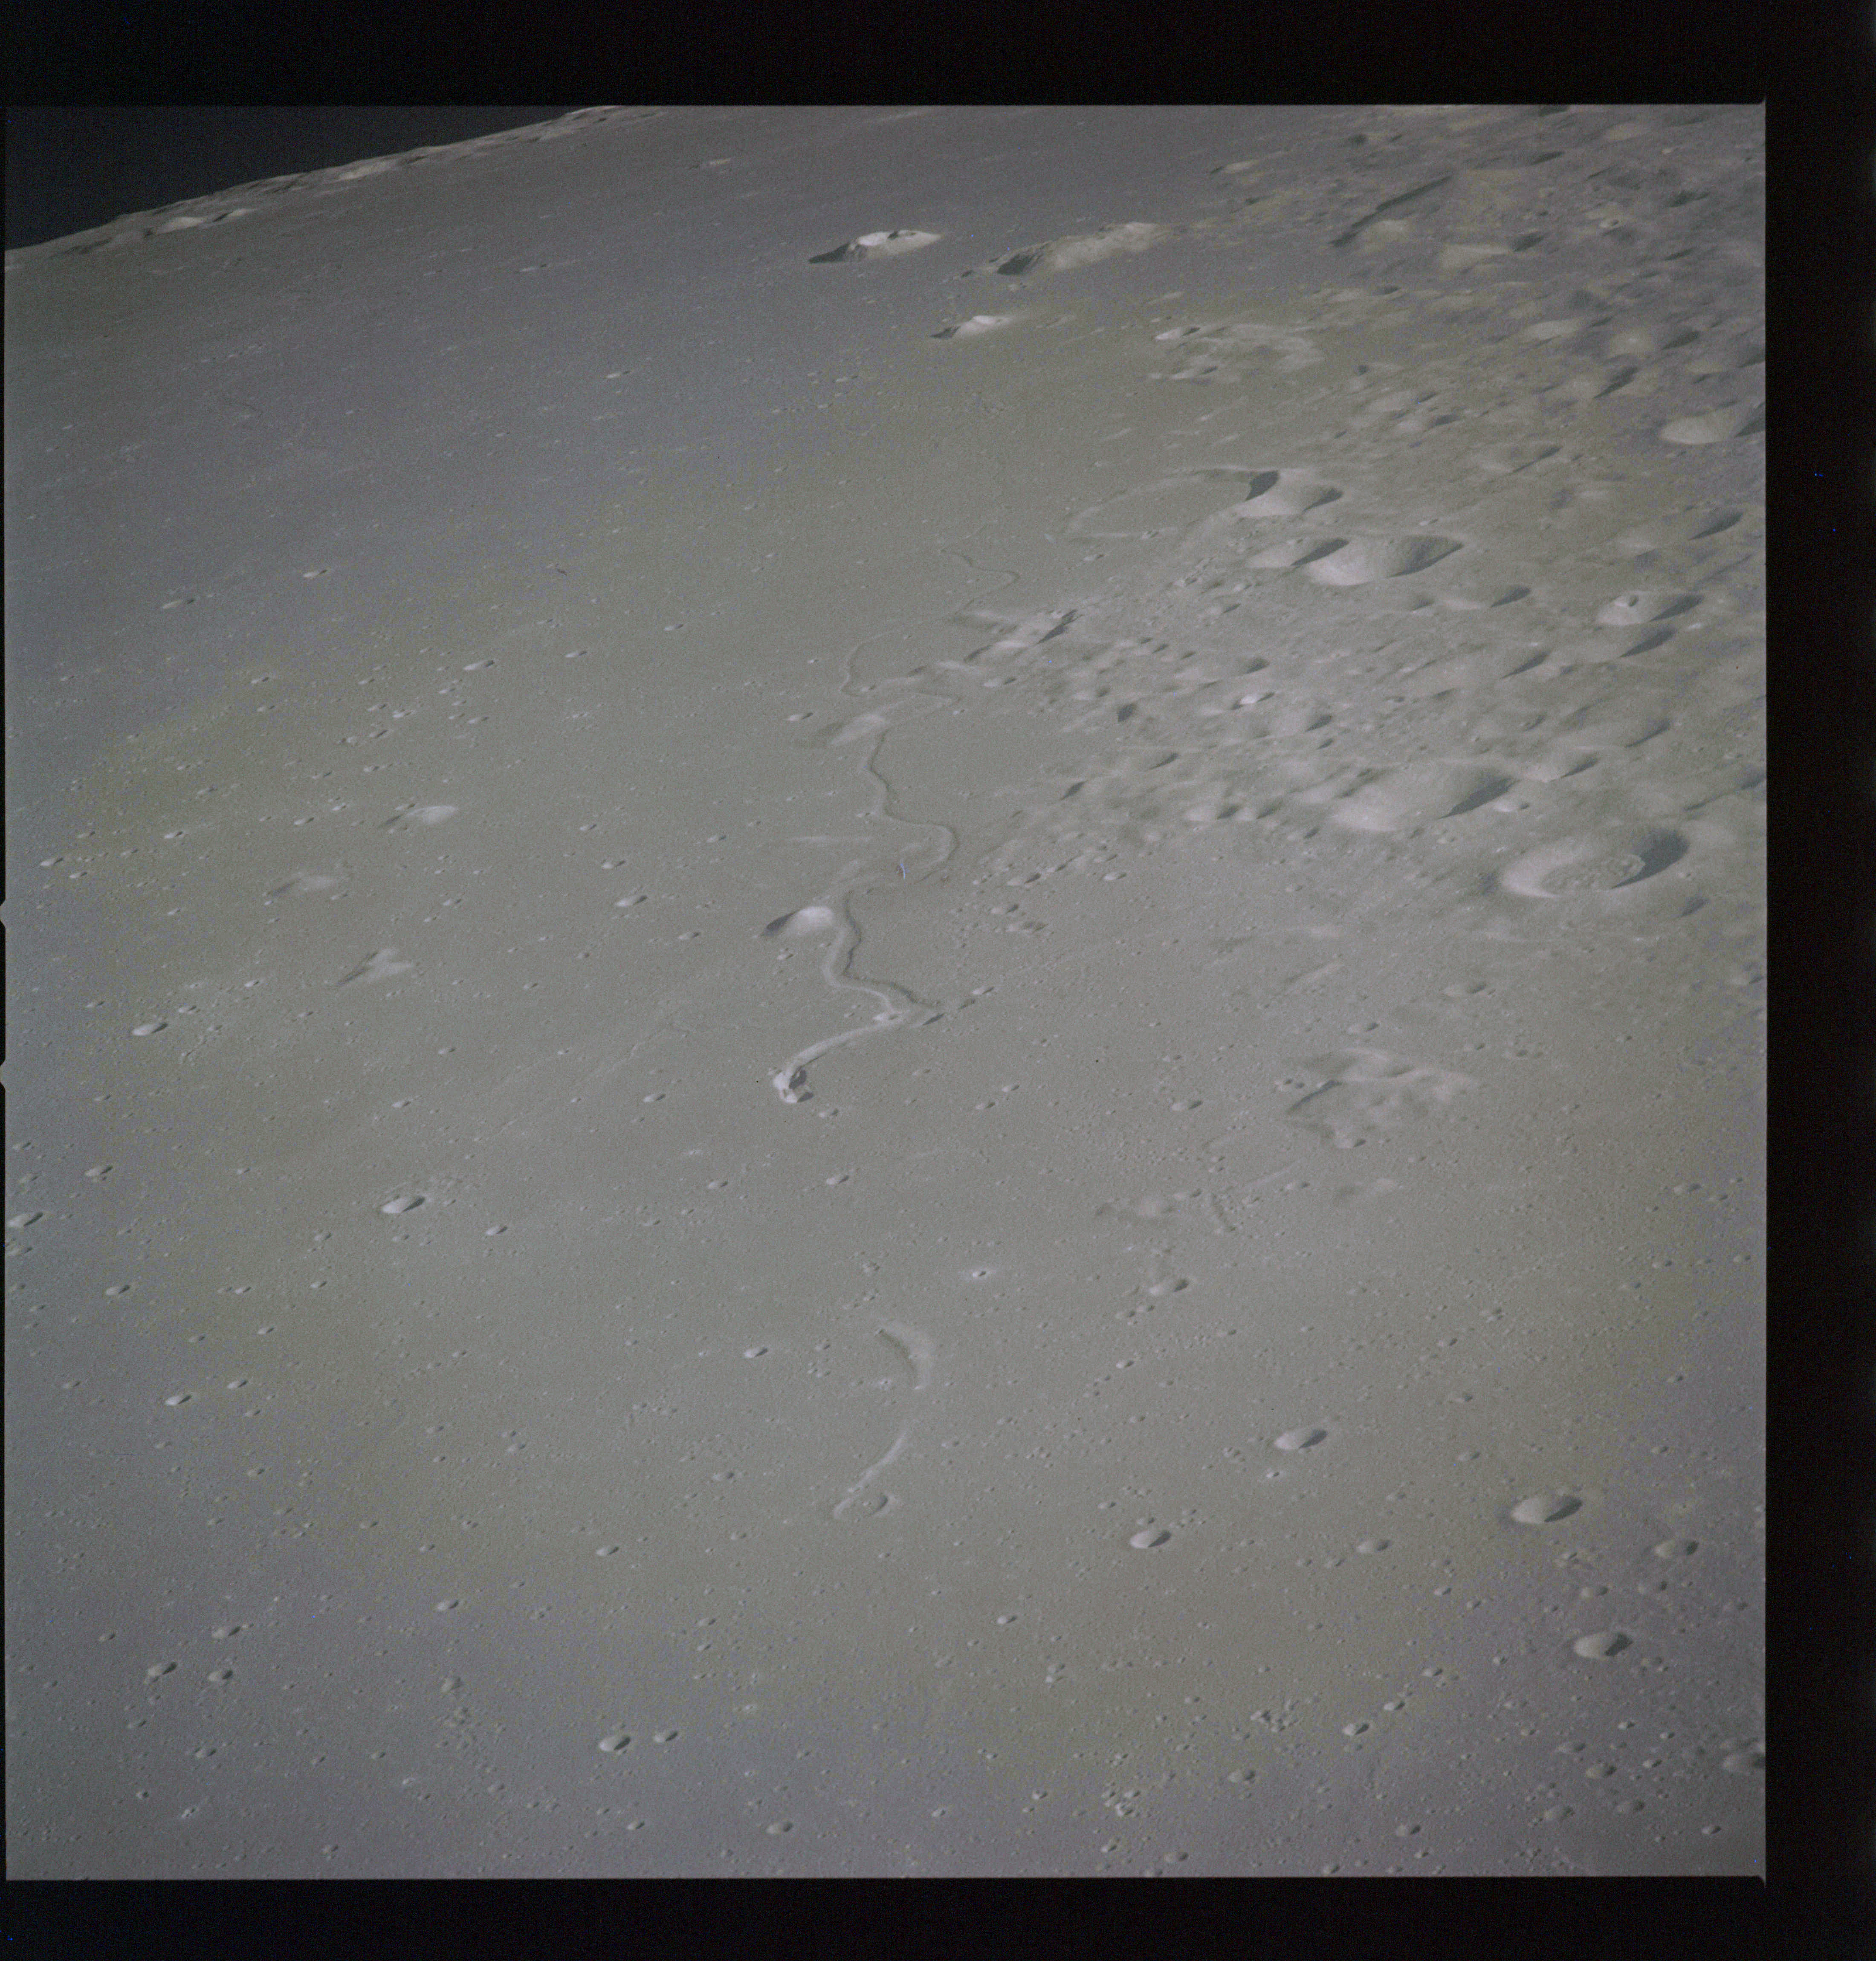
As read to the crew at 214:59:52, the start time for the upcoming Mapping Camera pass is 216:18:30 which coincides with Endeavour passing over the sunset terminator. During this pass, 130 images will be taken comprising AS15-M-2494 to 2623. The spacecraft's attitude gives the camera an oblique view towards the southern horizon, an aspect which often produces spectacular images.
A selection of these images will be presented here, beginning with the second photograph, AS15-M-2495. Then starting with AS15-M-2500, every subsequent tenth image will be shown. Readers who wish to browse the entire collection can find it at the Apollo Image Archive website at Arizona State University.
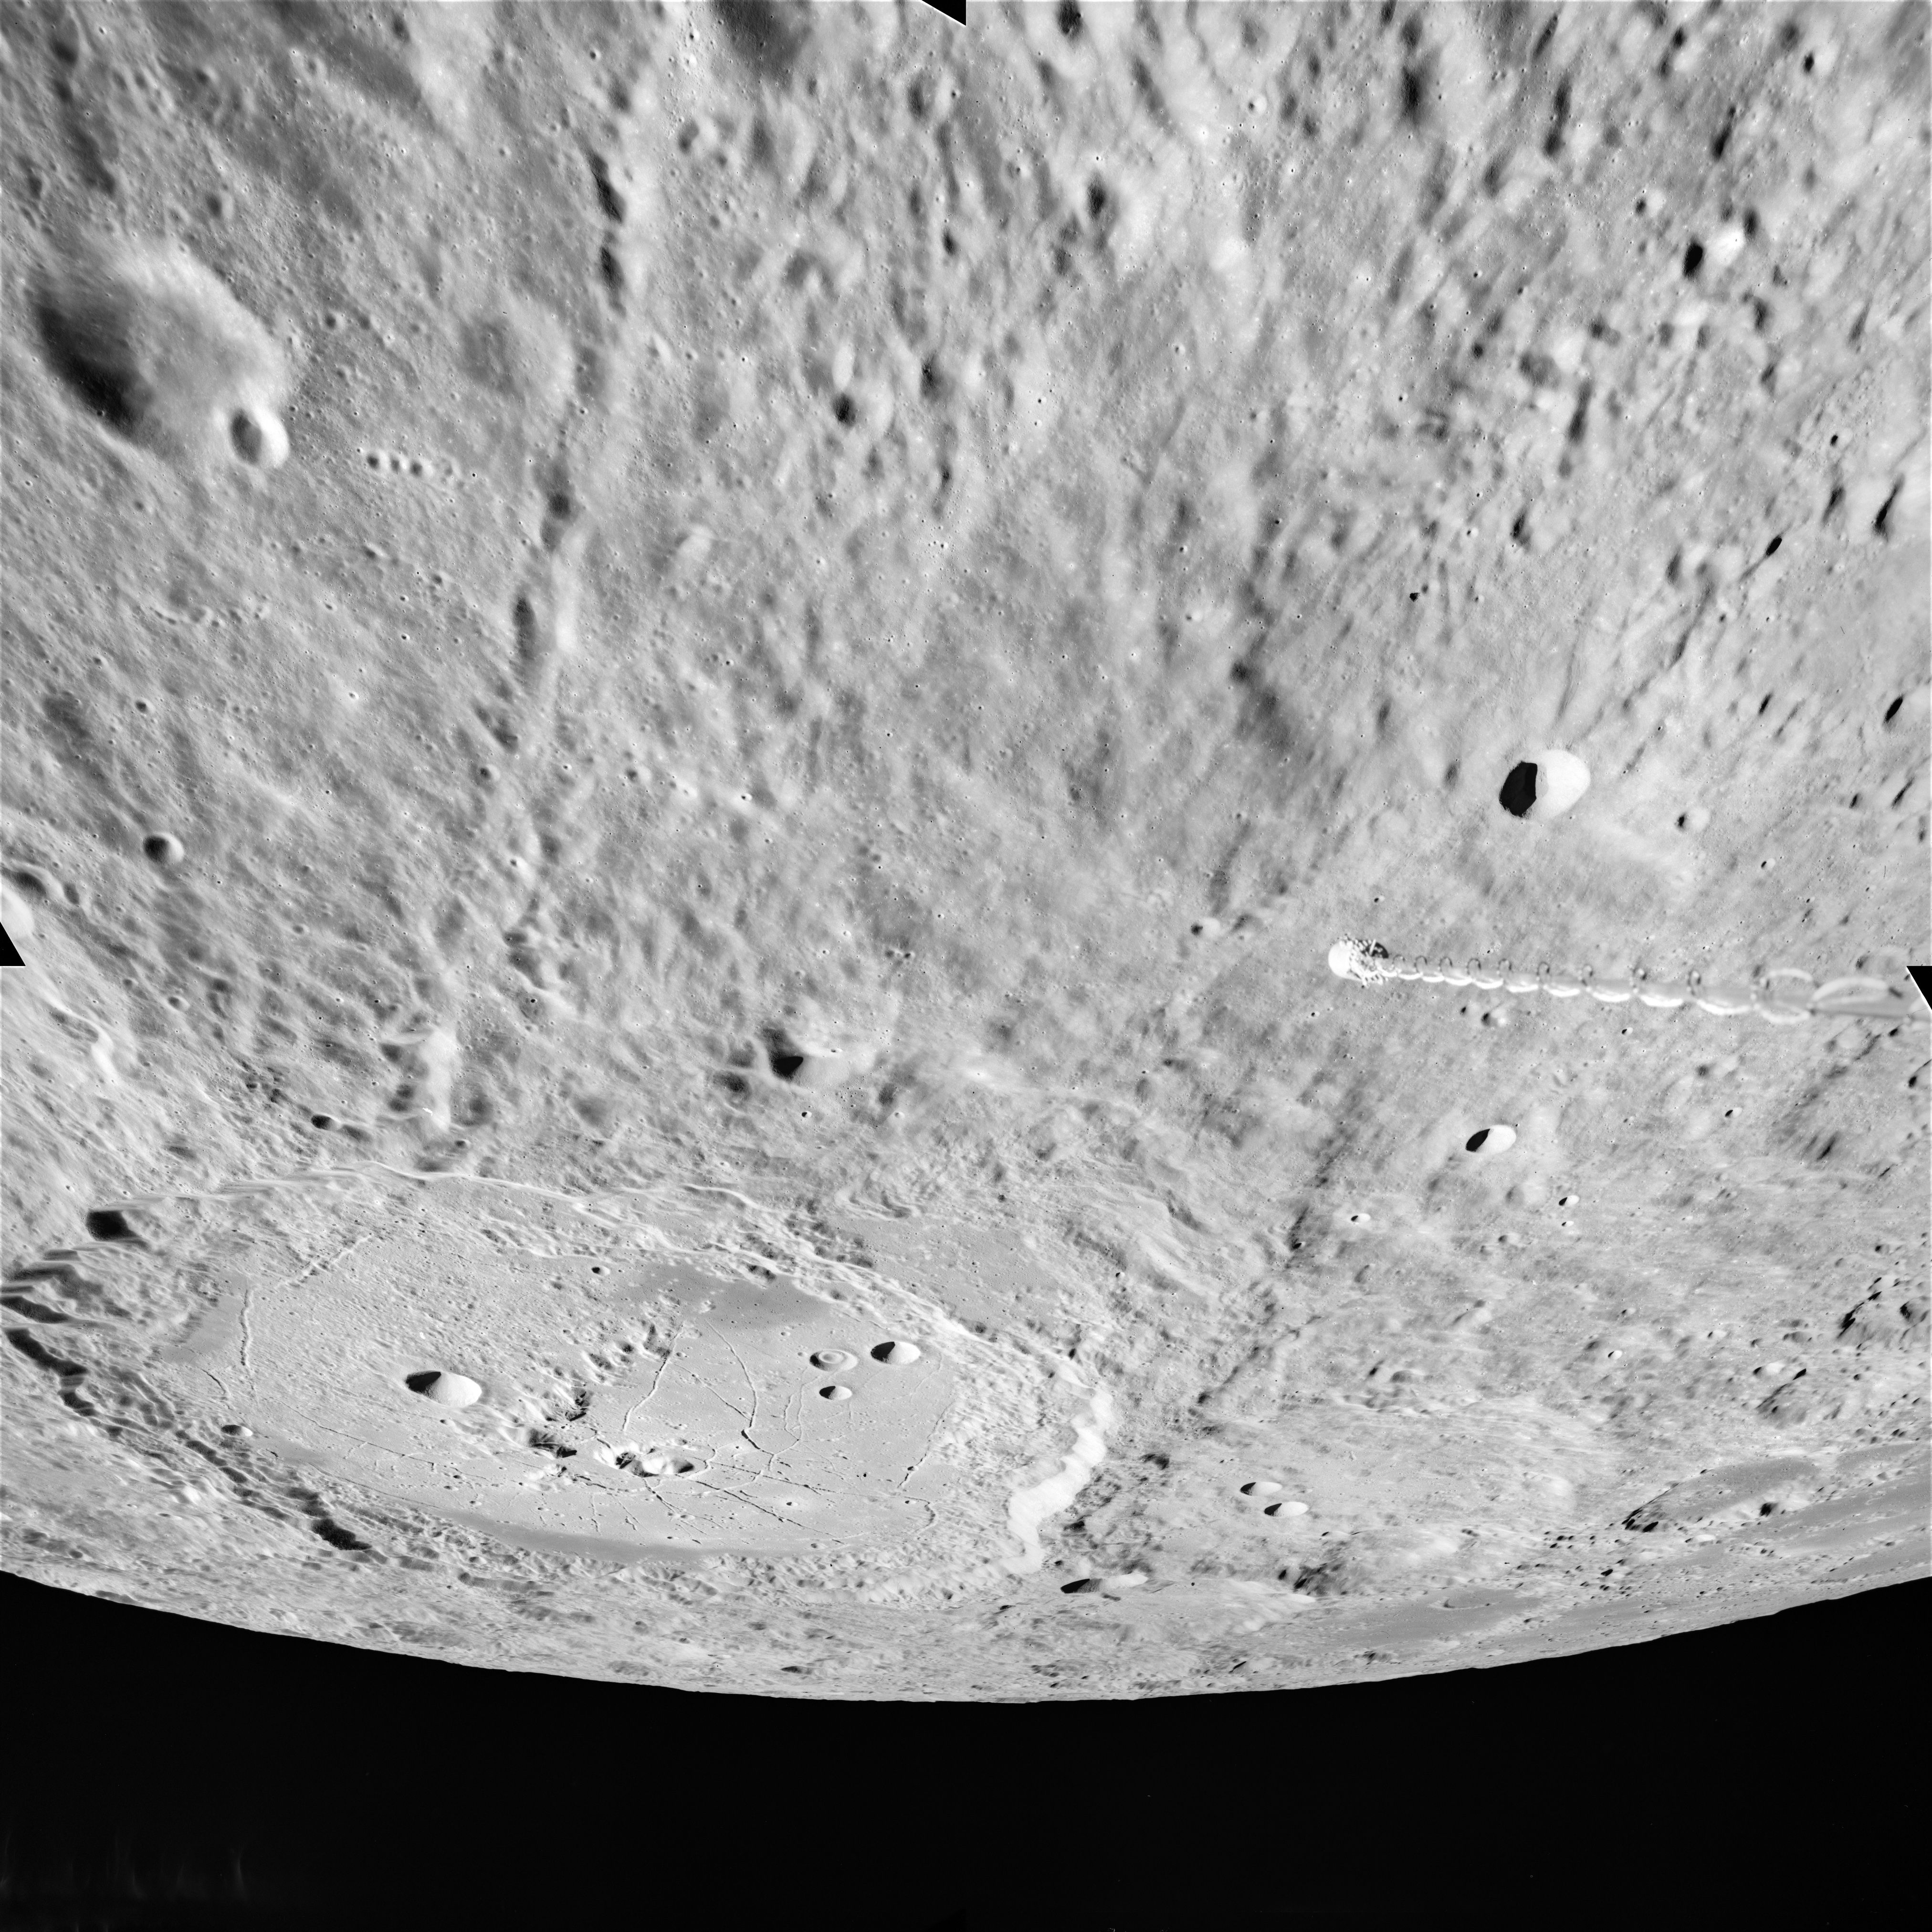
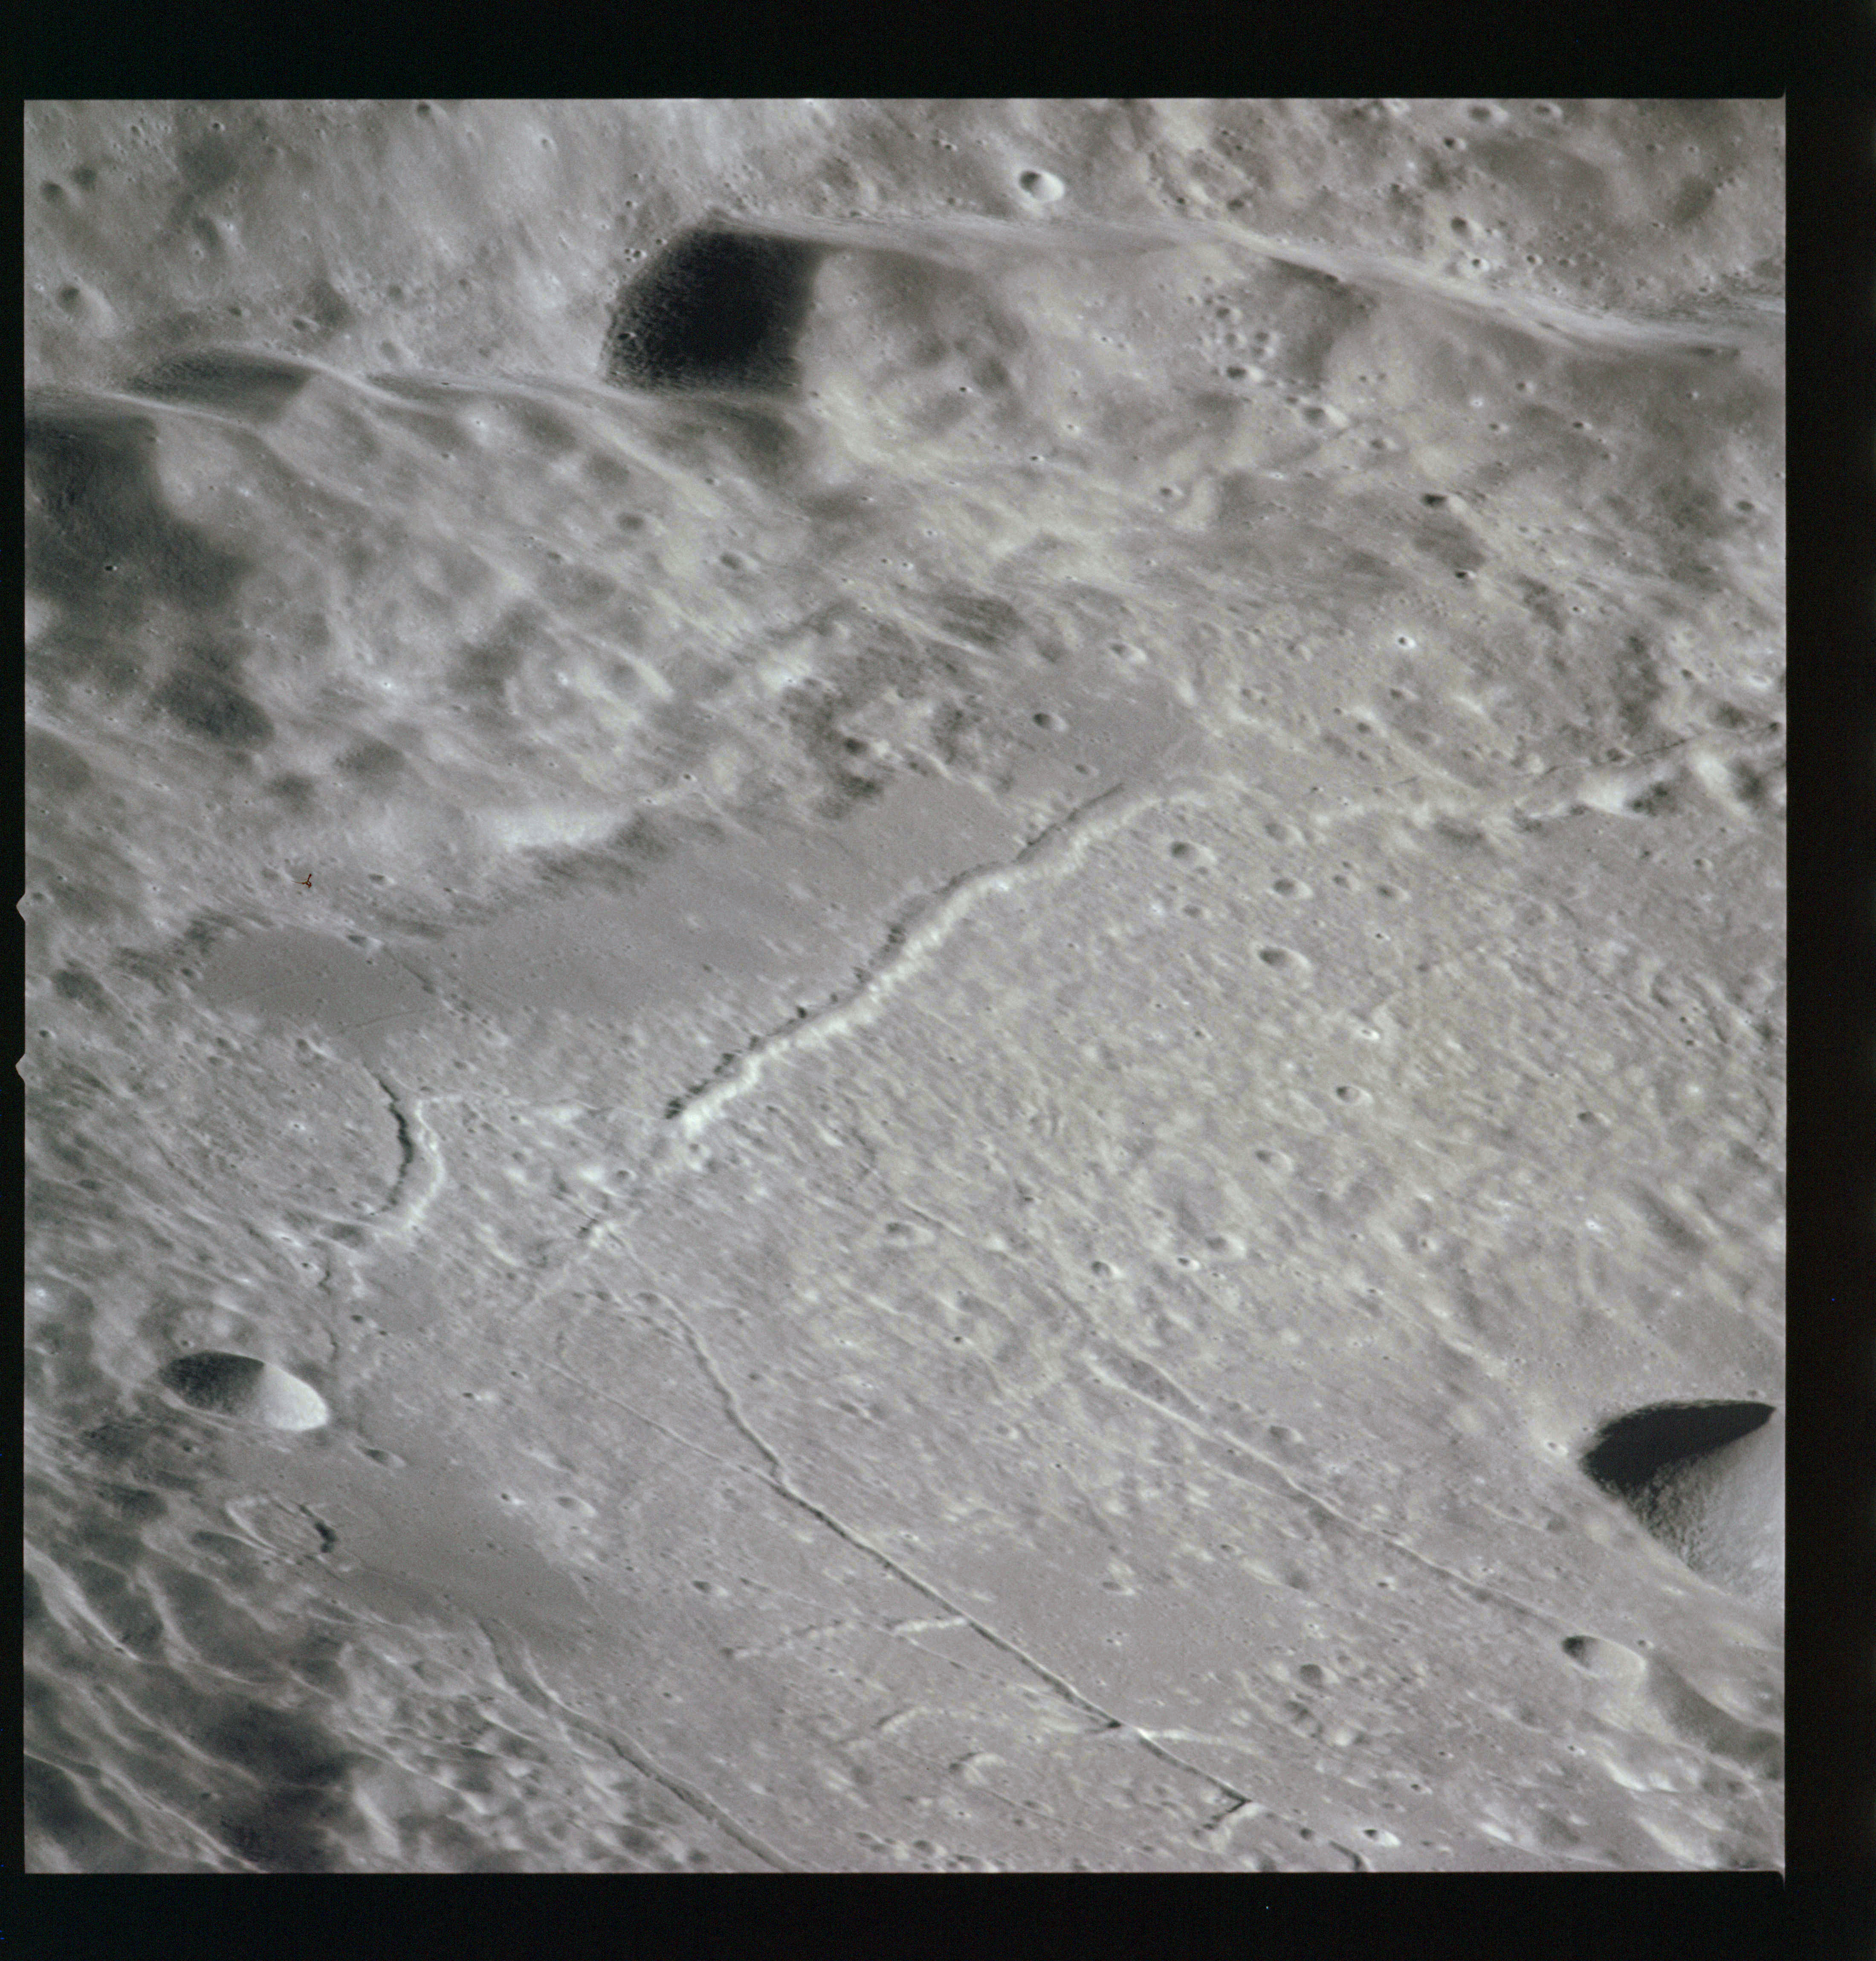
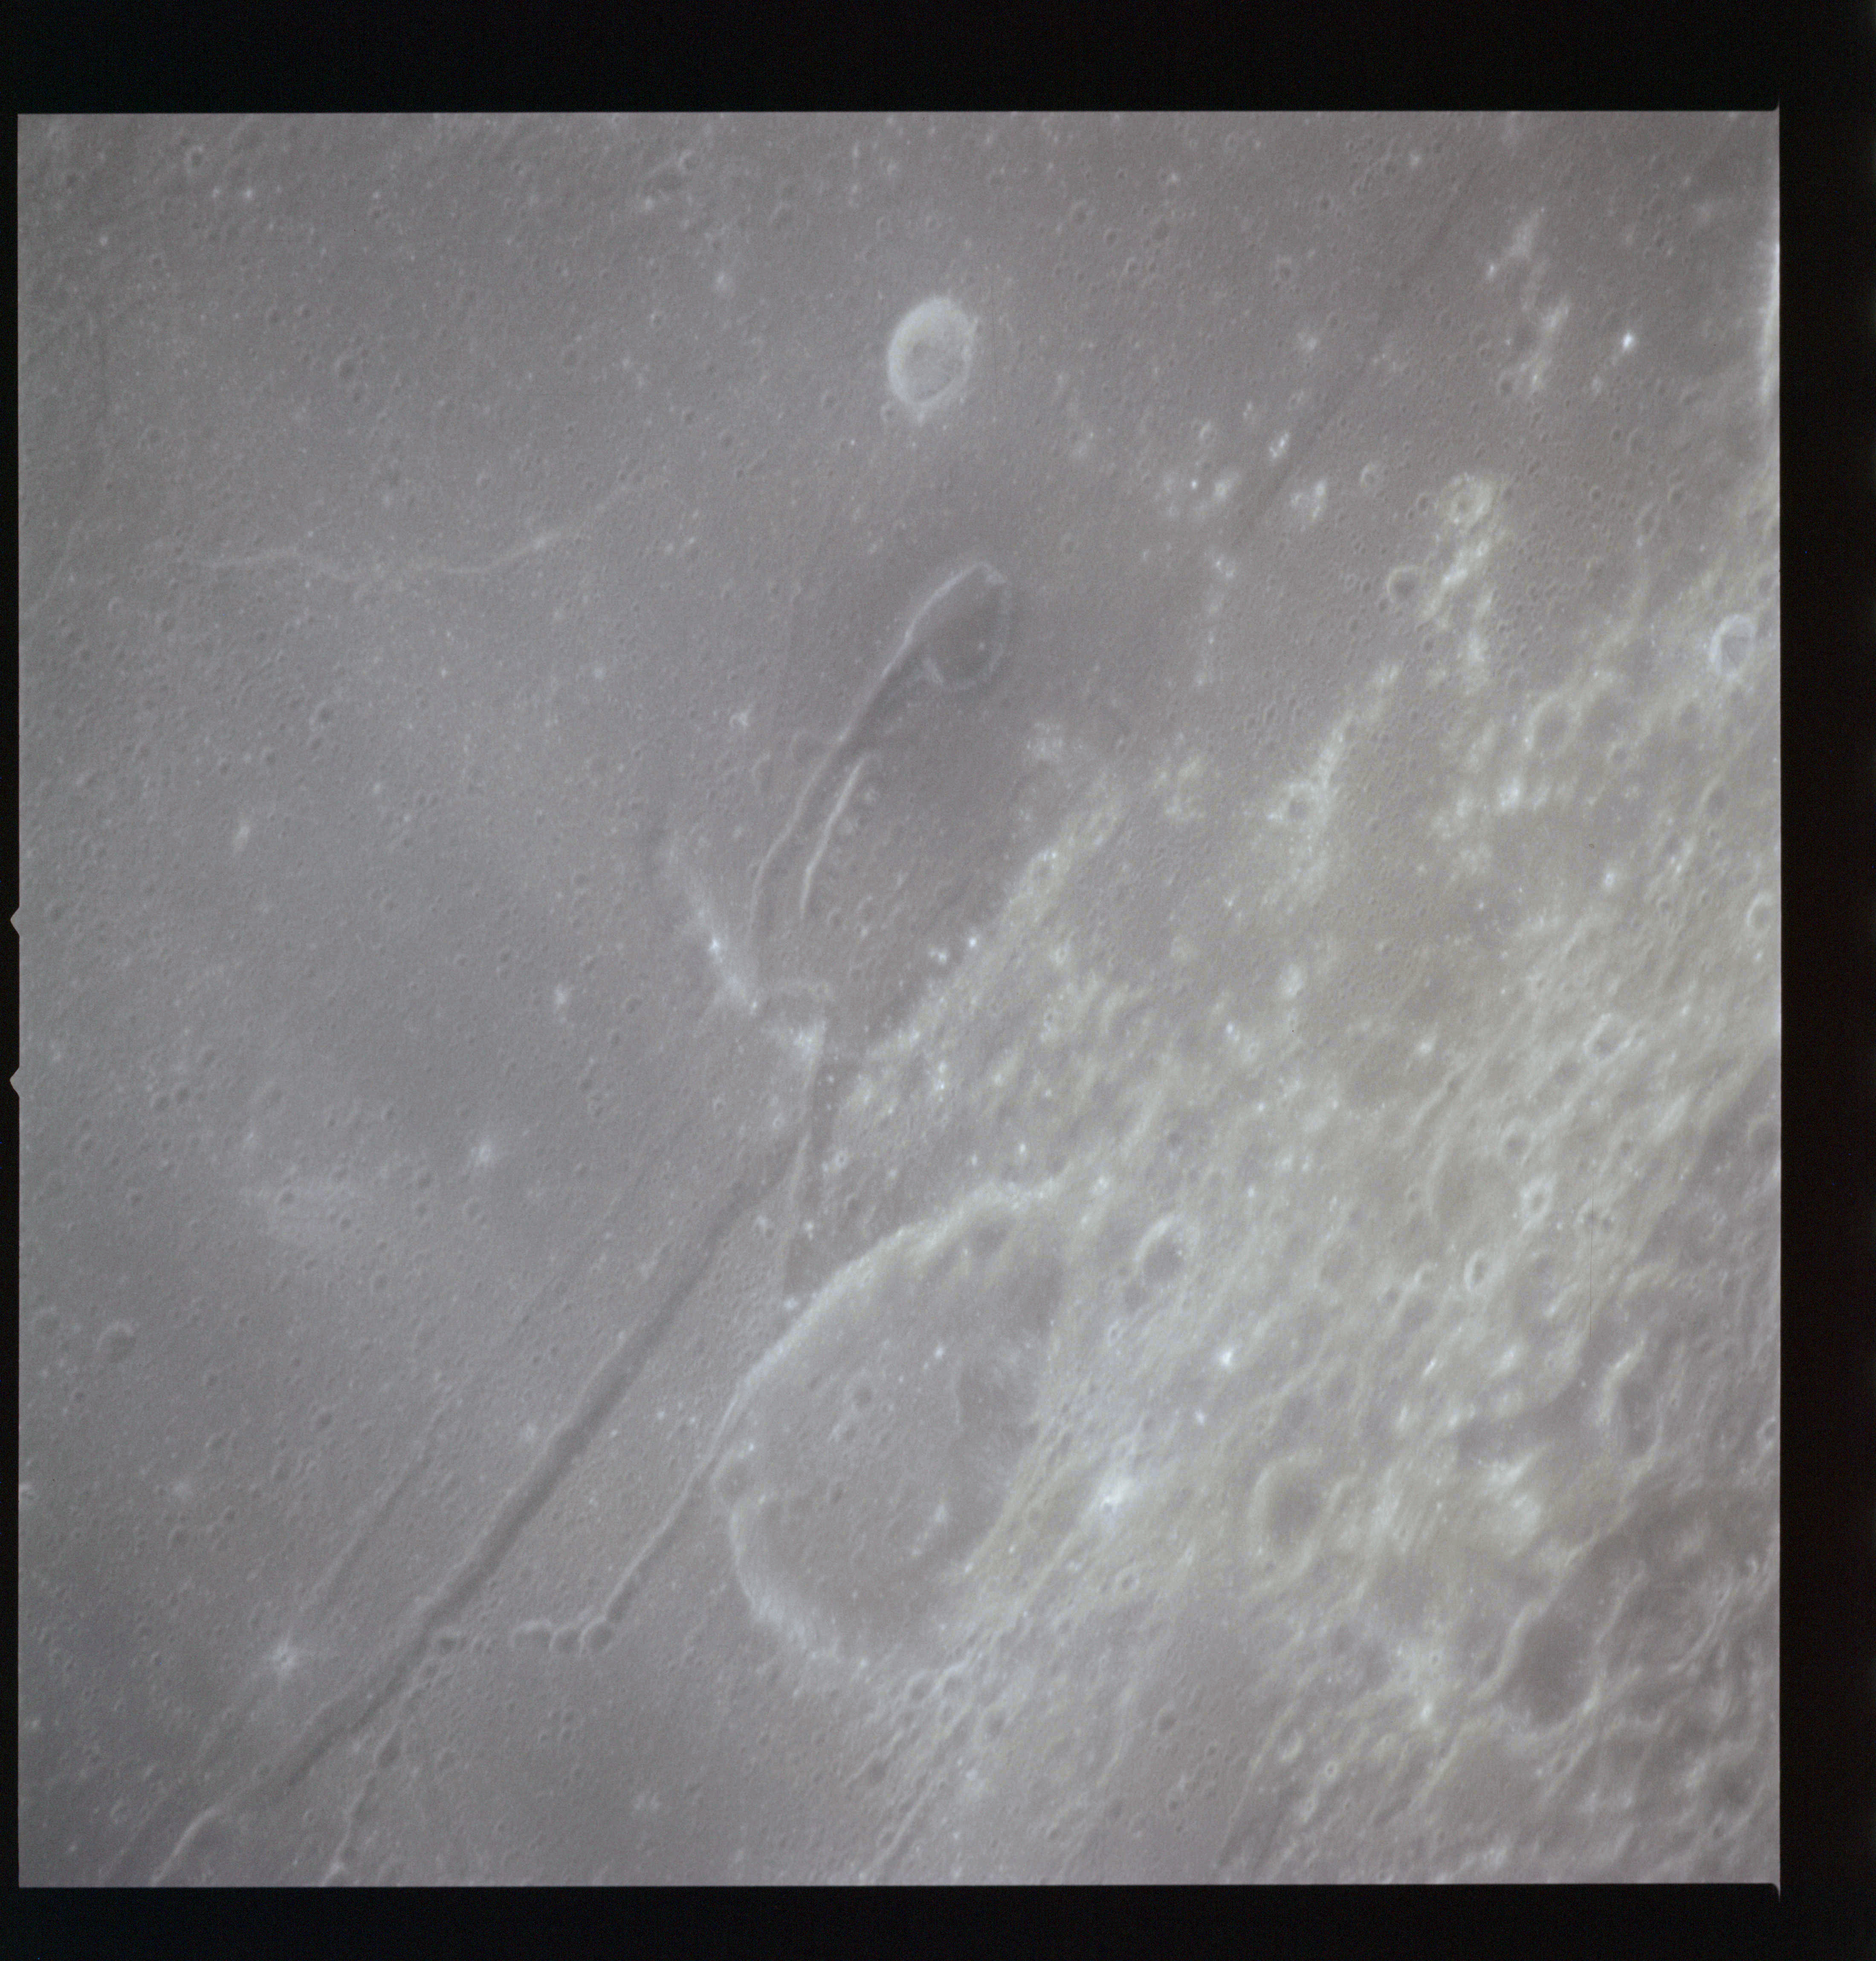
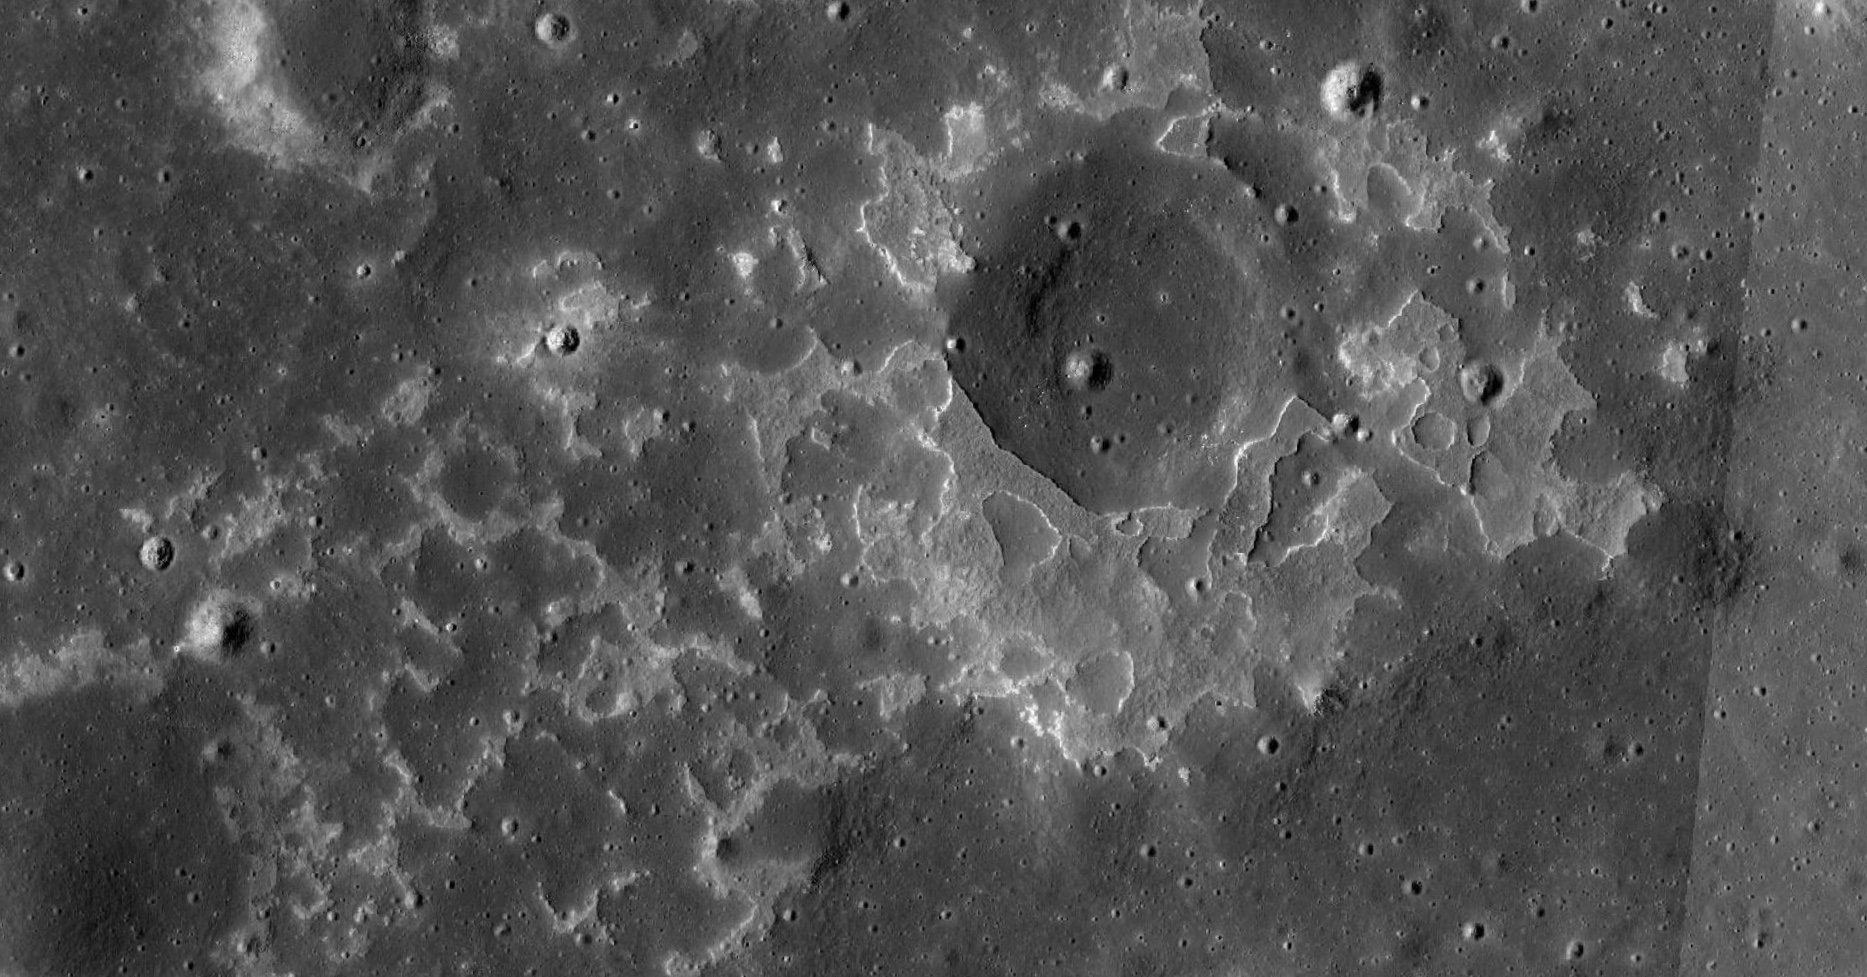
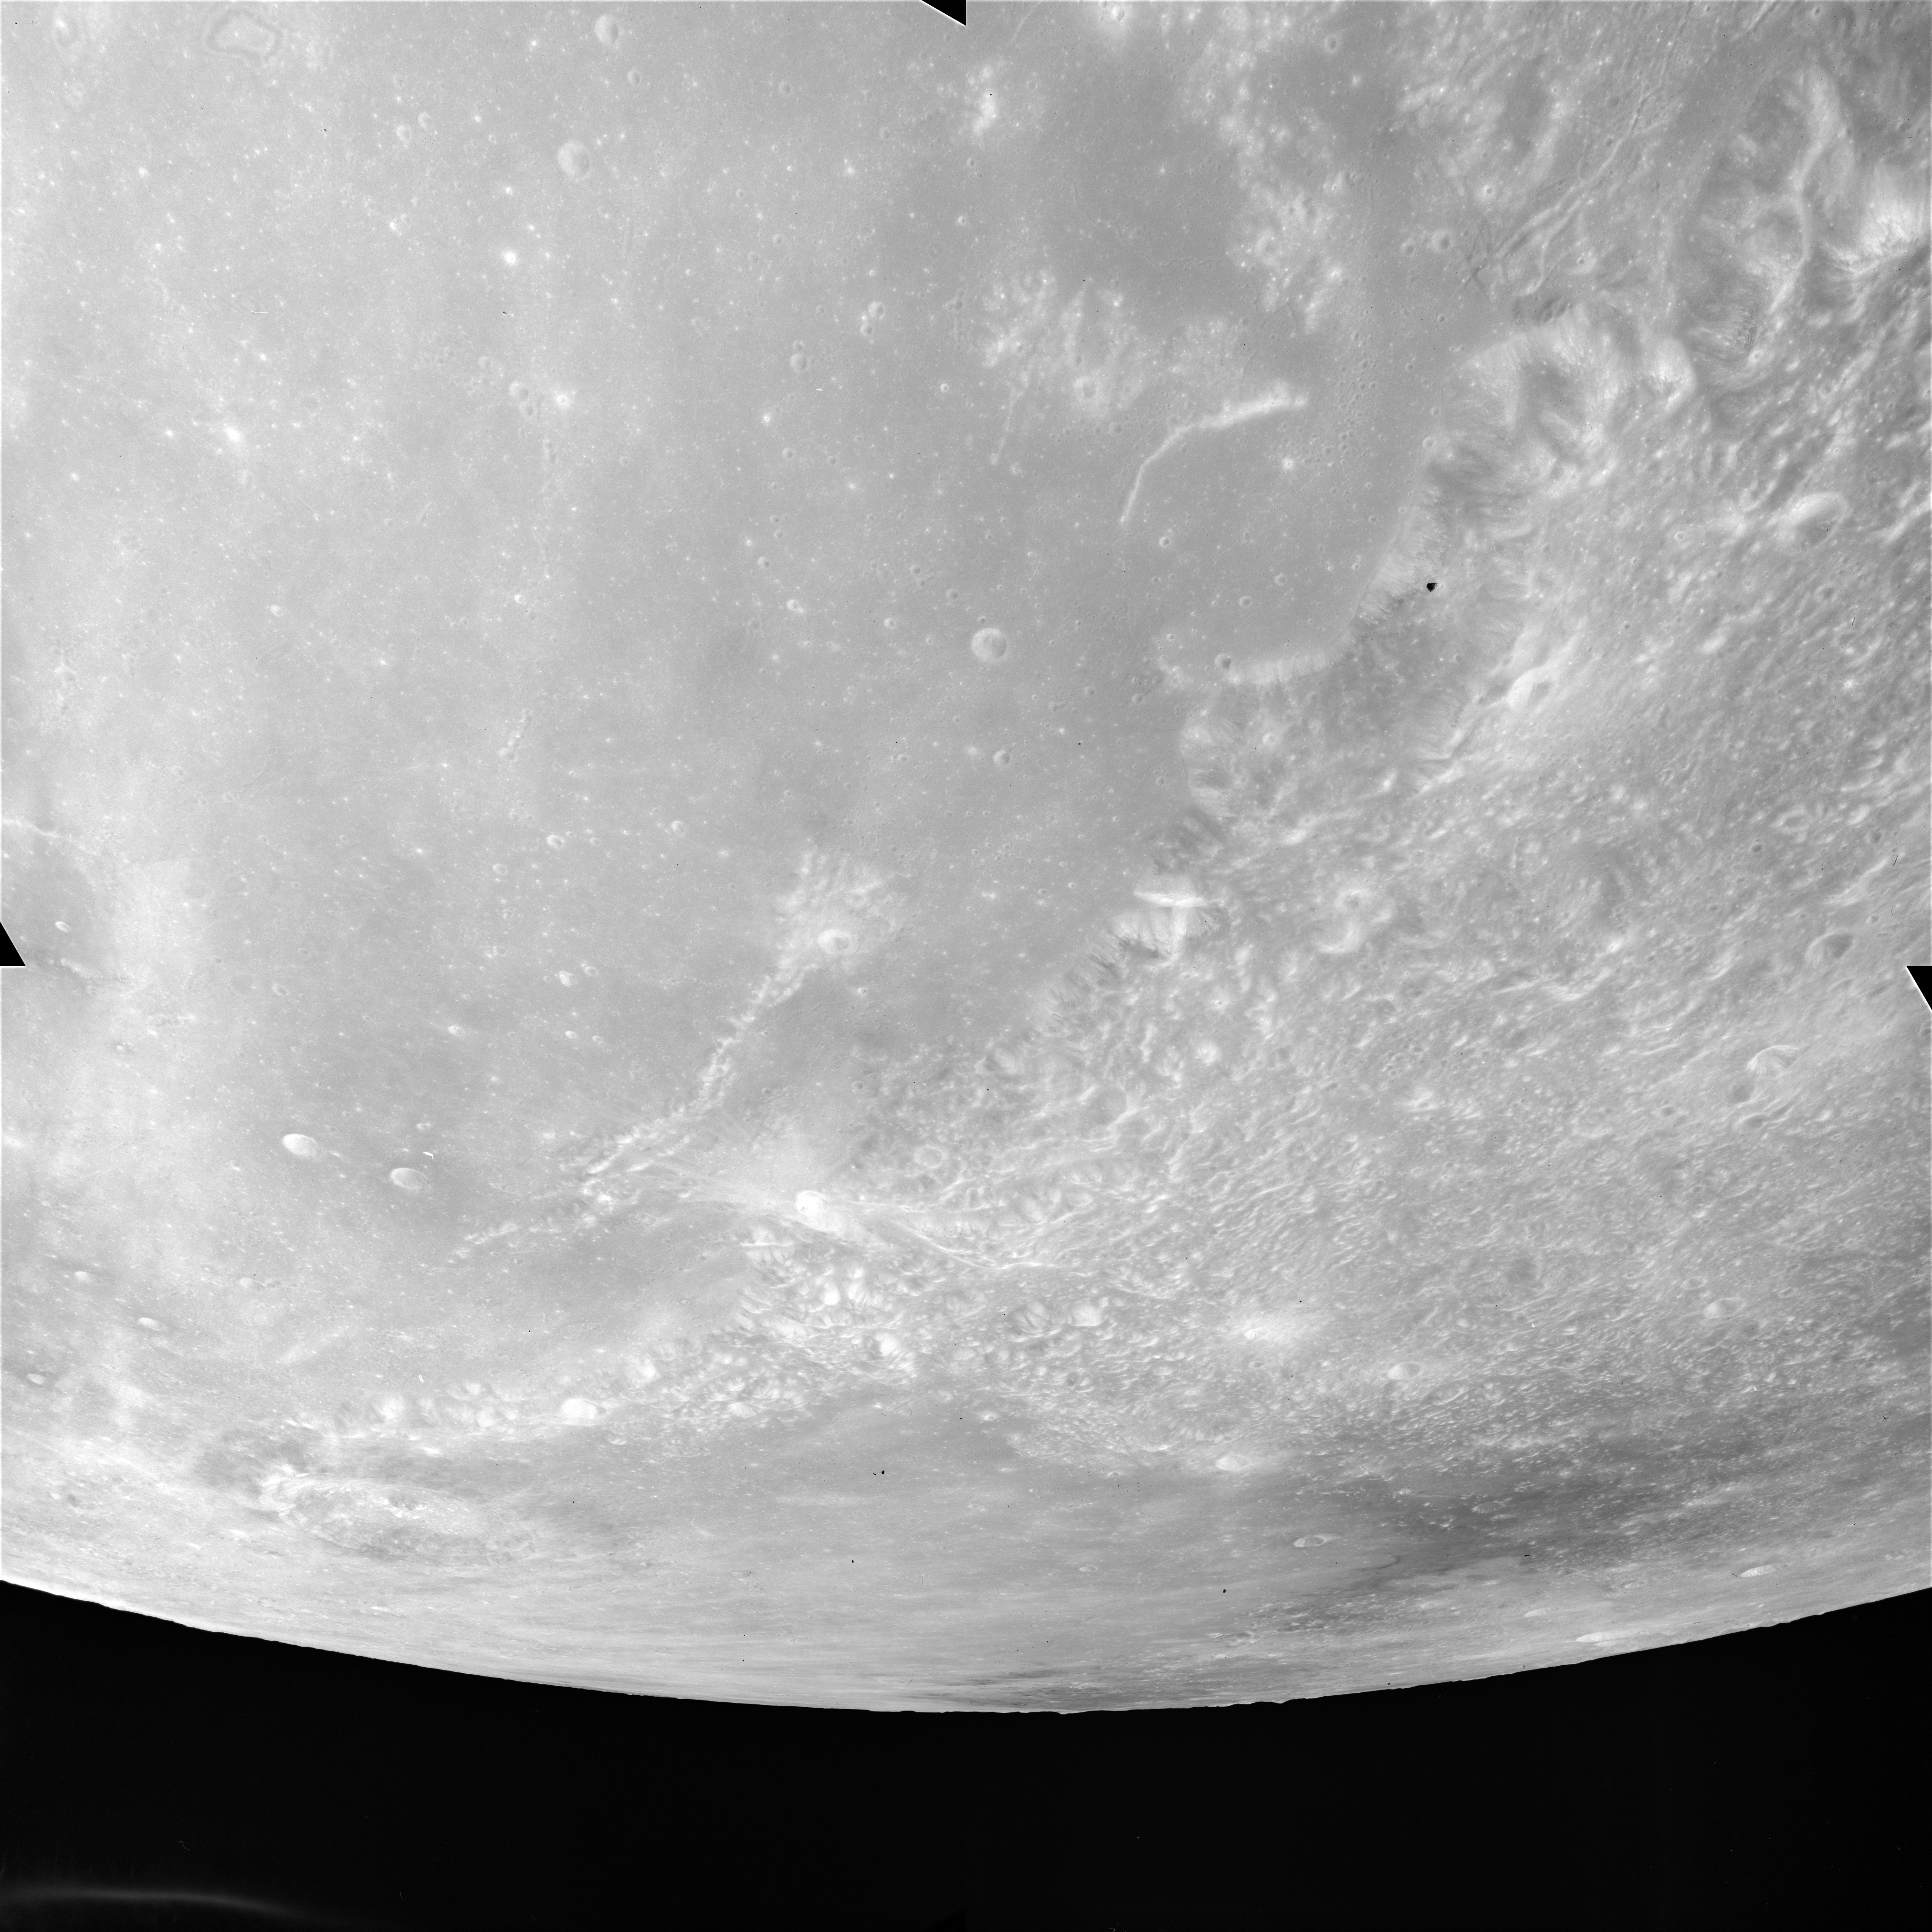
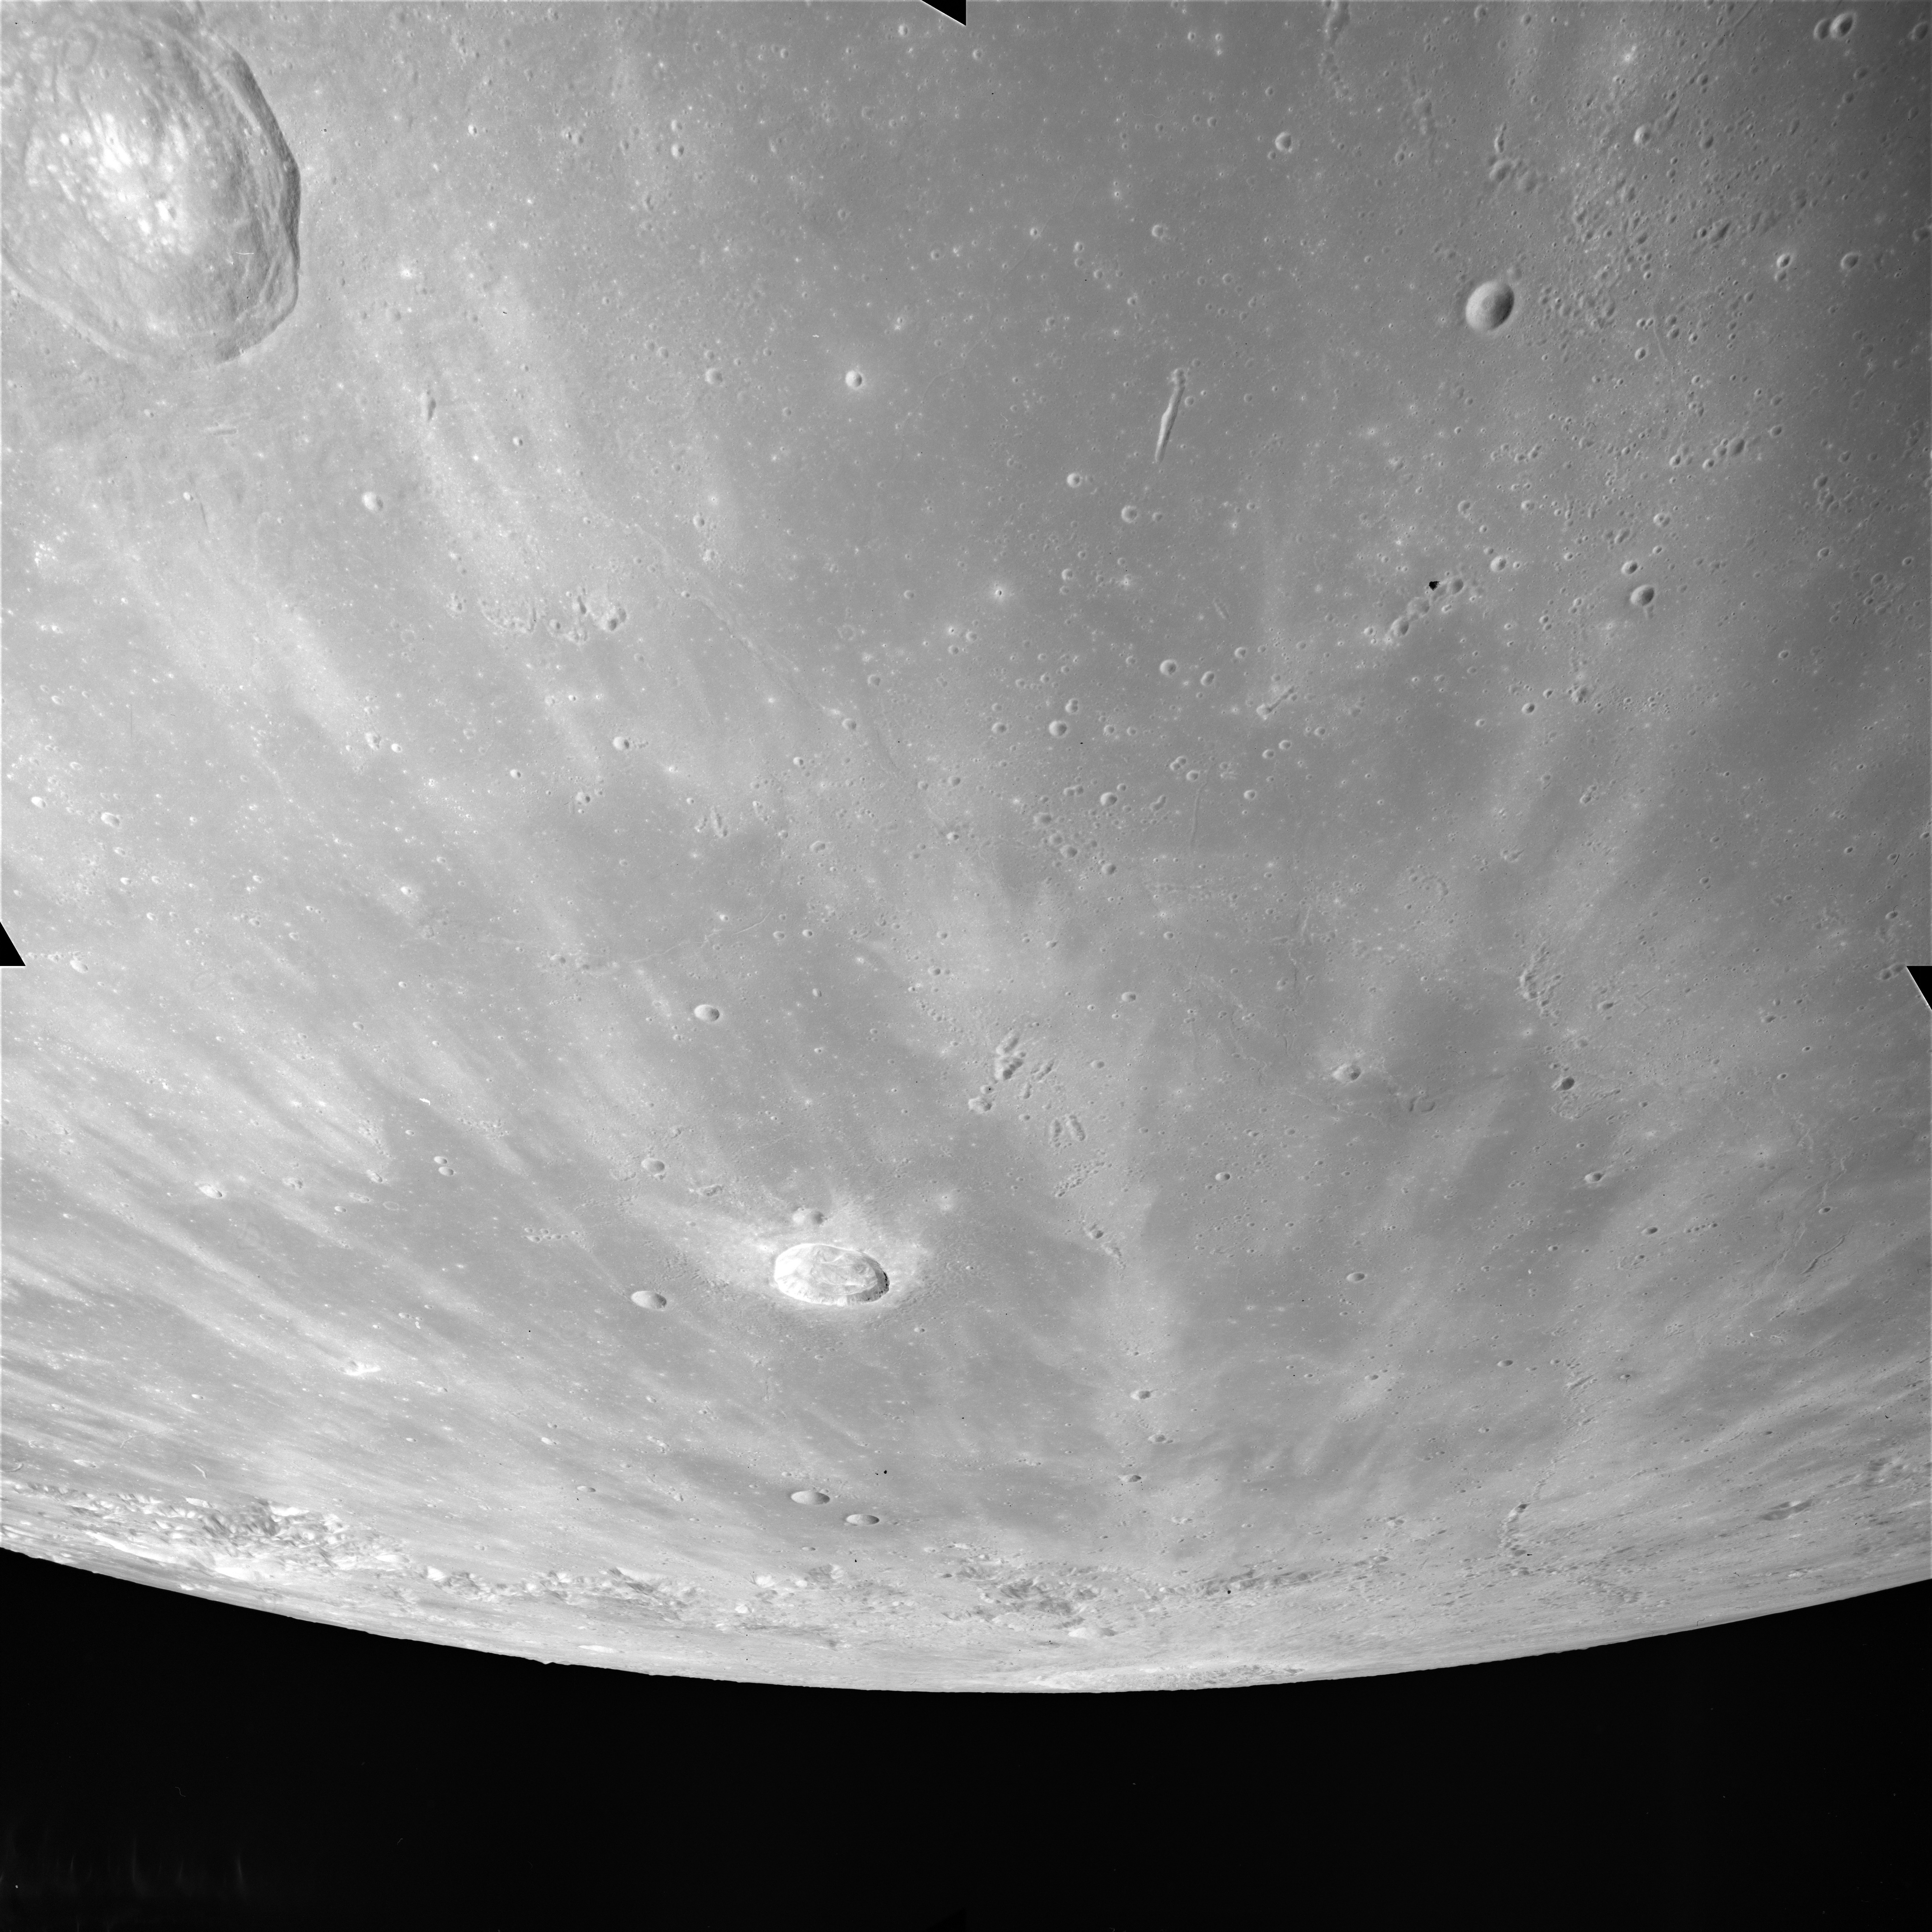
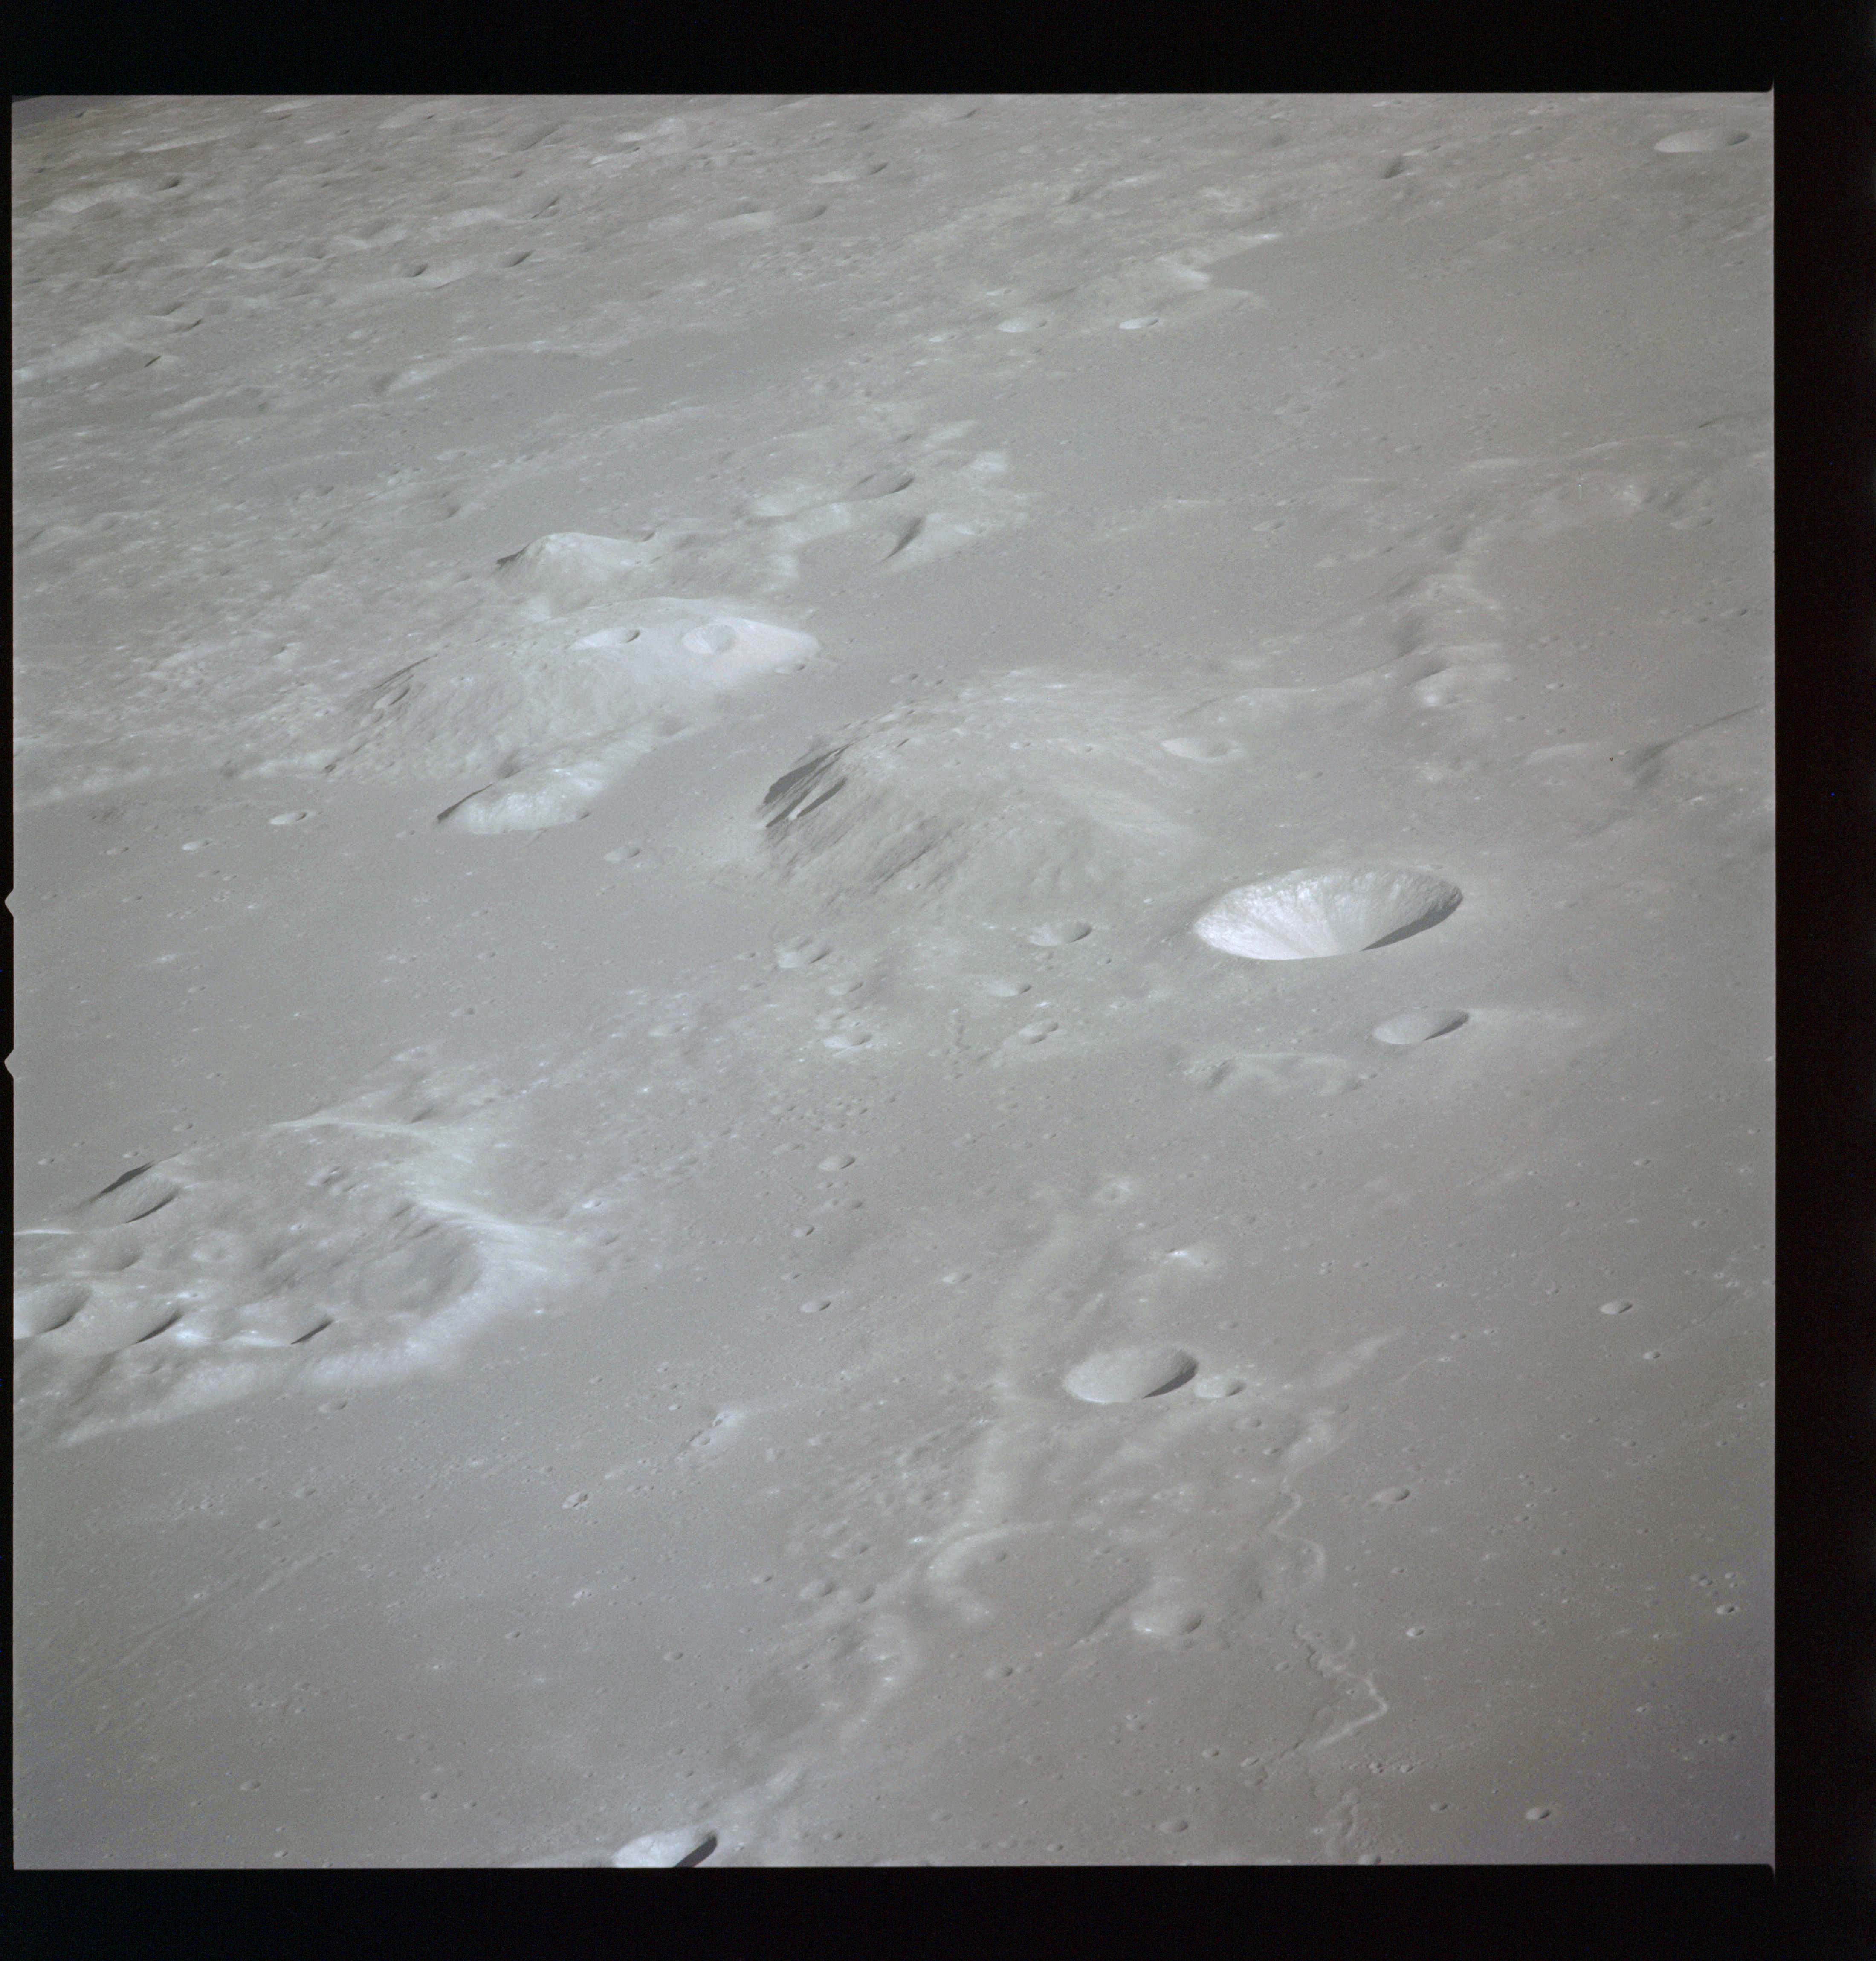
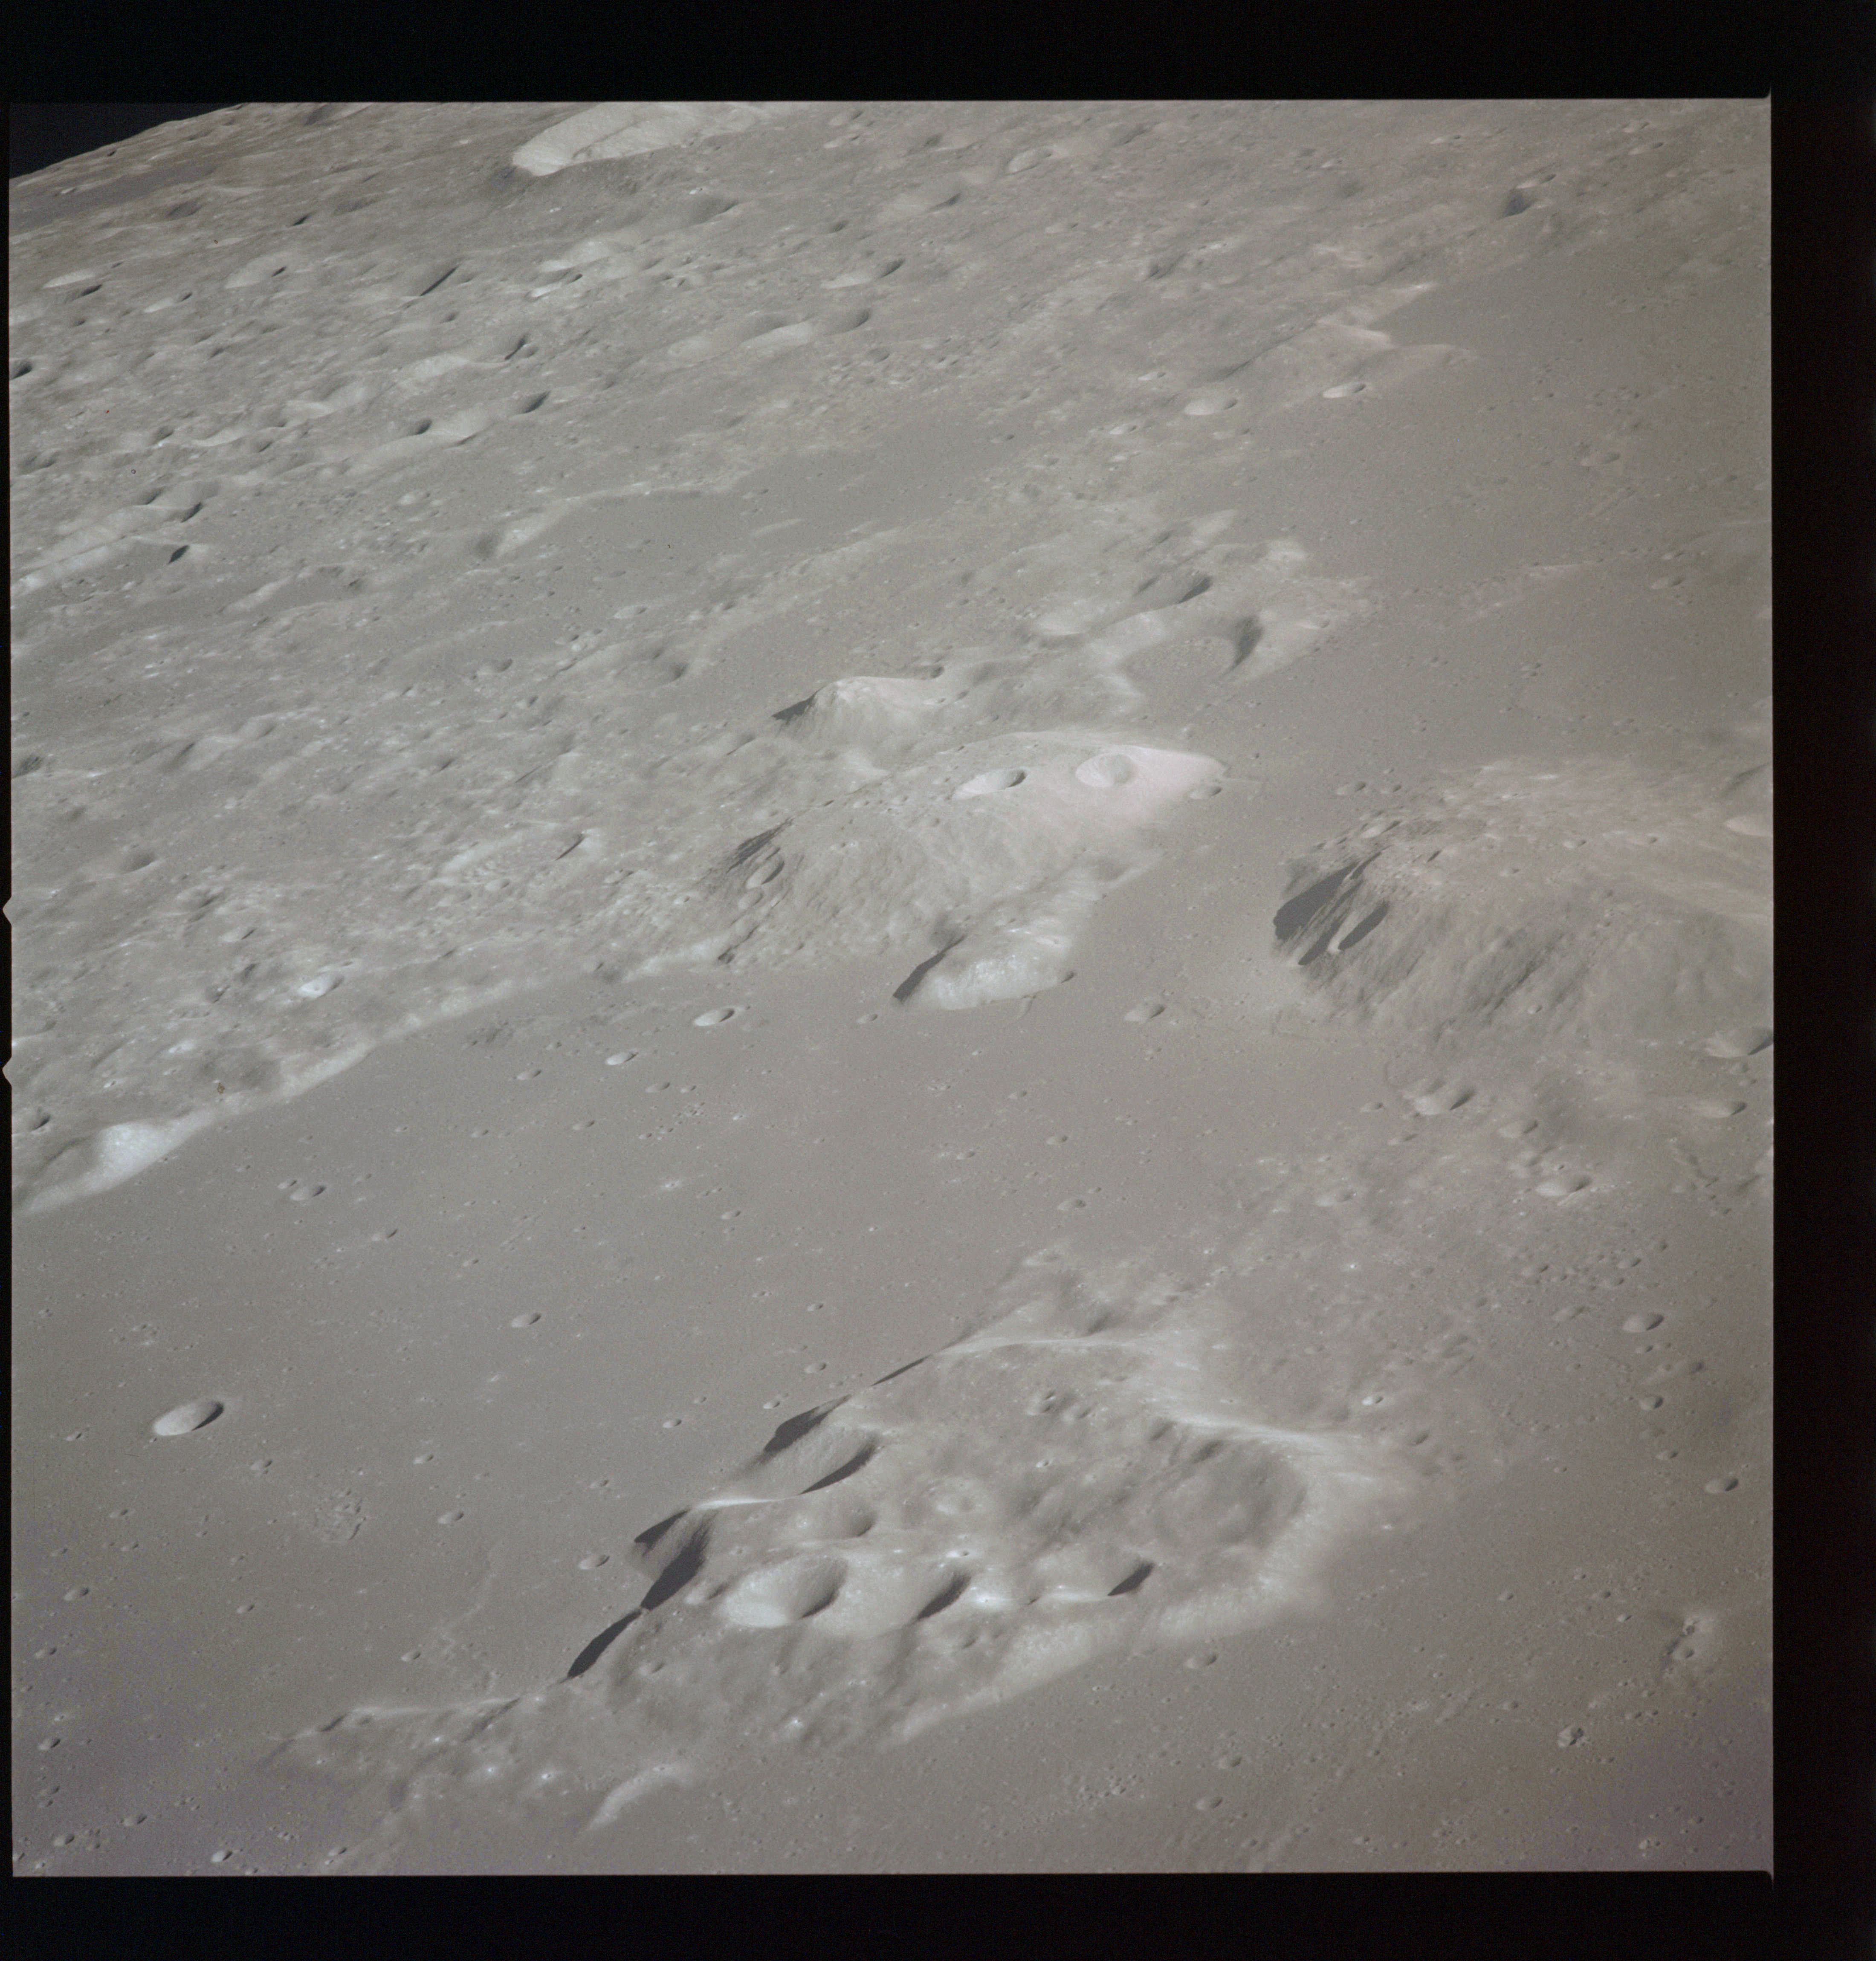
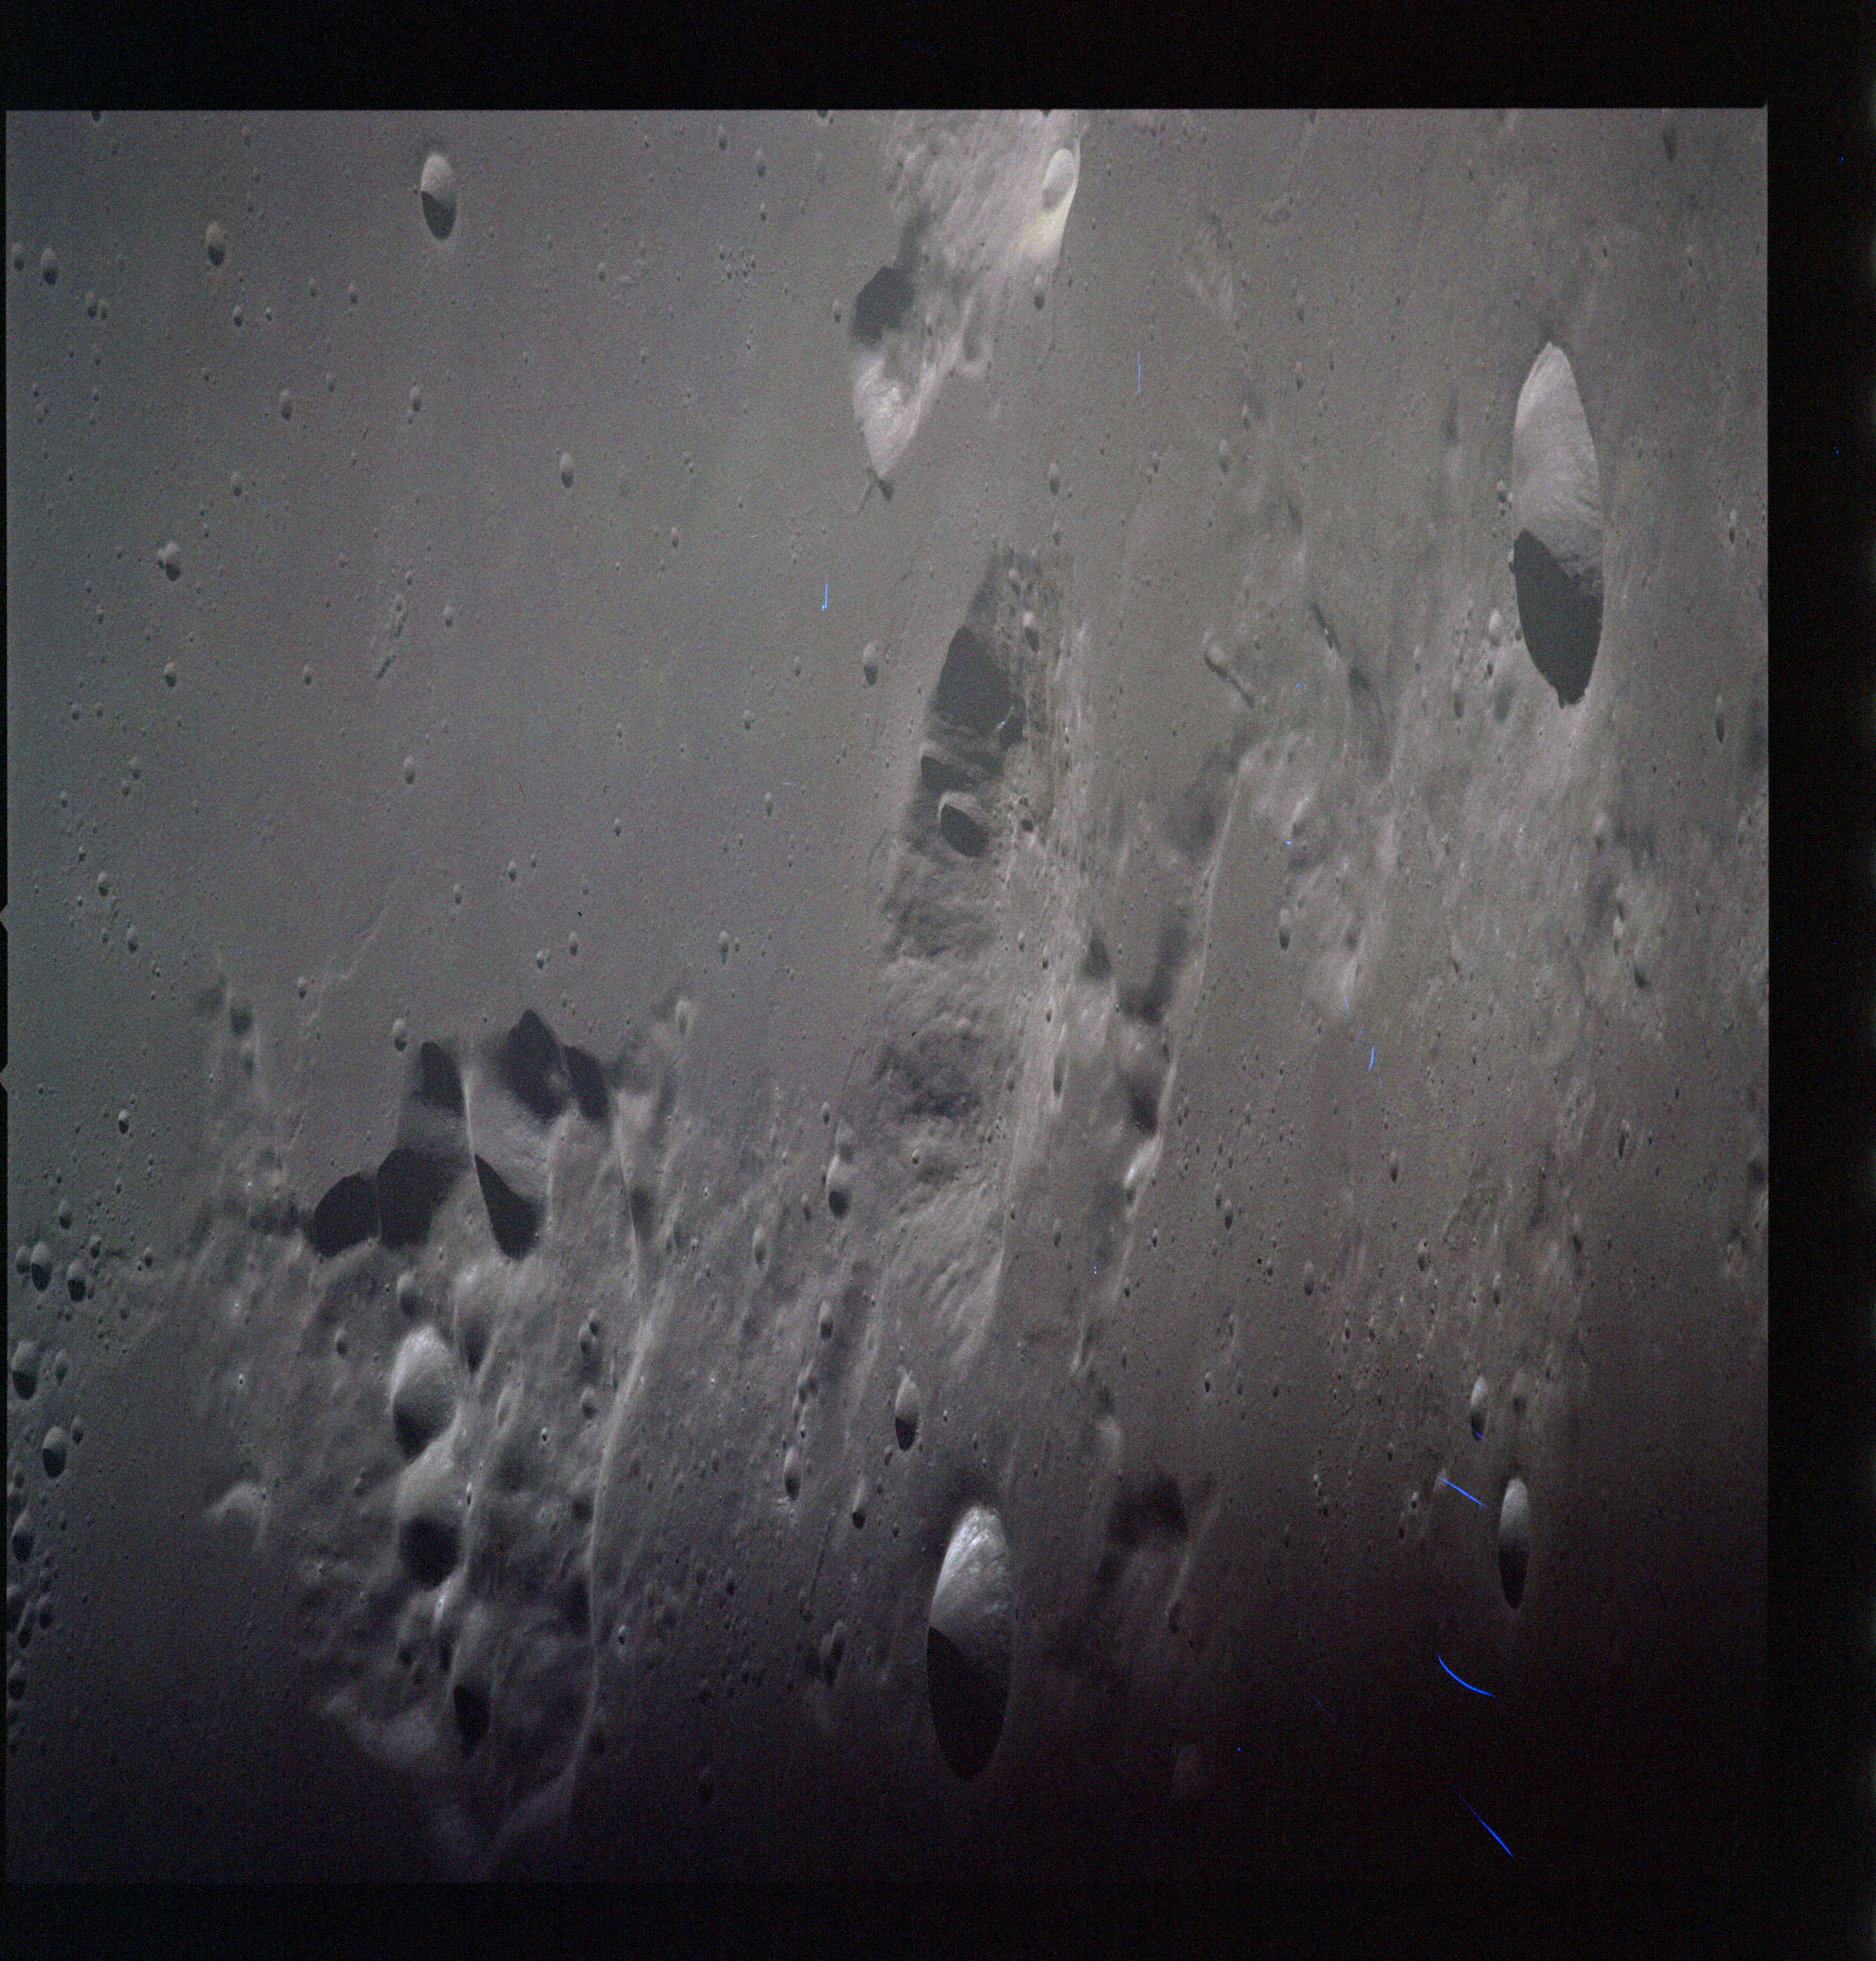
AS15-M-2495 - South oblique Metric Camera image of far side craters Scaliger, Milne and Parkhurst. Image taken at about 216:19. (250 megapixel version), (labelled version) - Image by NASA/ASU.
This is Apollo Control at 216 hours, 20 minutes. We're about a minute away from Acquisition of Signal. At approximately 9 o'clock this morning, on the television monitors in the news center, we will replay the video tape of this morning's test of the lunar surface television camera. This will be a video tape replay - will be video only, no audio. This test started at 3:53 am Central Daylight Time, this morning, lasted for approximately 12 minutes when the FM downlink from the Lunar Communications Relay Unit was lost. The LCRU has not responded to Power On commands since that time, and this problem is still being studied. We'll stand by now for AOS on Endeavour.
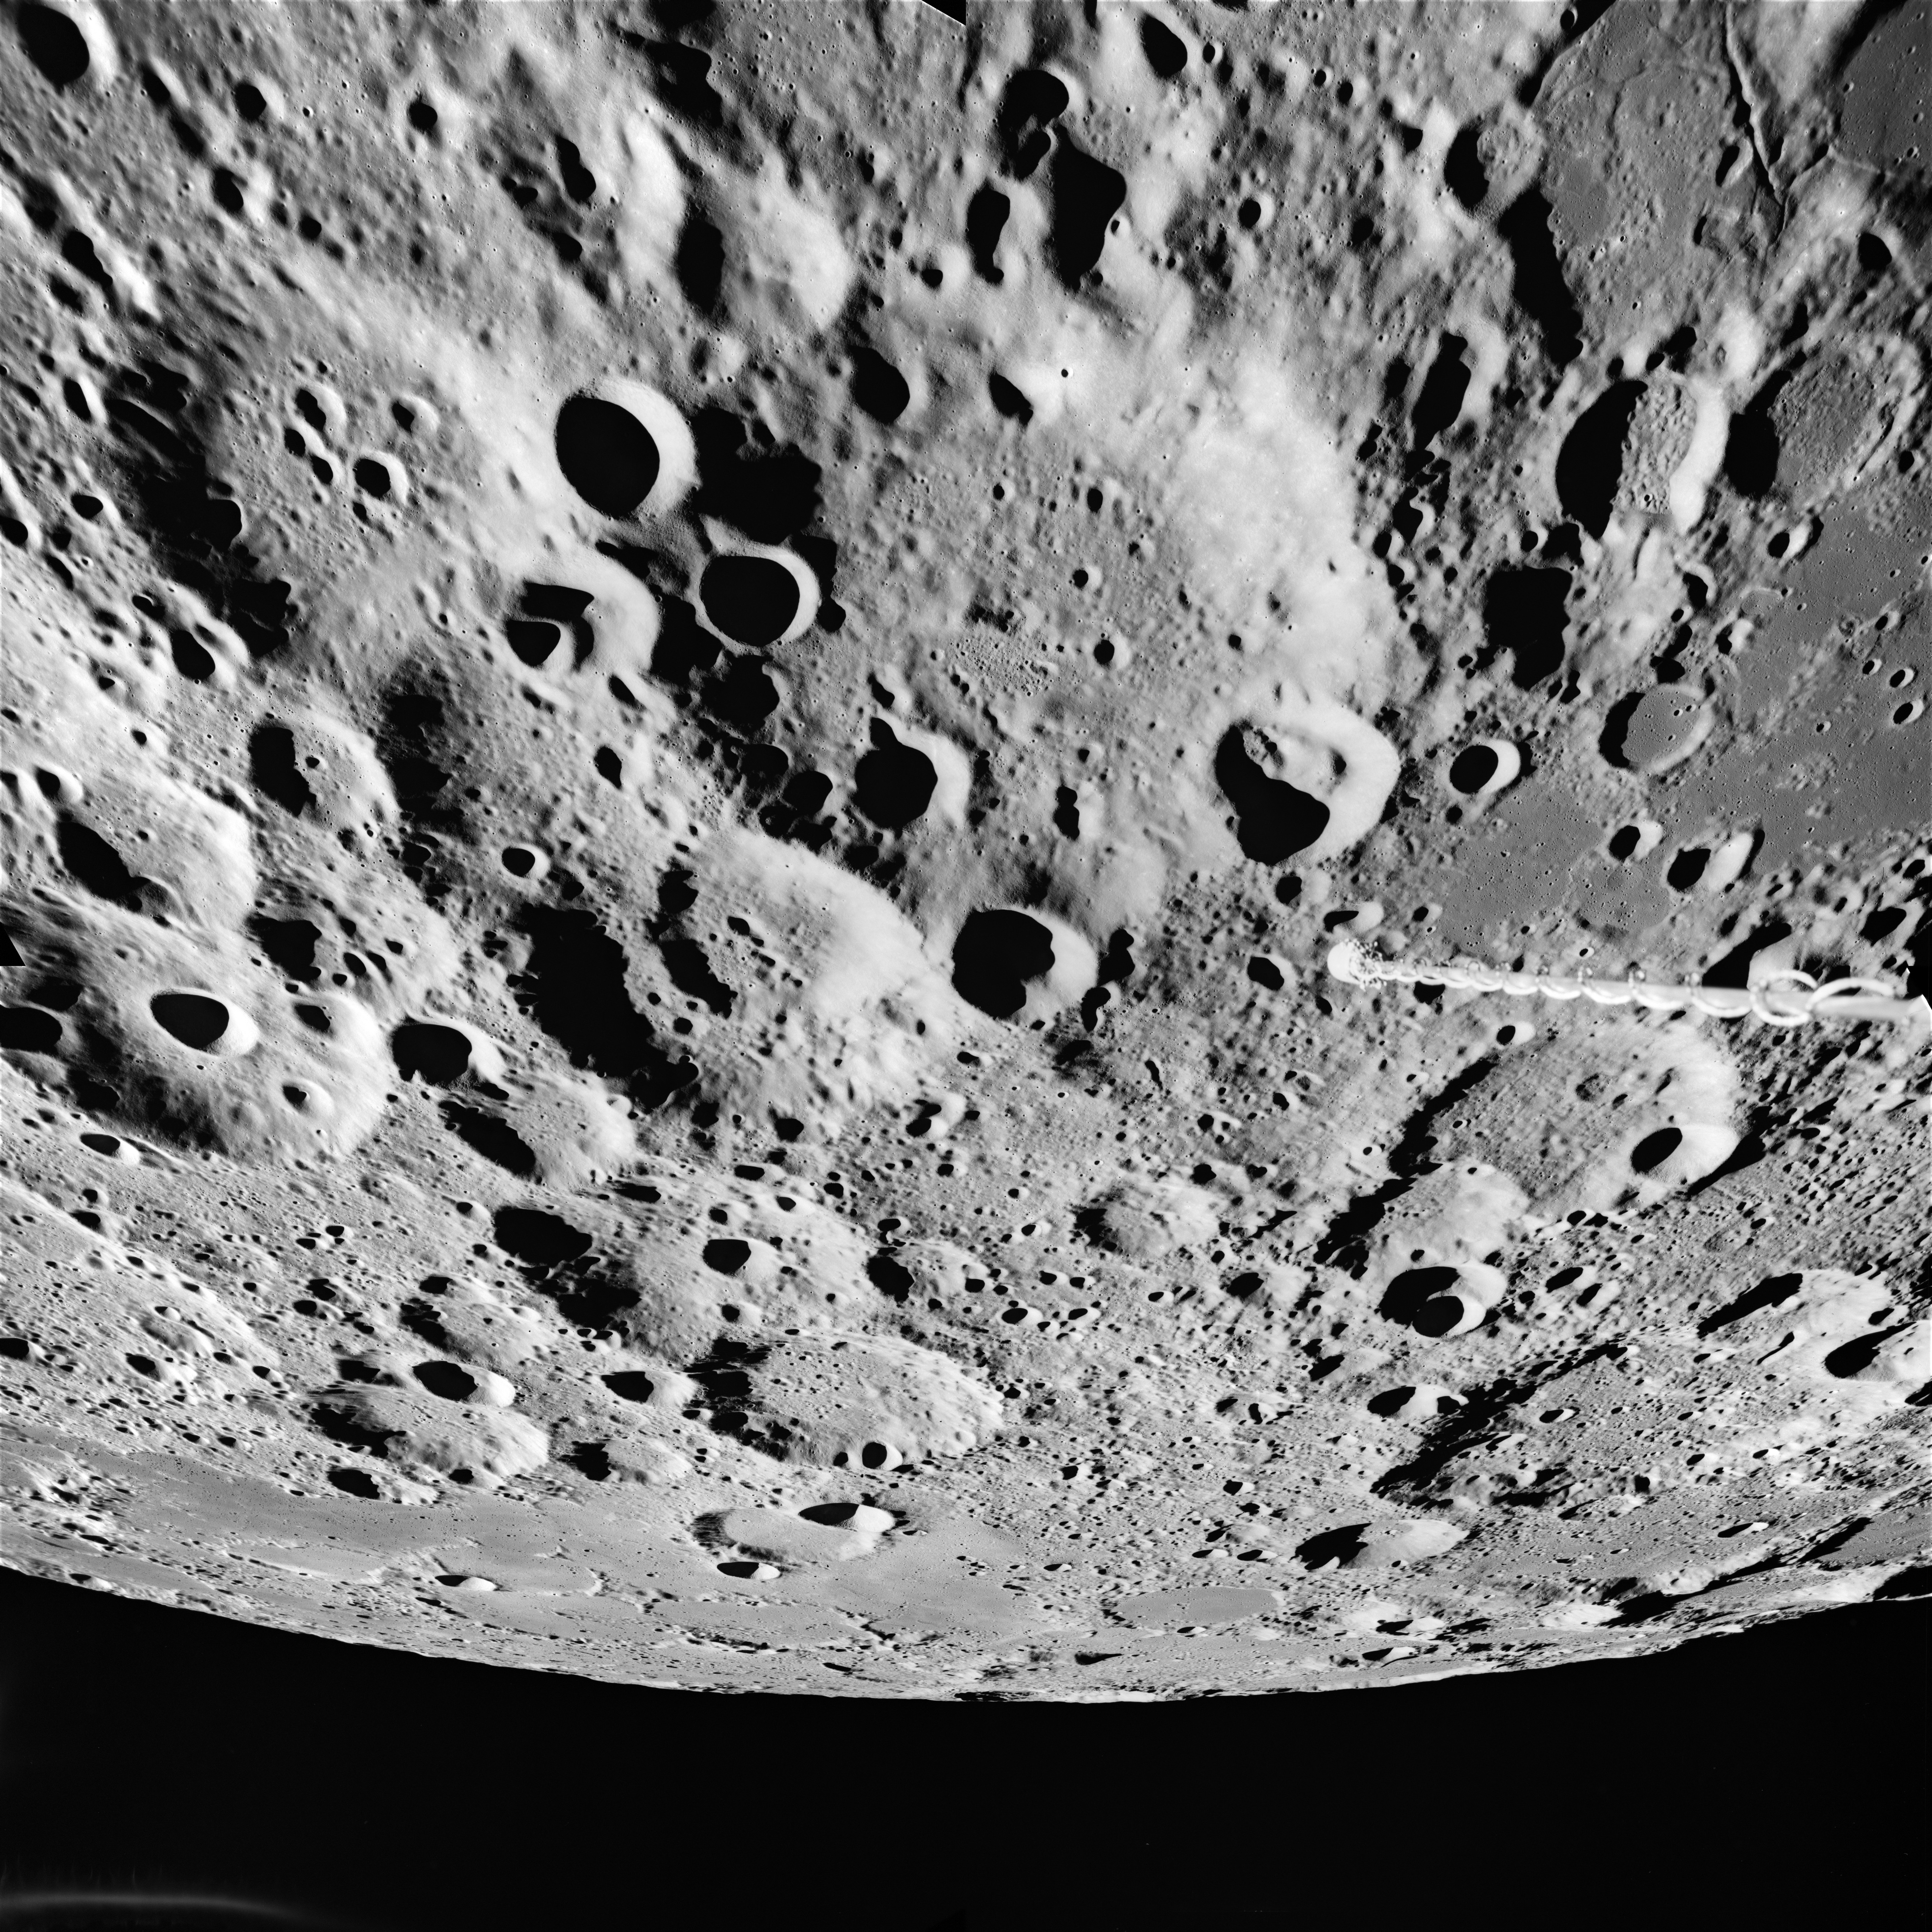
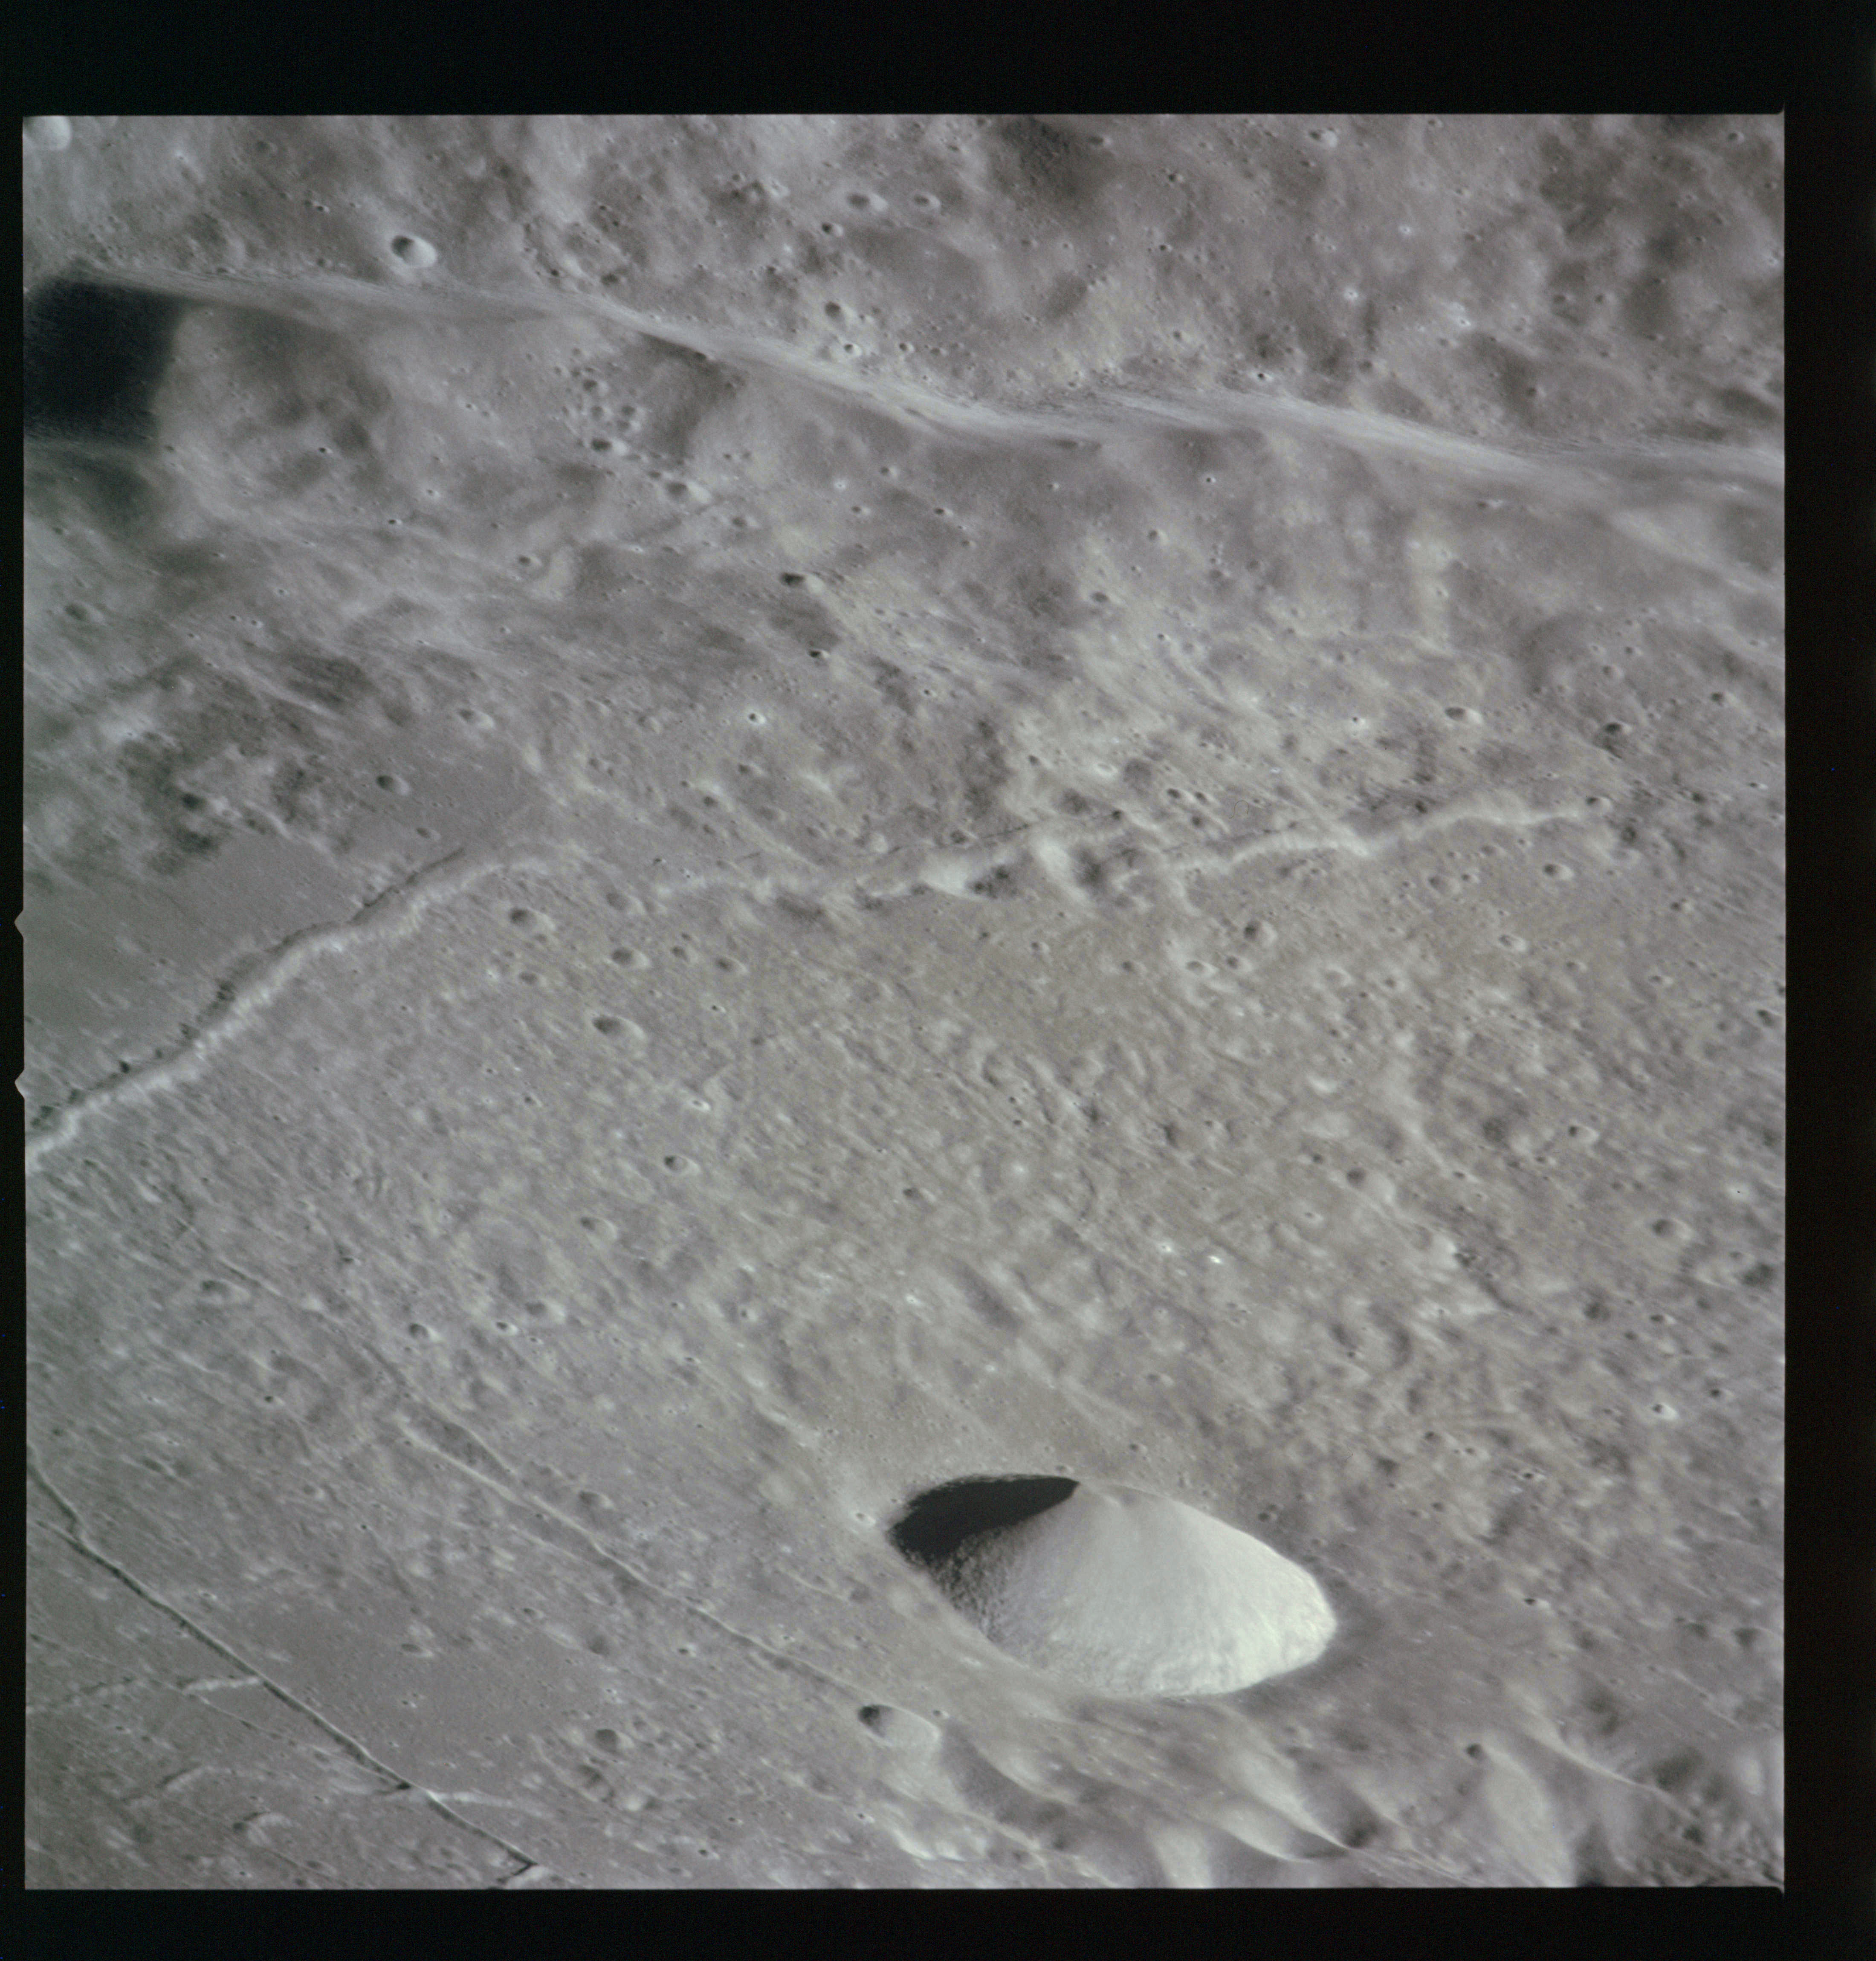
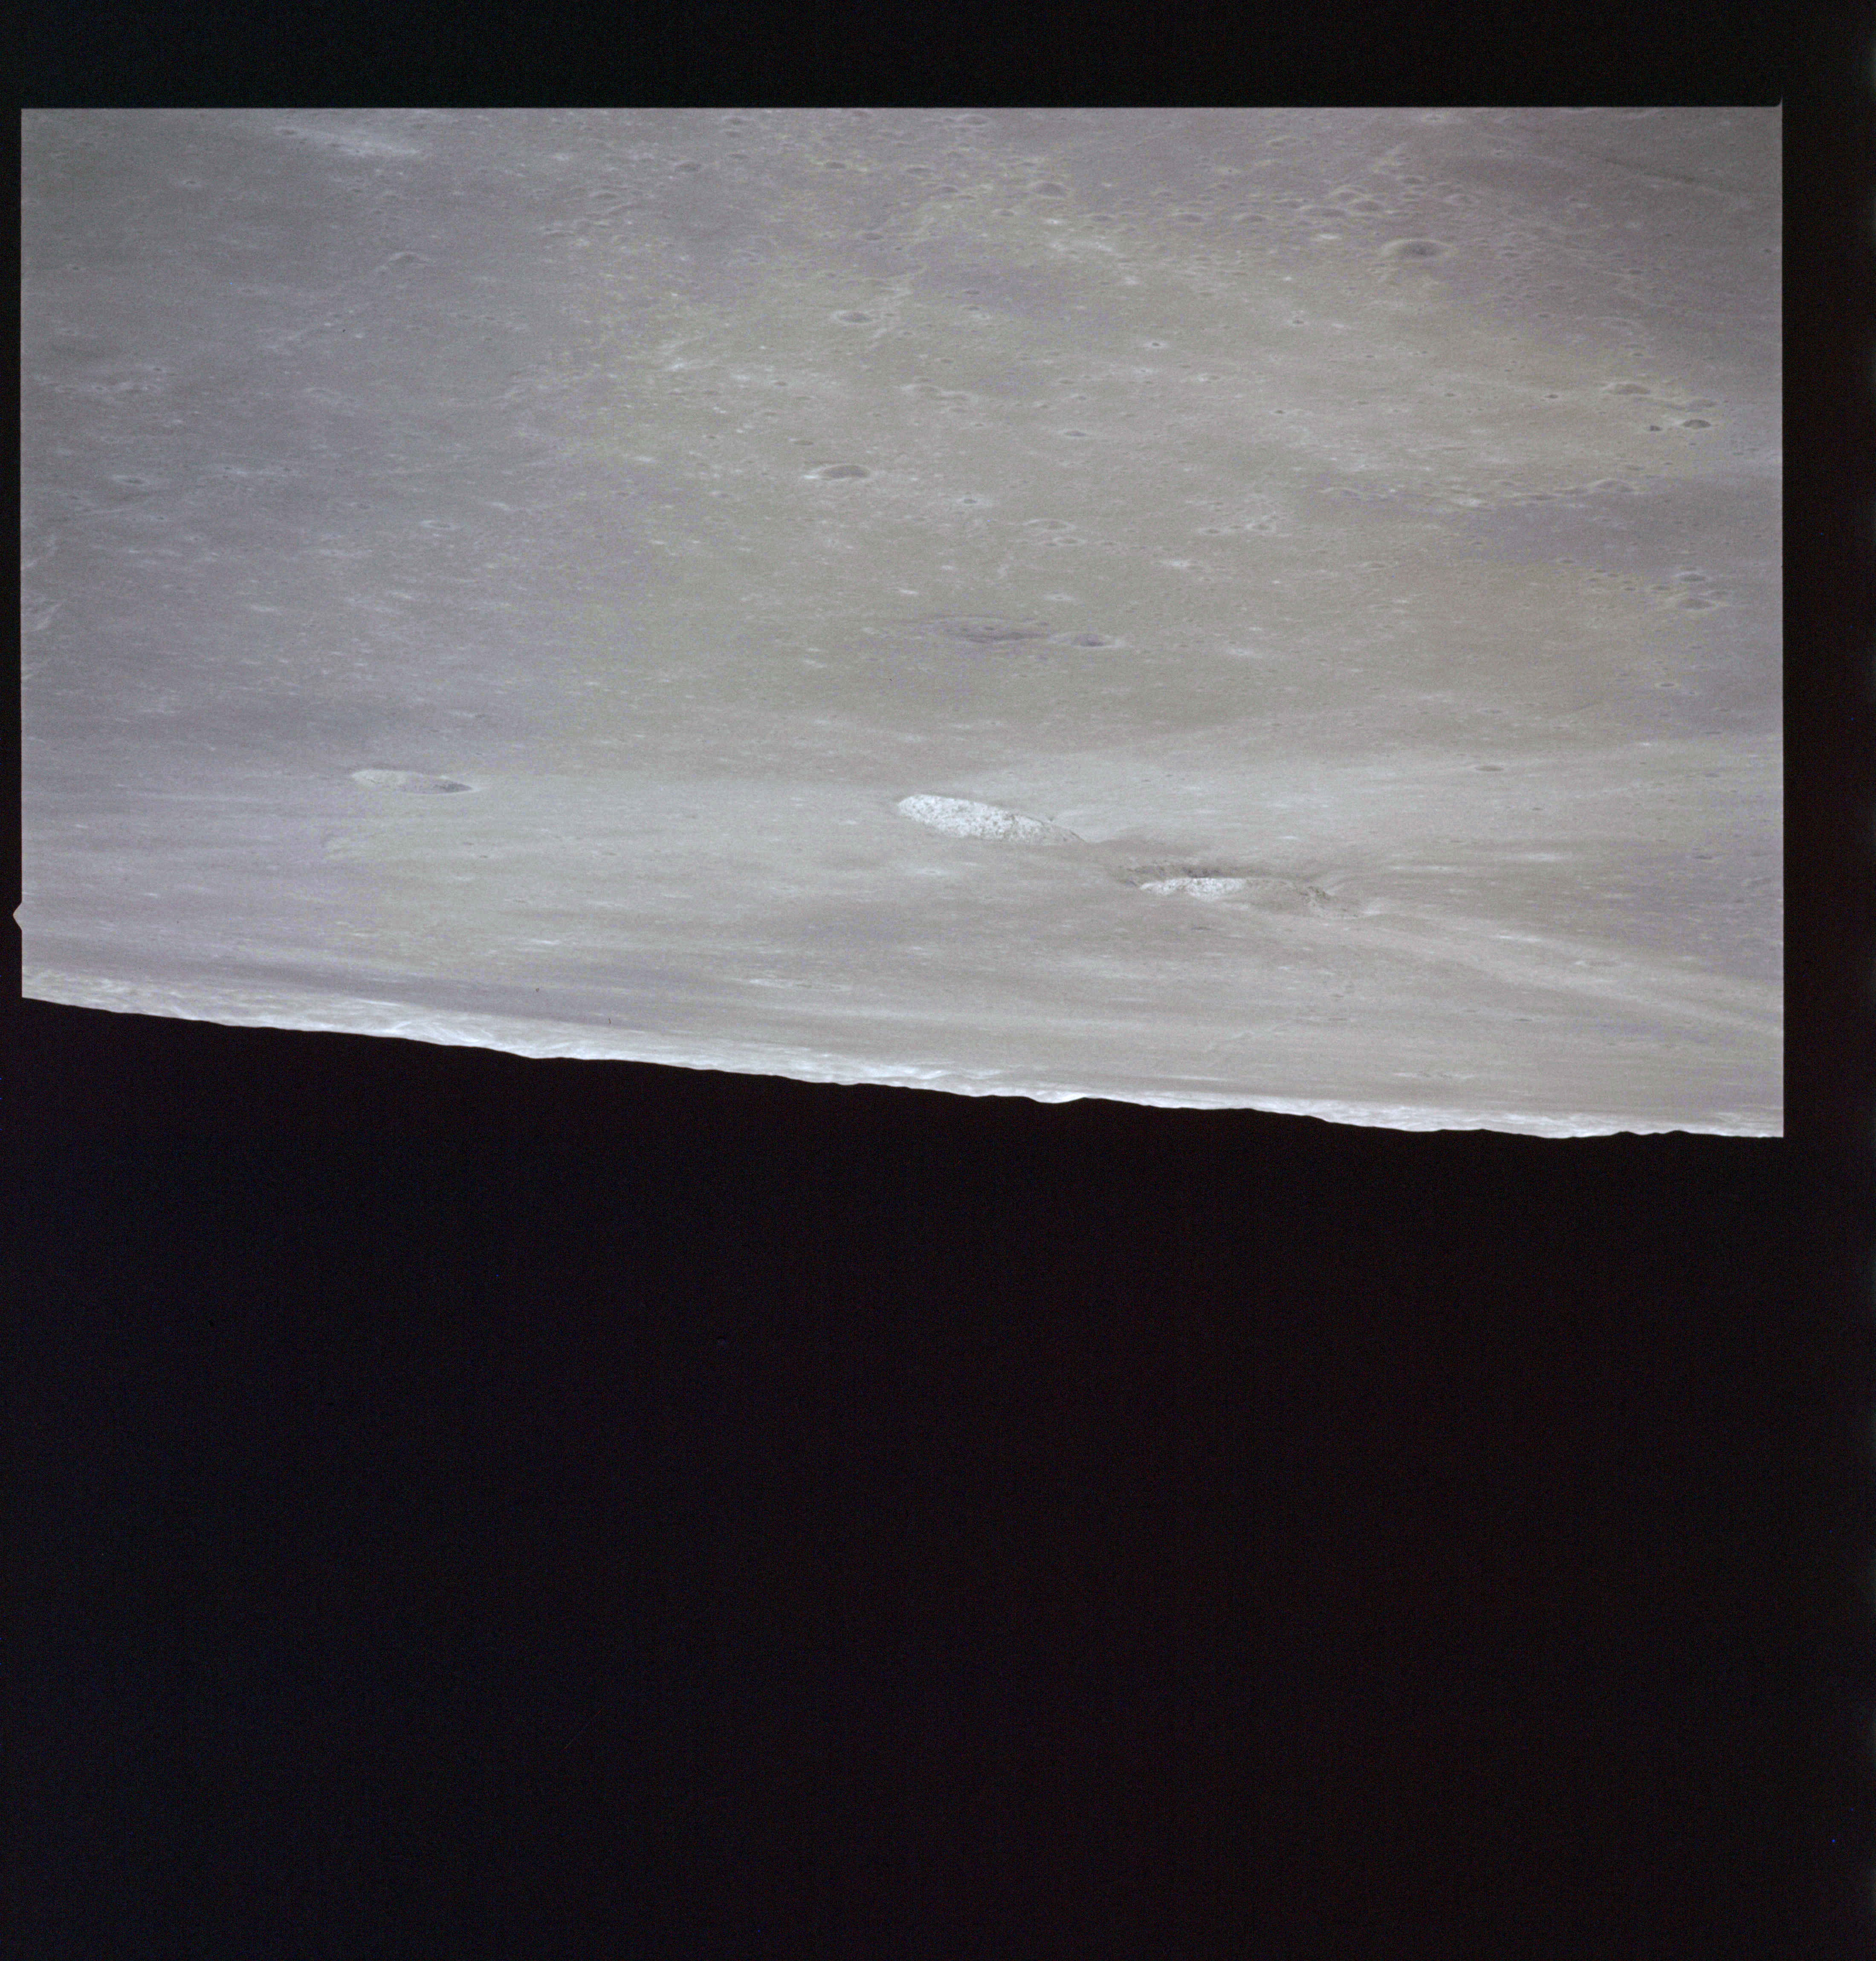
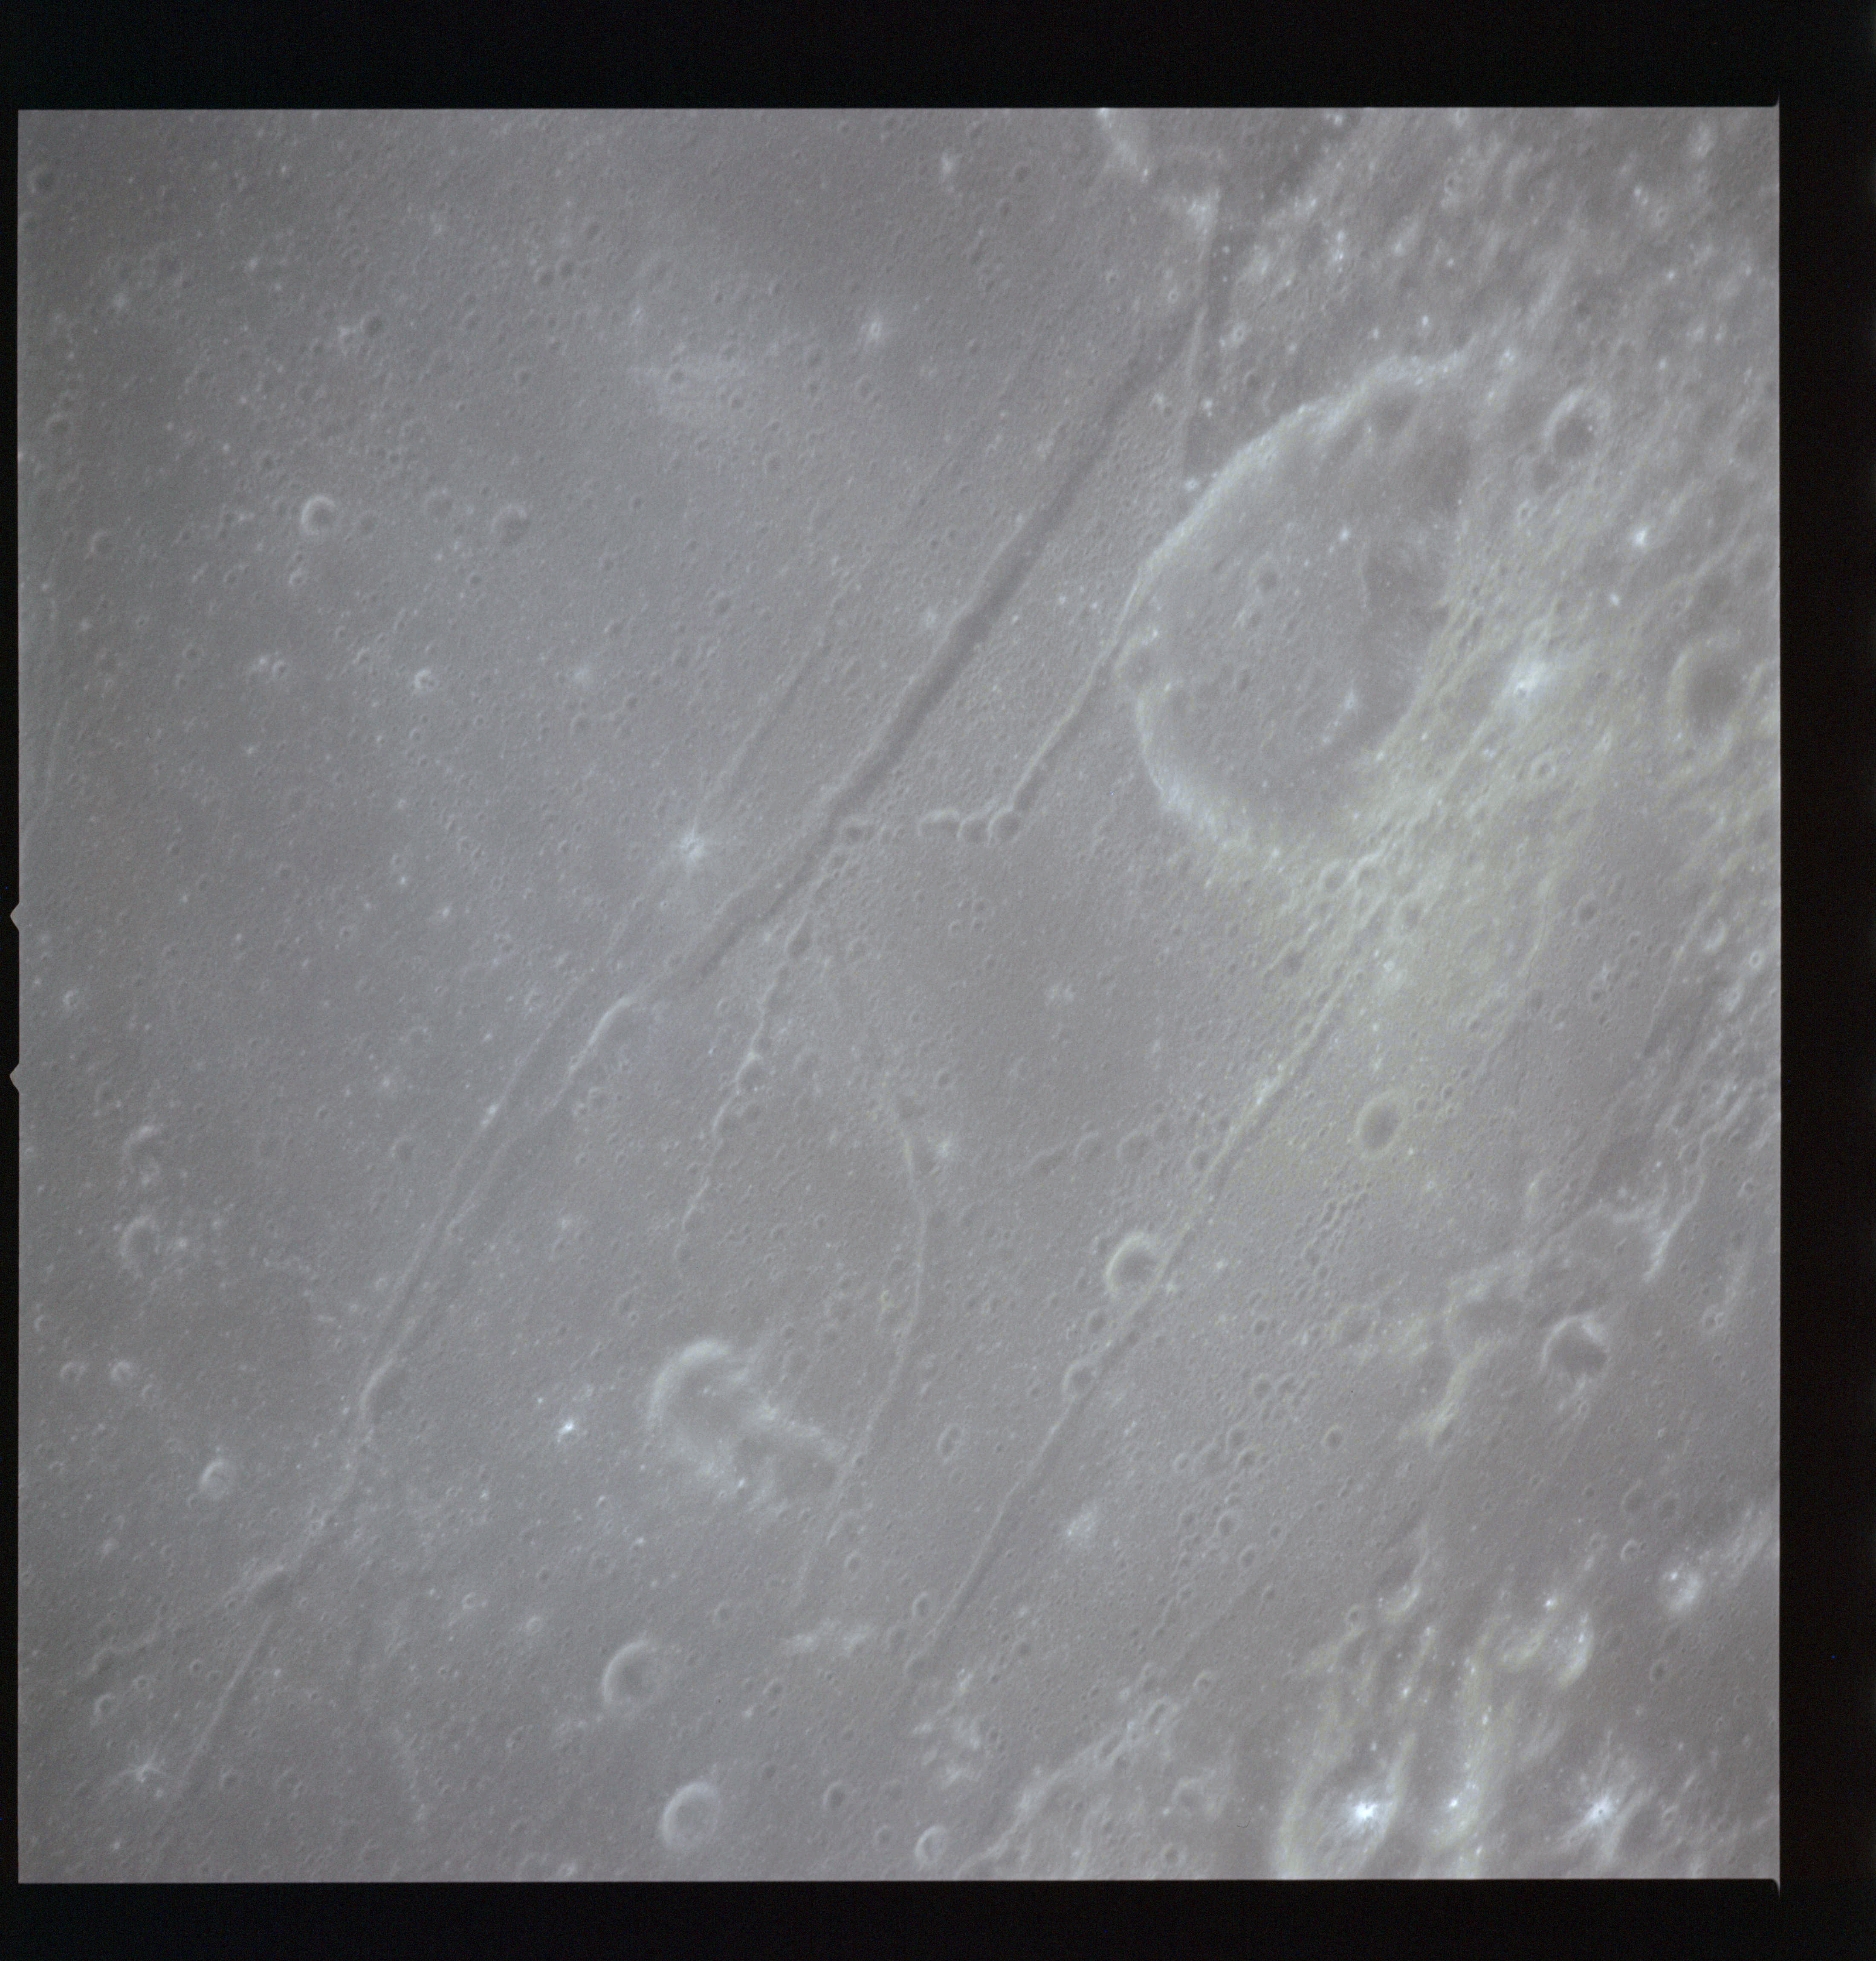
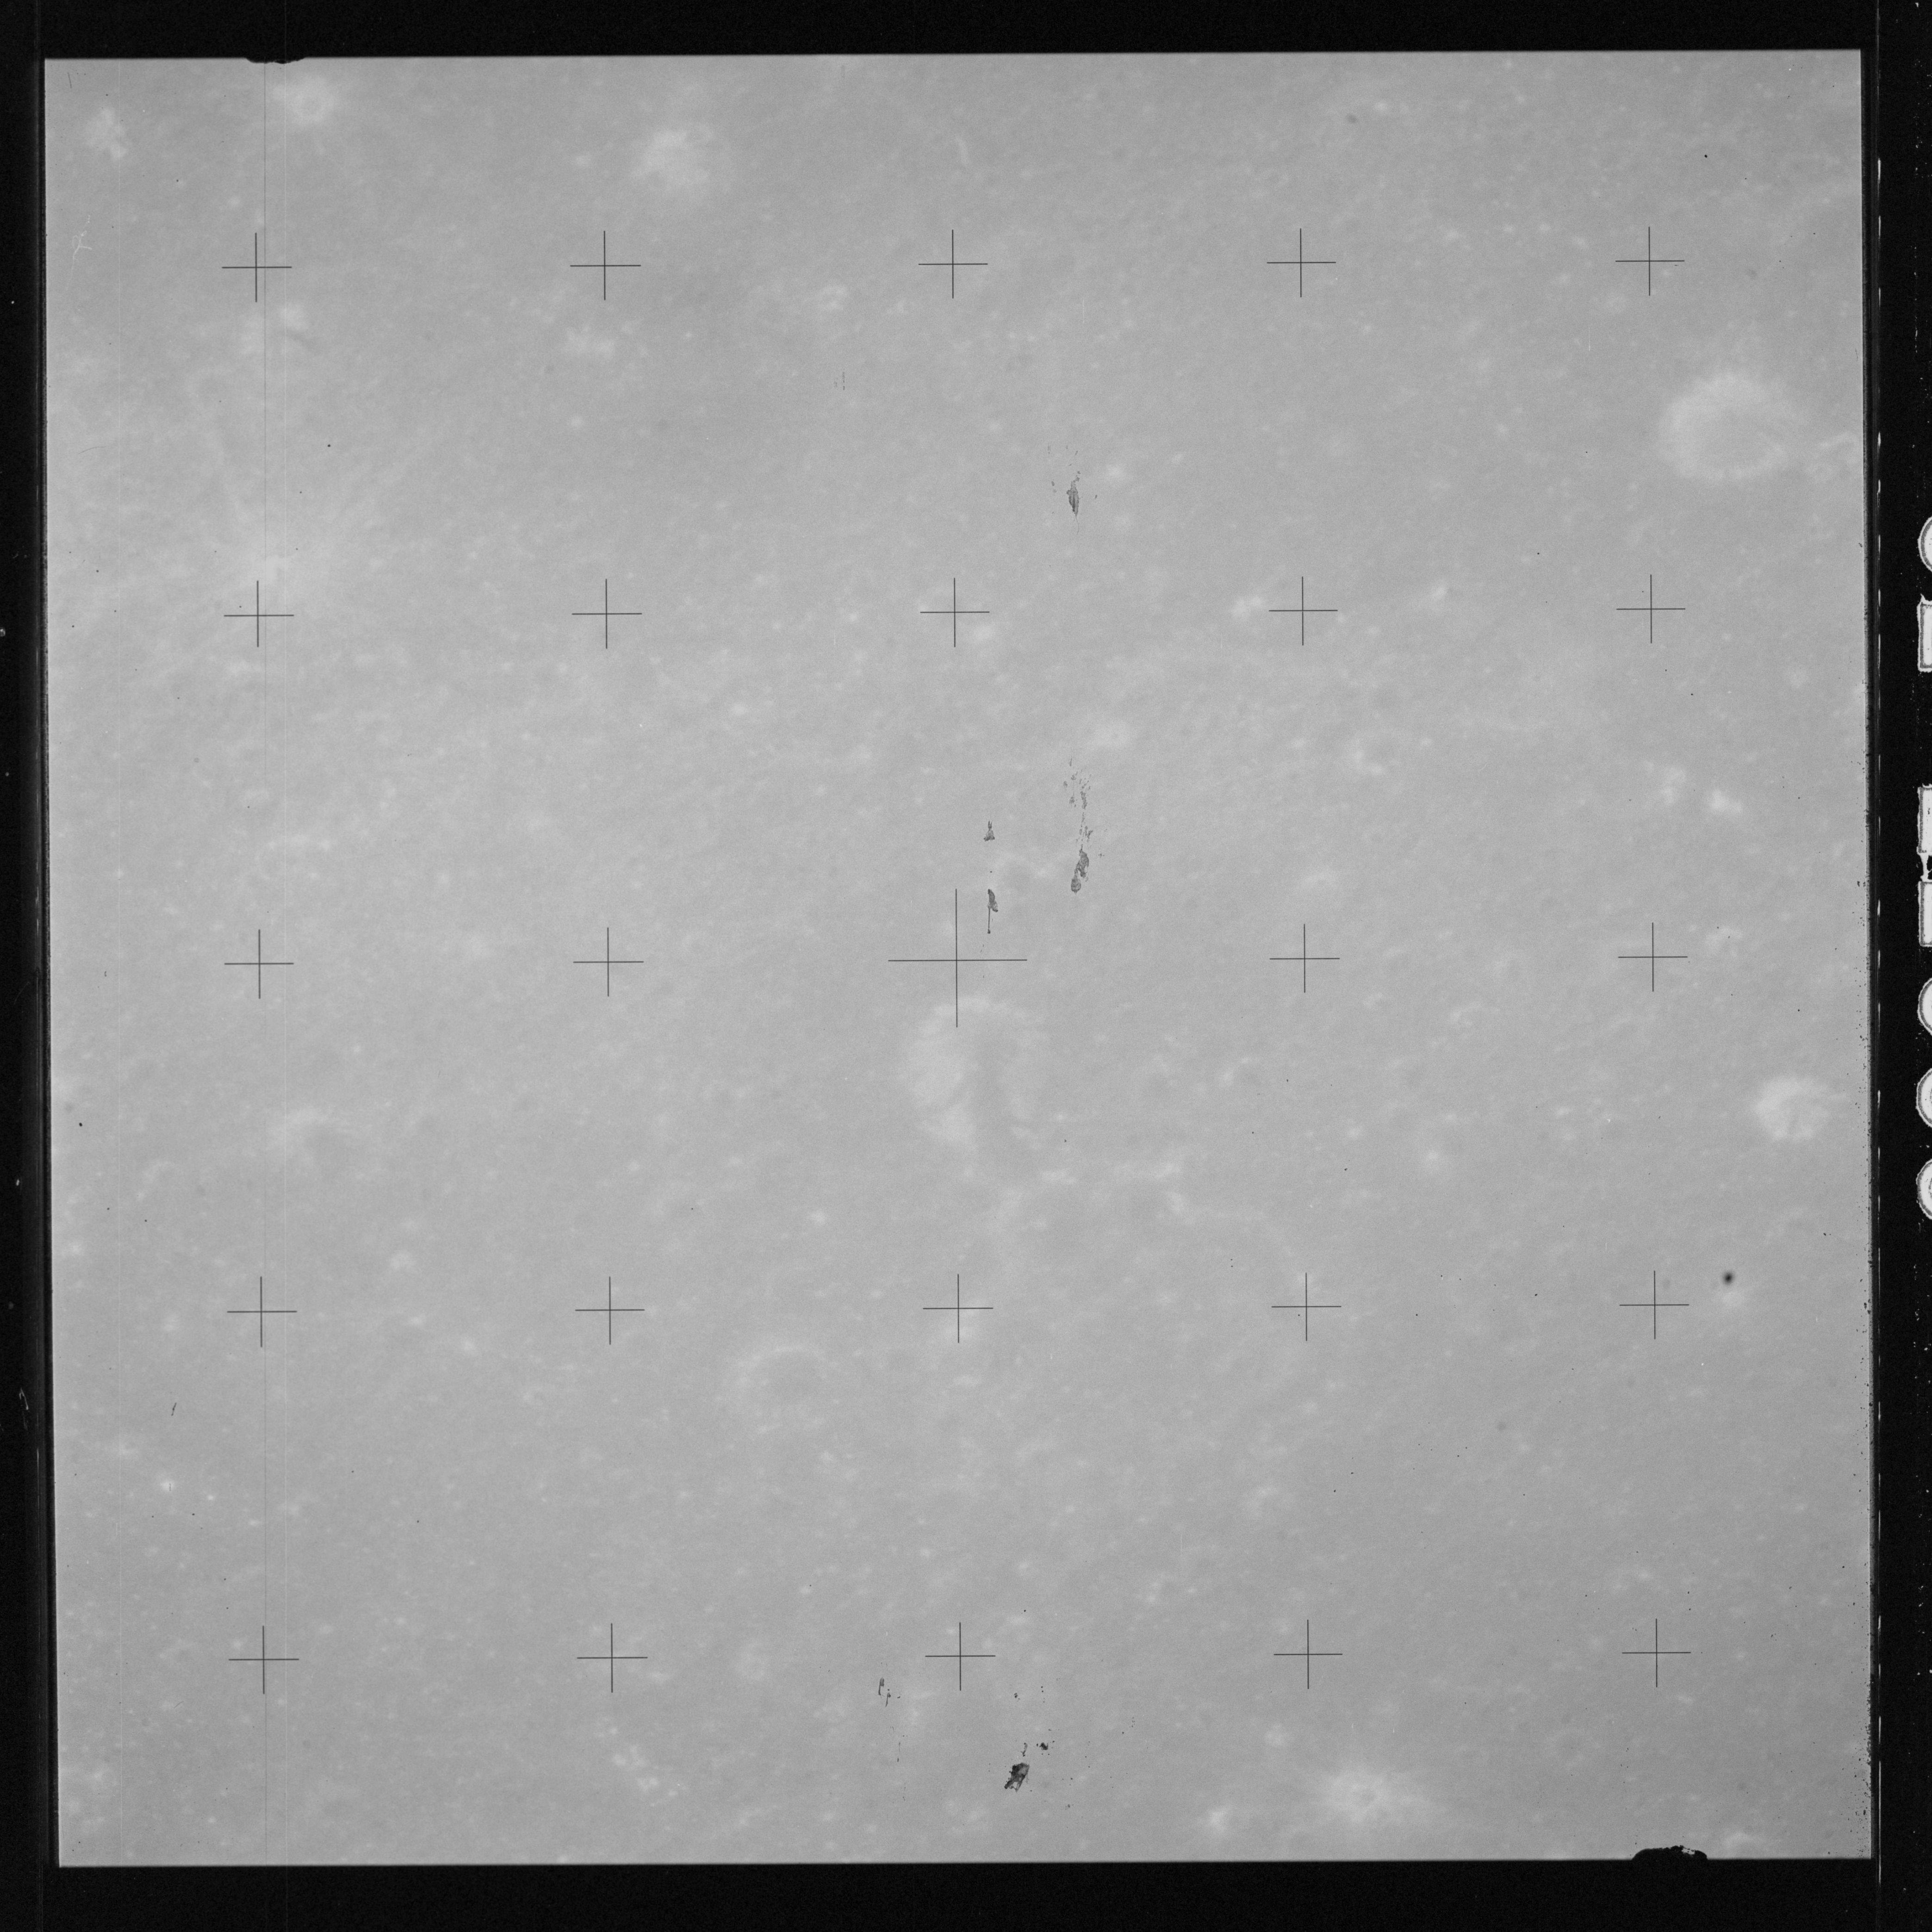
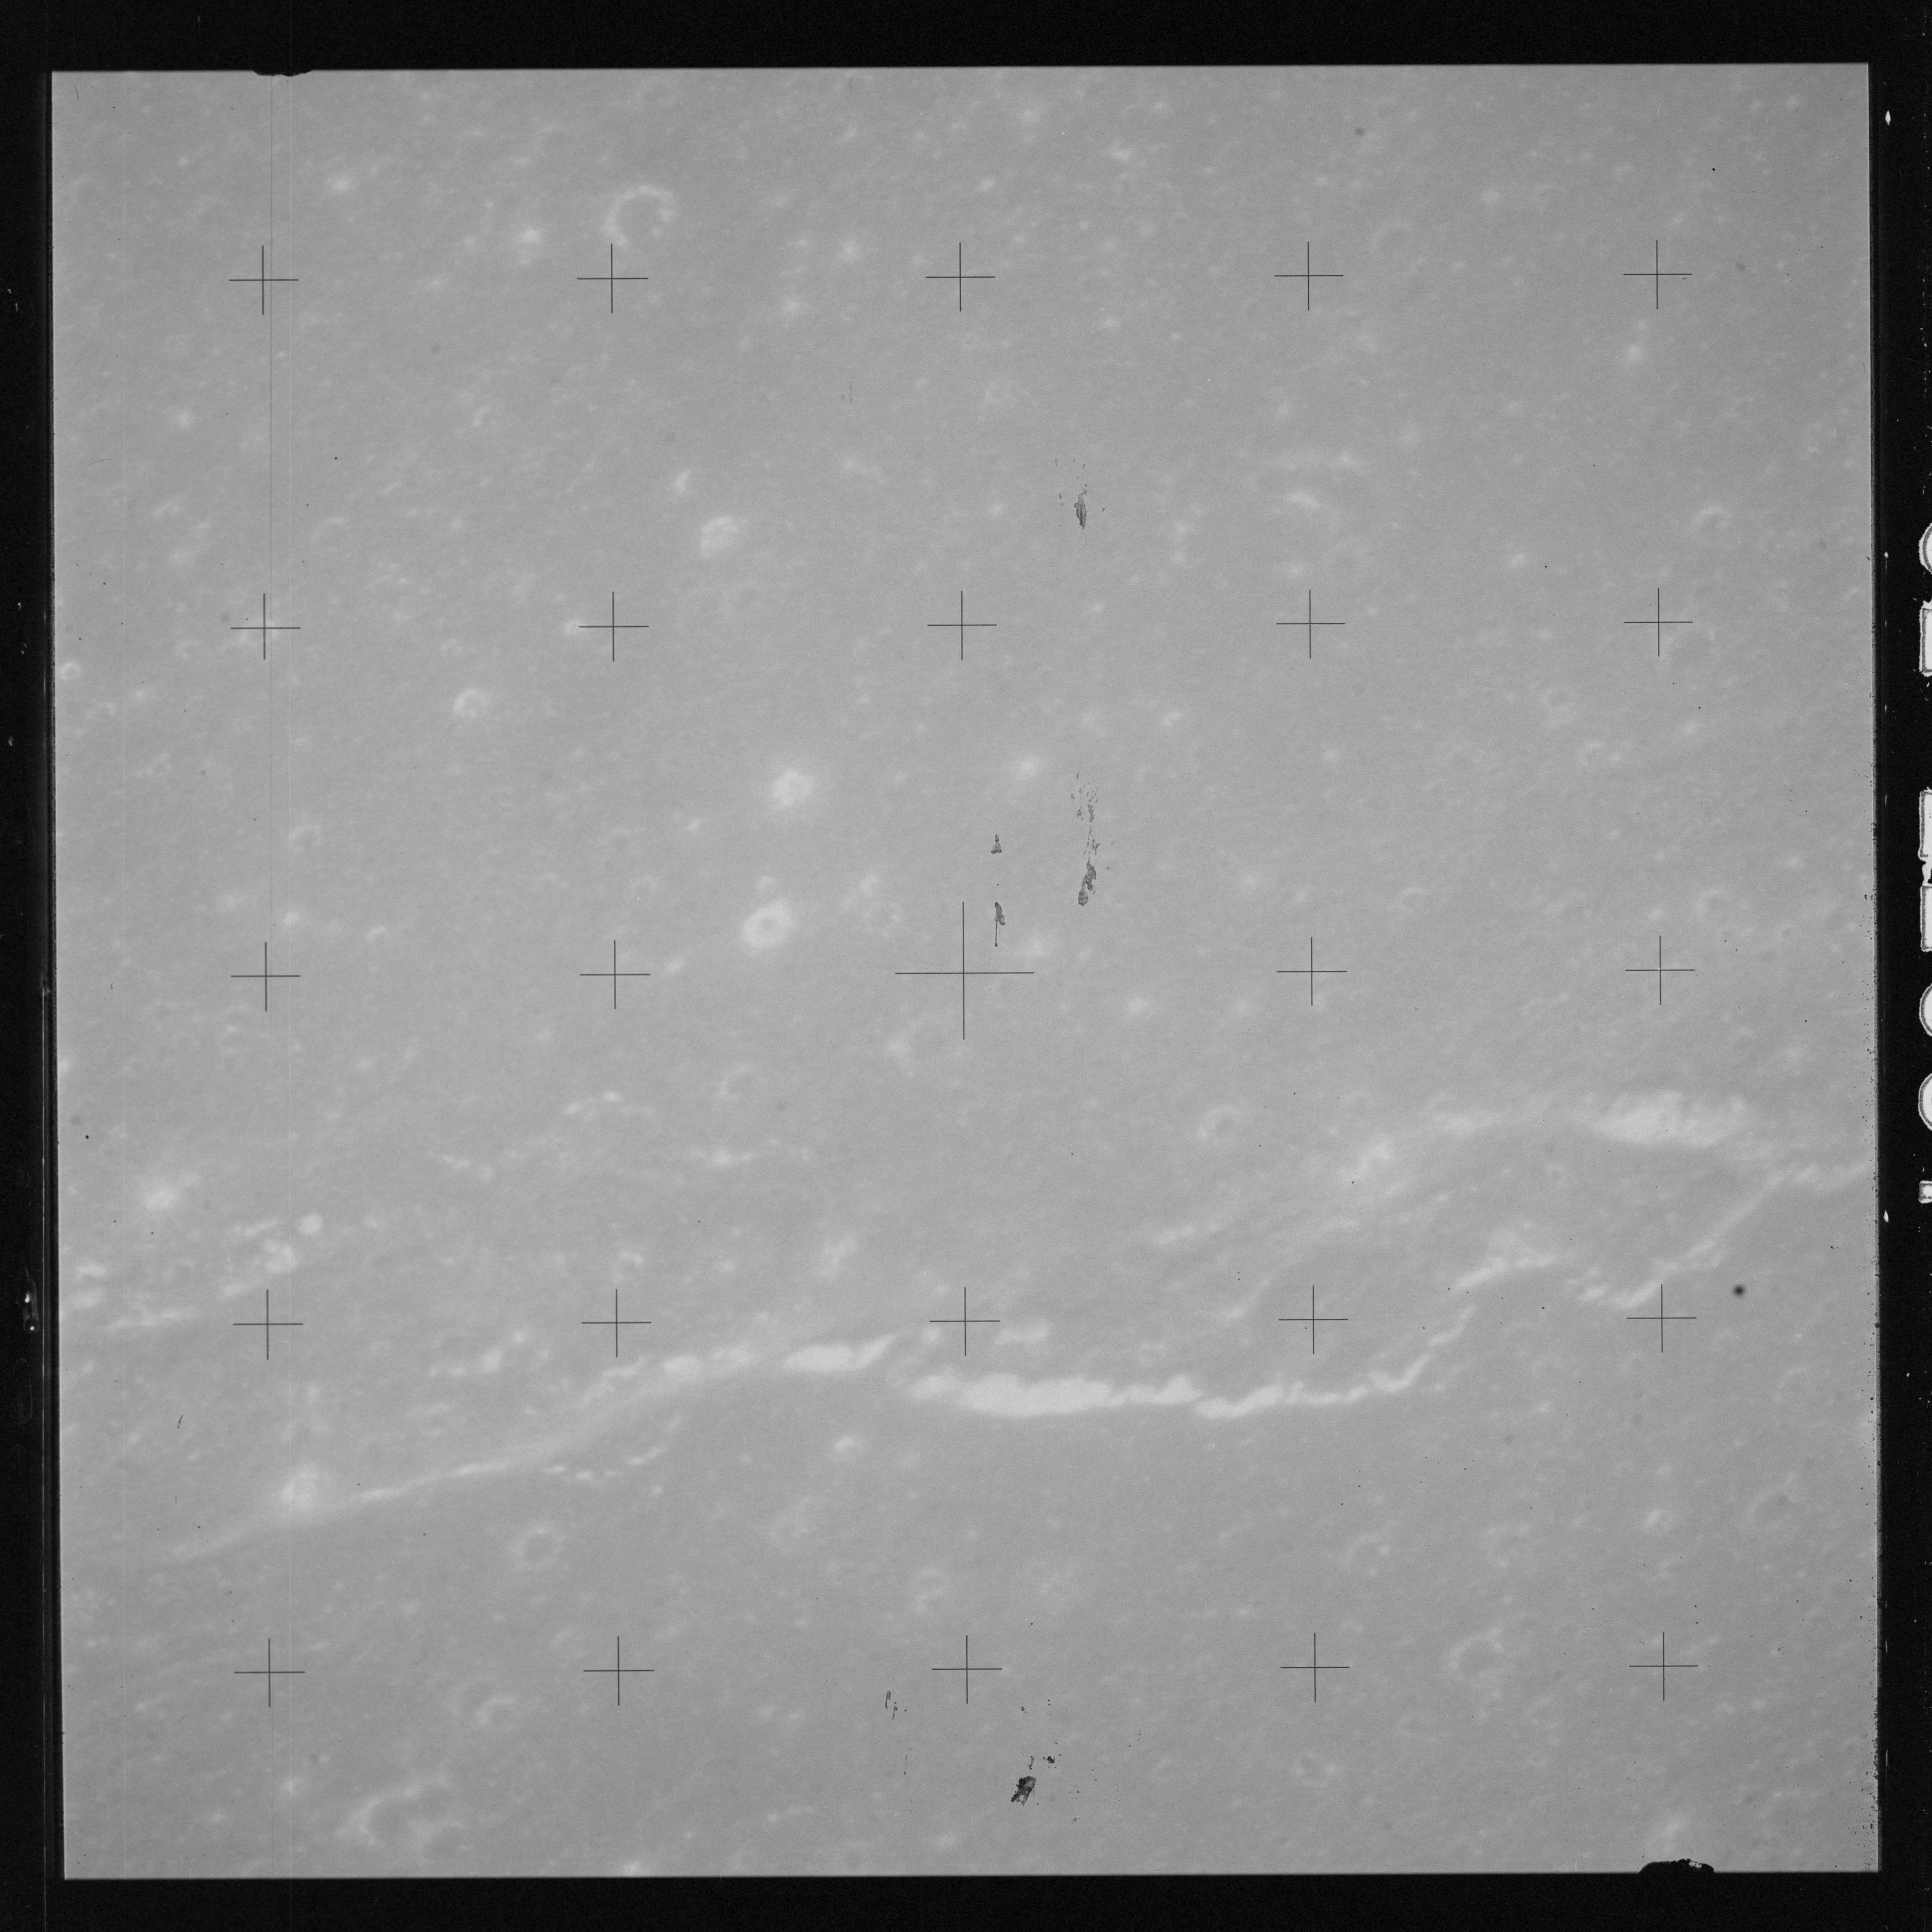
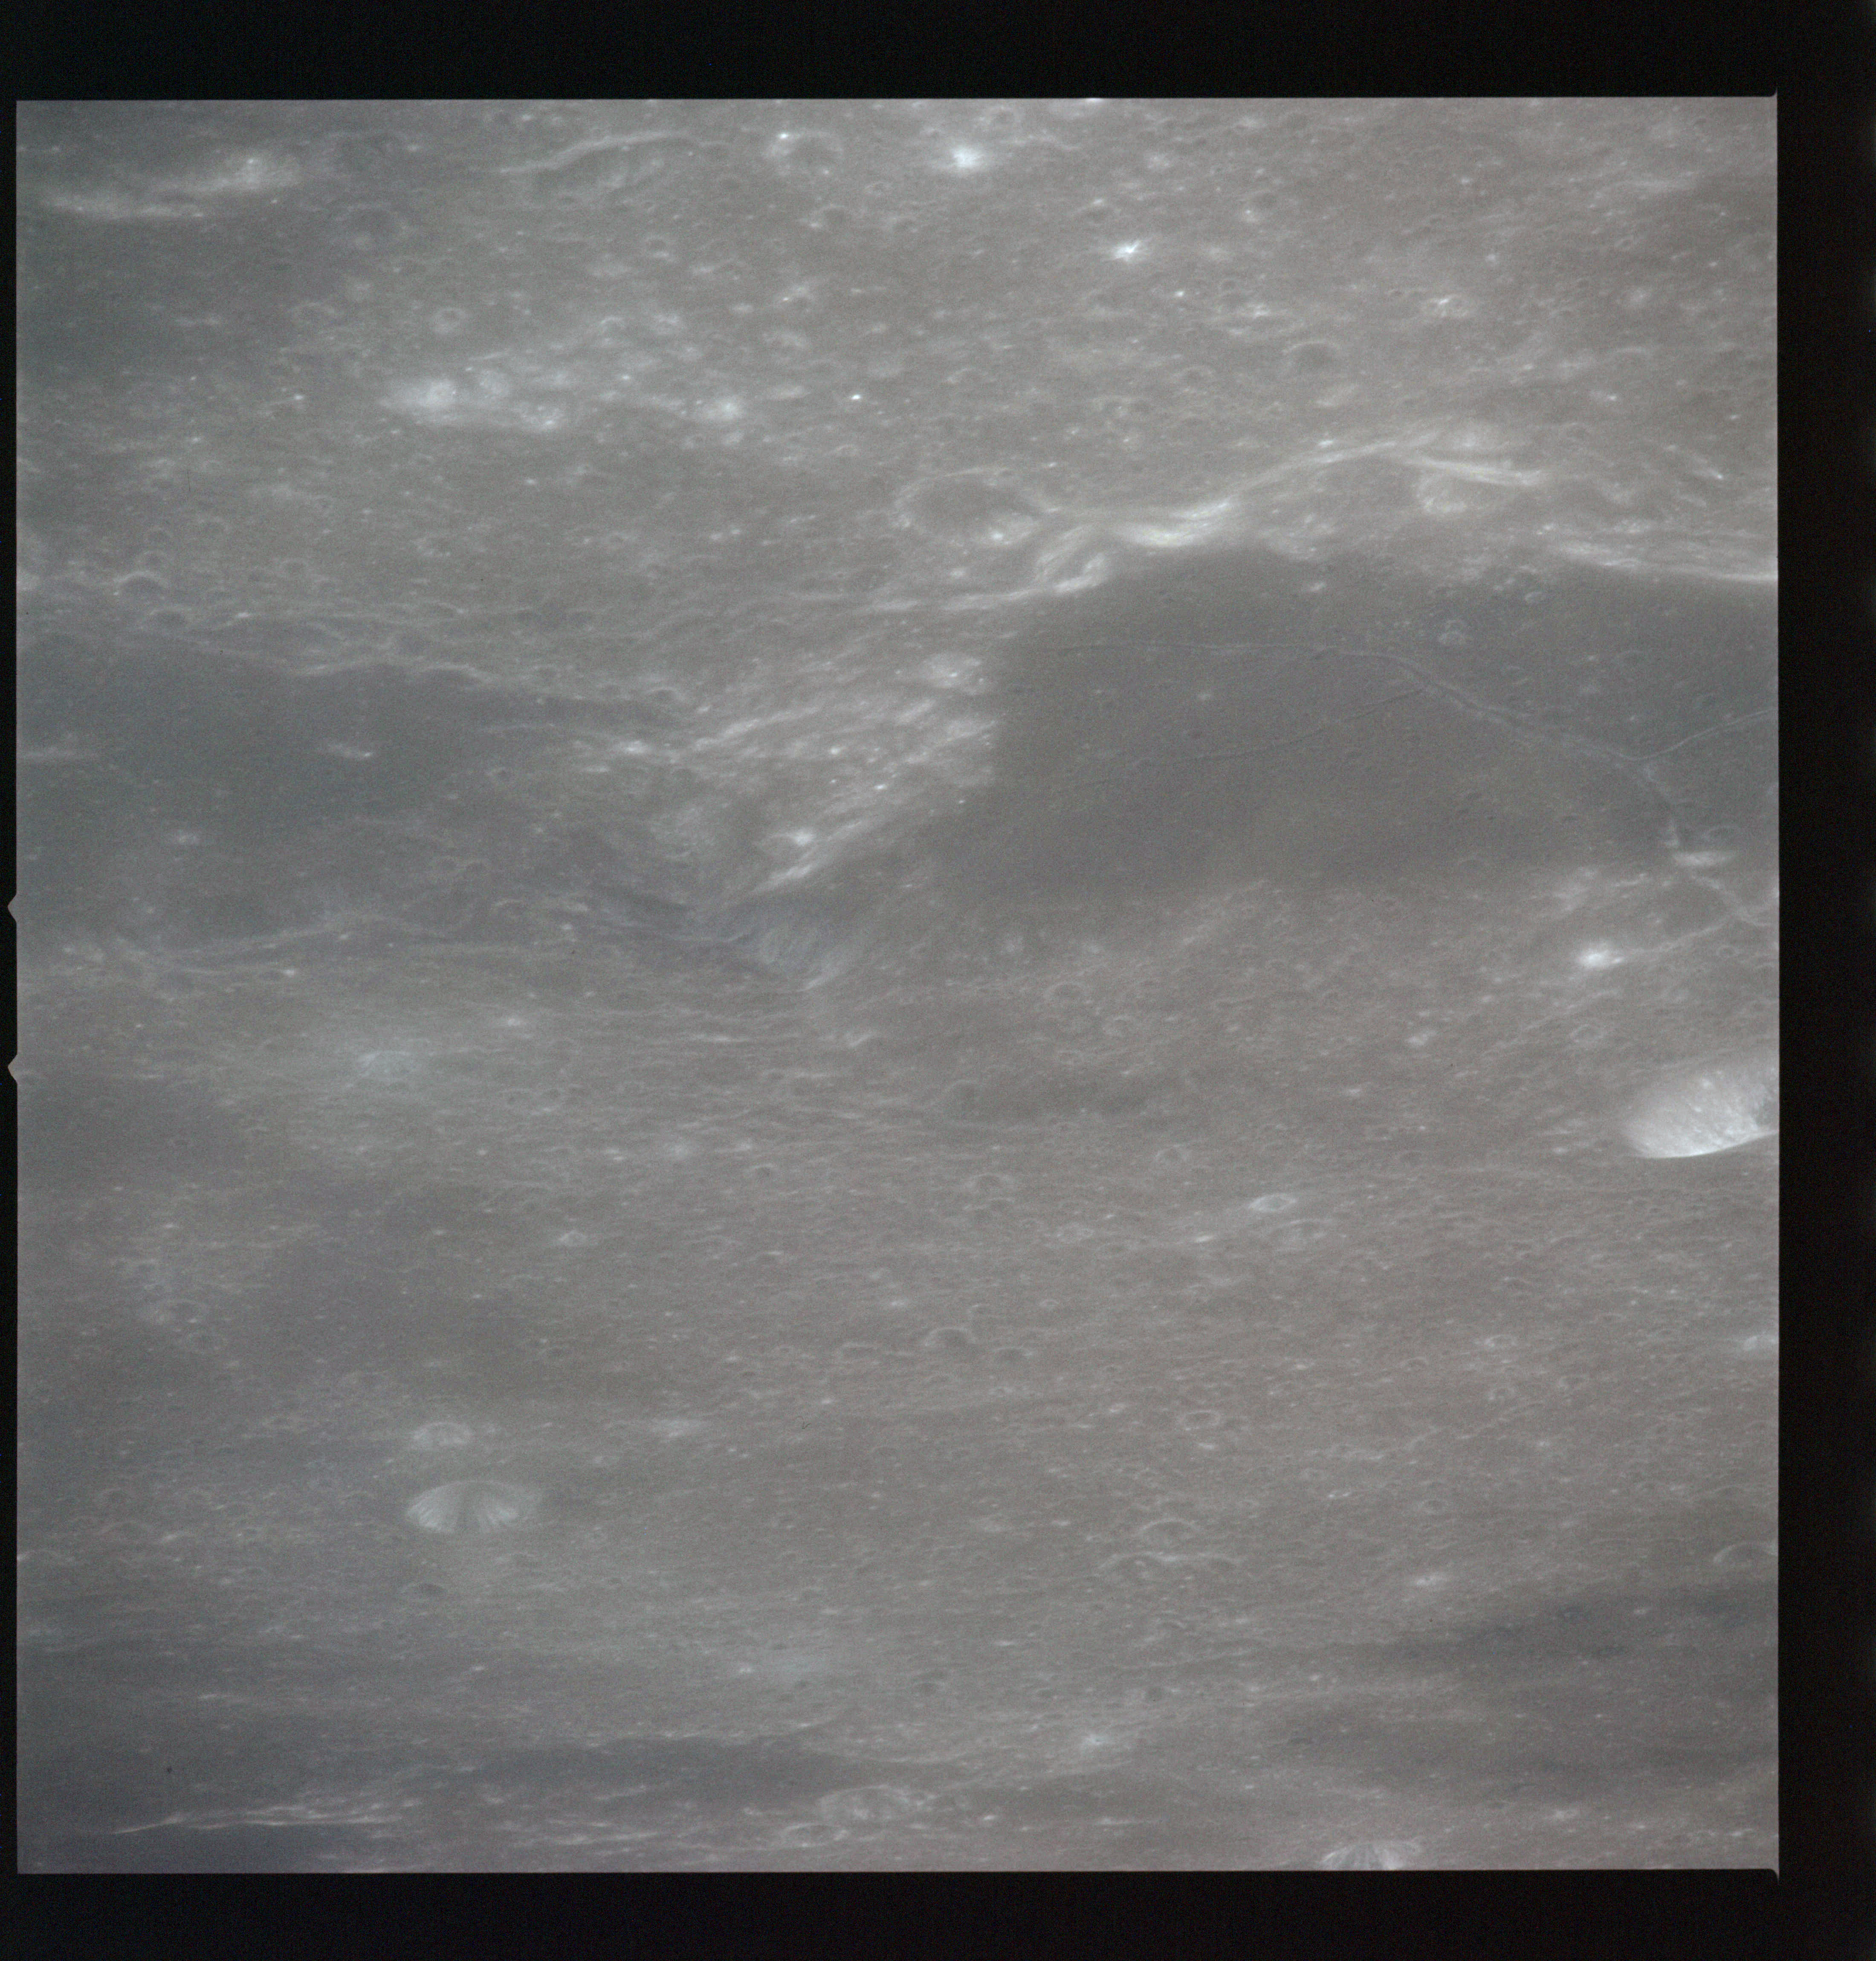
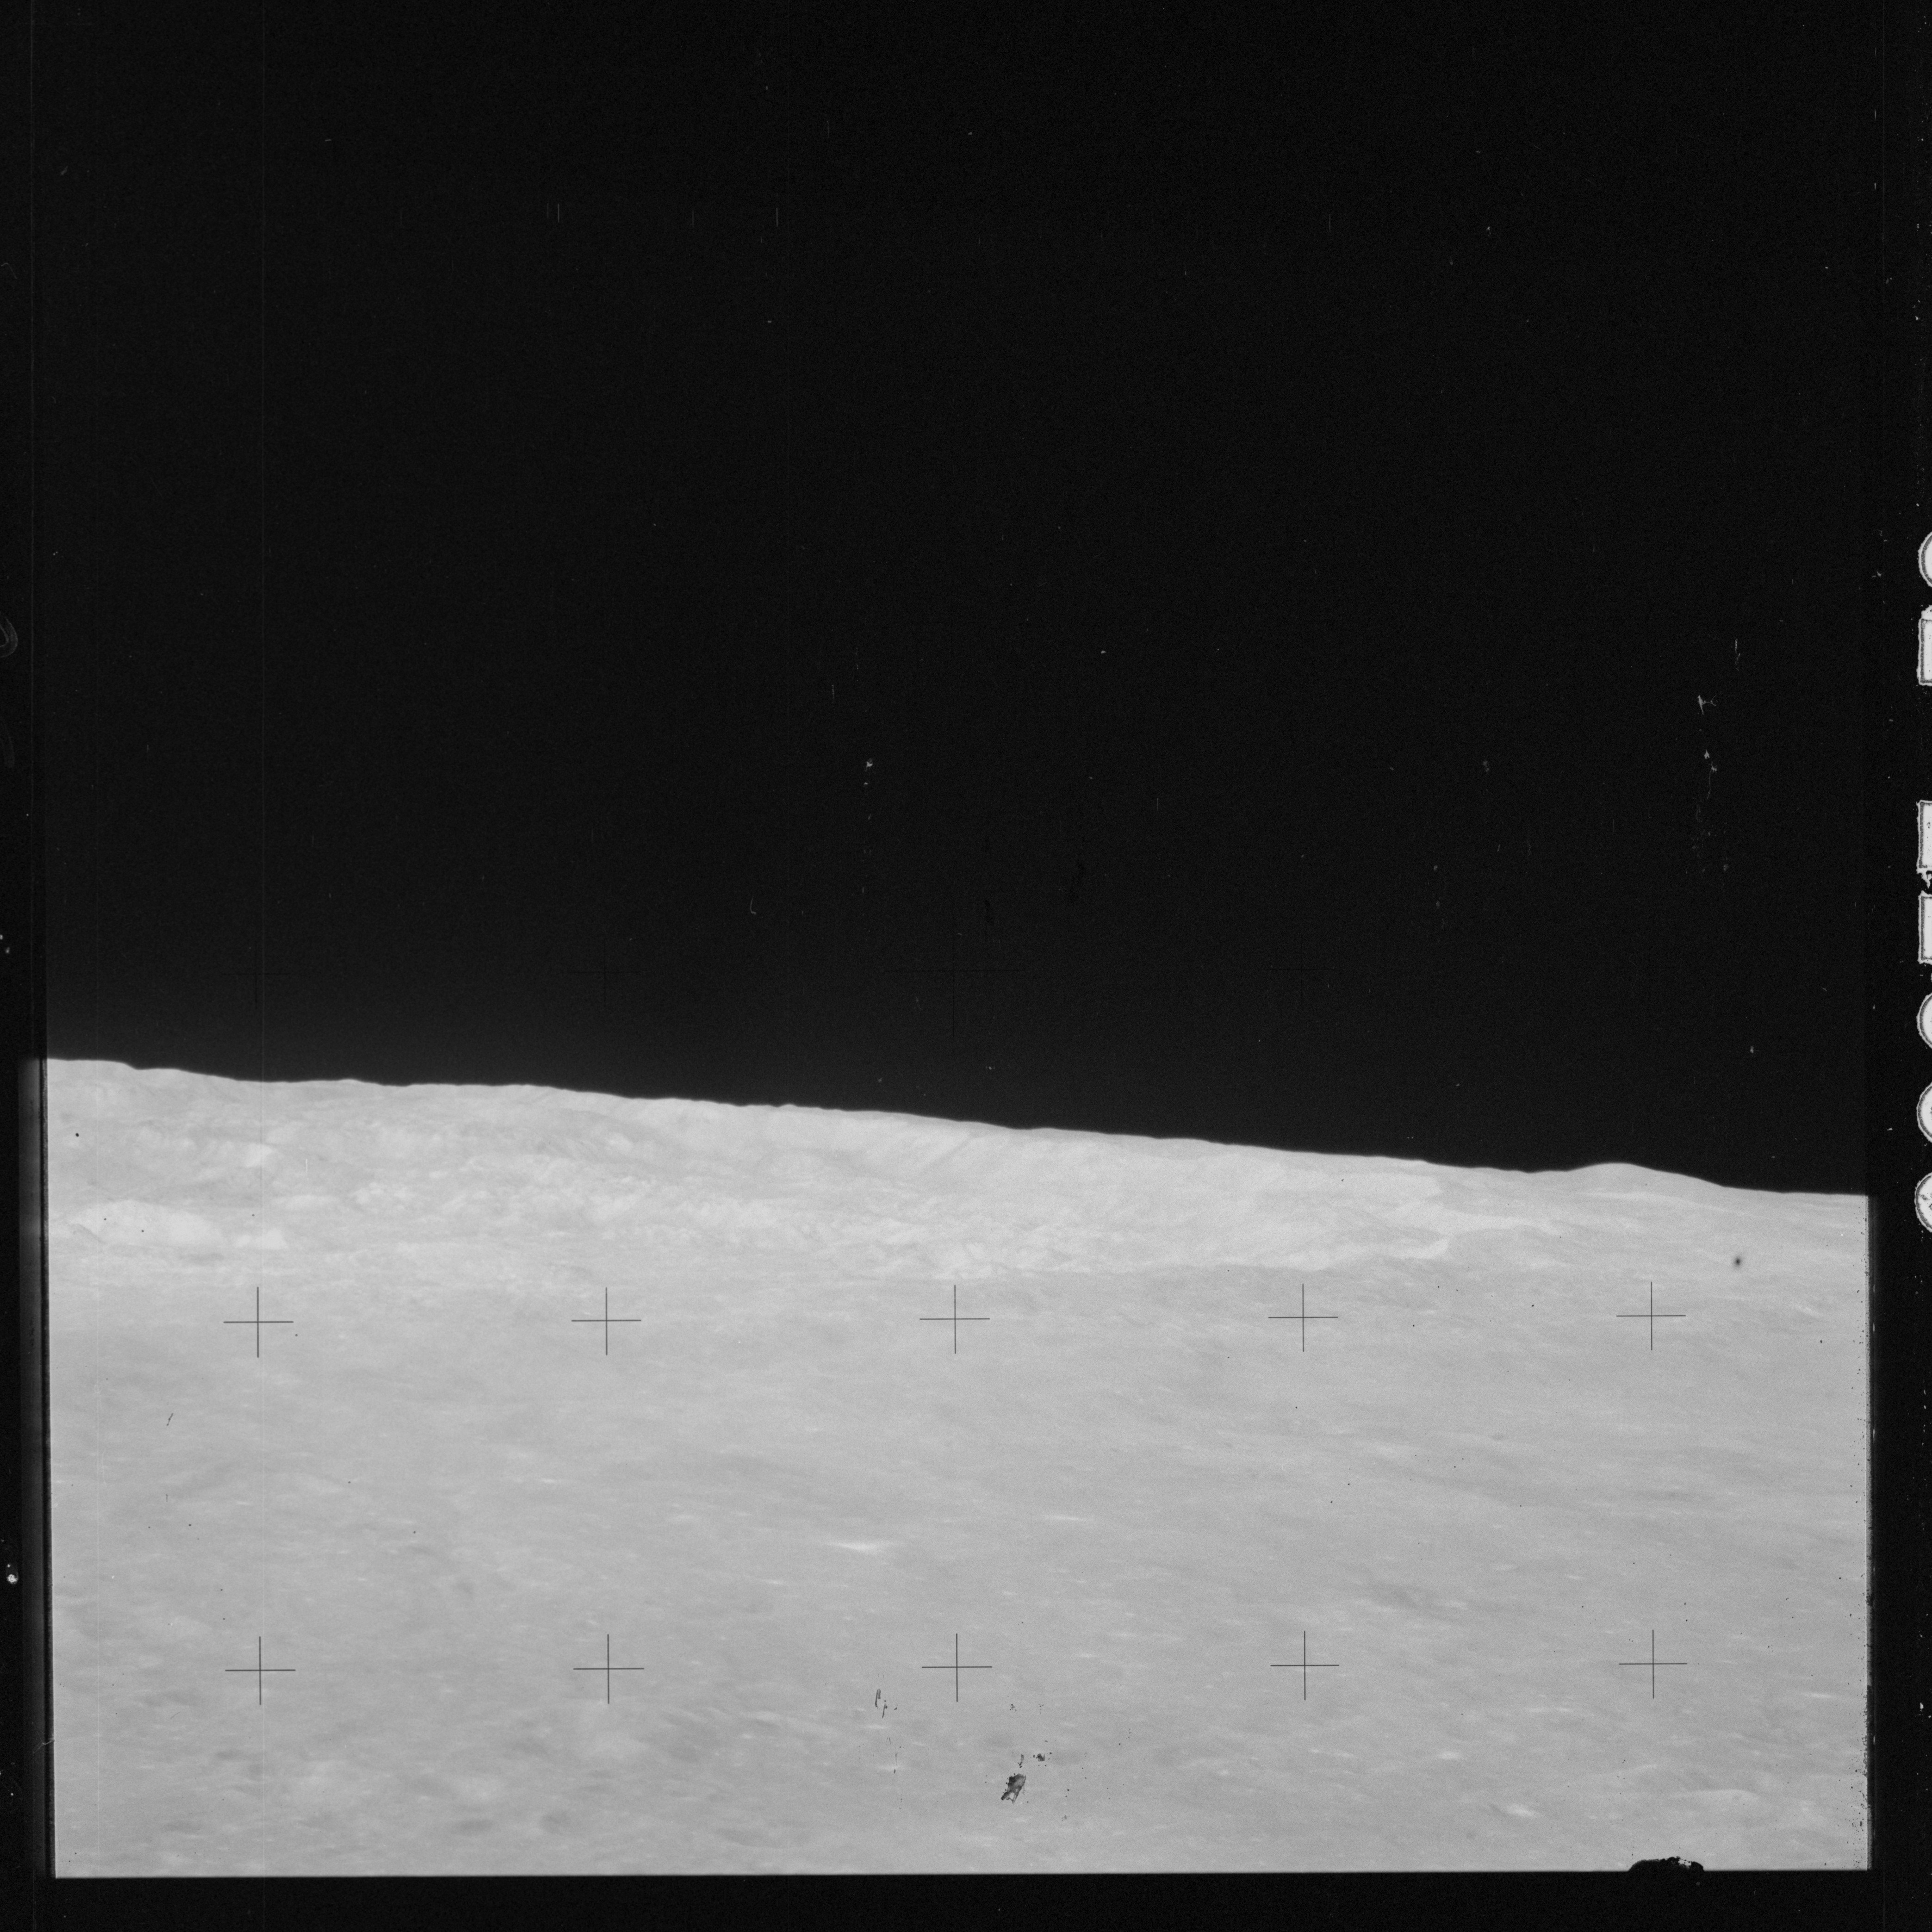
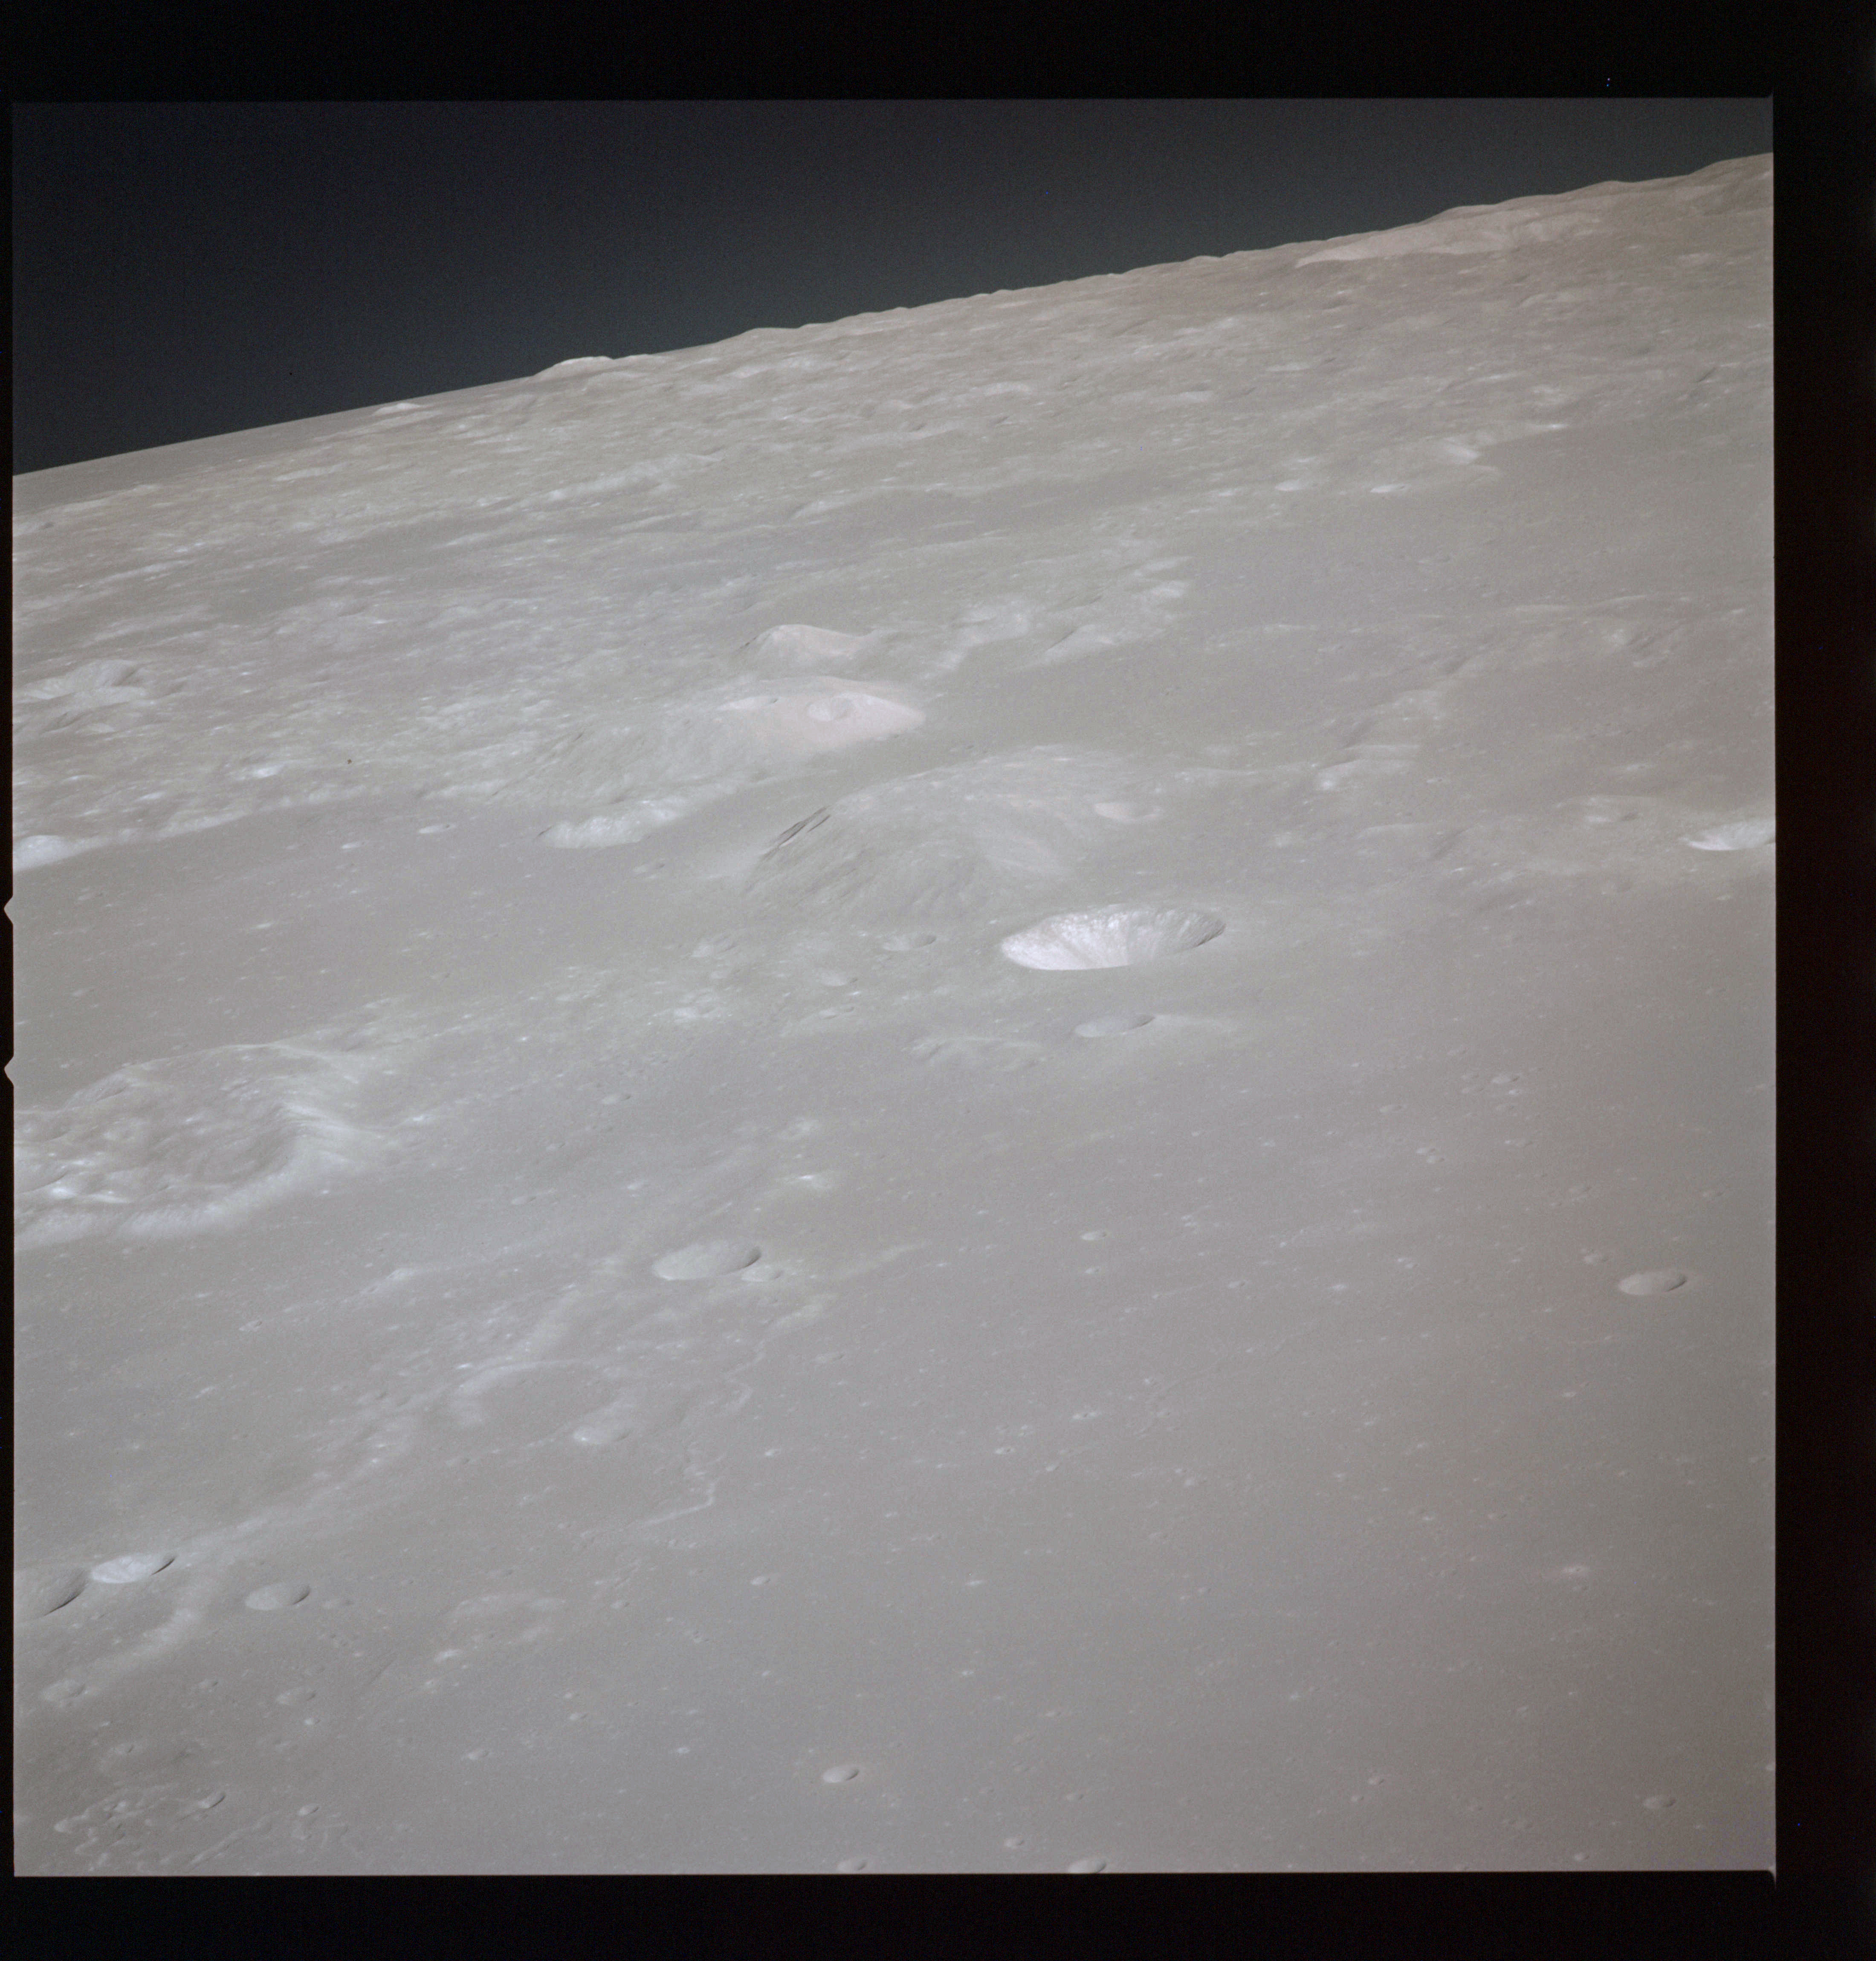
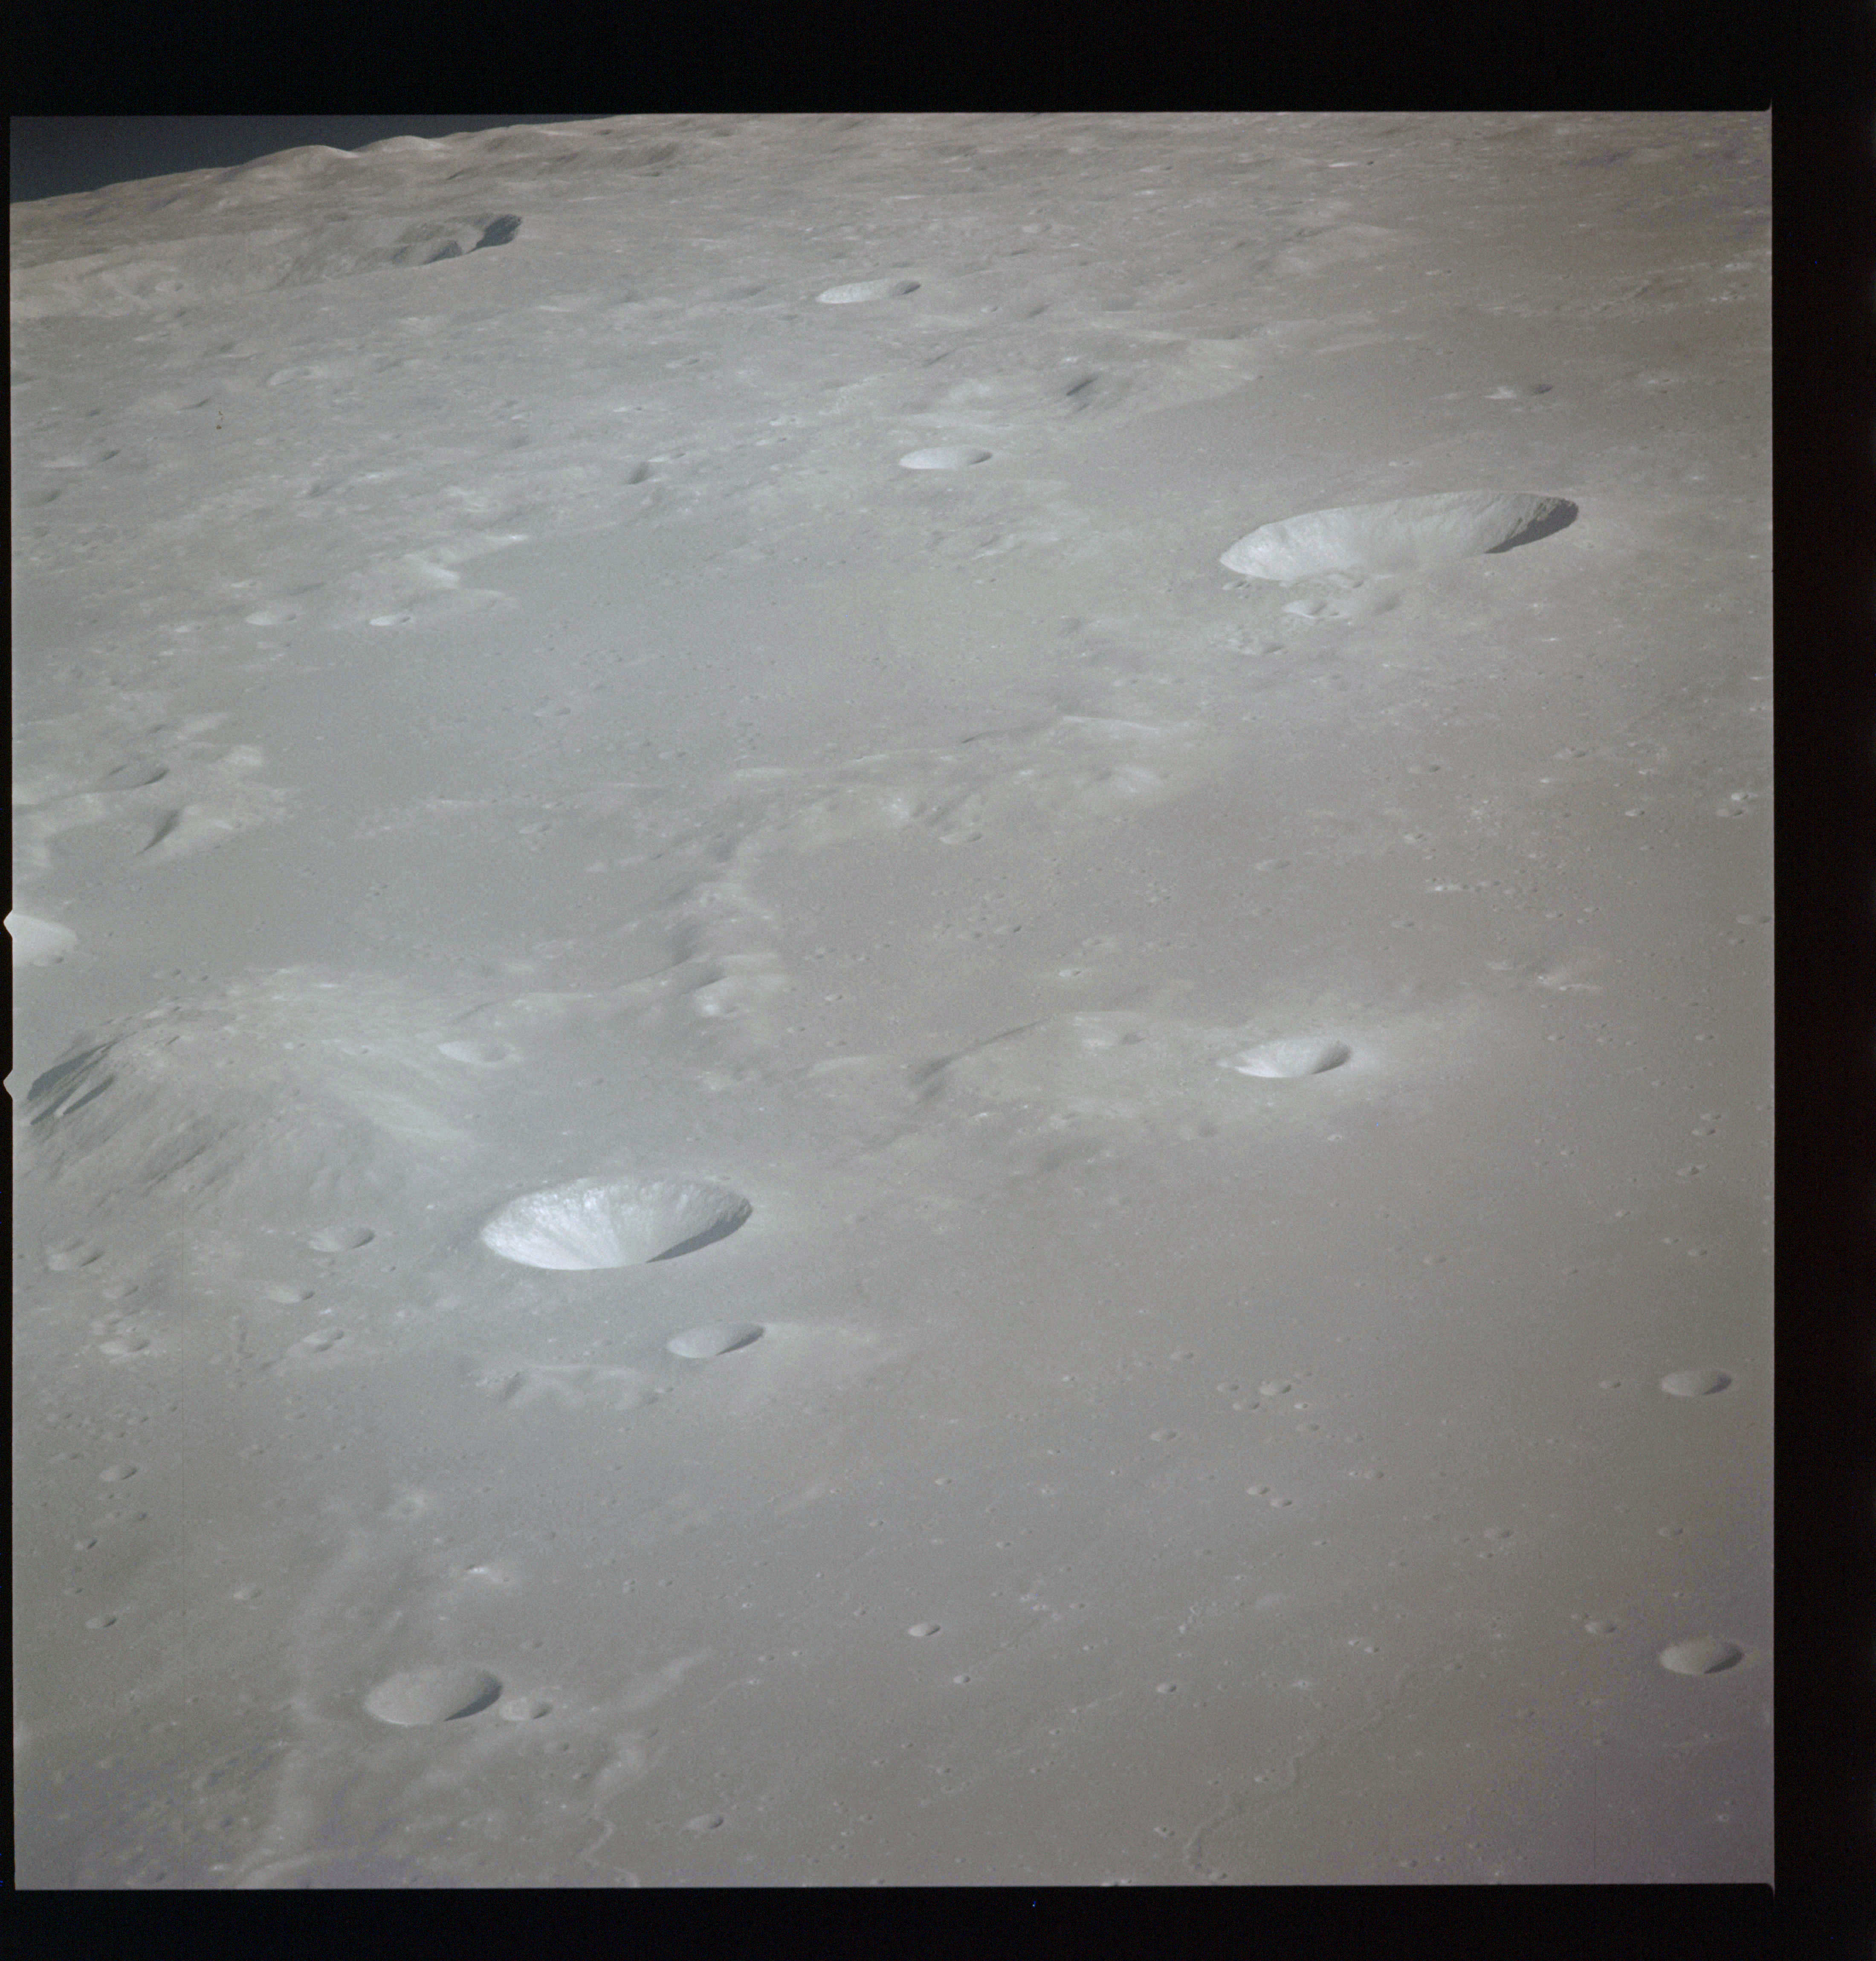
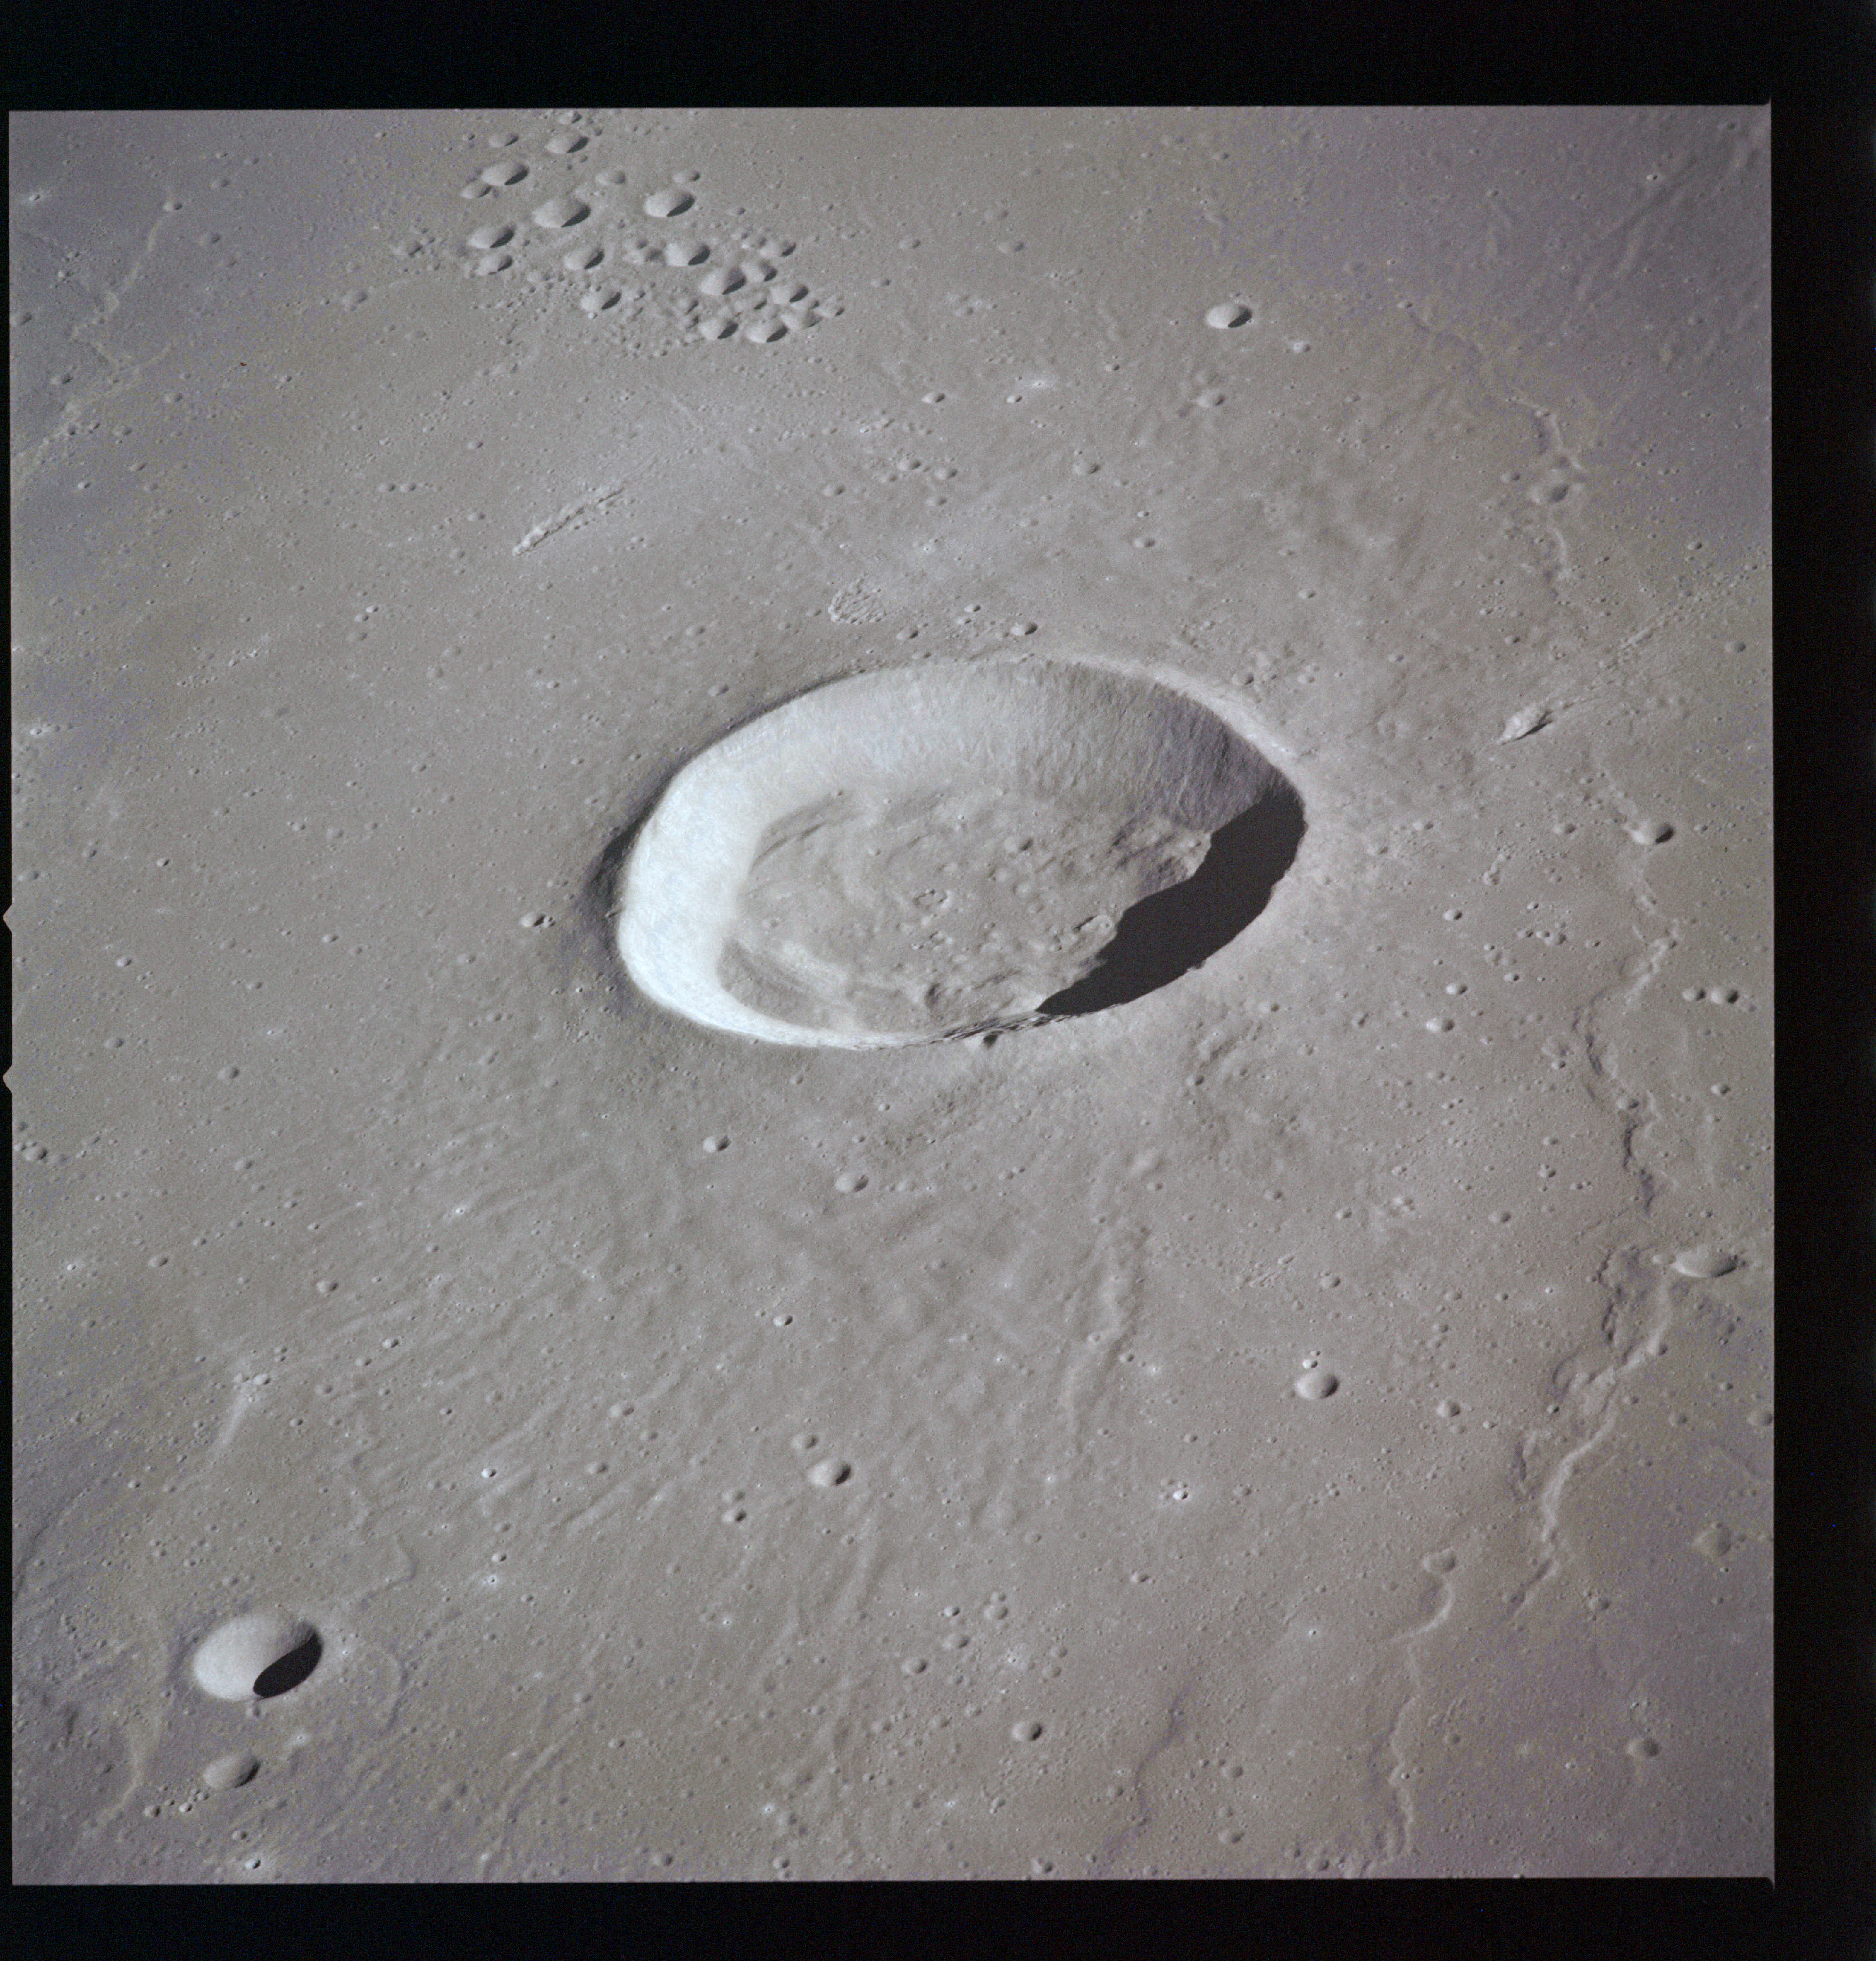
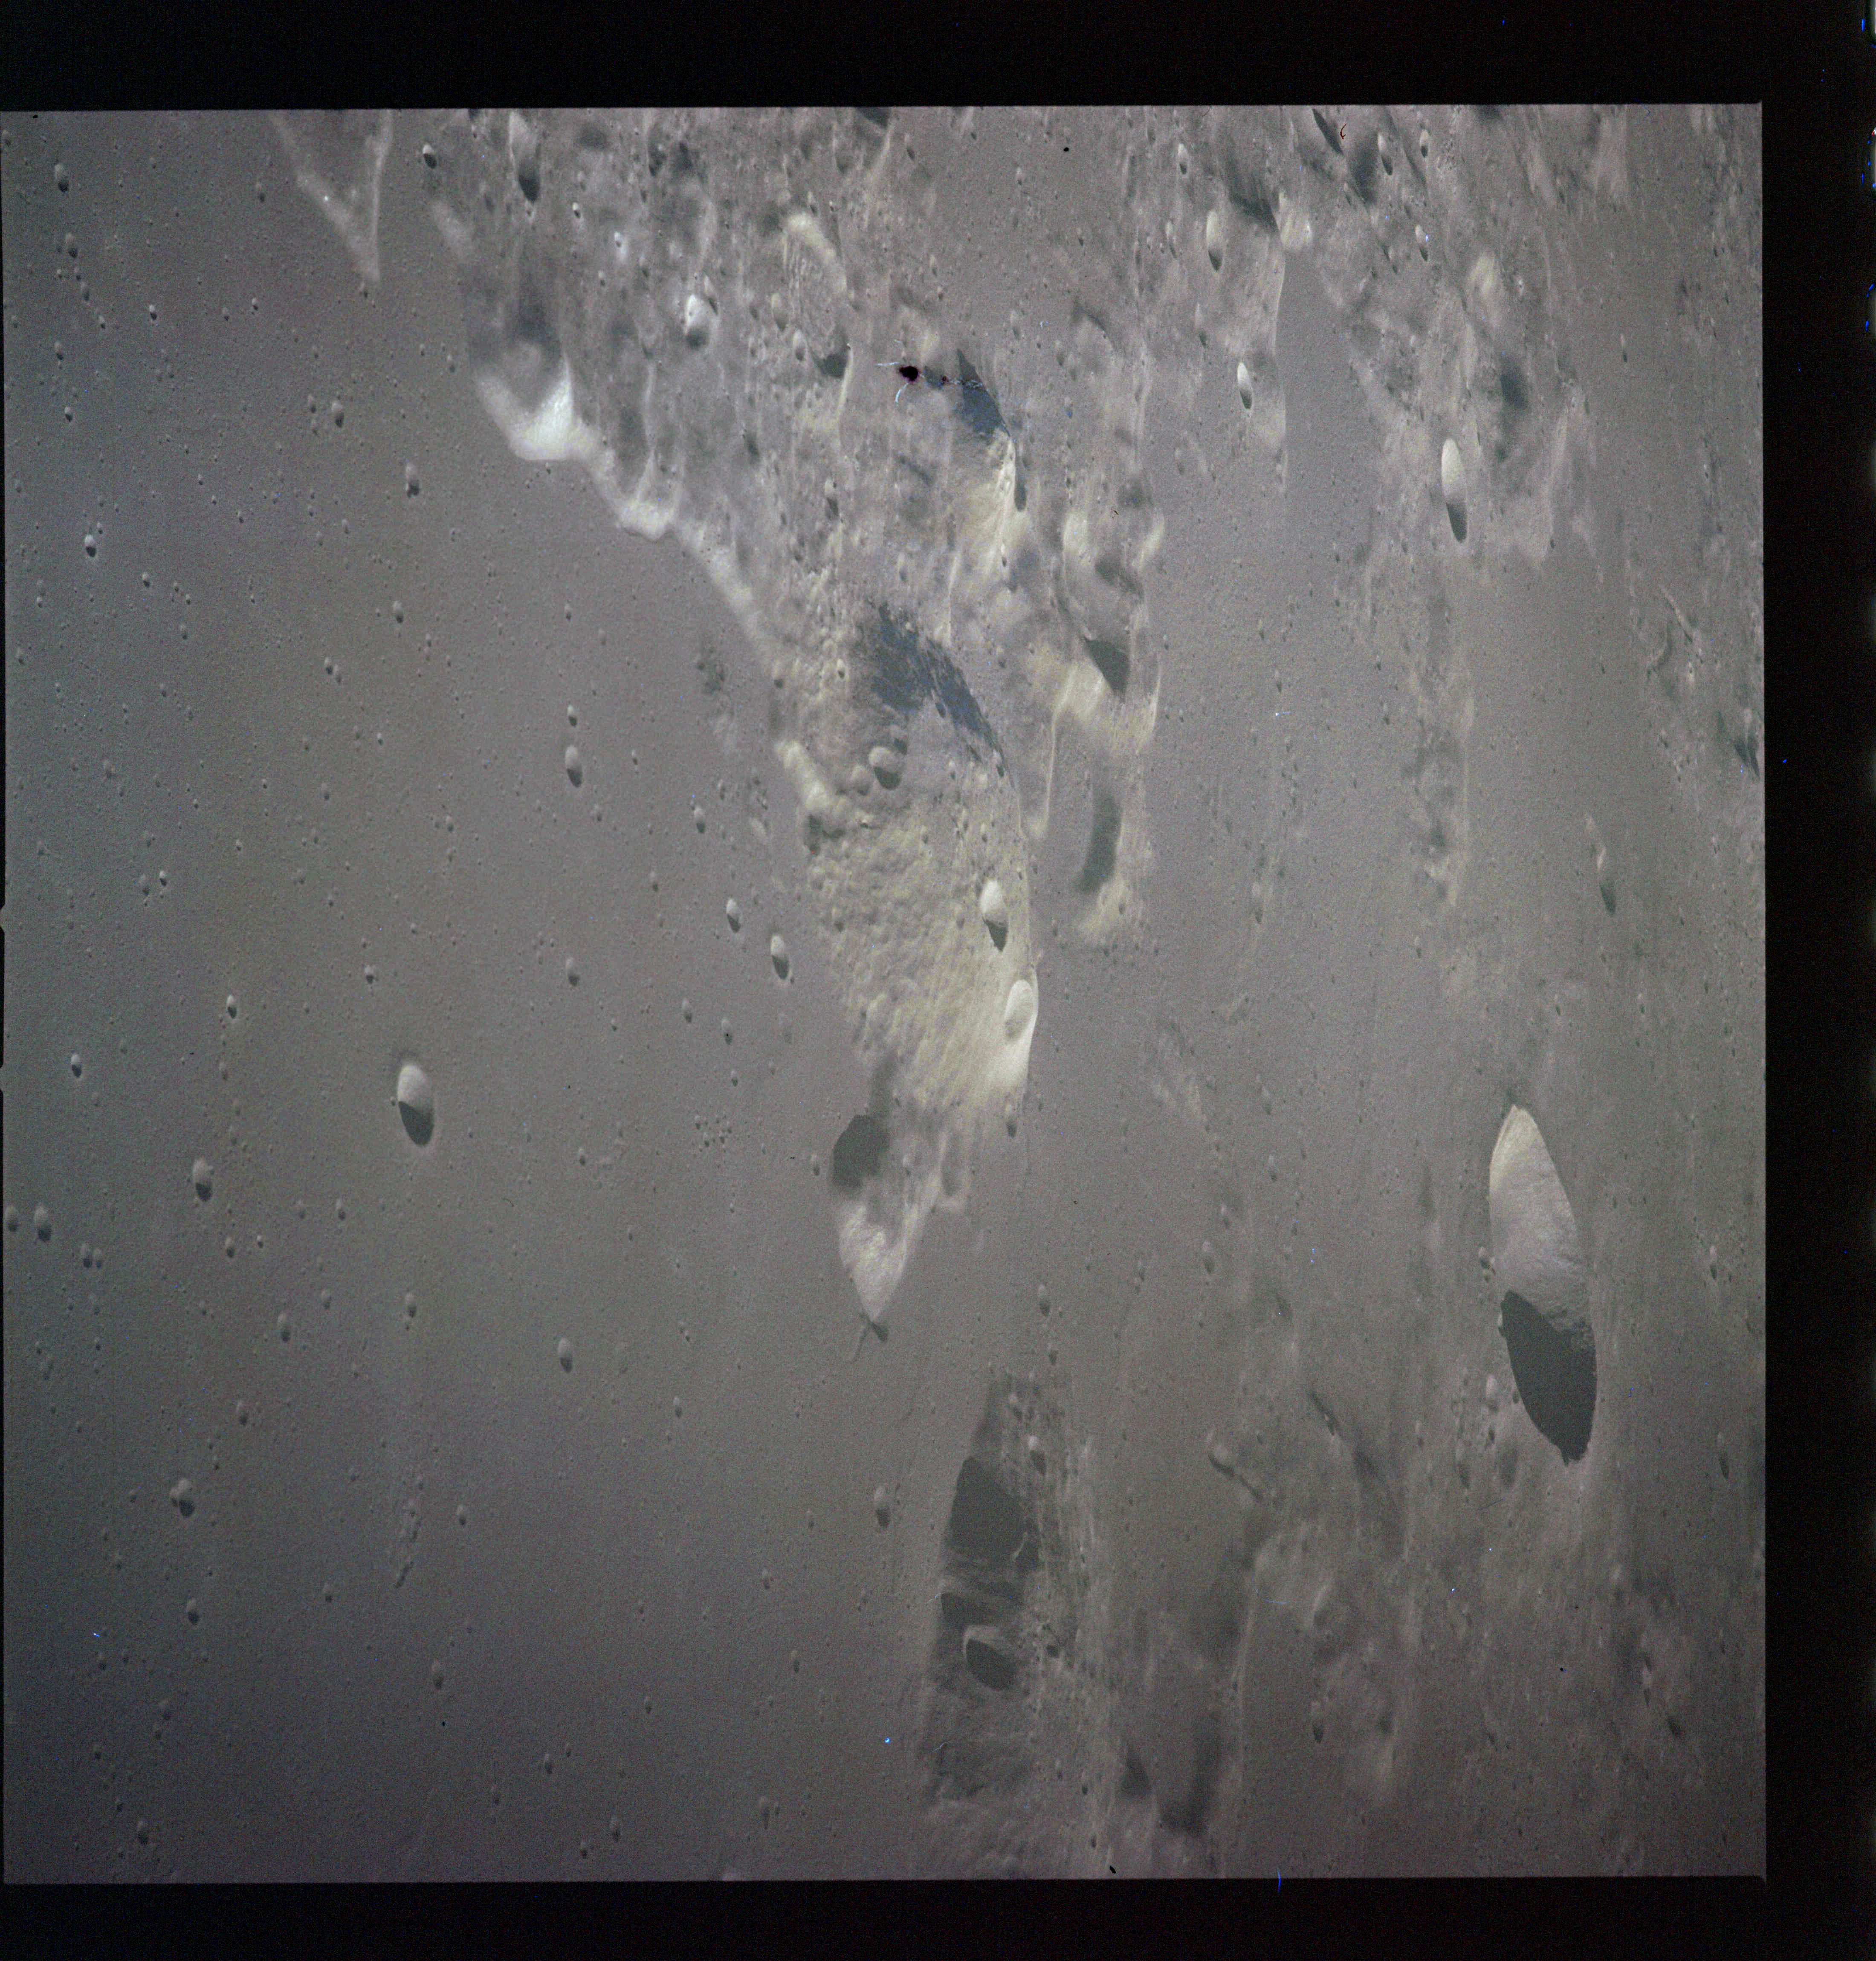
AS15-M-2500 - South oblique Metric Camera image of craters Titius, Donner and Parkhurst with Mare Australe on the horizon. Image taken at about 216:21. (250 megapixel version), (labelled version) - Image by NASA/ASU.
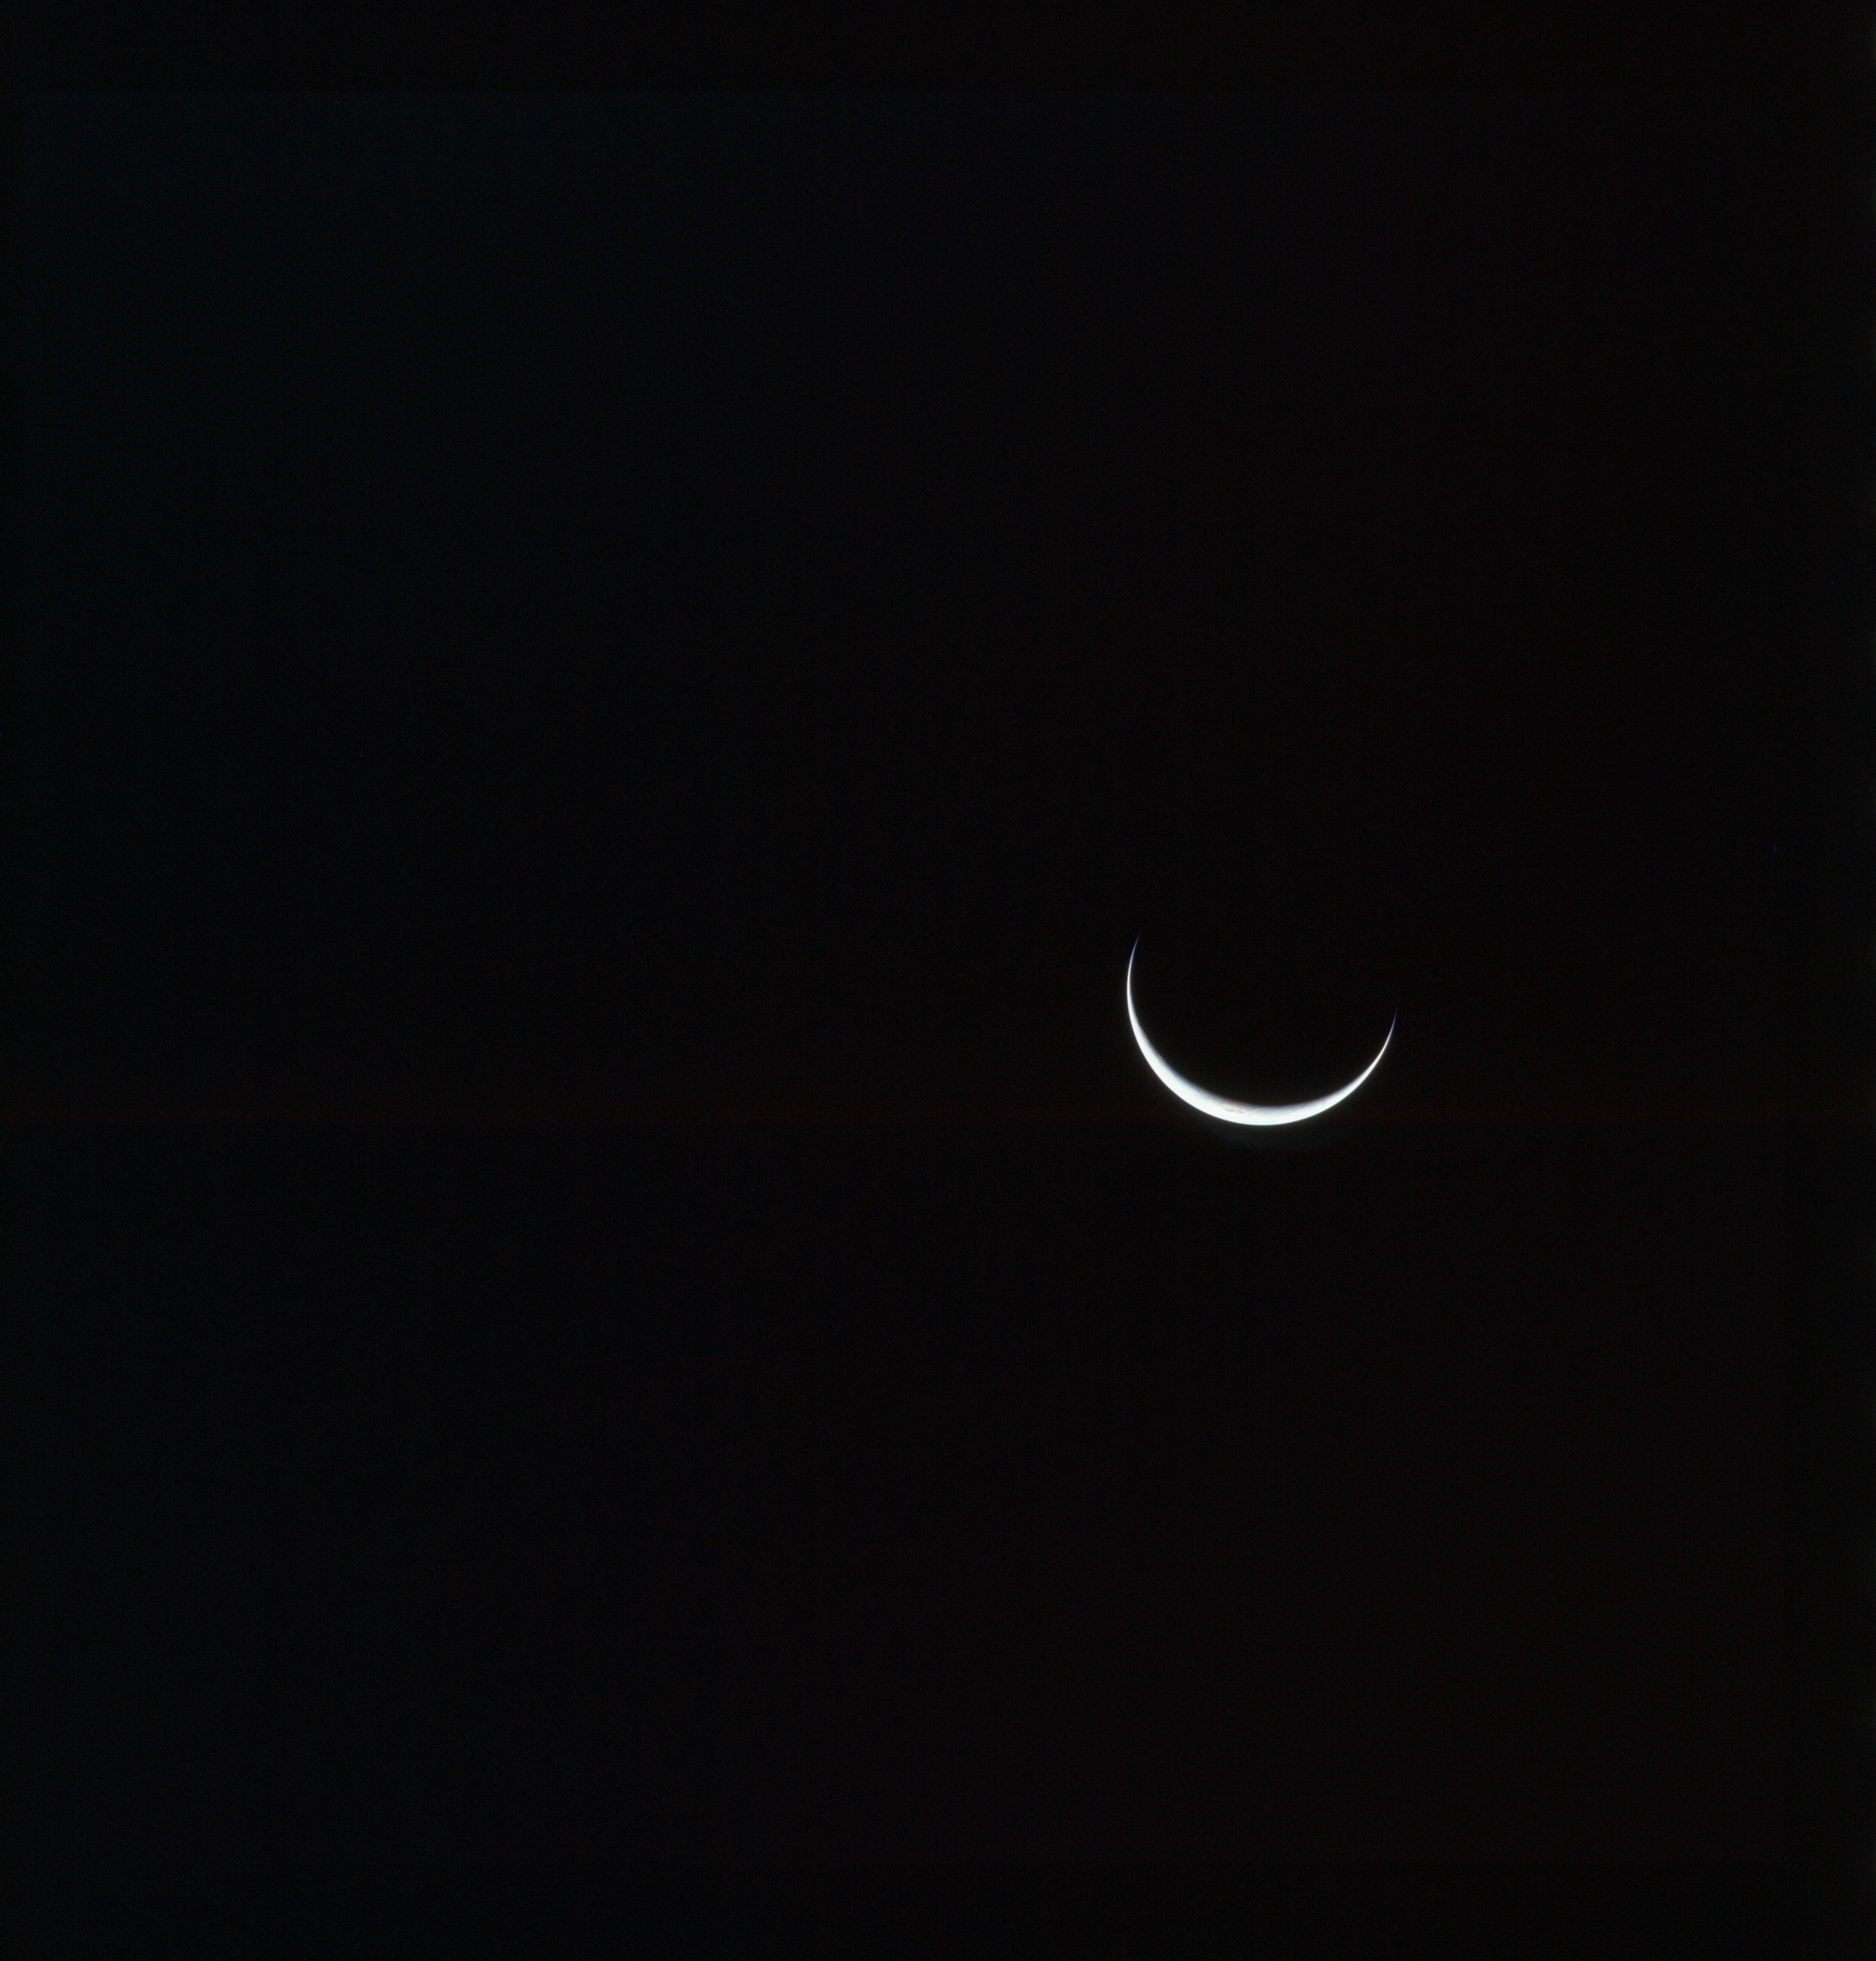
This coming near-side pass is the crew's last major photo opportunity before they begin preparing to come home. The picture taking begins on magazine P and the 250mm lens with AS15-93-12639, a stark portrait of the crescent Earth.
AS15-93-12639 - Earth in crescent - Image by NASA/Johnson Space Center.
216:25:37 Scott (onboard): Did we do a P20?
216:25:38 Worden (onboard): Yes.
216:25:41 Scott (onboard): I thought we called P20 now, Al.
216:25:43 Worden (onboard): Yes, just recall P20. It should do it itself. No, if you get the Uplink Activity light, that means it's gone outside the 10-degree deadband, in which case you have to do a Verb 58 - to get back in.
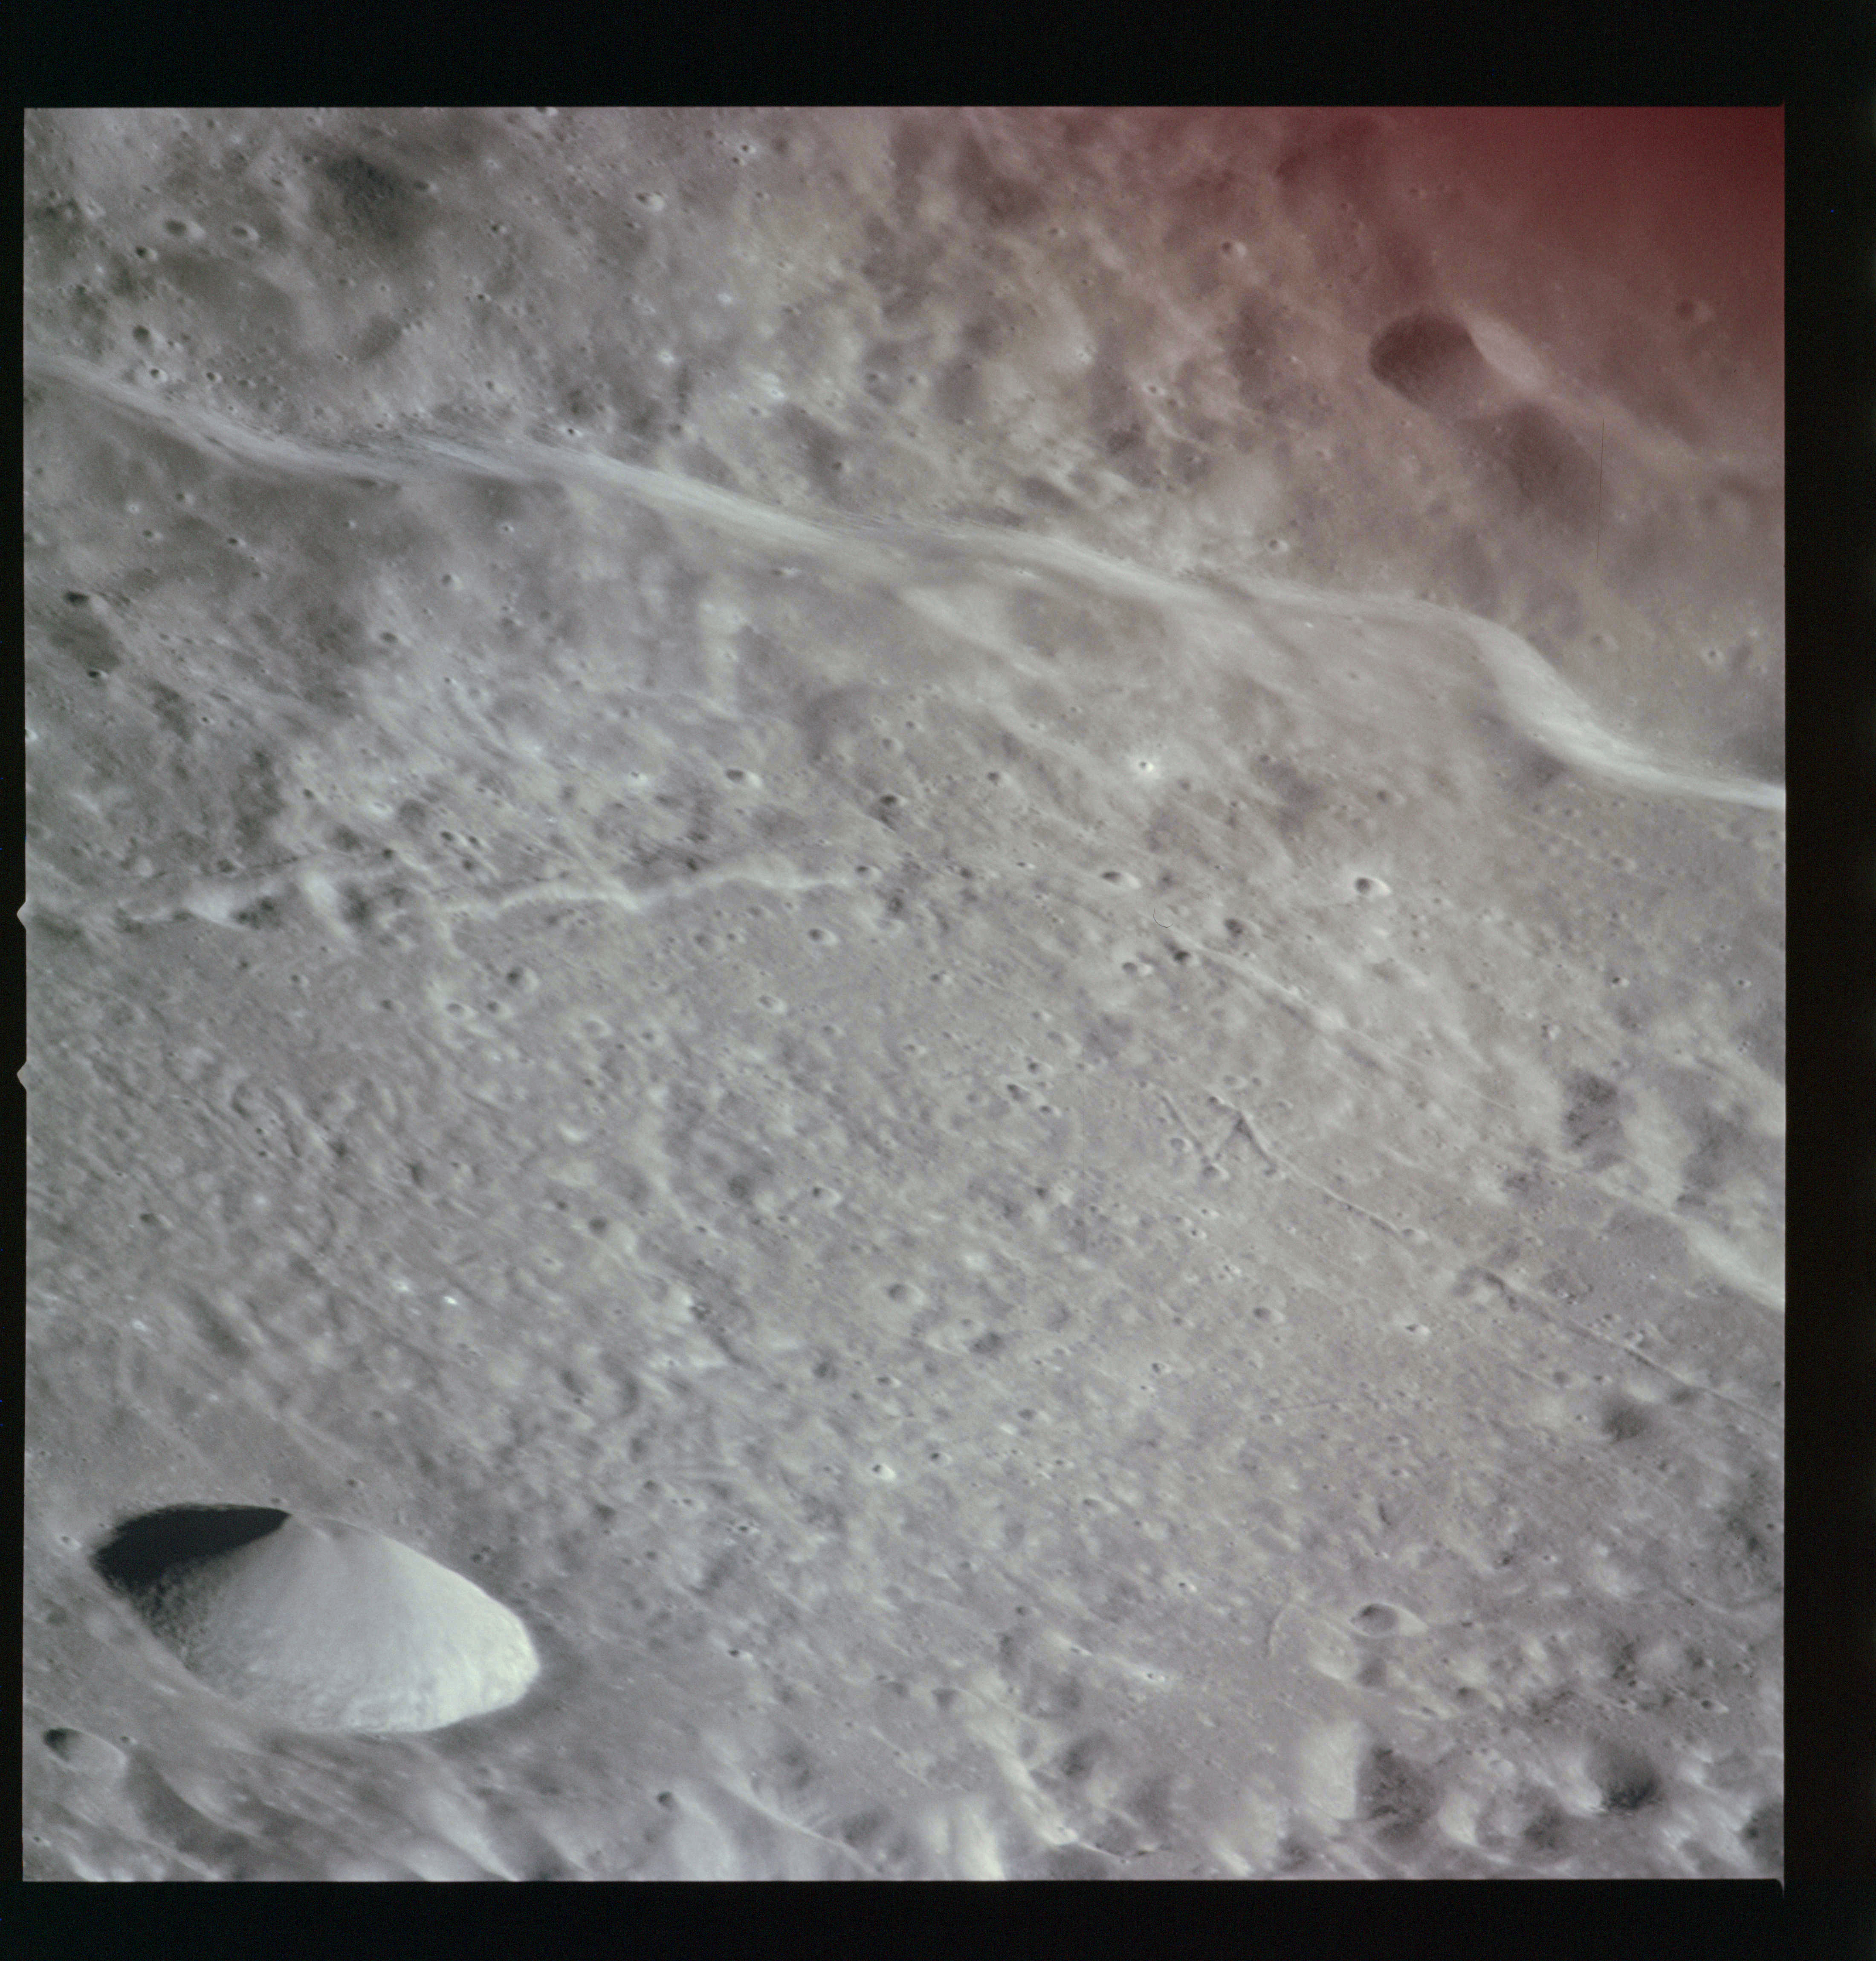
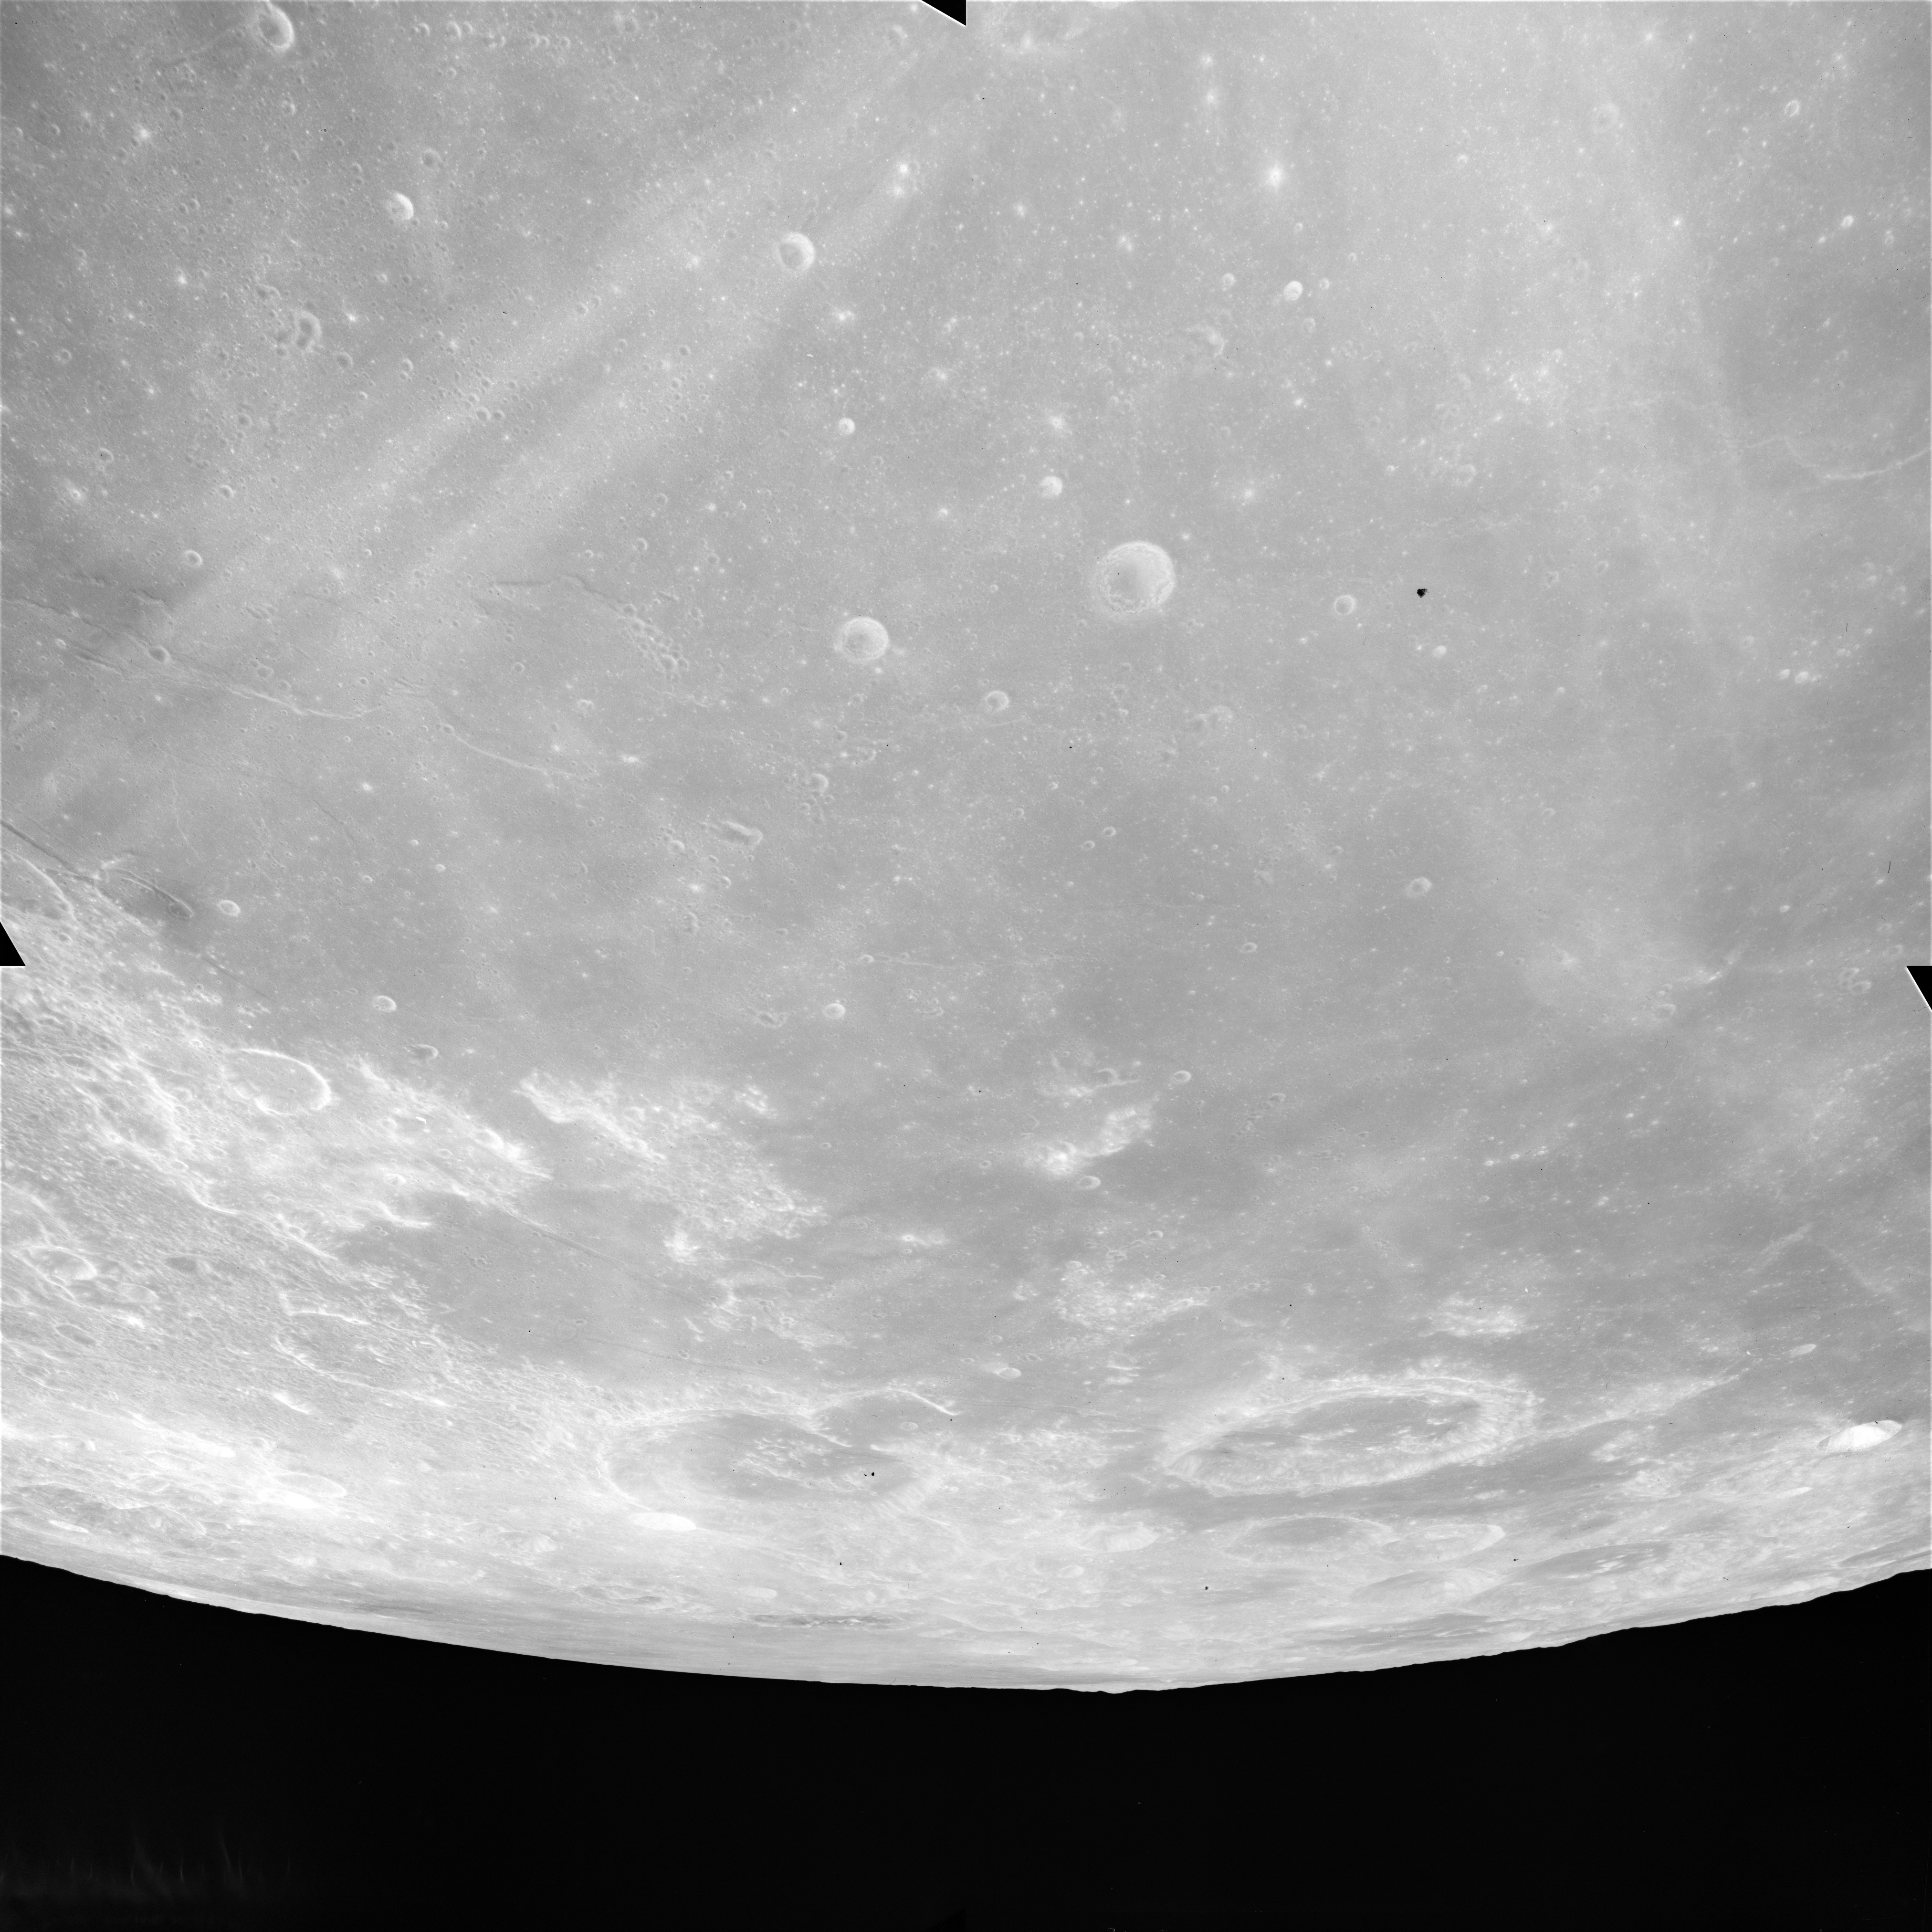
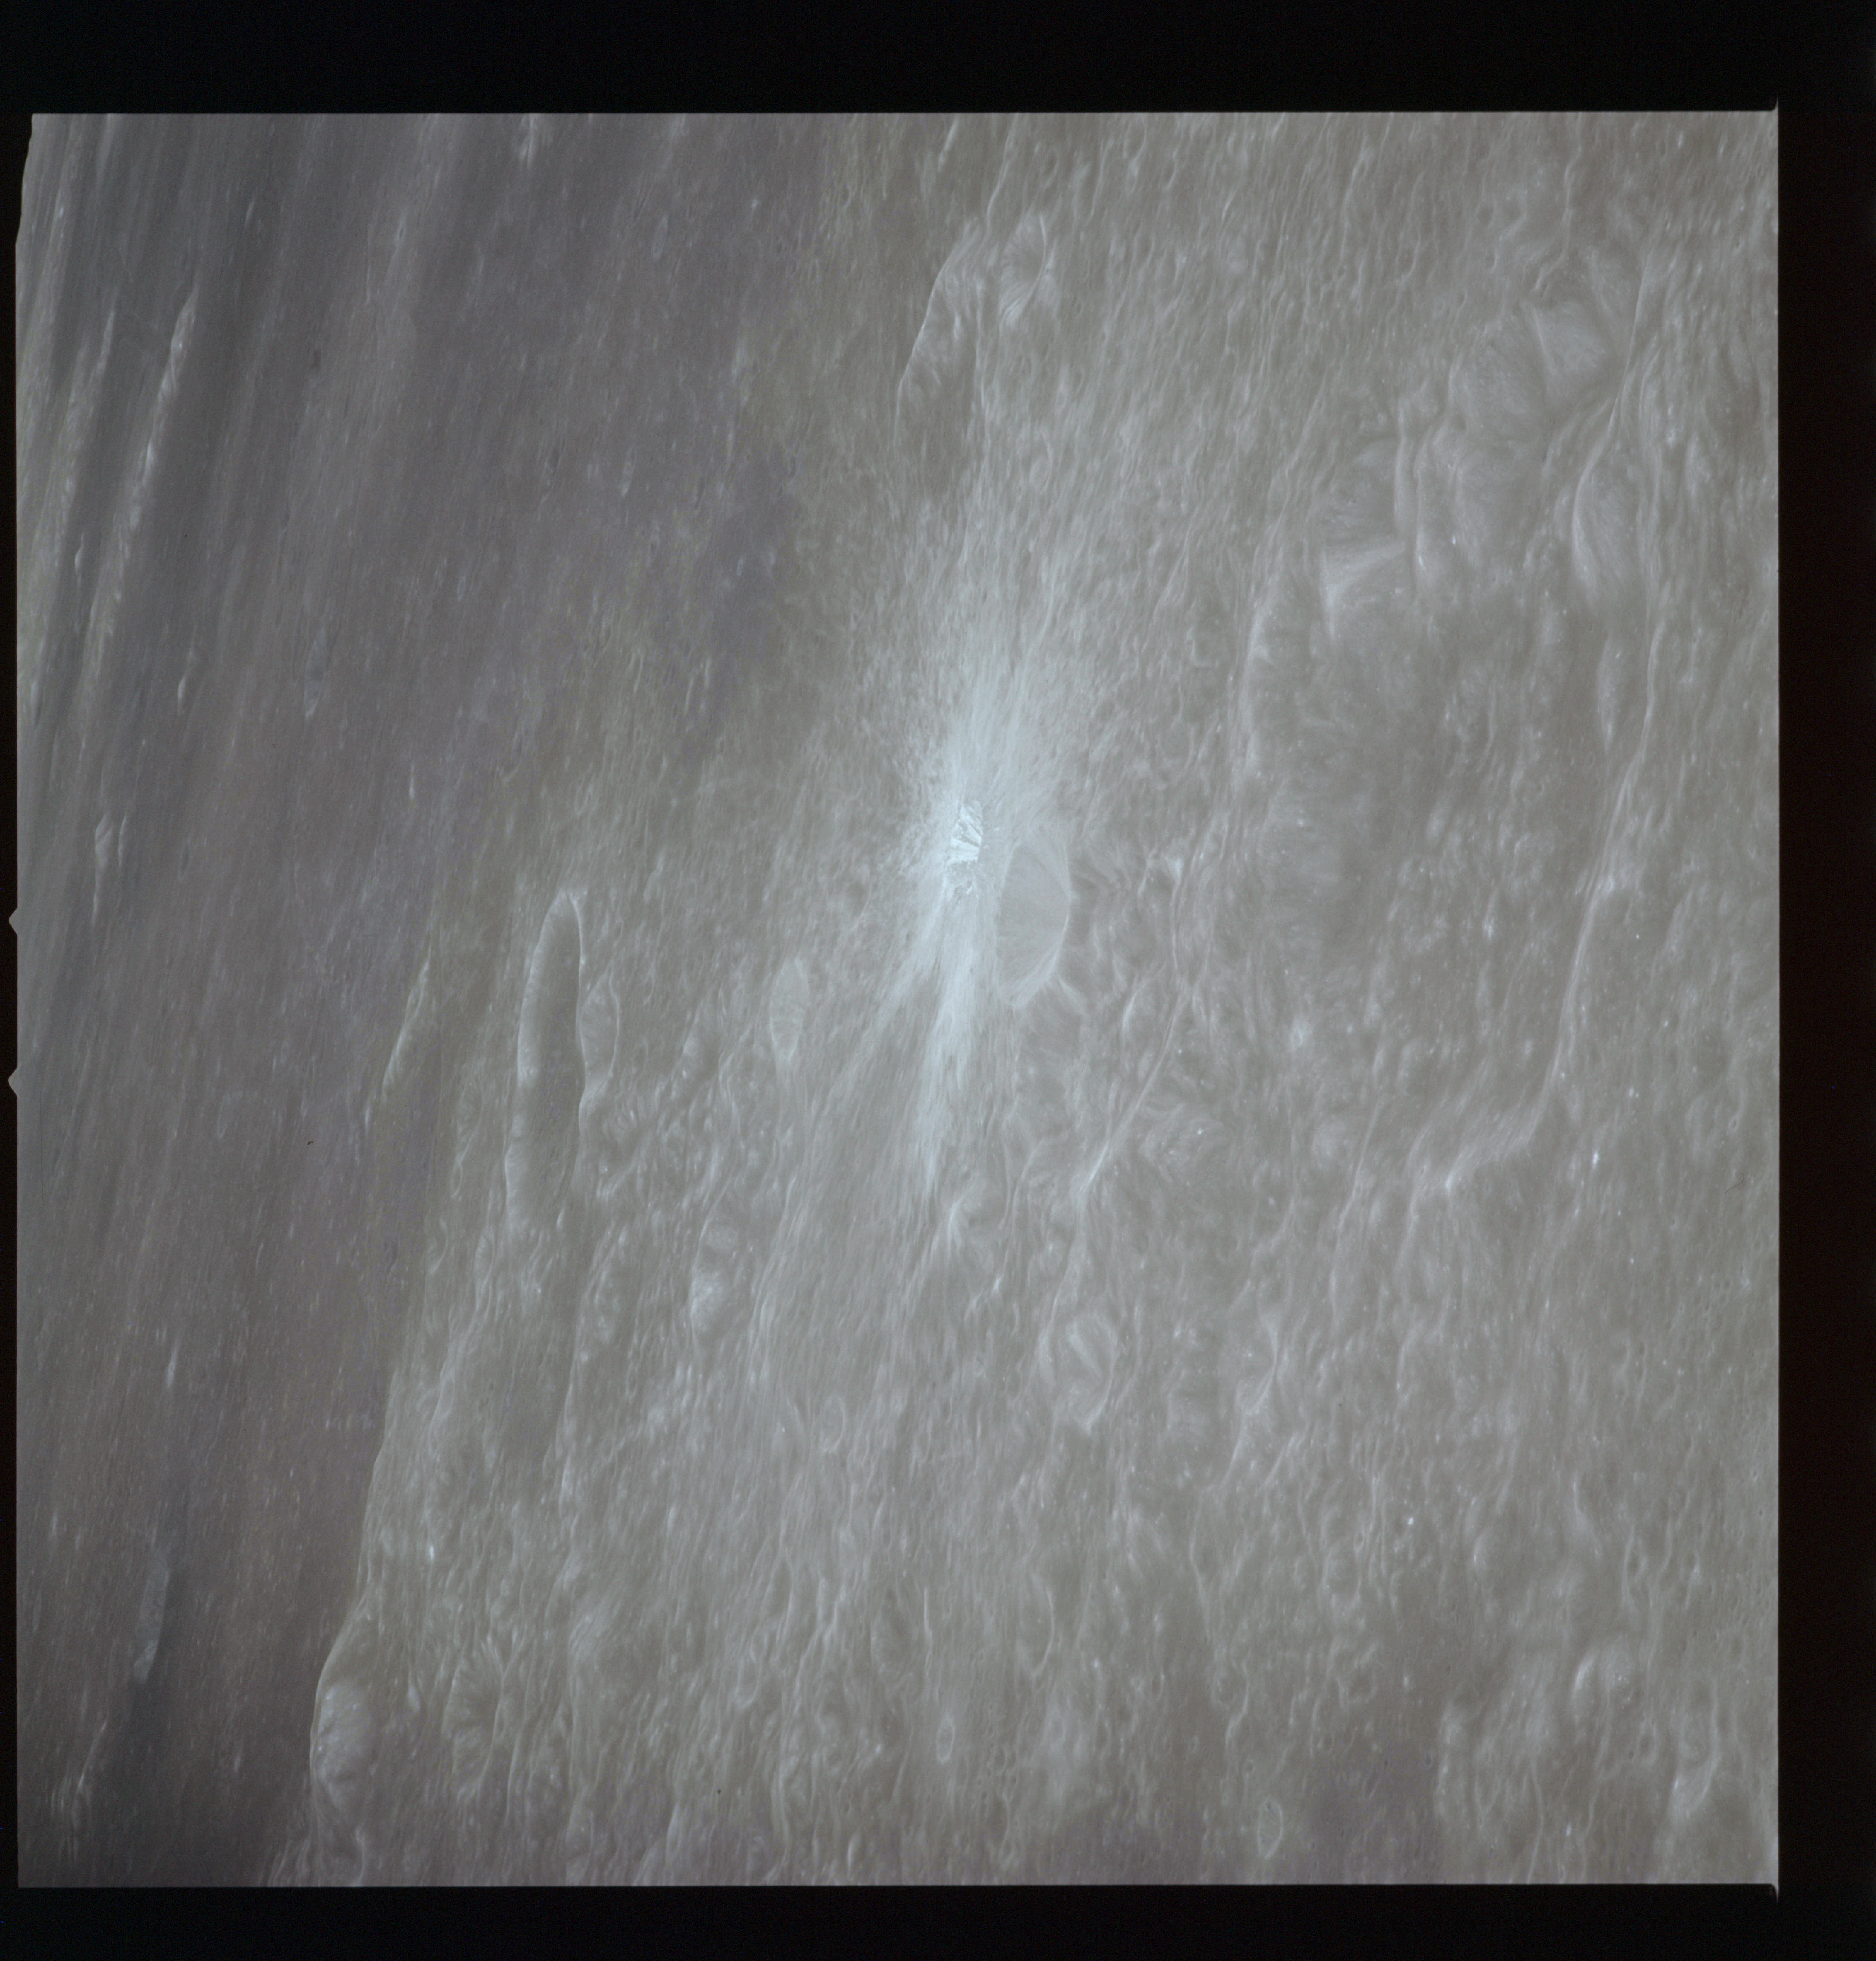
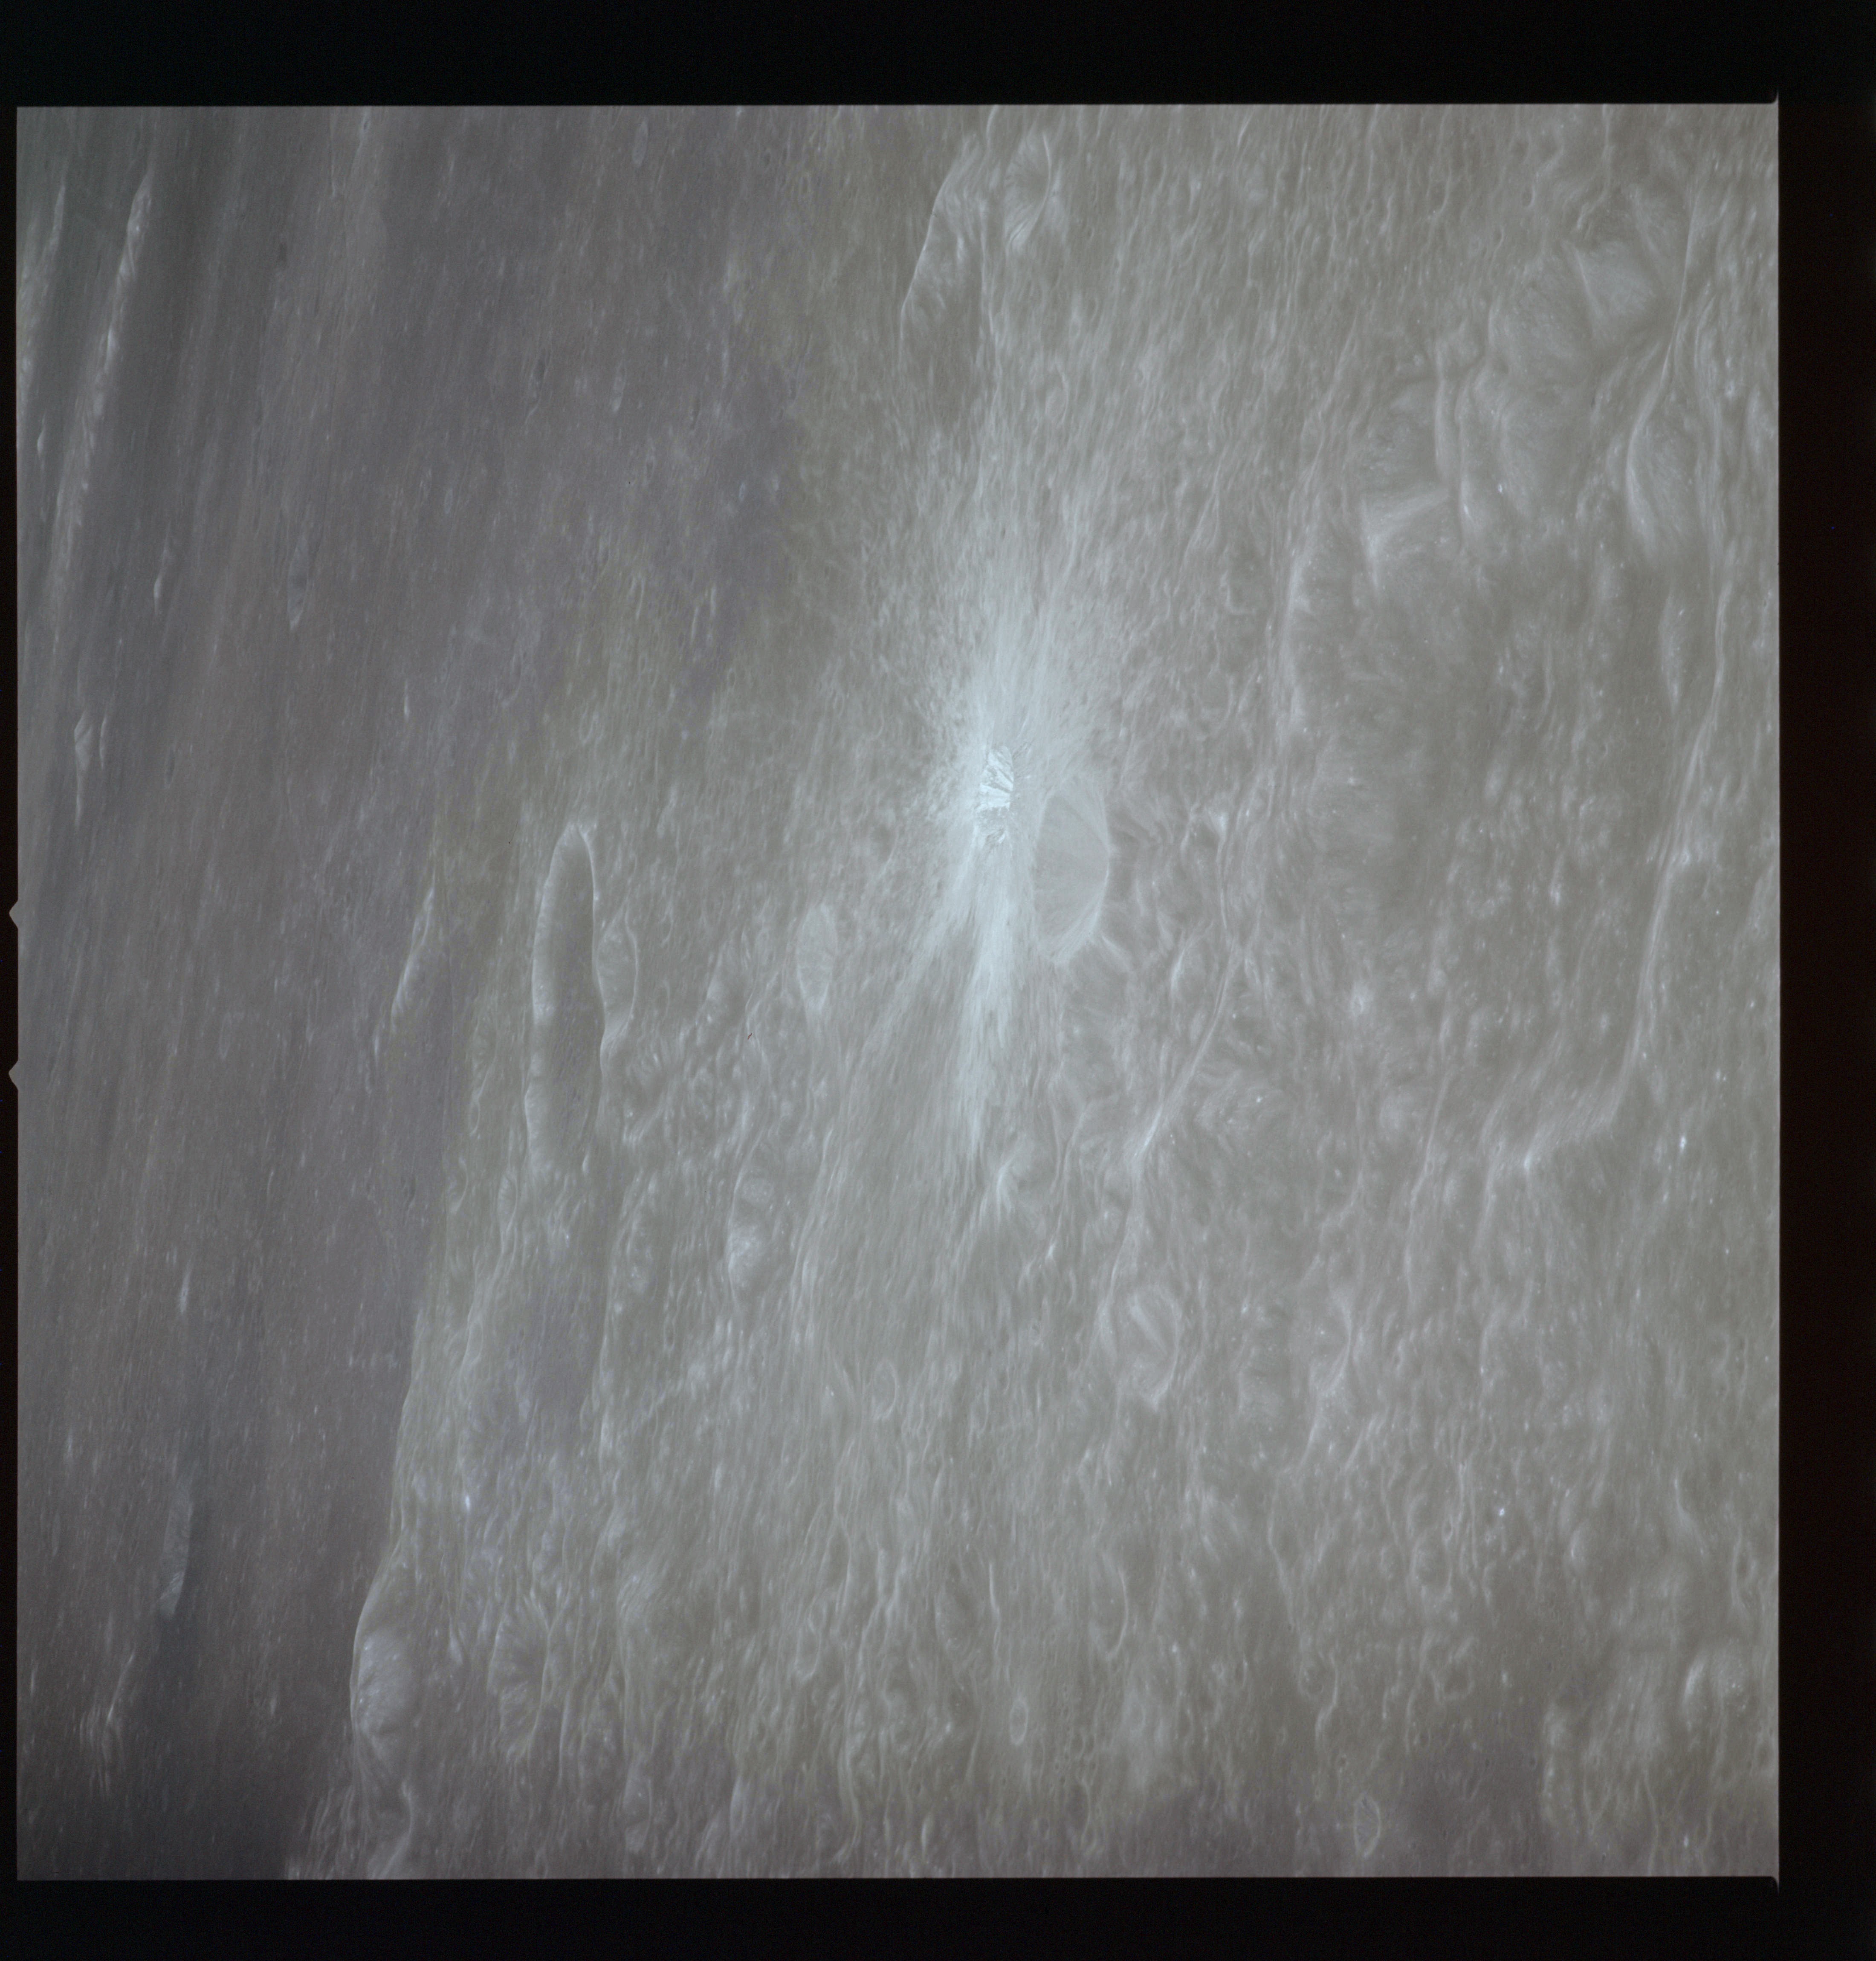
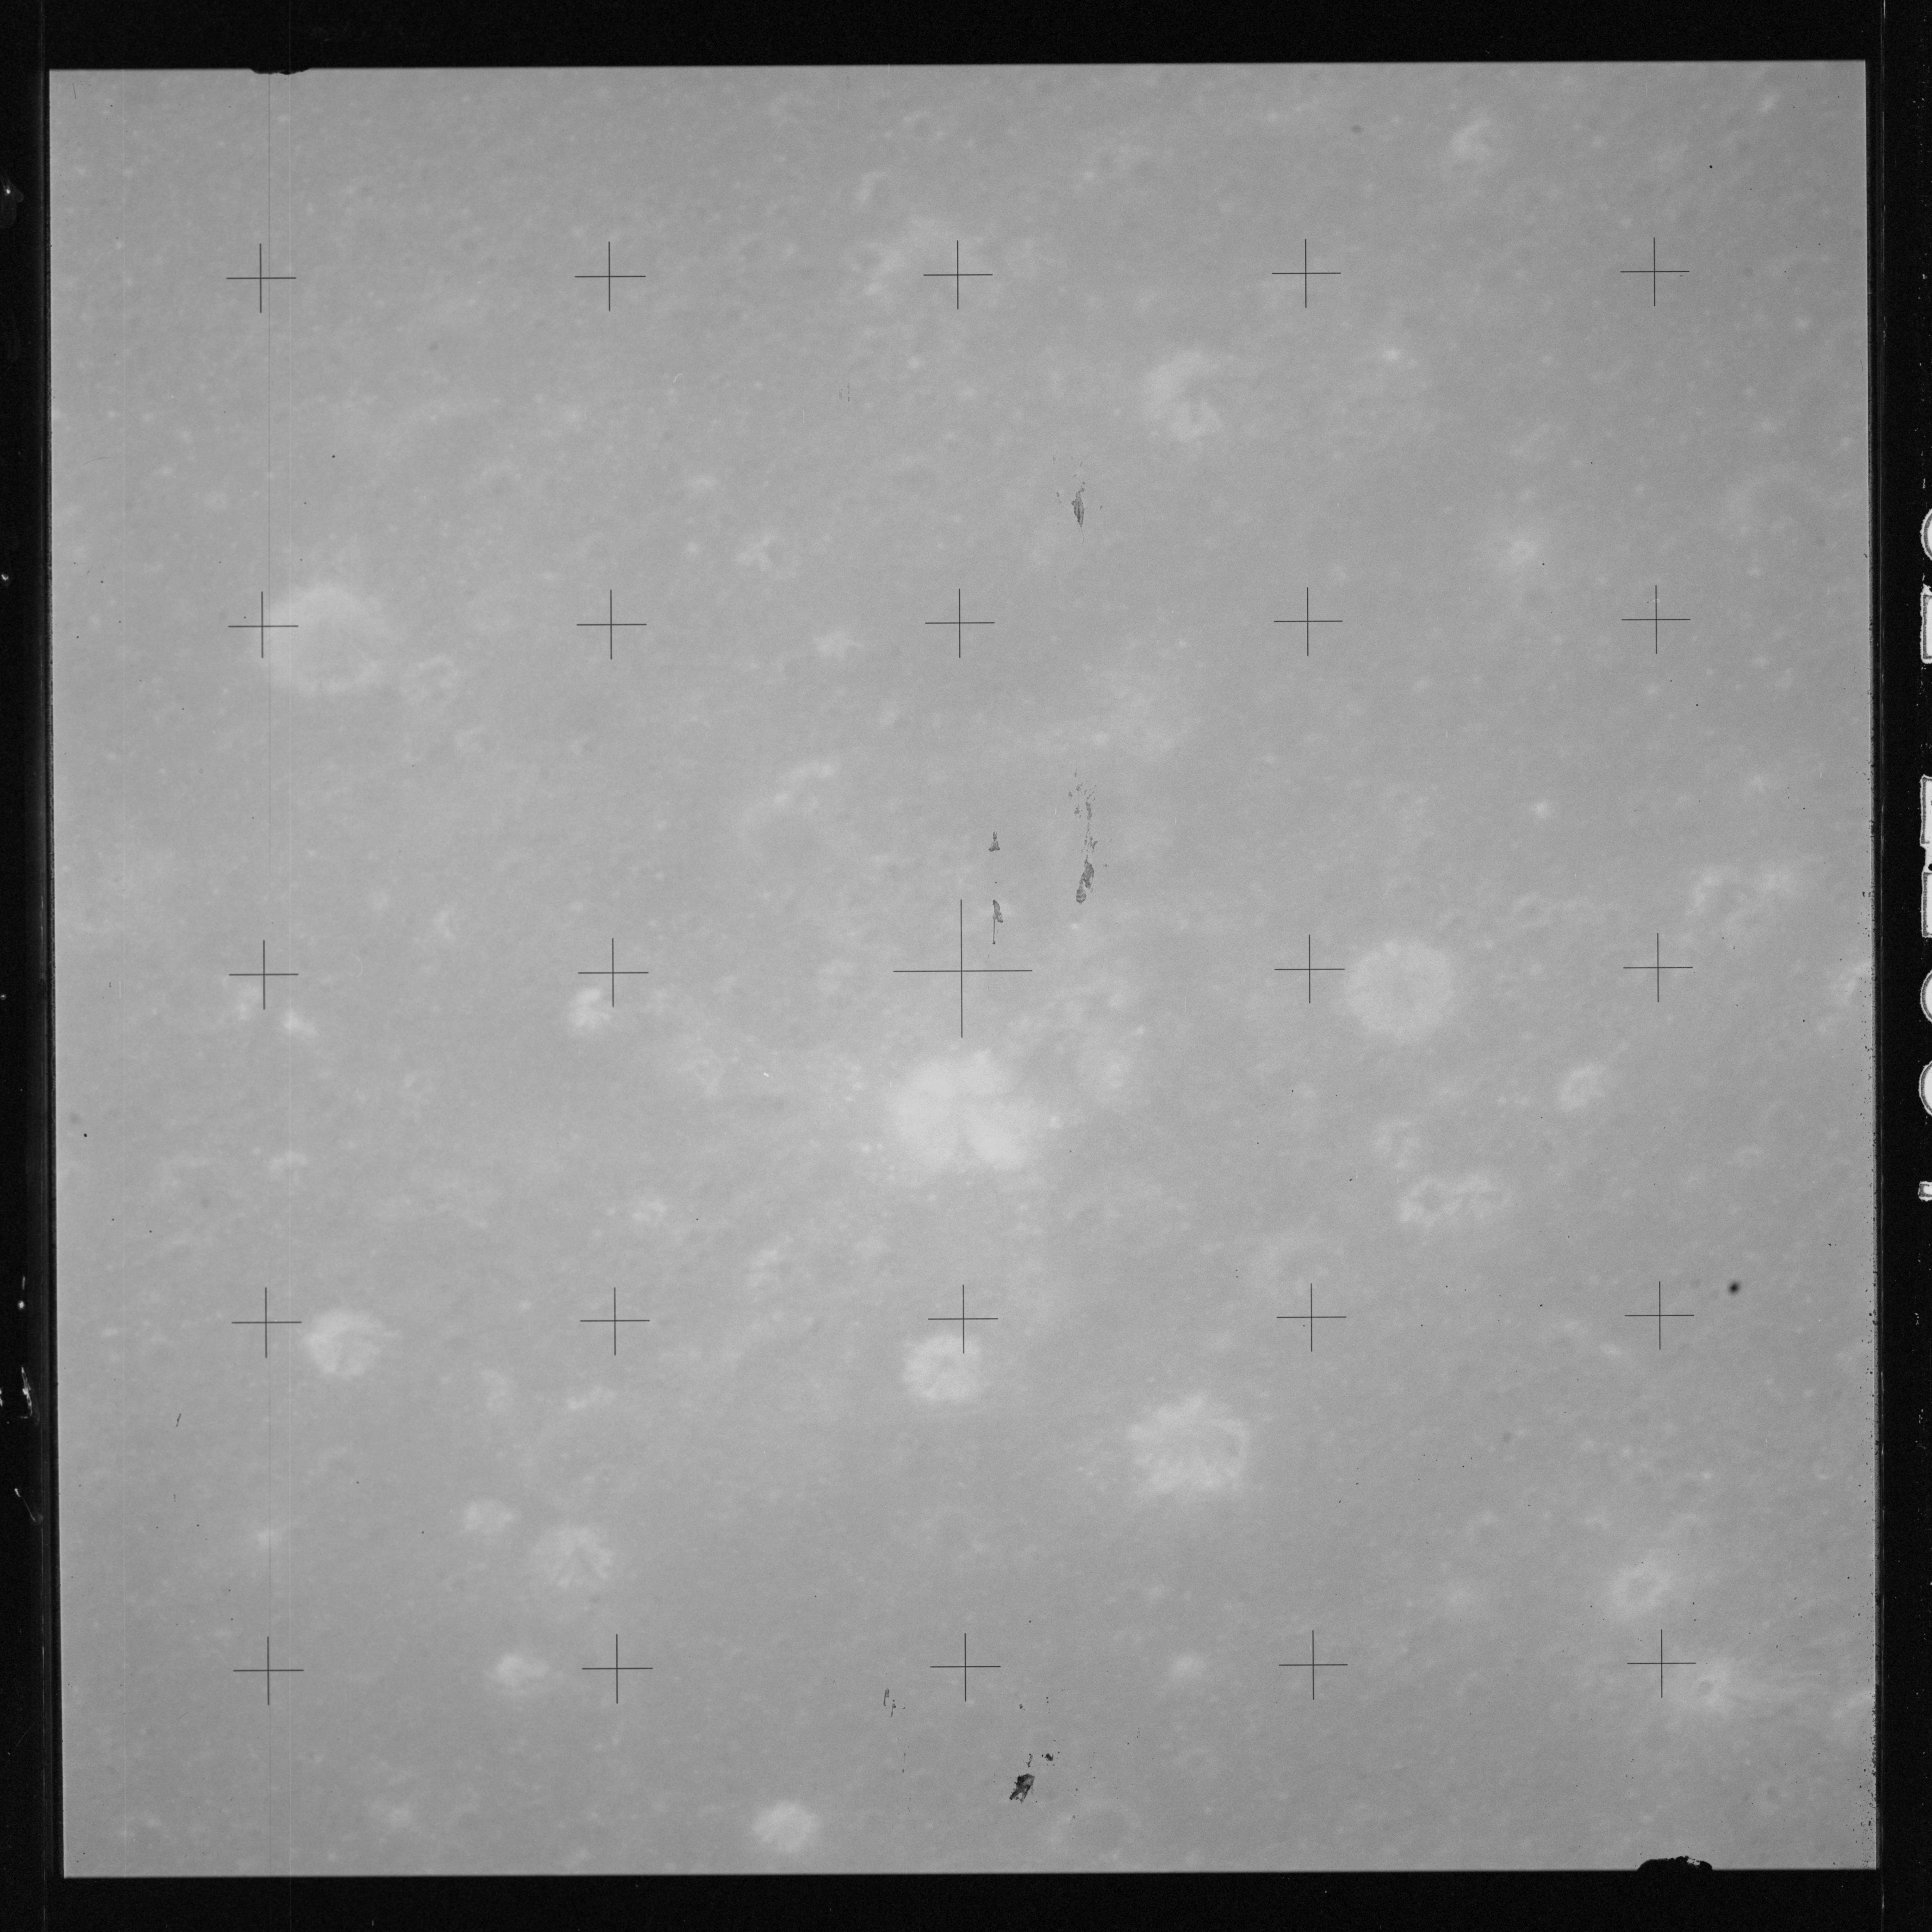
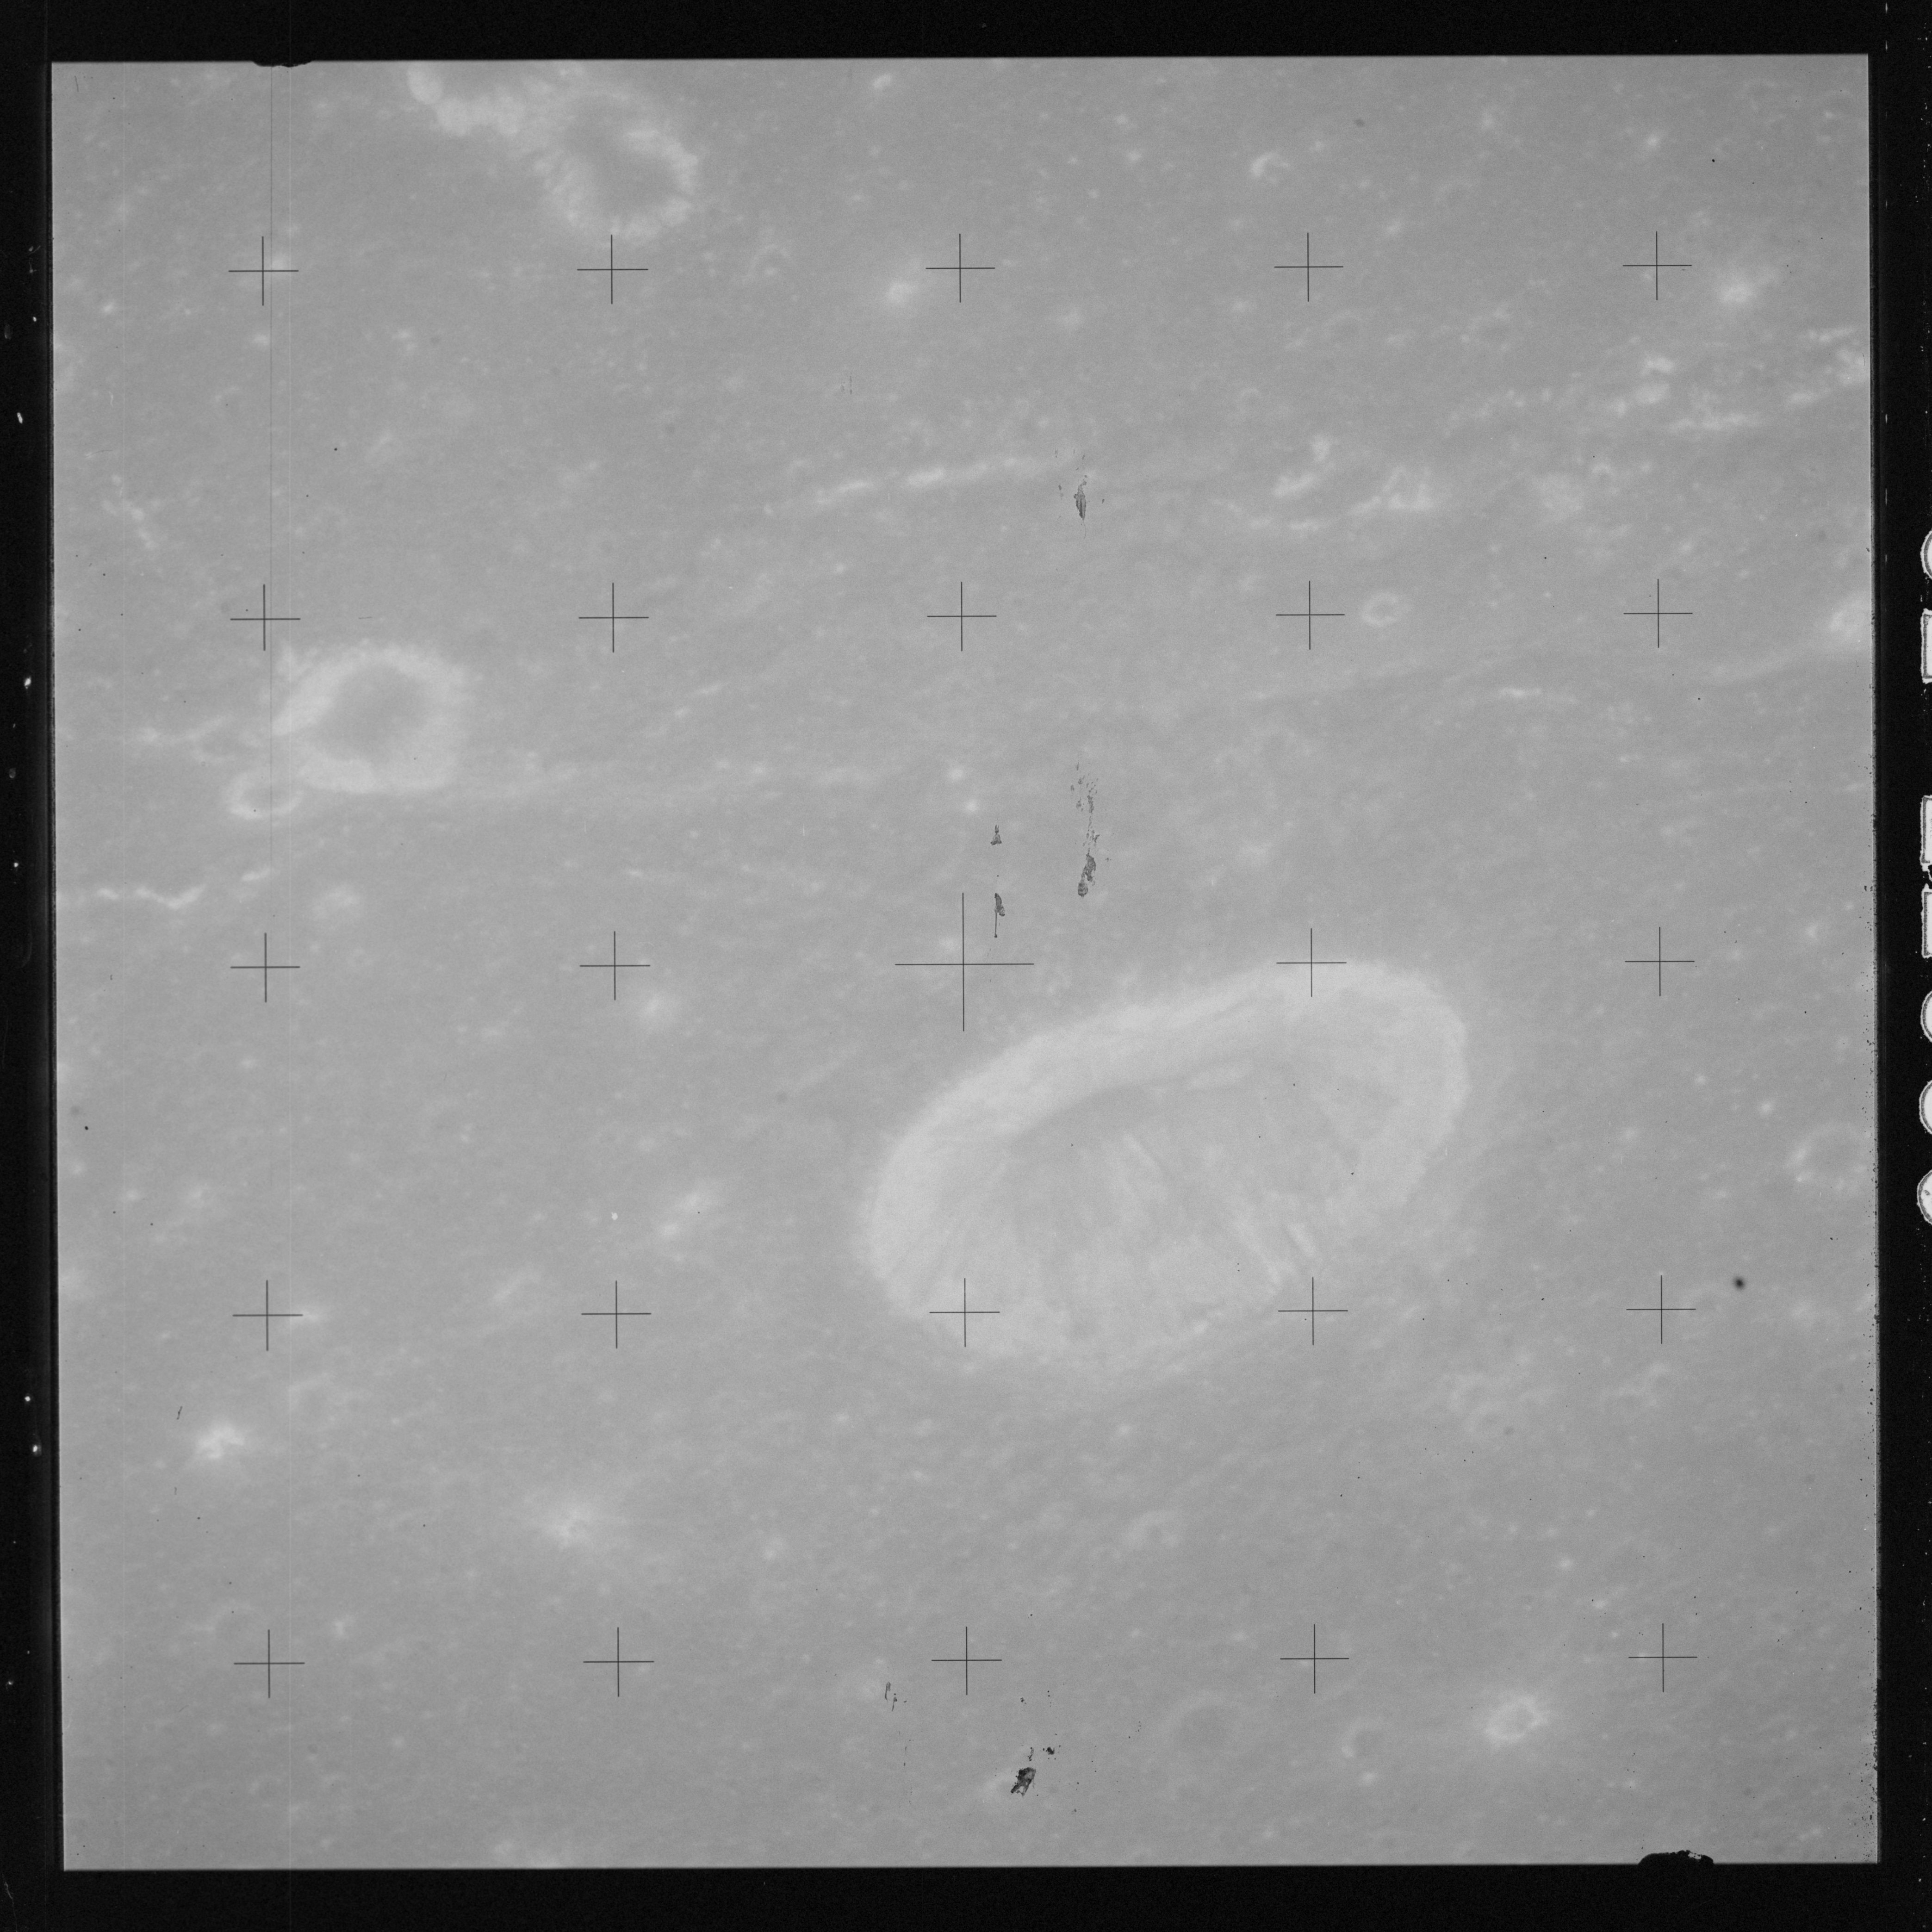
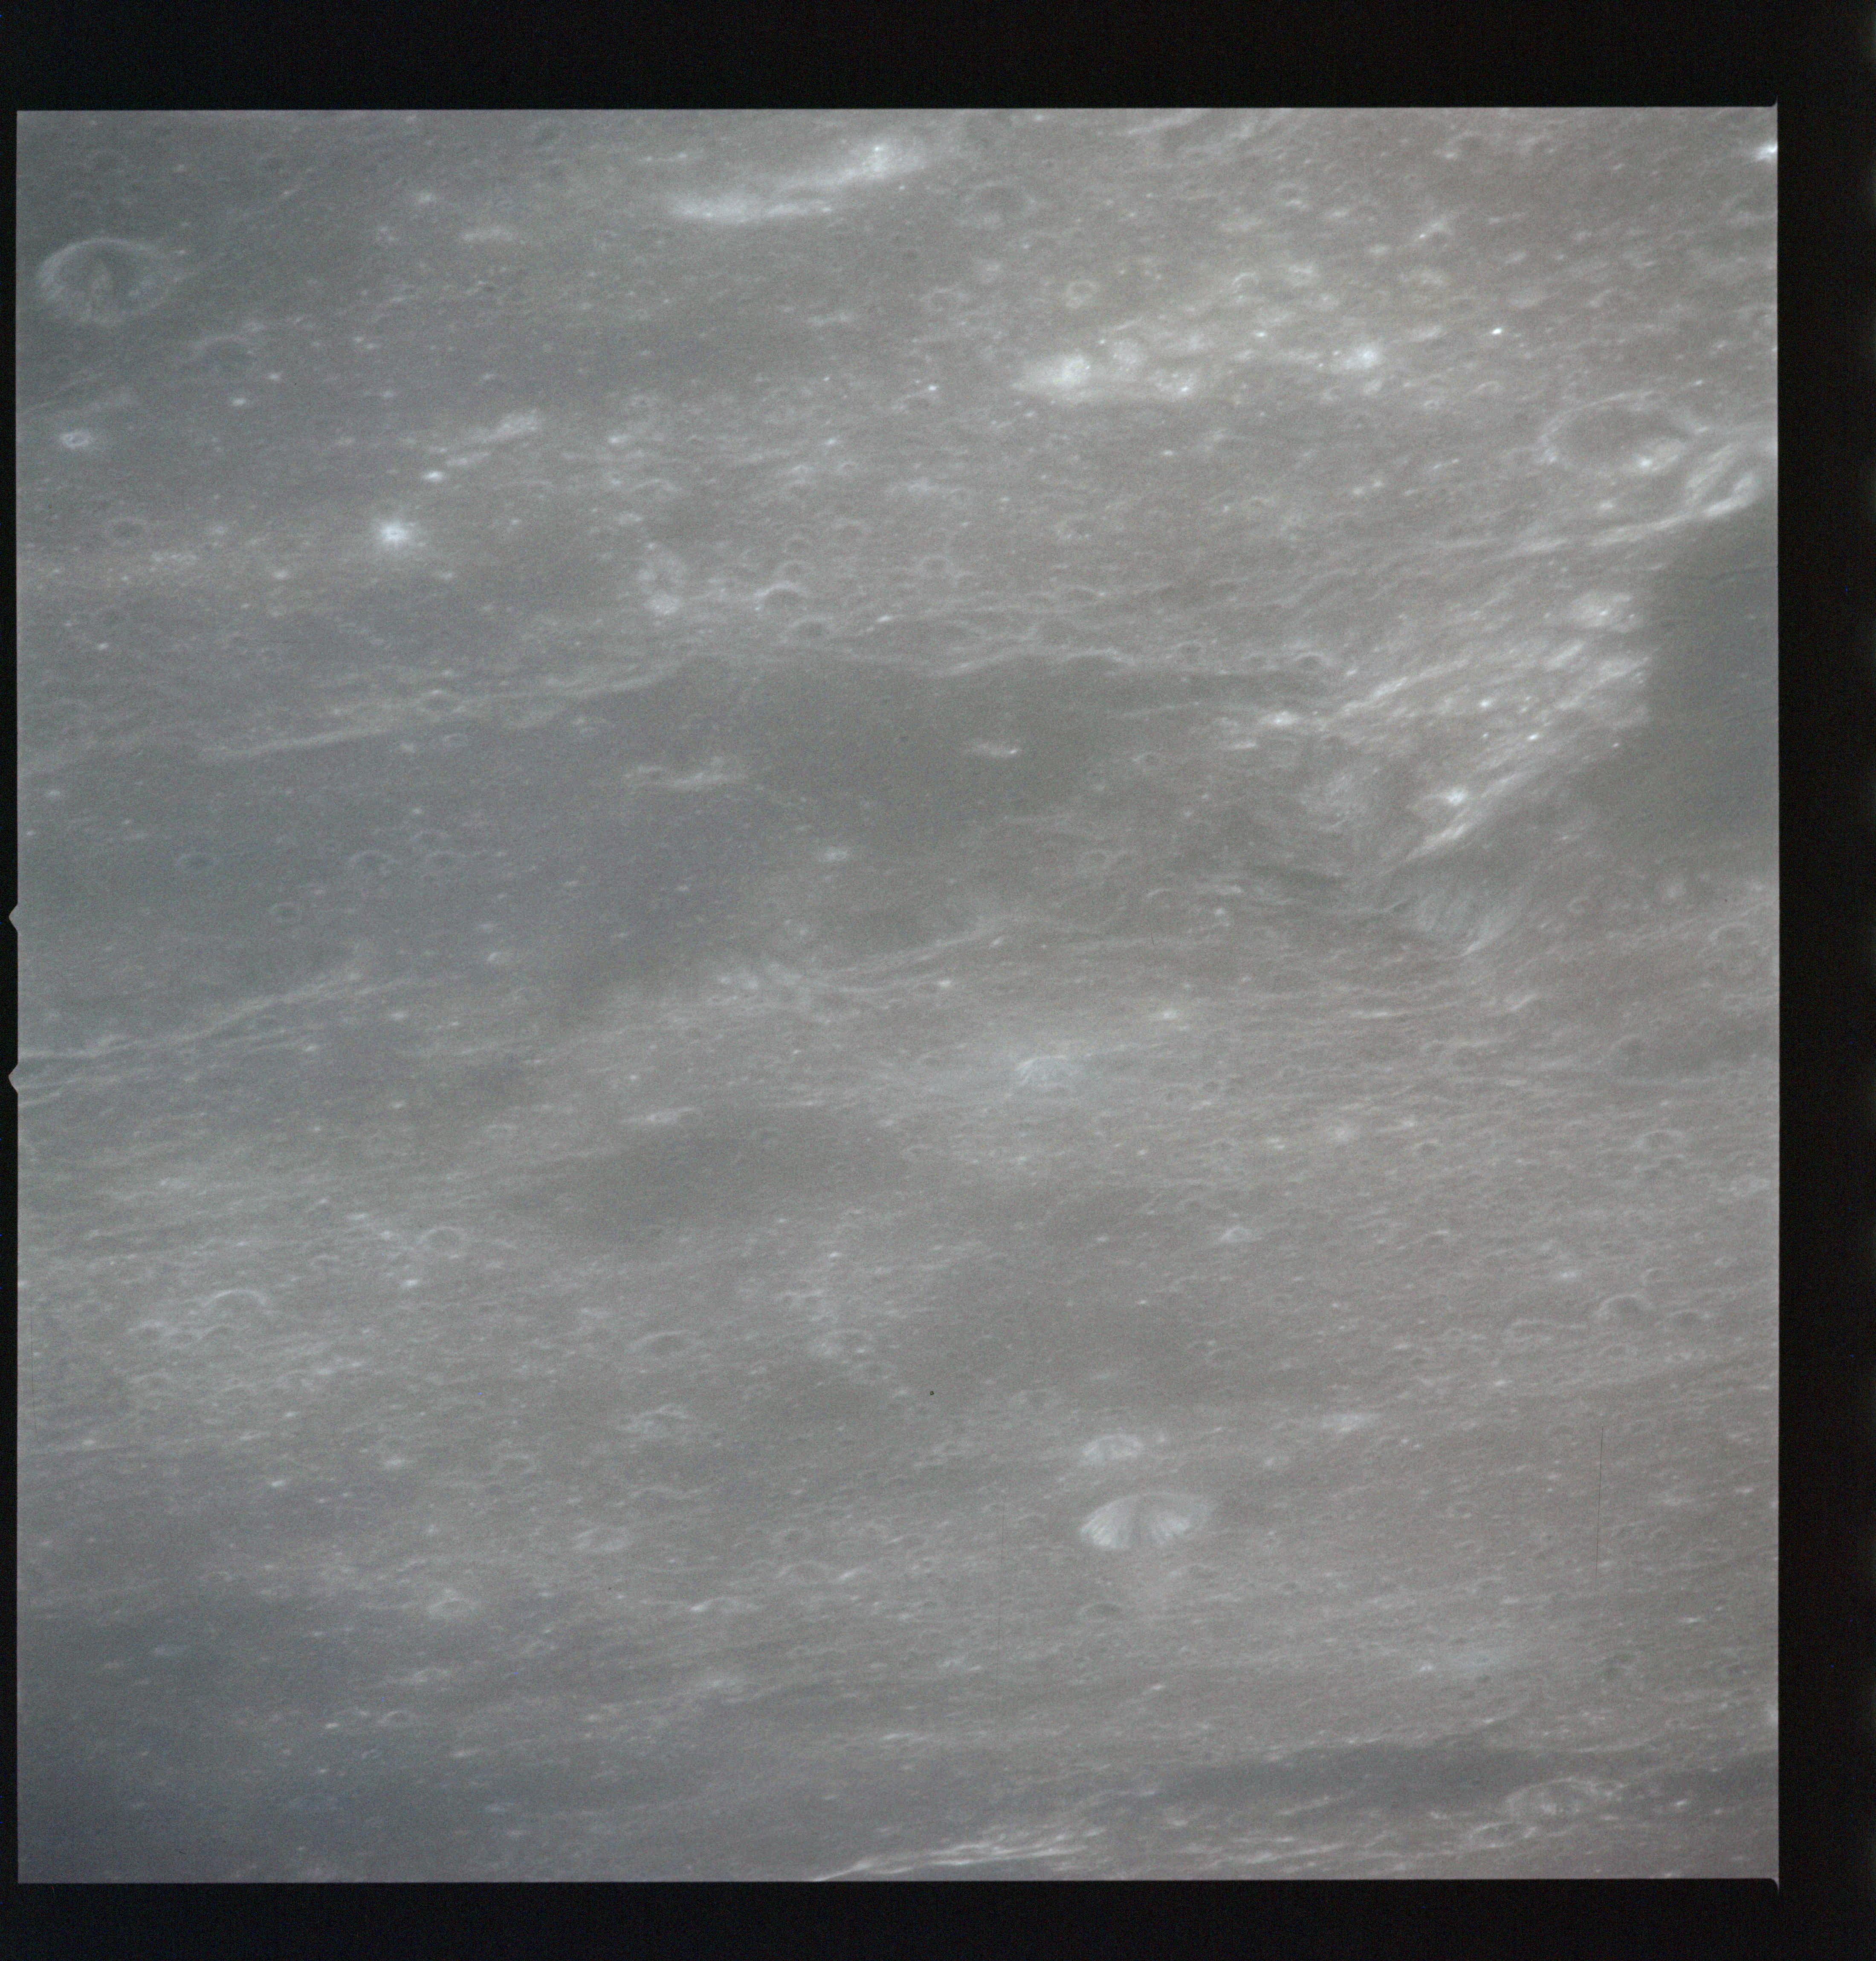
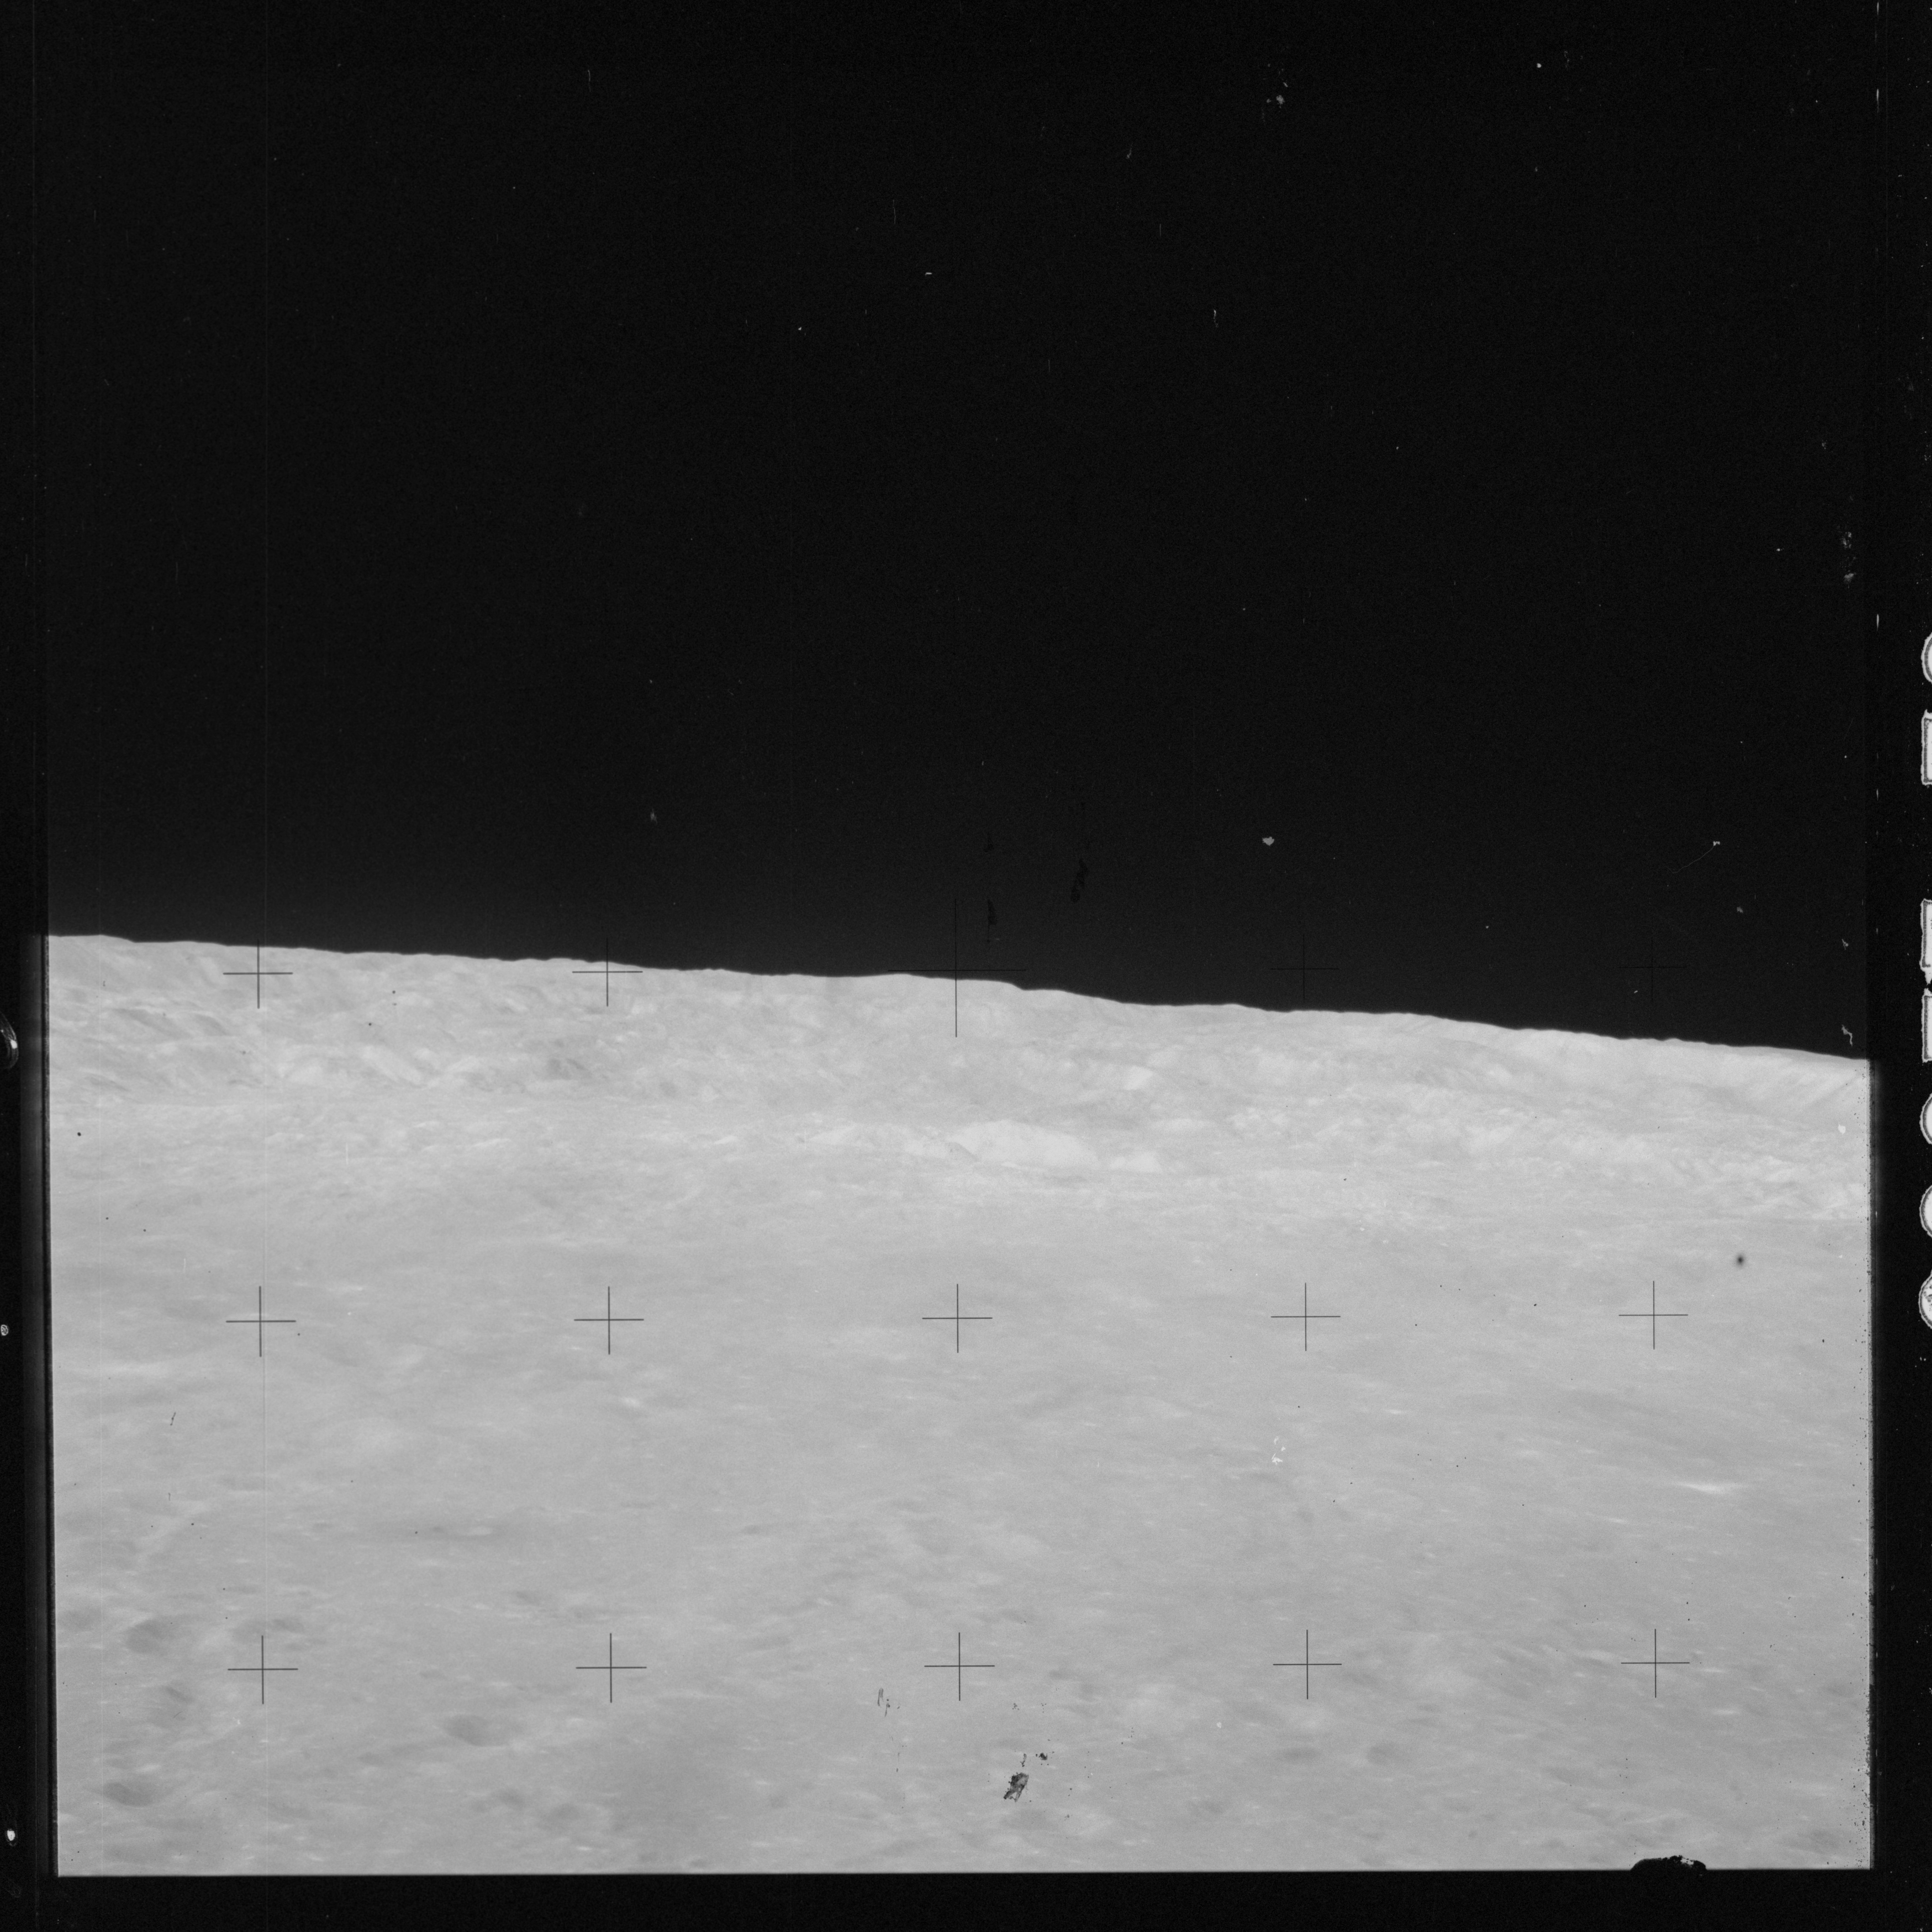
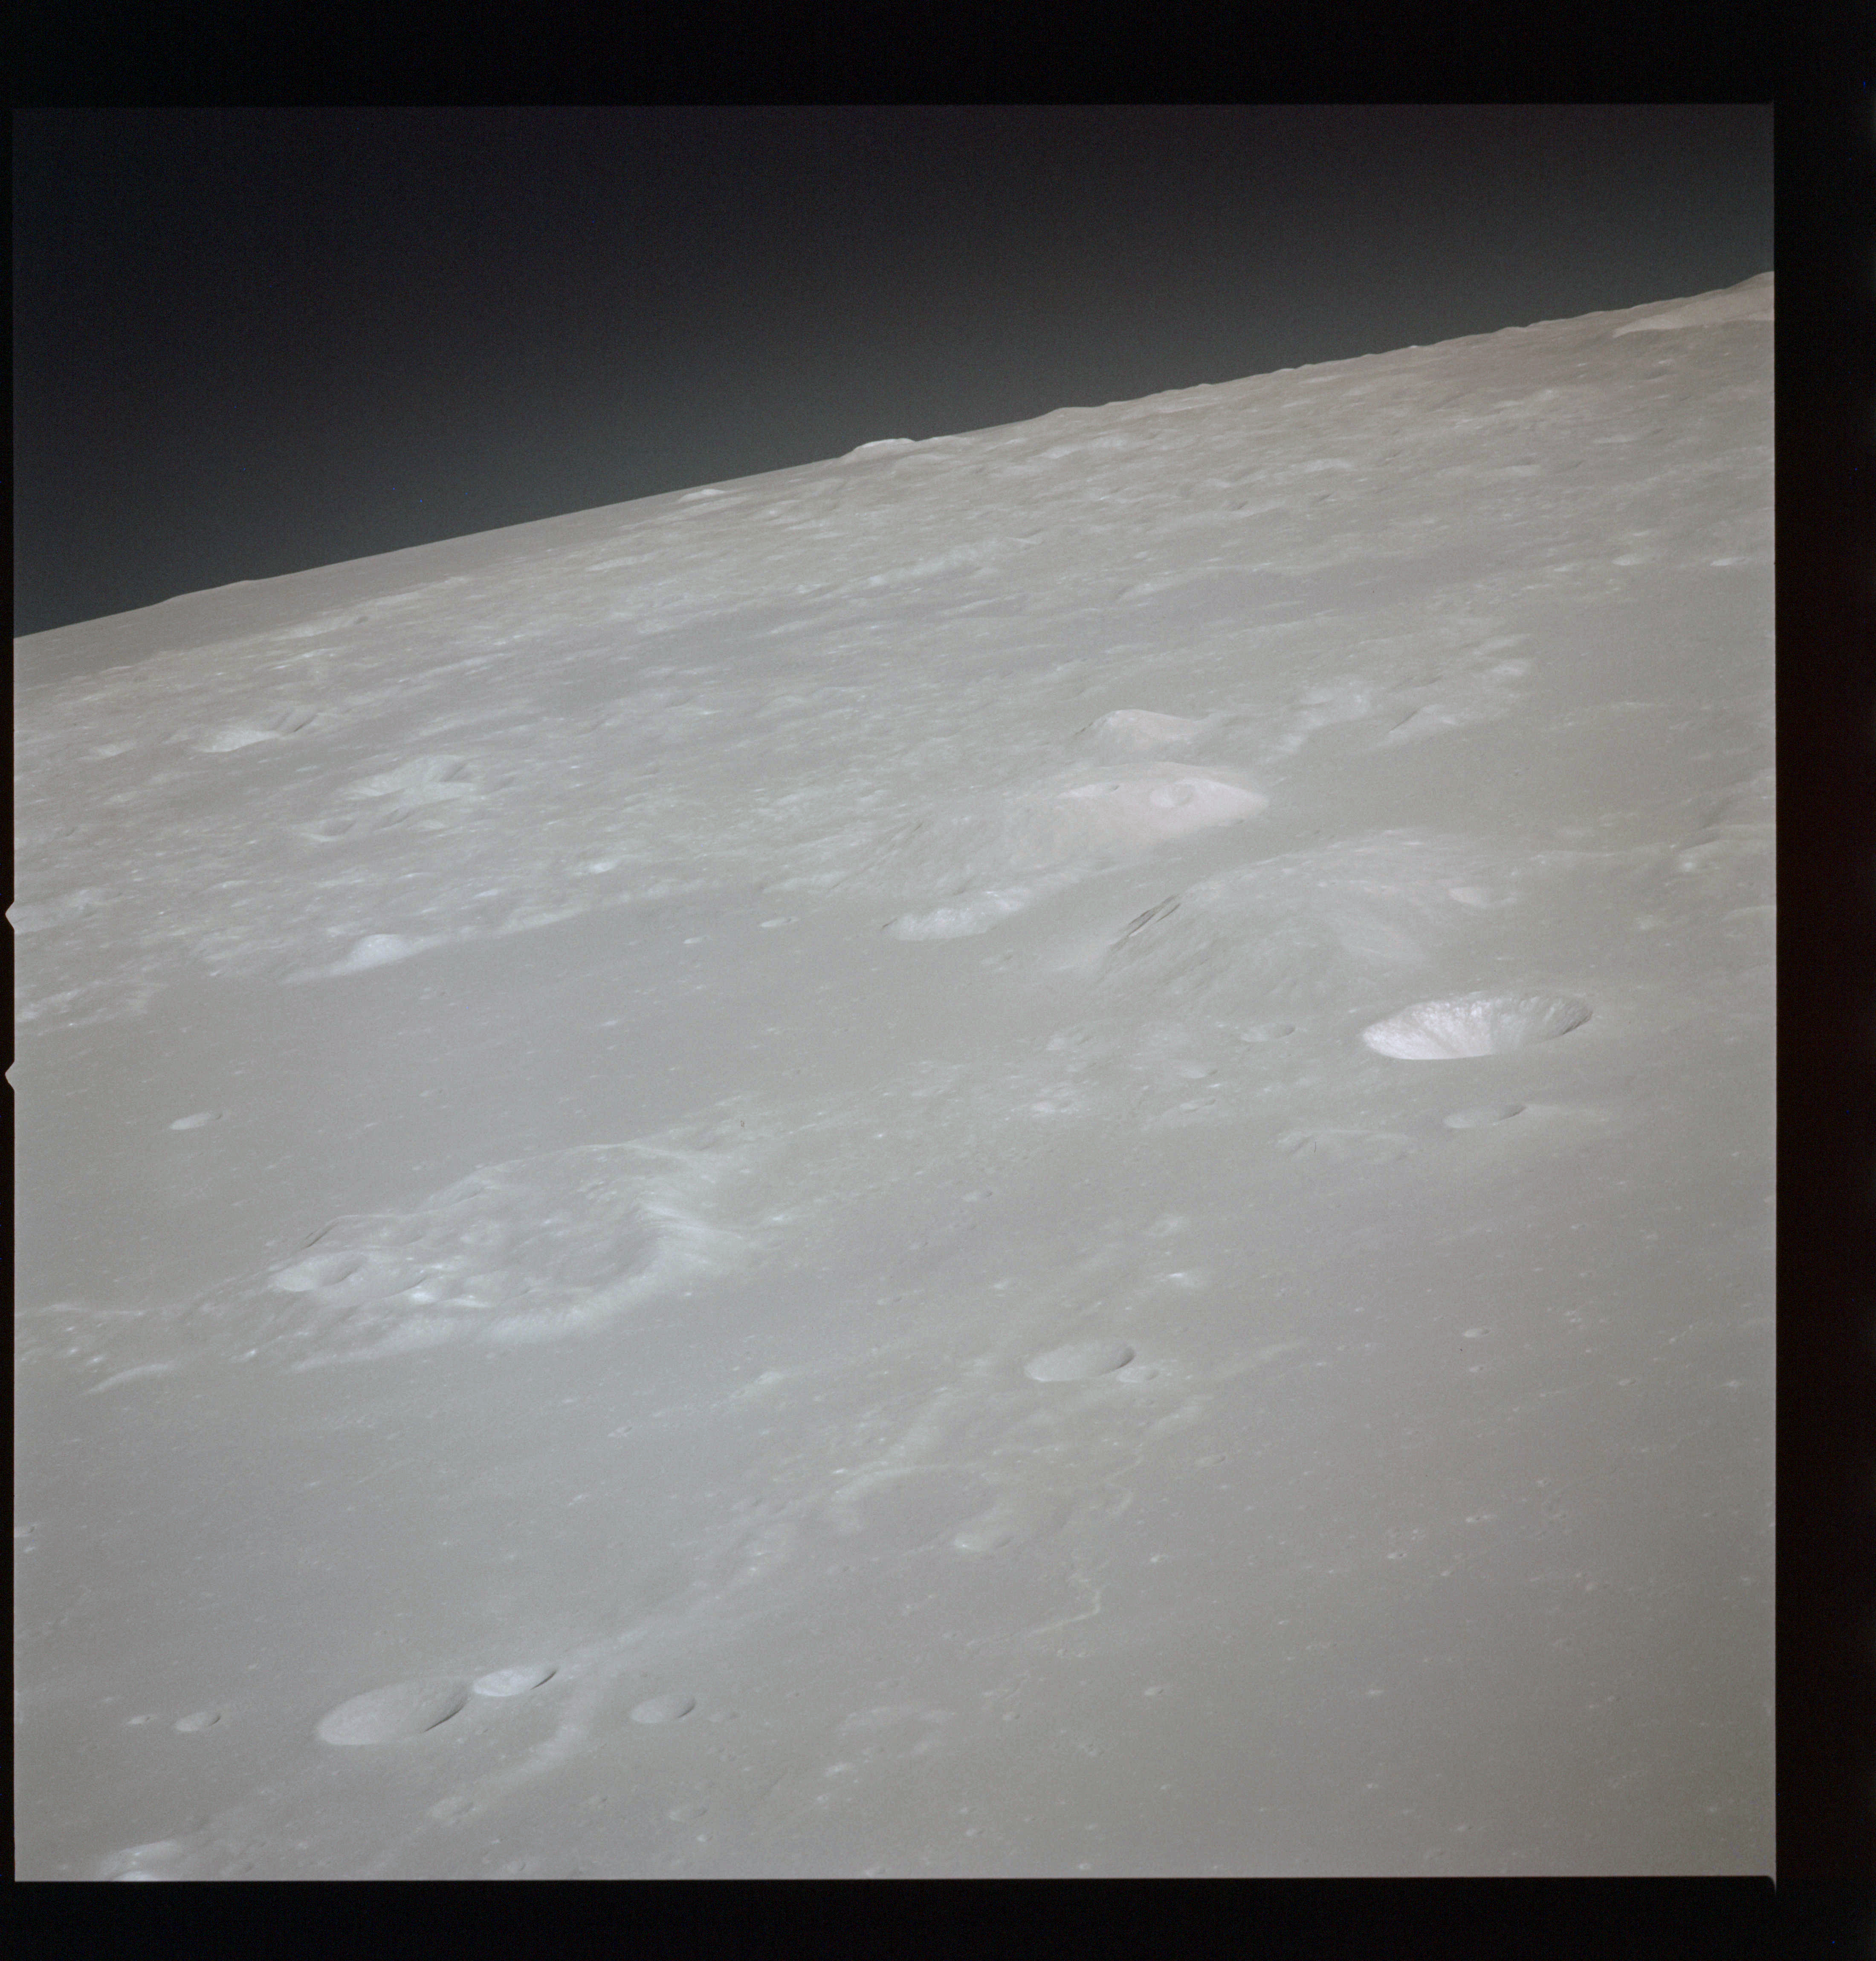
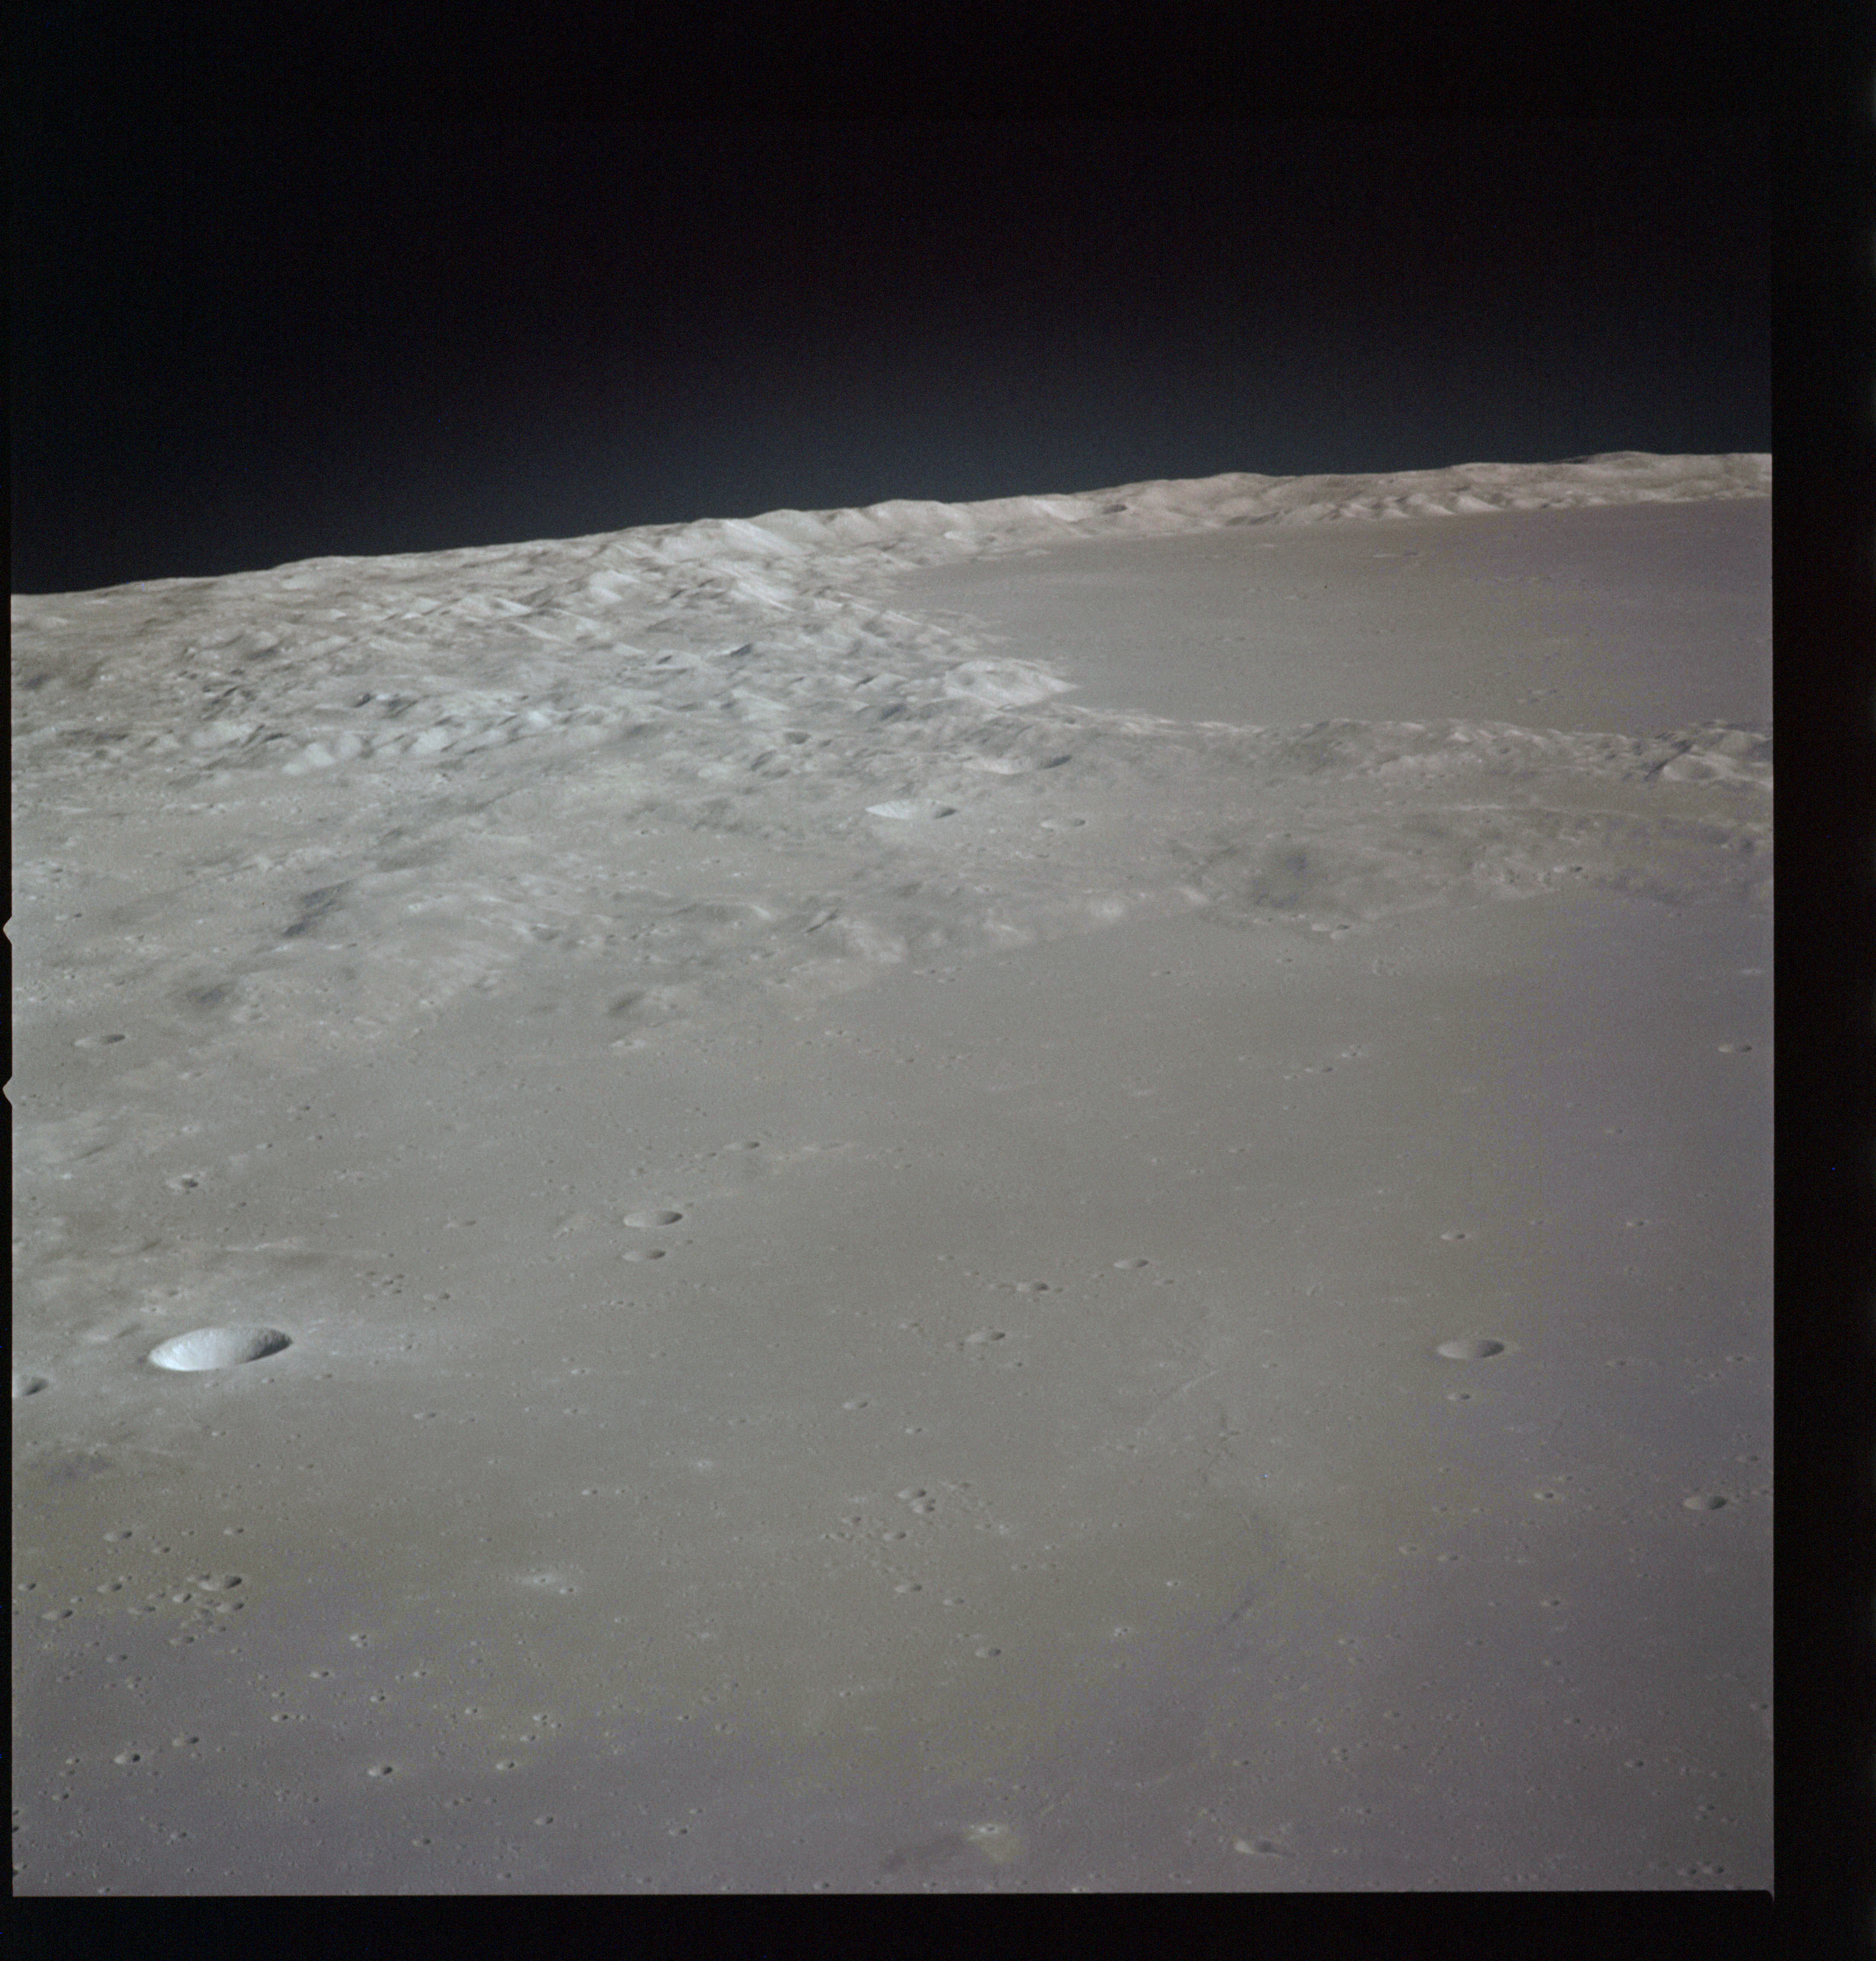
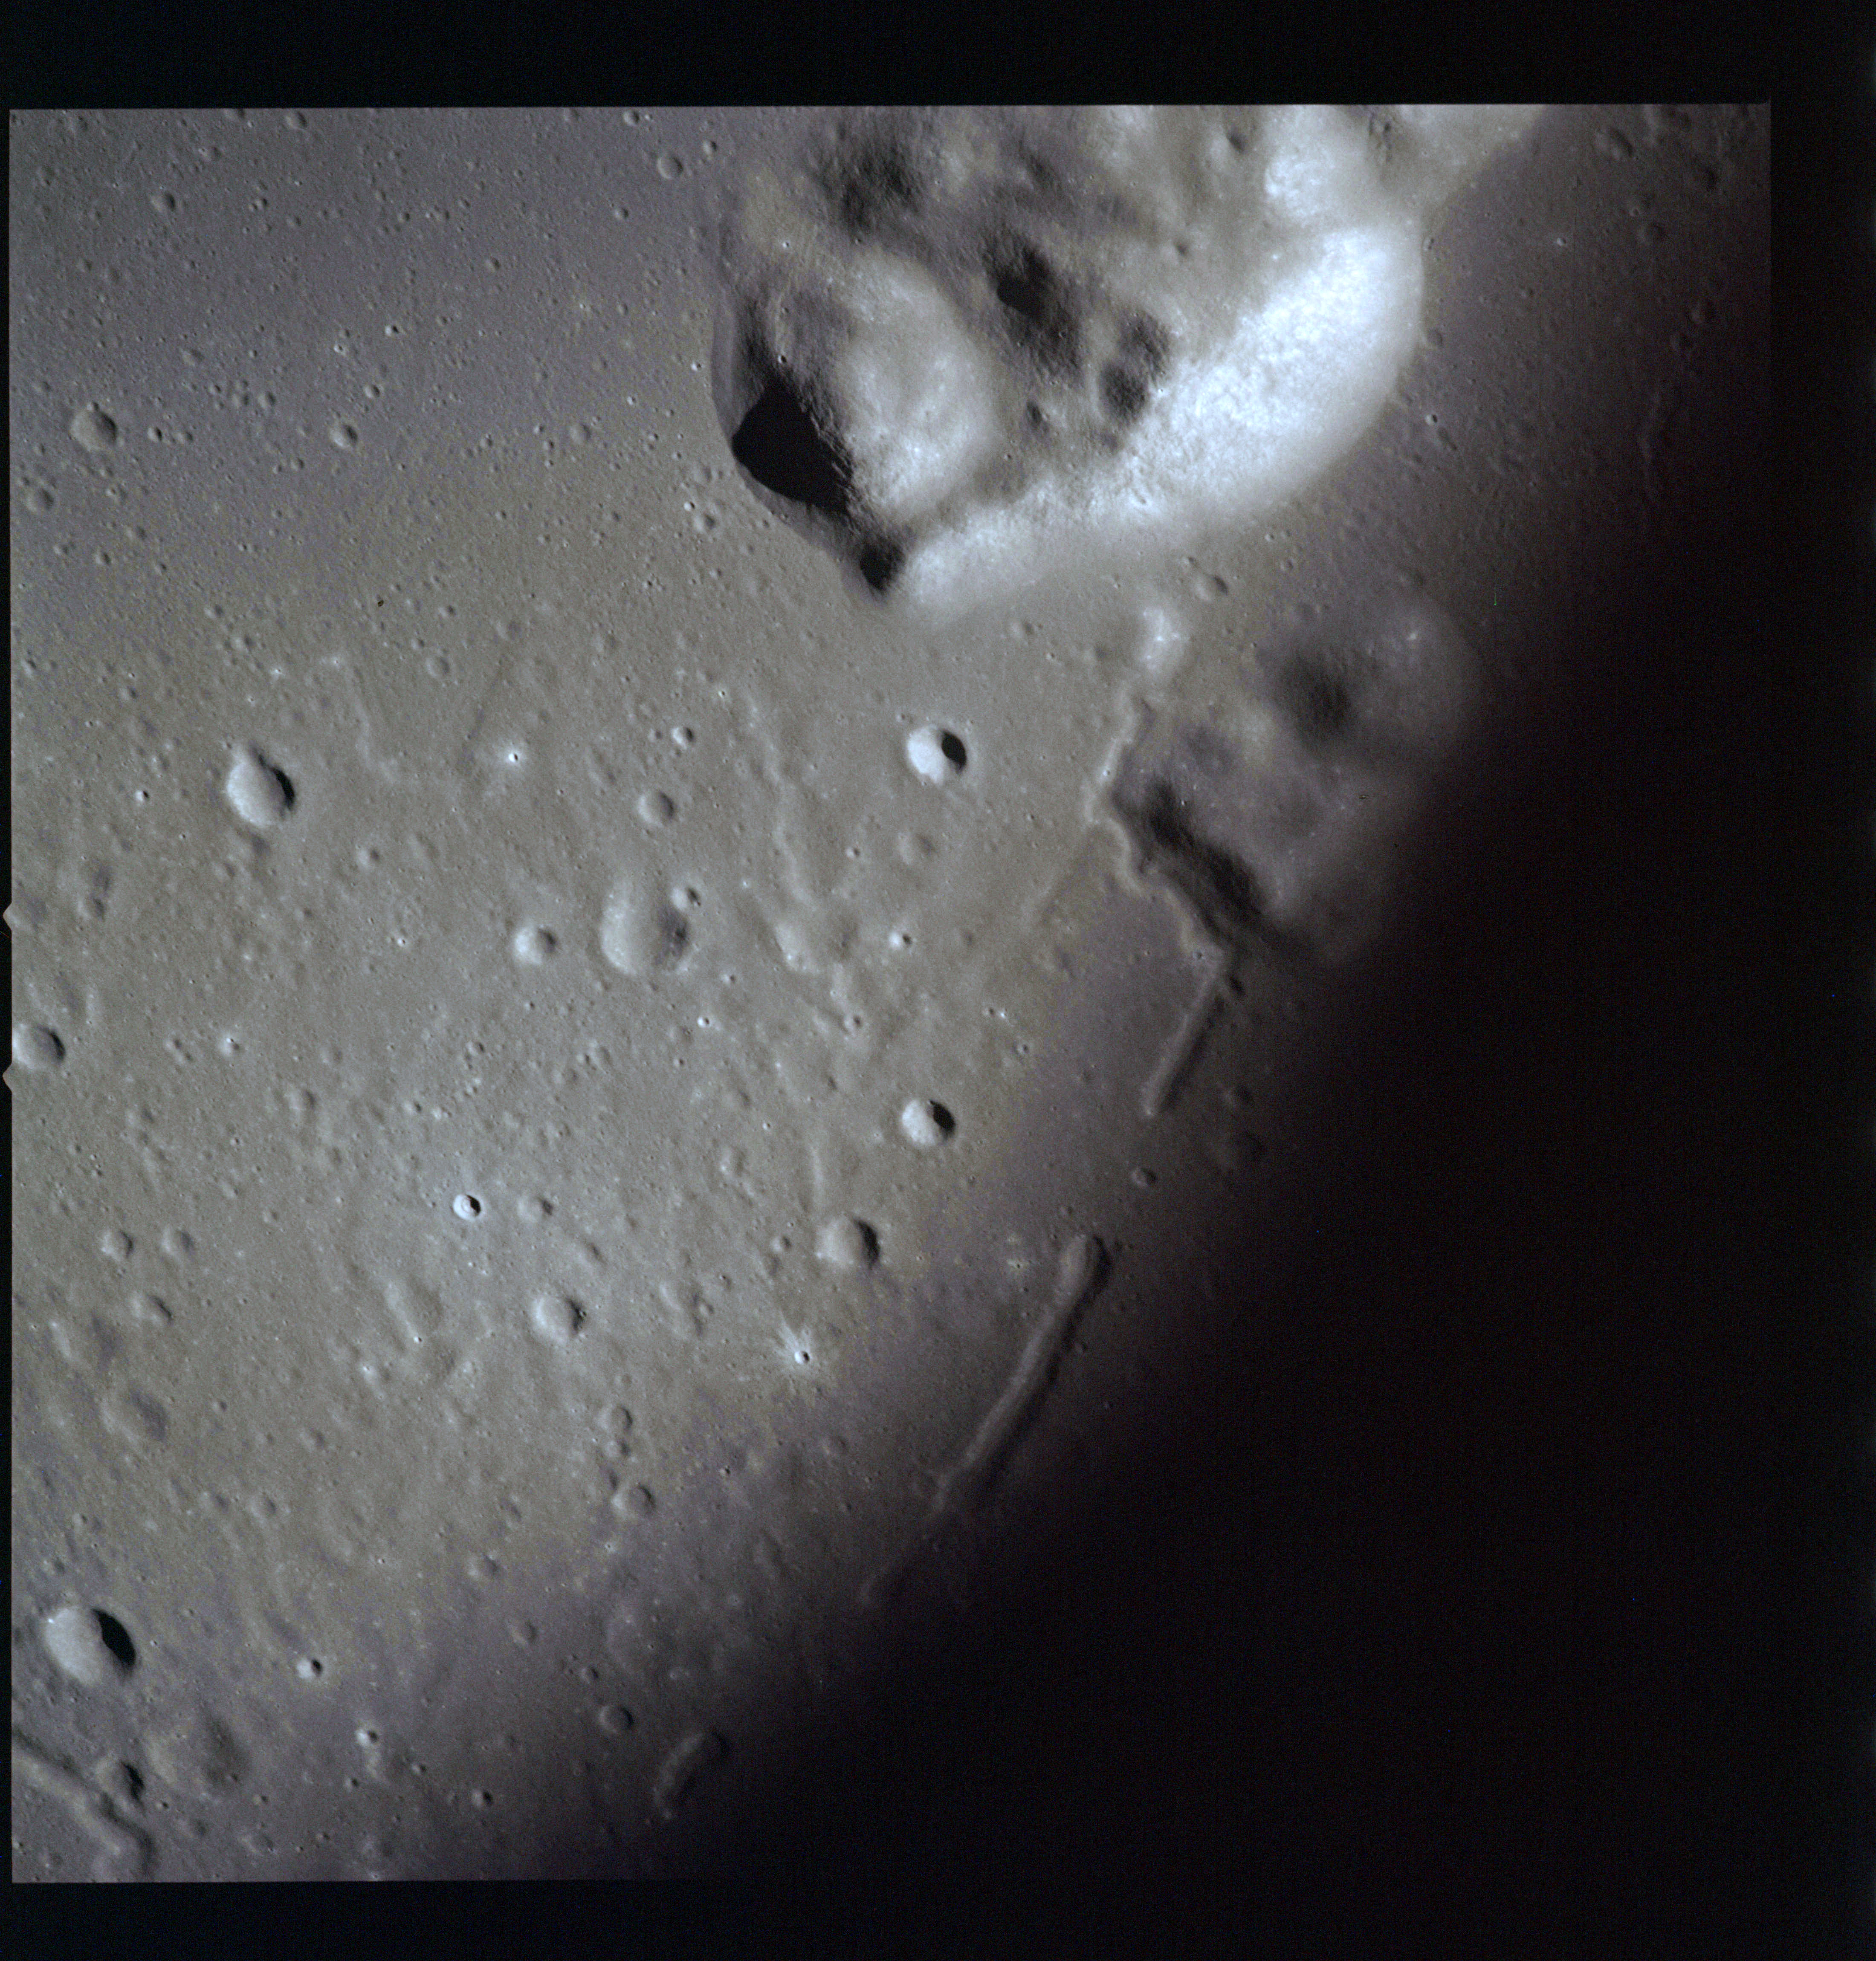
AS15-M-2510 - South oblique Metric Camera image of craters Humboldt and Barnard, including Catena Humboldt. Image taken at about 216:26. (250 megapixel version), (labelled version) - Image by NASA/ASU.
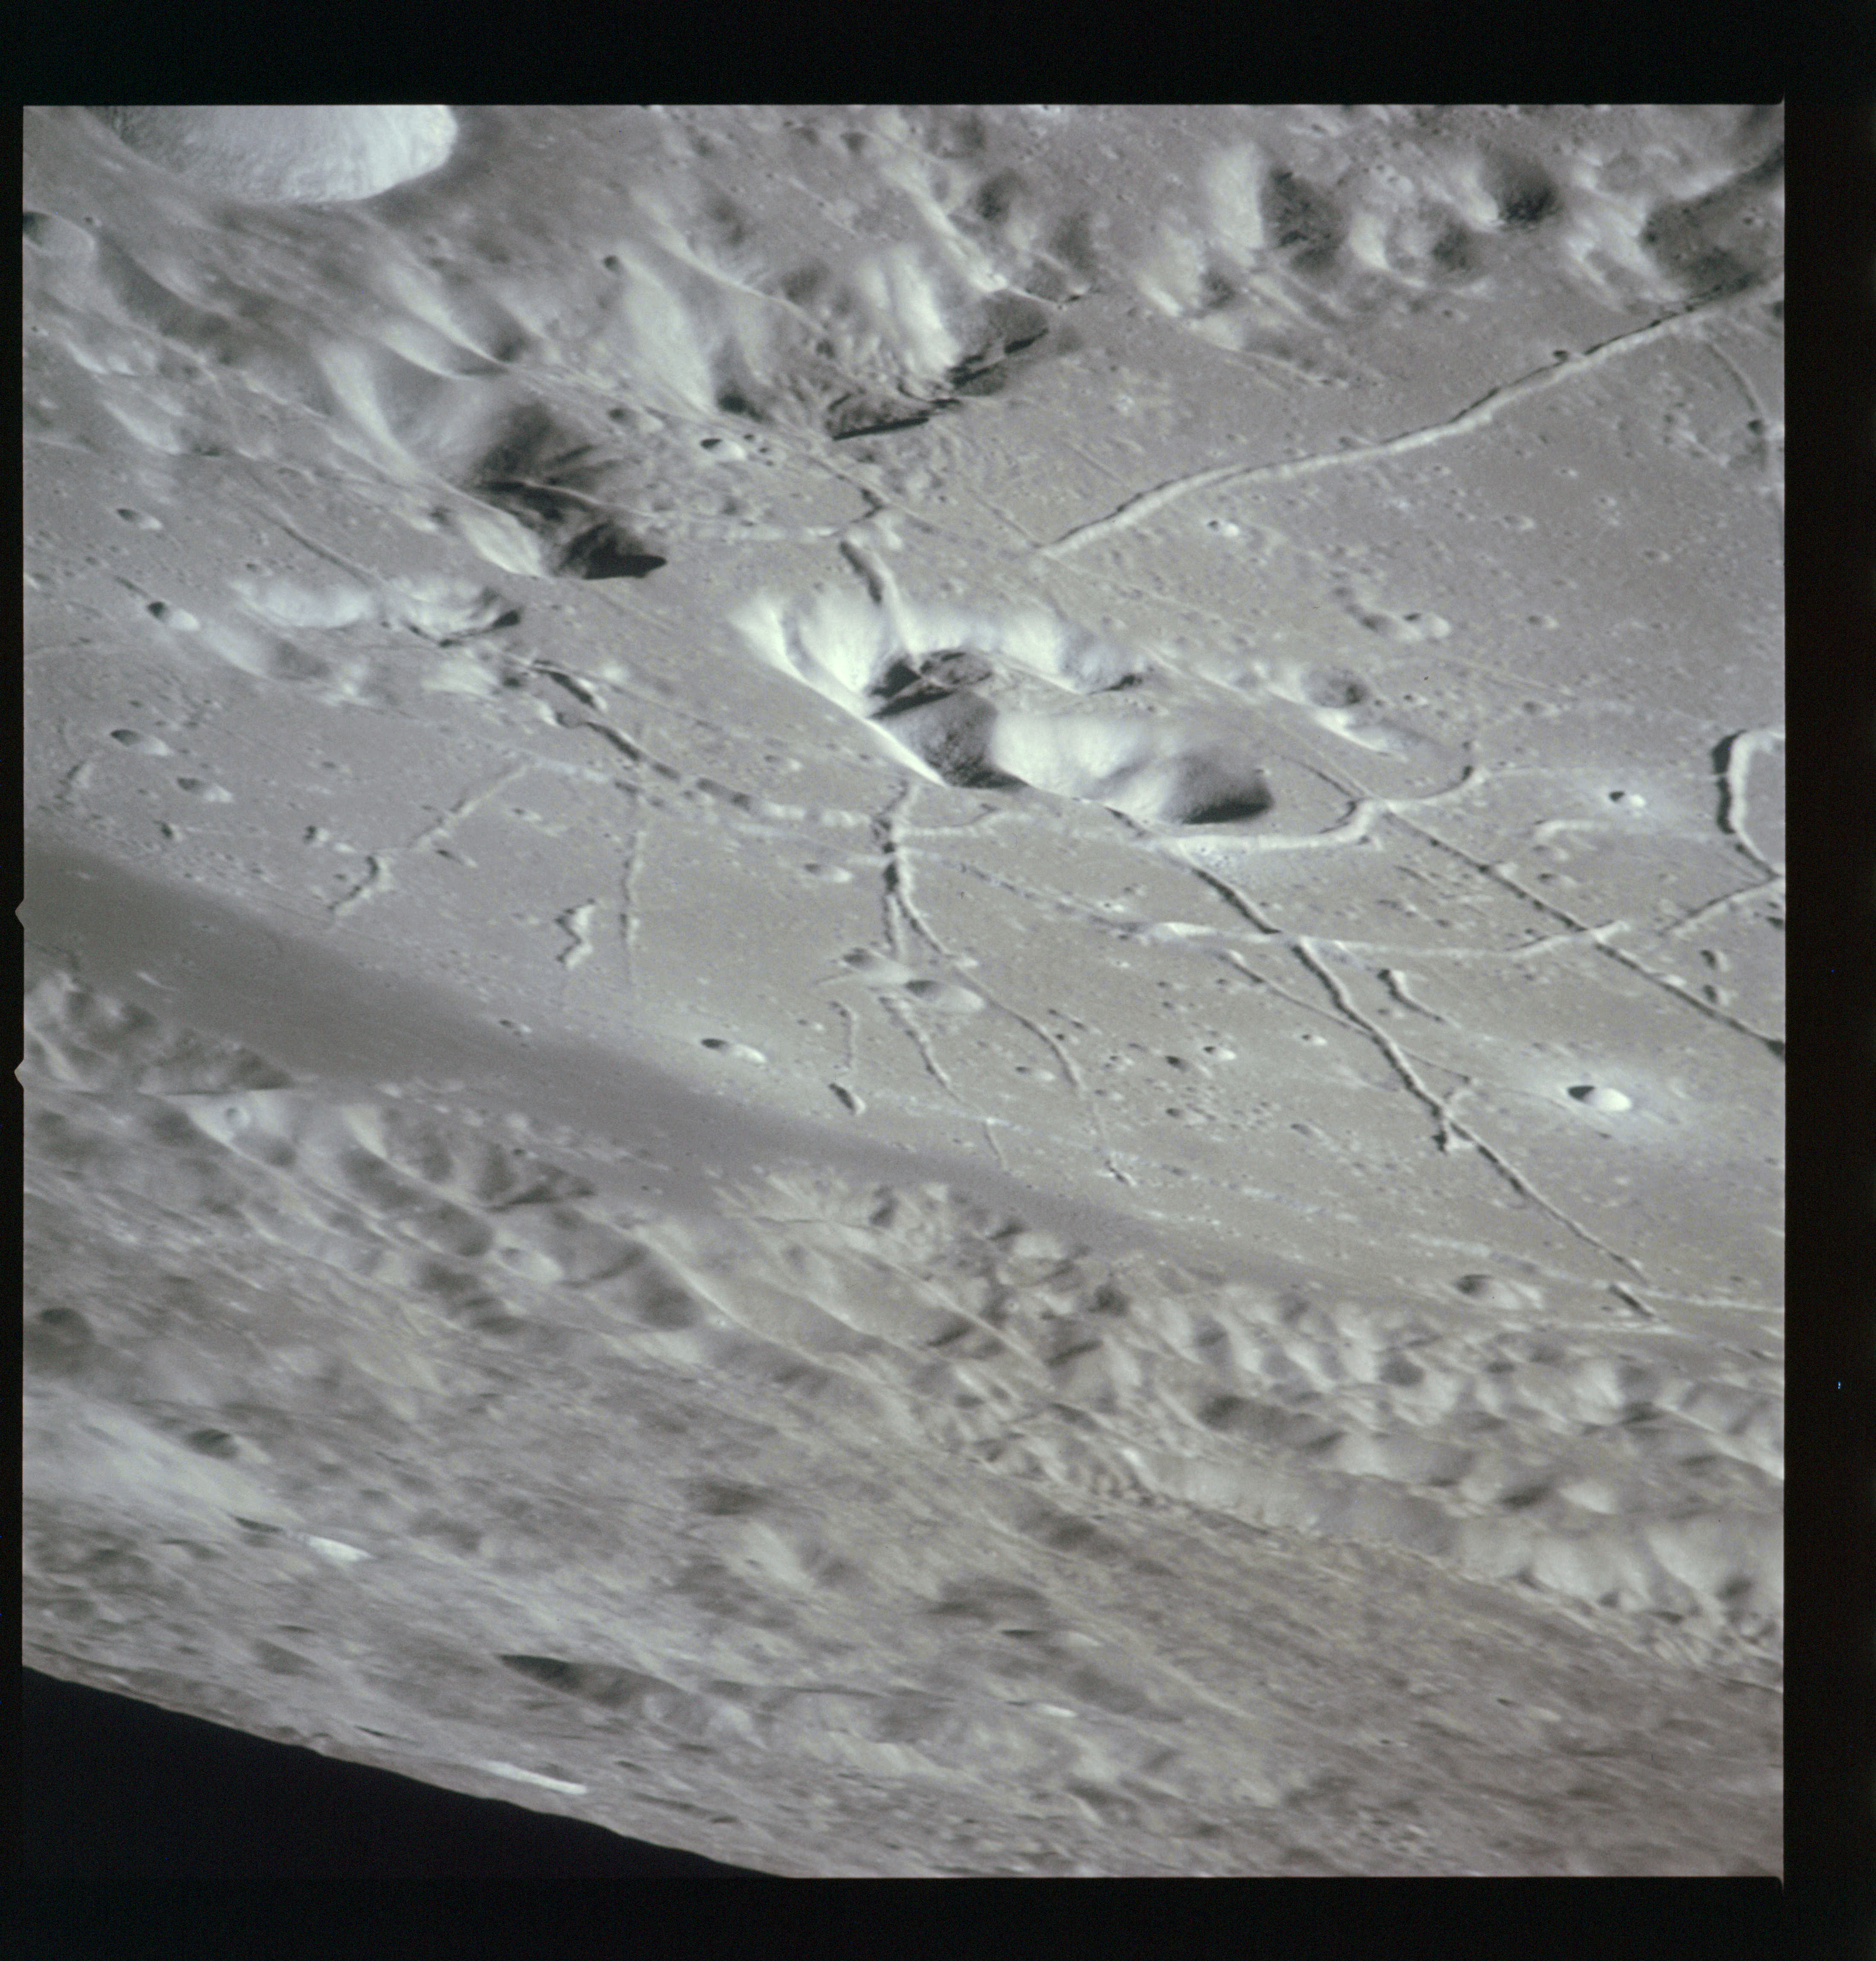
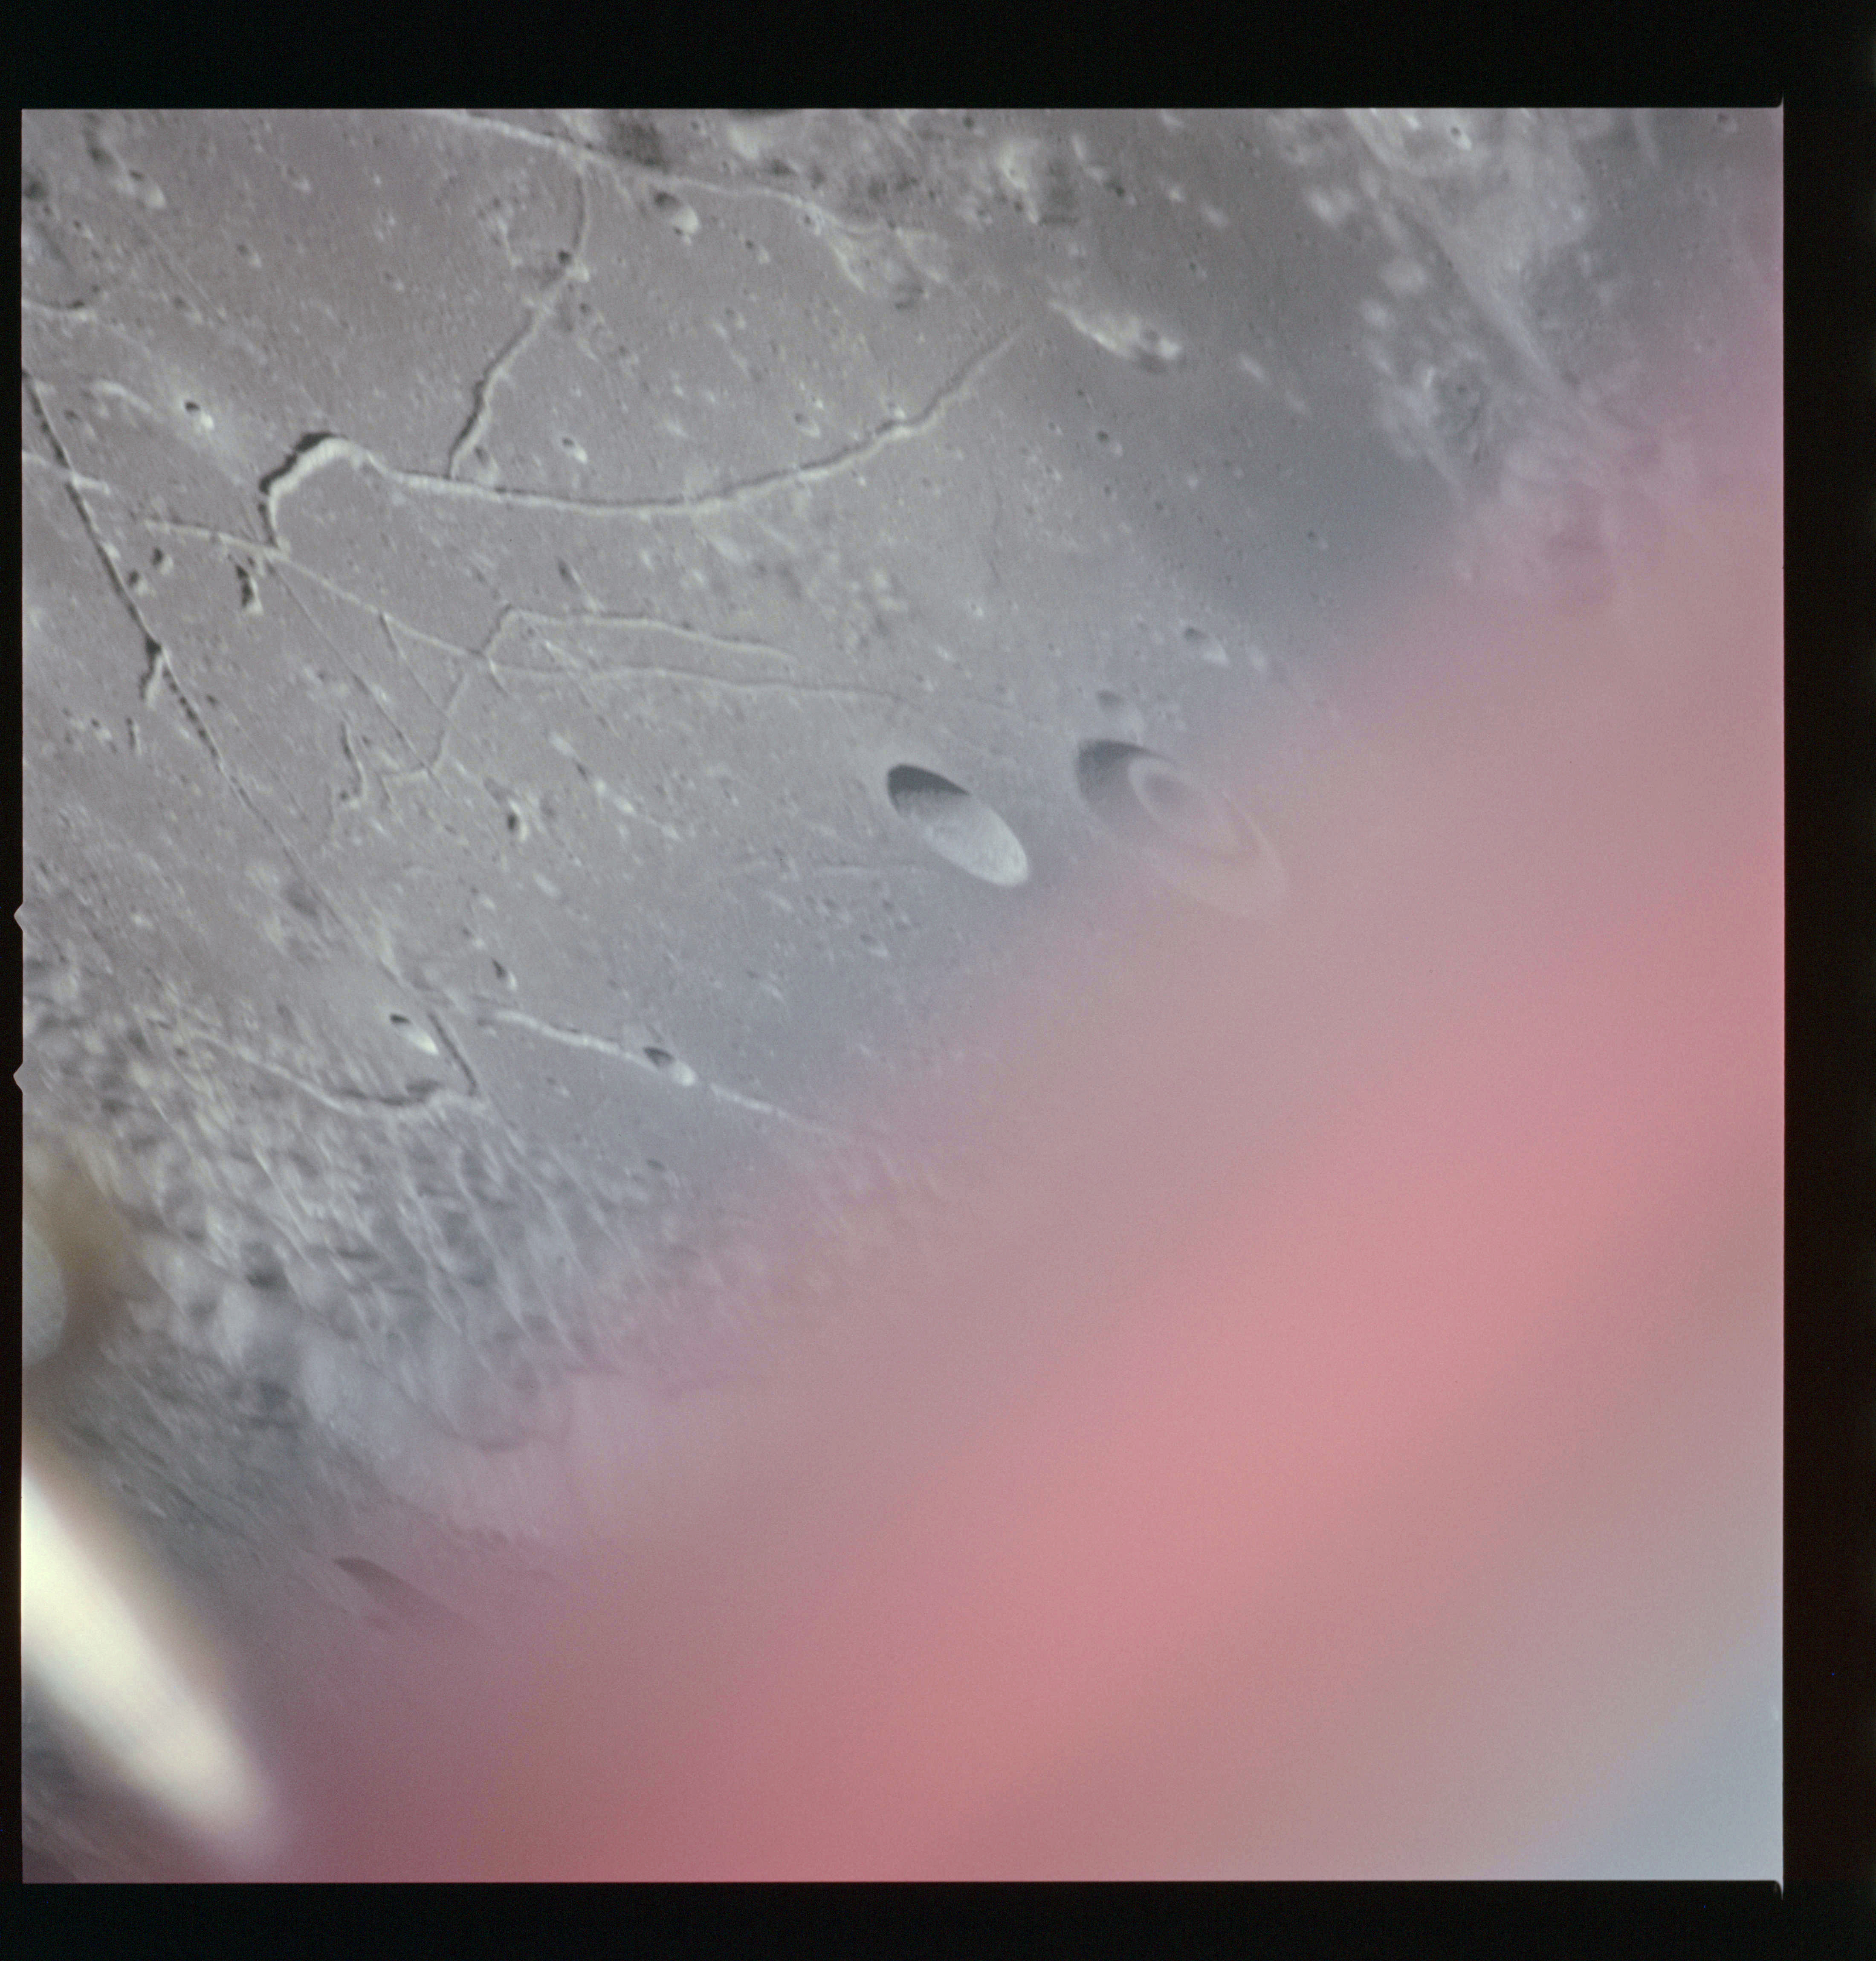
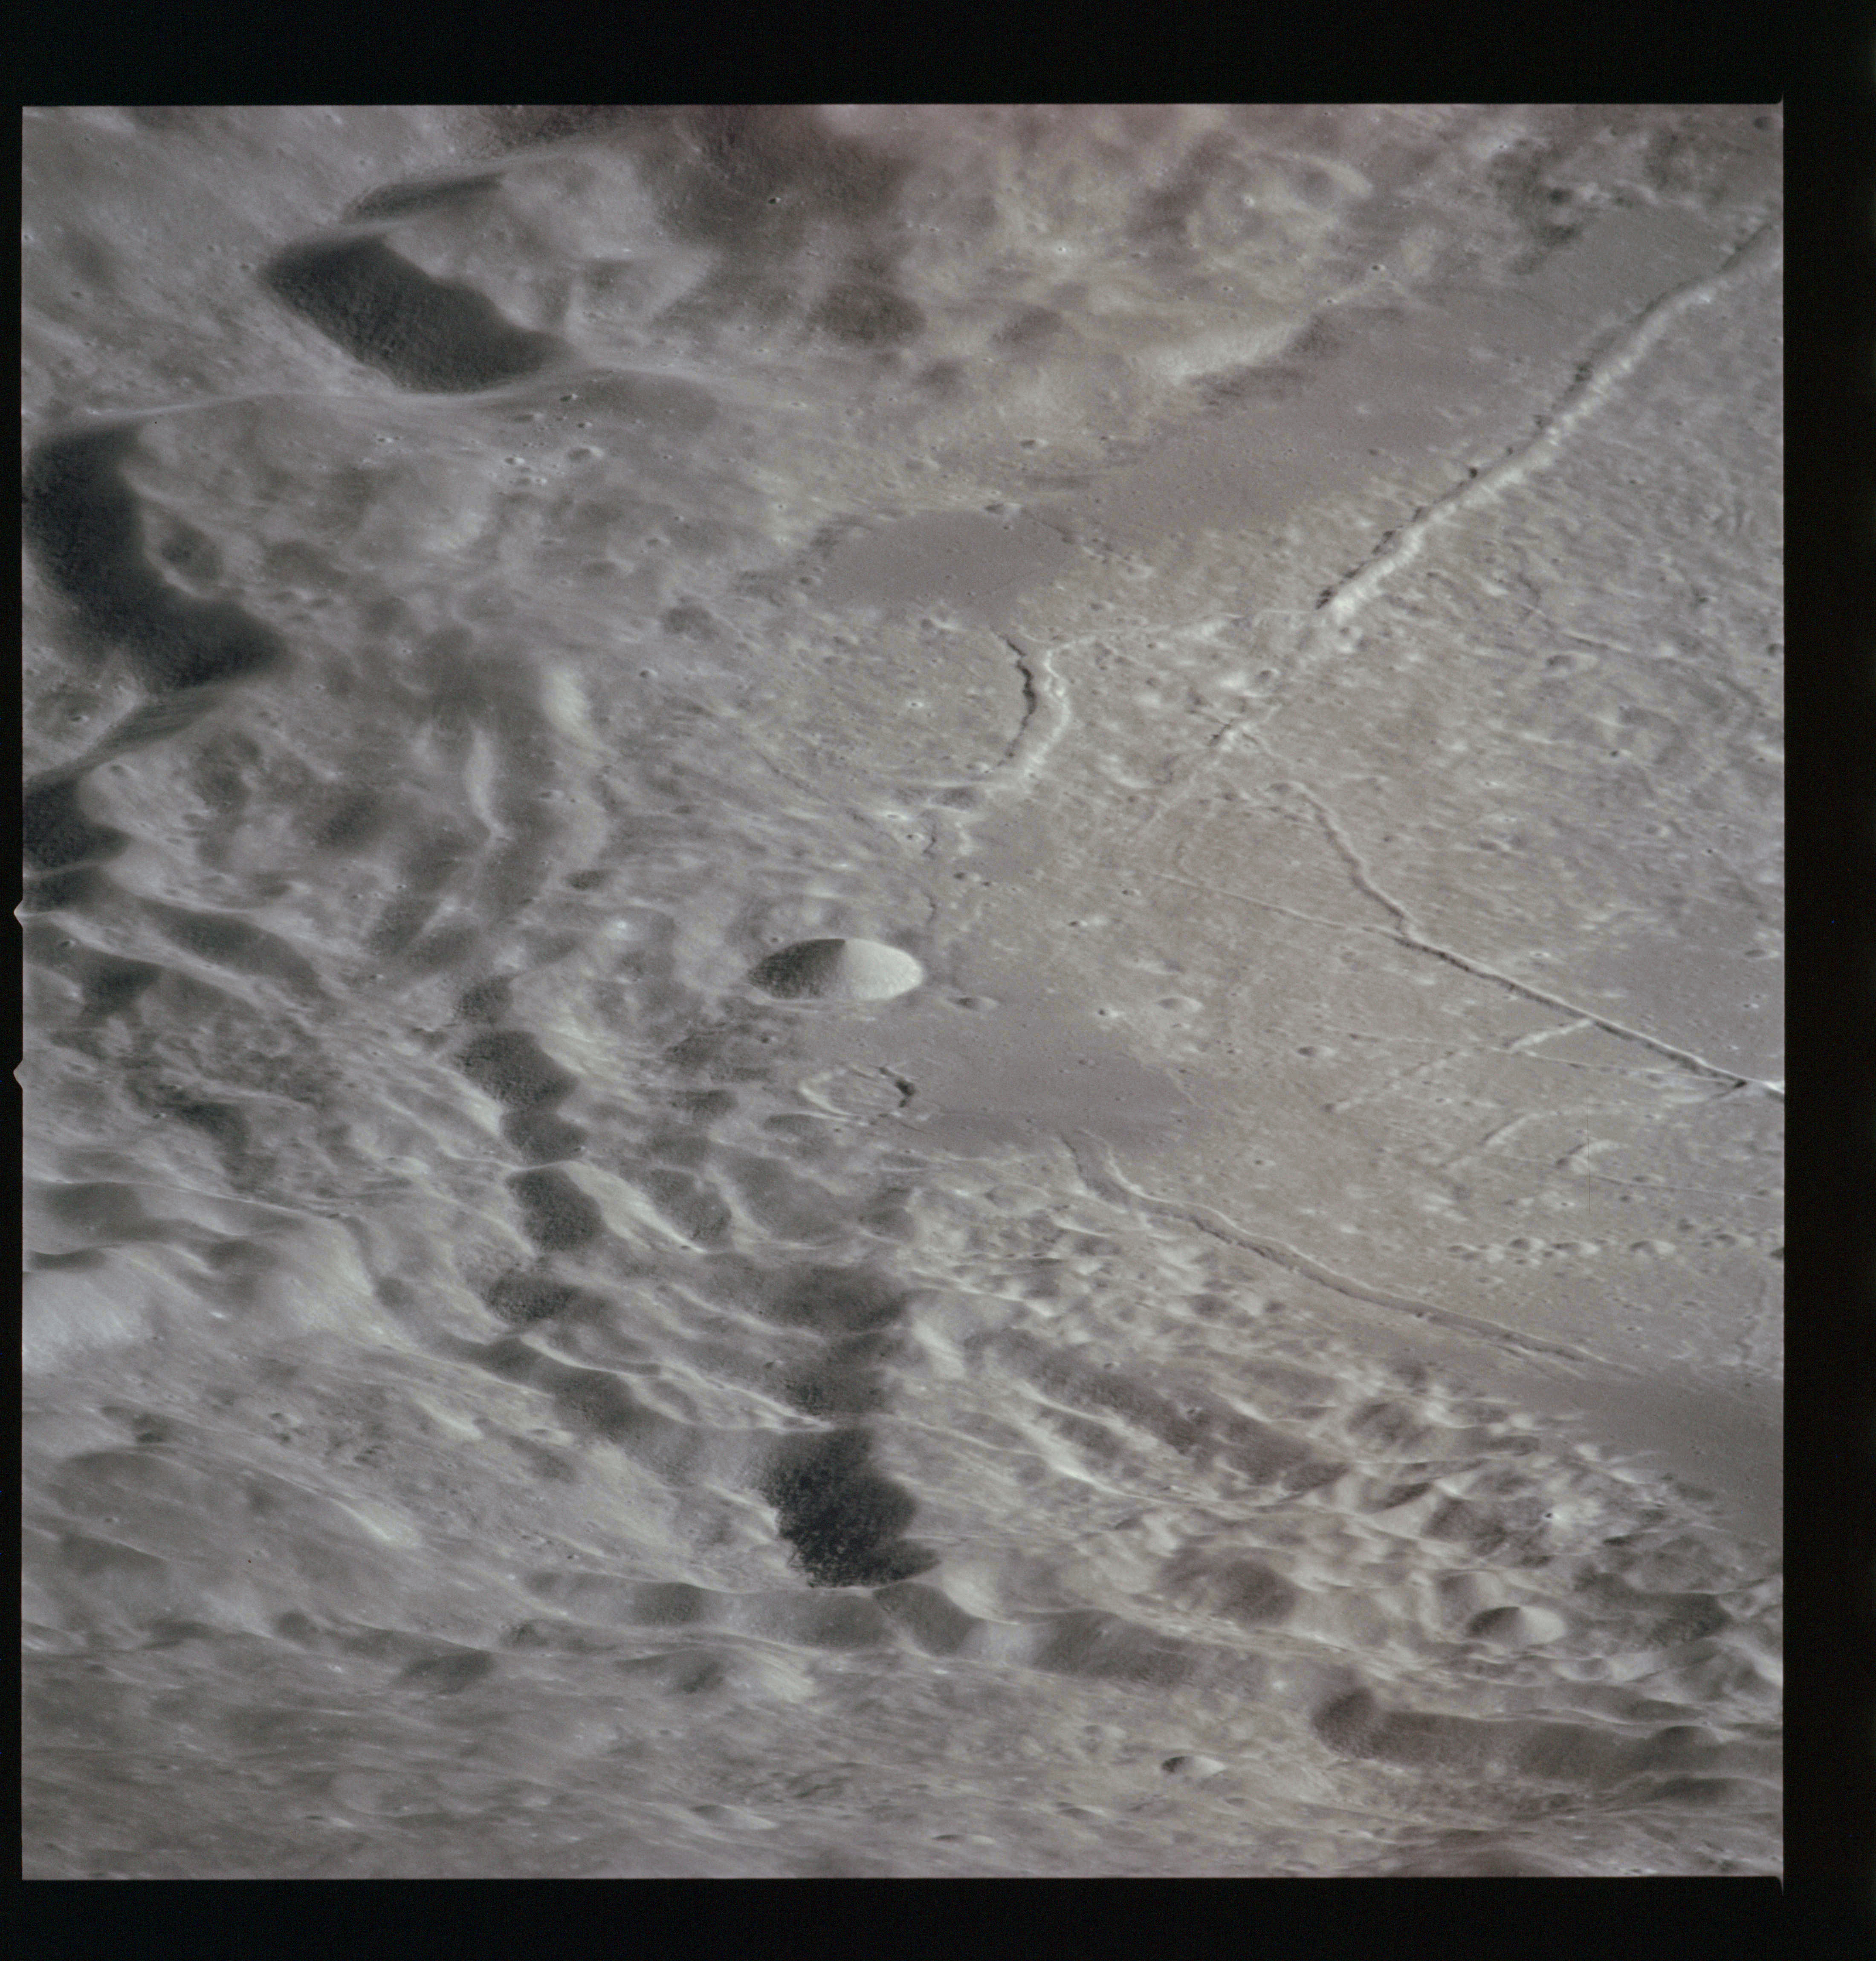
Handheld photography continues with an 18-frame sequence of the 207-km crater Humboldt, photo target 13 in the Flight Plan, looking to the south with the Sun illuminating from the west. The Apollo 15 Index of 70mm photographs has this sequence as having been taken using an 80mm lens, a focal length considered to be the standard lens for this format. However, given that previous Earth image and subsequent photos from this magazine are catalogued as having been taken using the 250mm lens, that the photographs themselves appear to be through a long focal length lens, and that the Flight Plan calls for the long lens to be fitted, it seems likely that the crew used the 250mm.
AS15-93-12640 - Crater Humboldt, southeast rim and eastern triplet including double crater - Image by NASA/Johnson Space Center.
AS15-93-12641 - Crater Humboldt, southern rim and southeast crater floor - Image by NASA/Johnson Space Center.
AS15-93-12642 - Crater Humboldt, central peak and southern crater floor - Image by NASA/Johnson Space Center.
AS15-93-12643 - Crater Humboldt, central hills and southwest crater floor - Image by NASA/Johnson Space Center.
AS15-93-12644 - Crater Humboldt, Humboldt N, central hill complex and southwest crater floor - Image by NASA/Johnson Space Center.
AS15-93-12645 - Crater Humboldt, Humboldt N and western crater floor - Image by NASA/Johnson Space Center.
AS15-93-12646 - Crater Humboldt, western crater floor and rim - Image by NASA/Johnson Space Center.
AS15-93-12647 - Crater Humboldt, northwestern crater floor and rim - Image by NASA/Johnson Space Center.
AS15-93-12648 - Crater Humboldt, Humboldt N and northern crater floor and rim - Image by NASA/Johnson Space Center.
AS15-93-12649 - Crater Humboldt, Humboldt N and northern crater floor and rim - Image by NASA/Johnson Space Center.
AS15-93-12650 - Crater Humboldt, central mountain chain, northeastern crater floor and rim - Image by NASA/Johnson Space Center.
AS15-93-12651 - Crater Humboldt, eastern crater floor - Image by NASA/Johnson Space Center.
AS15-93-12652 - Crater Humboldt, southeastern crater floor - Image by NASA/Johnson Space Center.
AS15-93-12653 - Crater Humboldt, central peak and southwestern crater floor and rim - Image by NASA/Johnson Space Center.
AS15-93-12654 - Crater Humboldt, central hills and southwest crater floor and rim - Image by NASA/Johnson Space Center.
AS15-93-12655 - Crater Humboldt, Humboldt N and southwest crater floor and rim - Image by NASA/Johnson Space Center.
AS15-93-12656 - Crater Humboldt, western crater floor and rim - Image by NASA/Johnson Space Center.
AS15-93-12657 - Crater Humboldt, western crater floor and rim - Image by NASA/Johnson Space Center.
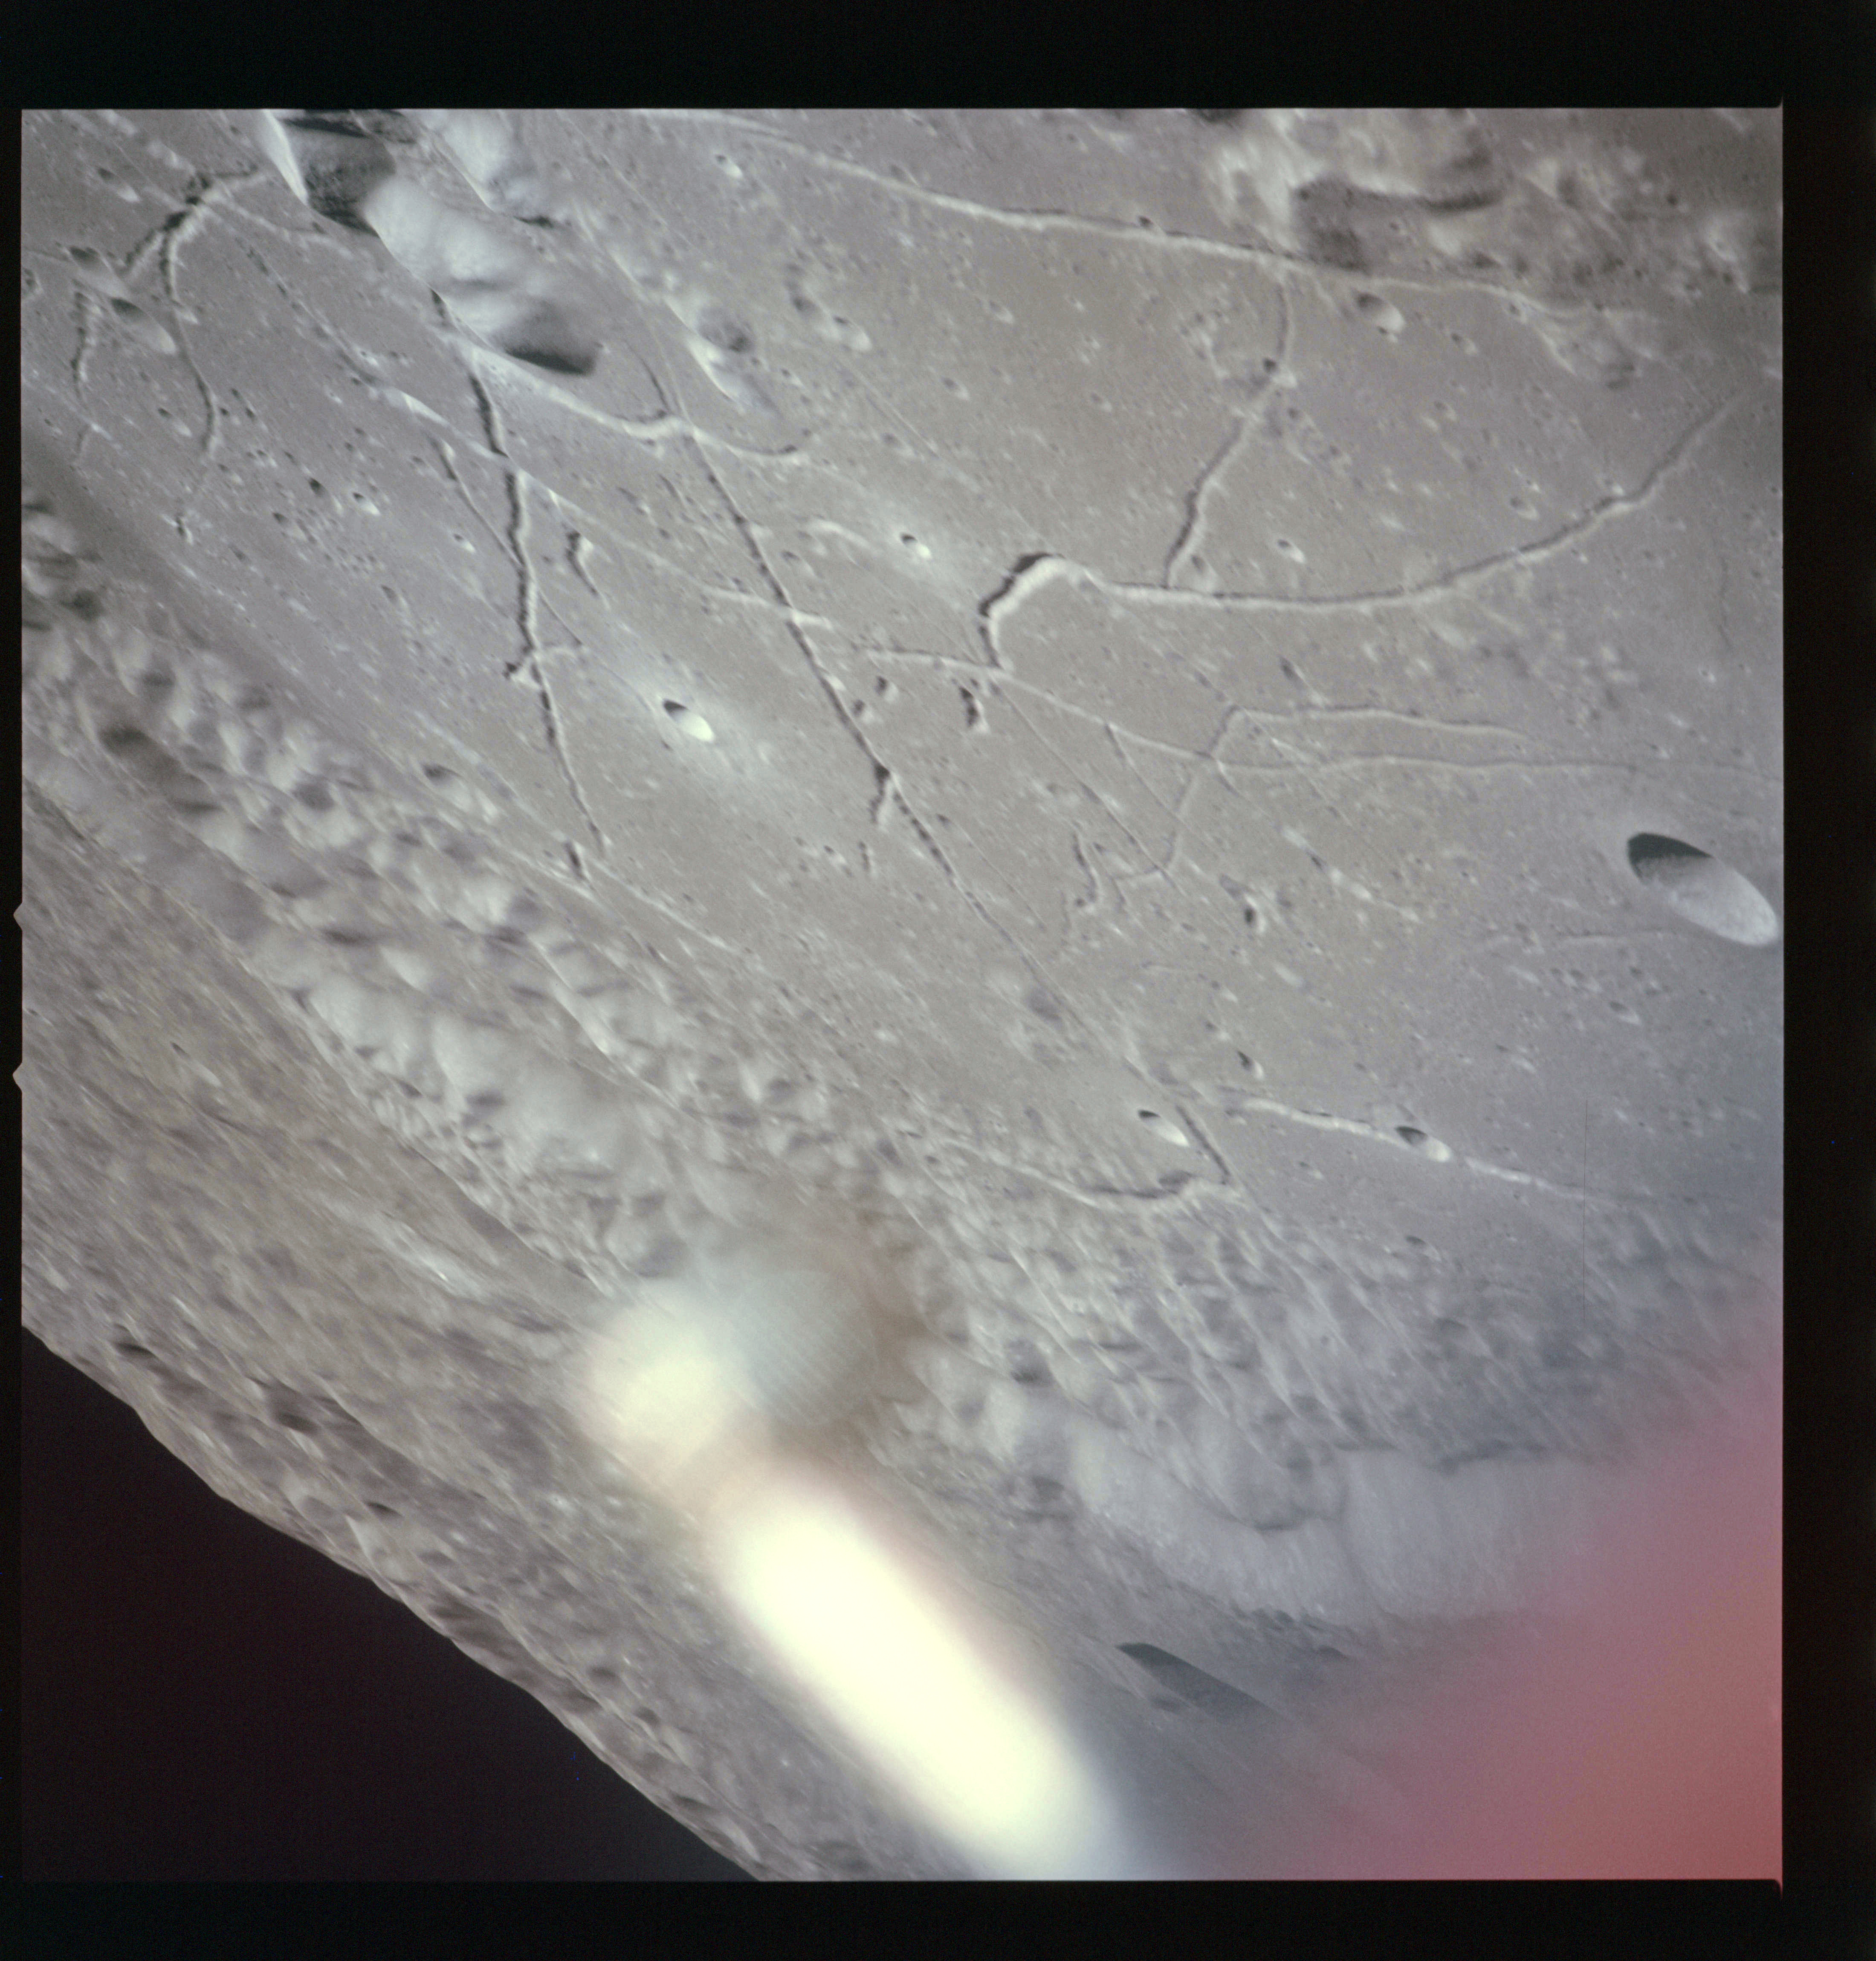
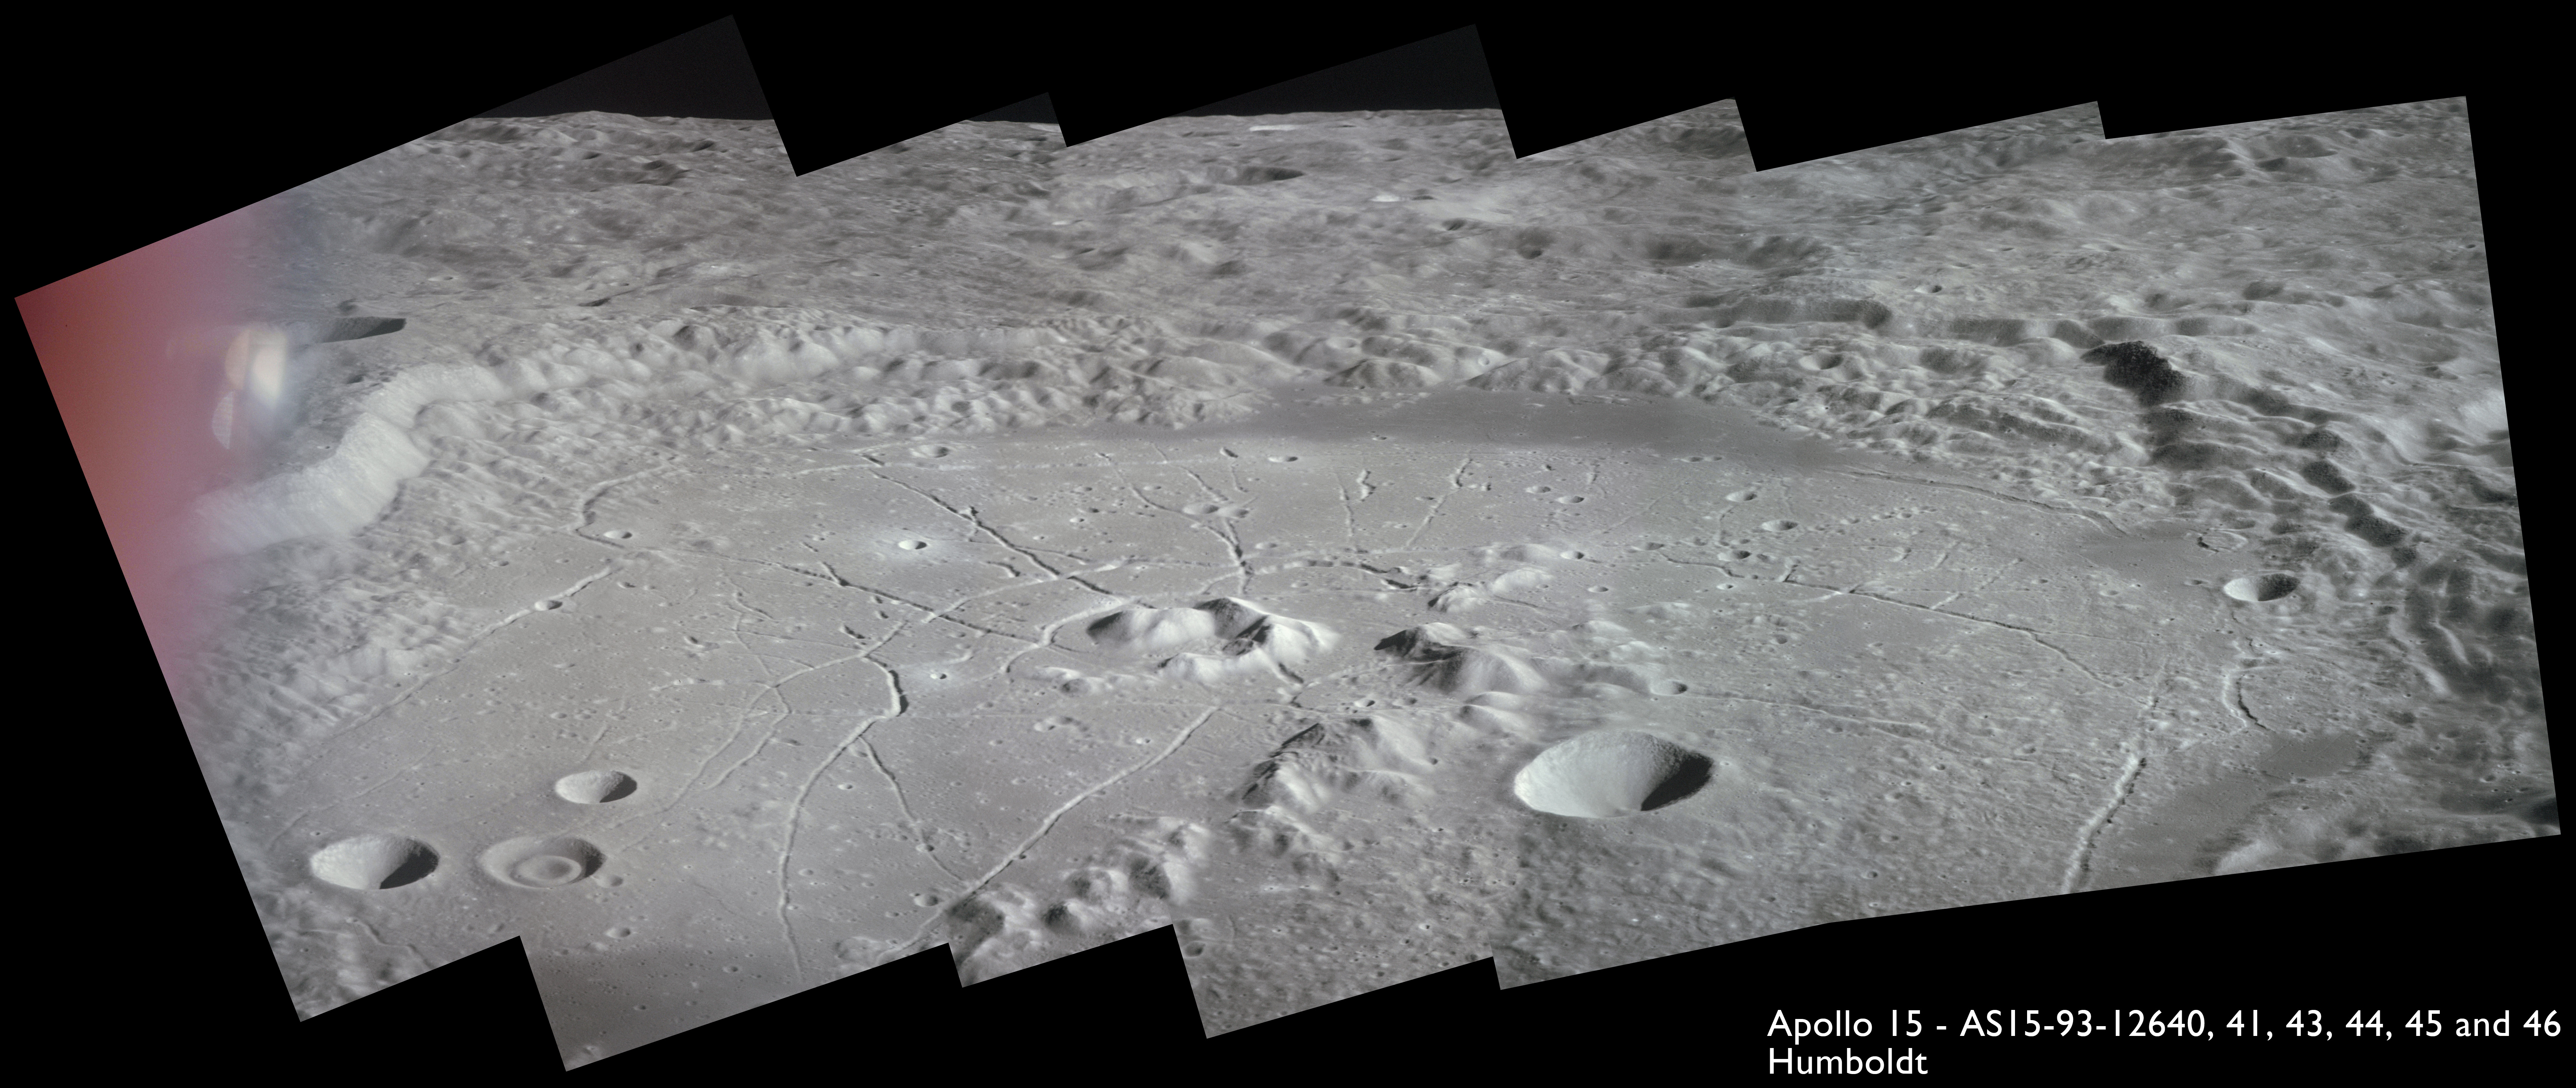
A composite image of some of these frames shows the crater well and the features within. To the east is a triplet of craters, one of which is an unusual double crater.
Composition of images AS15-93-12640, 41, 43, 44, 45 and 46 showing crater Humboldt, western crater floor and rim - Images by NASA/Johnson Space Center.
In the centre of Humboldt, part of a mountain range forms the focus of a splendid network of rilles, both radial and arcuate. Humboldt shares some common features with Alphonsus, another large, flat-floored crater. Both have dark patches on their floors and both have been the site of "Transient Lunar Phenomena", unexplained activity seen from Earth. Subsequent images in this sequence, AS15-93-12647 to 12657, essentially cover the same ground seen in the composite. Paul Spudis is a geologist at the Lunar and Planetary Institute in Houston.
Paul Spudis, from 2000 correspondence: "Humboldt is one of a class of features on the Moon known as 'floor-fractured craters' These craters have anomalously shallow floors and extensional features (cracks) on the floor. Often, they are partly filled with later, volcanic lava."
Spudis (continued): "The thought is that these craters were originally normal impact craters, but have been modified by internal processes. Specifically, liquid magma, injected underneath the crater floor, would (1) shallow the crater; (2) uplift and dome the floor; (3) create an extensional stress field, resulting in cracks; (4) possibly permit lava to reach the surface, accounting for the partial lava flooding."
Spudis (continued): "The 'double-crater' on the floor of Humboldt is an unrelated feature. It's not known how these 'doughnut craters' form, but there are several scattered around the Moon. For small craters (a few hundred meters in diameter), they indicate a solid, bedrock substrate beneath a fragmental over-layer, but the one in Humboldt is quite large (almost 10 km in diameter) and I suspect instead that these double craters represent impacts of clots of debris or clouds of fine debris, either a broken up, fragmented asteroid or it is a secondary crater."
Research by David Trang et al of the Hawai'i Institute of Geophysics and Planetology in 2016 doesn't clear up the question of how doughnut craters (also known as concentric craters) form. However they strongly suggest that subsurface processes are involved. "We find that these craters are regular impact craters that experienced intrusions of magma beneath them. Each intrusion pushed on the material around the crater causing the construction of the concentric doughnut-shaped topographic ridge."
216:27:00 Allen: Endeavour, this is Houston. Calling in the blind for Reacq and Narrow on the High Gain [Antenna]. [No answer.]
216:27:21 Allen: Hello, Endeavour, this is Houston requesting Reacq and Narrow on the High Gain [Antenna]. [No answer.]
216:27:43 Allen: Apollo 15, Apollo 15. Houston requesting Reacq and Narrow on the High Gain.
Comm break.
The routine procedure each time Apollo 15 reaches AOS is for the crew to position the HGA (High Gain Antenna) to angles given in the Flight Plan. These are based on the expected spacecraft attitude at AOS. The beamwidth of the antenna is set to Wide so that some signal will be received even with pointing errors. Once a crewmember gets the antenna within range of Earth and sees an appropriate indication on a meter, he switches it to Reacq(uire) and Narrow (beamwidth) whereupon it automatically homes in on its target. Houston are getting a weak signal and believe that the crew have not yet selected Reacq.
216:28:40 Worden: Hello, Houston; 15.
216:28:42 Allen: Hello, 15; this is Houston.
216:28:47 Worden: Okay, Joe. We're reading you and we were in Reacq and Narrow. Couldn't seem to pick you up, so we're back in Manual and Medium [beamwidth] now.
216:28:58 Allen: Okay, Al; we copy that. Thank you. While we're thinking about that one, got a couple of requests for you here. We'd like for you to turn on your RCS Propellant, Secondary. We're expecting a crossover in the D and C quads during the shape ullage, and we can, I guess, use those on now. And I've got some small changes to your Flight Plan when you're ready to copy. [Pause.]
Allen's request about the spacecraft's RCS propellants highlights some of the interesting ways in which consumables are managed by Houston. Remaining propellant quantities in the four jet clusters are not directly measured (a difficult thing to do in a zero-g environment). Instead, indirect methods are used. The spacecraft's gauge uses the ratio of pressure and temperature of each quad's helium pressurisation system. These readings are also telemetered to Earth and combined with thruster usage, system history and the like. However, by this stage of the mission, errors in these methods may have built up and it would be desirable to have some way to firm up their knowledge of what is left.
The propellants for each RCS quad are stored in two pairs of tanks; primary fuel and oxidiser and secondary fuel and oxidiser; four tanks in all. The quantity of propellant in the secondary tanks comprises 39.5 per cent of the total available and so when they switch to it, they know that this is the quantity that is actually remaining. It gives them an accurate data point to work from as they keep track of the RCS quantities for the rest of the mission. To avoid running the primary tank to empty, this 'crossover' is carried out when the total has been calculated to have reached 43 per cent remaining.
Houston estimate that the C and D quads will require switching over to the secondary tanks during the RCS burn that settles the SPS propellants prior to the upcoming orbit shaping burn, therefore Houston wants all the quads switched over.
216:29:34 Irwin: Okay Joe, I'm ready to copy the changes in Flight Plan.
216:29:40 Allen: Okay, Jim. I assume you're reading me loud and clear. You're still a little bit - have a little noise in the background. If you have your Flight Plan in front of you, the first entry is at 217 plus 17 and it is an addition. "Retract Map Camera". [Pause.] The next one is at 217 plus 21. Addition: "Close Map Camera and Laser Experiment Covers". [Pause.] The third is at 217 plus 58; delete those two lines: "O2 heaters, three, Auto; O2 heaters 1 and 2, Off". Those are two deletions. [Pause.] Another deletion...
216:30:53 Irwin: Okay. Let me read that back to you, Joe.
216:30:54 Allen: Okay, fine, Jim.
216:31:00 Irwin: You have 217:17, retract the Mapping Camera and 217:21, close Map Camera and Laser Covers. And then the deletion at 217:58 of the O2 heaters, three, and O2 heaters 1 and 2. [Pause.]
216:31:24 Allen: That's correct, Jim. And the next change is a - it's a deletion at 218:02, and that is delete the "PCM cable" line, there. And down a couple of inches, at 218:08, an addition: "Map Camera and Laser Experiment Covers to Open, and extend Map Camera". Read back. [Pause.]
216:32:11 Irwin: Okay. I understand to delete the PCM cable at 218:02, and then at 218:08, Map Camera and Laser Covers, Open, and Extend Mapping Camera.
216:32:23 Allen: That readback's correct and the next change is at 219:07; and once again, delete the "PCM cable" line. And at 219:17 add "Laser Altimeter, Off; [Pause.] Close Map Camera and Laser Experiment Covers", and delete Map Camera extension. And the last addition, that is to say the last change, is at 220 plus 05, delete the "PCM cable" line. Over.
216:32:33 Irwin: Okay. I copied 220:05, delete the PCM cable, and go on back to [the] page fore - before, we deleted the PCM cable there at 219:07. And 219:17, a new item, Laser Altimeter, Off. Close Mapping Camera and Laser Experiment covers, and then delete the next line - the "Map Camera Track to Extend".
216:34:05 Allen: Sounds good, Jim, and that's all I have for the moment. We - we do want a verification that all four propellant secondaries are opened on your RCS, please. [Pause.]
216:34:26 Irwin: Okay. That's verified. Just opened them.
216:34:29 Allen: Okay. Thank you.
Comm break.
This is a reminder that the valves to the secondary tanks in each RCS quad are still to be opened.
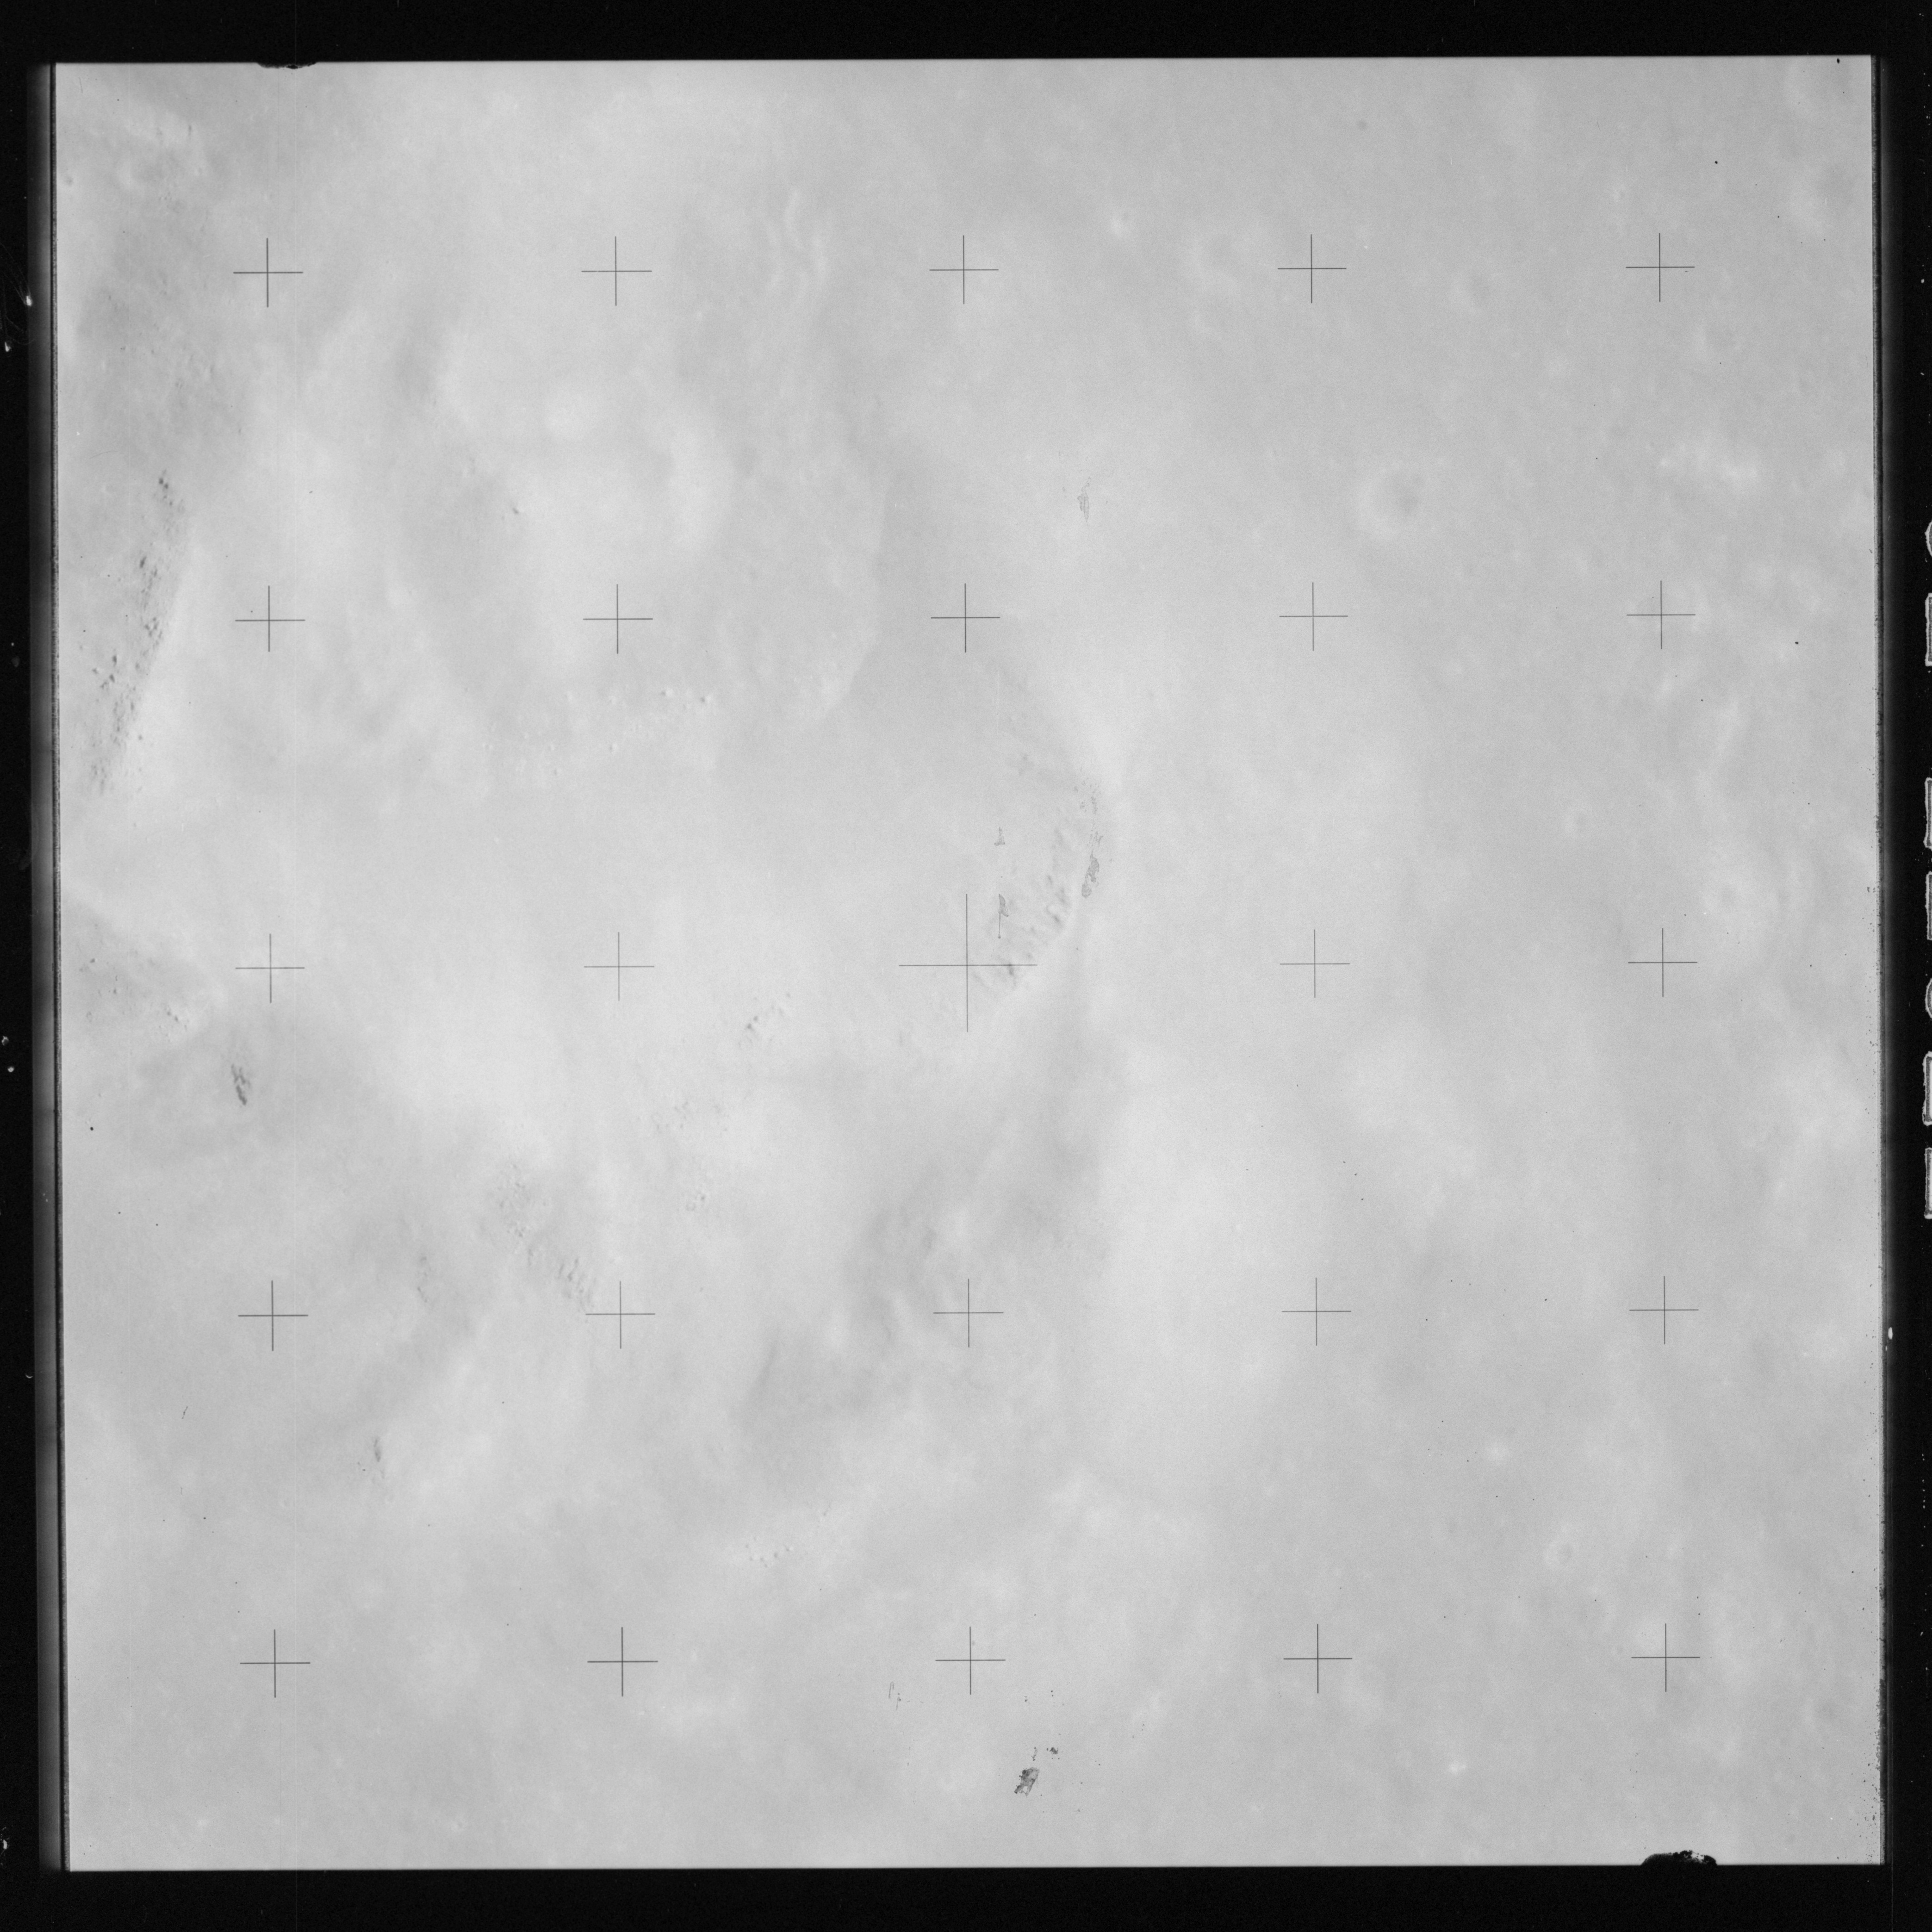
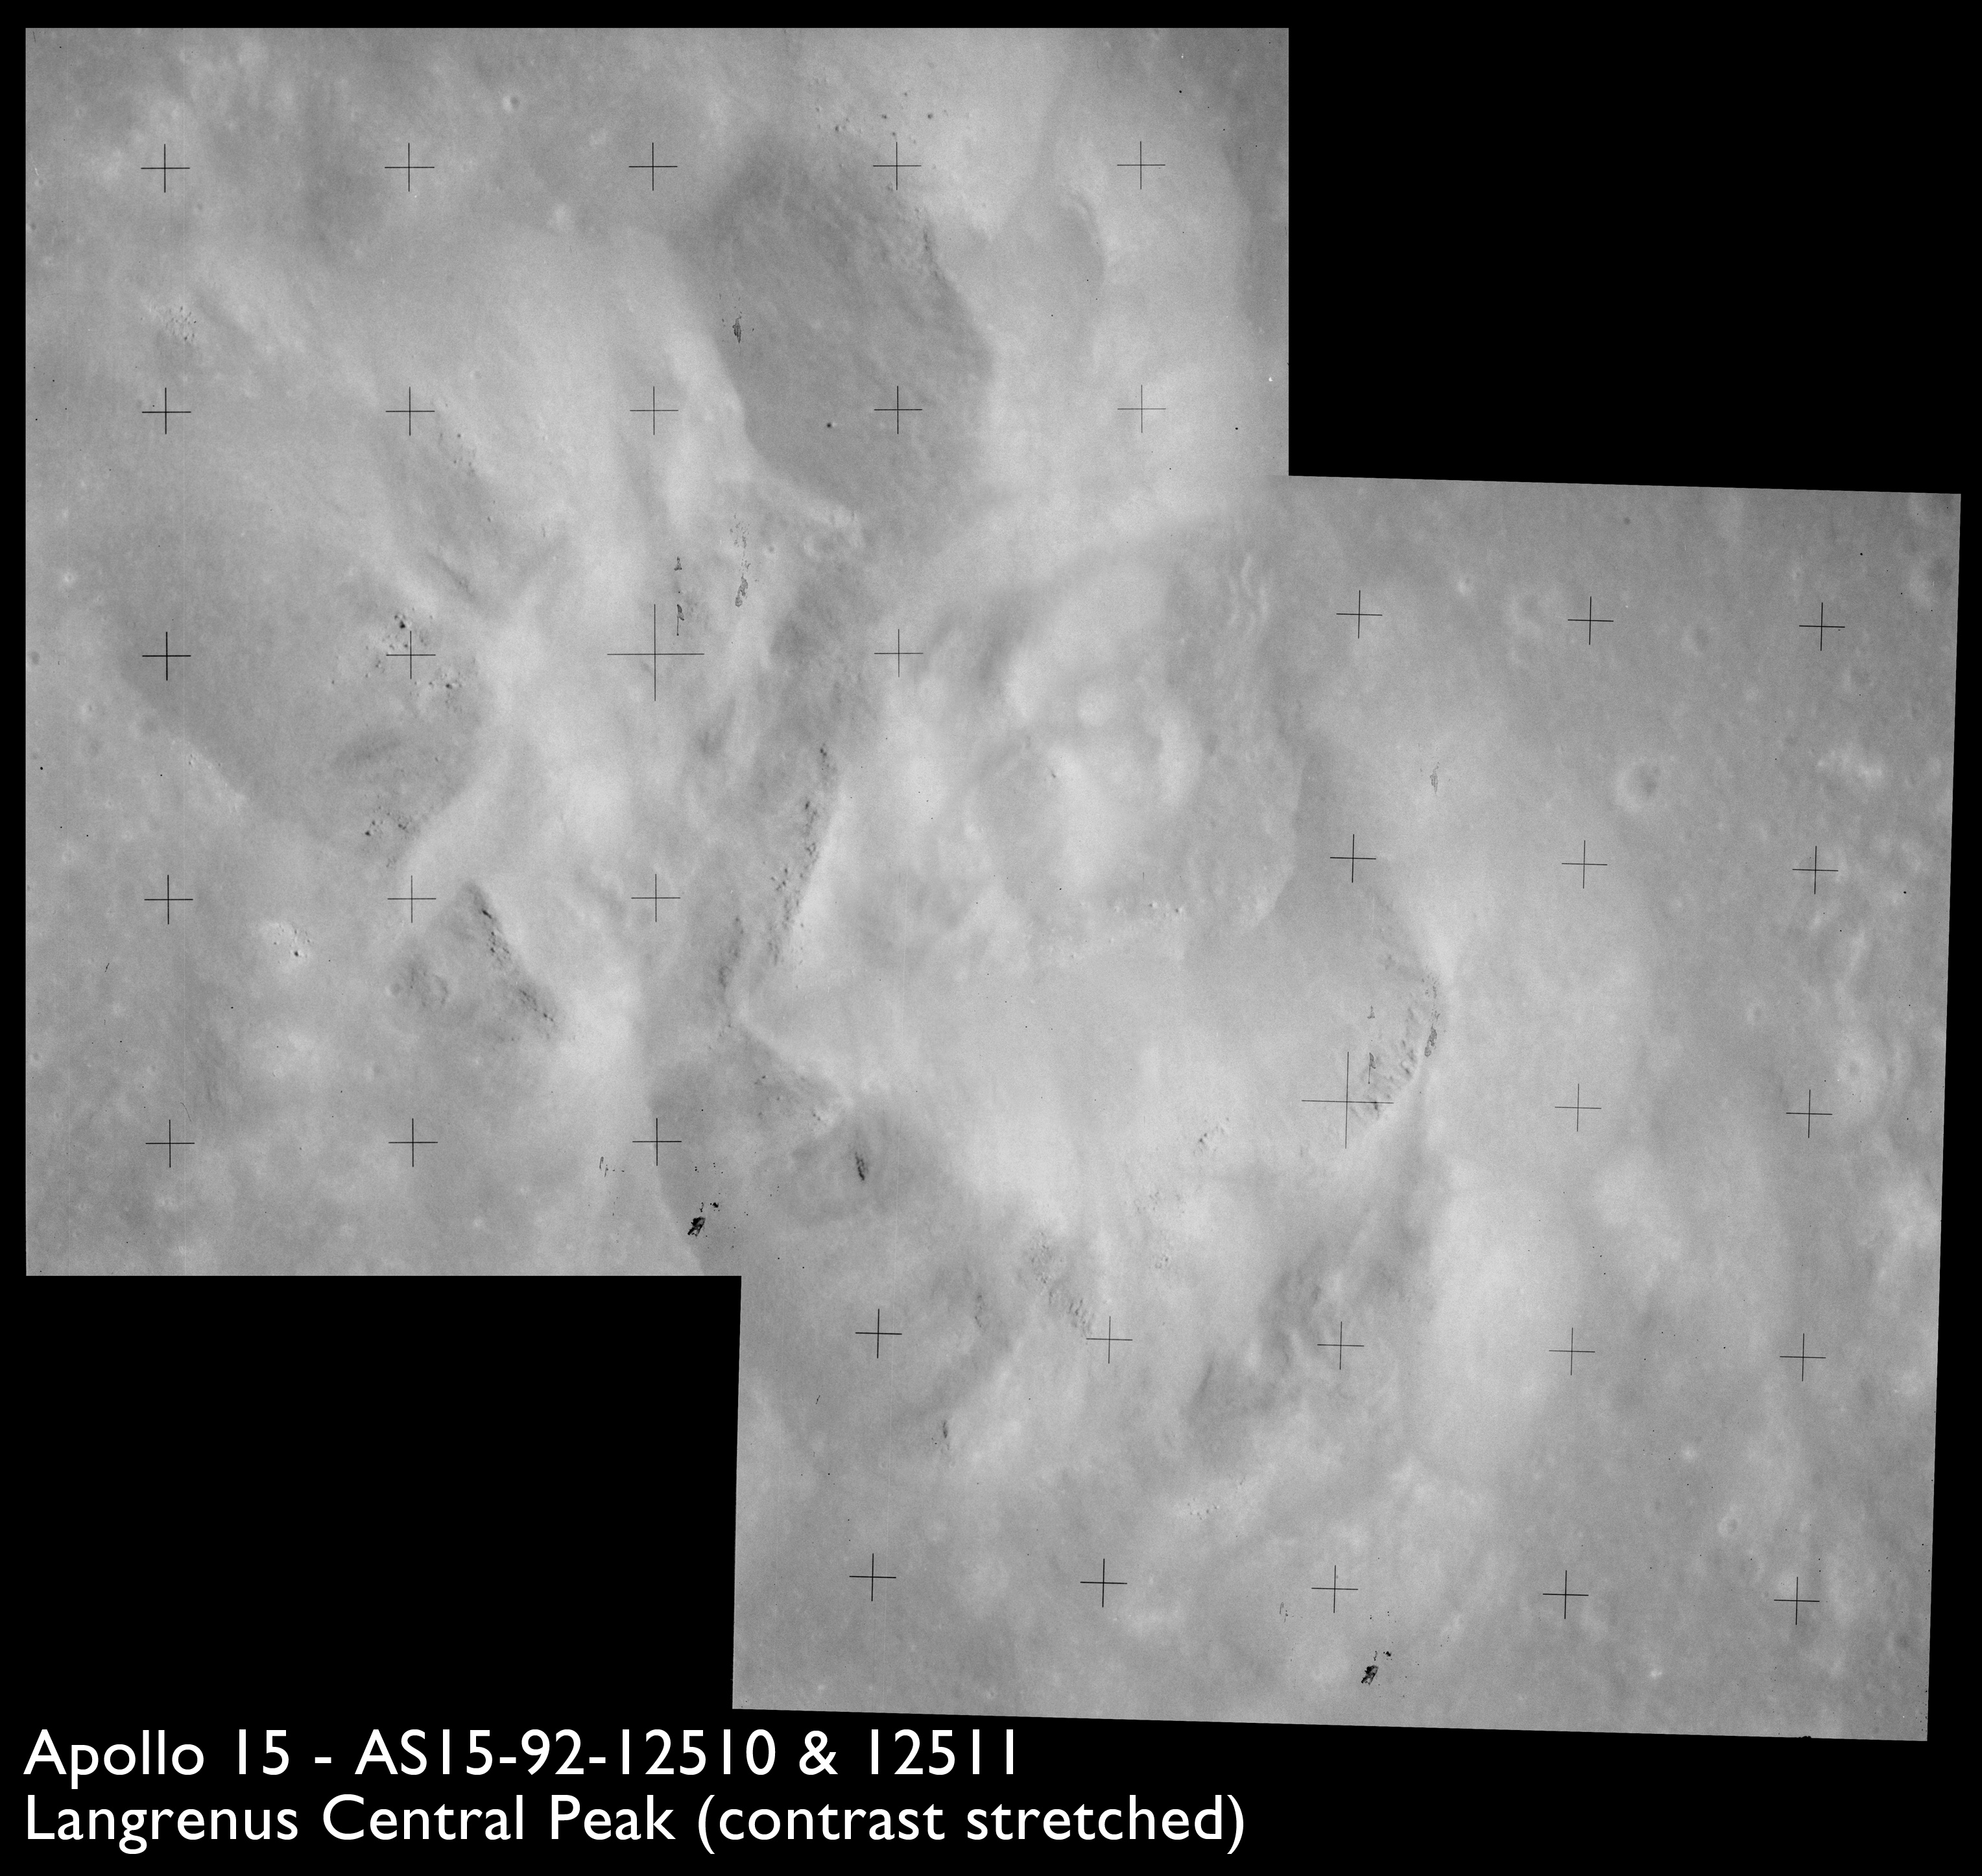
Using the 500-mm lens on magazine OO, AS15-92-12510 and 12511 cover the central peak cluster of Langrenus. These have been composited.
AS15-92-12510 - Langrenus central peak - Image by NASA/Johnson Space Center.
AS15-92-12511 - Langrenus central peak - Image by NASA/Johnson Space Center.
Composition of images AS15-92-12510 and 11 showing the central peak of crater Langrenus. Image contrast has been stretched - Images by NASA/Johnson Space Center.
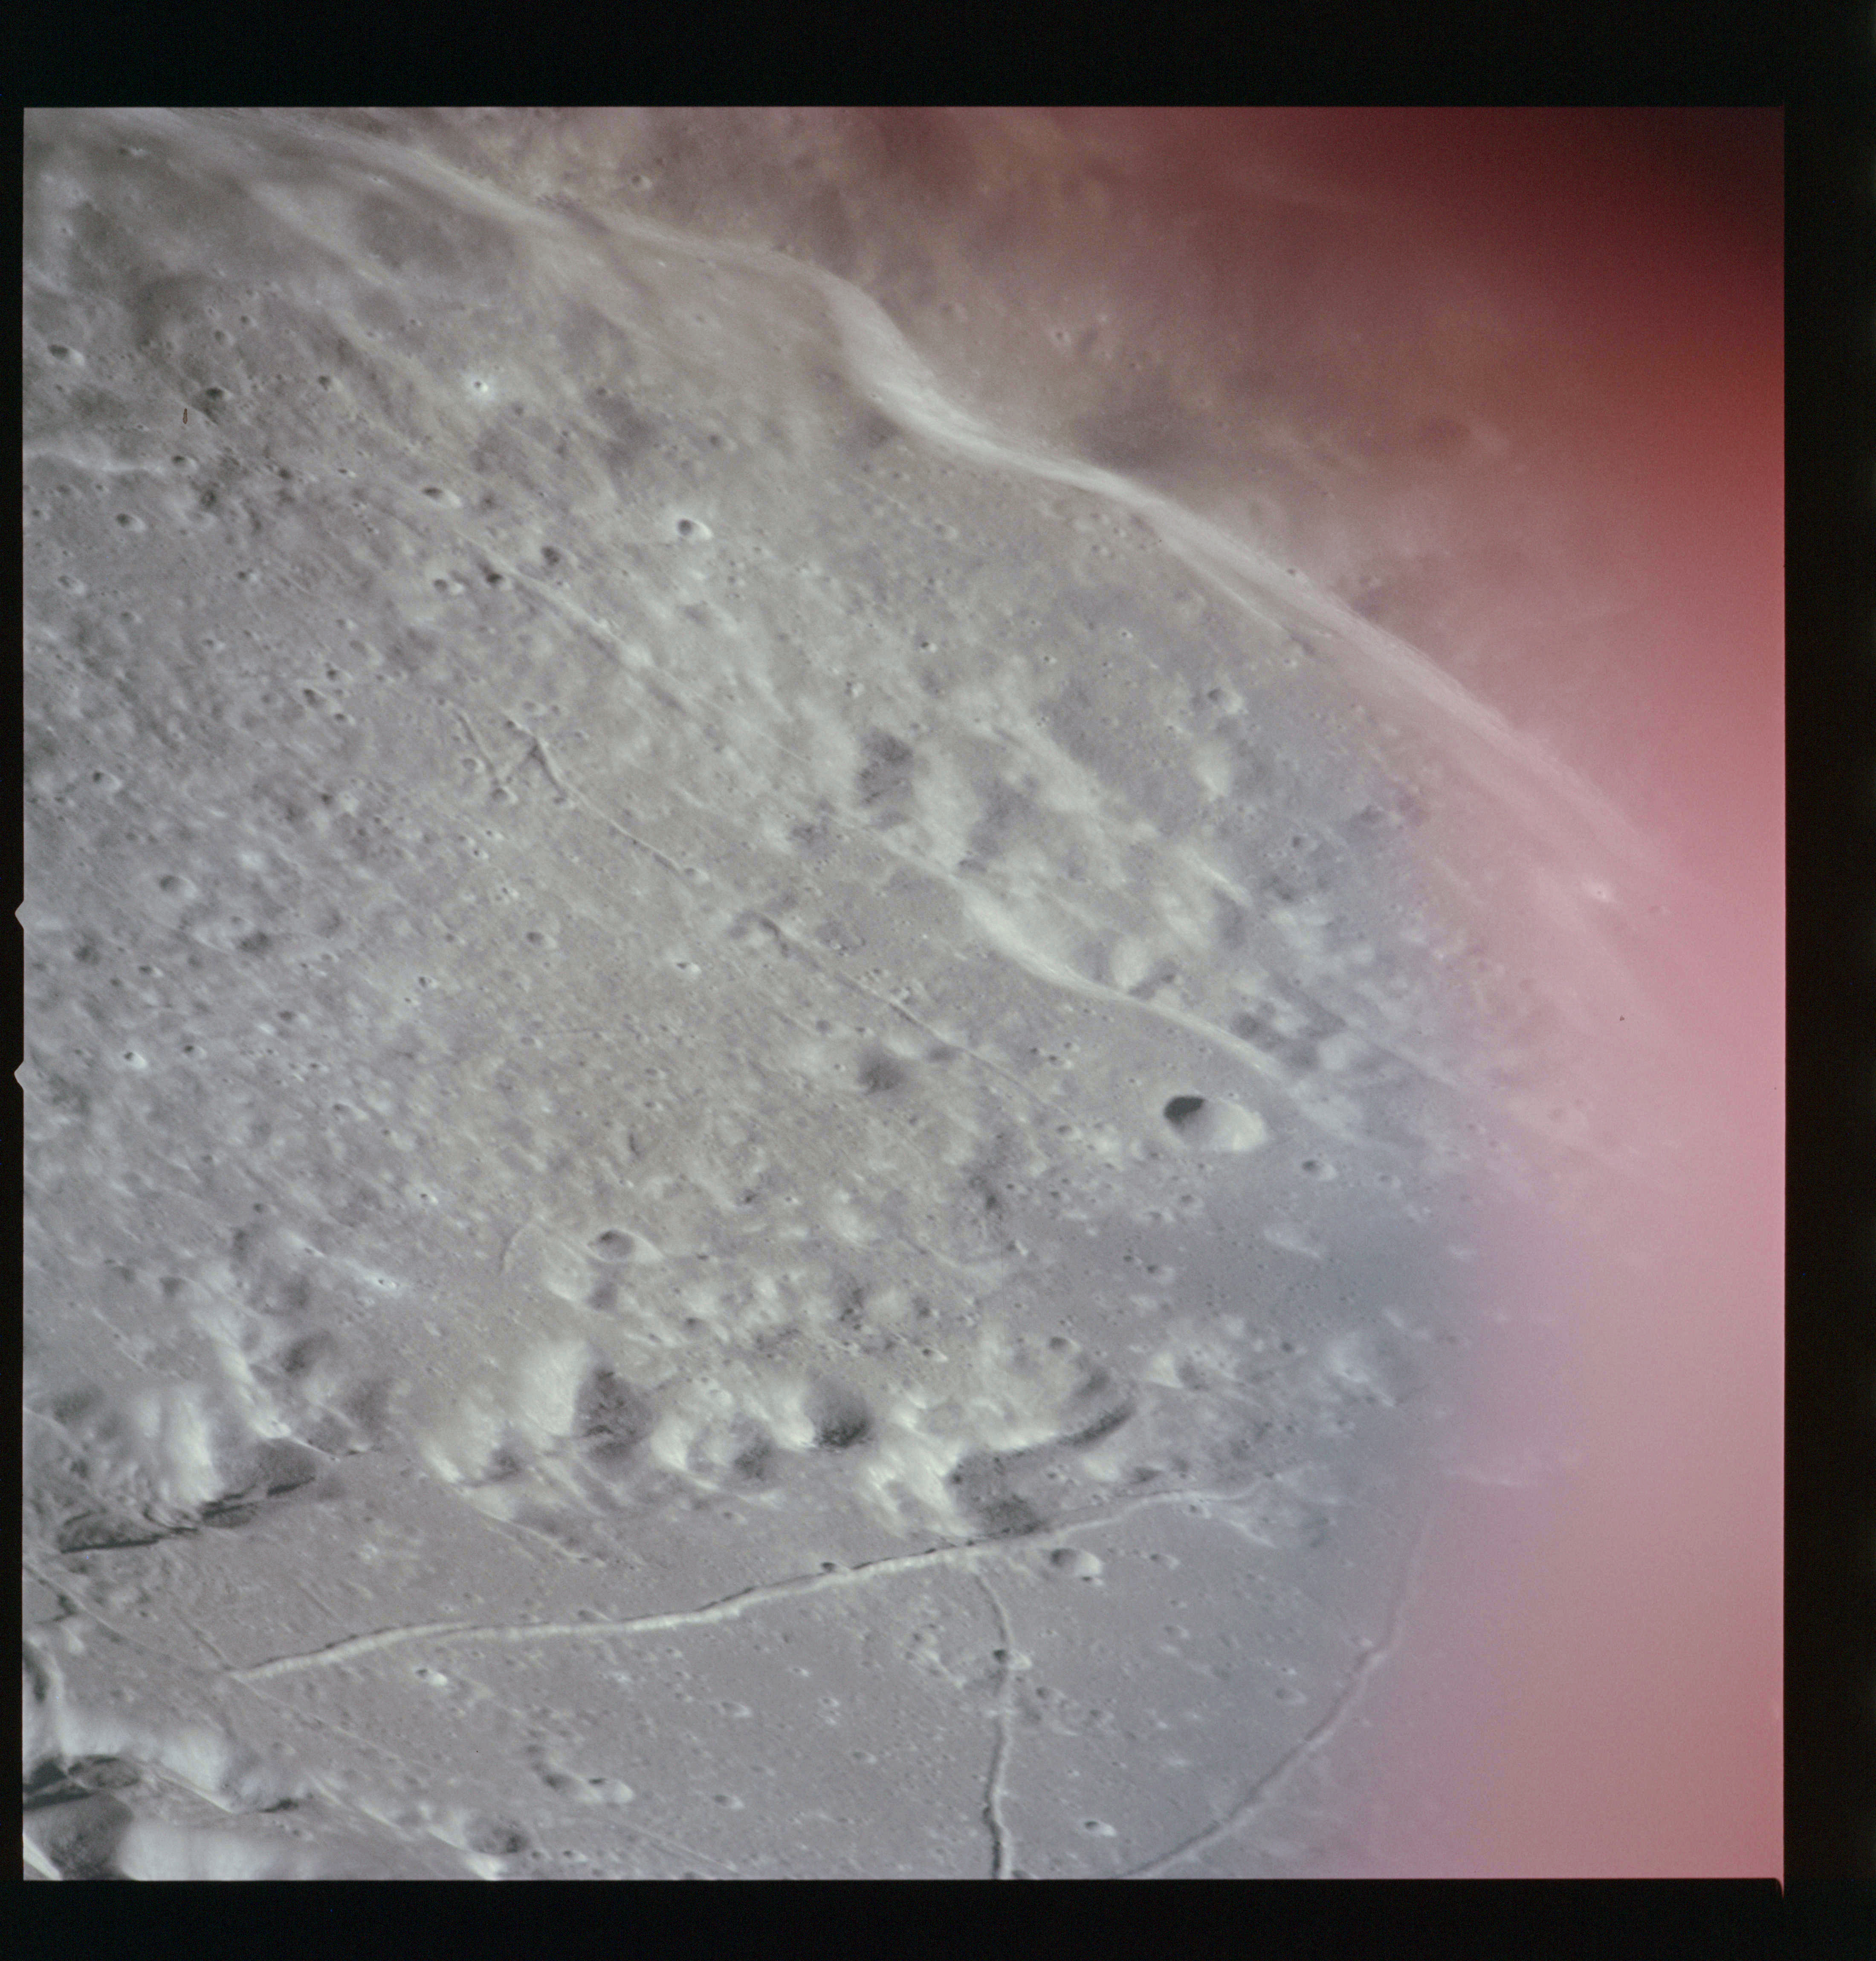
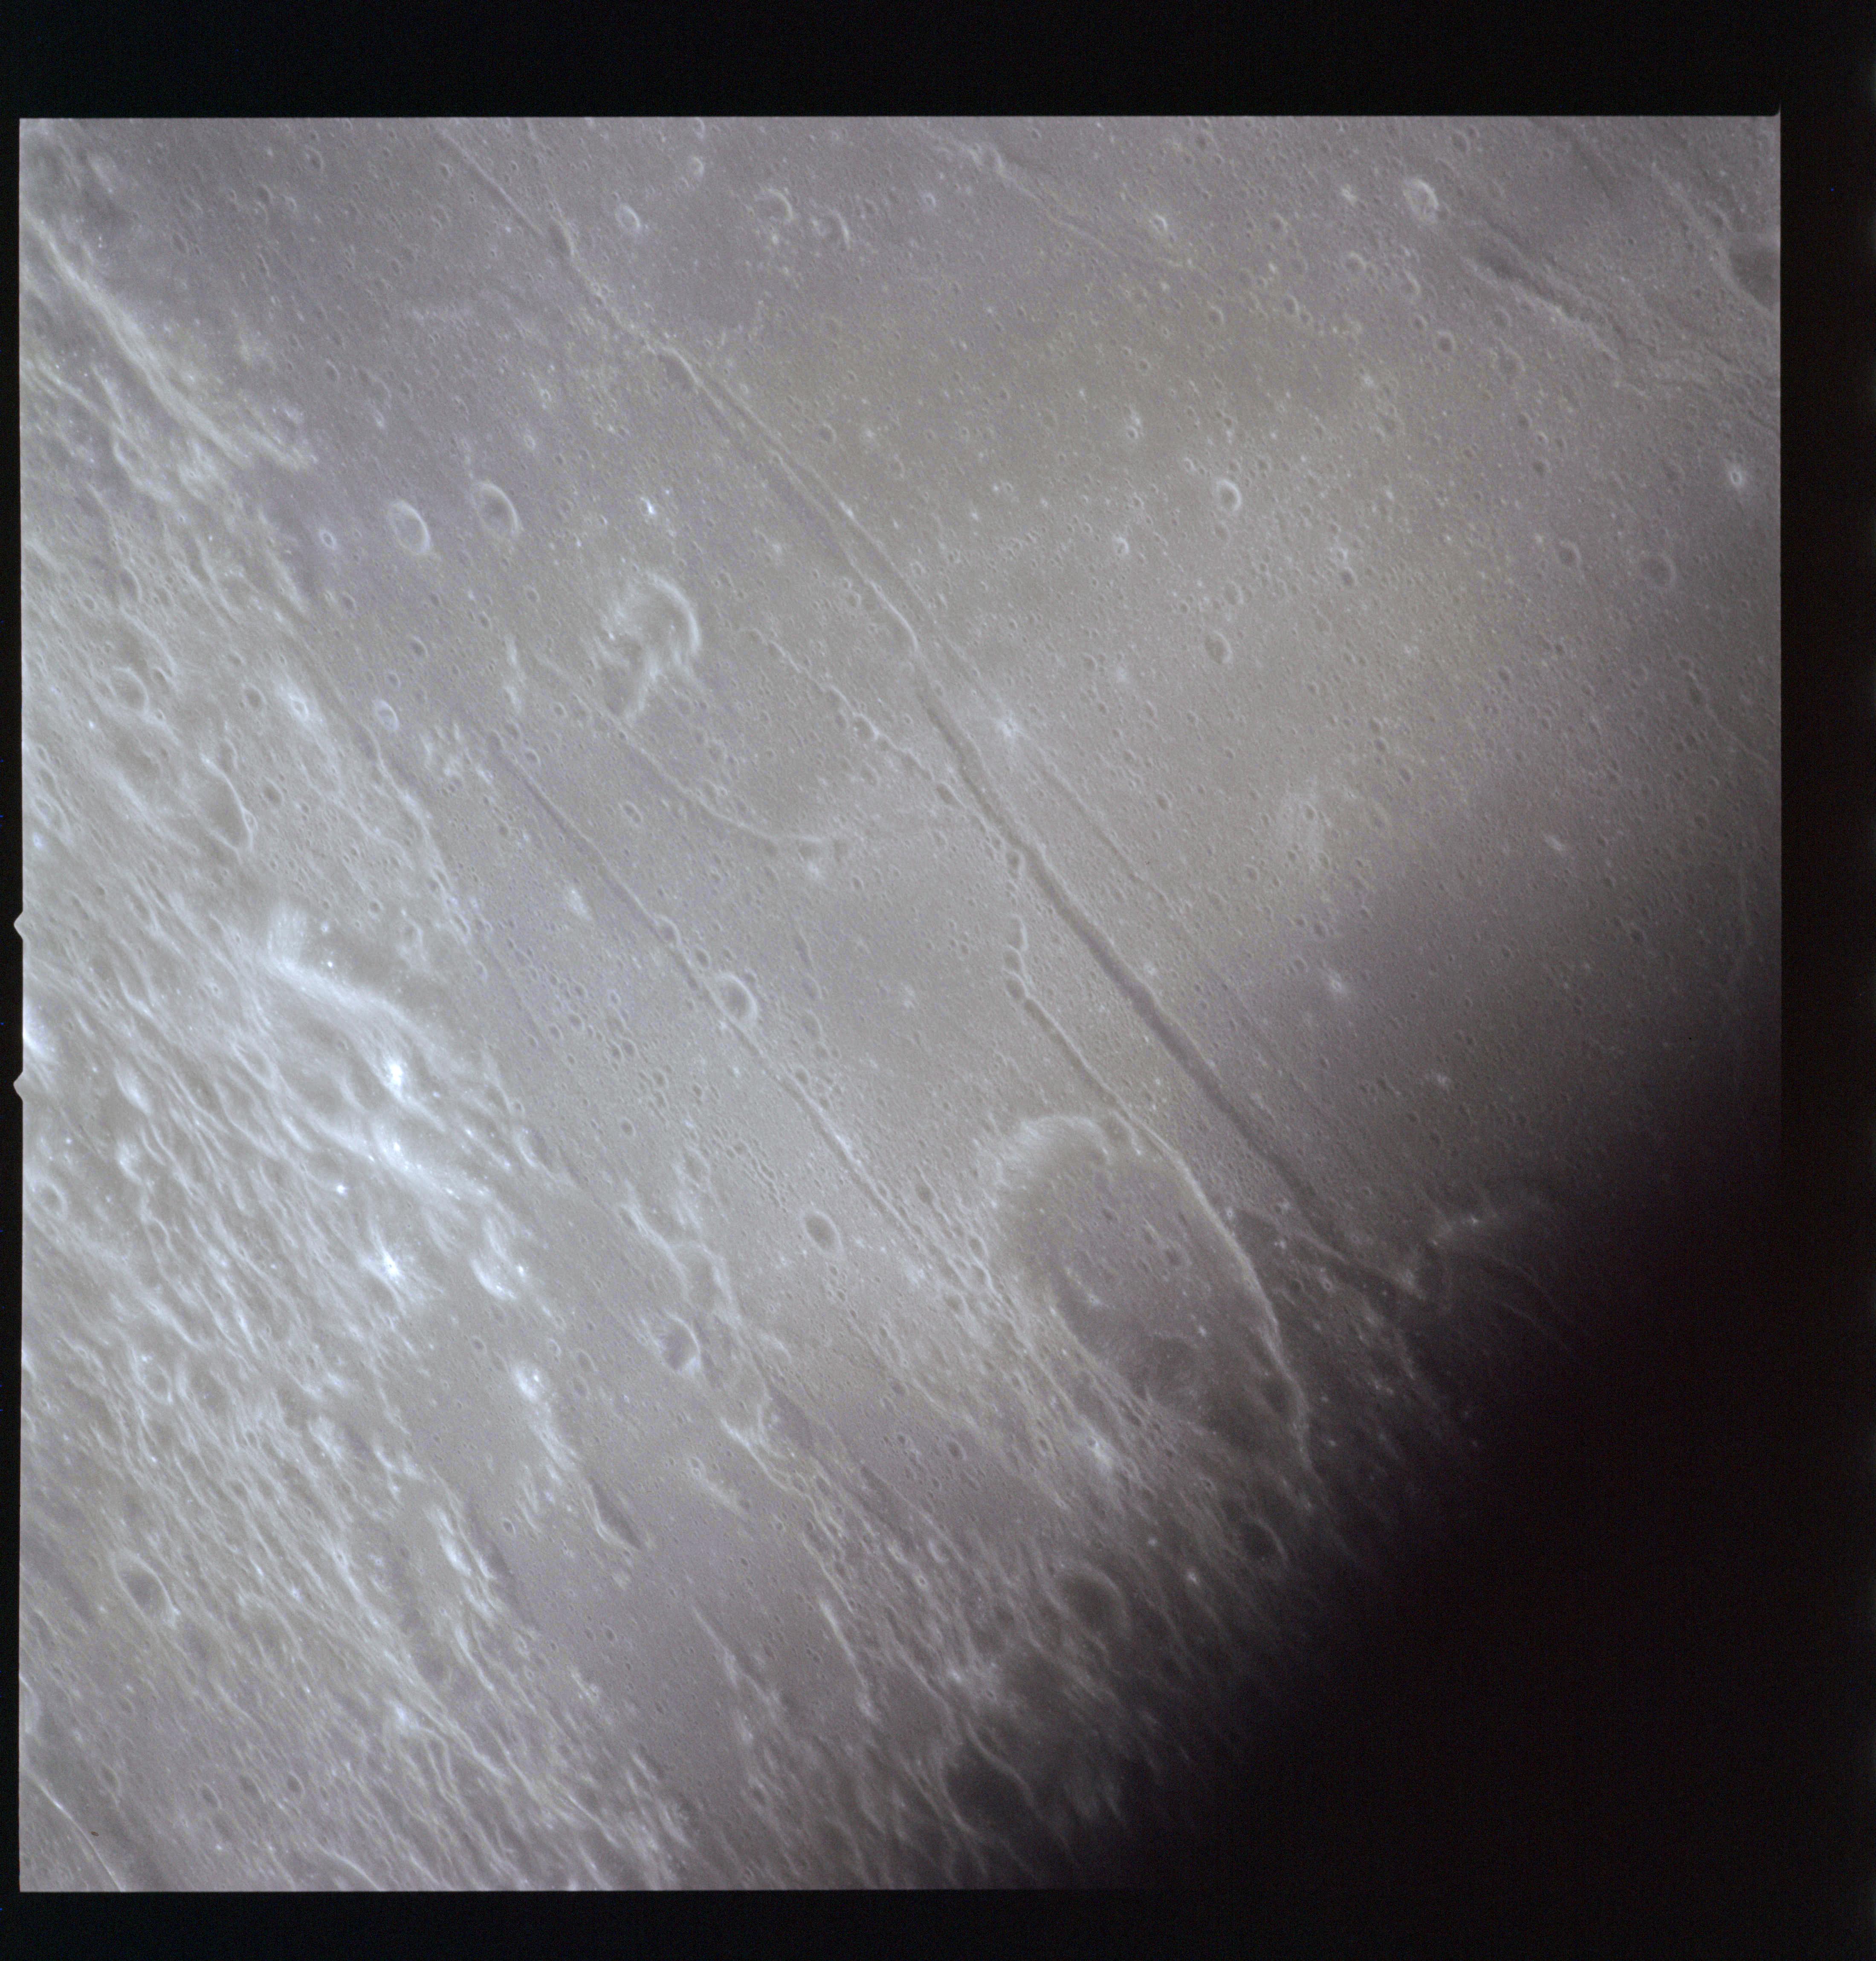
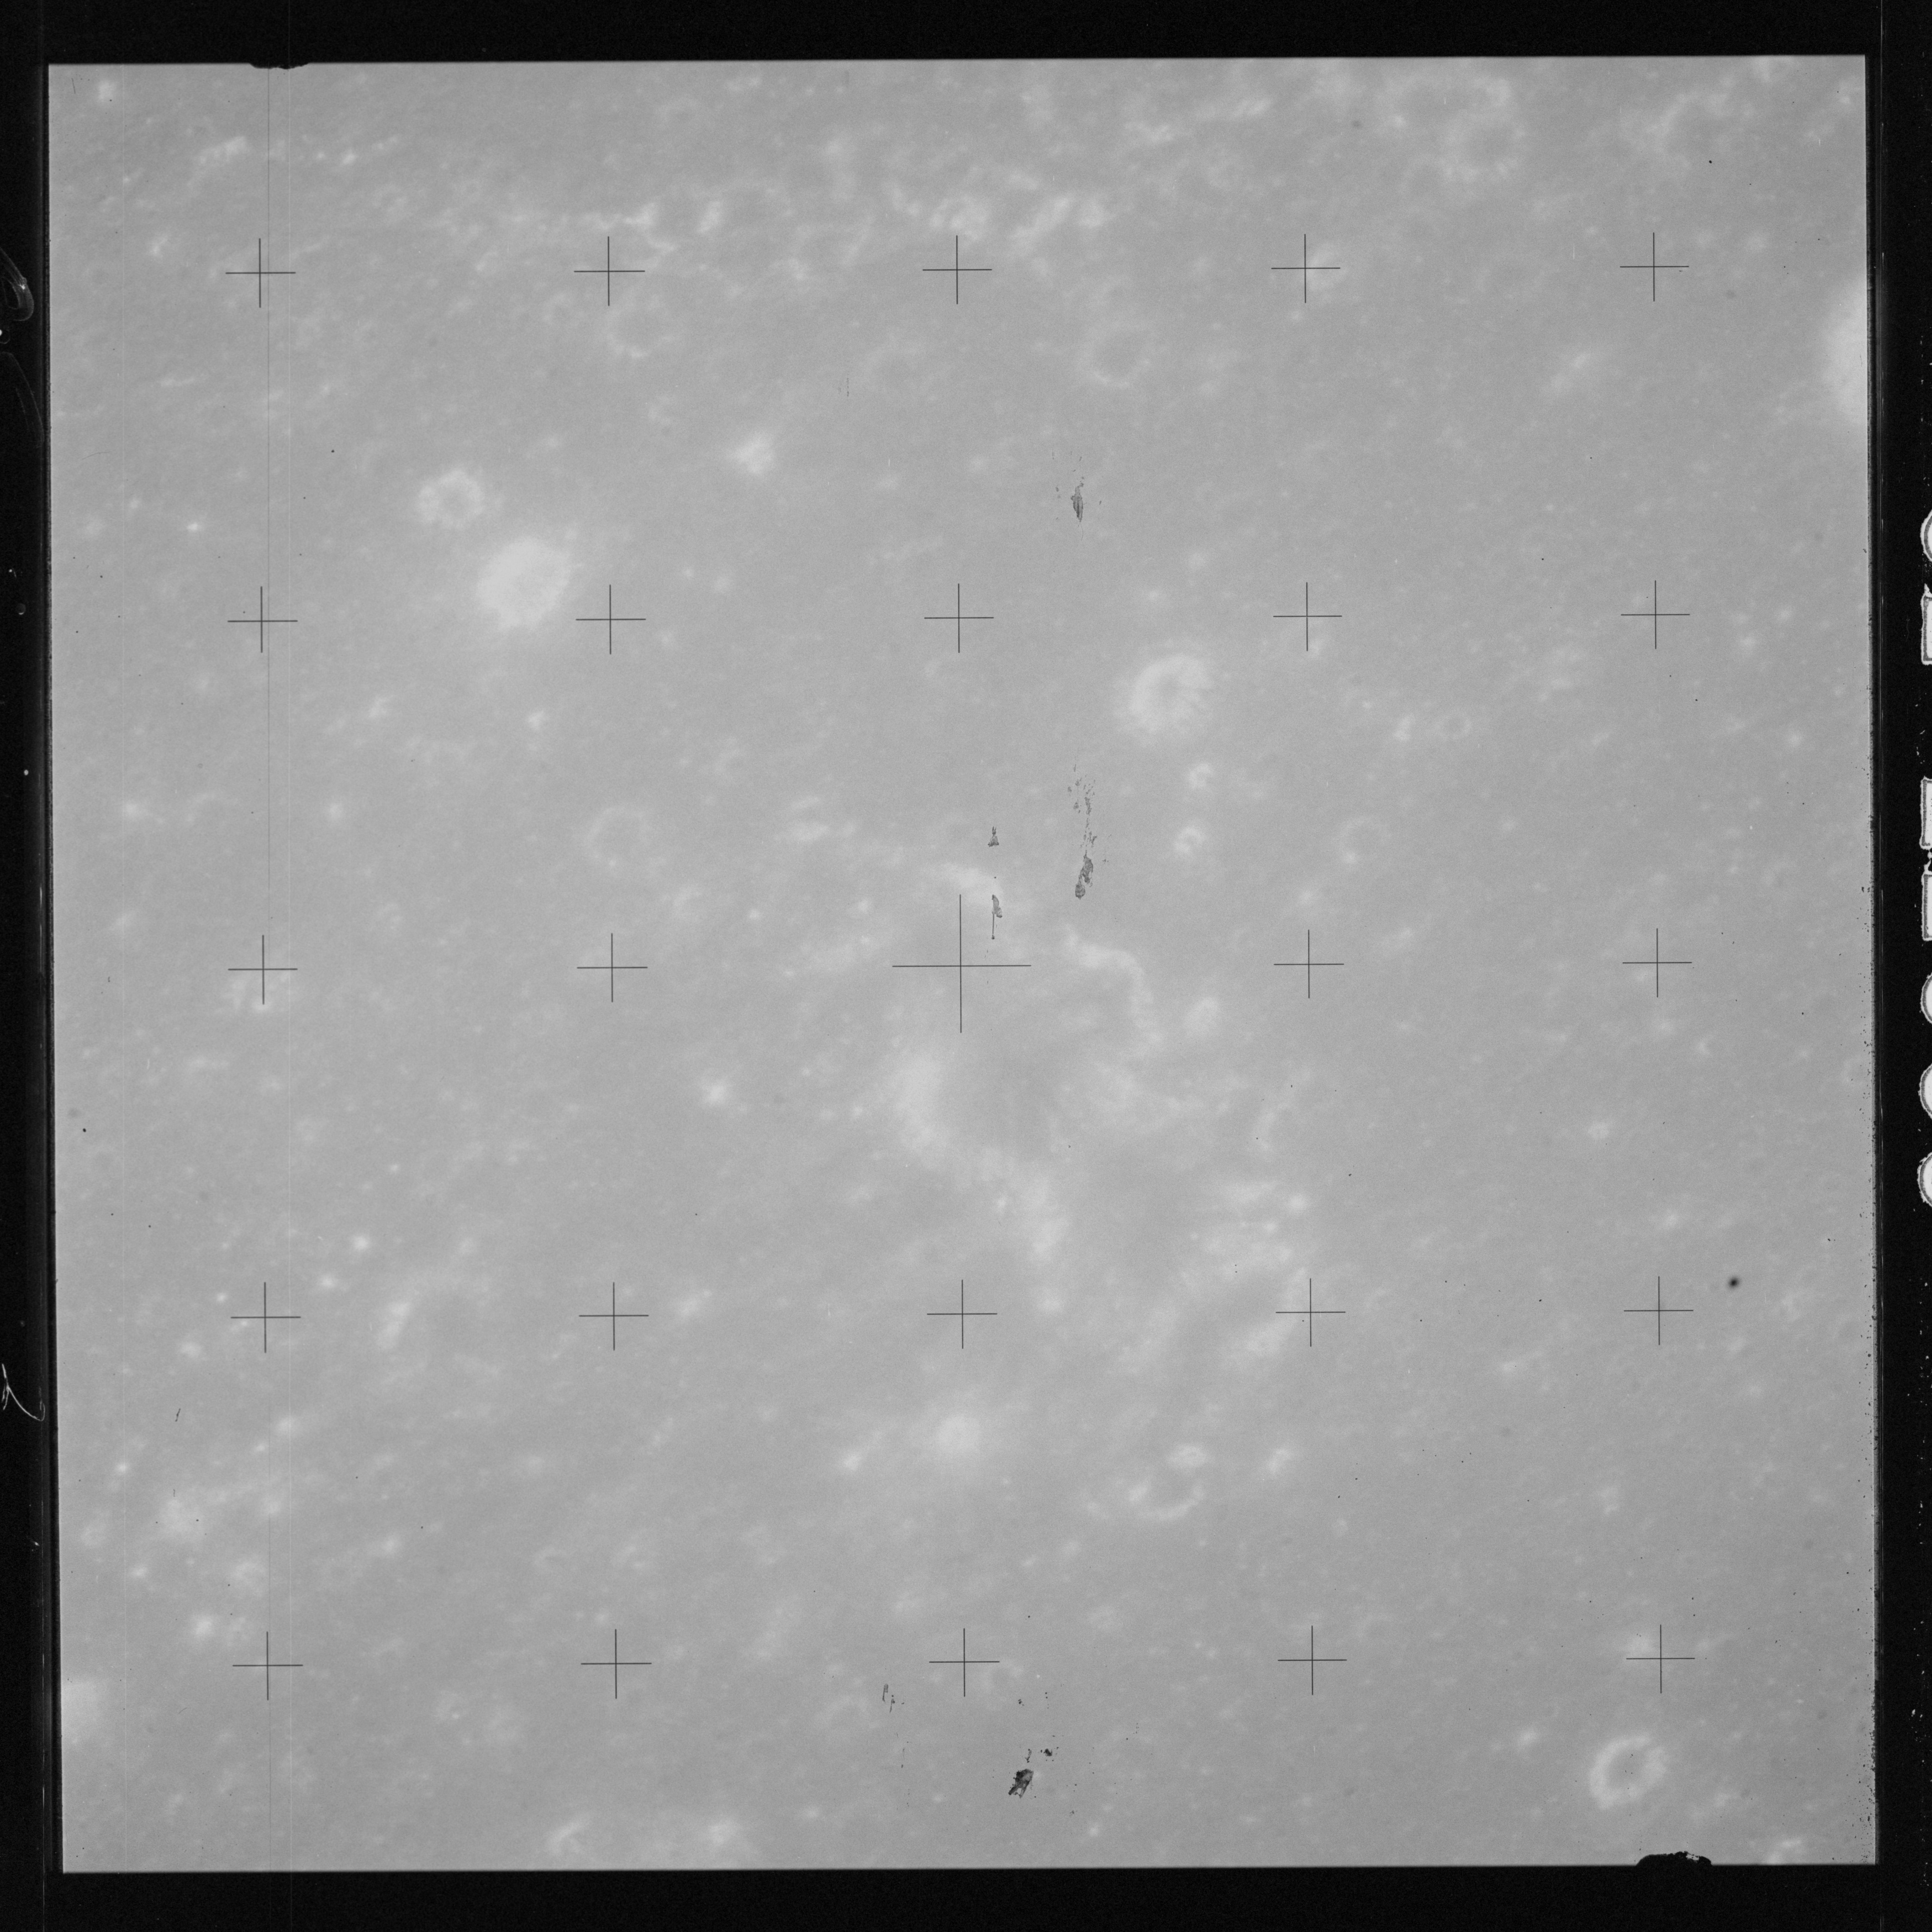
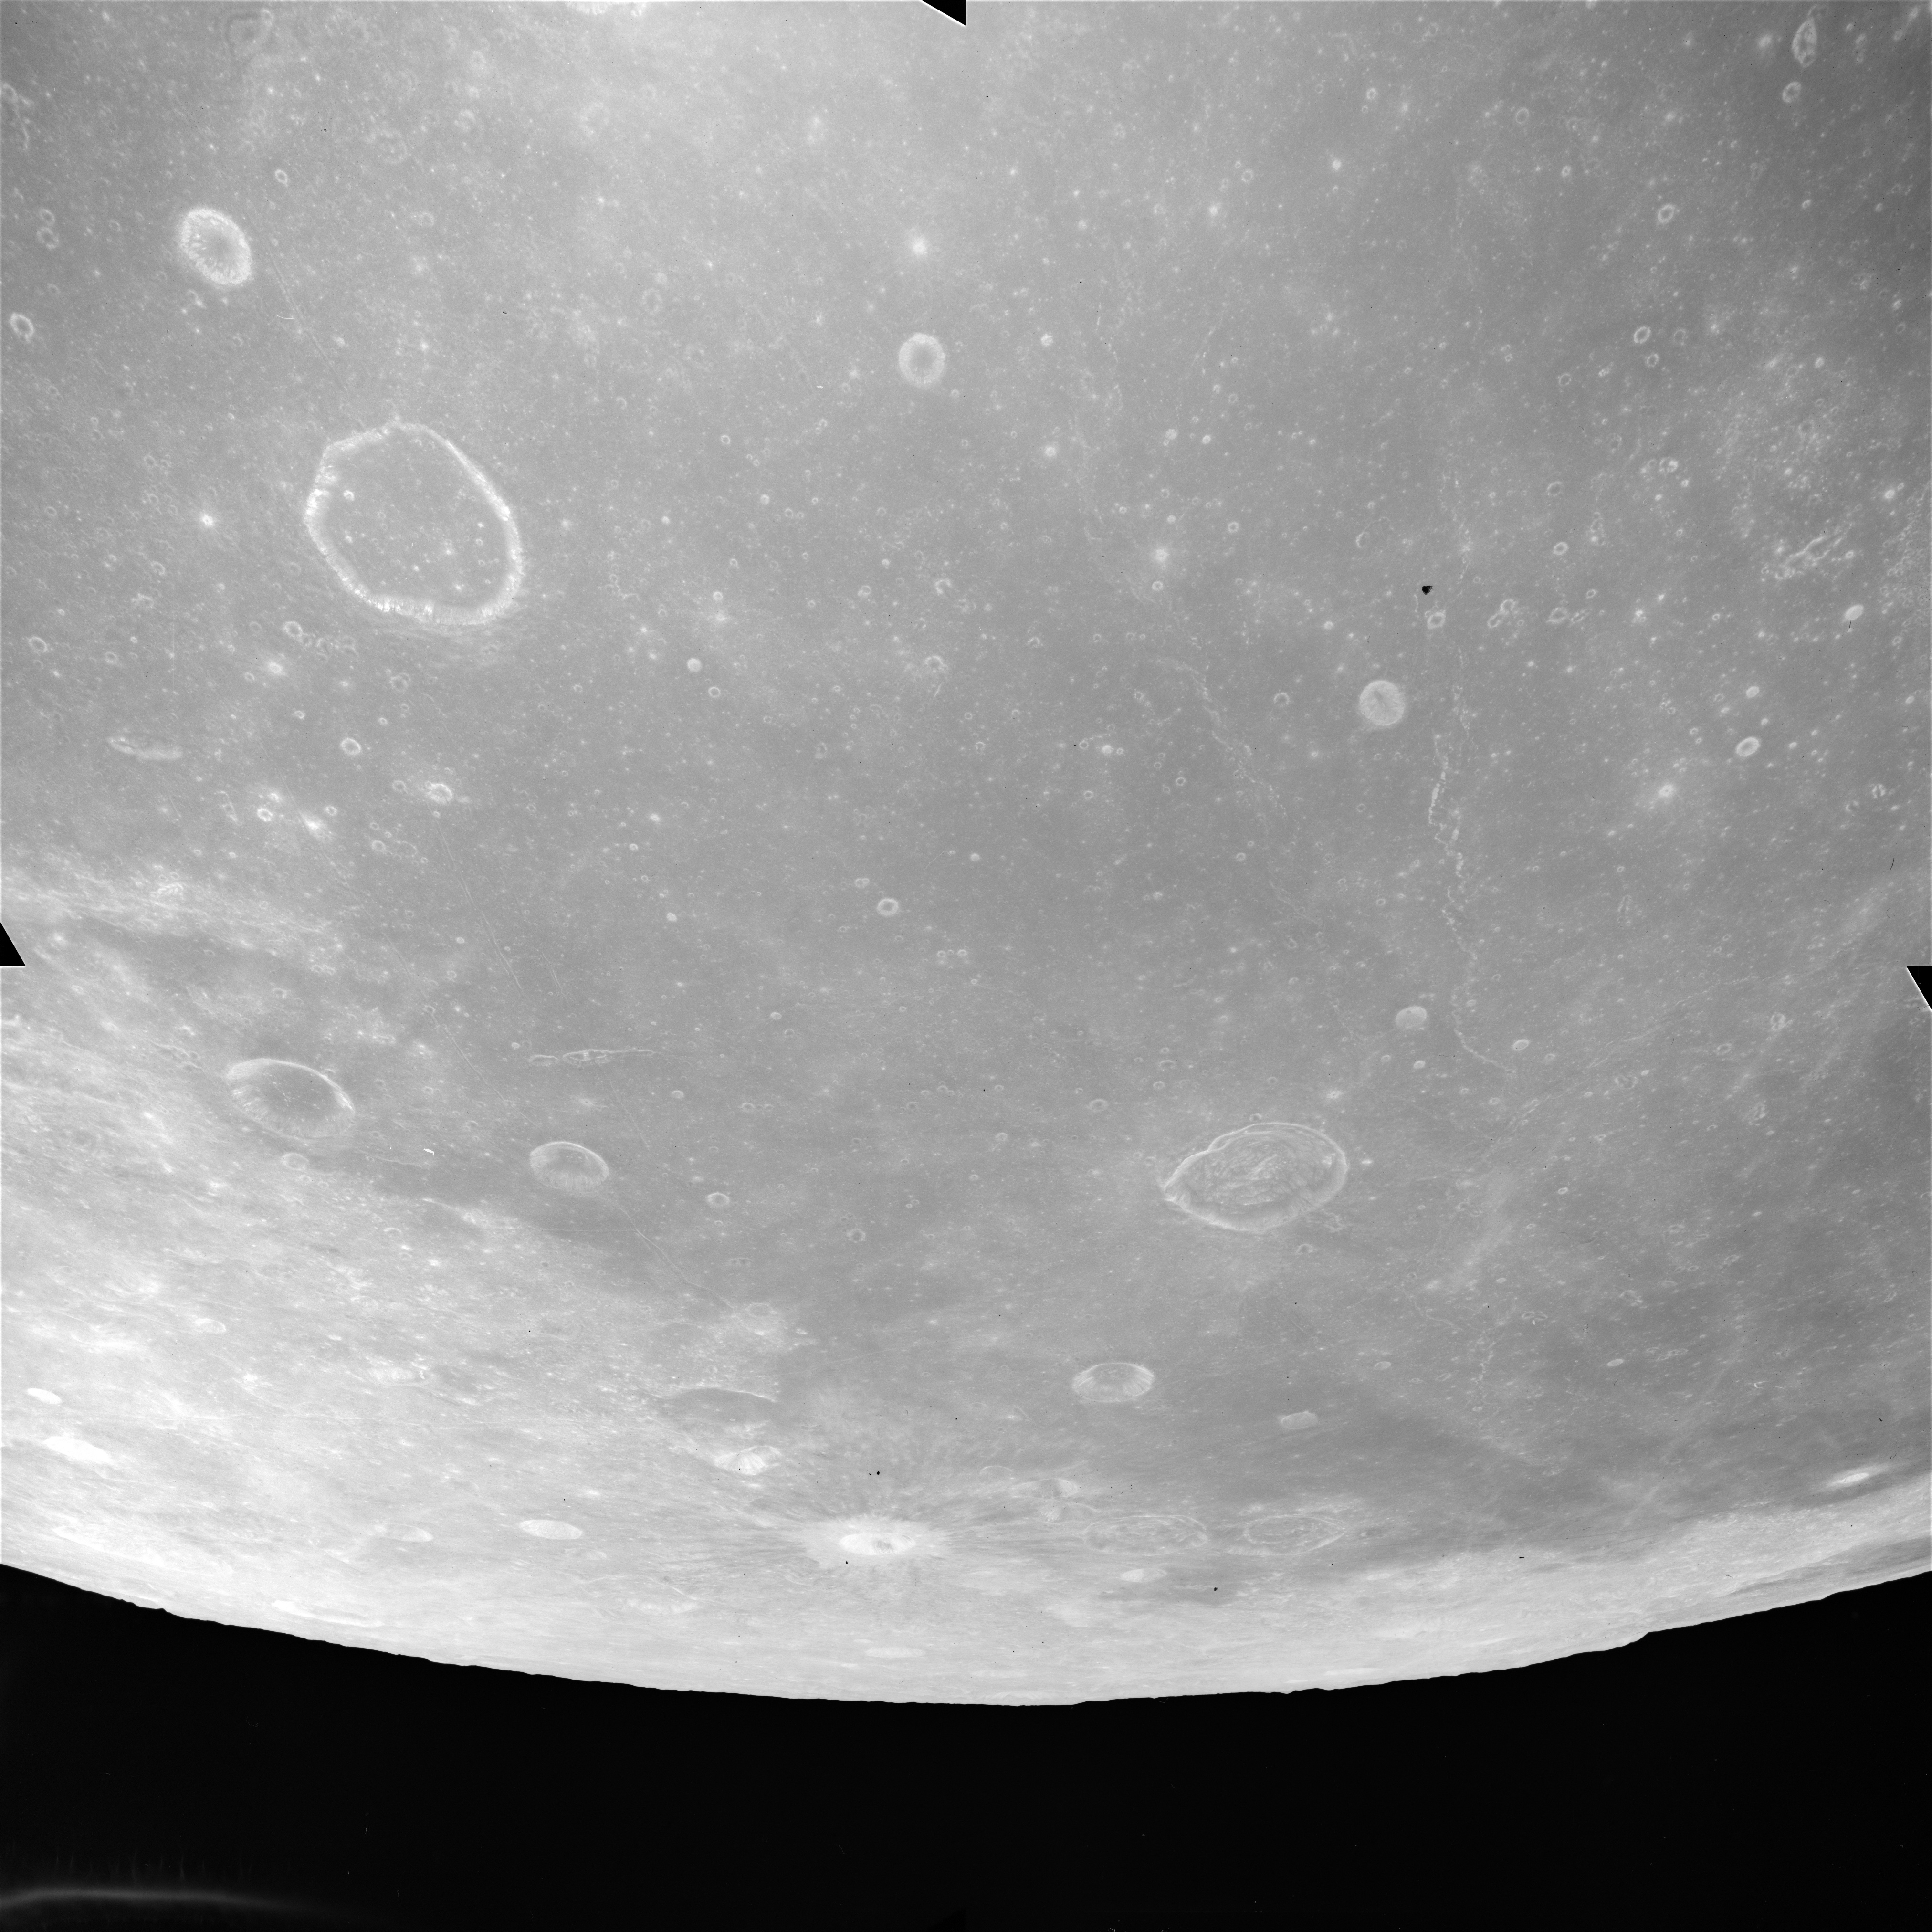
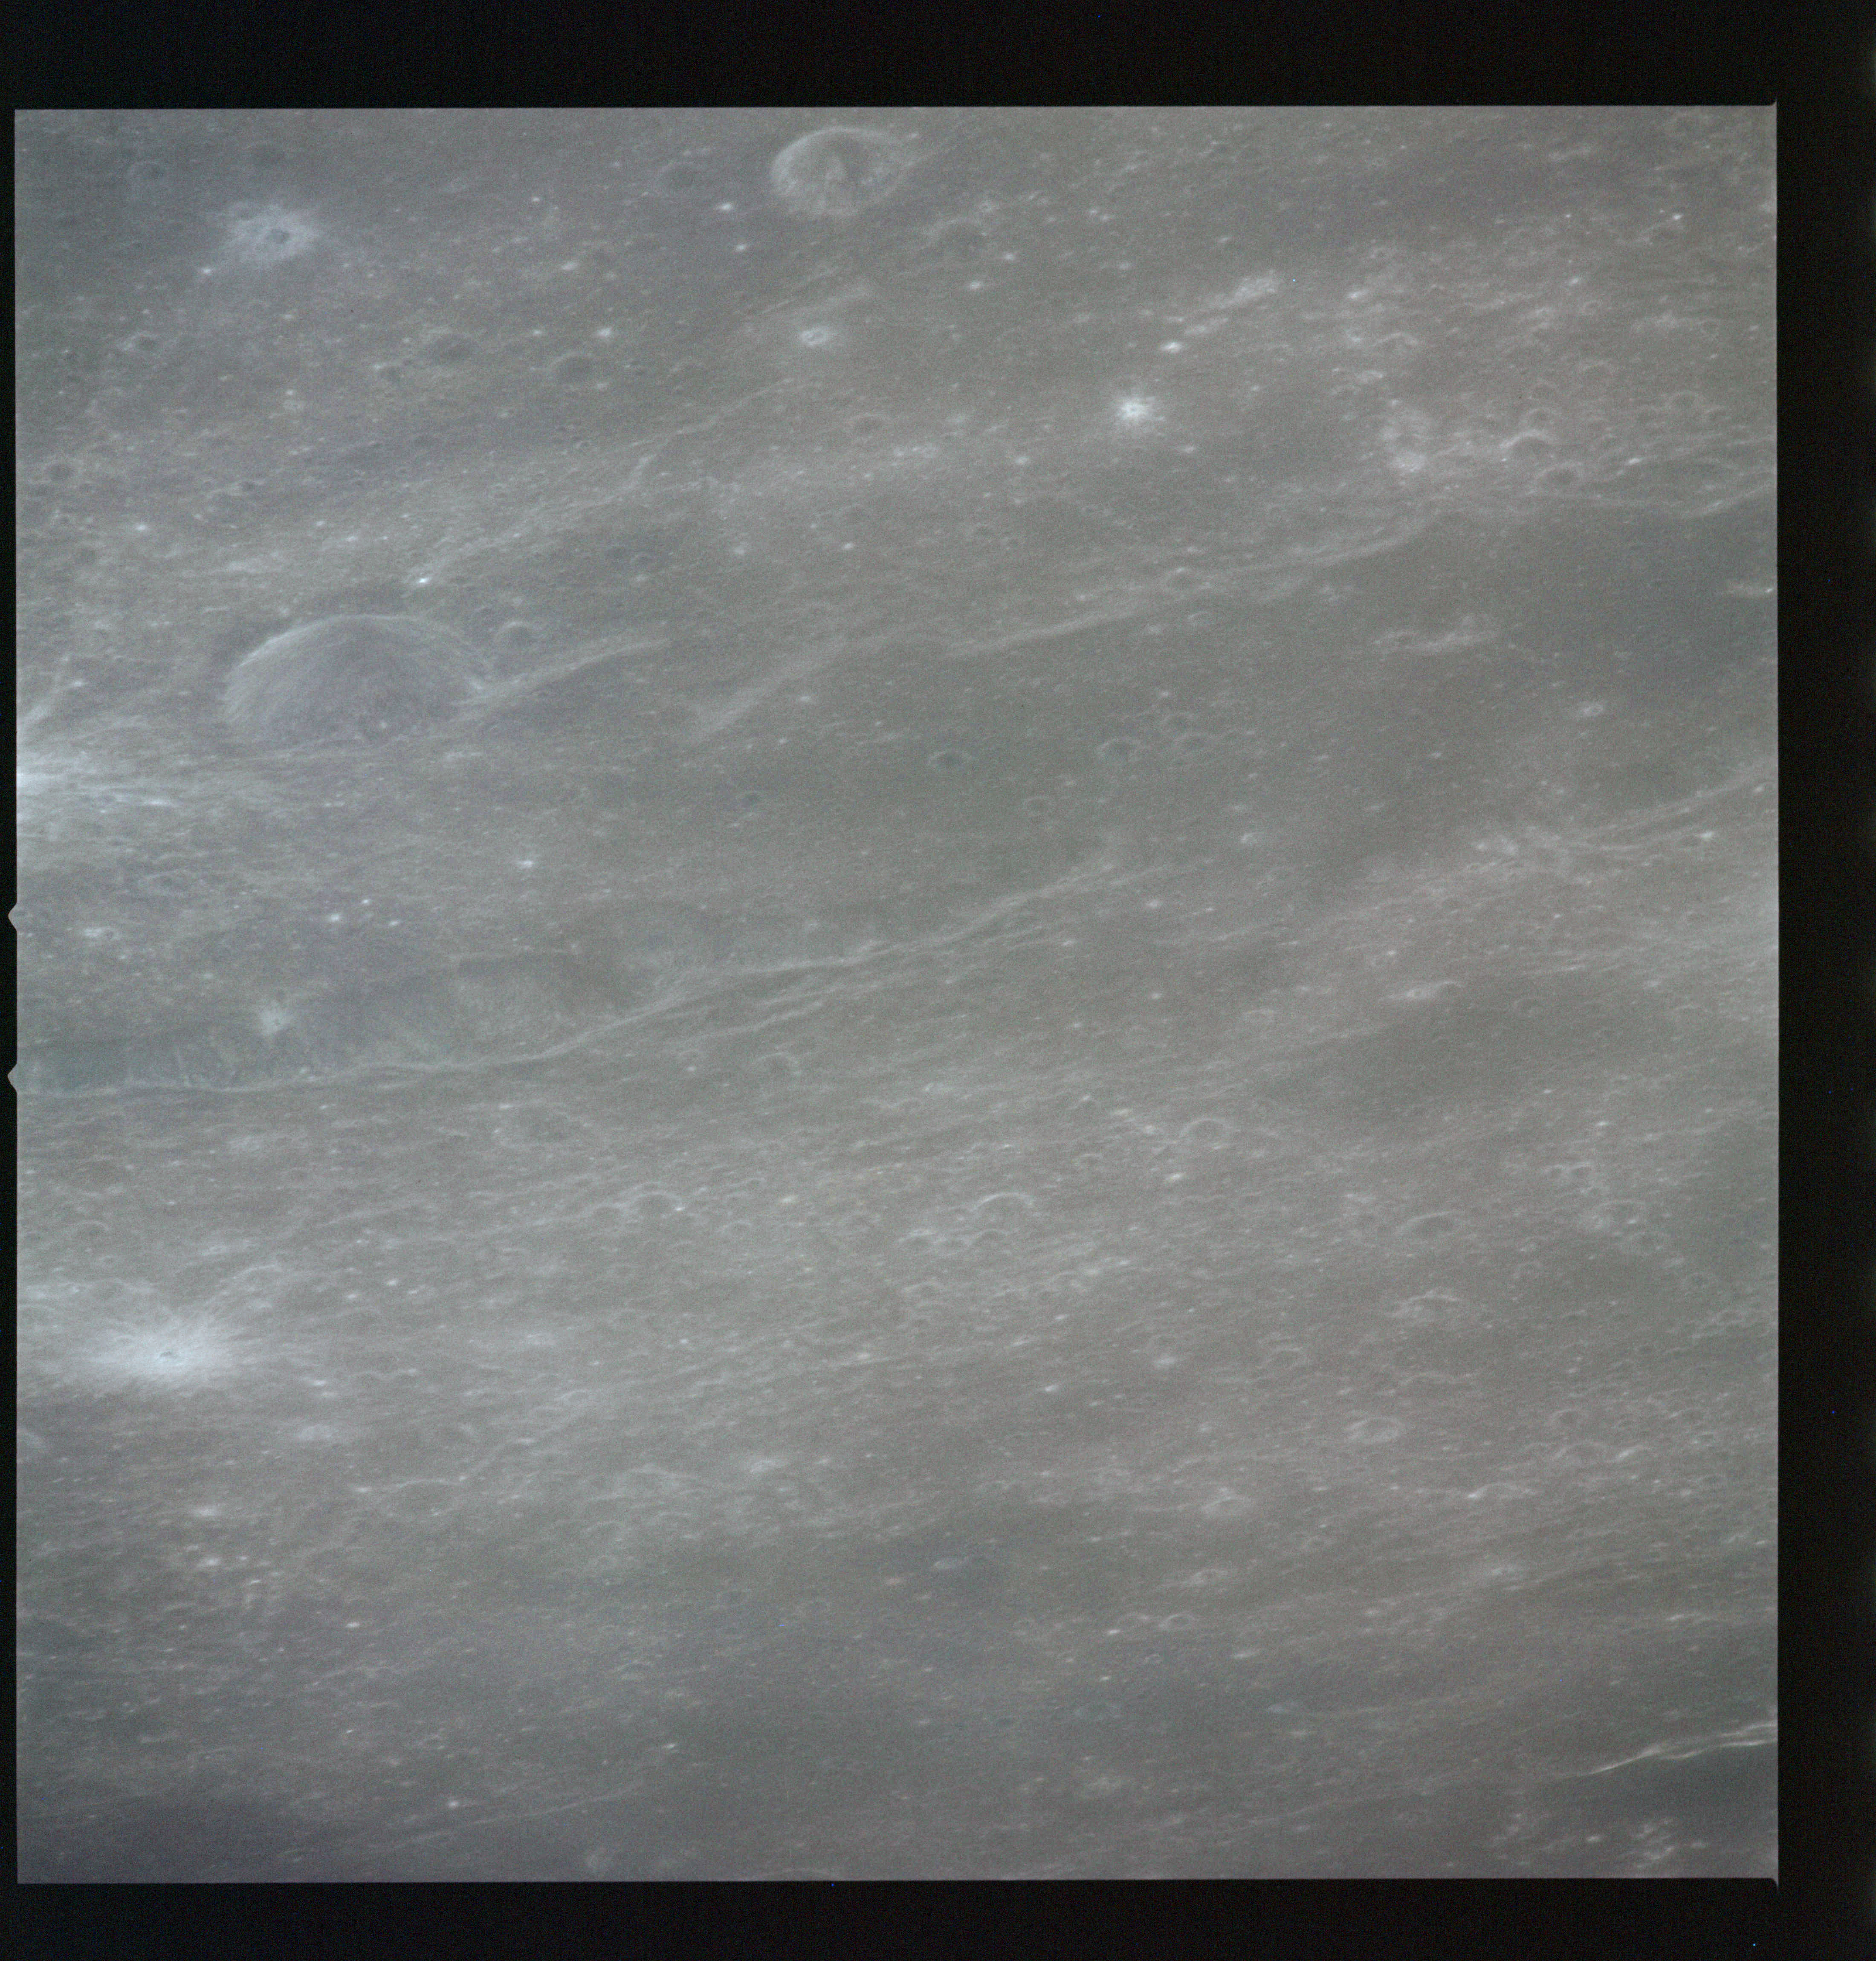
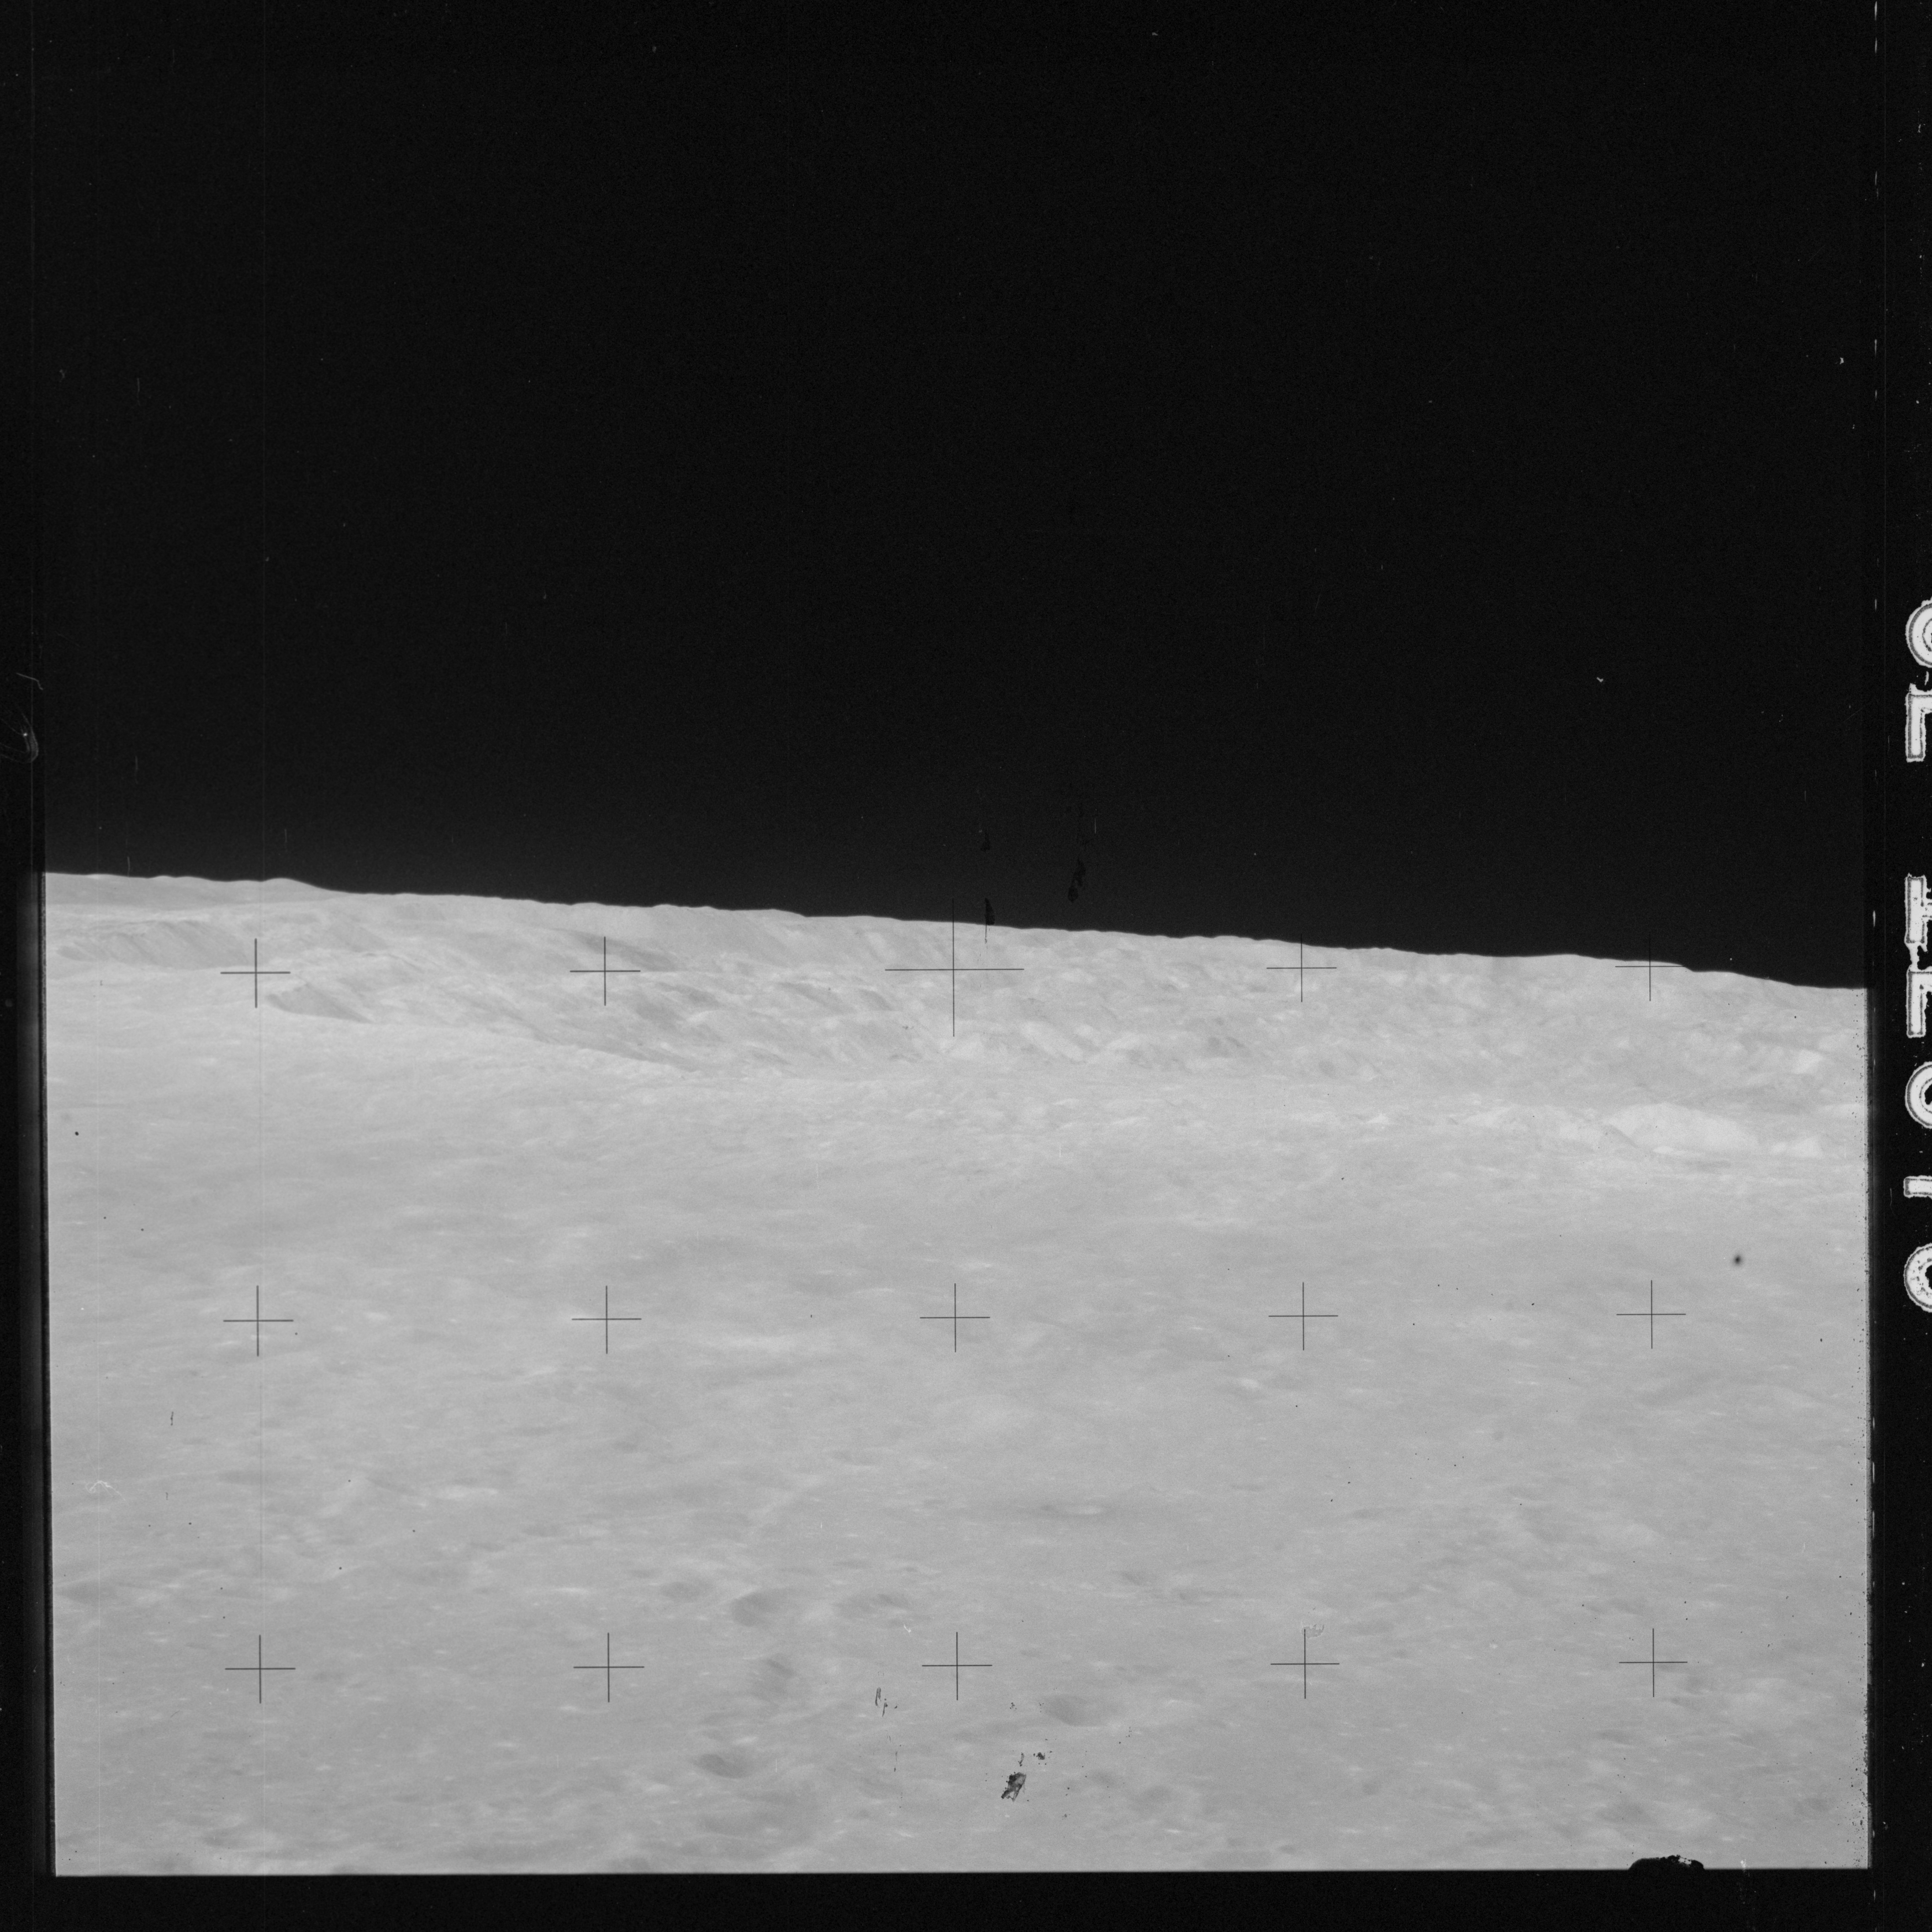
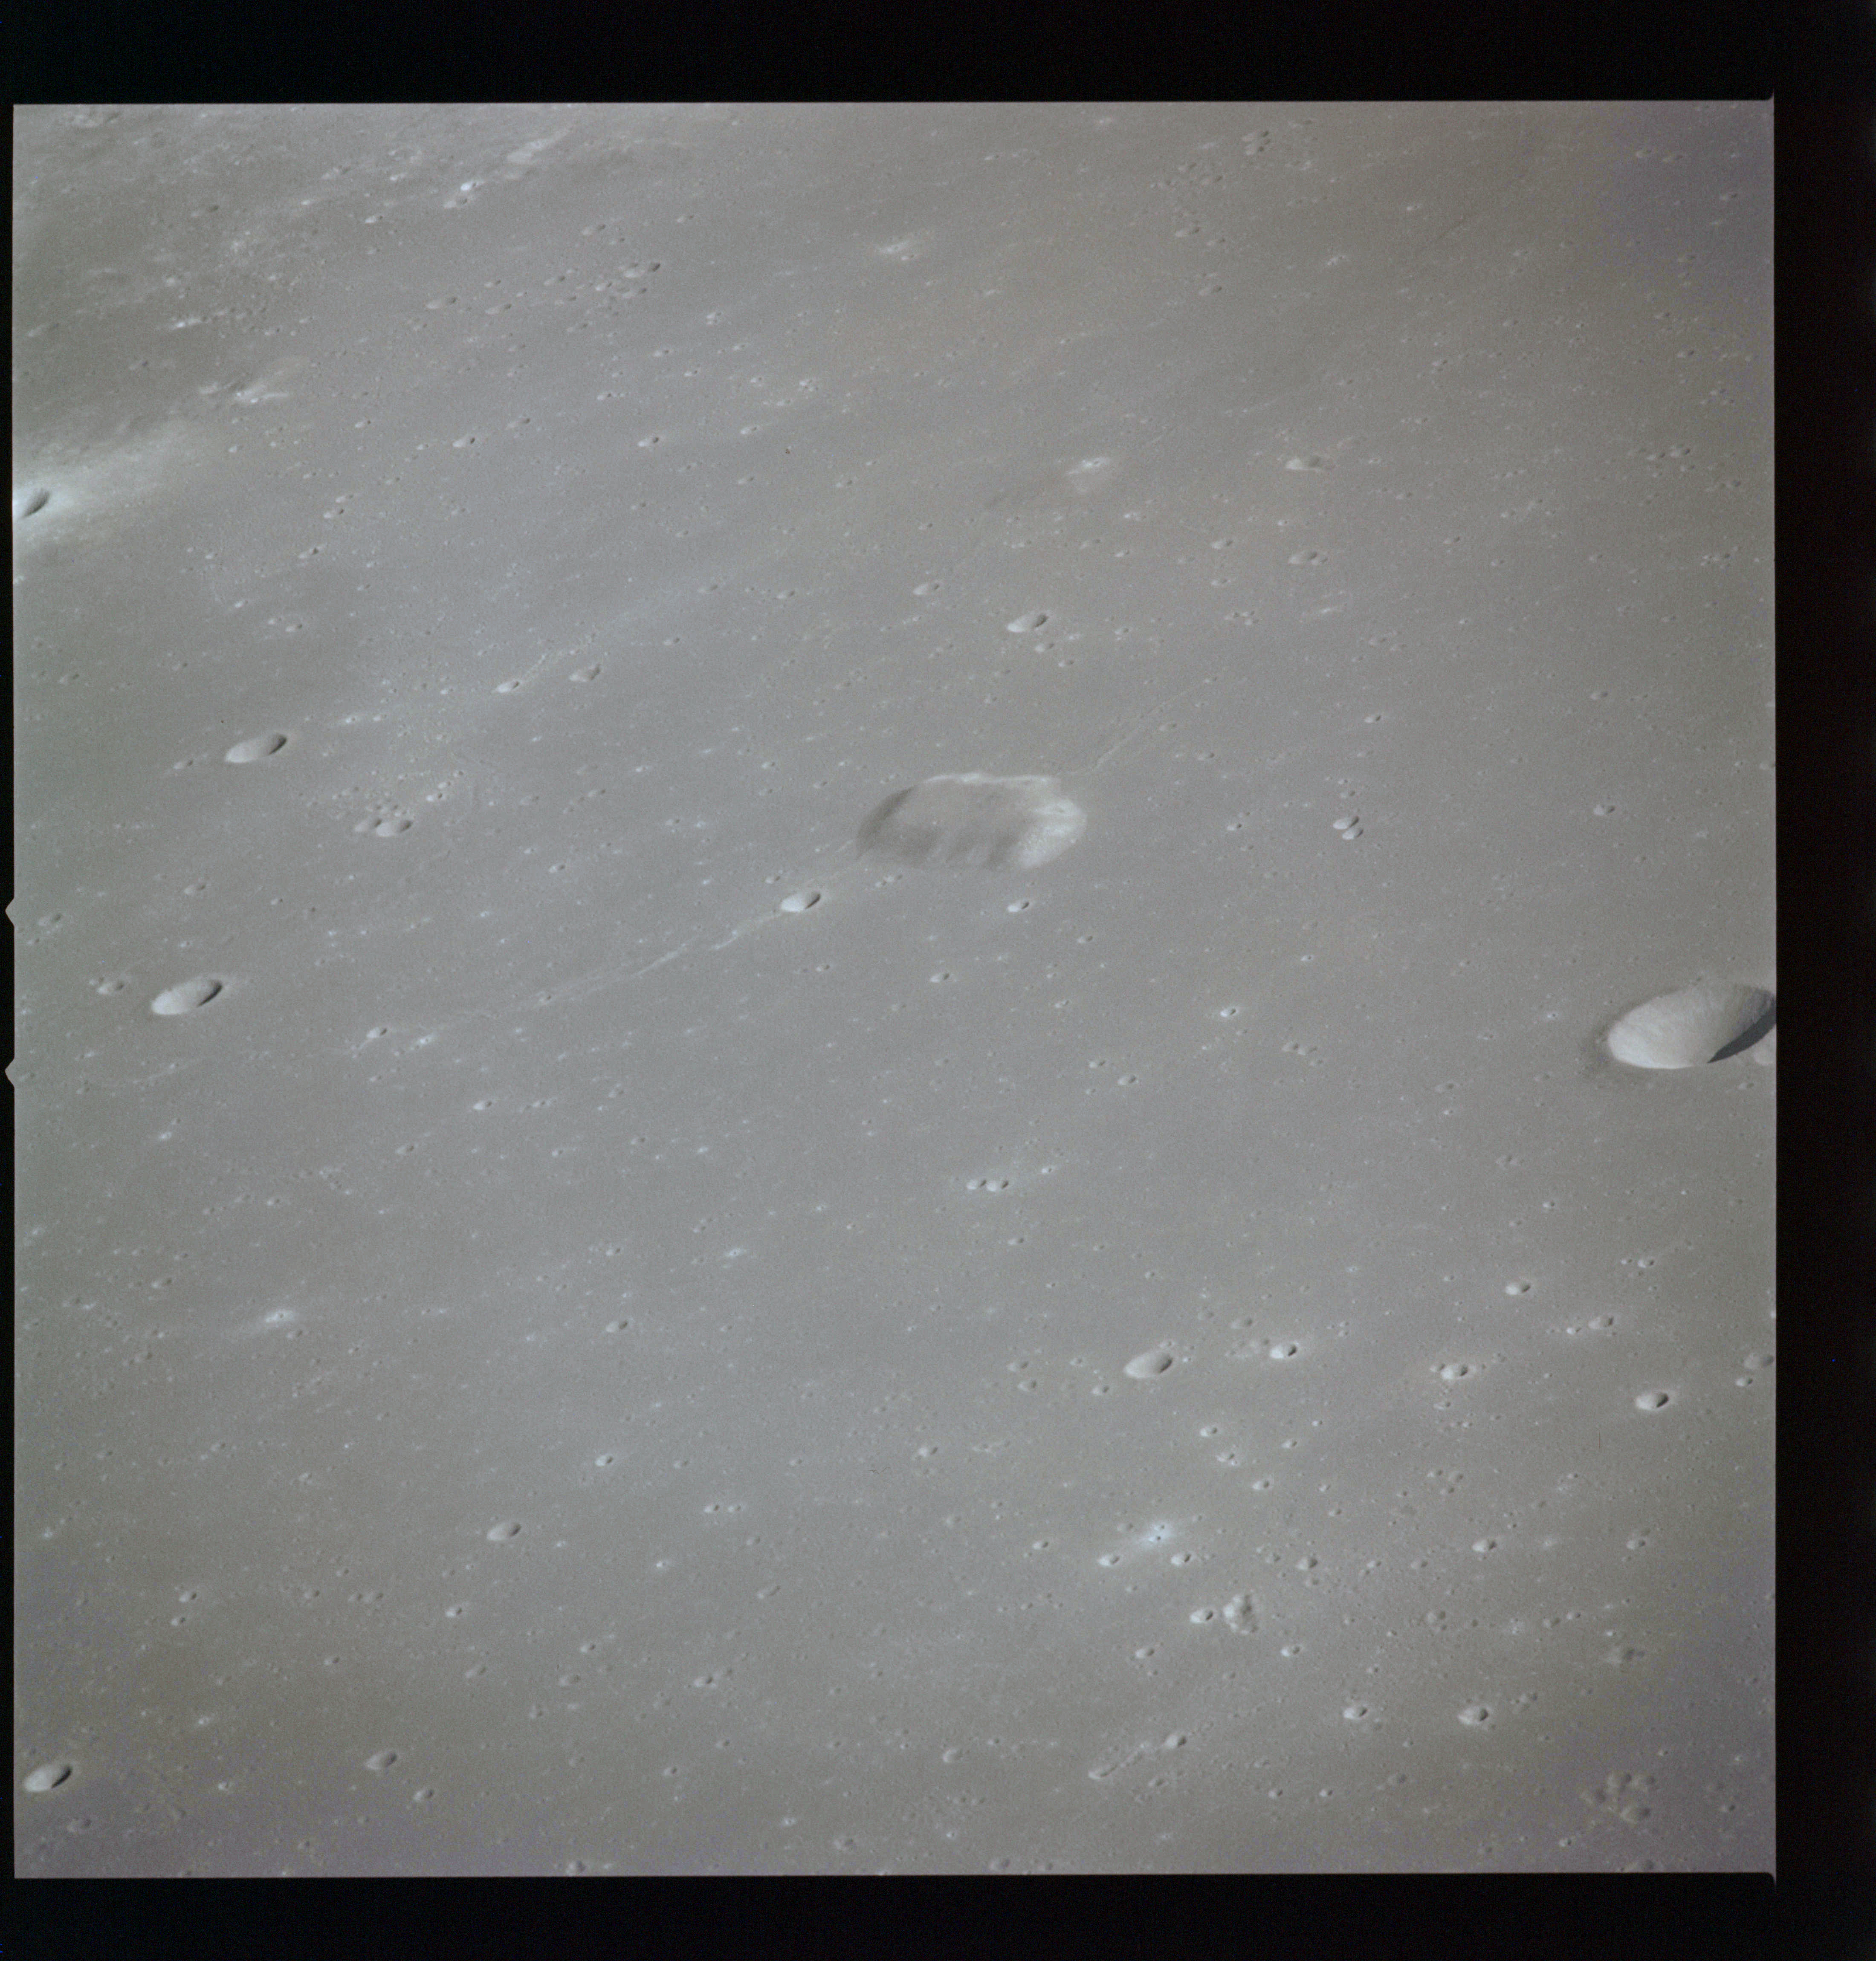
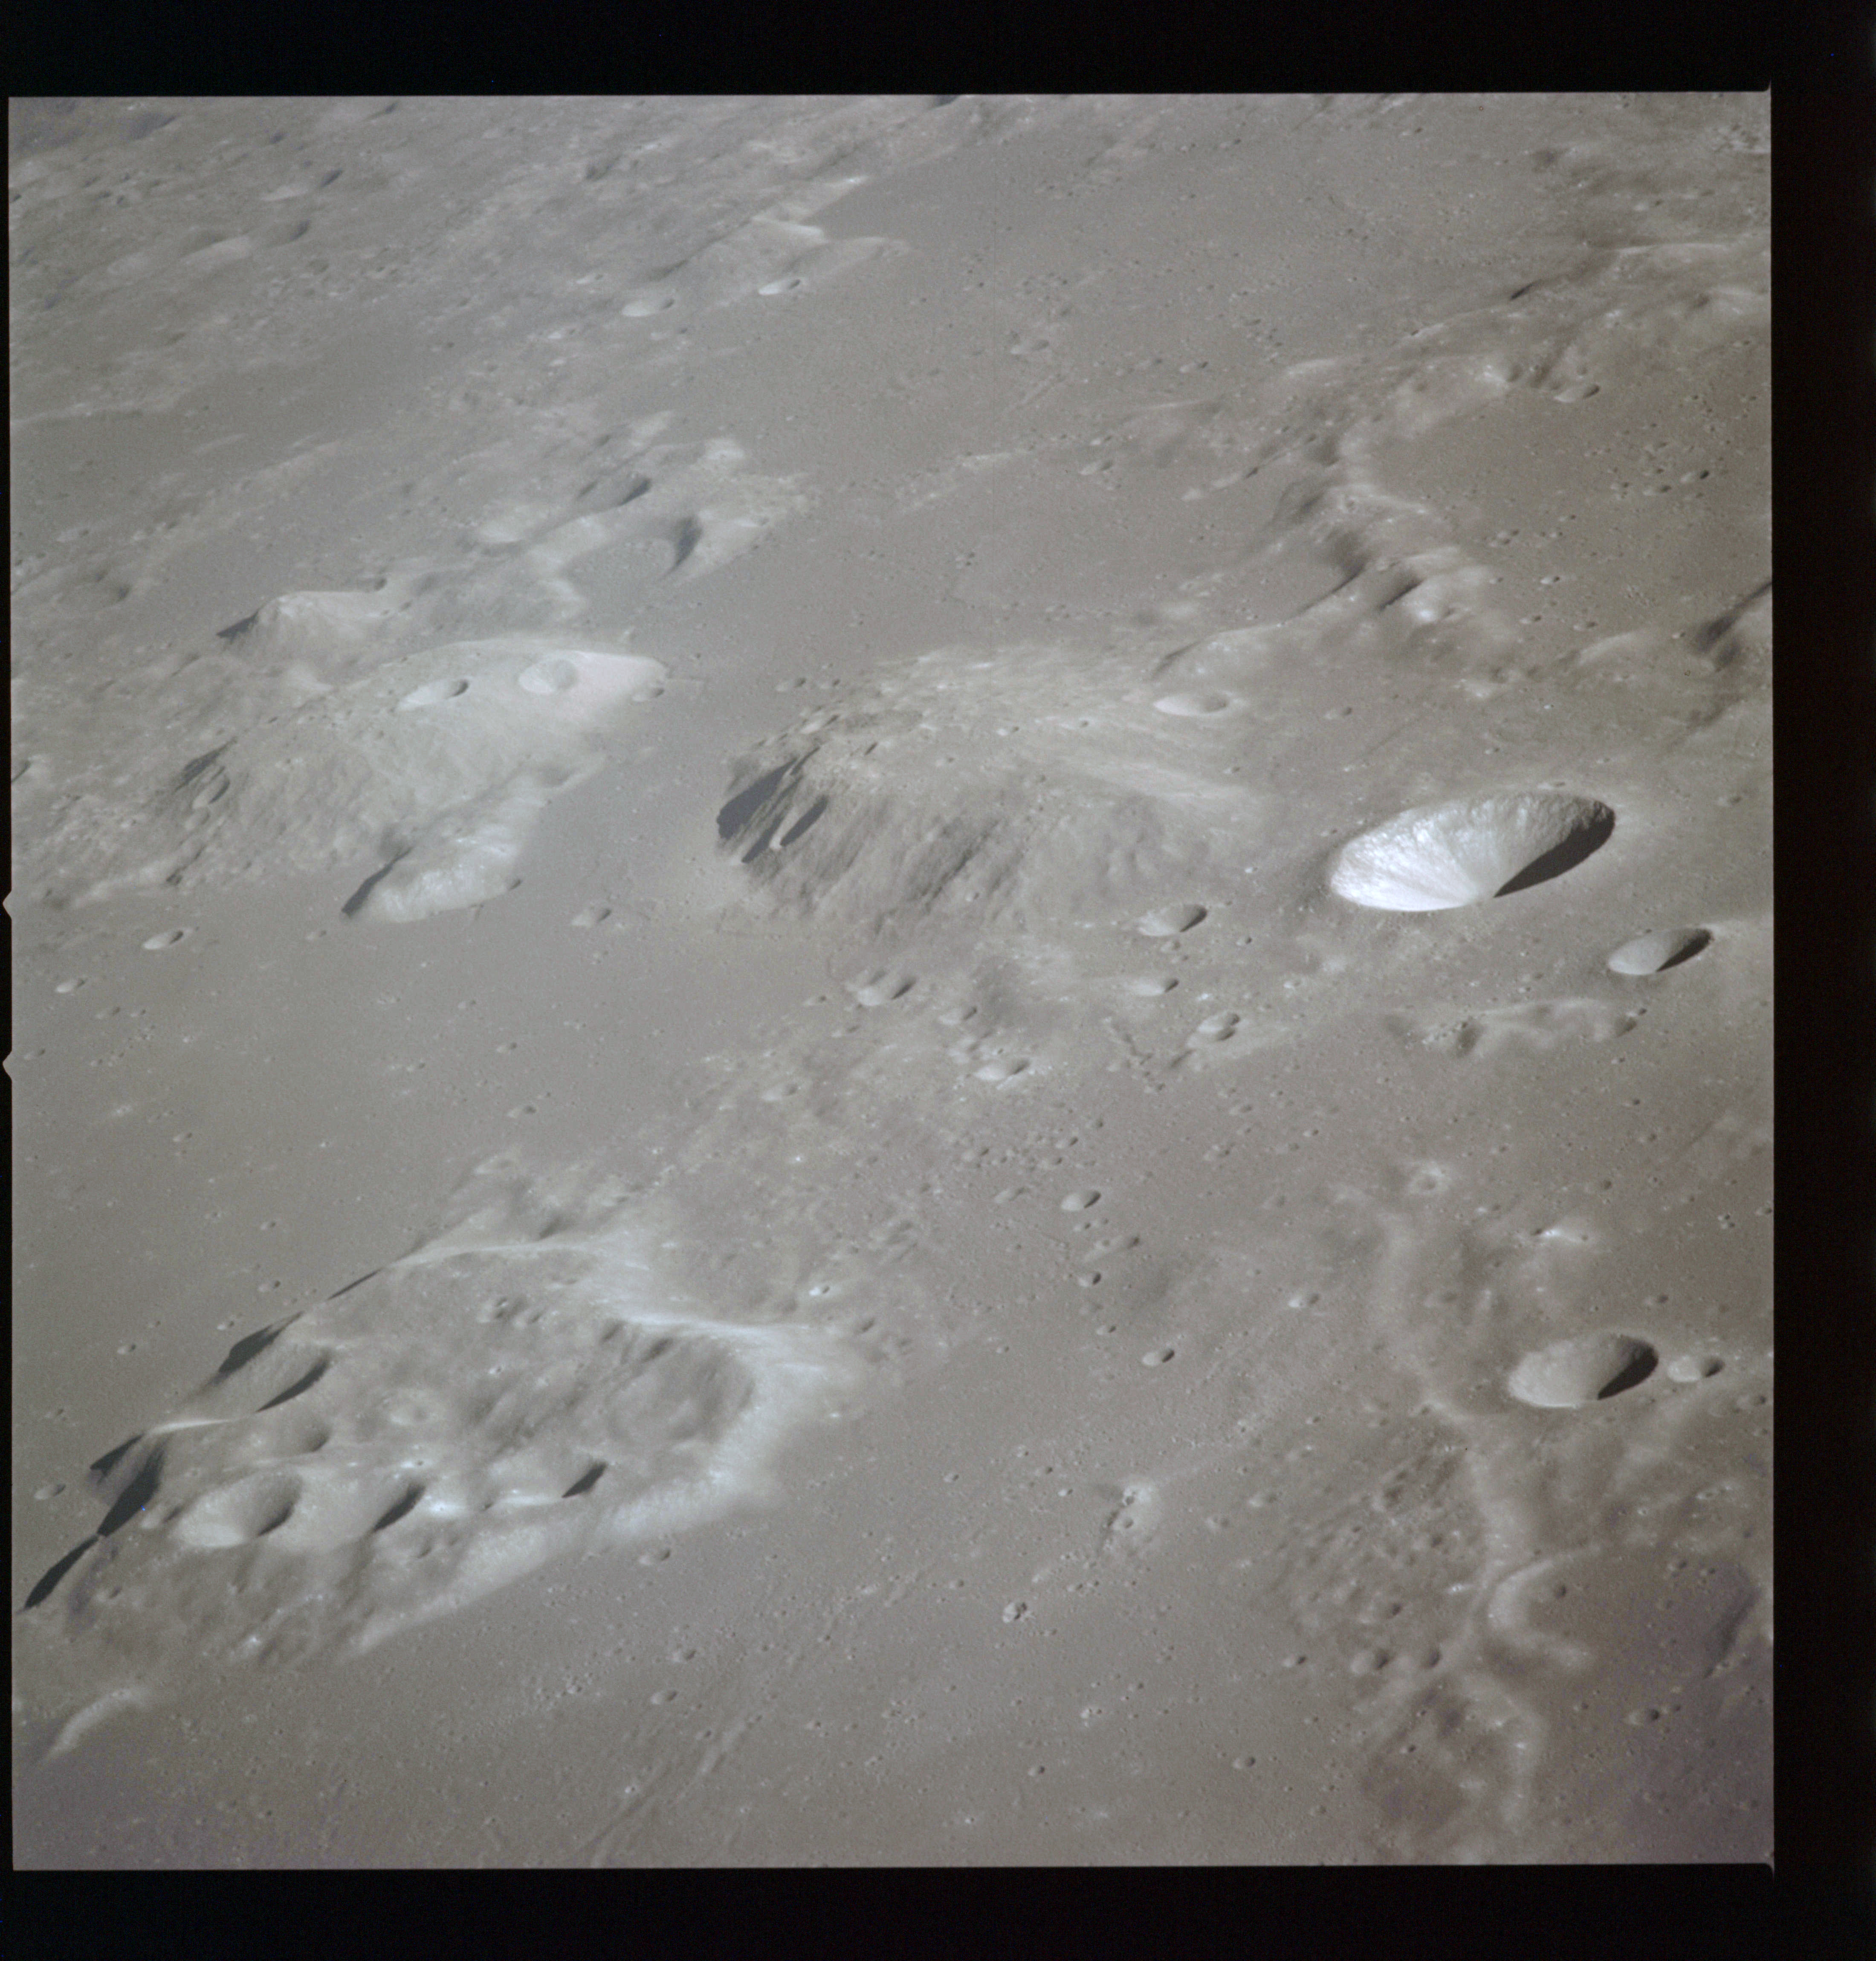
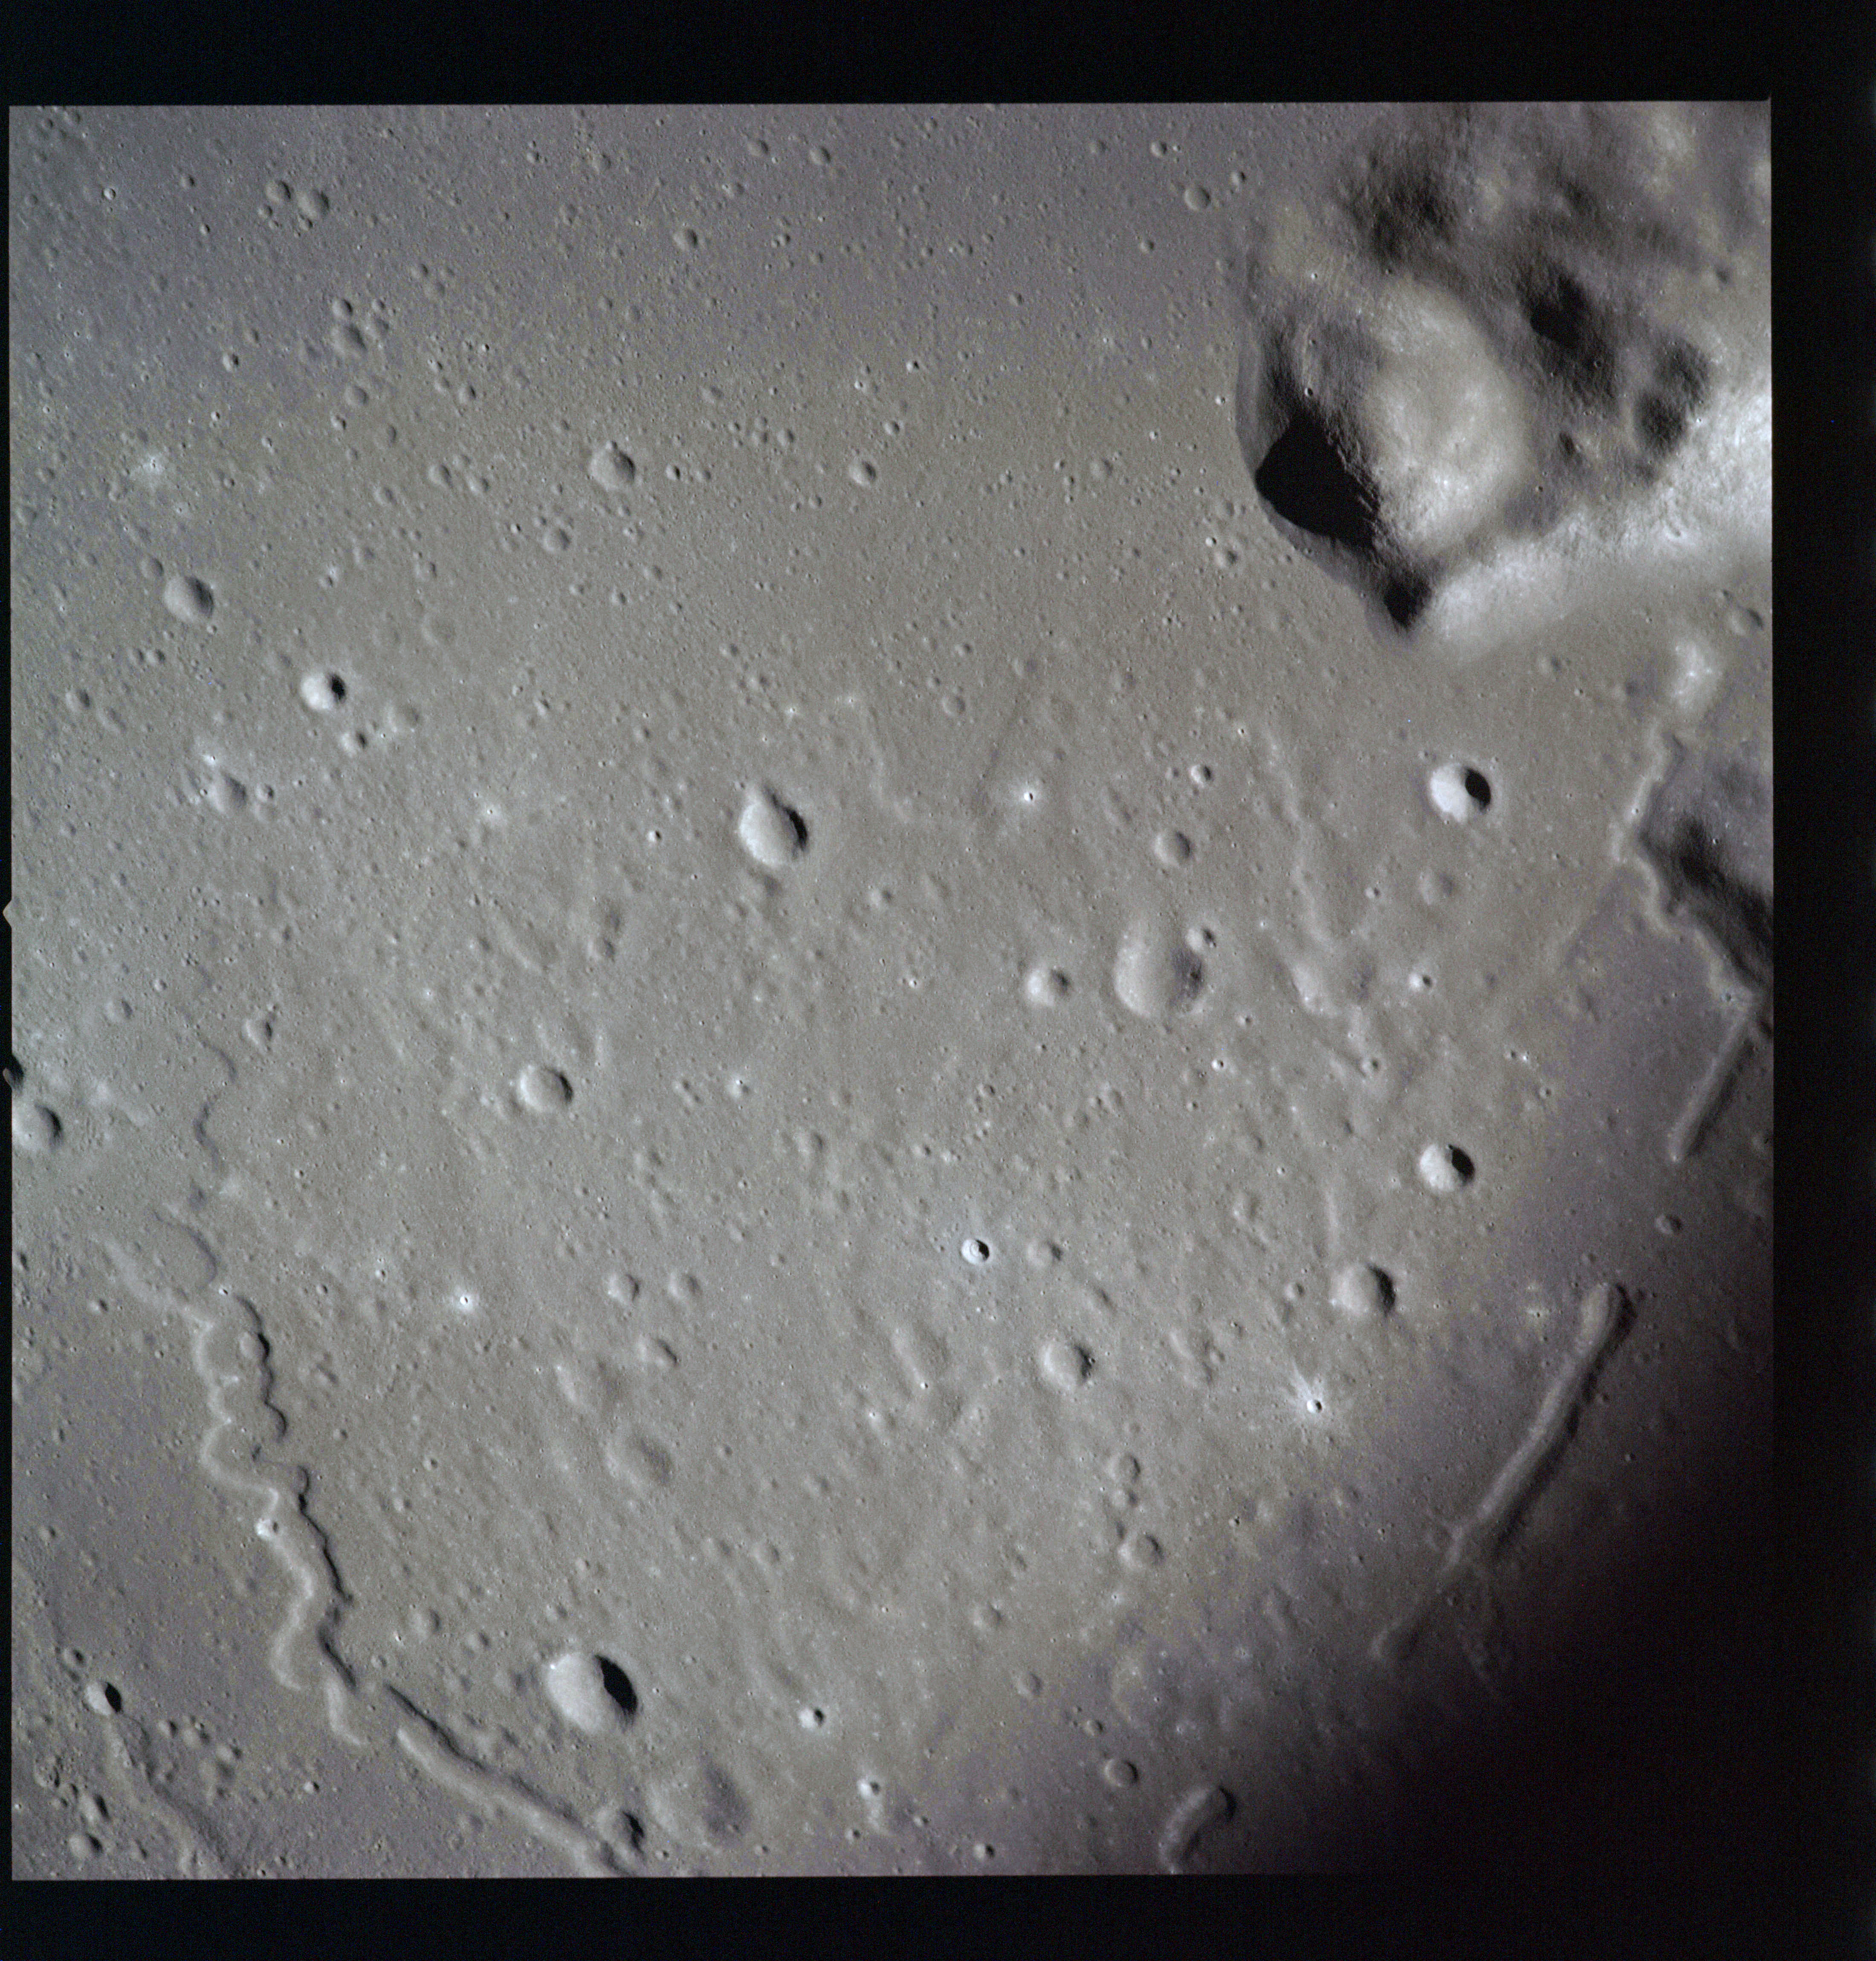
AS15-M-2530 - South oblique Metric Camera image of The southern rim of crater Langrenus. Also Mare Fecunditatis and craters Lohse, Vendelinus and Holden. Image taken at about 216:34. (250 megapixel version), (labelled version) - Image by NASA/ASU.
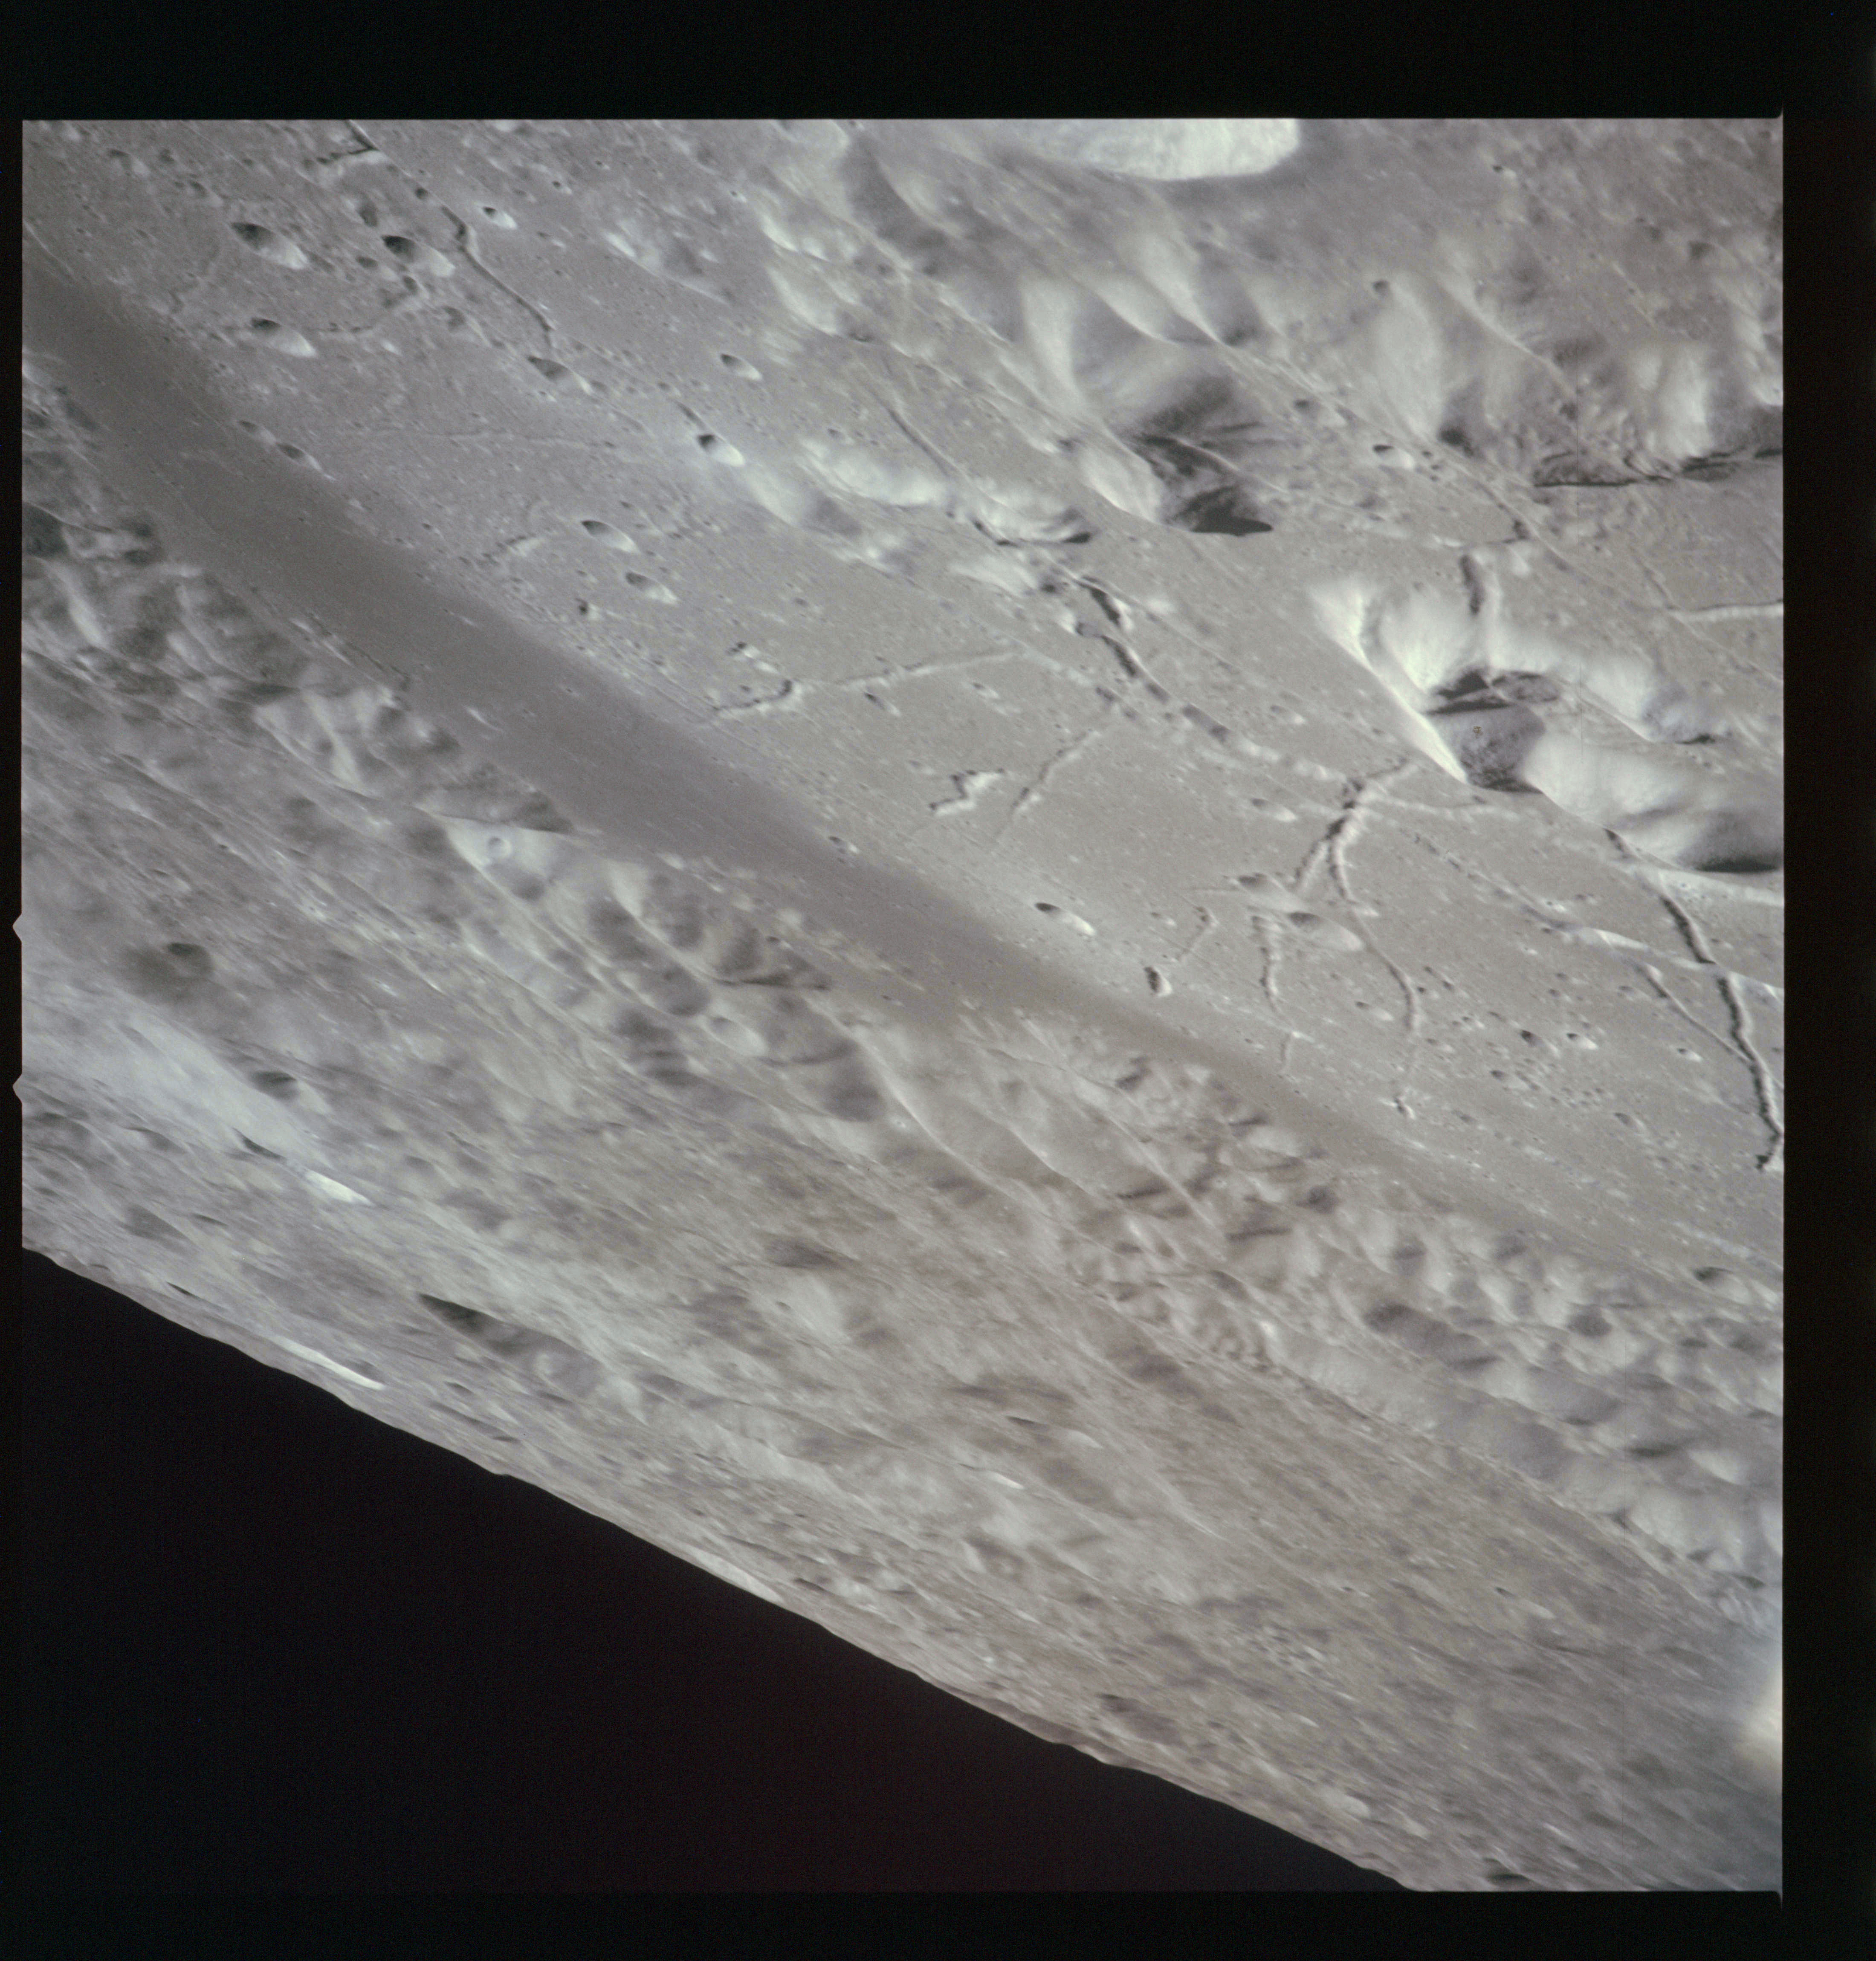
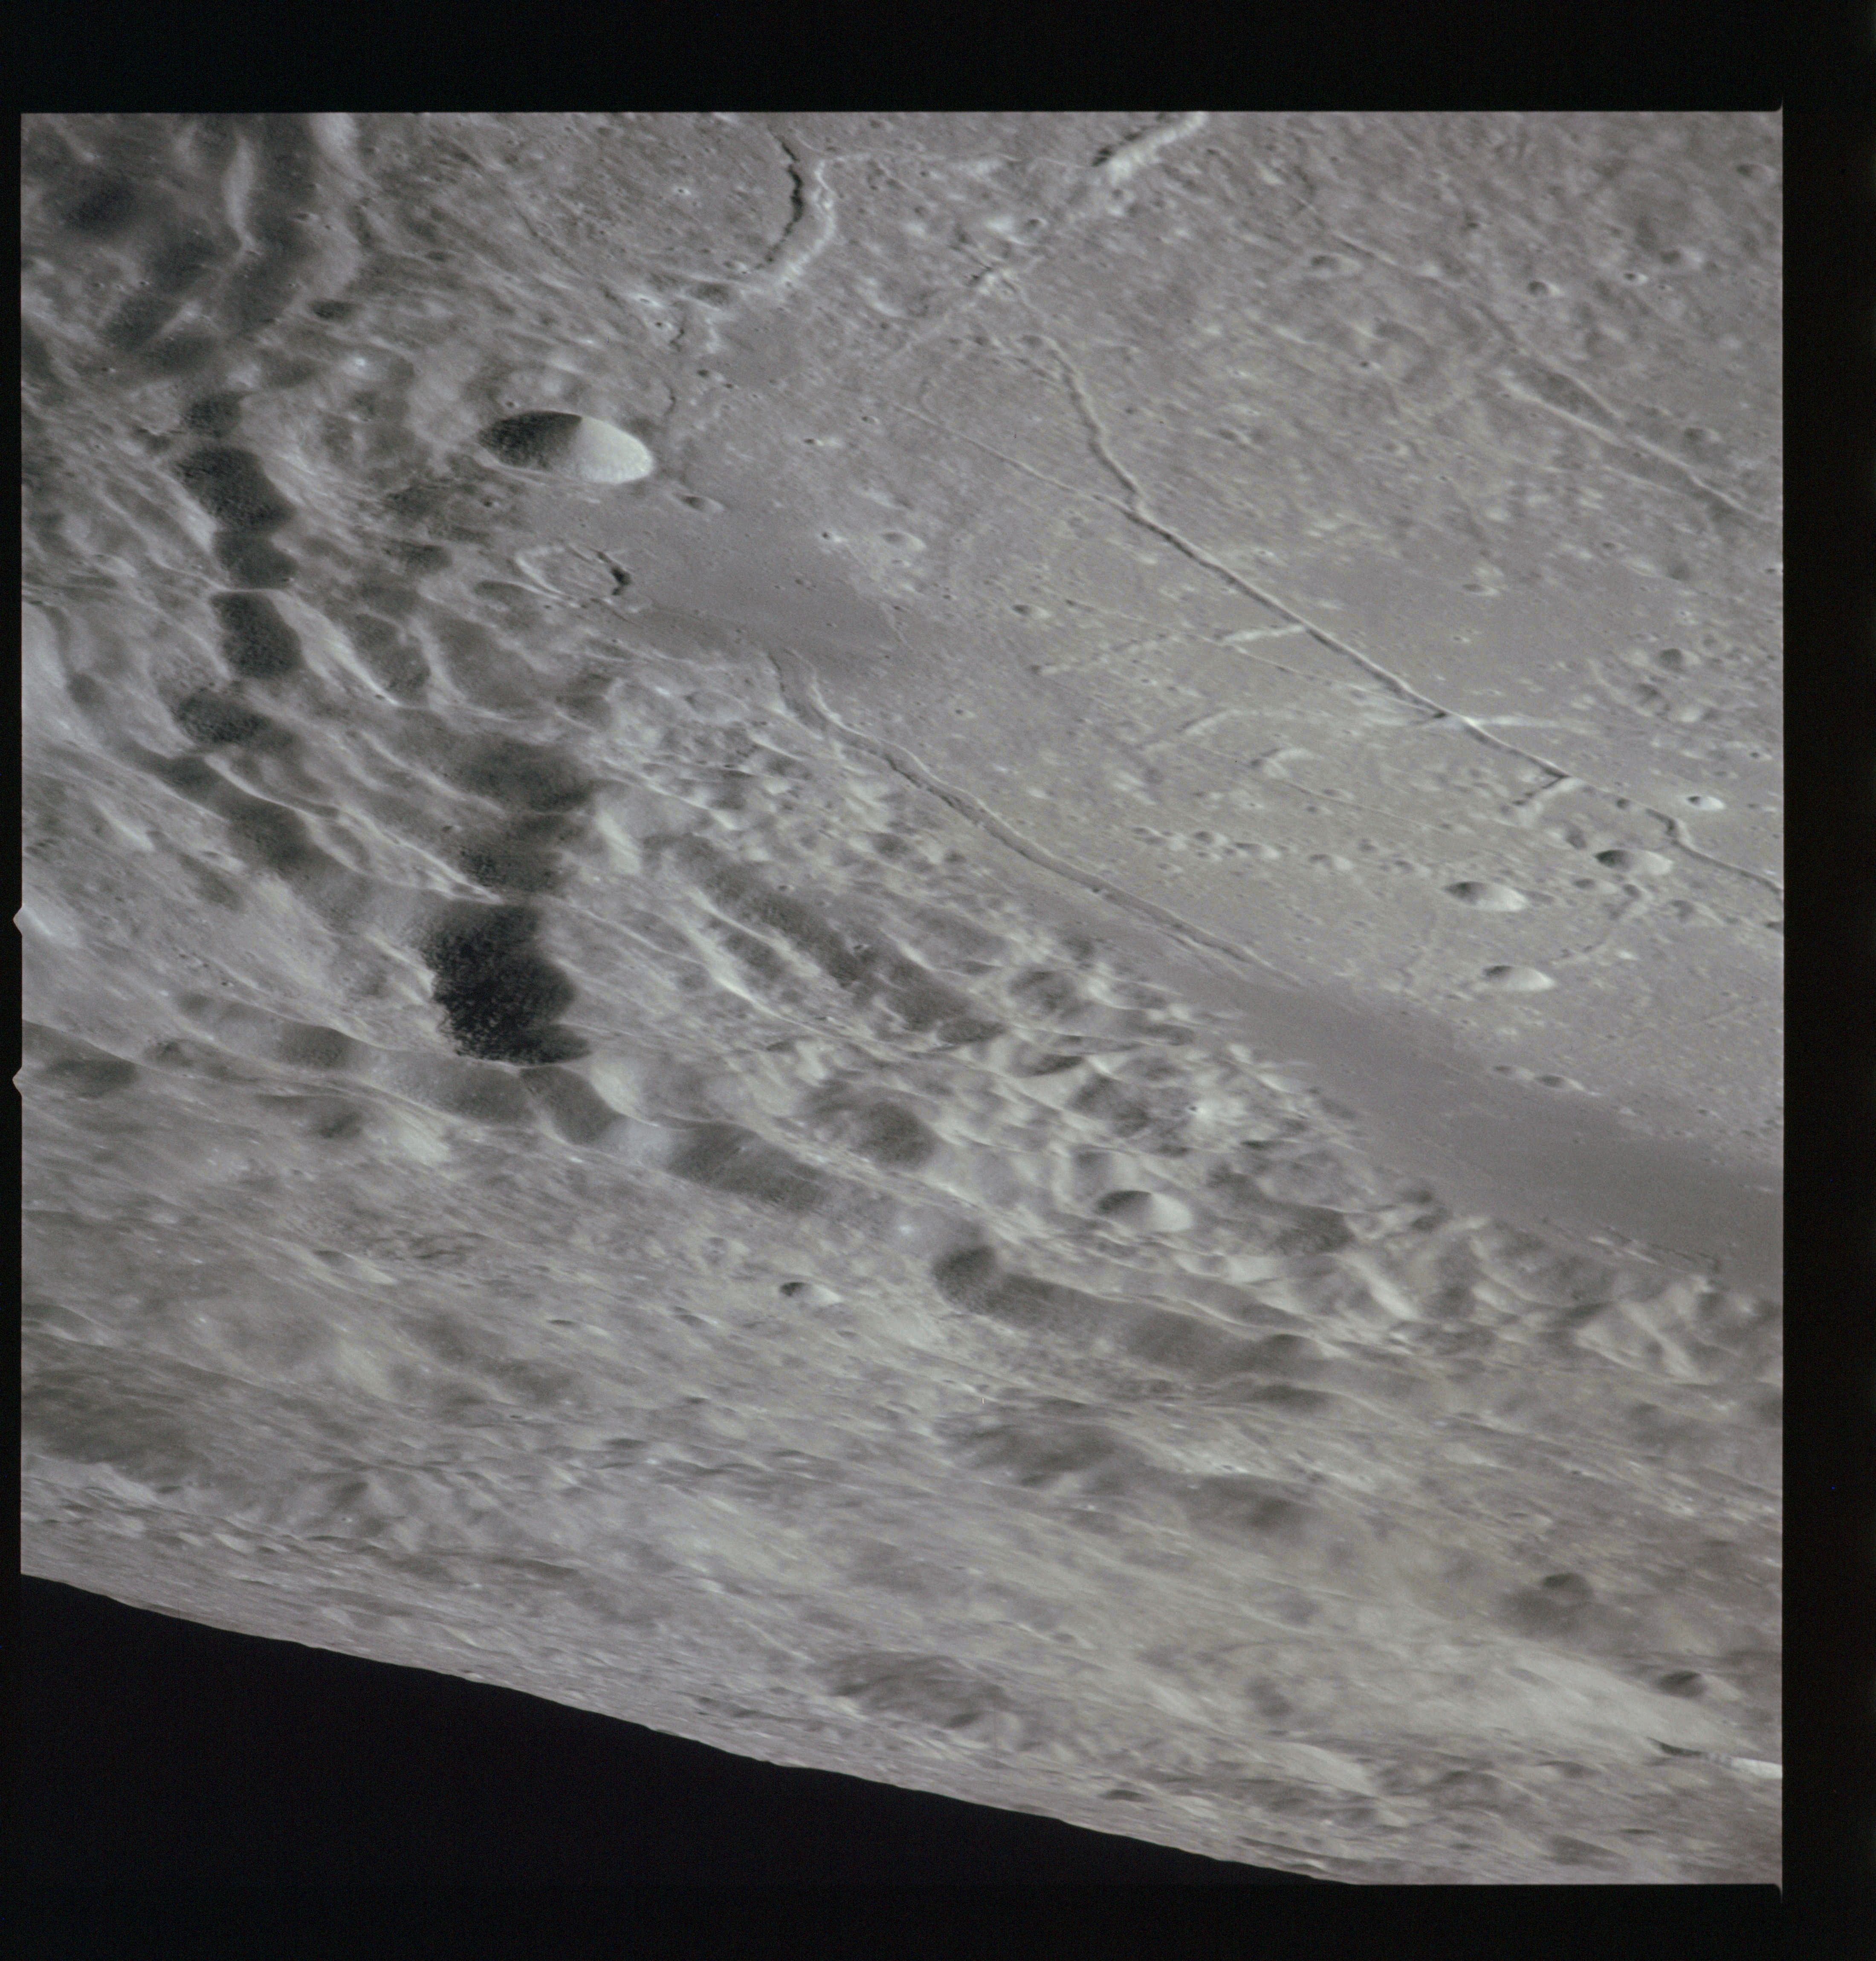
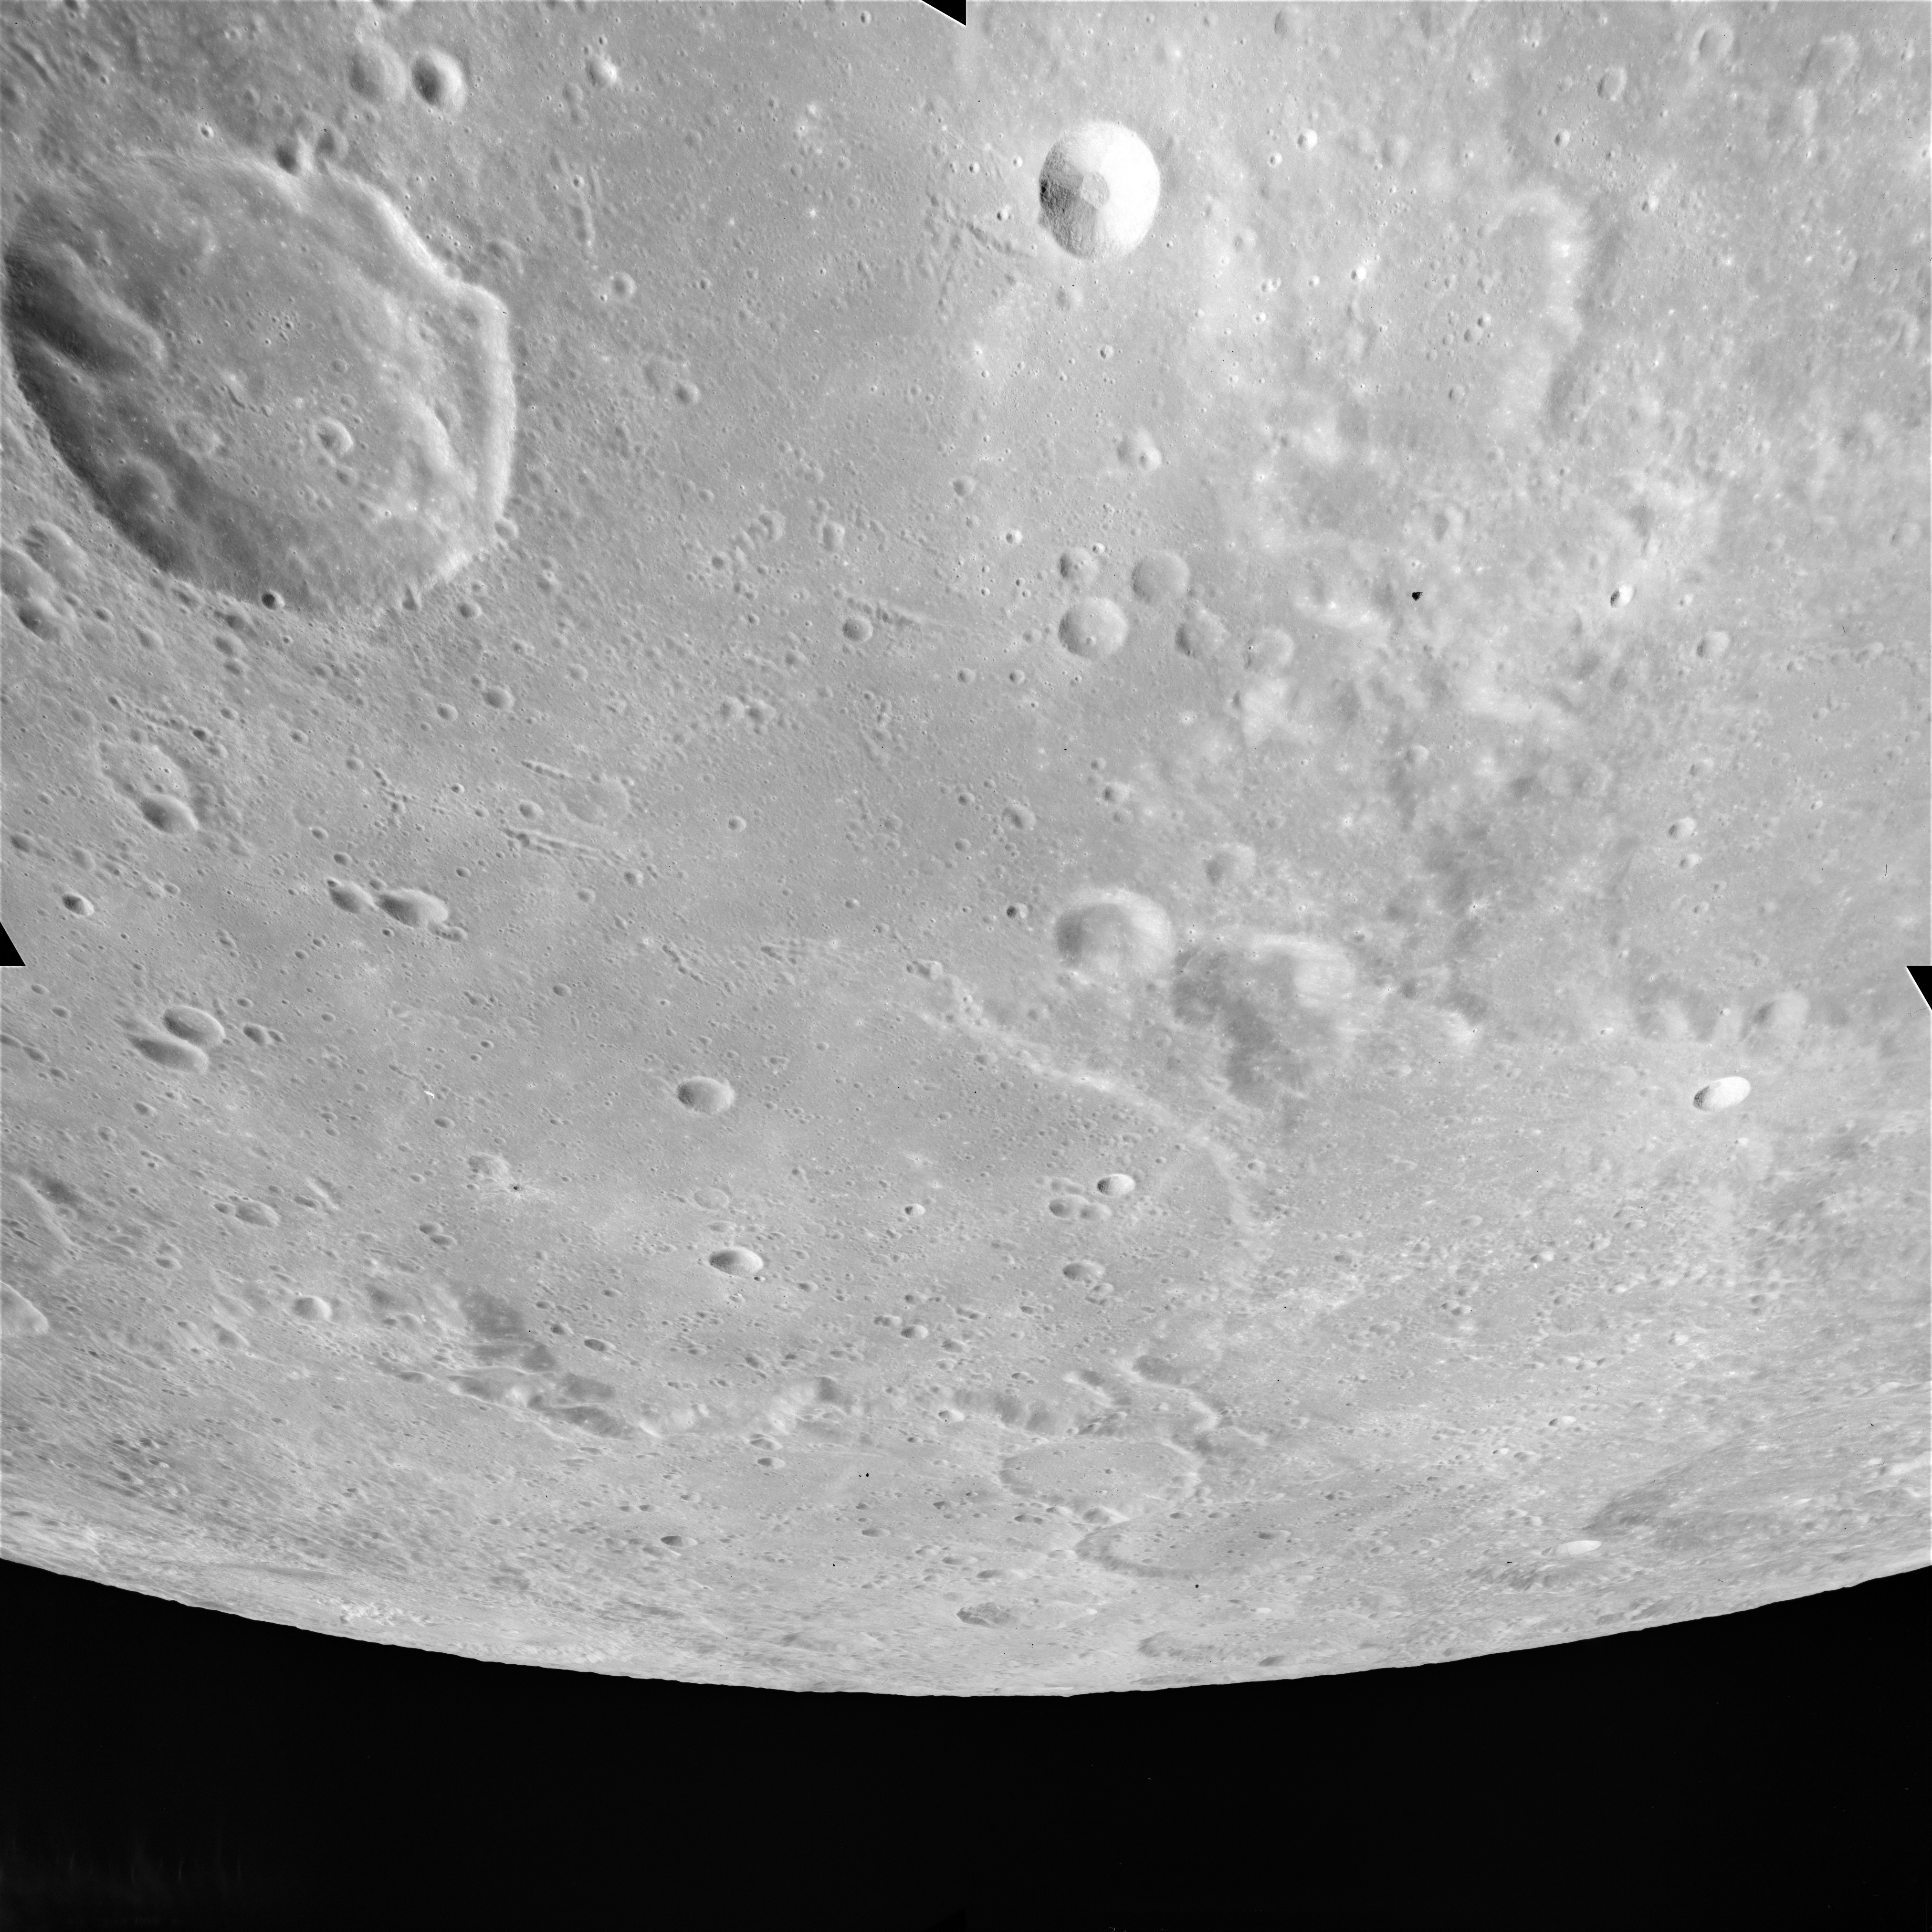
Endeavour is coasting across the prominent crater Langrenus to the south east of Mare Fecunditatis. On magazine P and using a 250-mm lens, frame AS15-93-12658 looks WNW across the mare. Langrenus FF (nearest camera) and FE (beyond and to the left) lead to the largest crater in the picture, the 13-km Lindbergh. Various light-toned rays sweep across the mare and the bright feature near the horizon and to the left is Messier.
AS15-93-12658 - Craters Lindbergh, Langrenus FE and FF - Image by NASA/Johnson Space Center.
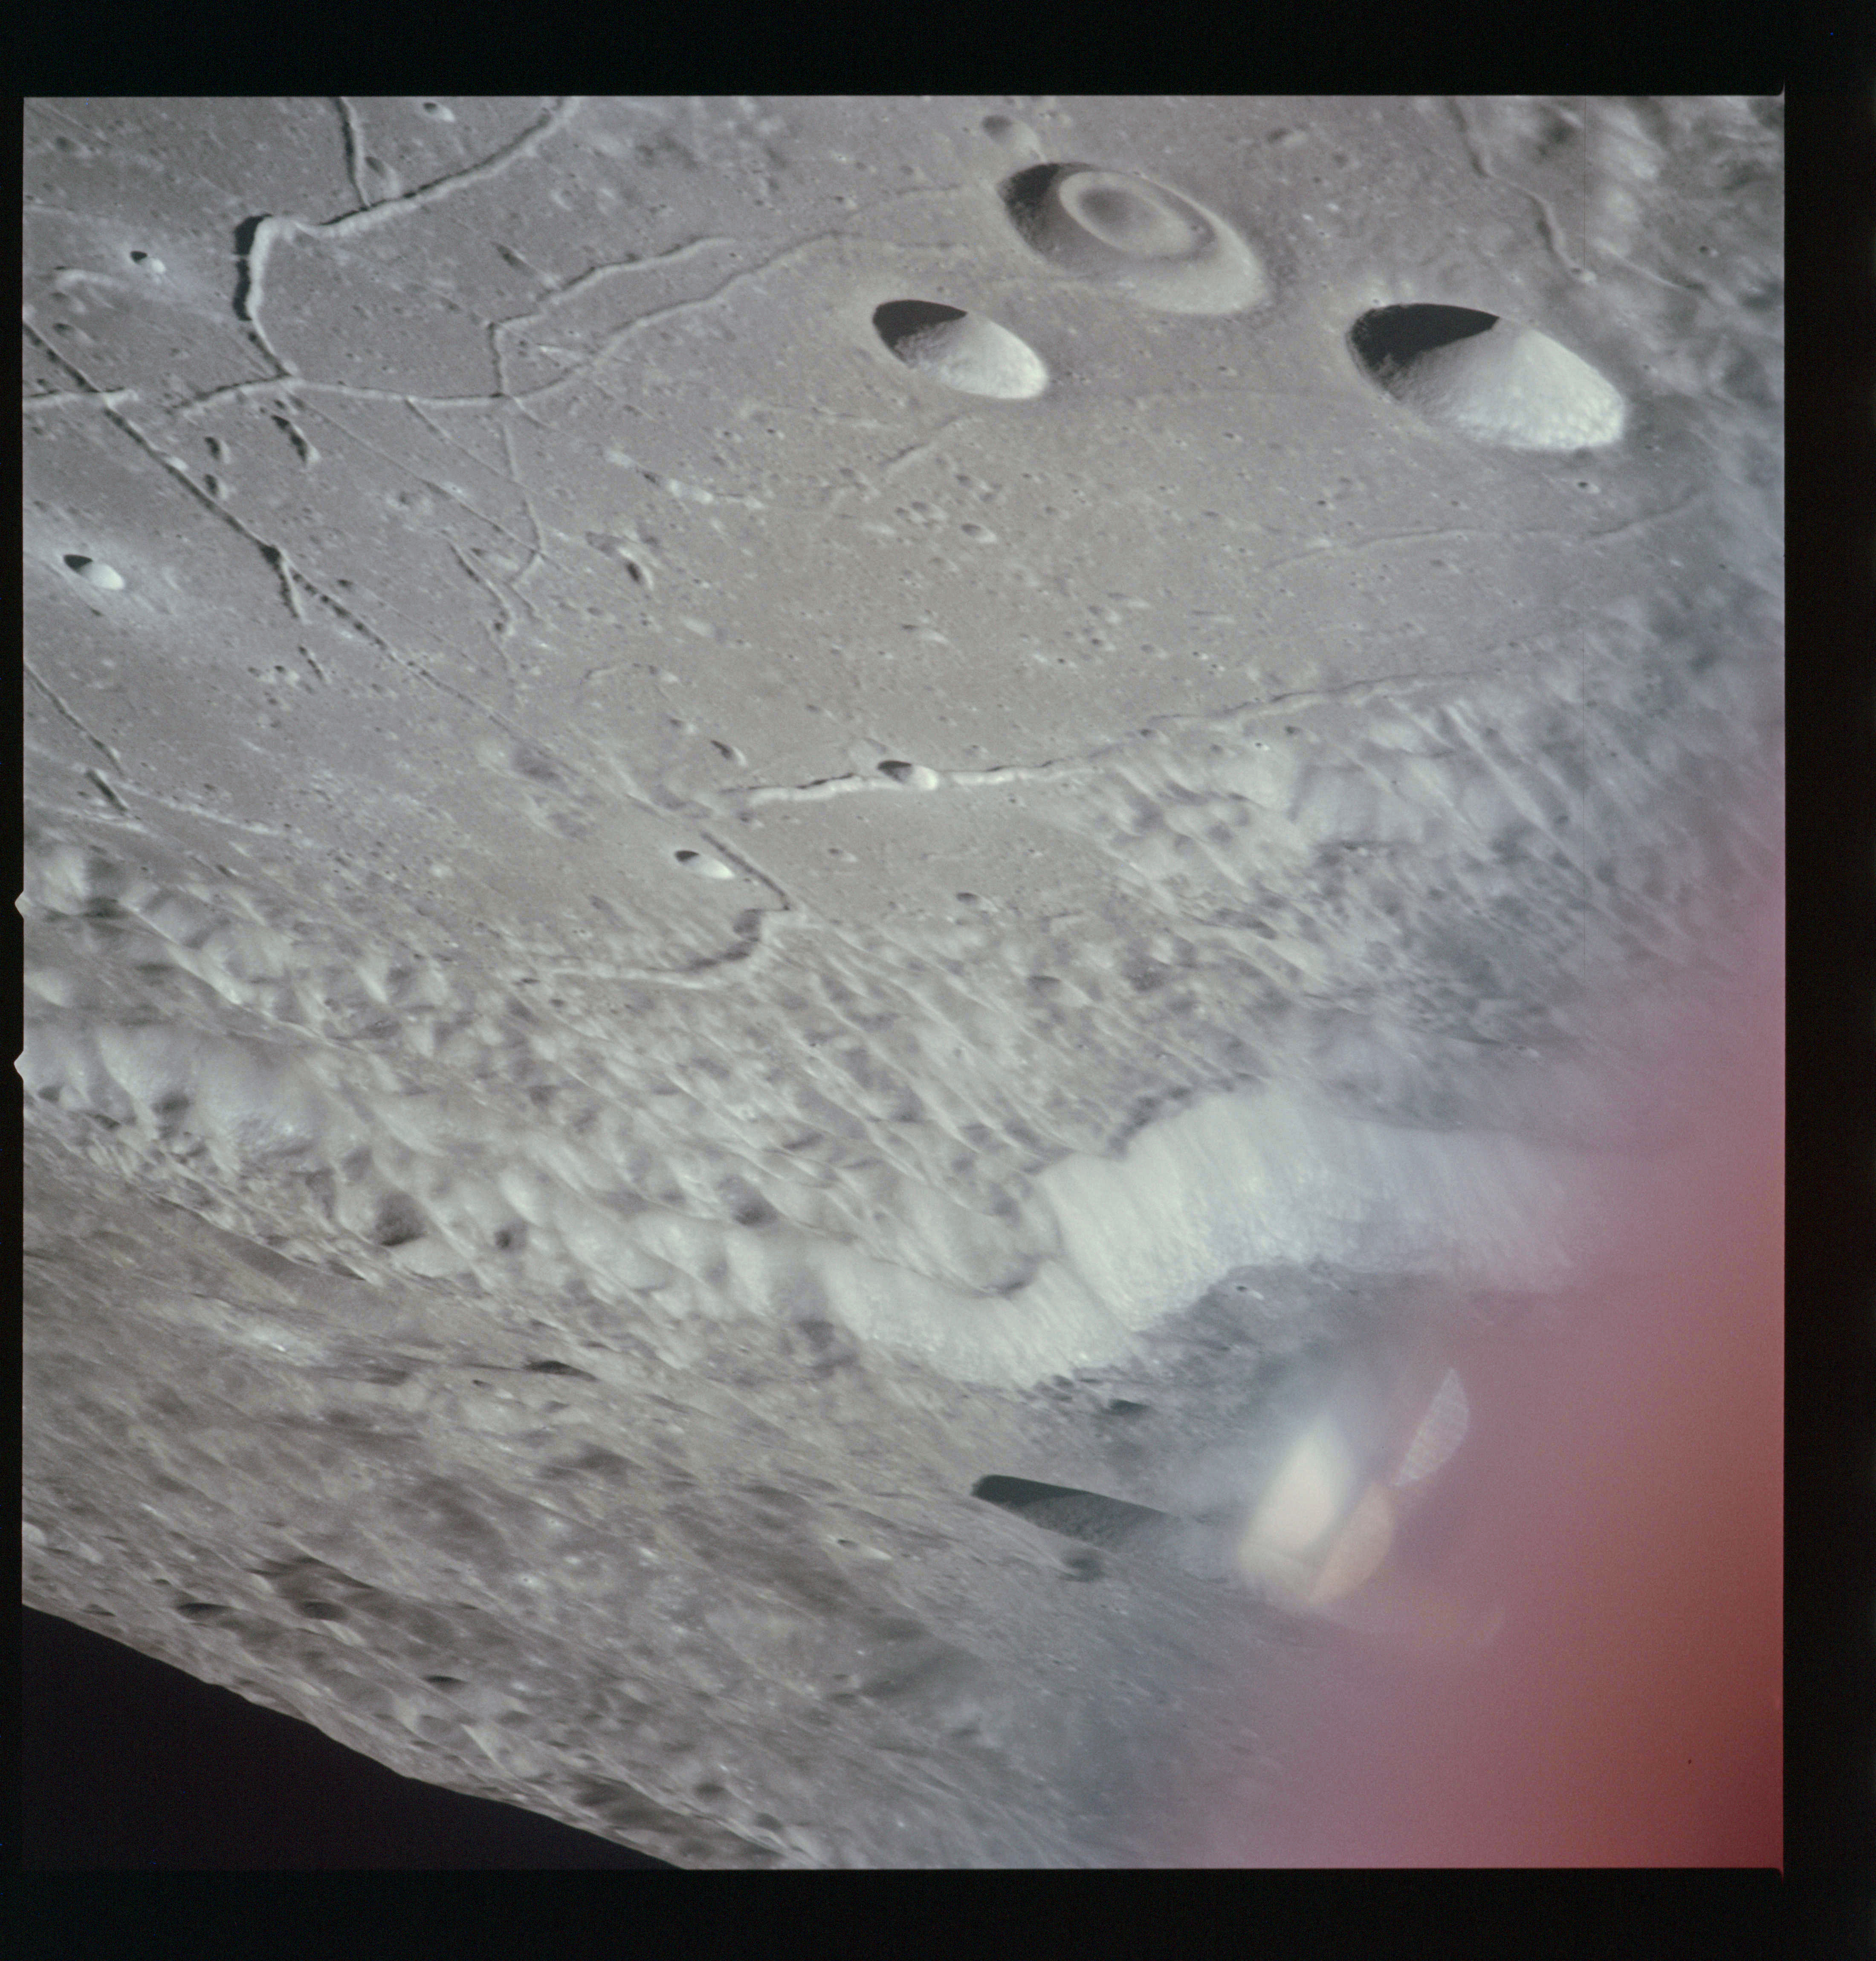
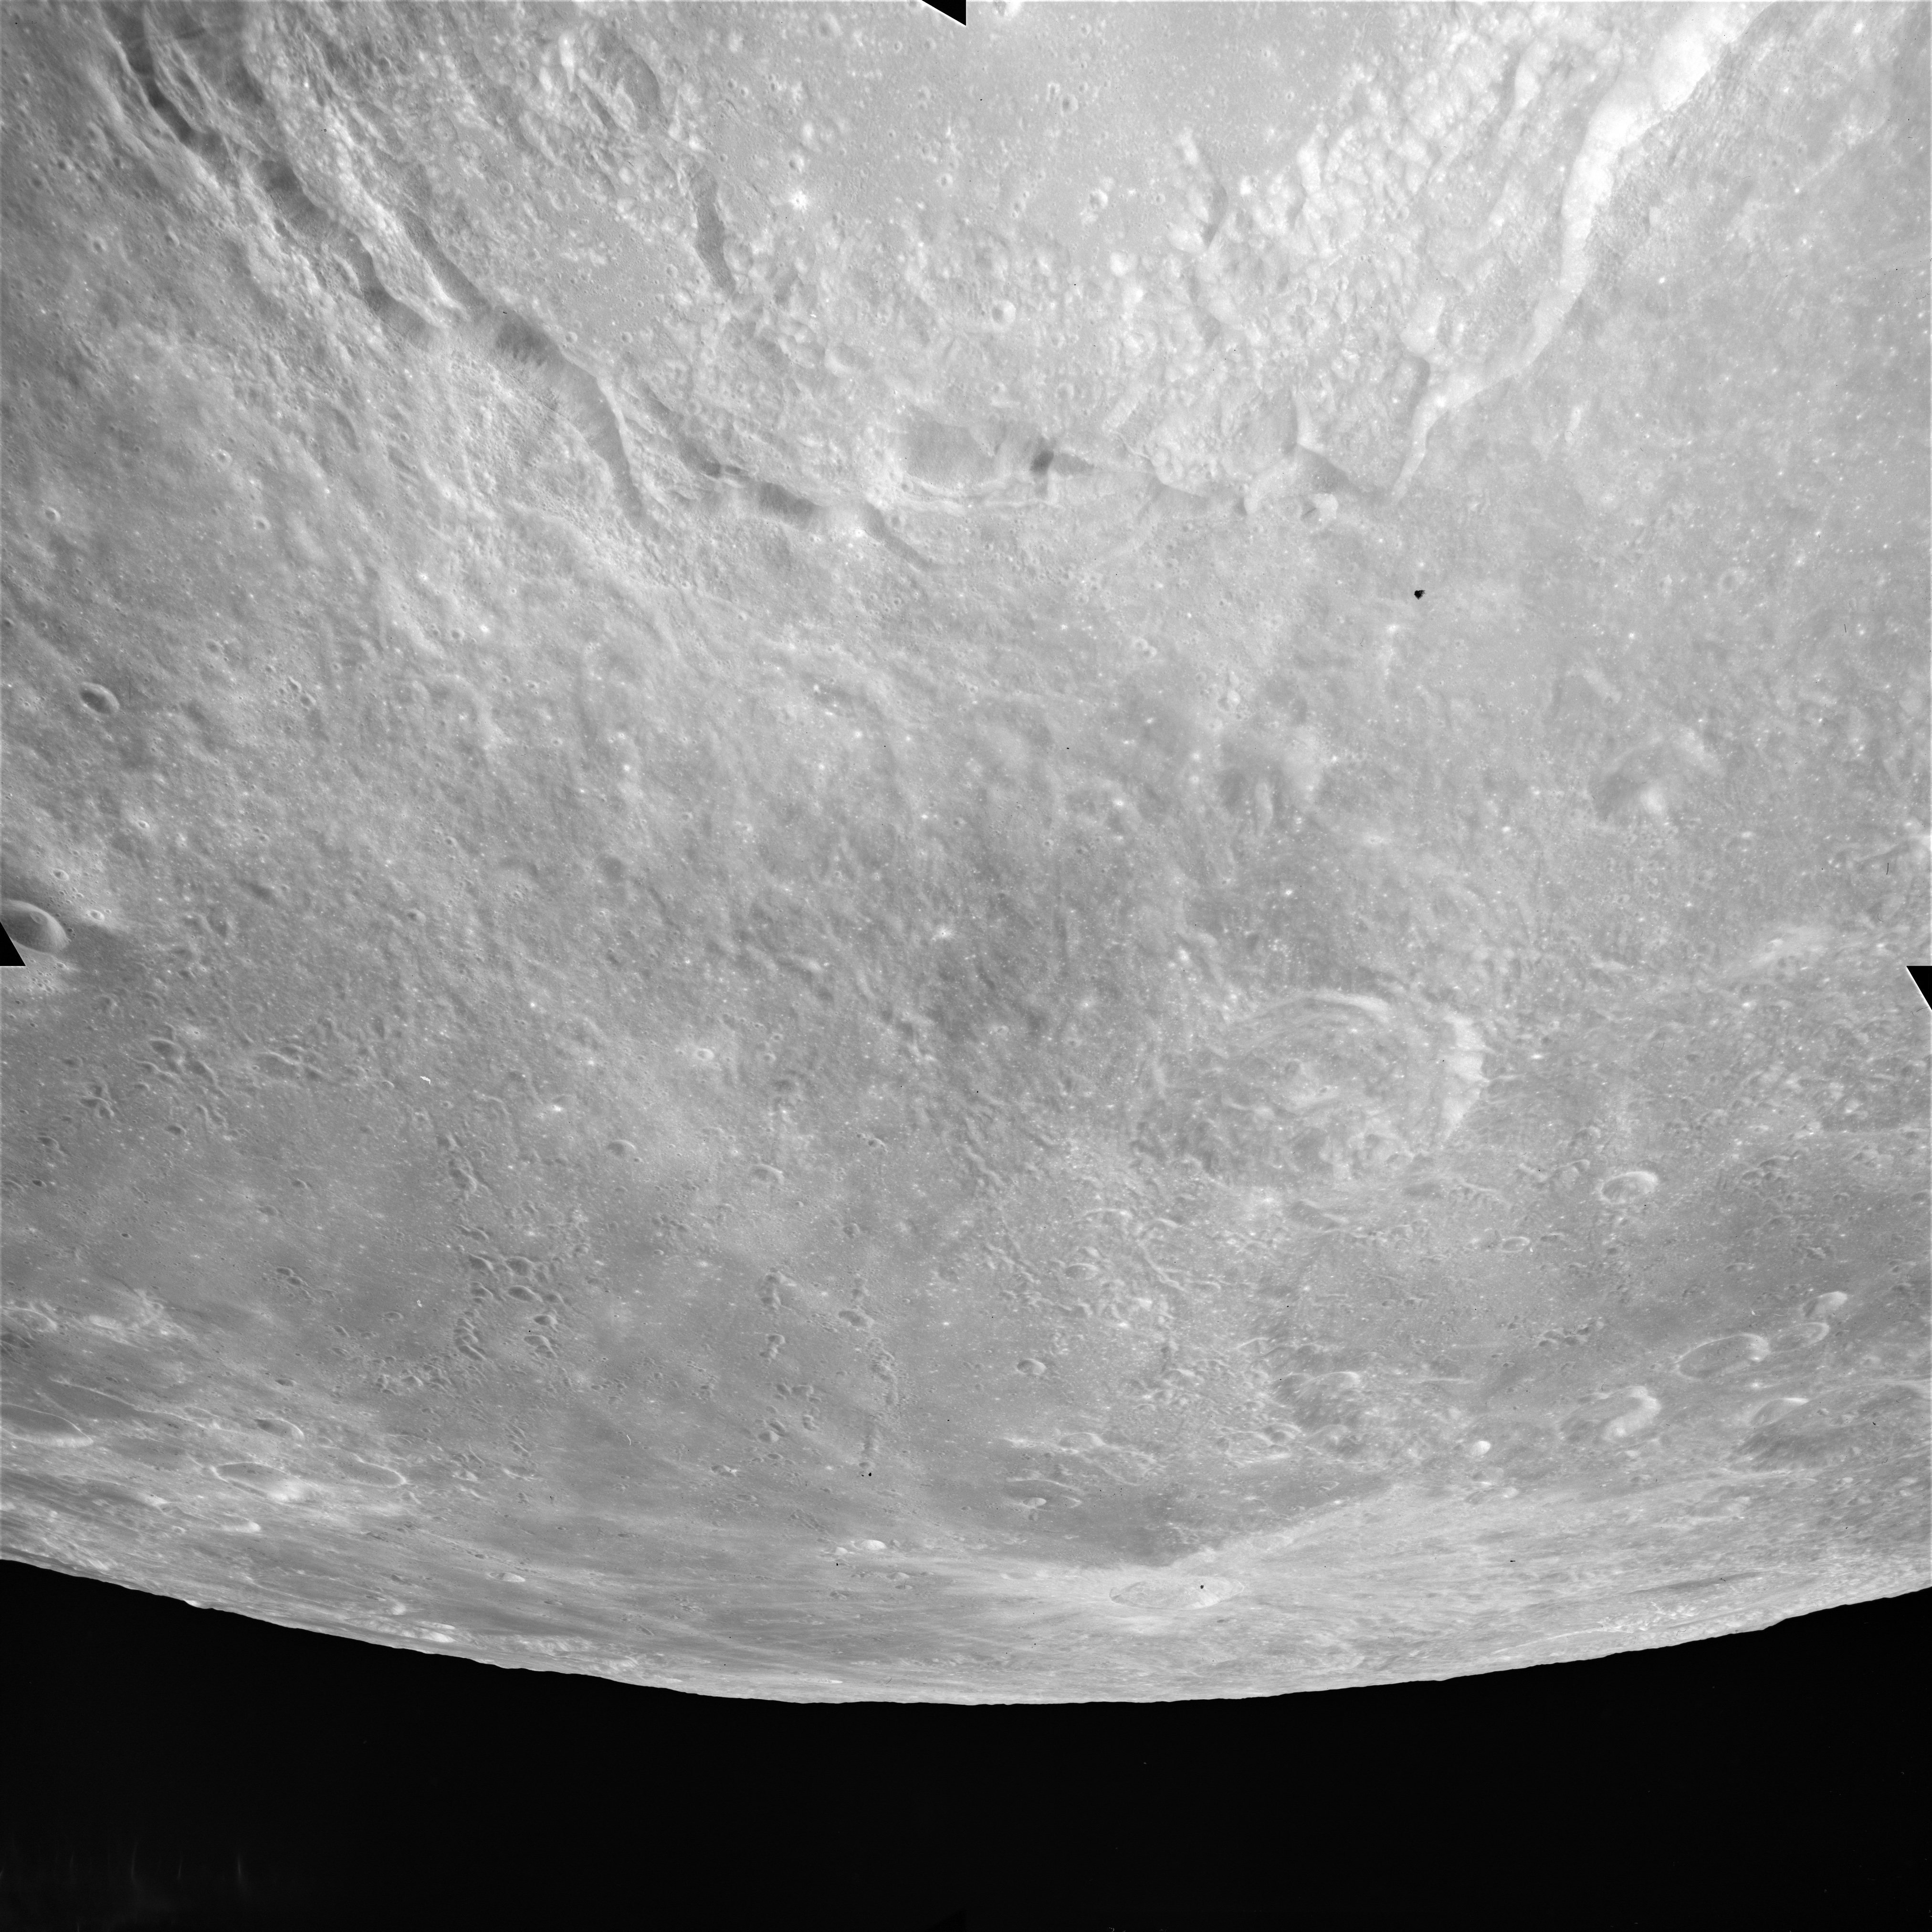
AS15-93-12659 looks down to the western rim of Langrenus showing the extensive slumping that has taken place.
AS15-93-12659 - WNW rim of crater Langrenus. Image centre at approx 7.9°S, 59.1°E - Image by NASA/Johnson Space Center.
AS15-93-12660 is another view WNW across Mare Fecunditatis to the Messier twins and their double ray system. To the left of the twins is Messier B.
AS15-93-12660 - Craters Messier, A and B - Image by NASA/Johnson Space Center.
216:37:00 Allen: Endeavour, this is Houston. We'd like Auto on the High Gain [Antenna], please, and we show your optics in the CMC Mode. We'd like that zeroed at your convenience, please. [Pause.]
216:37:19 Worden: Auto, zero.
Very long comm break.
AS15-M-2540 - South oblique Metric Camera image of Mare Fecunditatis including craters Lubbock, Gutenberg and Goclenius. Image taken at about 216:39. (250 megapixel version), (labelled version) - Image by NASA/ASU.
At 216:40, the Panoramic Camera is powered for a few minutes while Mission Control check its health by telemetry. Once happy, they will ask for it to be switched off again.
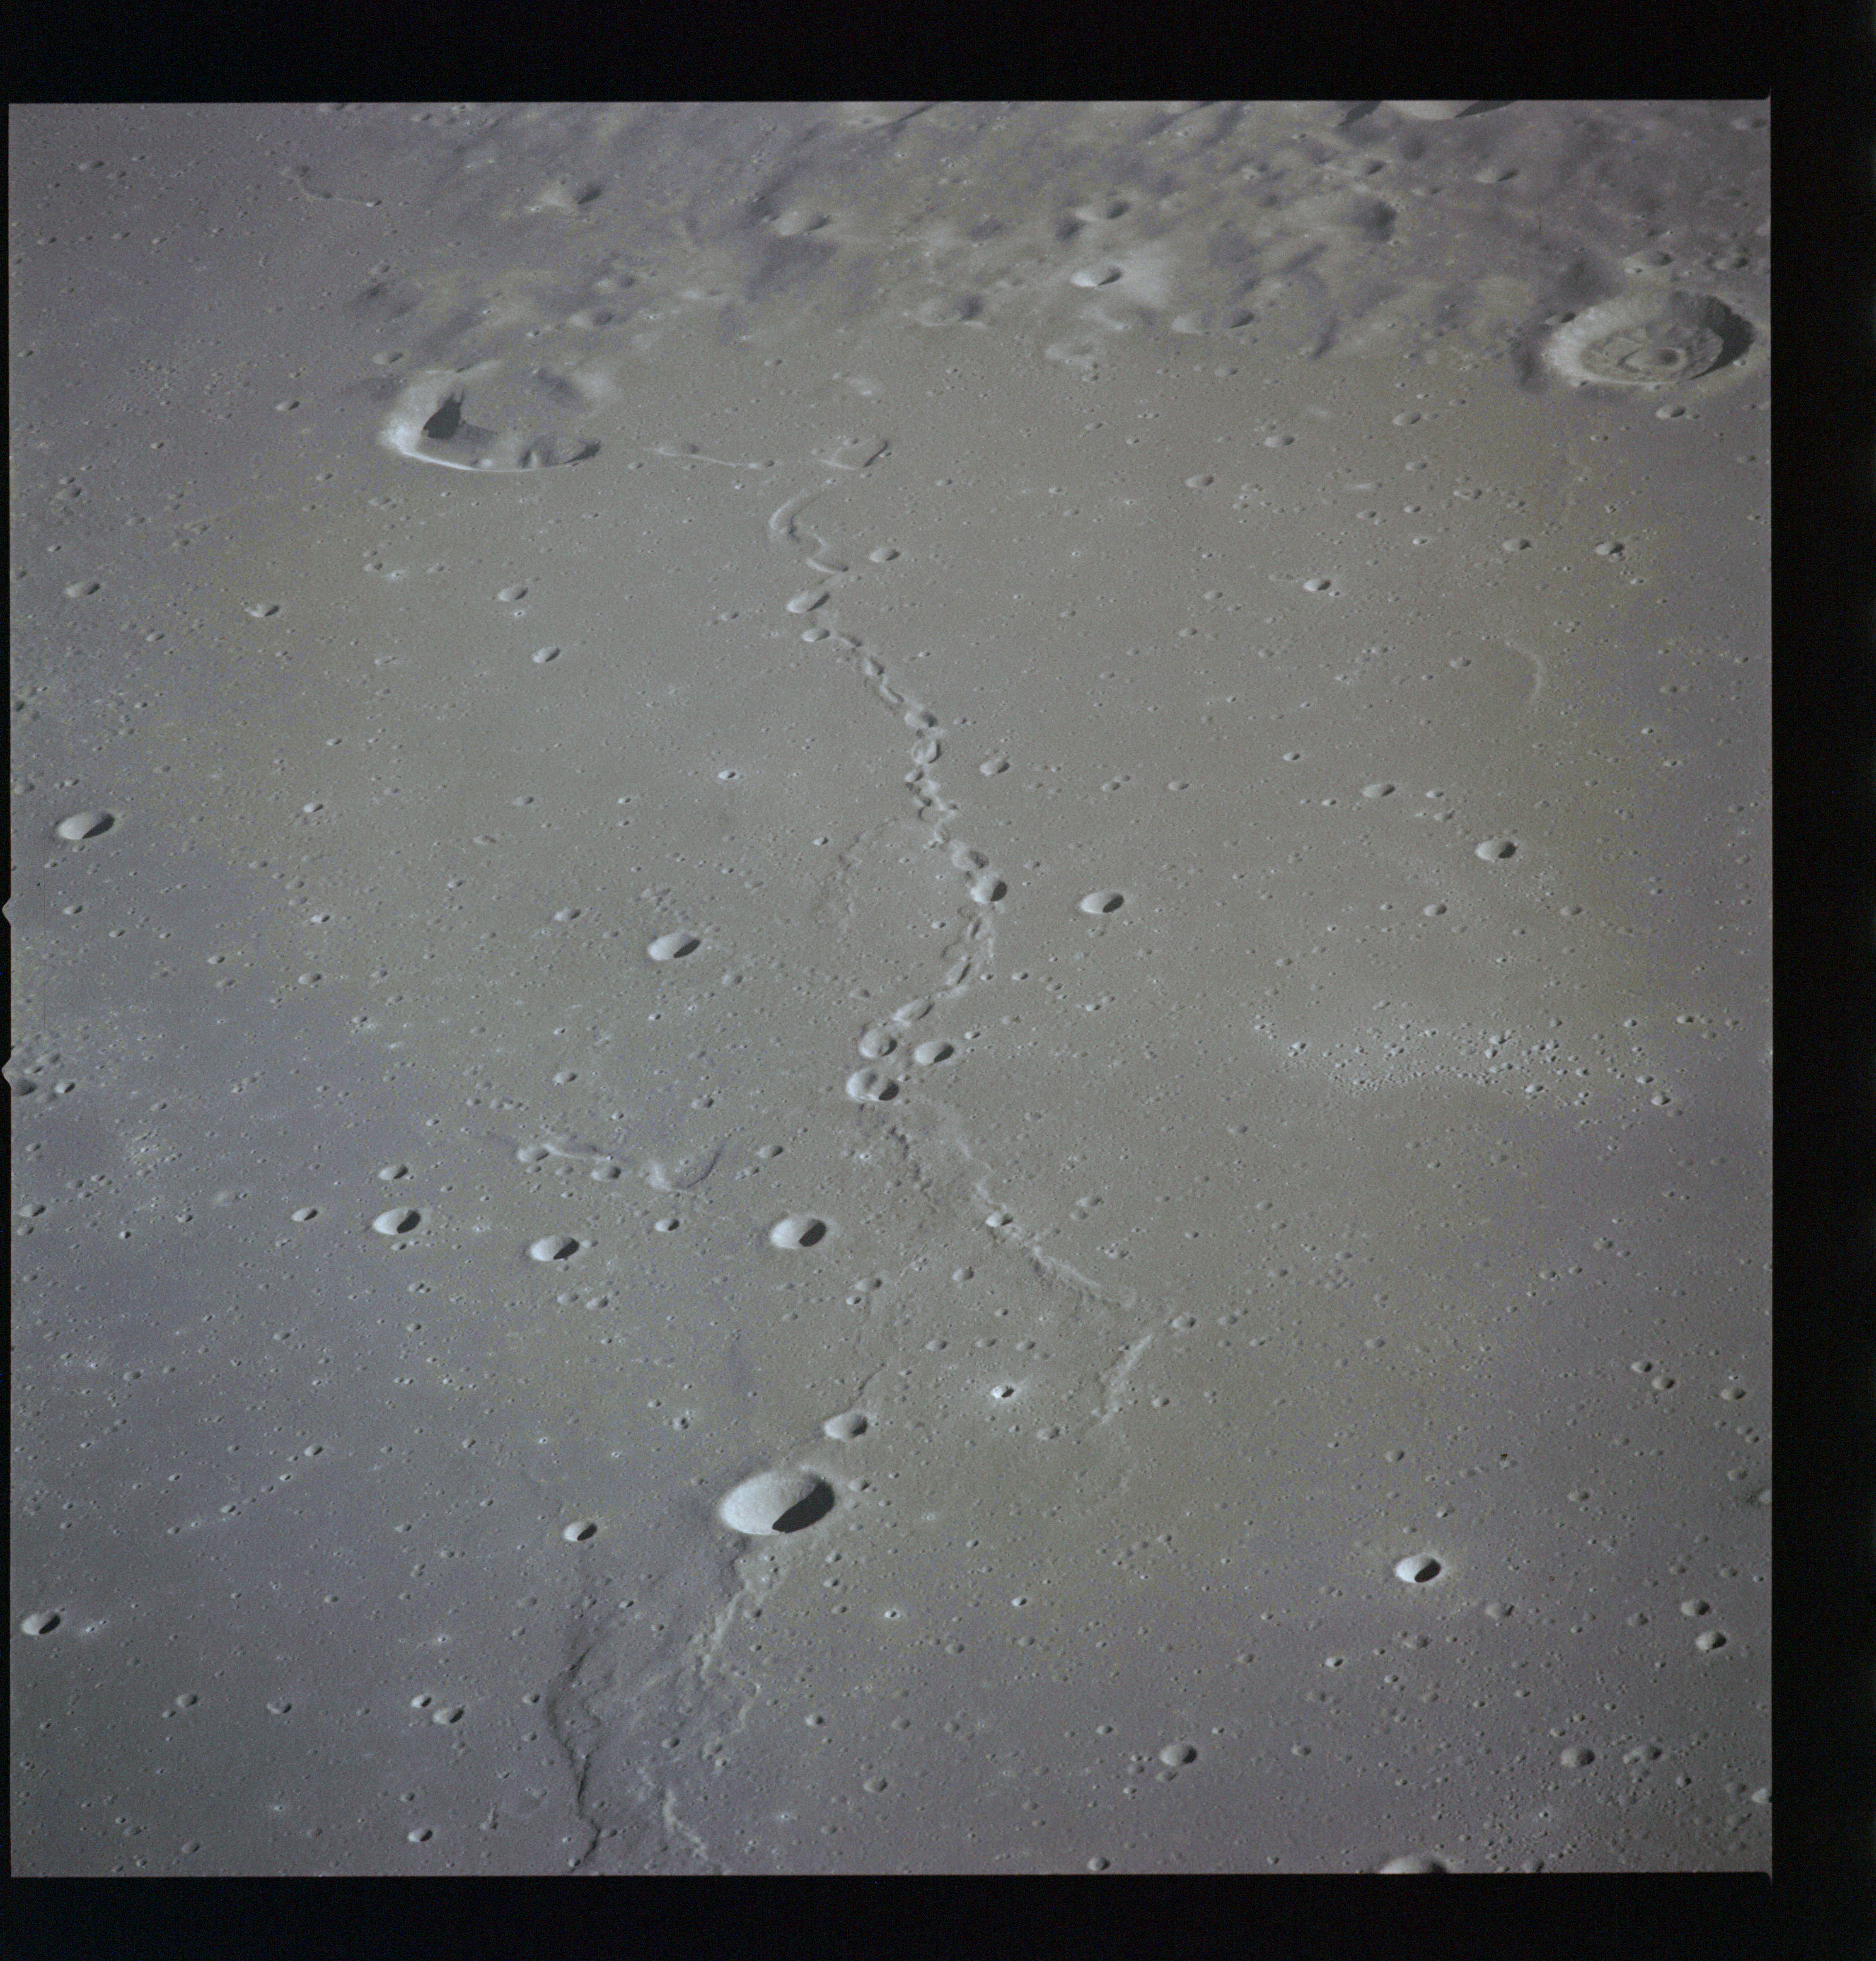
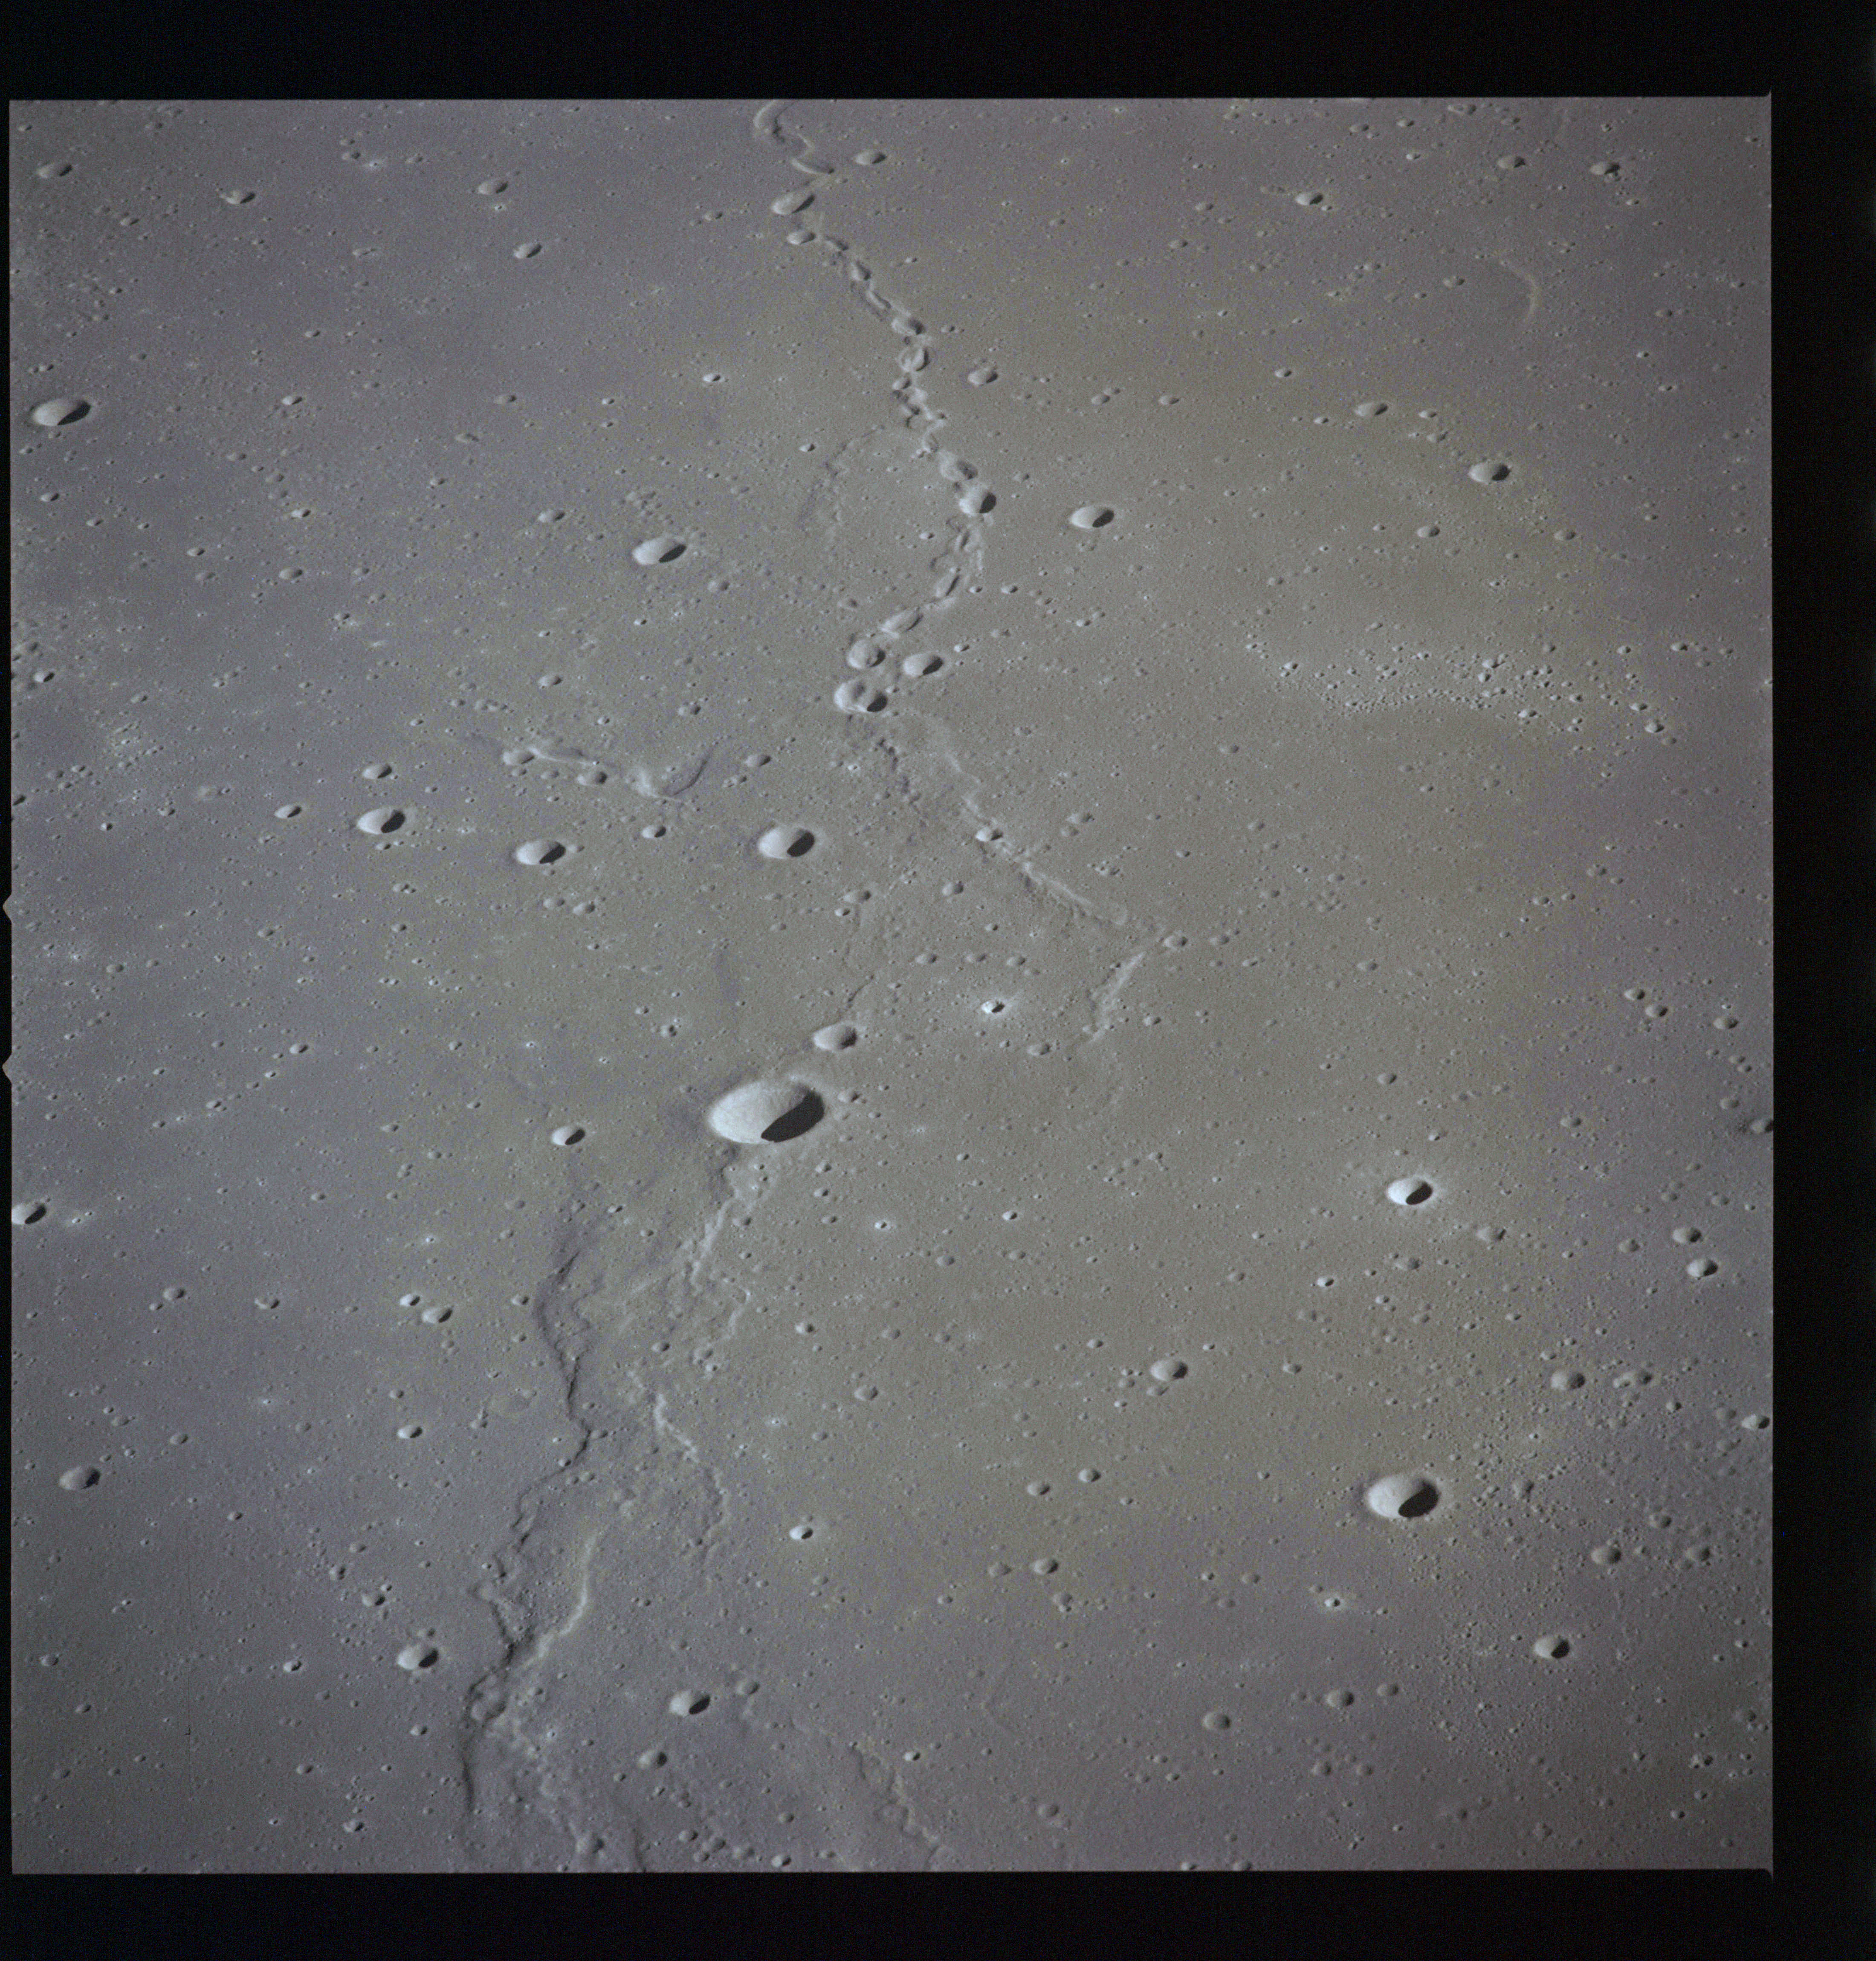
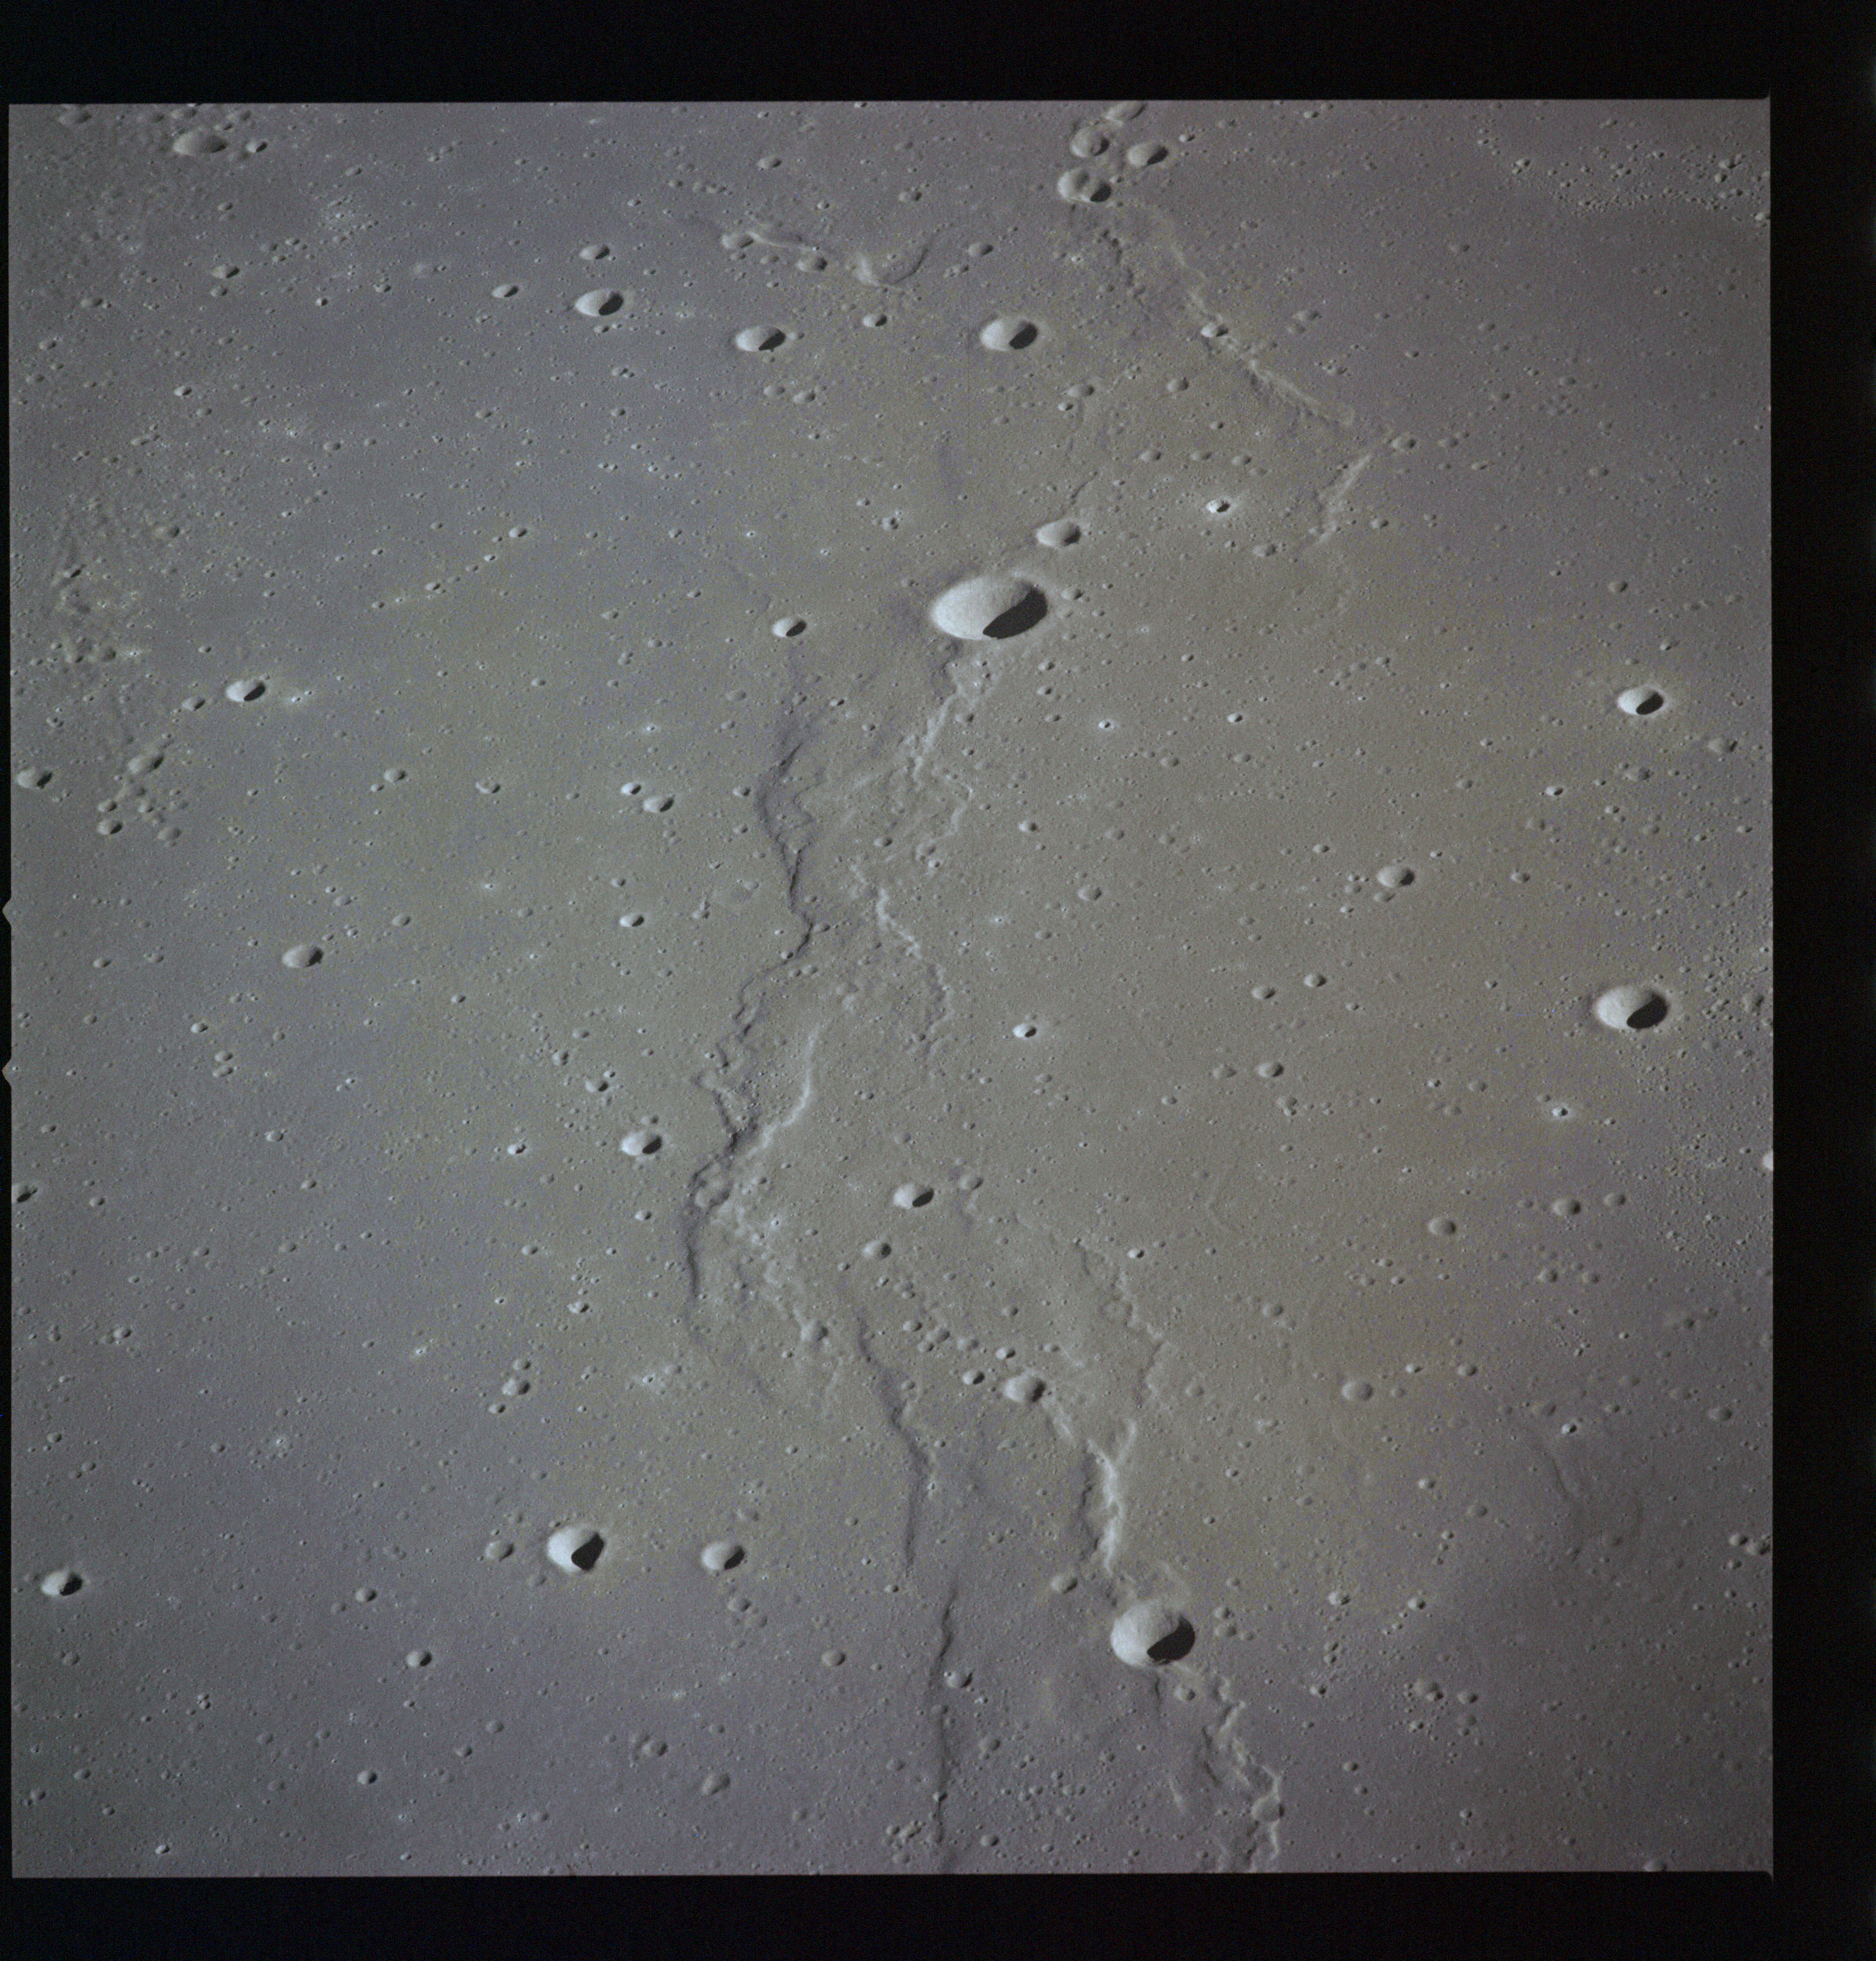
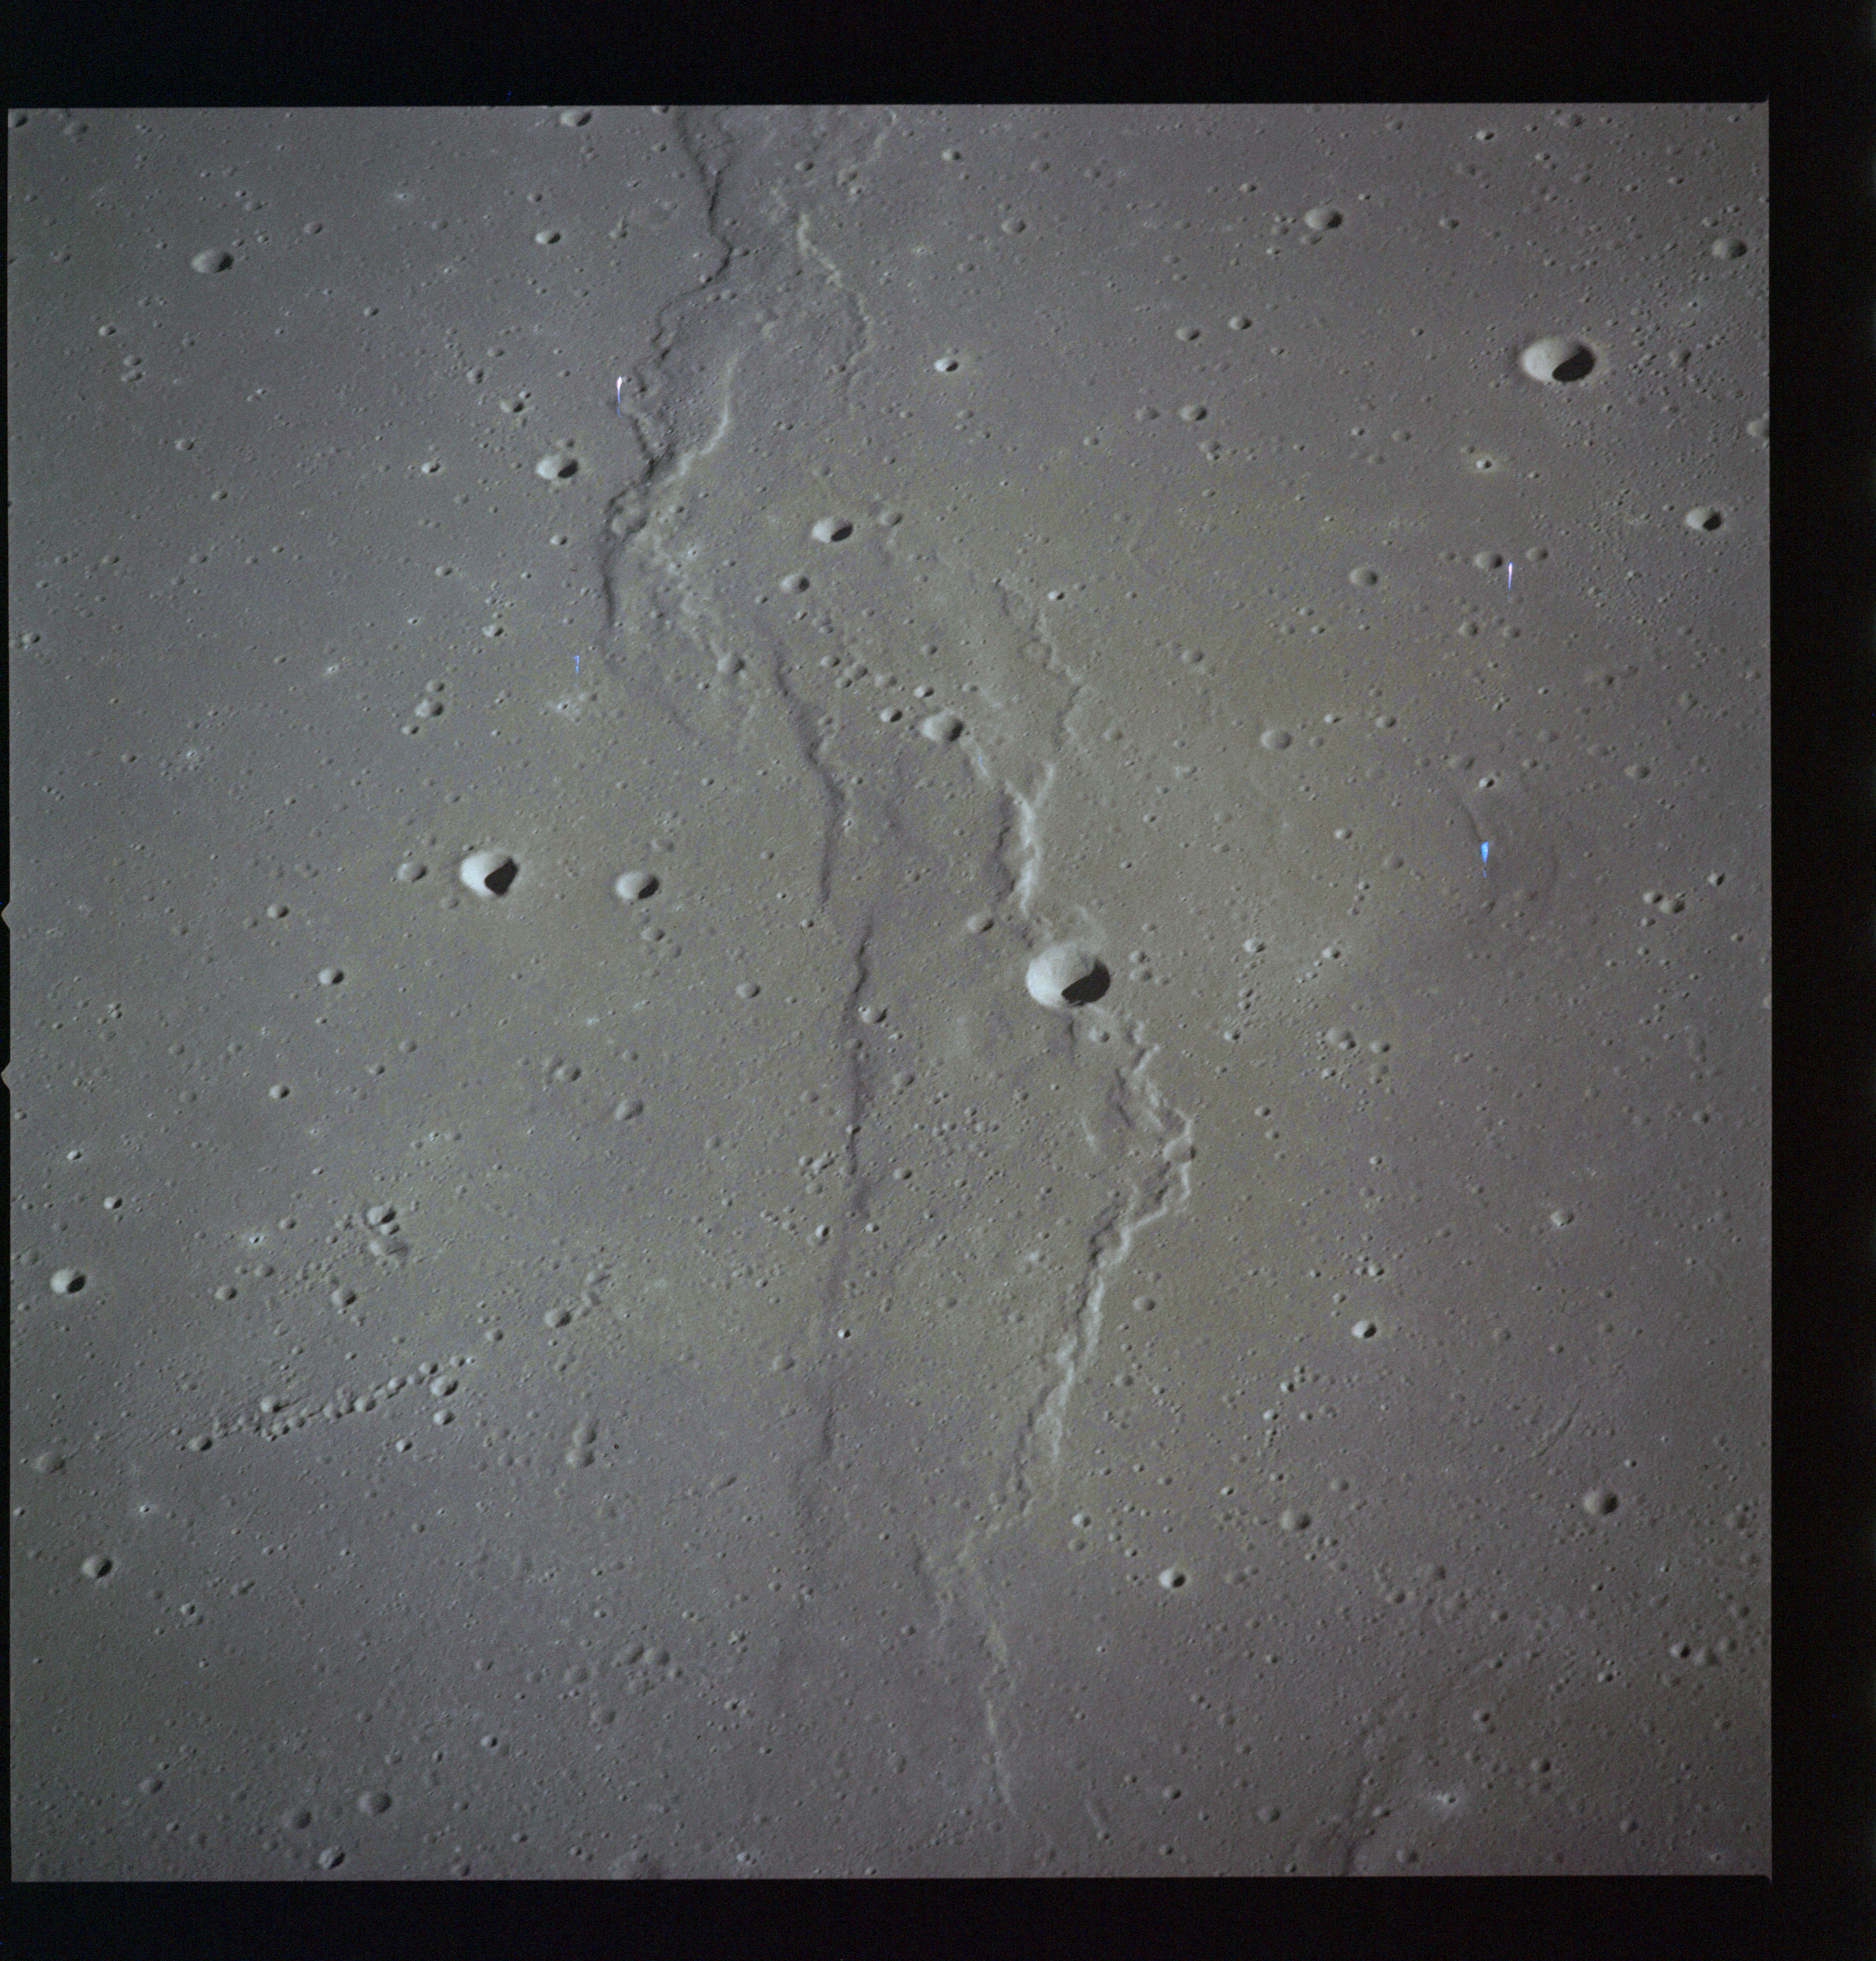
AS15-93-12661, 12662 and 12663 are taken at the end of the double ray from Messier, where it meets the highlands bordering Fecunditatis. A distinctly pear-shaped crater, Lubbock H, is visible along with an extension to the Rimae Goclenius system of rilles.
AS15-93-12661 - Crater Lubbock H - Image by NASA/Johnson Space Center.
AS15-93-12662 - Crater Lubbock H - Image by NASA/Johnson Space Center.
AS15-93-12663 - Crater Lubbock H - Image by NASA/Johnson Space Center.
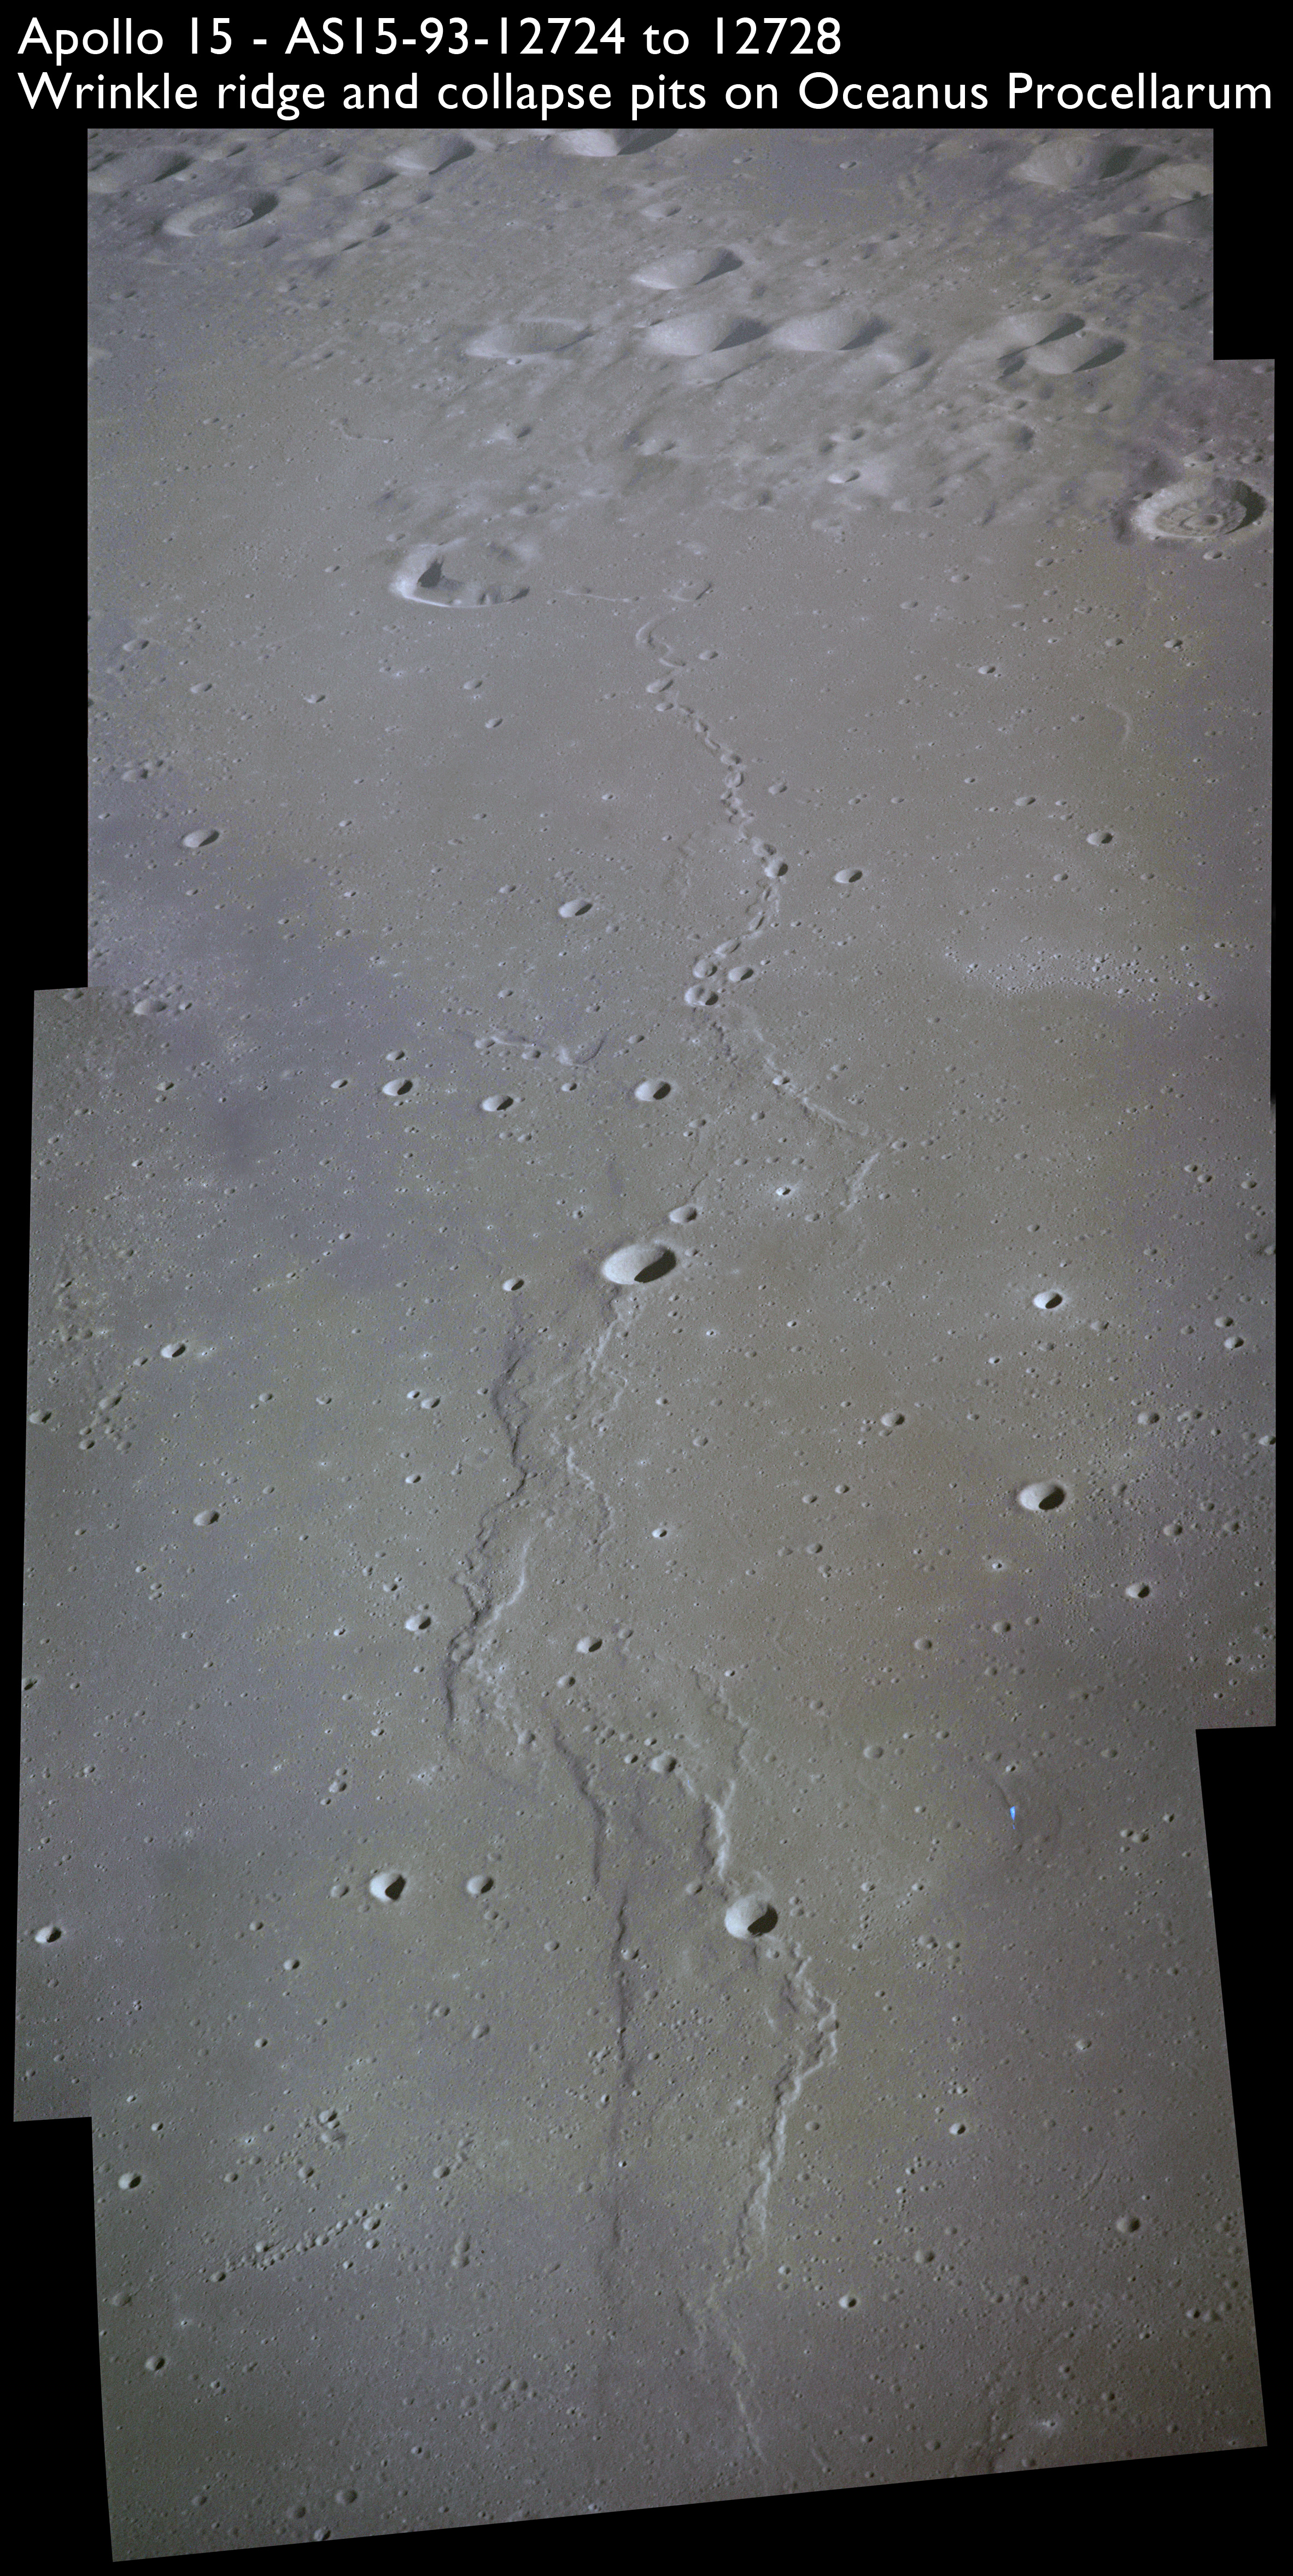
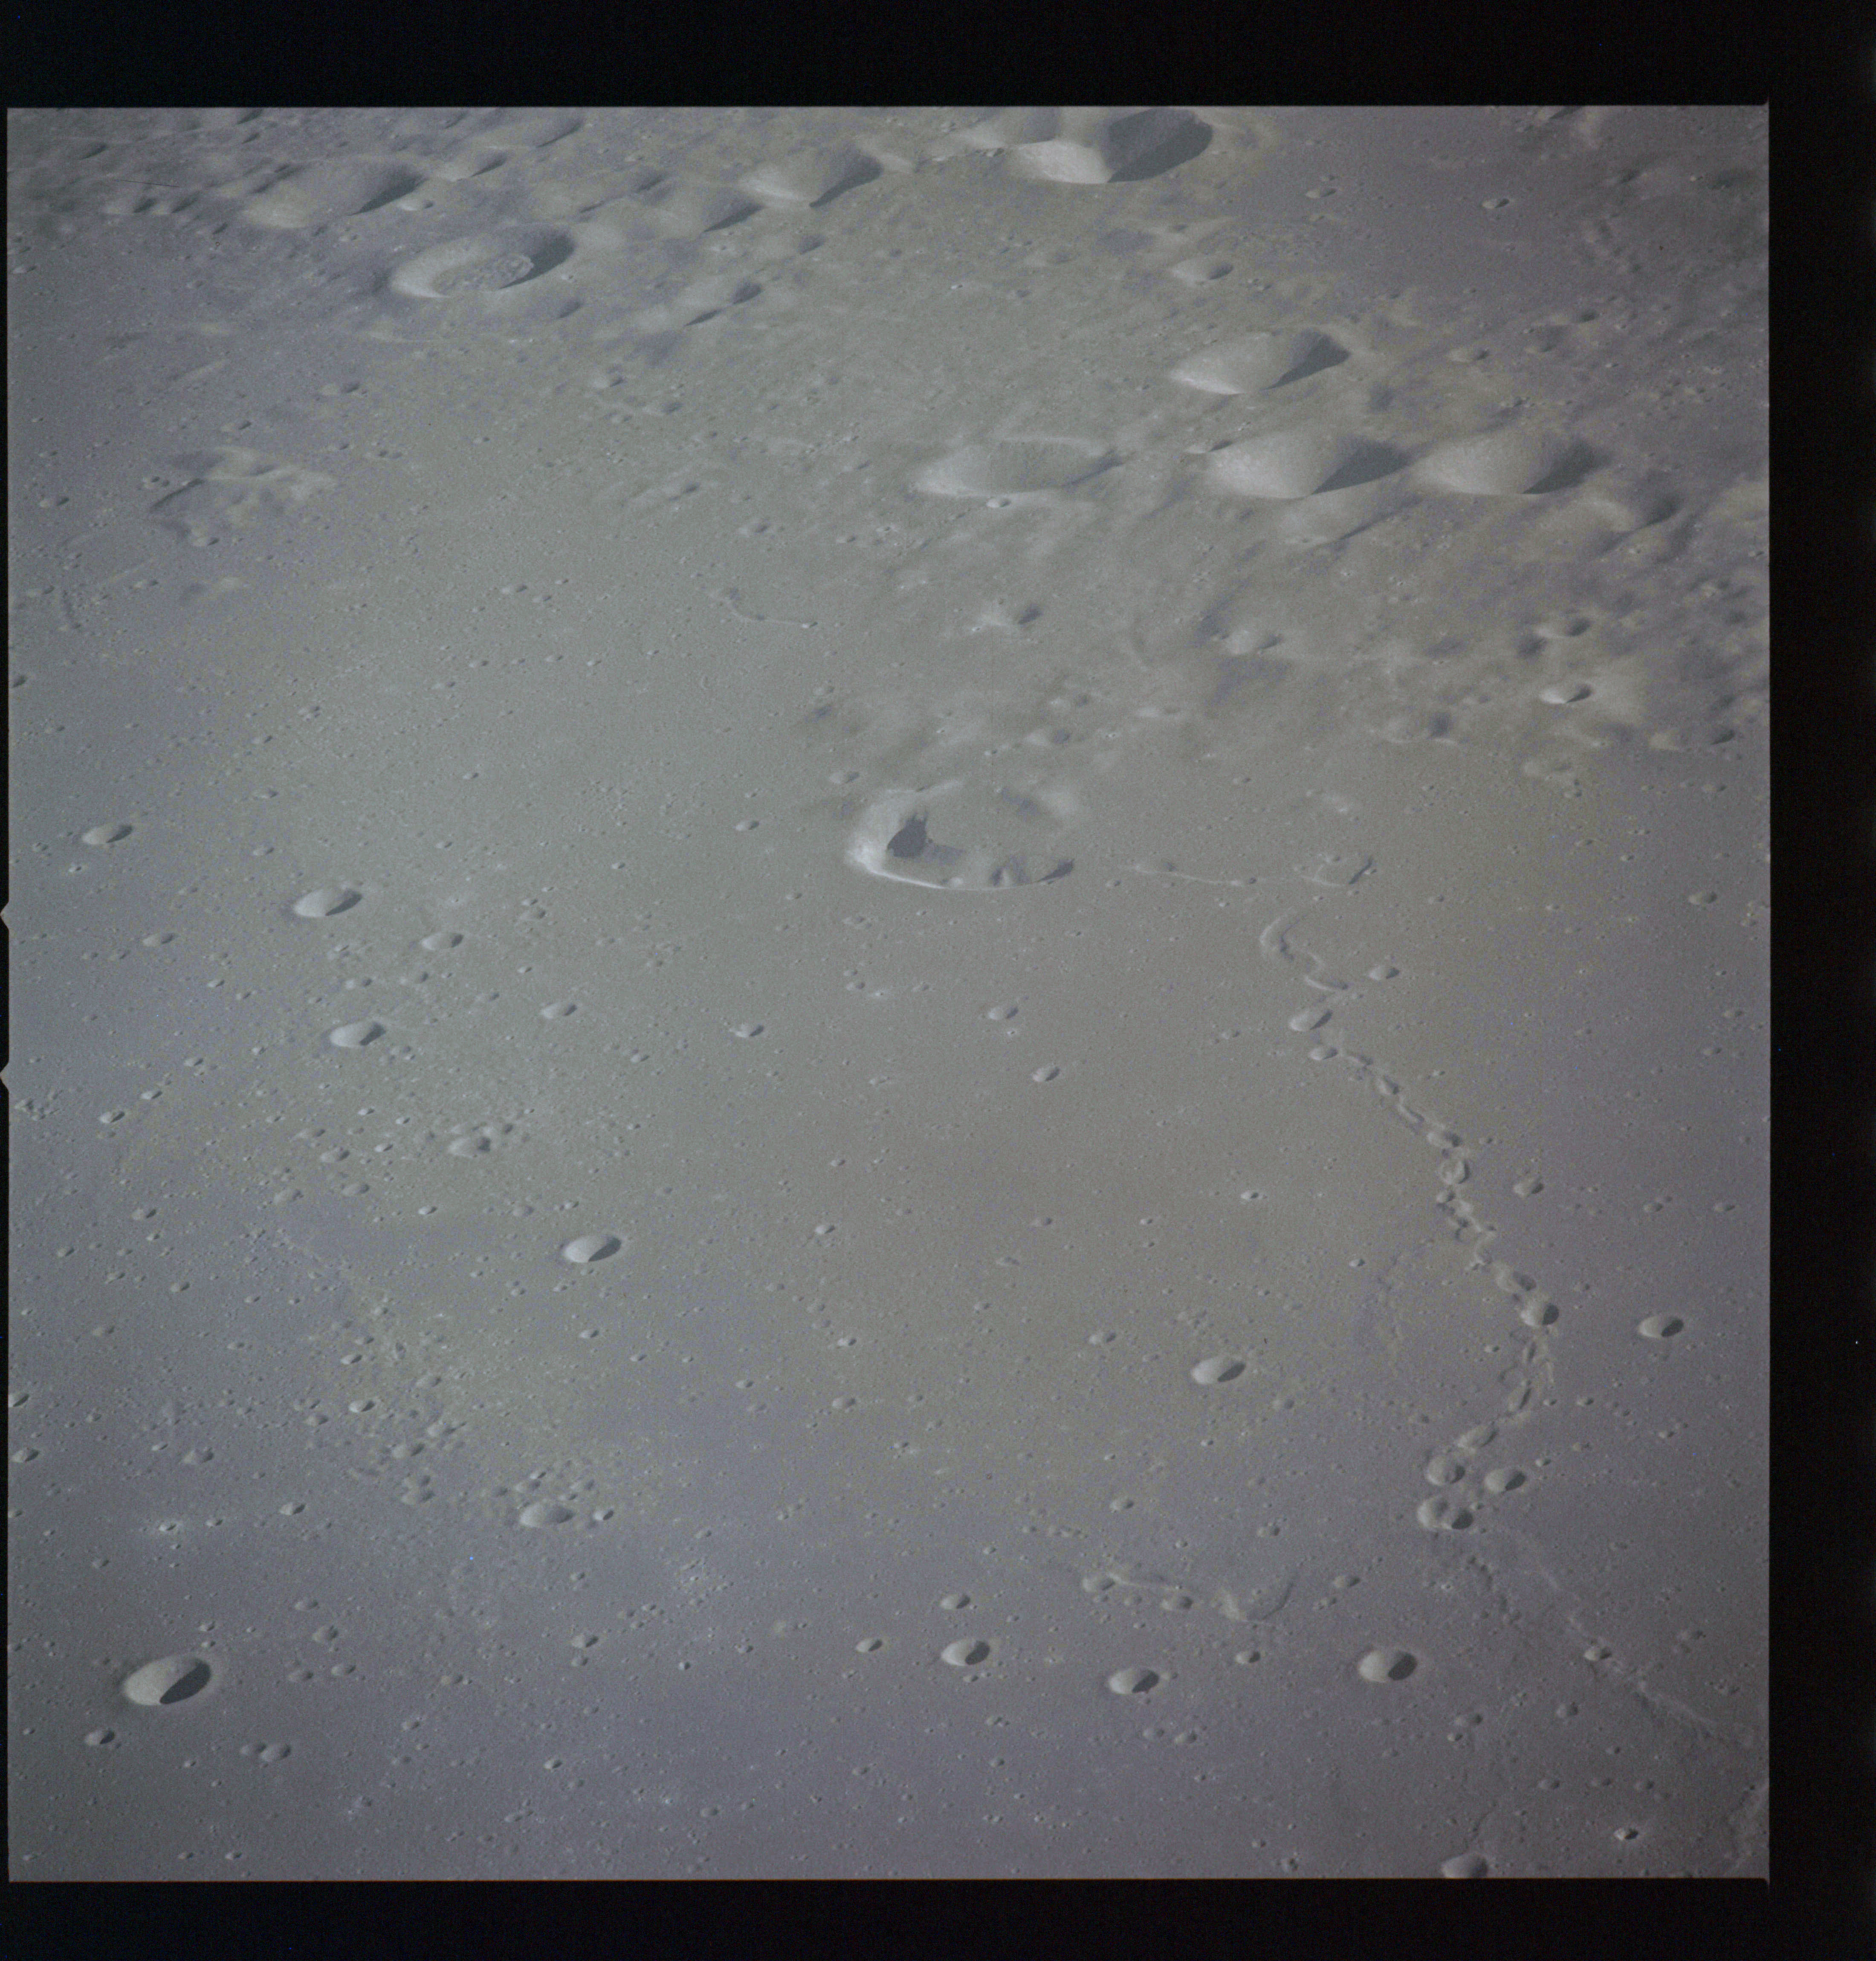
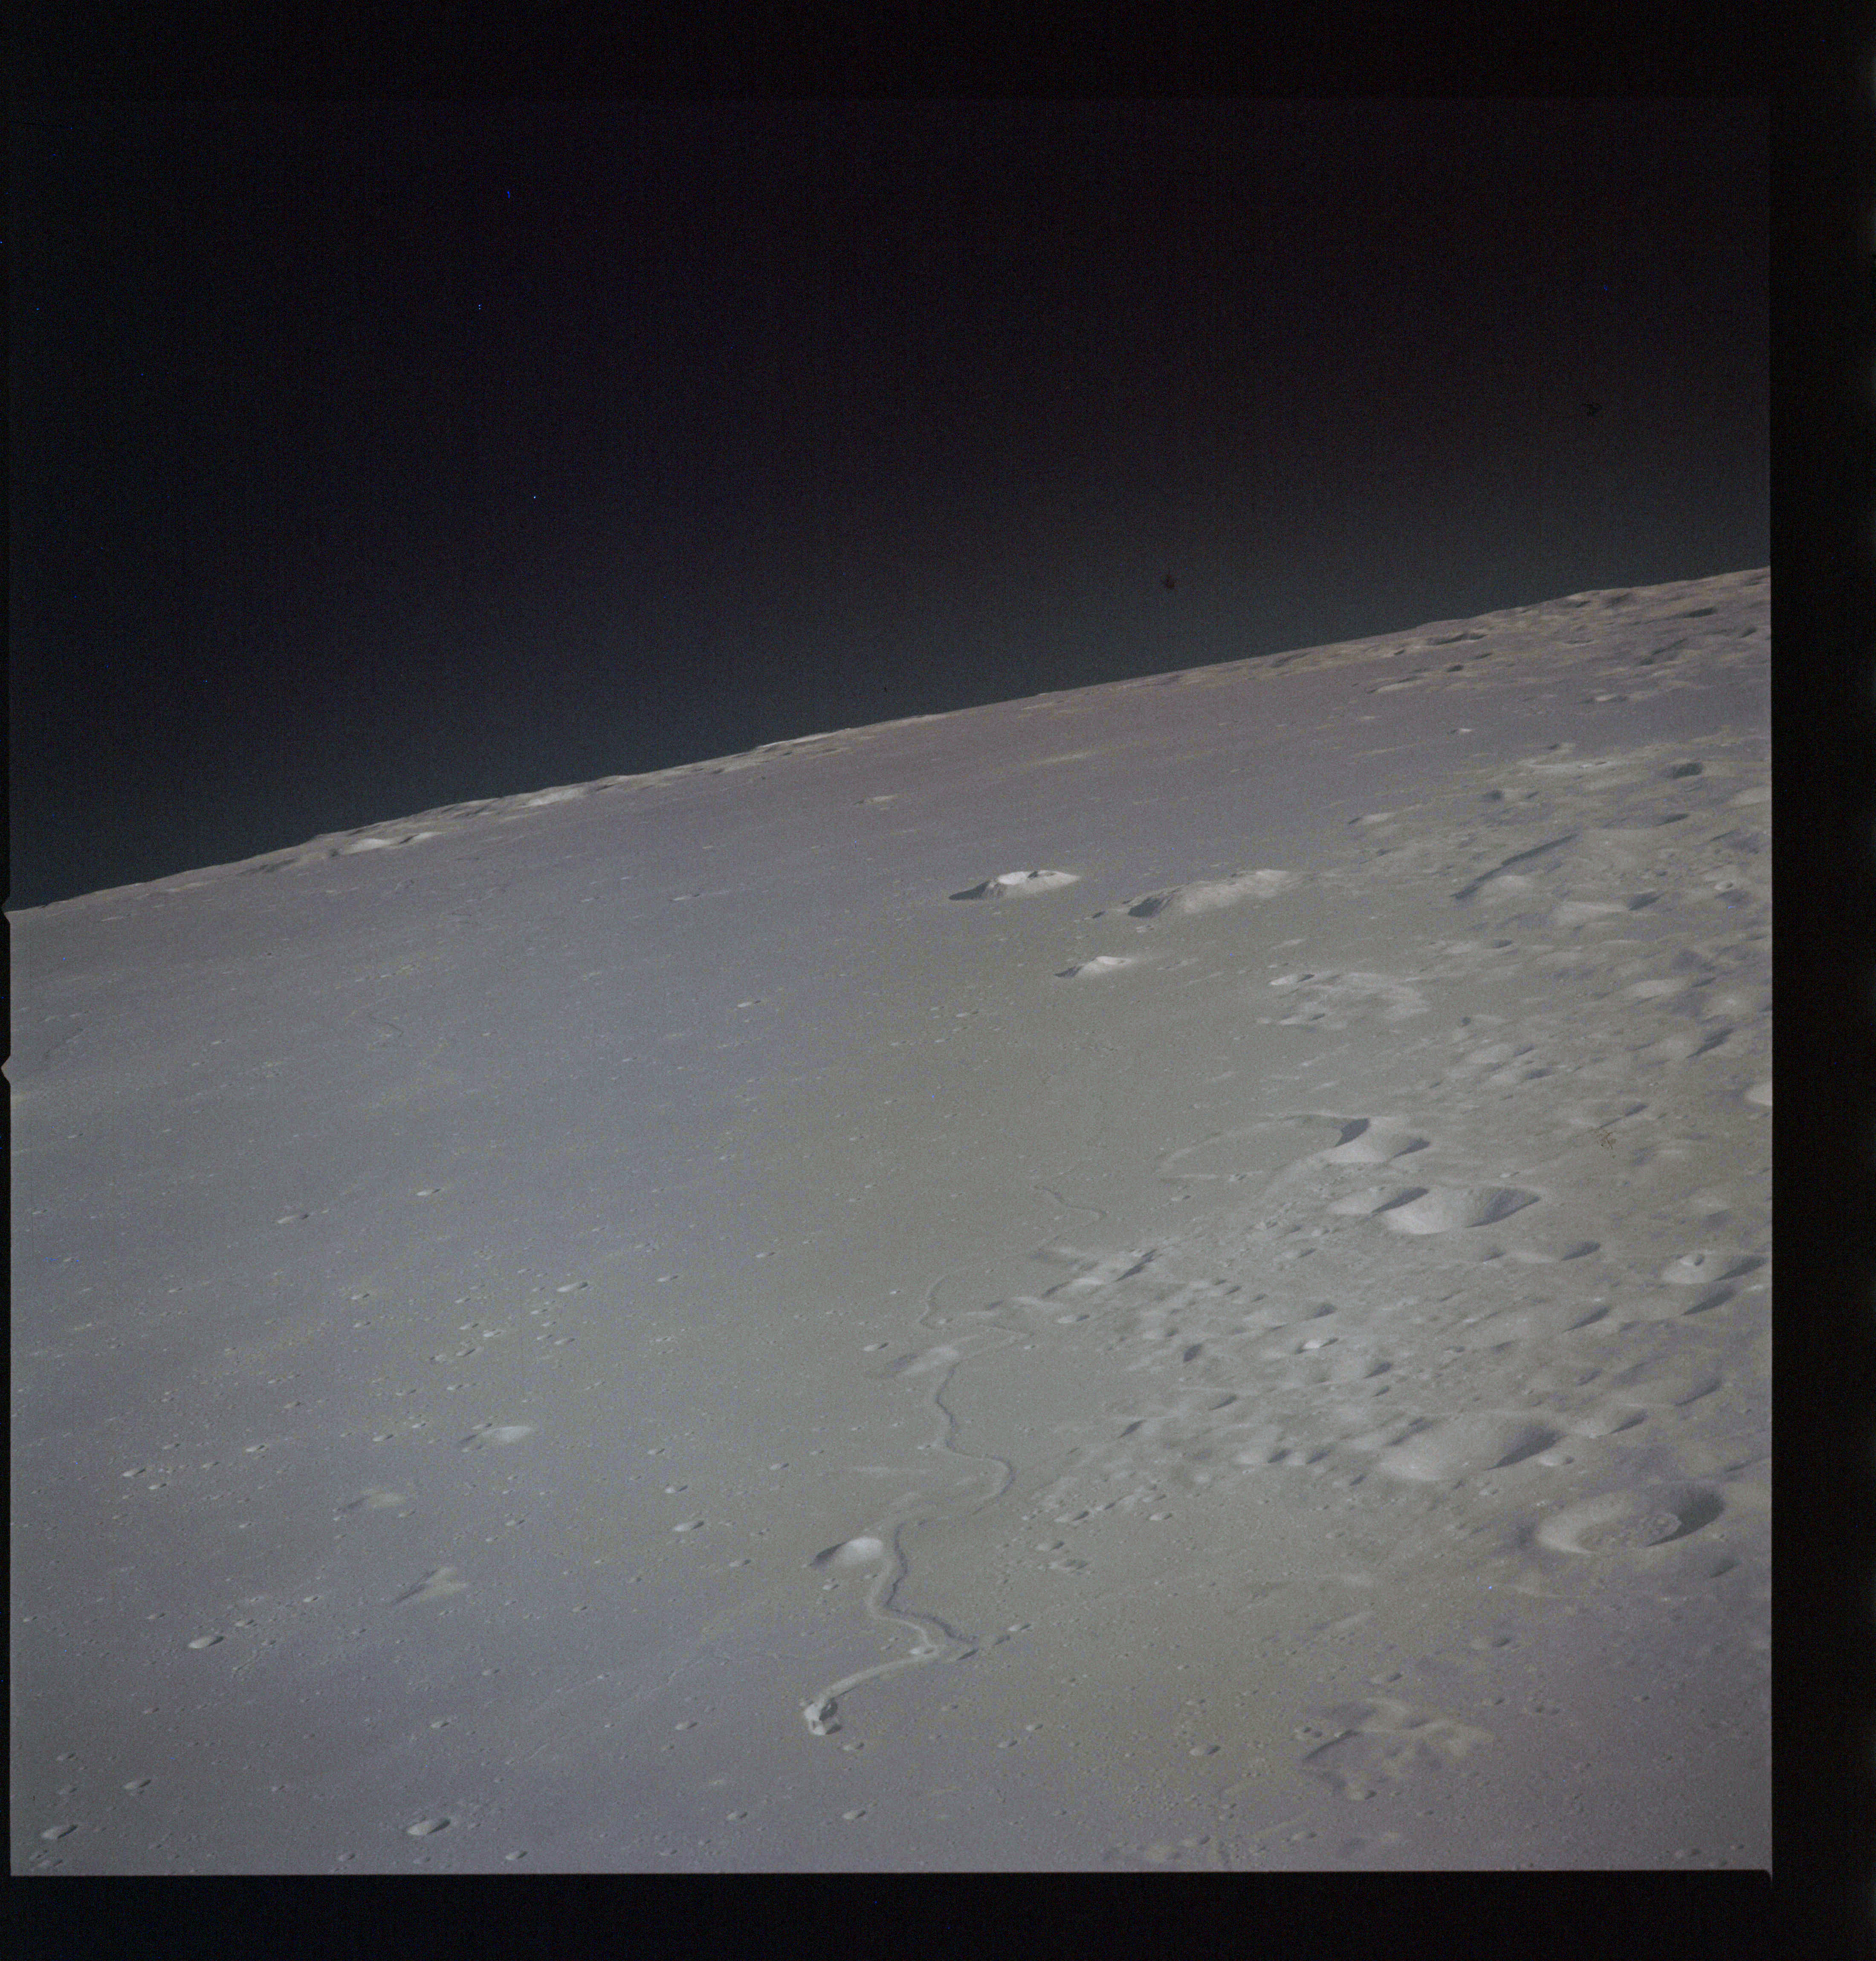
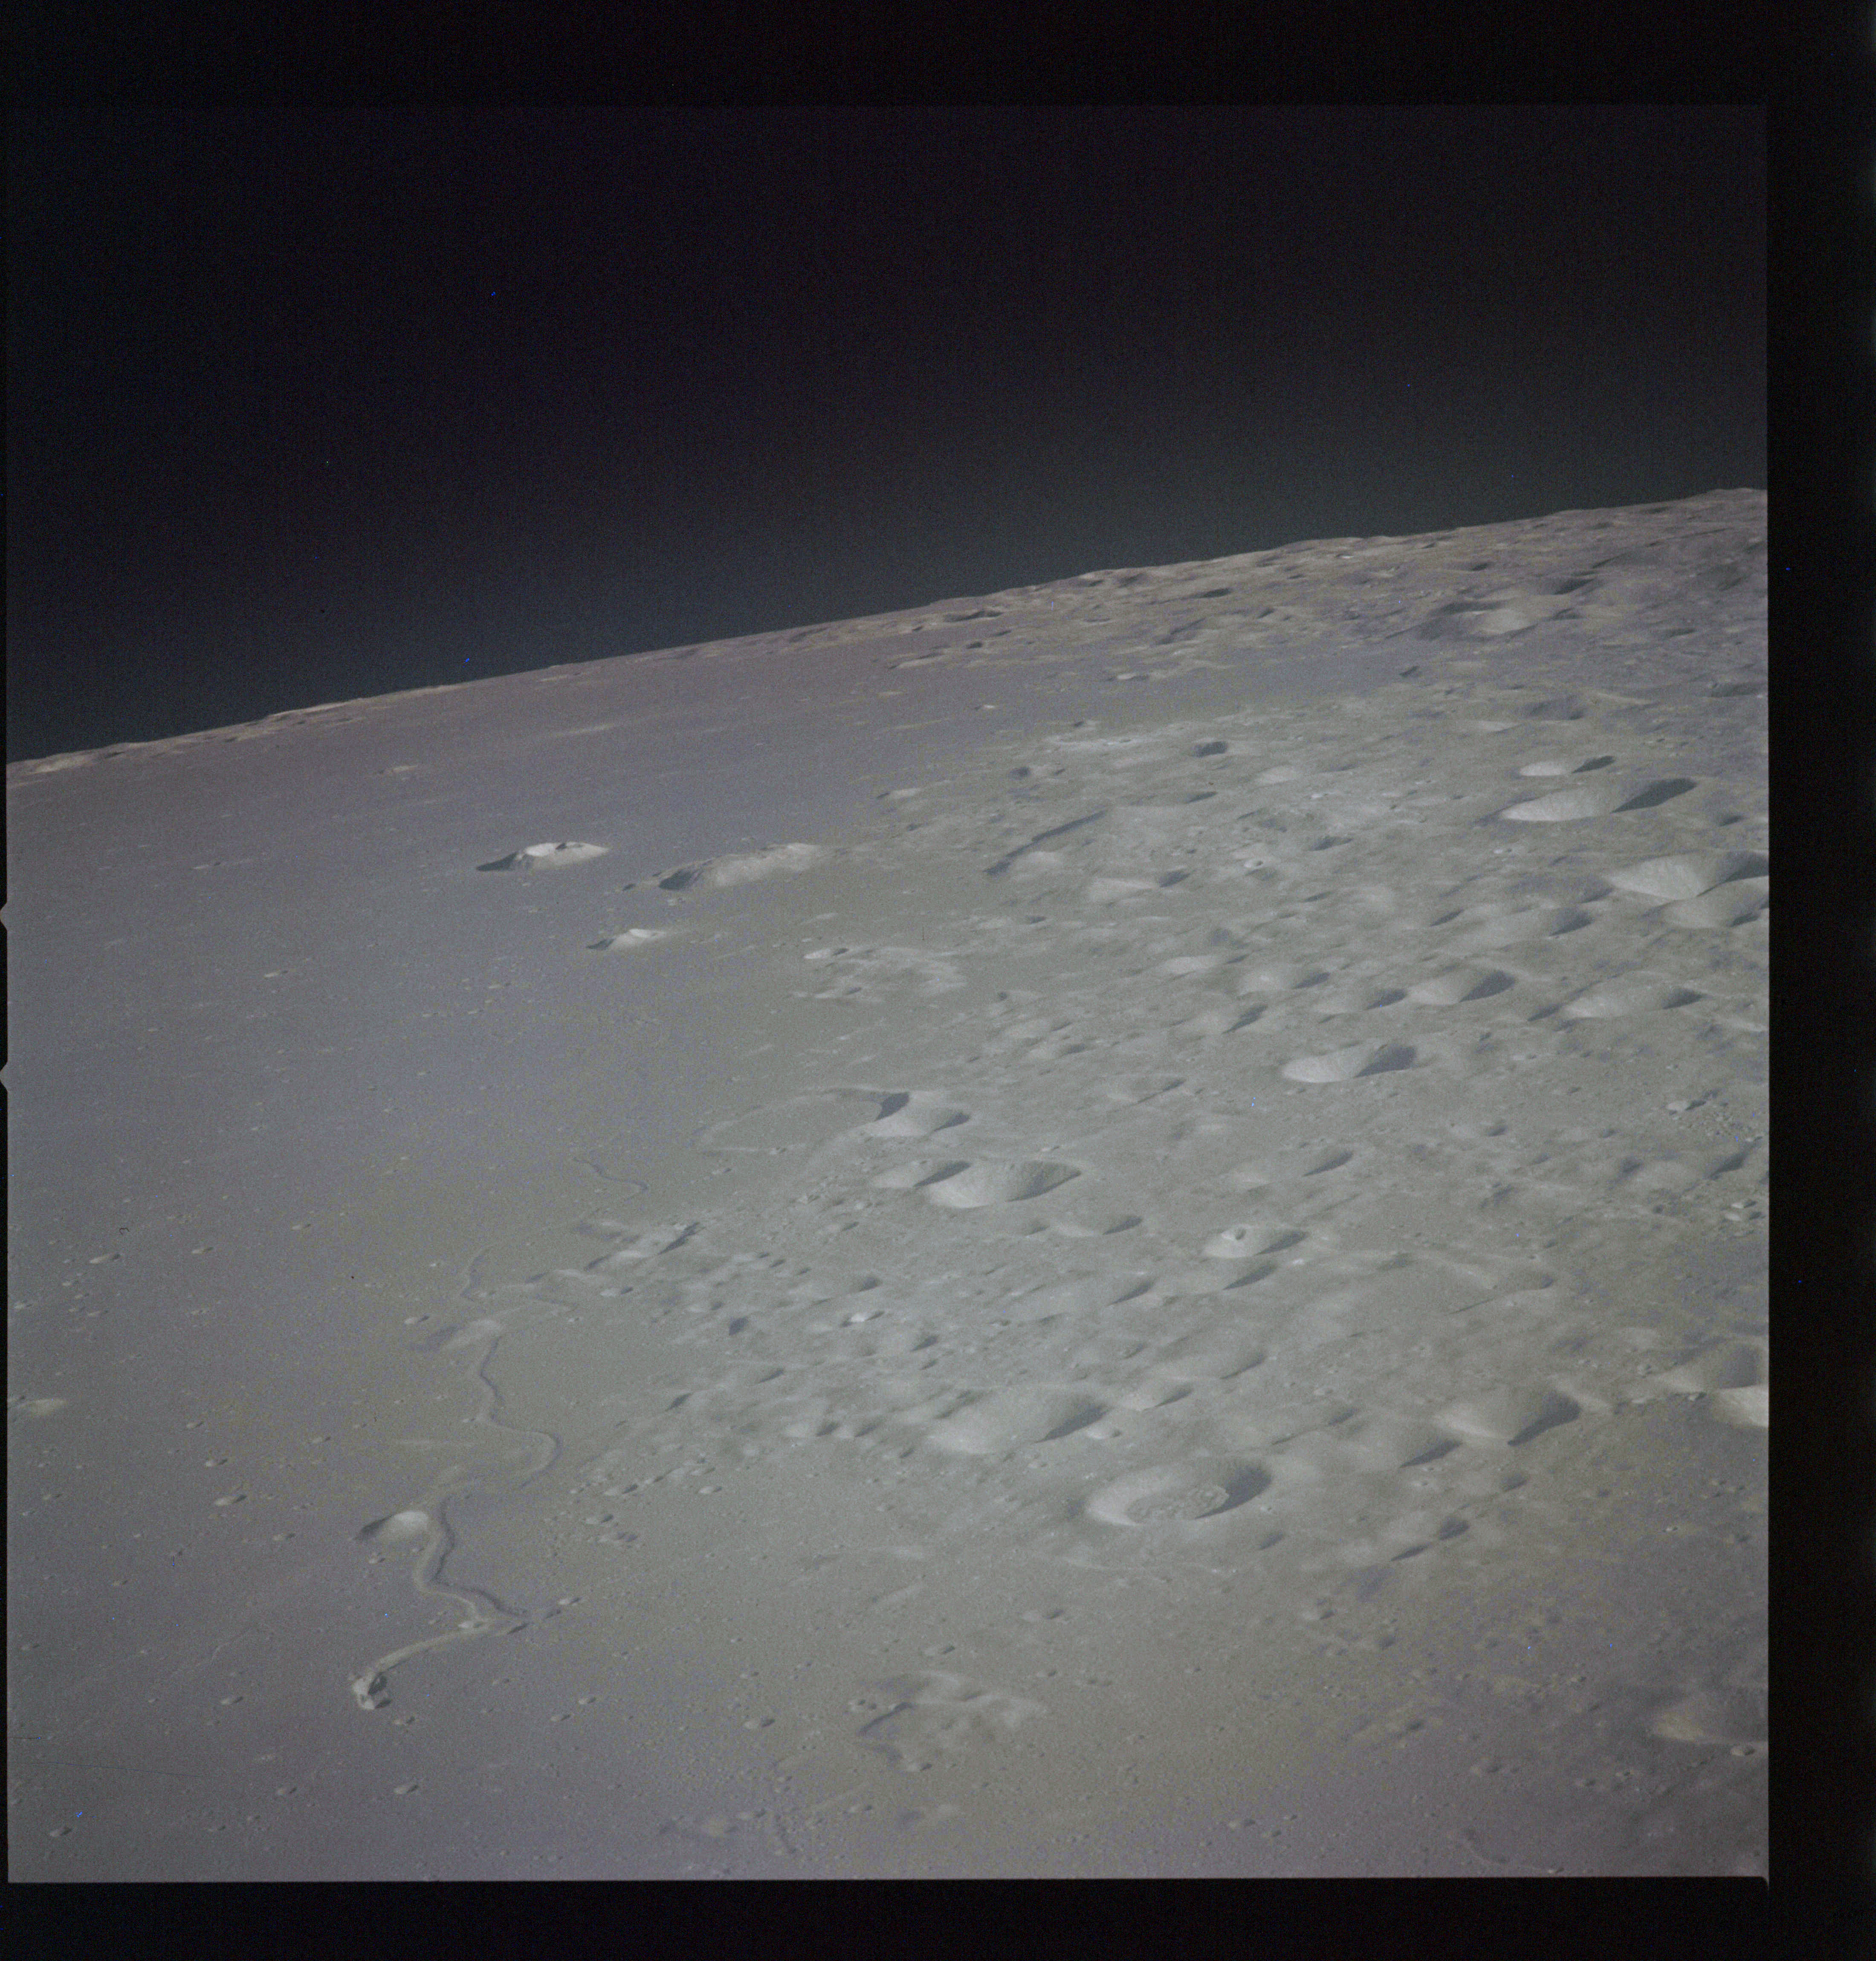
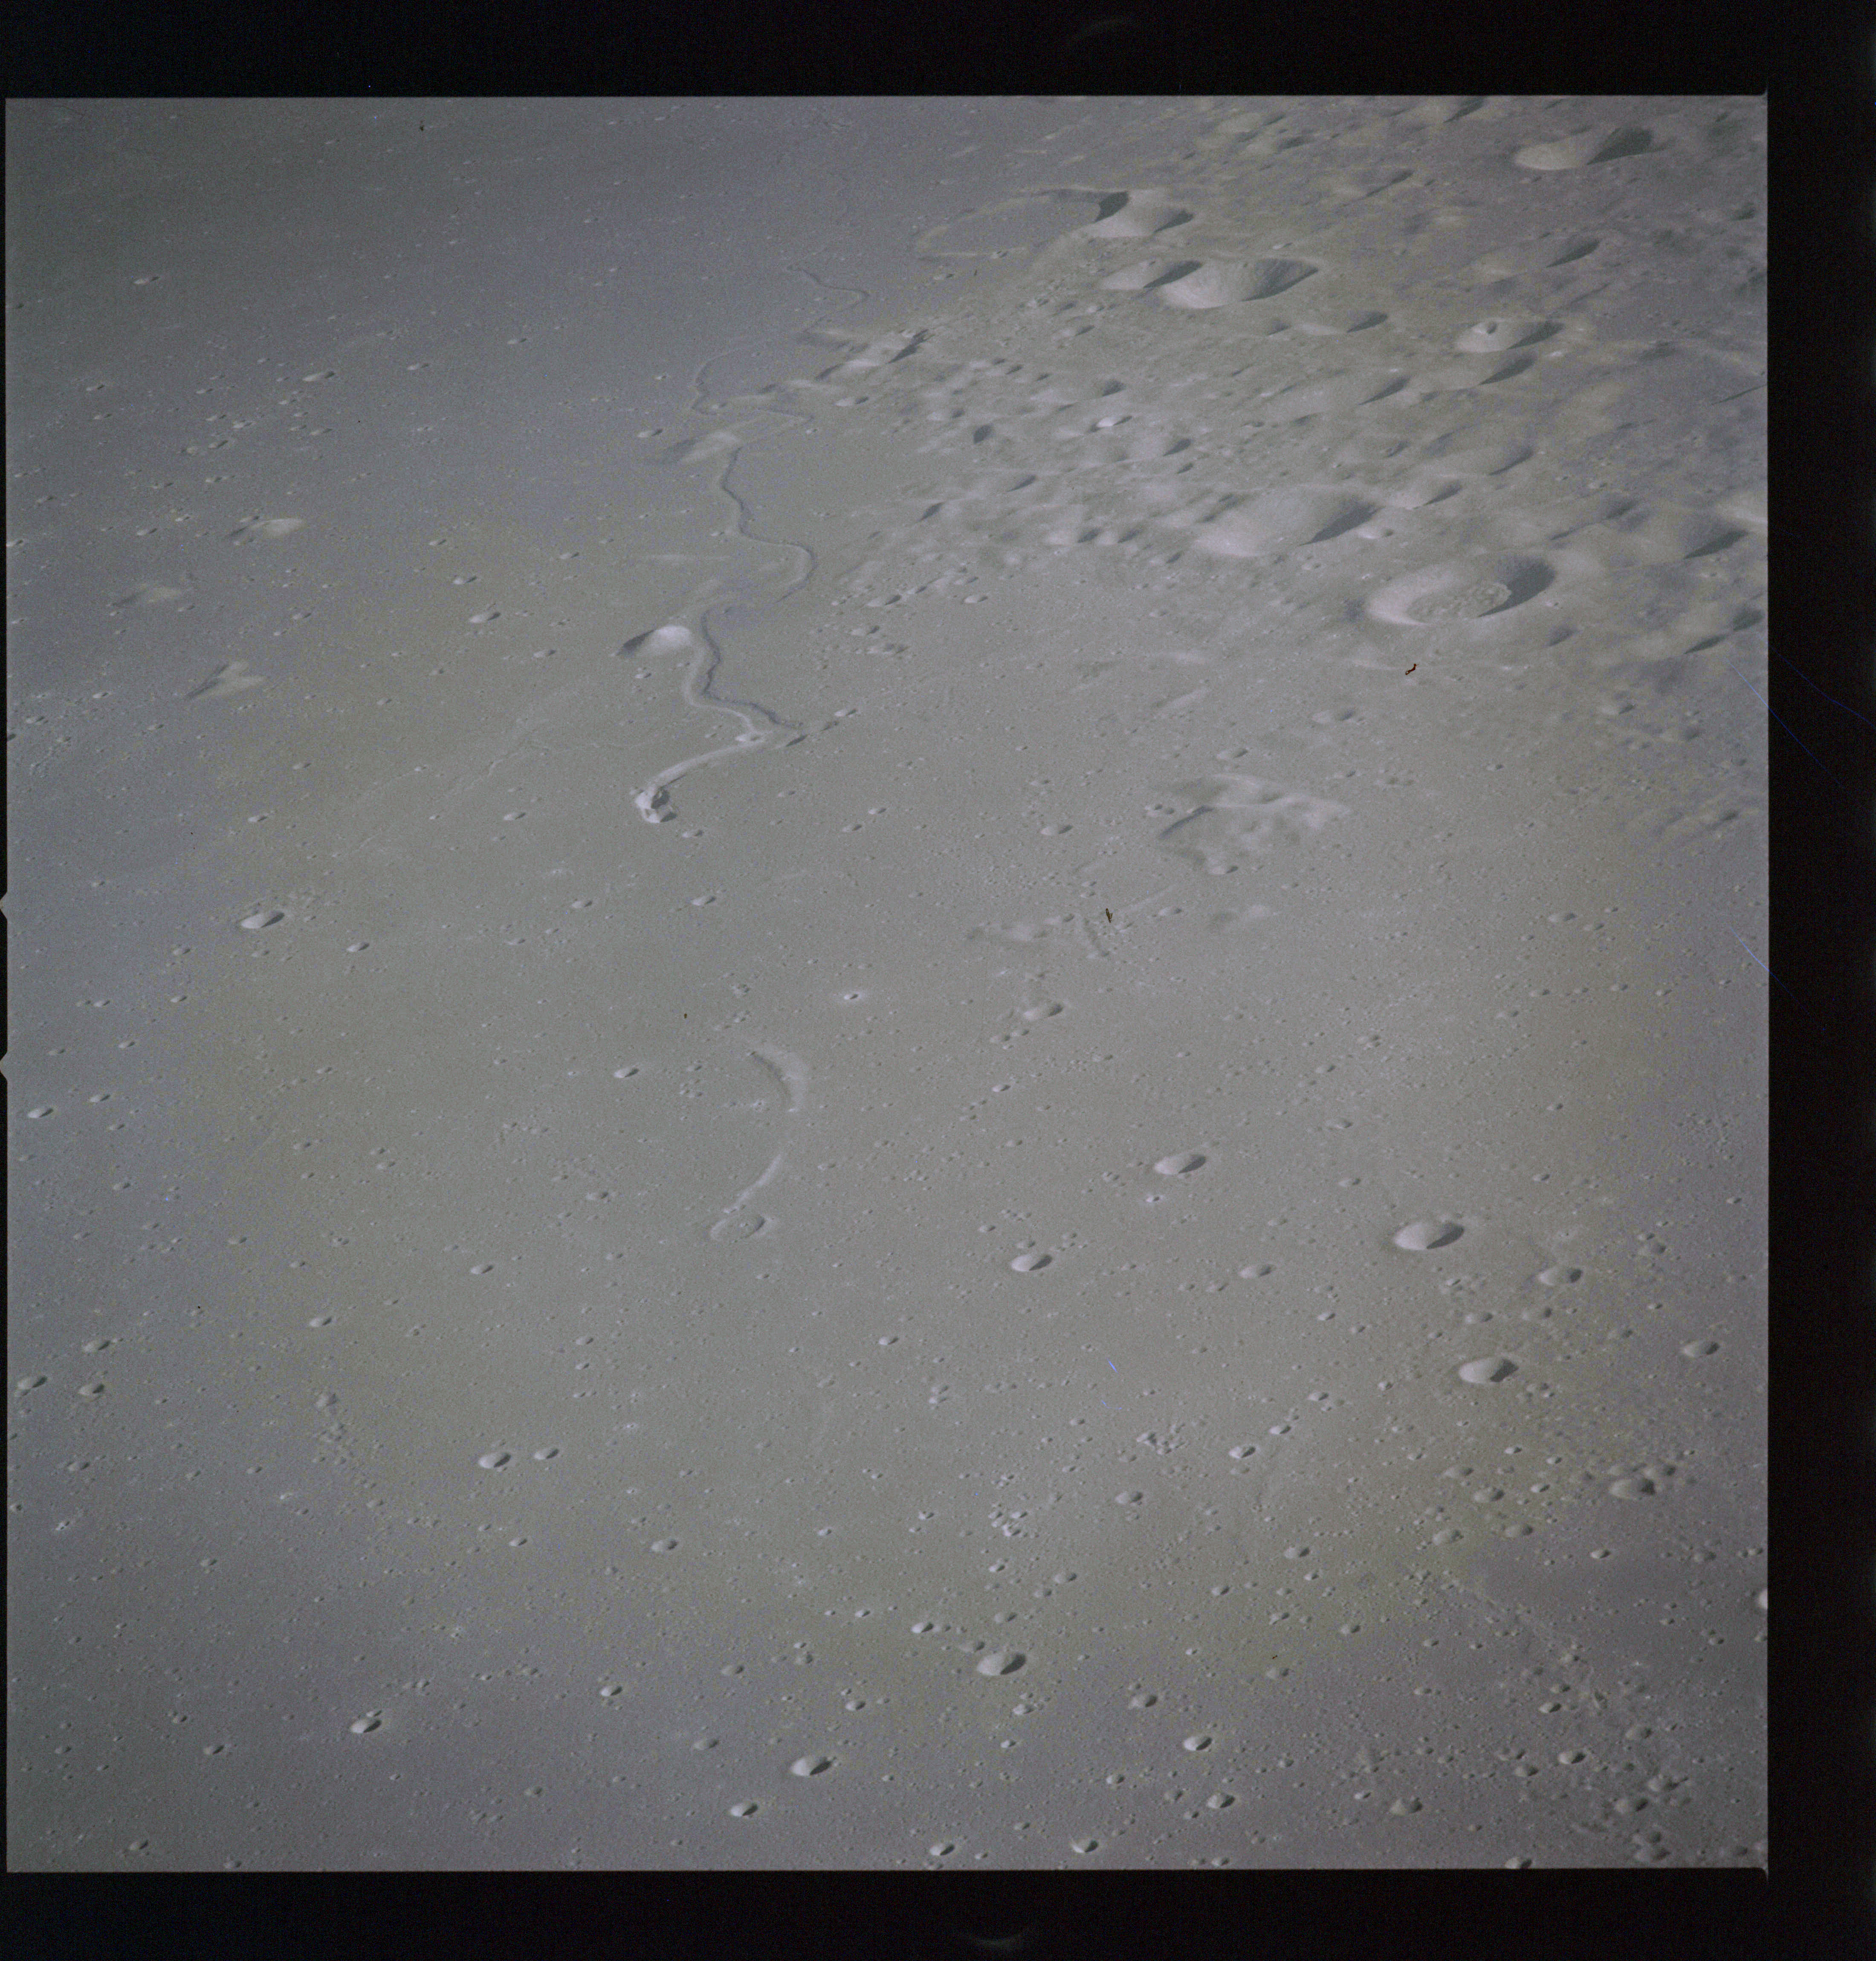
Of particular interest is the string of craters that takes a dogleg north of Lubbock H. These are likely collapse pits that reveal a lava tube which runs beneath the mare surface. Frames AS15-93-12664 and 12665 are a view west to the shore of Mare Tranquillitatis and the bright ray crater Censorinus. Crater Maskelyne A is in the foreground (right) of these images.
AS15-93-12664 - Craters Maskelyne A, Censorinus - Image by NASA/Johnson Space Center.
AS15-93-12665 - Craters Maskelyne A, Censorinus - Image by NASA/Johnson Space Center.
AS15-M-2550 - South oblique Metric Camera image of Mare Tranquillitatis including craters Wallach, Maskelyne and Censorinus. Image taken at about 216:43. (250 megapixel version), (labelled version) - Image by NASA/ASU.
Censorinus is also the subject of four images, AS15-92-12512 to 12515, taken on magazine OO with the long telephoto lens.
AS15-92-12512 - Craters Censorinus and Censorinus A. Image centre at 0.15°S, 32.88°E - Image by NASA/Johnson Space Center.
AS15-92-12513 - Craters Censorinus and Censorinus A. Image centre at 0.17°S, 32.96°E - Image by NASA/Johnson Space Center.
AS15-92-12514 - Landscape northeast of crater Censorinus (named 'Lonesome Mesa' during Apollo 11). Image centre at 1.23°N, 35.12°E - Image by NASA/Johnson Space Center.
AS15-92-12515 - Craters Censorinus and Censorinus A. Image centre at 0.24°S, 32.96°E - Image by NASA/Johnson Space Center.
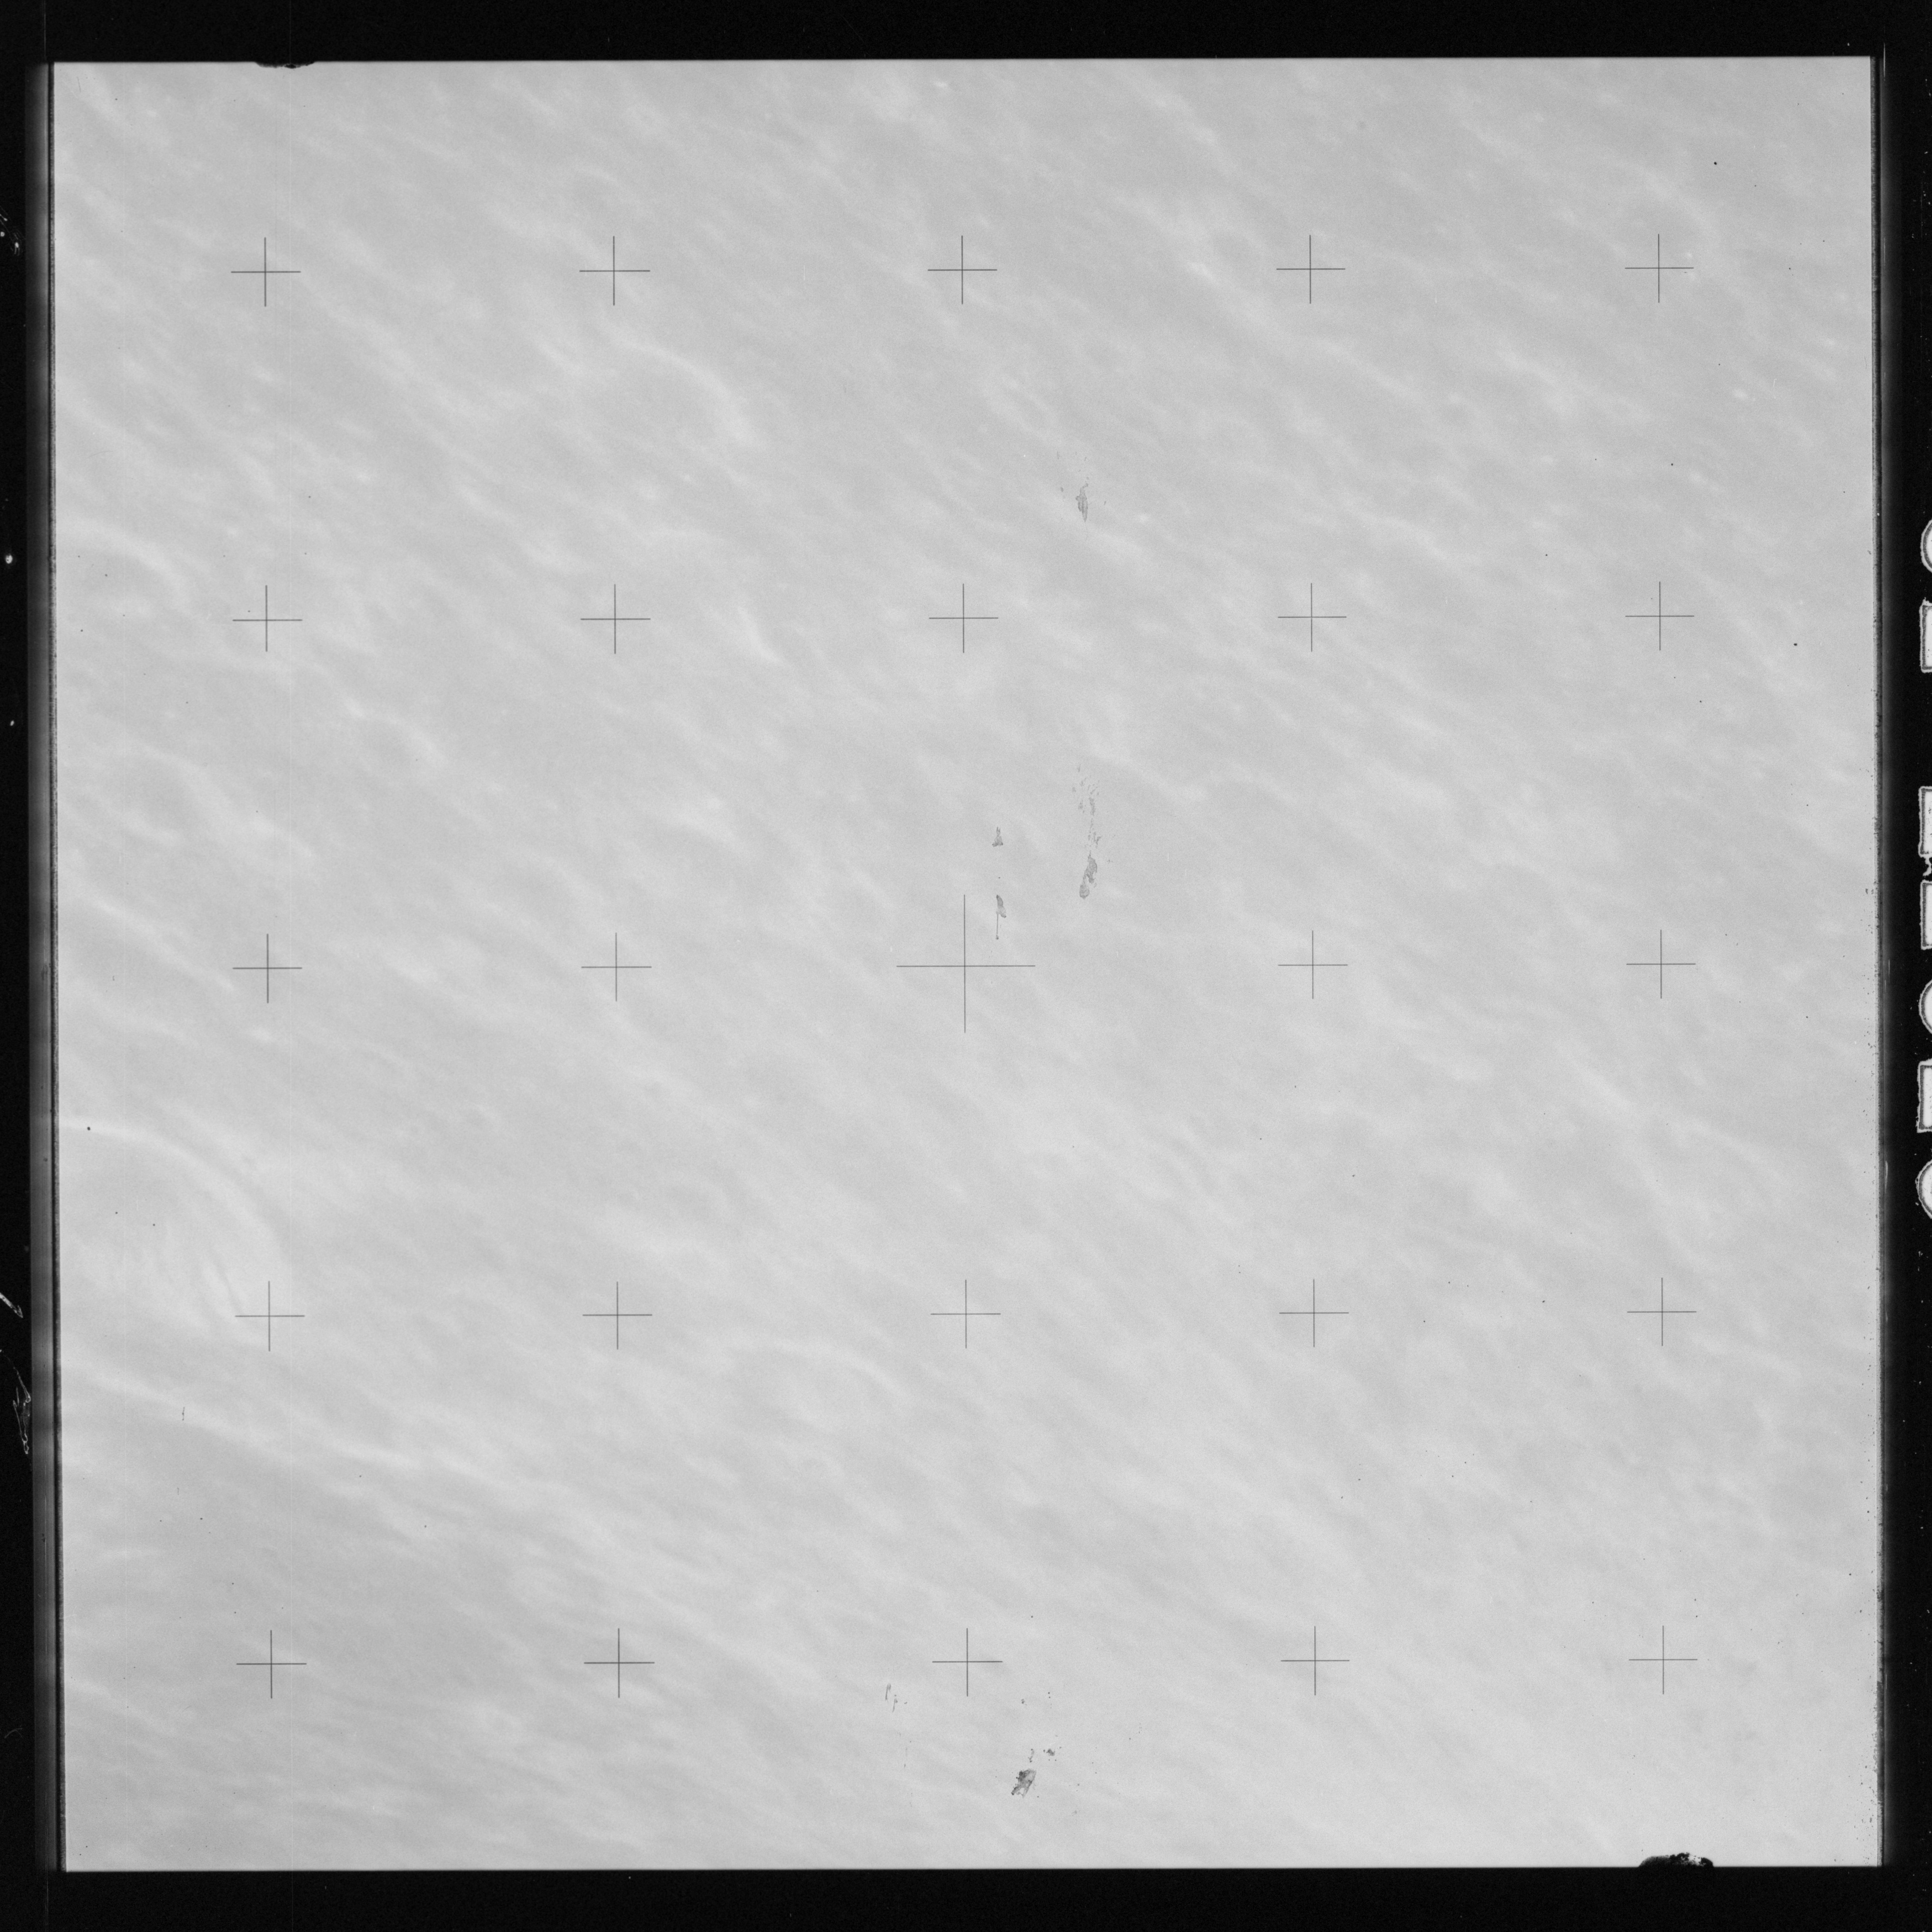
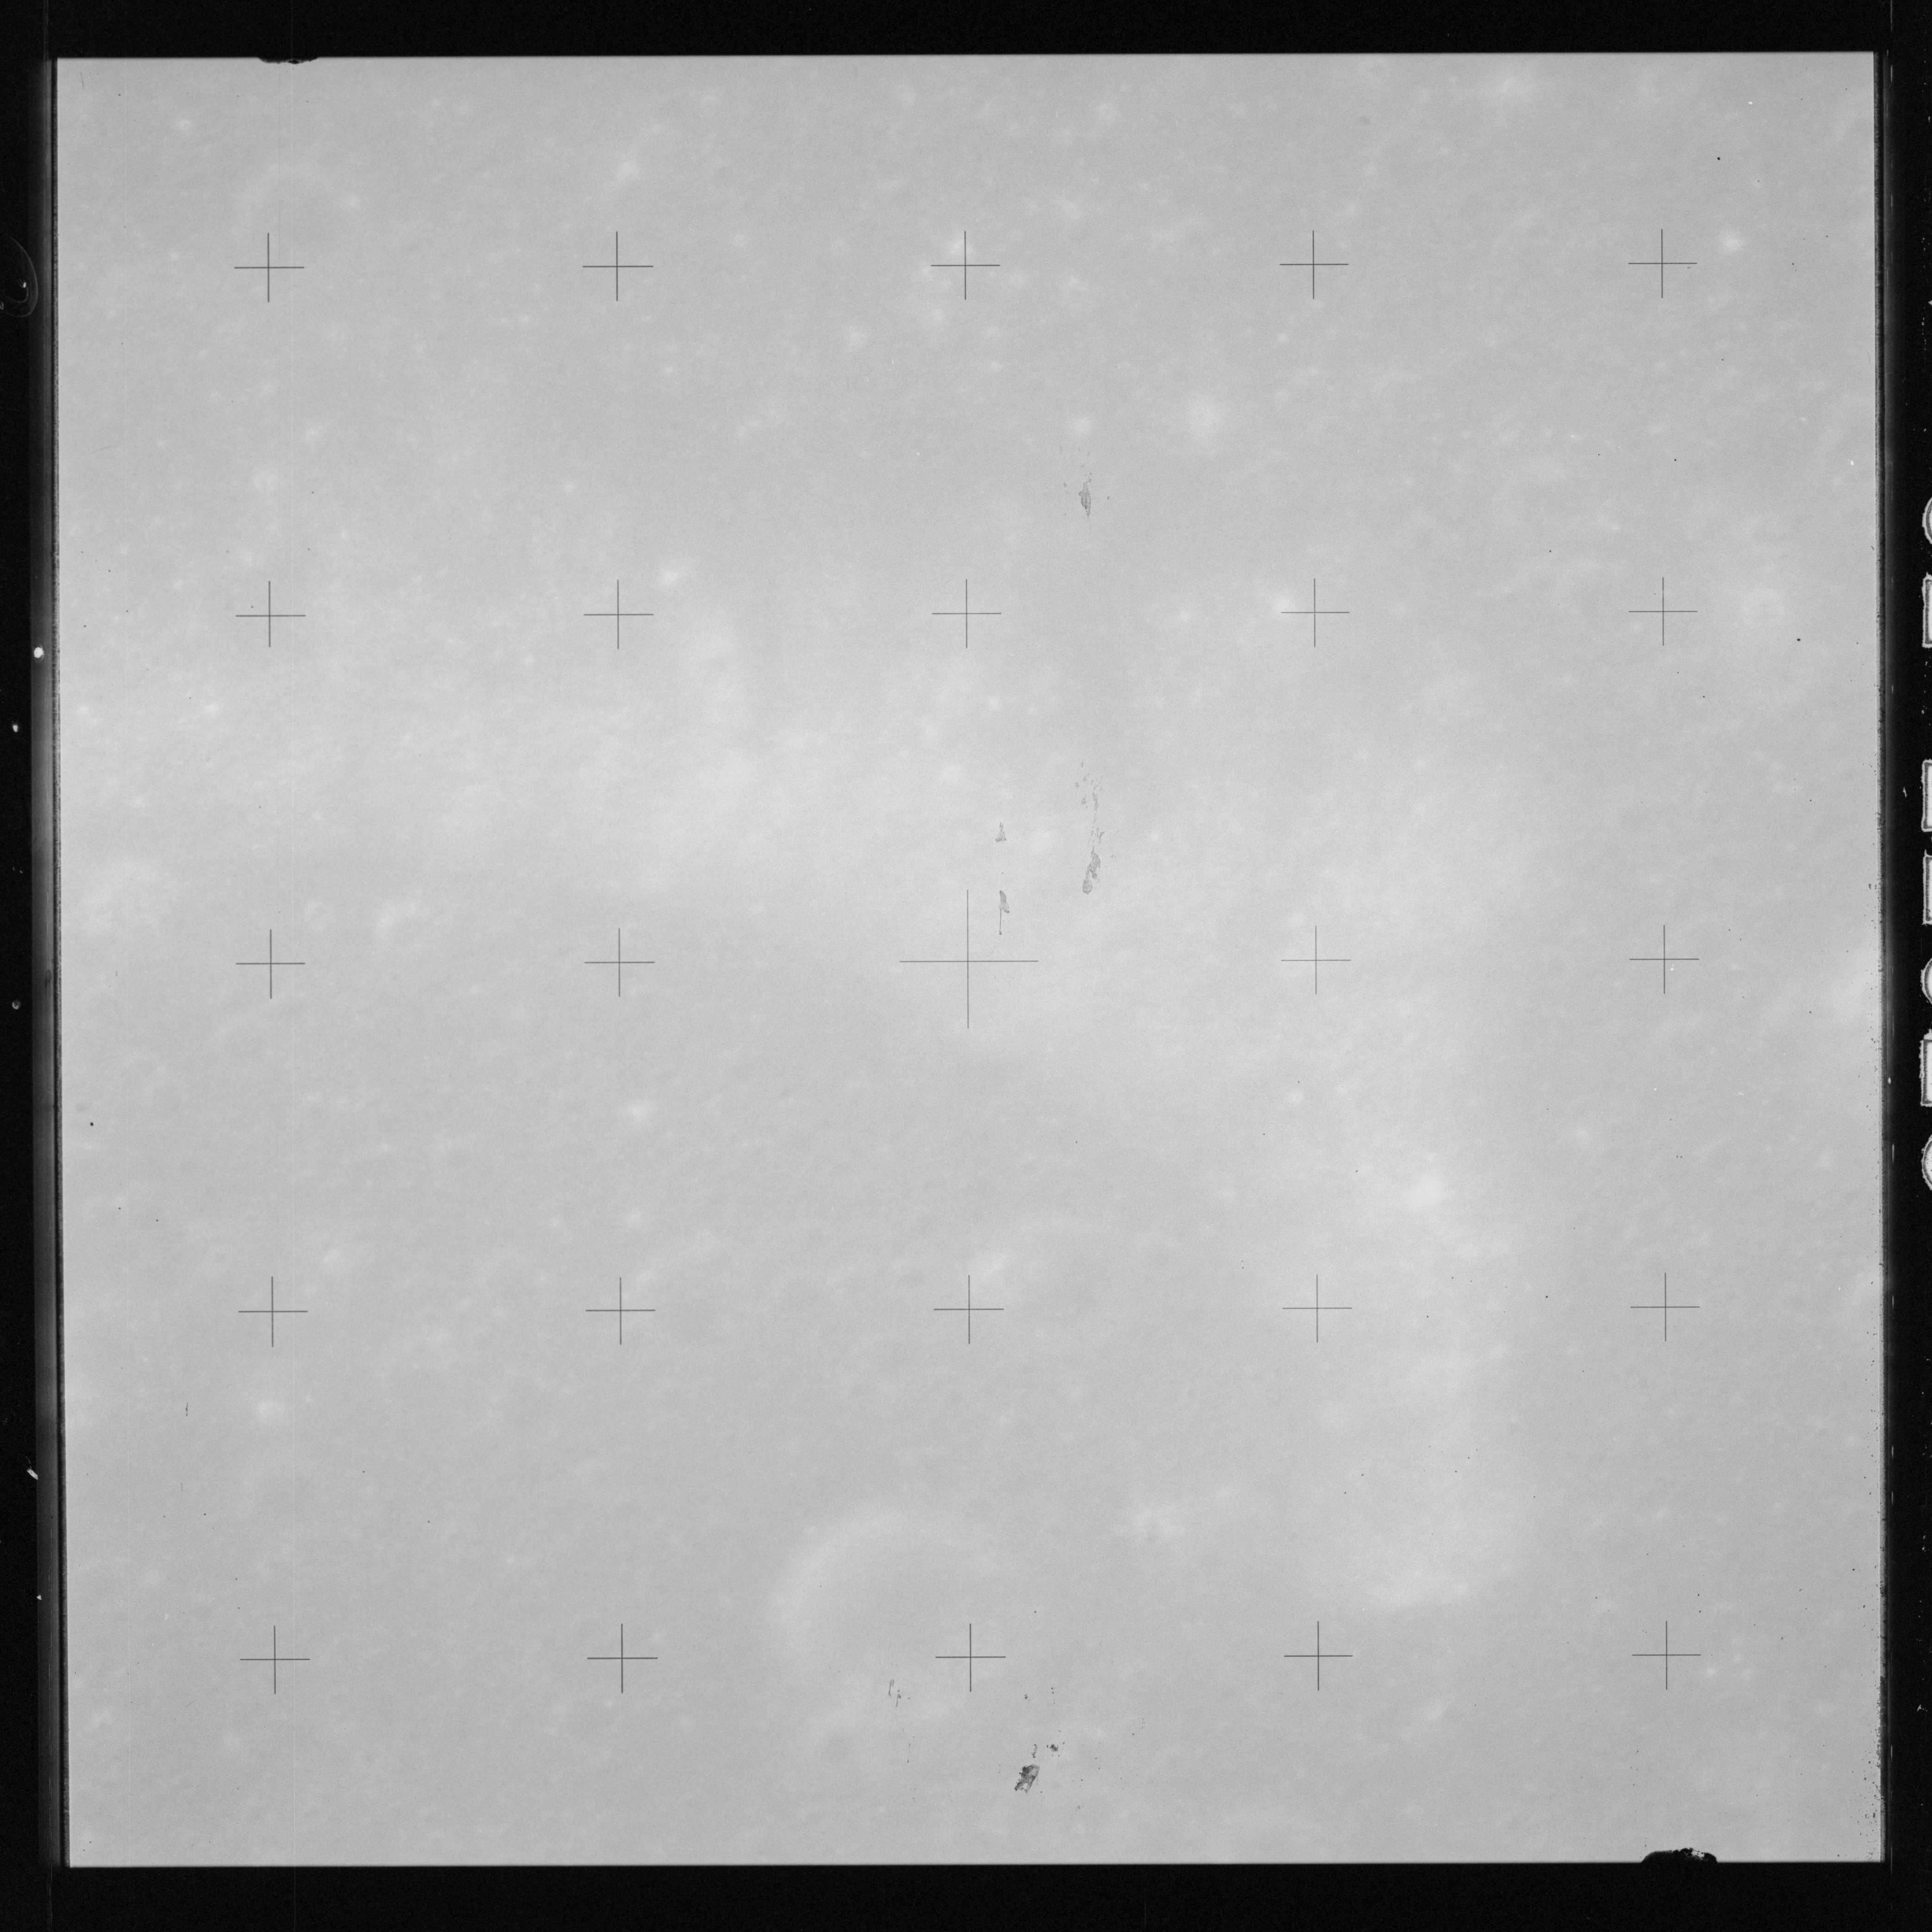
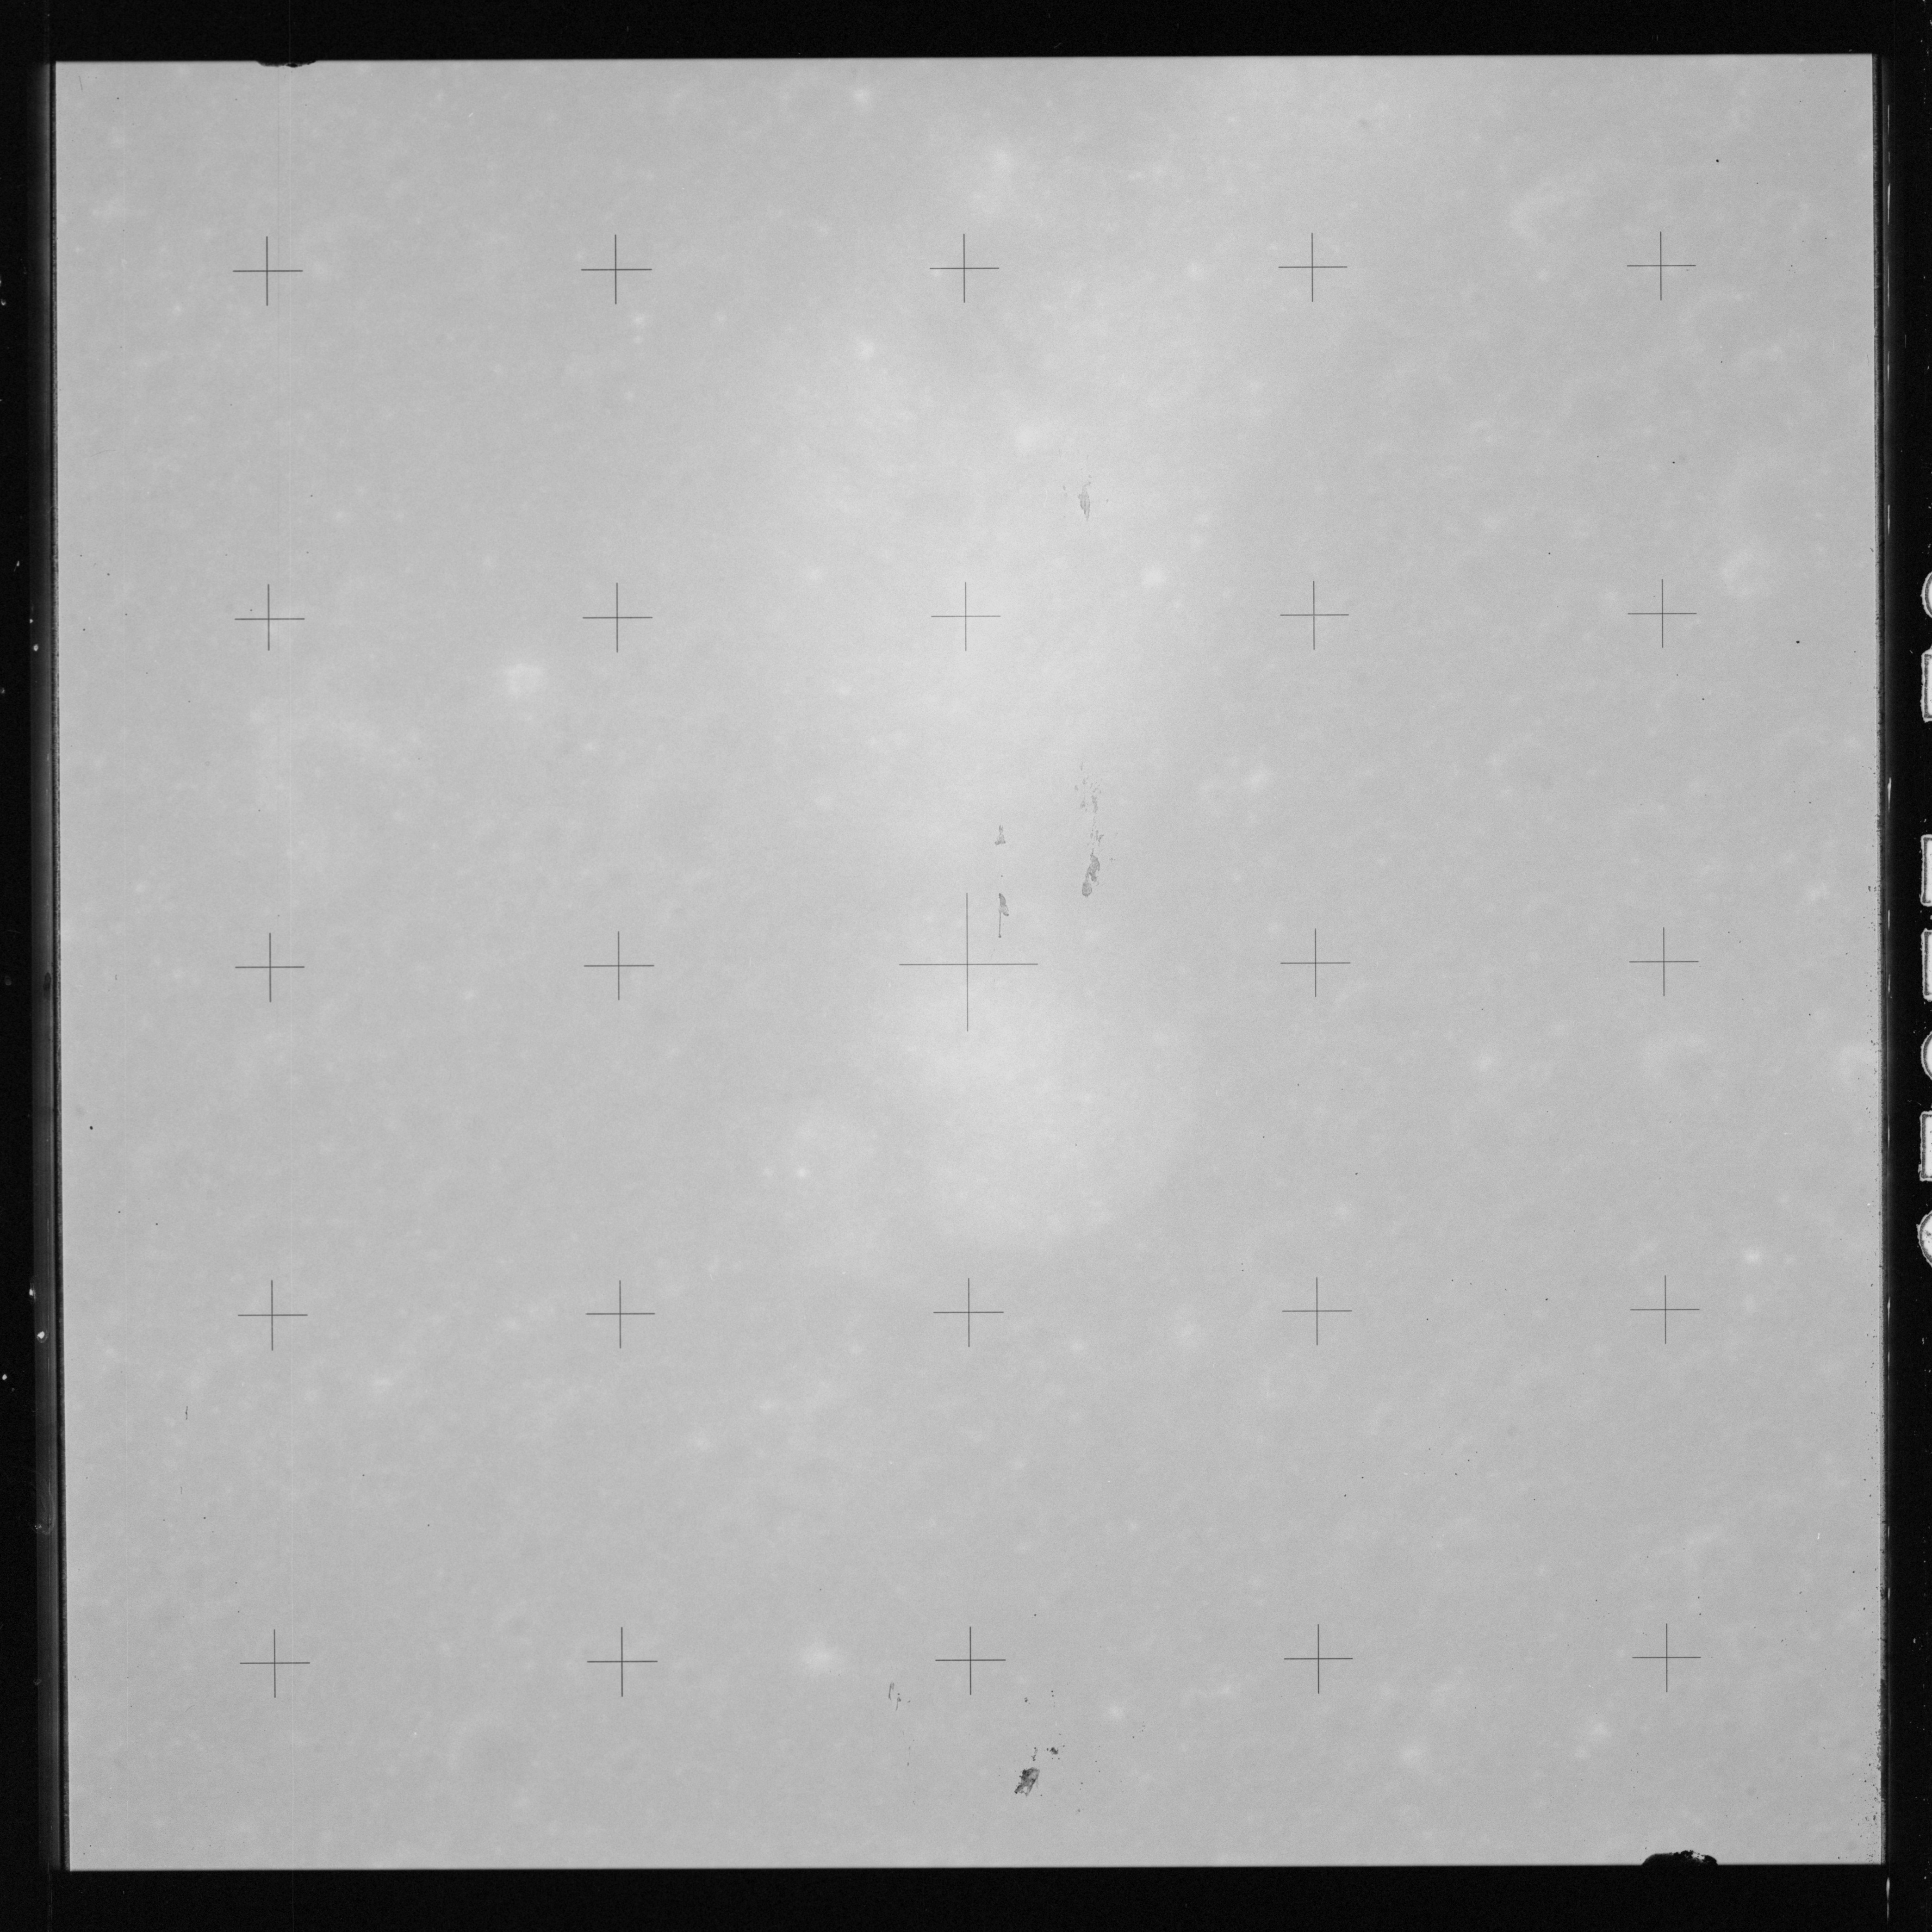
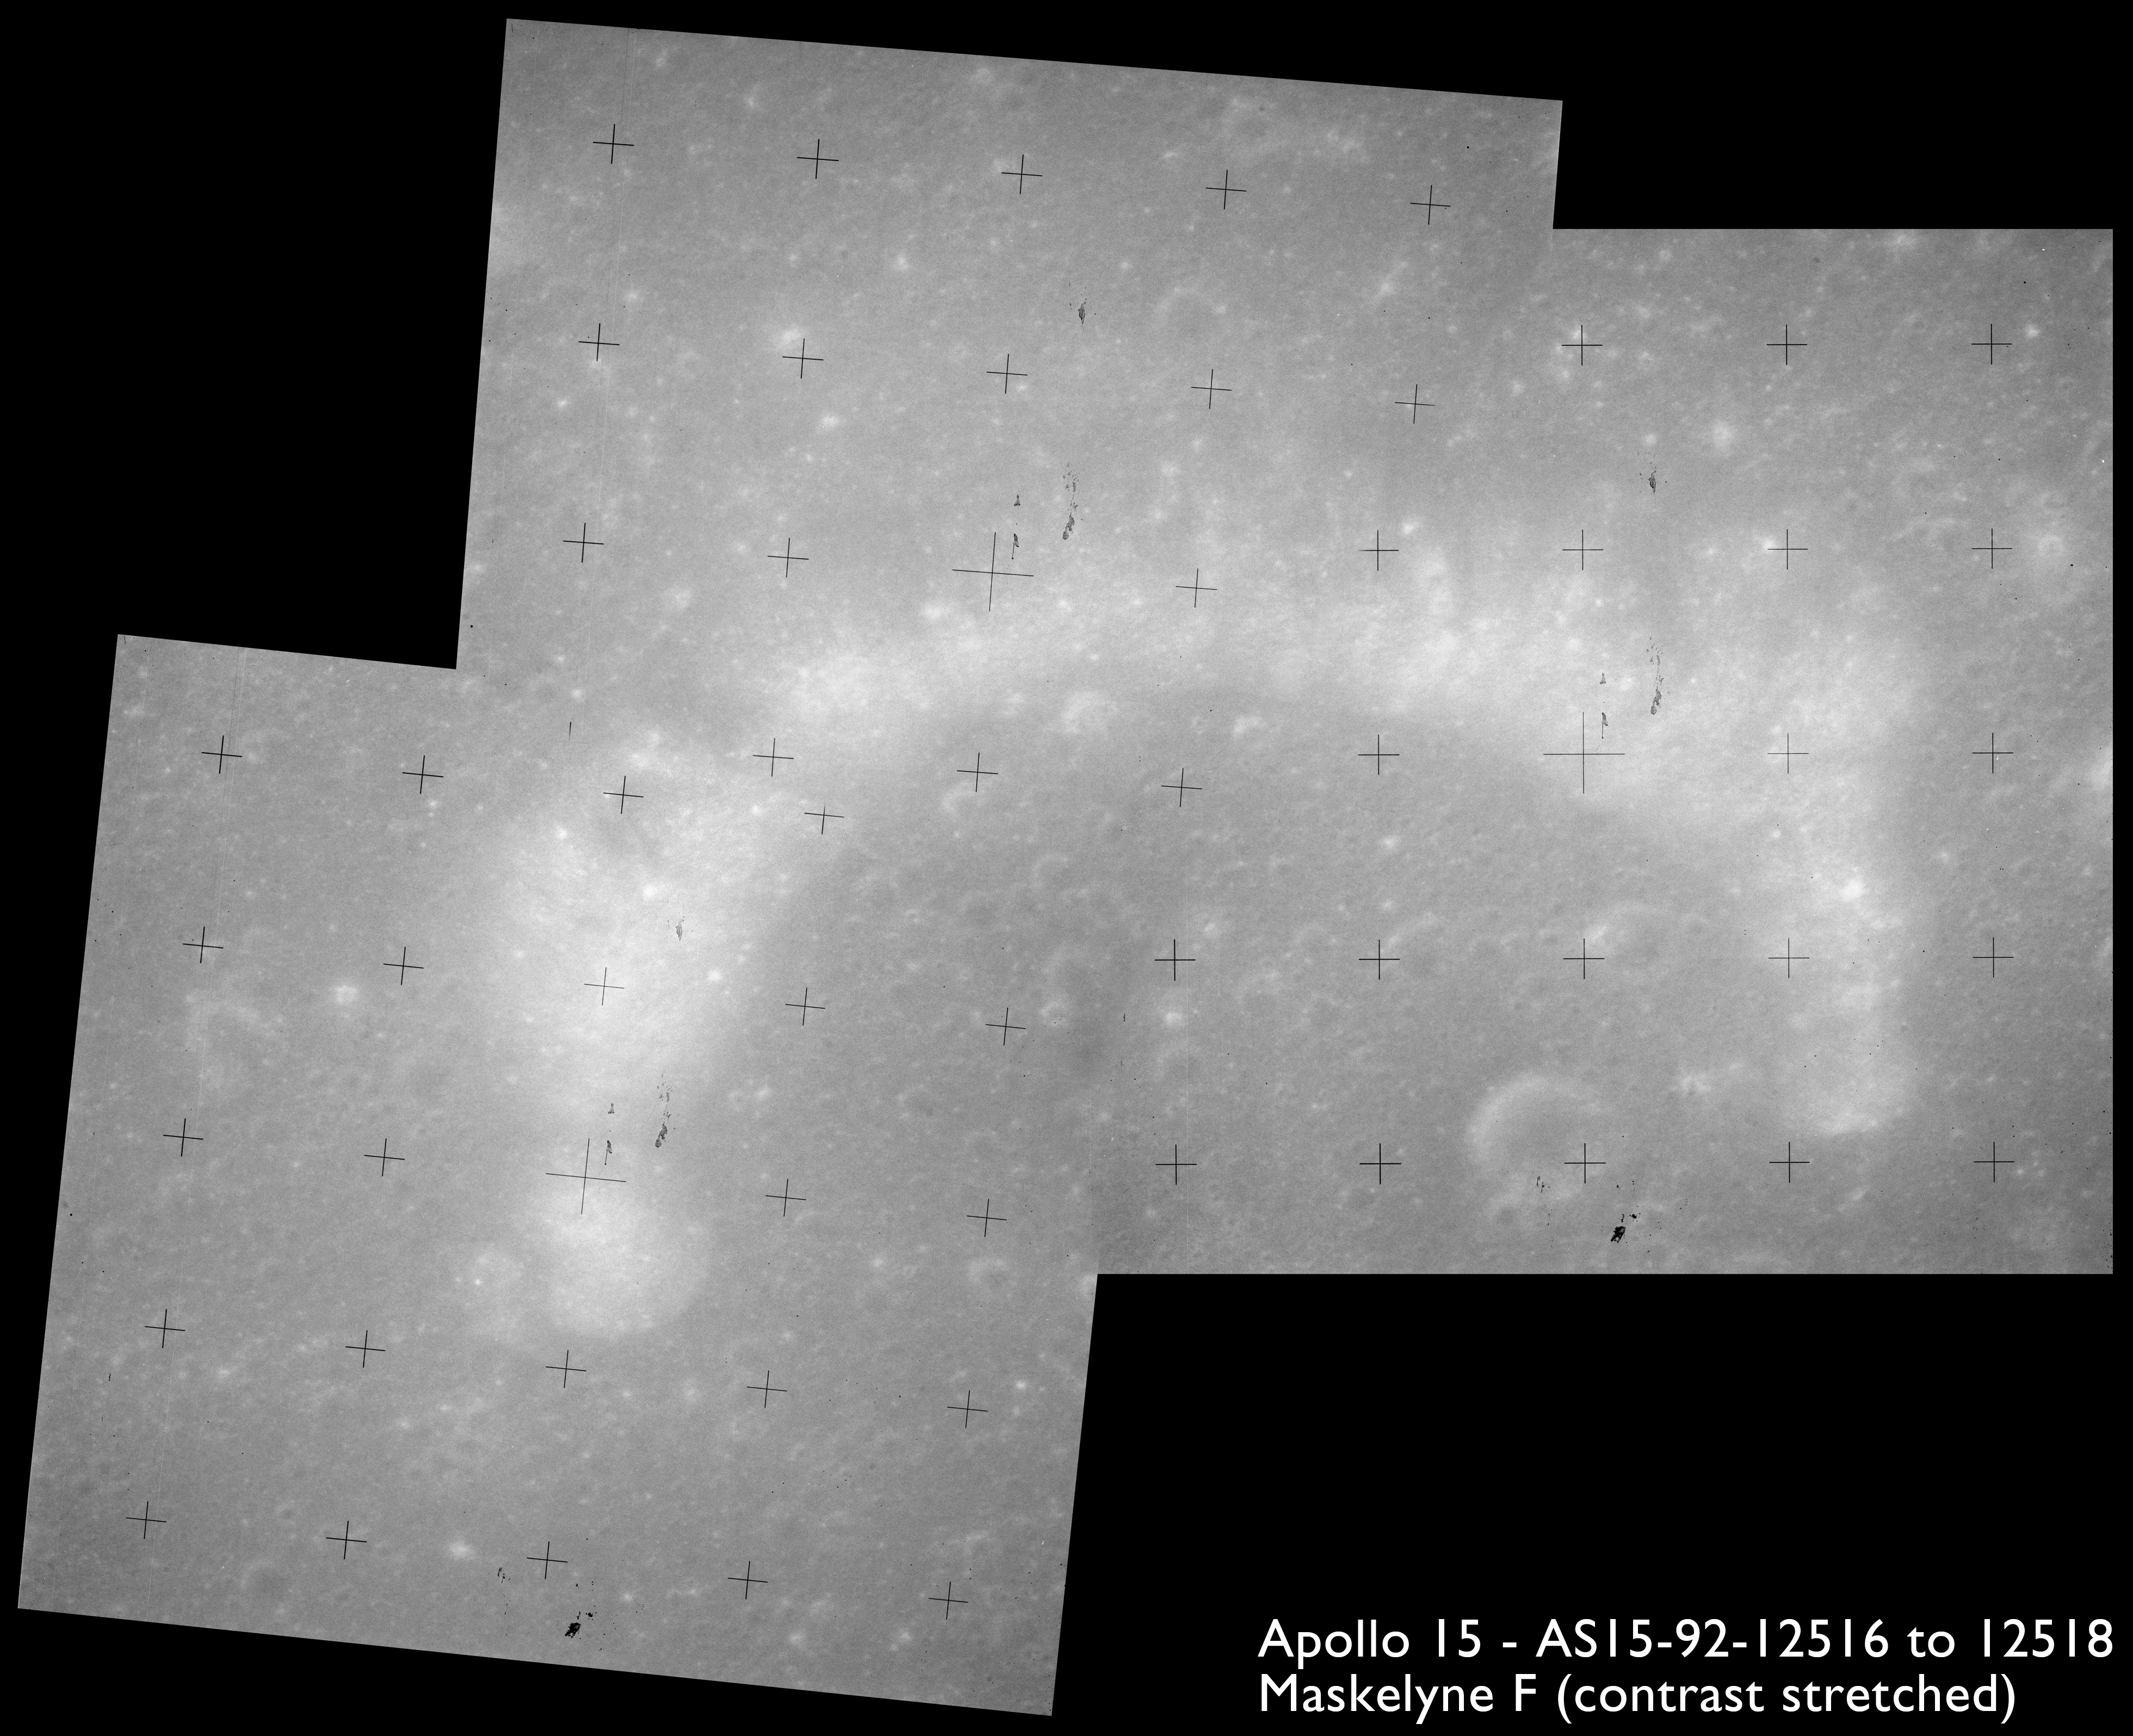
Within Mare Tranquillitatis is a ring of hills which are the remnants of an inundated crater, Maskelyne F. Under the very high Sun, these hills stand out light-coloured against the mare, as seen in AS15-92-12516 to 12518. These images have also been composited here.
AS15-92-12516 - Crater Maskelyne F - Image by NASA/Johnson Space Center.
AS15-92-12517 - Crater Maskelyne F - Image by NASA/Johnson Space Center.
AS15-92-12518 - Crater Maskelyne F - Image by NASA/Johnson Space Center.
Composition of images AS15-92-12516 to 12518 showing inundated crater Maskelyne F. Image contrast has been stretched - Images by NASA/Johnson Space Center.
Frames 12519 to 12522 pinpoint areas northwest of Maskelyne F which come under the heading of special features showing pits, mounds and a crater. The first, 12519, includes a patch of mounds surrounded by a lighter toned surface thought to be formed from gas-rich, foamy lava. Image AS15-81-11013 shows a larger version of the same phenomenon in Lacus Felicitatis known as Ina which shows these characteristics very well.
AS15-92-12519 - Unusual feature 47 km west of crater Maskelyne F. Image centre at 4.38°N, 33.81°E - Image by NASA/Johnson Space Center.
LROC narrow-angle image of mounds 47 km west of crater Maskelyne F - Image by LROC/ASU.
AS15-92-12520 - Hills northwest of crater Maskelyne F. Image centre at 5.29°N, 33.46°E - Image by NASA/Johnson Space Center.
AS15-92-12521 - Crater Sinas K. Image centre at 6.74°N, 33.16°E - Image by NASA/Johnson Space Center.
AS15-92-12522 - Hills northwest of crater Maskelyne F. Image centre at 6.89°N, 32.55°E - Image by NASA/Johnson Space Center.
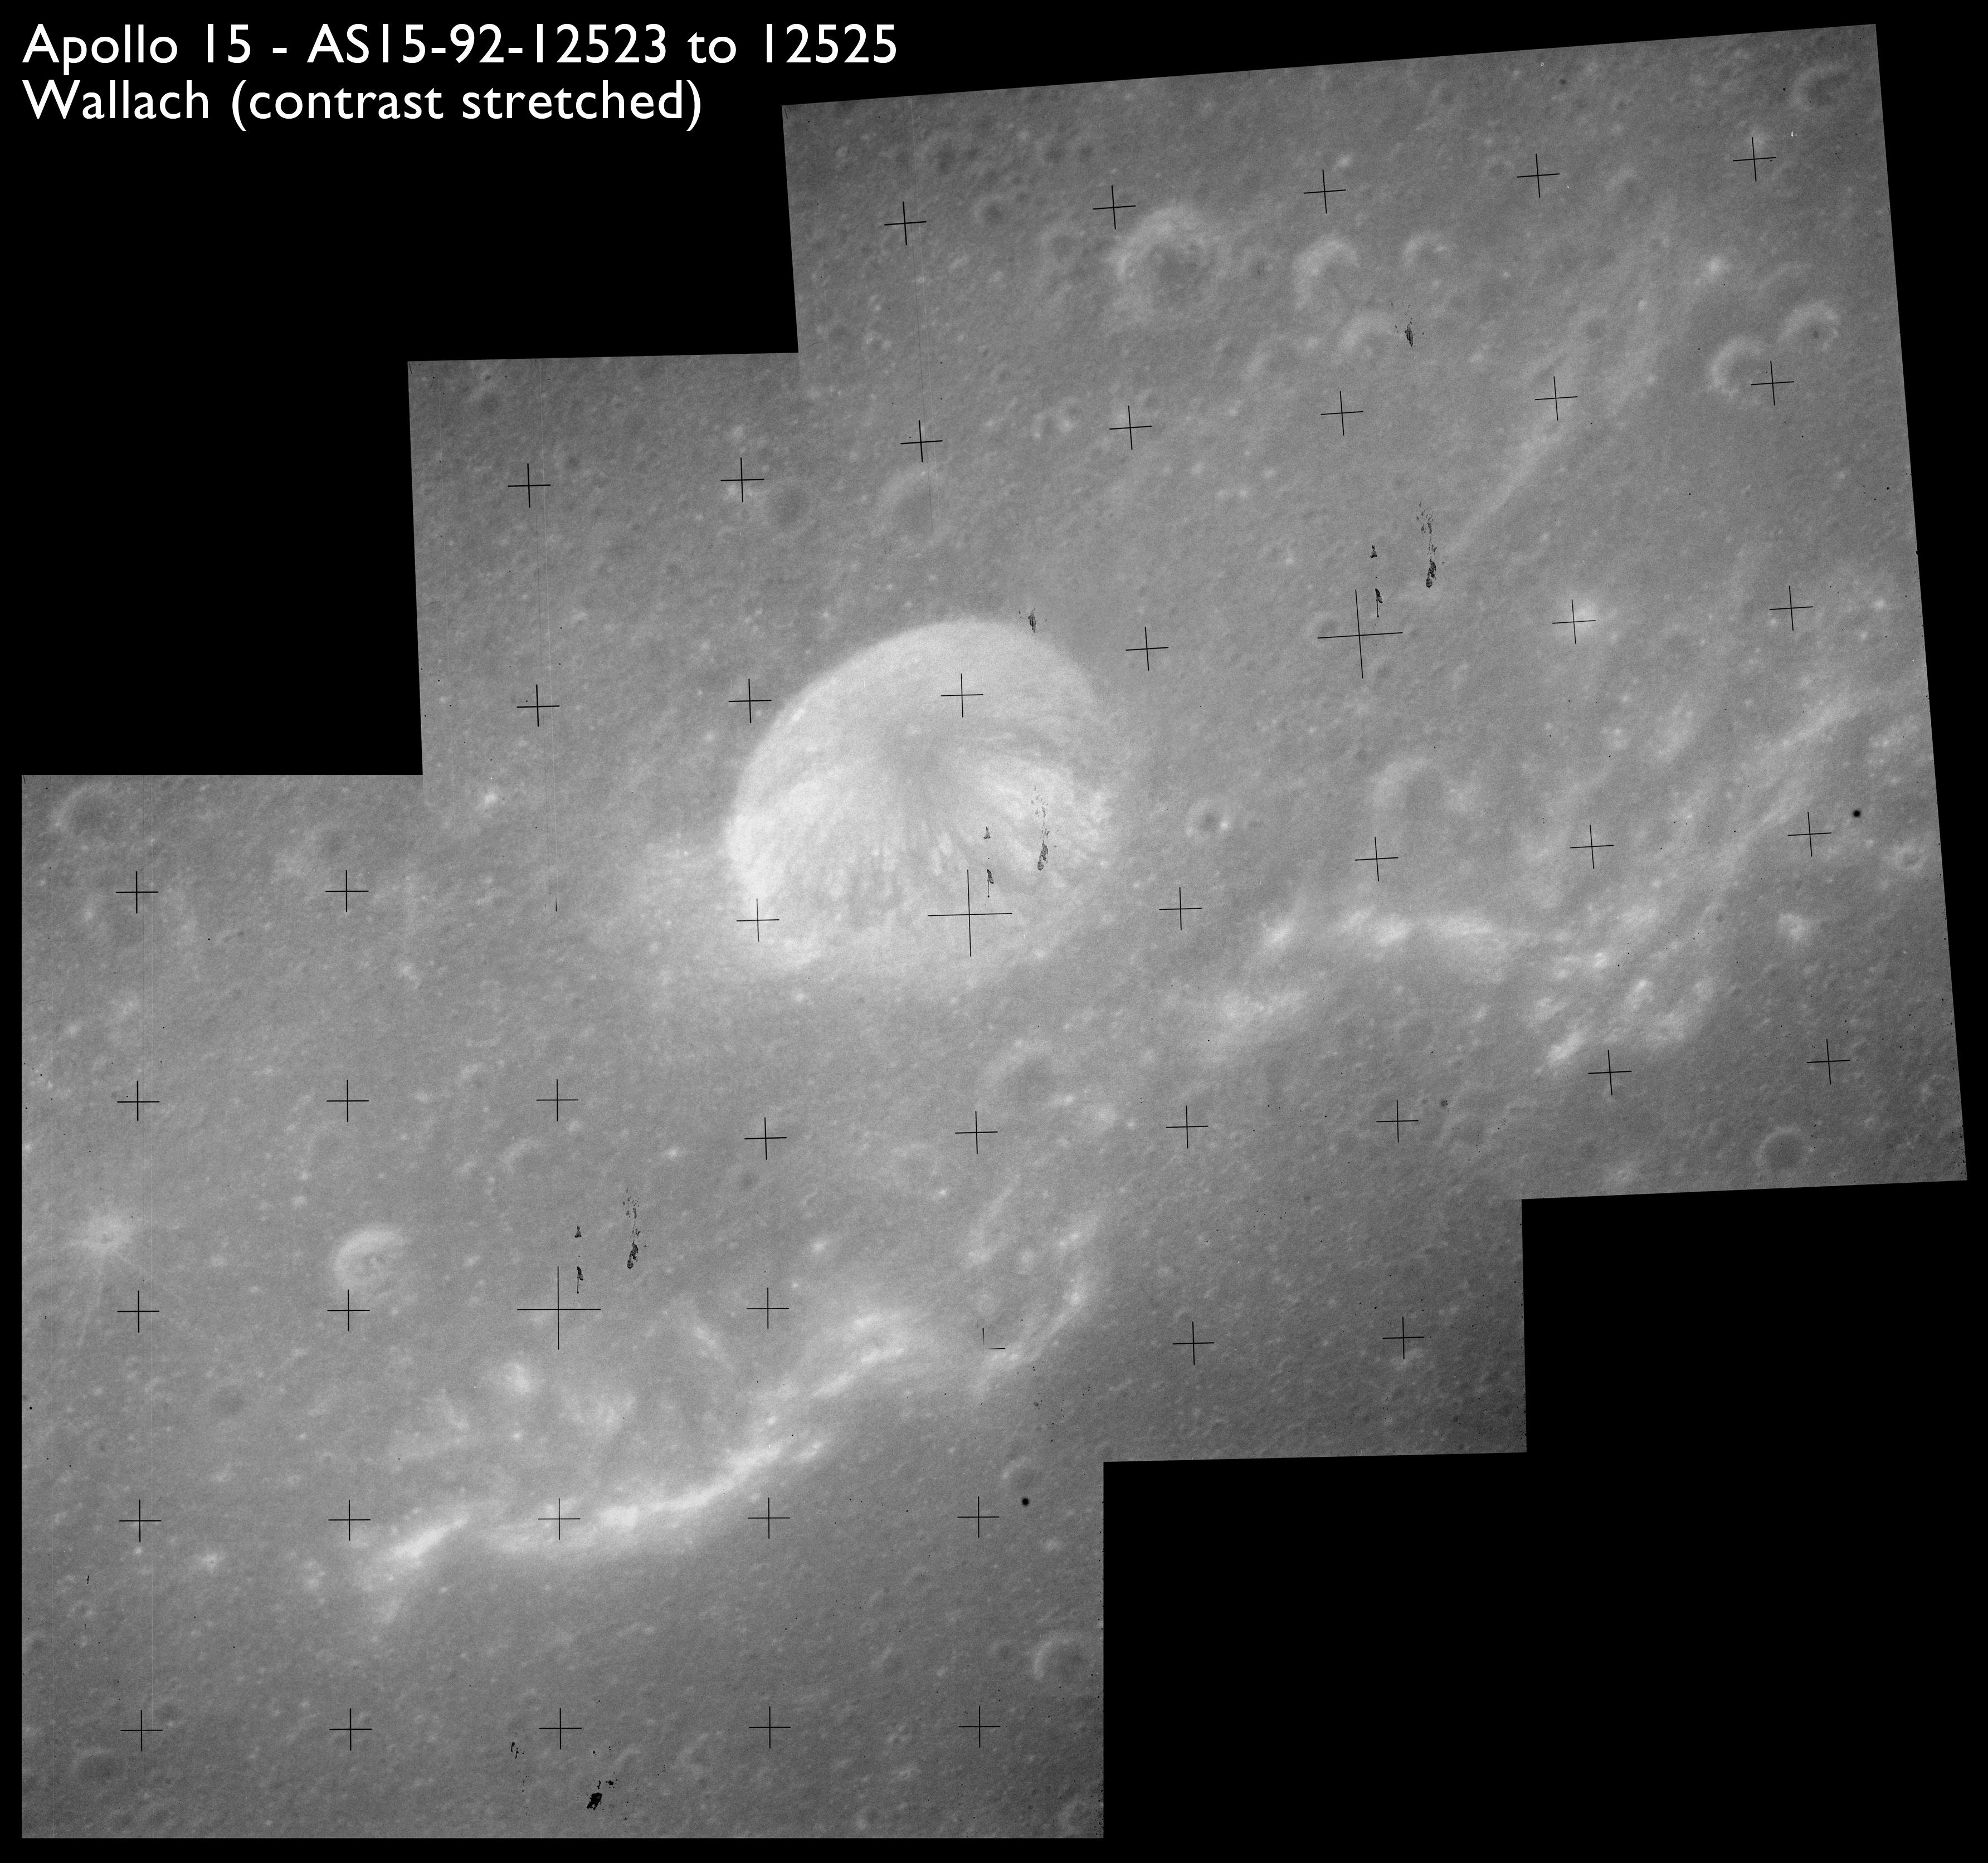
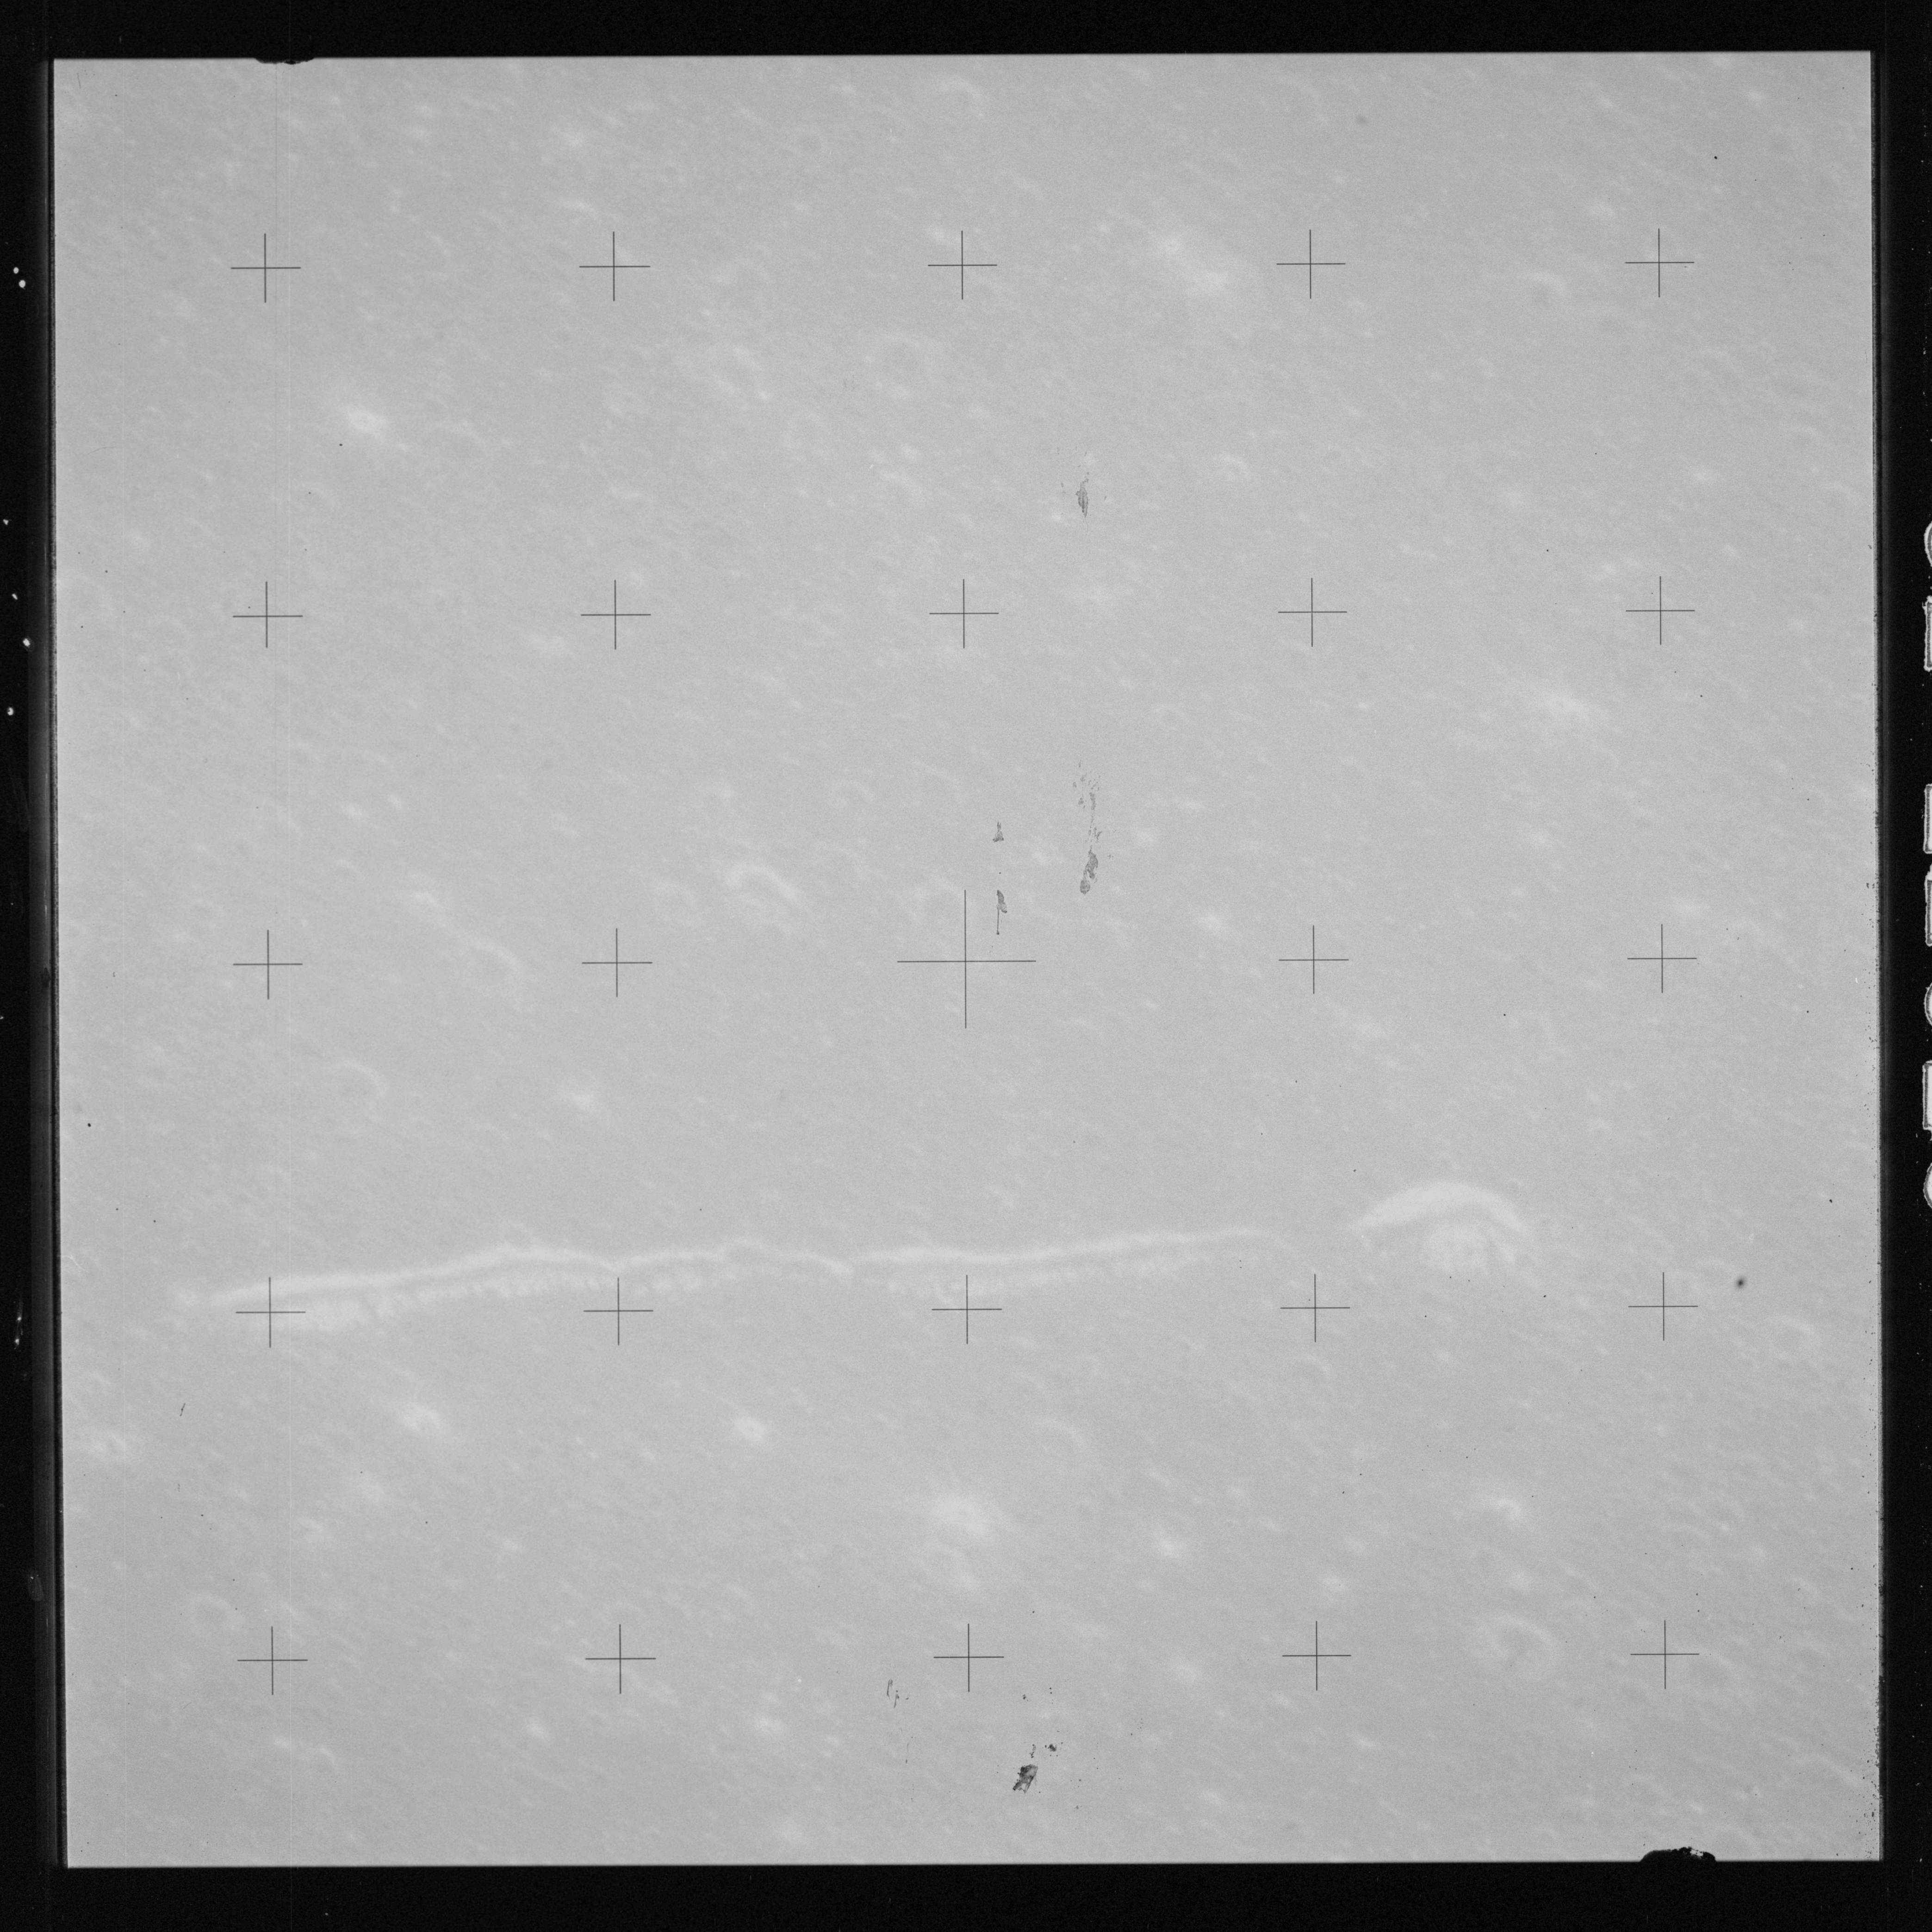
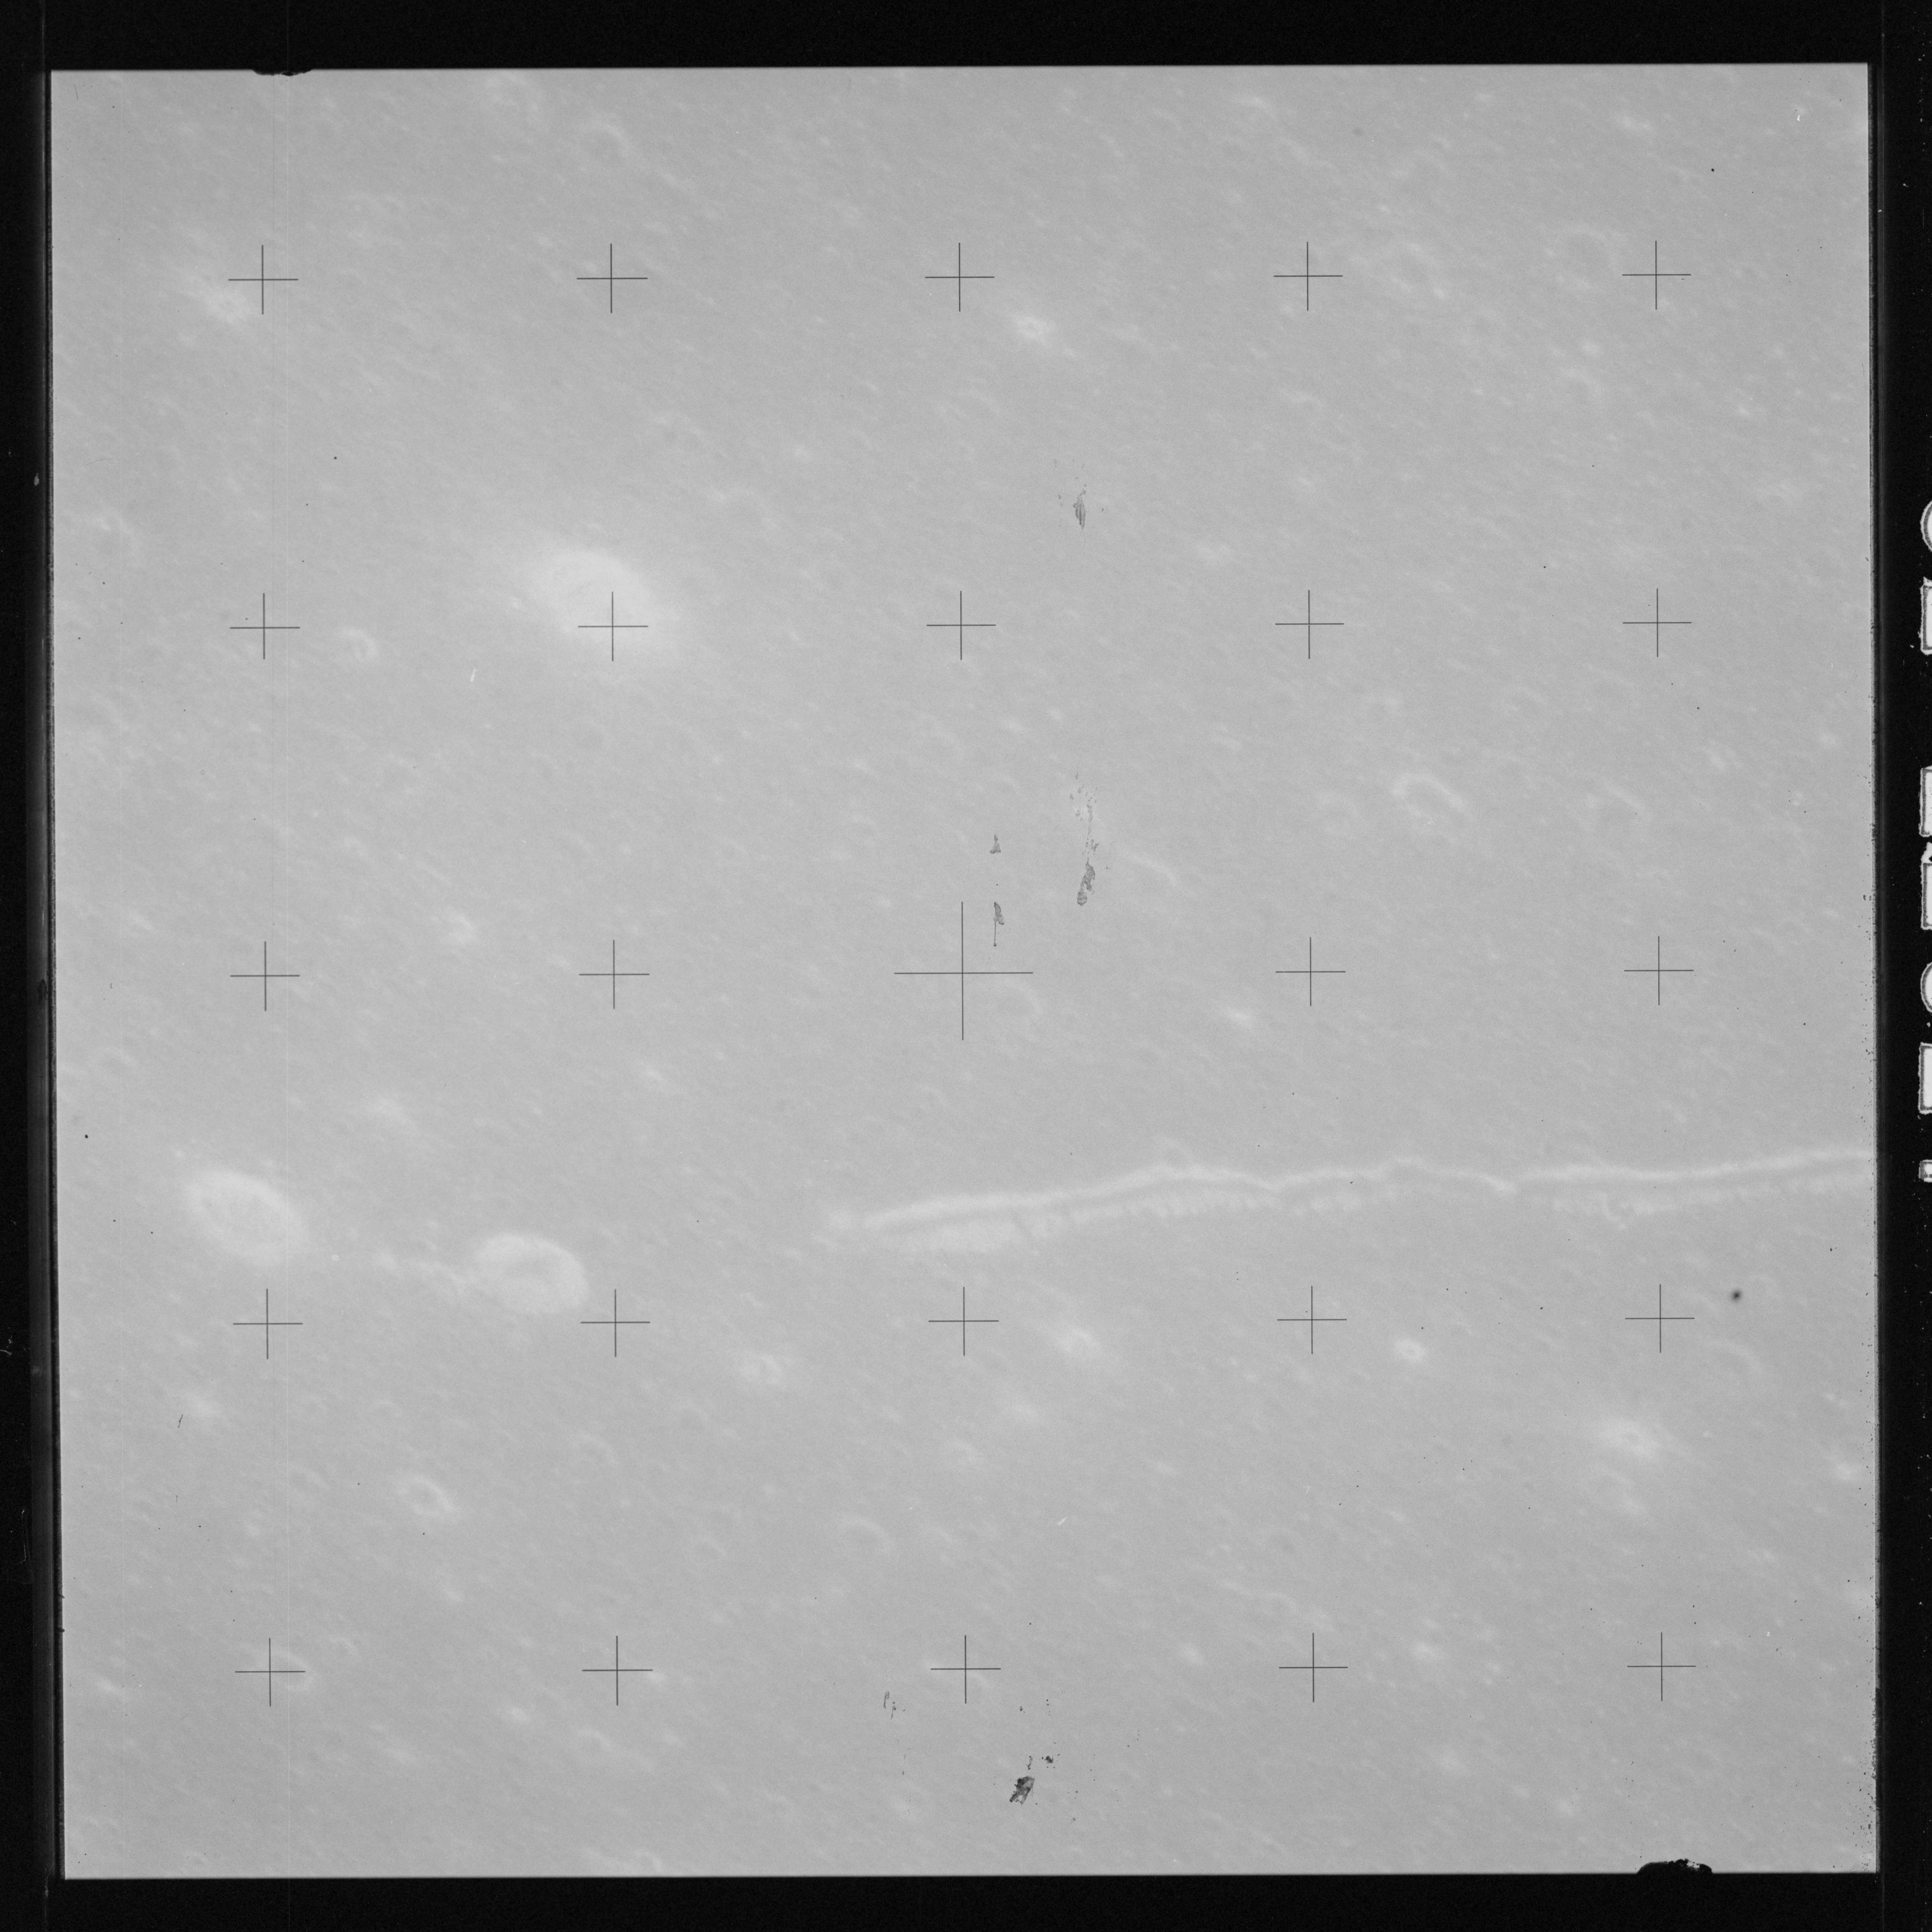
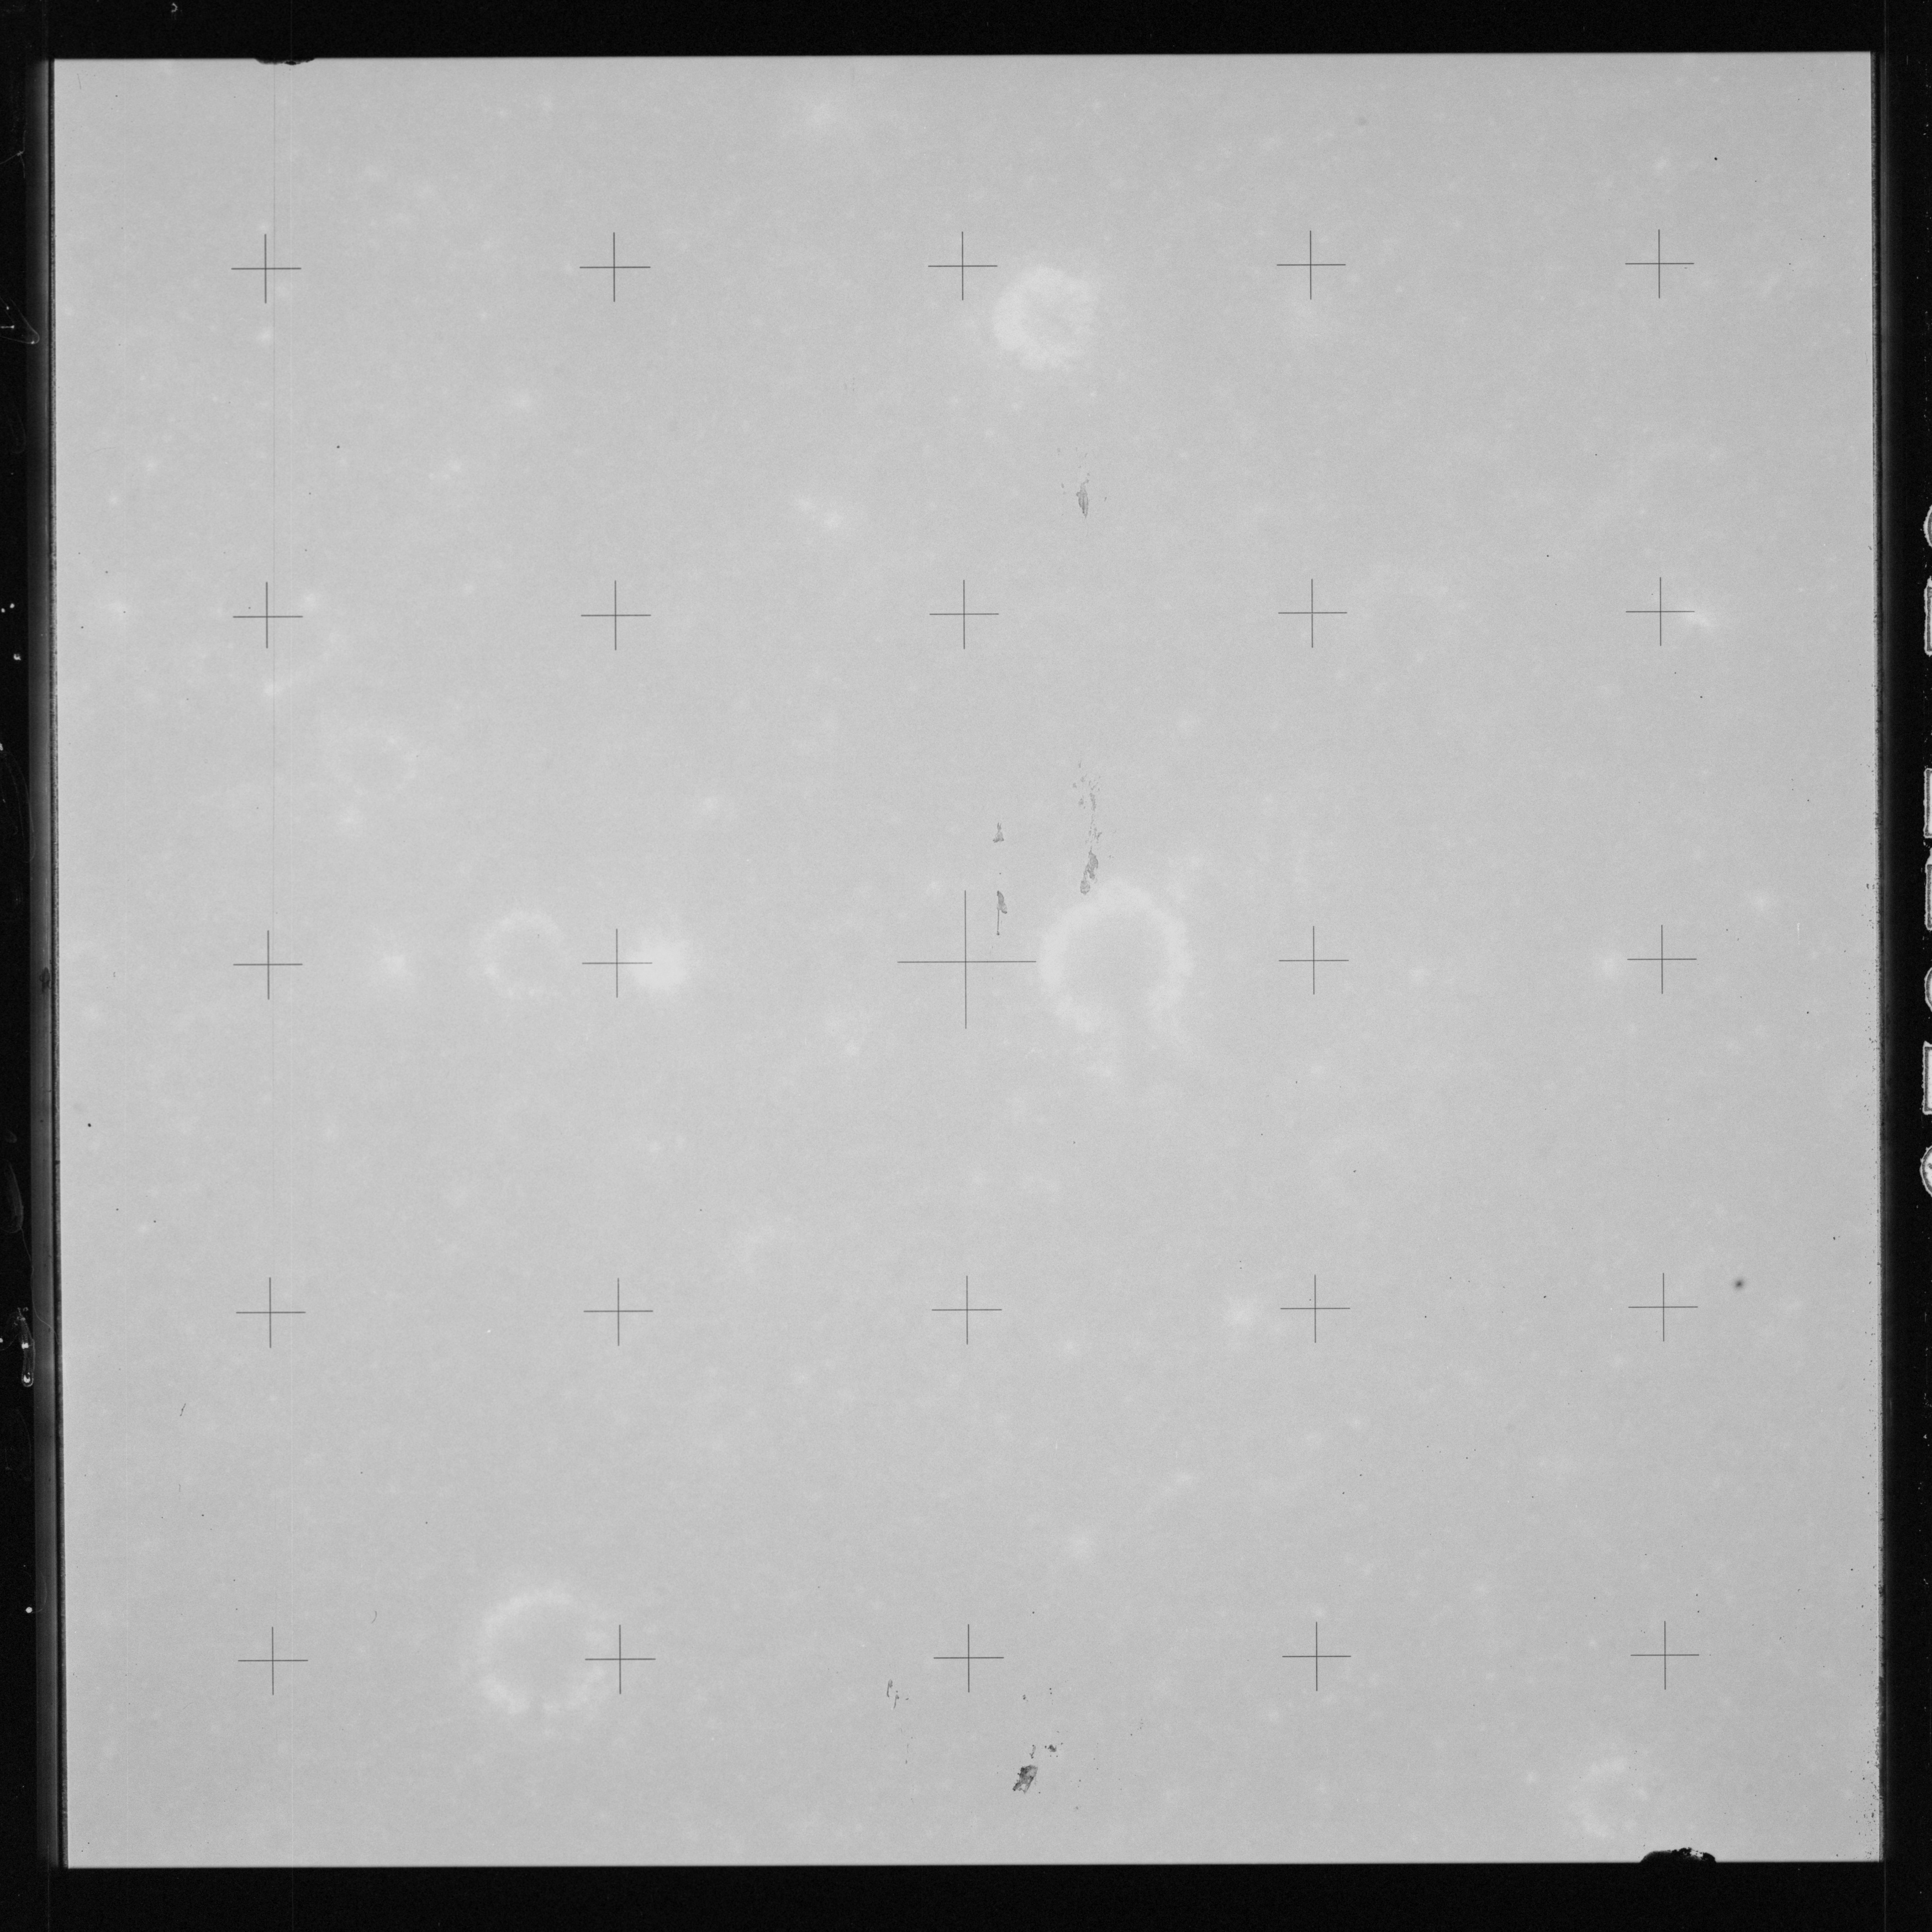
Frames AS15-92-12523 to 12525 are of a small, 6-km pit formerly called Maskelyne H but now named after Otto Wallach, 1847-1931, a chemist from Germany. Wallach is sited about 90 km from Maskelyne next to a cluster of low hills.
AS15-92-12523 - Crater Wallach - Image by NASA/Johnson Space Center.
AS15-92-12524 - Crater Wallach - Image by NASA/Johnson Space Center.
AS15-92-12525 - Crater Wallach - Image by NASA/Johnson Space Center.
Composition of images AS15-92-12523 to 12525 showing crater Wallach. Image contrast has been stretched - Images by NASA/Johnson Space Center.
Photography of 'special features' continues, mostly on magazine OO.
AS15-92-12526 - Rille NW of Maskelyne. Image centre at 5.14°N, 28.34°E - Image by NASA/Johnson Space Center.
AS15-92-12527 - Rille NW of Maskelyne. Image centre at 5.42°N, 27.95°E - Image by NASA/Johnson Space Center.
AS15-92-12528 - Craters within Mare Tranquillitatis. Image centre at 6.60°N, 30.99°E - Image by NASA/Johnson Space Center.
AS15-92-12529 - Crater cluster within Mare Tranquillitatis. Image centre at 7.08°N, 29.90°E - Image by NASA/Johnson Space Center.
AS15-92-12530 - Rille on Mare Tranquillitatis. Image centre at 9.18°N, 27.78°E - Image by NASA/Johnson Space Center.
AS15-92-12531 - Rille on Mare Tranquillitatis. Image centre at 9.20°N, 27.73°E - Image by NASA/Johnson Space Center.
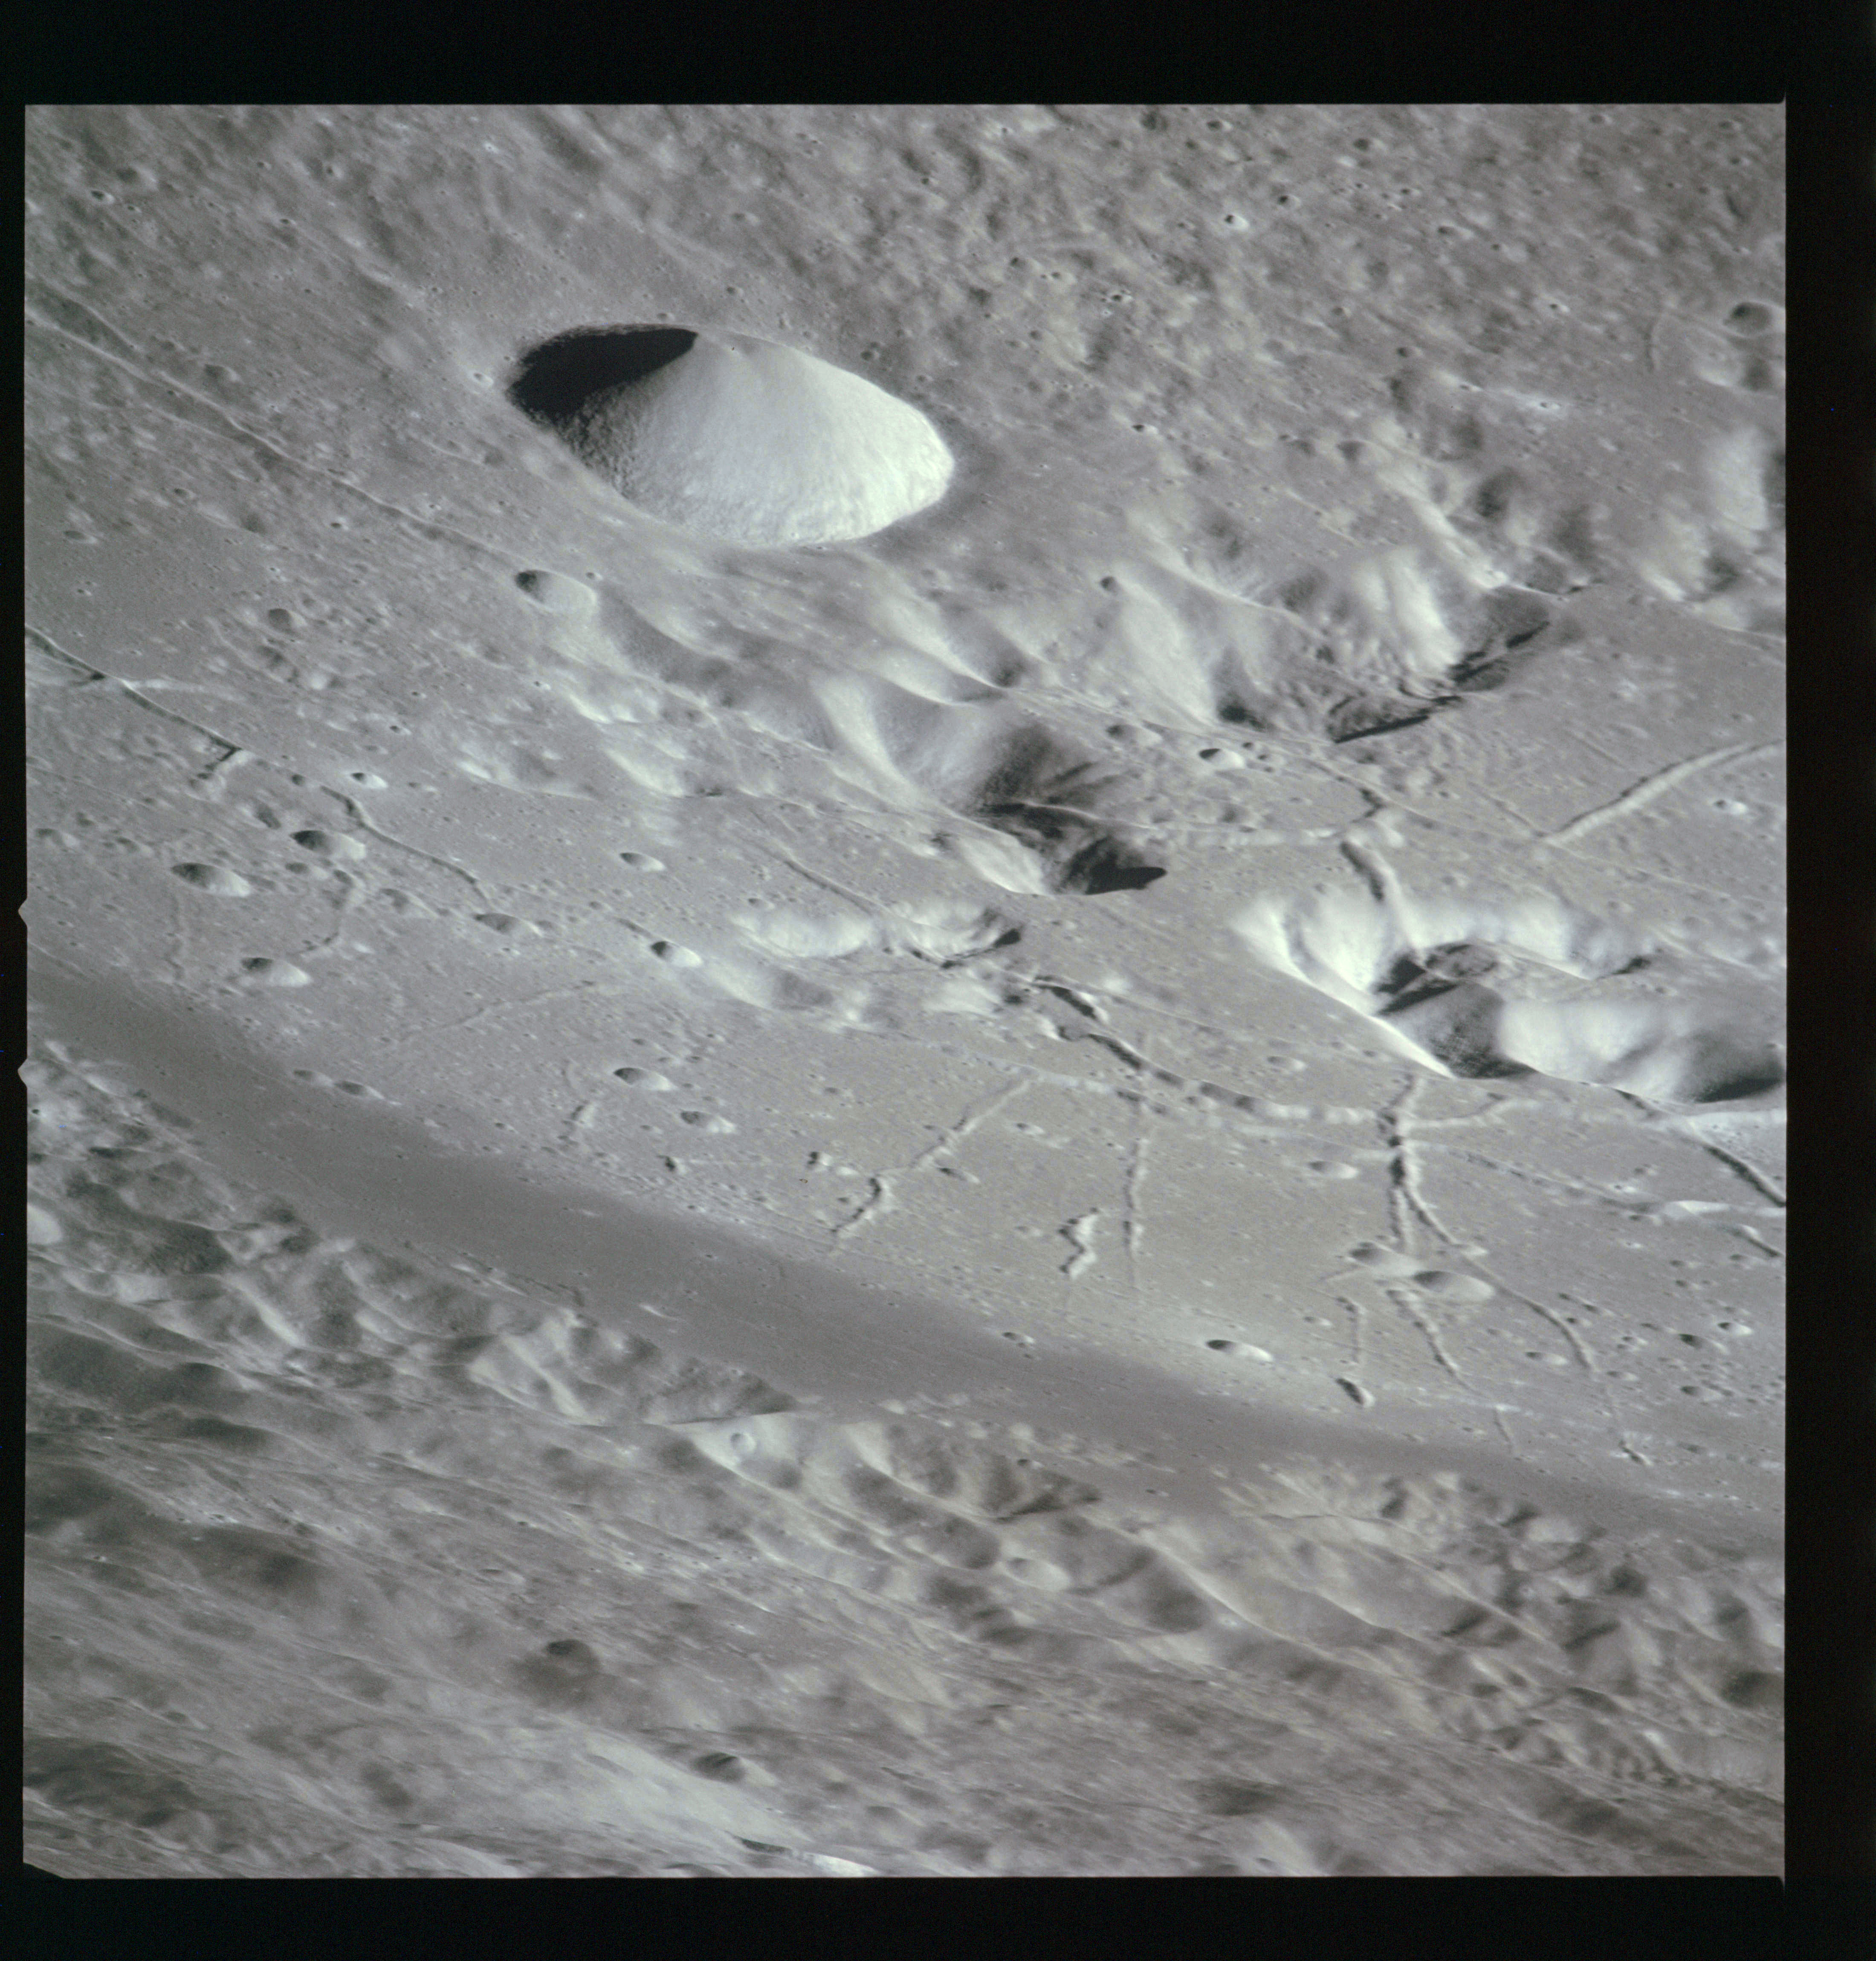
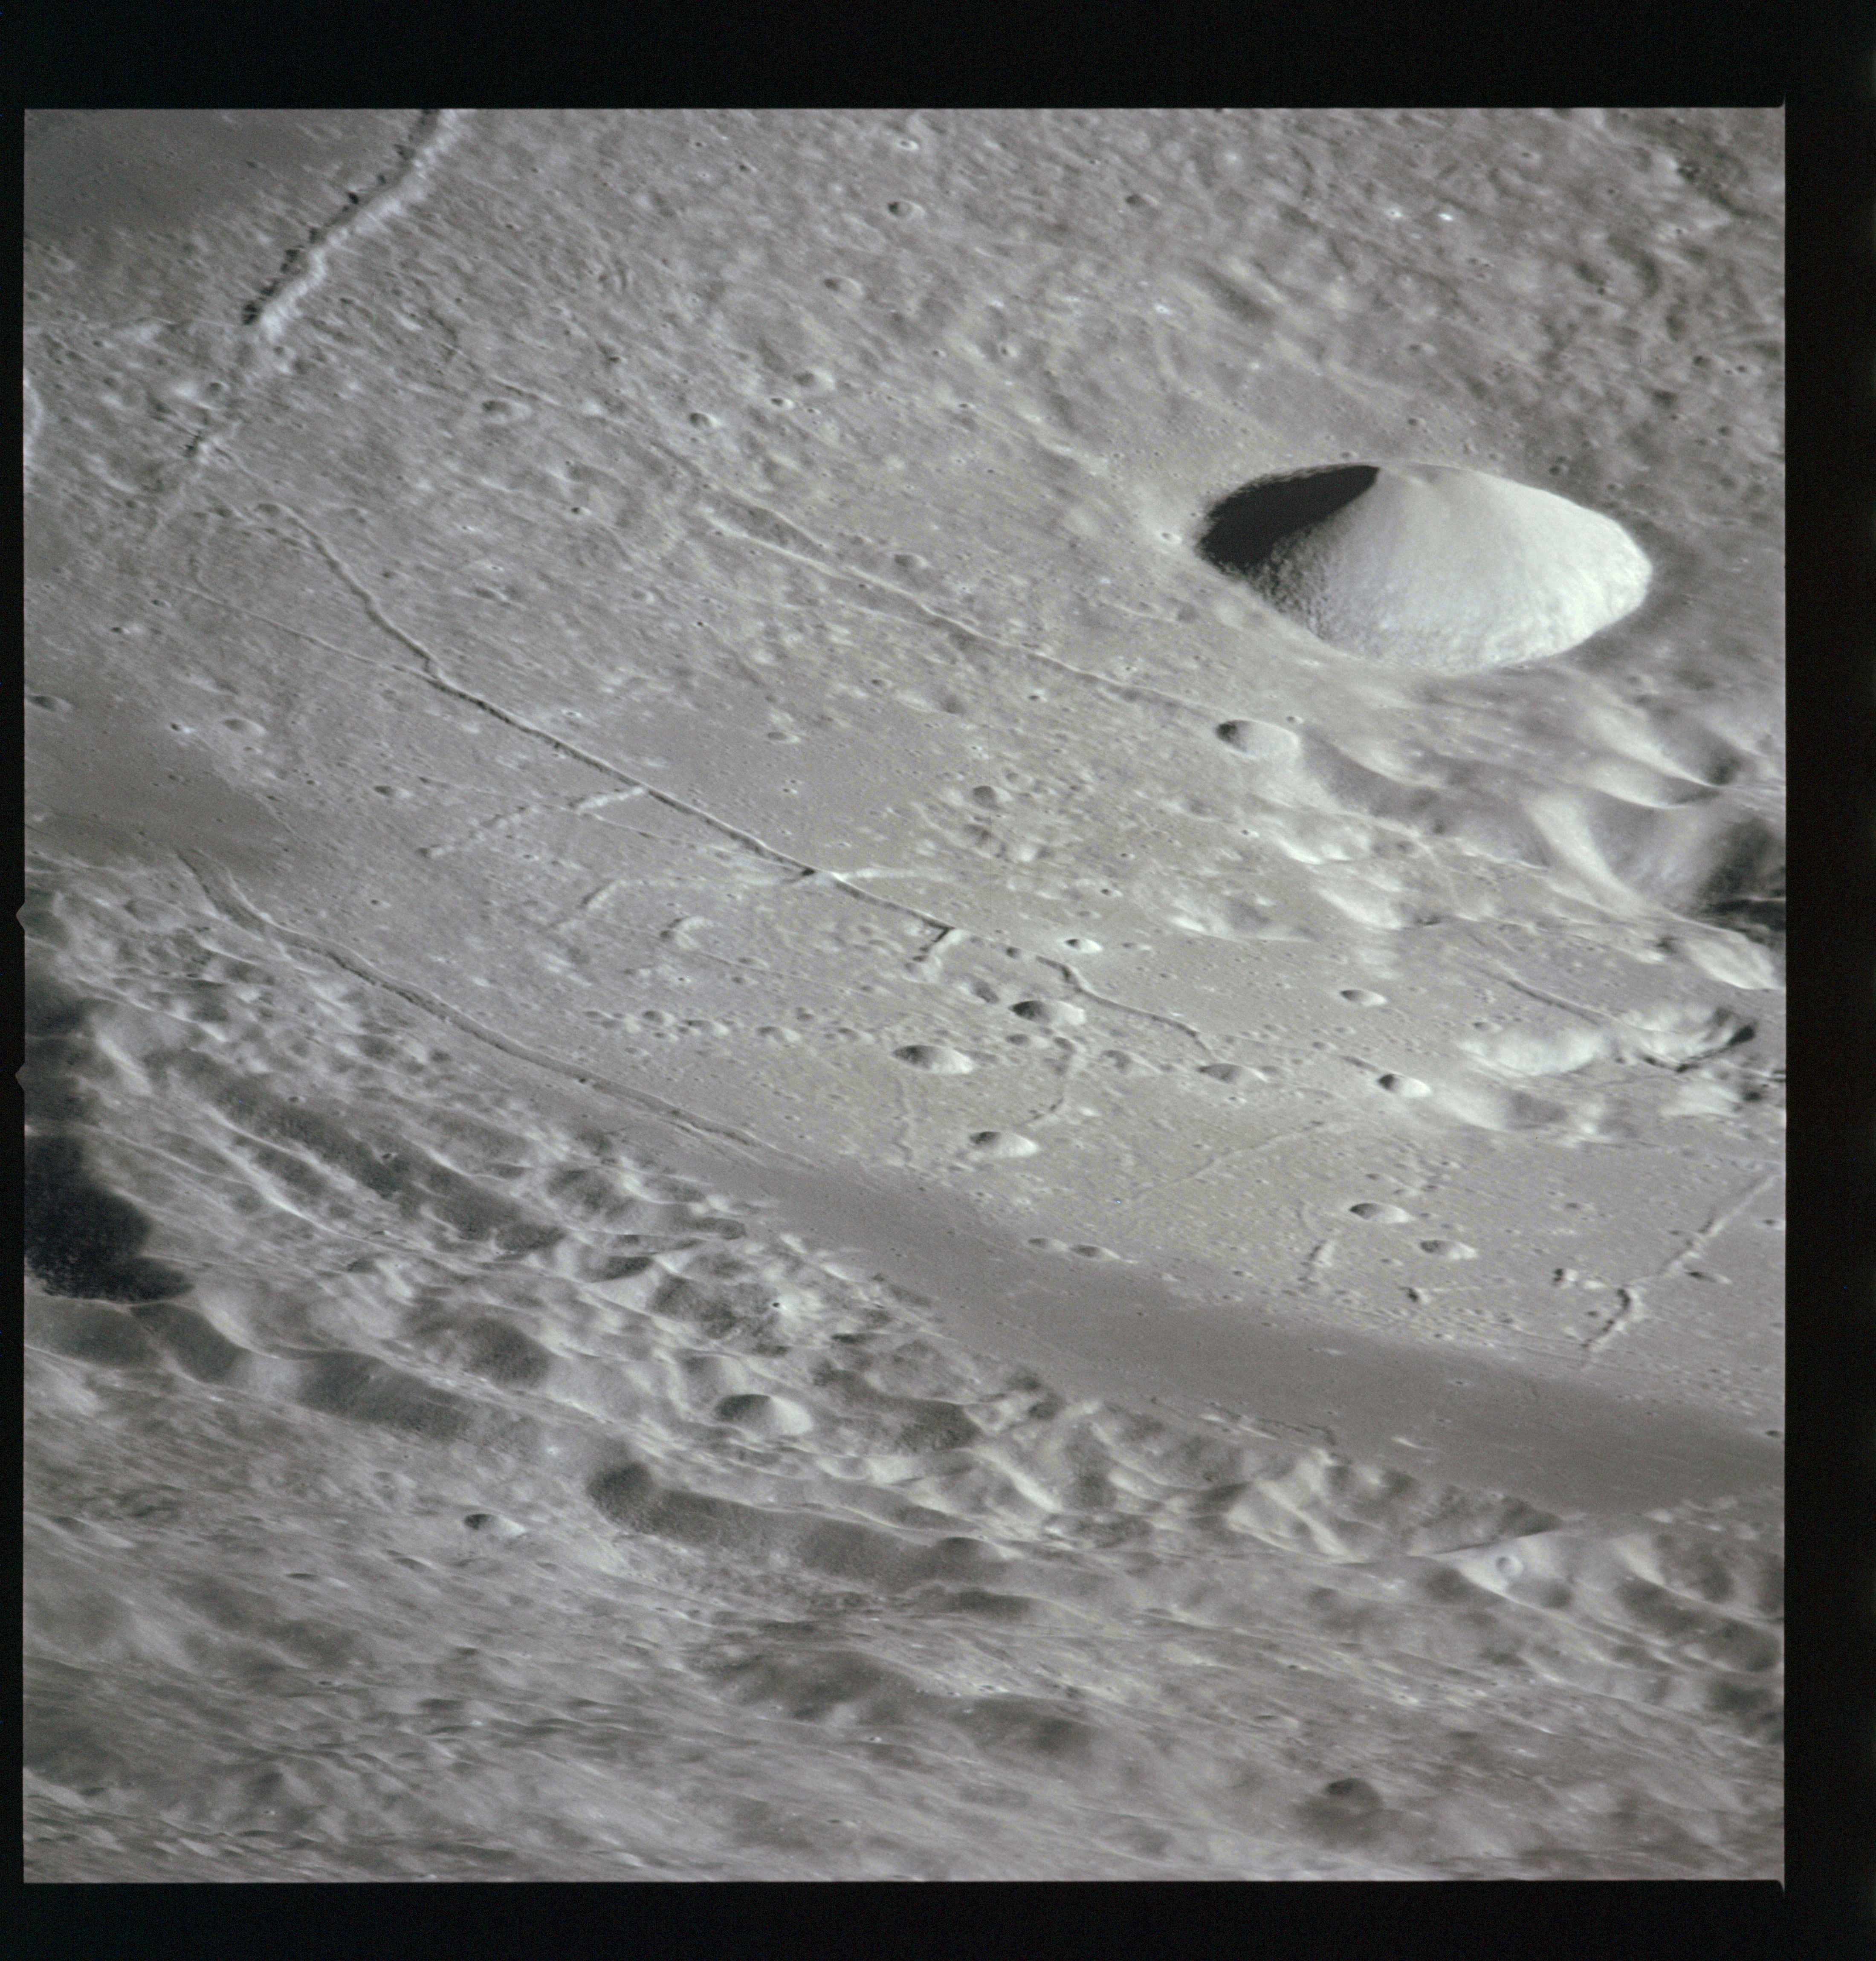
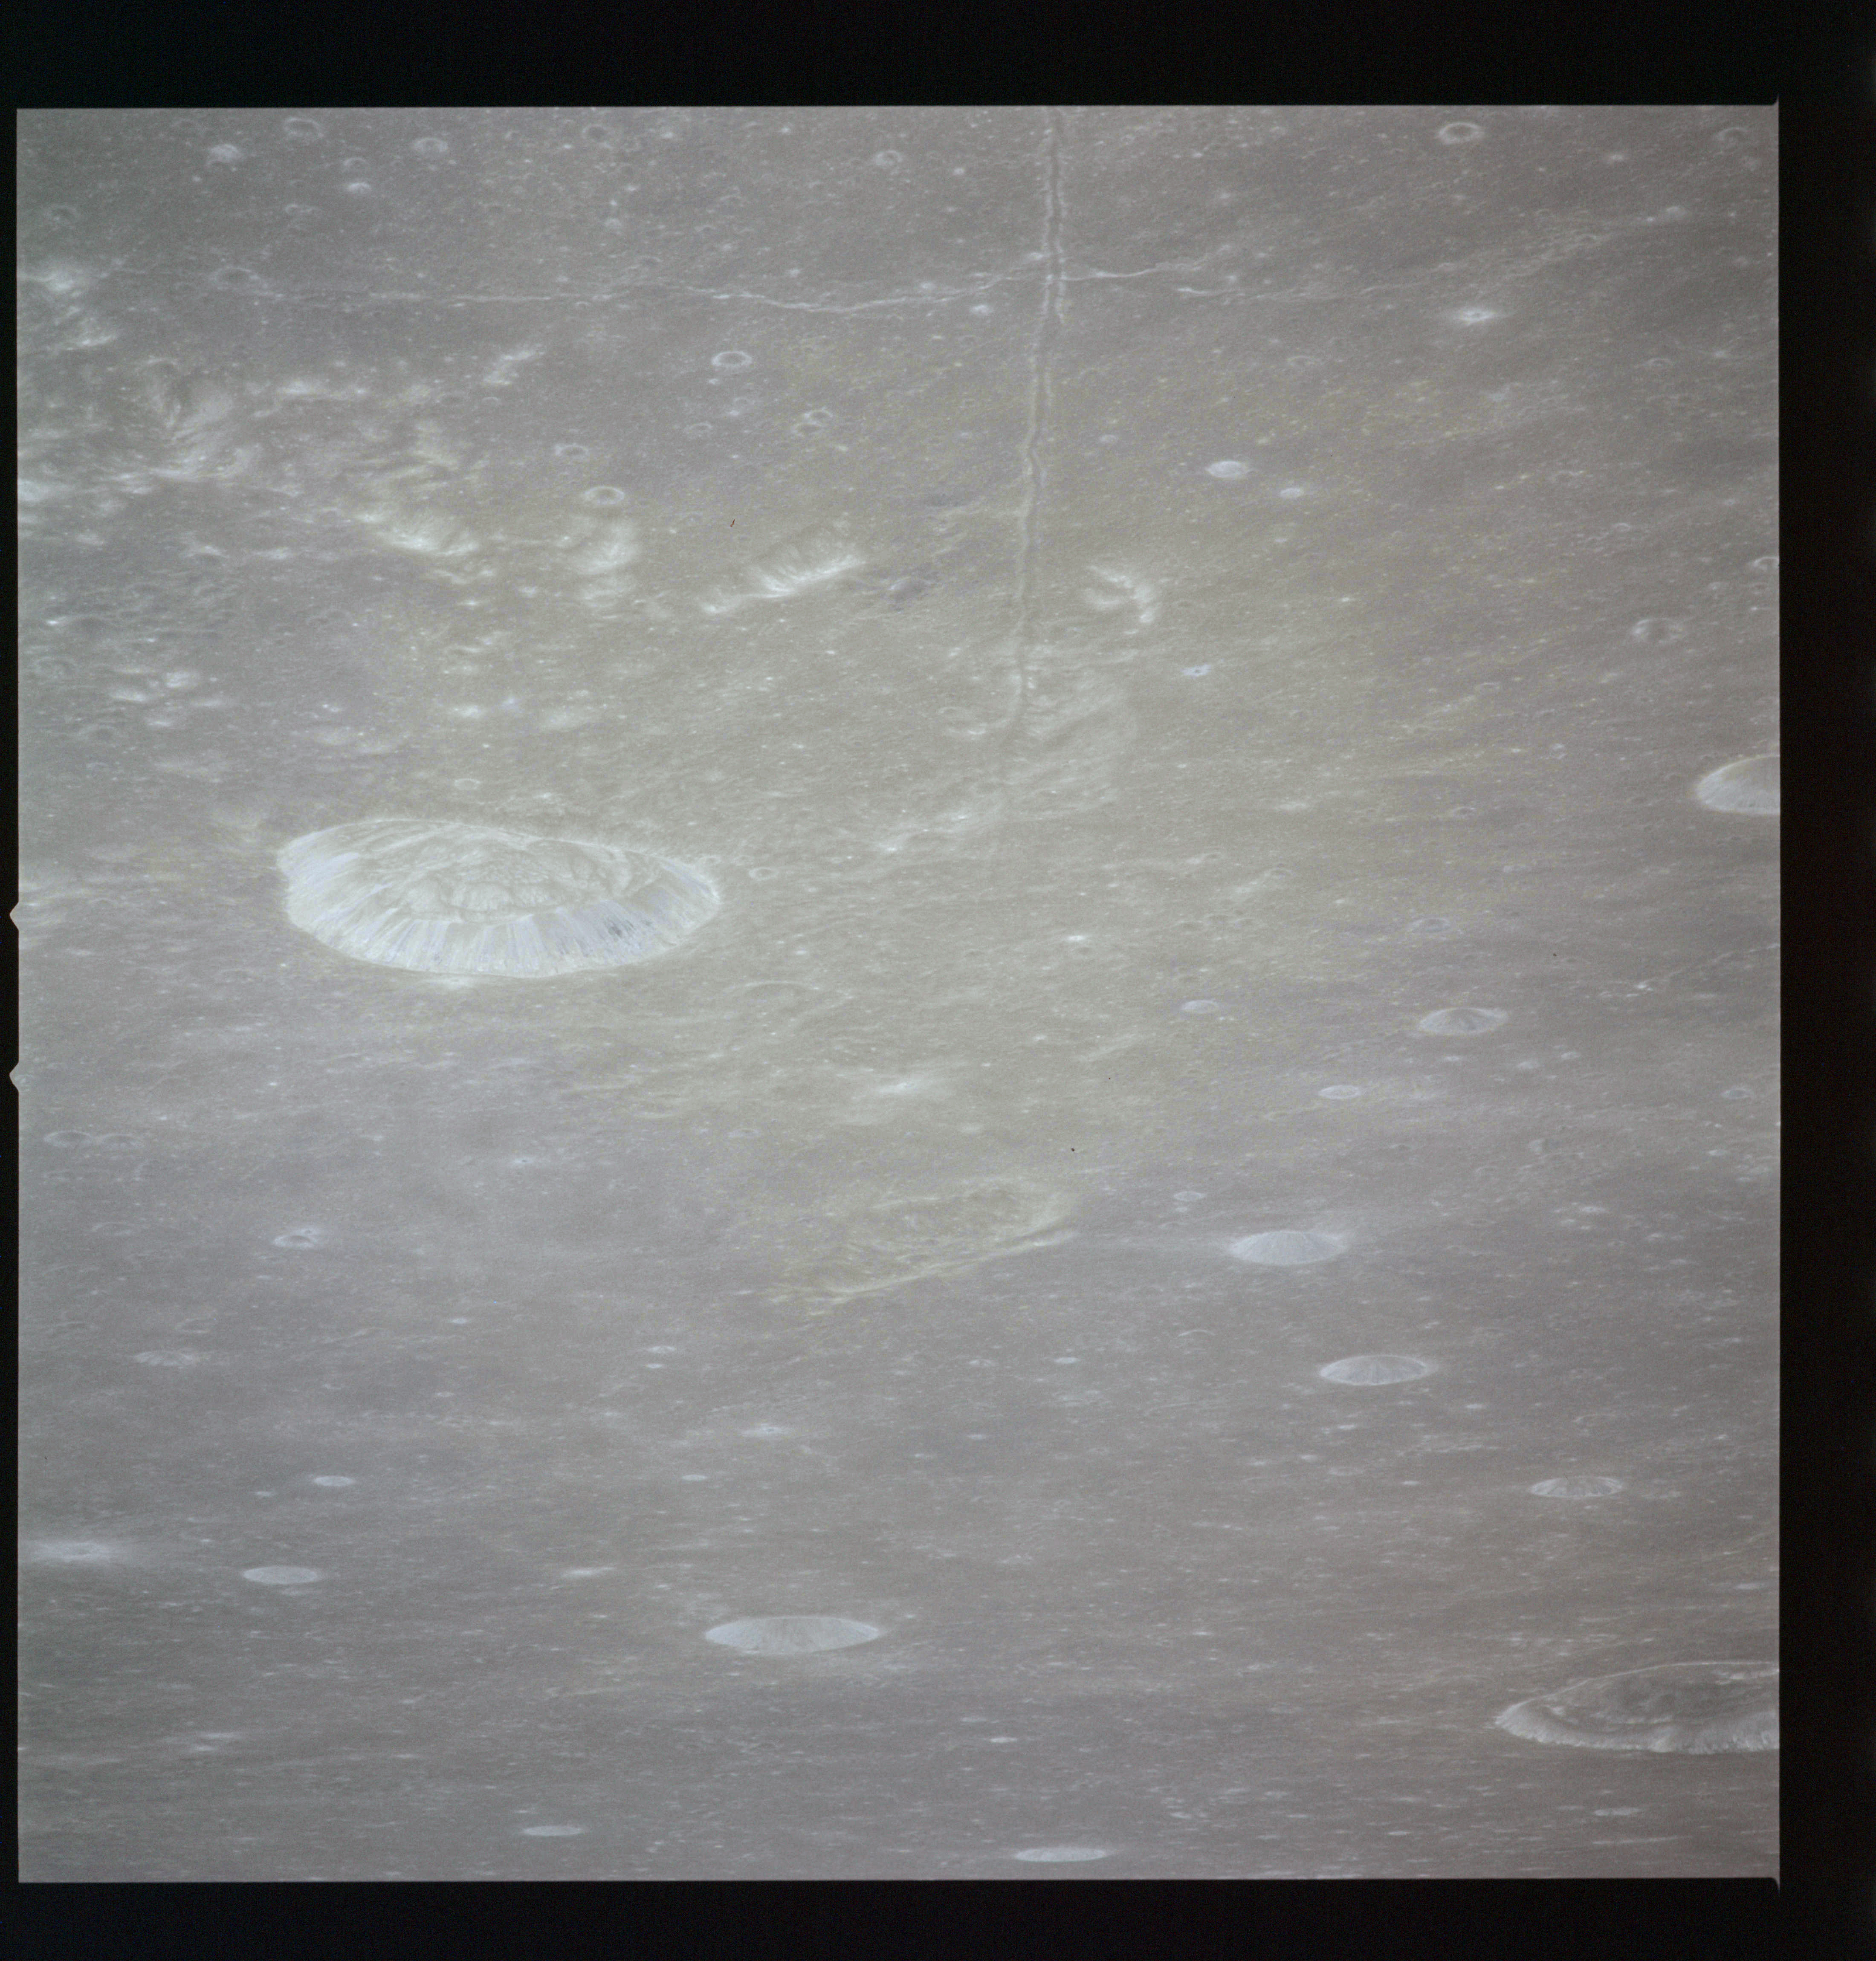
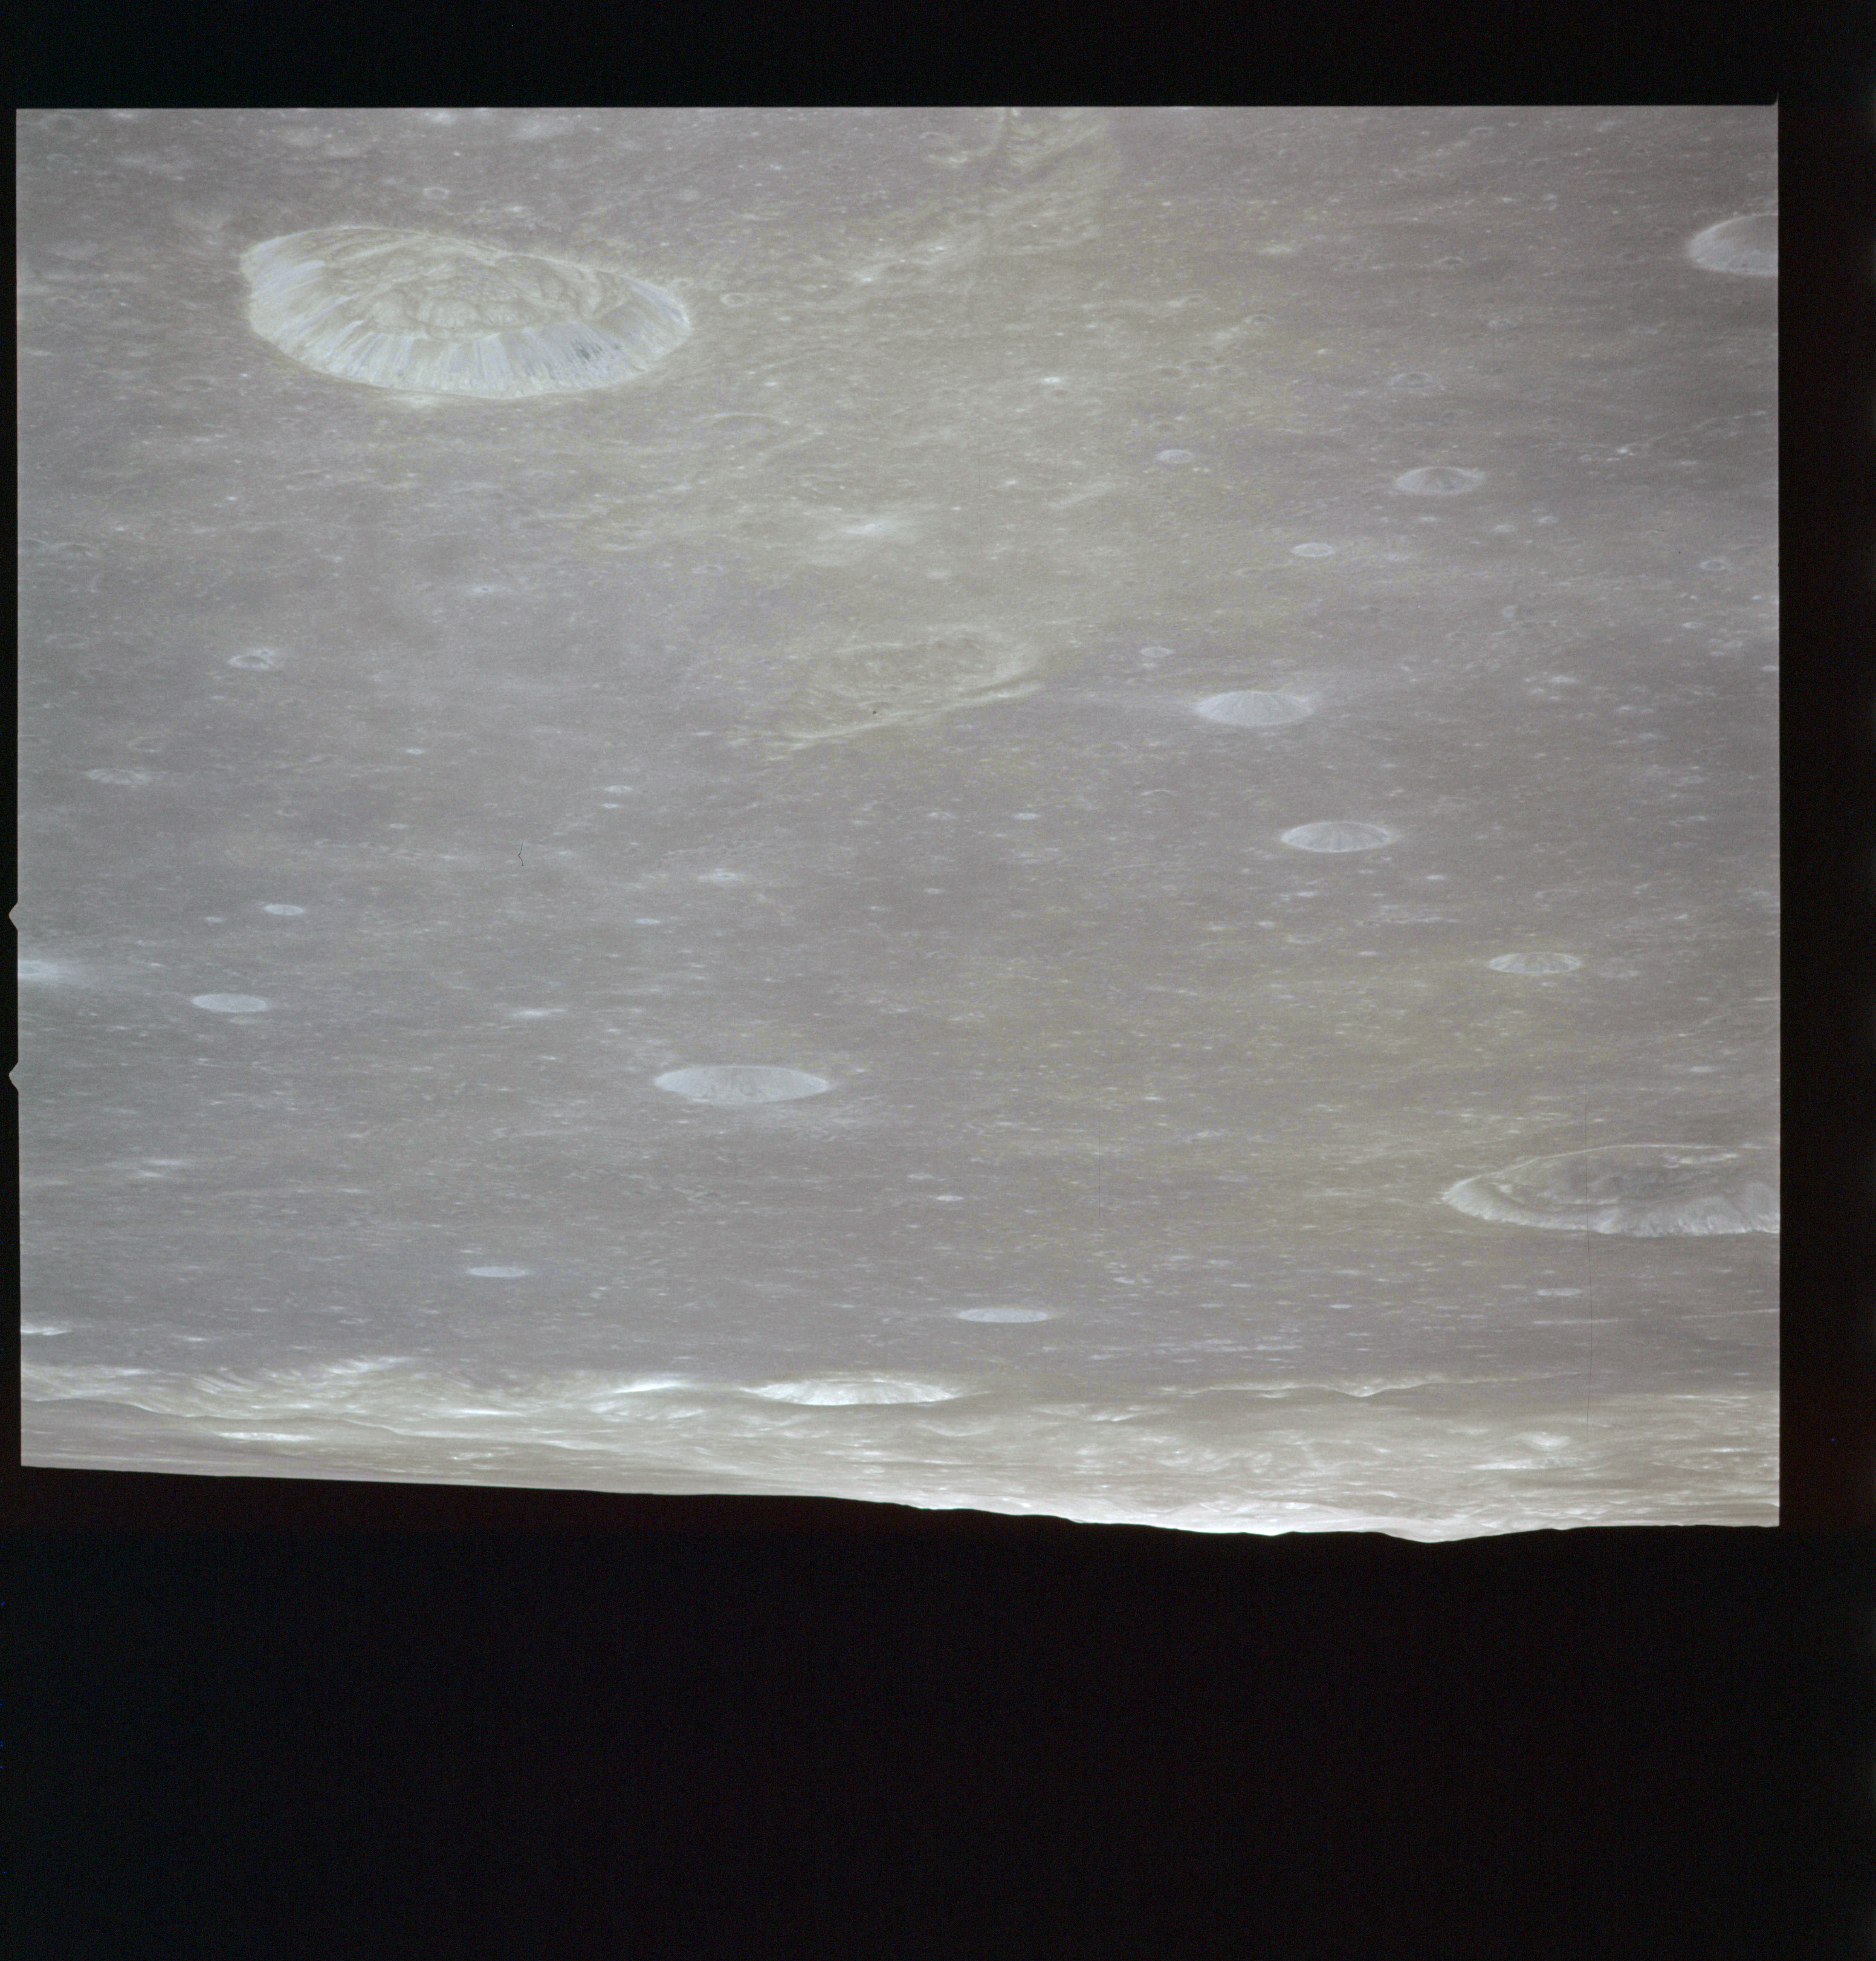
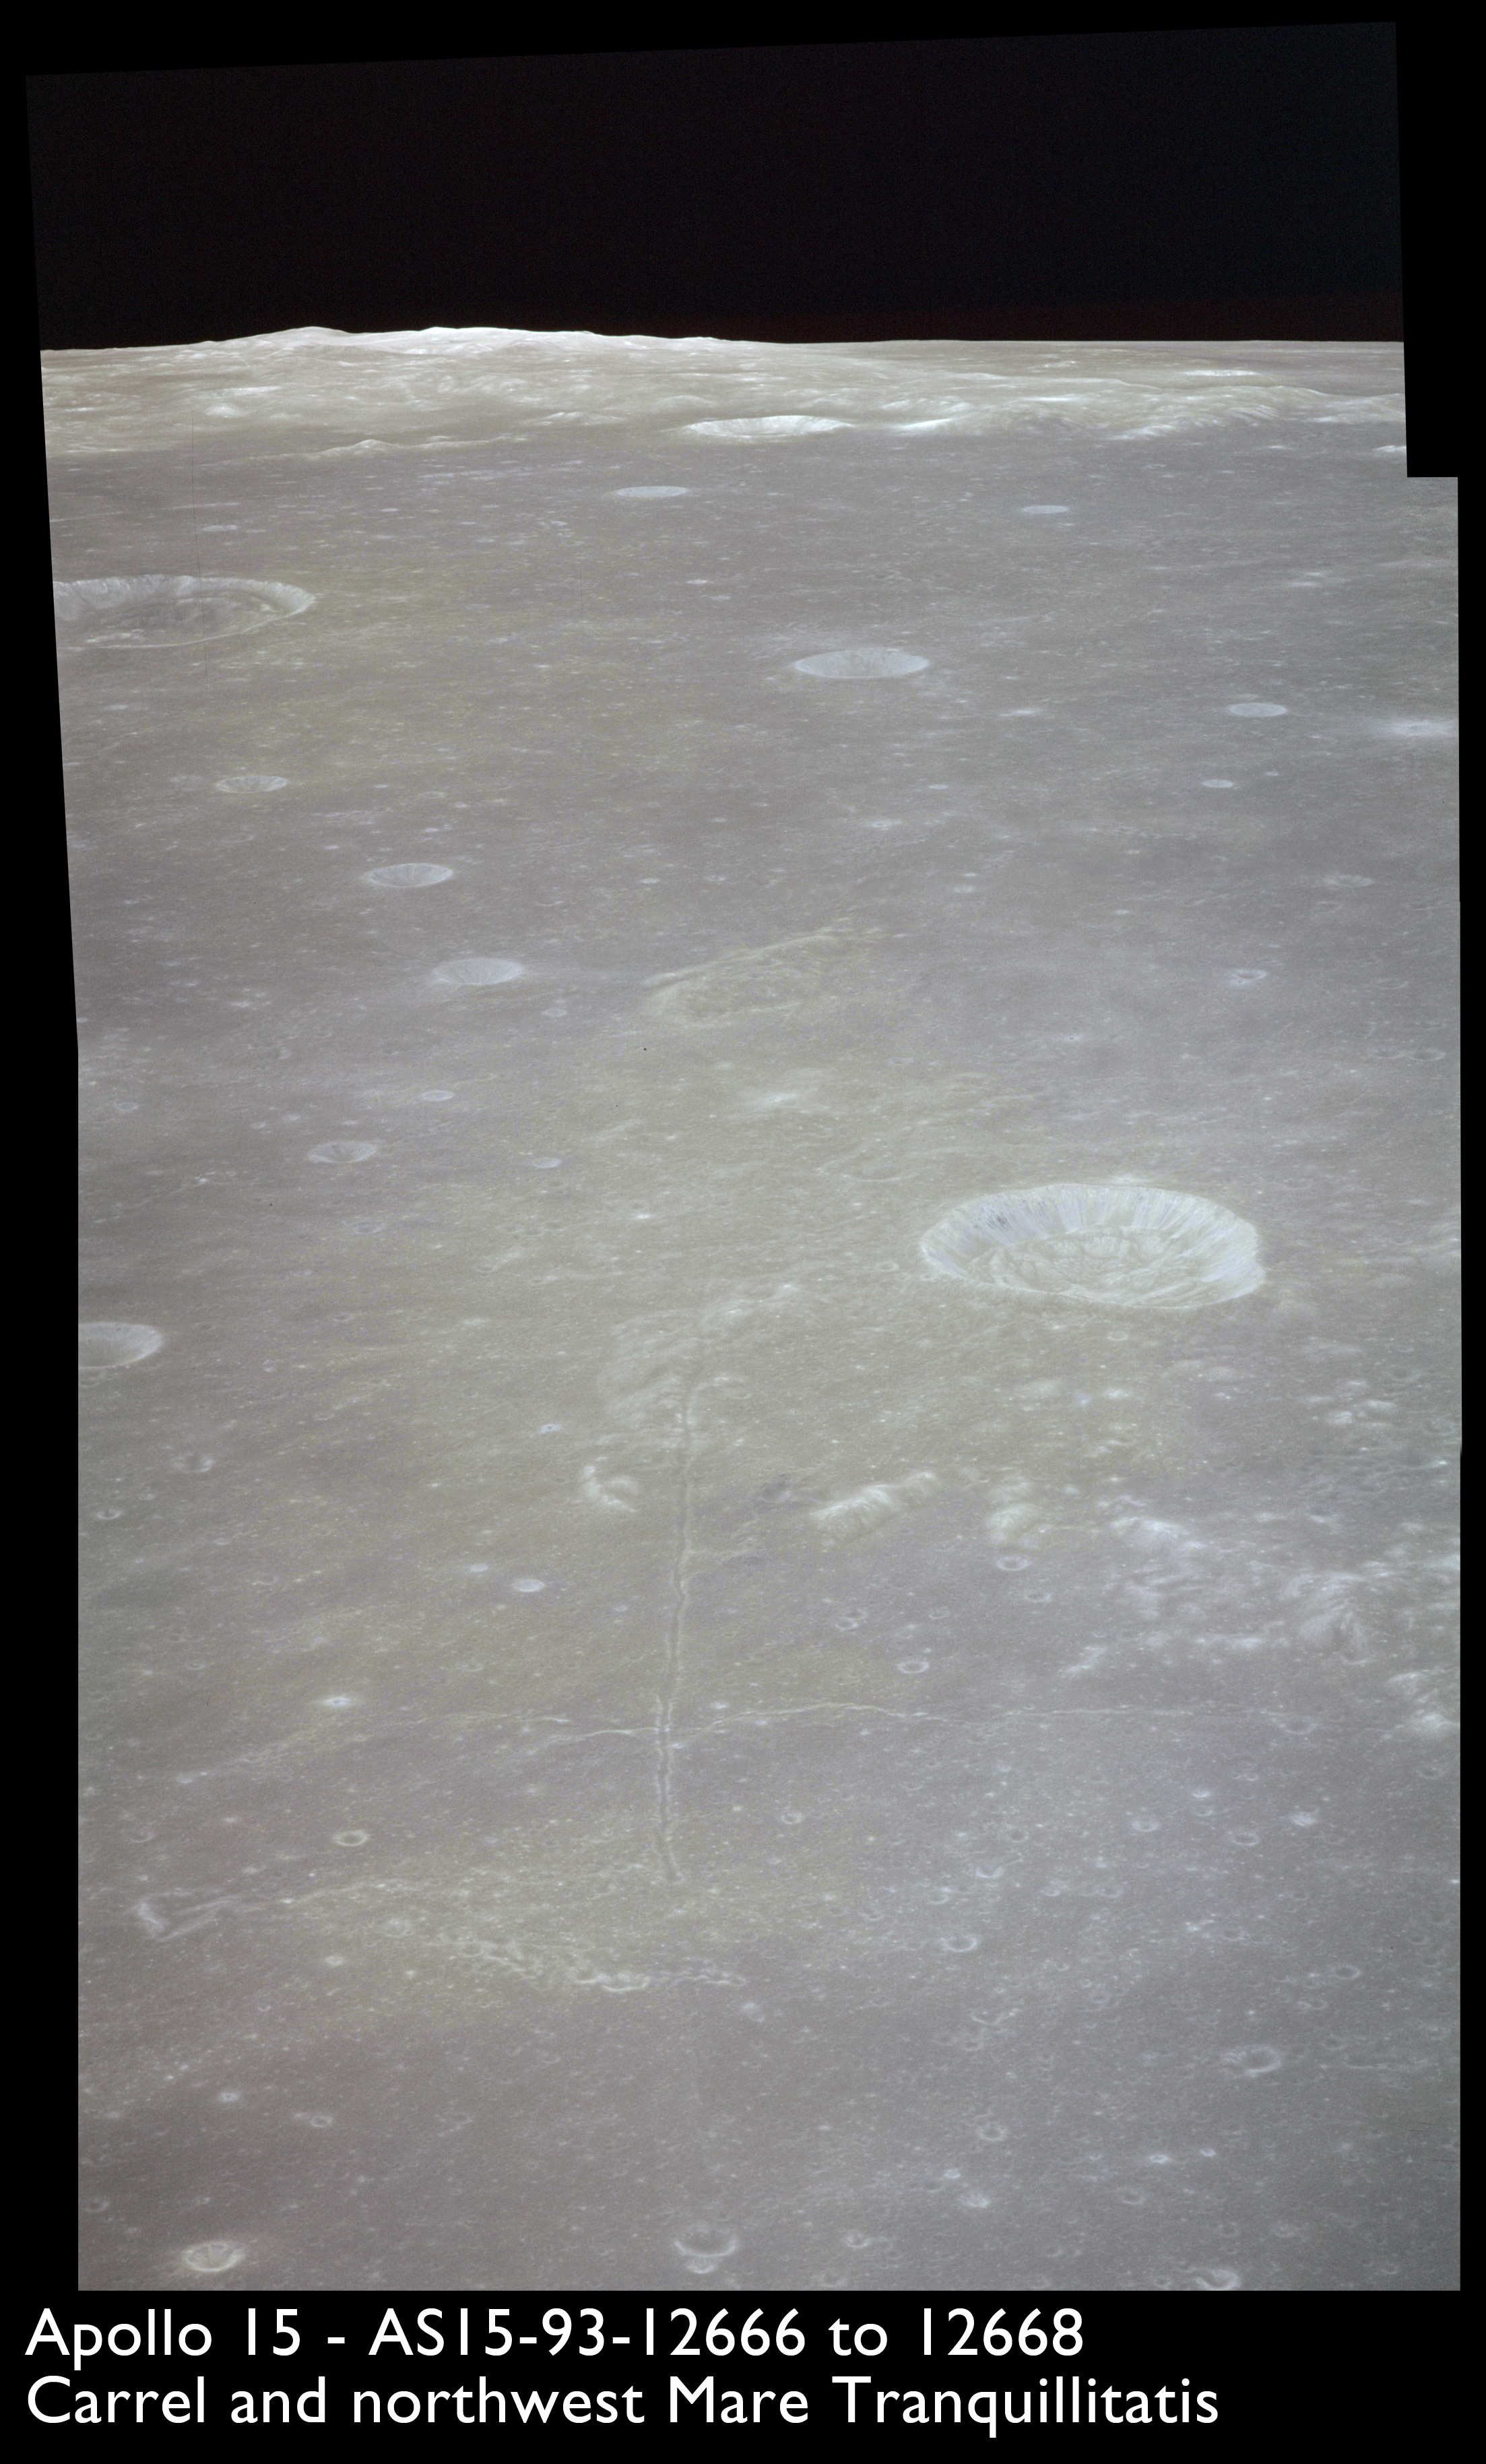
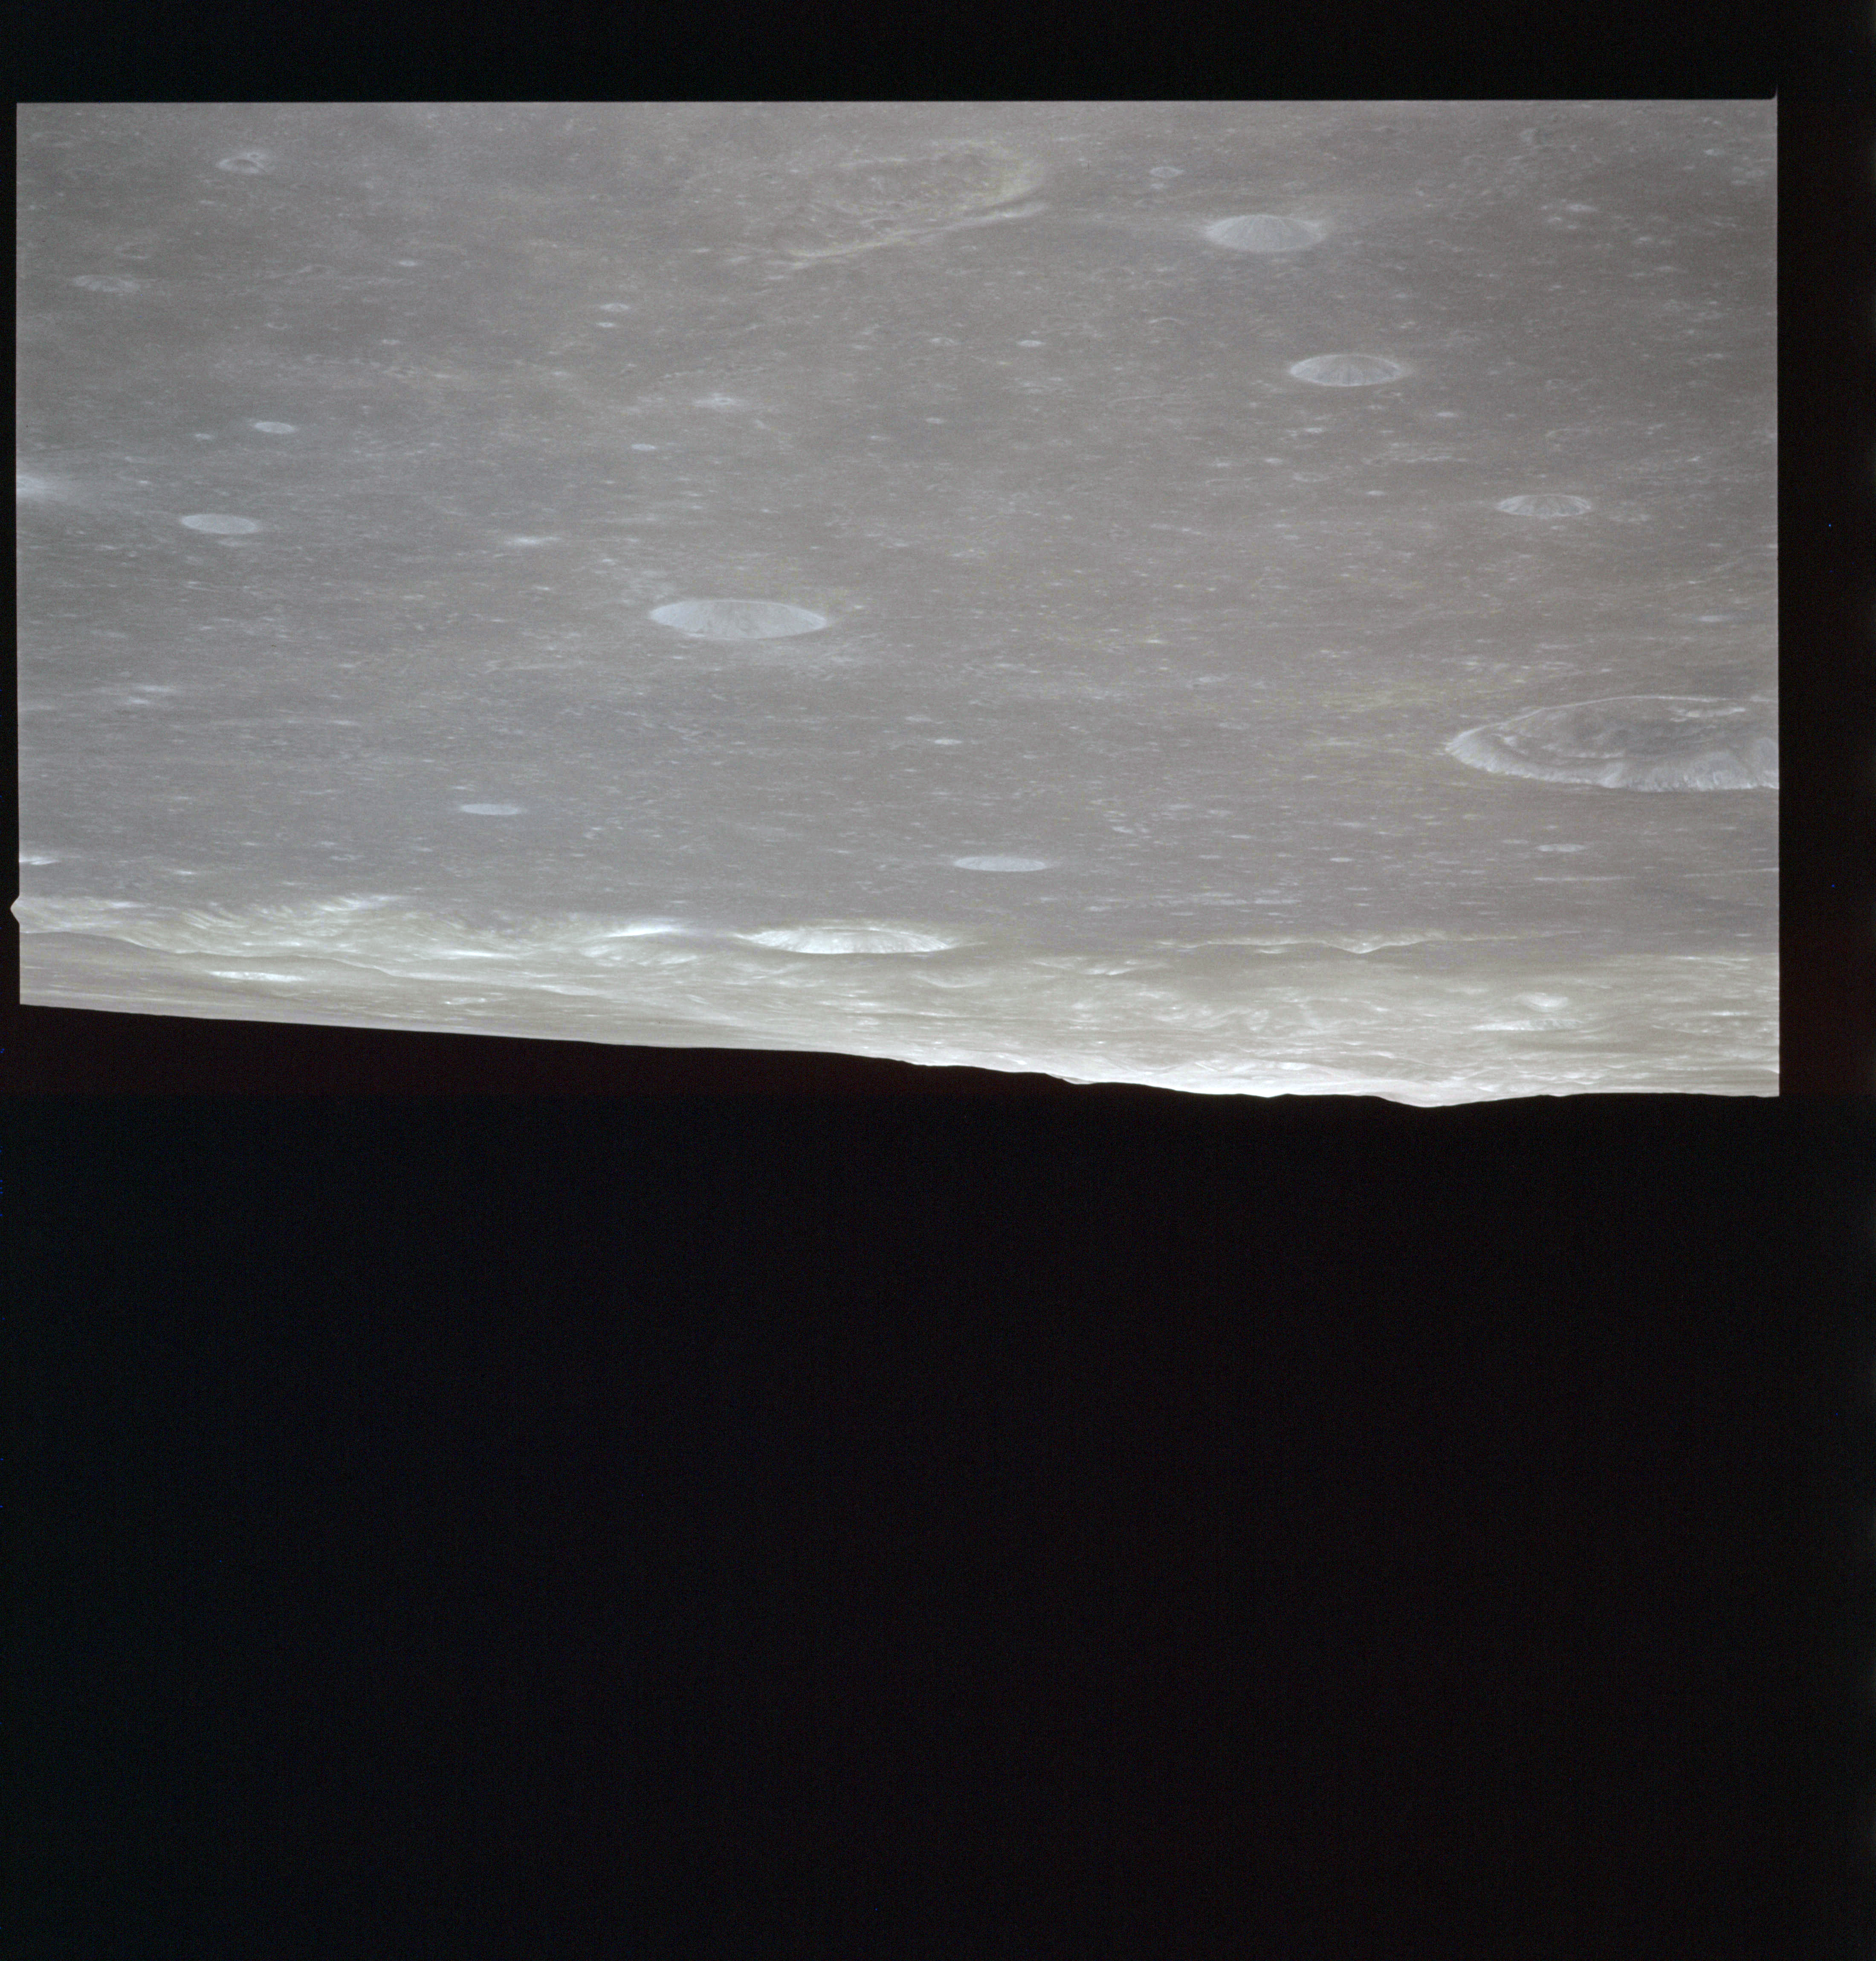
The rille in these two previous images leads towards the distinctively egg-shaped crater Carrel which is also photographed on colour film on magazine P. Four frames, AS15-93-12666 to 12669, look northwest across Mare Tranquillitatis with the Montes Haemus range on the horizon and Mare Serenitatis beyond. The major craters visible in this montage begin with Carrel, formerly Jansen B but now named after Alexis Carrel, 1873-1944, a French biologist who became a Nobel Laureate for Medicine in 1912. Ross D lies in the middle ground and to its left, only partially visible is Ross itself. The bright patch this side of the mountains is Al-Bakri.
AS15-93-12666 - View WNW across Mare Tranquillitatis to crater Carrel - Image by NASA/Johnson Space Center.
AS15-93-12667 - View WNW across Mare Tranquillitatis to craters Carrel, Ross and Ross D - Image by NASA/Johnson Space Center.
AS15-93-12668 - View WNW across Mare Tranquillitatis to craters Carrel, Ross and Ross D - Image by NASA/Johnson Space Center.
Composition of images AS15-93-12666 to 12668 showing northwest Mare Tranquillitatis and crater Carrel - Images by NASA/Johnson Space Center.
AS15-93-12669 - View WNW across Mare Tranquillitatis to craters Ross and Ross D - Image by NASA/Johnson Space Center.
Photography continues on magazine OO.
AS15-92-12532 - East rim of crater Carrel - Image by NASA/Johnson Space Center.
AS15-92-12533 - Southwest of crater Carrel. Image centre at 10.17°N, 25.05°E - Image by NASA/Johnson Space Center.
AS15-92-12534 - Bright crater southwest of crater Carrel. Image centre at 9.82°N, 24.84°E - Image by NASA/Johnson Space Center.
AS15-92-12535 - Irregular depression on Mare Tranquillitatis between craters Carrel and Arago. Image centre at 8.39°N, 24.18°E - Image by NASA/Johnson Space Center.
AS15-92-12536 - Wrinkle Ridge north of crater Lamont. Image centre at 8.99°N, 23.23°E - Image by NASA/Johnson Space Center.
AS15-92-12537 - Wrinkle Ridge north of crater Lamont. Image centre at 8.05°N, 22.97°E - Image by NASA/Johnson Space Center.
AS15-92-12538 - Crater Arago E and wrinkle ridge. Image centre at 000°N, 000°E - Image by NASA/Johnson Space Center.
The wrinkle ridge shown in the previous three images is part of a system of radial ridges across Mare Tranquillitatis which emanate from the ghost crater Lamont. This crater itself only exists as a circular series of wrinkle ridges. All these ridges arise from compression stresses in the basalt sheet that form the mare. Those that form Lamont may be purely due to the distribution of these stresses or they may betray the presence of a subdued impact structure.
AS15-M-2560 - South oblique Metric Camera image of Mare Tranquillitatis including craters Maclear, Arago and Dionysius. Image taken at about 216:47. (250 megapixel version), (labelled version) - Image by NASA/ASU.
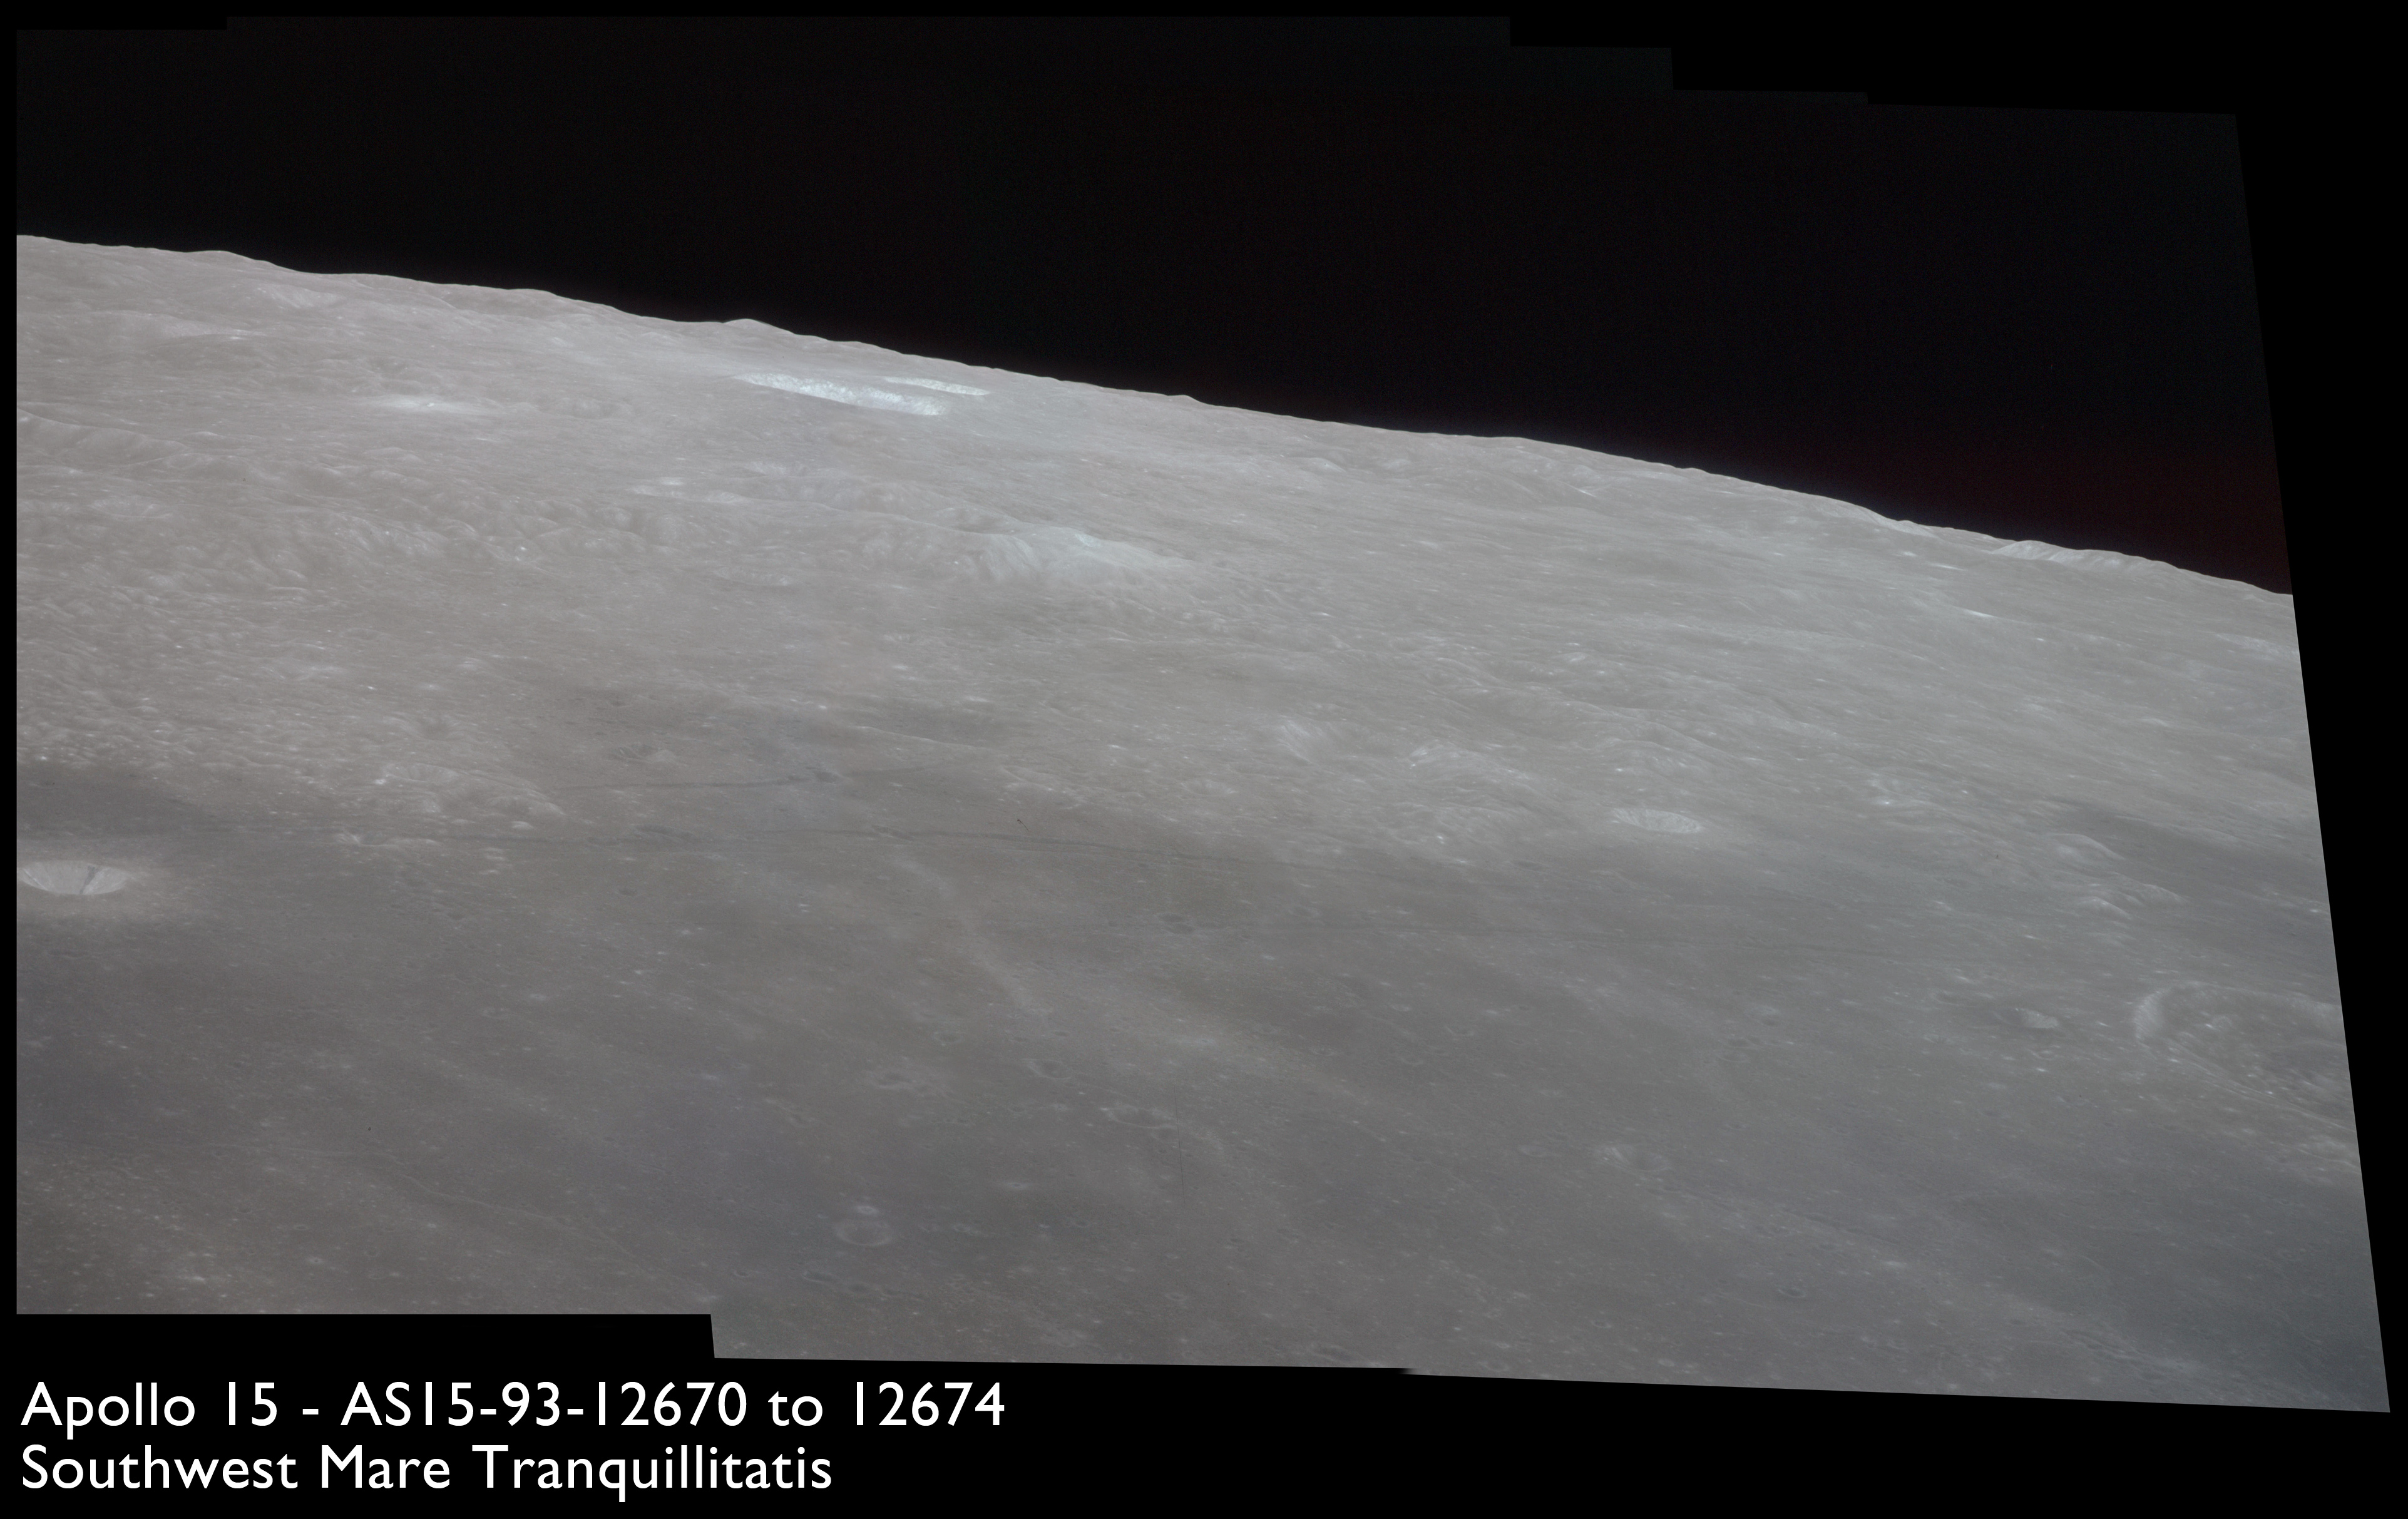
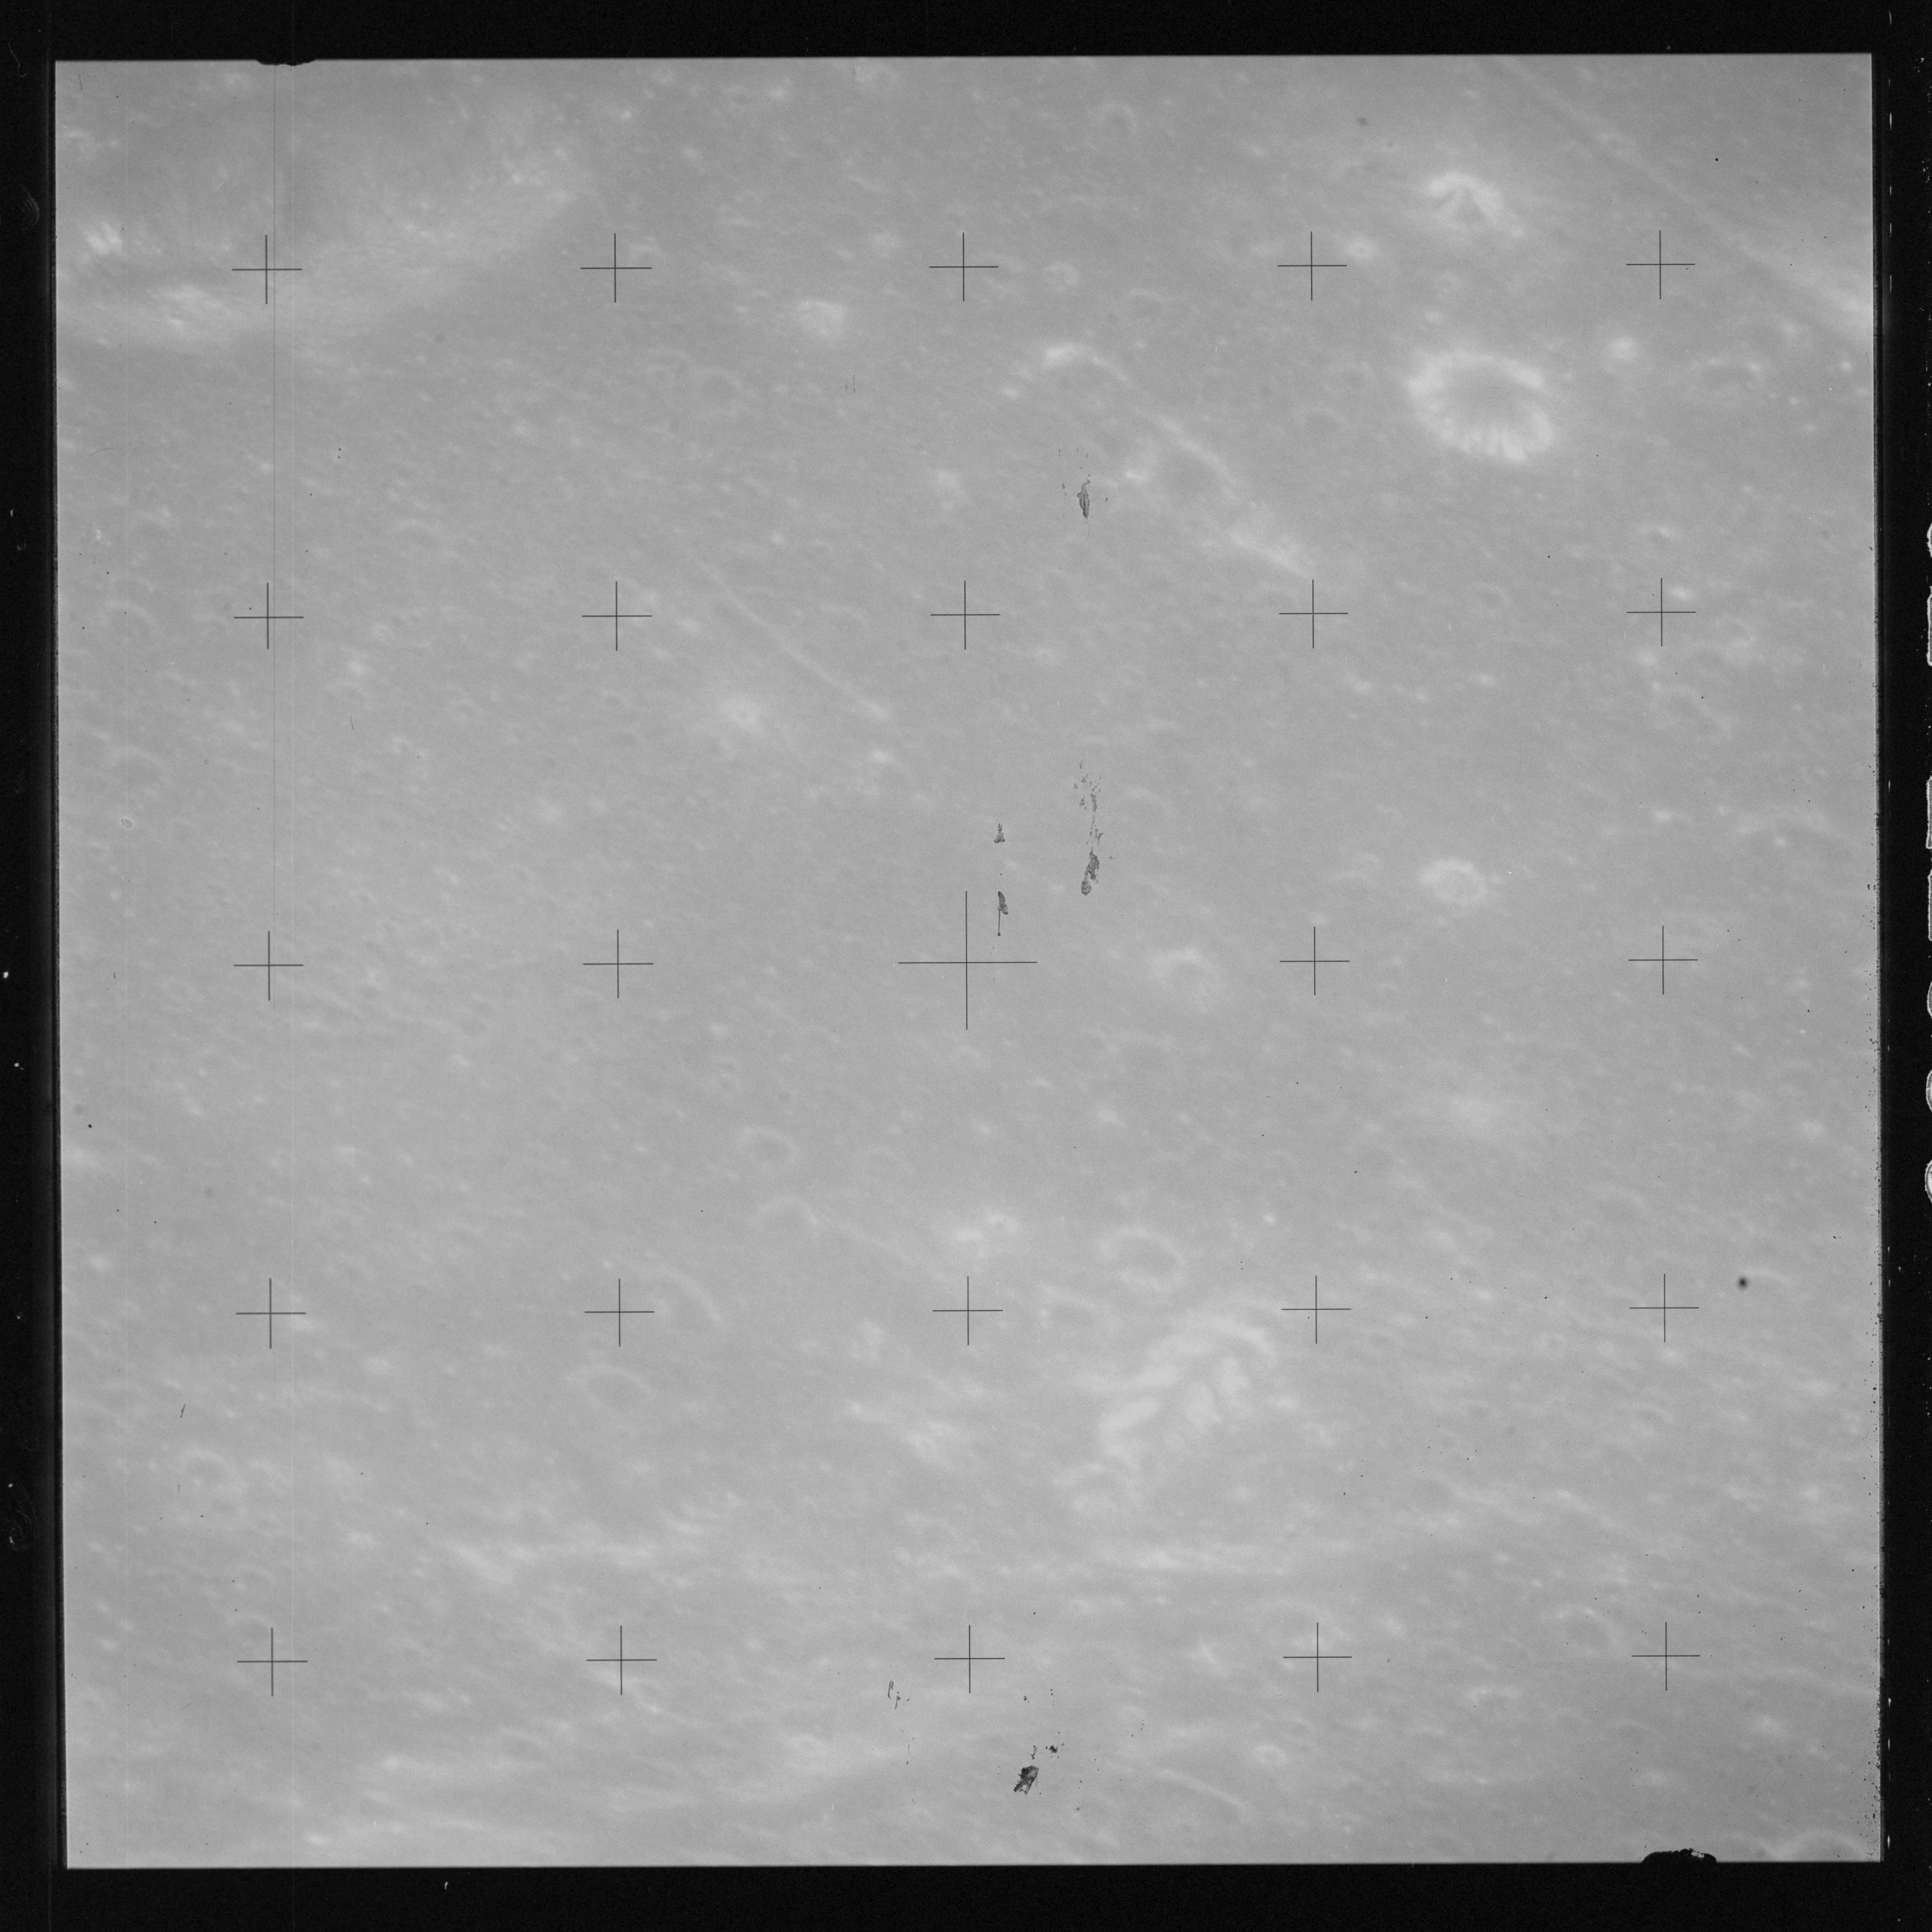
The next sequence of photographs on magazine P, AS15-93-12670 to 12674, look to the southeastern corner of Mare Tranquillitatis and the Apollo 11 landing site.
AS15-93-12670 - Southeastern Mare Tranquillitatis including Rimae Hypatia and crater Moltke - Image by NASA/Johnson Space Center.
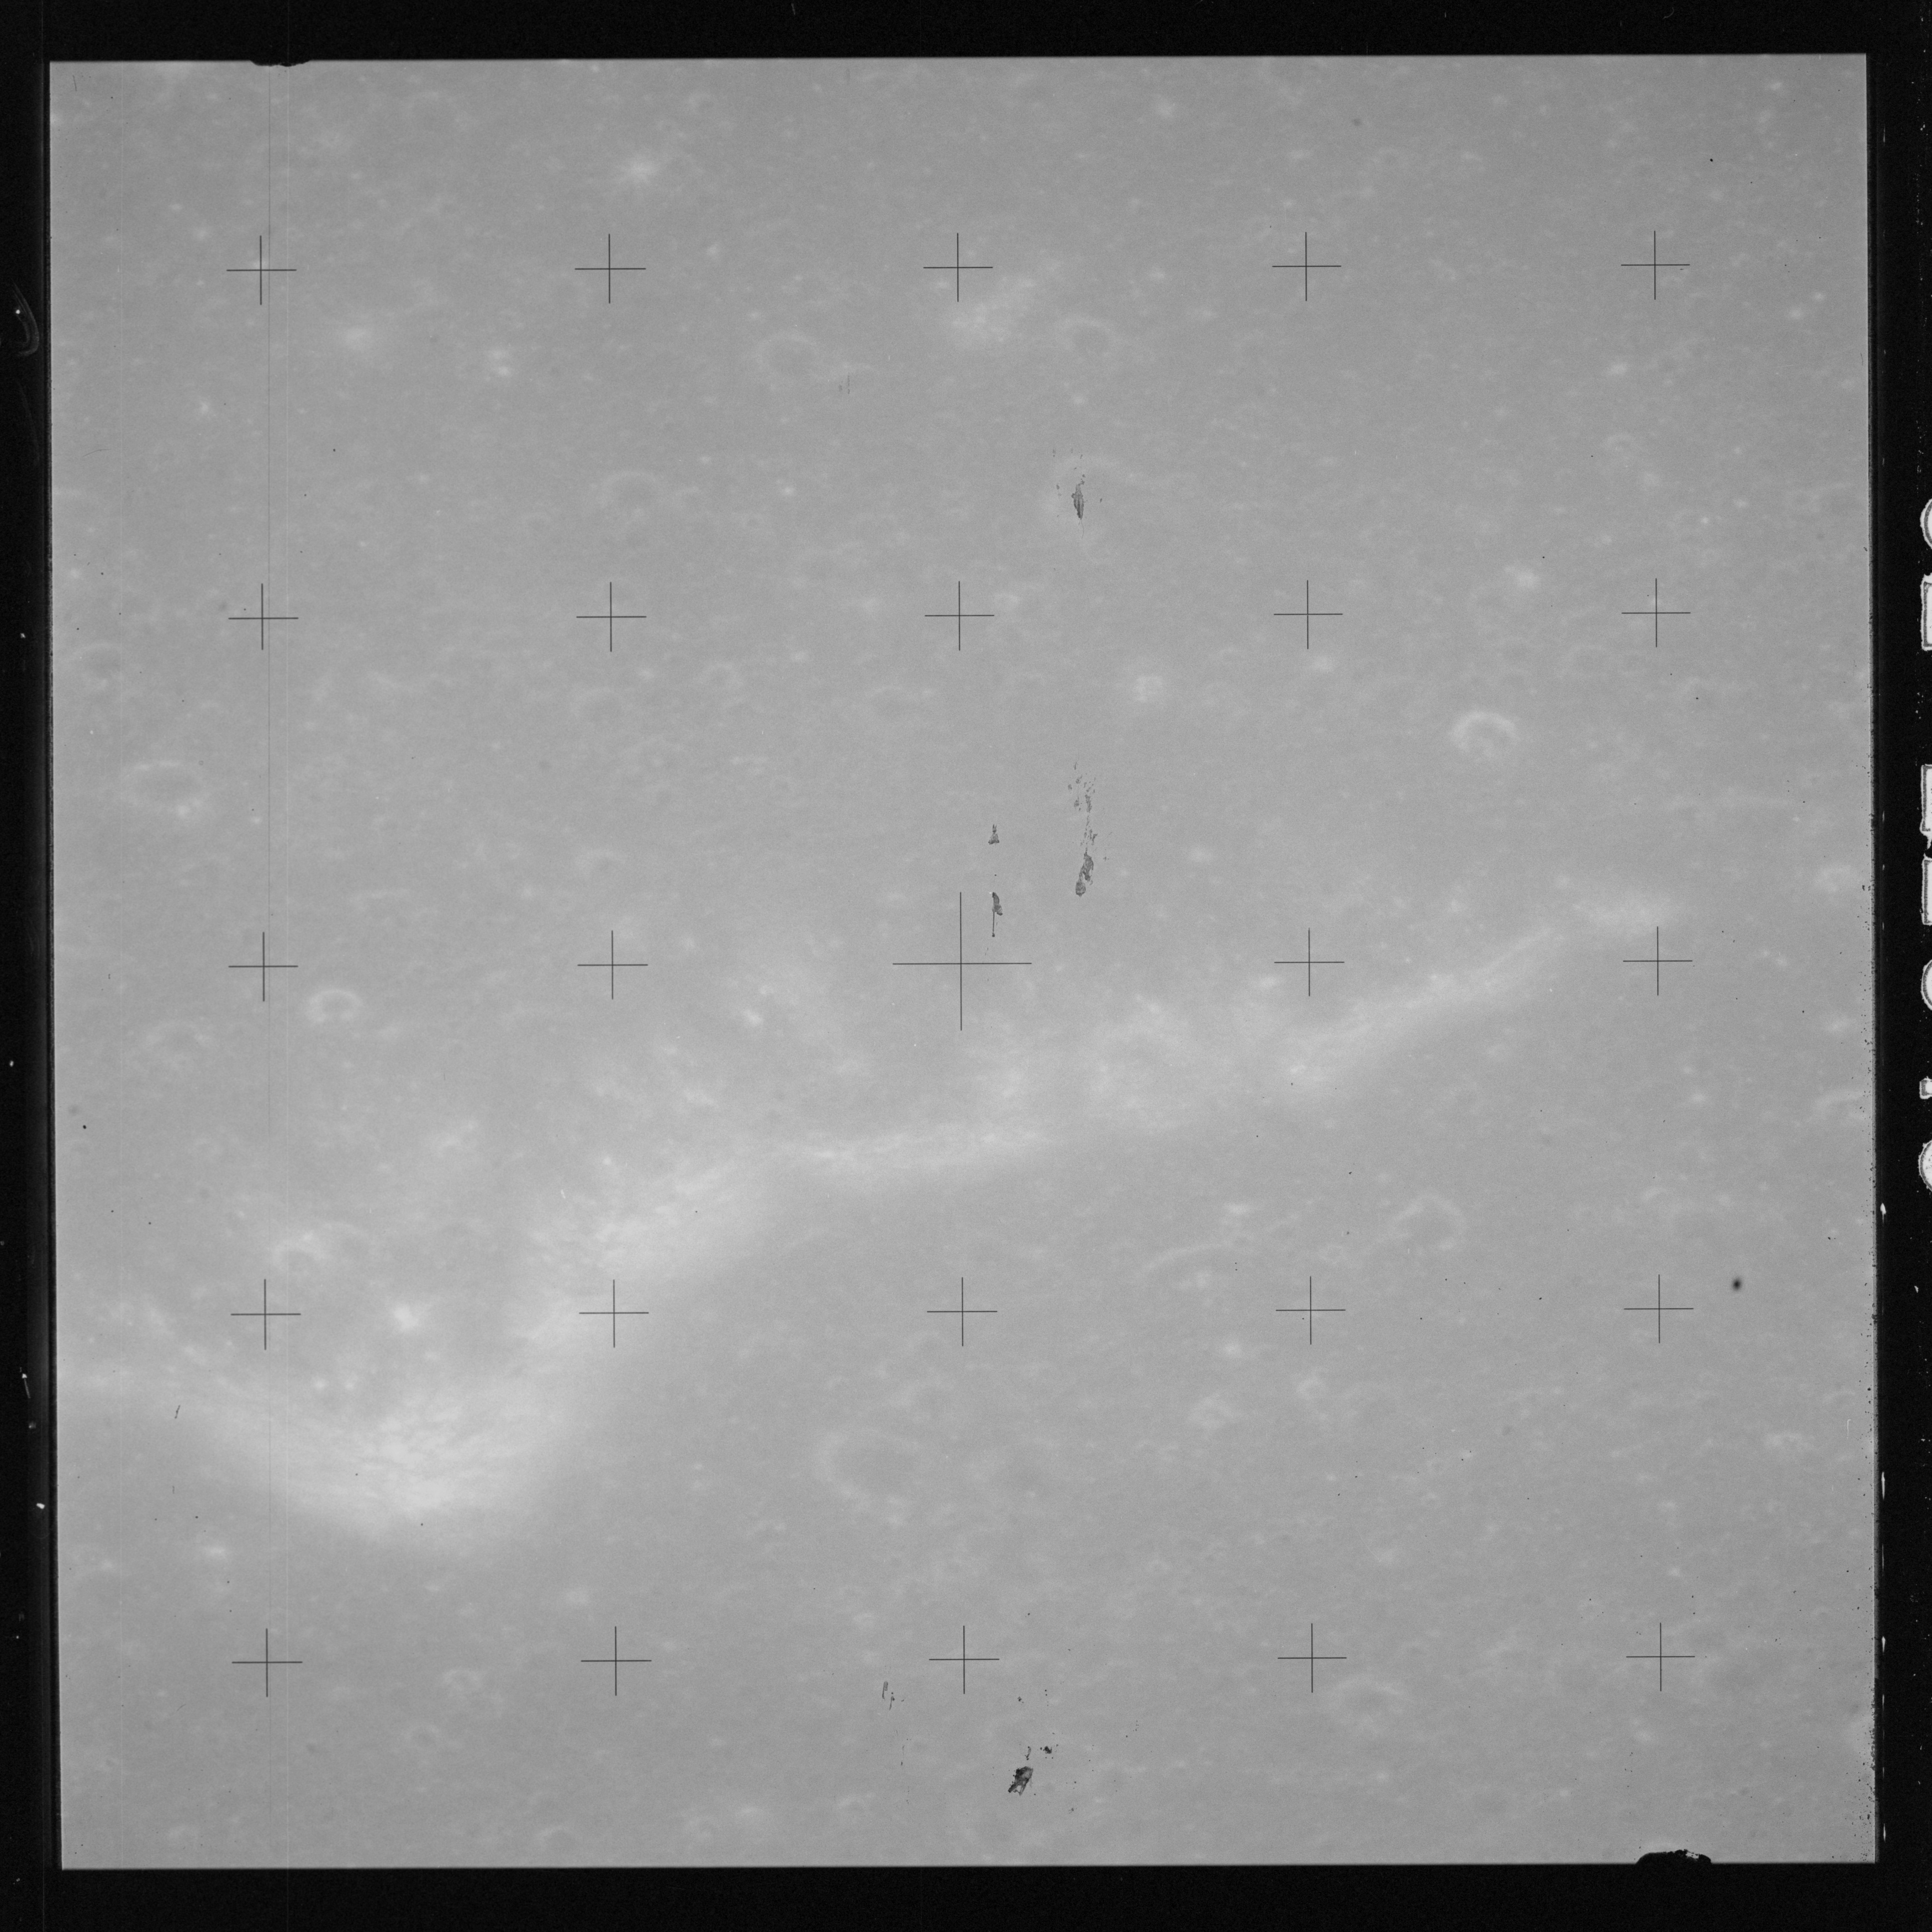
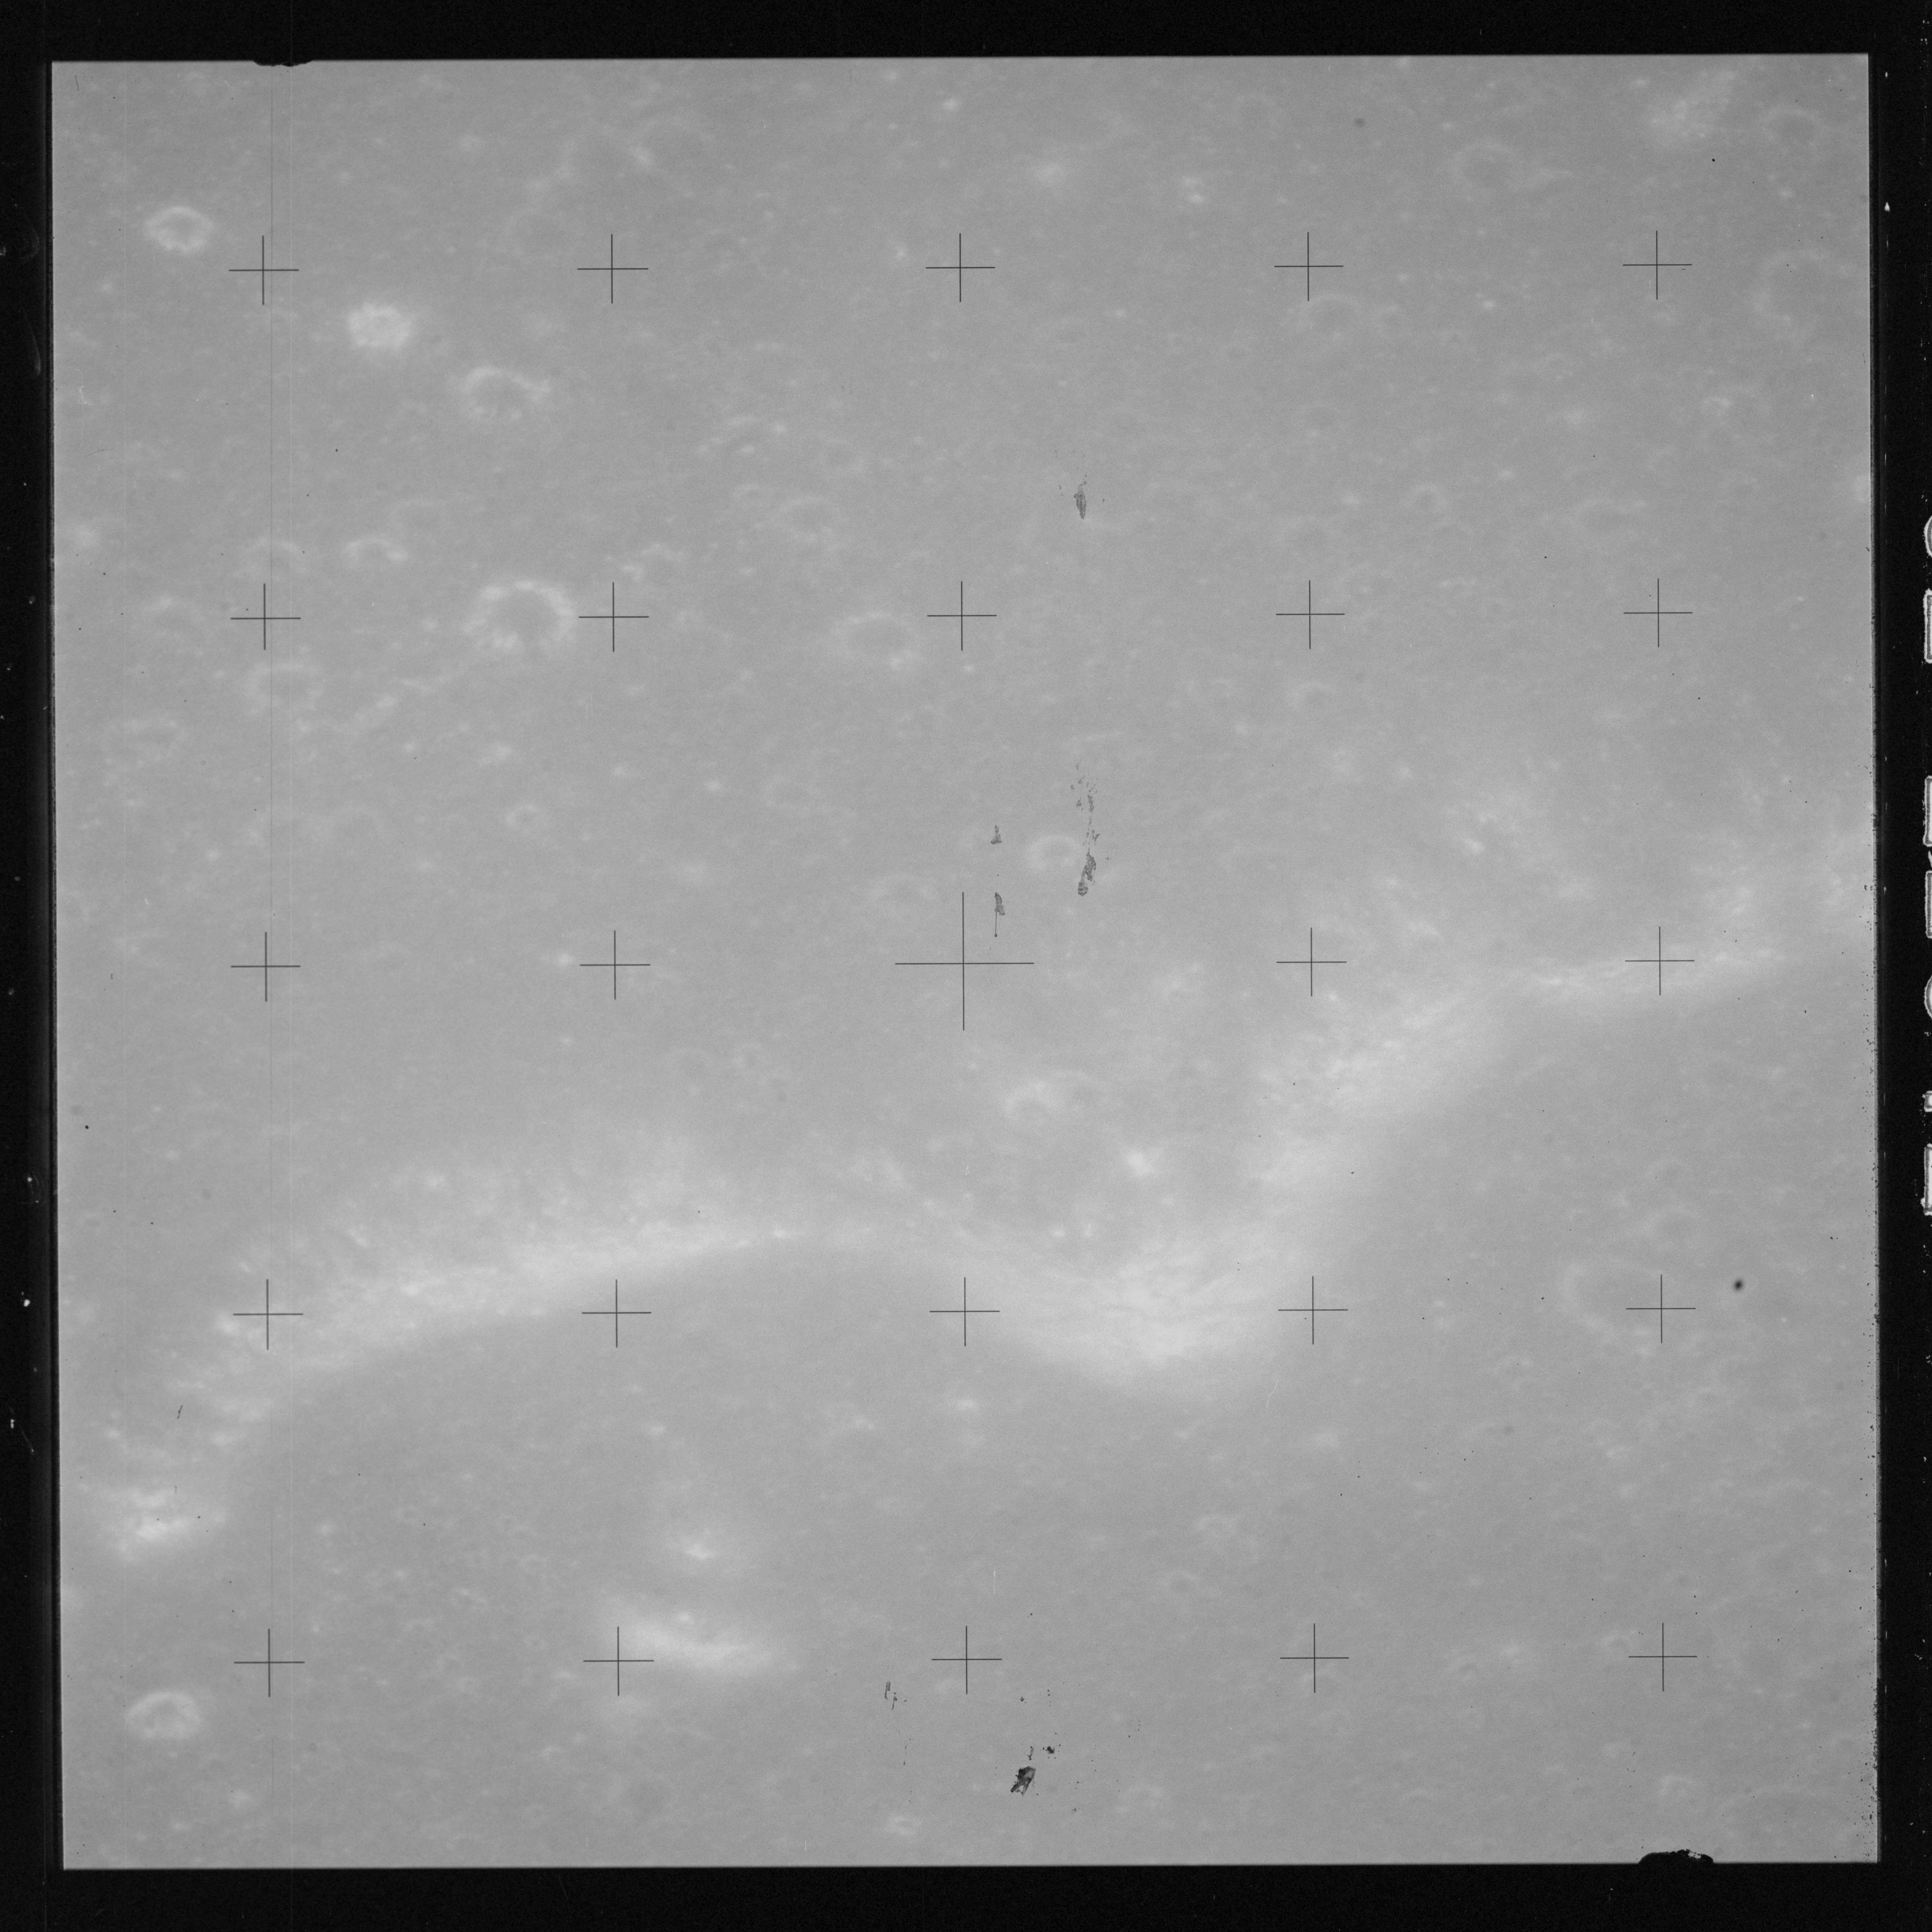
AS15-93-12671 - Rimae Hypatia - Image by NASA/Johnson Space Center.
AS15-93-12672 - Rimae Hypatia - Image by NASA/Johnson Space Center.
AS15-93-12673 - Rimae Hypatia - Image by NASA/Johnson Space Center.
AS15-93-12674 - Rimae Hypatia including crater Sabine - Image by NASA/Johnson Space Center.
These shots have been composited into a 5-frame pan of the southern shore of Mare Tranquillitatis, including Moltke on the left and Sabine partially visible on the extreme right.
Composition of images AS15-93-12670 to 12674 showing southwest Mare Tranquillitatis - Images by NASA/Johnson Space Center.
In the Apollo 15 photo index, on magazine OO, AS15-92-12539 is marked as showing part of crater Sosigenes. After some searching, the centre of the image was found to be located nearly 37 km northeast of that crater. There is a small (300- to 400-metre) hill at top left in the photo whose long axis is in line with most of the other hills in the area, part of what is now understood to be the 'sculpture' imparted to the landscape by flying ejecta during the formation of the Imbrium basin to the northwest nearly 4 billion years ago.
AS15-92-12539 - Mare landscape near Sinus Honoris. Image centre at 9.98°N, 18.33°E - Image by NASA/Johnson Space Center.
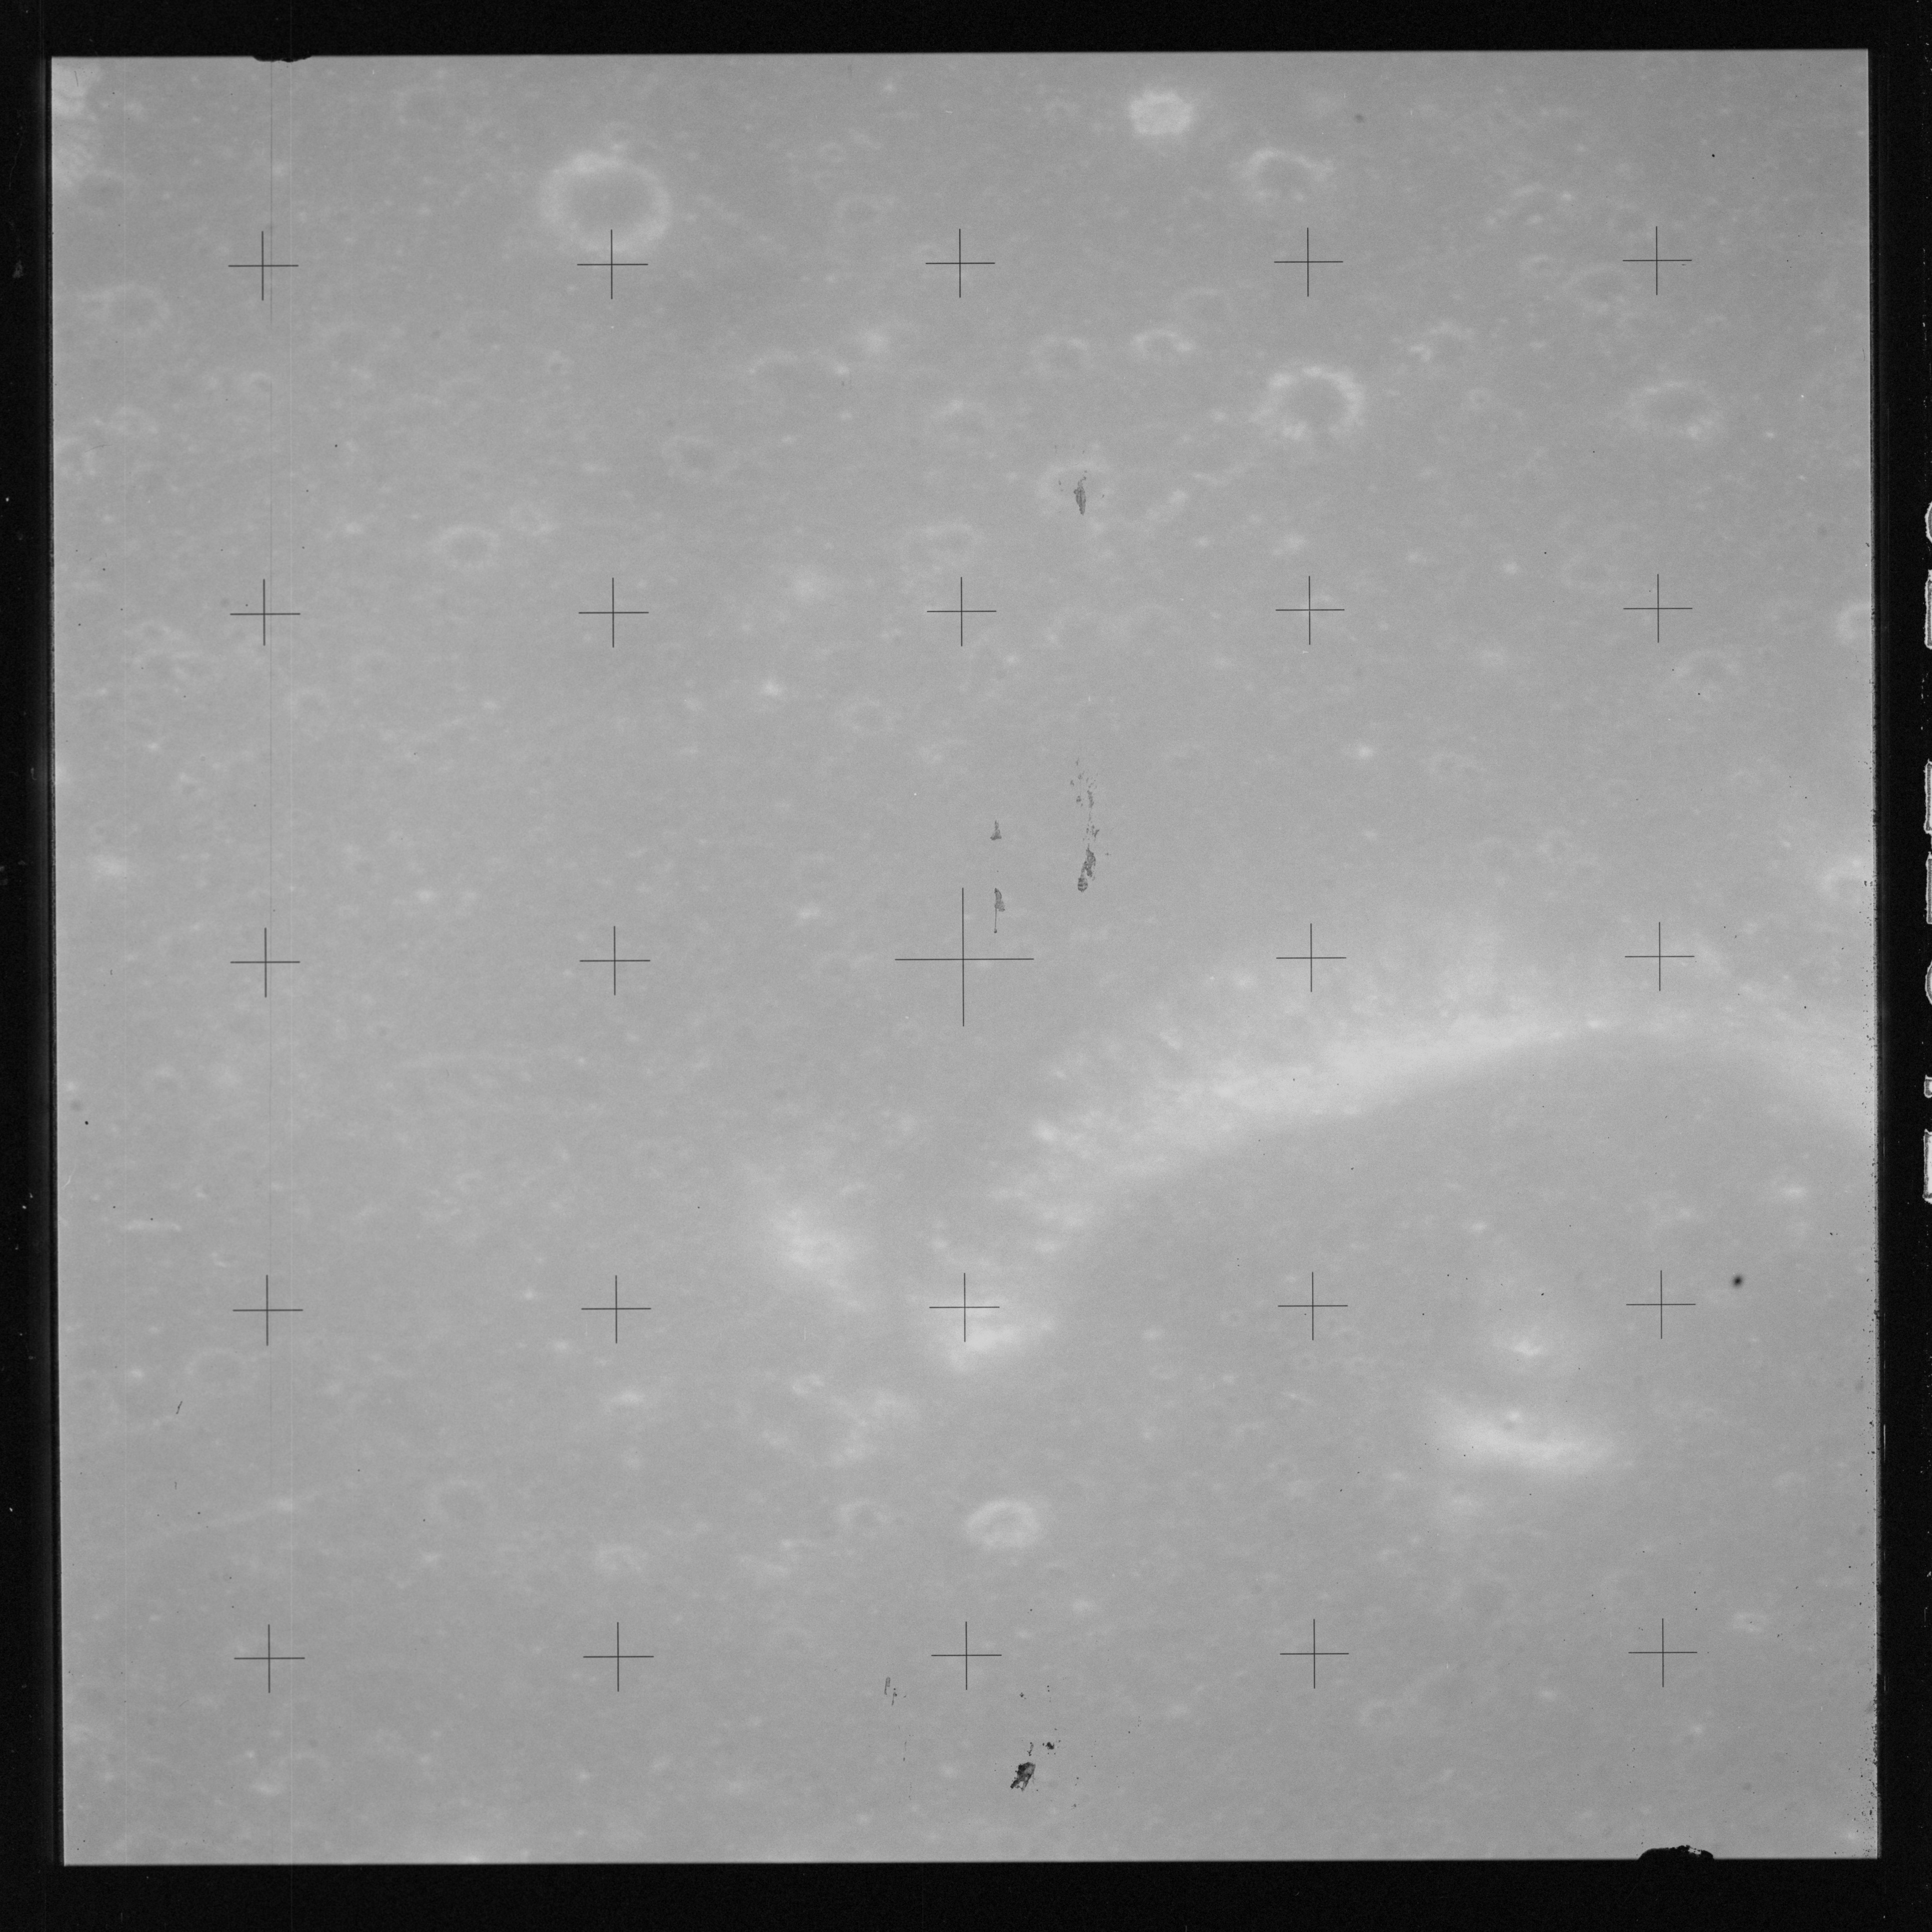
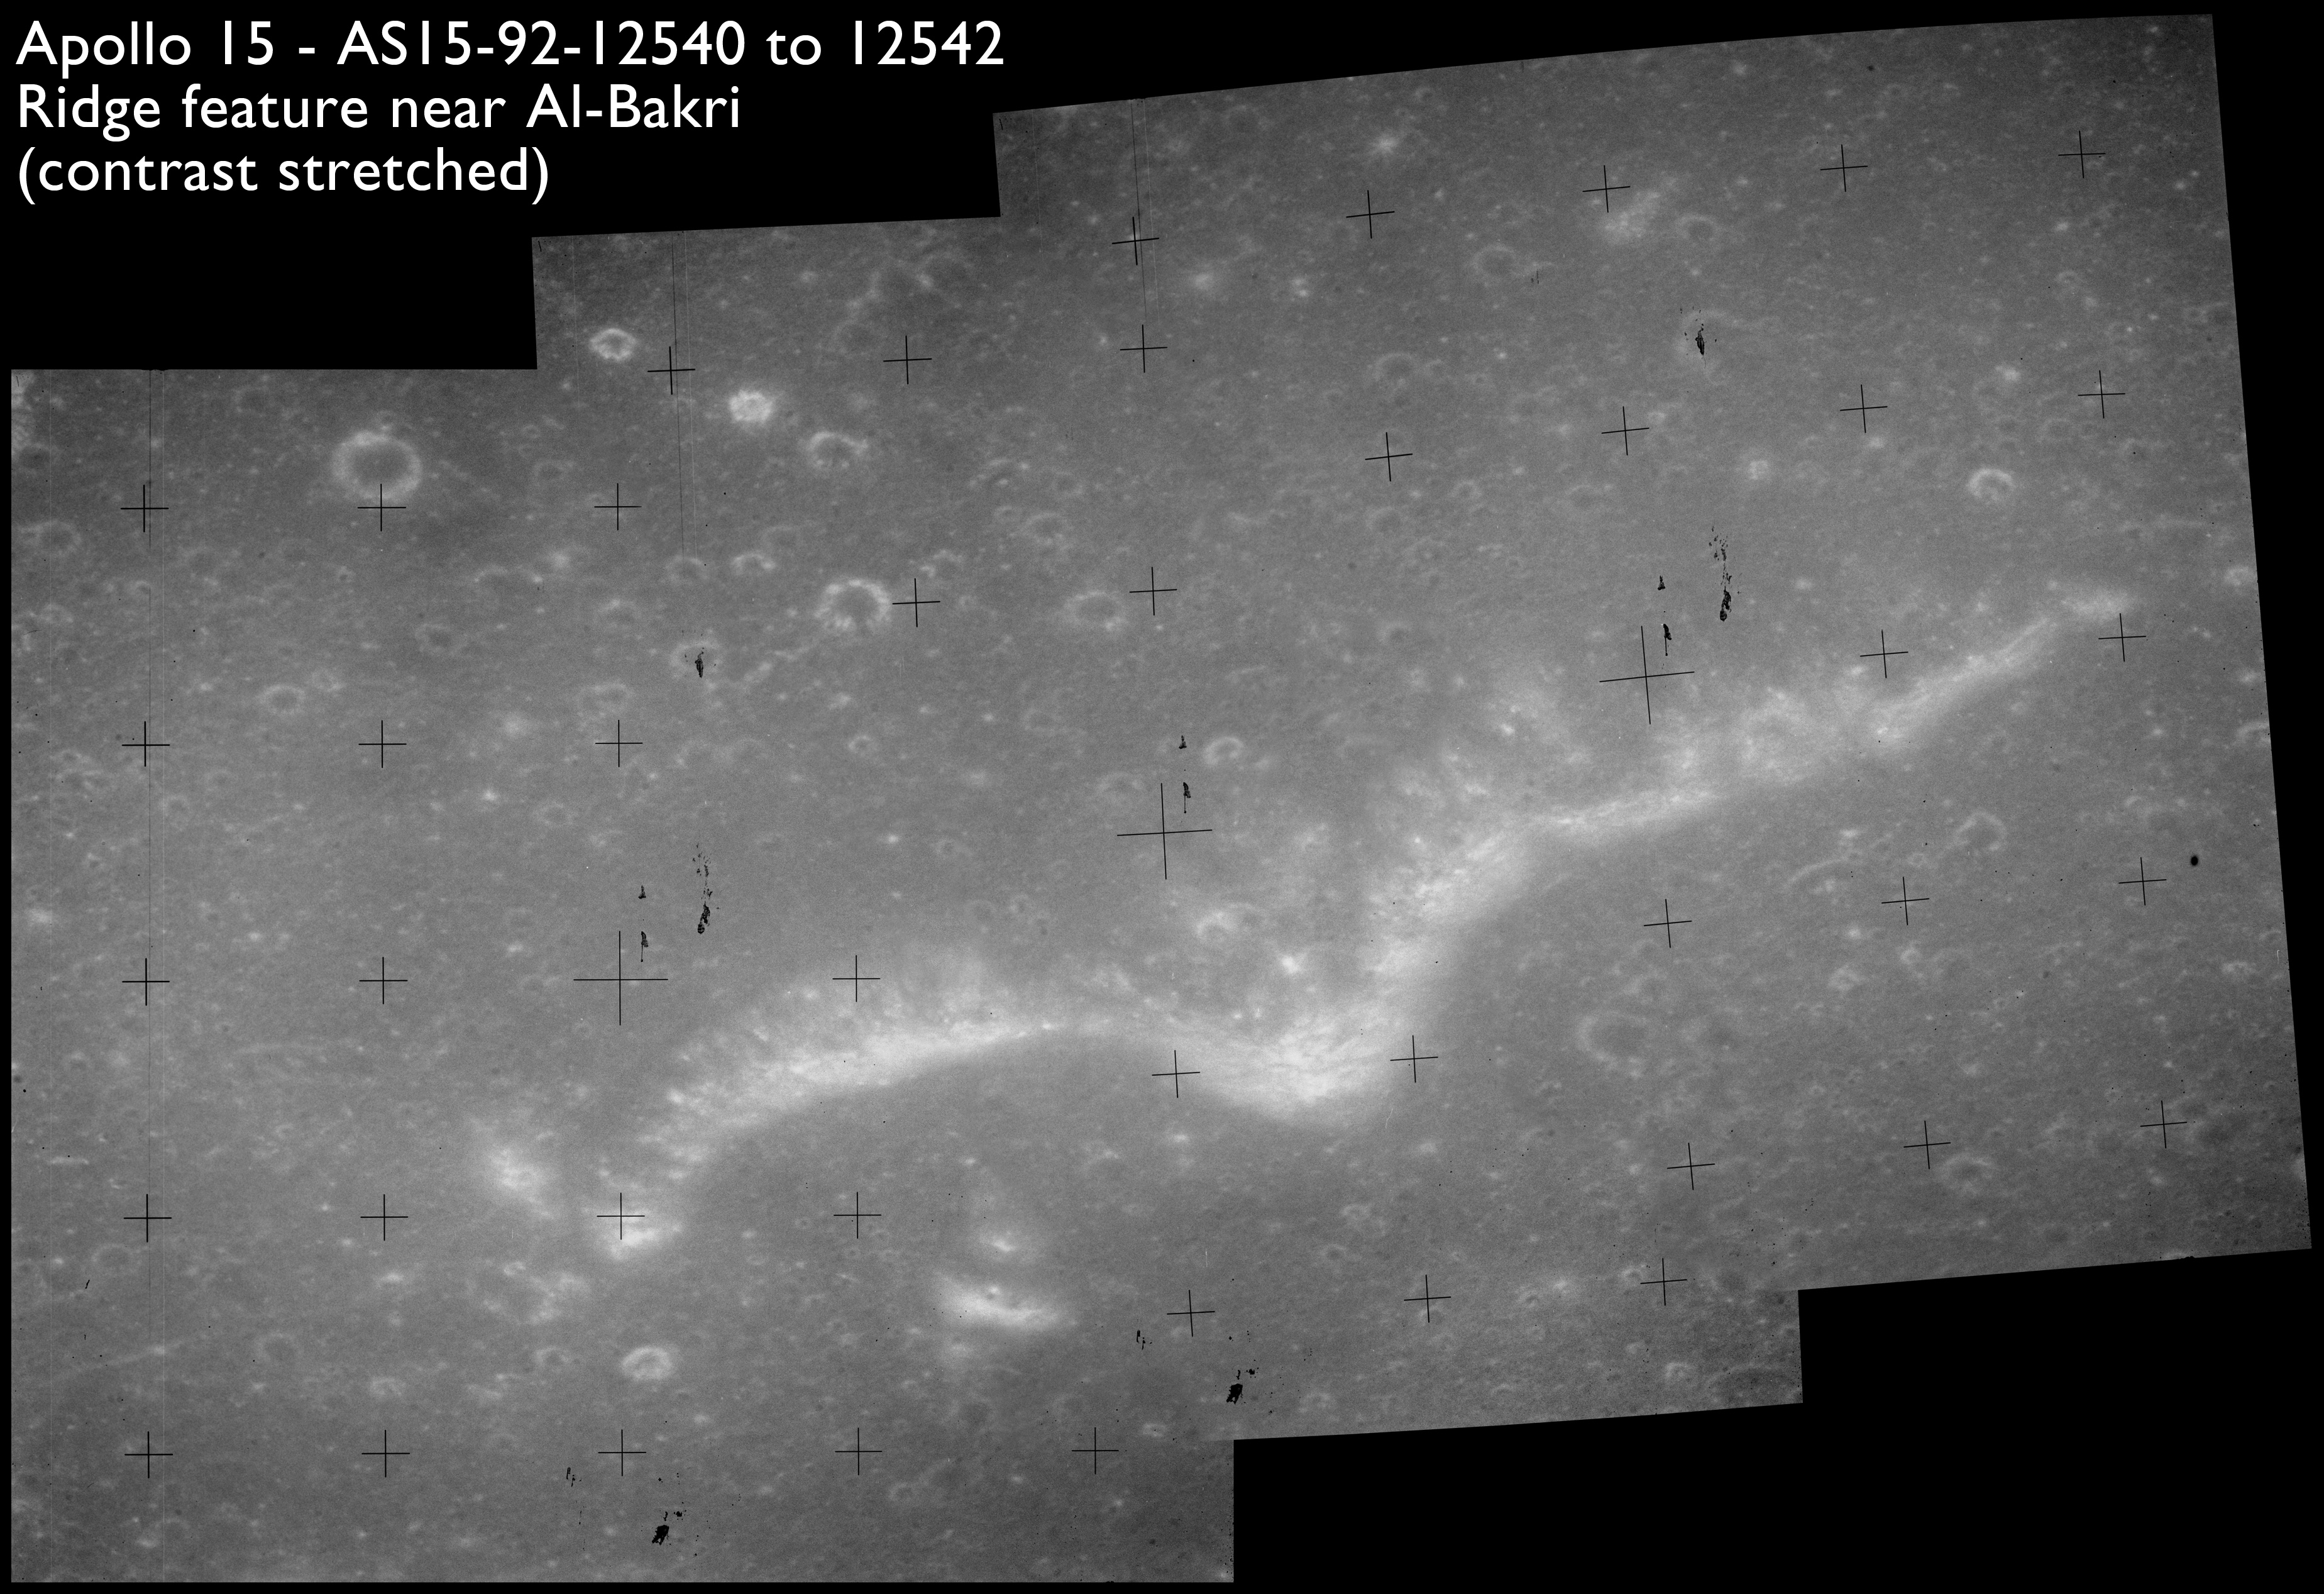
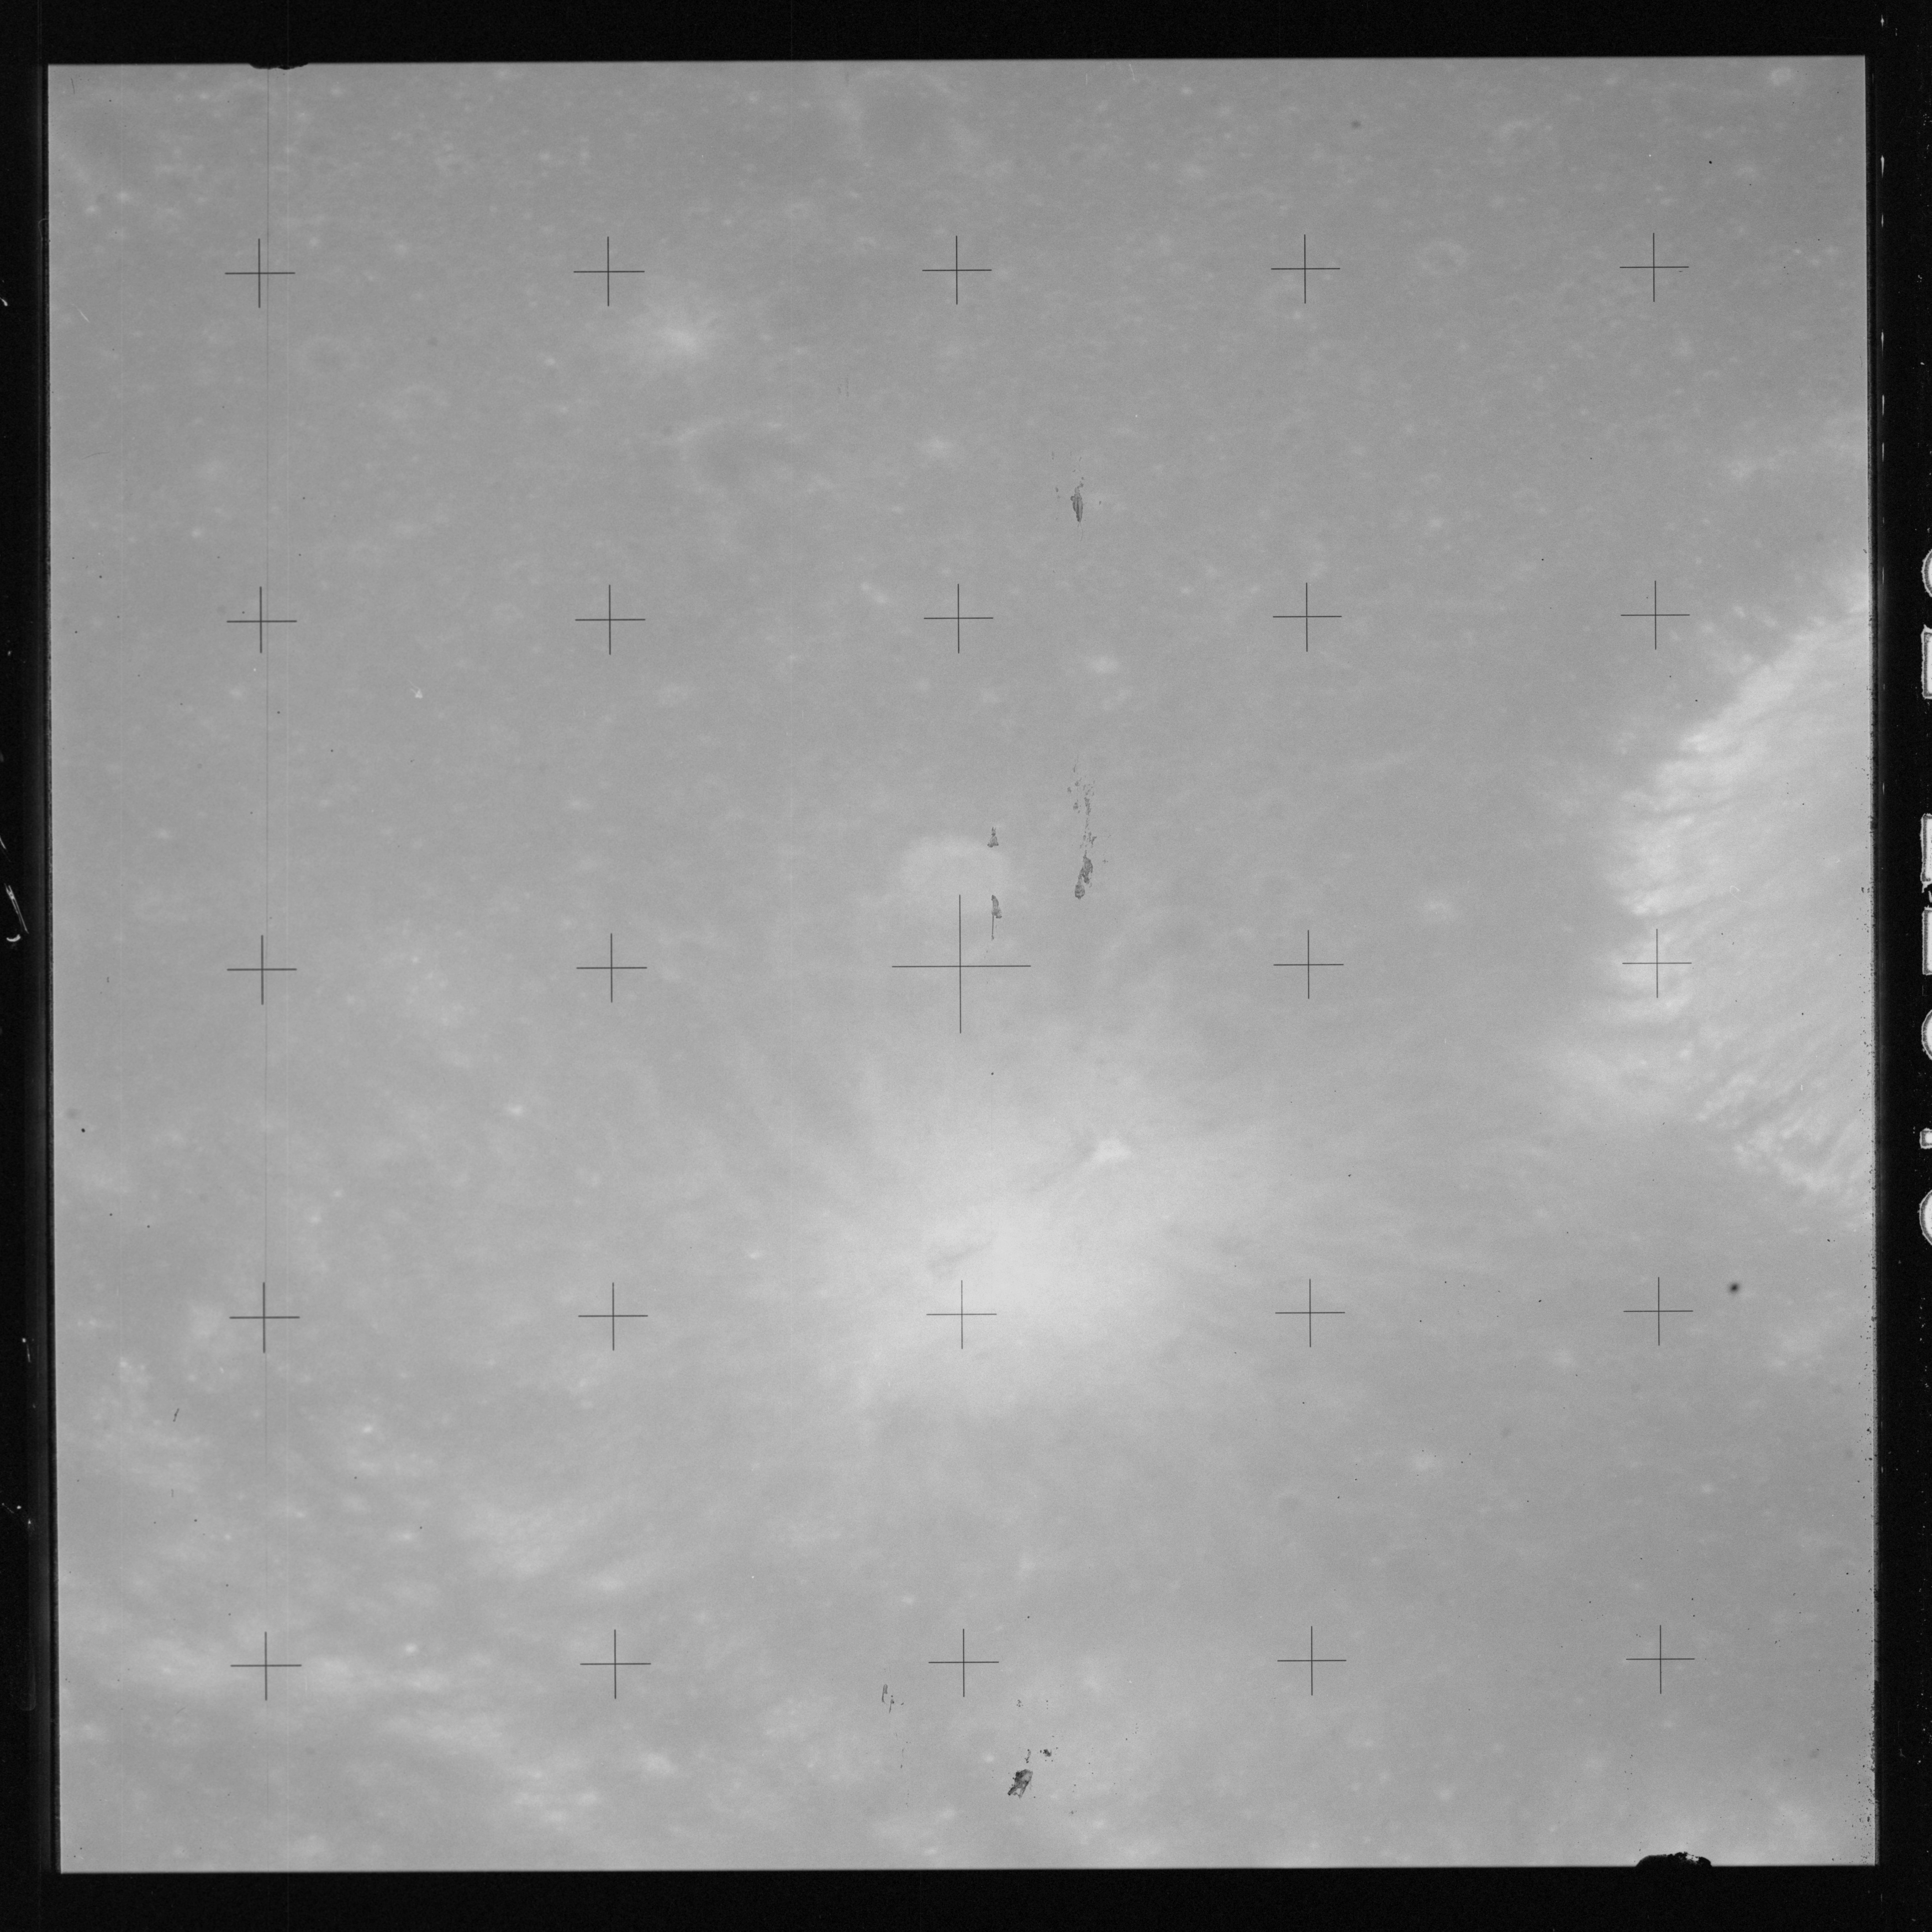
The next three photos in this sequence show a 30-km ridge stretching south-southwest from Al-Bakri. These have been composited. The ridge, about 300 metres high, appears to be the rims of two craters, now inundated by the mare lavas. This impression is especially strong in the northern example.
AS15-92-12540 - Ridge south-southwest of Al-Bakri. Image centre at 13.1°N, 19.8°E - Image by NASA/Johnson Space Center.
AS15-92-12541 - Ridge south-southwest of Al-Bakri. Image centre at 13.4°N, 19.9°E - Image by NASA/Johnson Space Center.
AS15-92-12542 - Ridge south-southwest of Al-Bakri. Image centre at 13.7°N, 20.0°E - Image by NASA/Johnson Space Center.
Composition of images AS15-92-12540 to 12542 showing ridge near crater Al-Bakri. Image contrast has been stretched - Images by NASA/Johnson Space Center.
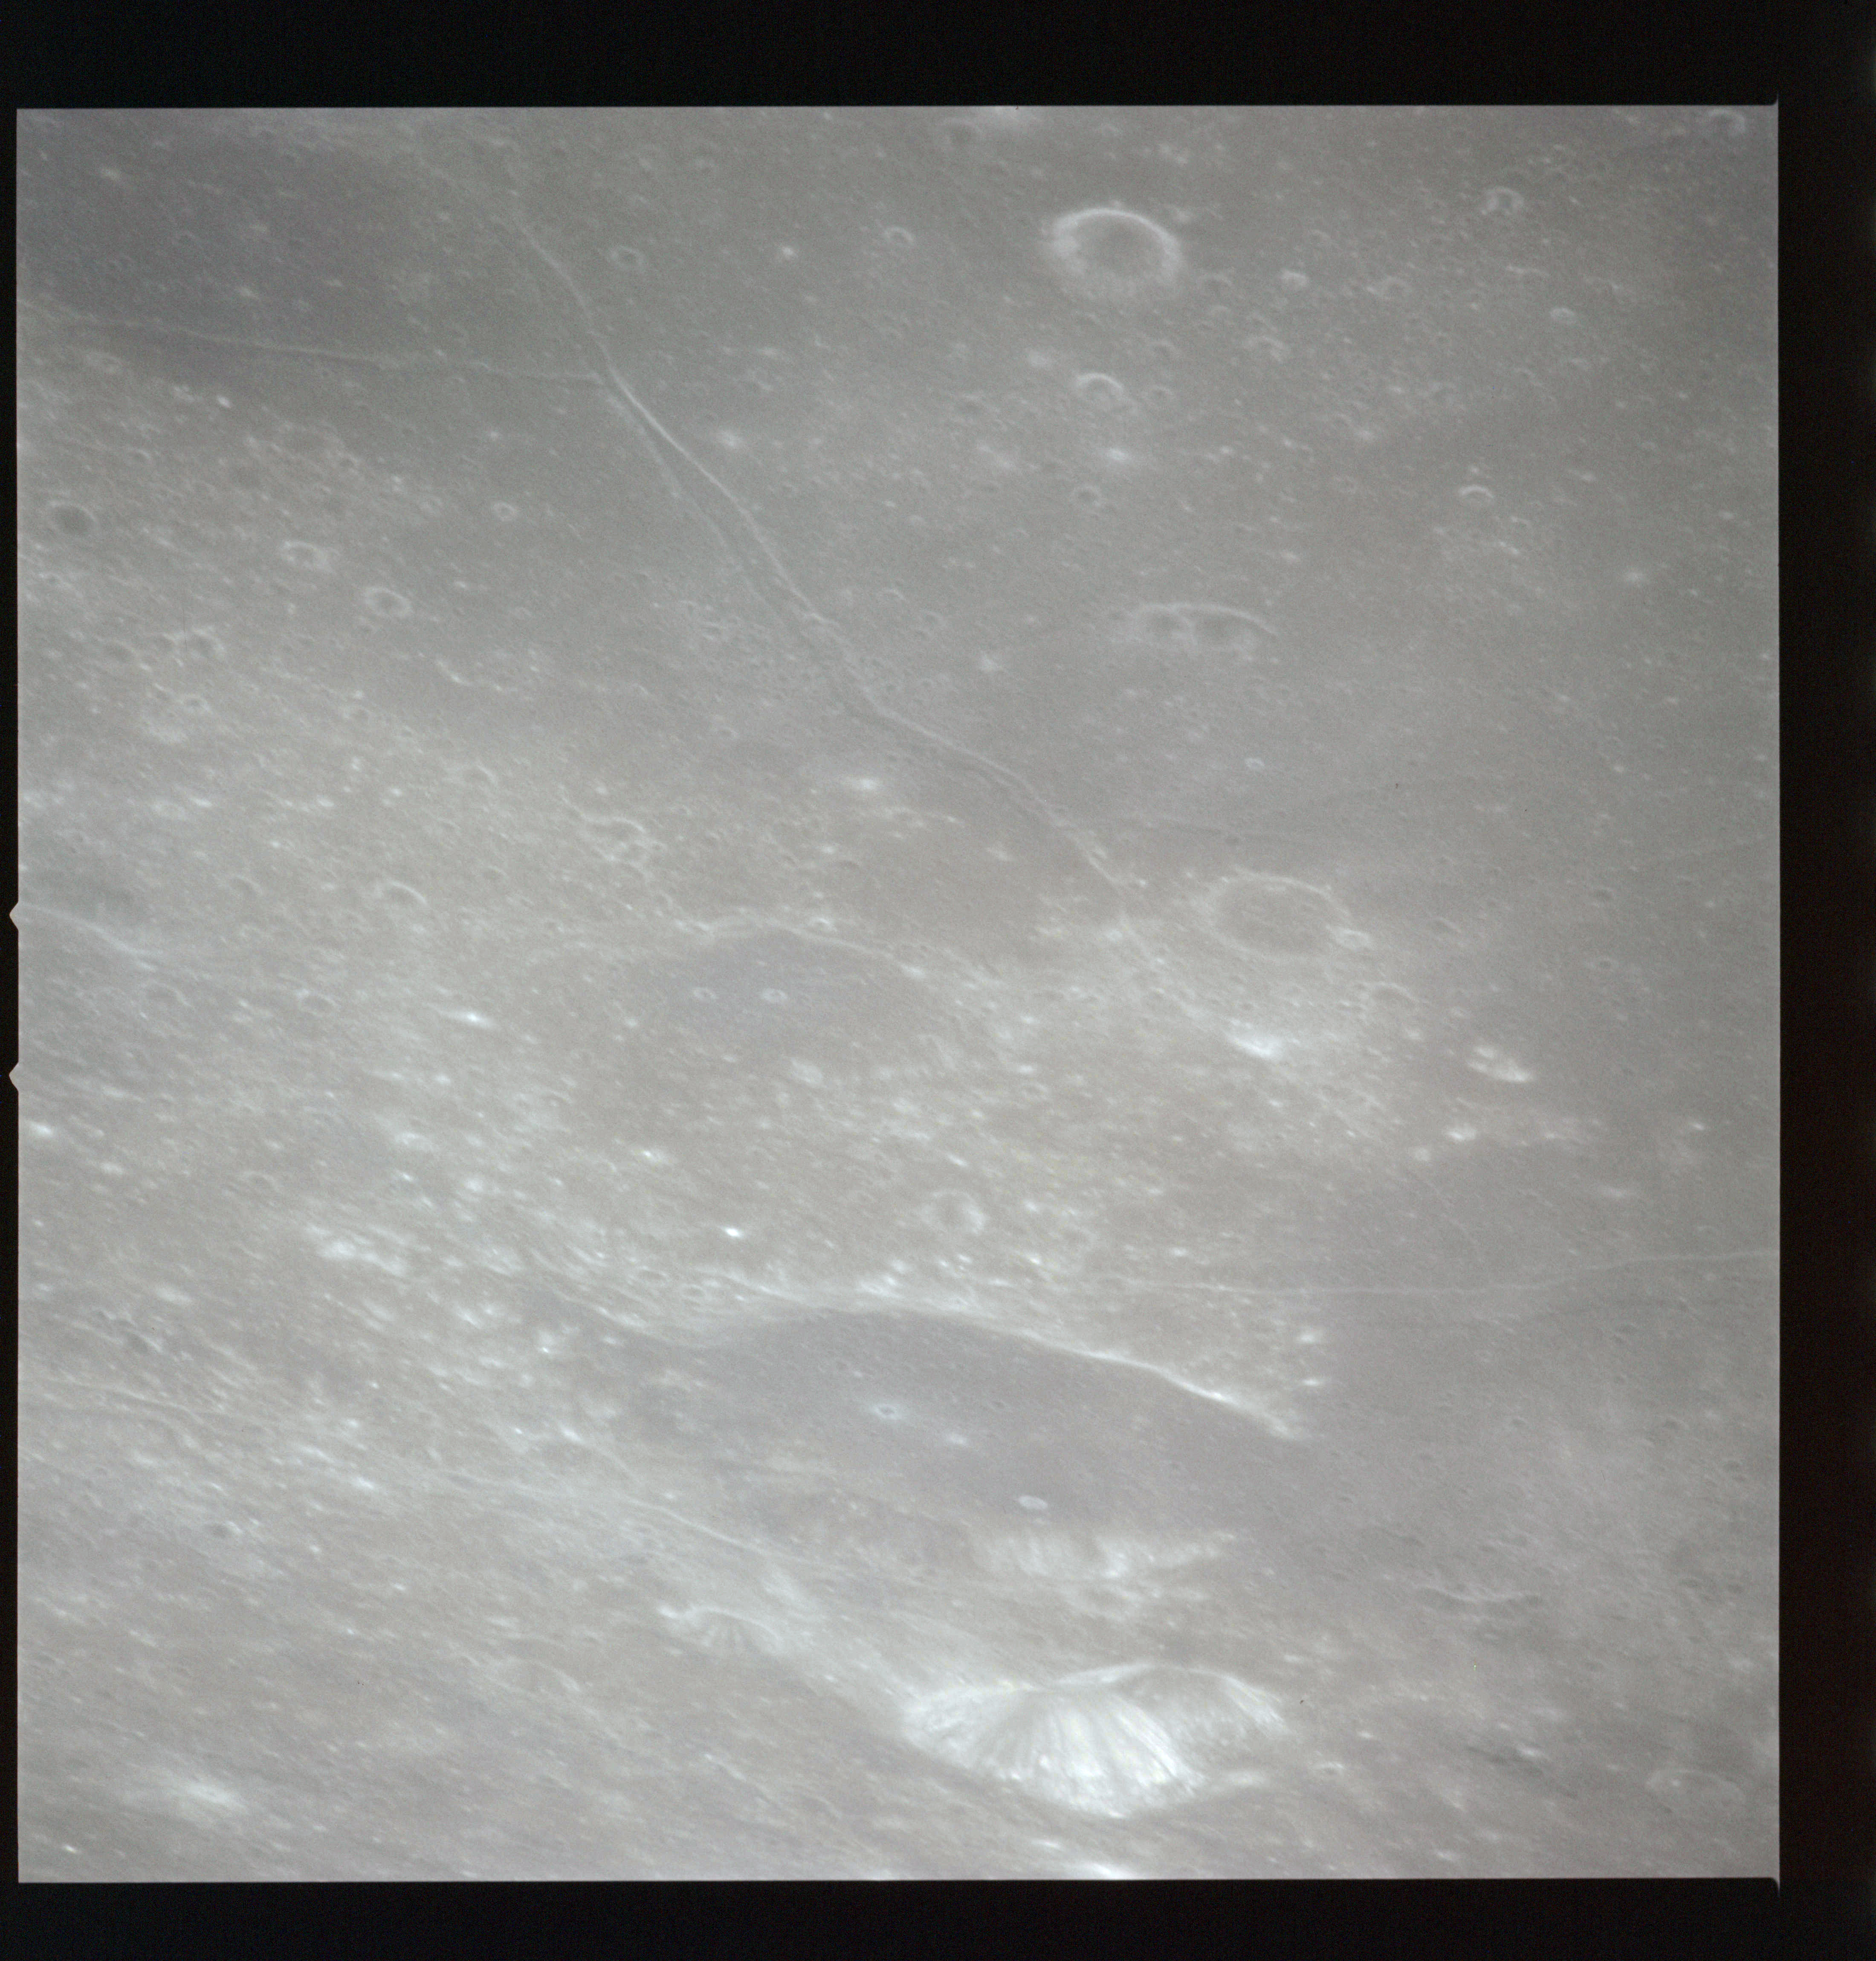
AS15-92-12543 - NE rim of crater Al-Bakri - Image by NASA/Johnson Space Center.
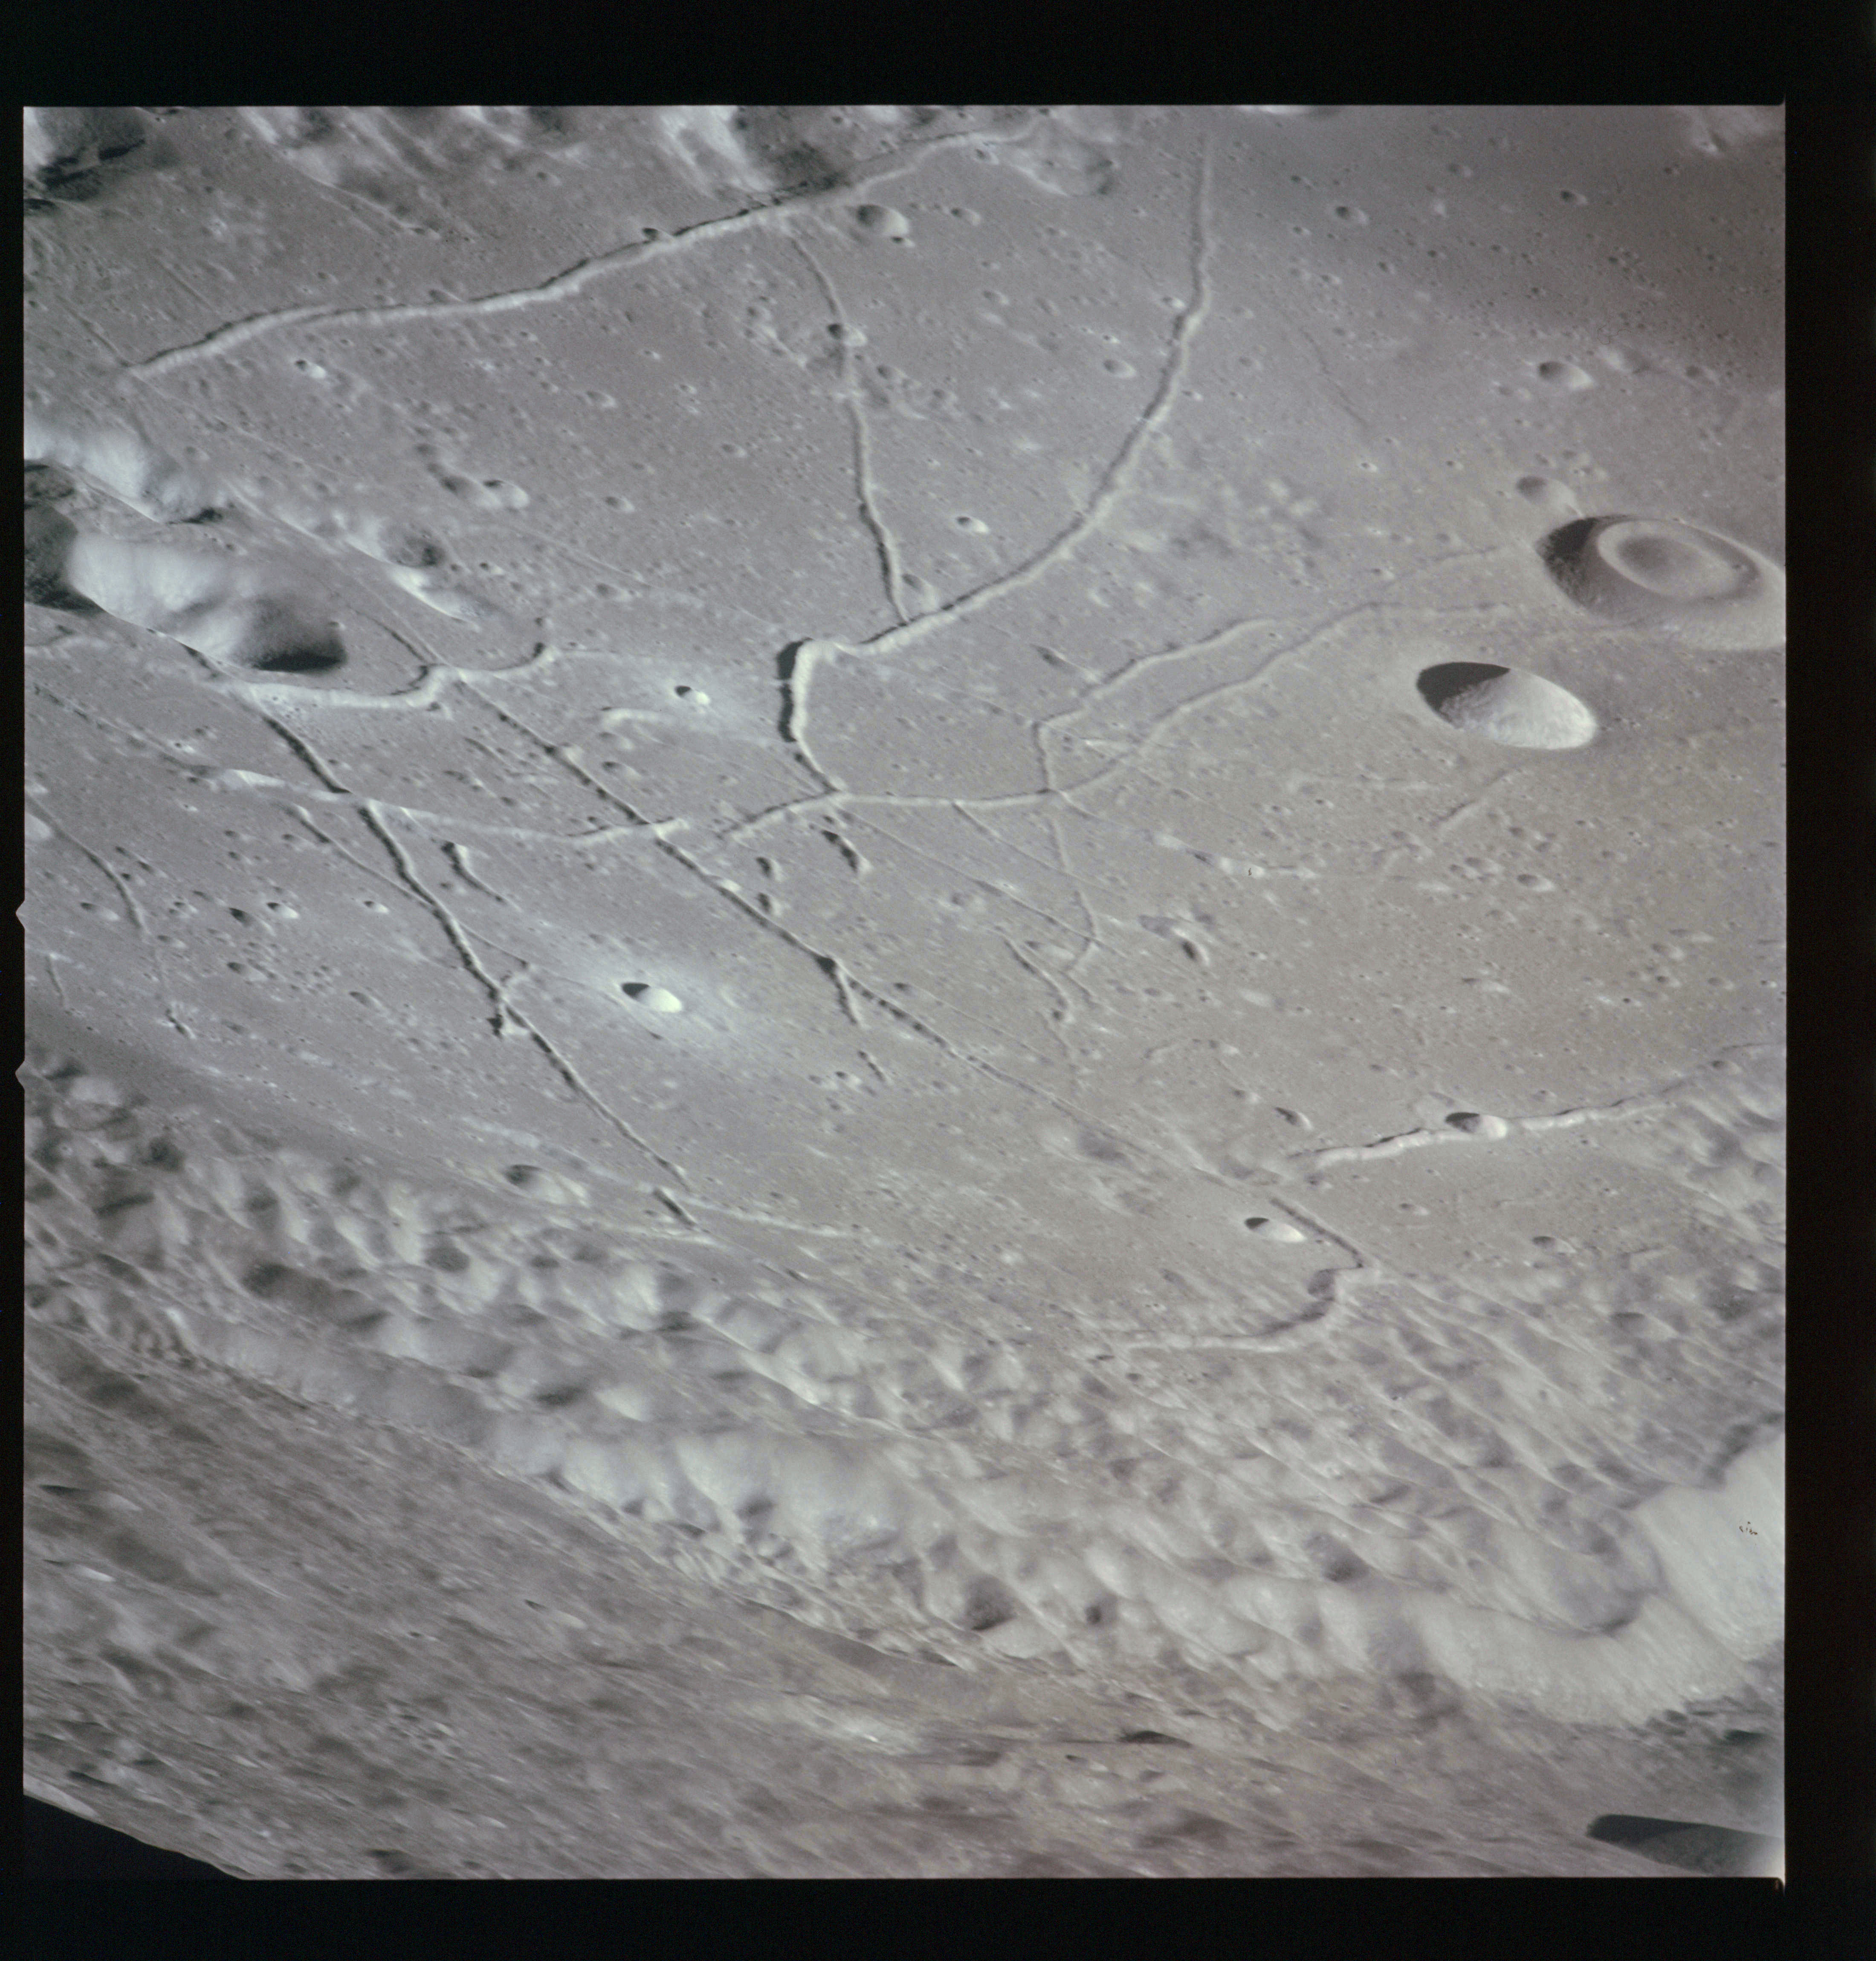
Frames AS15-93-12675 and 12677 show Sosigenes A and the expansion-induced rille system at the western margin of the mare, Rimae Sosigenes. An unusual elongated feature crosses the rilles nearly perpendicular to them. This may be a collapsed volcanic lava feature rather than an impact scar.
AS15-93-12675 - Crater Sosigenes A and Rima Sosigenes - Image by NASA/Johnson Space Center.
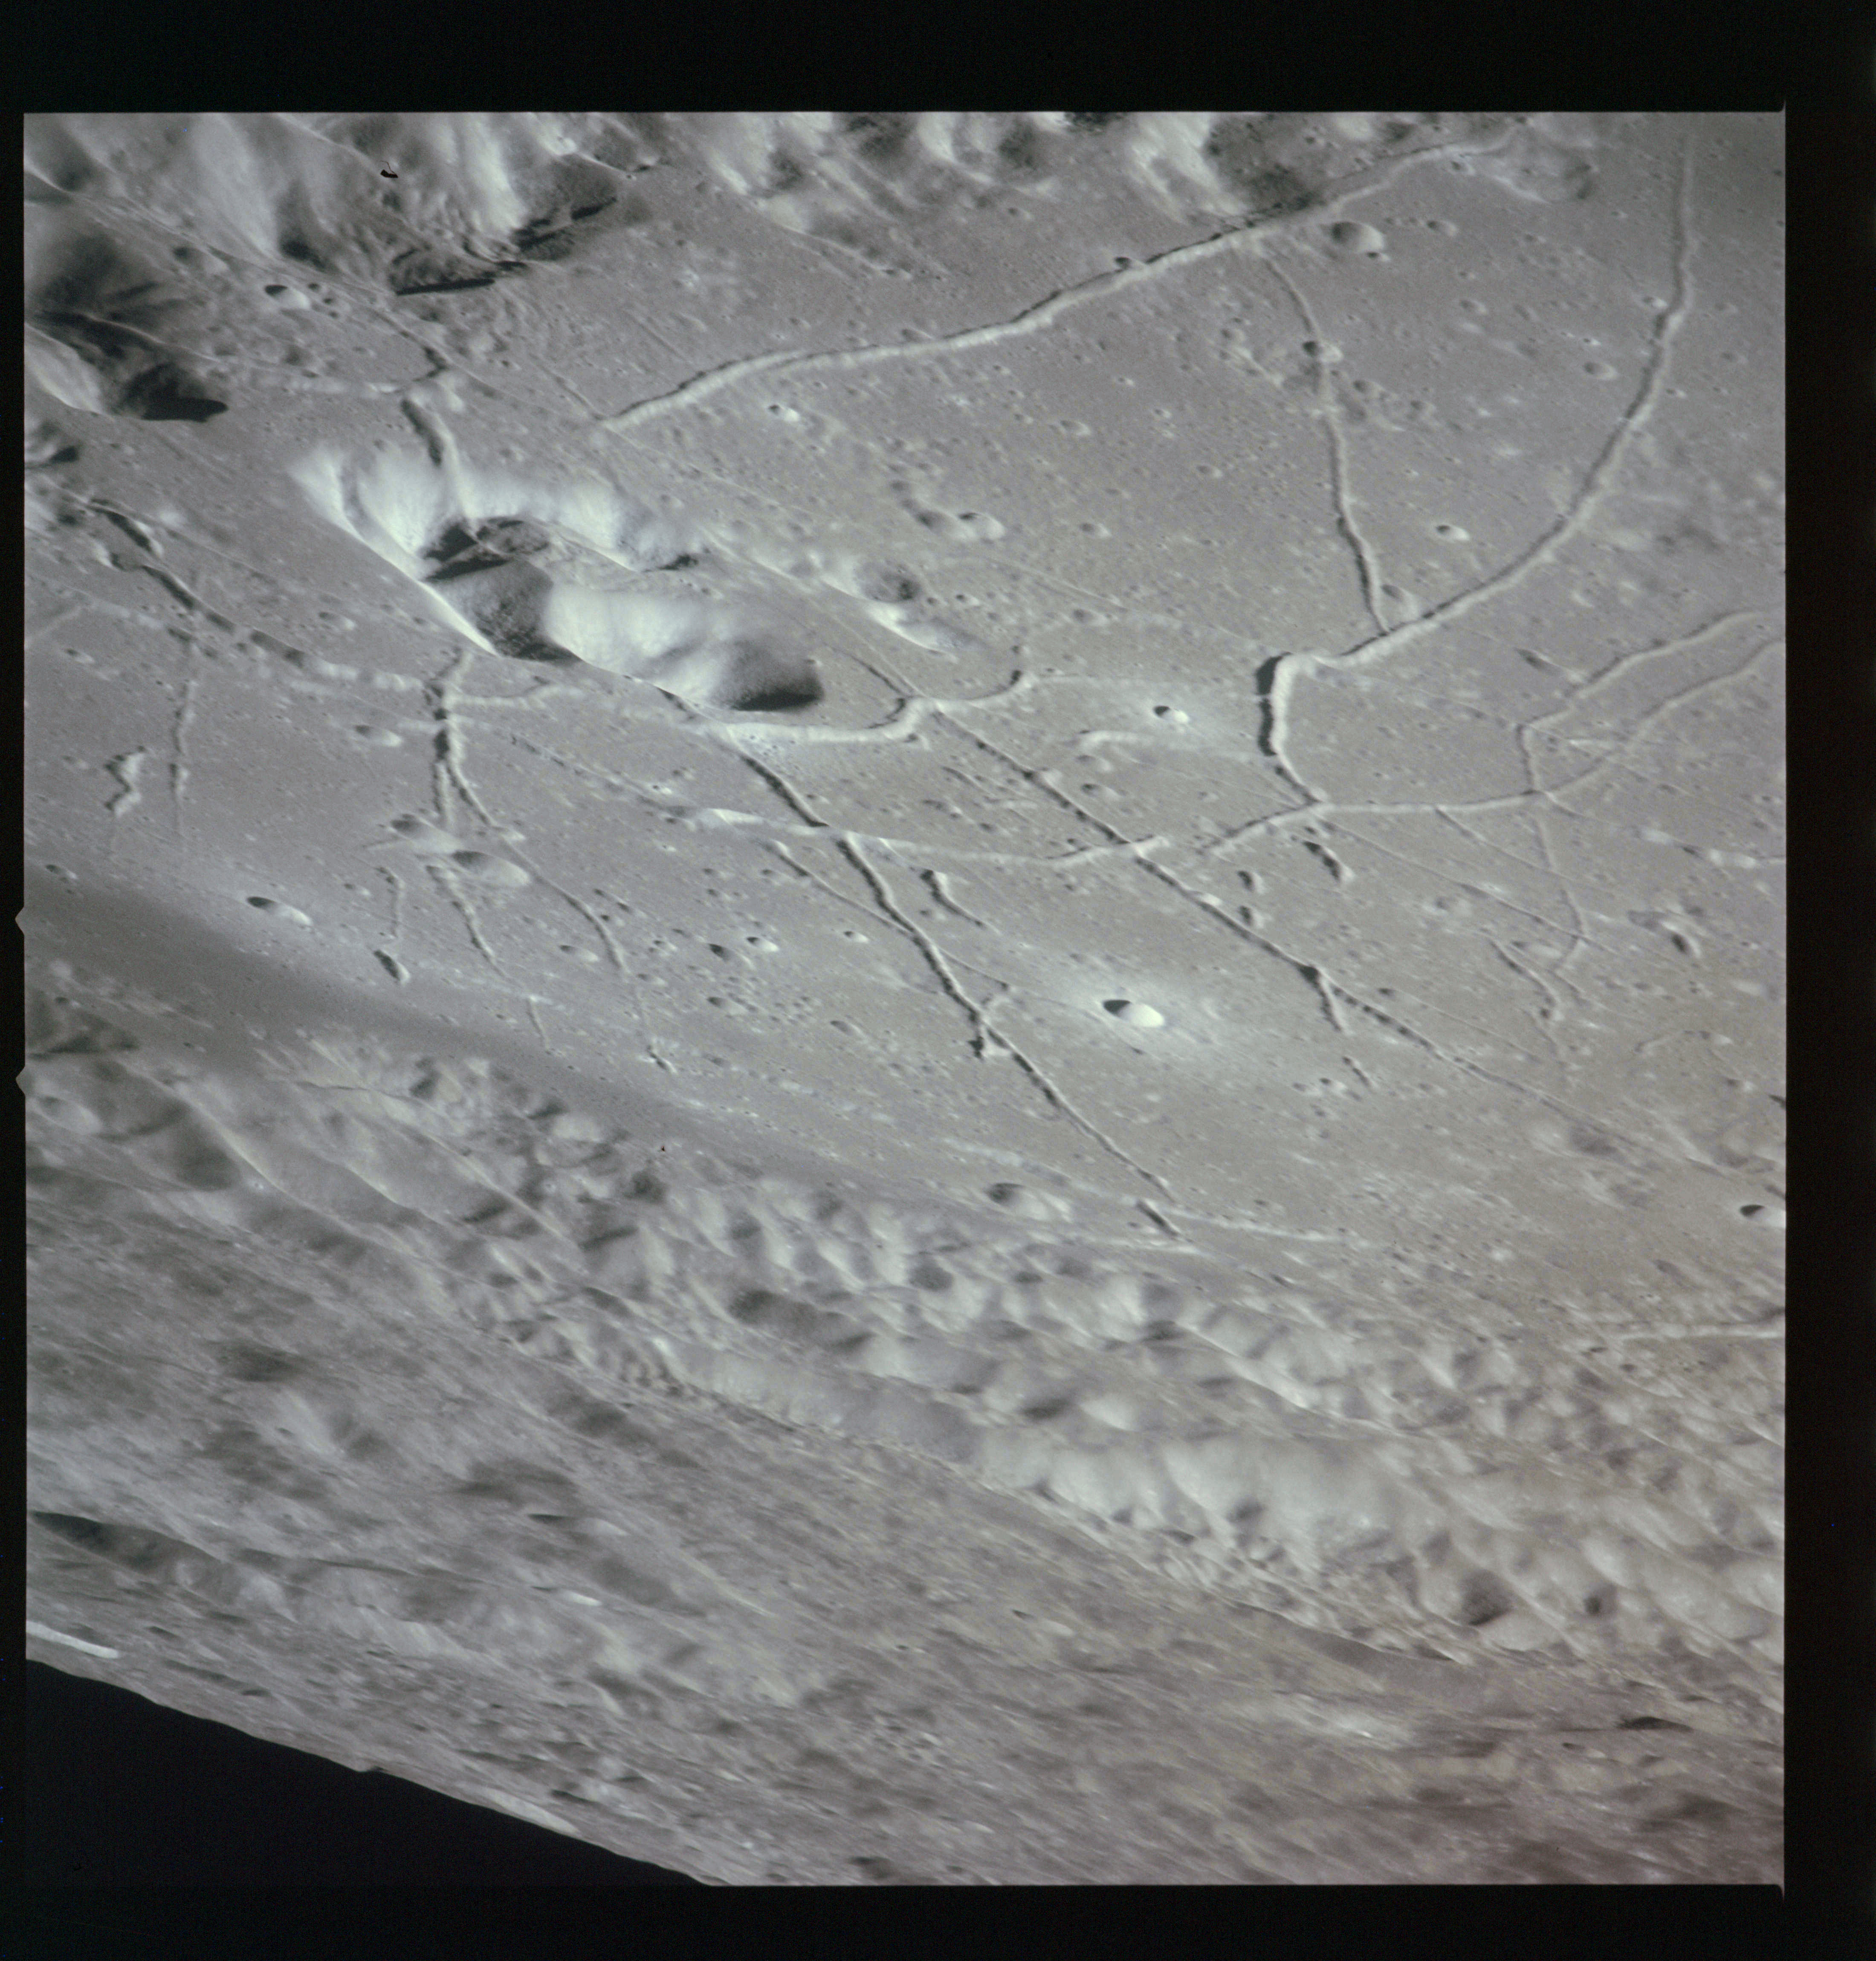
The rilles of Rimae Sosigenes continue south past Ariadaeus, as seen in AS15-93-12676. This is part of a double crater as it directly abuts Ariadaeus A. Ariadaeus E is the flooded embayment just in front of the pair and at the bottom of the photograph is Sosigenes C.
AS15-93-12676 - Rimae Sosigenes, craters Ariadaeus, A, D, E and Sosigenes C - Image by NASA/Johnson Space Center.
AS15-93-12677 - Crater Sosigenes A and C, Rimae Sosigenes - Image by NASA/Johnson Space Center.
216:49:12 Allen: Endeavour, Pan Camera Power, Off, please. [Pause.]
216:49:20 Worden: Rog. Pan Camera, Off.
216:49:23 Allen: Thank you.
Comm break.
AS15-93-12678 - Small bright crater and Menelaus D - Image by NASA/Johnson Space Center.
The 500-mm telephoto lens is still being used with the black and white magazine OO. Frame AS15-92-12544 looks very obliquely across some of the lakes between Mare Vaporum and Mare Serenitatis. To the left is Lacus Doloris (Lake of Suffering) with the 9-km flat-floored crater, Bowen, on its northeastern shore which is named after Ira Bowen, 1898-1973, an American astronomer. Beyond Bowen is Manilius H To the right is Lacus Odii (Lake of Hate).
AS15-92-12544 - Mare Vaporum. Image centre at 18.3°N, 7.9°E - Image by NASA/Johnson Space Center.
A few of the next sequence of photos feature a small bright crater WSW of Menelaus D.
AS15-92-12545 - Bright crater WSW of Menelaus D. Image centre at 13.12°N, 15.98°E - Image by NASA/Johnson Space Center.
AS15-92-12546 - Bright crater WSW of Menelaus D. Image centre at 13.09°N, 16.00°E - Image by NASA/Johnson Space Center.
AS15-92-12547 - Bright crater WSW of Menelaus D. Image centre at 13.06°N, 15.96°E - Image by NASA/Johnson Space Center.
AS15-92-12548 - Bright crater WSW of Menelaus D. Image centre at 13.07°N, 15.94°E - Image by NASA/Johnson Space Center.
AS15-92-12549 - WSW of Menelaus D. Image centre at 12.74°N, 16.26°E - Image by NASA/Johnson Space Center.
AS15-92-12550 - WSW of Menelaus D. Image centre at 12.77°N, 15.85°E - Image by NASA/Johnson Space Center.
AS15-92-12551 - Bright crater WSW of Menelaus D. Image centre at 13.12°N, 15.68°E - Image by NASA/Johnson Space Center.
AS15-92-12552 - Crater Daubrée. Image centre at 15.70°N, 14.84°E - Image by NASA/Johnson Space Center.
AS15-92-12553 - northwest rim of crater Menelaus. Image centre at 16.45°N, 15.68°E - Image by NASA/Johnson Space Center.
AS15-92-12554 - Bright crater southwest of Manilius T. Image centre at 13.41°N, 10.50°E - Image by NASA/Johnson Space Center.
AS15-92-12555 - Bright crater east of Manilius U and on the shore of Lacus Lenitatis. Image centre at 13.92°N, 11.48°E - Image by NASA/Johnson Space Center.
AS15-92-12556 - Bright crater north of Manilius G. Image centre at 16.03°N, 9.78°E - Image by NASA/Johnson Space Center.
AS15-M-2570 - South oblique Metric Camera image of Mare Vaporum including craters Manilius and Boscovich. Image taken at about 216:51. (250 megapixel version), (labelled version) - Image by NASA/ASU.
On magazine P, a sequence of four southwest-facing images pan across Boscovich, to the east of Mare Vaporum. These are AS15-93-12679 to 12682 and Boscovich is the dark, degraded bowl to the left, one of a scattering of dark-floored depressions or "lacus" (lakes) which mottle the terrain between Mare Vaporum and Mare Serenitatis.
AS15-93-12679 - Crater Boscovich - Image by NASA/Johnson Space Center.
AS15-93-12680 - Crater Boscovich - Image by NASA/Johnson Space Center.
AS15-93-12681 - Crater Boscovich P, B - Image by NASA/Johnson Space Center.
AS15-93-12682 - Craters Boscovich P and Manilius C - Image by NASA/Johnson Space Center.
Frame AS15-93-12683 features an unusual sight, a crater with a dark ejecta blanket - the vast majority have light ejecta - which may be caused by the excavation of dark subsurface material.
AS15-93-12683 - Craters Manilius and Manilius D - Image by NASA/Johnson Space Center.
Frames AS15-93-12684 and 12685 is of the Haemus mountains, seen under a high Sun with the slopes only recognisable by the light colour of their slopes.
AS15-93-12684 - Montes Haemus between craters Sulpicius Gallus and Bowen. Image centre at approx 19.1°N, 9.8°E - Image by NASA/Johnson Space Center.
AS15-93-12685 - Montes Haemus between craters Sulpicius Gallus and Bowen. Image centre at approx 19.1°N, 9.8°E - Image by NASA/Johnson Space Center.
At the centre of the above two images is a small bright crater with a distinctive dark section to its ray system. This is shown in close up in the next two images on magazine OO.
AS15-92-12557 - Bright crater within Montes Haemus. Image centre at 18.87°N, 9.90°E - Image by NASA/Johnson Space Center.
AS15-92-12558 - Bright crater within Montes Haemus. Image centre at 18.87°N, 9.88°E - Image by NASA/Johnson Space Center.
216:51:29 Allen: Hello, Endeavour. This is Houston with photography PADs and a TEI-73 PAD, when you're ready. [Pause.]
216:51:43 Irwin: Okay, Joe. I'm ready to copy the photo PADs. [Pause.]
216:51:50 Allen: Okay, Jim. I've got a Map Camera photo PAD, a Pan Camera PAD, and a Terminator photo PAD for you. And before I start, just a word of explanation. Because of your change of trajectory from what we considered a nominal one, we've got some details to add to the PAD that involve image-motion setting changes and exposure changes. And I'll read those in detail, in a moment. I just wanted to give you a word of explanation on it. The first PAD is the Map Camera photo PAD copied at 217 plus 10. [Pause.] And at 217 plus 10 it is T-start: 218 plus 16 plus 59, T-stop: 219 plus 16 plus 44. Over. [Pause.]
216:53:11 Allen: That's correct, Jim. And if you'll turn the page now, I want you to delete two lines, one at 218 plus 35 and that is "Map Camera, Image Motion, Increase, talkback barber pole, On". Delete that, and delete the line at 218 plus 55 which reads, "Map Camera, Image Motion, Increase, talkback barber pole plus four steps" et cetera. And, instead, put in the instructions: At T-start, [pause] it should be barber pole plus four. At 218 plus 39 plus 00, barber pole plus three; and at 218:49 plus 00, barber pole plus four. Readback, please. [Pause.]
216:54:49 Irwin: Okay, the instructions are that at T-start, it should be barber pole plus four; at 218 plus 39 plus 00, barber pole plus three; at 218 plus 49 plus 00, barber pole plus four. [Pause.]
216:55:08 Allen: That's correct, Jim. And those are your image-motion settings, and you're to delete the other two image-motion instructions in the Flight Plan. One at 218:35 and the other at 218:55, and - and I know you got that. The second...
216:55:29 Irwin: Yes, I made those two deletions.
216:55:31 Allen: Okay, the second is the terminator photo PAD to copy at 218 plus 07. And it is T-start: 218 plus 15 plus 19. Over. [Pause.]
216:55:54 Irwin: 218:15:19.
As Jim continues with his secretarial duties, Al and Dave are busy with a camera each shooting off their excess film.
Woods, from 2000 correspondence: "Was there a sense of wanting to use up film rather than bring home unexposed stock?"
Scott, from 2000 correspondence: "Probably a sense of capturing the spectacular scenes before we departed - our high inclination ground track presented us with a great variety of superb views. And of course, why return with unexposed film?"
The next set of images on magazine OO are of various mountains and ray craters along the Apennine Front southwest of the landing site.
AS15-92-12559 - Bright crater northwest of crater Conon, within Montes Apenninus. Image centre at 22.95°N, 1.21°E - Image by NASA/Johnson Space Center.
AS15-92-12560 - Montes Apenninus, north of crater Huygens A. Image centre at 20.62°N, 1.57°W - Image by NASA/Johnson Space Center.
AS15-92-12561 - Apennine Front, southwest of Mons Bradley and west of crater Conon. Image centre at 21.31°N, 0.03°W - Image by NASA/Johnson Space Center.
AS15-92-12562 - Bright crater northwest of crater Conon, within Montes Apenninus. Image centre at 22.96°N, 1.02°E - Image by NASA/Johnson Space Center.
AS15-92-12563 - Bright crater northwest of crater Conon, within Montes Apenninus. Image centre at 22.96°N, 1.02°E - Image by NASA/Johnson Space Center.
Frames AS15-92-12564 and 12565 look down upon the Apennine Front about 50 km west of the Crater Conon and about 150 km southwest of the landing site at Hadley.
AS15-92-12564 - Apennine Front, southwest of Mons Bradley and west of crater Conon. Image centre at 21.43°N, 0.13°W - Image by NASA/Johnson Space Center.
AS15-92-12565 - Apennine Front, southwest of Mons Bradley and west of crater Conon. Image centre at 21.21°N, 0.24°W - Image by NASA/Johnson Space Center.
Two images are taken with the 250-mm lens and colour film at this time. AS15-93-12686 and 12687 look down down onto the southeast corner of the Apennine Bench Formation near Rima Bradley.
AS15-93-12686 - Rima Bradley area. Image centre at approx 21.7°N, 9.8°E - Image by NASA/Johnson Space Center.
AS15-93-12687 - Rima Bradley area. Image centre at approx 22.1°N, 9.8°E - Image by NASA/Johnson Space Center.
Frame AS15-92-12566 on magazine OO is of a curved ridge, very likely the northern rim of a sunken crater rising out of Mare Imbrium near Mons Huygens.
AS15-92-12566 - Curved ridge near Mons Huygens. Image centre at 20.66°N, 3.50°E - Image by NASA/Johnson Space Center.
AS15-M-2580 - South oblique Metric Camera image of southeast Mare Imbrium and Sinus Aestuum including the southern section of the Montes Apenninus range. Image taken at about 216:56. (250 megapixel version), (labelled version) - Image by NASA/ASU.
Frame AS15-92-12567 is of another curved ridge, but this one is just about complete, betraying the crater, known as Wallace, that lies beneath the mare surface.
AS15-92-12567 - Crater Wallace - Image by NASA/Johnson Space Center.
216:55:55 Allen: Roger. And finally, the Pan Camera photo PAD. Copy at 218 plus 39. T-start: 218 plus 52 plus 55. T-stop: 219 plus 16 plus 44. And delete the two Pan Camera exposure lines. The first one at 218 plus 57. Delete that. And the second one at 219 plus 03. Delete that. And instead, use these exposure instructions. [Pause.] At 219 plus 00 plus 13, decrease. At 219 plus 00 plus 50, normal. At 219 plus 06 plus 35, decrease. At 219 plus 07 plus 28, normal. Readback please. [Pause.]
216:57:55 Irwin: Okay, I understand the instructions on the Pan Camera. Exposure at 219 plus 00 plus 13, it's decrease; 219 plus 00 plus 50, it's normal; 219 plus 06 plus 35, it's decrease; 219 plus 07 plus 28, it goes back to normal.
216:58:15 Allen: That's right, Jim. And give me the T-start and T-stop times, please. [Pause.]
216:58:24 Irwin: Okay, T-start was 218:52:55, and 219:16:44.
216:58:32 Allen: Sounds fine, and I'm holding TEI-73 PAD when you're ready for that. [Pause.]
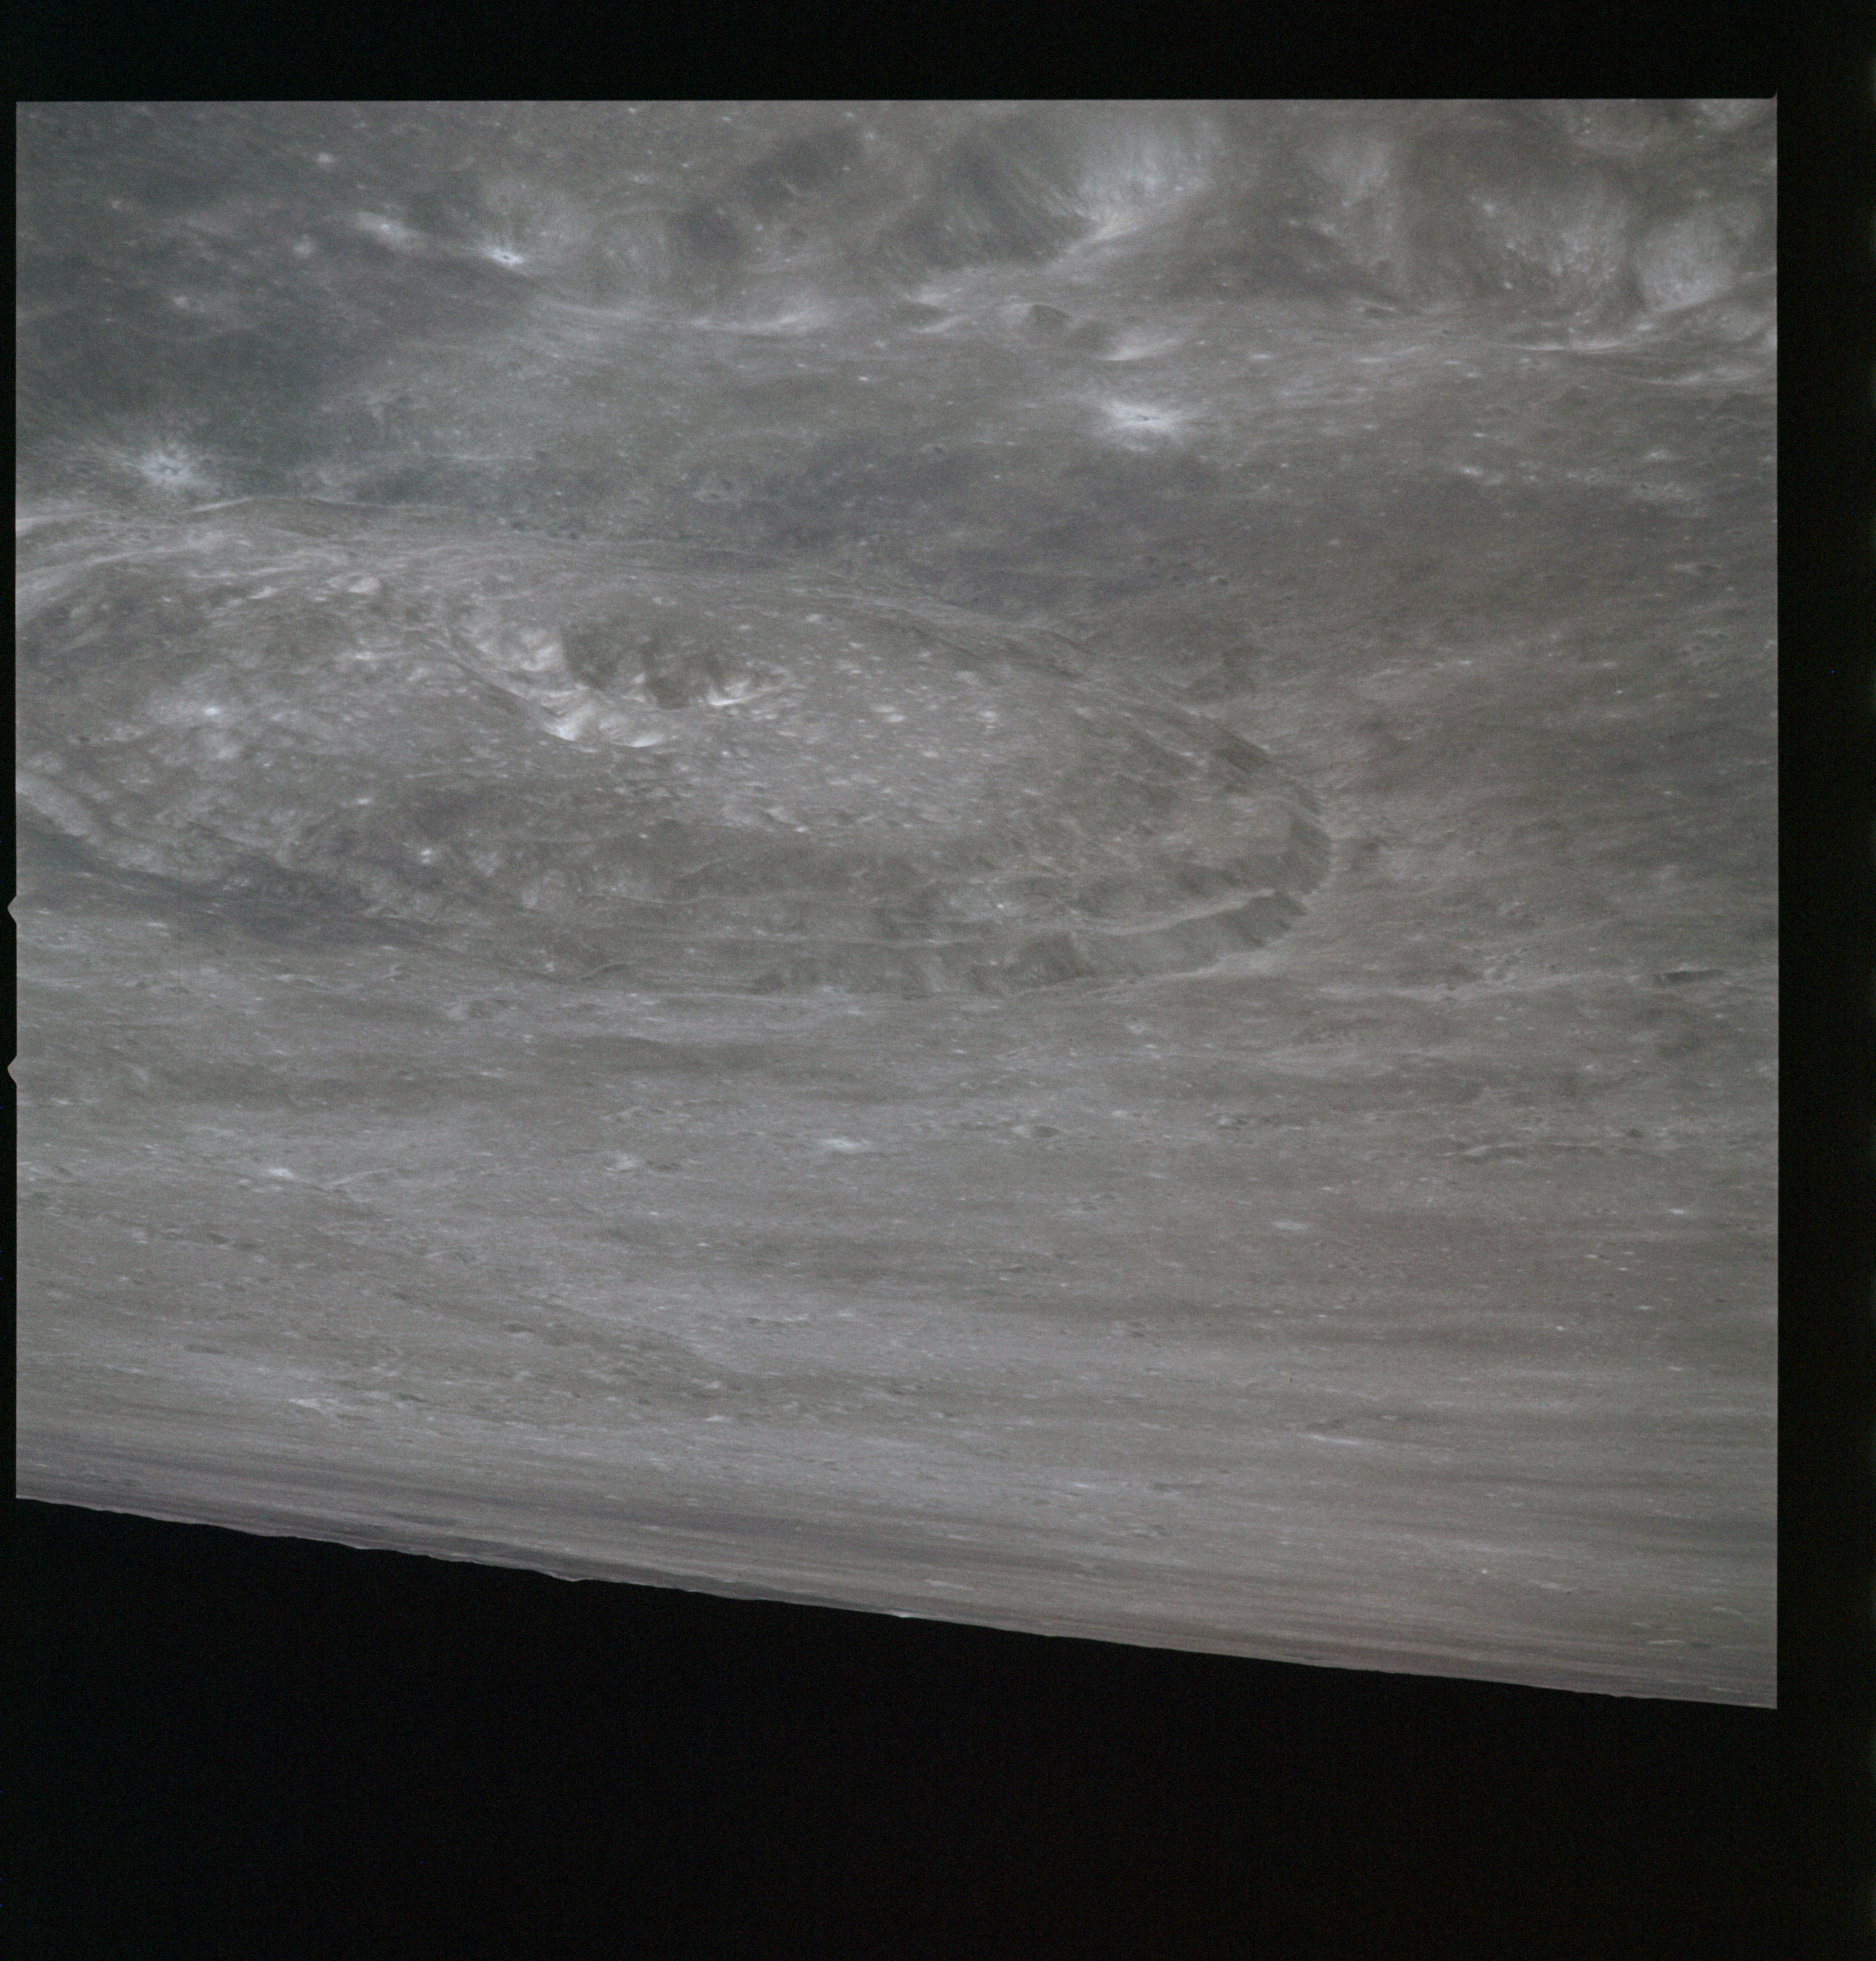
The camera with magazine P and the 250mm lens is trained southwest on one of the great lunar craters, Eratosthenes, which is becoming more visible to the crew as the Moon's rotation brings their inclined orbit over new territory.
AS15-93-12688 - Crater Eratosthenes
. Image centre at 000°N, 000°E - Image by NASA/Johnson Space Center.
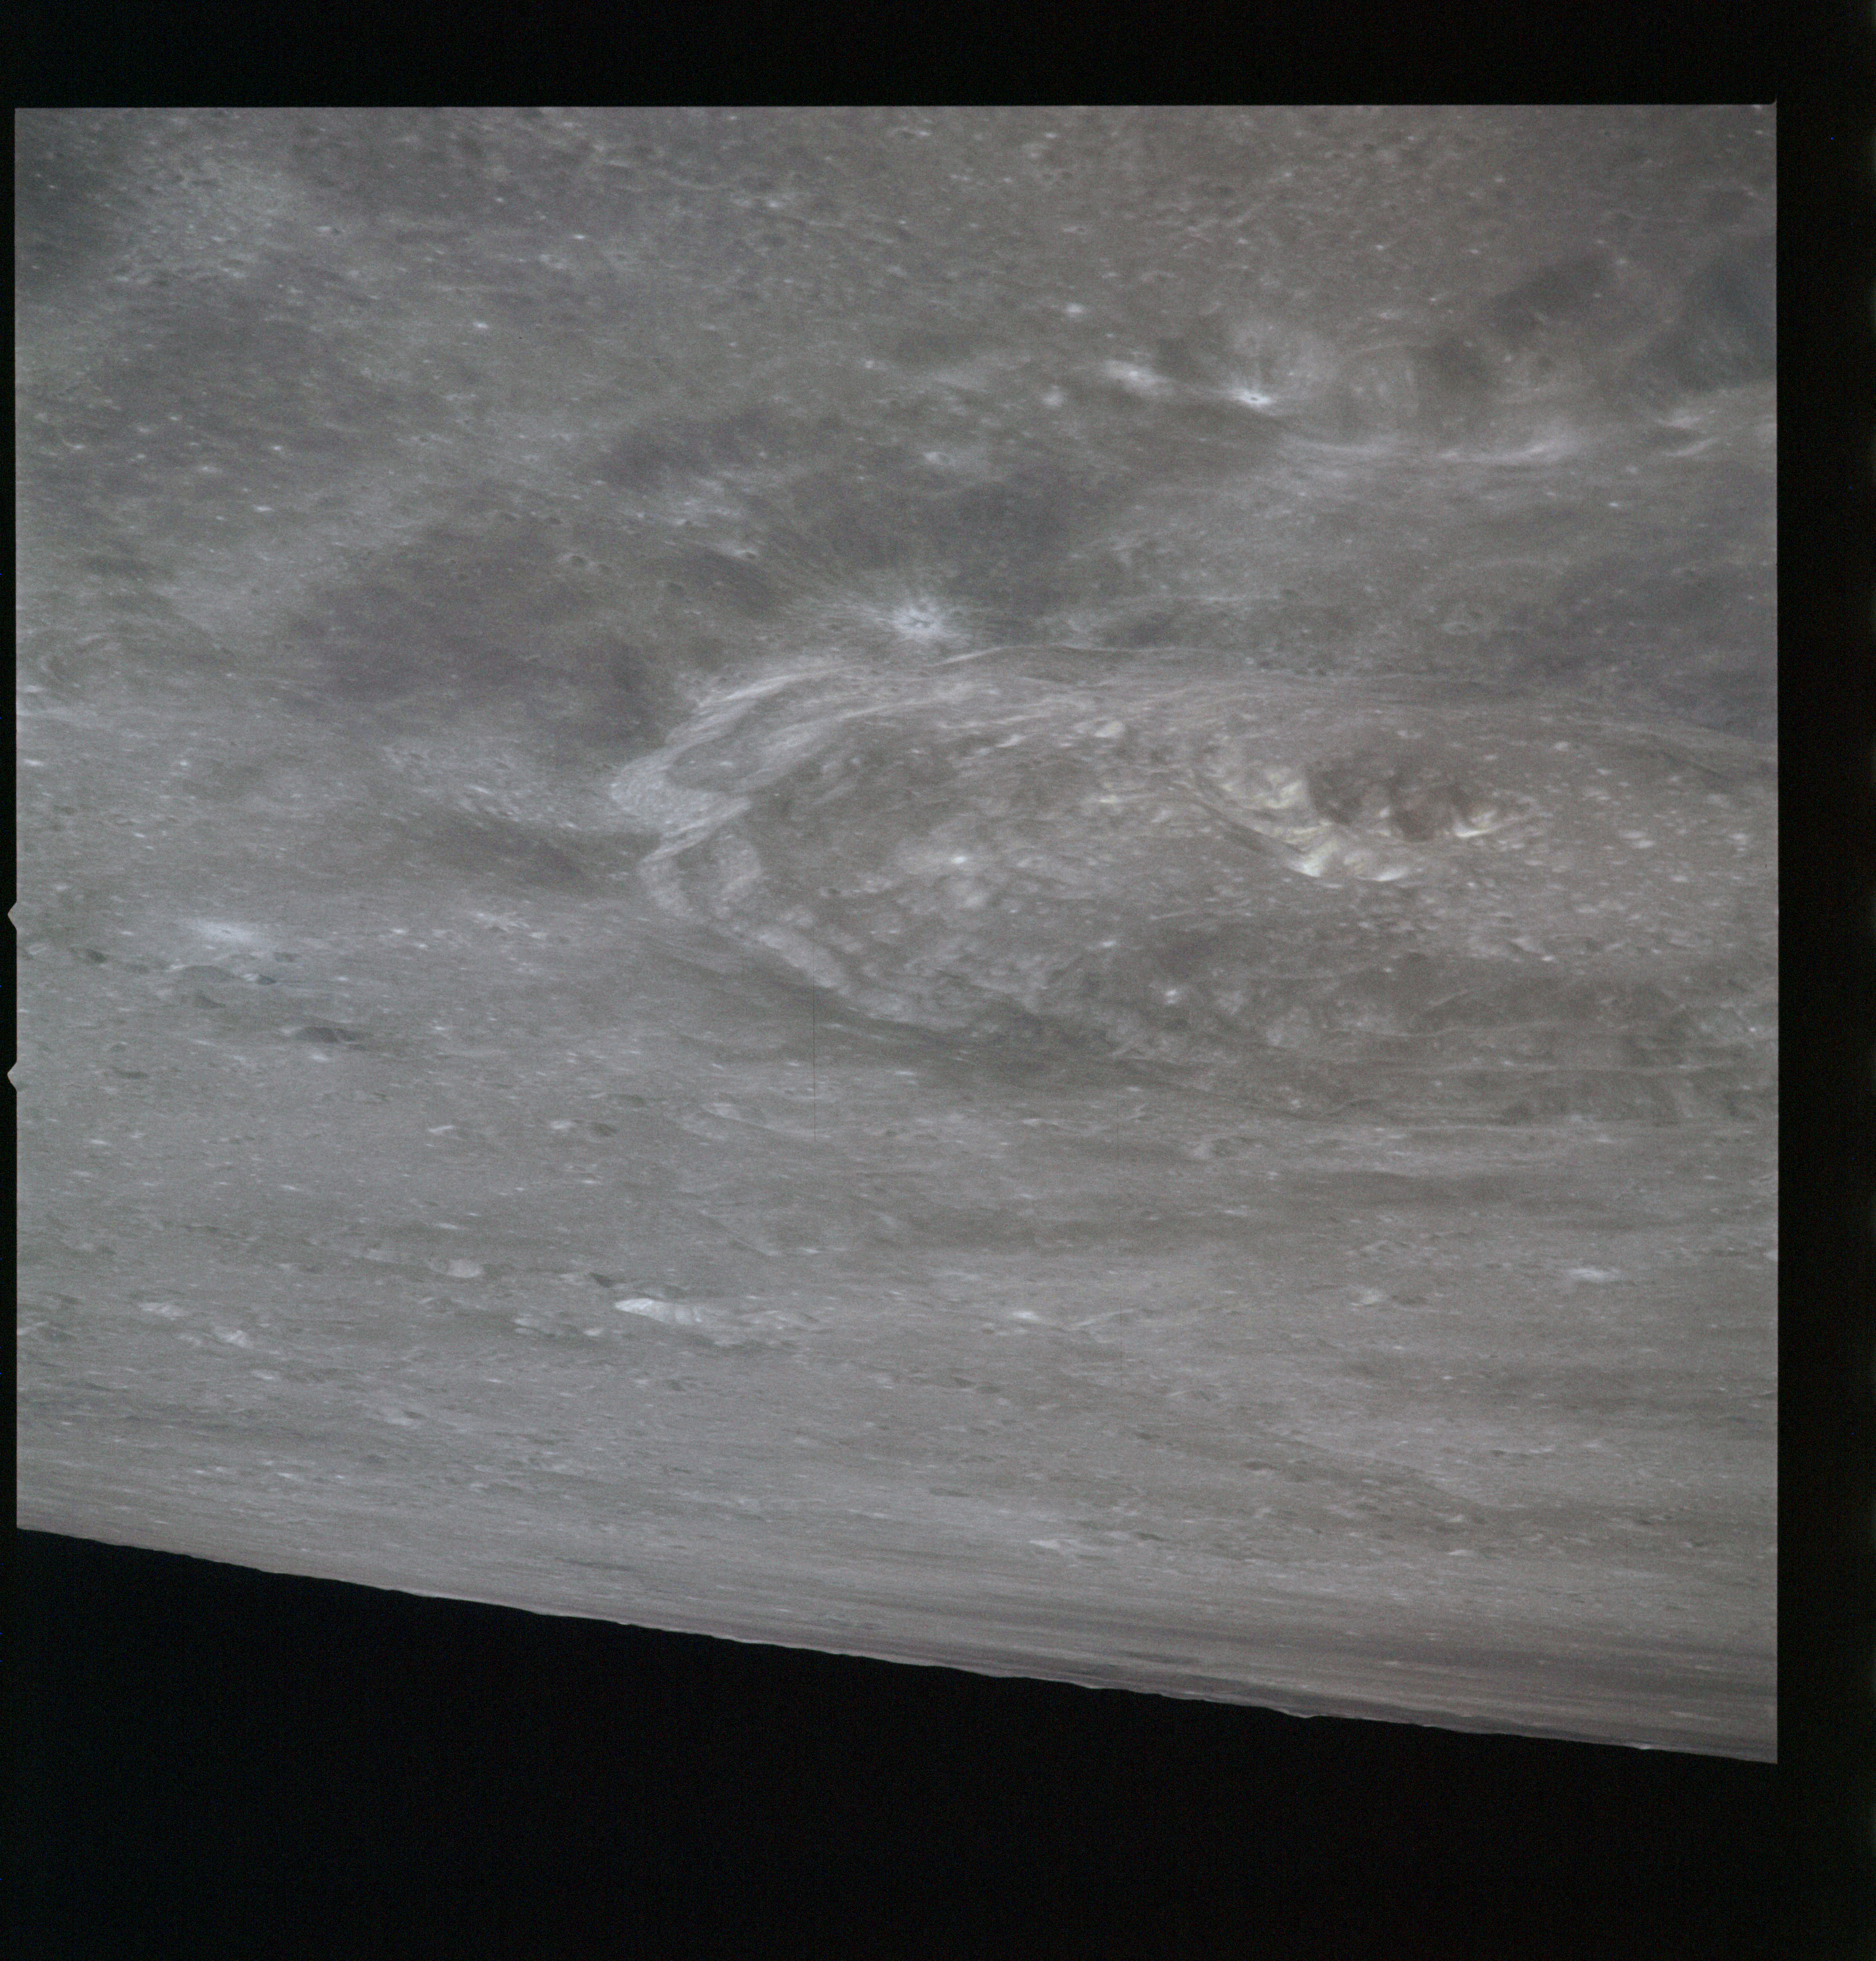
AS15-93-12689 - Crater Eratosthenes
. Image centre at 000°N, 000°E - Image by NASA/Johnson Space Center.
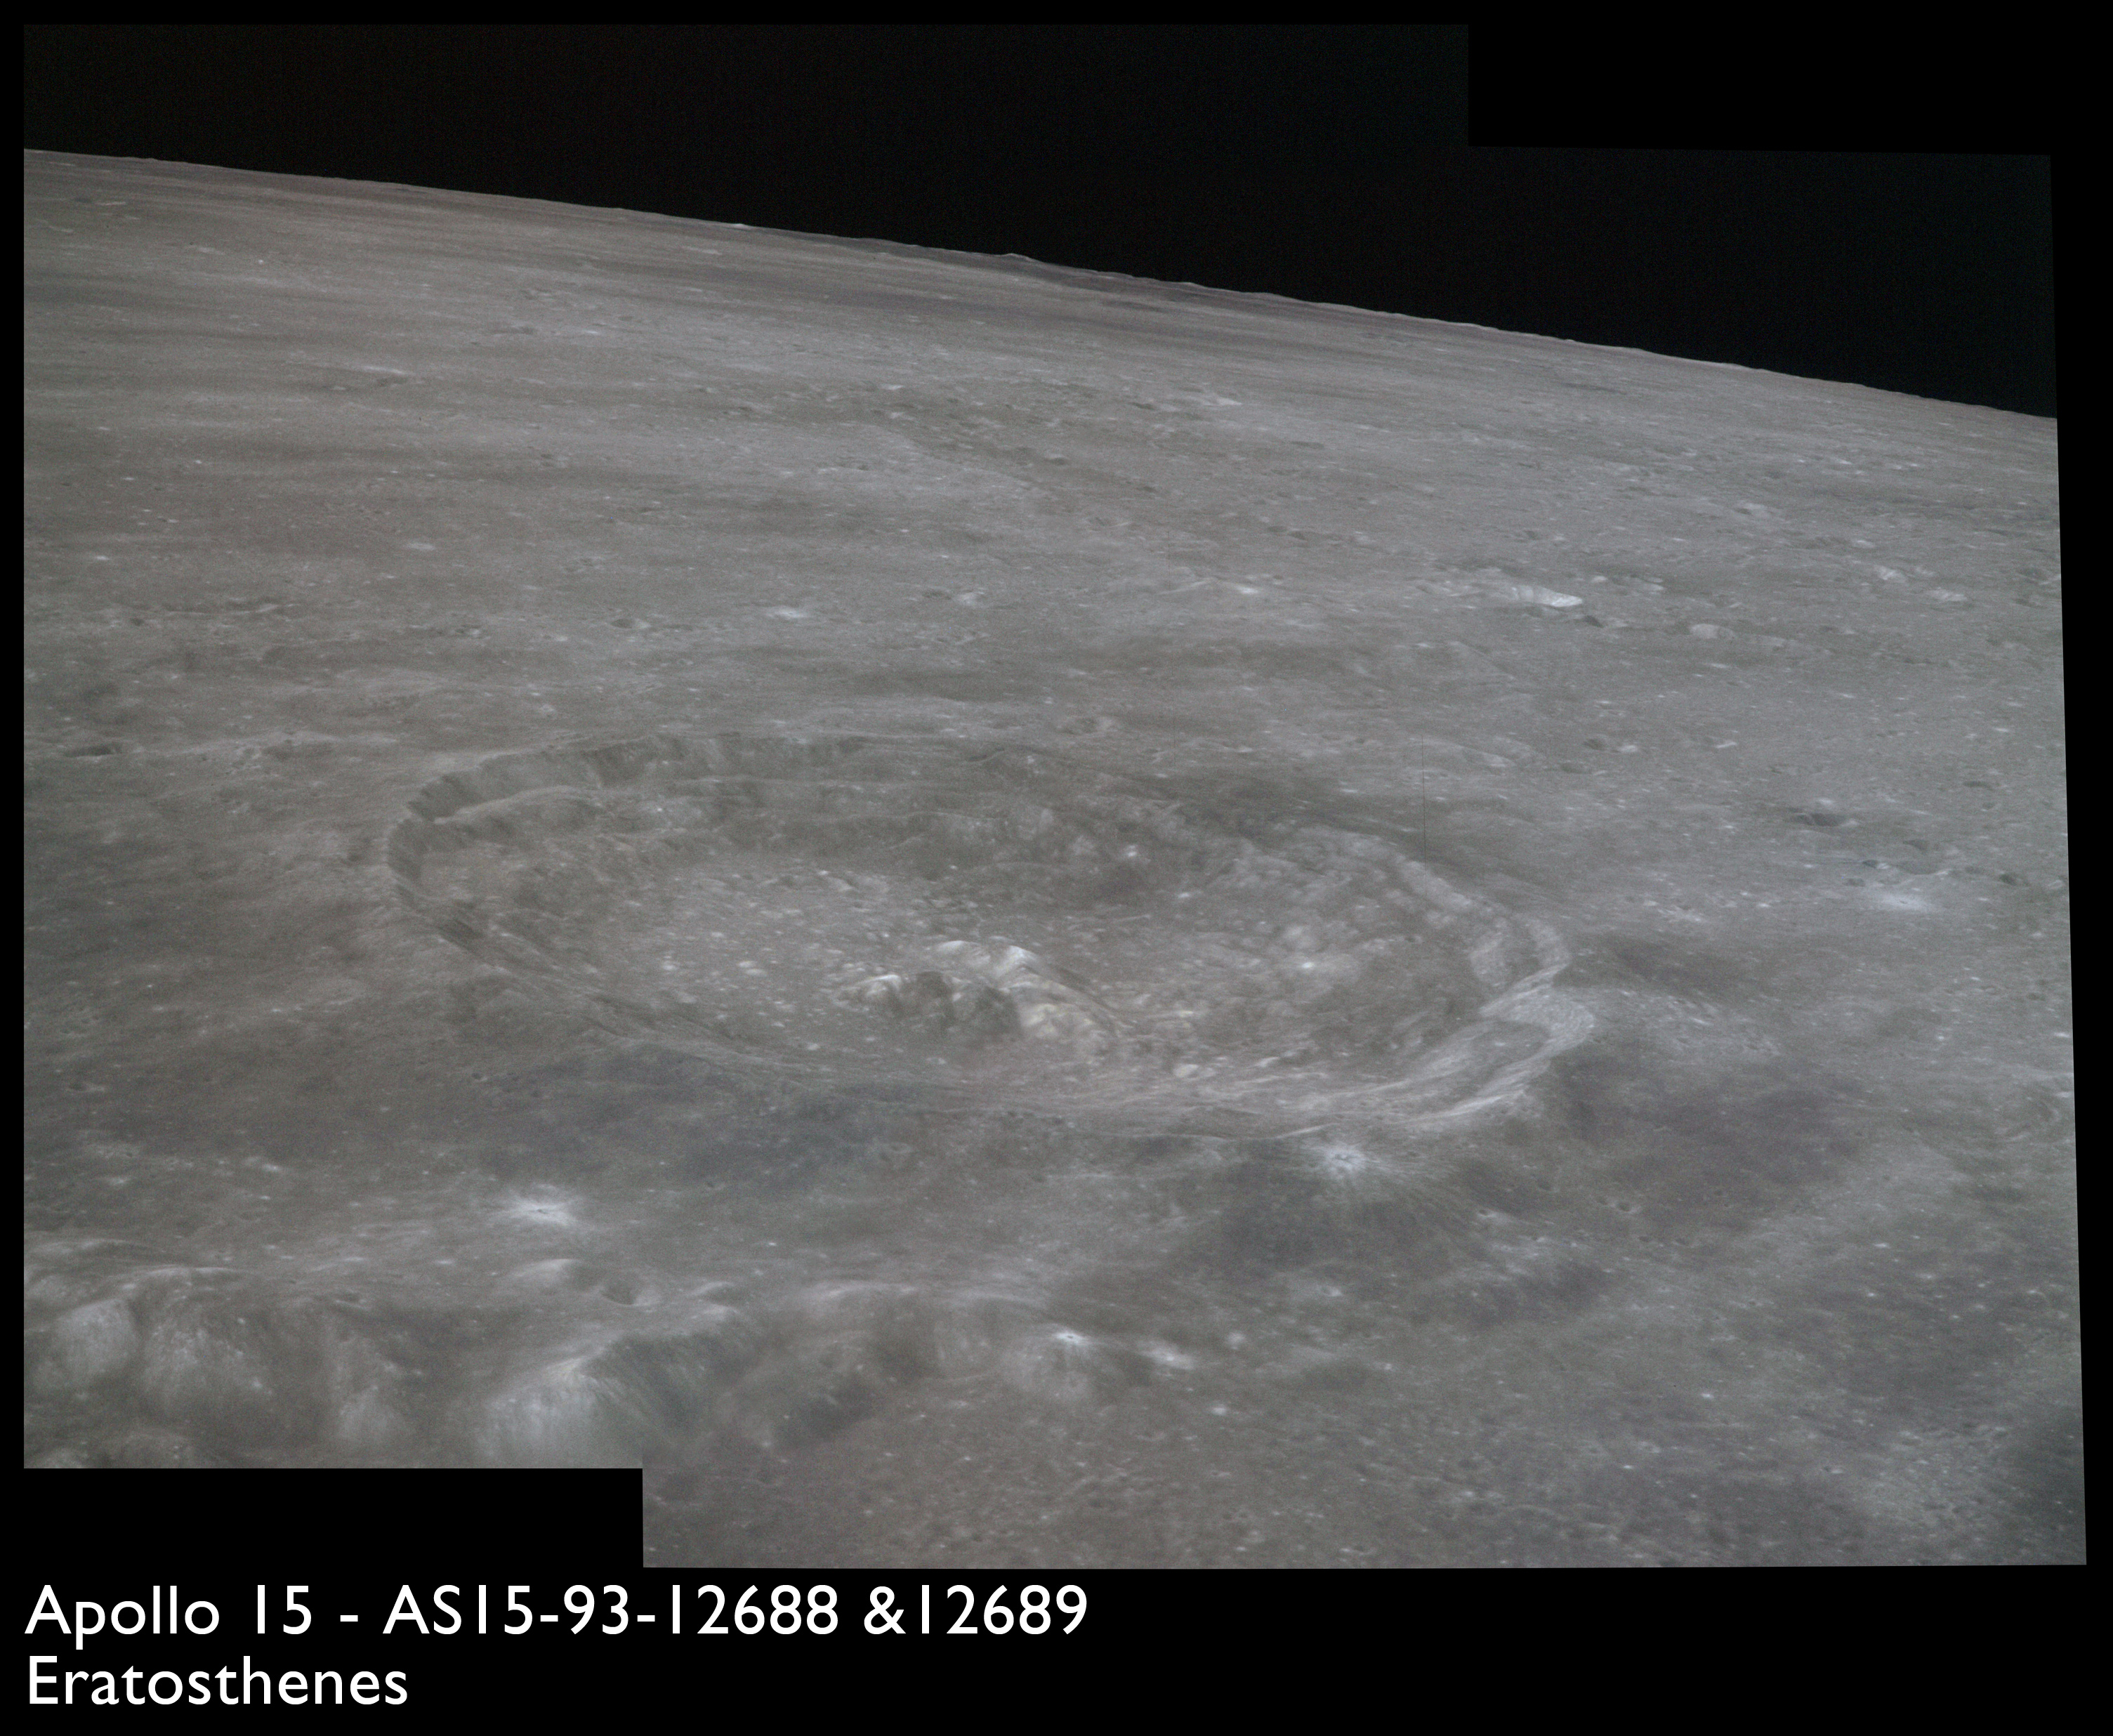
Composition of images AS15-93-12688 and 12689 showing crater Eratosthenes - Images by NASA/Johnson Space Center.
This composition of AS15-93-12688 and 12689 of the 58-kilometre crater Eratosthenes shows the wall terracing, flat floor and central peak; morphology that is classic for its size. However, notice also that while Eratosthenes itself displays no rays, a vast system of rays from Copernicus, about 250 km WSW, are blasted across it and its surroundings, indicating that Eratosthenes is the older formation. At one time, it would also have displayed an impressive ray system of its own but it is believed that rays fade away after about an aeon or so. Both Copernicus and Eratosthenes lie on the margins of Mare Imbrium, and as they and their secondary craters overlie the mare, both craters are known to be younger than the mare. All this and other evidence had led lunar geologists to classify the ages of all lunar features as follows:
Copernican System: Applies to features up to about 1 aeon (billion years) old; impact craters with ray systems which define them as being relatively fresh. All geological units which can be linked to these in age.
Eratosthenian System: Applies to features about 1 to 3 aeons old; slightly eroded impact craters without rays, but with other features that obviously postdate the maria.
Imbrian System: This includes the formation of the Imbrium and Orientale basins about 3.8 aeons ago, the filling of these and all the other basins during the major mare-laying epoch up until about 3 aeons ago and the features that can be associated with this timeframe.
Nectarian System: Applies to those features formed at the same time as the major basins, between the formation of the Nectaris and Imbrium basins.
Pre-Nectarian System: Applies to everything formed prior to Nectaris.
Lacking rays but having damaged the nearby mare surface during its formation, Eratosthenes clearly is part of the Eratosthenian System!
217:00:01 Irwin: Okay, Joe. I'm ready here for the TEI PAD.
217:00:15 Allen: Roger, Jim. It's TEI-73, SPS/G&N: 36188; plus 0.63, plus 0.98; 221:47:42.81; plus 2883.3, minus 0661.3, minus 0195.5; 179, 128, 350. All the rest is NA. Ullage, four jet, 12 seconds. Other: the PAD assumes no shape maneuver, and it assumes the lift-off REFSMMAT. Over. [Pause.]
Interpretation of the TEI-73 PAD is as follows:
Purpose: TEI-73 is the last abort TEI PAD that will be sent to the crew, and is intended to get the crew headed home one orbit earlier than planned. The next PAD, the preliminary TEI-74 PAD, will be the first estimate for the scheduled burn to get them home.
System: The maneuver would use the Service Propulsion System, and the primary Guidance and Navigation system.
CSM Weight (Noun 47): 36,188 pounds (16,415 kg).
Pitch and yaw trim (Noun 48): +0.63° and +0.98°.
Time of ignition, TIG (Noun 33): 221 hours, 47 minutes, 42.81 seconds.
Change in velocity (Noun 81), fps (m/s): X, +2,883.3 (+878.8); Y, -661.3 (-201.6); Z, -195.5 (-59.6). These velocities are expressed with respect to the local vertical frame of reference.
Spacecraft attitude at TIG: Roll: 179°, Pitch: 128°, Yaw: 350°.
The final notes of the PAD include the following: The SPS propellants are settled in their tanks by firing the plus-X thrusters on all four of the Service Module RCS quads for 12 seconds. The details assume that the crew have not carried out an upcoming burn that will change the shape of their orbit to extend the life of the subsatellite. The attitude angles are based on the IMU still being aligned per the lunar lift-off REFSMMAT.
217:01:38 Irwin: Okay, Joe. TEI-73, PAD readback. SPS/G&N; 36188; plus 0.63, plus 0.98; 221:47:42.81; plus 2883.3, minus 0661.3, minus 0195.5; 179, 128, 350. Four-jet, 12 seconds; PAD assumes no shape burn, and lift-off REFSMMAT. Over.
217:02:11 Allen: Okay, Jim. Right on. Thank you.
Comm break.
AS15-M-2590 - South oblique Metric Camera image of Mare Imbrium including craters Lambert, Pytheas and, on the horizon, Copernicus. Image taken at about 217:01. (250 megapixel version), (labelled version) - Image by NASA/ASU.
The last images on magazine OO mostly look towards the southwest horizon and the great crater Copernicus.
AS15-92-12568 - Crater Copernicus - Image by NASA/Johnson Space Center.
AS15-92-12569 - Crater Copernicus - Image by NASA/Johnson Space Center.
AS15-92-12570 - Crater Copernicus - Image by NASA/Johnson Space Center.
AS15-92-12571 - Crater Copernicus - Image by NASA/Johnson Space Center.
AS15-92-12572 - Crater Copernicus - Image by NASA/Johnson Space Center.
AS15-92-12573 - Crater Copernicus - Image by NASA/Johnson Space Center.
AS15-92-12574 - Crater Copernicus - Image by NASA/Johnson Space Center.
AS15-92-12575 - Crater Copernicus - Image by NASA/Johnson Space Center.
The final image on magazine OO is an oblique view of Pytheas, an 18.8 km crater in the southern reaches of Mare Imbrium.
AS15-92-12576 - Crater Pytheas - Image by NASA/Johnson Space Center.
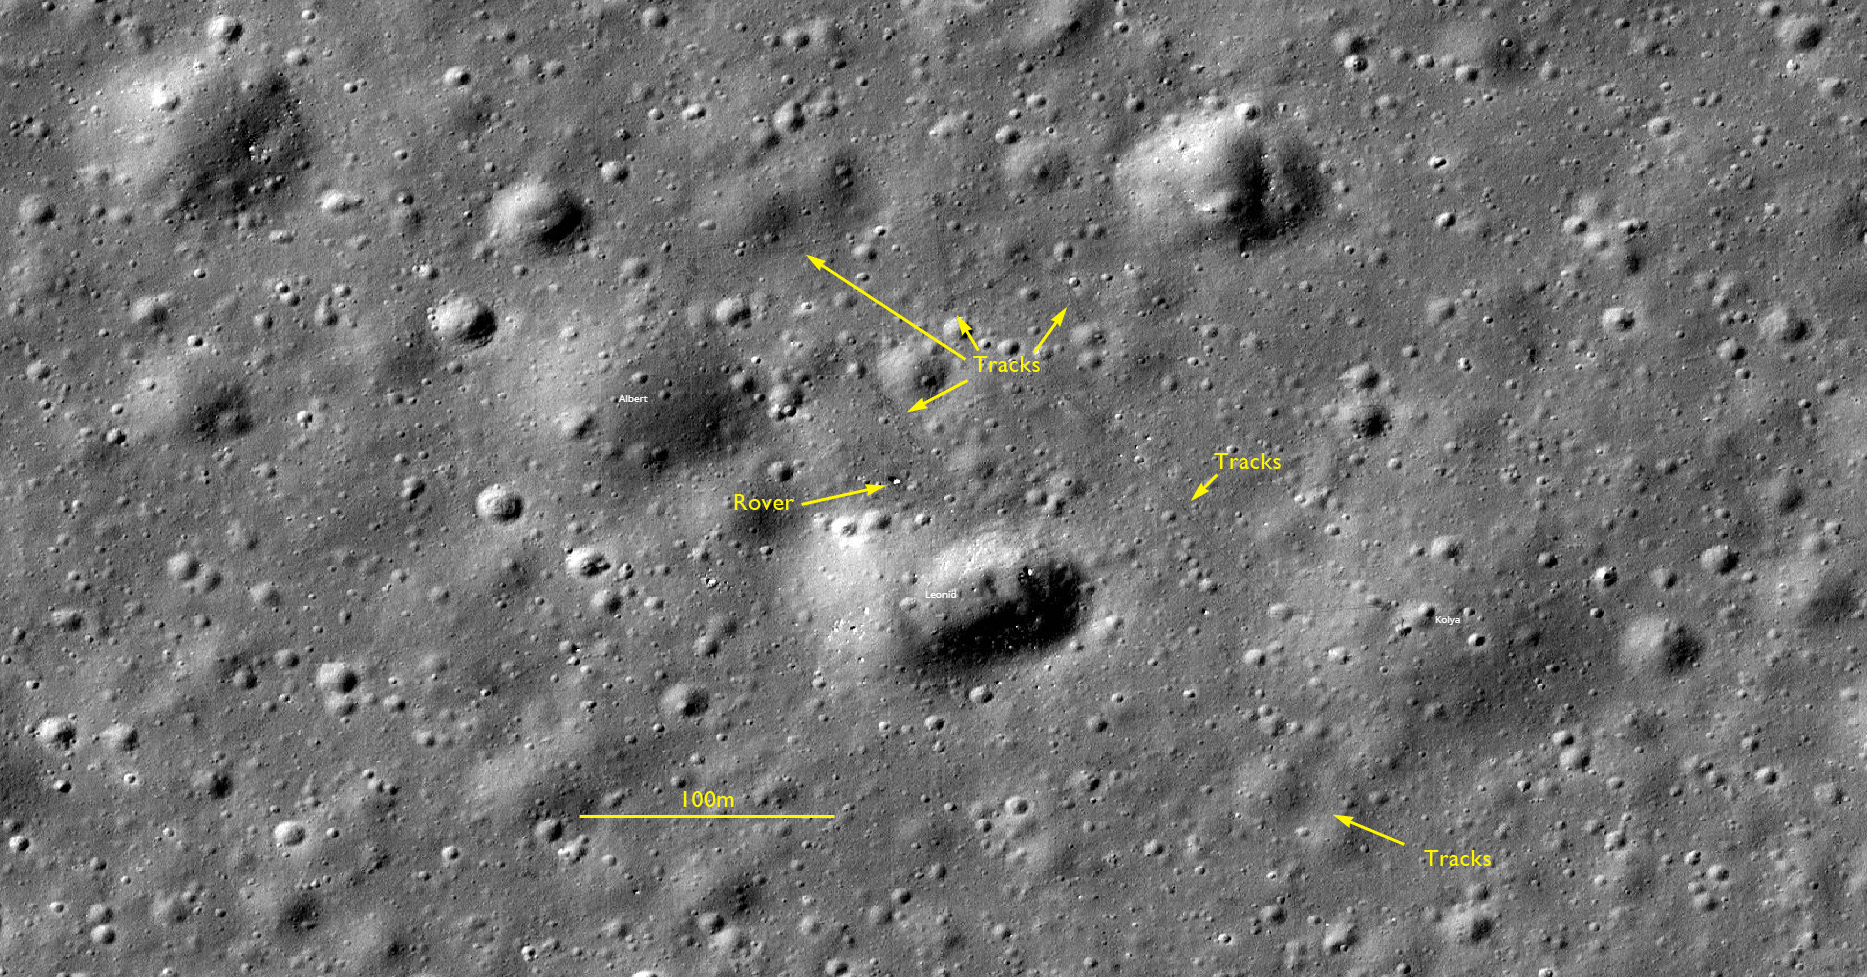
Photography on this pass is completed by exposing the final 47 frames on magazine P using the 250-mm lens. Twenty frames, AS15-93-12690 to 12709, are taken looking north, essentially letting the spacecraft's motion alter the point of view. This is Photo Target 27 and is the area in which the Soviet-built Luna 17 landed, launched from Earth on 10 November 1970, and carrying a Lunokhod unmanned rover. The Lunokhod 1 rover is still operating while Apollo 15 carries out its exploration and will finally expire in October 1971, having traversed 10.5 kilometres of Mare Imbrium.
AS15-93-12690 - Craters Carlini A and S, with Laplace A in the distance. Promontorium Laplace is on the right horizon - Image by NASA/Johnson Space Center.
Frame AS15-93-12691 looks north across Mare Imbrium with Montes Jura, the mountain range that forms the rim of Sinus Iridum, on the horizon. In the foreground are two small craters, Carlini A nearest the bottom of frame, Carlini S in the middle distance. Lighting is from the east.
AS15-93-12691 - Craters Carlini A and S, with Laplace A in the distance on the right. Montes Jura form the rim of Sinus Iridum - Image by NASA/Johnson Space Center.
AS15-93-12692 - Craters Carlini A and S. Montes Jura form the rim of Sinus Iridum - Image by NASA/Johnson Space Center.
AS15-93-12693 - View northwest into Sinus Iridum and Montes Jura - Image by NASA/Johnson Space Center.
As the spacecraft continues its progress westwards, Promontorium Heraclides (Hercules Promontory) comes into view. This represents the southwestern cusp of Sinus Iridum.
AS15-93-12694 - View northwest into Sinus Iridum and Montes Jura with Promontorium Heraclides on the left - Image by NASA/Johnson Space Center.
AS15-93-12695 - Craters Caroline Herschel, U and C. Promontorium Heraclides and Sinus Iridum beyond - Image by NASA/Johnson Space Center.
AS15-93-12696 - Craters Caroline Herschel U on the left. Sinus Iridum and Montes Jura with Promontorium Heraclides - Image by NASA/Johnson Space Center.
AS15-93-12697 - View north to craters Caroline Herschel U and C, with Sinus Iridum, Montes Jura and Promontorium Heraclides - Image by NASA/Johnson Space Center.
AS15-93-12698 - View north to craters Caroline Herschel U, C and V, with Sinus Iridum, Montes Jura and Promontorium Heraclides - Image by NASA/Johnson Space Center.
AS15-93-12699 - View north to craters Caroline Herschel V, C, U and Heraclides F, with Caroline Herschel cut off at bottom of frame. Part of Sinus Iridum and Montes Jura on the right horizon - Image by NASA/Johnson Space Center.
The Lunokhod 1 rover is within the field of view of many of these images. In AS15-93-12699, it is sited roughly at the image's centre. The final resting position of the rover, stated as being 38.3150°N, 35.0081°W, is shown in the following image from the Lunar Reconnaissance Orbiter probe. The rover's tracks are also clearly visible.
AS15-93-12700 - Craters Caroline Herschel V and Heraclides F - Image by NASA/Johnson Space Center.
LROC narrow-angle image of of the Lunokhod 1 rover - Image by LROC/ASU.
AS15-93-12701 - Craters Caroline Herschel V and Heraclides F - Image by NASA/Johnson Space Center.
The wrinkle ridge adjacent to Caroline Herschel U which runs north to Sinus Iridum is shown better in AS15-93-12702.
AS15-93-12702 - View north over Mare Imbrium towards Montes Jura. Crater Caroline Herschel U is at lower left - Image by NASA/Johnson Space Center.
AS15-93-12703 - View north over Mare Imbrium towards Sinus Iridum and Montes Jura, including craters Caroline Herschel U and C - Image by NASA/Johnson Space Center.
AS15-93-12704 - View north over Mare Imbrium towards Sinus Iridum and Montes Jura, including craters Caroline Herschel U, C, V and Heraclides F - Image by NASA/Johnson Space Center.
217:04:09 Allen: Endeavour, this is Houston. [Pause.]
217:04:17 Irwin: Go ahead, Joe.
217:04:19 Allen: Roger, Jim. Just for your own thinking, we'd like to advise you that we have reviewed the cue card F-K1 for the plane change burn that Al copied, and it's update is still valid for your shape burn later on. And we're in the process of going over your SPS thrusting procedures on G5-1 in the checklist, and we see very - only very minor changes that we'll be coming up to you with regarding your burn later on today, so I think things are pretty well in hand down here. Over.
217:05:07 Scott: Okay, we copy. Thank you, Joe.
217:05:13 Allen: Another item regarding that, the FAO wants me to urge you again just to follow the Flight Plan items regarding SIM bay operation before and after these burns coming up, and we'll get no - we'll get into no problems at all. Over.
217:05:35 Scott: Rog. Understand.
Very long comm break.
AS15-93-12705 - View north over Mare Imbrium with Sinus Iridum and Montes Jura to the right. Includes craters C. Herschel V and Heraclides F - Image by NASA/Johnson Space Center.
AS15-M-2600 - South oblique Metric Camera image of Mare Imbrium including crater Diophantus. Image taken at about 217:06. (250 megapixel version), (labelled version) - Image by NASA/ASU.
AS15-93-12706 - Western shore of Mare Imbrium including crater Mairan E - Image by NASA/Johnson Space Center.
By frame AS15-93-12707, the camera has moved across to the light-coloured terrain that forms the western margin of Mare Imbrium, just southwest of Sinus Iridum. The two major craters visible are Mairan E (smaller and near the centre) and Mairan A (larger and to the left).
AS15-93-12707 - Western shore of Mare Imbrium including crater Mairan E, A and H - Image by NASA/Johnson Space Center.
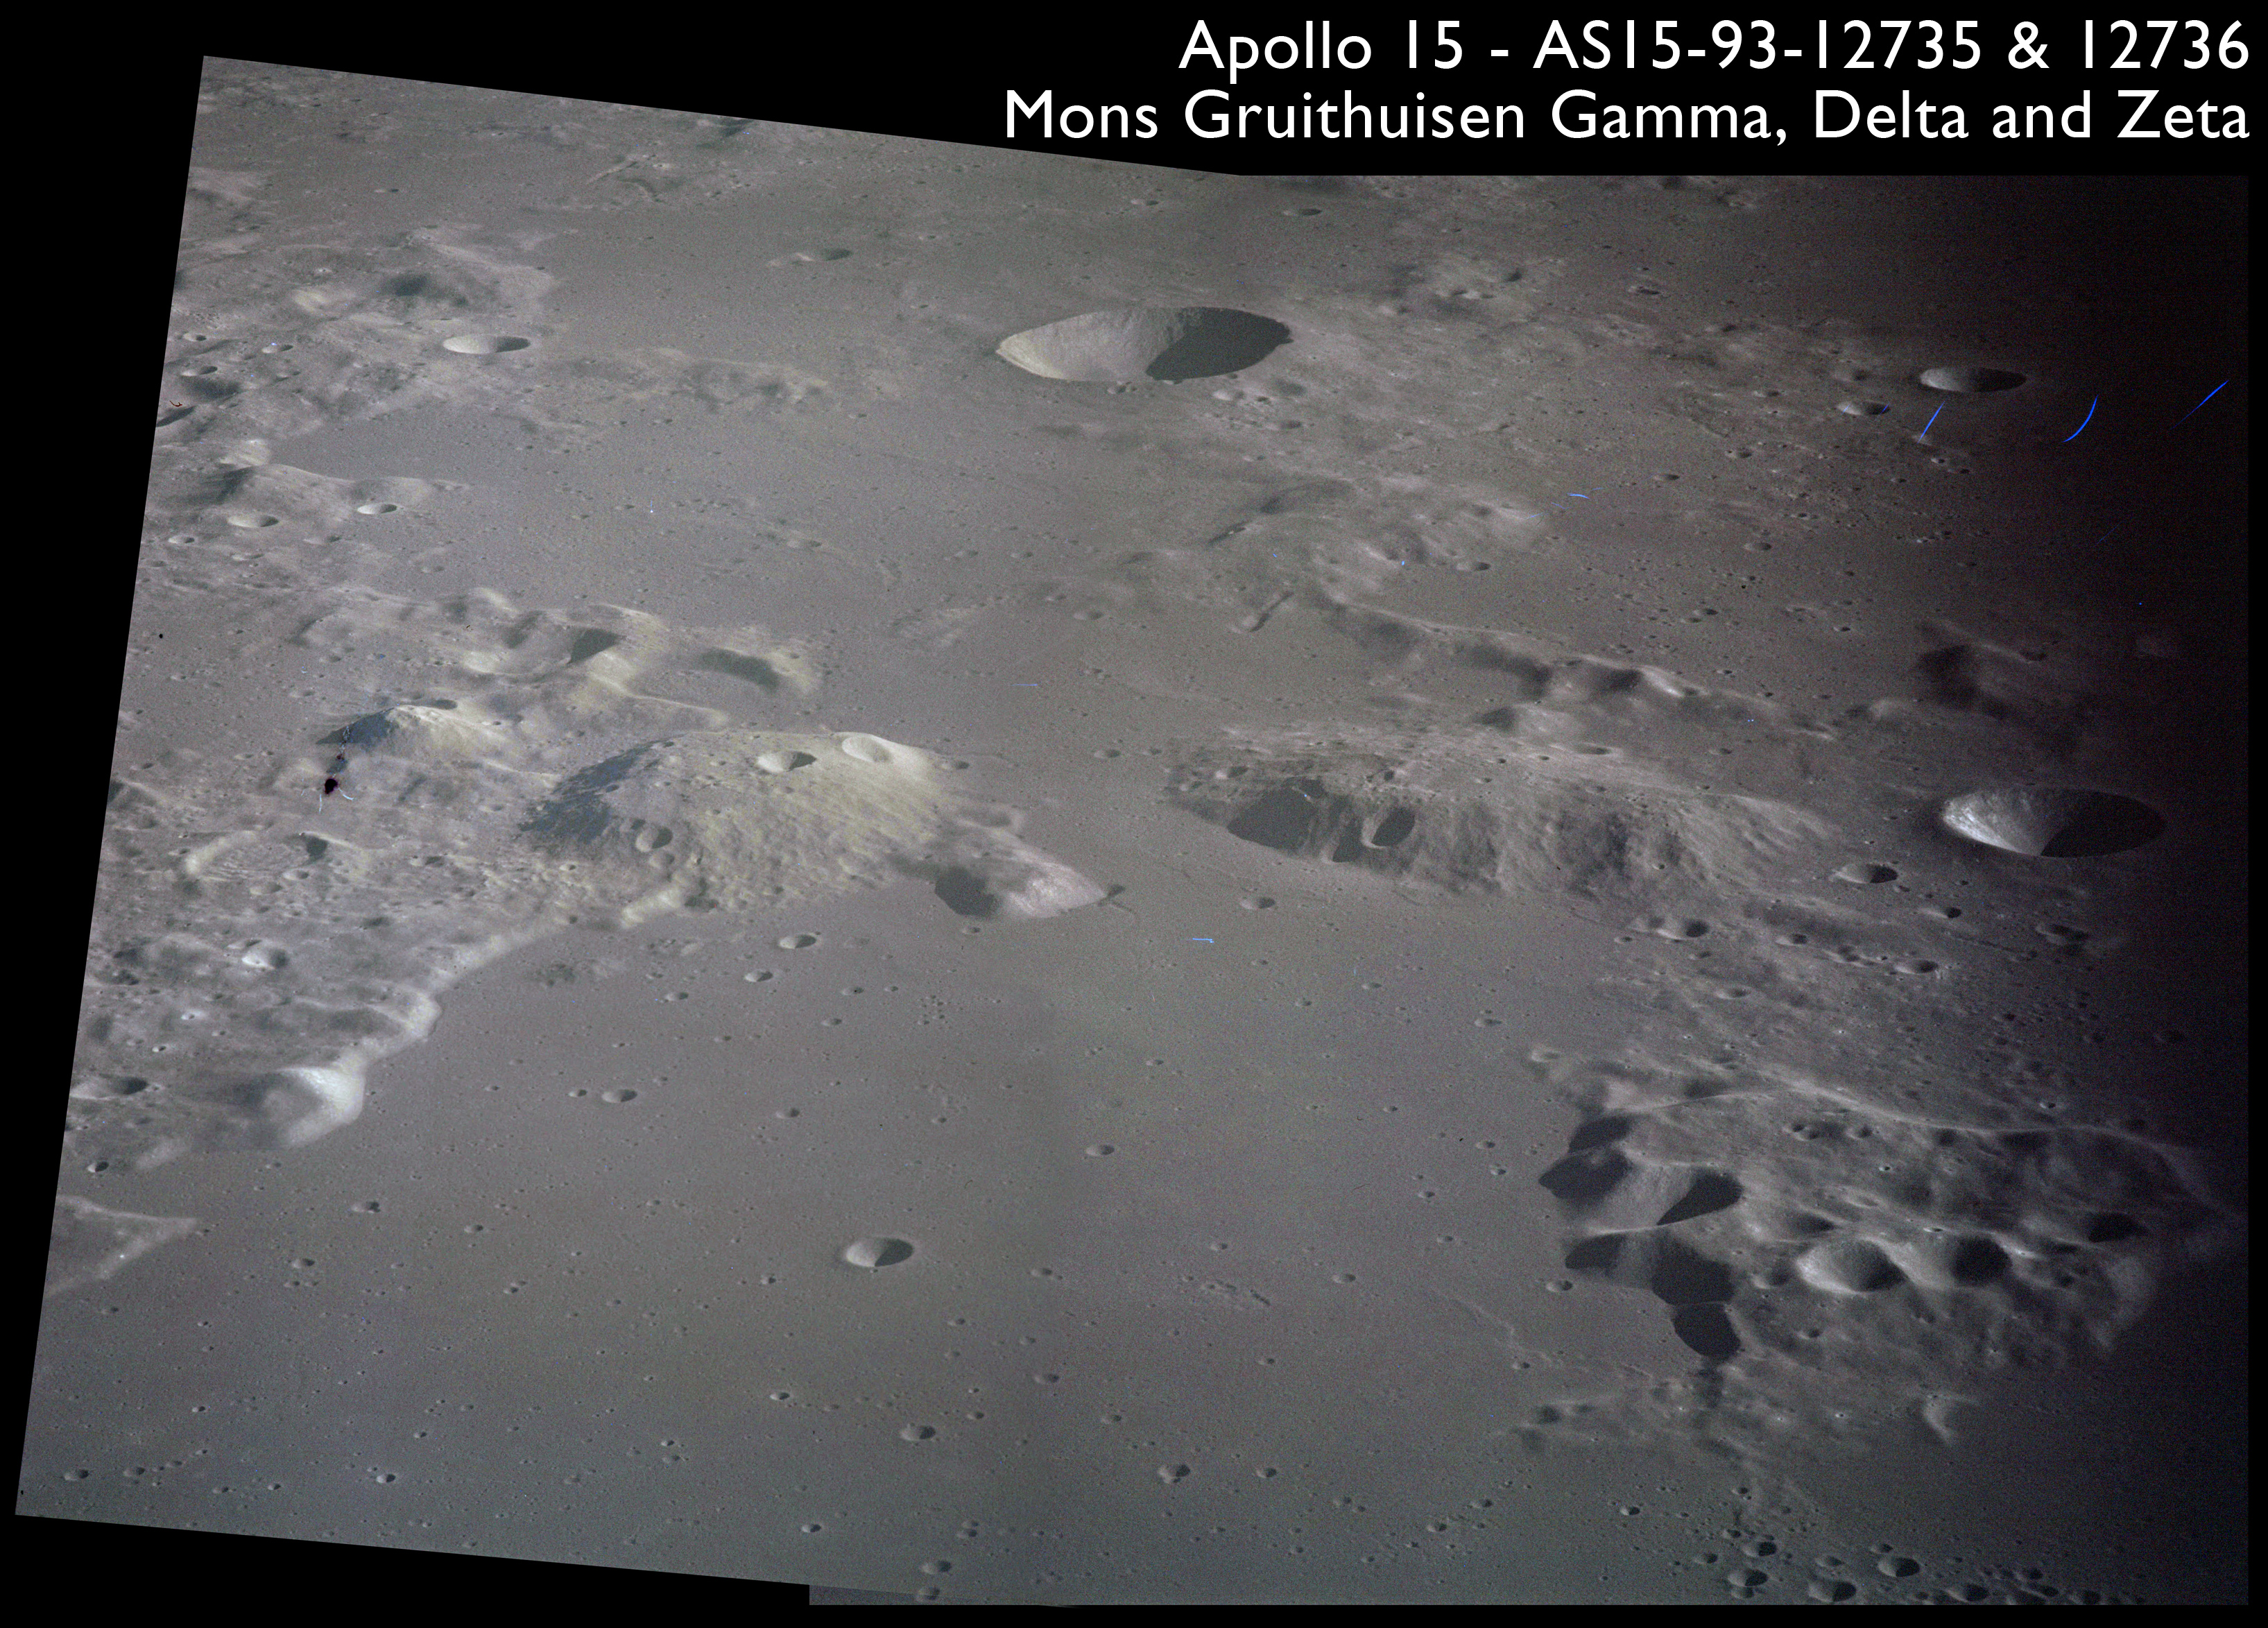
This light-toned terrain ends further south near the crater Gruithuisen, where the basalts of Mare Imbrium and Oceanus Procellarum meet. This area has some unusual features that will be the subject of much of the remaining photography.
Frames AS15-93-12708 and 12709 show some of the interesting features in this region. At the bottom left of 12709 is Gruithuisen H and centre-right is the 9.4-km Gruithuisen B with a branch of Dorsum Bucher running between. Beyond and to the left of Gruithuisen B are two dome-shaped hills, each rising about 1,800 metres above the surrounding mare basalt. Nearest to crater Gruithuisen B is Mons Gruithuisen Delta and beyond is Mons Gruithuisen Gamma. This latter hill has a 900-metre craterlet at it peak, giving it a look of an unusually domed volcano.
AS15-93-12708 - Craters Gruithuisen B and F. Mons Gruithuisen Delta and Gamma - Image by NASA/Johnson Space Center.
AS15-93-12709 - Craters Gruithuisen H and B. Mons Gruithuisen Delta and Gamma - Image by NASA/Johnson Space Center.
East of the two domes is a low hill that rises 400 to 500 metres above the surrounding mare. It is seen in frame AS15-93-12710, near Caroline Herschel E, and is known as the Epsilon Prominence.
AS15-93-12710 - Caroline Herschel E and Prominence Epsilon - Image by NASA/Johnson Space Center.
AS15-93-12711 - Craters Gruithuisen B. Mons Gruithuisen Delta and Gamma - Image by NASA/Johnson Space Center.
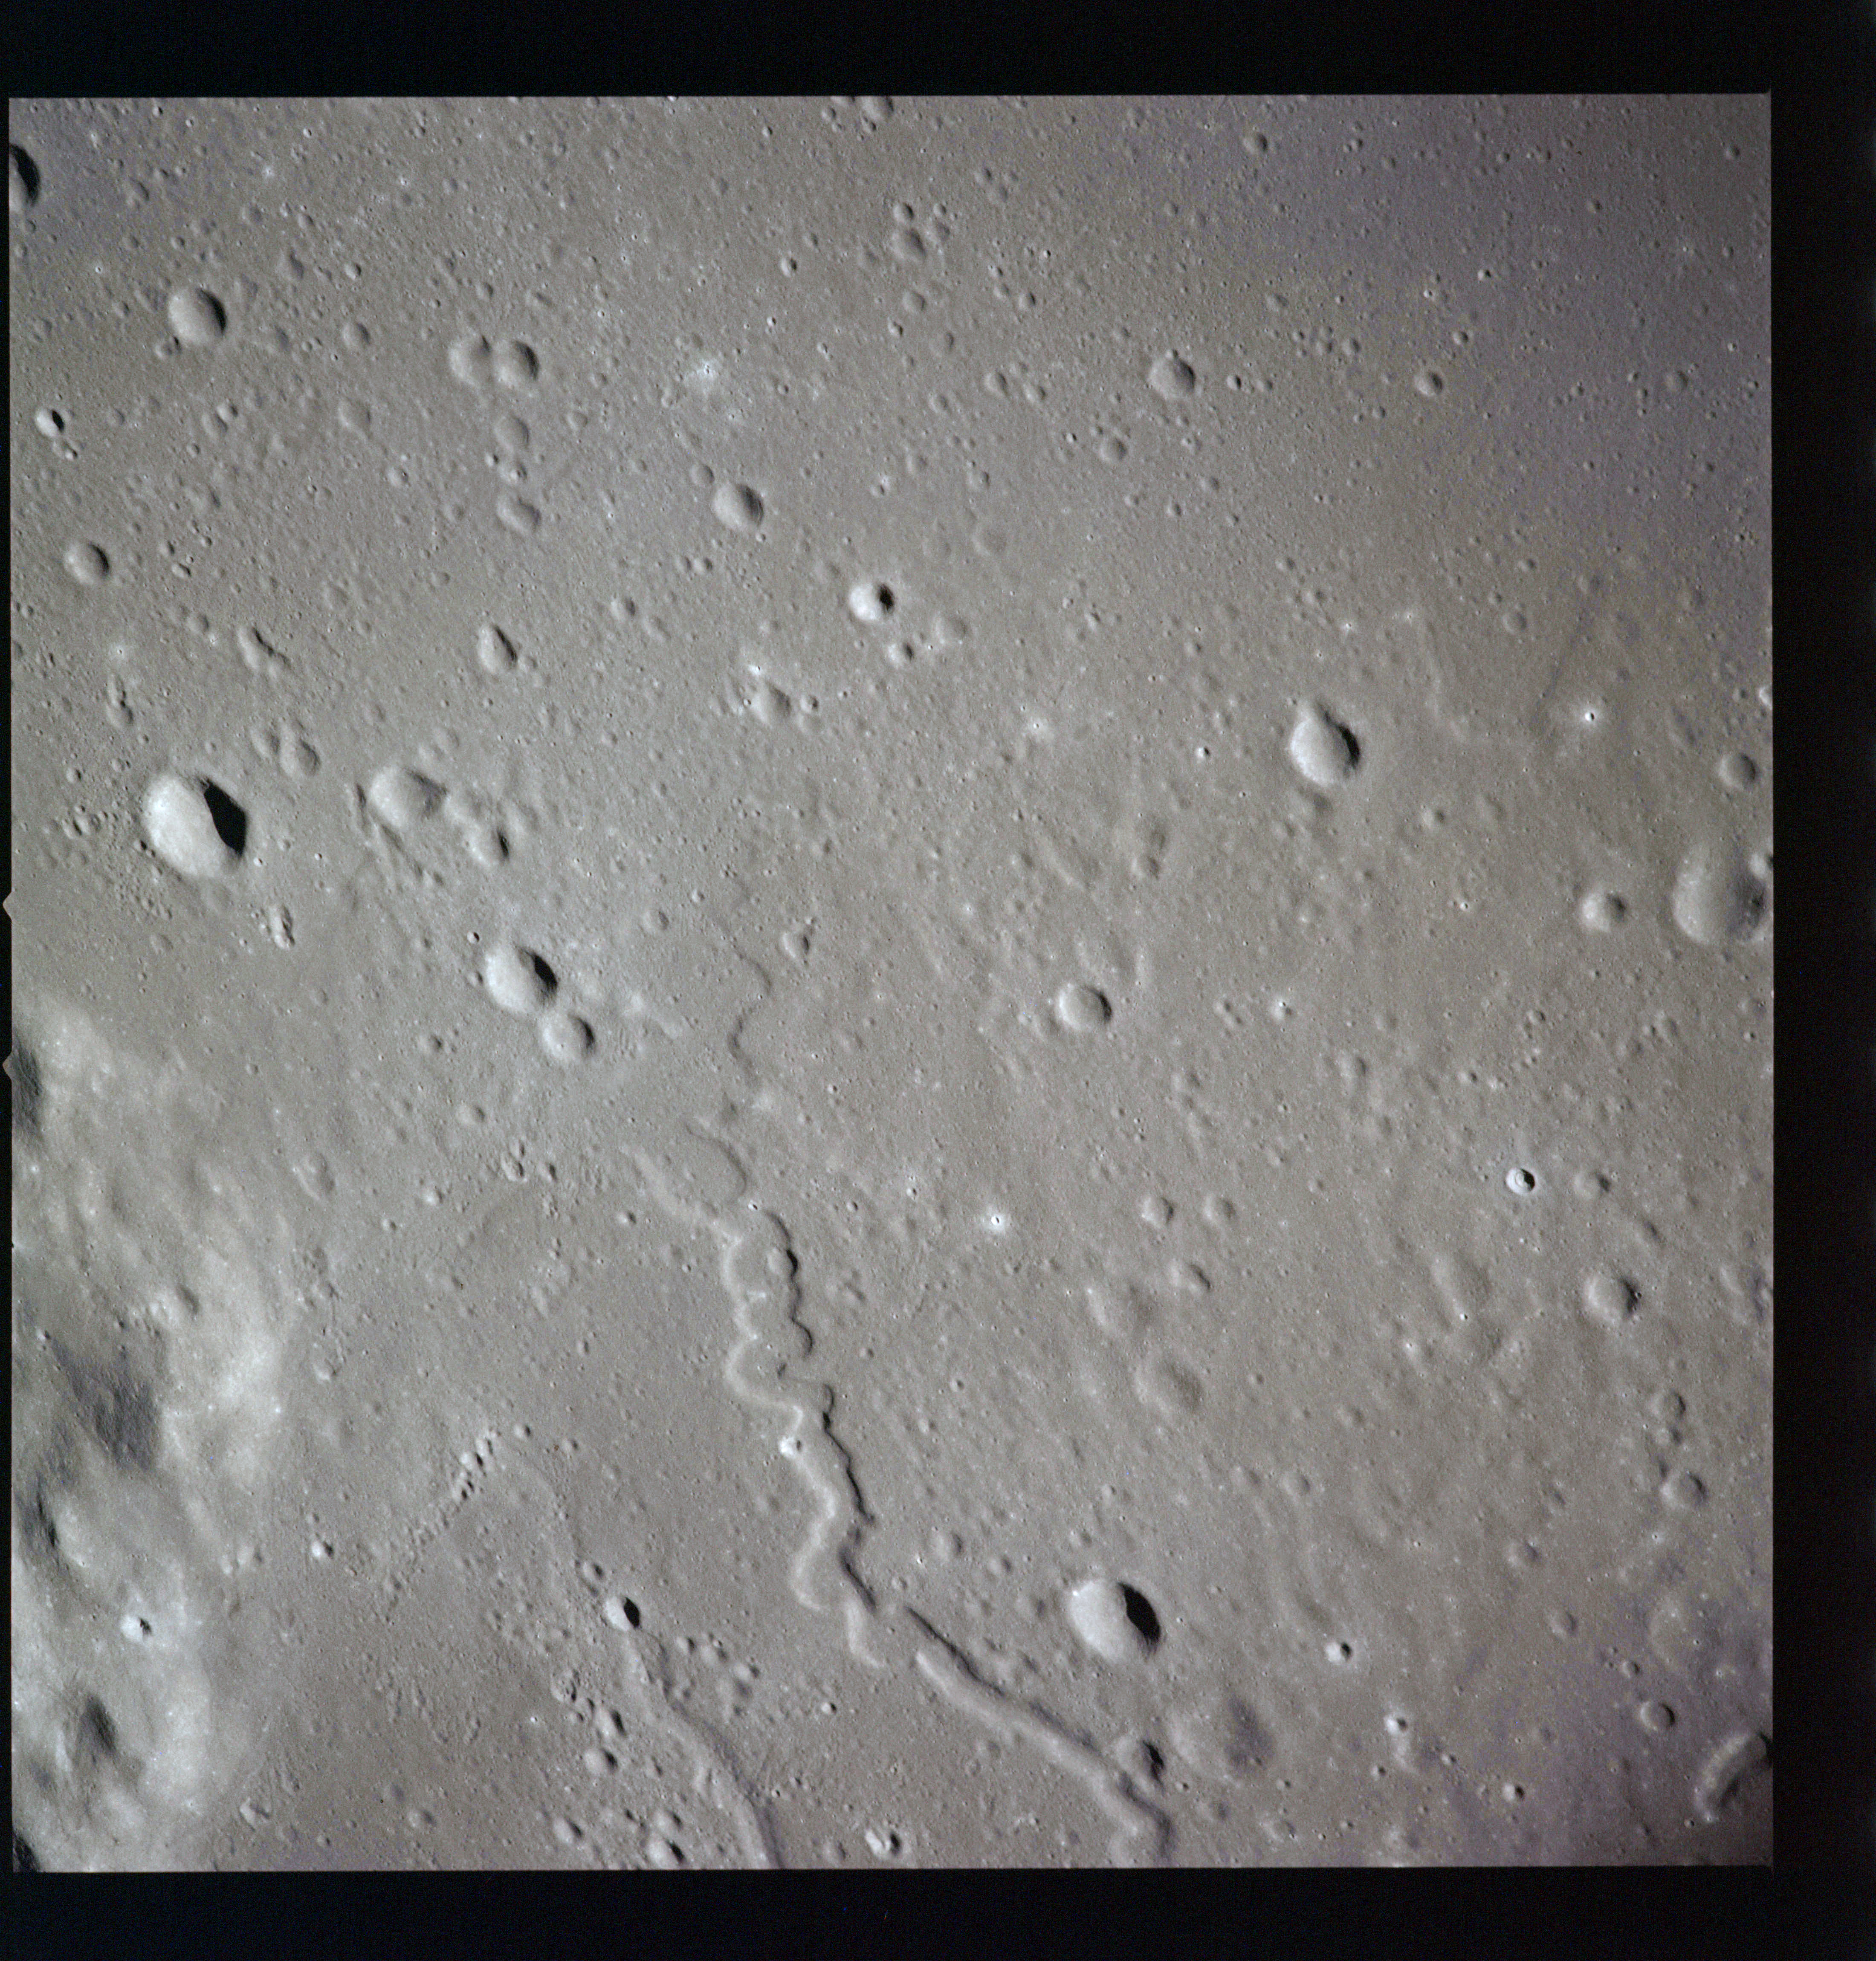
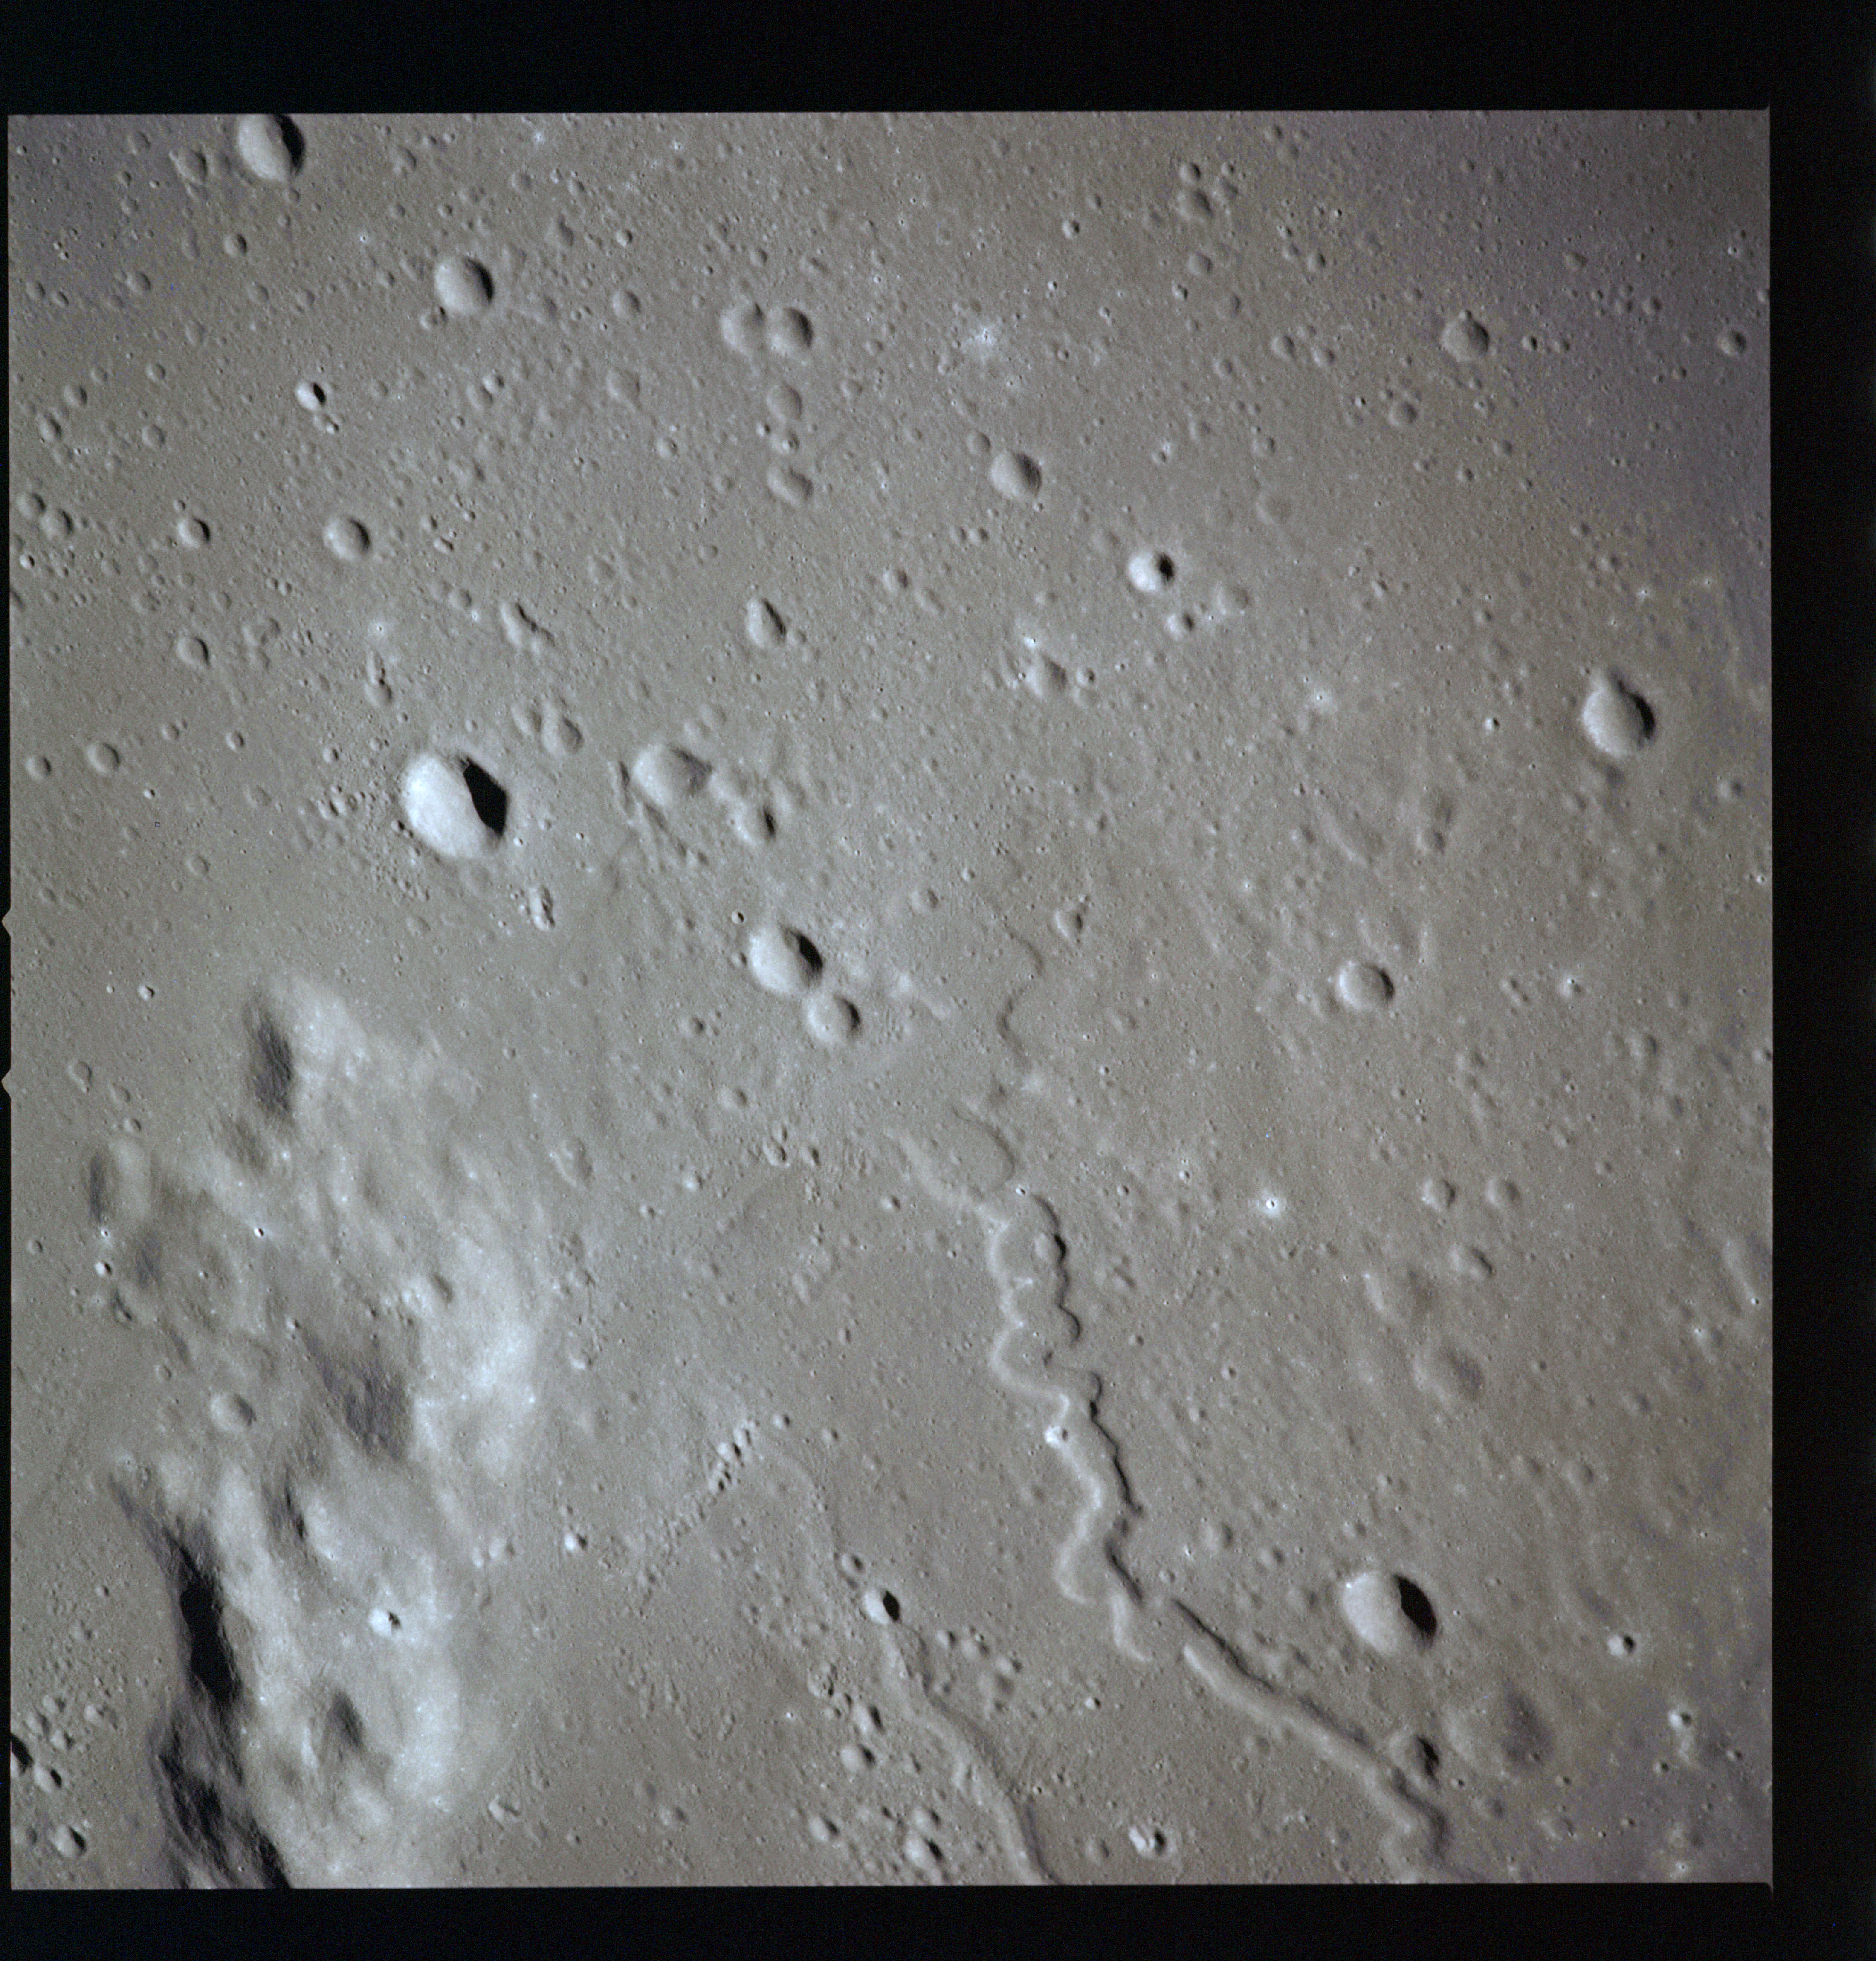
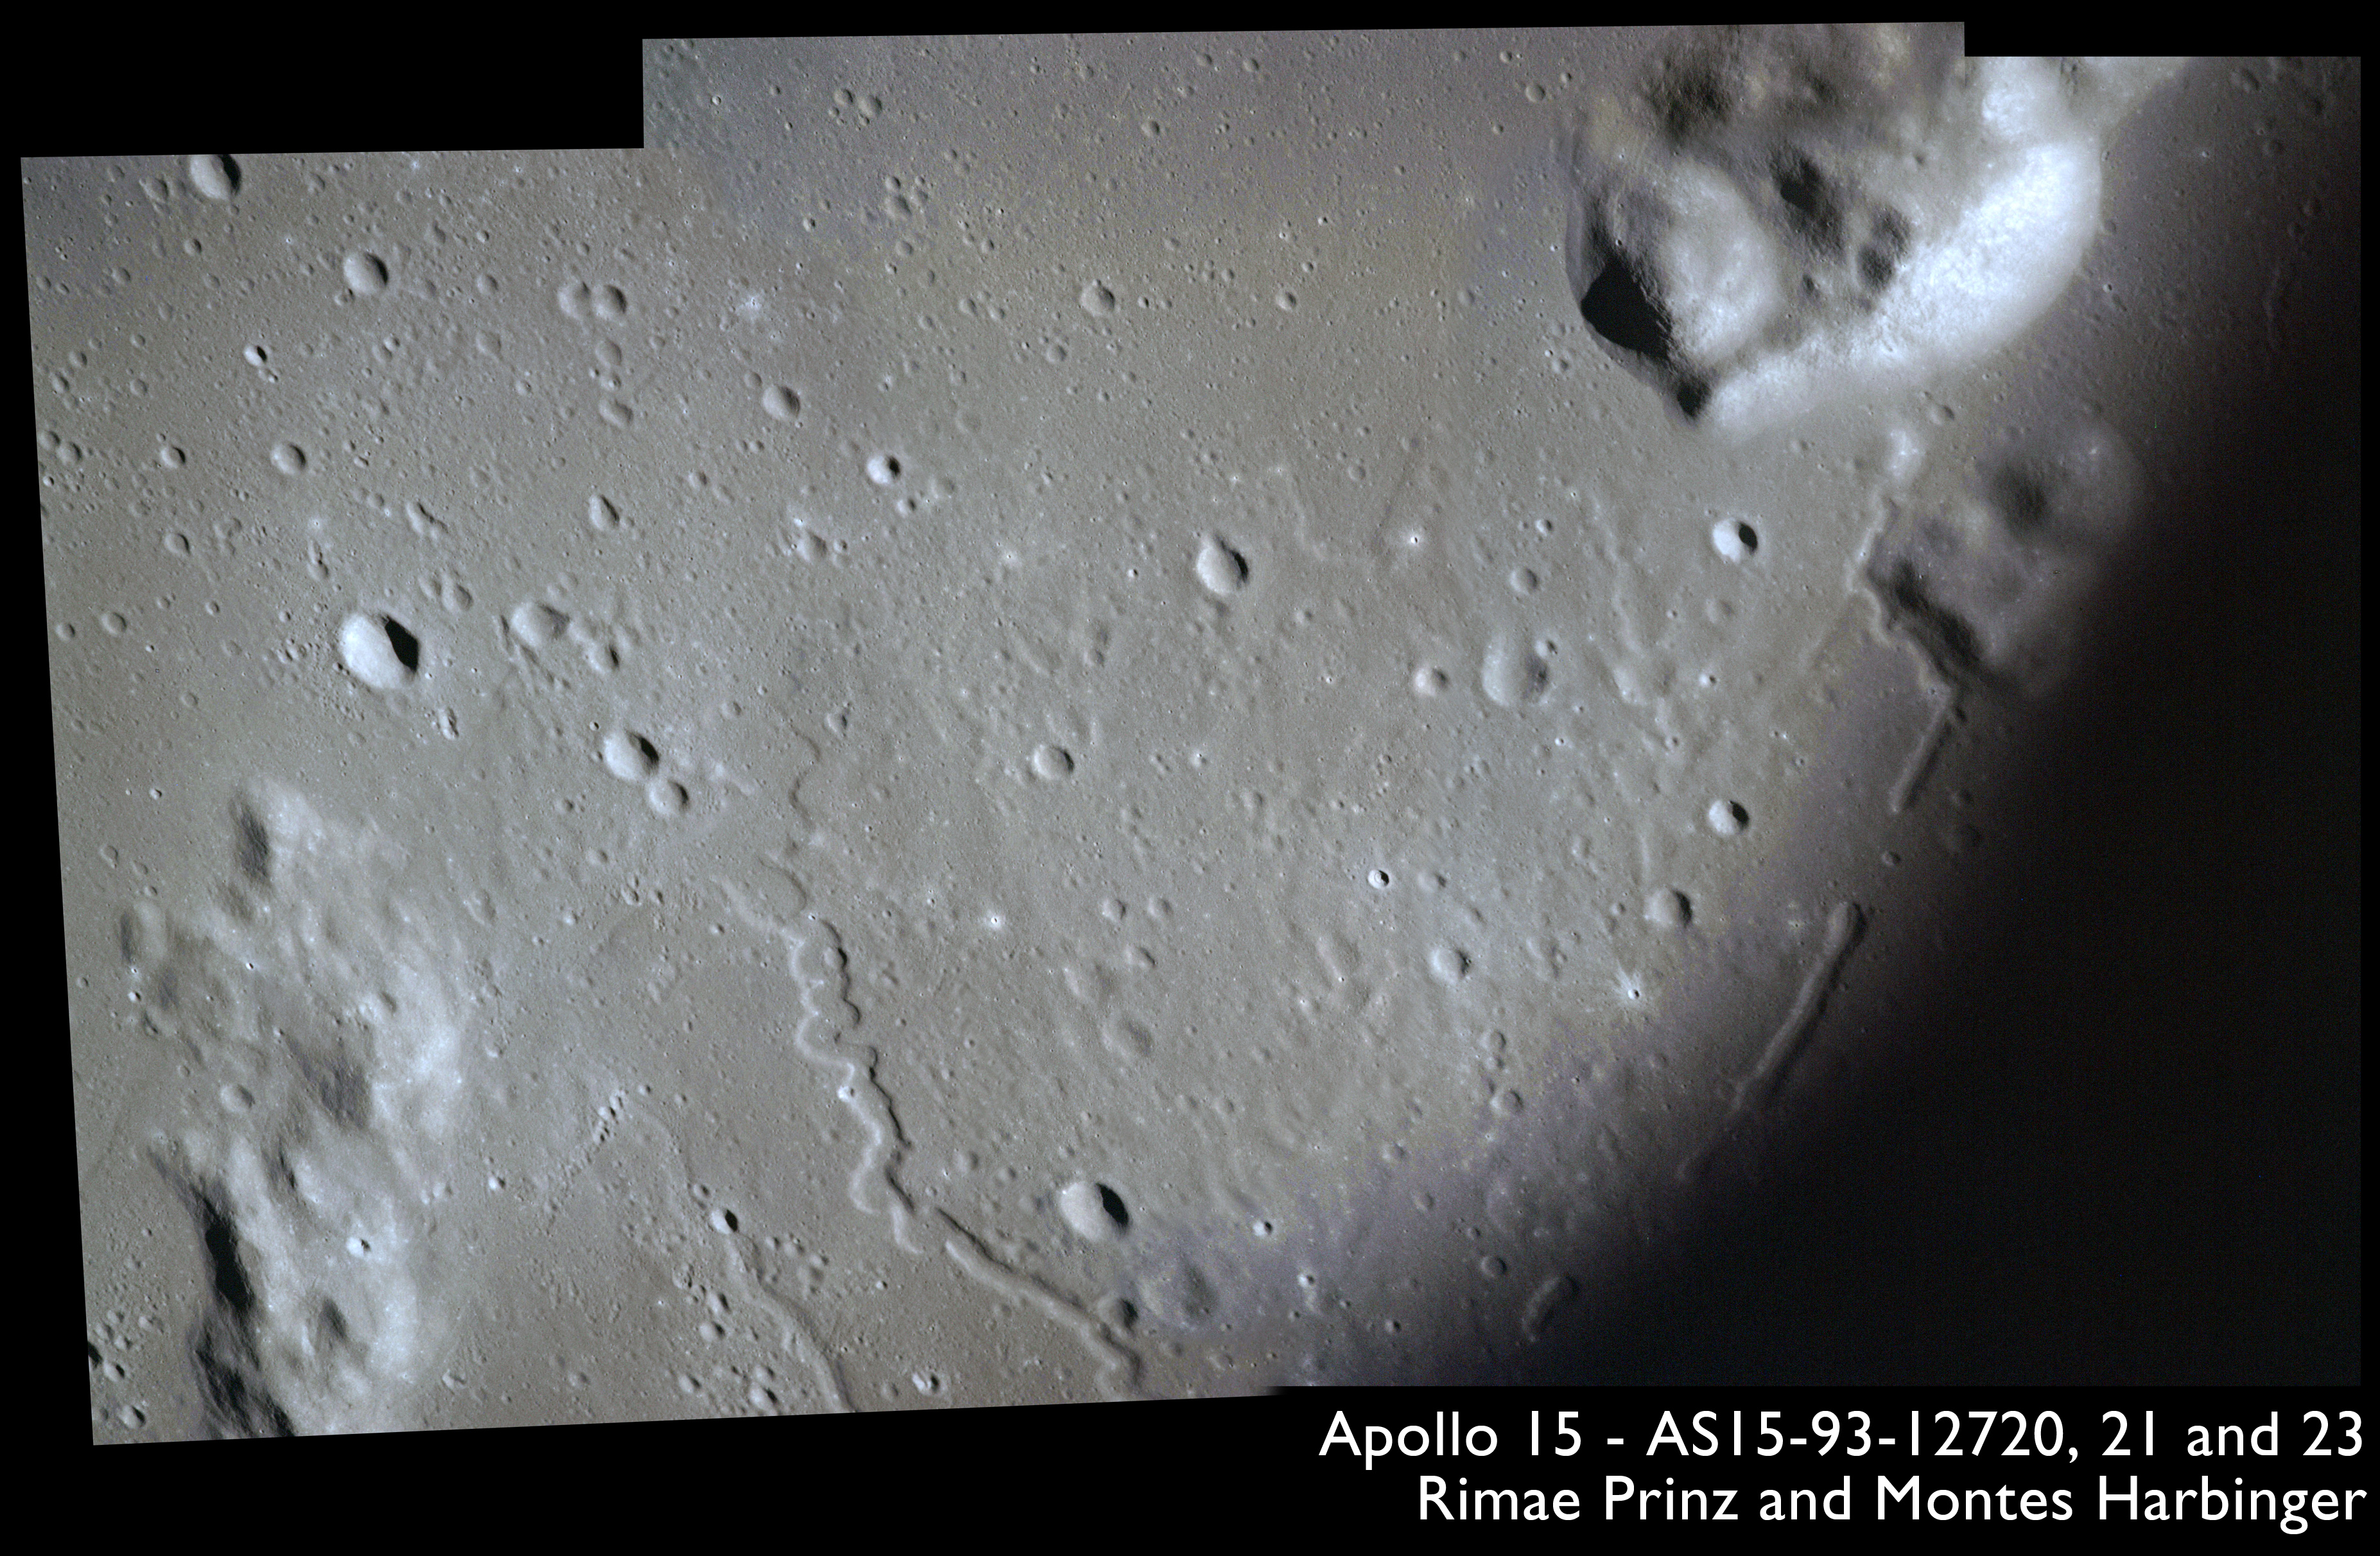
AS15-93-12712 - Mons Gruithuisen Delta and Gamma - Image by NASA/Johnson Space Center.
AS15-93-12713 - Craters Gruithuisen B and F, Mairan A and Mons Gruithuisen Delta - Image by NASA/Johnson Space Center.
A sequence of three images are taken looking towards the north at the western side of Sinus Iridum.
AS15-93-12714 - Promontorium Heraclides, Sinus Iridum and crater Heraclides F - Image by NASA/Johnson Space Center.
AS15-93-12715 - Mairan E, Montes Jura and wester Sinus Iridum - Image by NASA/Johnson Space Center.
AS15-93-12716 - Craters Mainran A and E, and Gruithuisen F - Image by NASA/Johnson Space Center.
Composition of images AS15-93-12714 to 12716 showing western Sinus Iridum and crater Mairan A - Images by NASA/Johnson Space Center.
The Gruithuisen domes are well shown in AS15-93-12717 with Gruithuisen B to the right. The 900-metre craterlet atop Mons Gruithuisen Gamma is easily apparent. Mons Gruithuisen Zeta is at bottom left and is not dome-like in profile. It rises only about half of the height of the other two mountains.
AS15-93-12717 - Crater Gruithuisen B and the Gruithuisen domes - Image by NASA/Johnson Space Center.
AS15-93-12718 - Mons Gruithuisen Zeta, Delta and Gamma - Image by NASA/Johnson Space Center.
The 16-kilometre crater after which so many of these features are named is nicely framed in AS15-93-12719. Franz von Paula Gruithuisen, 1774-1852, was a German astronomer who pioneered lunar study in two opposing ways. He was the first to postulate an impact theory to explain the lunar craters, an idea now very widely accepted. However, through his active imagination, he announced the discovery of buildings and cities on the Moon, writing a book on the subject. Centuries later, there are still people who claim to detect non-human intelligent artifacts through close study of the imagery from manned and unmanned photography of the lunar surface, a concept that is very widely rejected. To the northwest of Gruithuisen is a large, dense cluster of small craters. These are likely to be secondary craters formed by the impact of a loose clump of debris, themselves ejected from a large, distant impact.
AS15-93-12719 - Crater Gruithuisen - Image by NASA/Johnson Space Center.
The final 17 images from this pass can be summarised in three montages and a couple of frames from the Gruithuisen area. Looking vertically down at the terrain beneath them, AS15-93-12720, 12721 and 12723 show part of the Montes Harbinger range and Rimae Prinz collection of rilles.
AS15-93-12720 - Mons Harbinger Delta - Image by NASA/Johnson Space Center.
AS15-93-12721 - Mons Harbinger Delta and Rimae Prinz - Image by NASA/Johnson Space Center.
AS15-93-12722 - Mons Harbinger Mu and Rimae Prinz - Image by NASA/Johnson Space Center.
AS15-93-12723 - Mons Harbinger Mu and Rimae Prinz - Image by NASA/Johnson Space Center.
Composition of images AS15-93-12720, 12721 and 12723 showing parts of Rimae Prinz and Montes Harbinger - Images by NASA/Johnson Space Center.
The next set of frames, AS15-93-12724 to 12728, follow a wrinkle ridge northwards across Oceanus Procellarum to where it becomes a string of collapsed pits, presumeably betraying a lava tube.
AS15-93-12724 - Collapse pits across Oceanus Procellarum, including craters Gruithuisen R, G and K - Image by NASA/Johnson Space Center.
AS15-93-12725 - Wrinkle ridge and collapse pits across Oceanus Procellarum, including crater Gruithuisen K - Image by NASA/Johnson Space Center.
AS15-93-12726 - Wrinkle ridge and collapse pits across Oceanus Procellarum - Image by NASA/Johnson Space Center.
AS15-93-12727 - Wrinkle ridge across Oceanus Procellarum - Image by NASA/Johnson Space Center.
AS15-93-12728 - Wrinkle ridge across Oceanus Procellarum - Image by NASA/Johnson Space Center.
Composition of images AS15-93-12724 to 12728 showing parts of Rimae Prinz and Montes Harbinger - Images by NASA/Johnson Space Center.
AS15-93-12729 returns to the string of collapsed pits.
AS15-93-12729 - collapse pits across Oceanus Procellarum, including crater Gruithuisen G, E, R and S - Image by NASA/Johnson Space Center.
The next five images, AS15-93-12730 to 12734, look north/northwest along the eastern shore of Oceanus Procellarum. All include Rima Mairan and the first four show Mairan T, an isolated hill rising about 700 metres above the mare, but with an irregular depression at its summit.
AS15-93-12730 - Rima Mairan and craters Mairan C, T, and Gruithuisen R and S - Image by NASA/Johnson Space Center.
AS15-93-12731 - Rima Mairan and craters Mairan C, T, and Gruithuisen R and S - Image by NASA/Johnson Space Center.
AS15-93-12732 - Rima Mairan and craters Mairan C, T, N, and Gruithuisen R and S - Image by NASA/Johnson Space Center.
AS15-93-12733 - Rima Mairan and craters Mairan C, T, and Gruithuisen R and S - Image by NASA/Johnson Space Center.
AS15-93-12734 - Rima Mairan and craters Mairan C, N, and Gruithuisen R and S - Image by NASA/Johnson Space Center.
Two final images of the Gruithuisen hills completes the photography for this pass. These include Mairan A in the distance.
AS15-93-12735 - Mons Gruithuisen Zeta and Delta, and crater Mairan A - Image by NASA/Johnson Space Center.
AS15-93-12736 - Mons Gruithuisen Gamma and Delta, and craters Mairan A and H - Image by NASA/Johnson Space Center.
Composition of images AS15-93-12735 and 12736 showing Mons Gruithuisen Gamma, Delta and Zeta - Images by NASA/Johnson Space Center.
AS15-M-2610 - South oblique Metric Camera image of the Aristarchus Plateau and Oceanus Procellarum, including craters Aristarchus and Herodotus. Image taken at about 217:11. (250 megapixel version), (labelled version) - Image by NASA/ASU.
AS15-M-2620 - South oblique Metric Camera image of Oceanus Procellarum and the sunrise terminator including crater Seleucus. Image taken at about 217:16. (250 megapixel version), (labelled version) - Image by NASA/ASU.
This is Apollo Control at 217 hours, 17 minutes. Flight Dynamics Officer Bill Stovall has just passed to Flight Director Gene Kranz, the latest computed times for the shaping burn, and for the subsatellite jettison. These times will be updated later and they may change in the seconds, but they're very close to what the times will be. Present computation shows the shaping maneuver will be performed at 221 hours, 20 minutes, 49 seconds with the delta-V of approximately 66 feet per second [20 m/s]. Subsatellite jettison at 222 hours, 39 minutes, 34 seconds. The resulting satellite orbit is expected to be 76.5 by 55.1 nautical miles [141.7 by 102.0 km]. The longitude of perilune on that orbit, 47.6° west.
According to the SIM camera index, the last image in the current sequence is AS15-M-2623. However, this is a double exposure with the first image of the next sequence. The last clear image, AS15-M-2622, is shown here instead.
AS15-M-2622 - South oblique Metric Camera image of Oceanus Procellarum and the sunrise terminator including crater Seleucus and the sunlit eastern rim of crater Briggs. Image taken at about 217:17. (250 megapixel version), (labelled version) - Image by NASA/ASU.
At 217:18:15, just as the spacecraft reaches the terminator, the Mapping Camera finishes its sequence of southward facing oblique photography. Immediately after, Al maneuvers Endeavour into the "Plus-X Forward SIM Attitude" which has the spacecraft flying pointy-end forward.
217:28:53 Allen: Endeavour, this is Houston. We have no problems at all as you come up on 5 minutes before LOS. Al, we do have a question for you, if this is a good time to ask it. Over.
217:29:09 Worden: Yeah; go ahead, Joe.
217:29:11 Allen: Rog, Alfredo. We're sitting down here wondering if, perhaps, at sometime over the past few days you've gotten a visual on the Mass Spectrometer boom and unit, and if so, has it been possible at all to determine which direction the Mass Spec. might be twisting as you move through the orbit over the Moon? Over. [Pause.]
As described earlier in the journal, the boom which carries the two extendible instruments is made of thin sheet metal with a natural curl to it. Its resistance to twisting forces is limited and, in the case of the Mass Spectrometer which has a directional intake, any twist might be relevant to the results obtained from the instrument.
217:29:37 Worden: Yeah. I have seen that, Joe, and I've - haven't watched a great deal of twisting and, as a matter of fact, I was rather surprised that there wasn't more twist than what I observed. I may not have picked up the maximum deflection, but I only observed about a - maybe a 5- or 10-degree rotation on the end on the boom, and, as I recall, as I was looking at it from inside the spacecraft, the rotation was counter-clockwise.
217:30:07 Allen: Okay, Al. That's interesting information. We don't necessarily expect it to have rotated more, but just wondering if you had some good visual data for us, and that's excellent. Another comment, and it's more in the way of a reminder; during your EVA, we're going to ask you to look very closely at the V over H sensor, and the symptoms we've had concerning that sensor down here, is as though it has a small crack in the lens or perhaps there's foreign contamination of some kind down in the barrel. And we're going to ask you to look particularly for either a crack, or contamination in the barrel during the EVA. Just wanted to lay that one on you now in case we forgot it later on. We'll most likely remind you of it later on.
Mission Control are mentioning this because they have had problems with the Panoramic Camera's V over H sensor throughout the flight. Poor contrast in this device has meant that many of the frames from this camera have been slightly smeared. Al's EVA tomorrow is an opportunity to get a close look at what might be the problem, something that can very rarely be done during any space flight.
217:31:01 Worden: Roger, Joe. I understand that one. [Long pause.]
217:31:34 Allen: Endeavour, we'd like a Pro on the P20 now, please. [Pause.]
217:31:48 Irwin: Okay, that's in work, Joe.
This is the maneuver, controlled by P20 in the computer, to change the attitude of the spacecraft.
217:31:51 Allen: Roger; Jim. Thanks. [Pause.]
217:31:58 Worden: Yeah.
217:31:59 Allen: And, Endeavour, requesting you configure DSE now, please.
217:32:15 Worden: Okay.
217:32:39 Scott (onboard): Back to normal now.
217:32:40 Worden (onboard): Okay. [Garble].
217:32:41 Scott (onboard): Okay.
217:33:11 Scott (onboard): [Garble]?
217:33:13 Worden (onboard): No, [garble] 15.
217:33:17 Allen: Endeavour. Recall the 50 18 and get the attitude, please.
Very long comm break.
The "50 18" refers to the computer display Verb 50, Noun 18, meaning "Please perform an Auto maneuver" though in this case they are only using it to recall the attitude angles.
This is Apollo Control at 217 hours, 34 minutes. Endeavour's gone behind the Moon on the 71st revolution and we've had Loss Of Signal. And a Lunar Surface Science briefing is beginning now in the main MSC auditorium.