| 70-mm magazine U - AS11-42-6160 to 6348 |
Photography Index | 70-mm magazine V - AS11-44-6540 to 6696 |
No copyright is asserted for NASA photographs. If a recognizable person appears in a photo, use for commercial purposes may infringe a right of privacy or publicity. Photos may not be used to state or imply the endorsement by NASA or by any NASA employee of a commercial product, process or service, or used in any other manner that might mislead. Accordingly, it is requested that if a NASA photograph is used in advertising and other commercial promotion, layout and copy be submitted to NASA prior to release.
NASA photos reproduced from this archive should include photo credit to "NASA" or "National Aeronautics and Space Administration" and should include scanning credit to the appropriate individuals or agencies as noted in the captions.
|
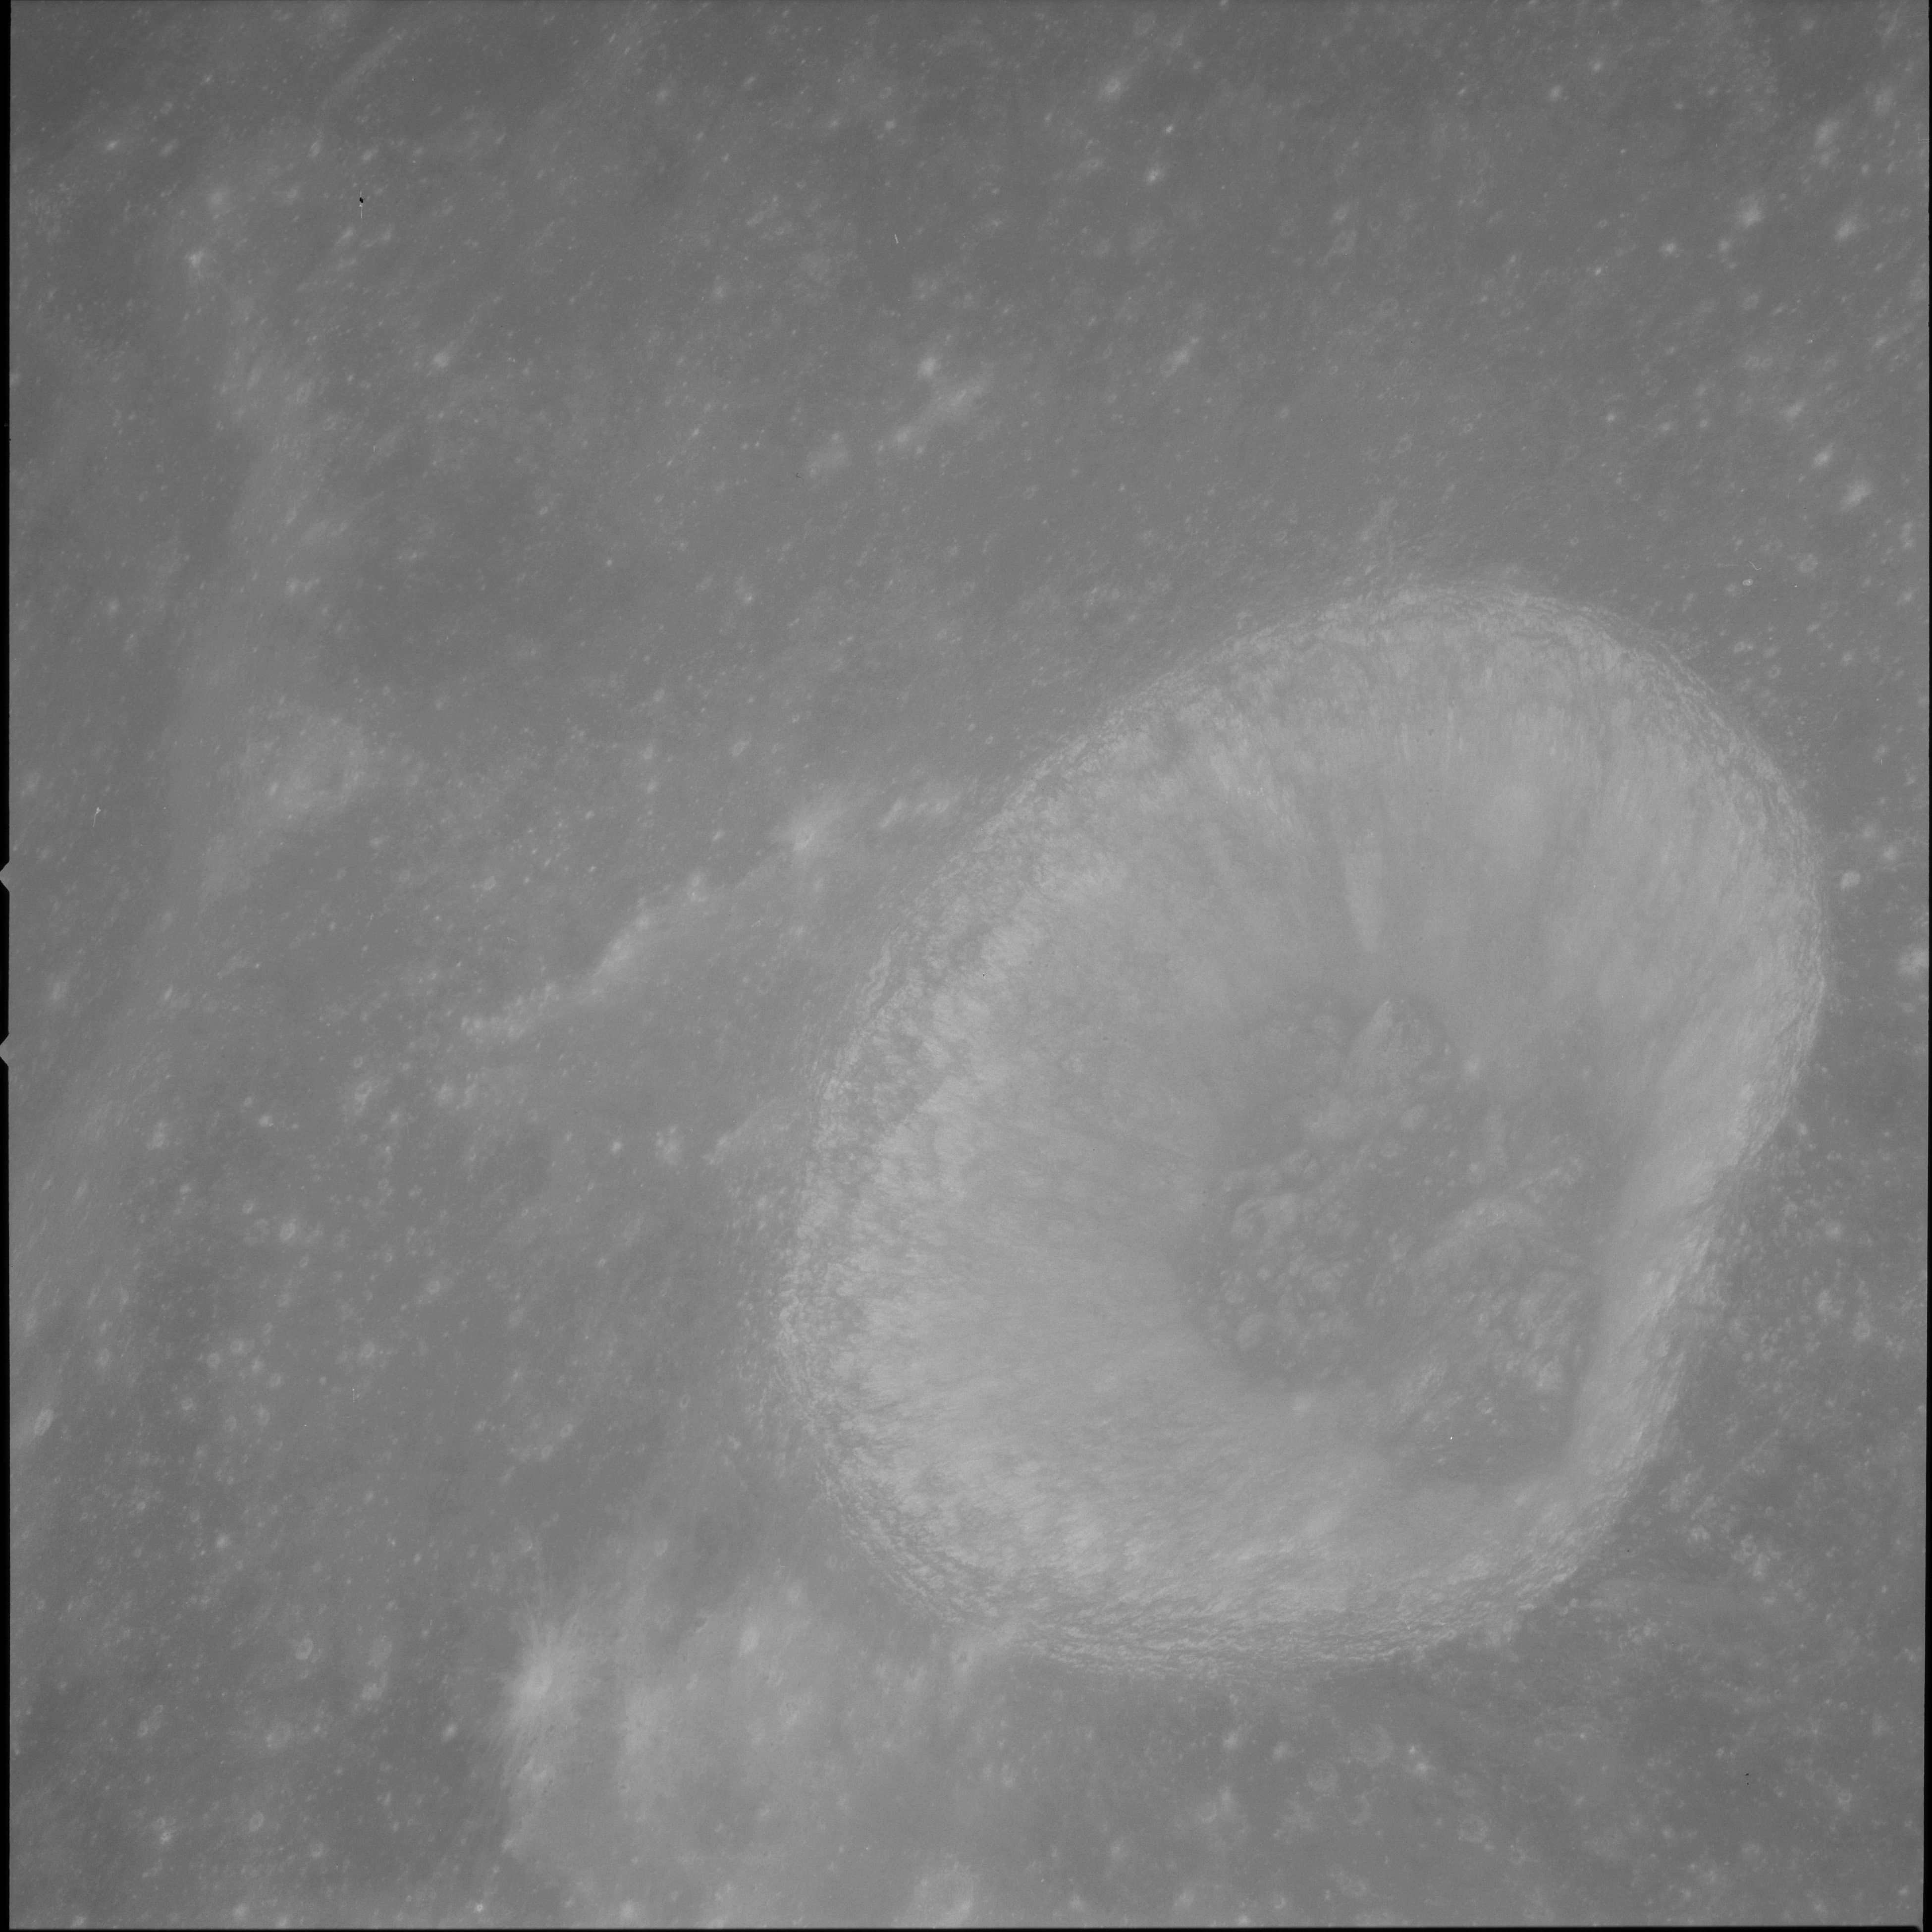
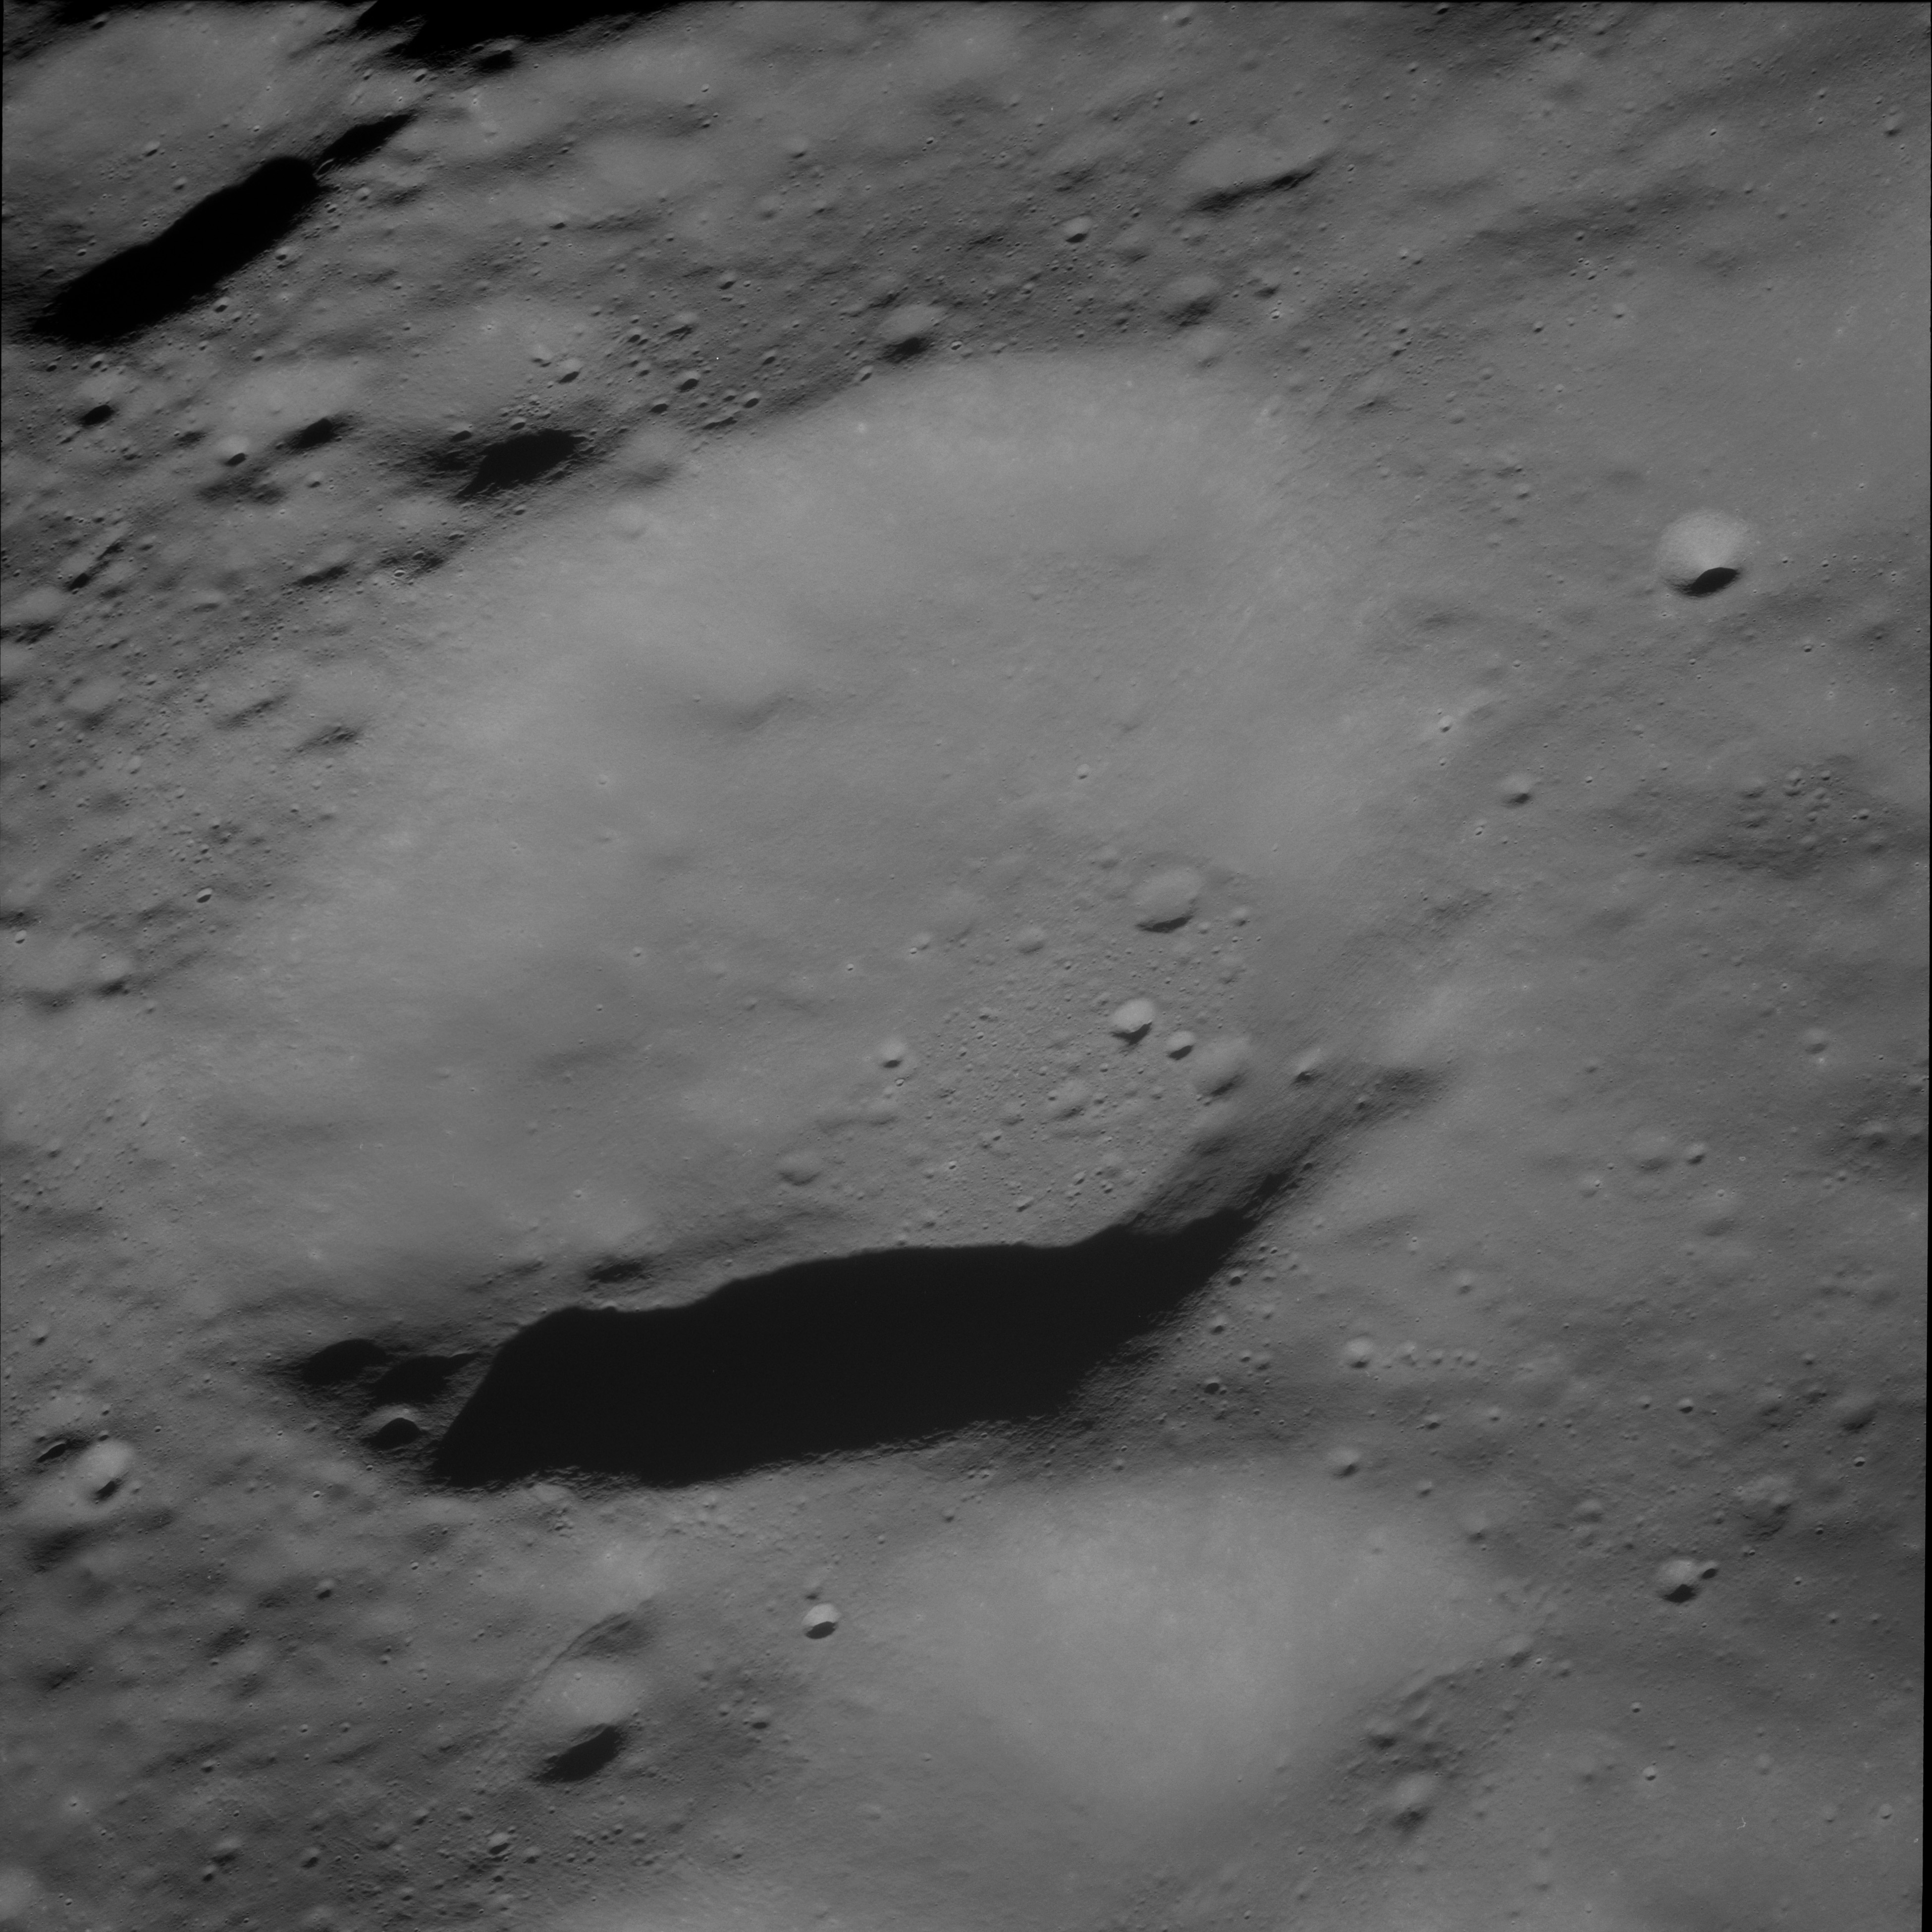
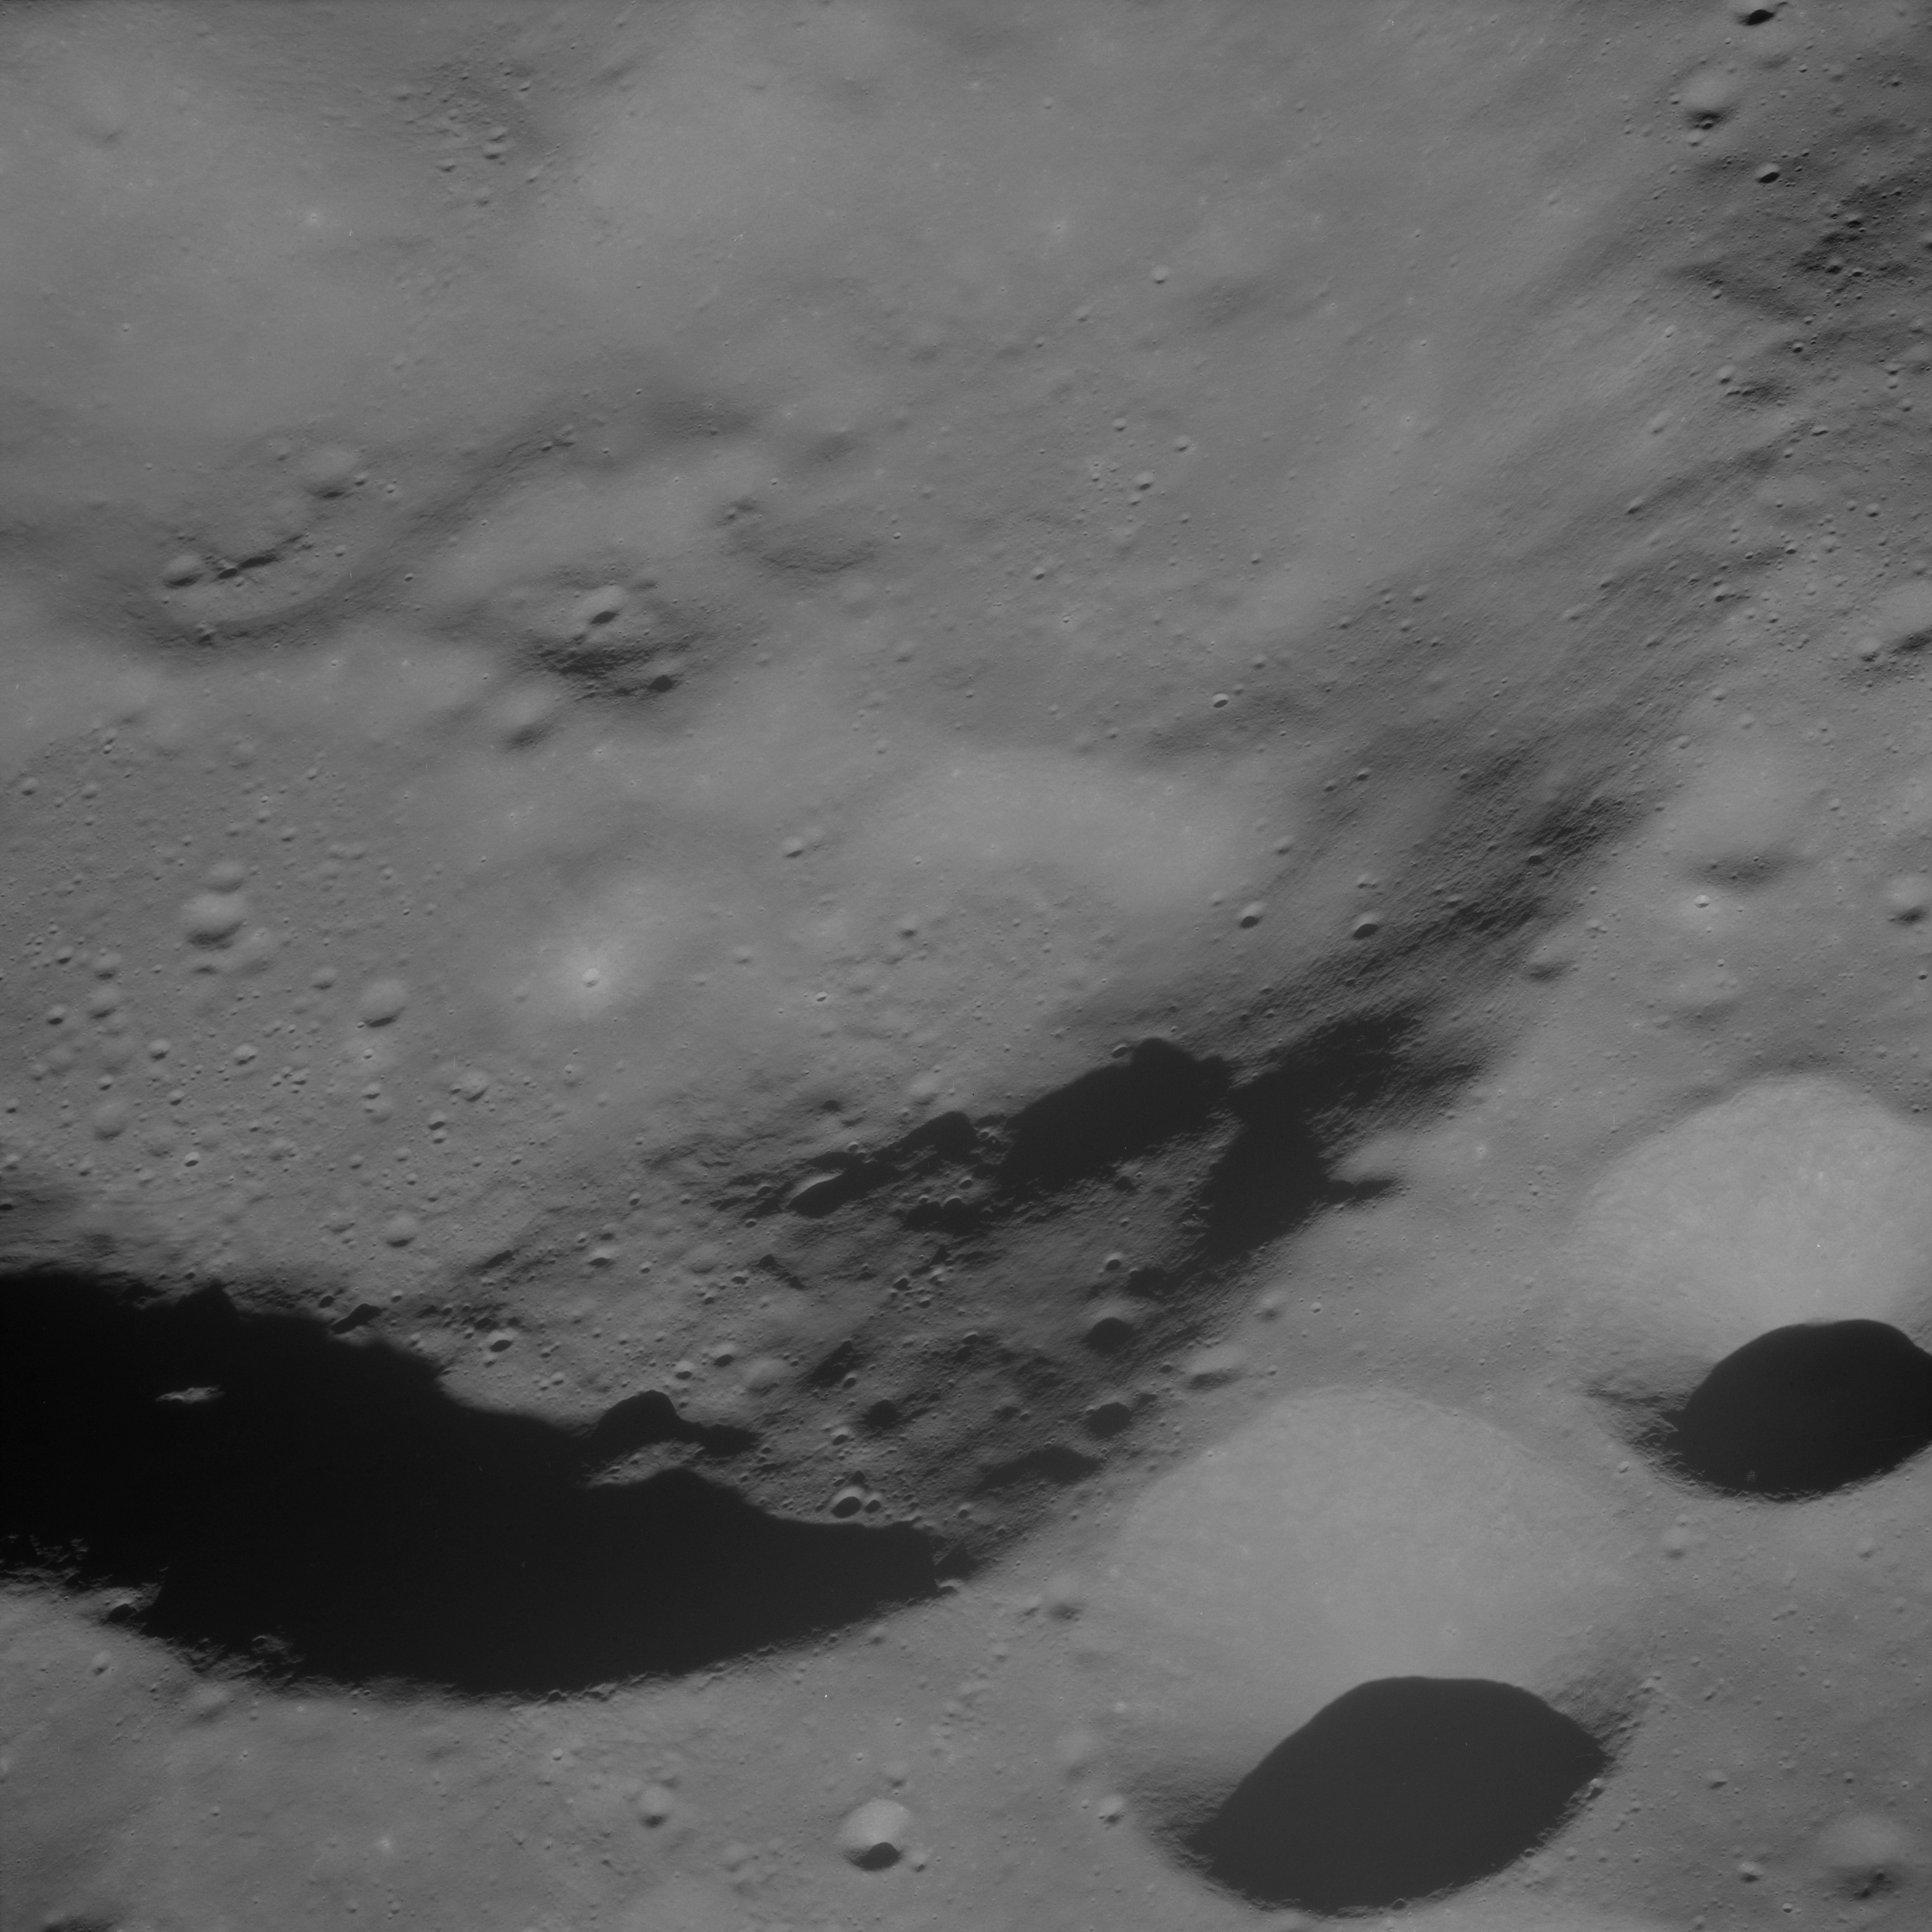
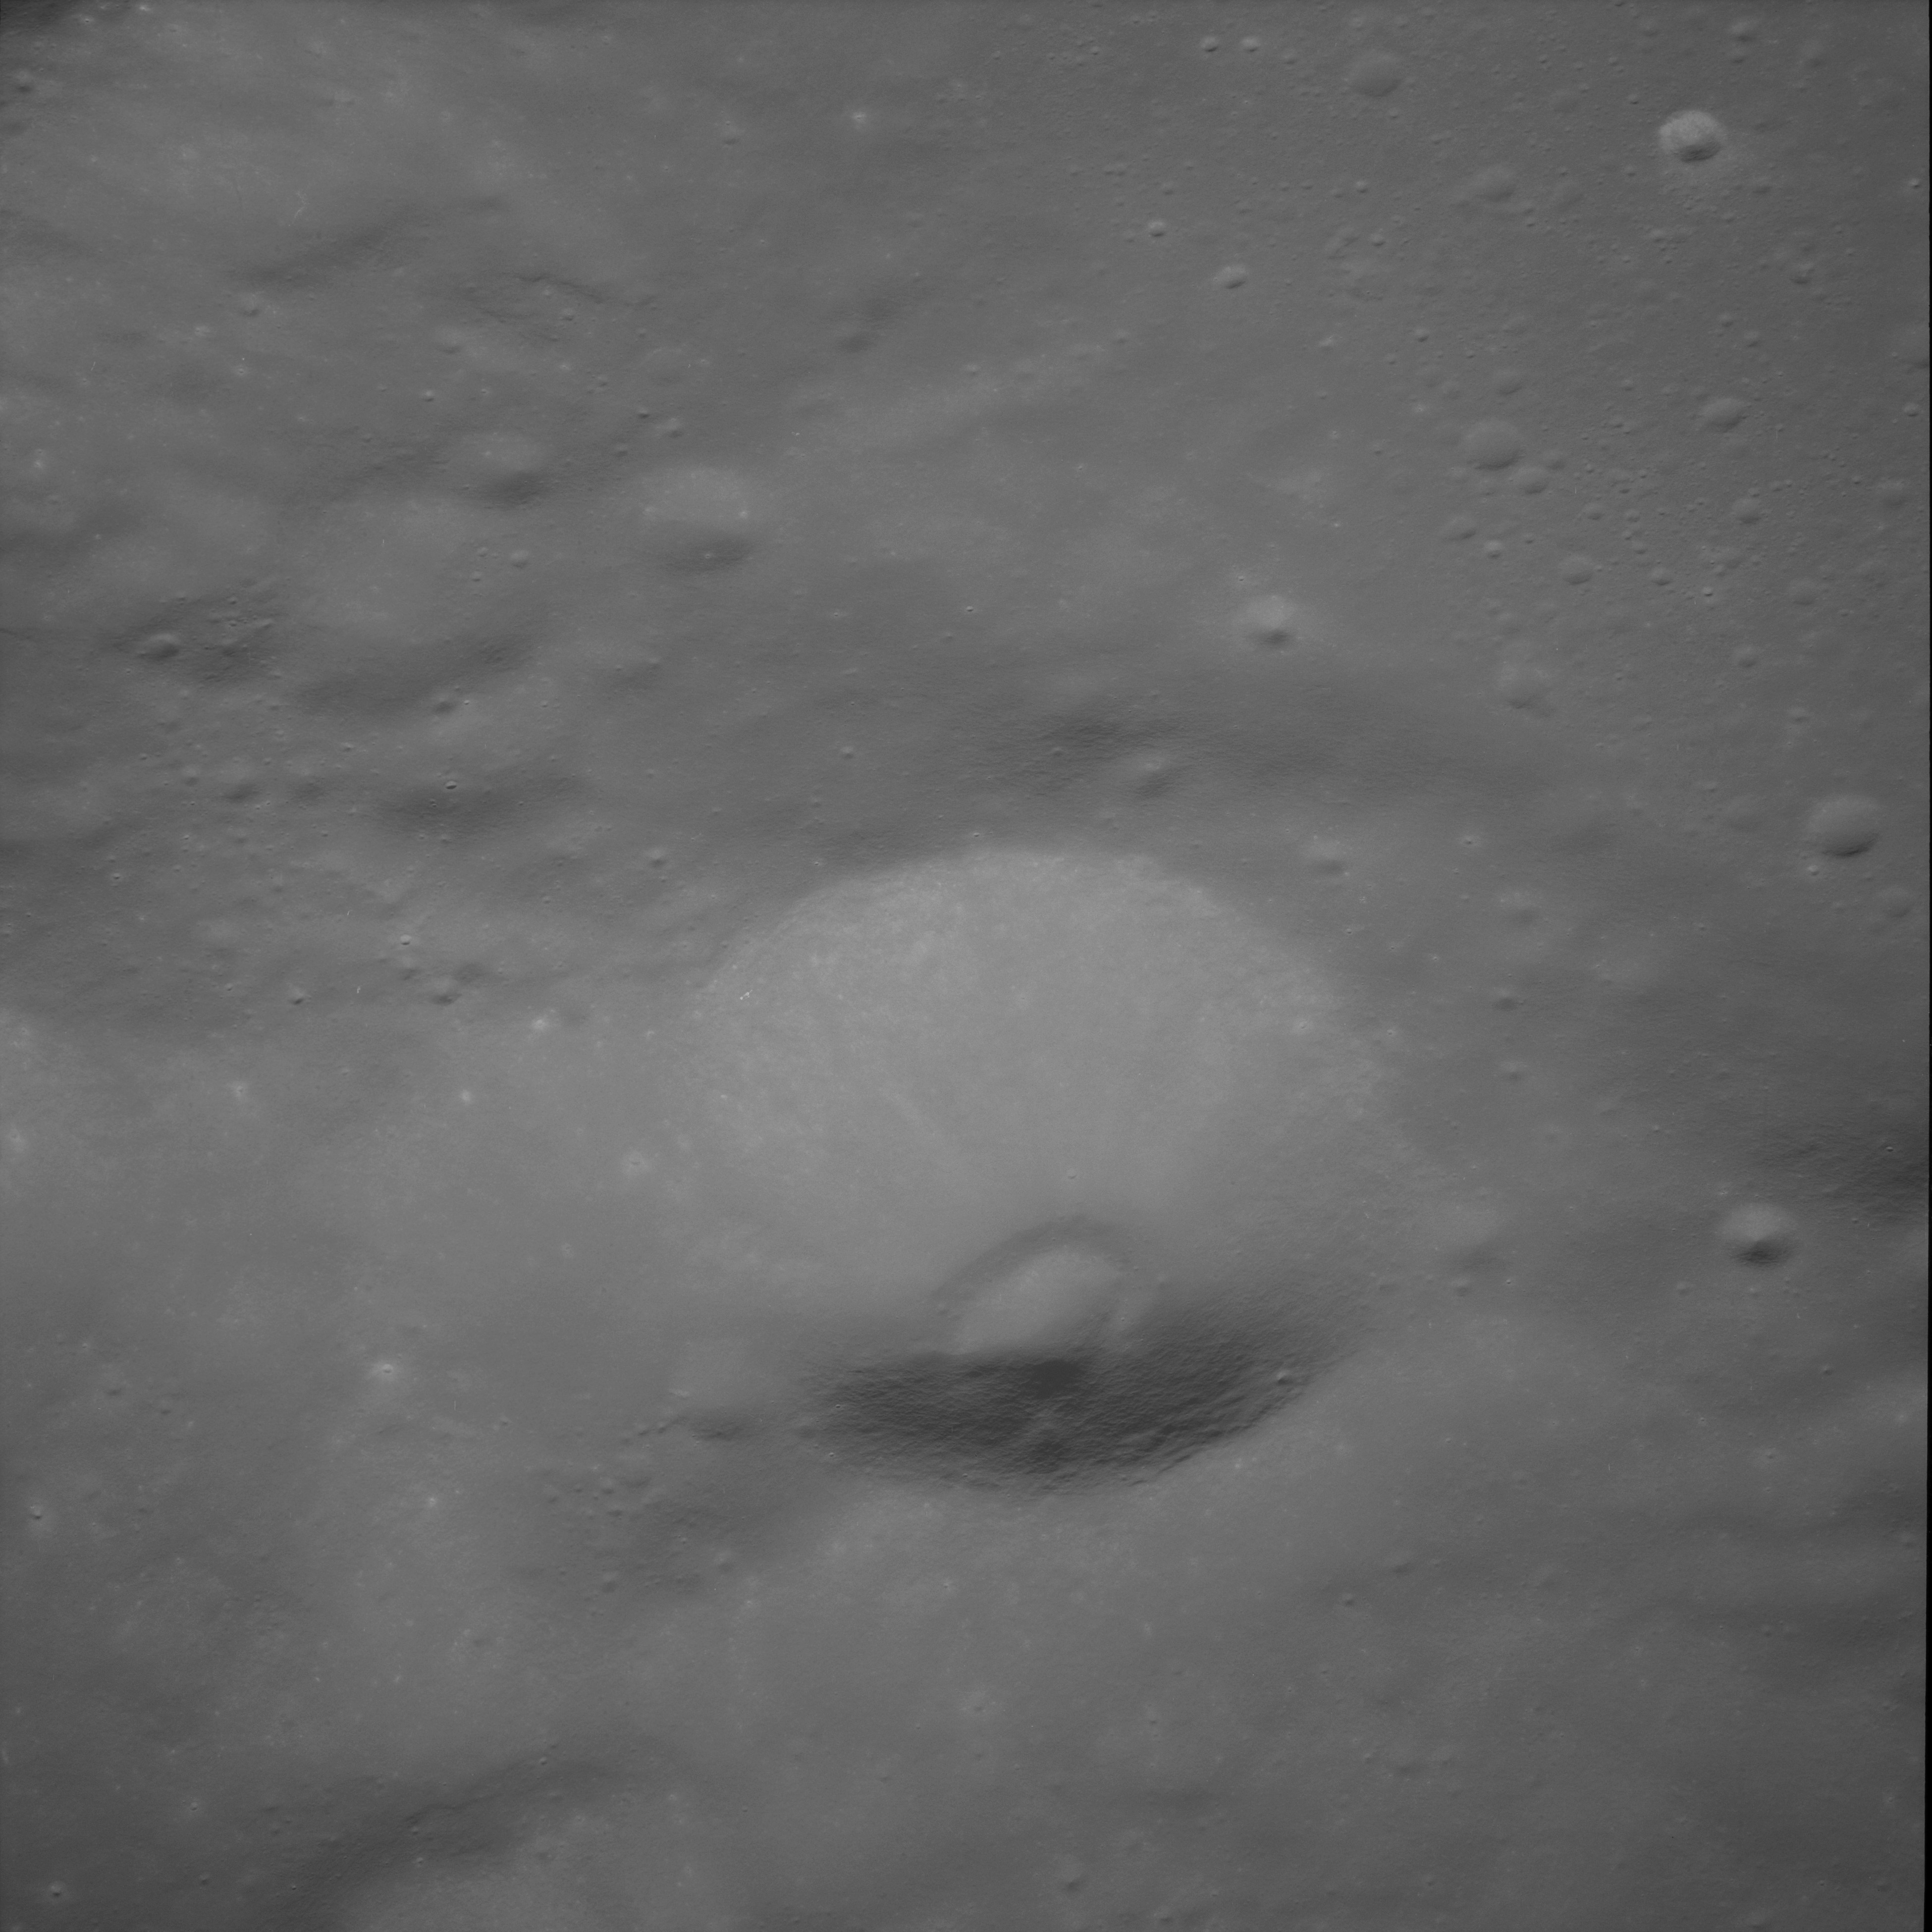
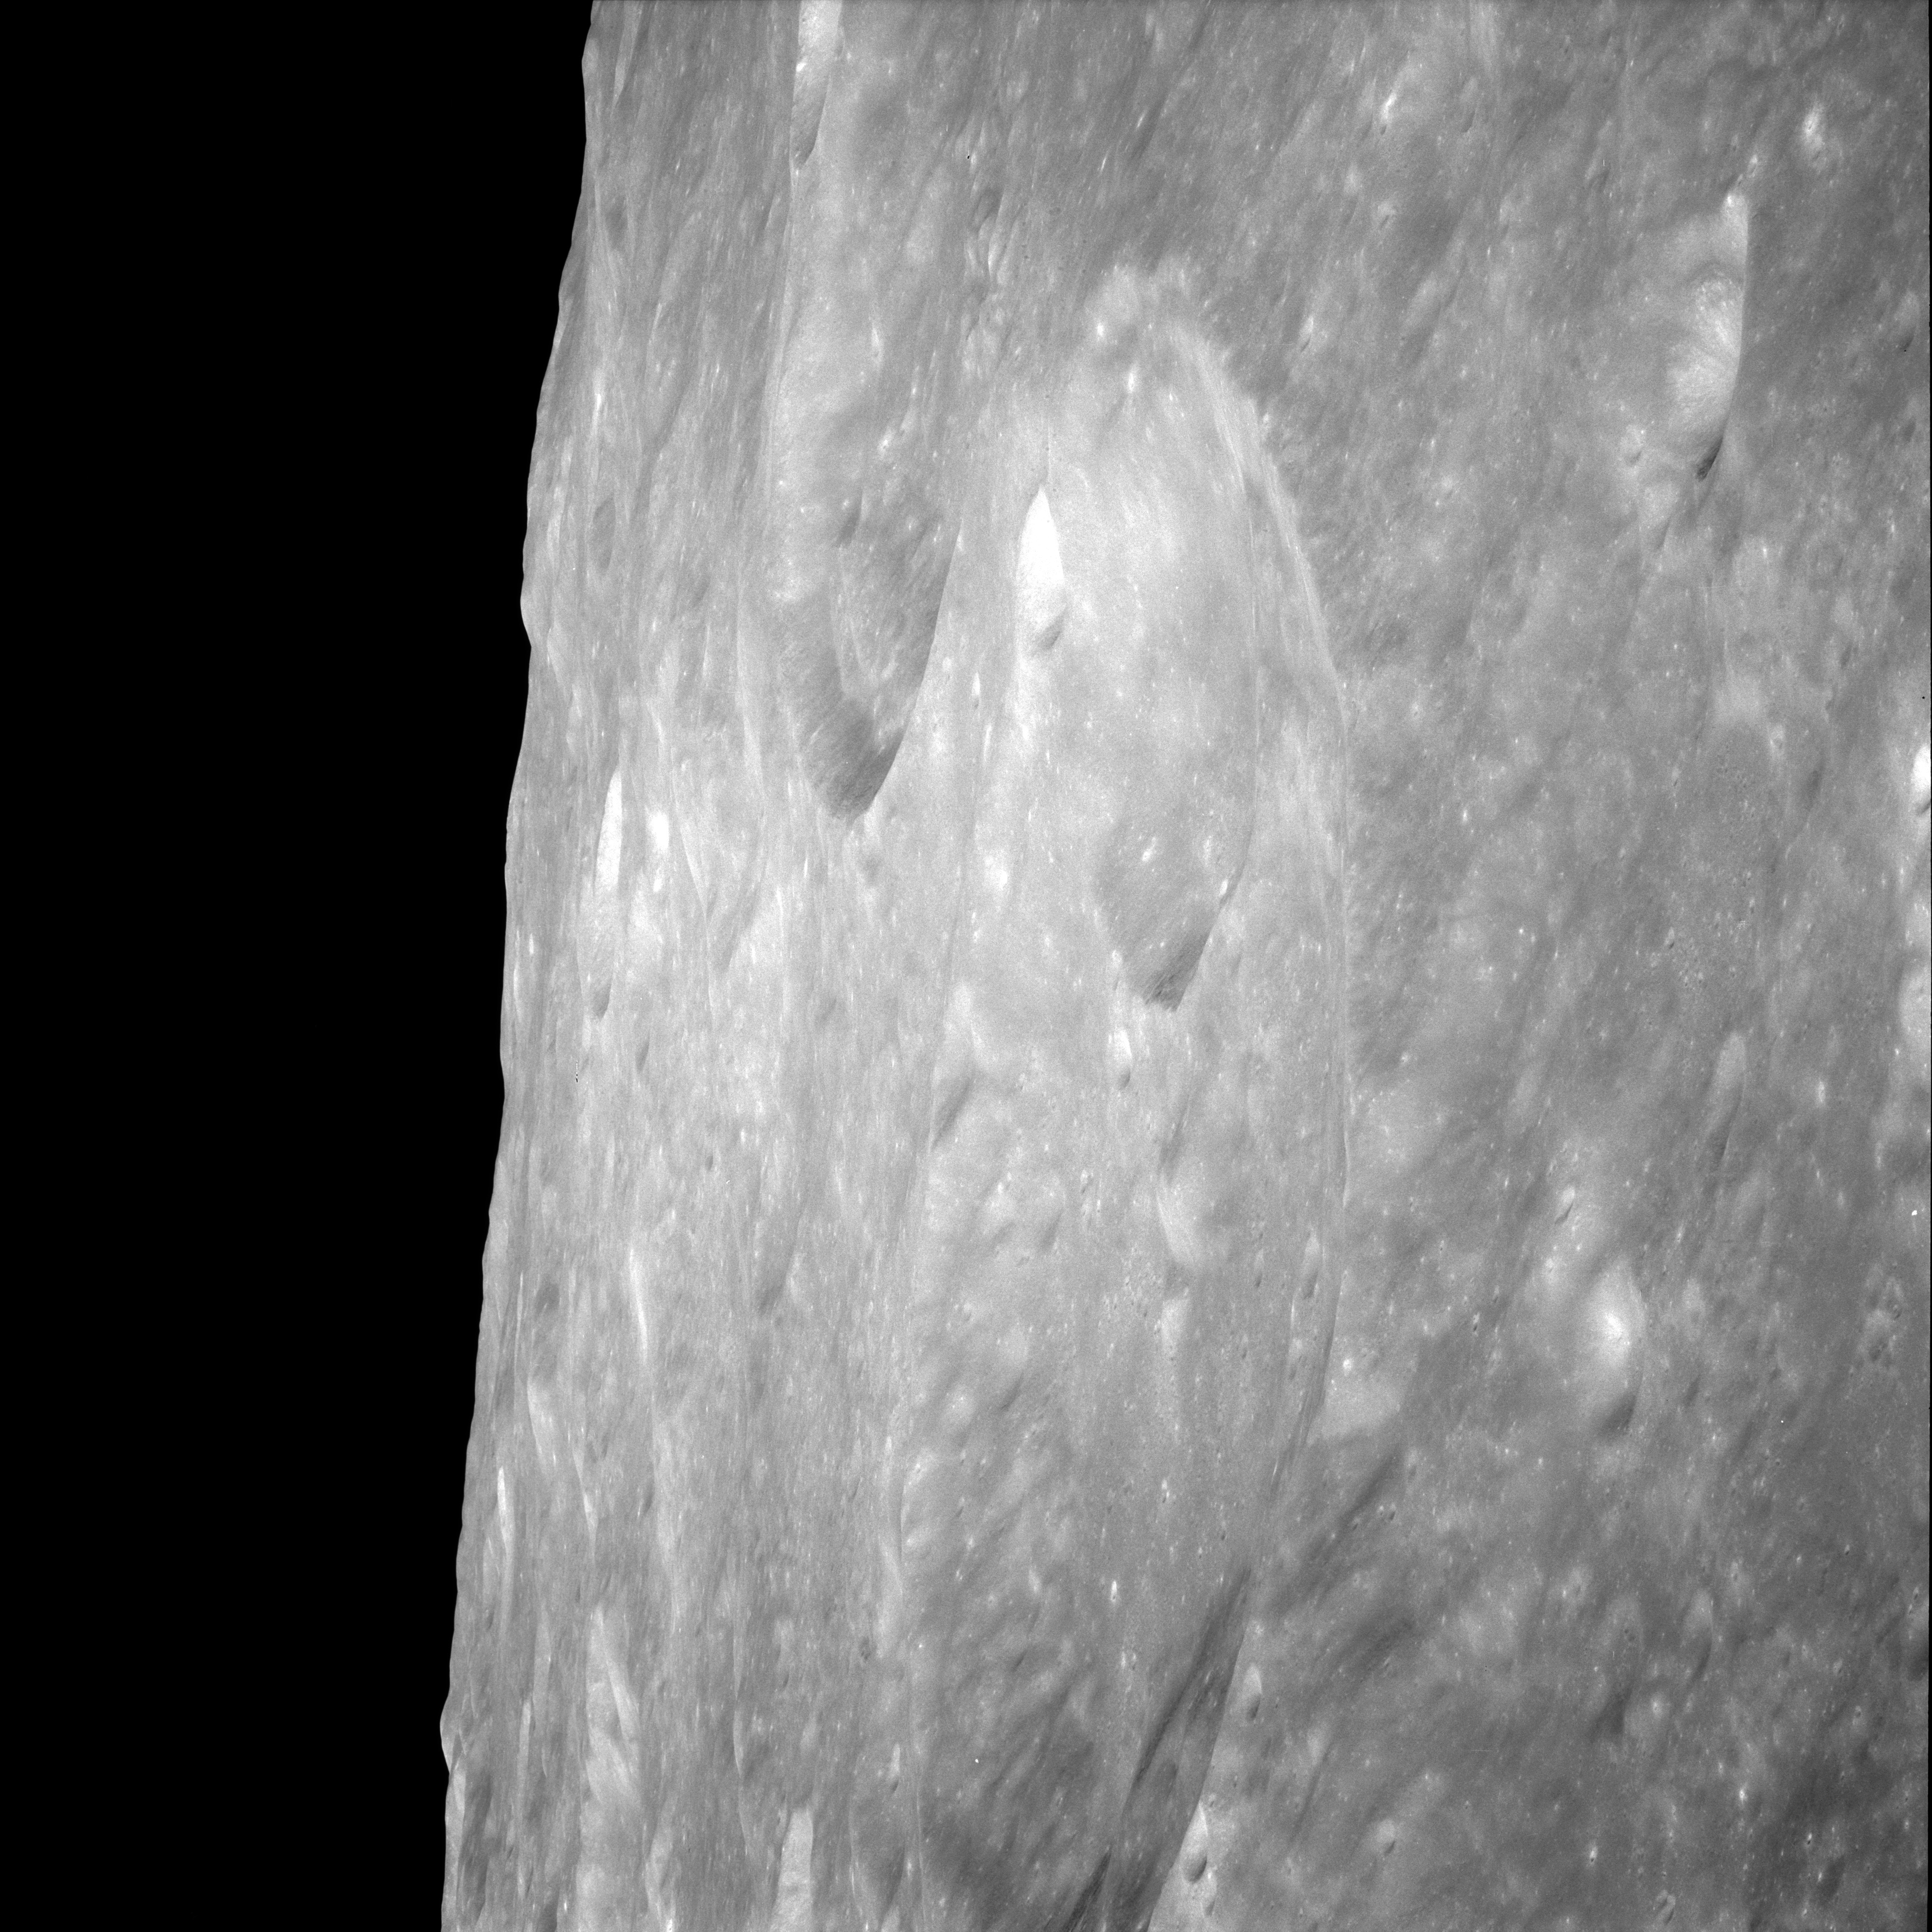
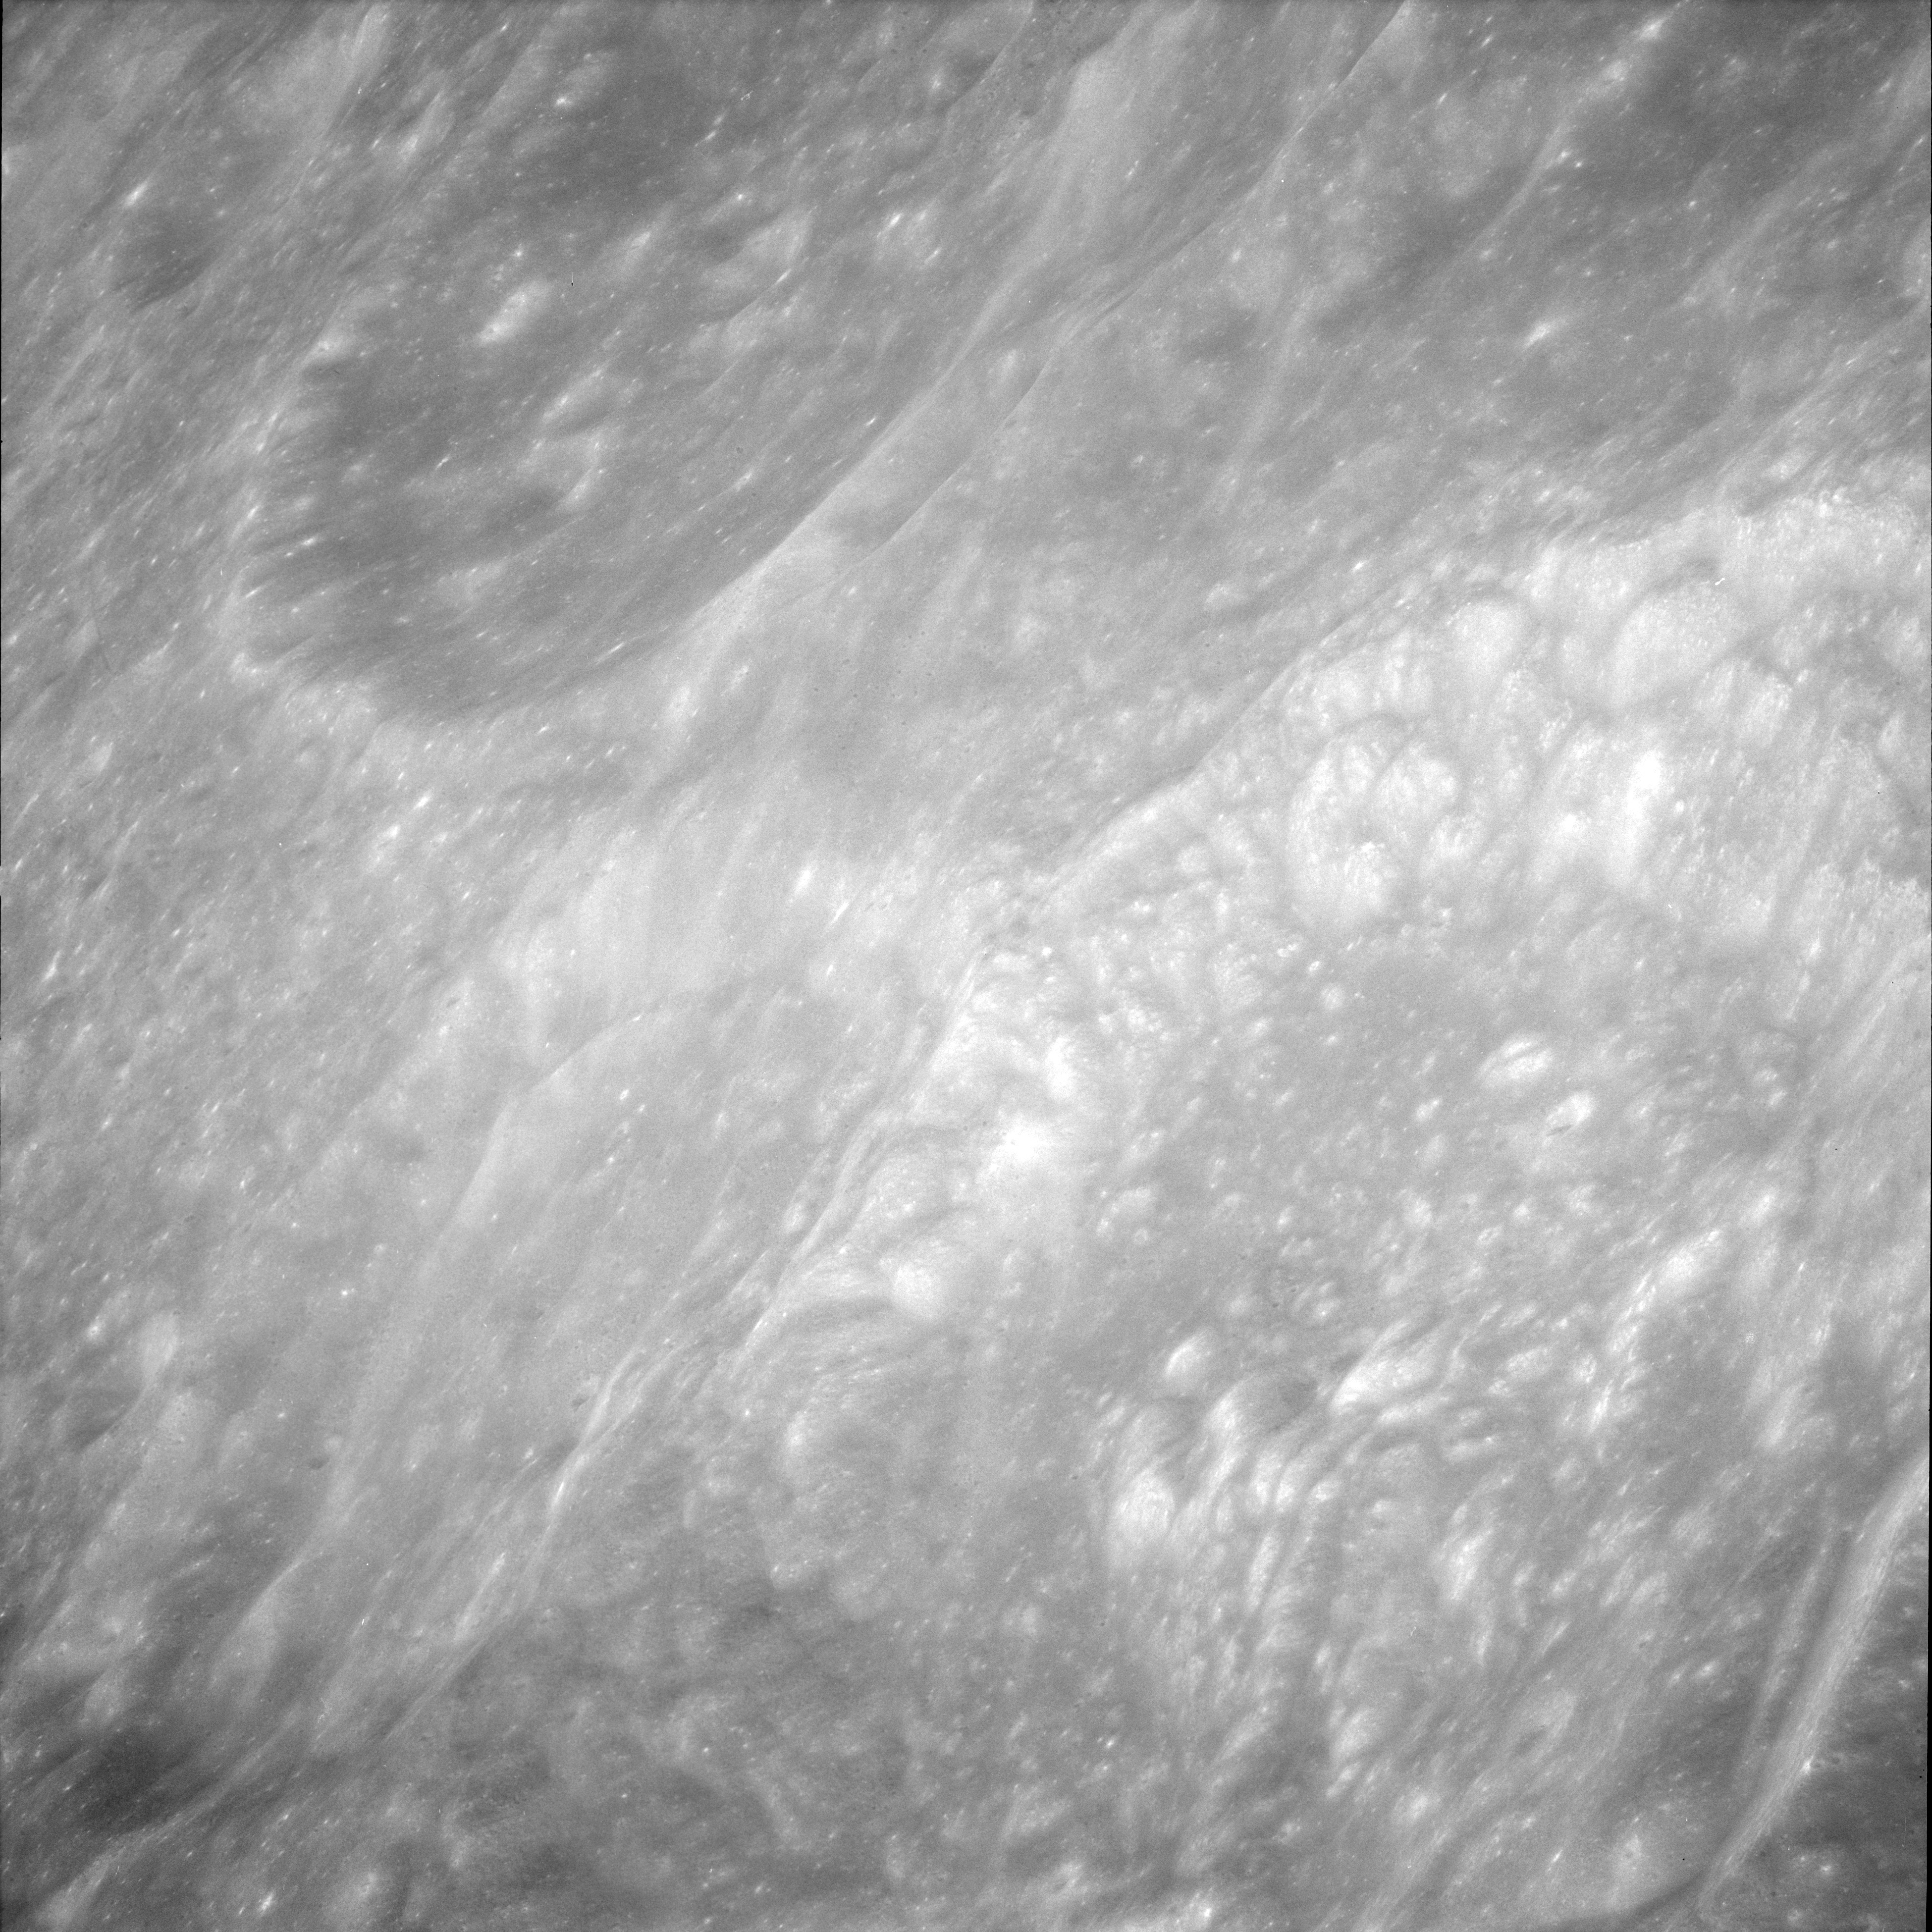
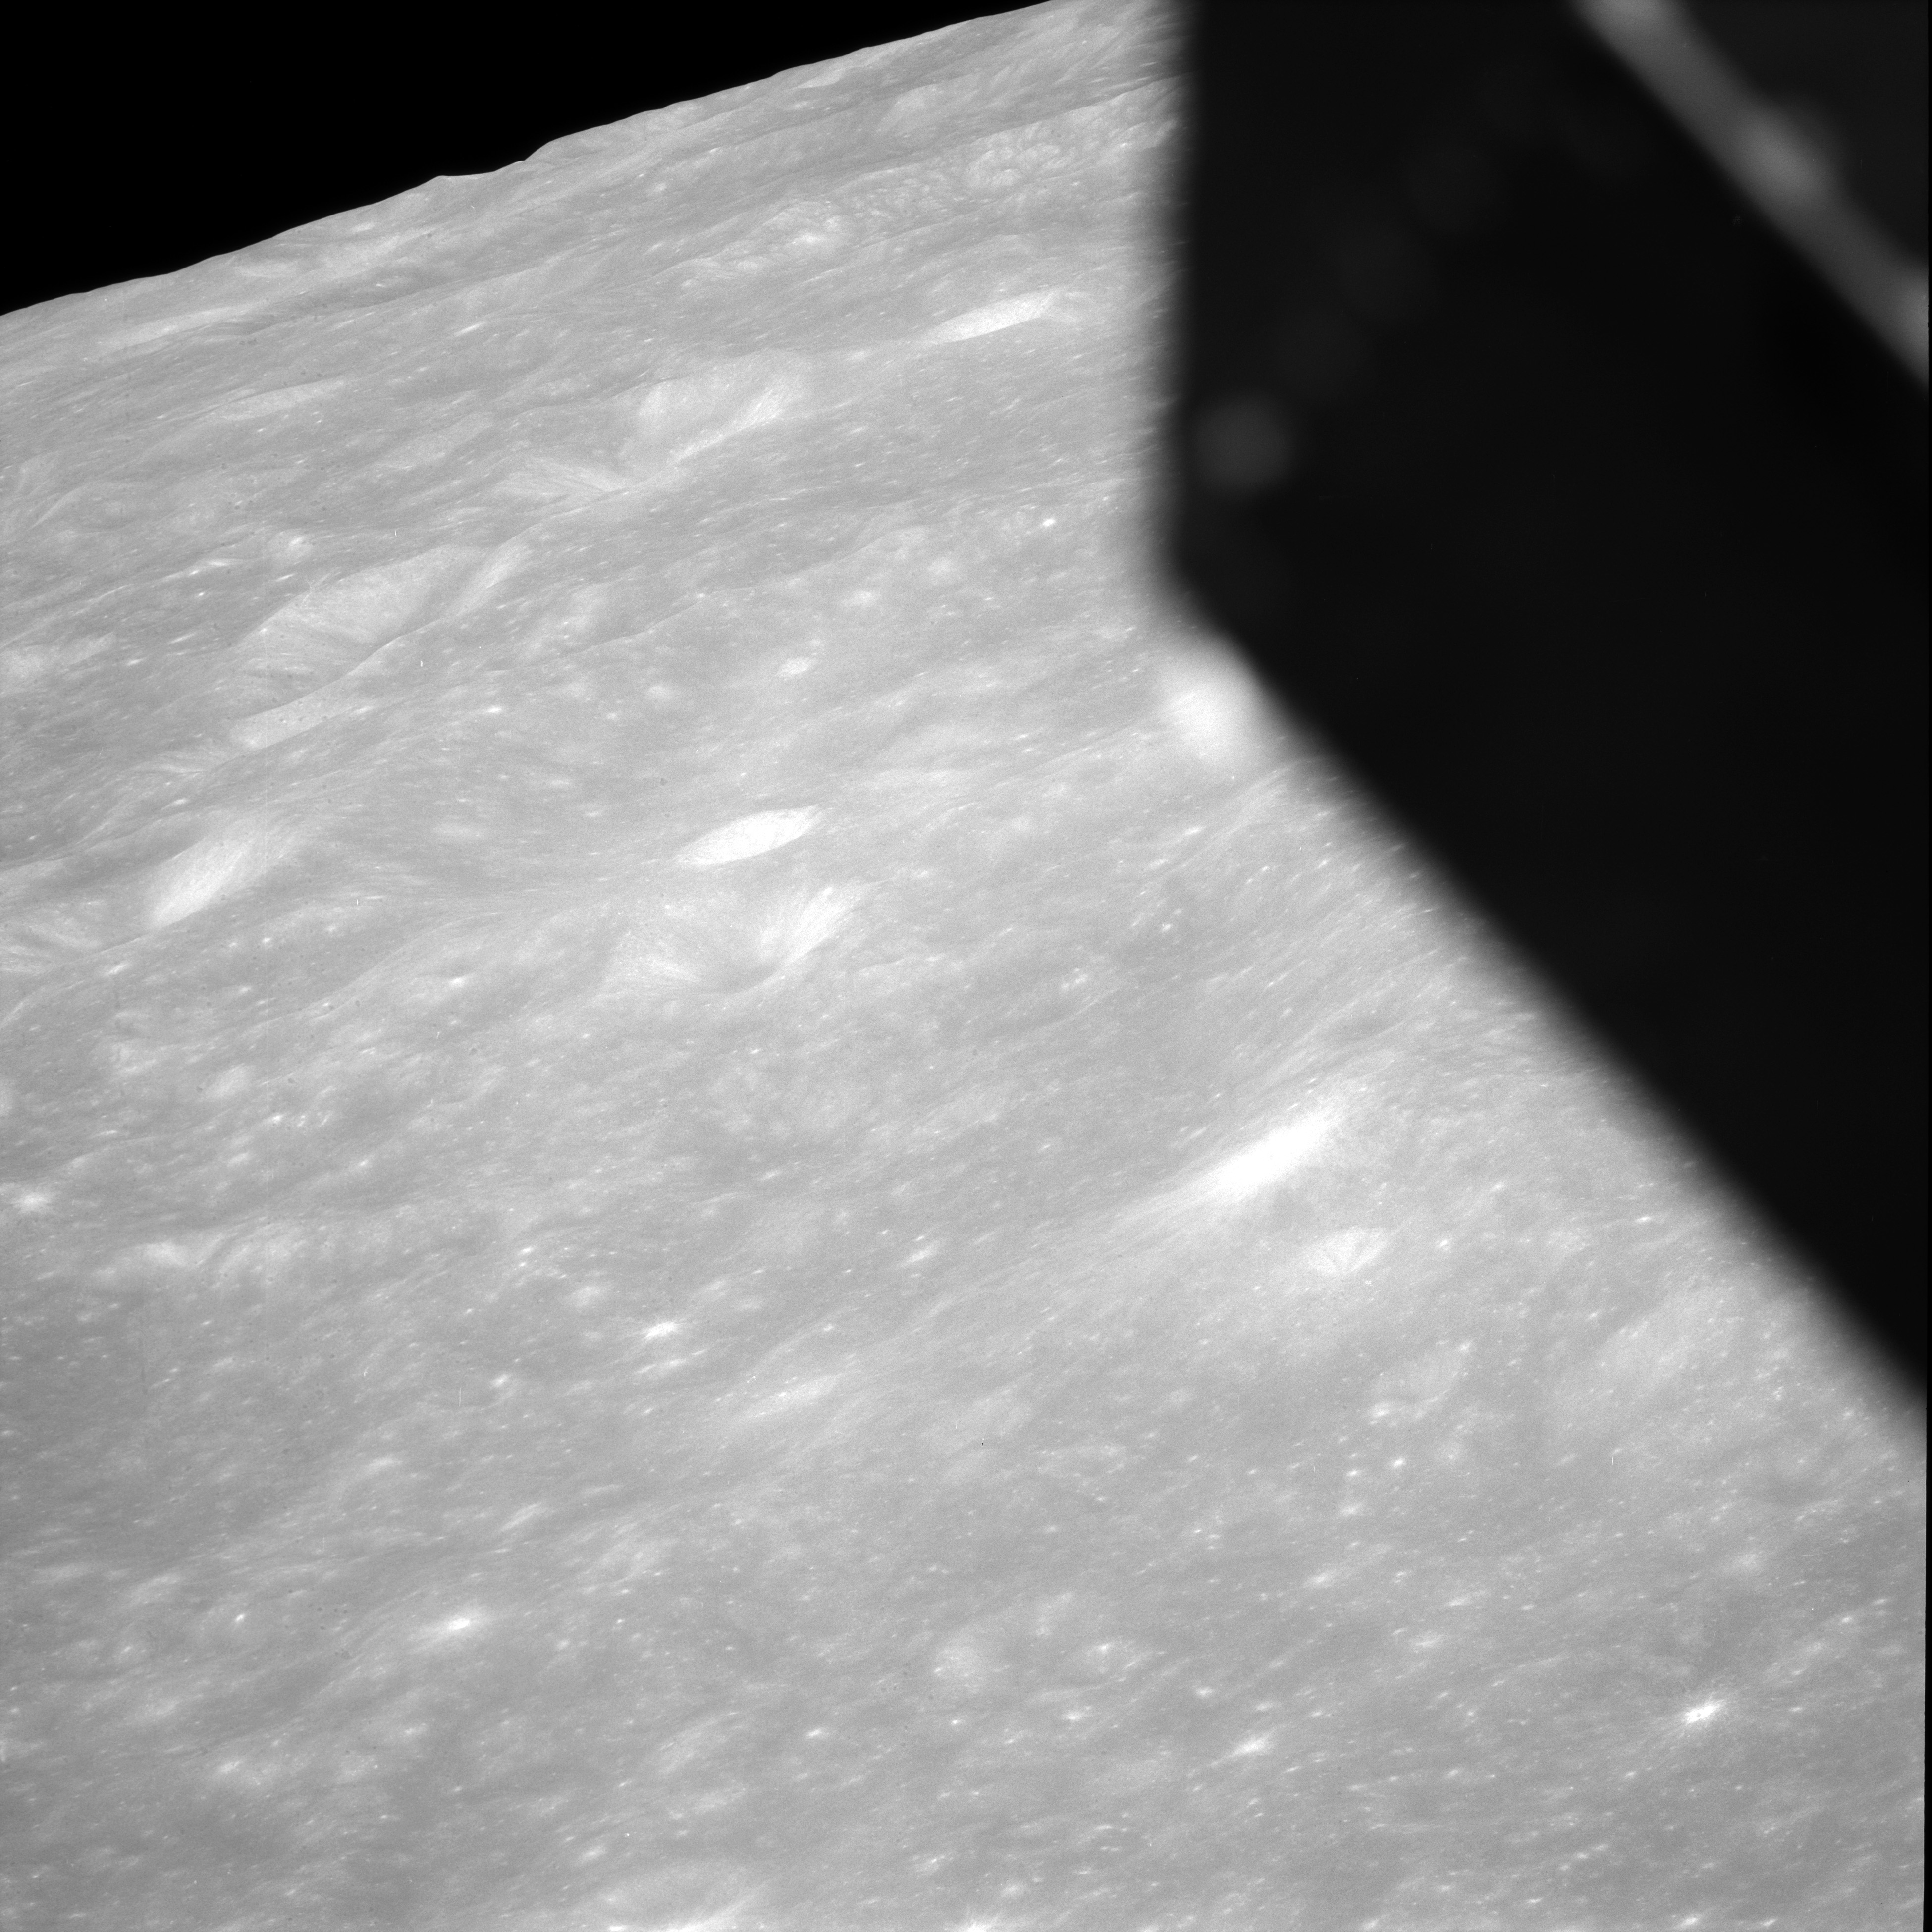
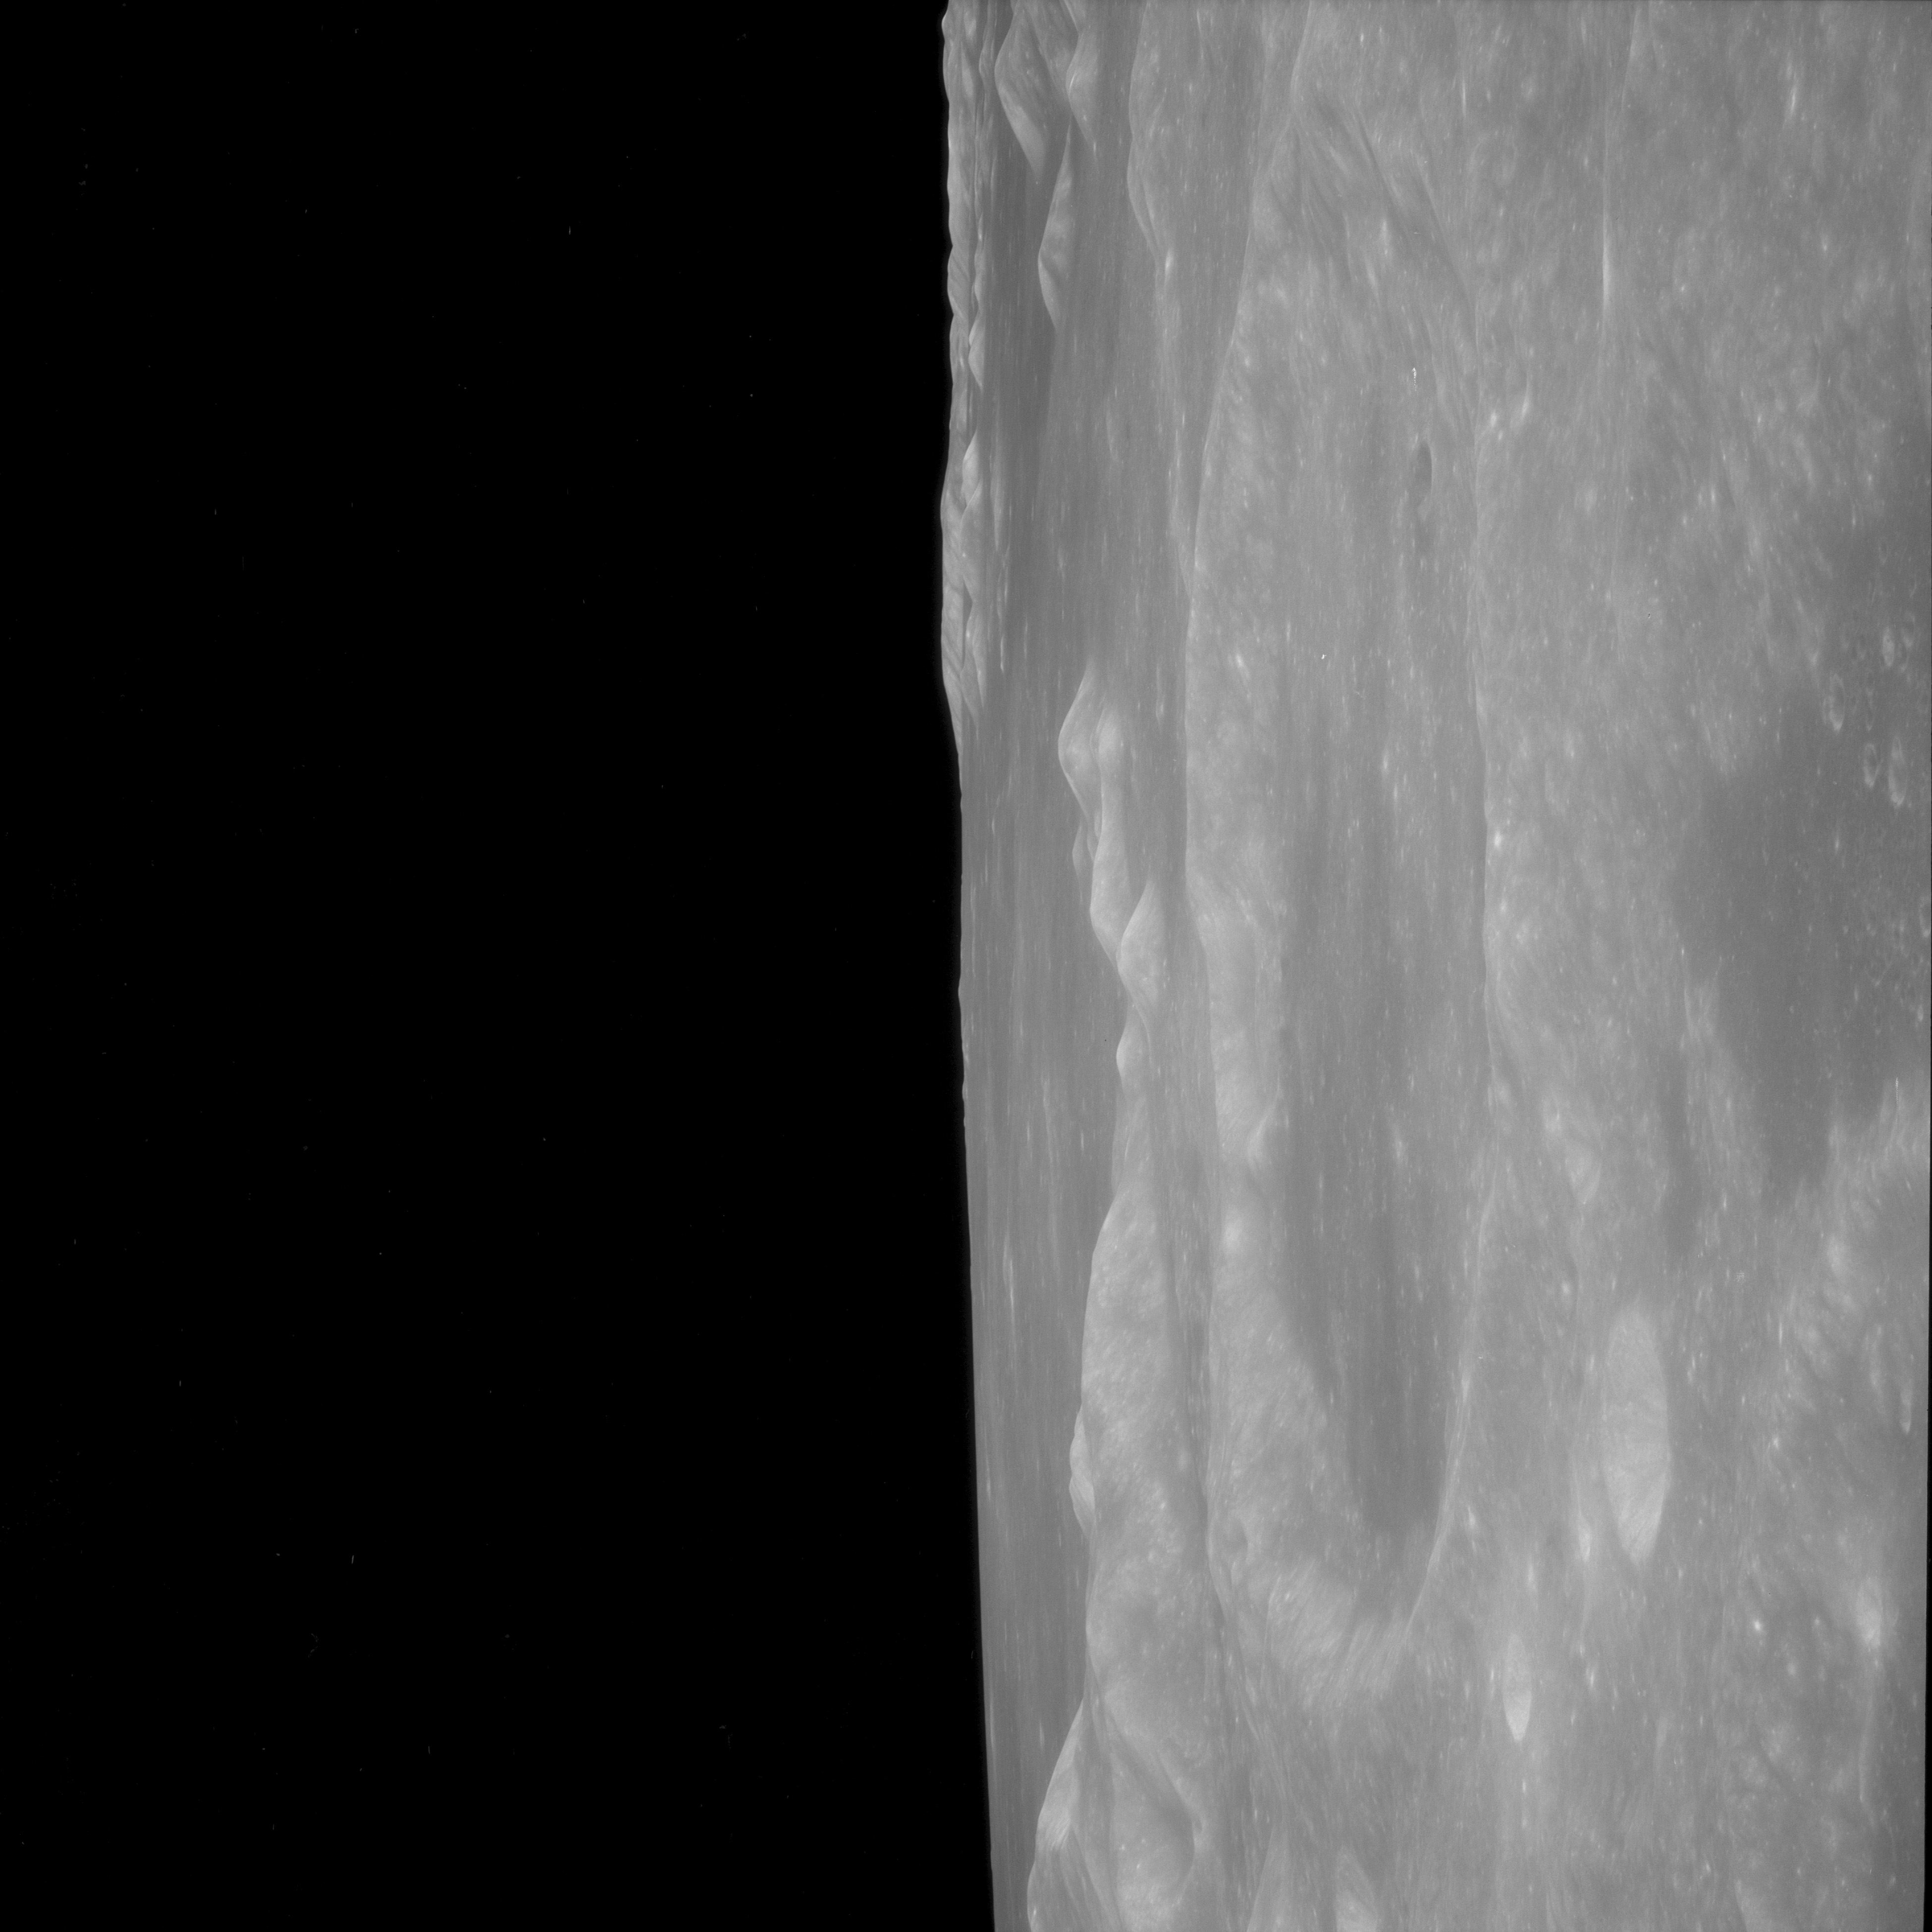
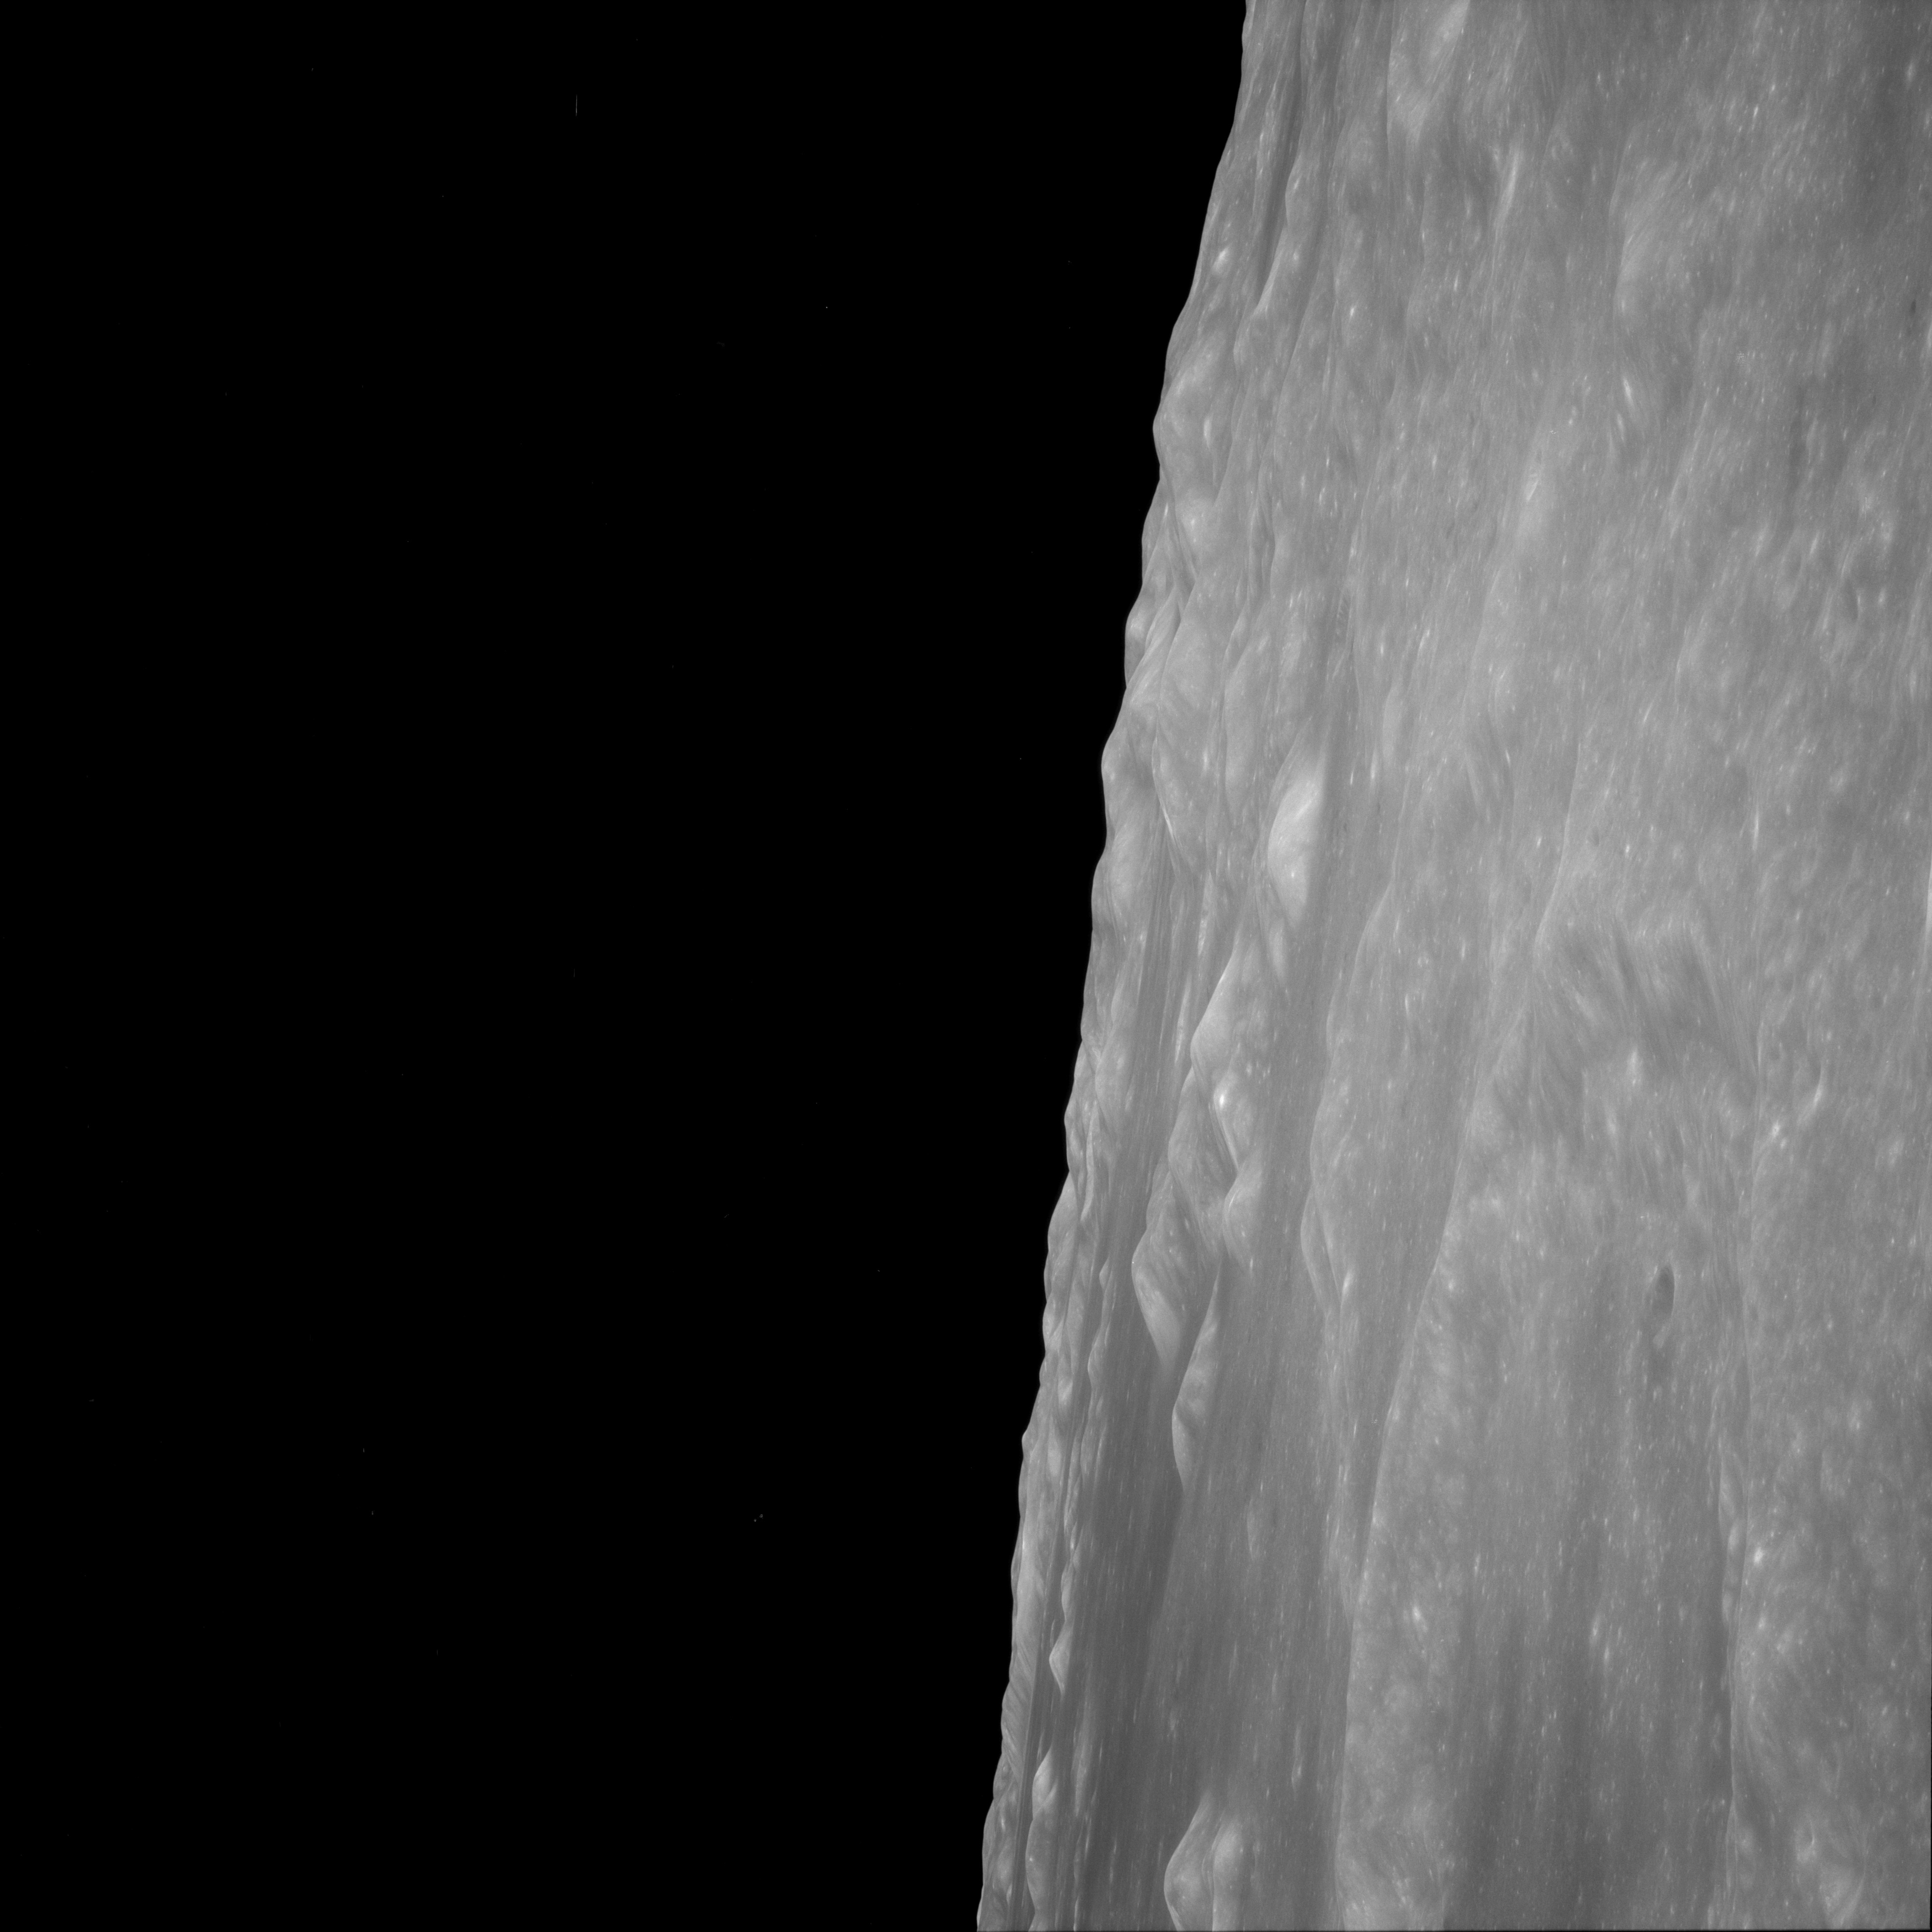
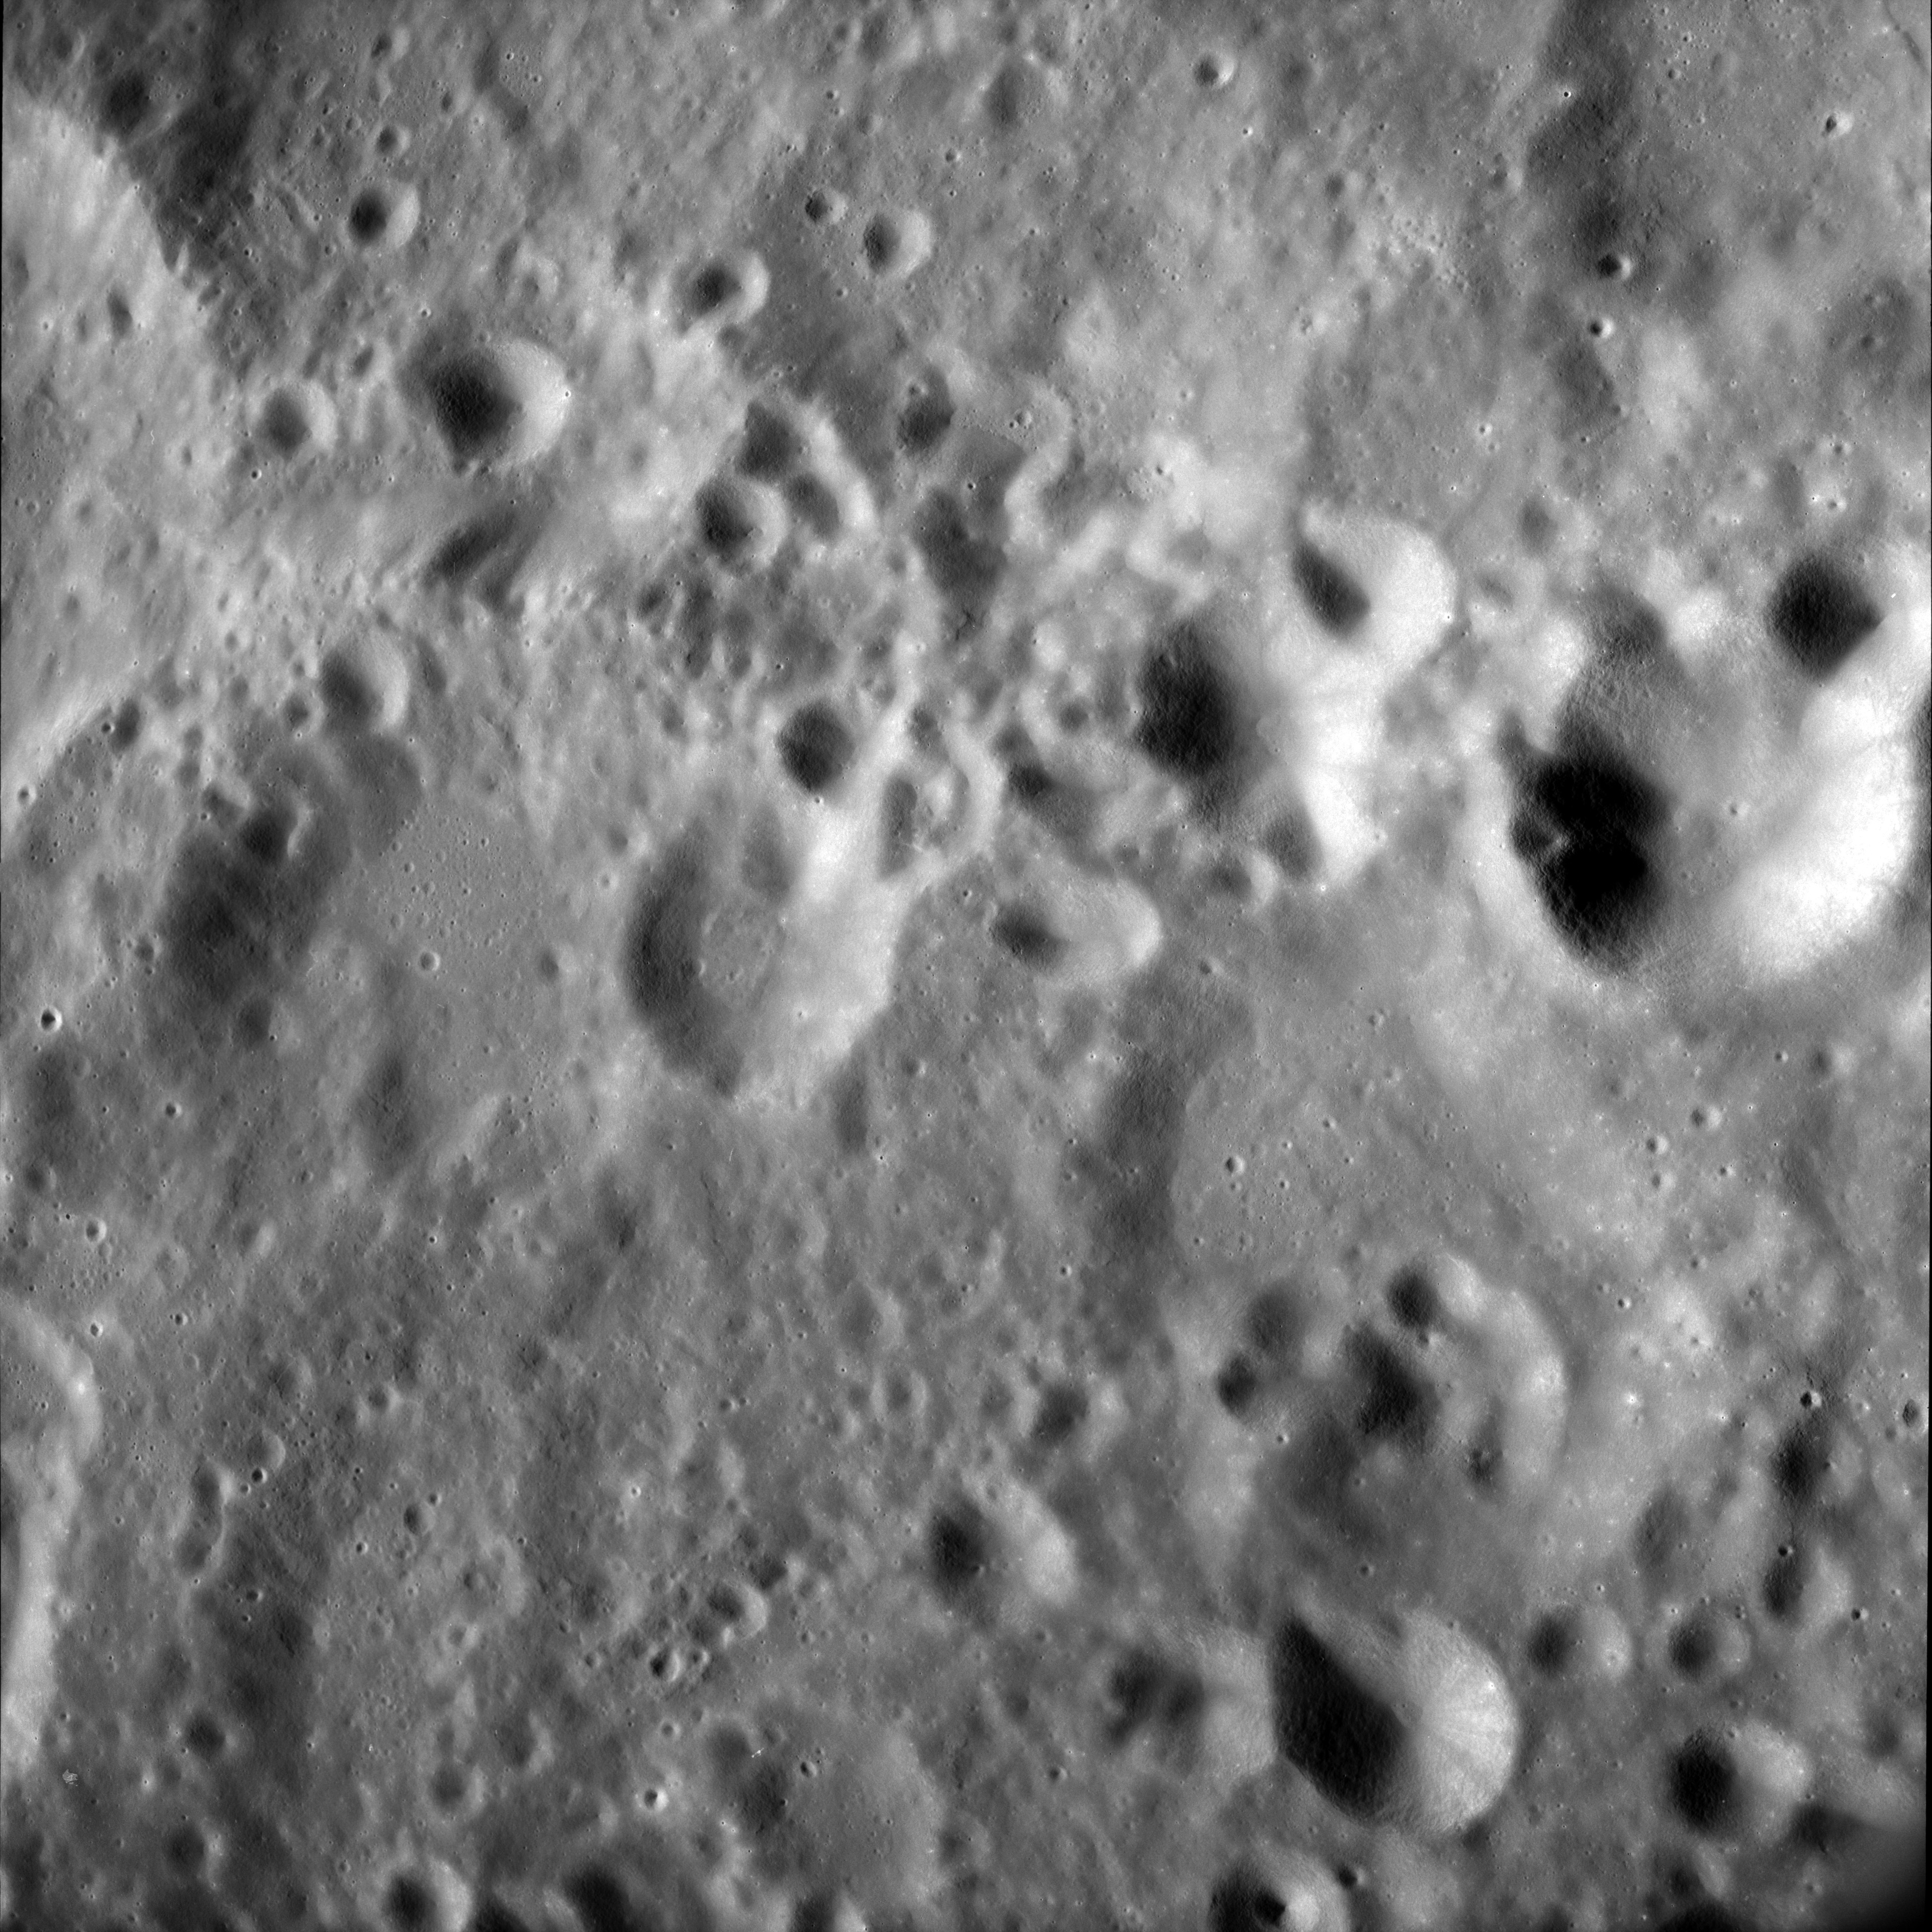
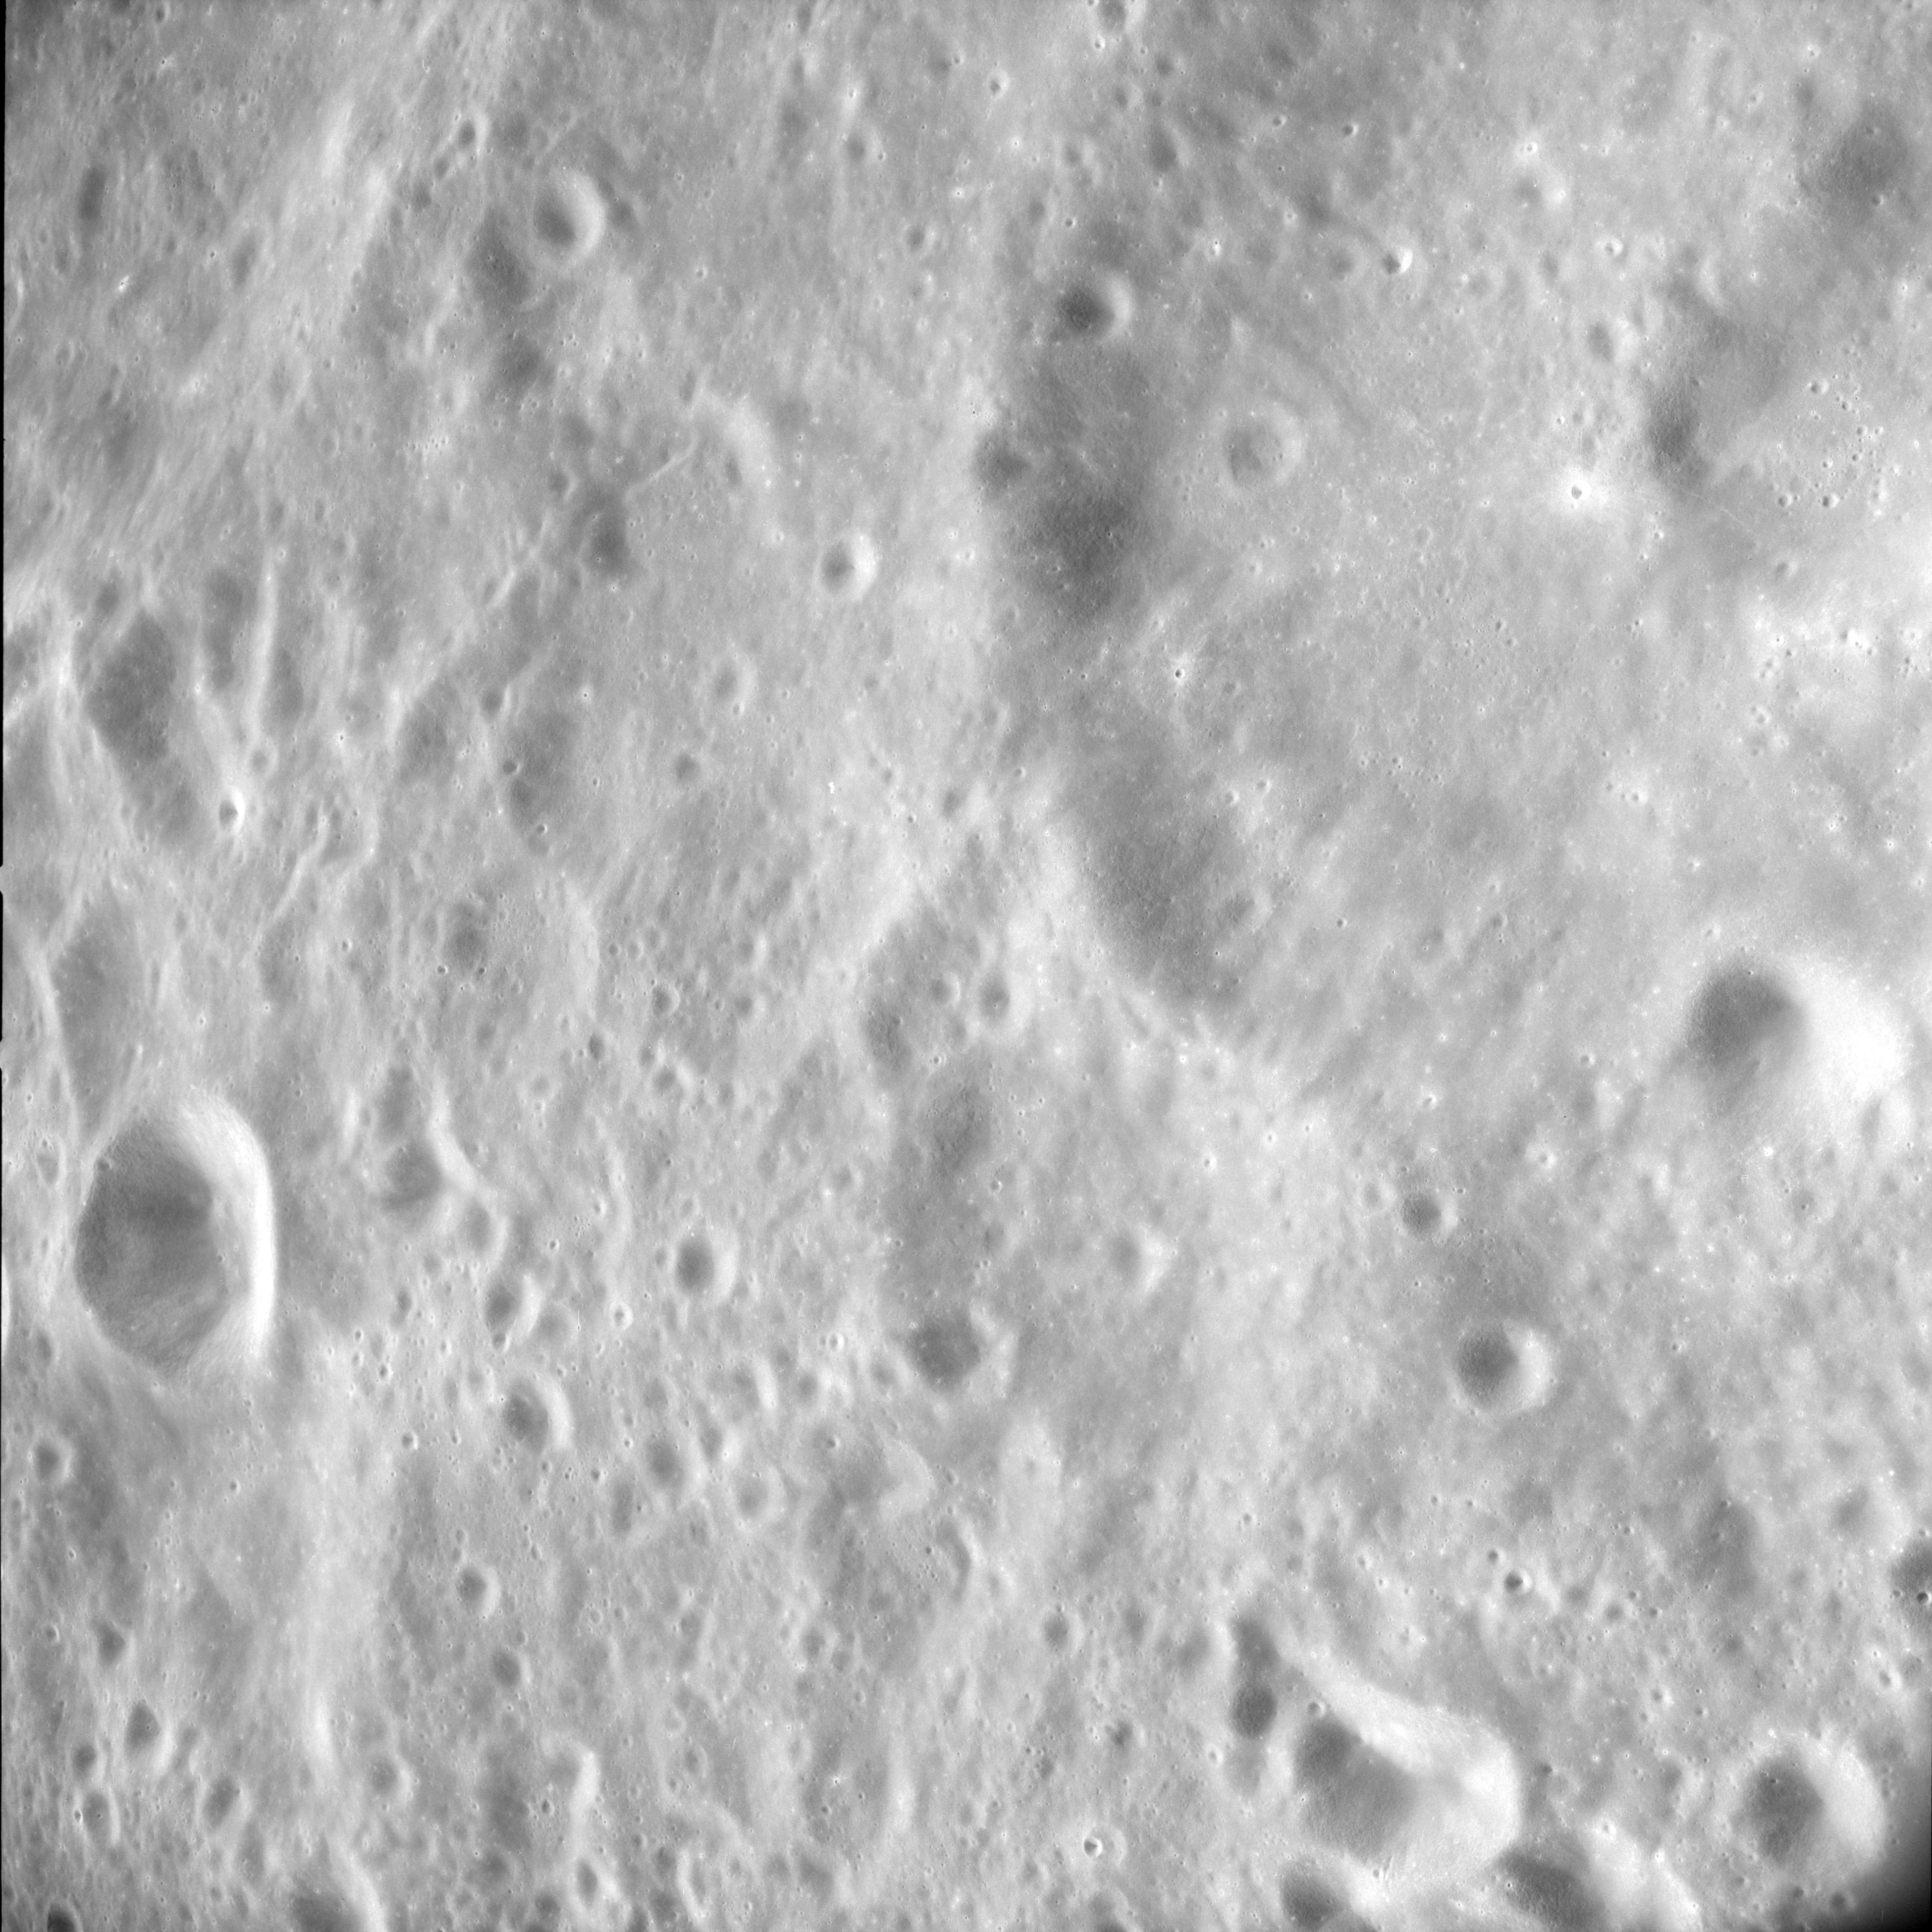
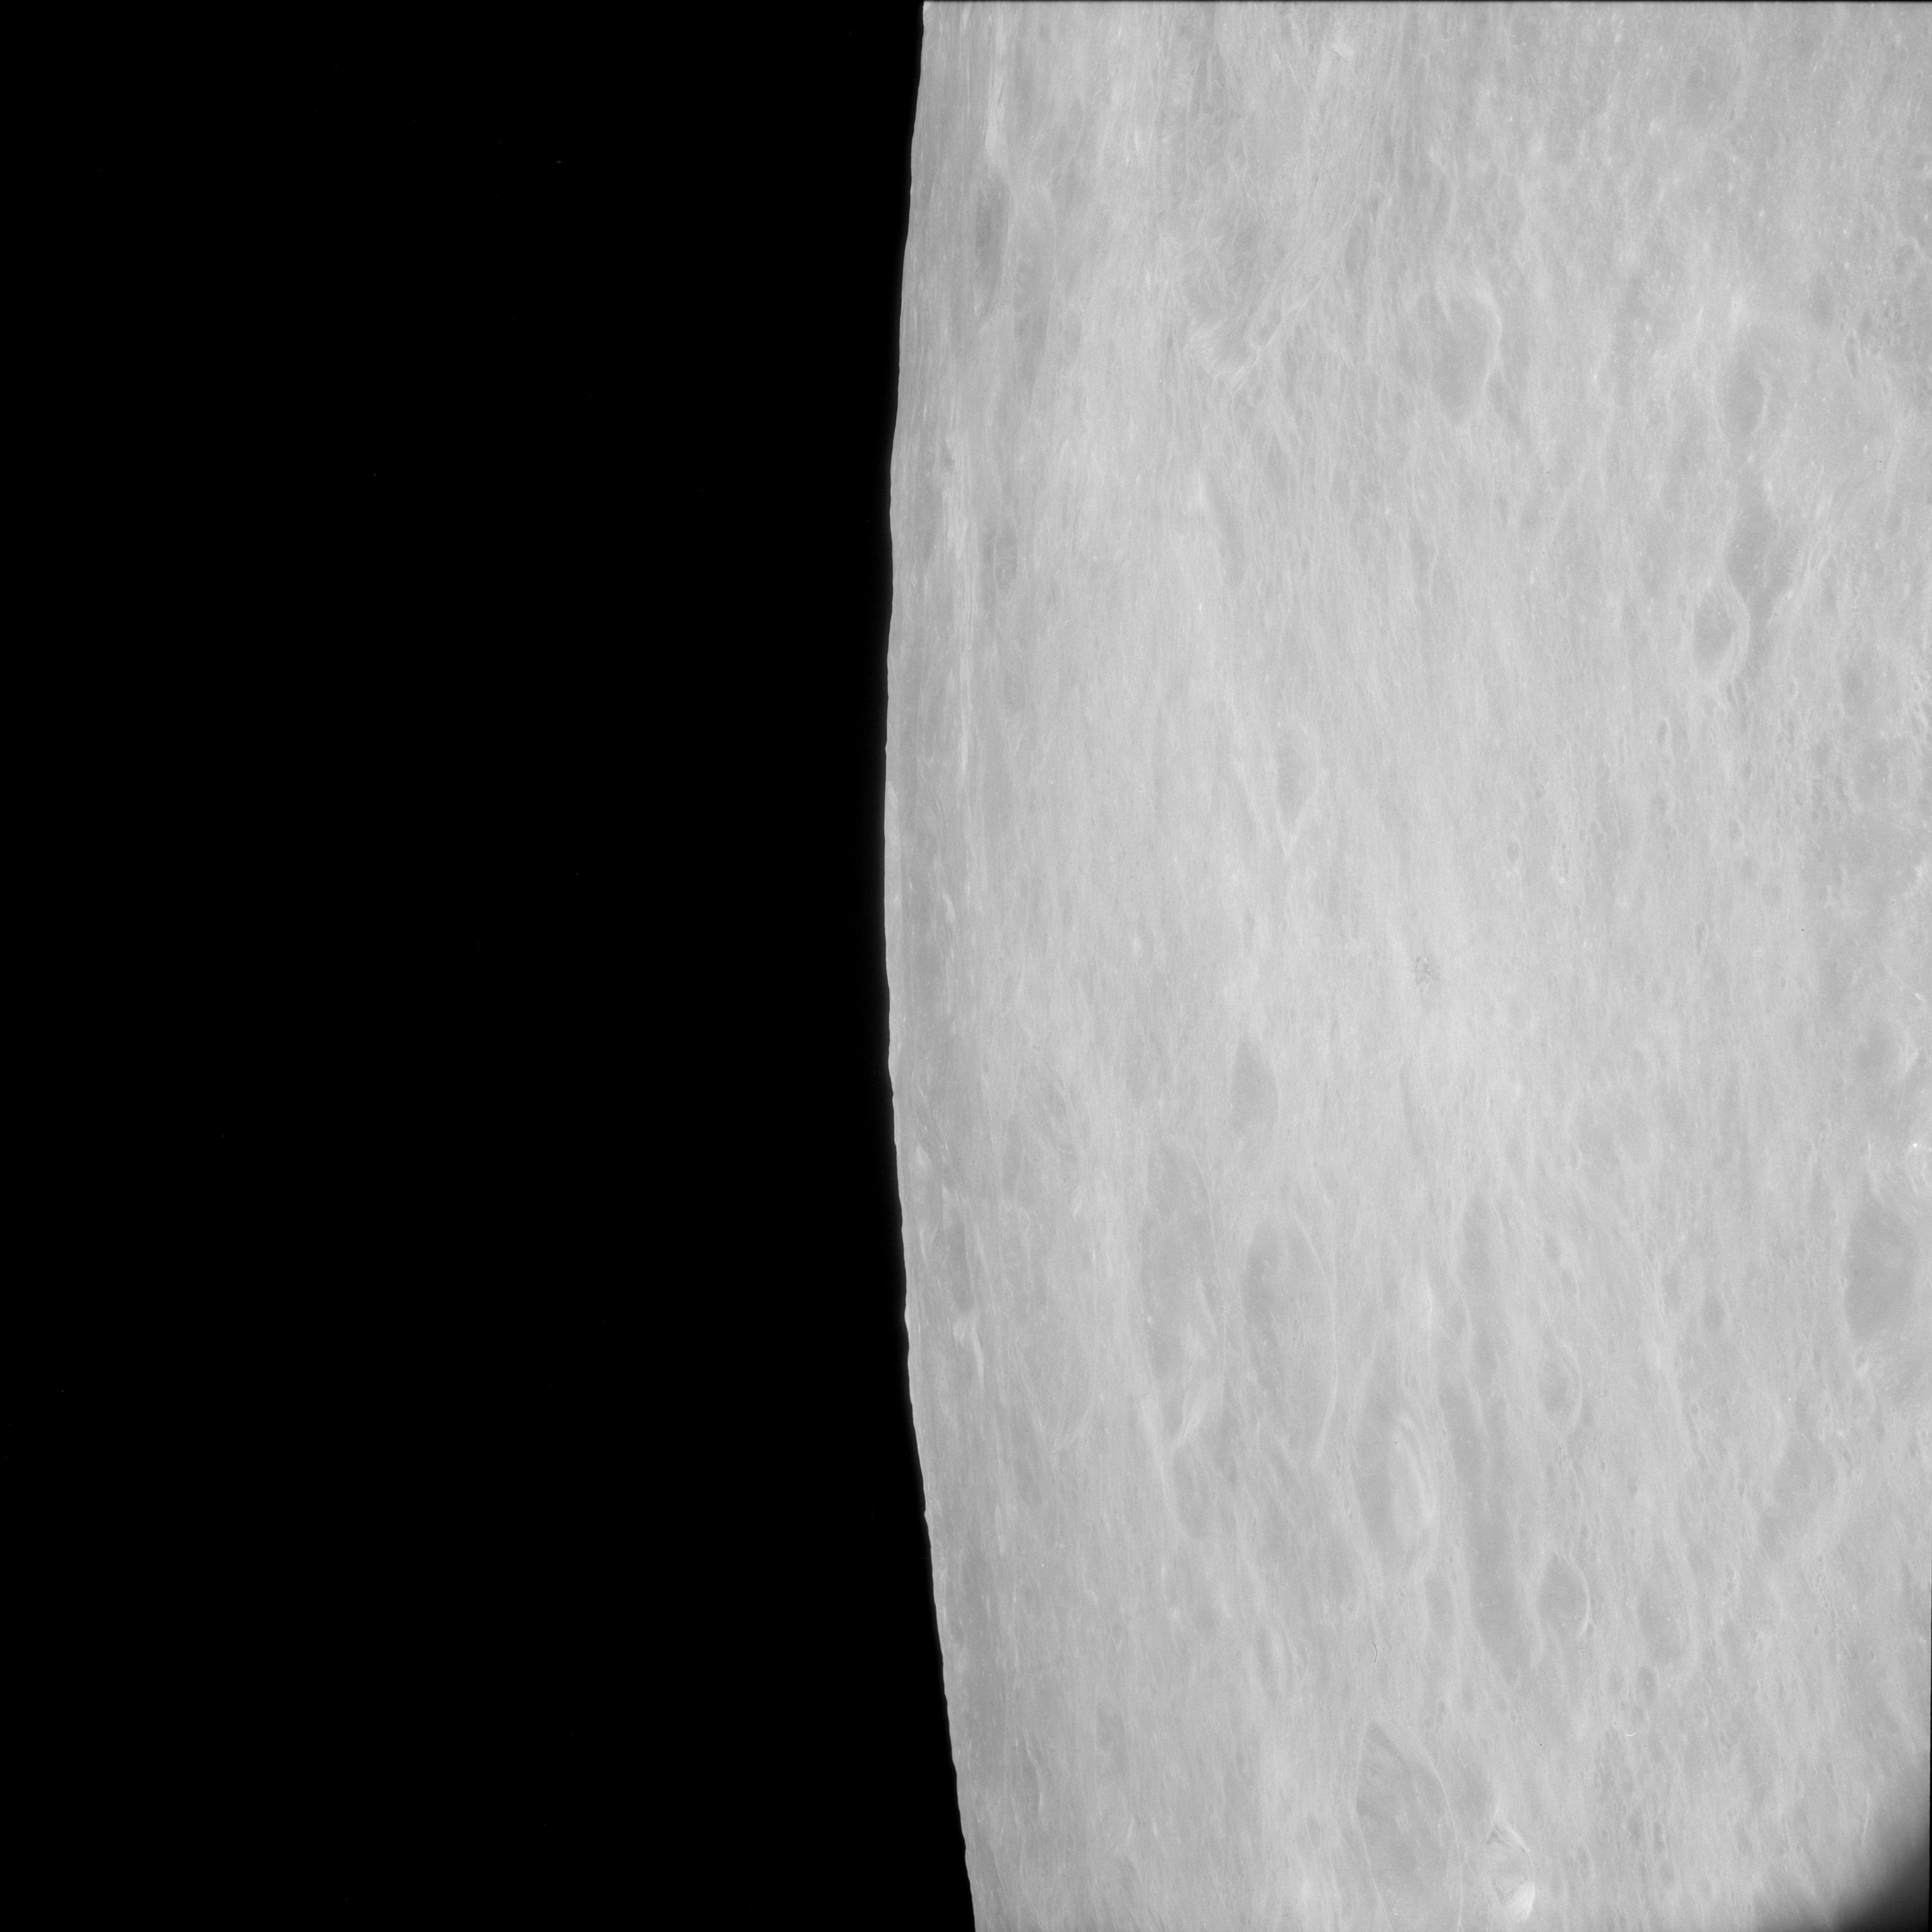
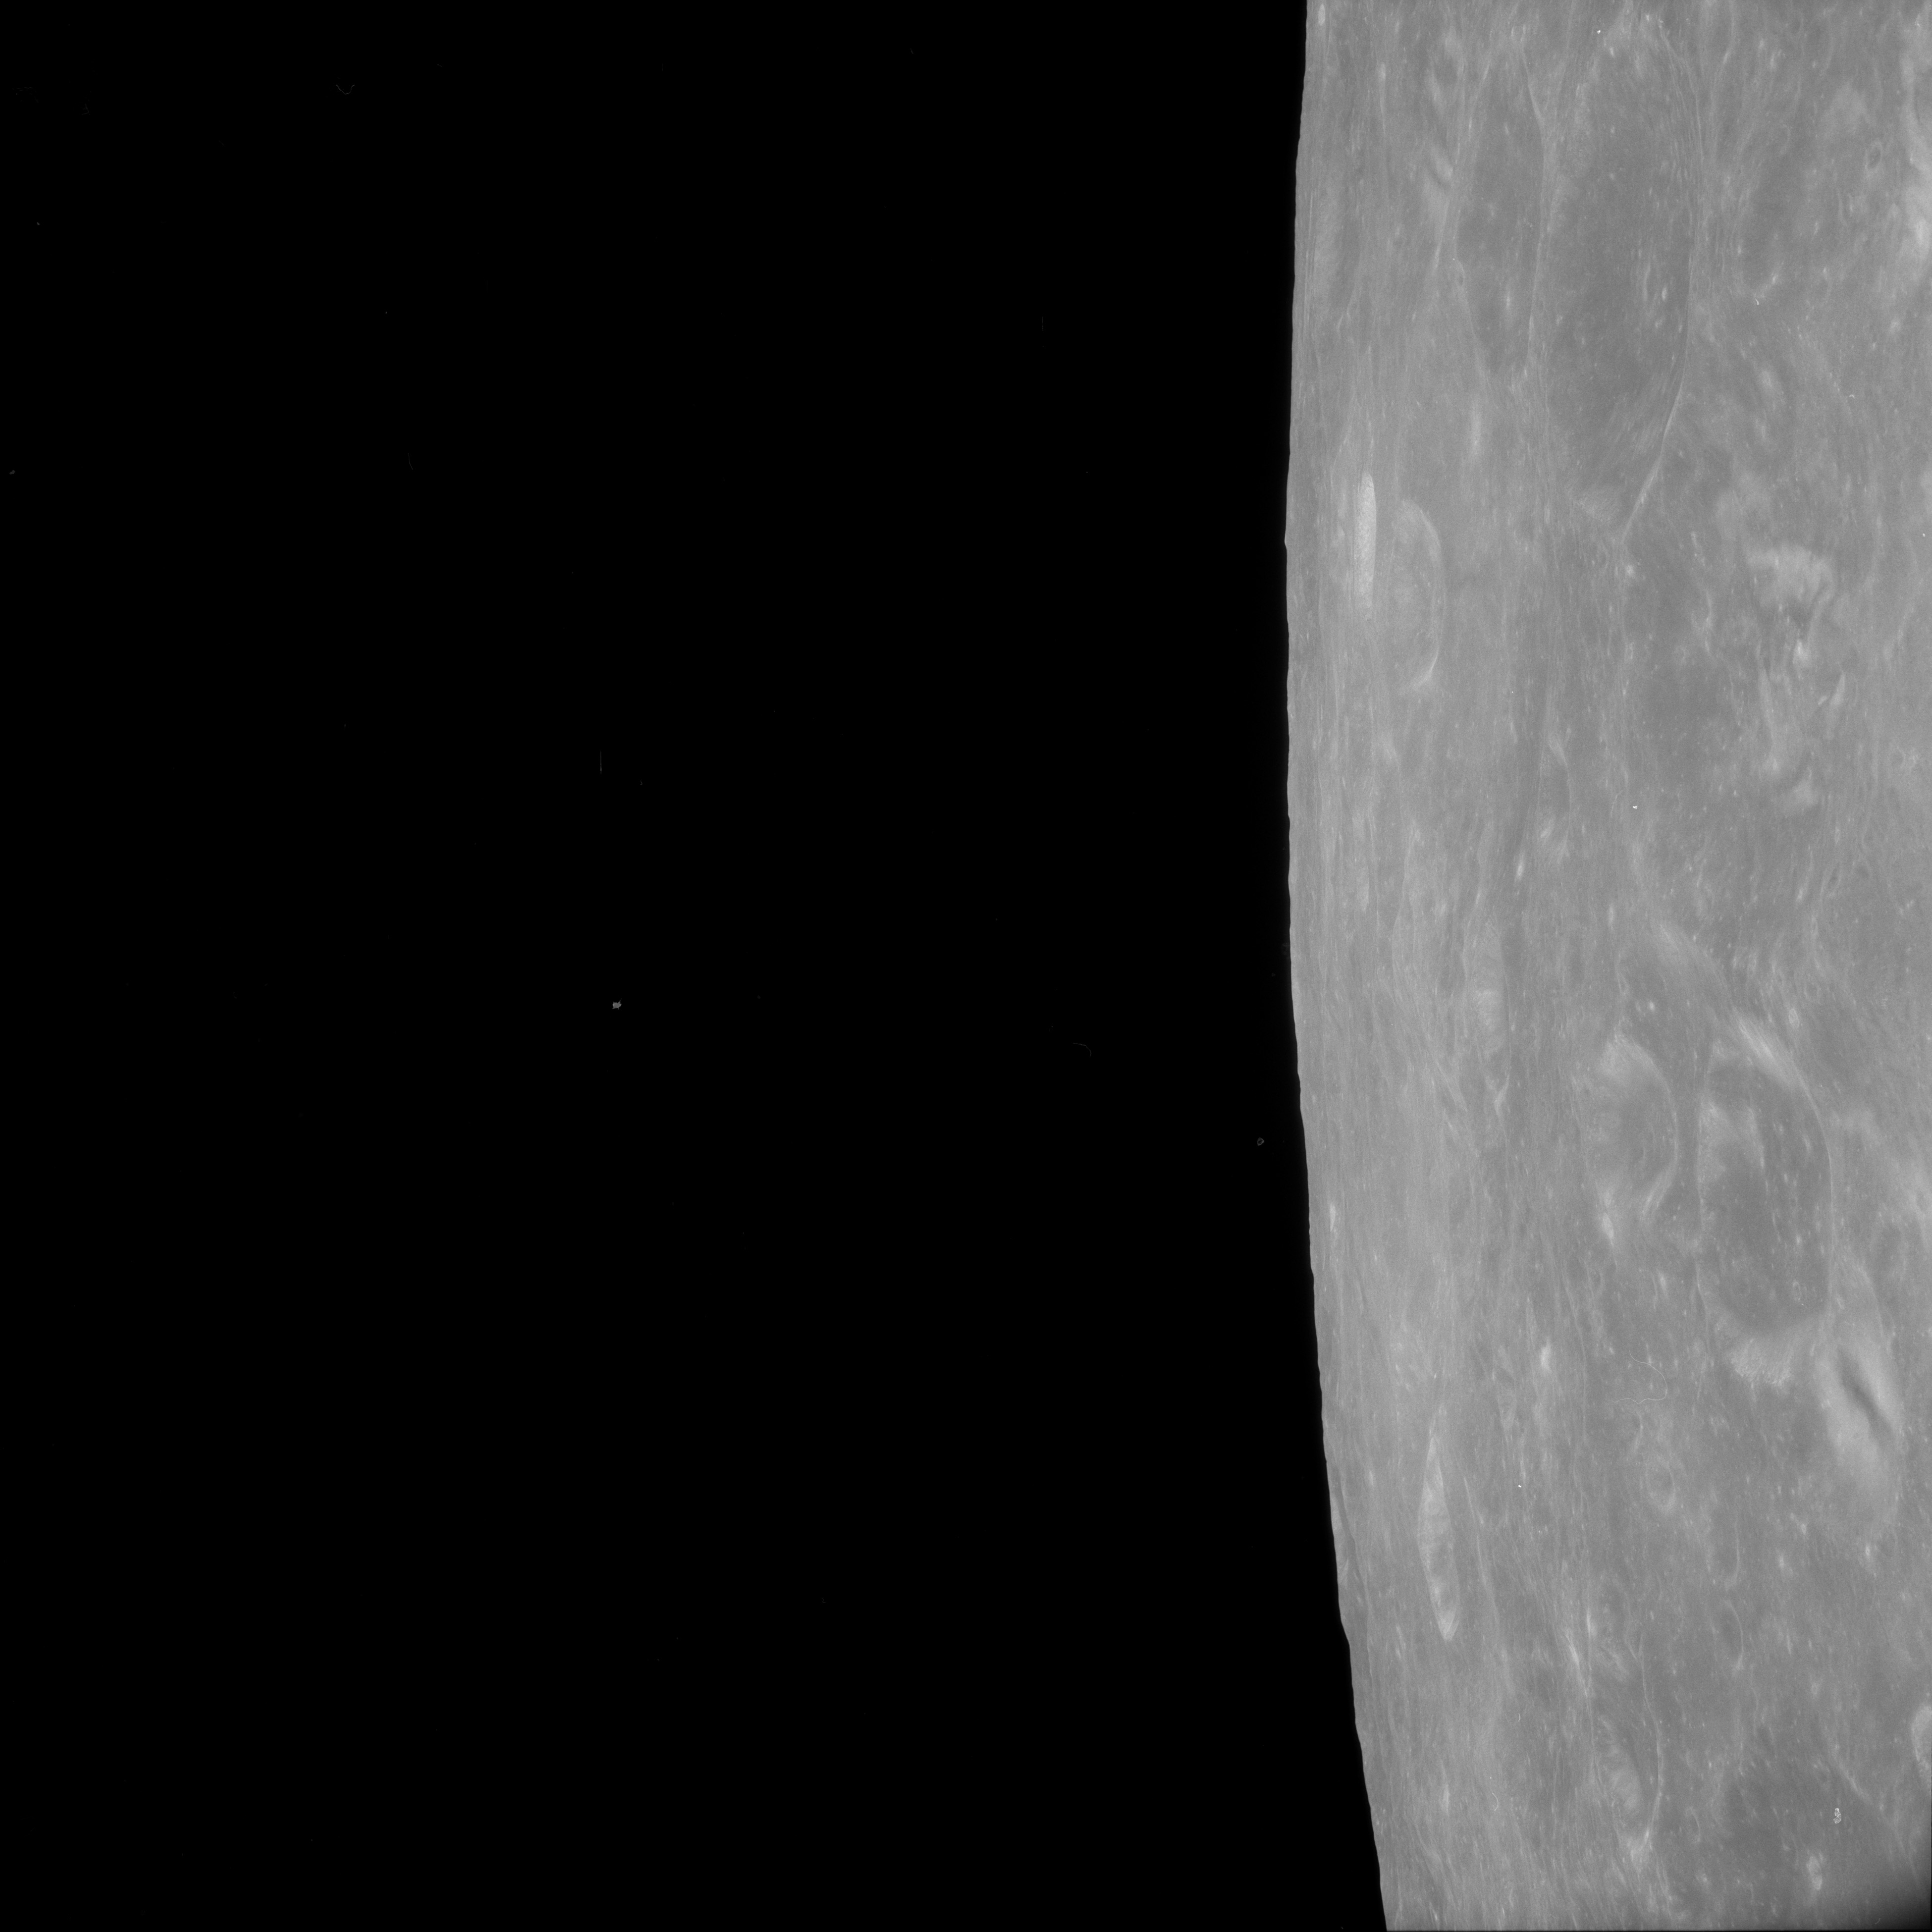
AS11-43-6349 Browse or print resolution. Crater Al-Khwarizmi K. Image credit: Image Science and Analysis Laboratory, NASA-Johnson Space Center. |

|
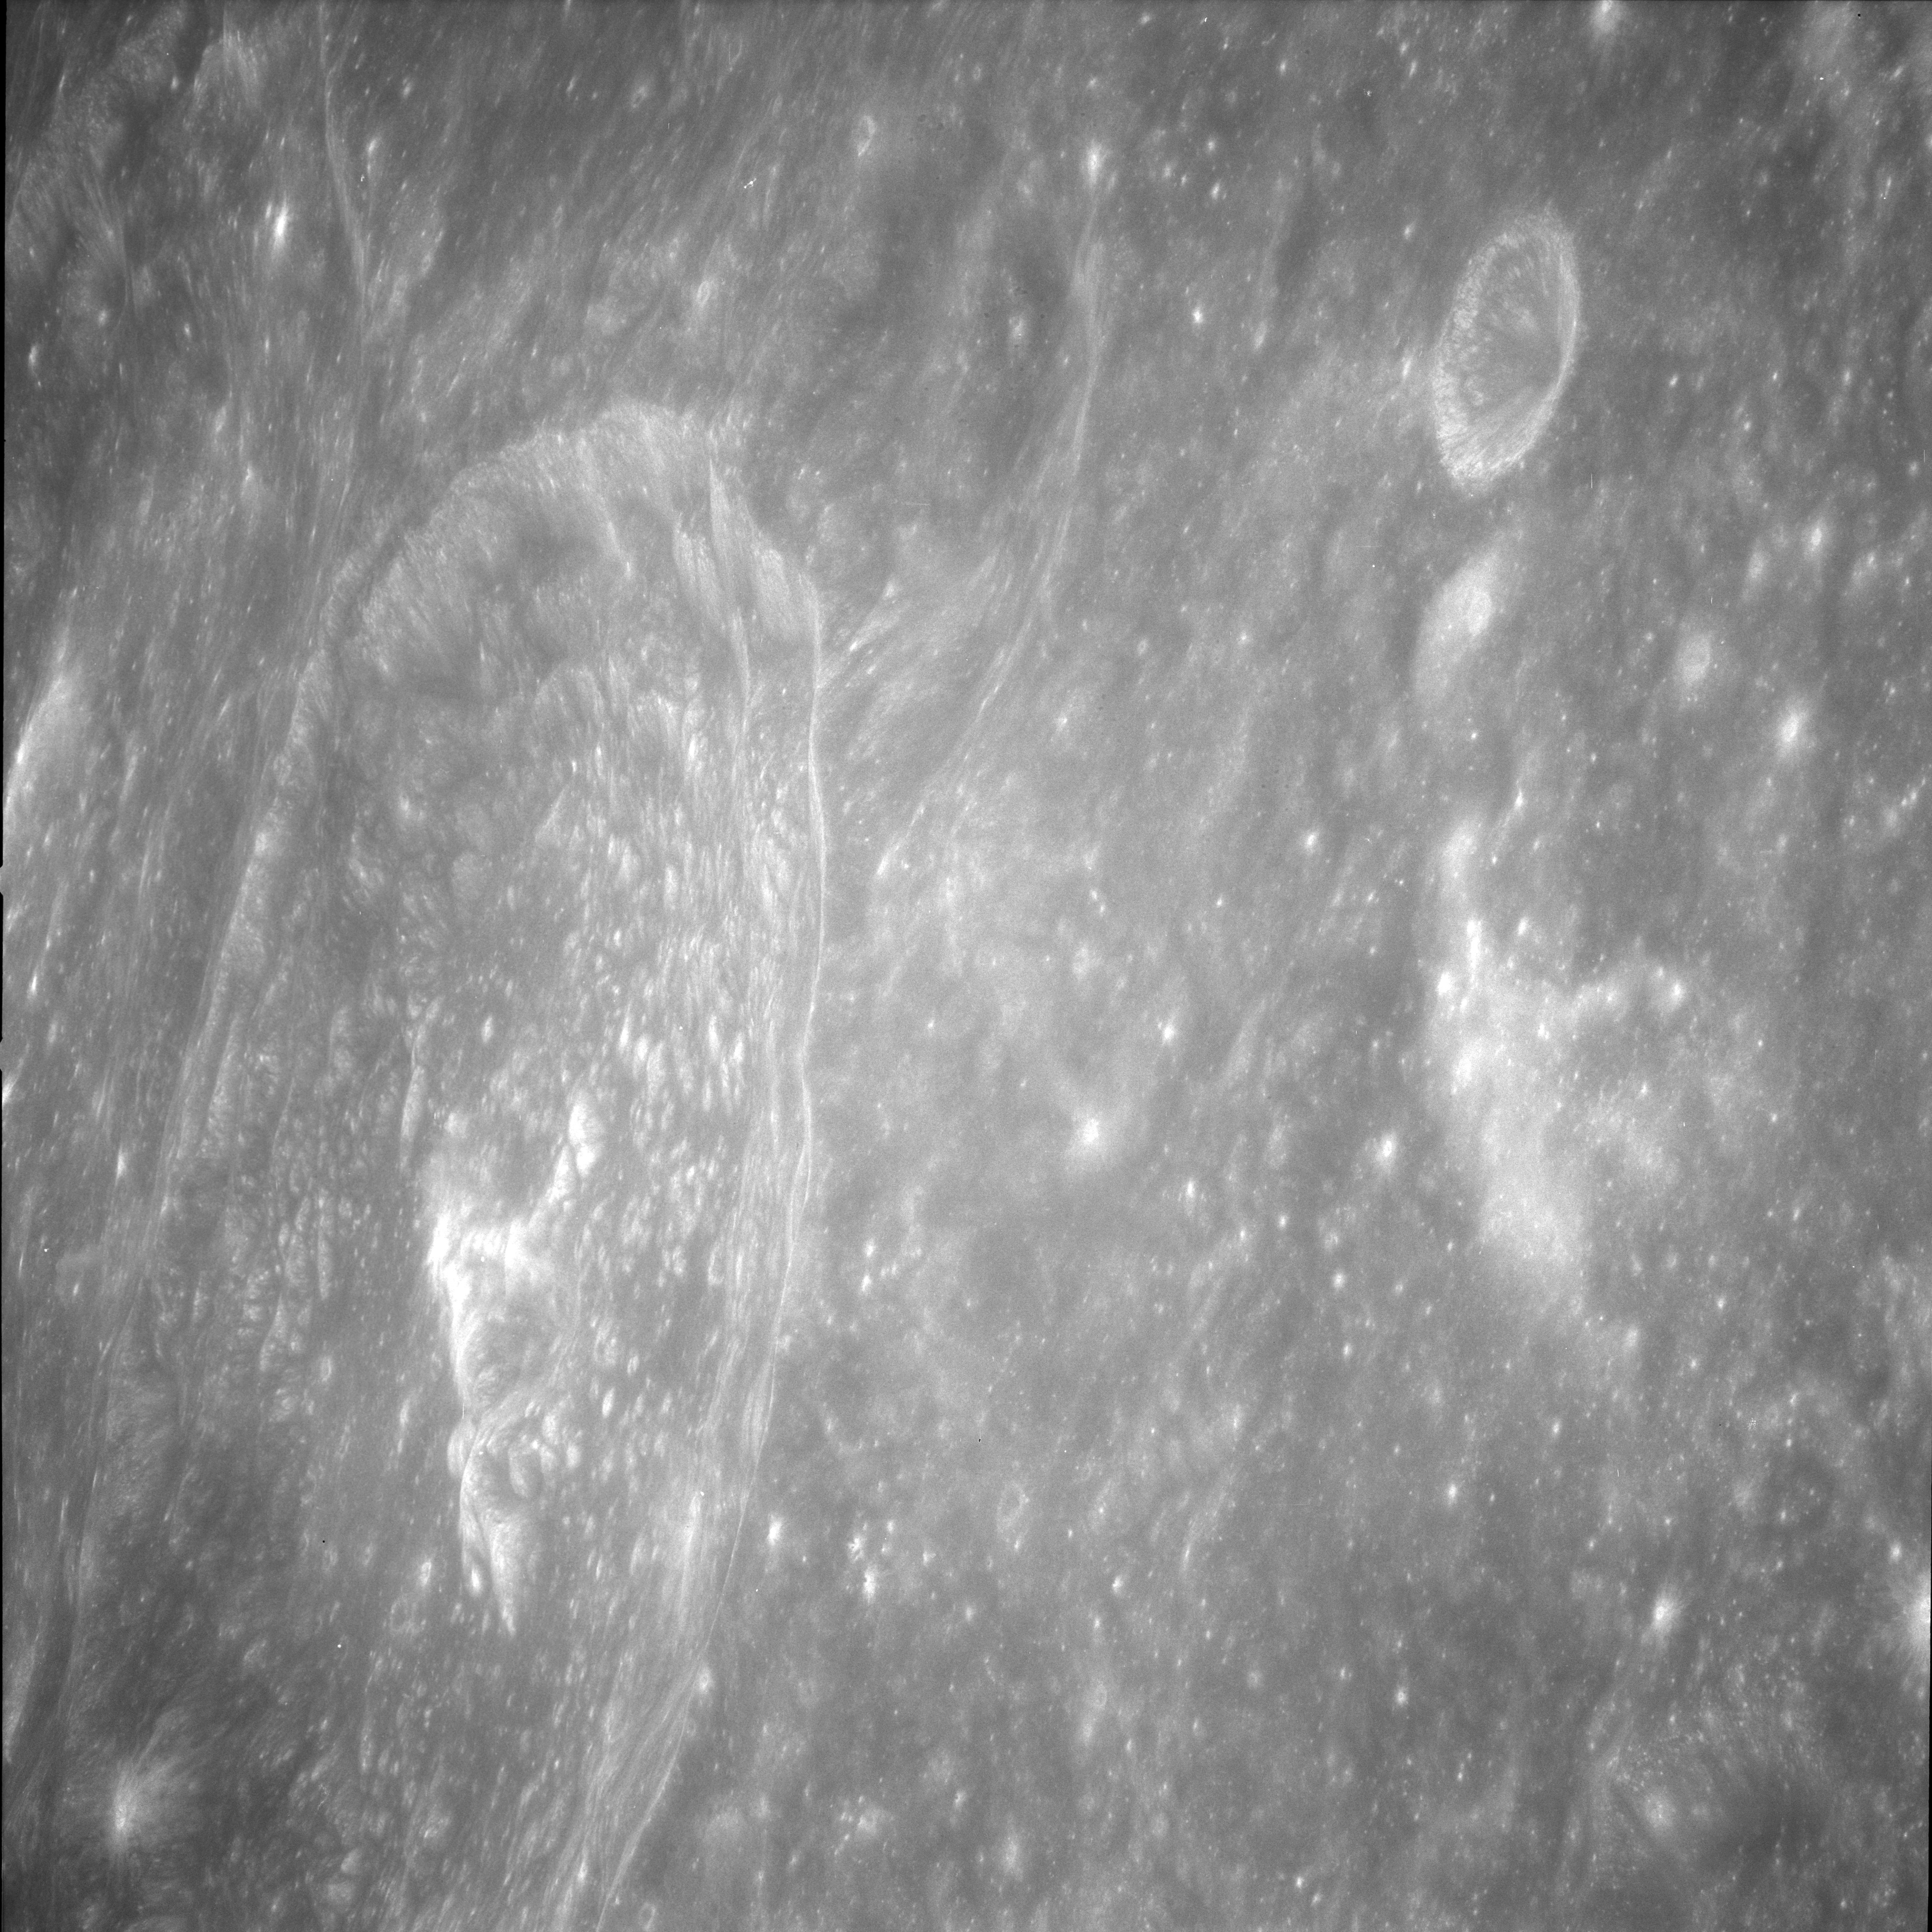
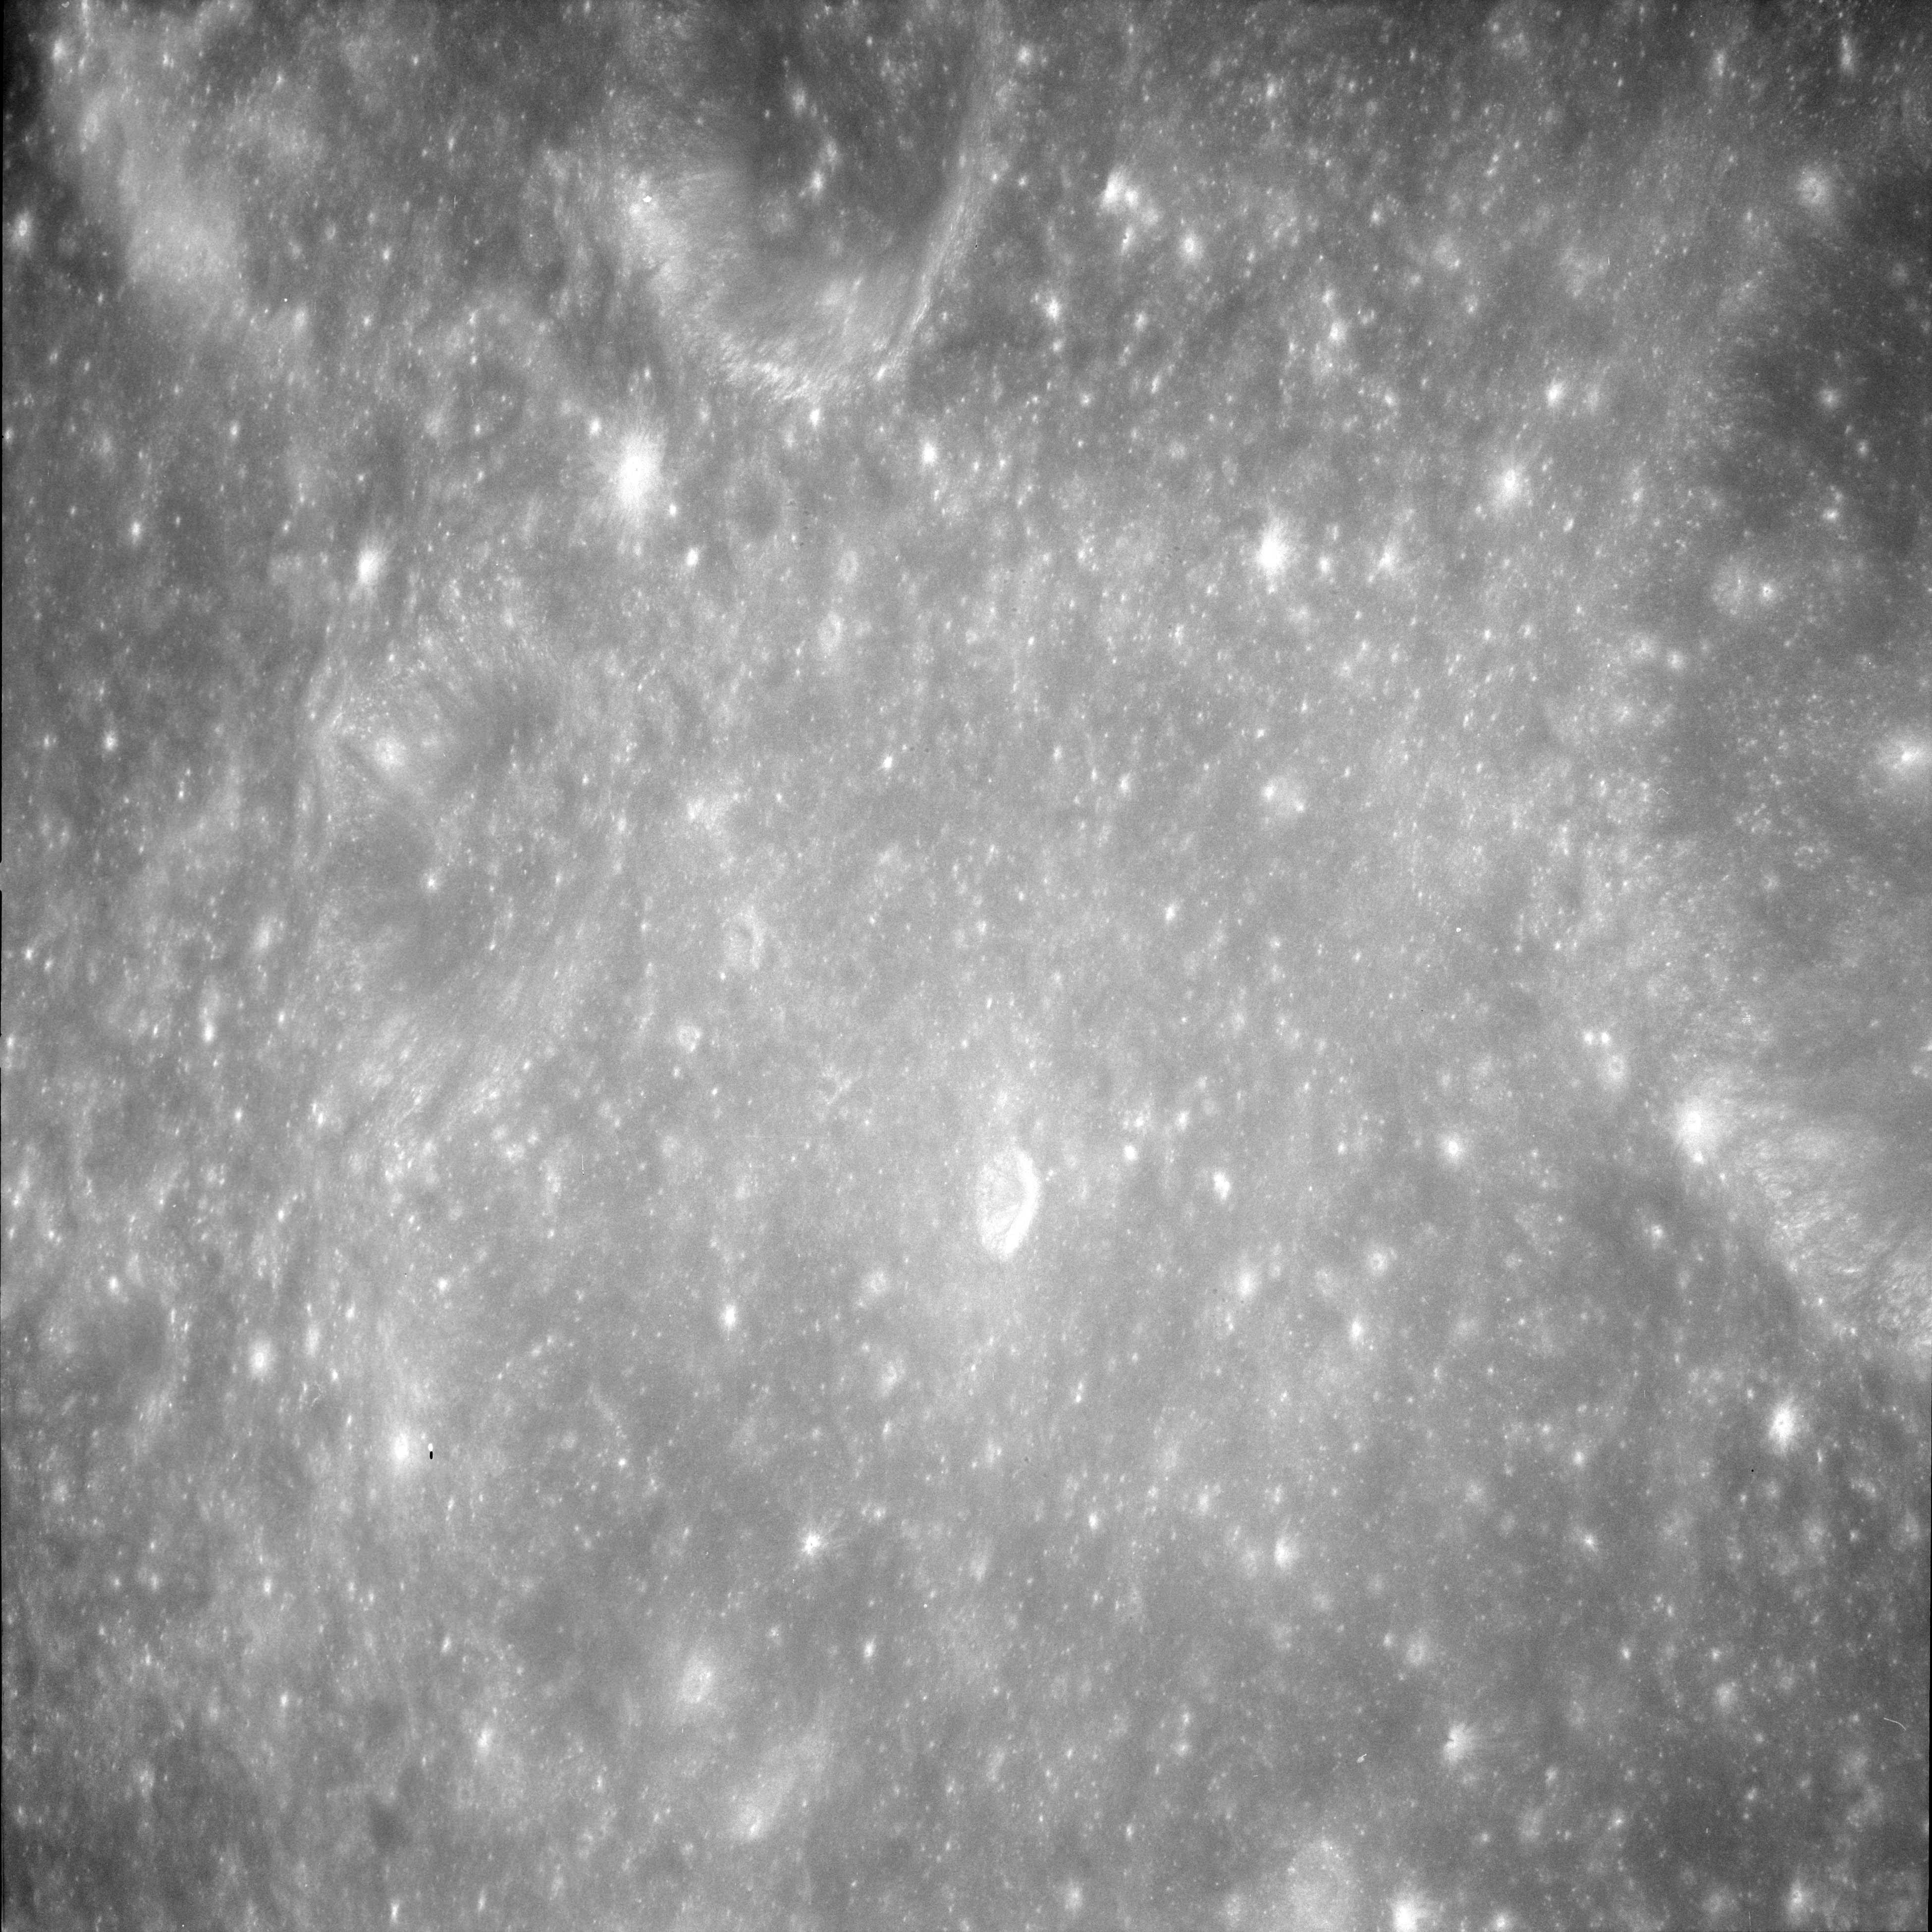
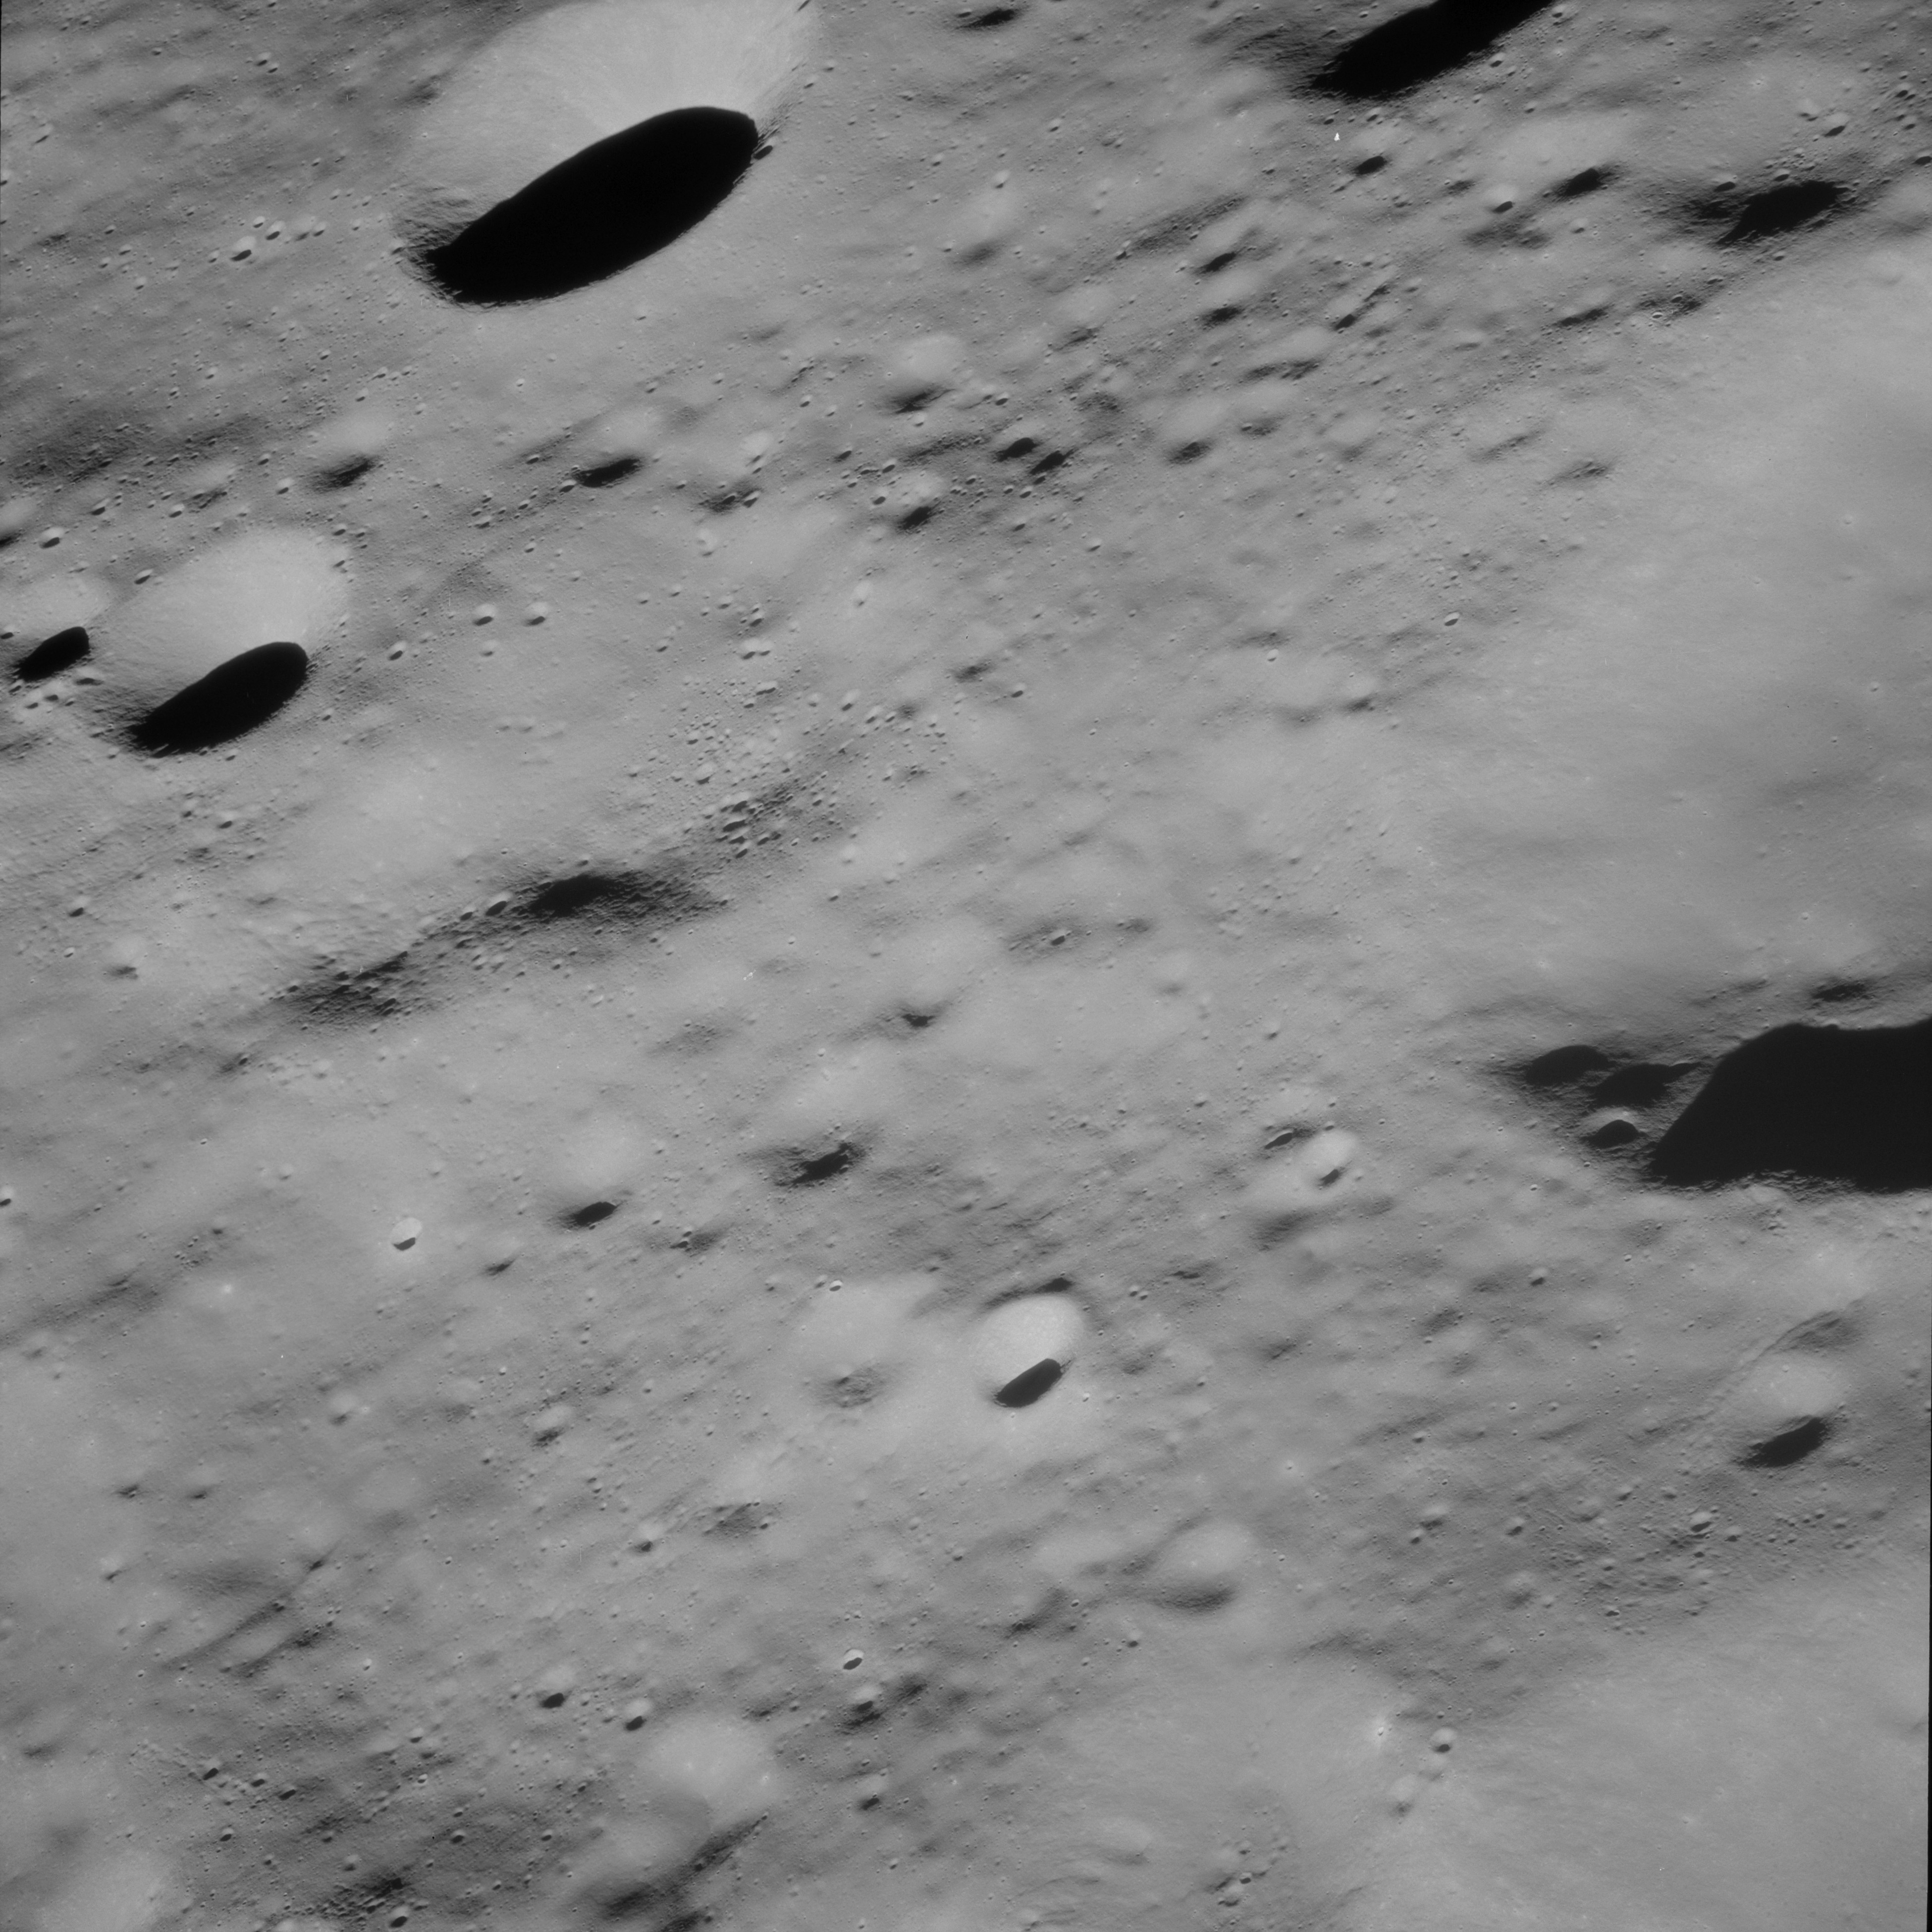
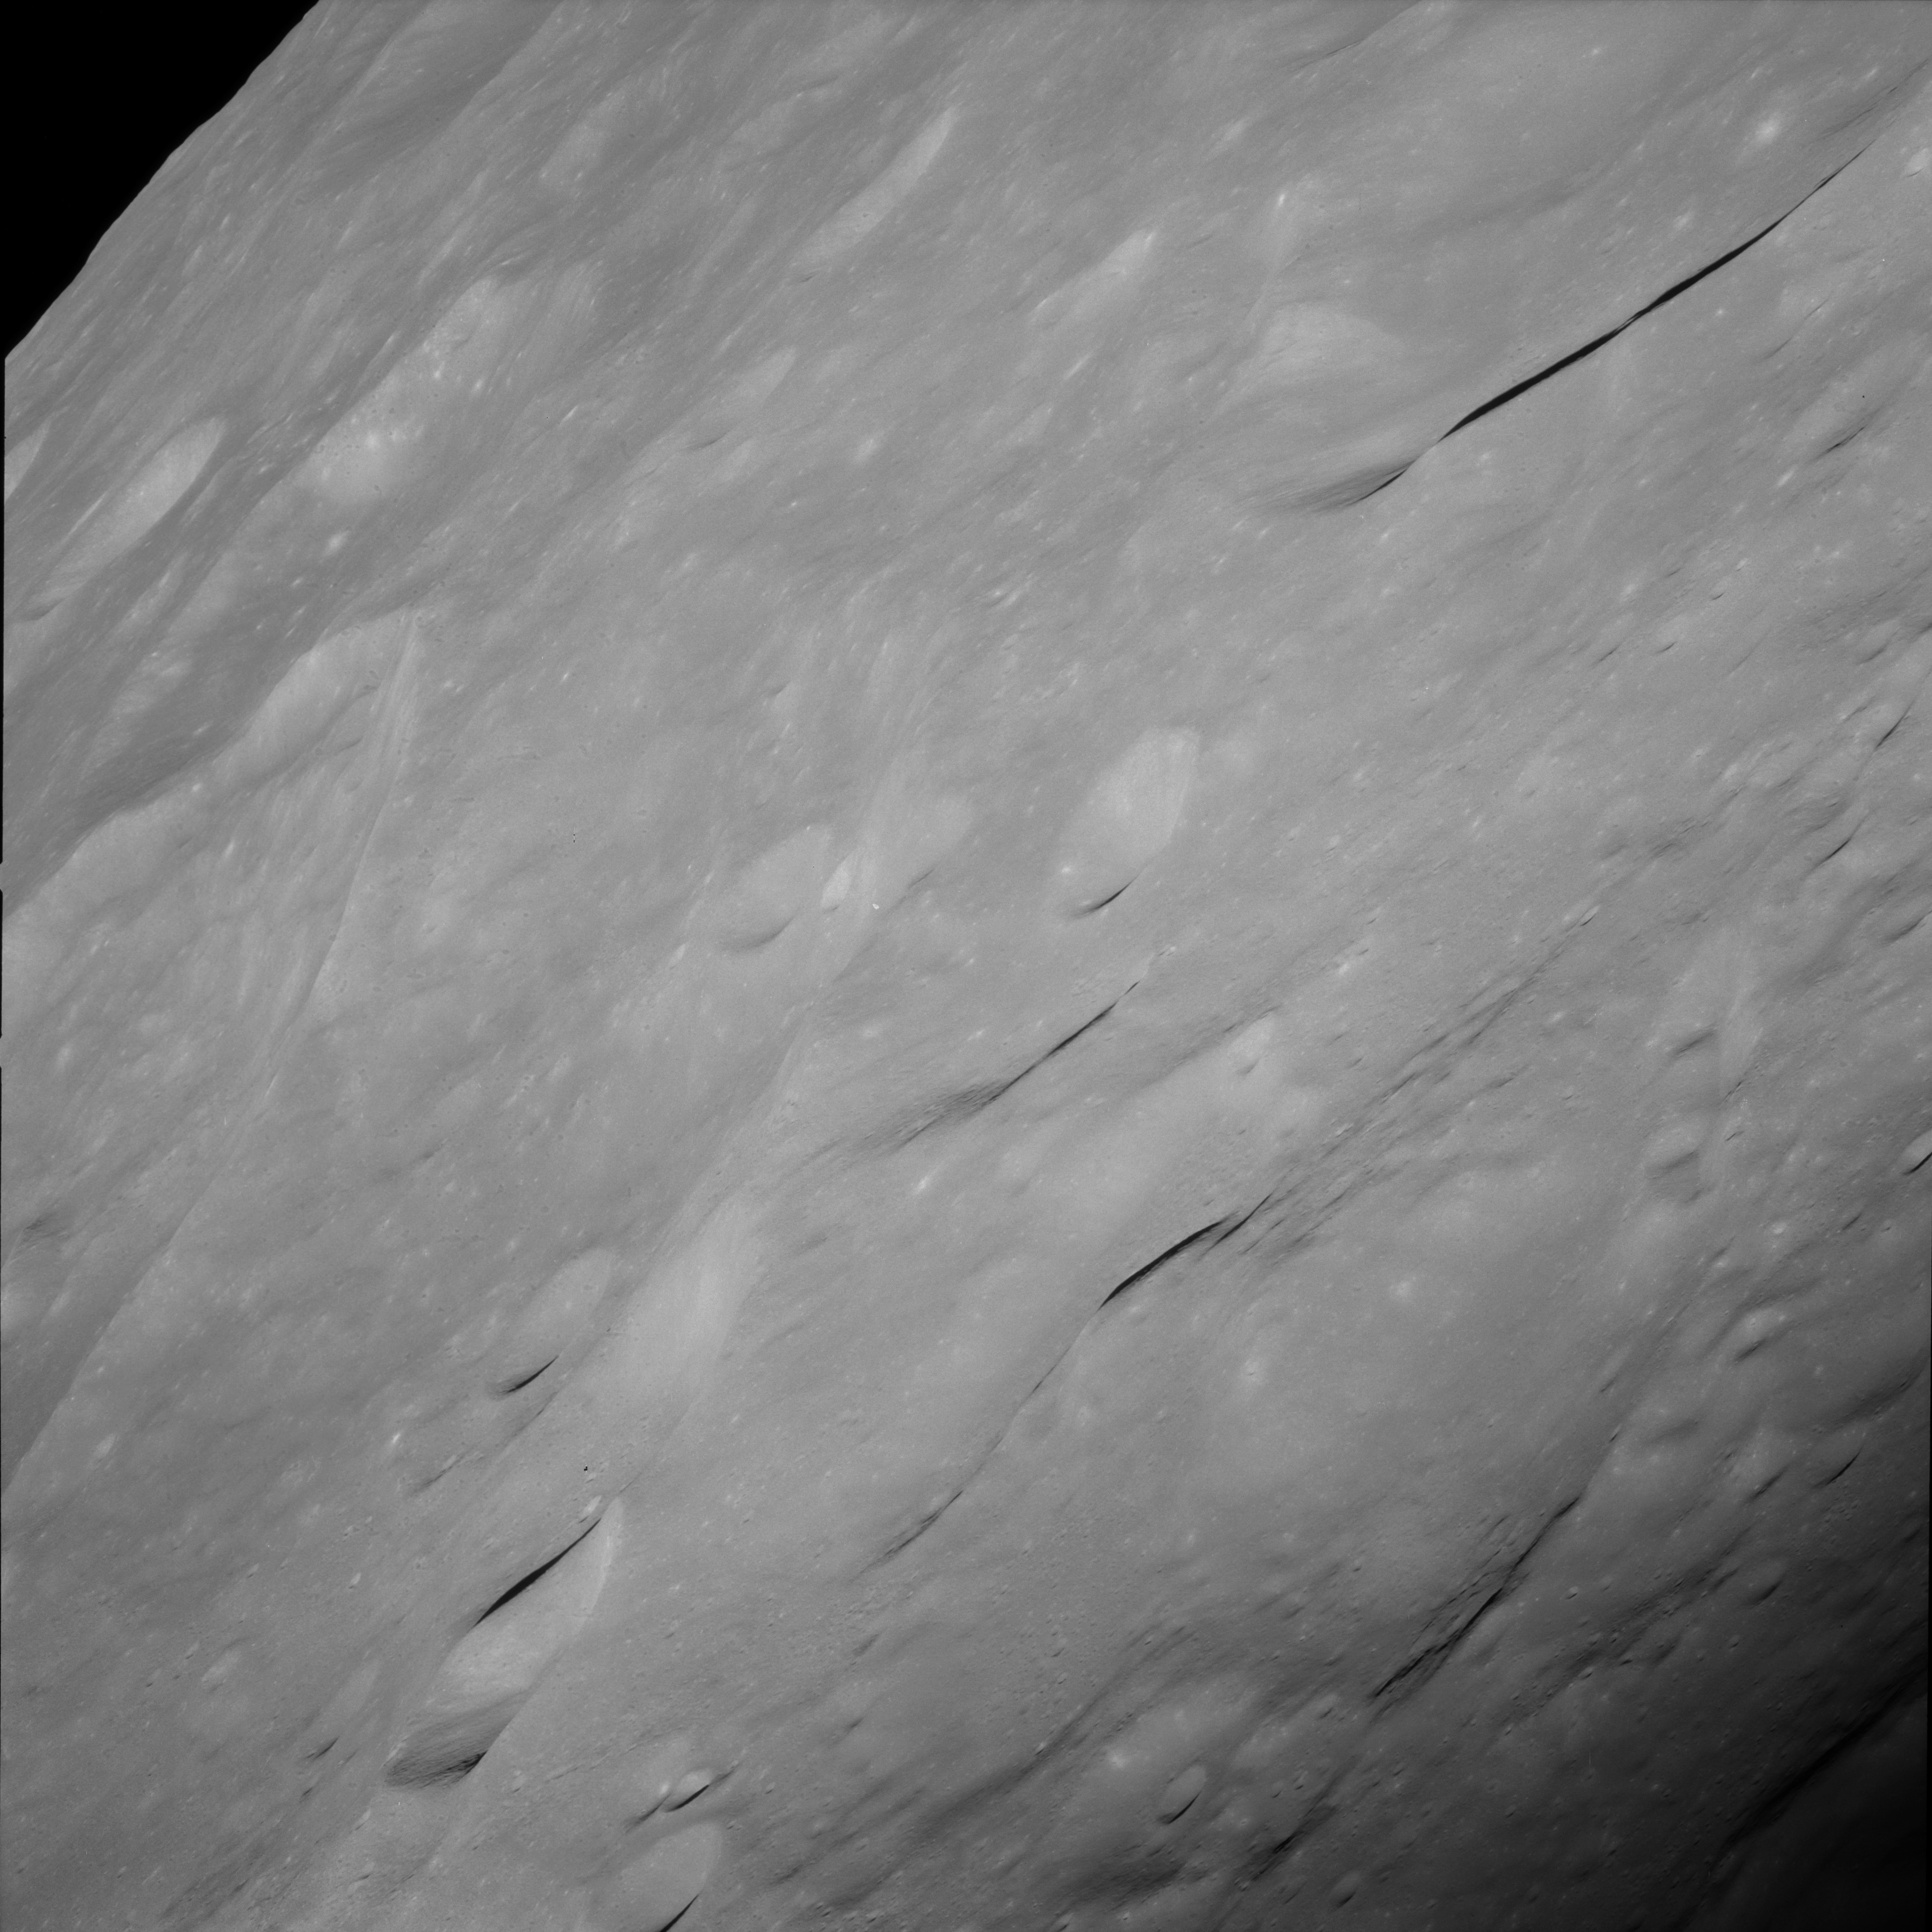
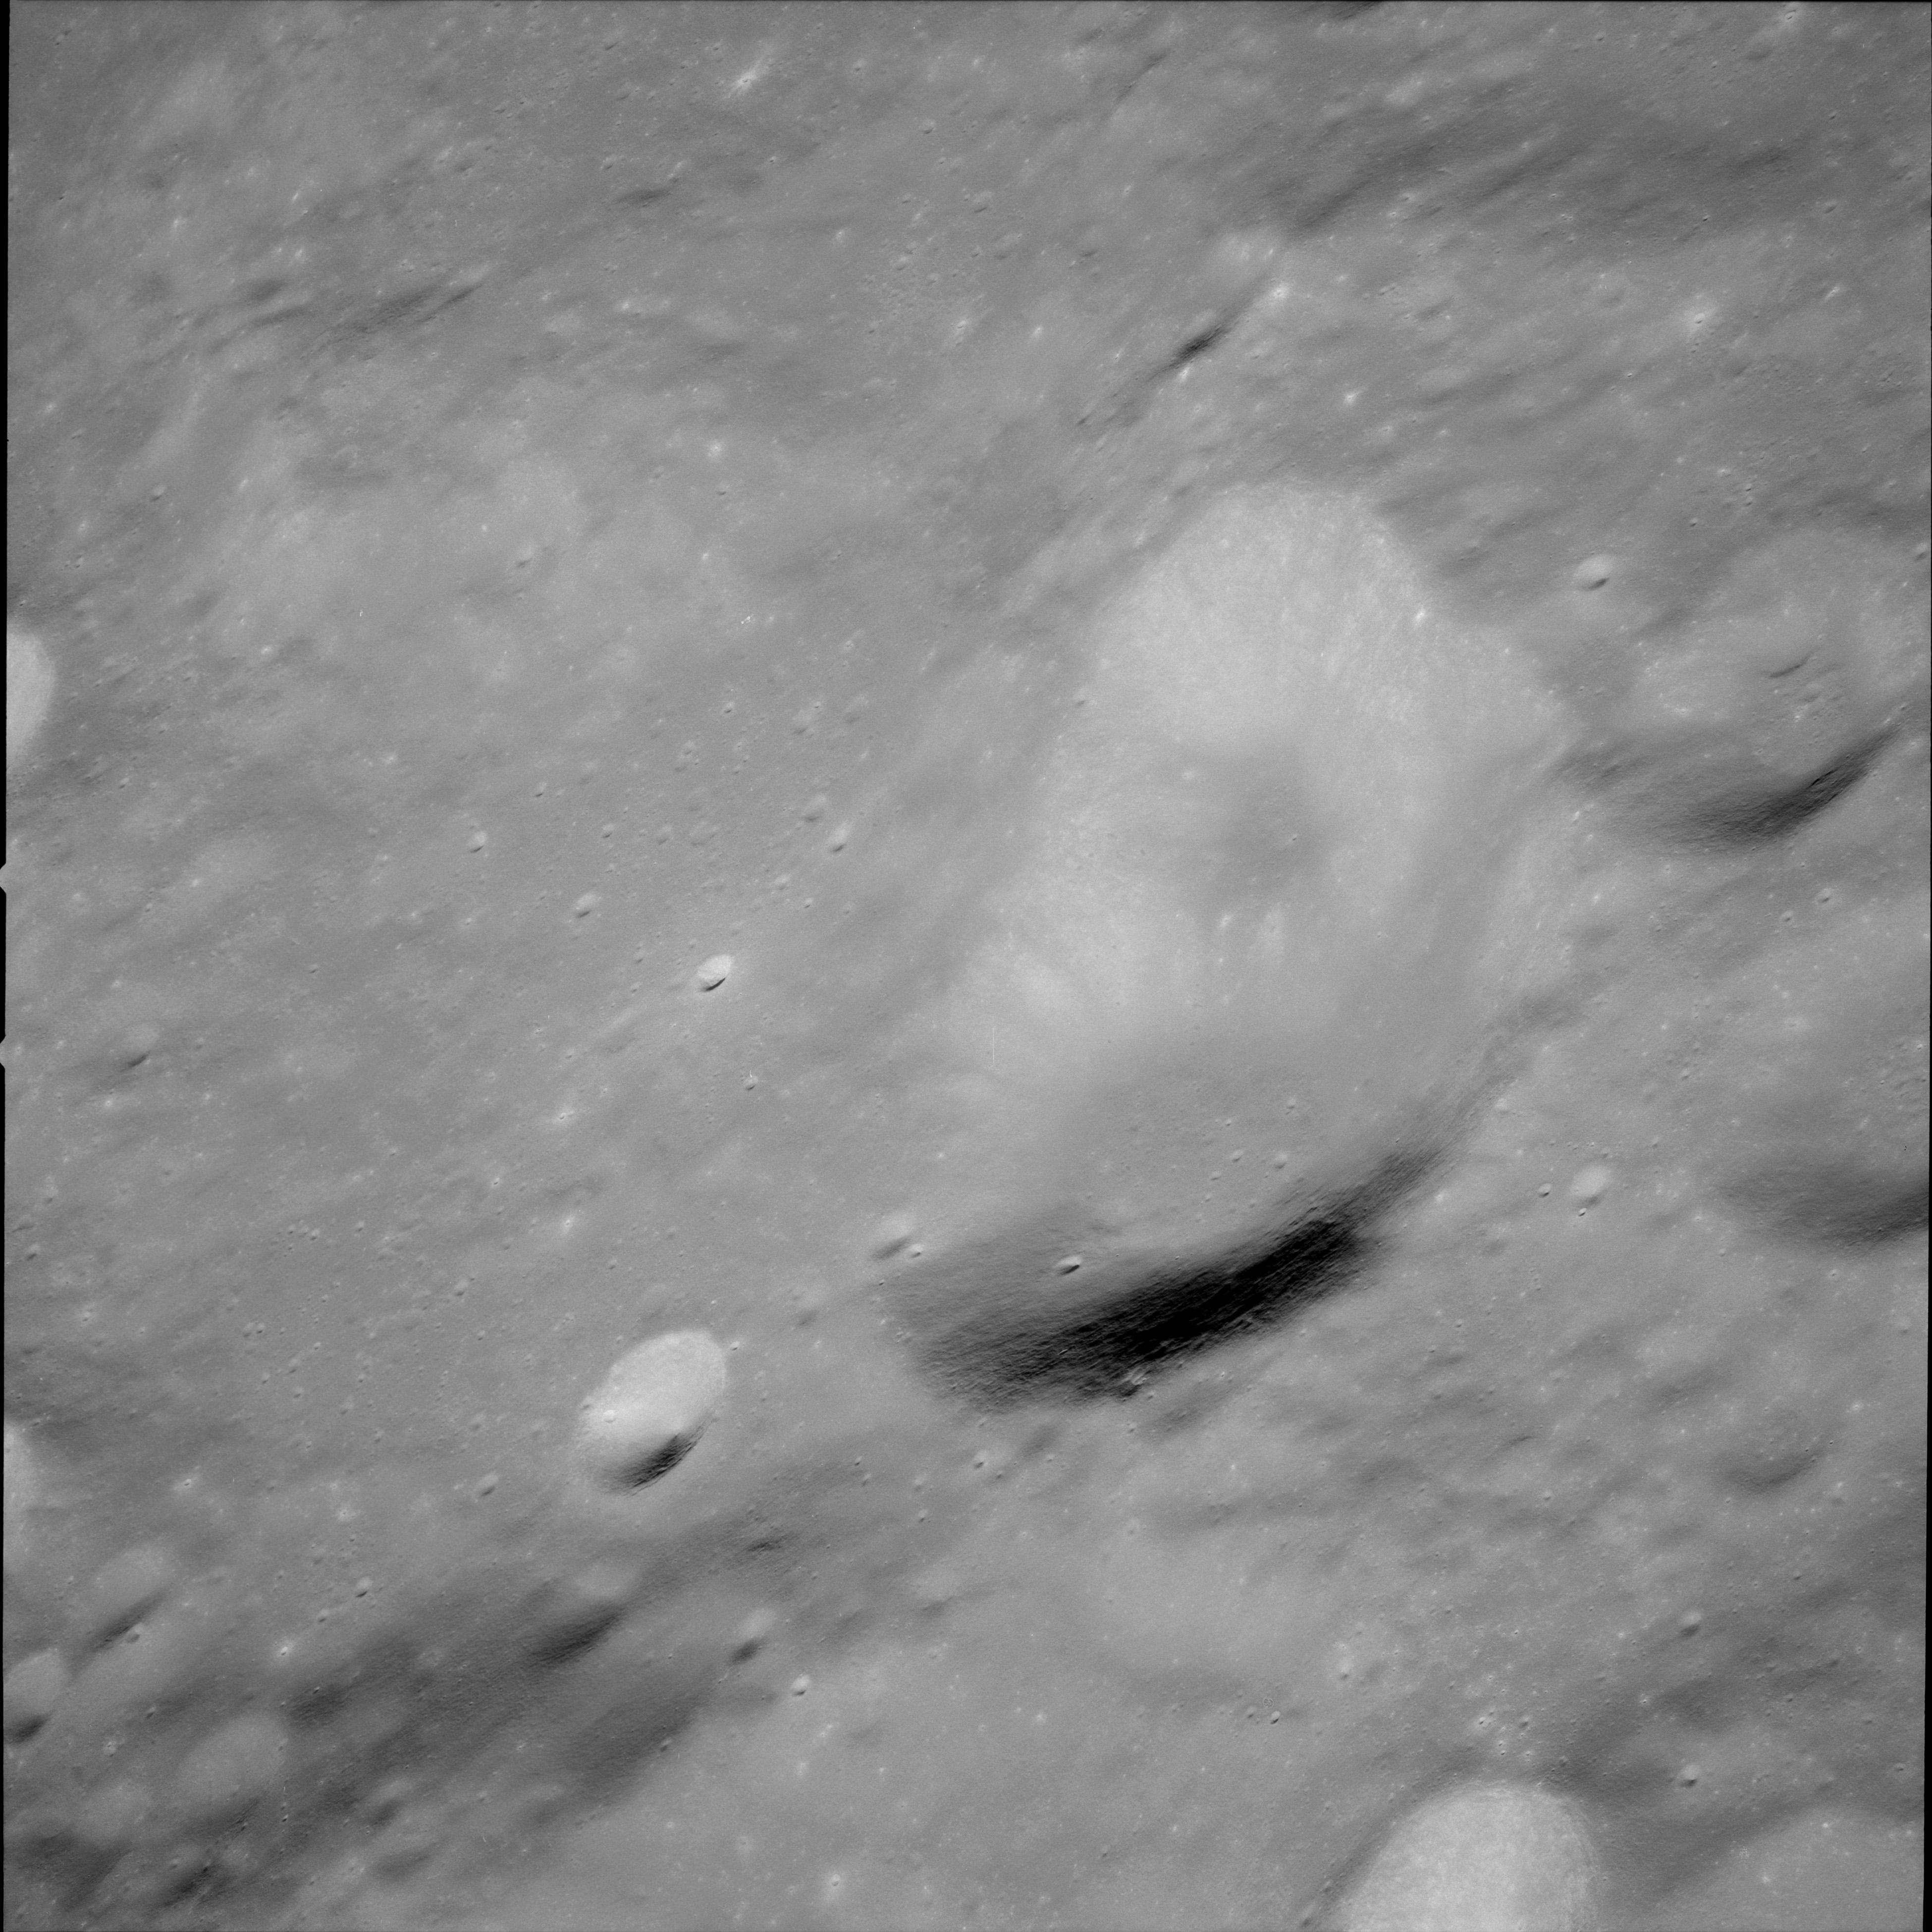
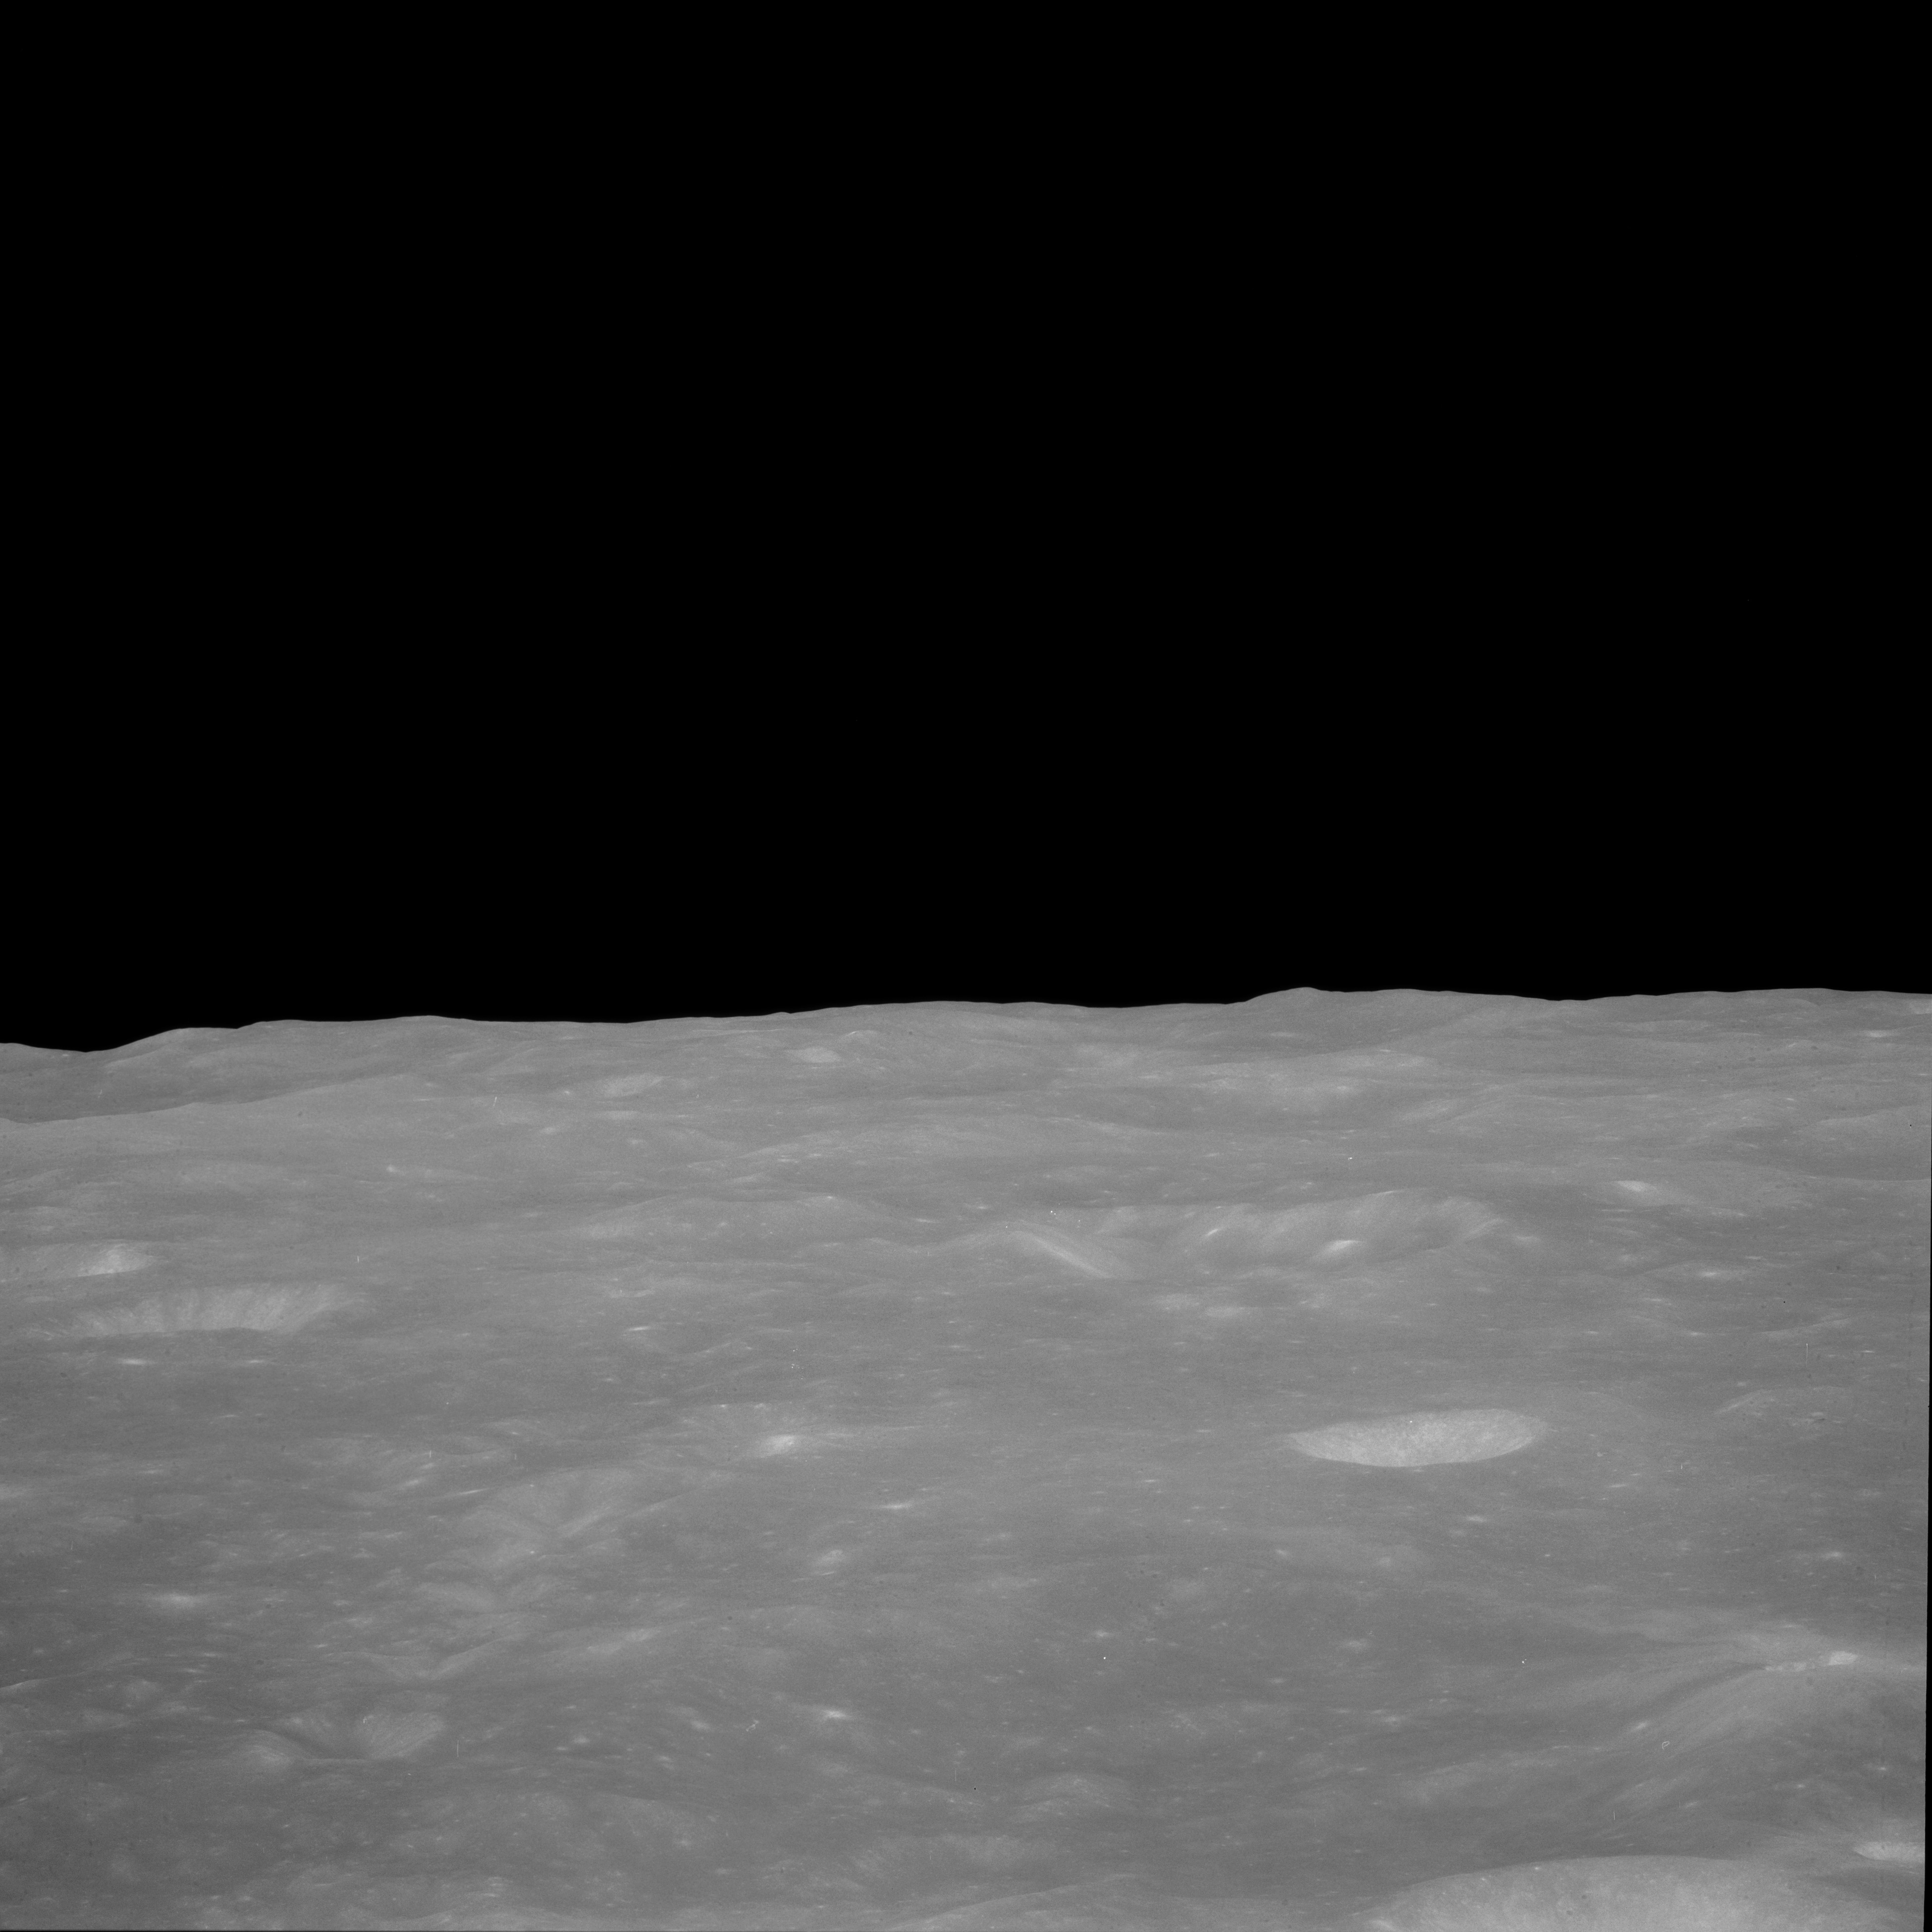
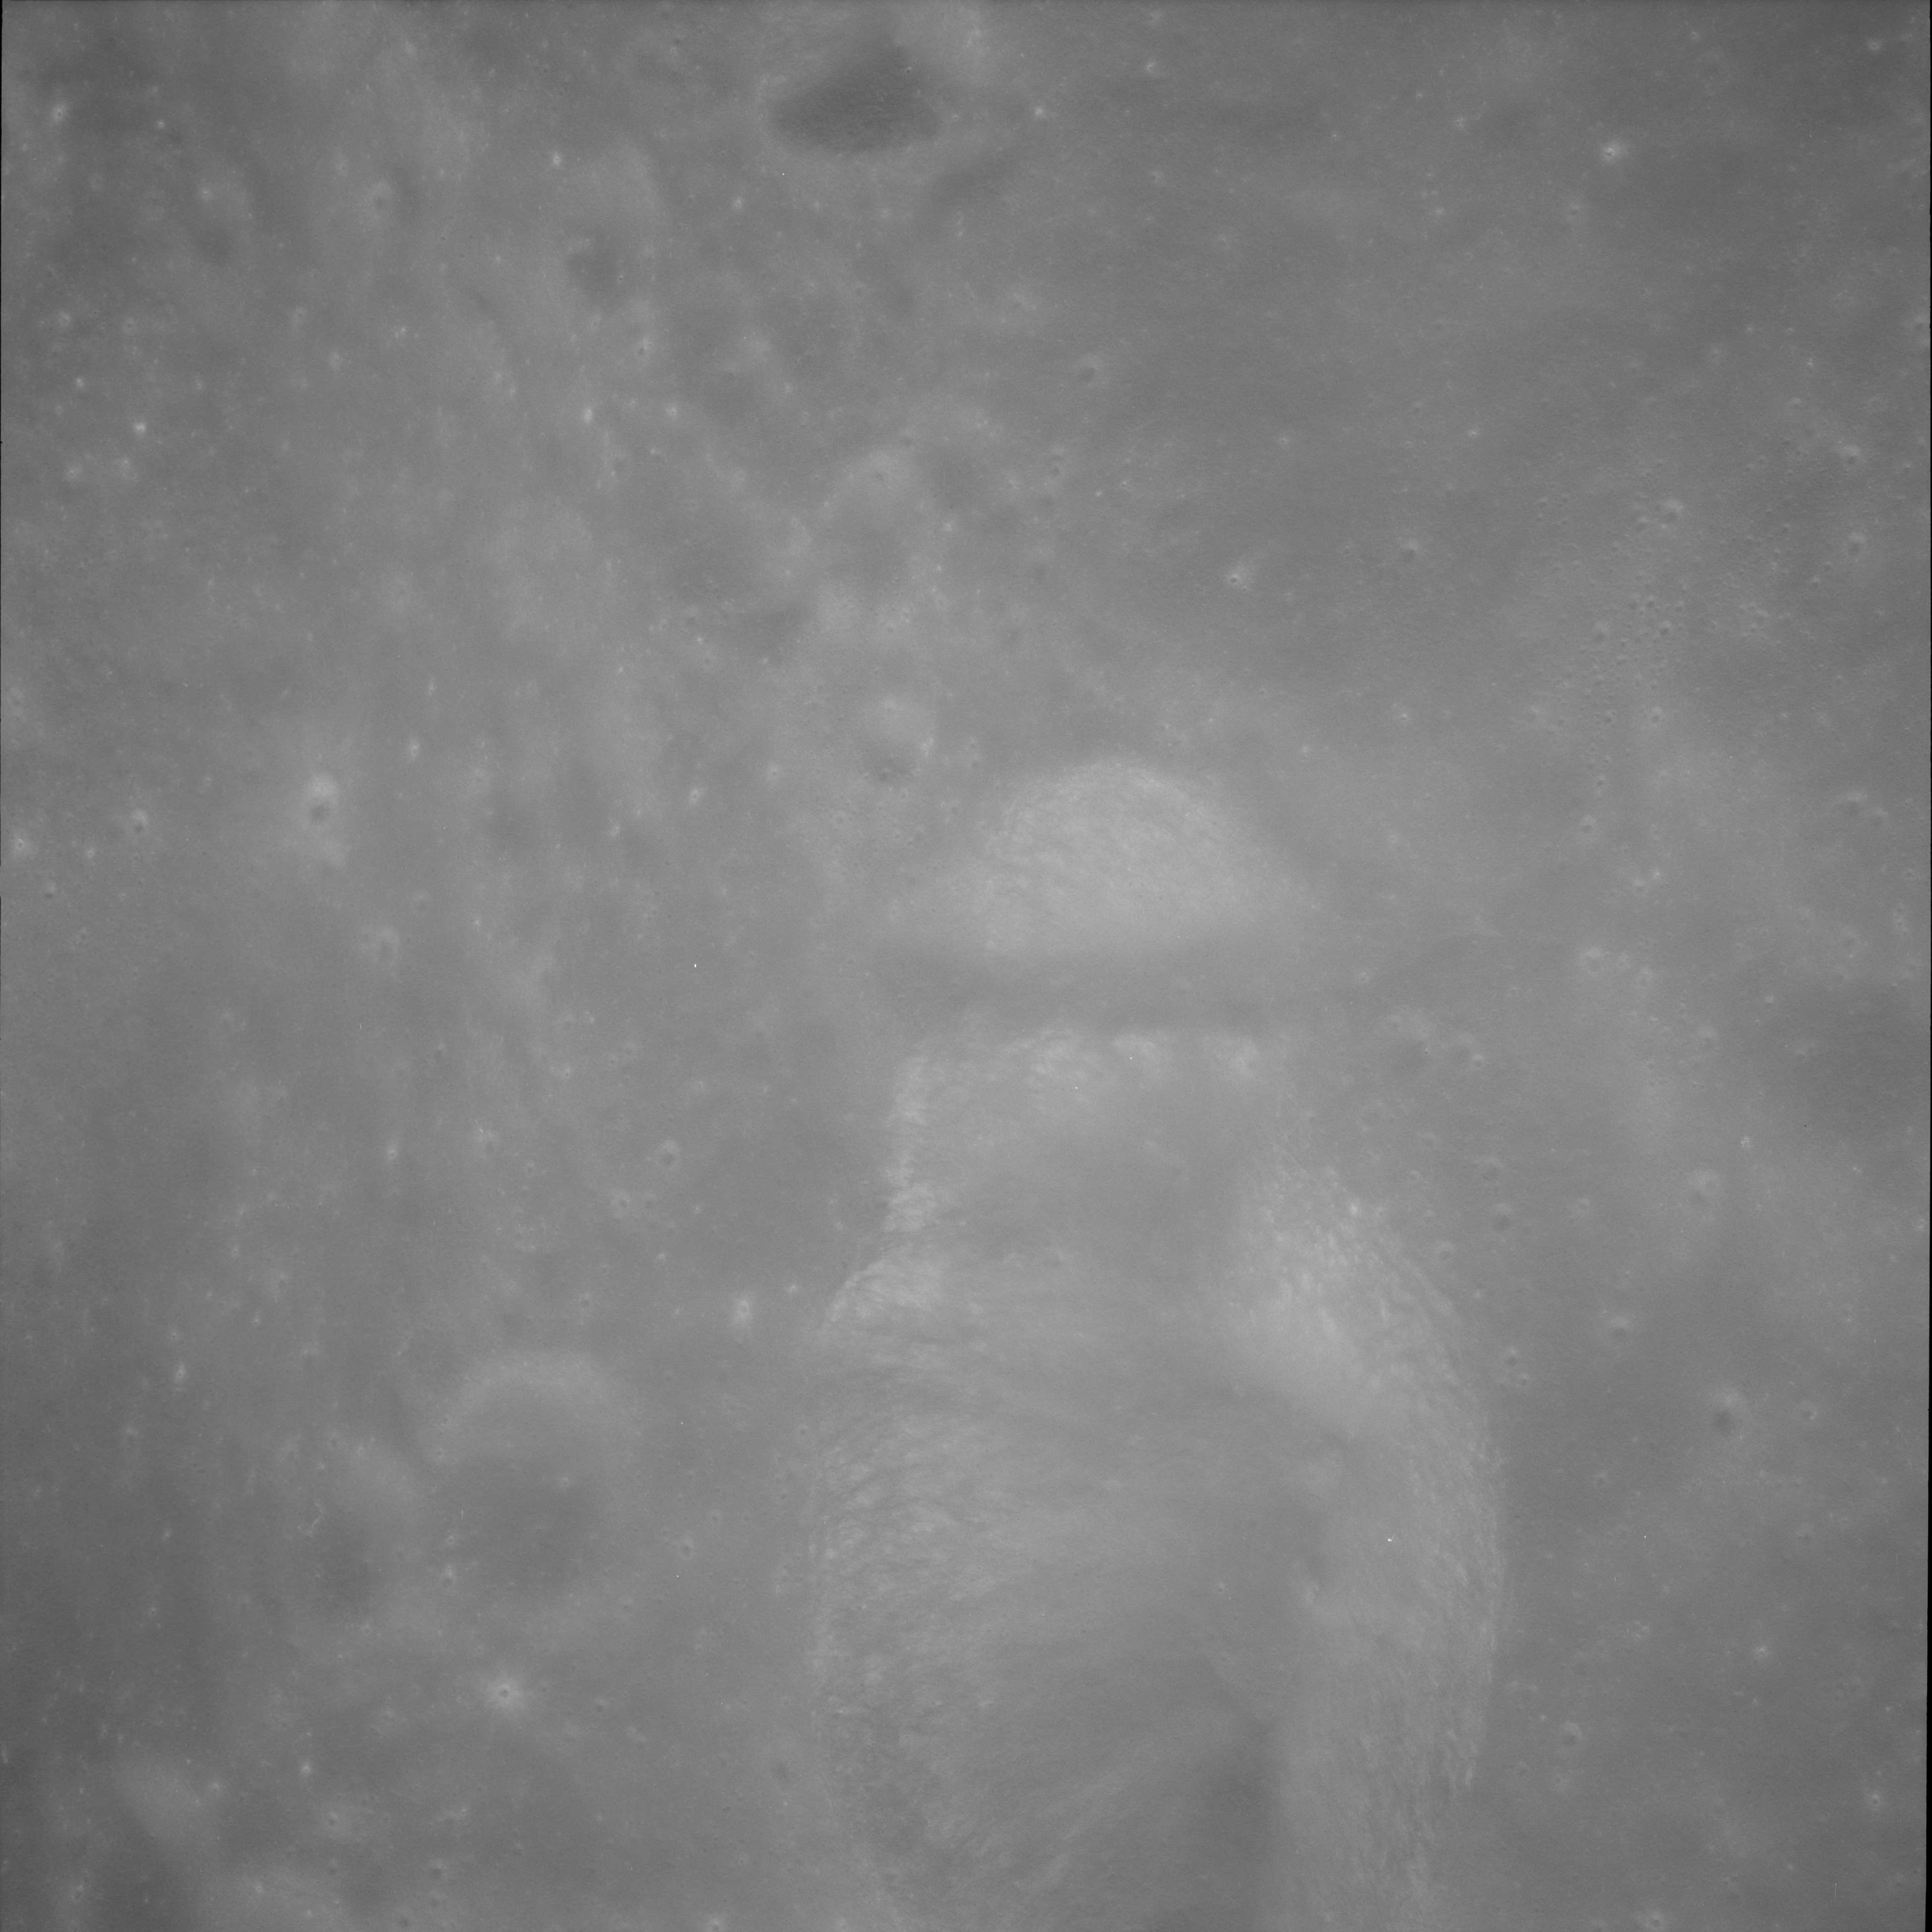
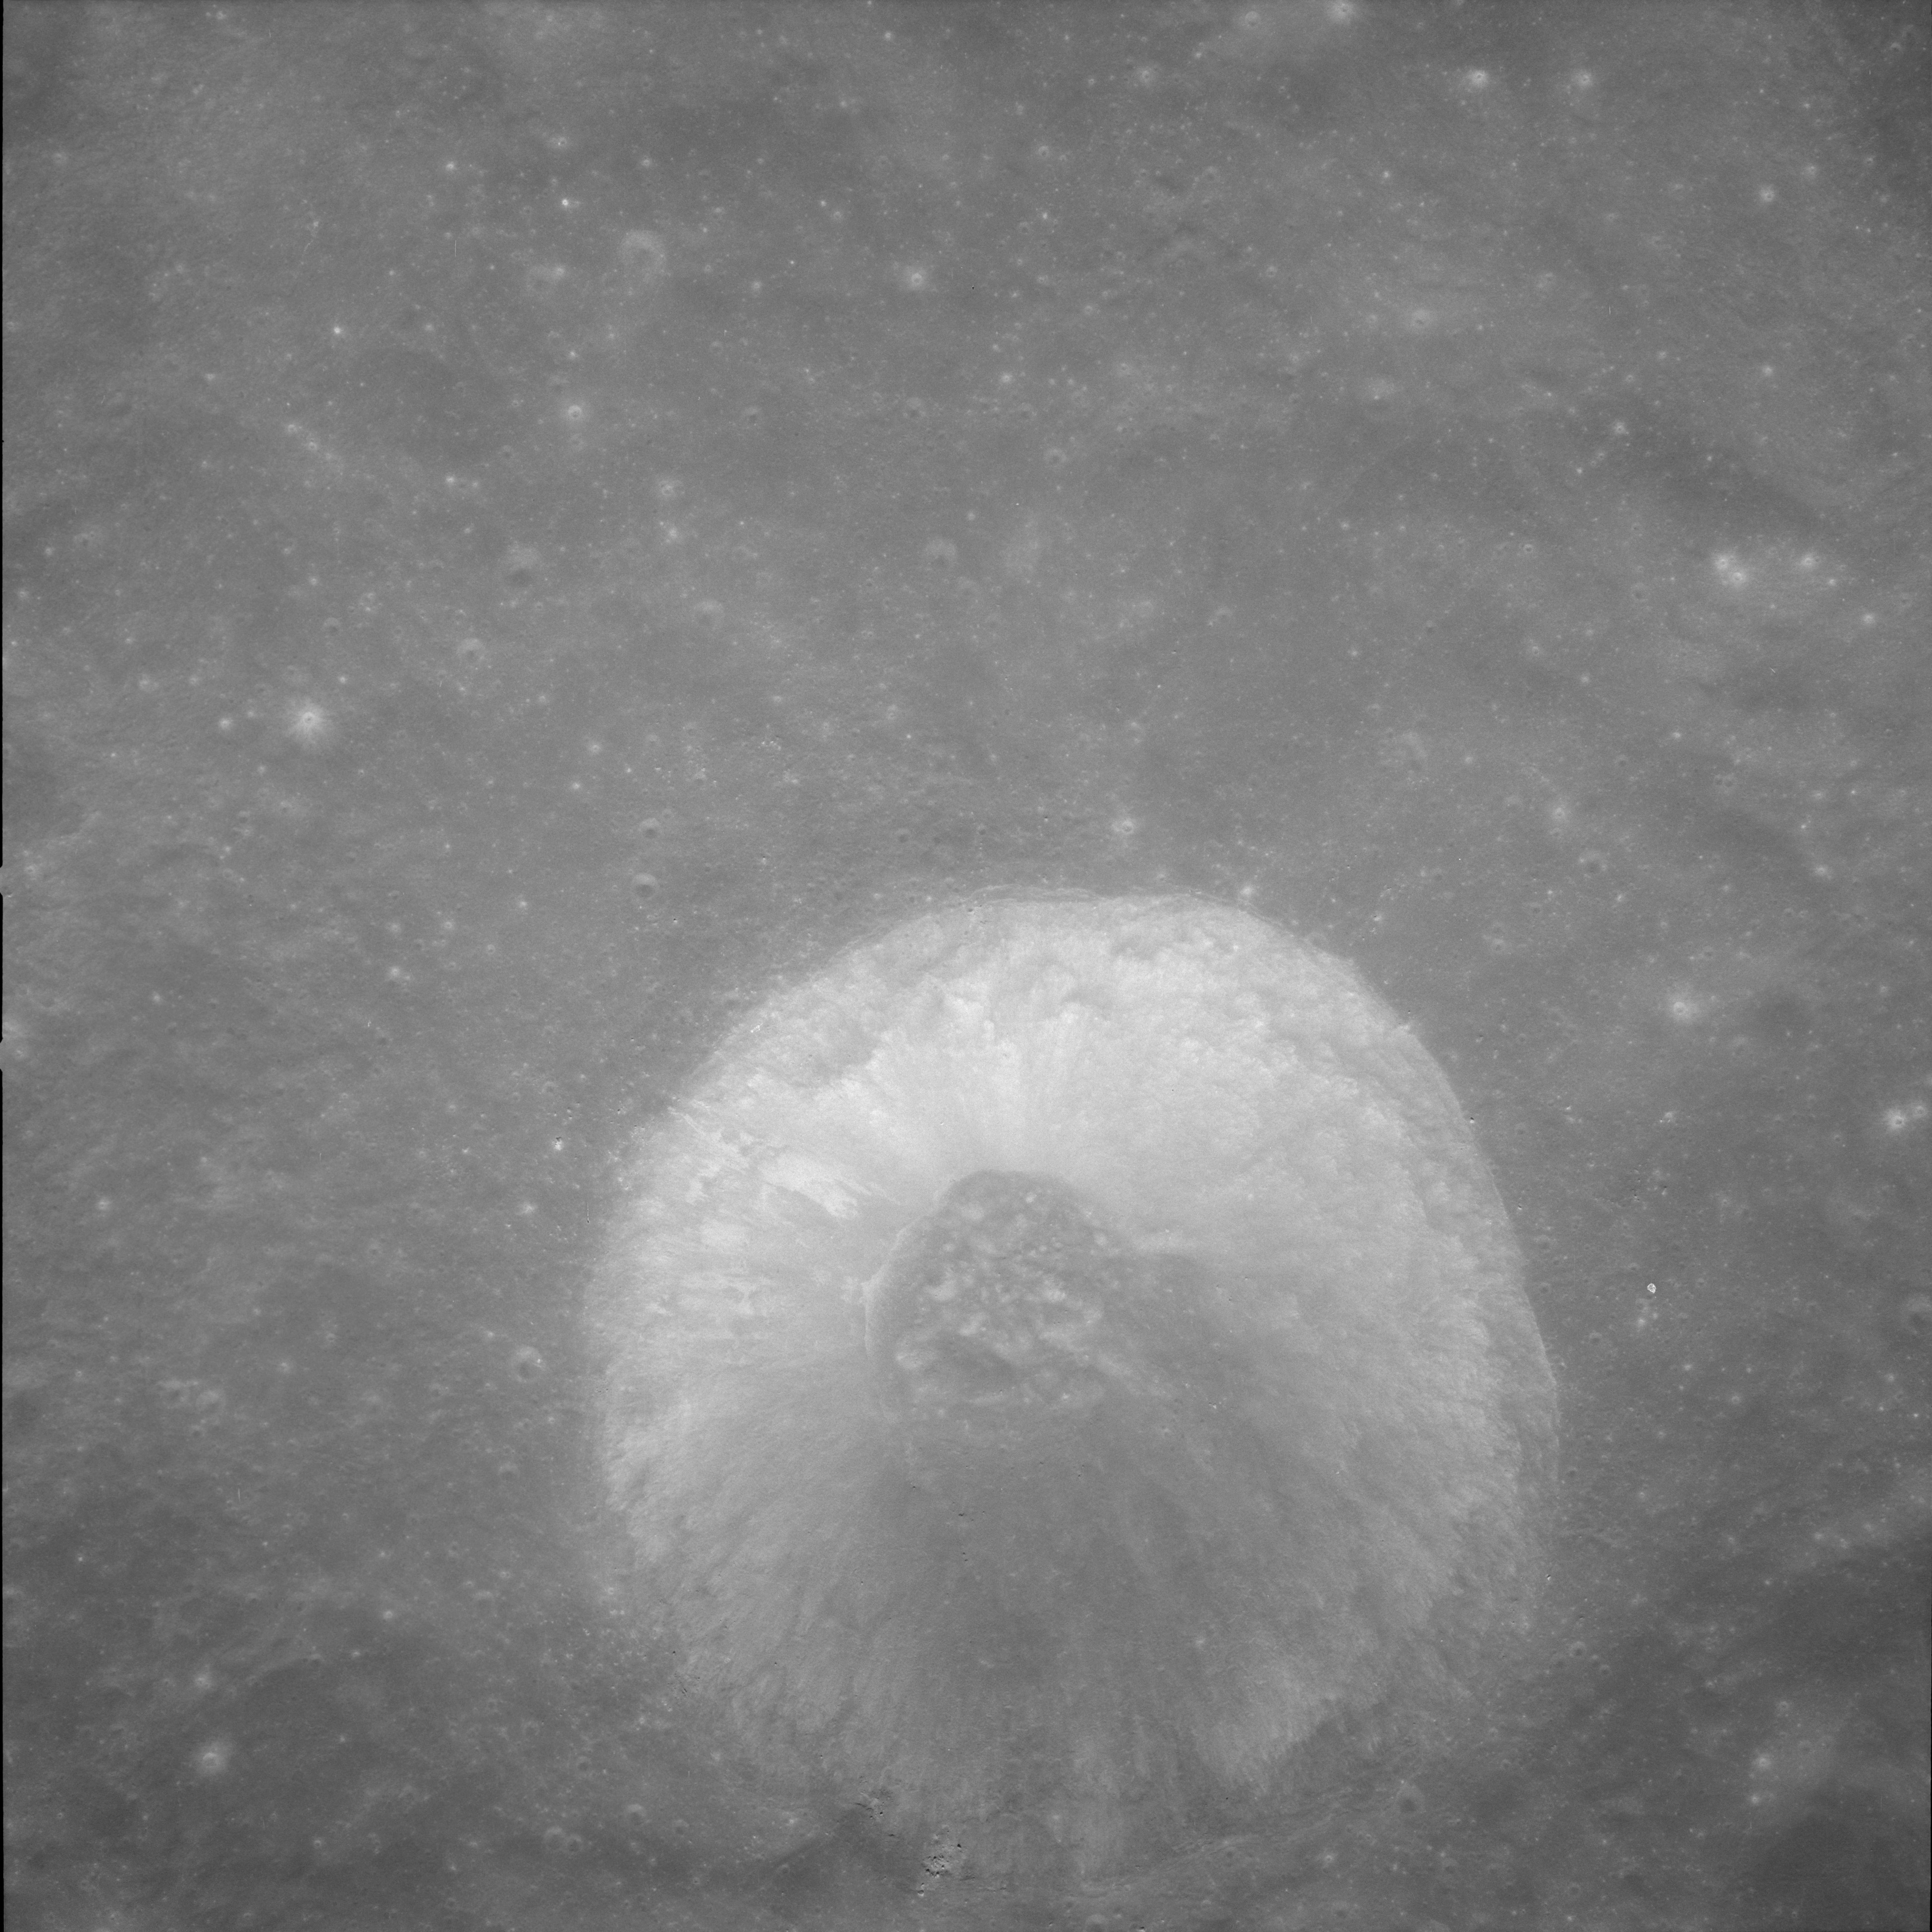
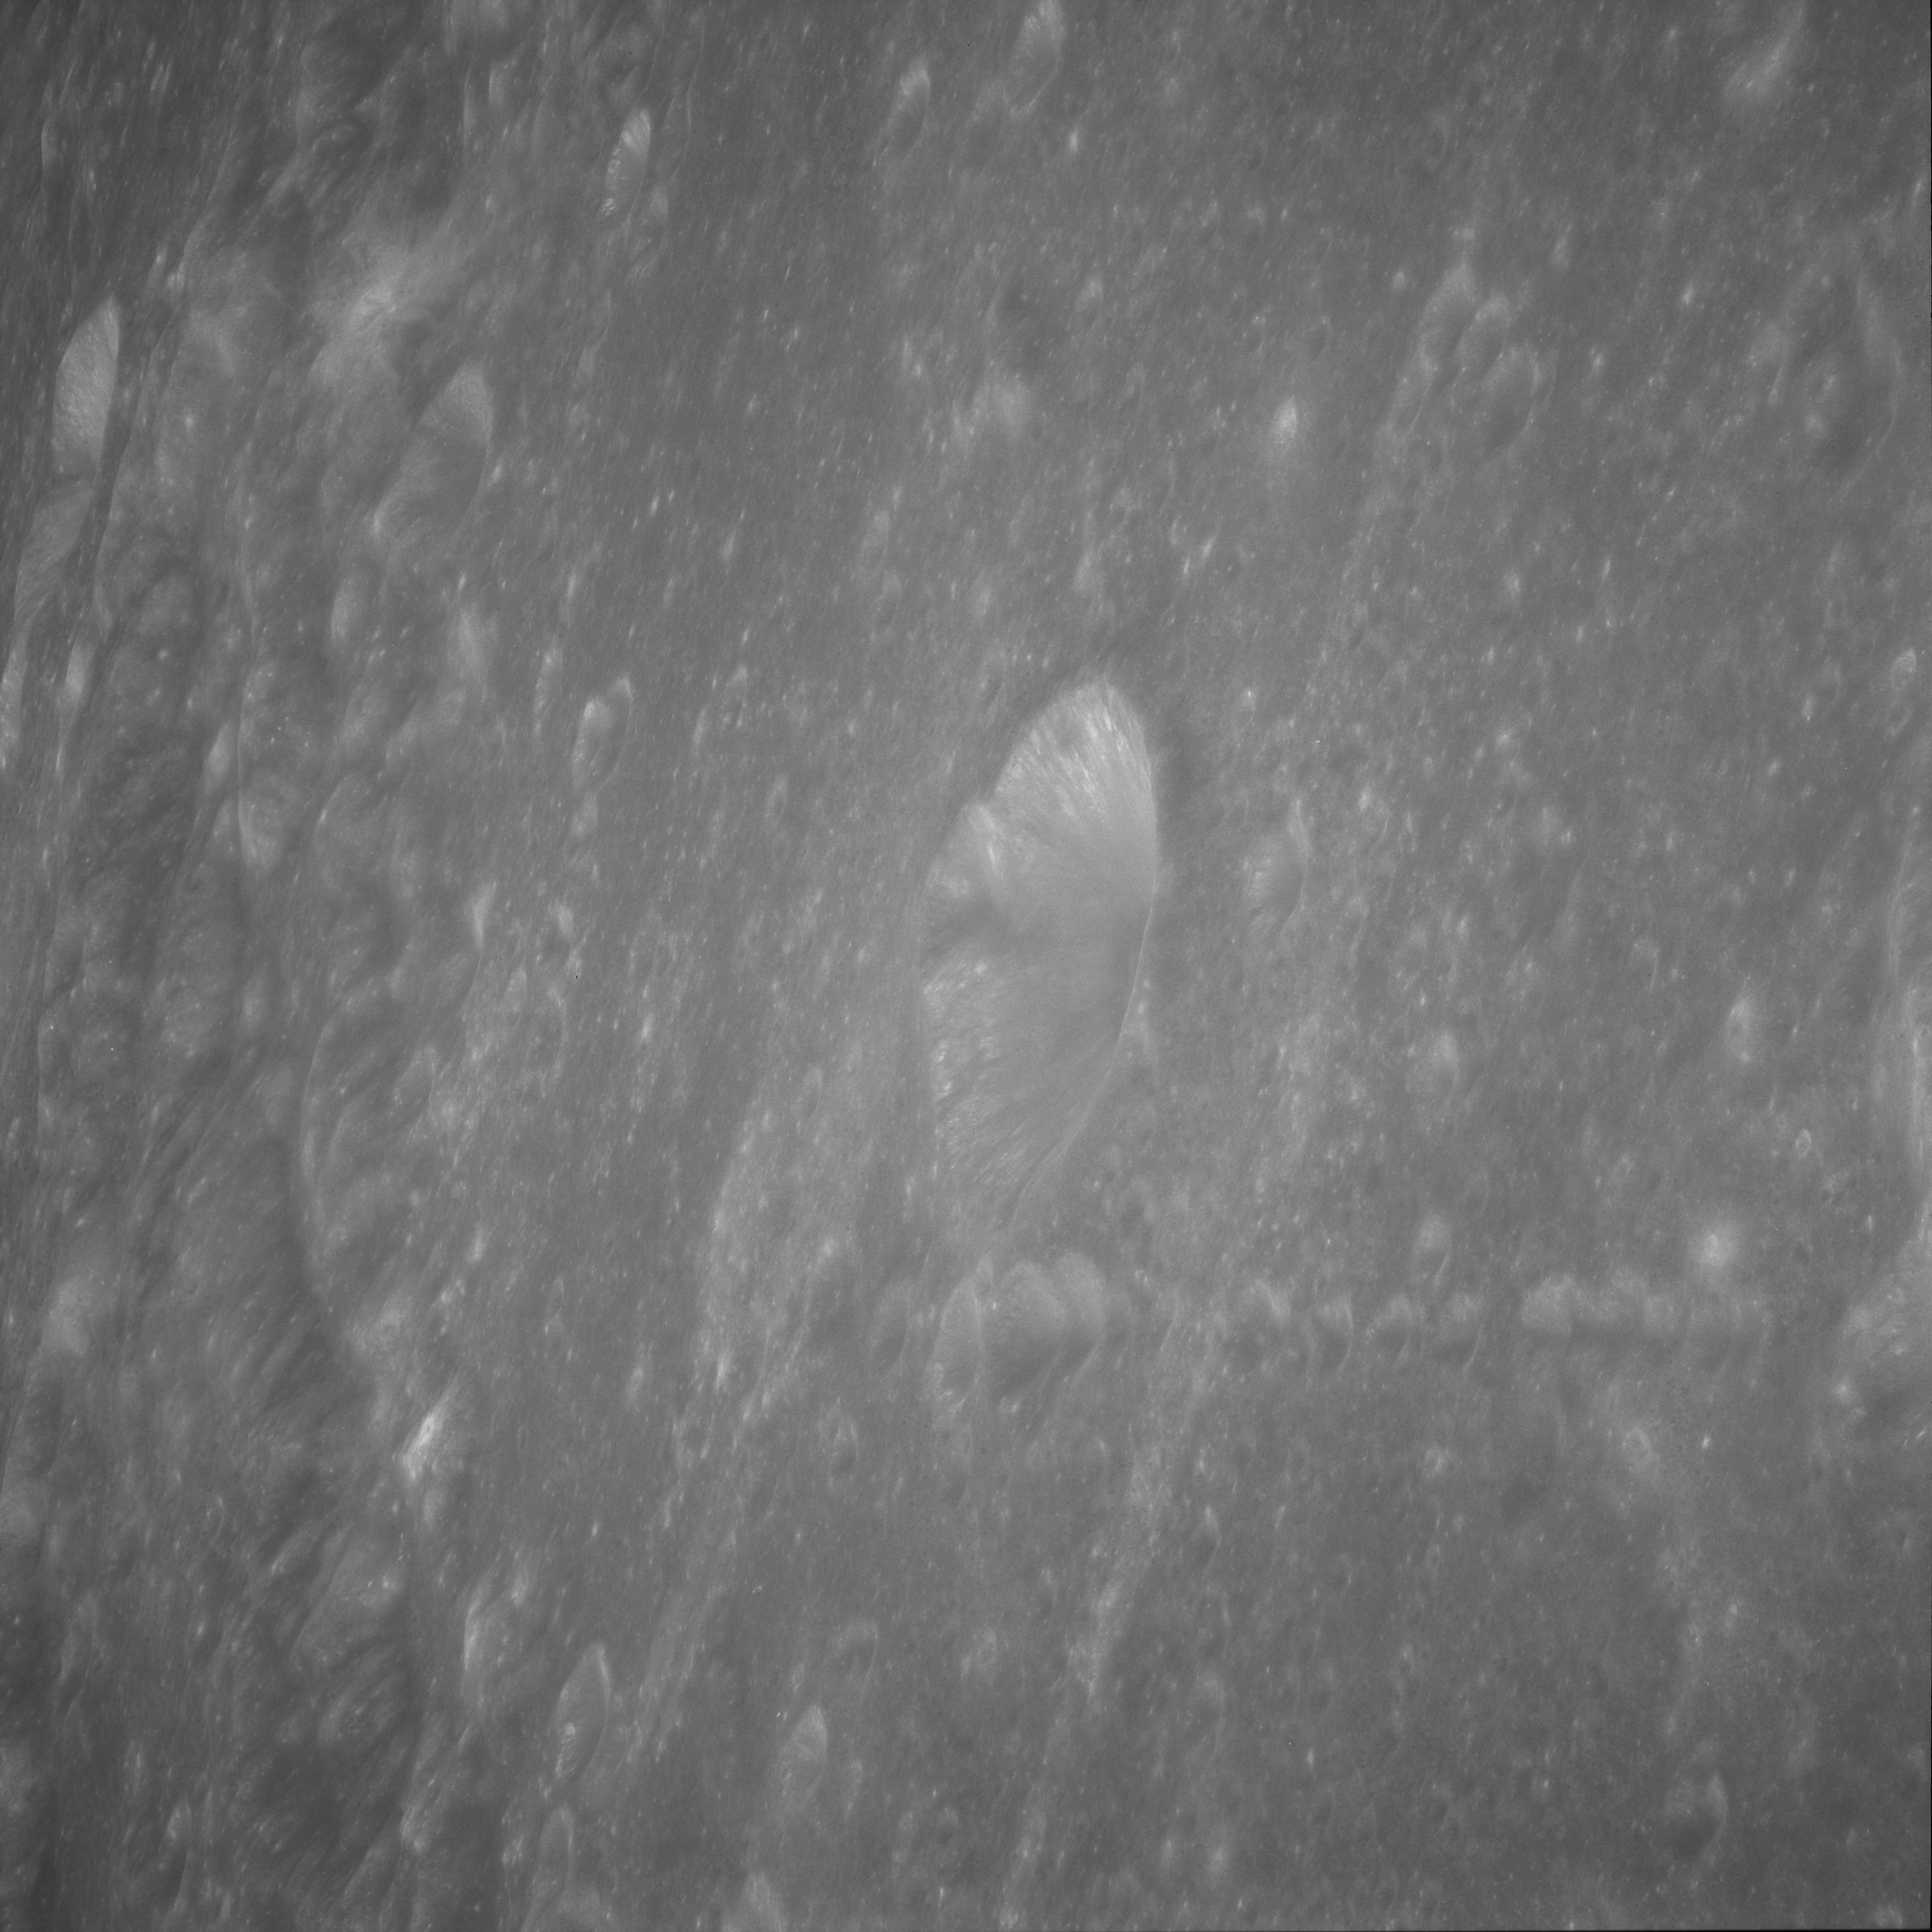
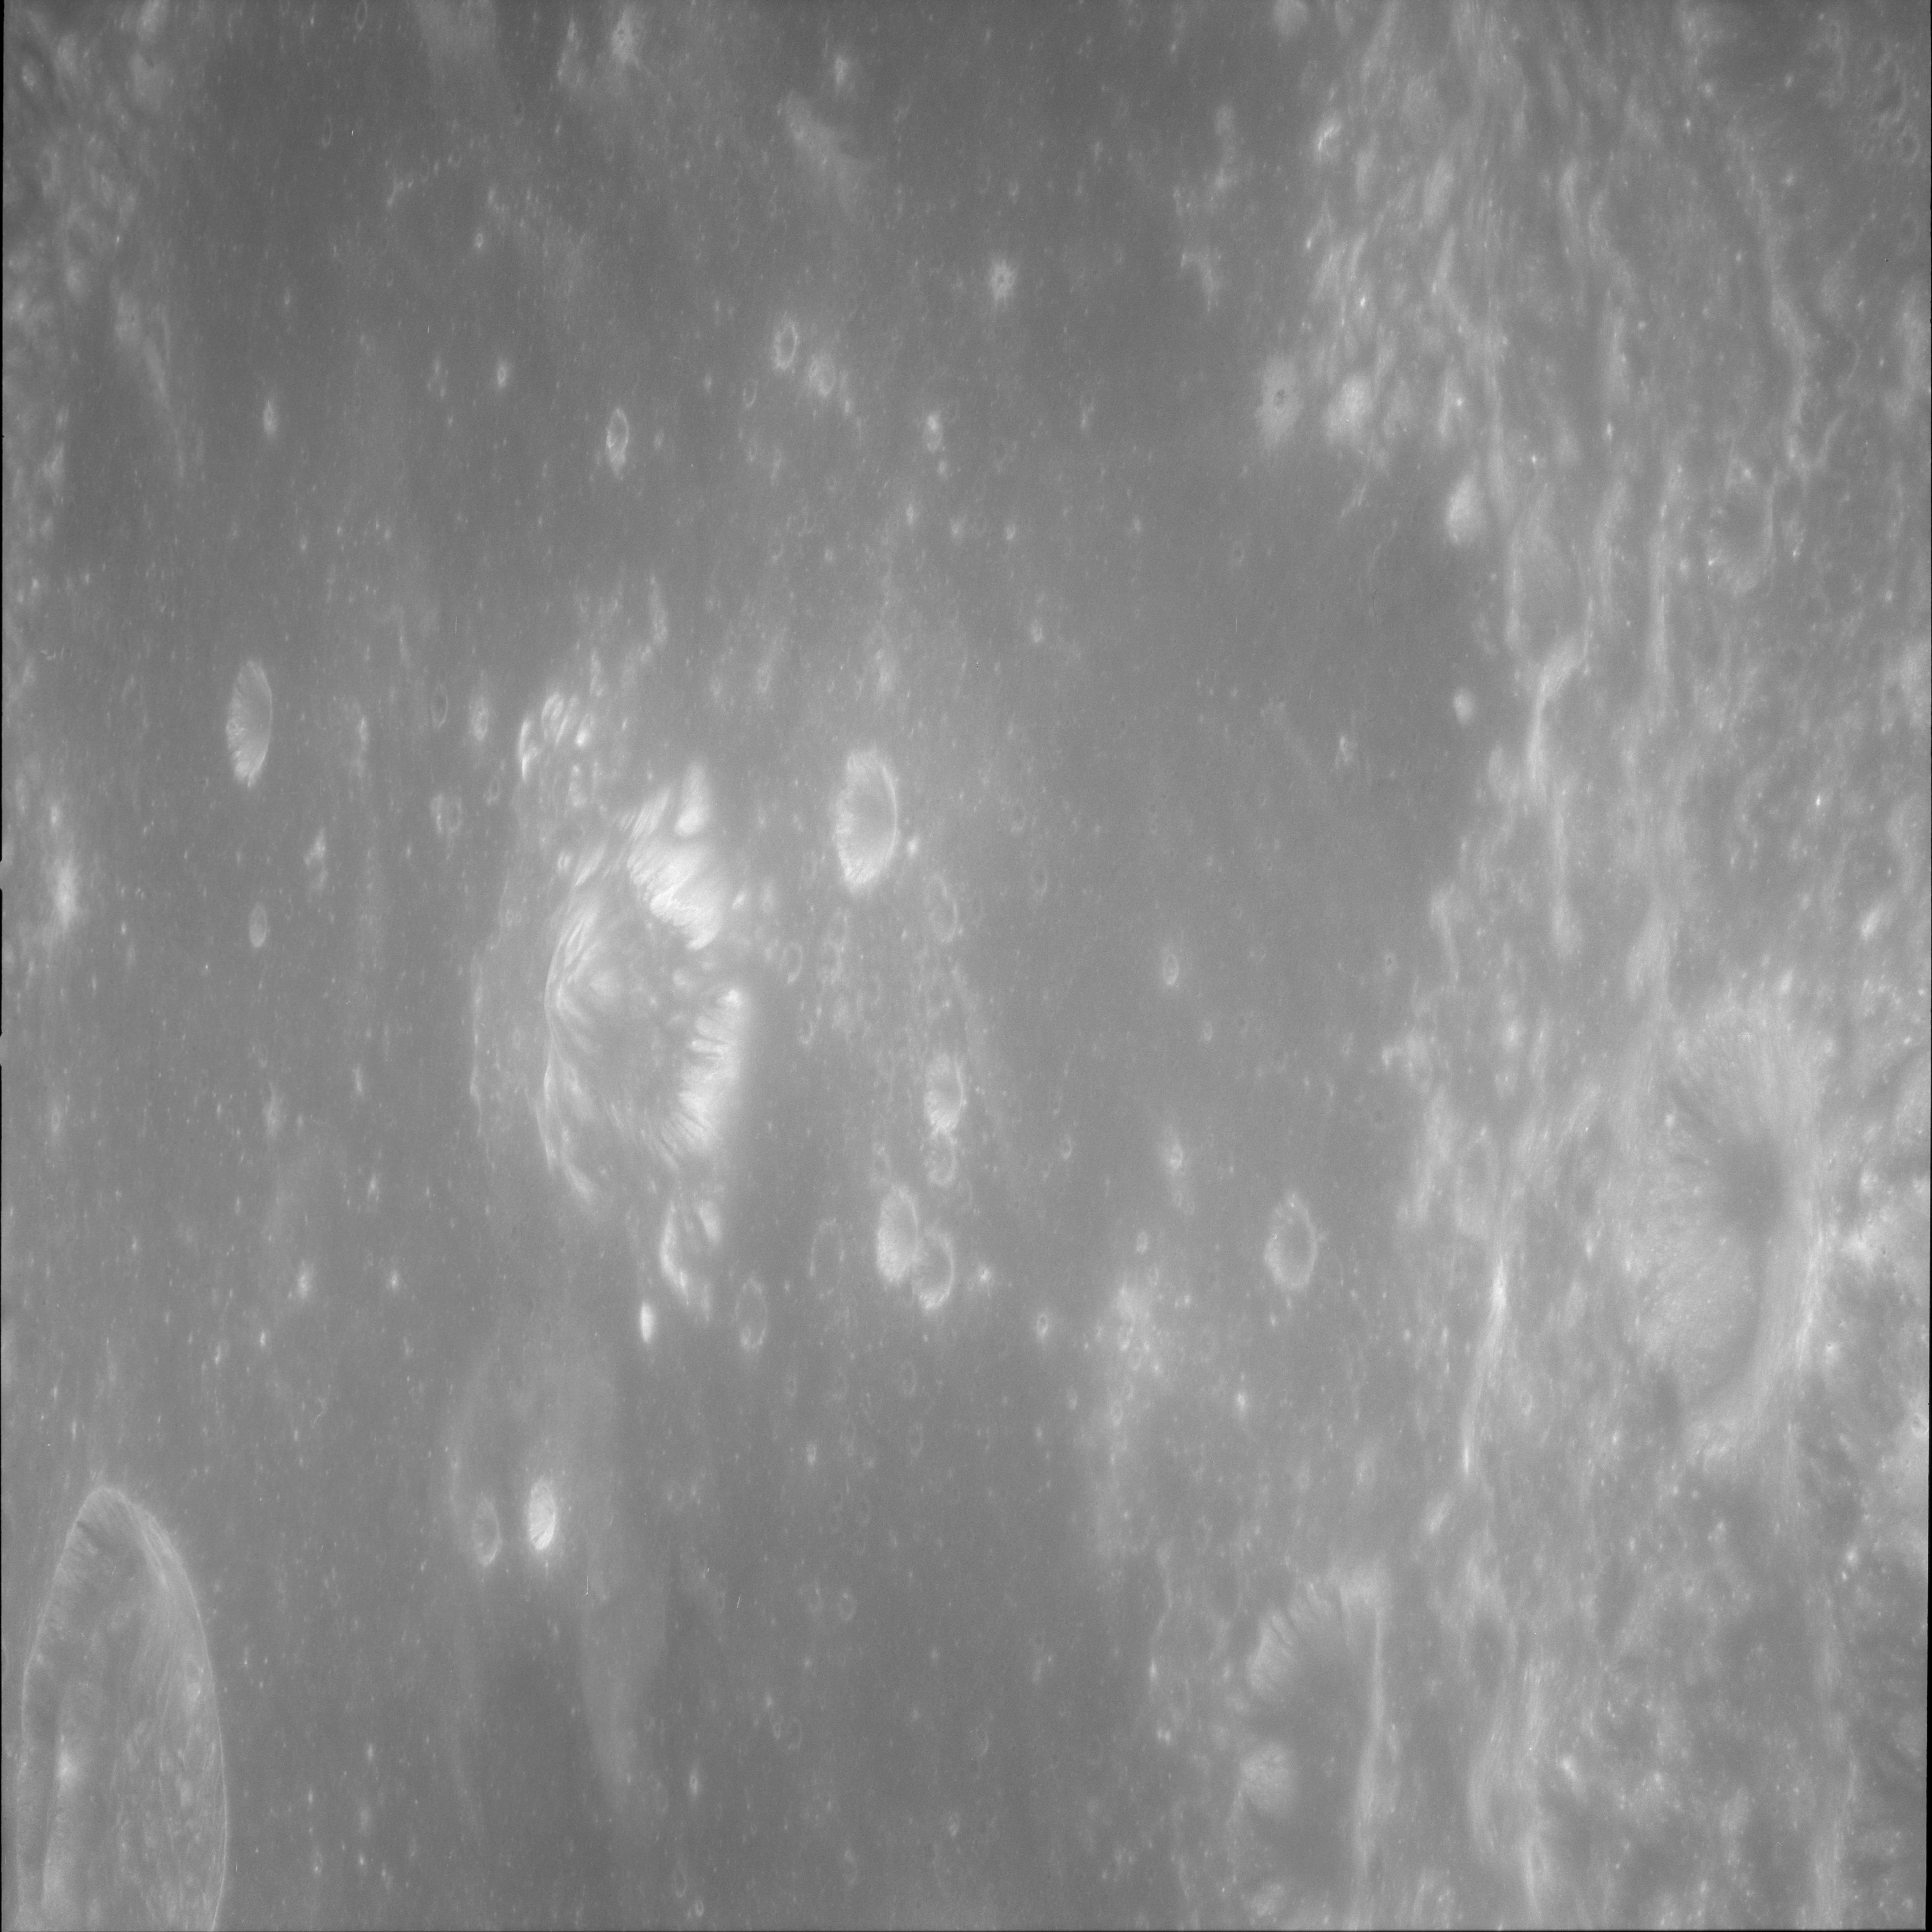
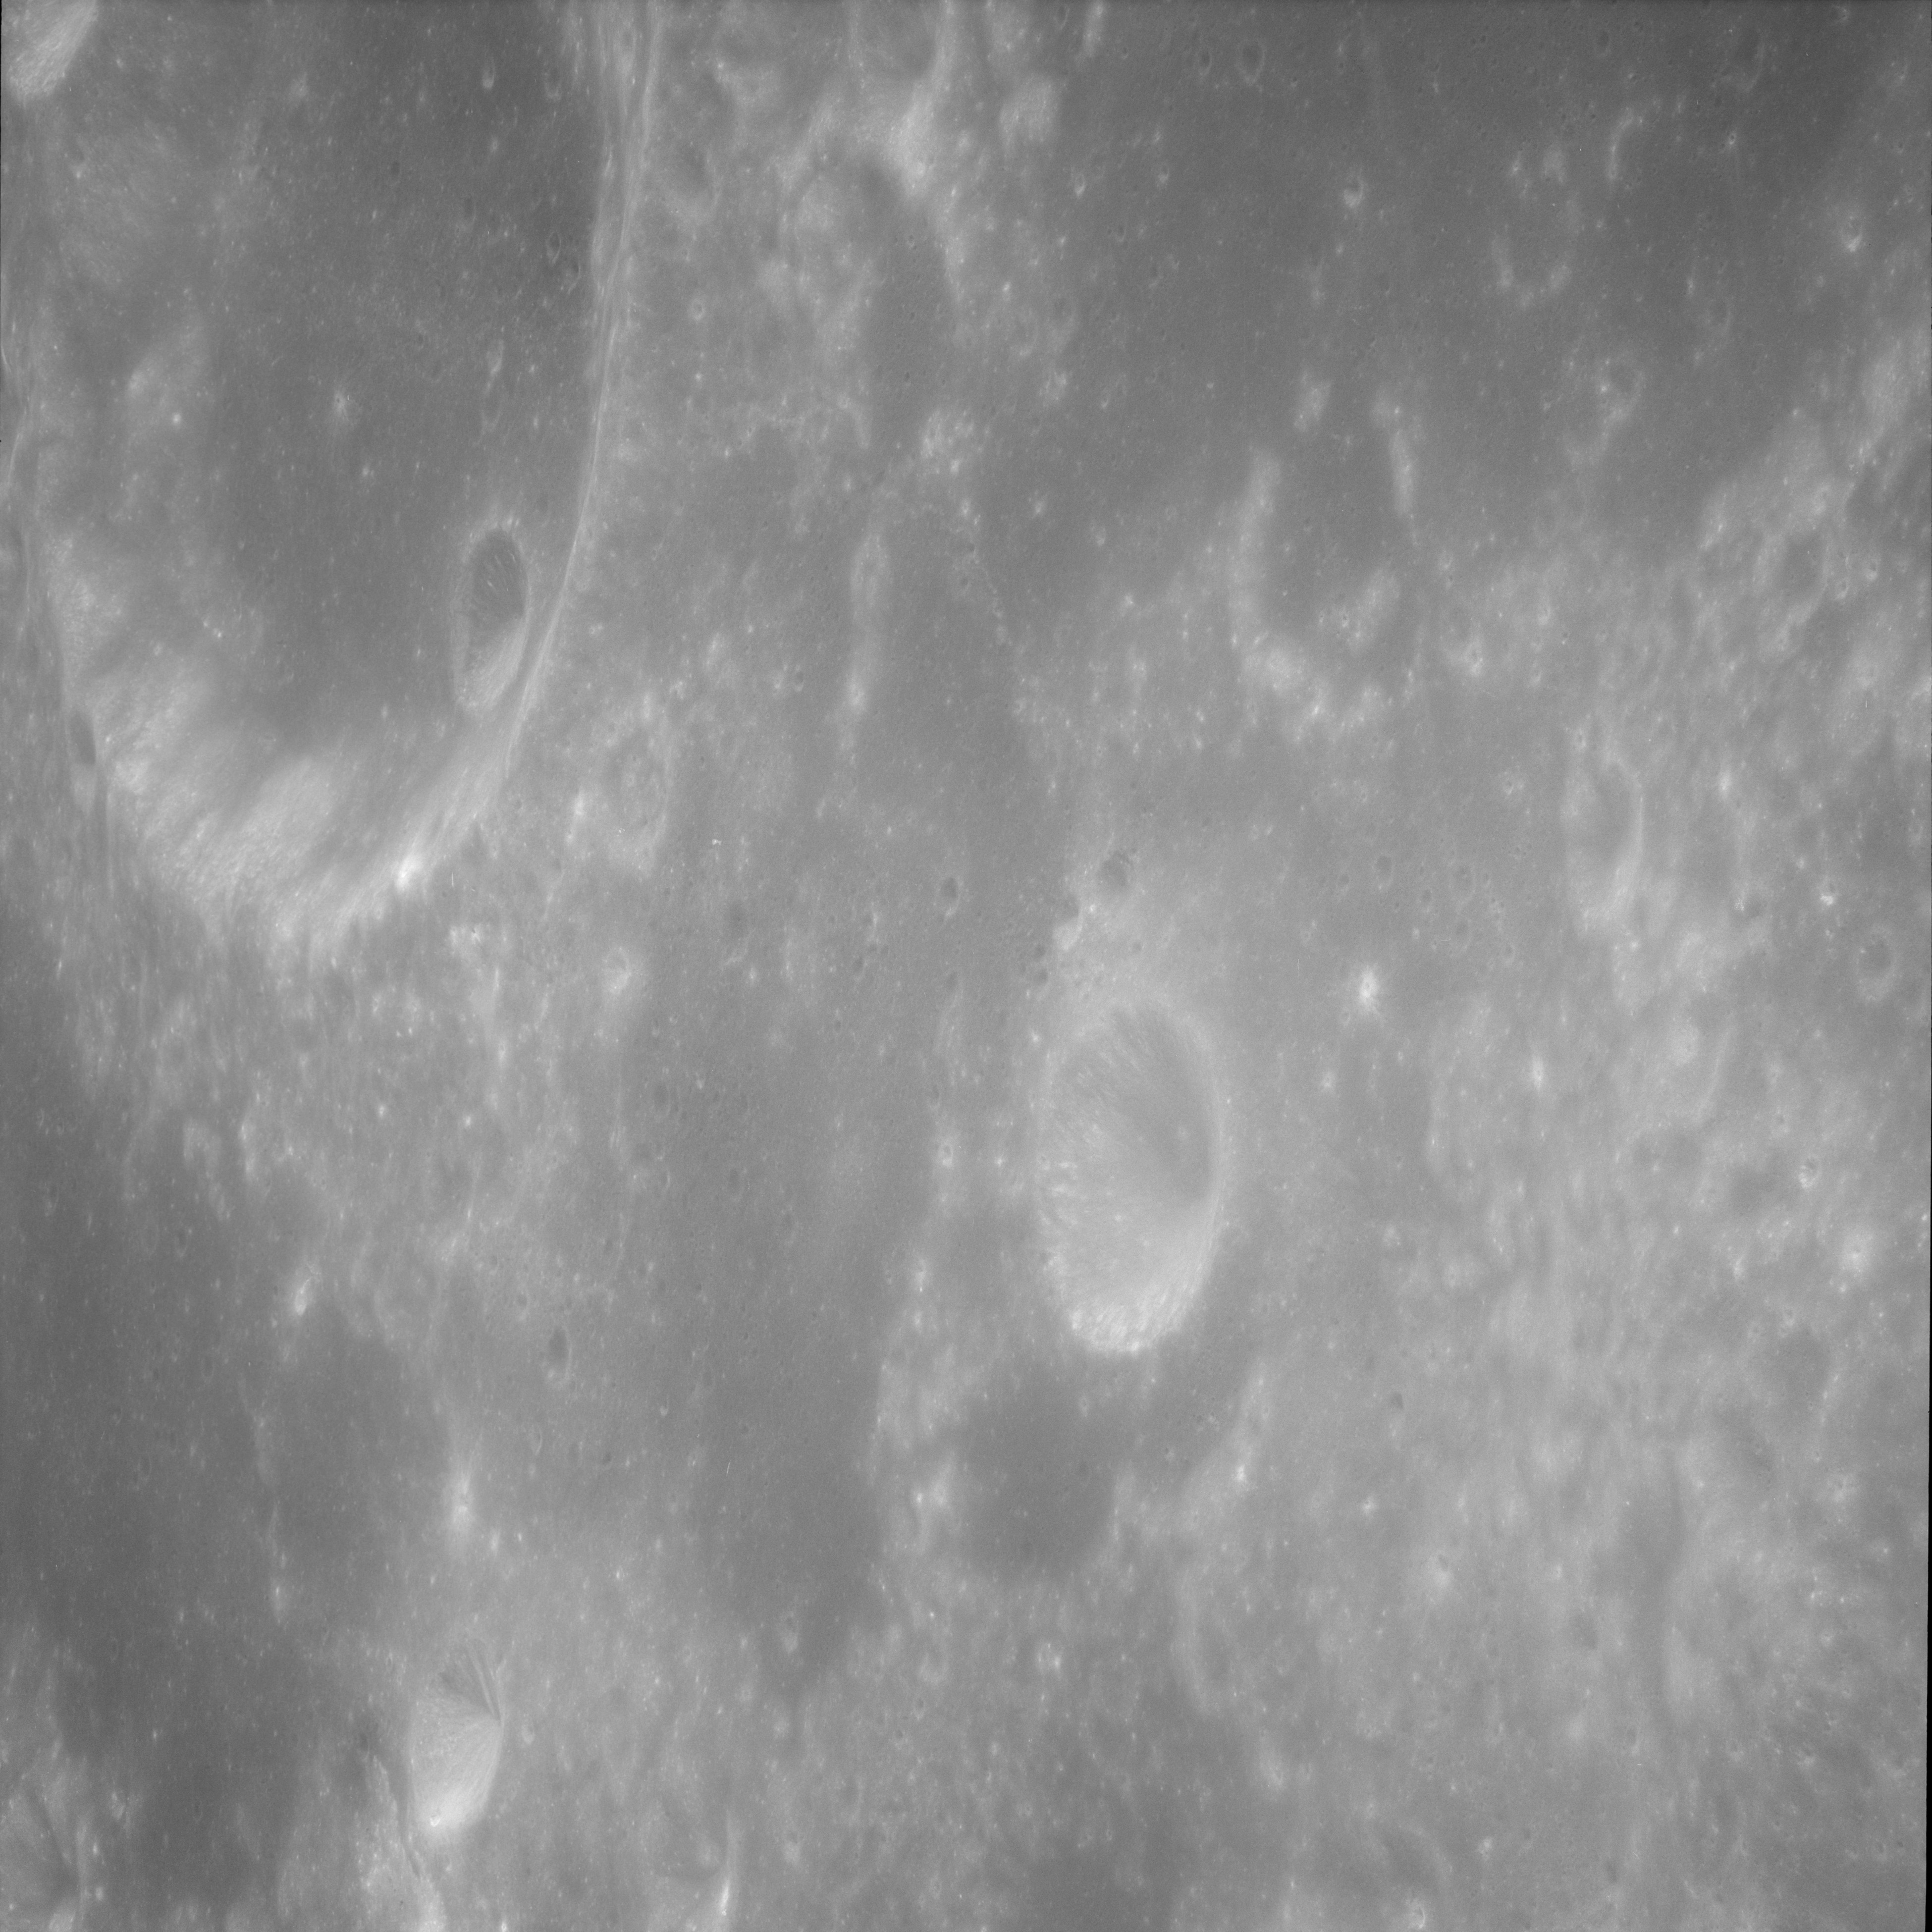
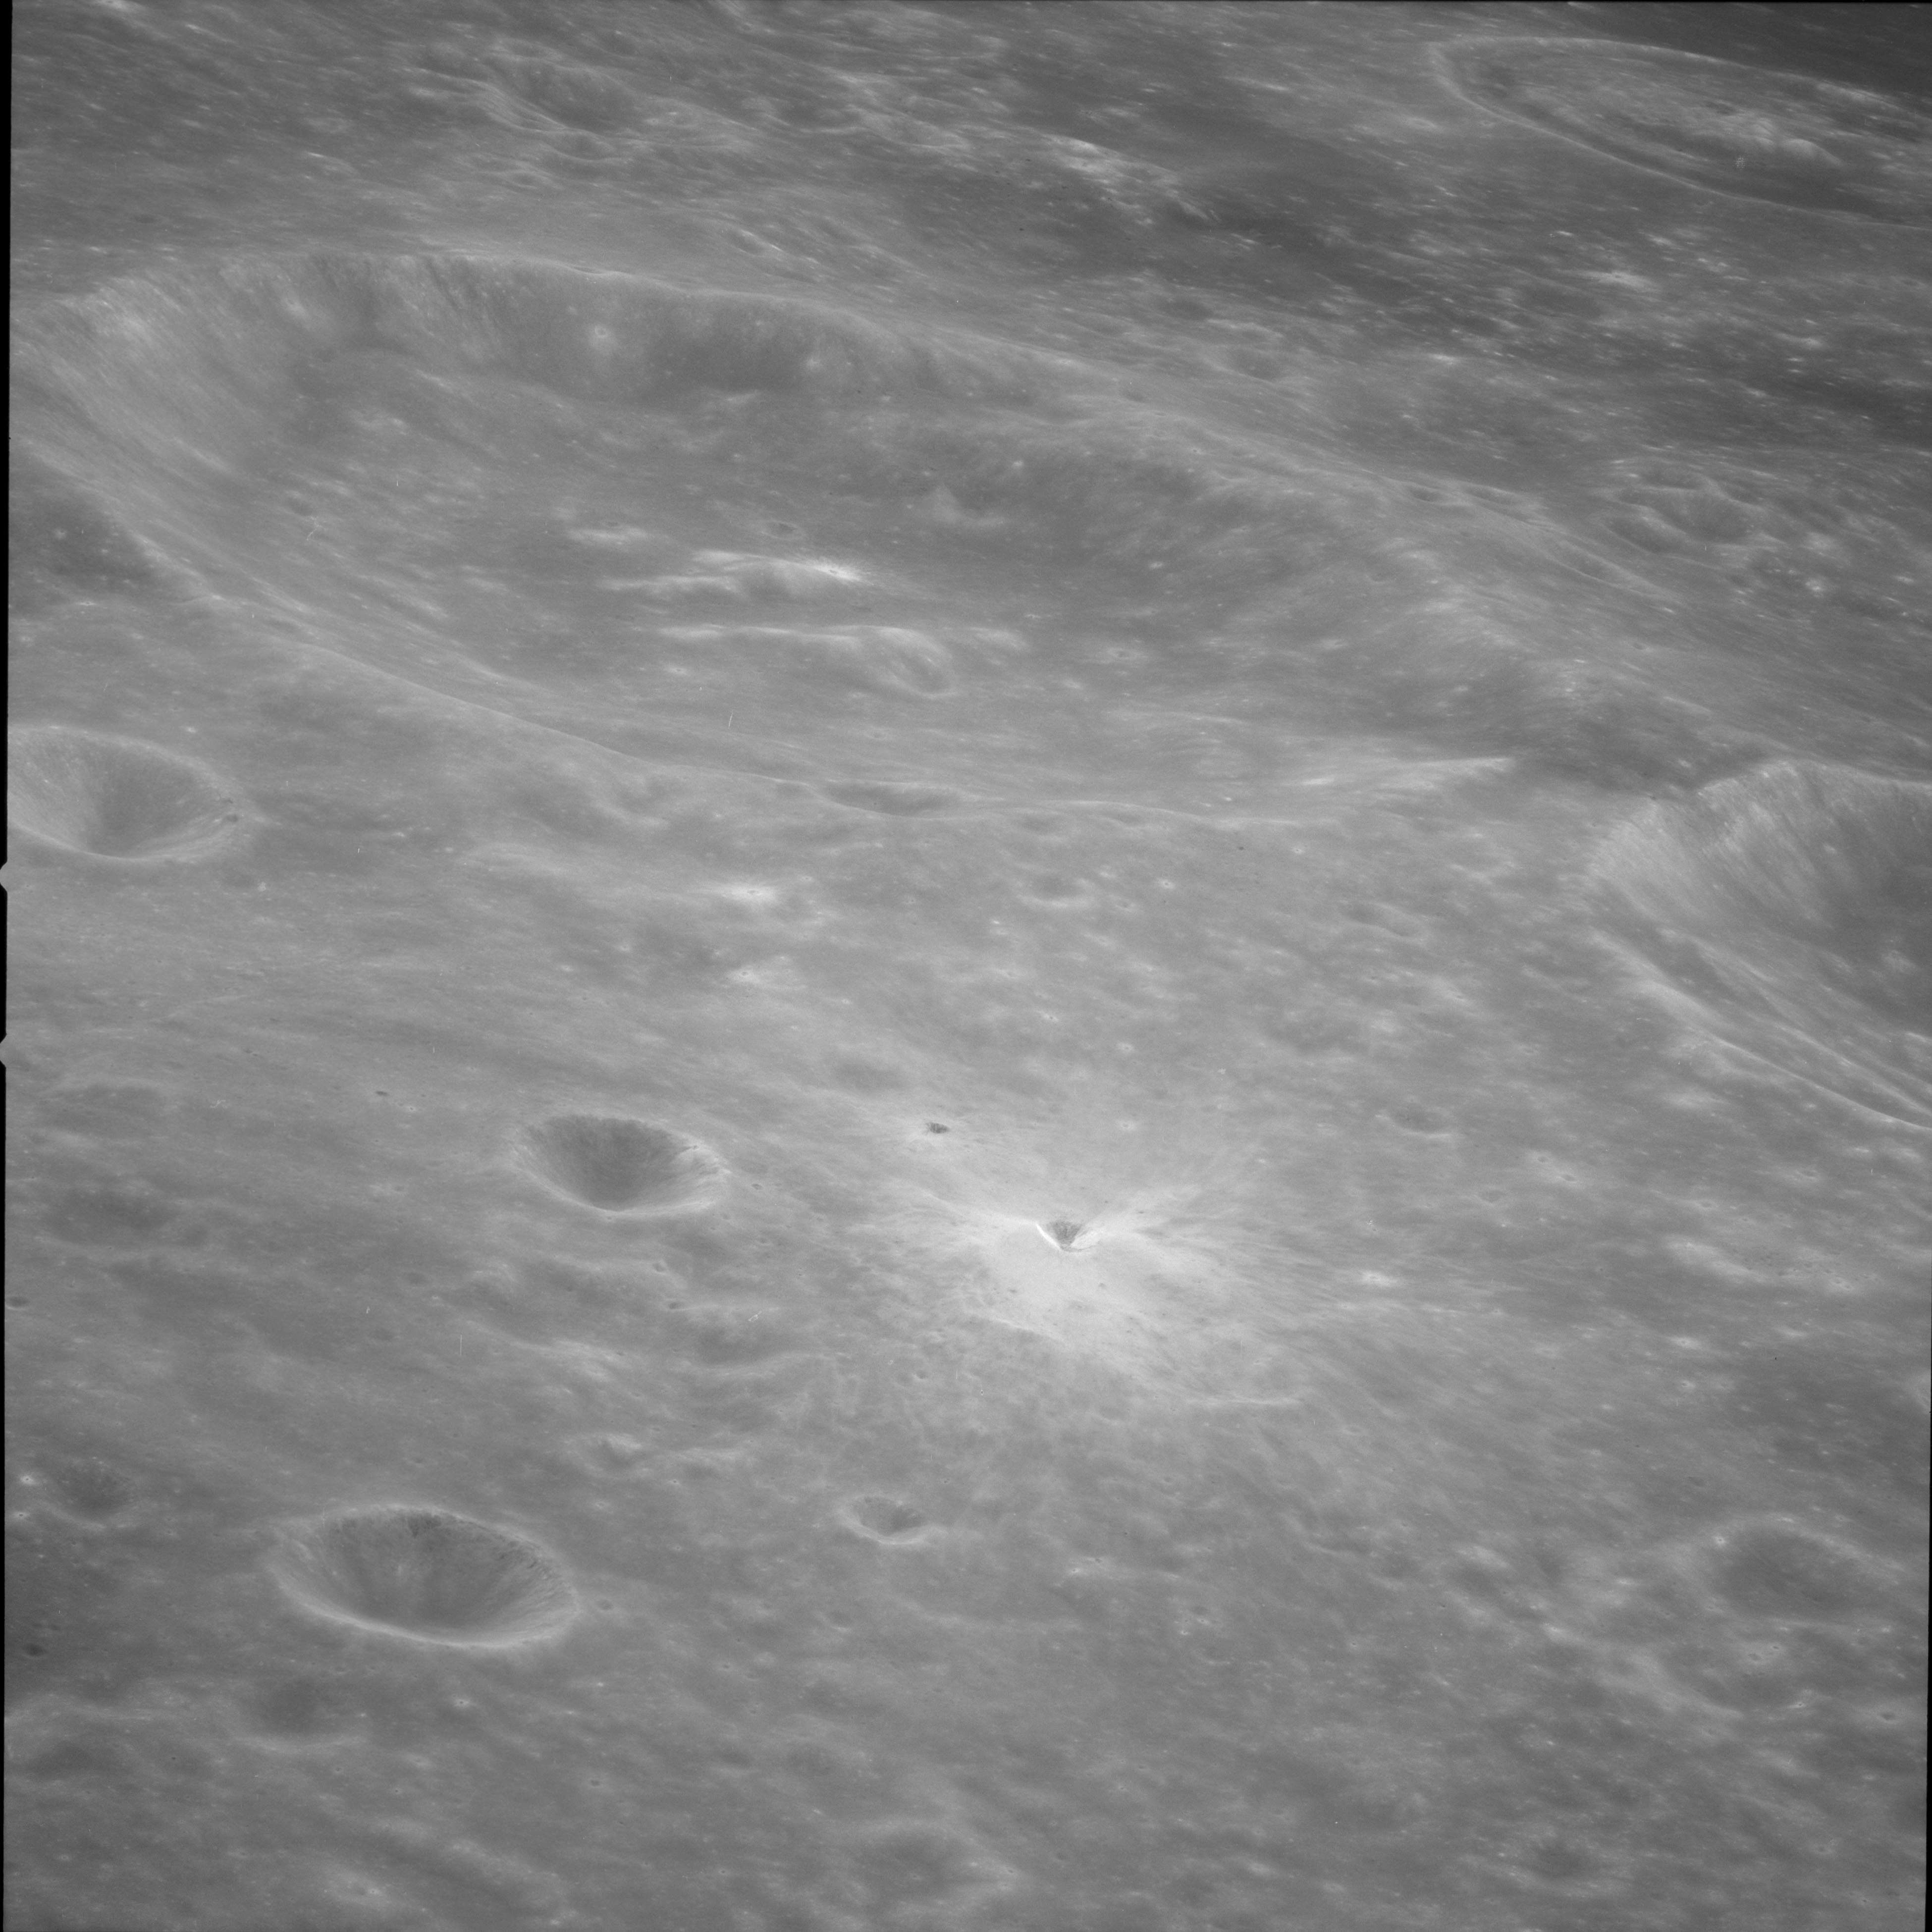
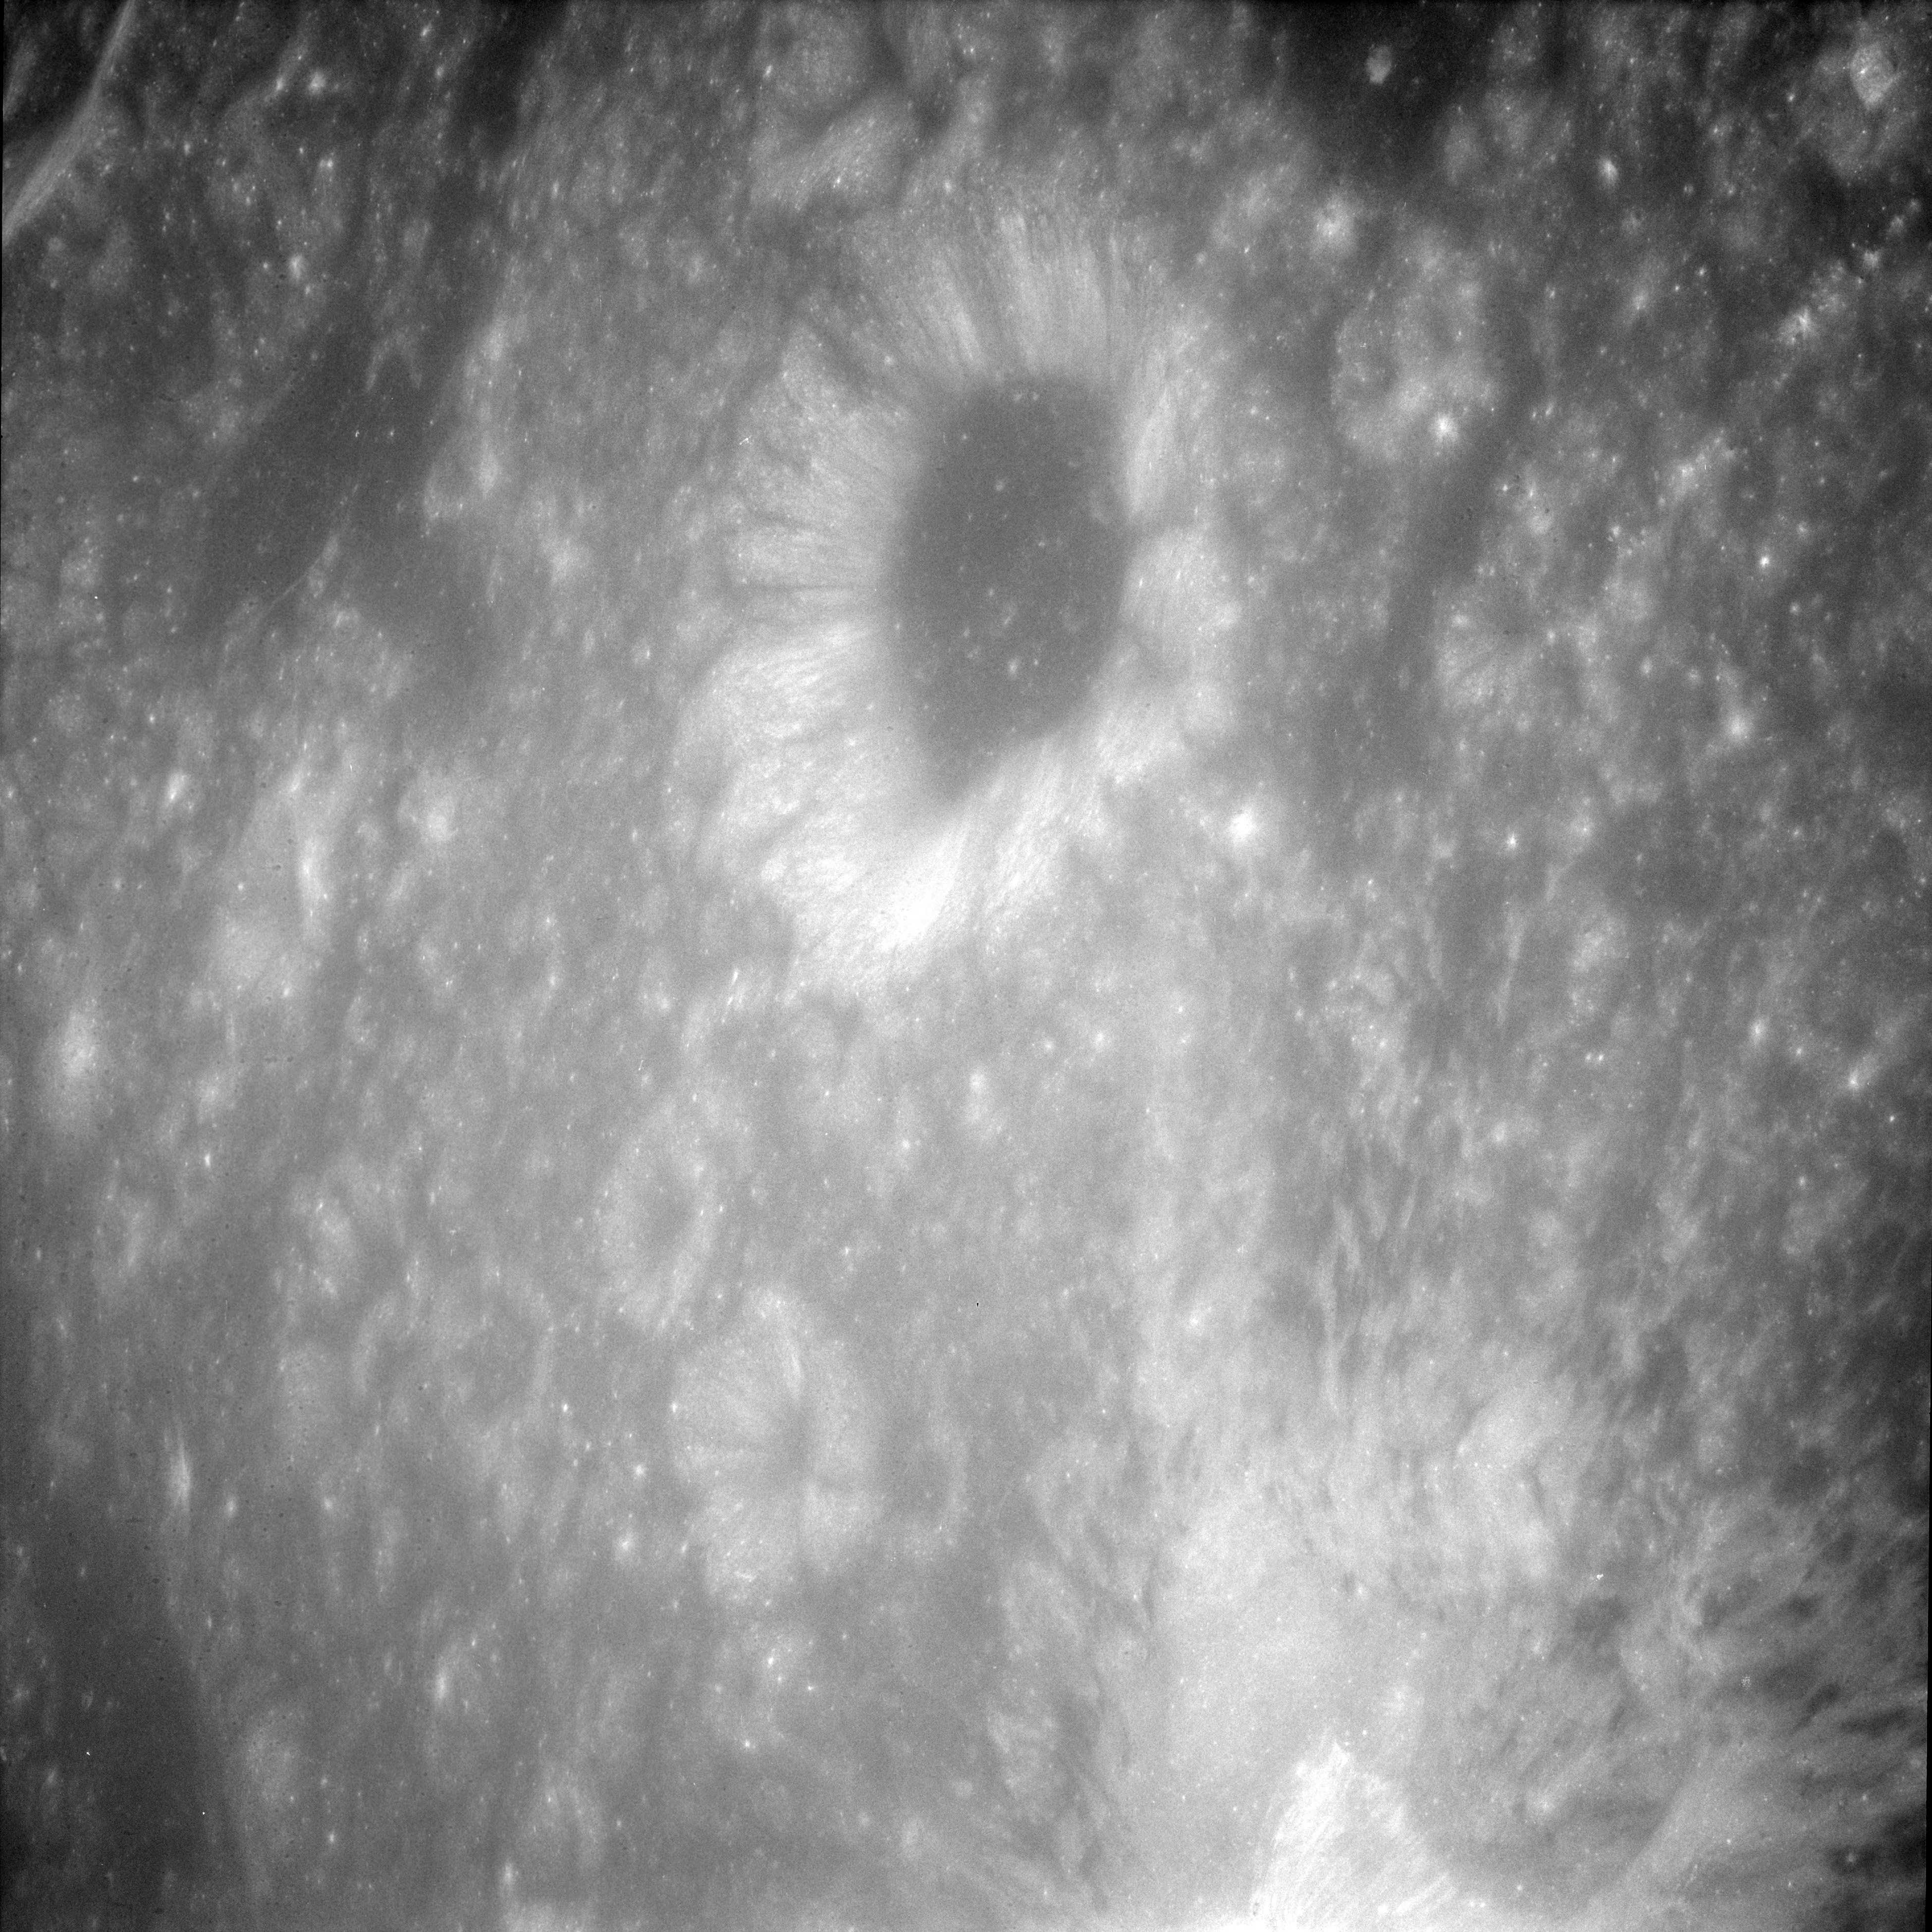
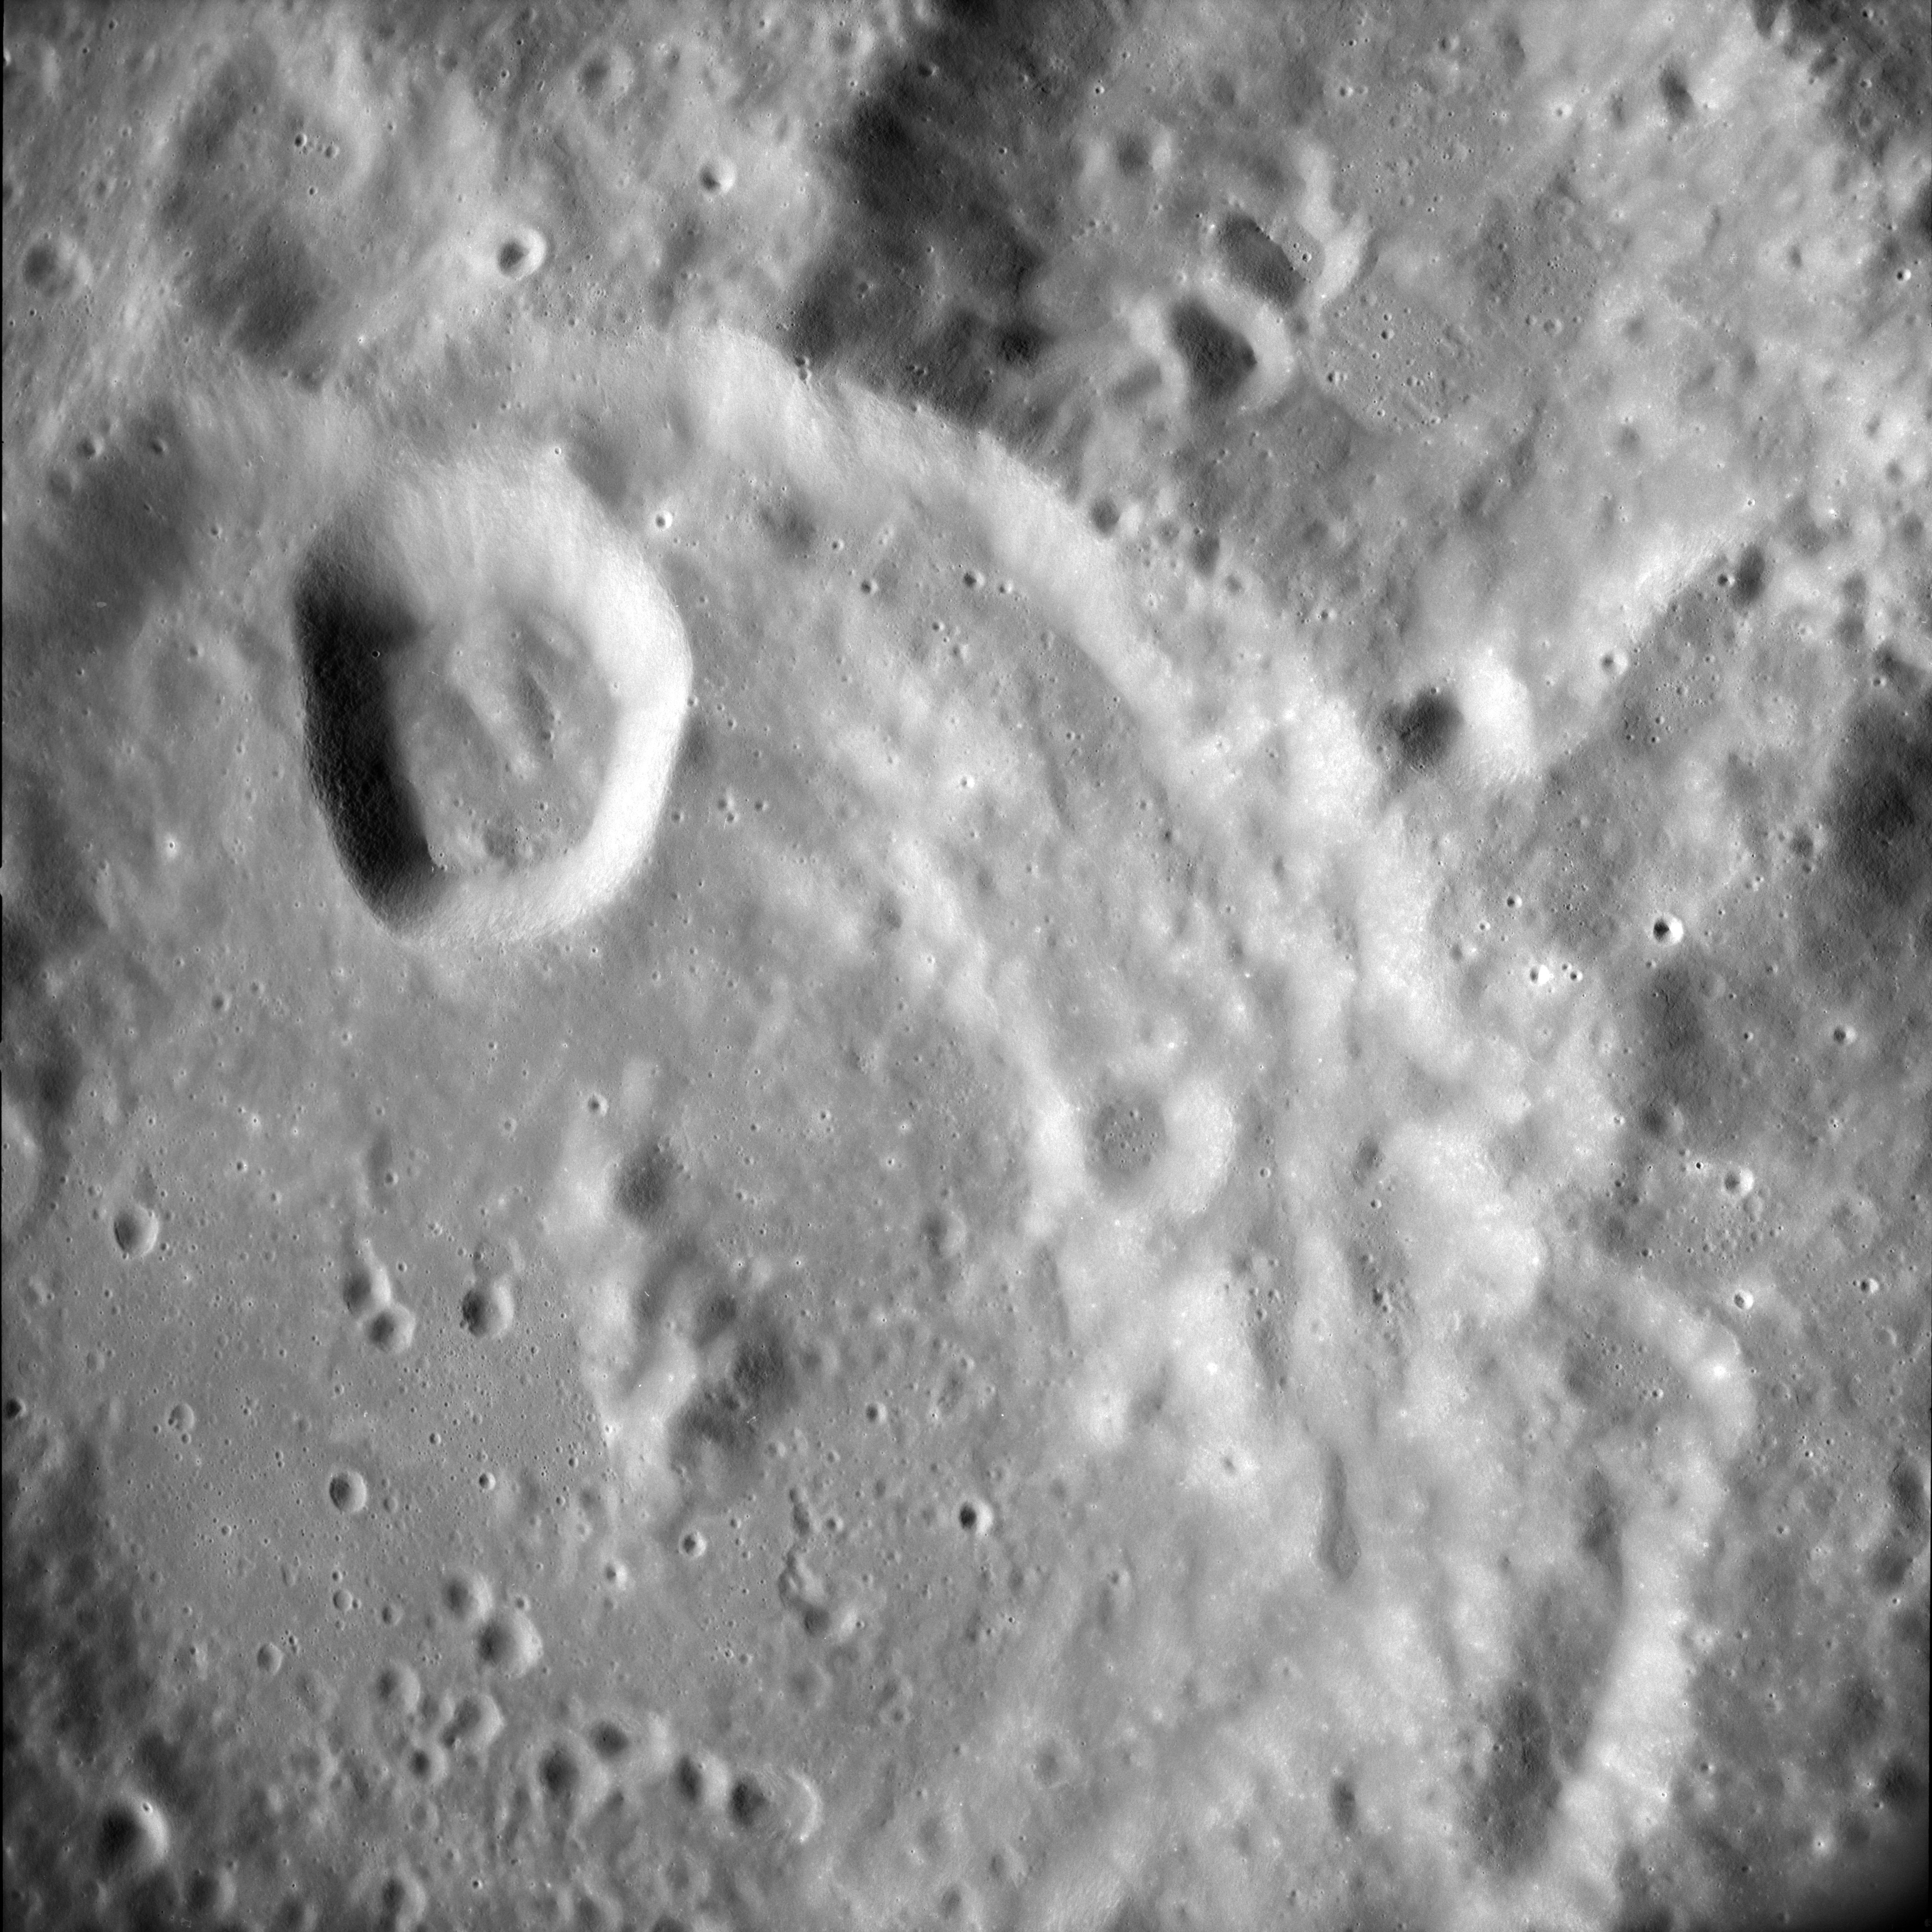
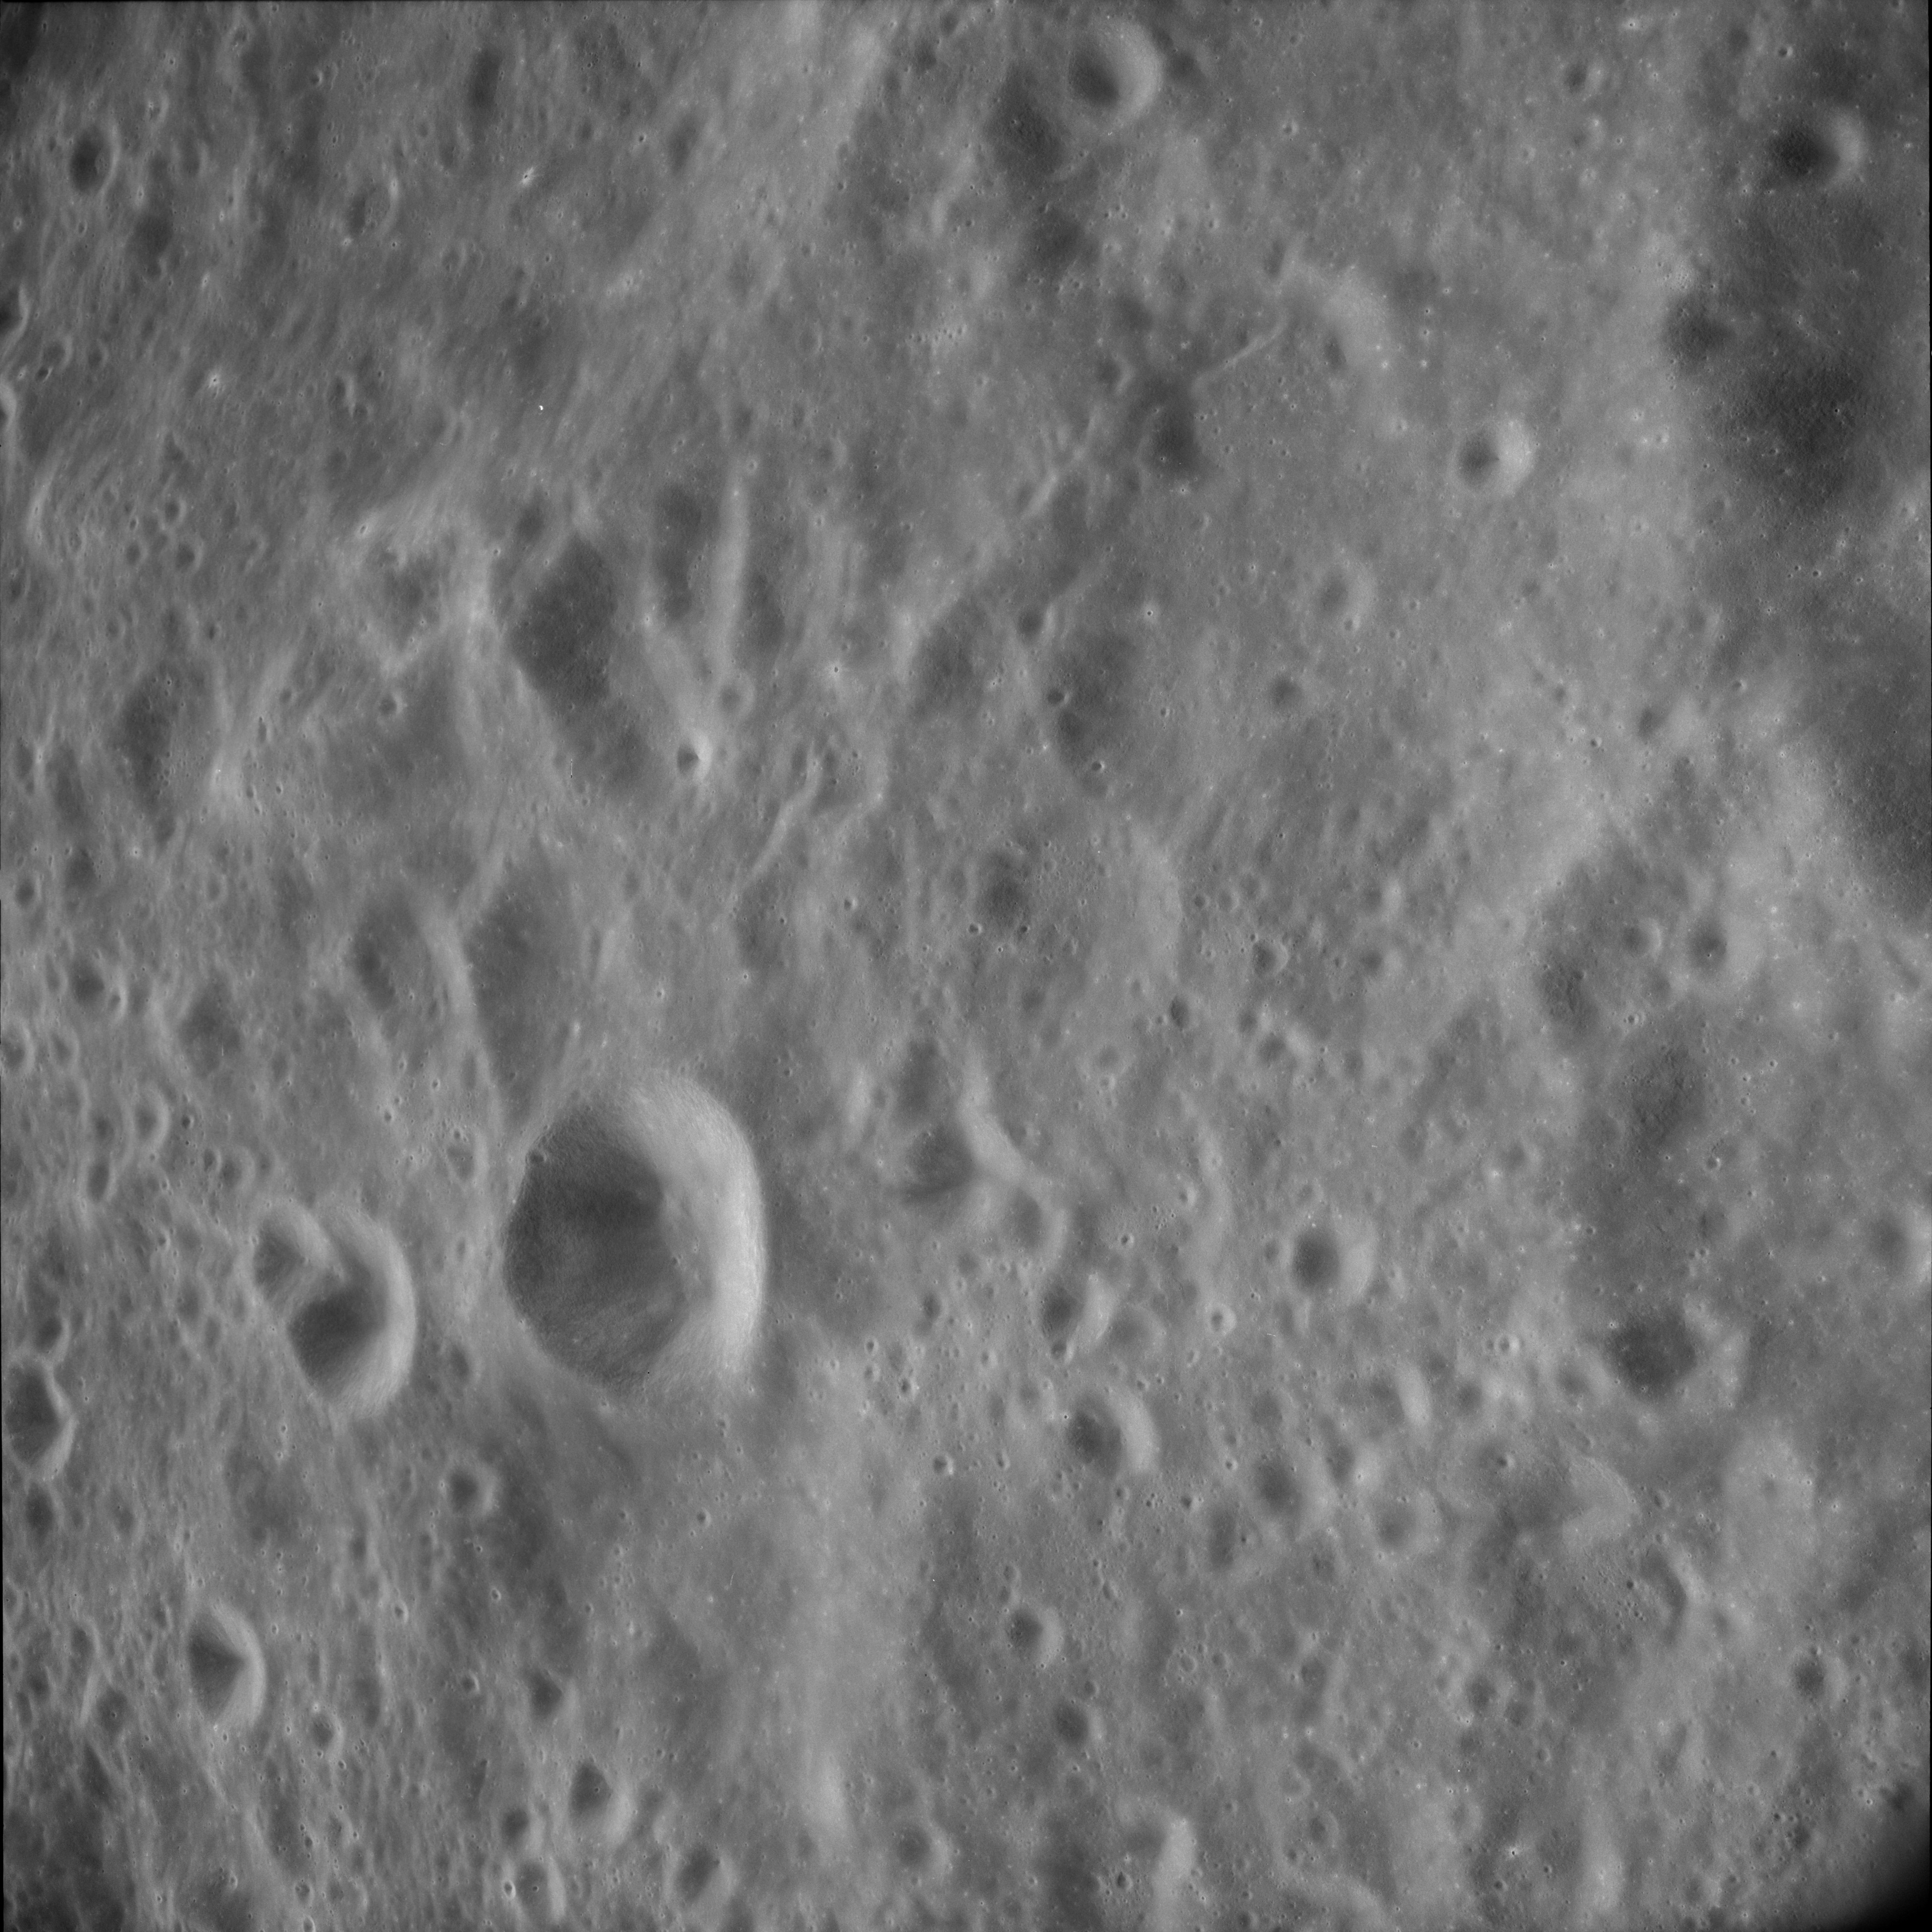
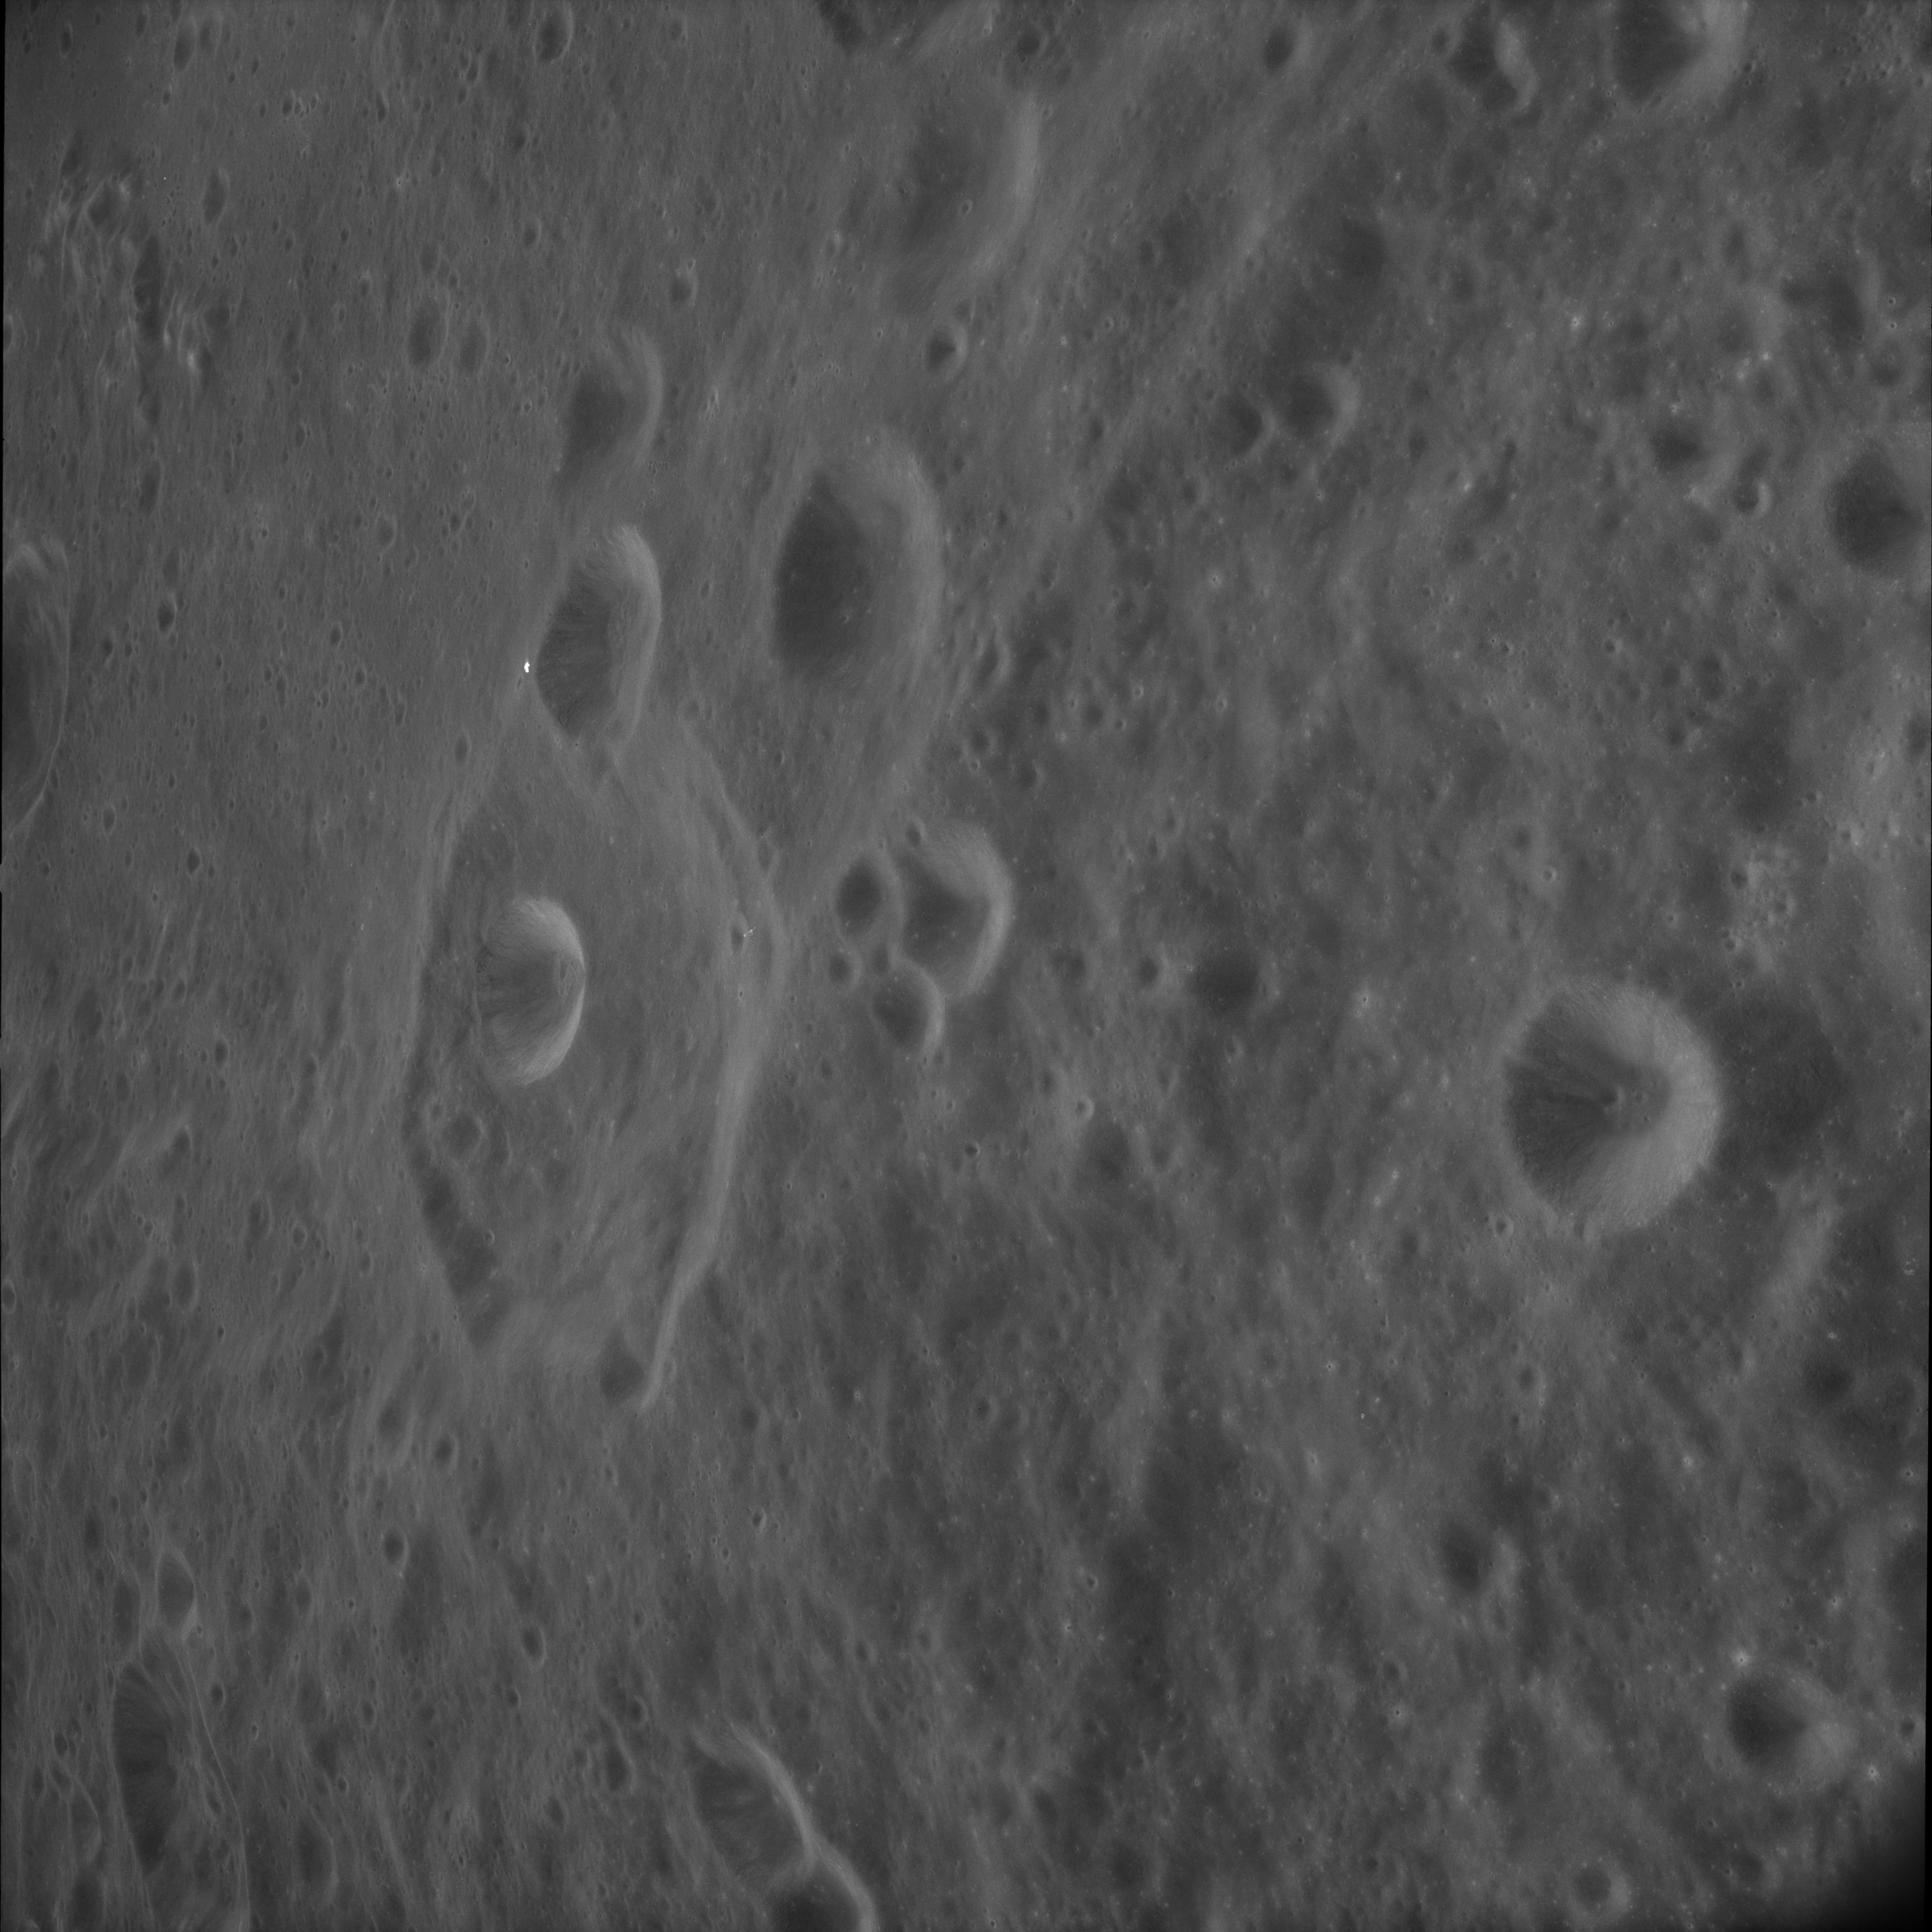
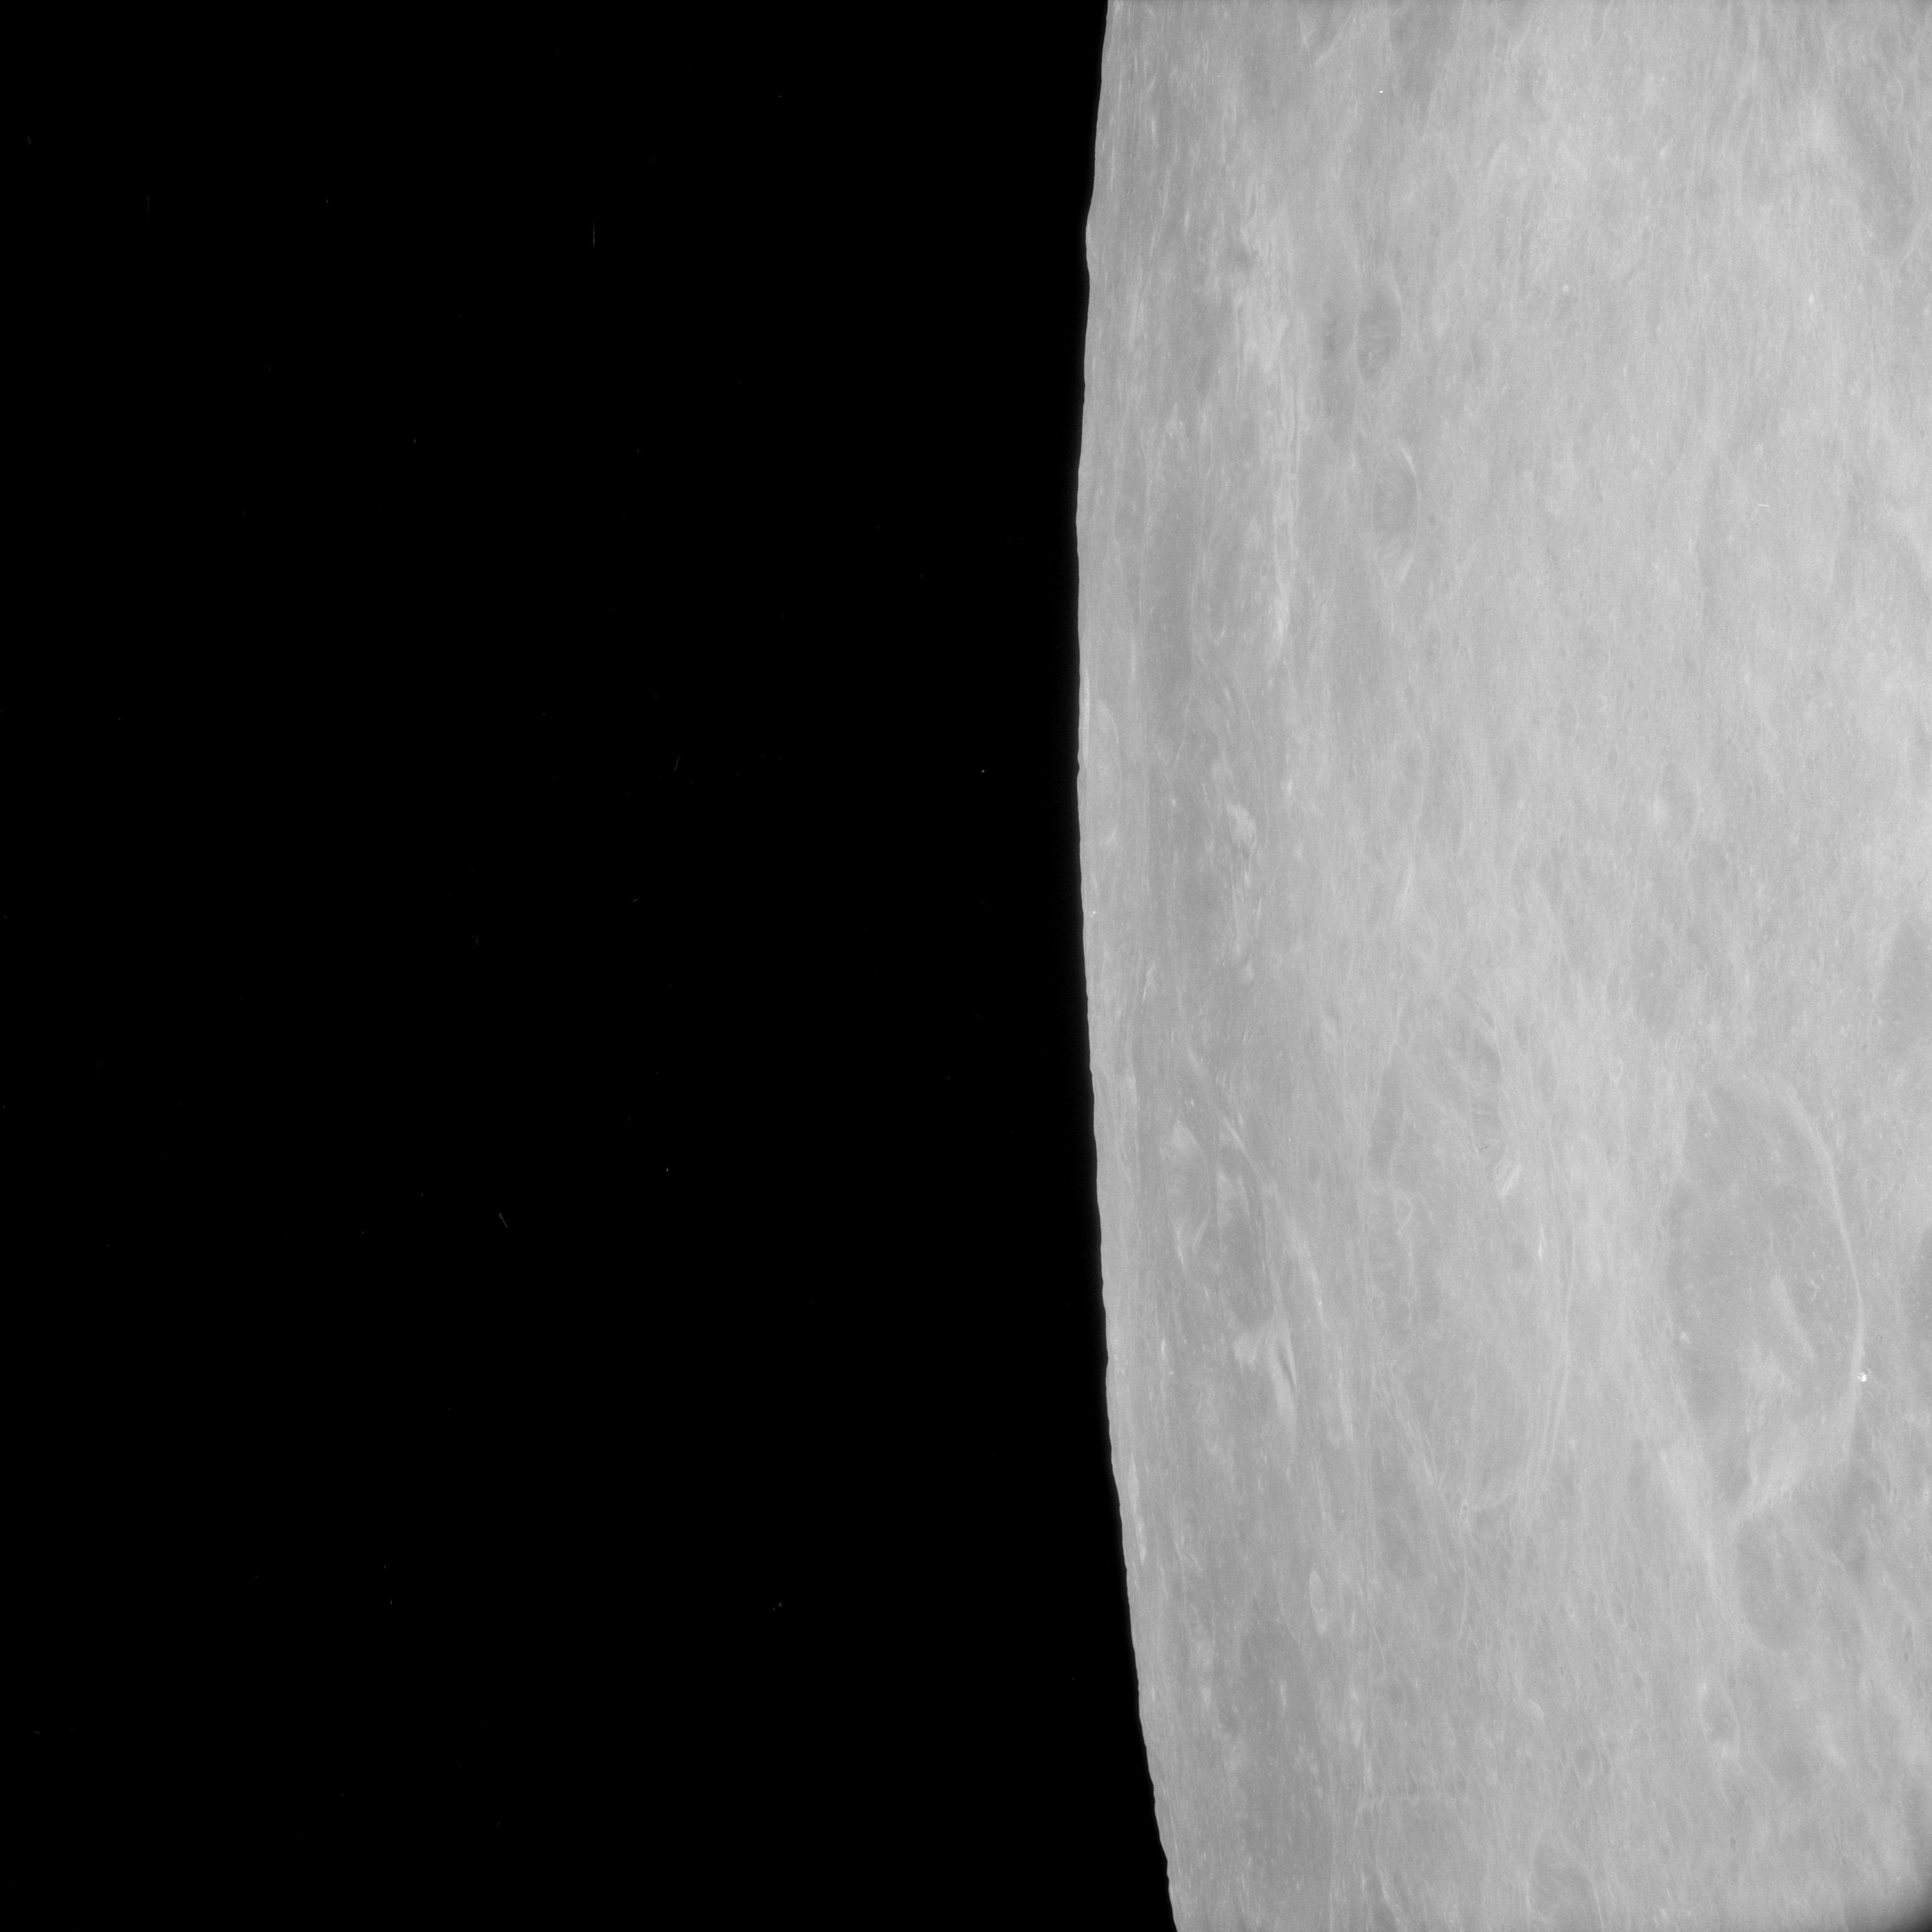
AS11-43-6350 Browse or print resolution. Small fresh rayed crater between Saenger and Erro. Coordinates of crater are 4.57N, 101.10E. Image credit: Image Science and Analysis Laboratory, NASA-Johnson Space Center. |

|
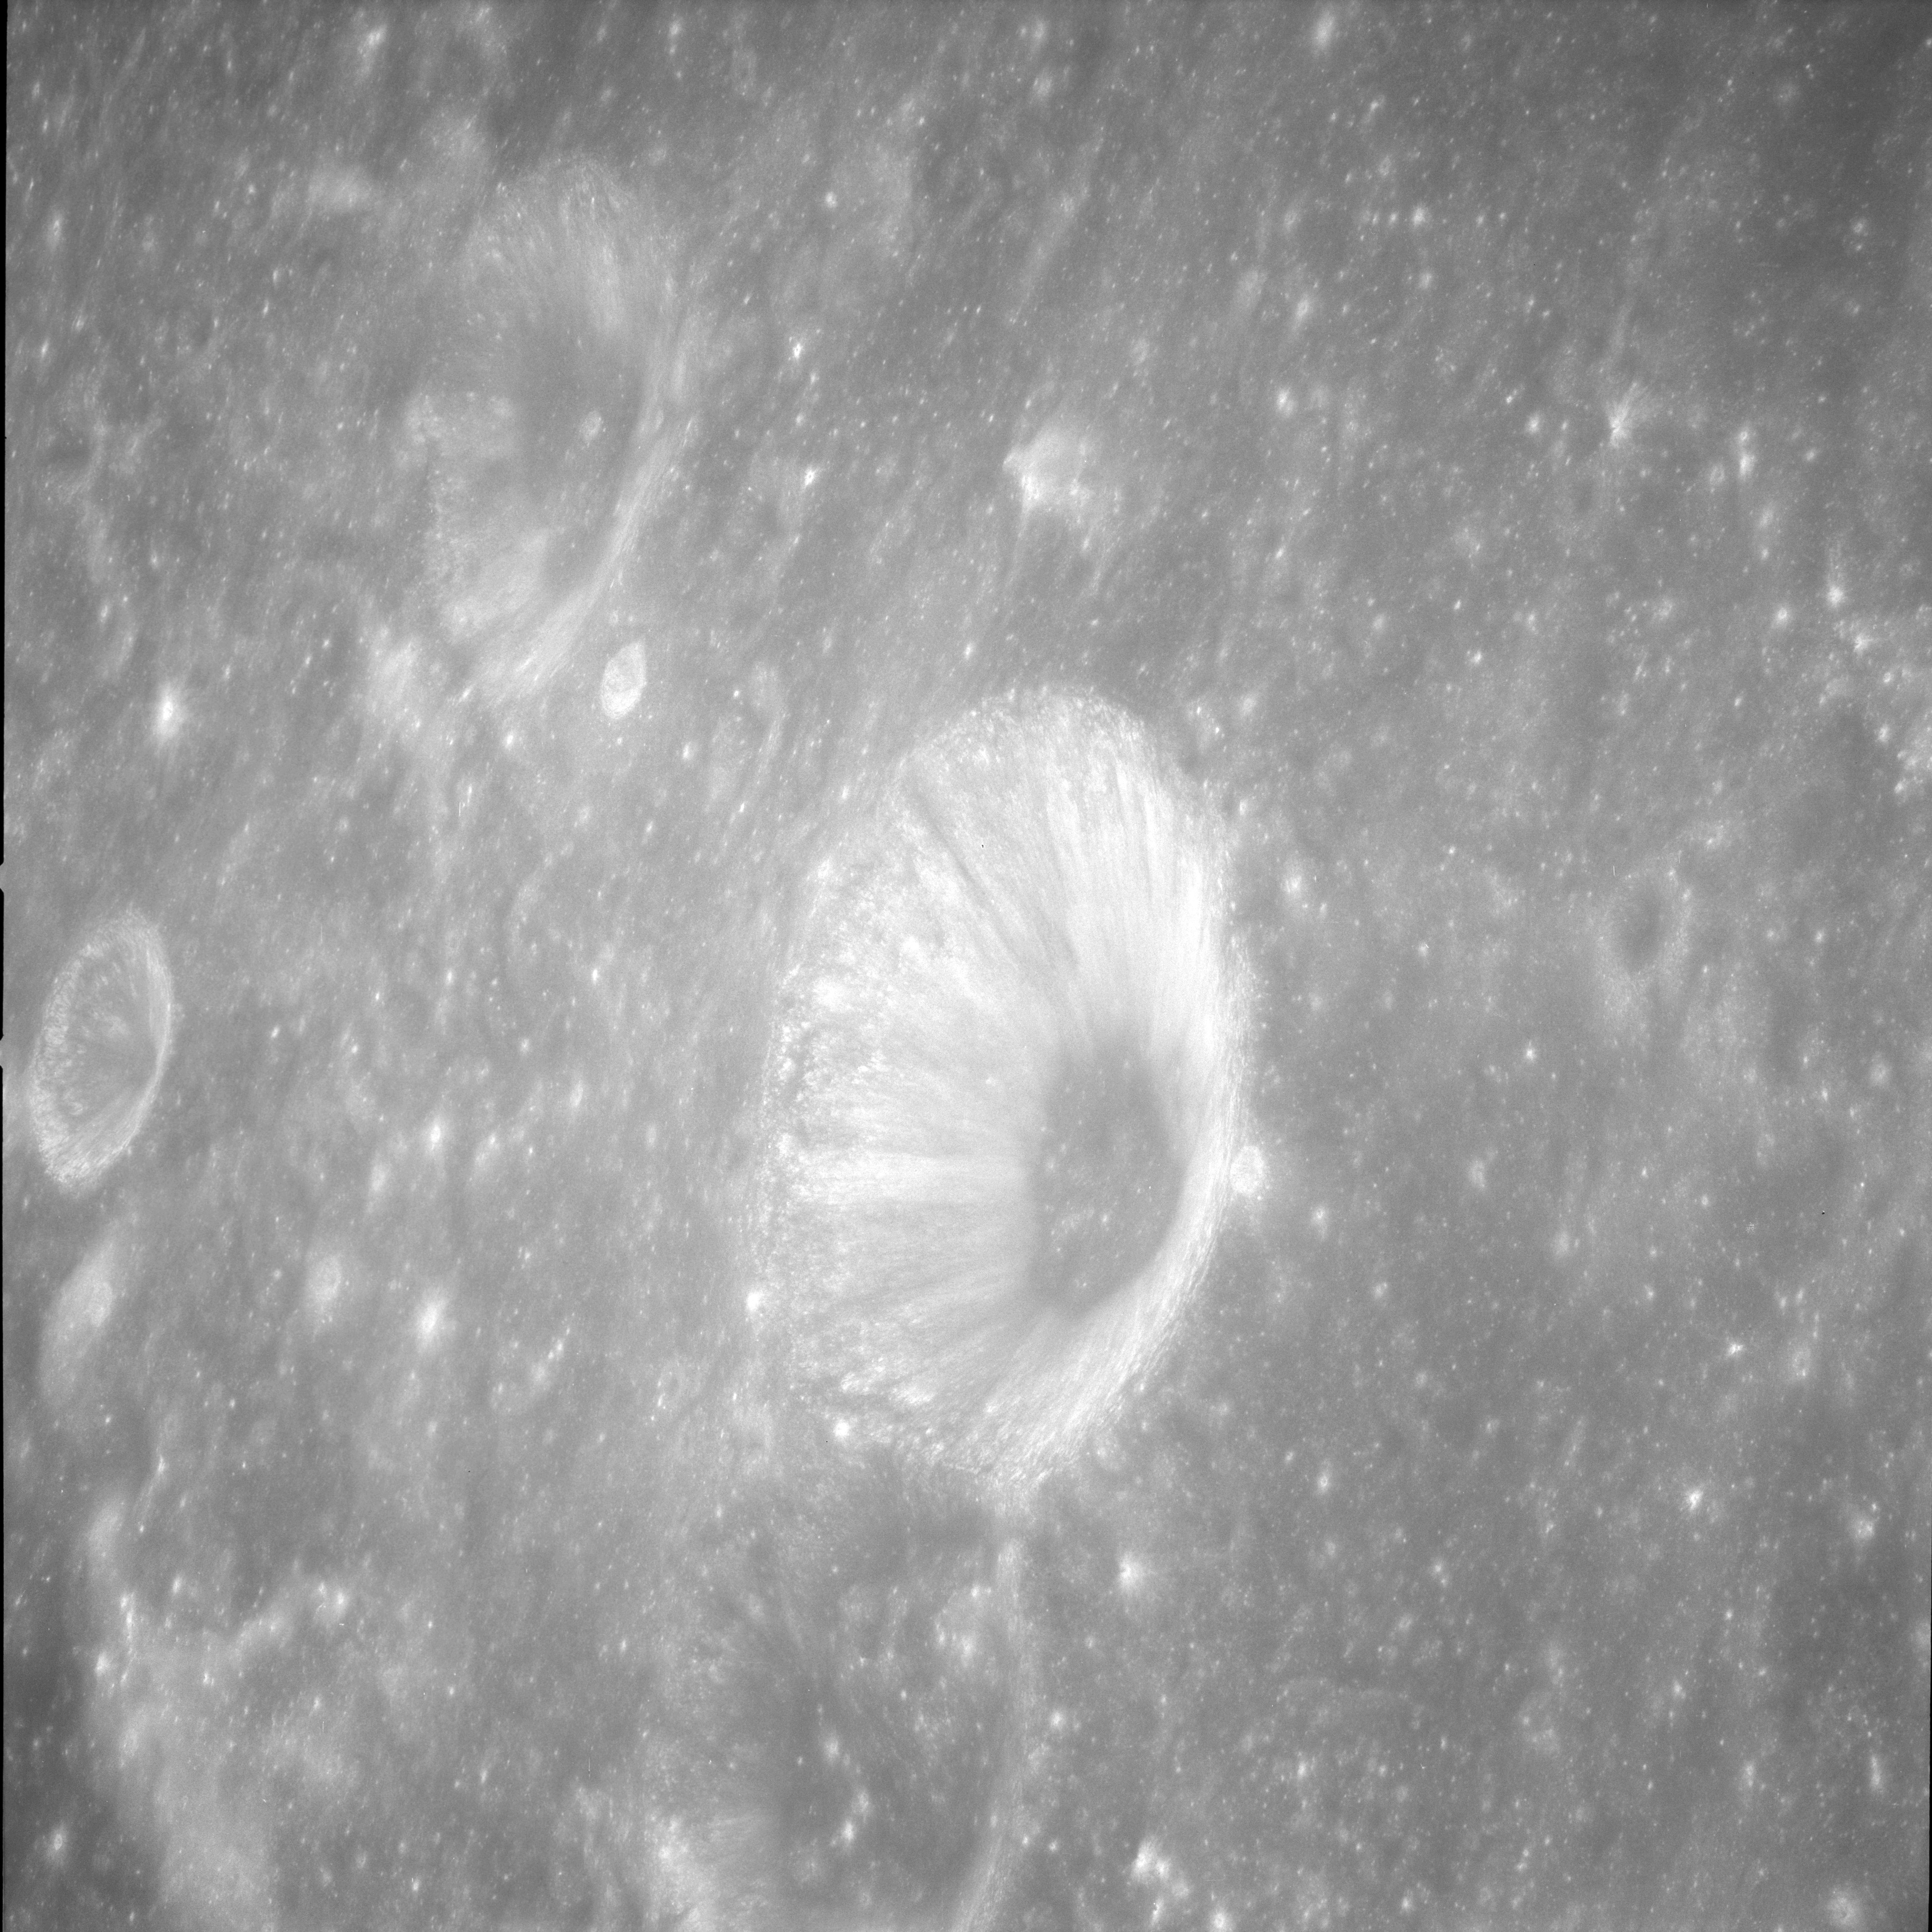
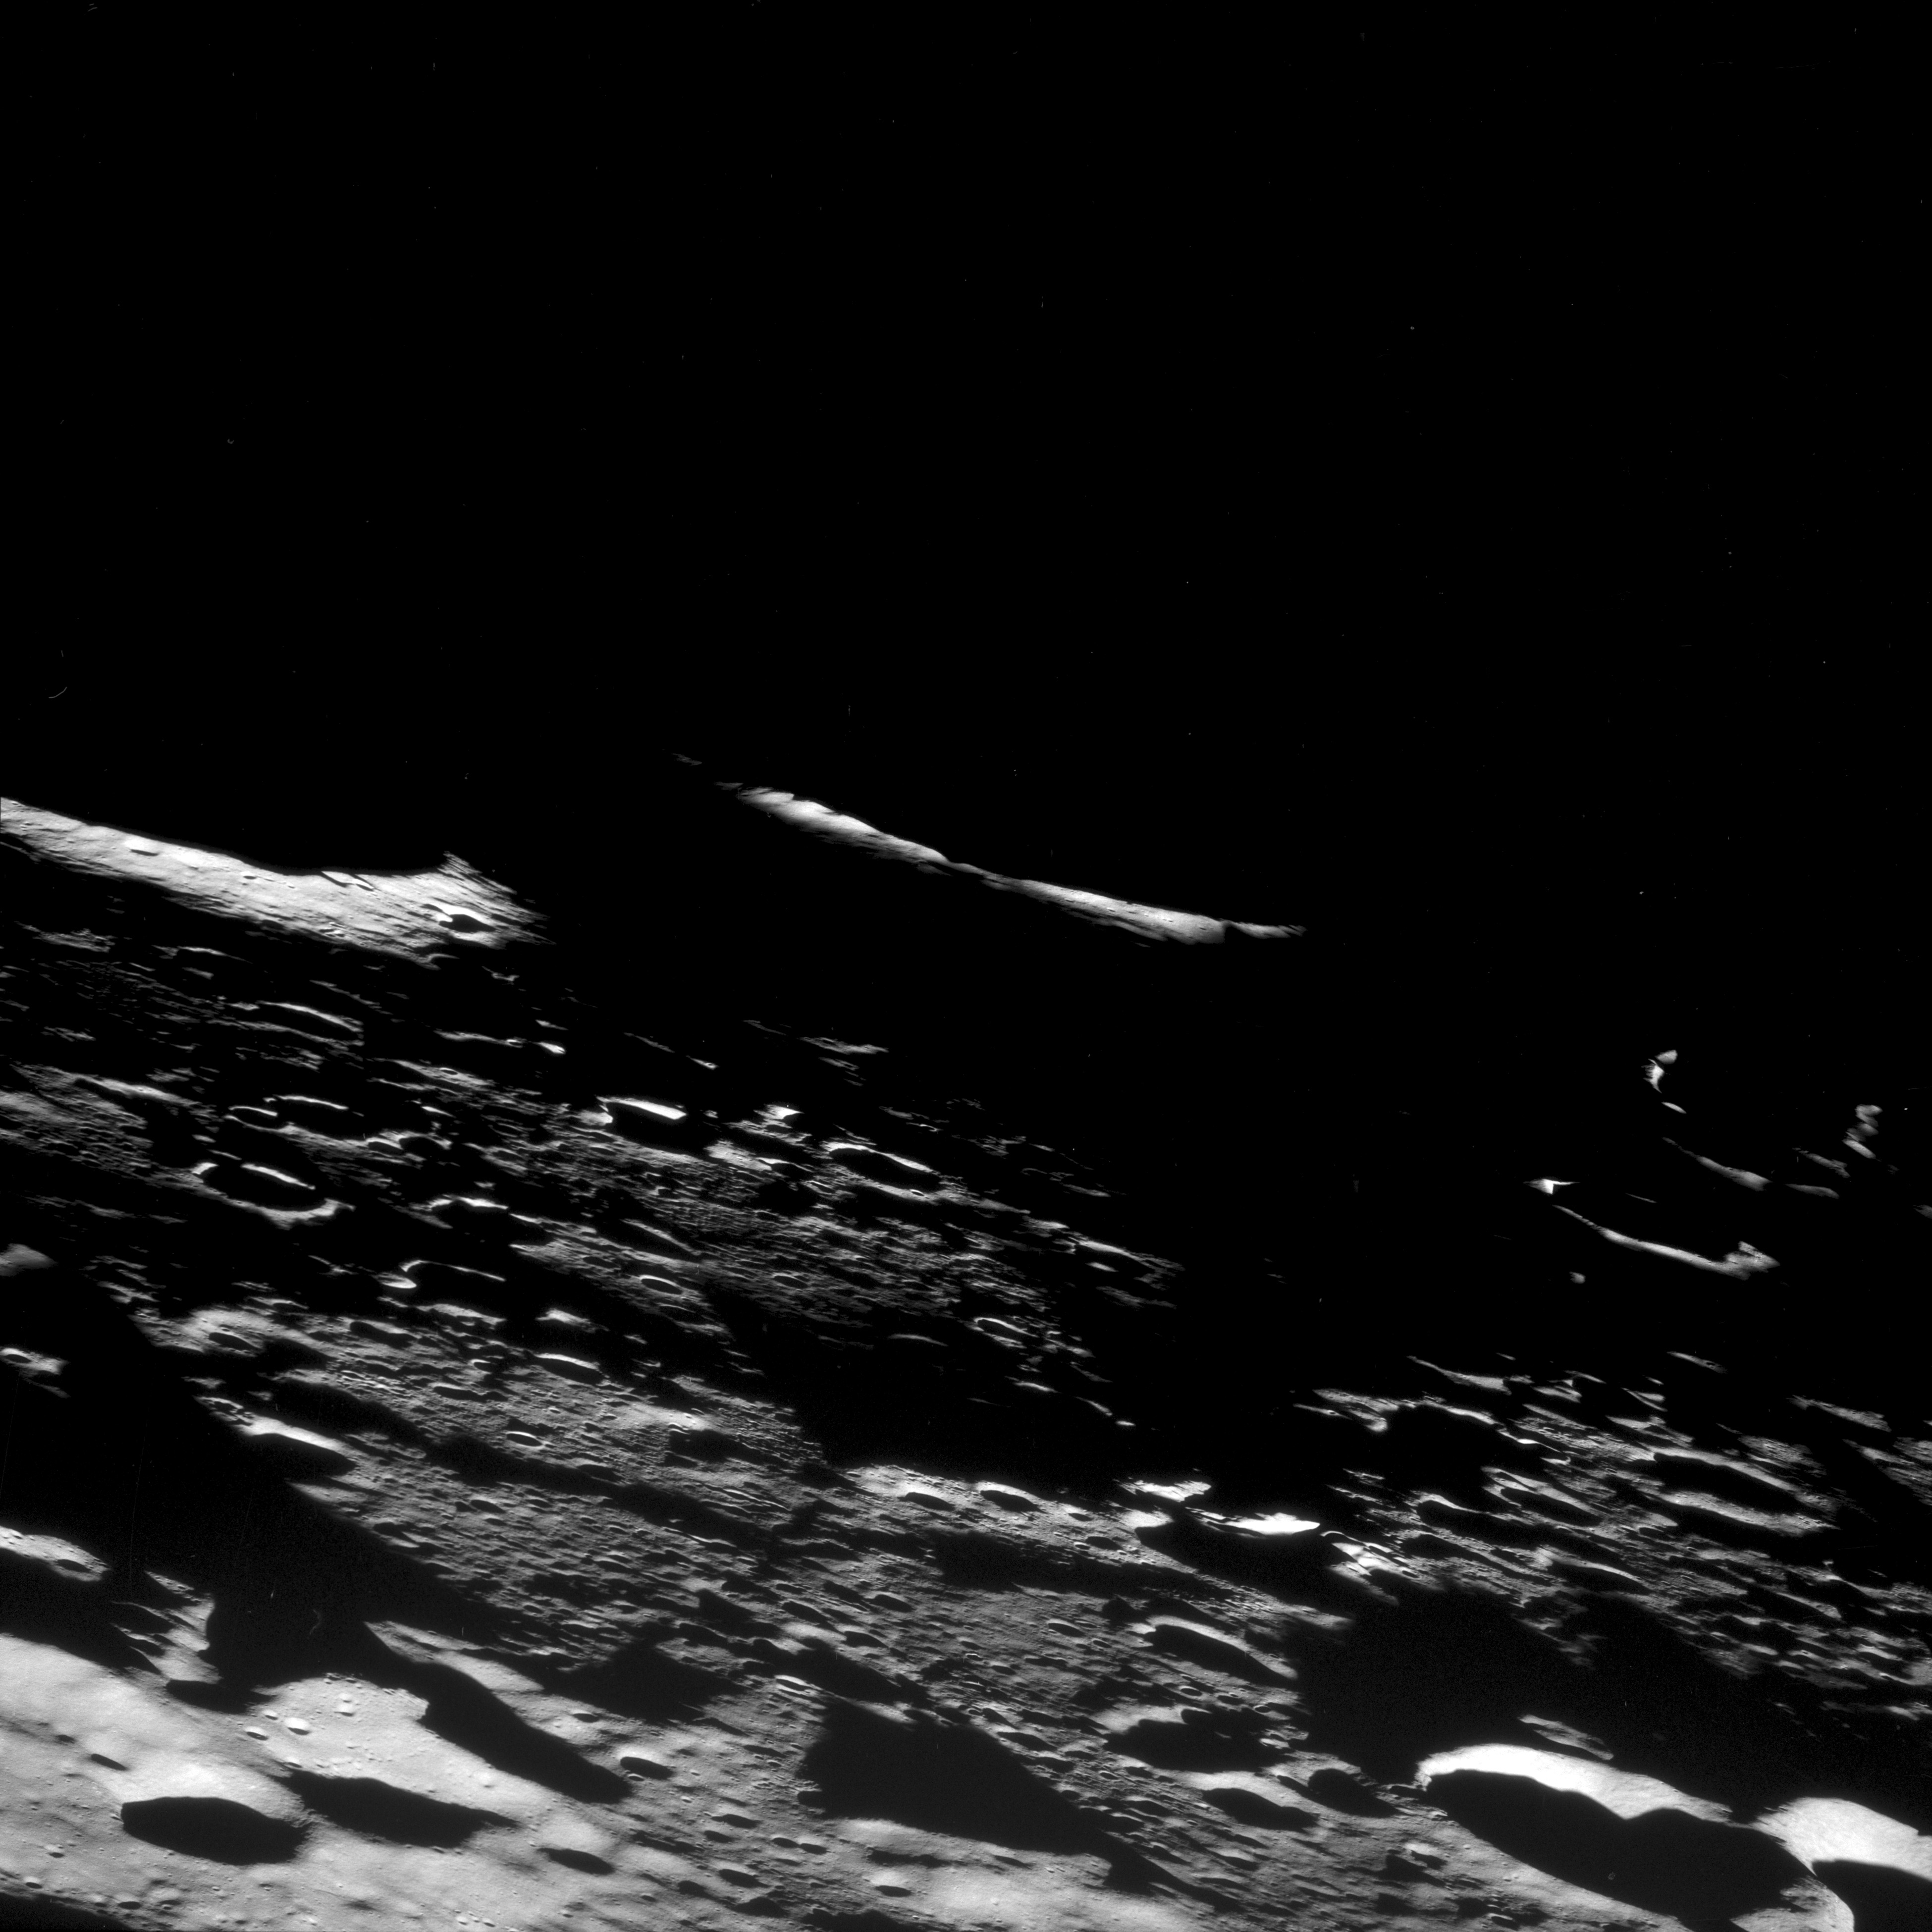
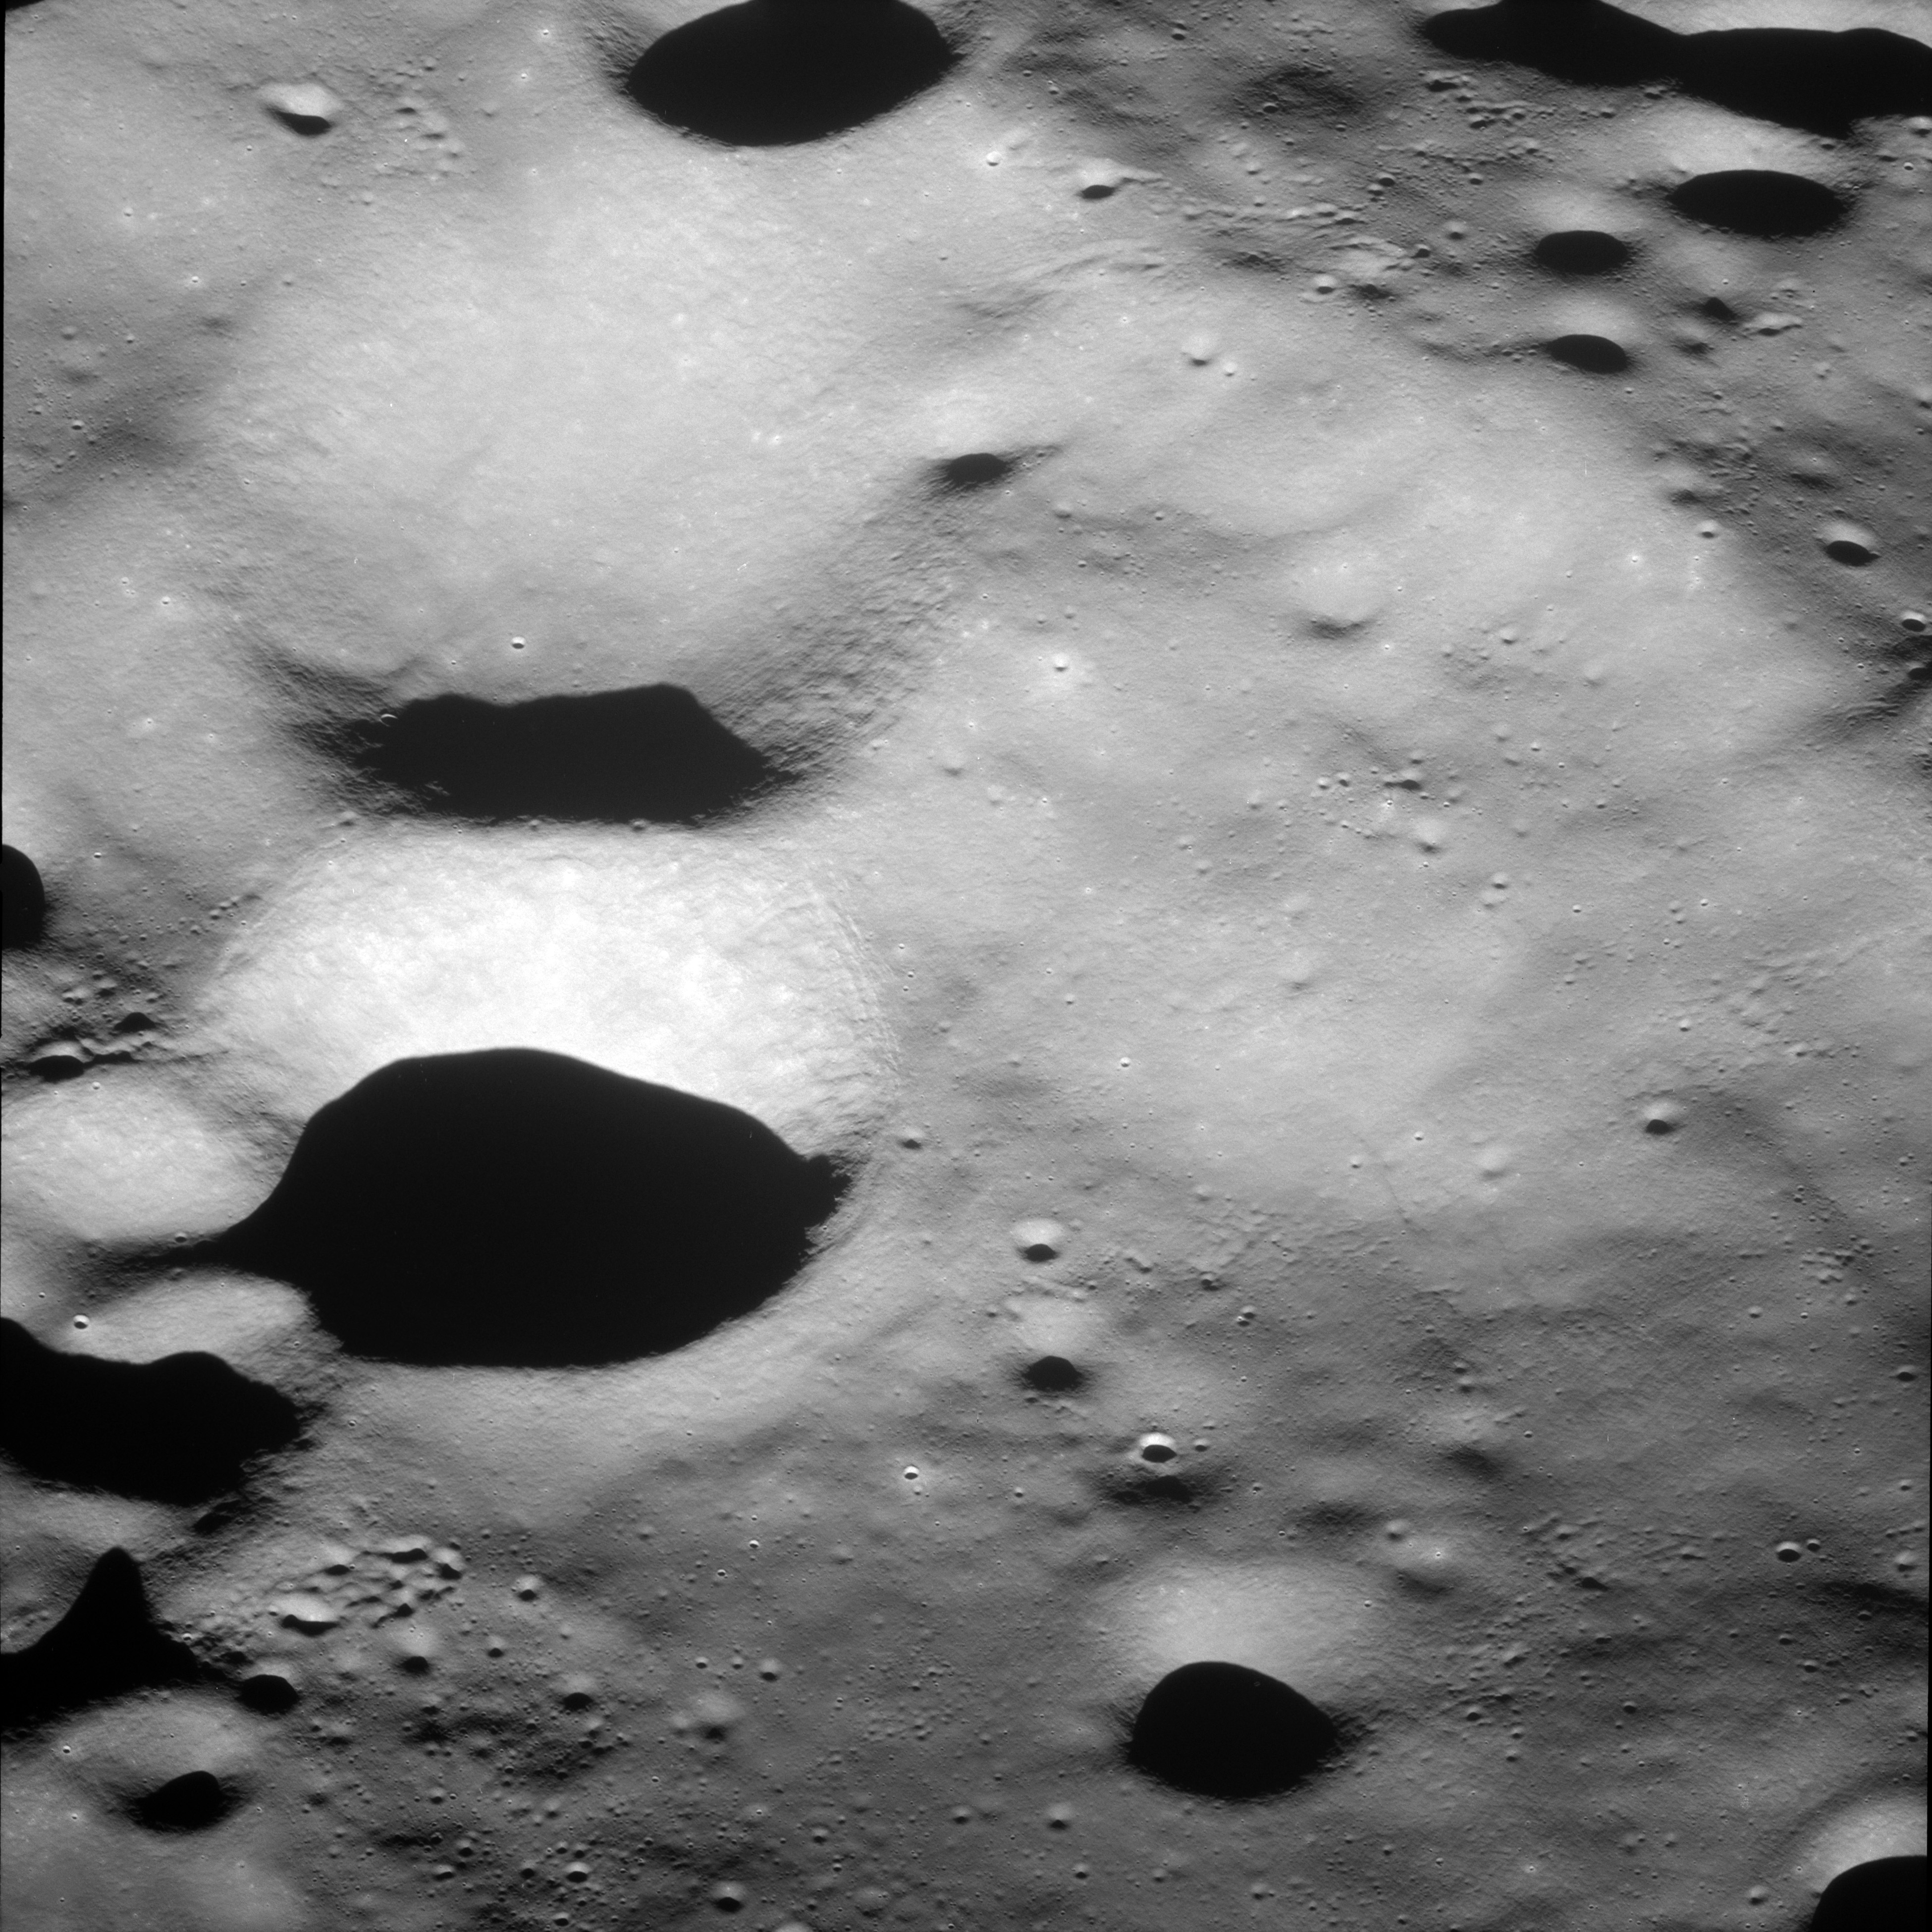
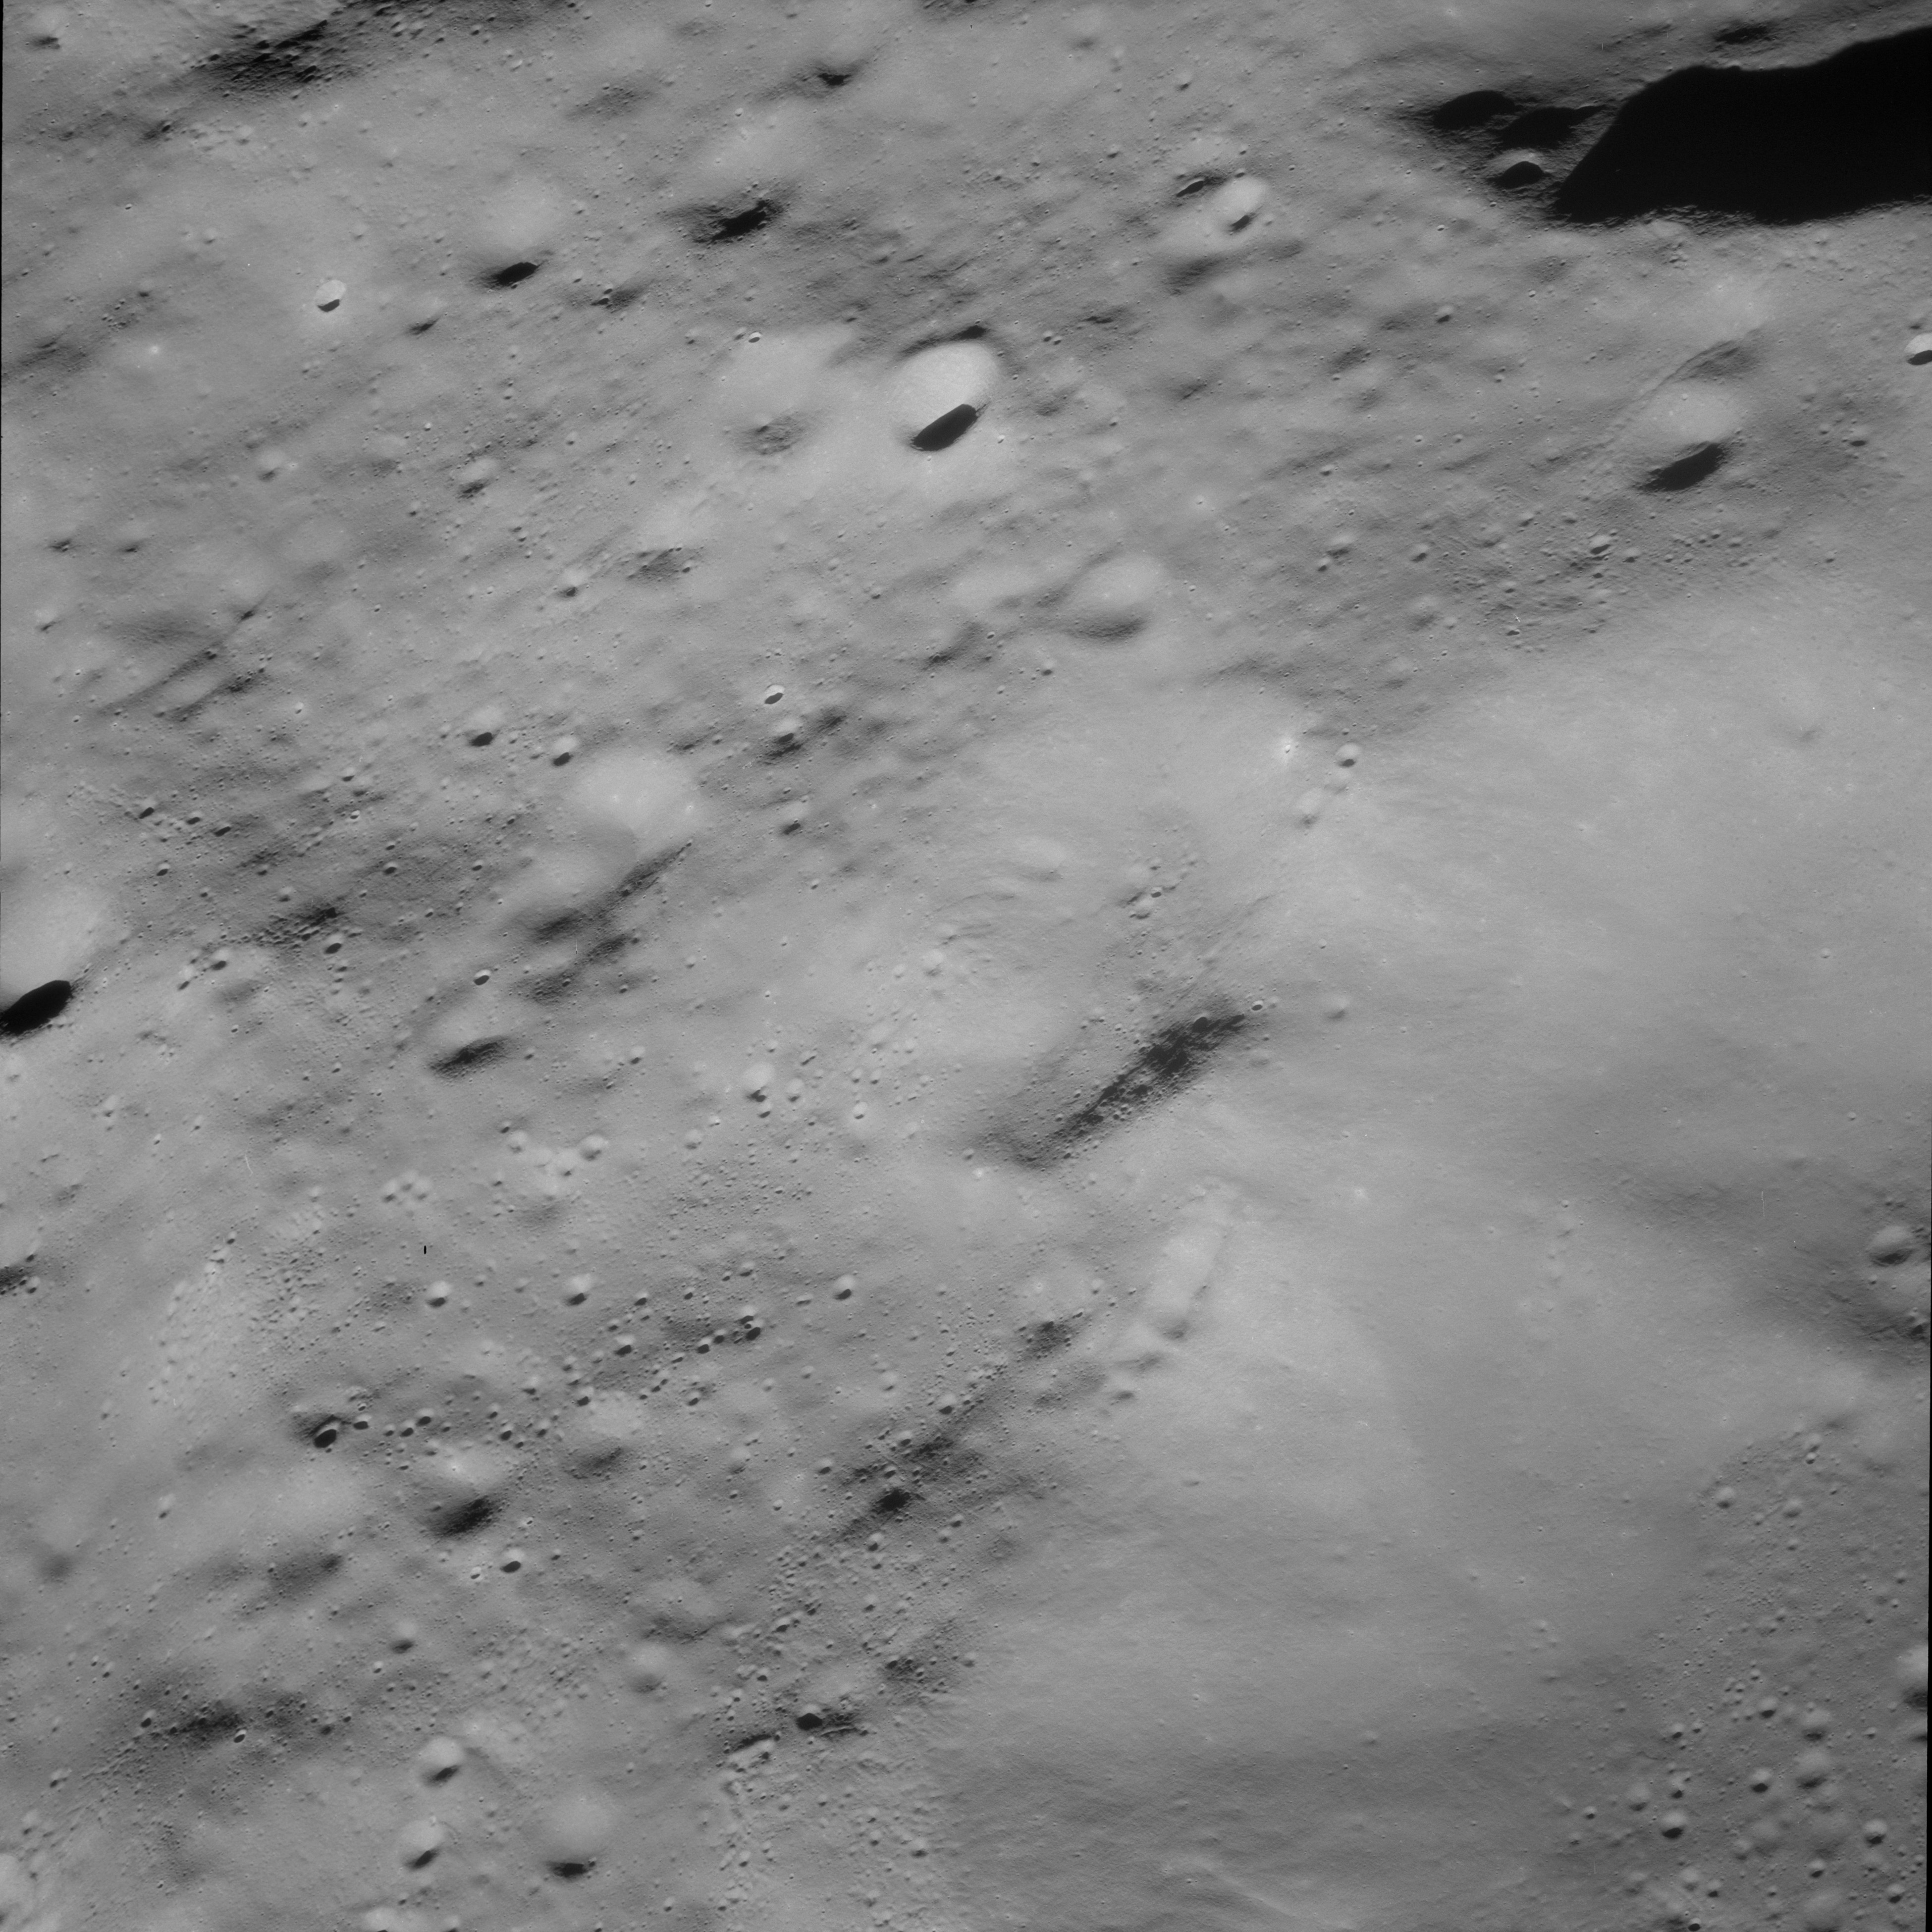
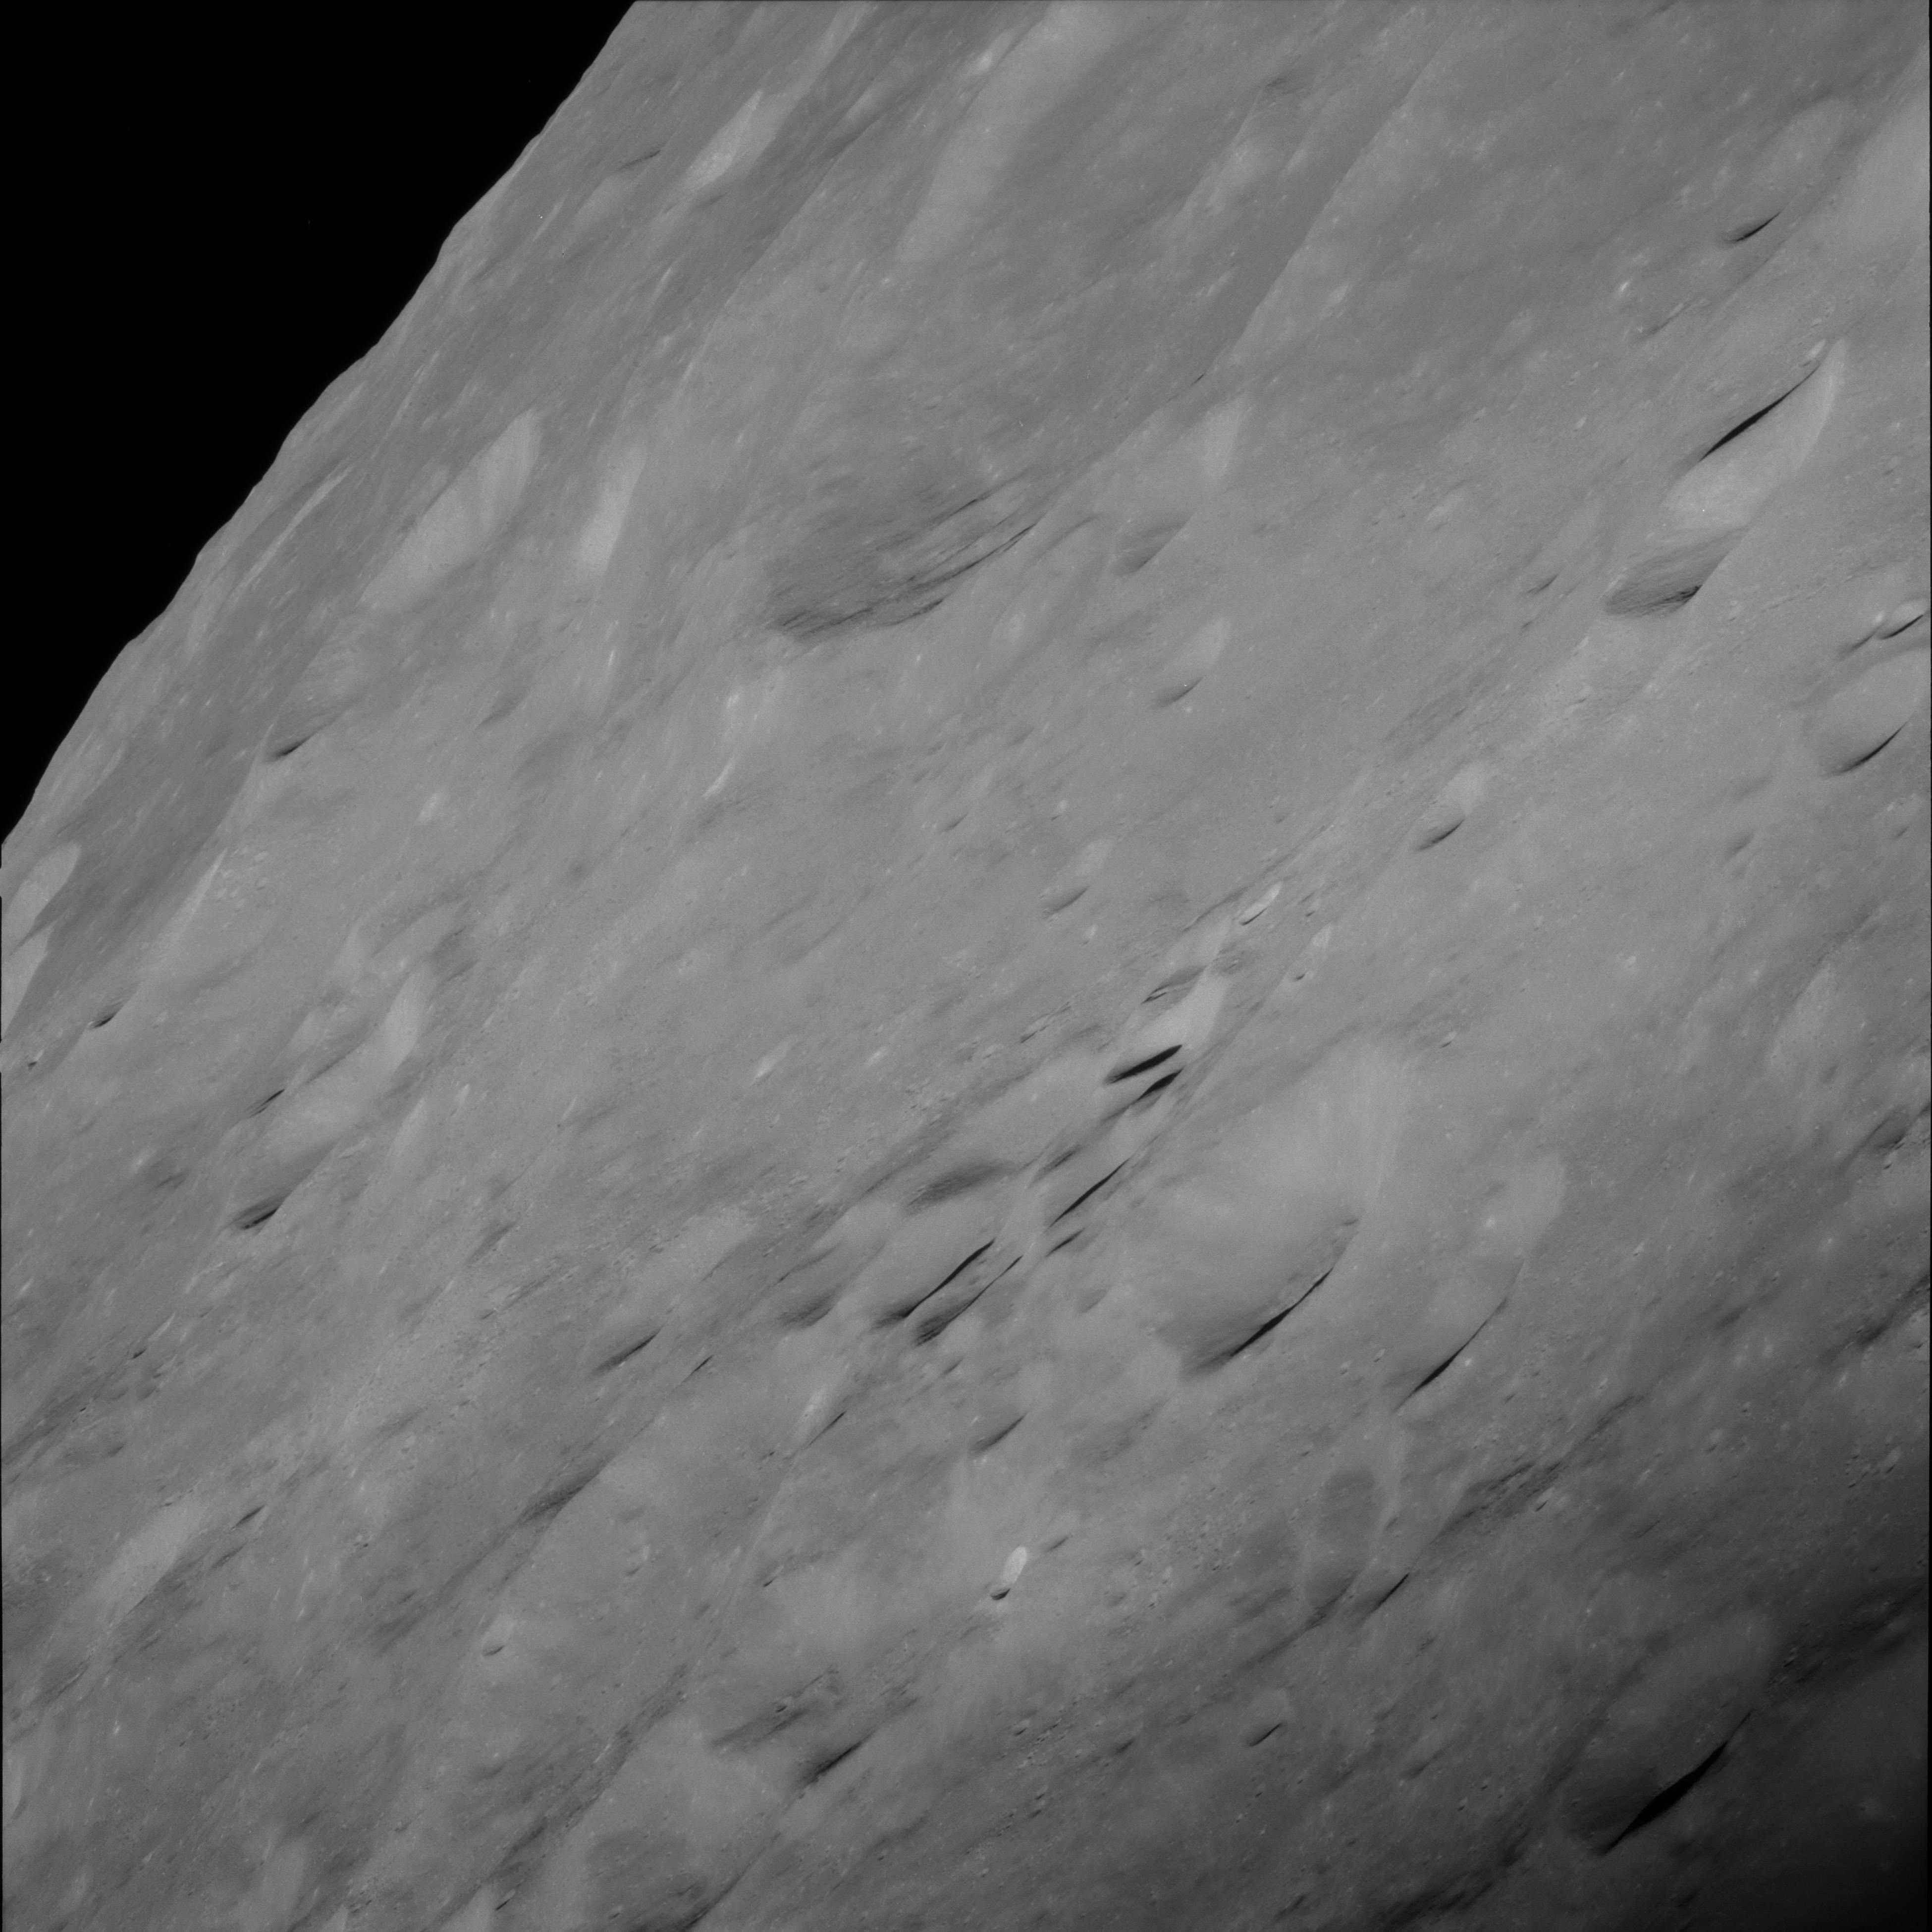
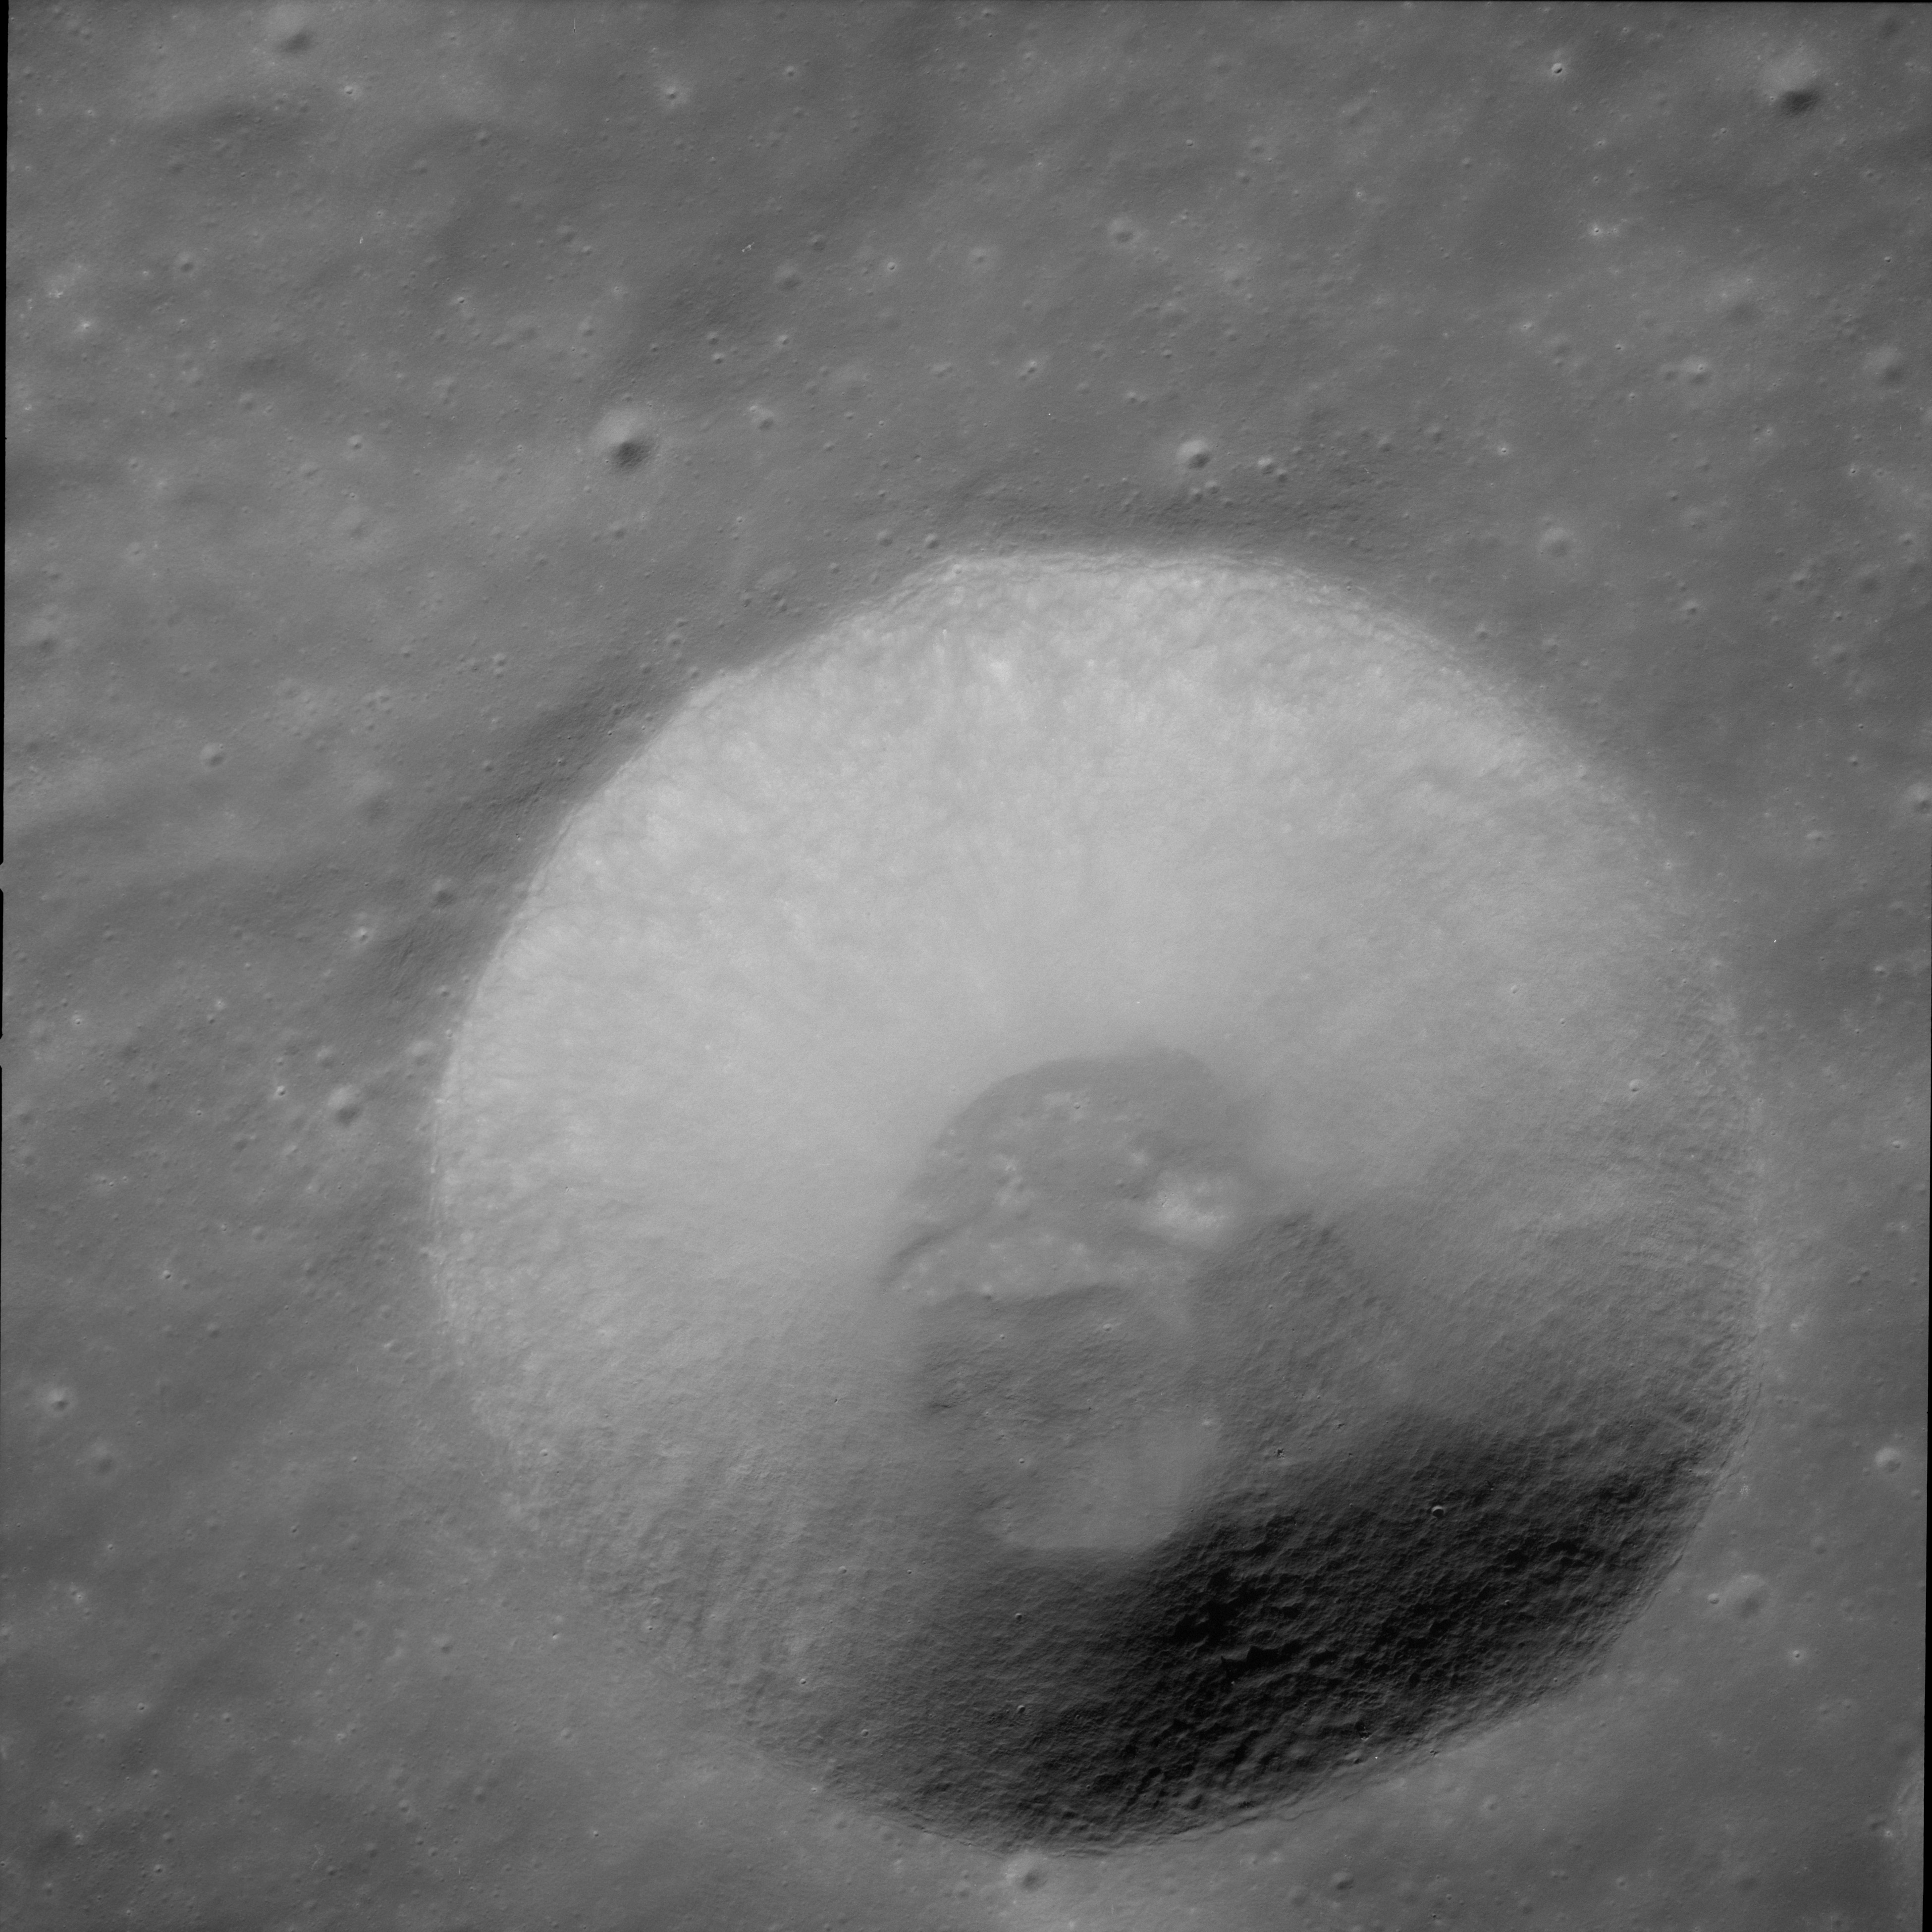
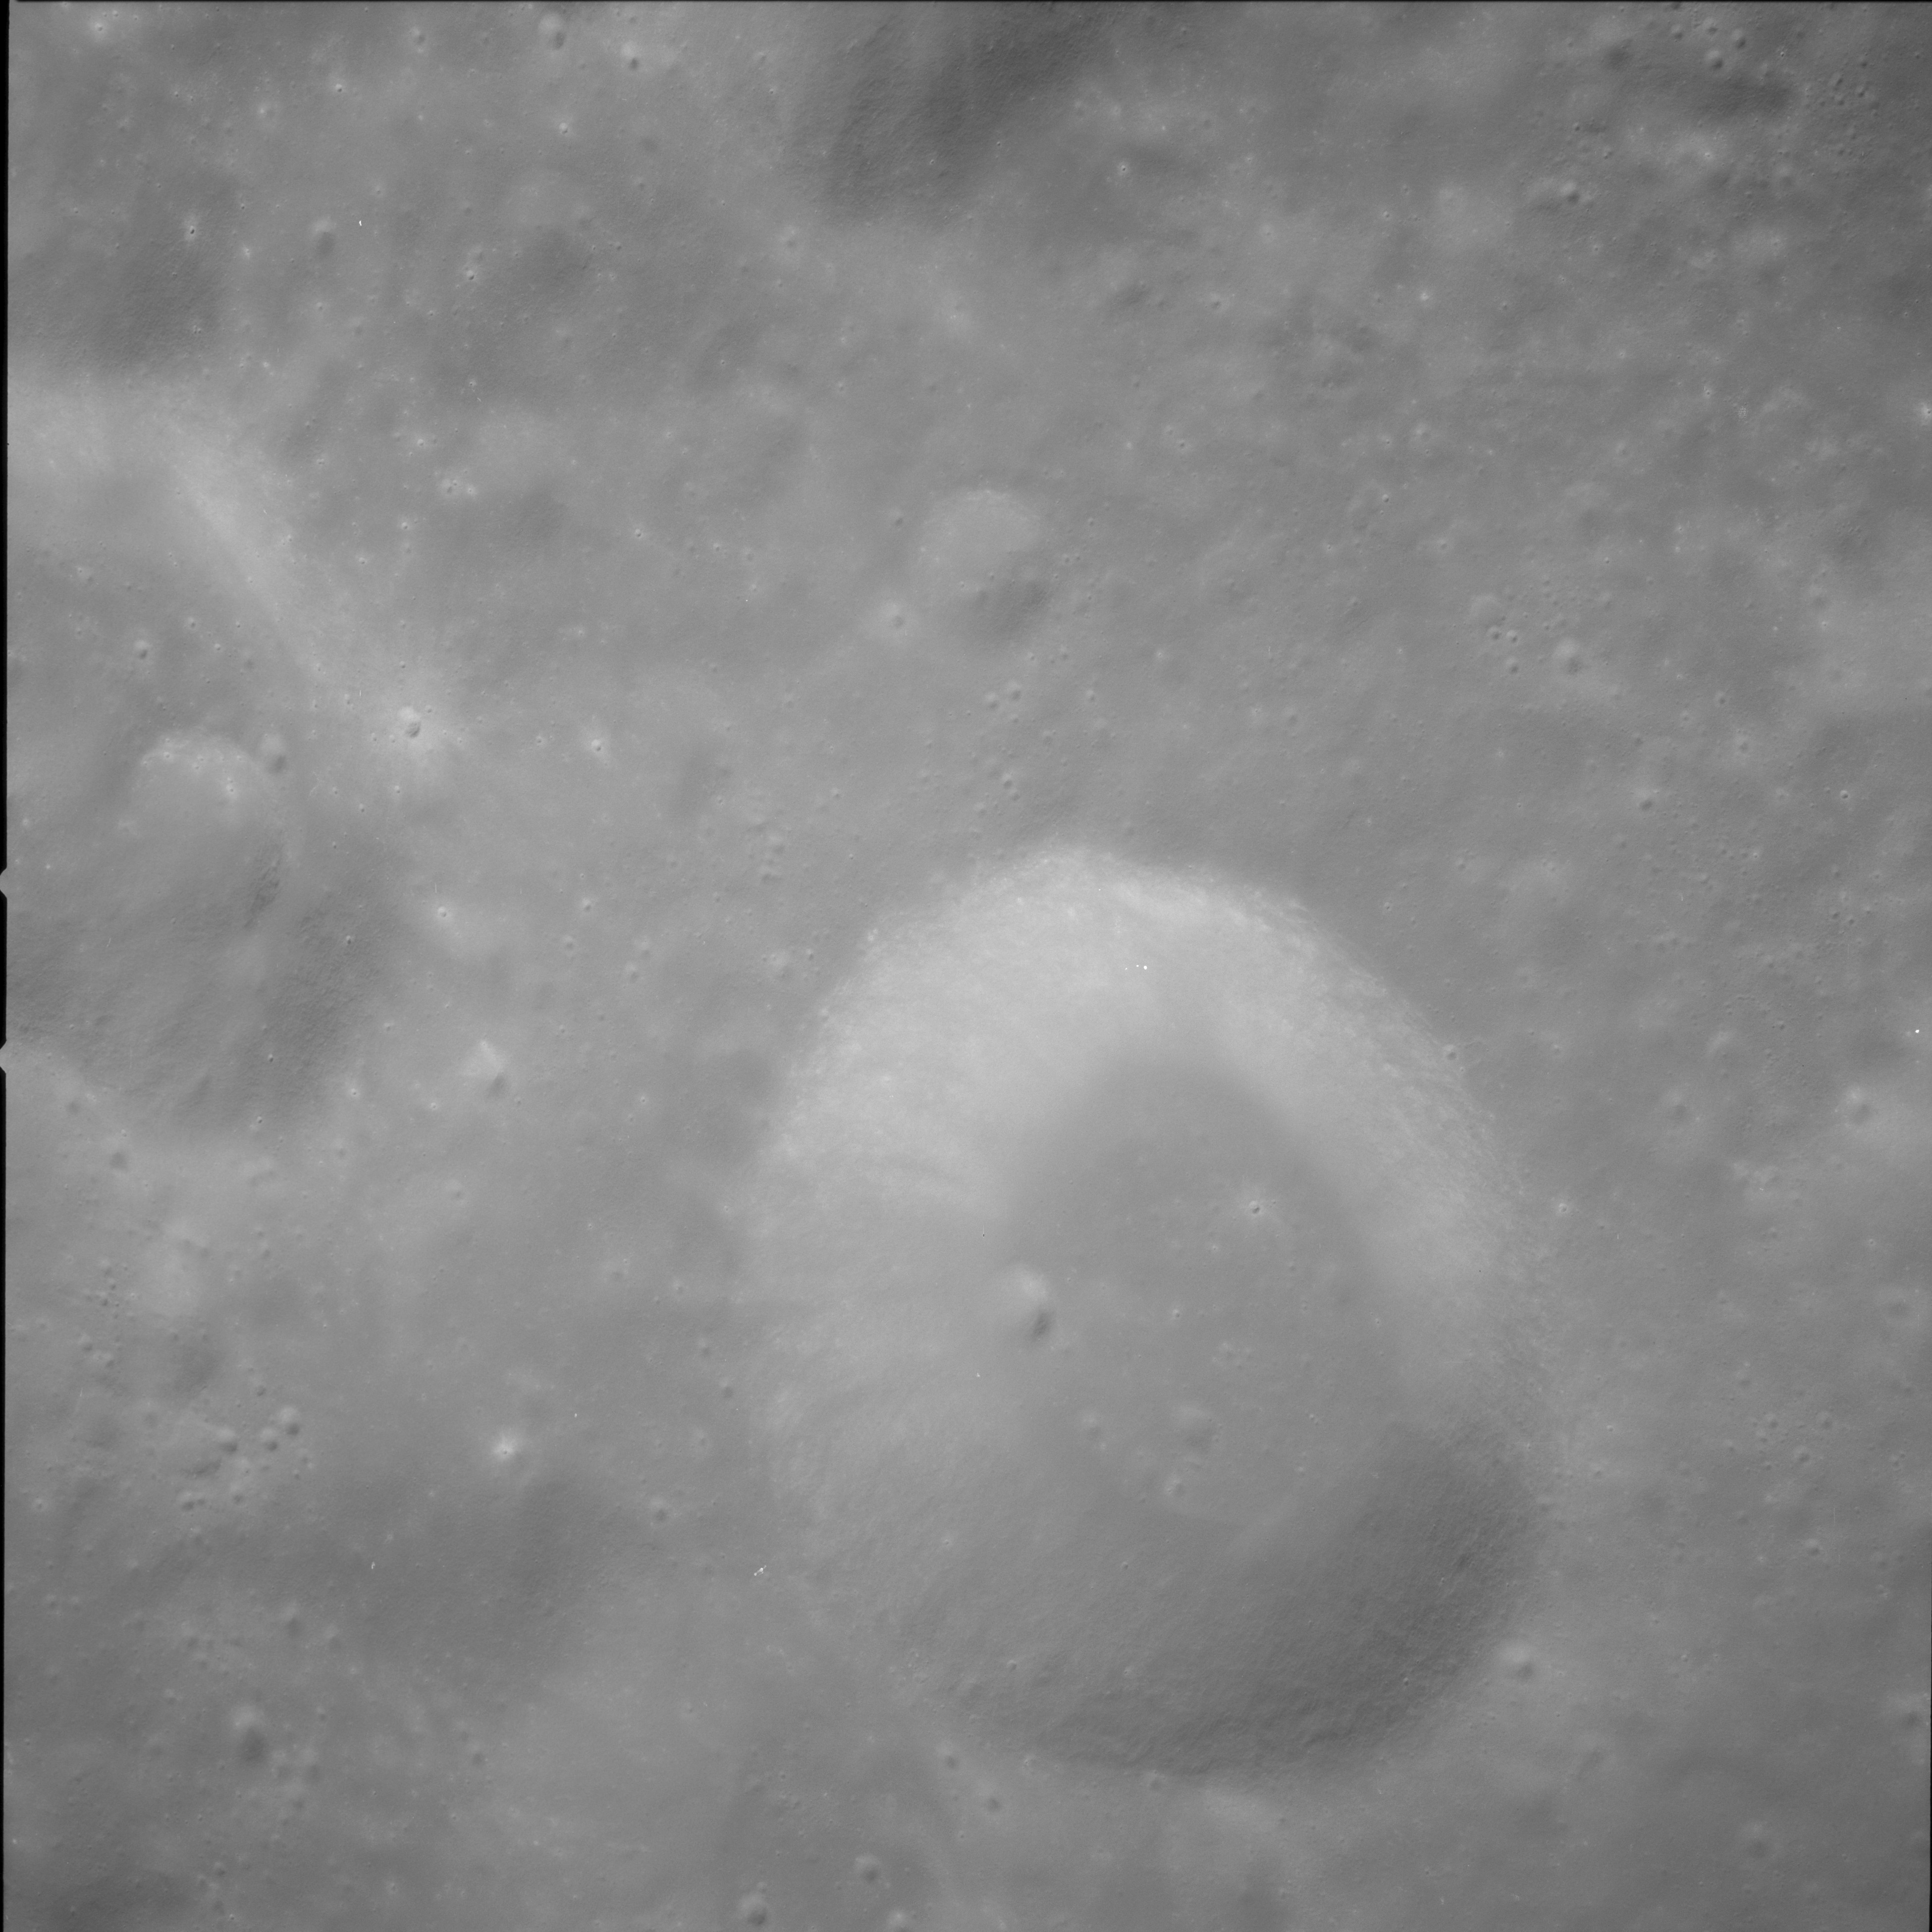
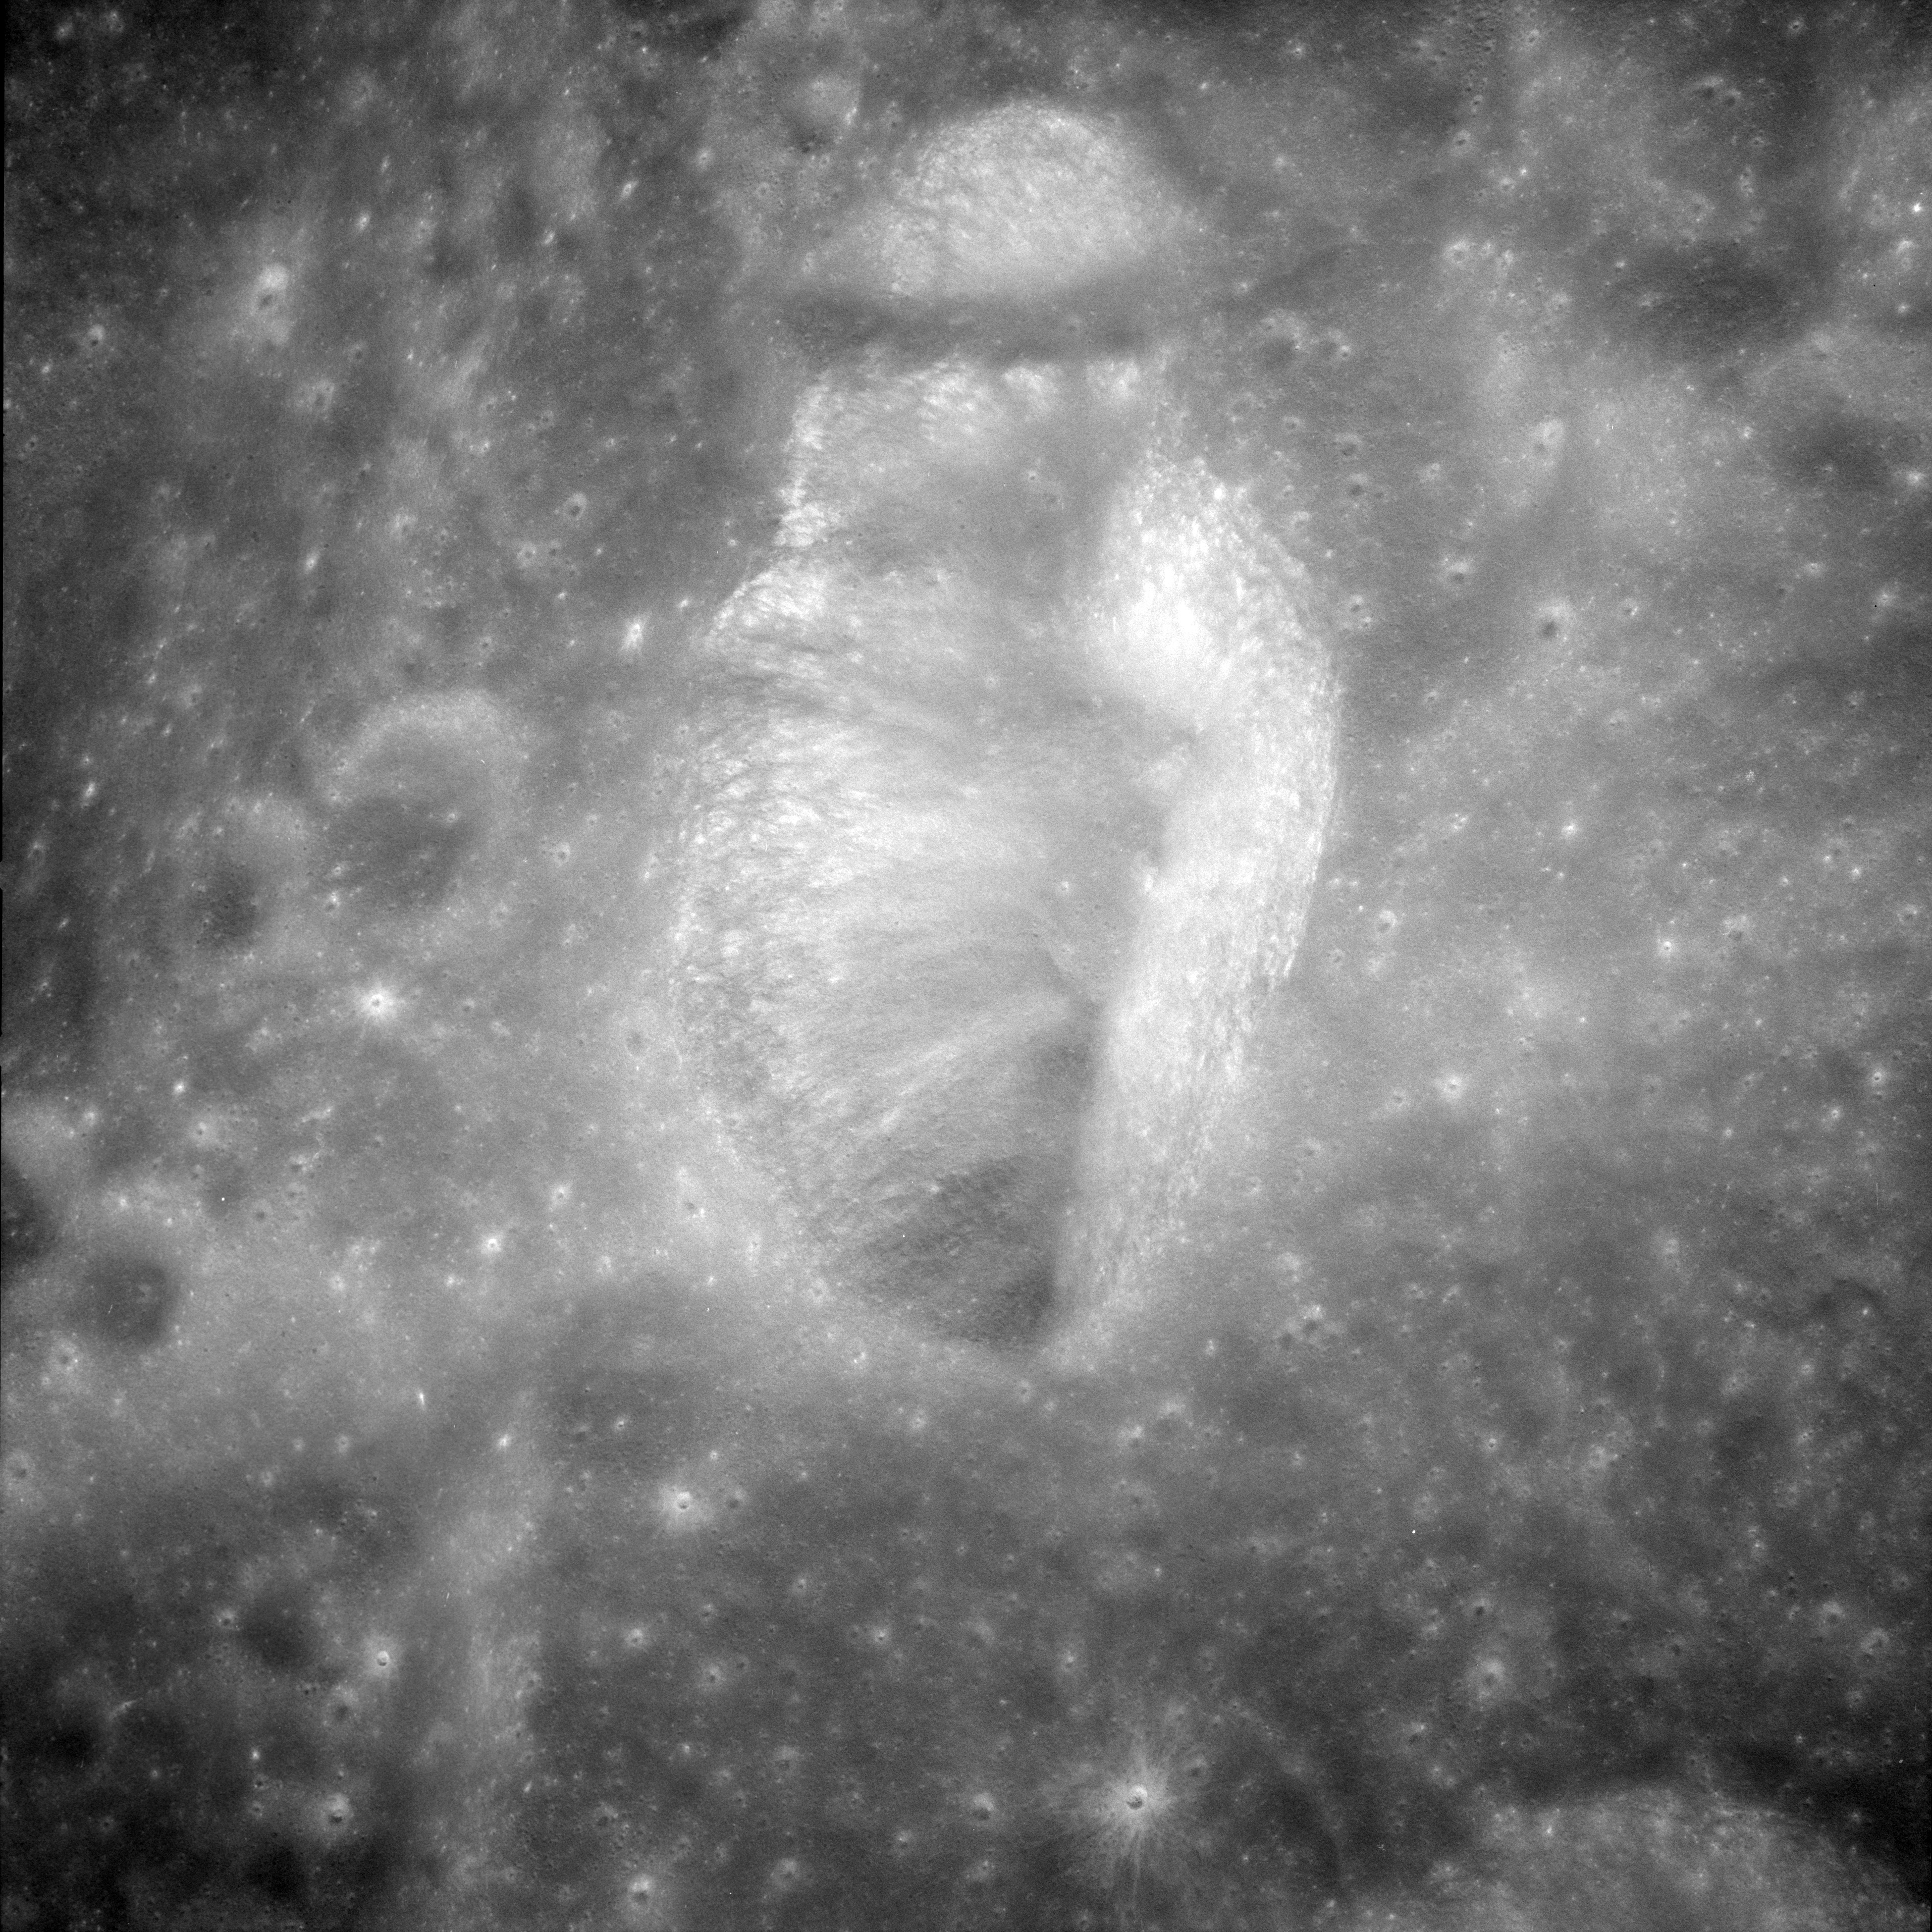
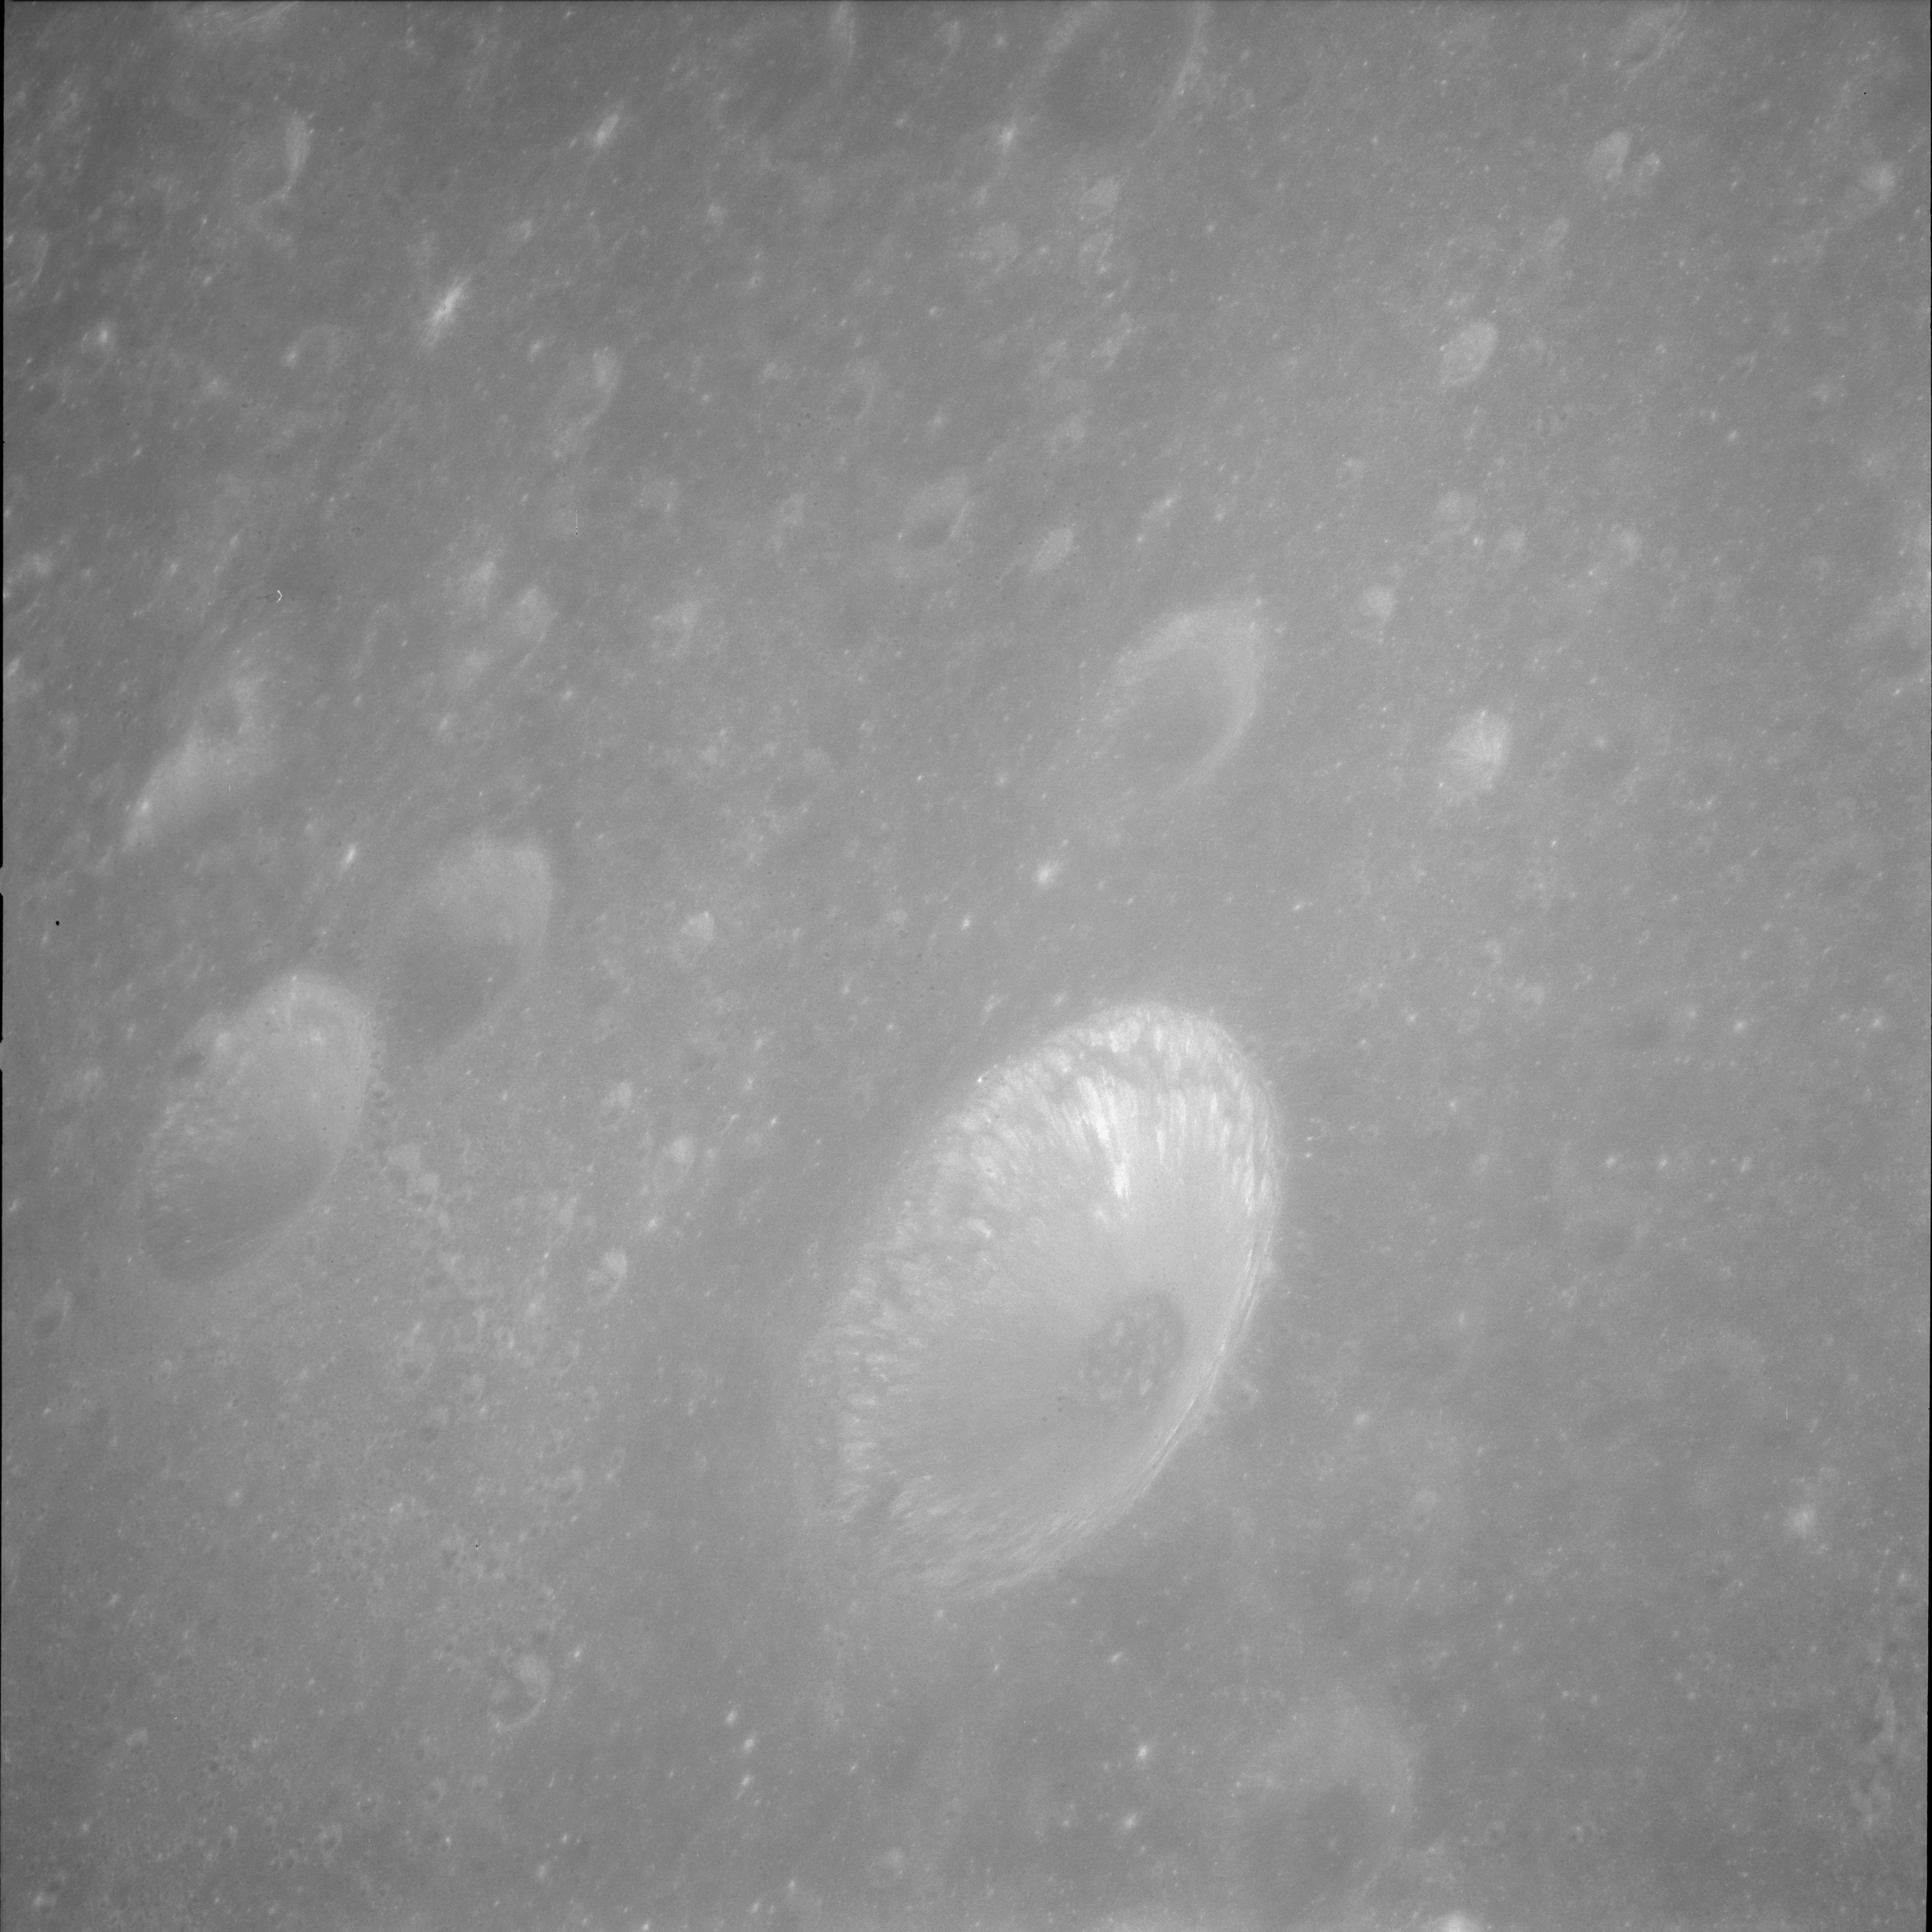
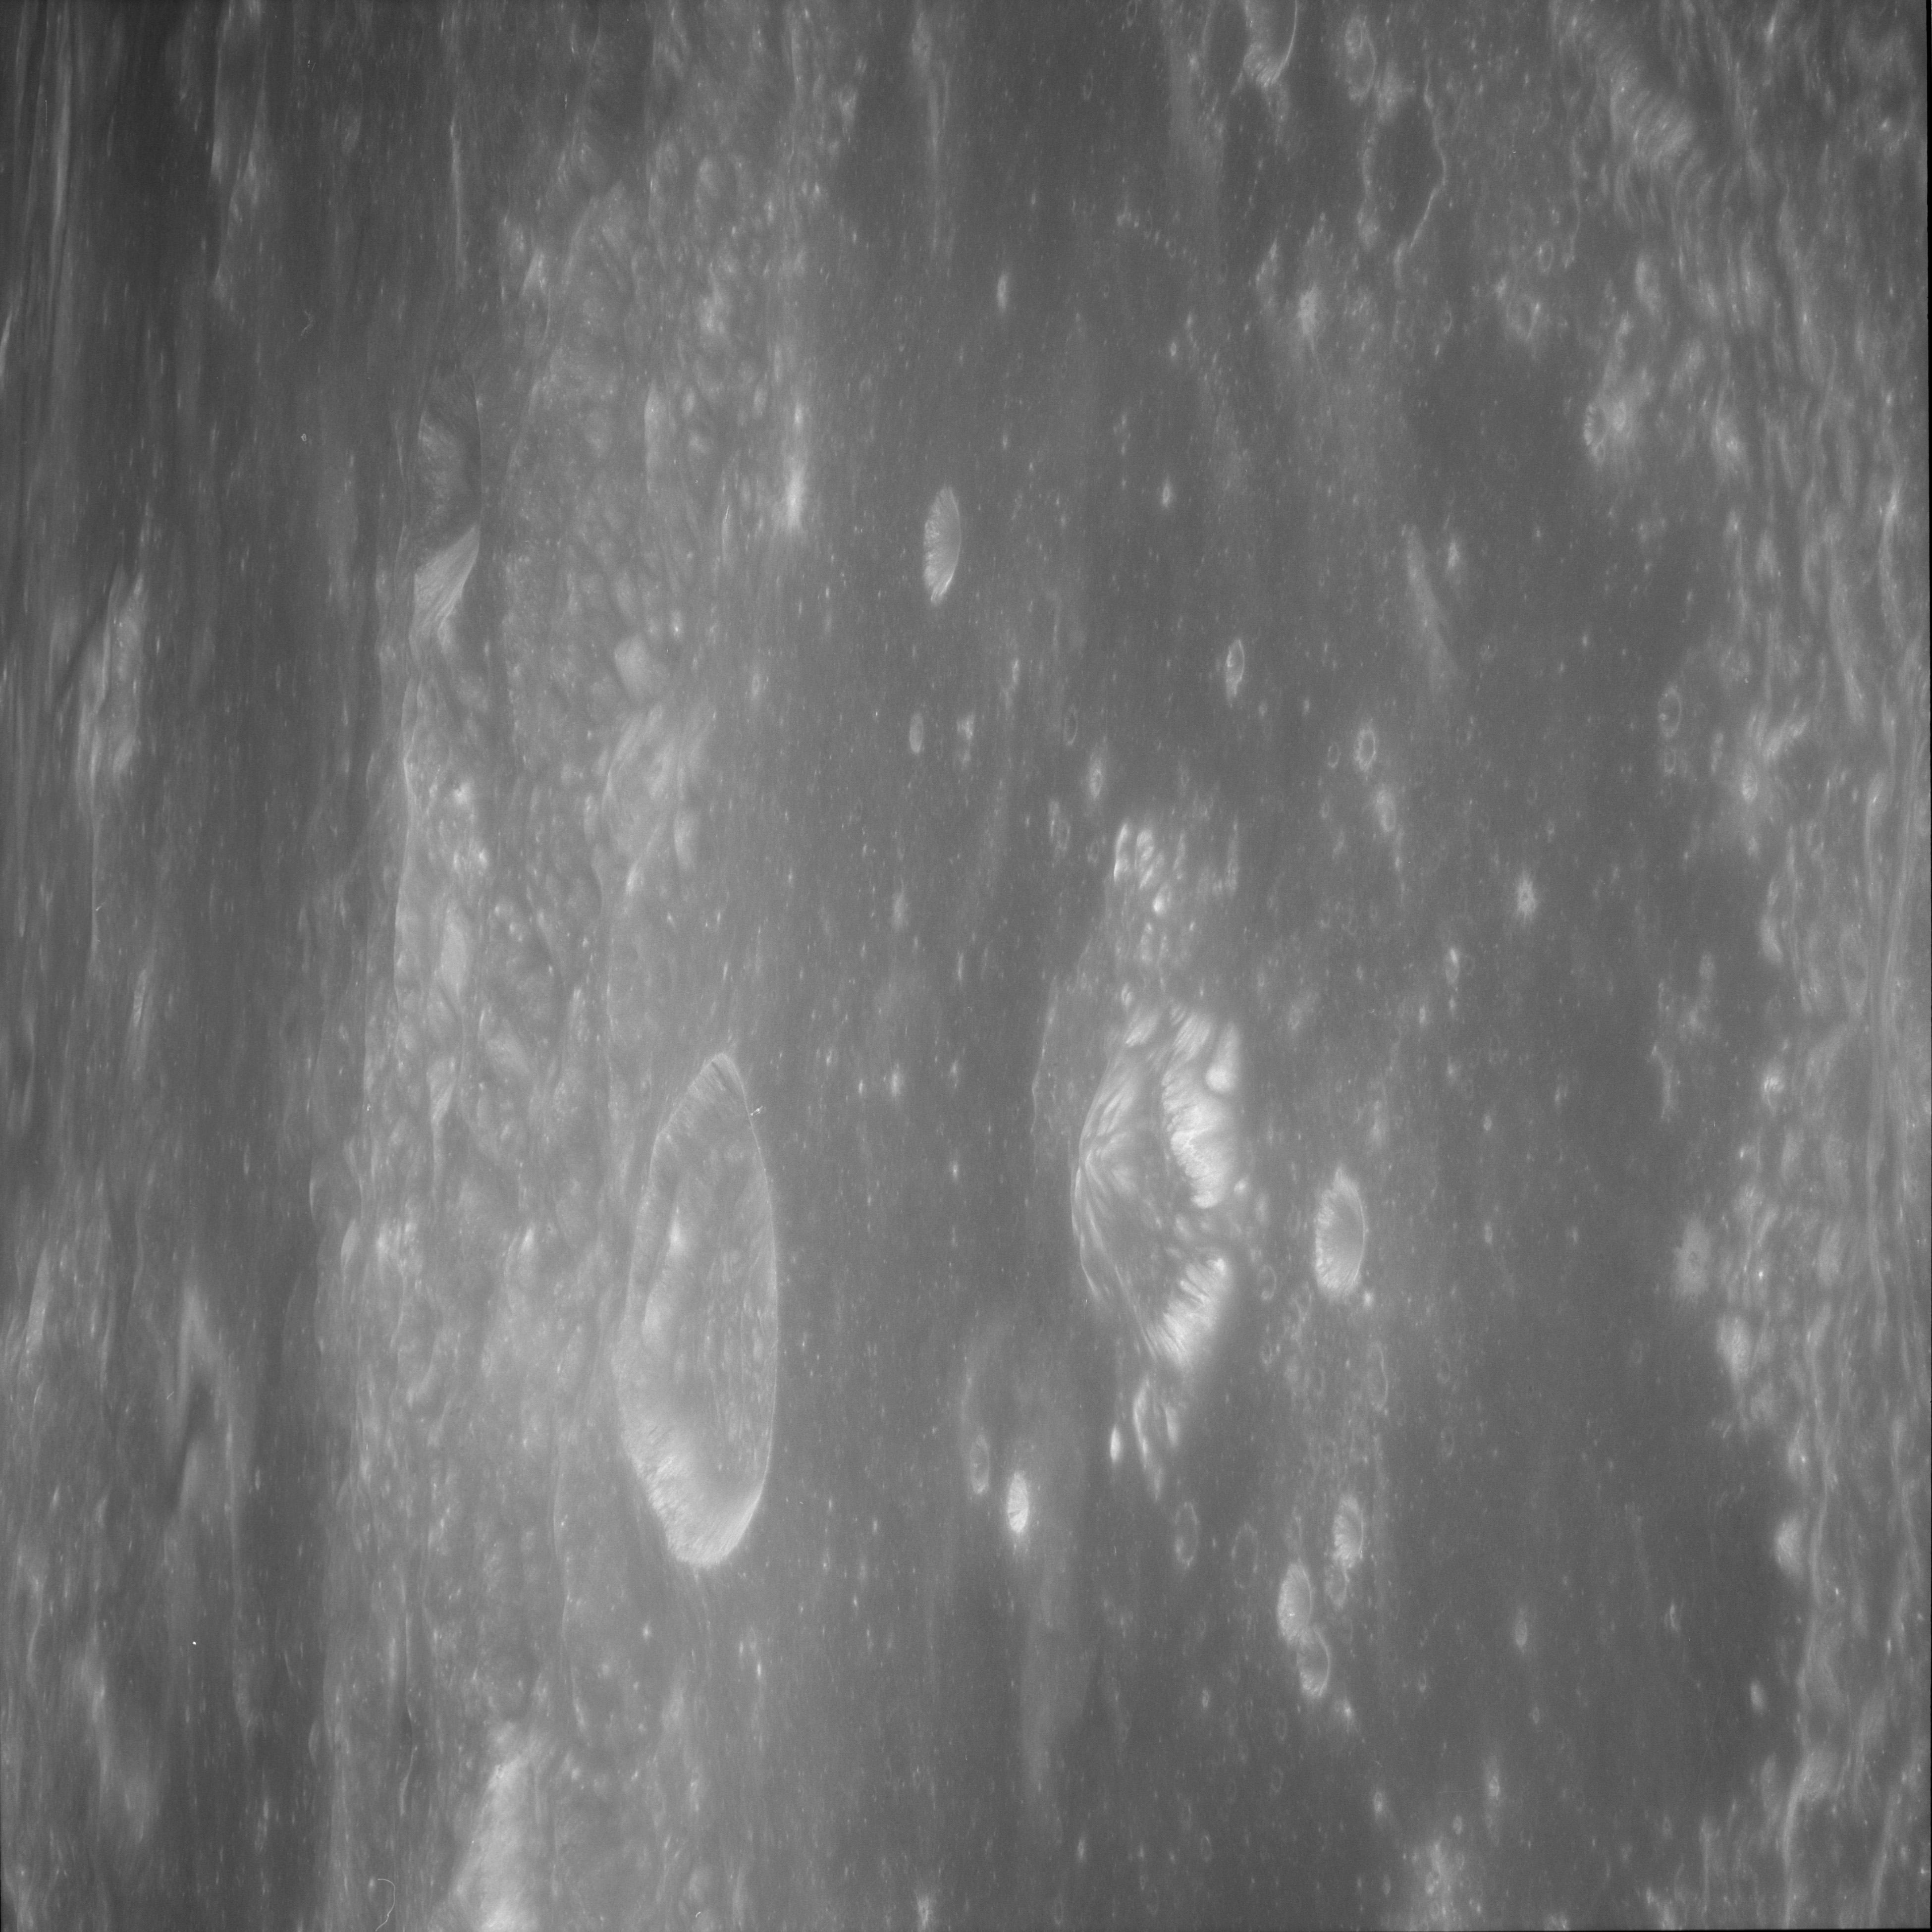
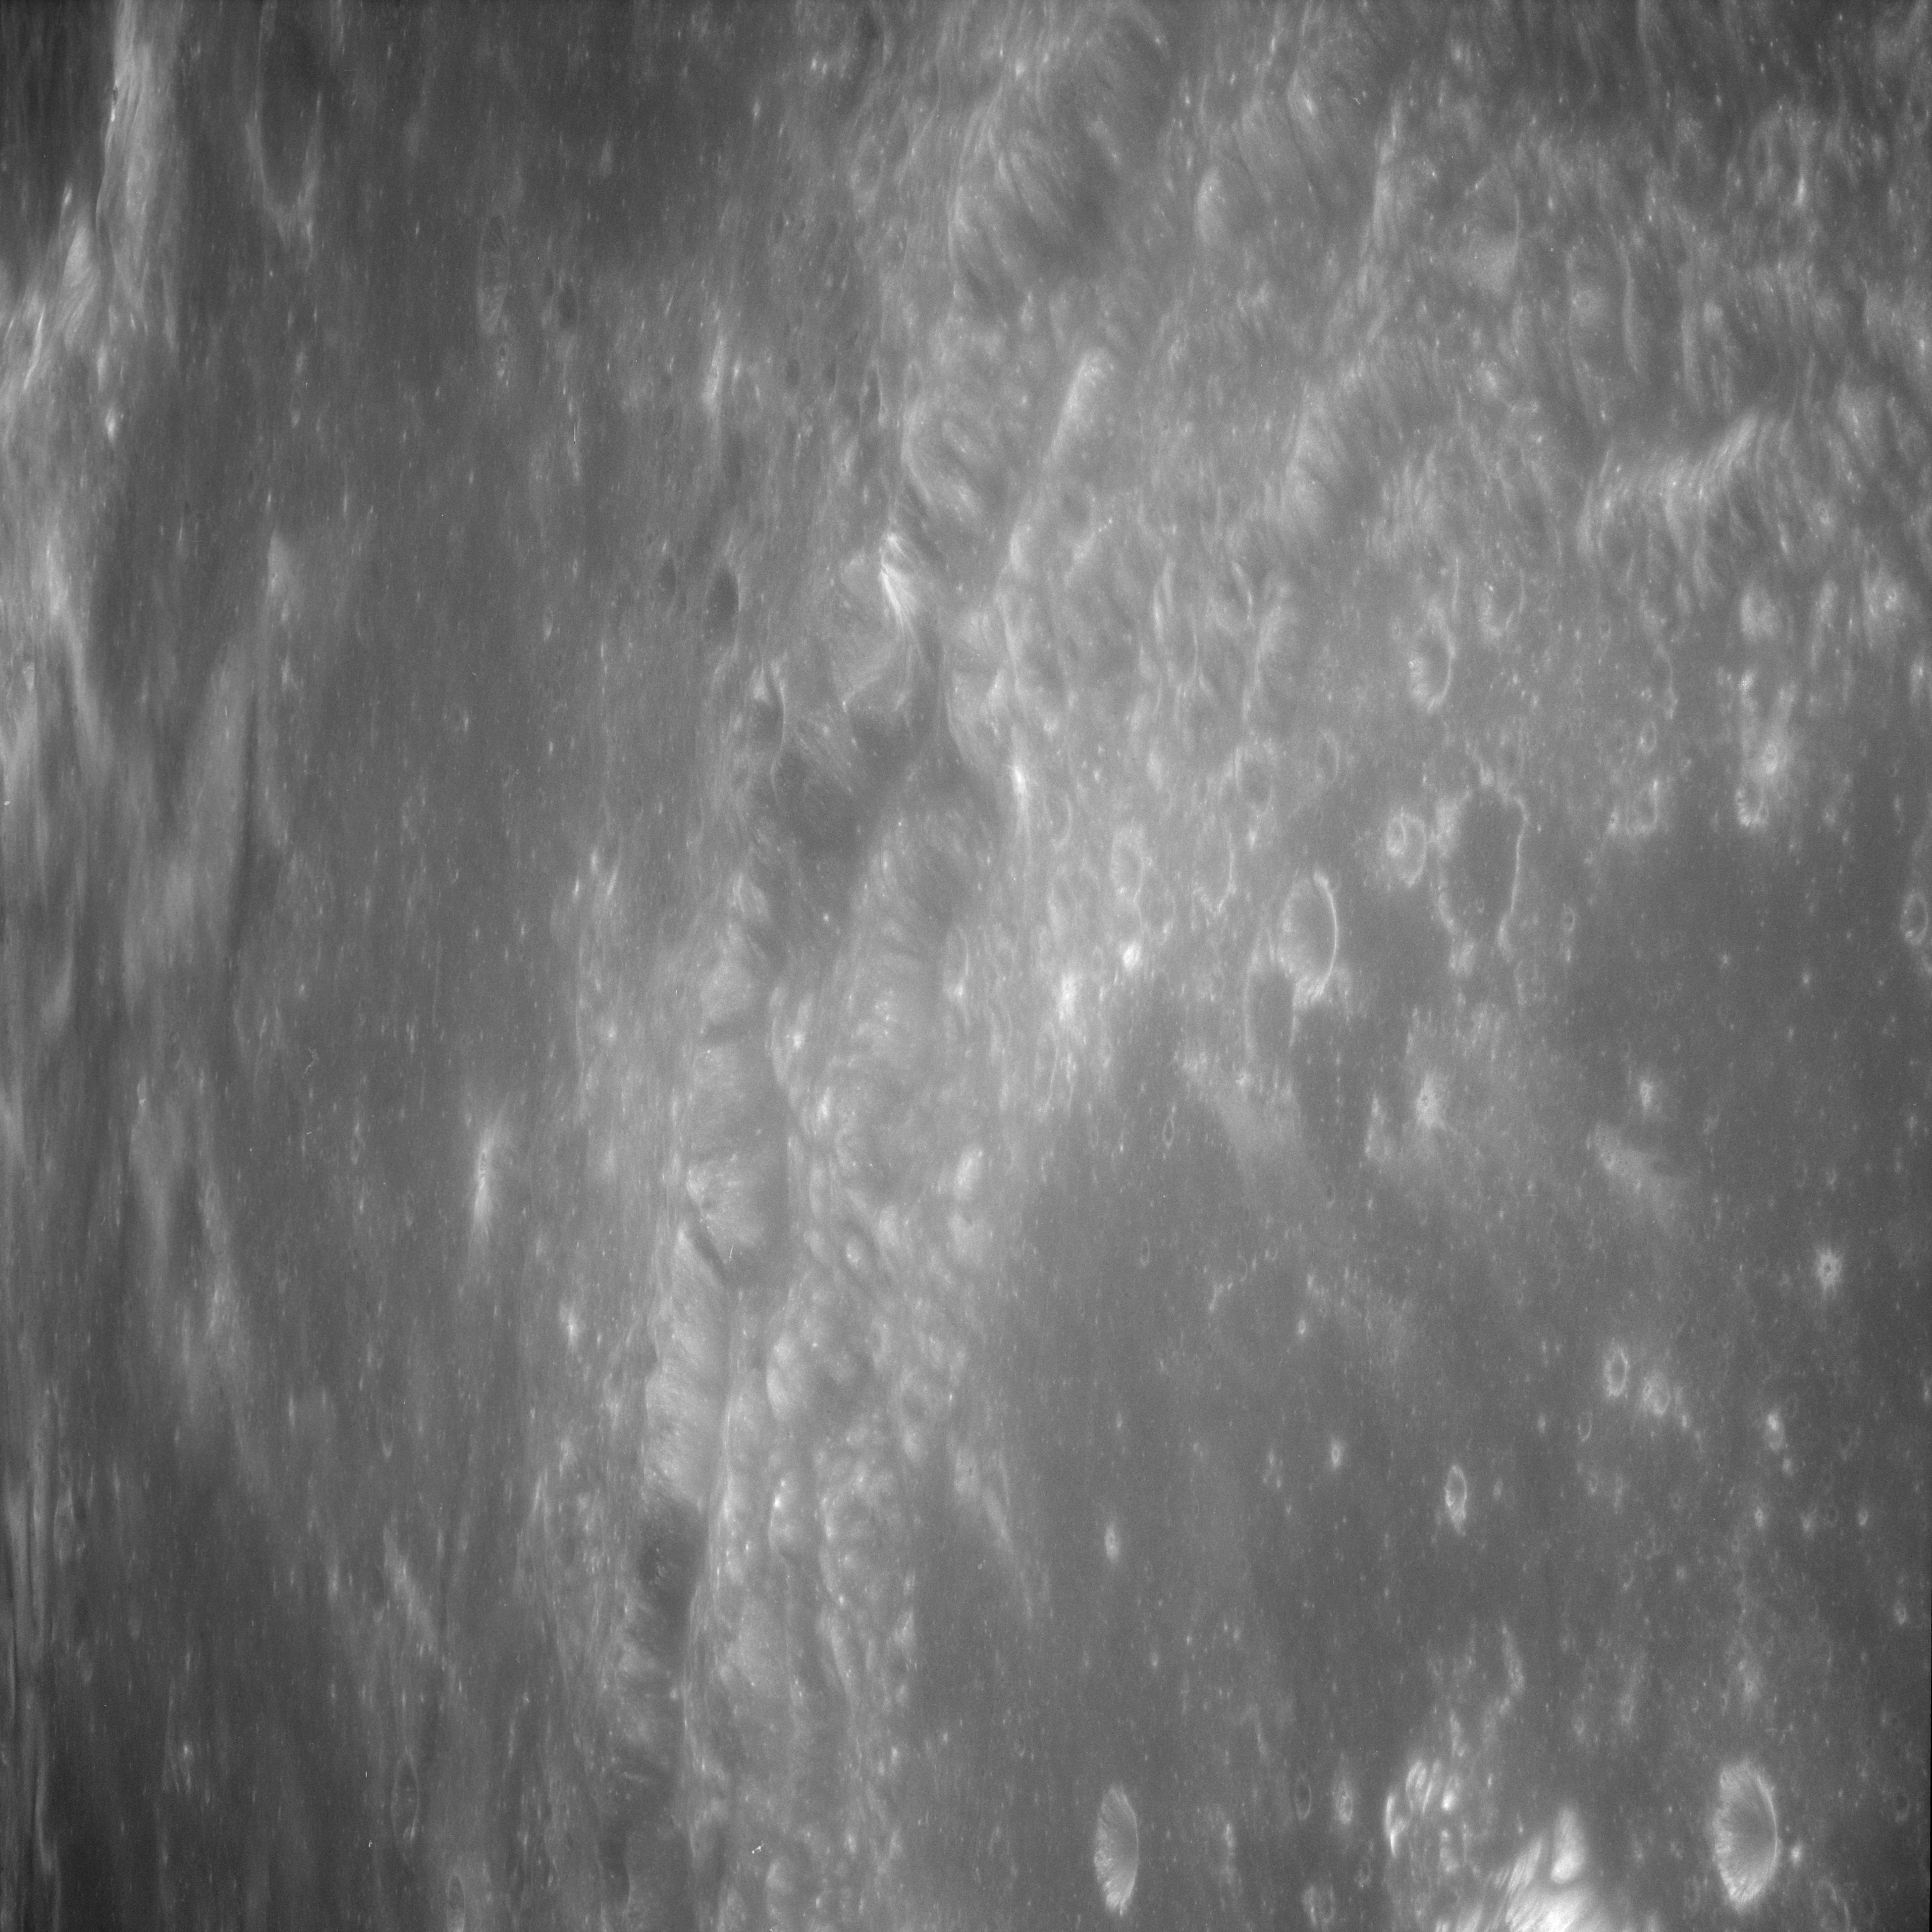
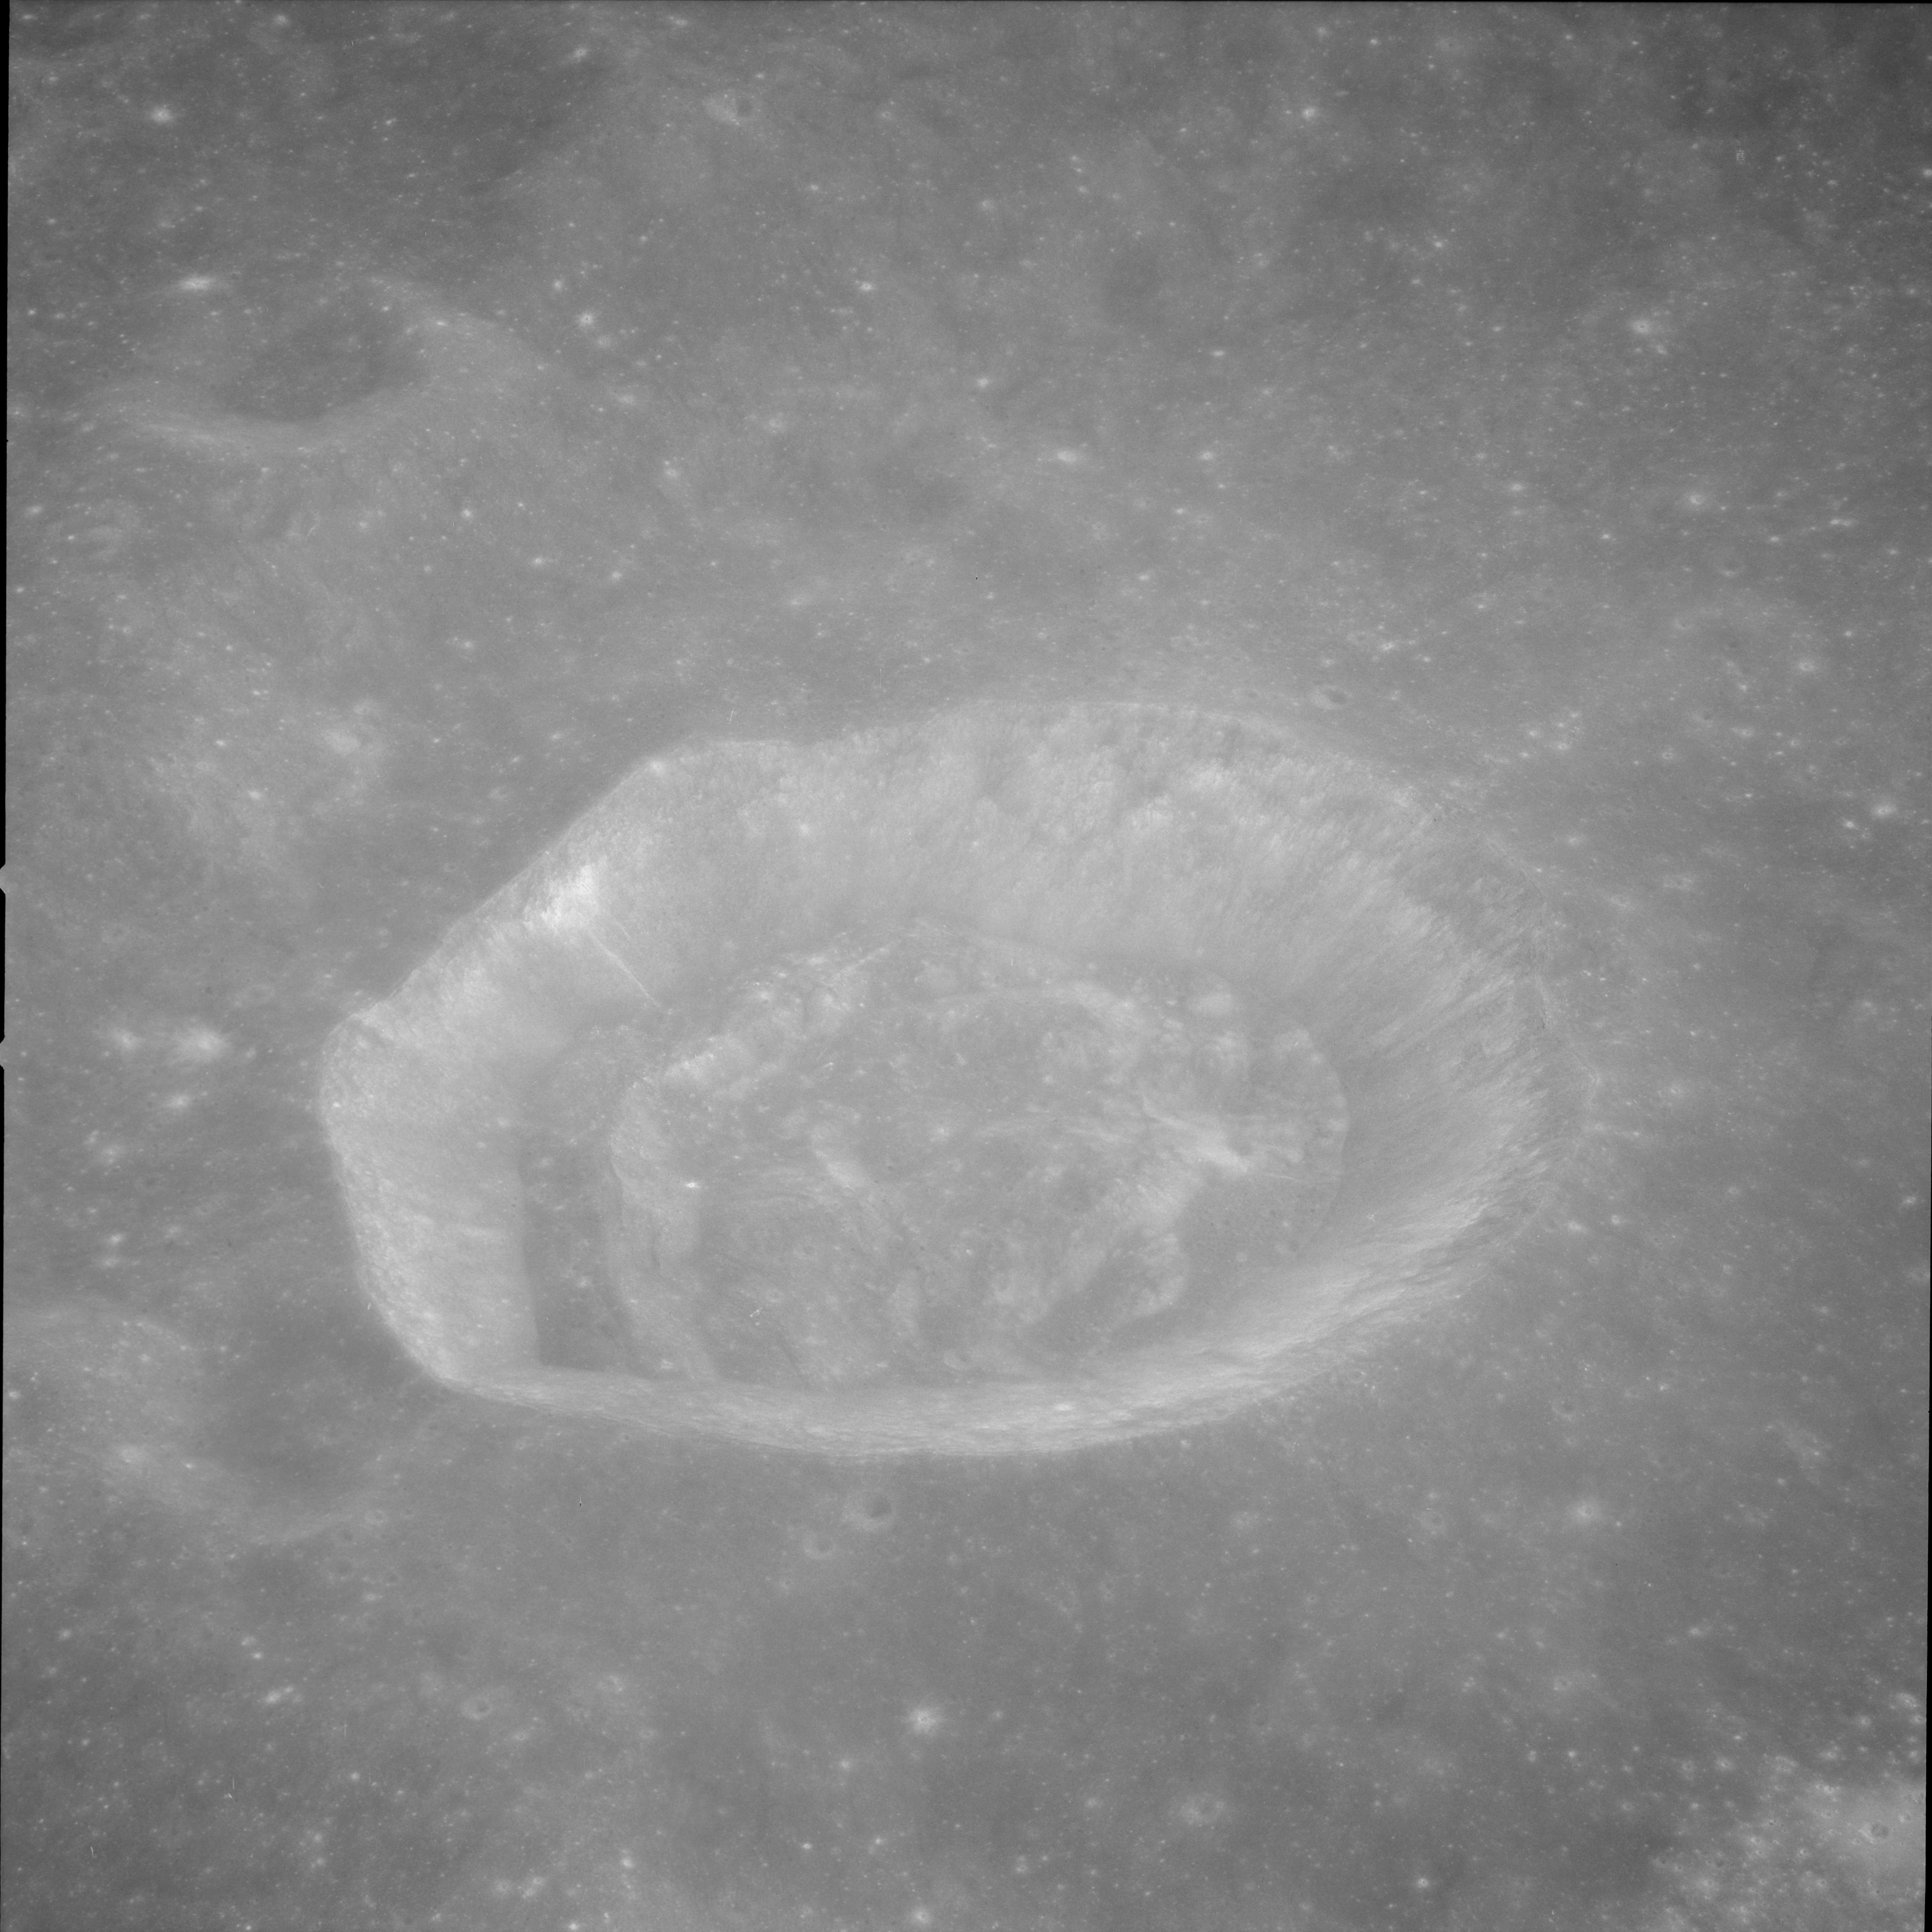
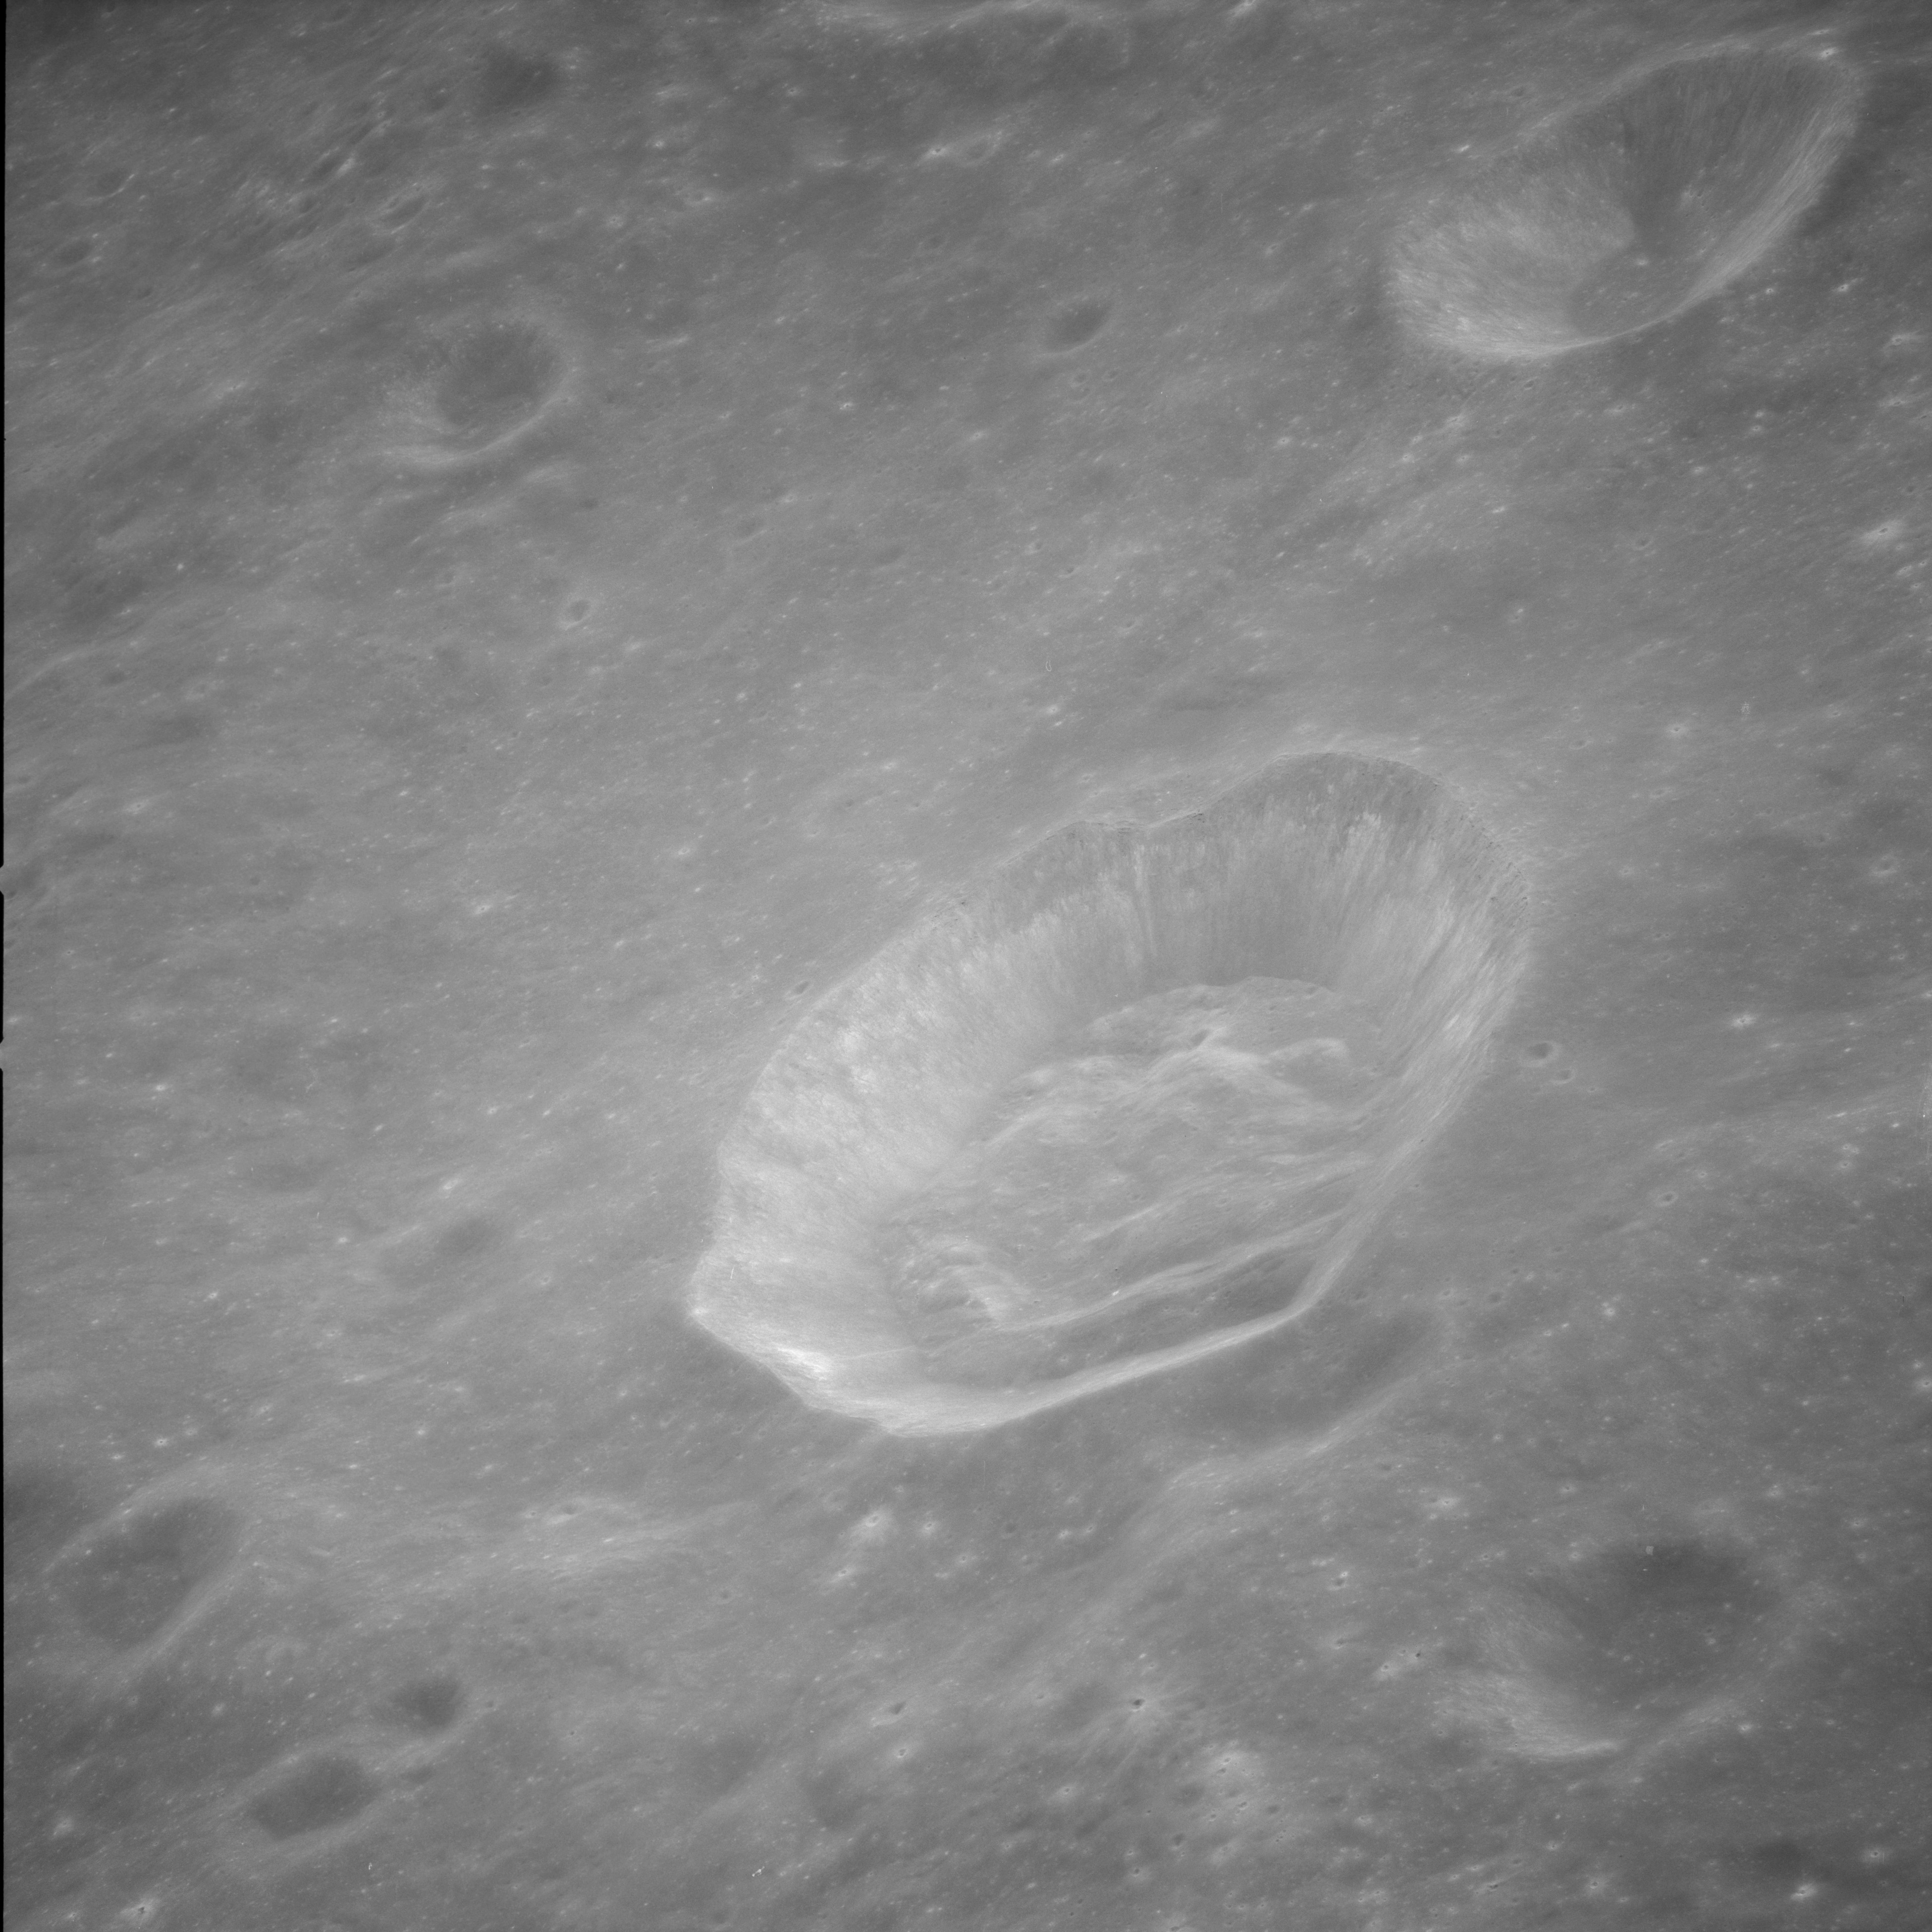
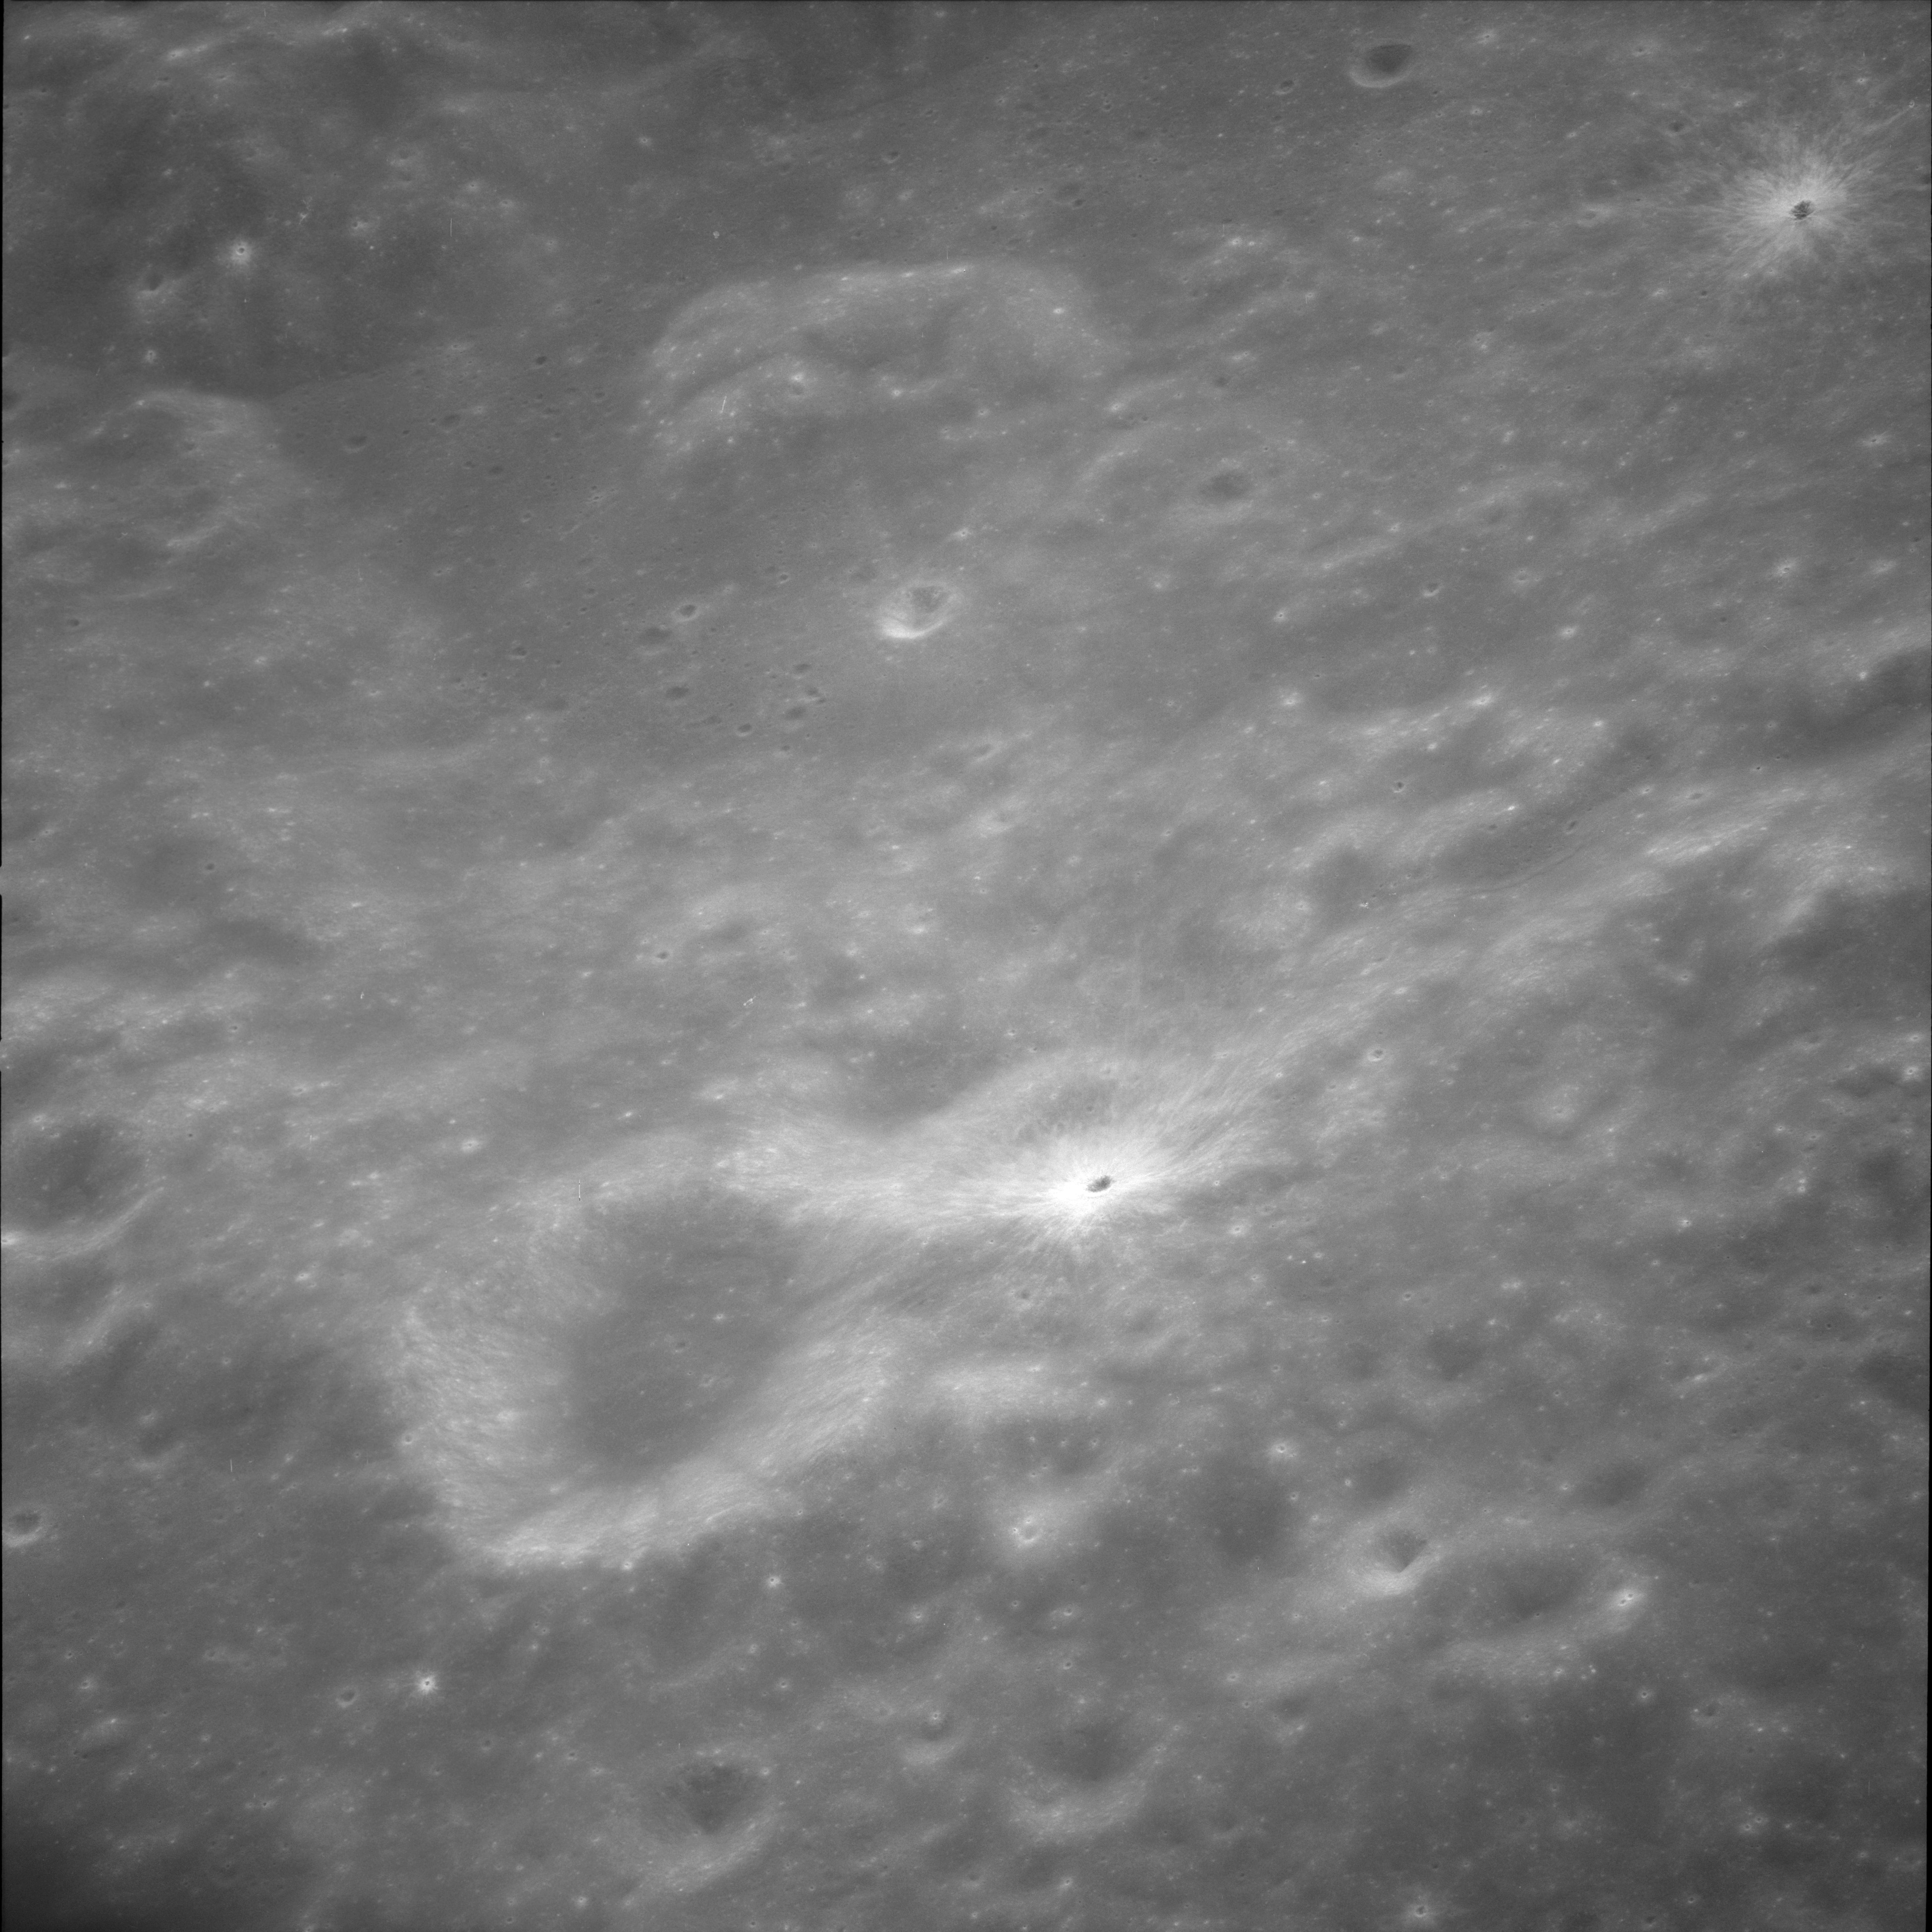
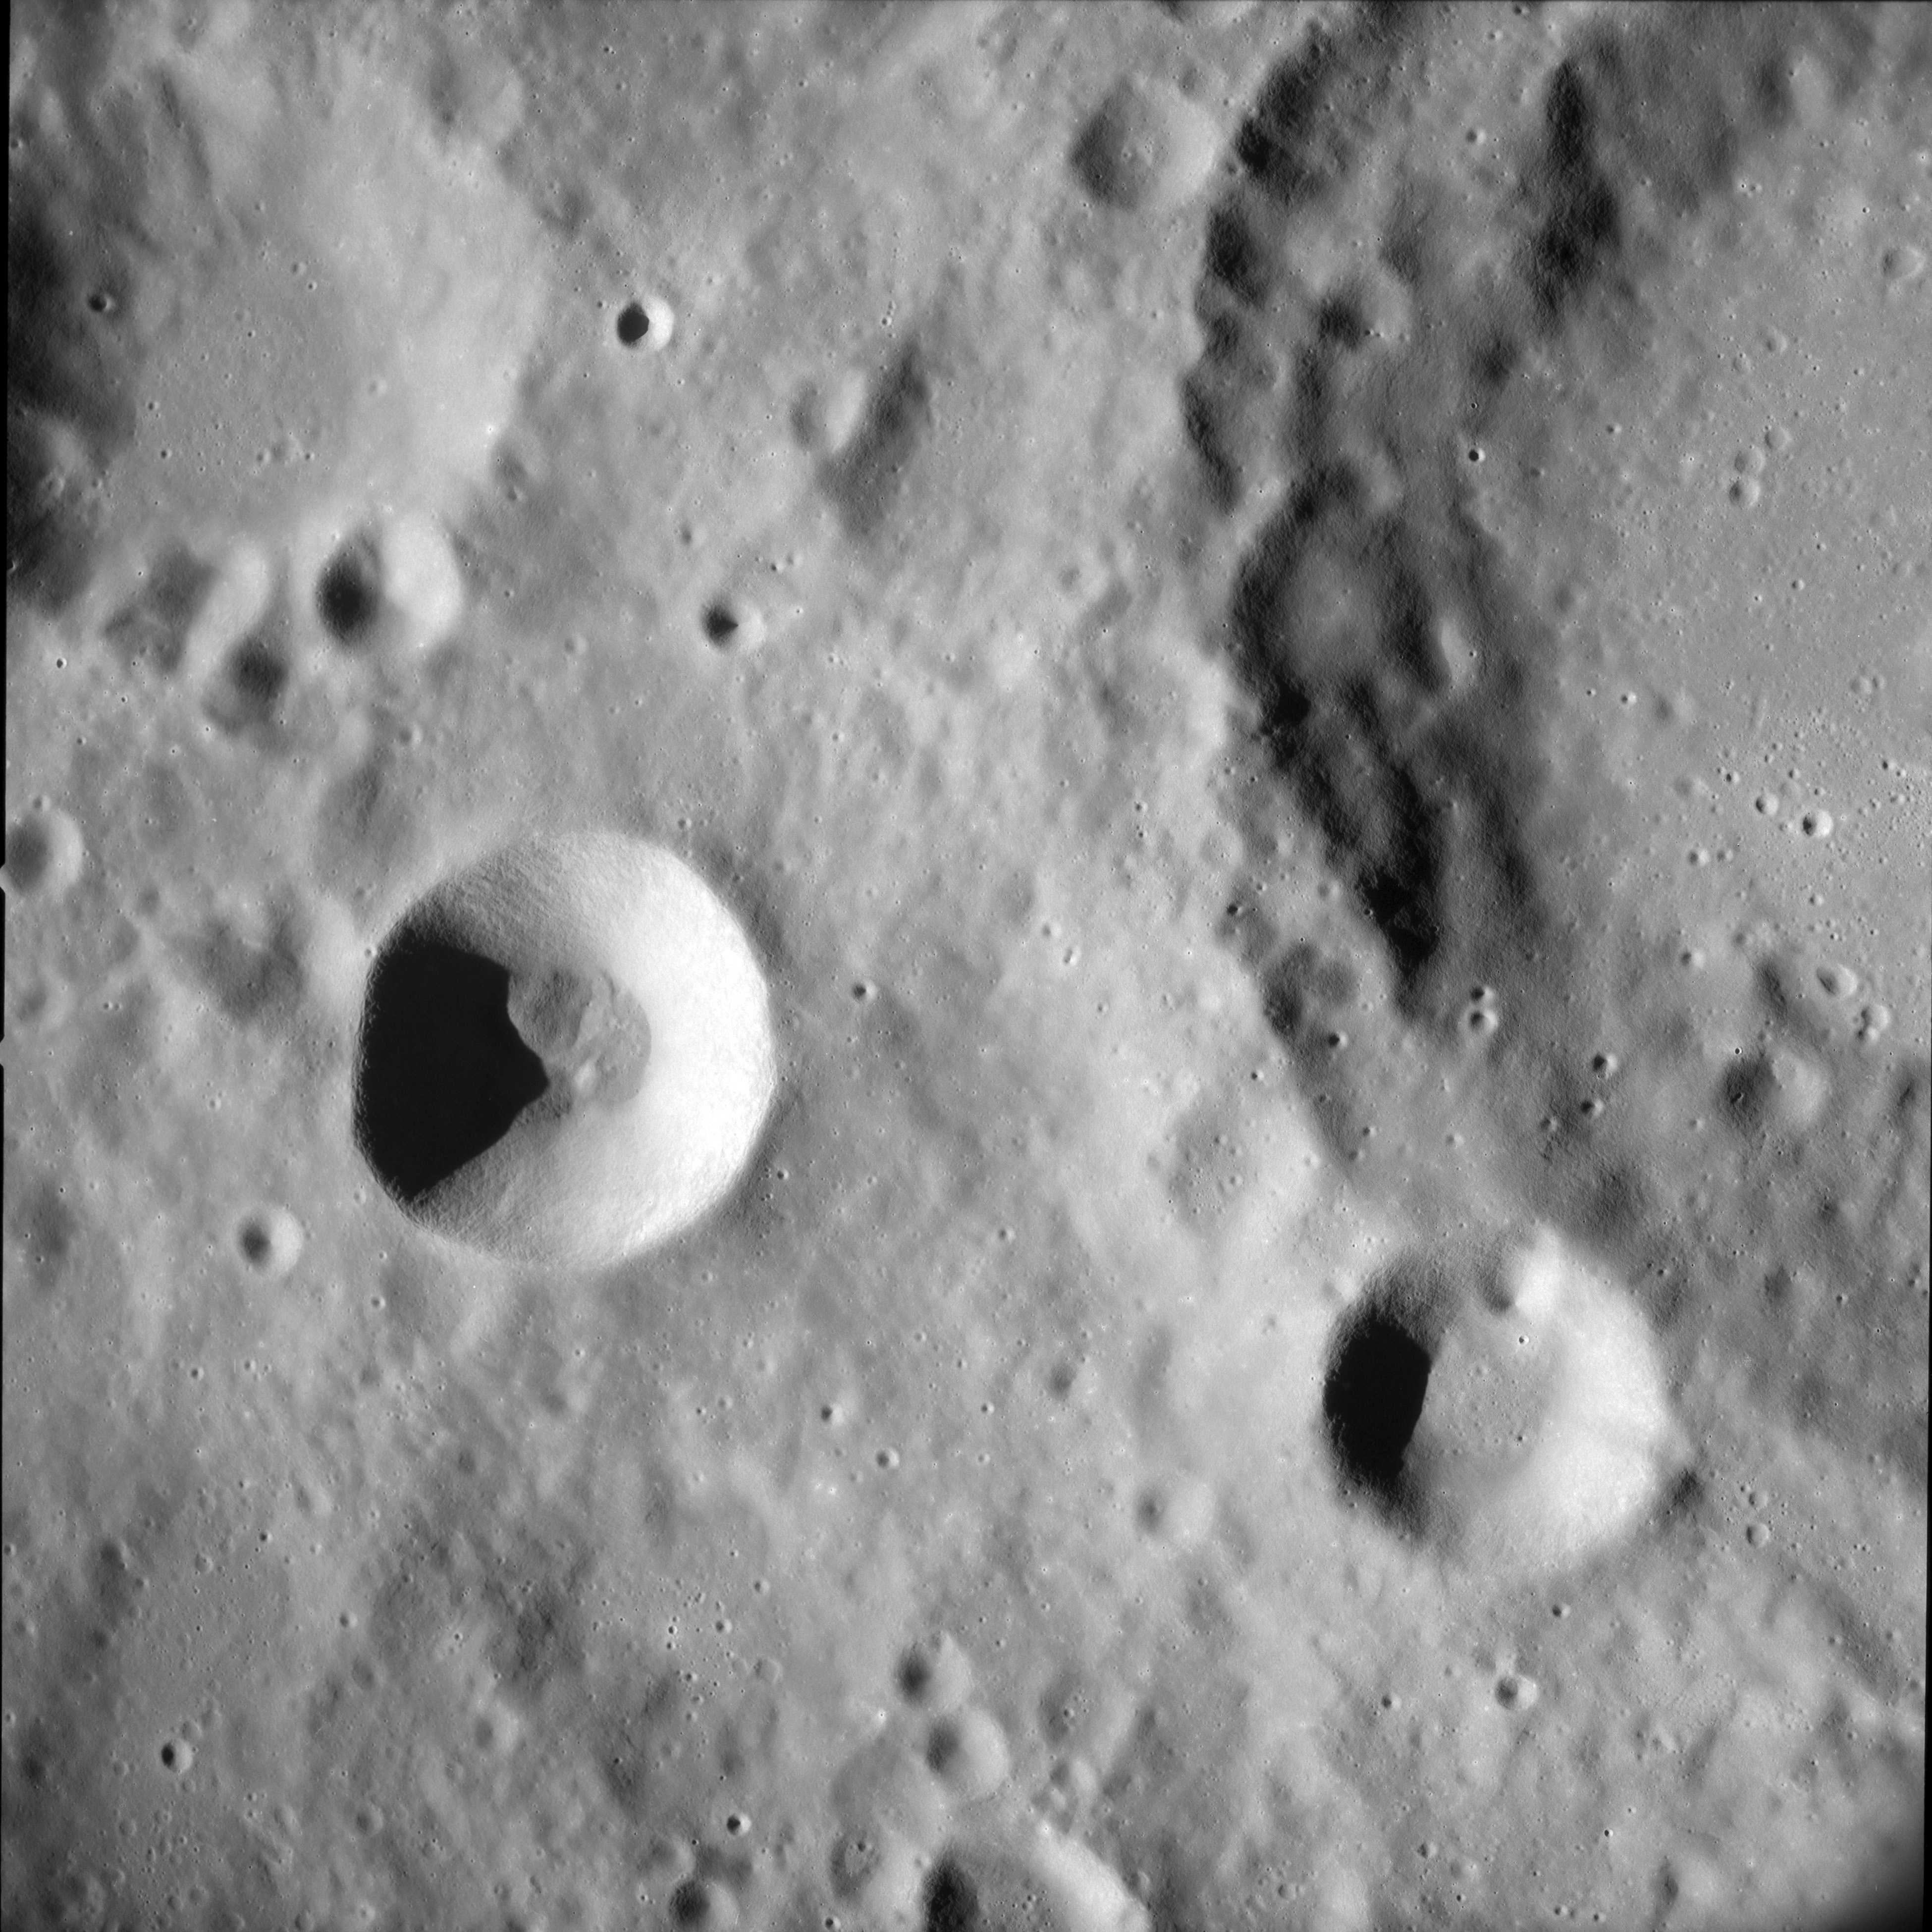
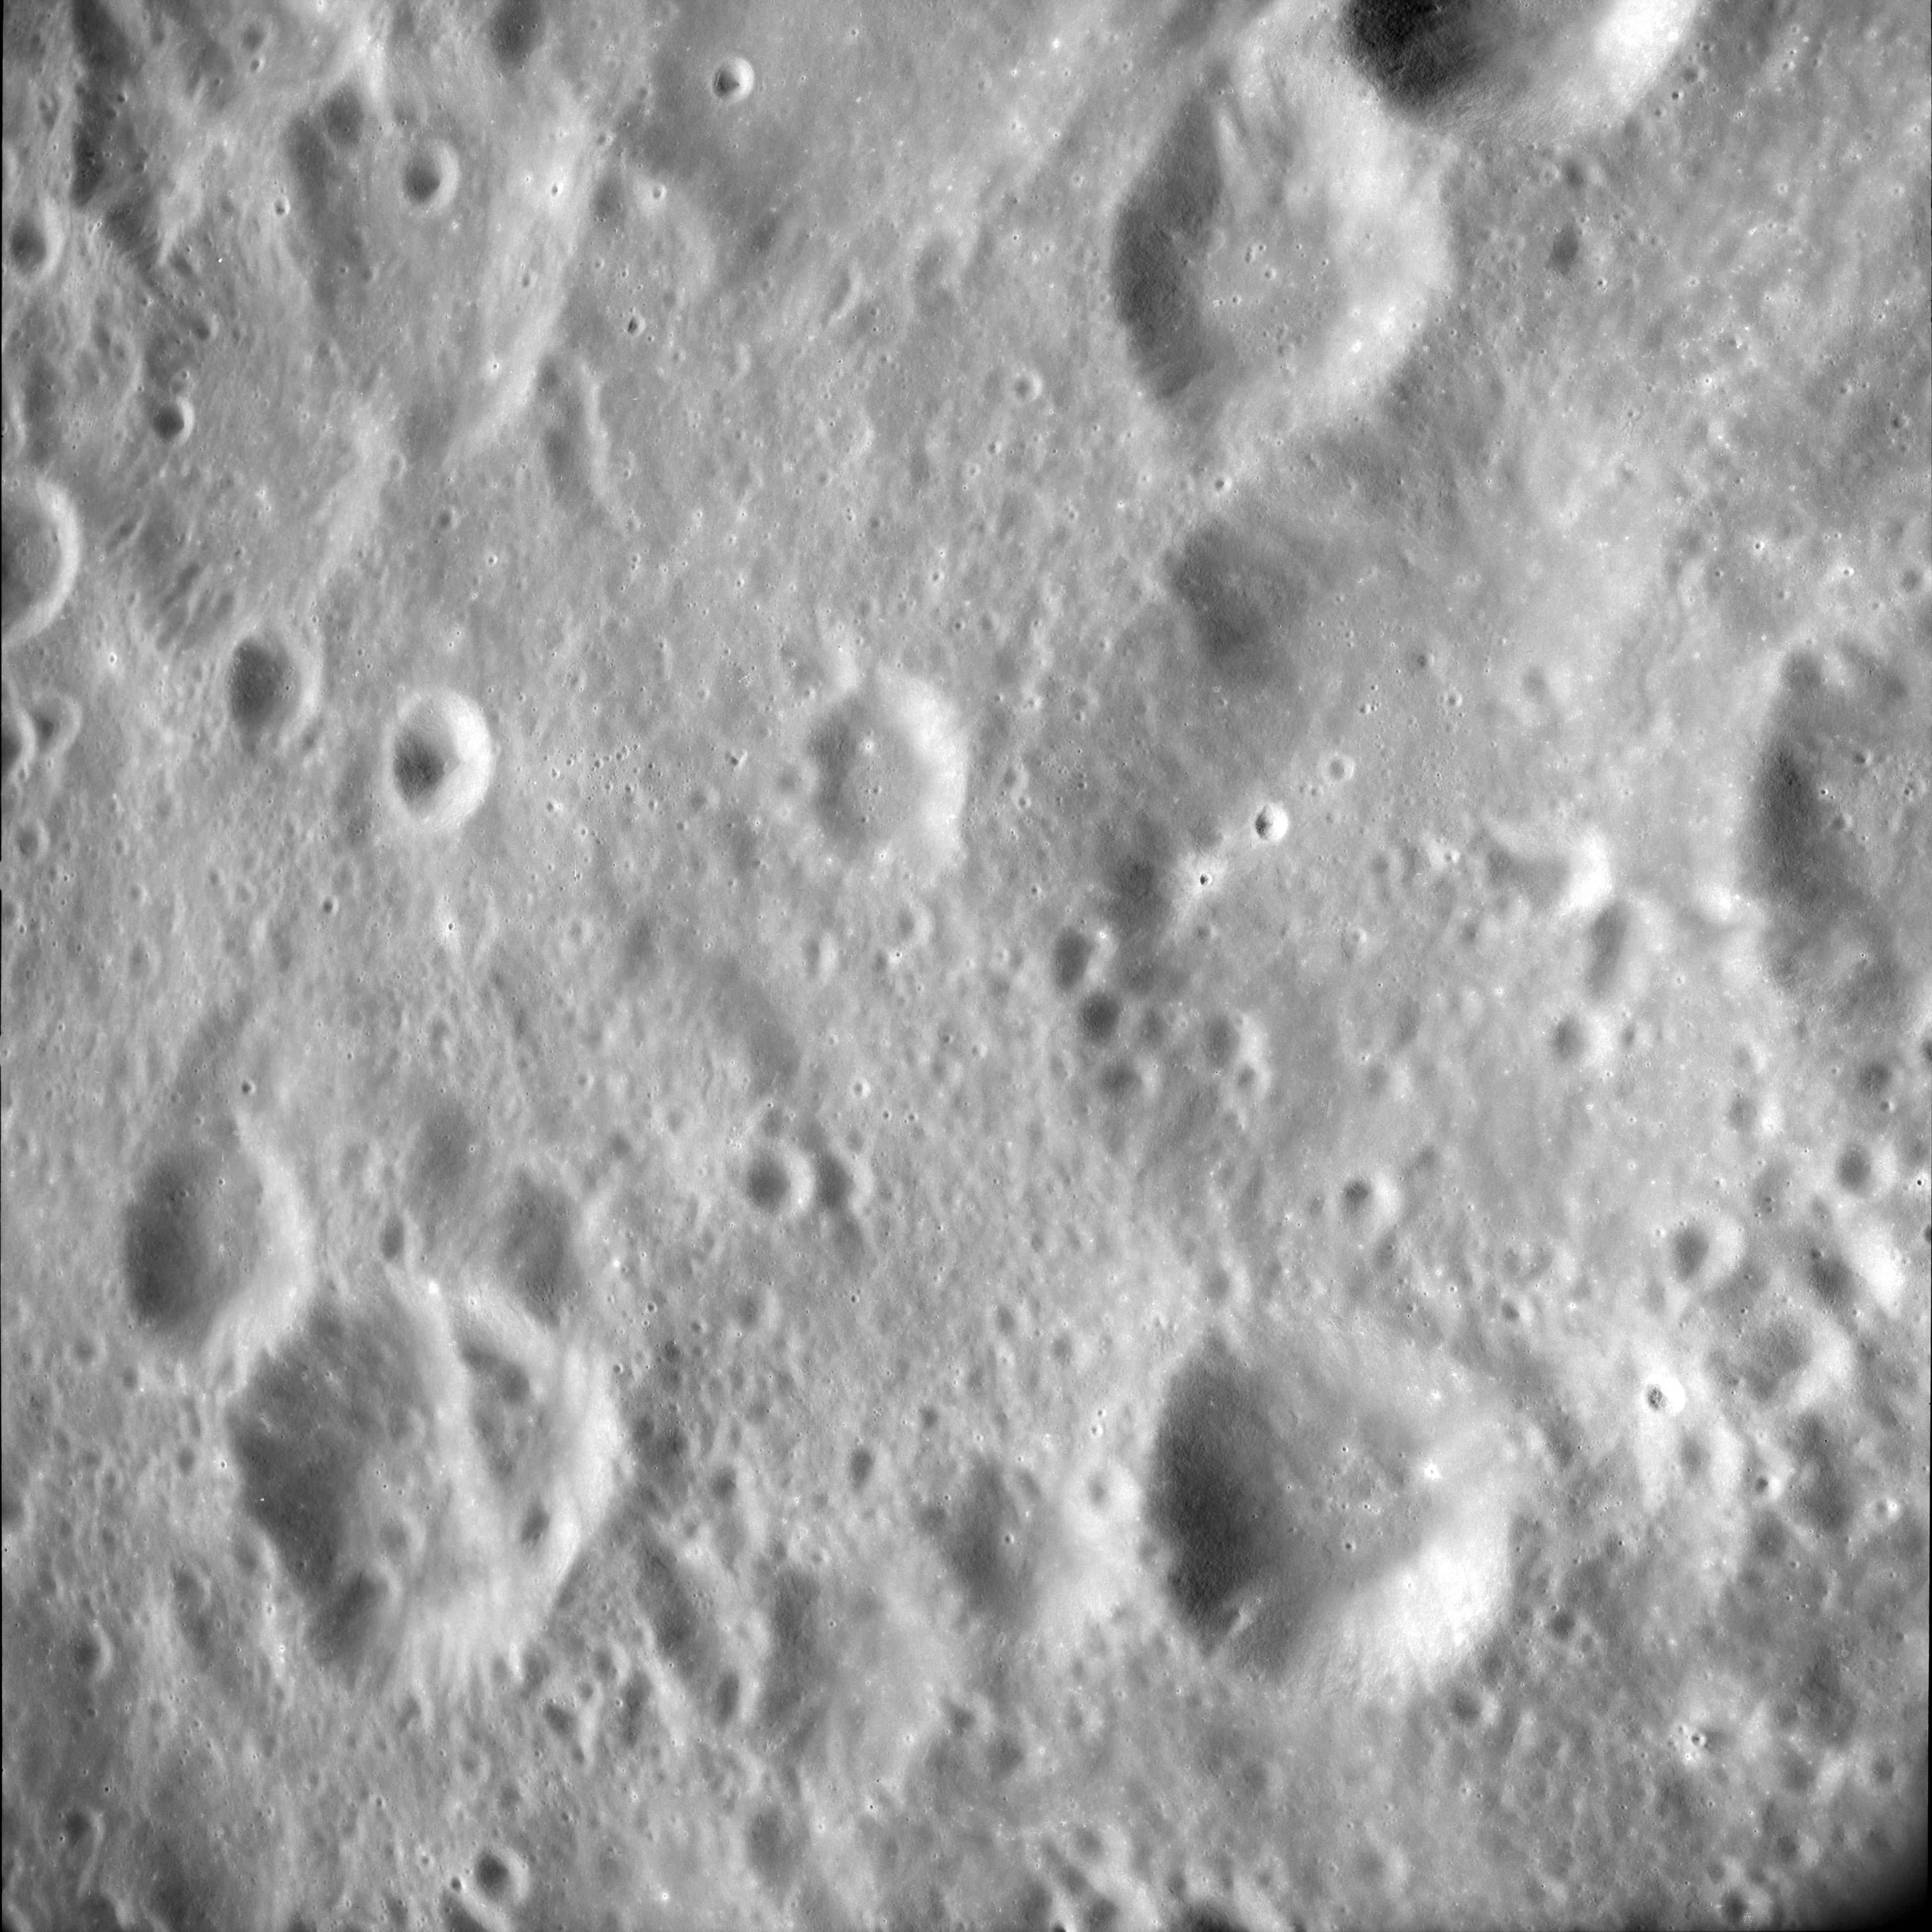
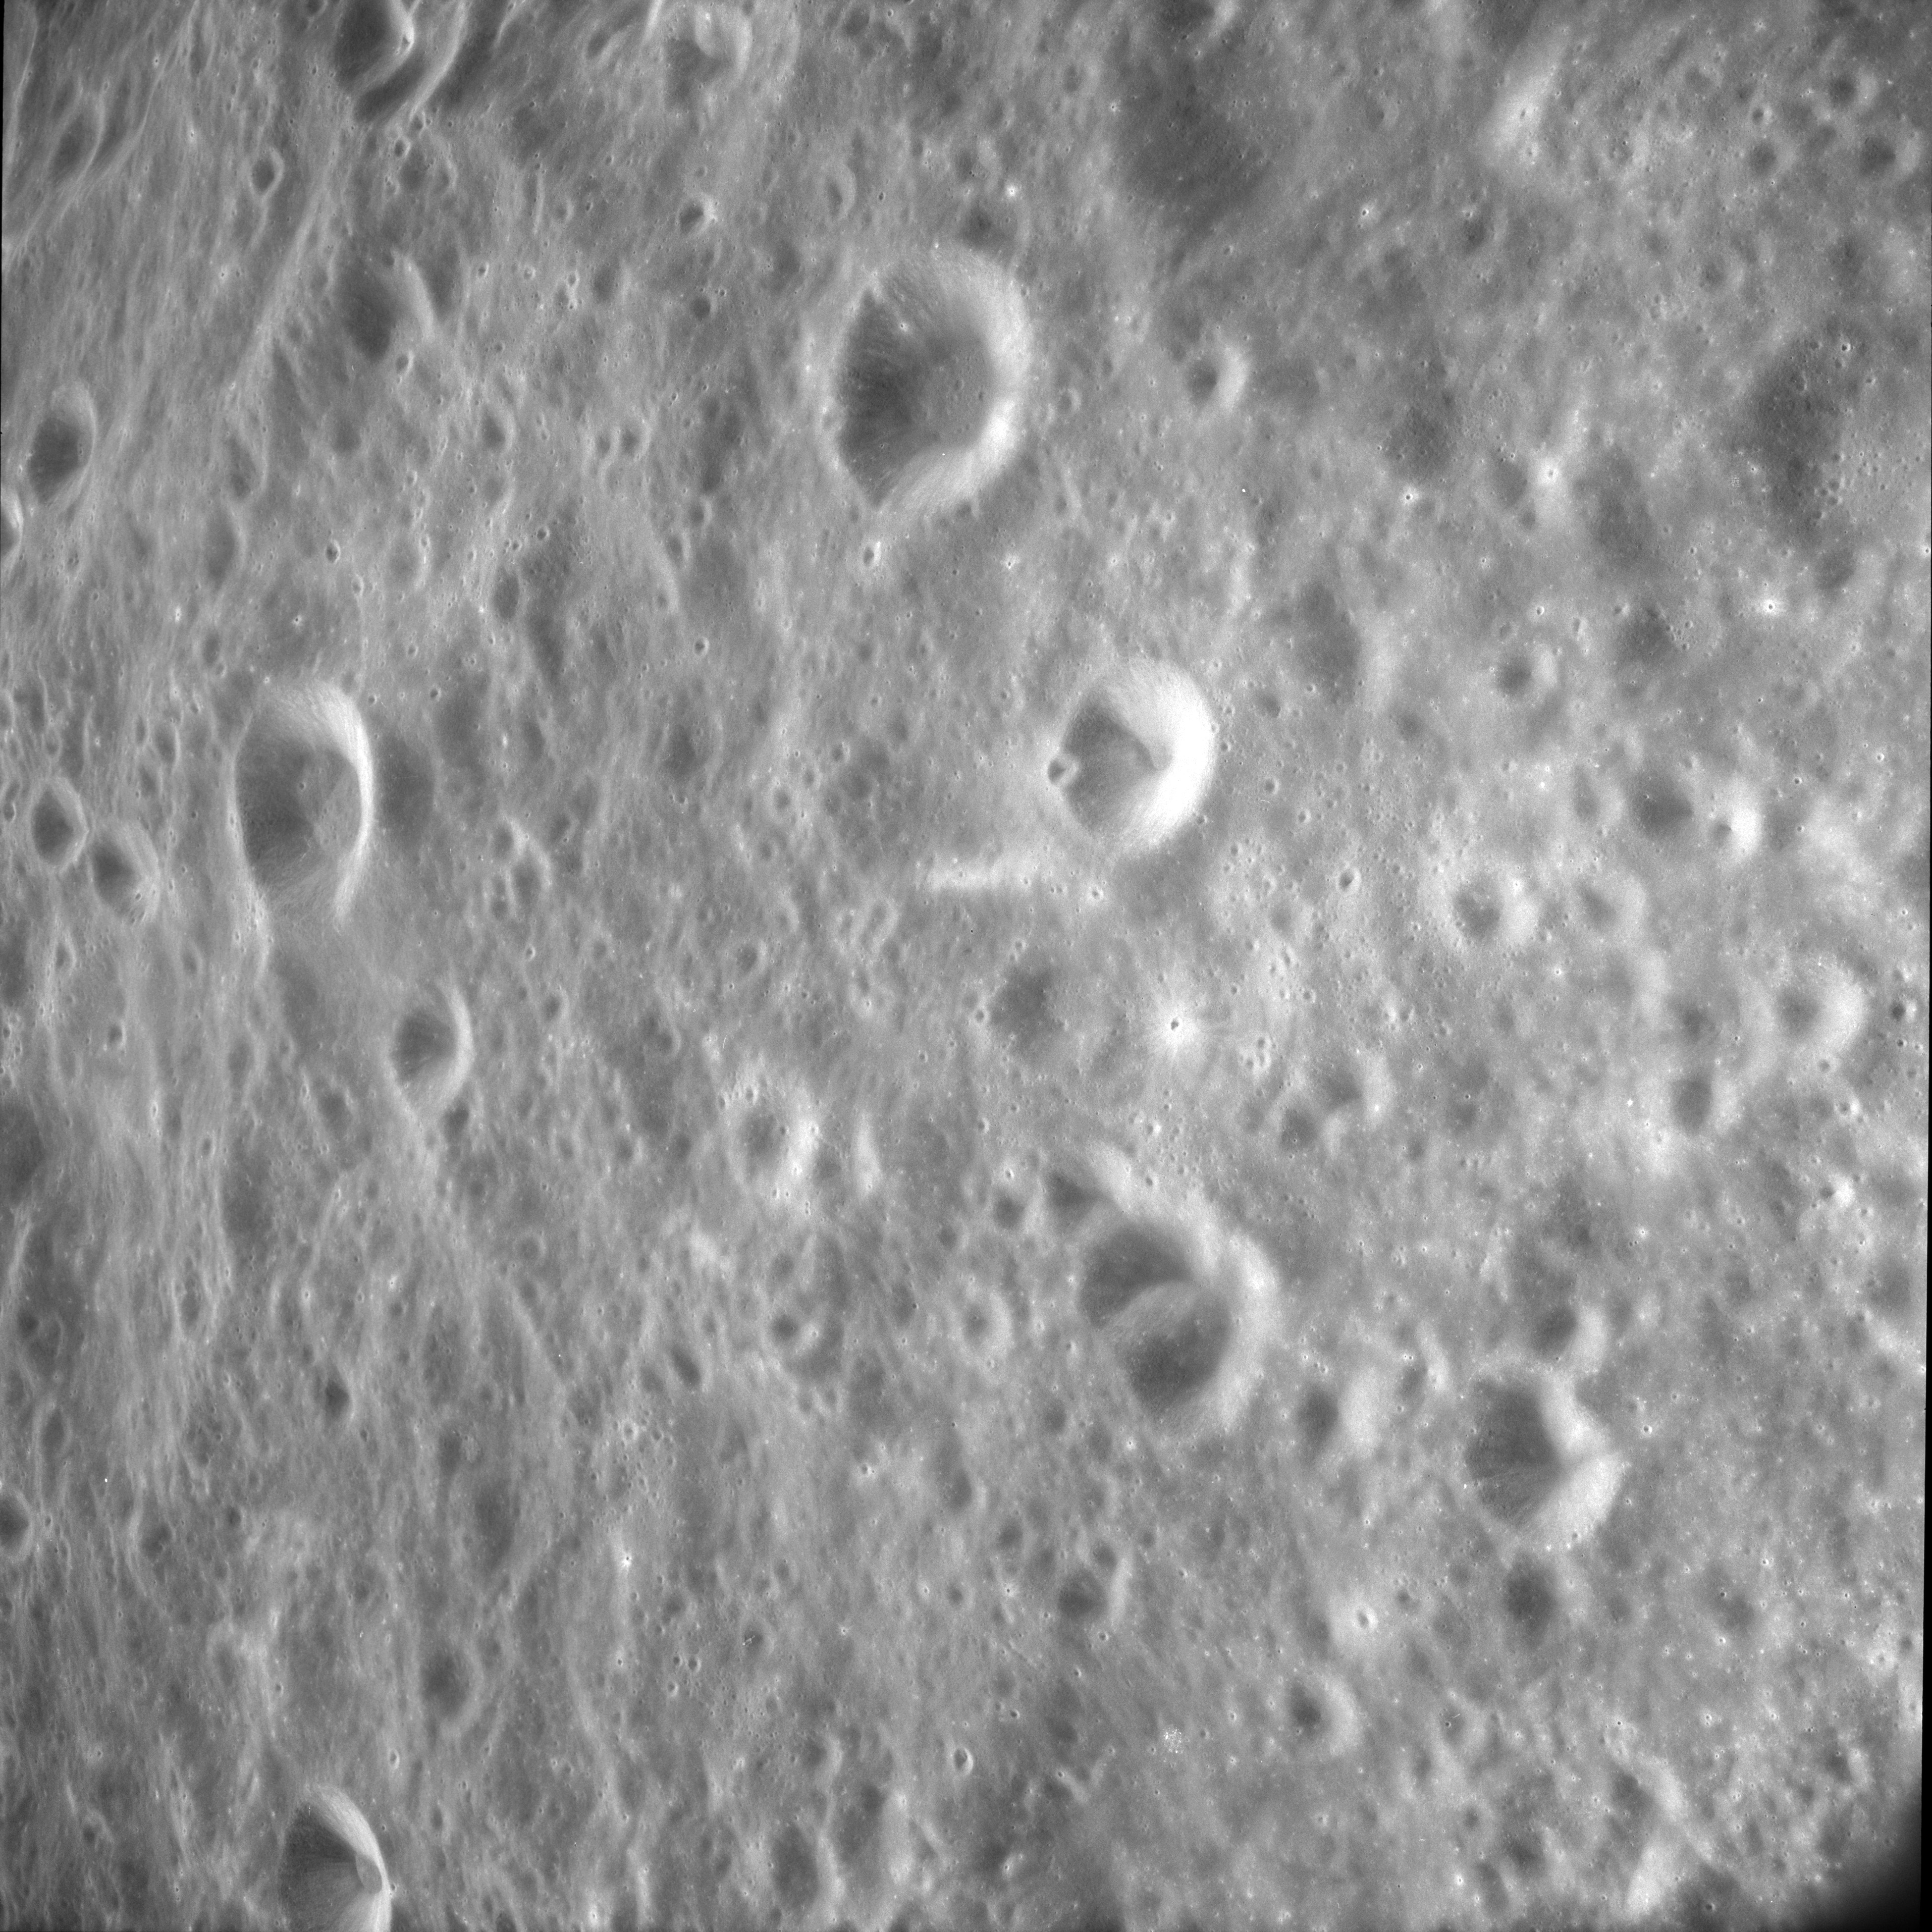
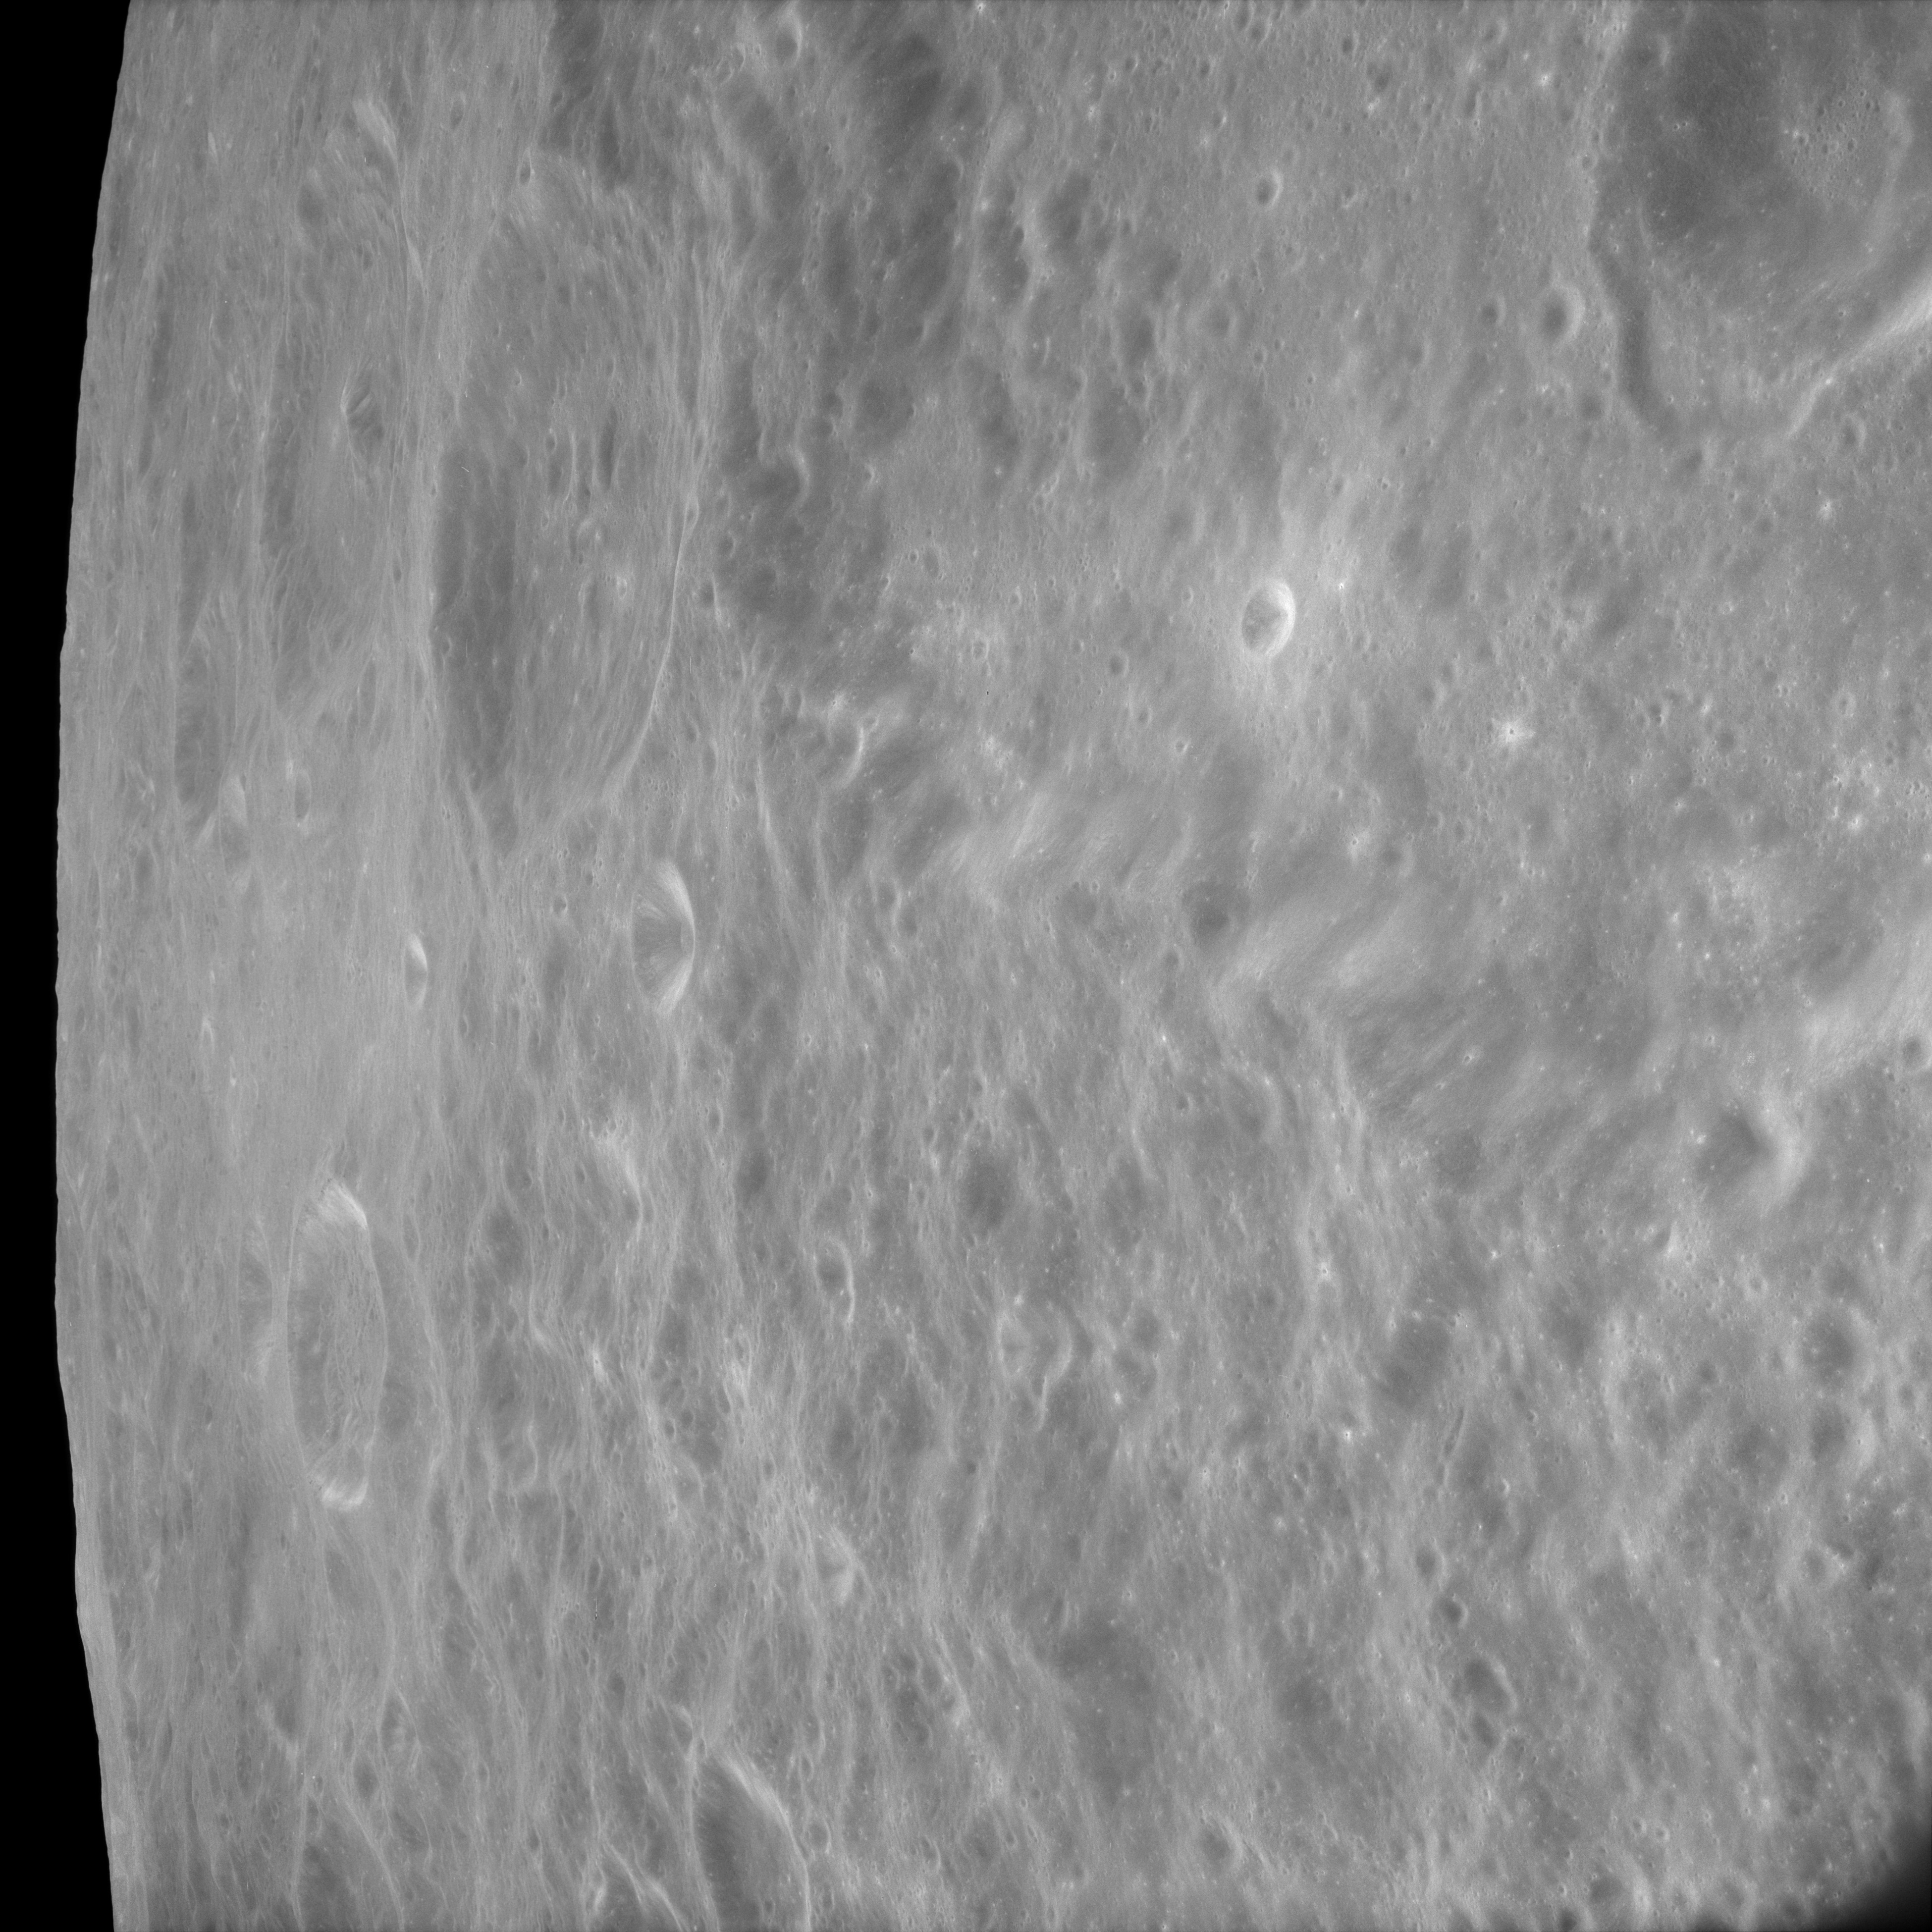
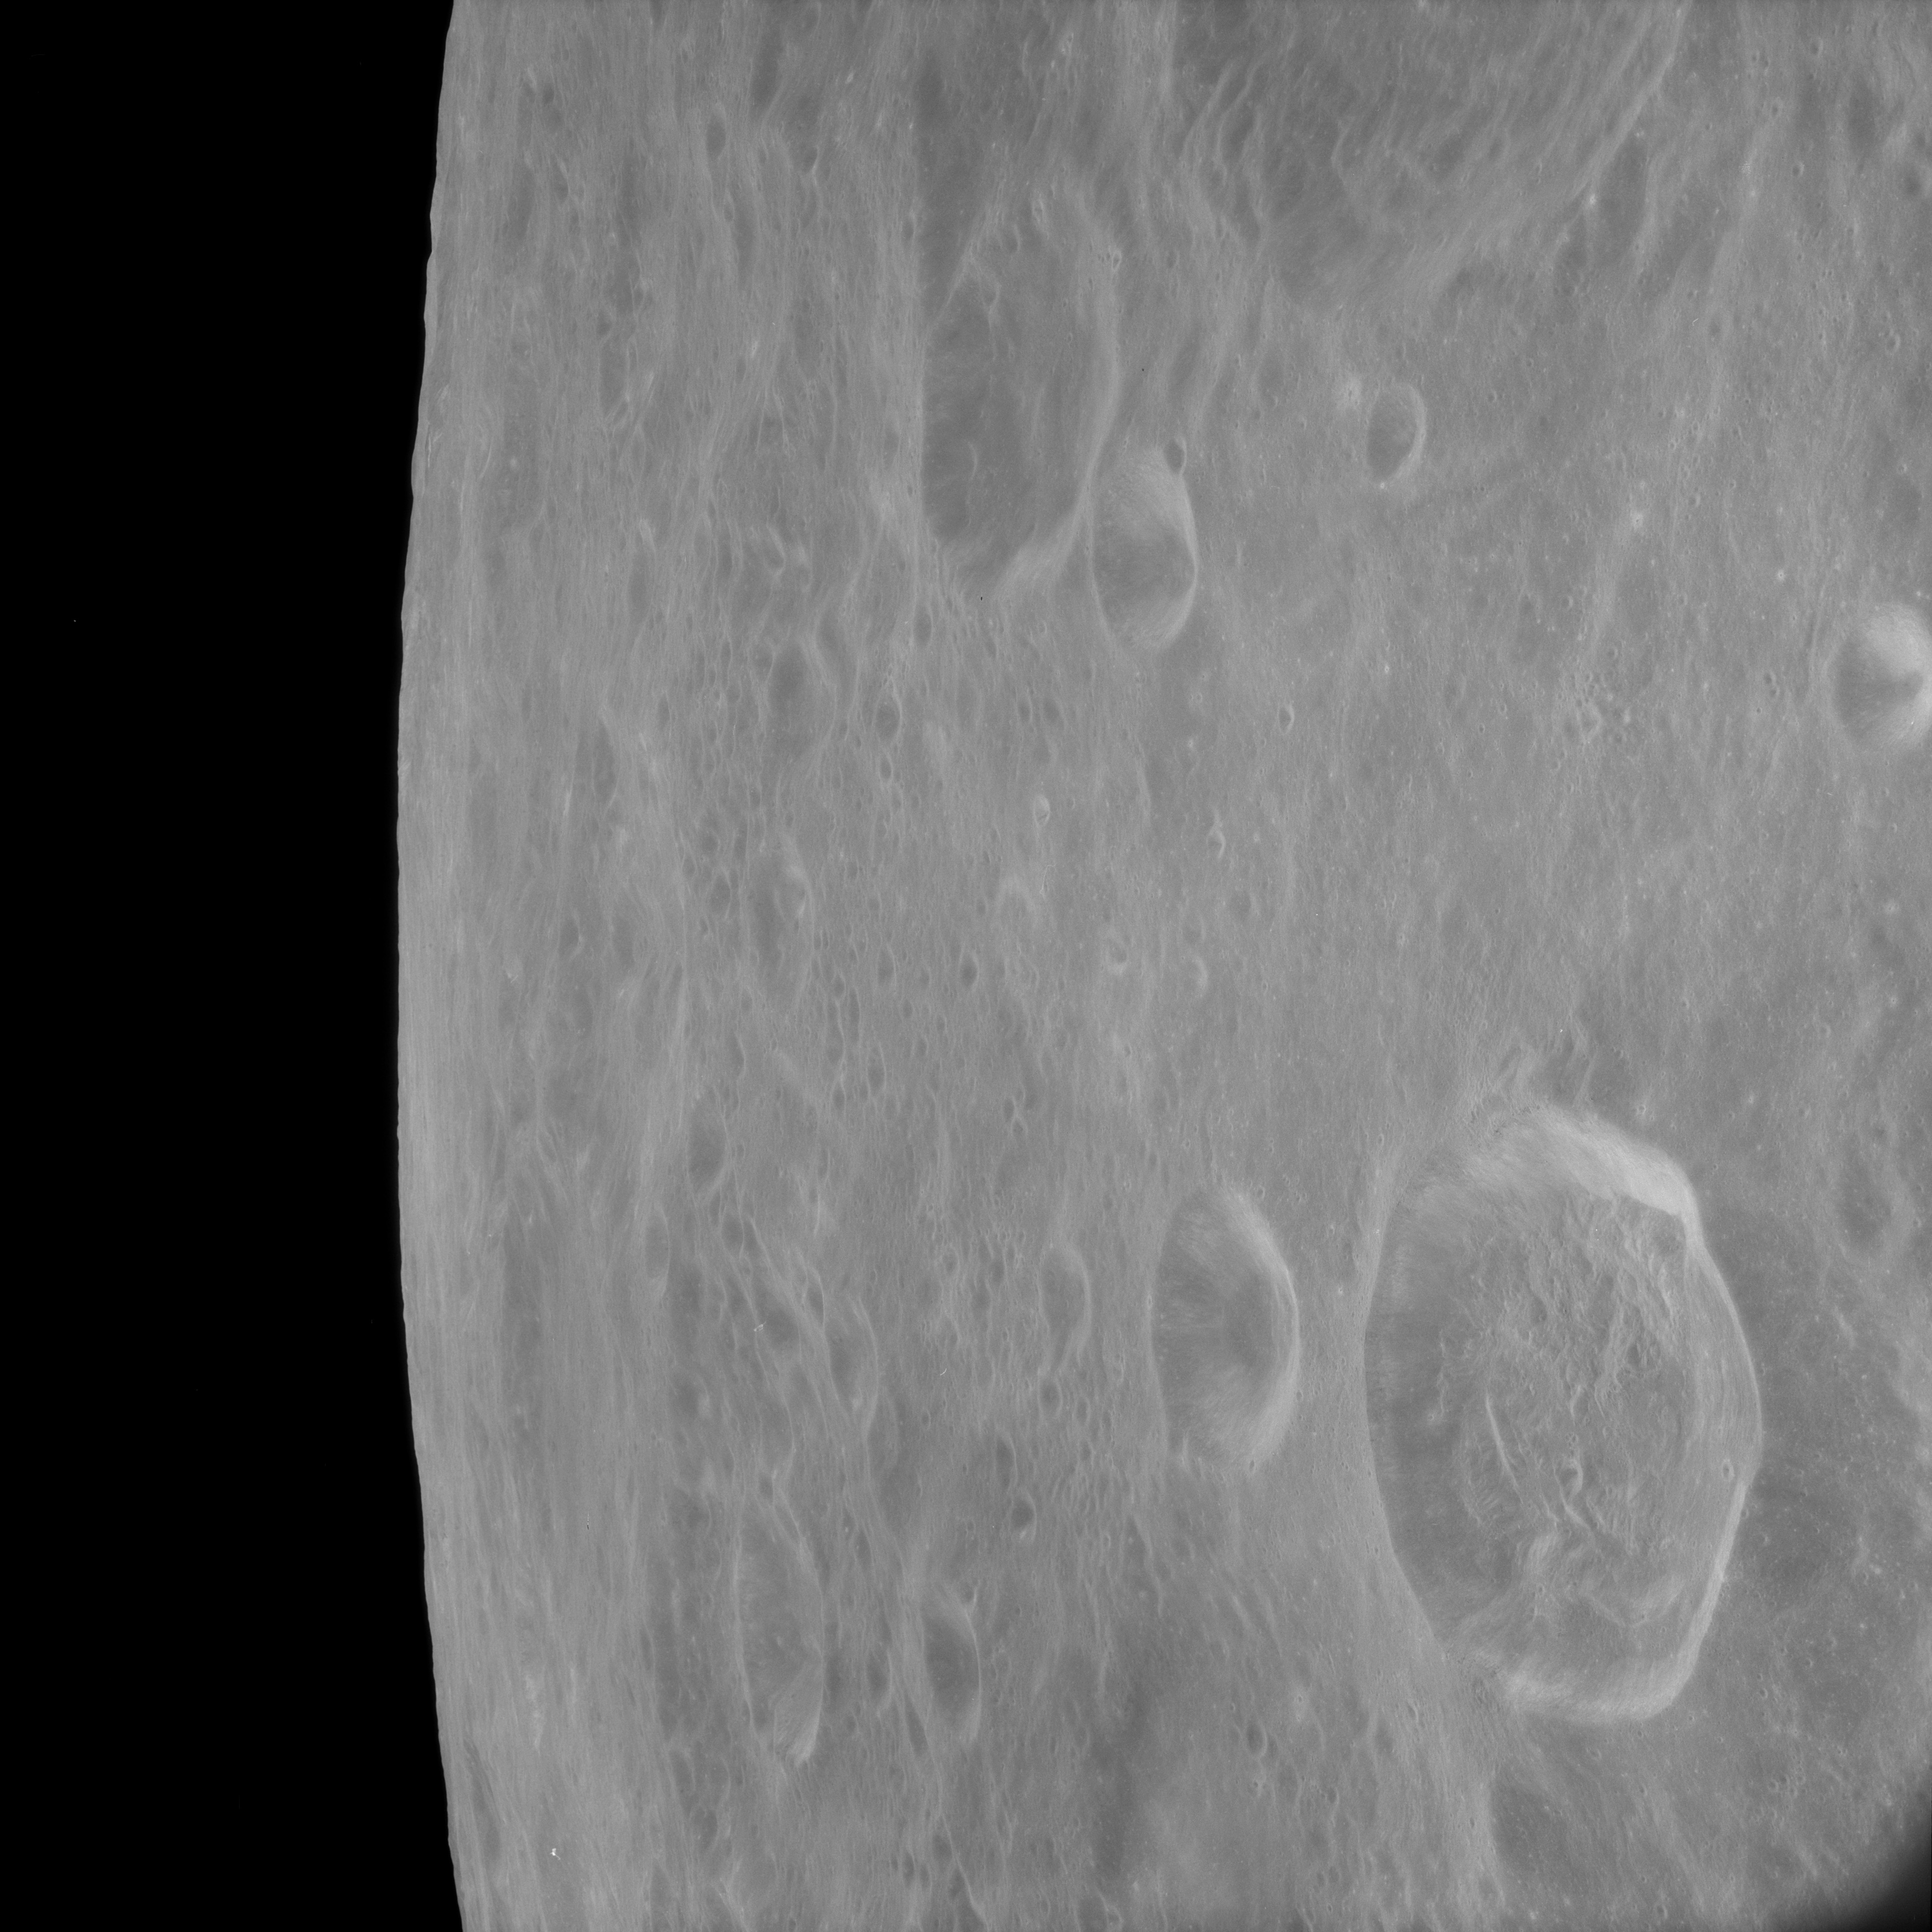
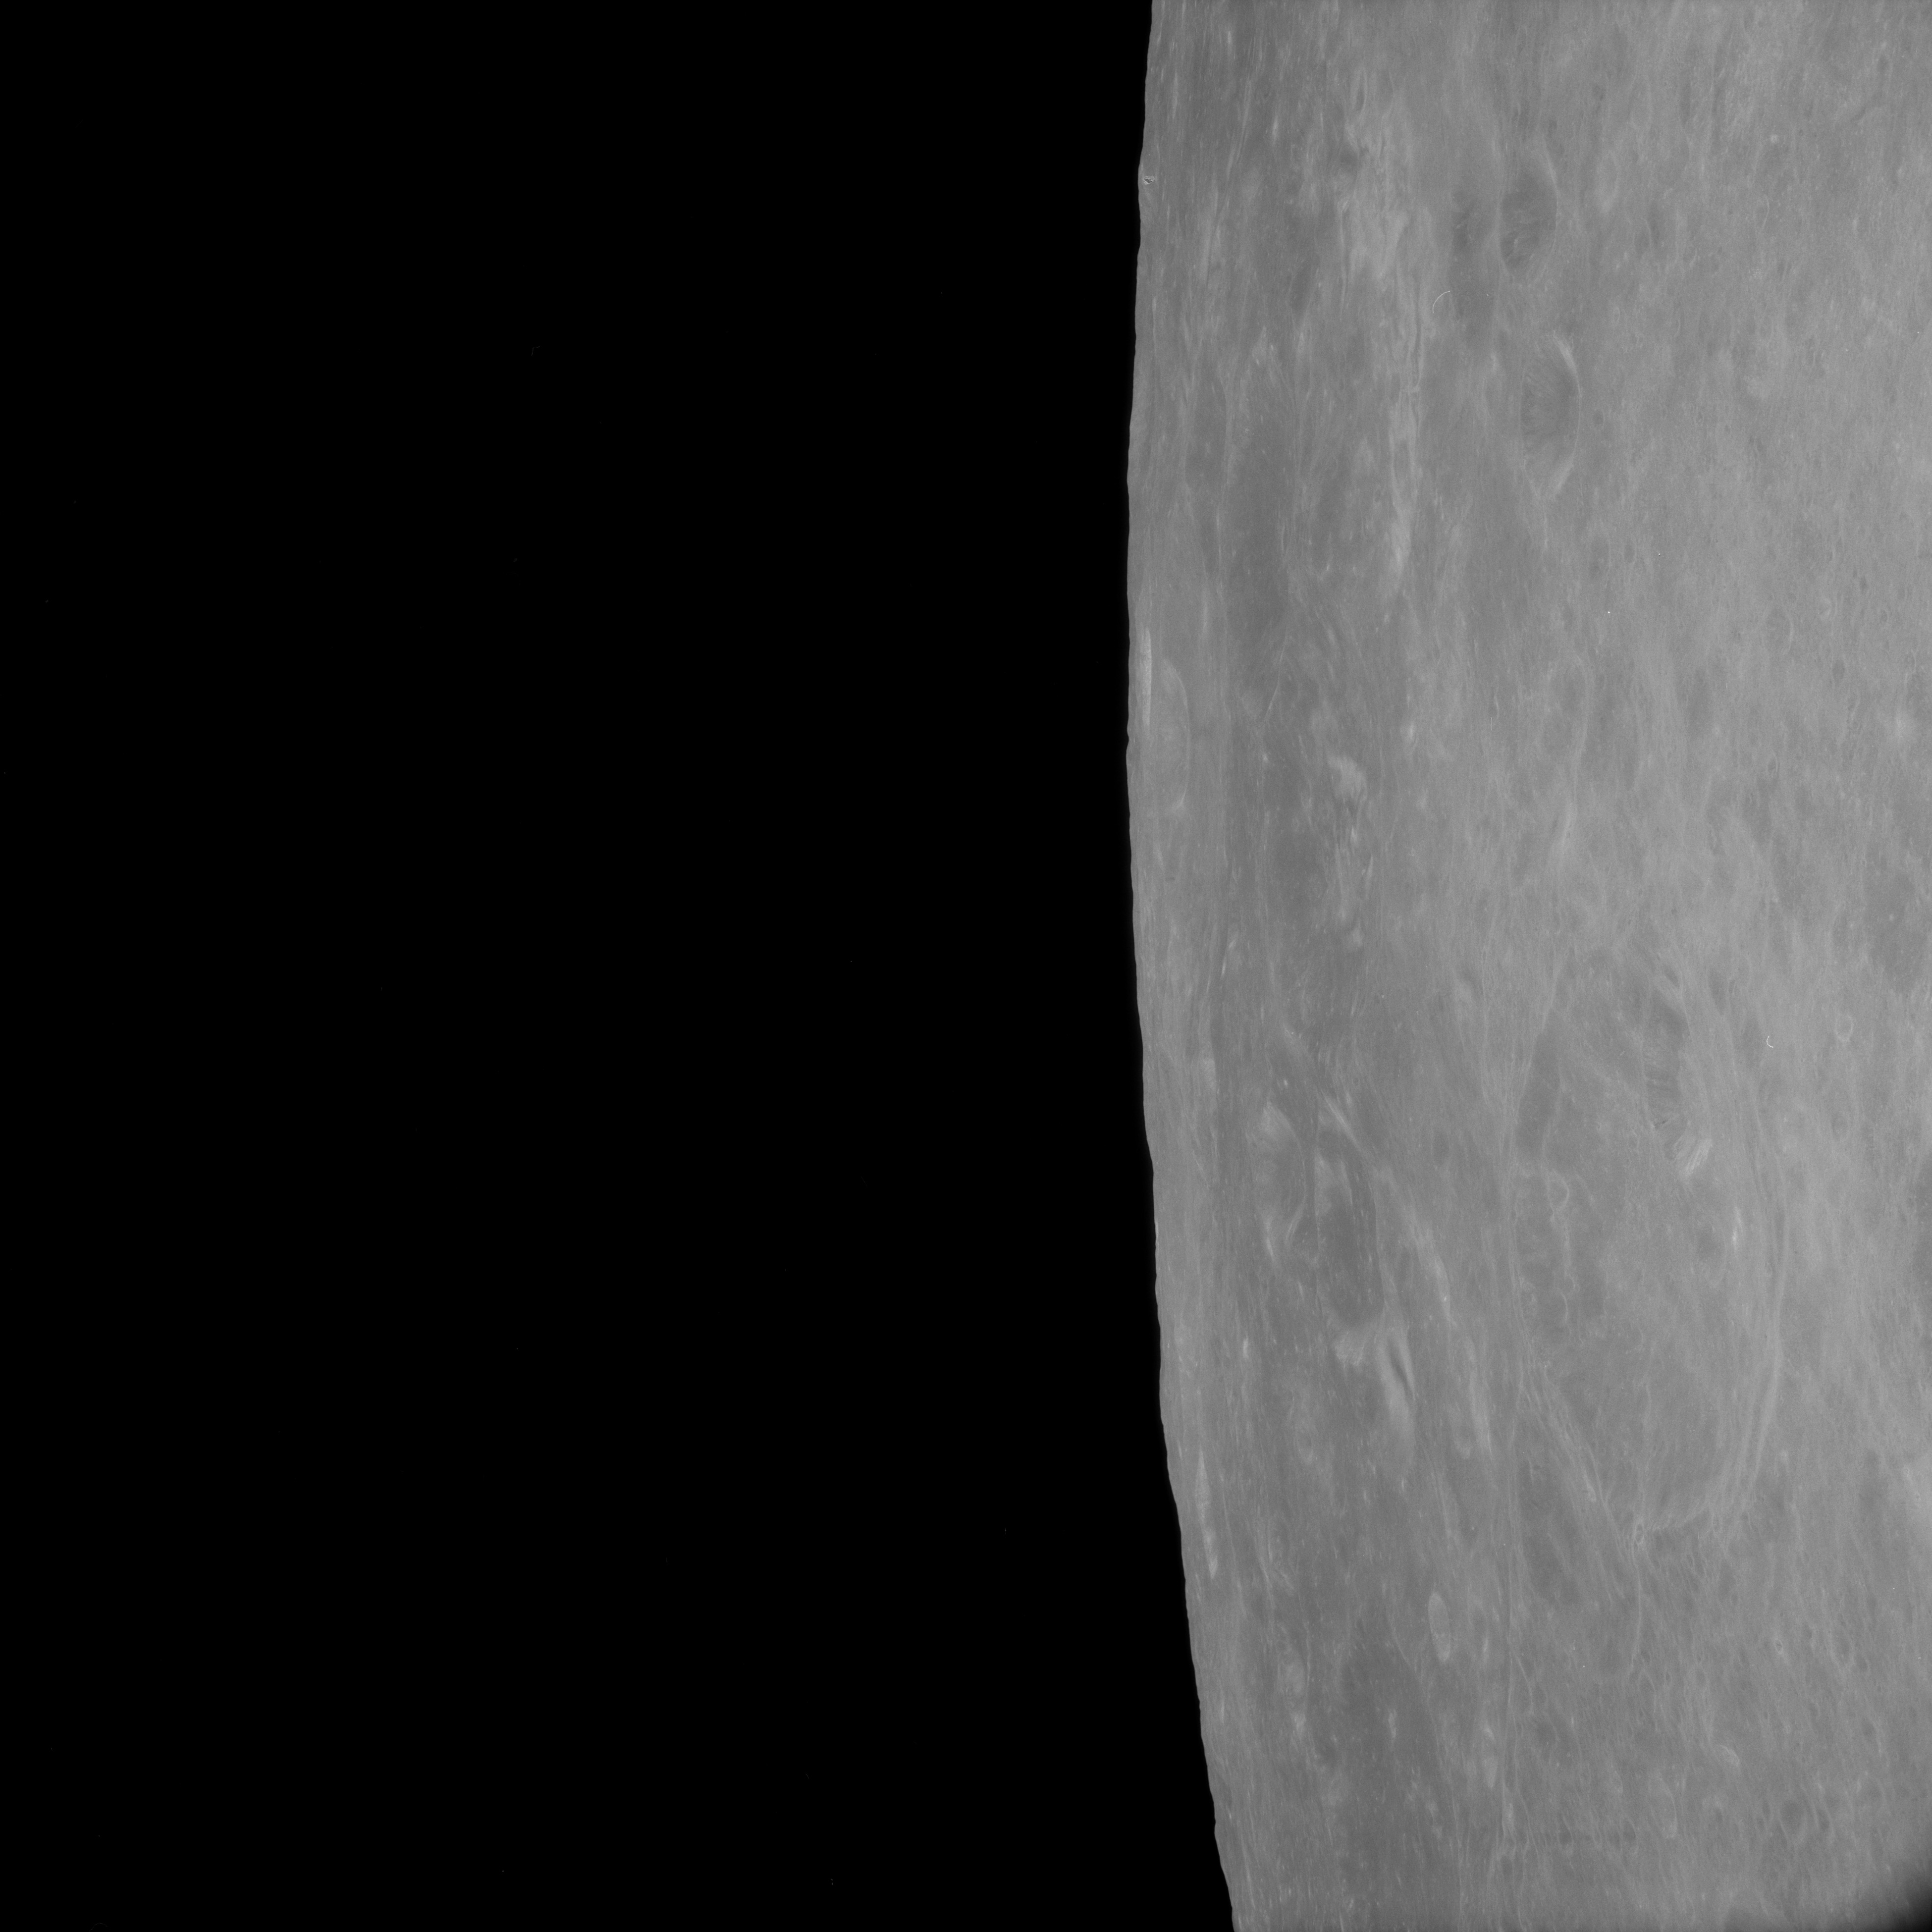
AS11-43-6351 Browse or print resolution. View west across large crater Babcock. Lower bright crater within Babcock is Zasyadko. Image credit: Image Science and Analysis Laboratory, NASA-Johnson Space Center. |

|
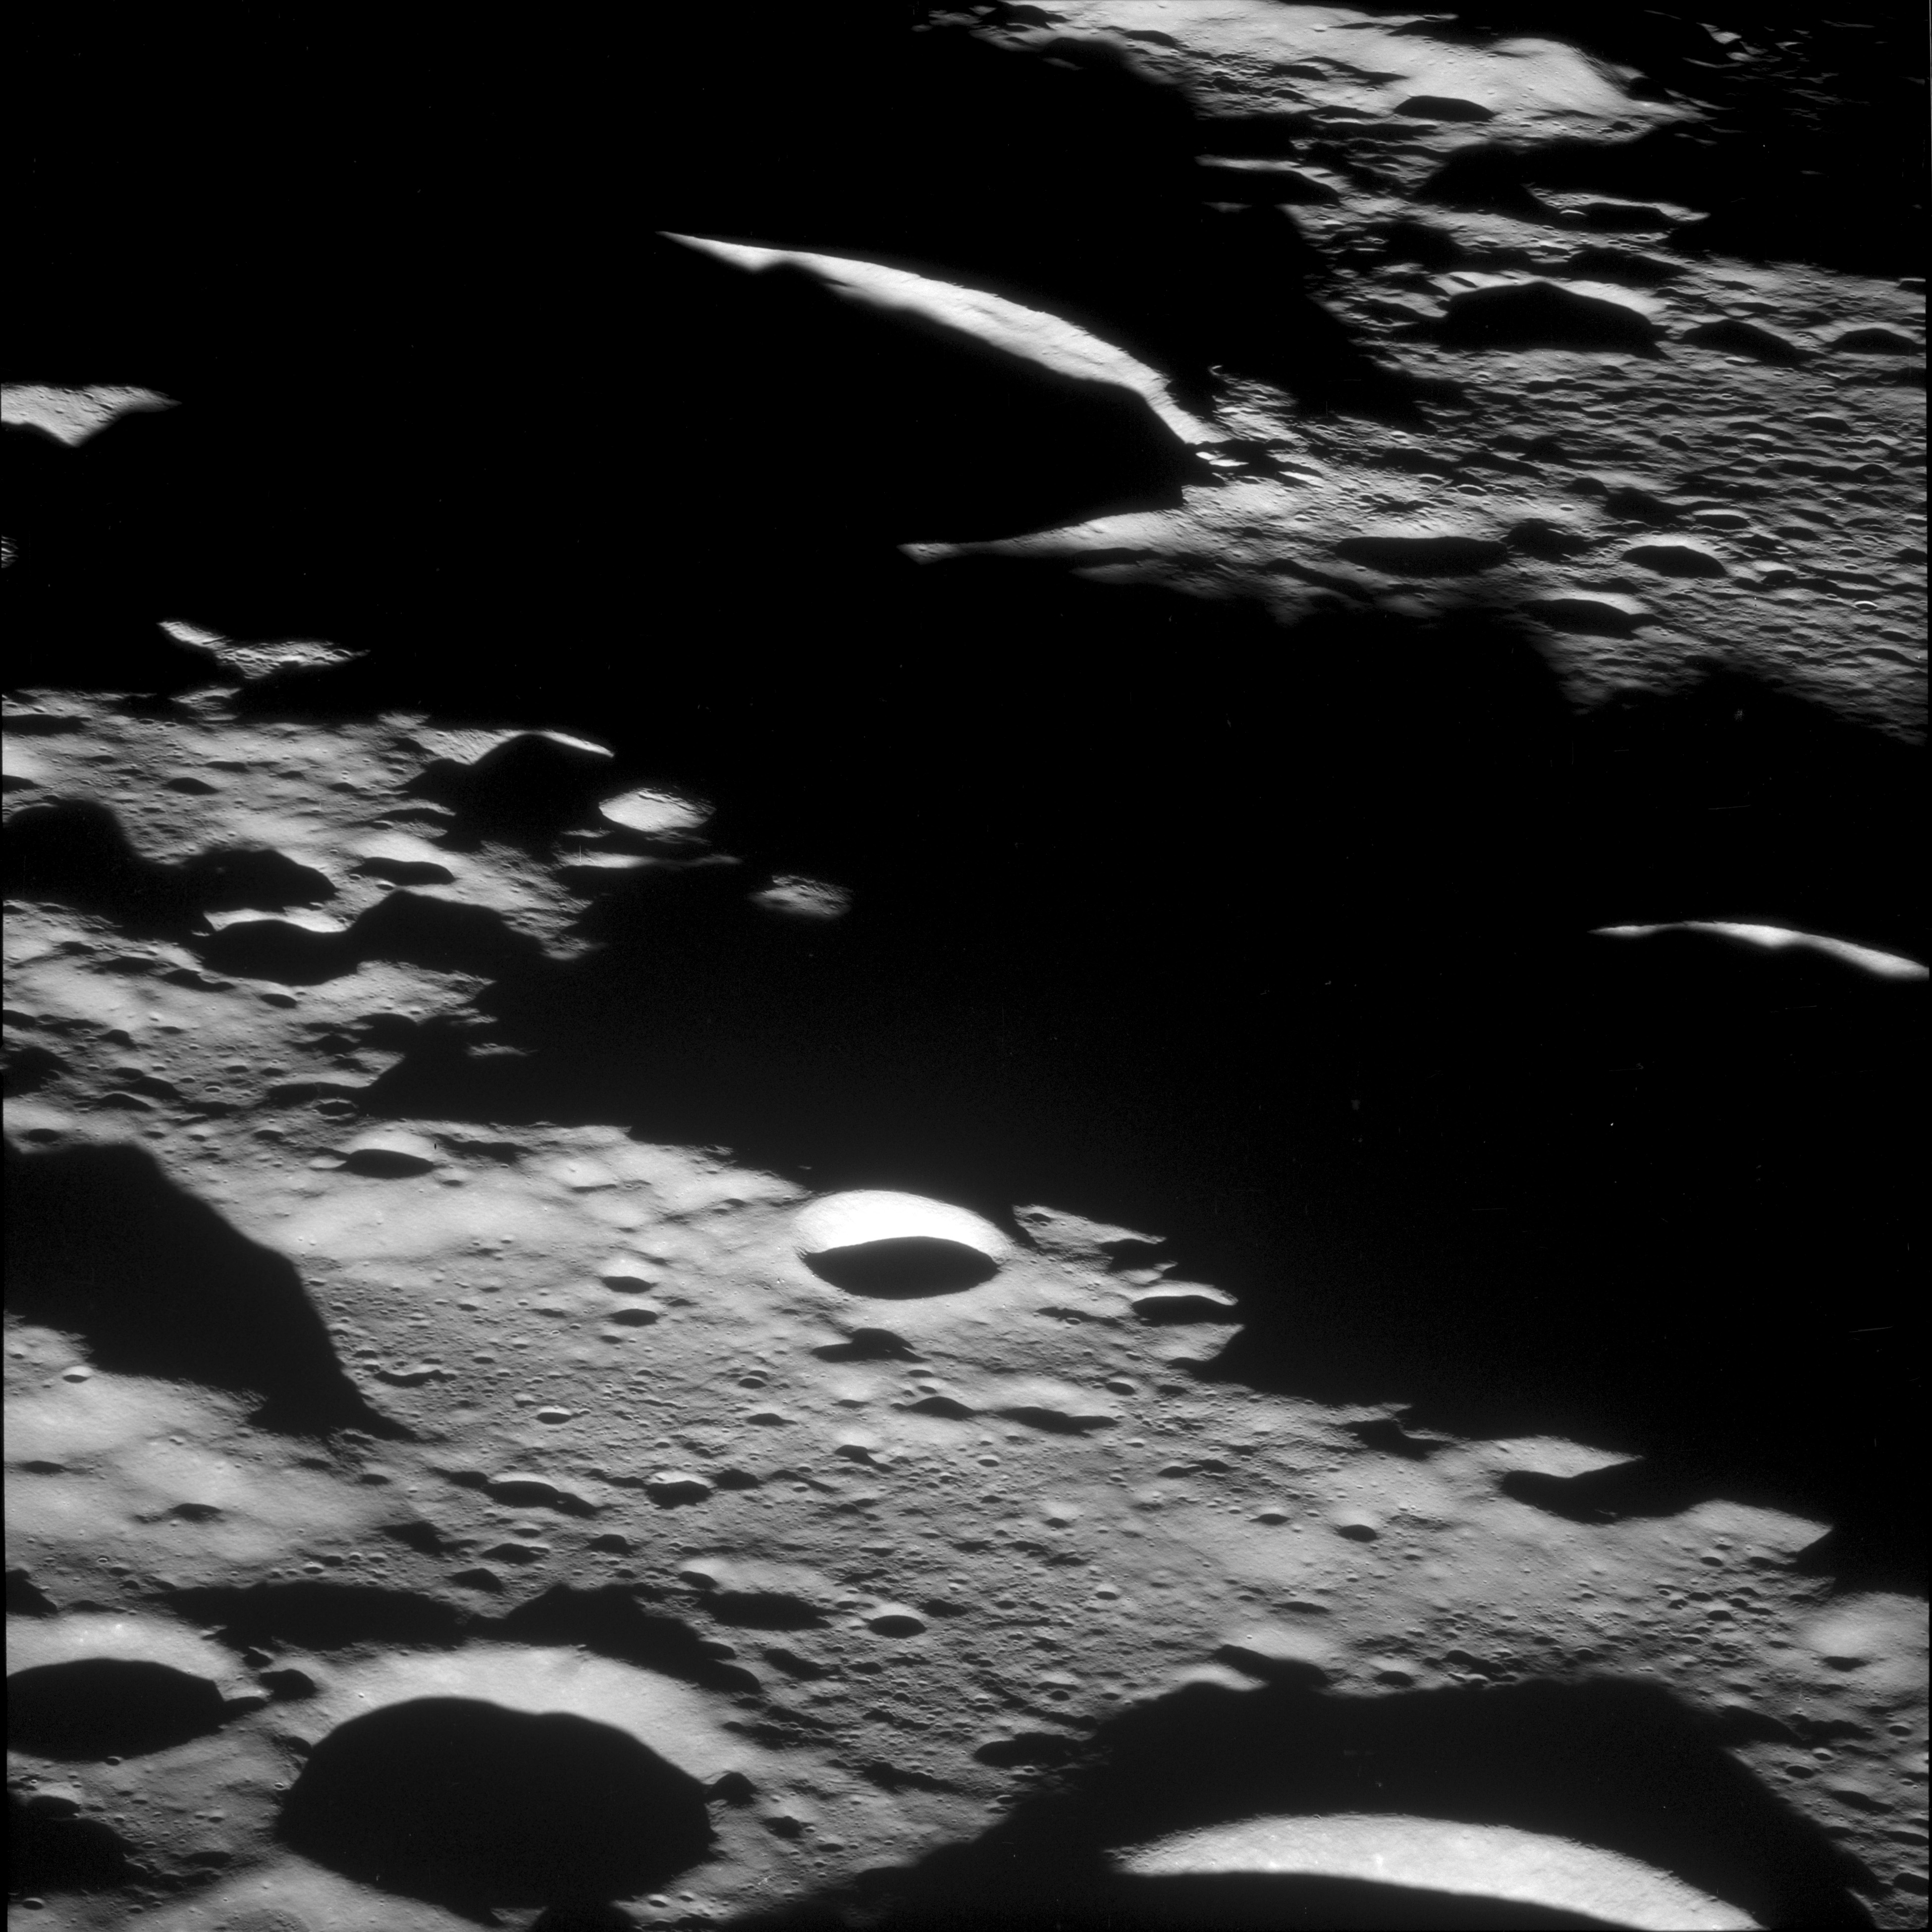
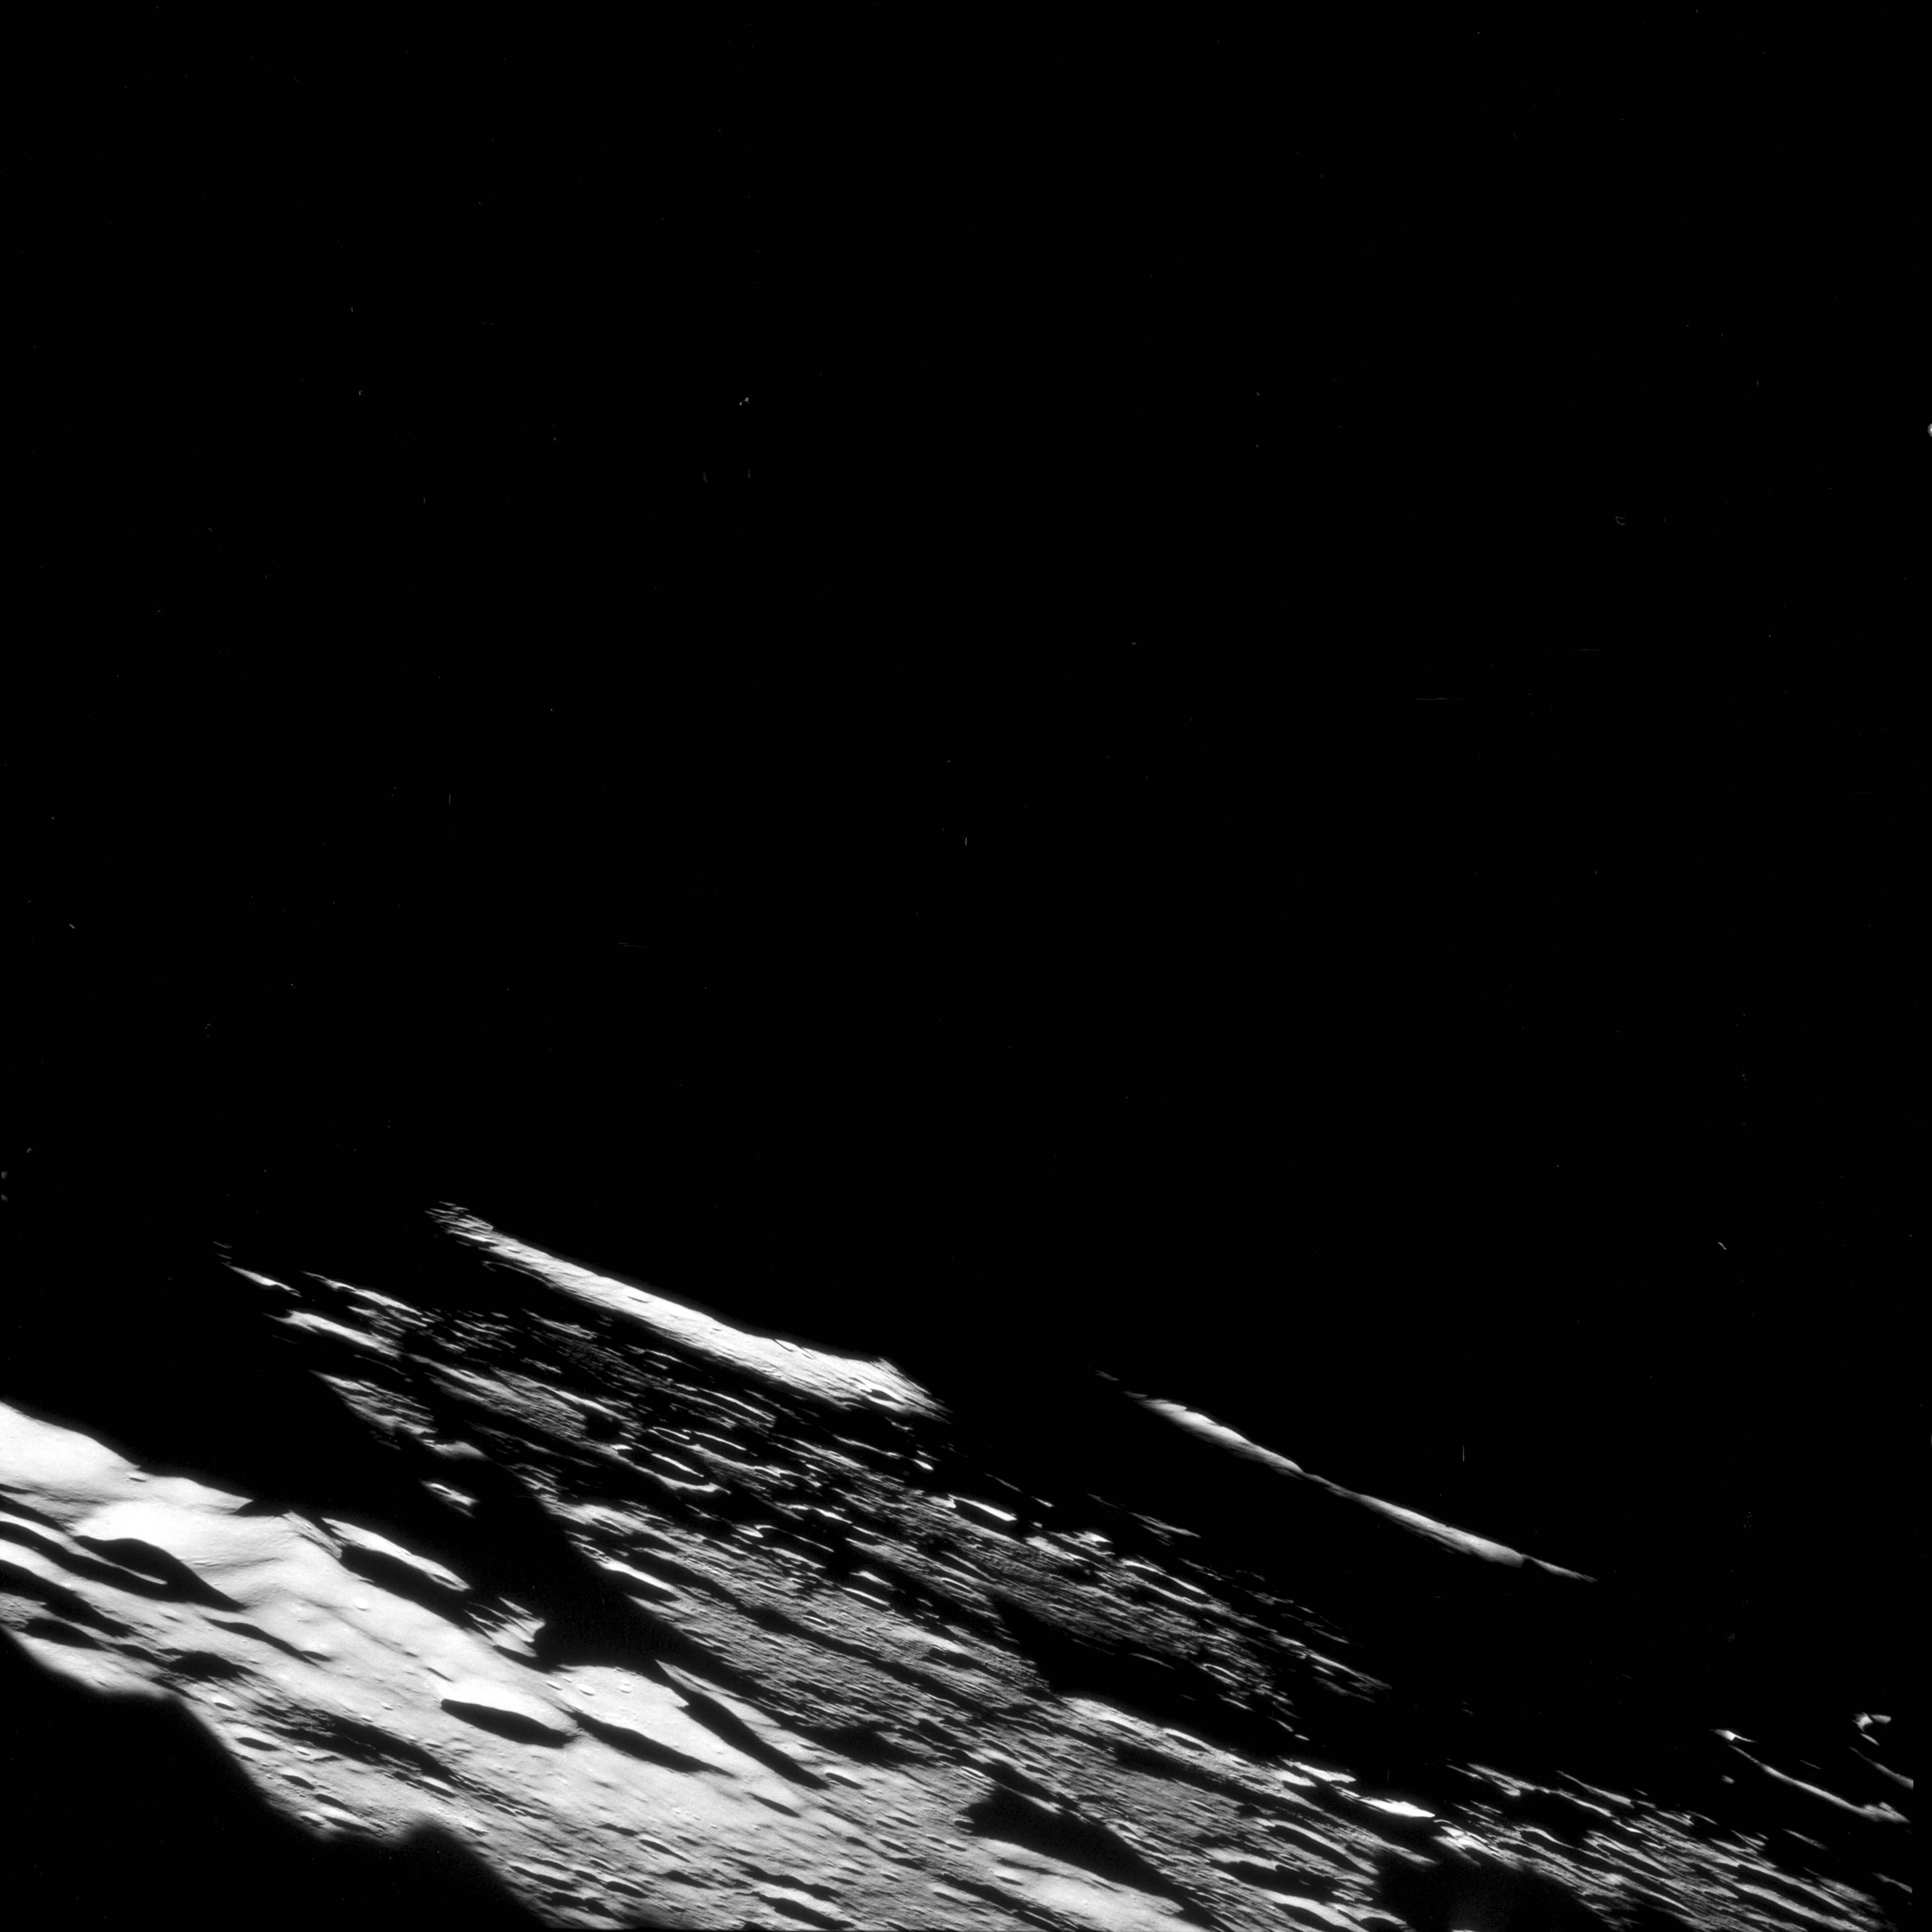
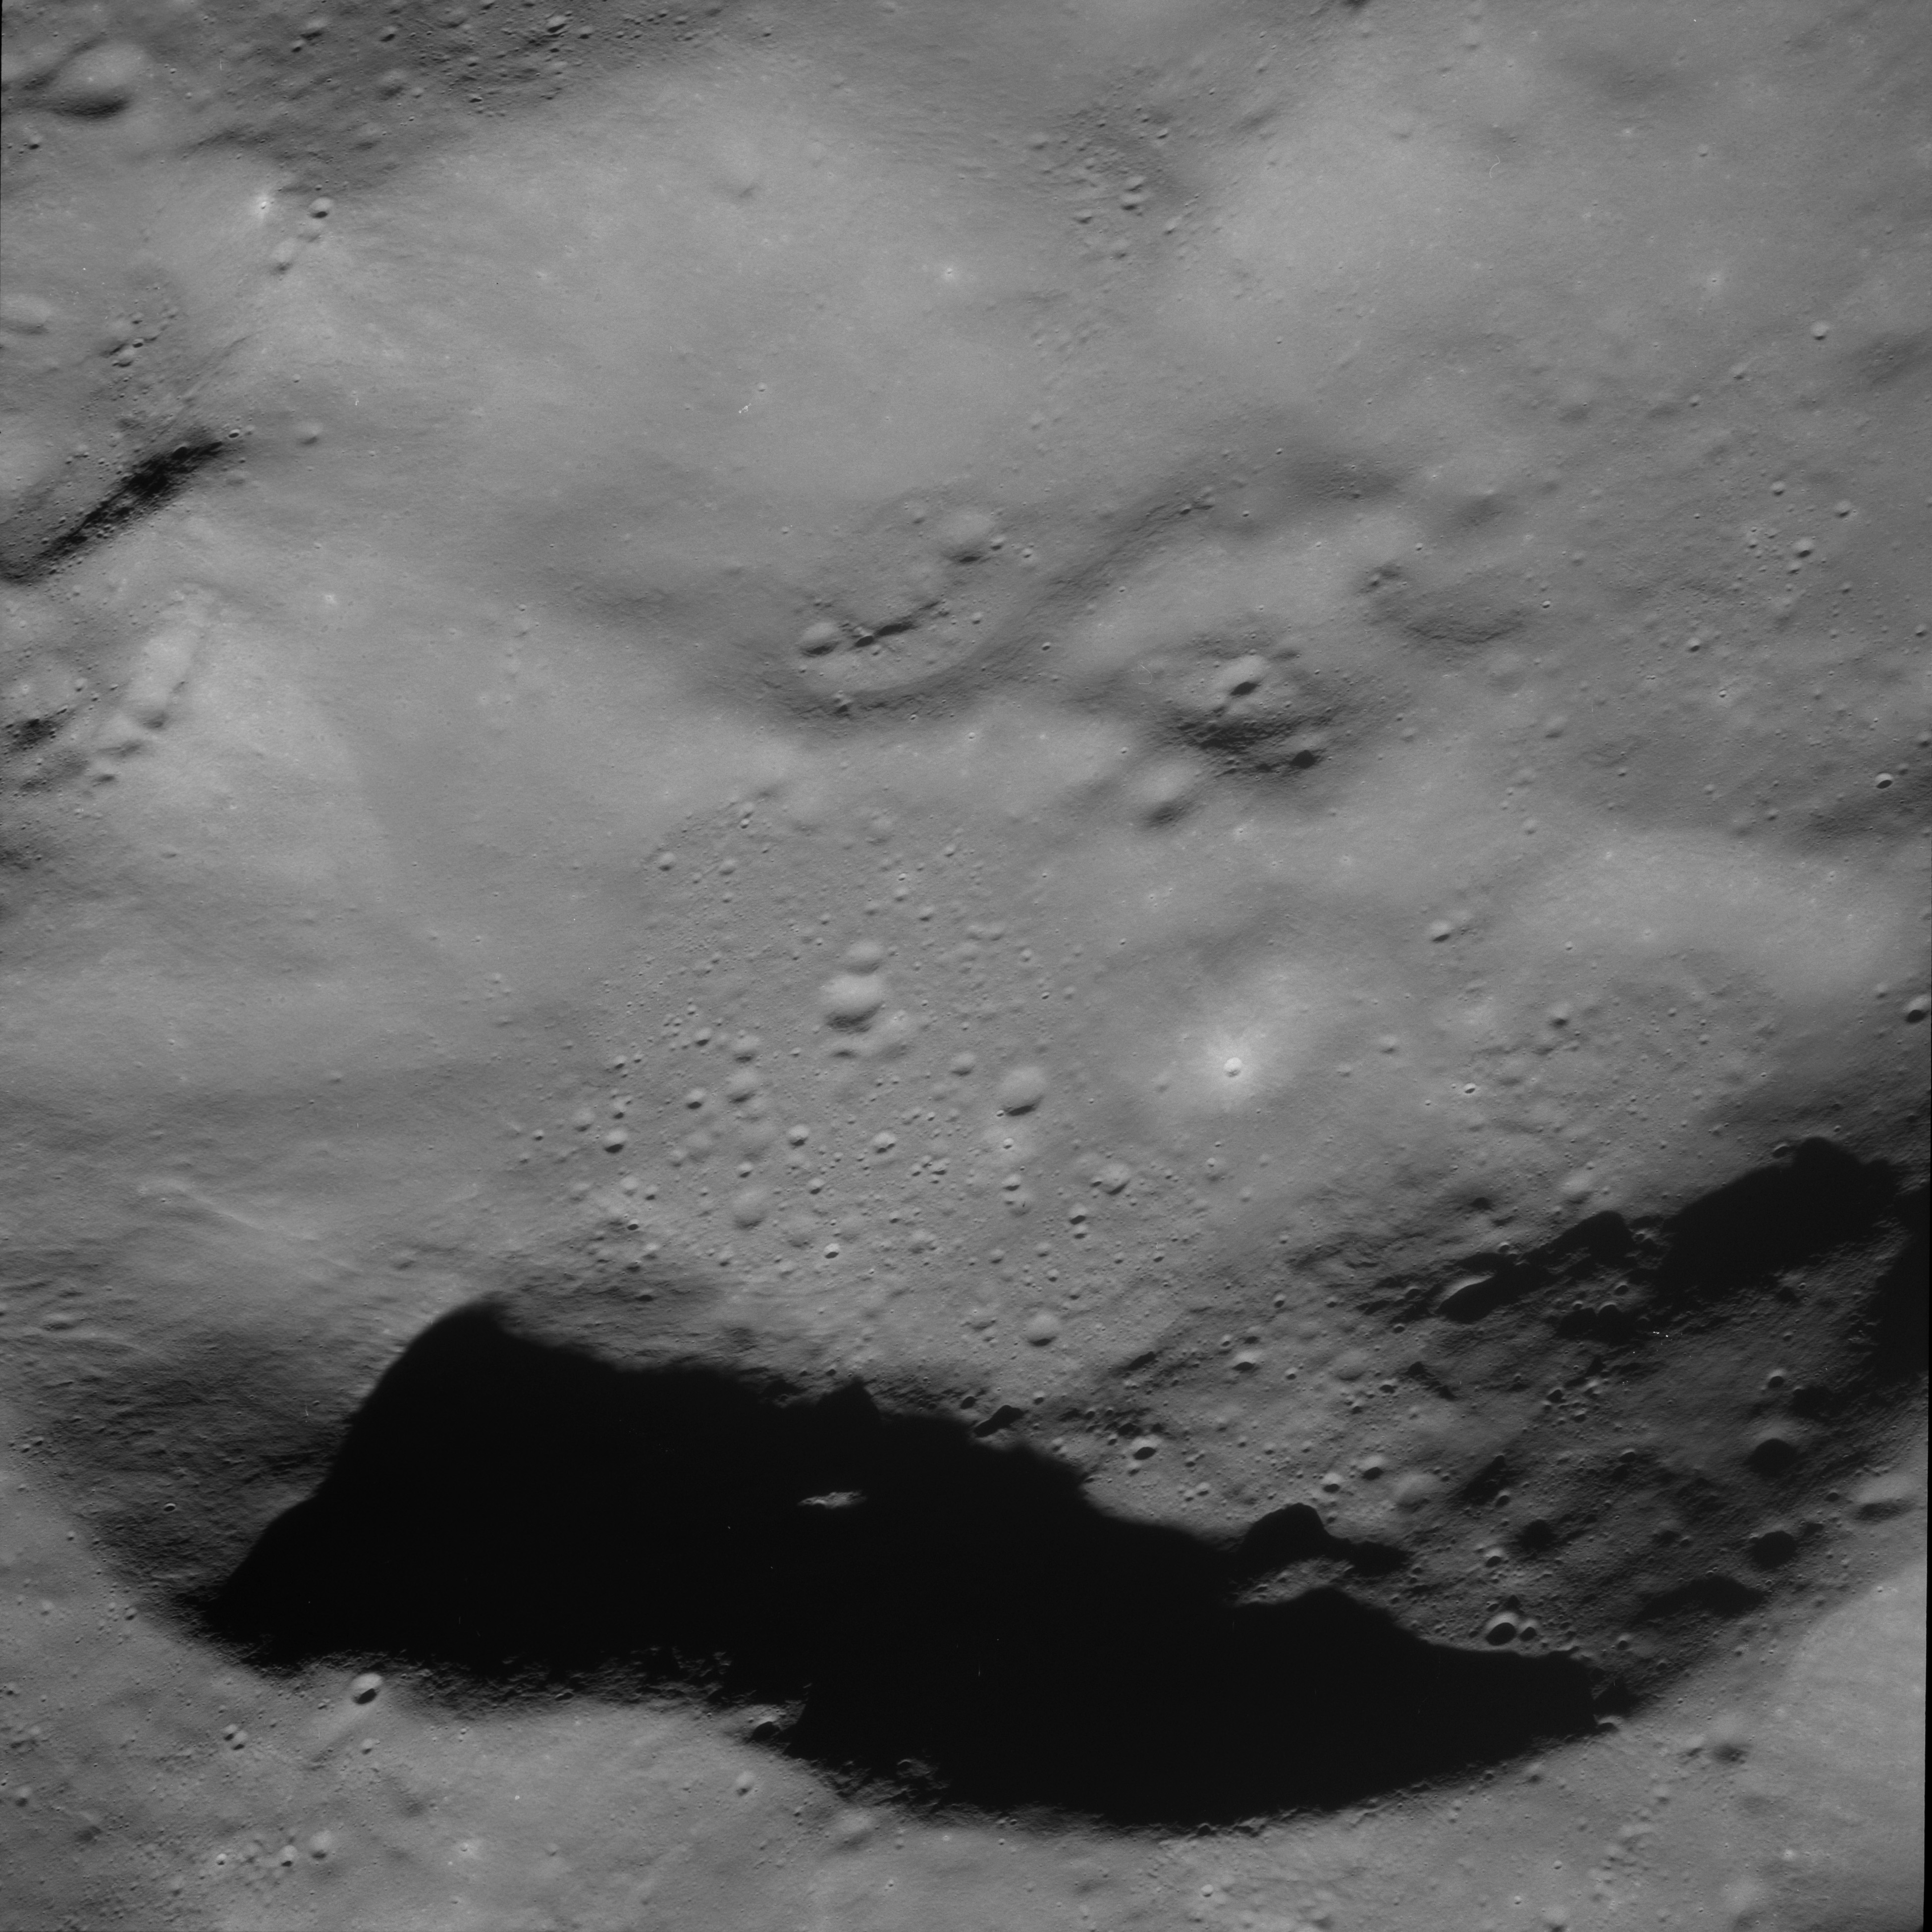
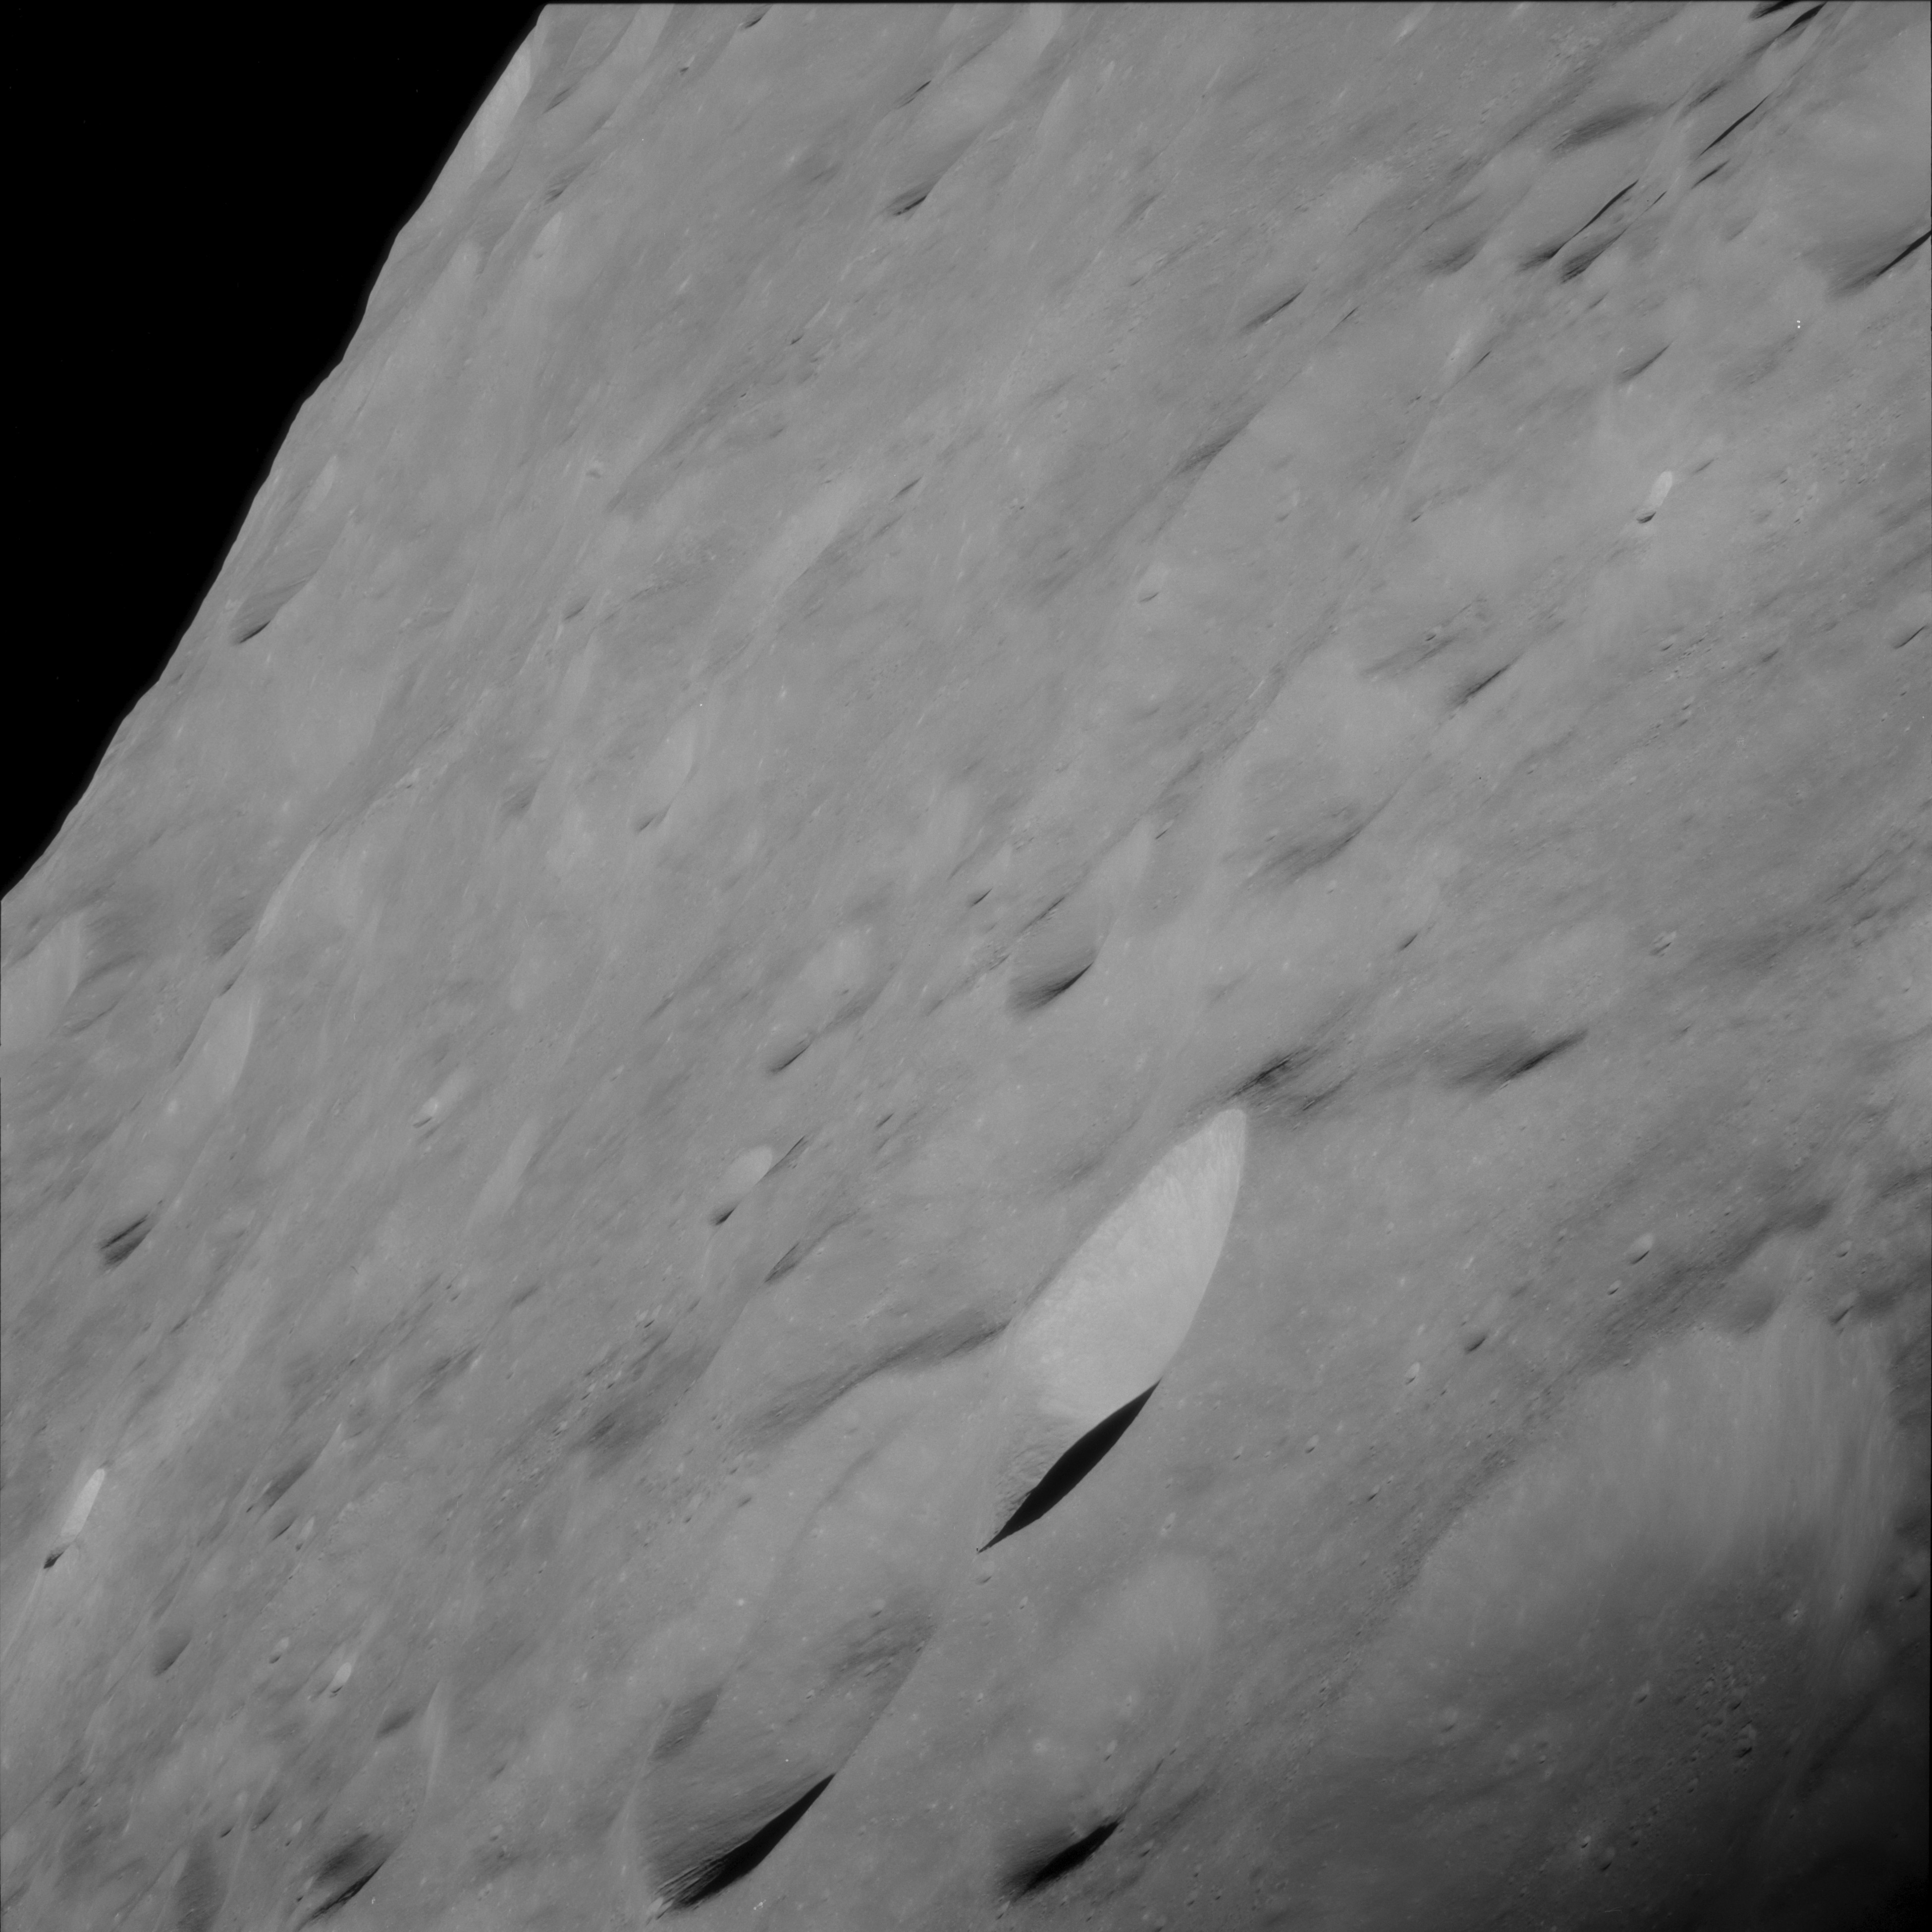
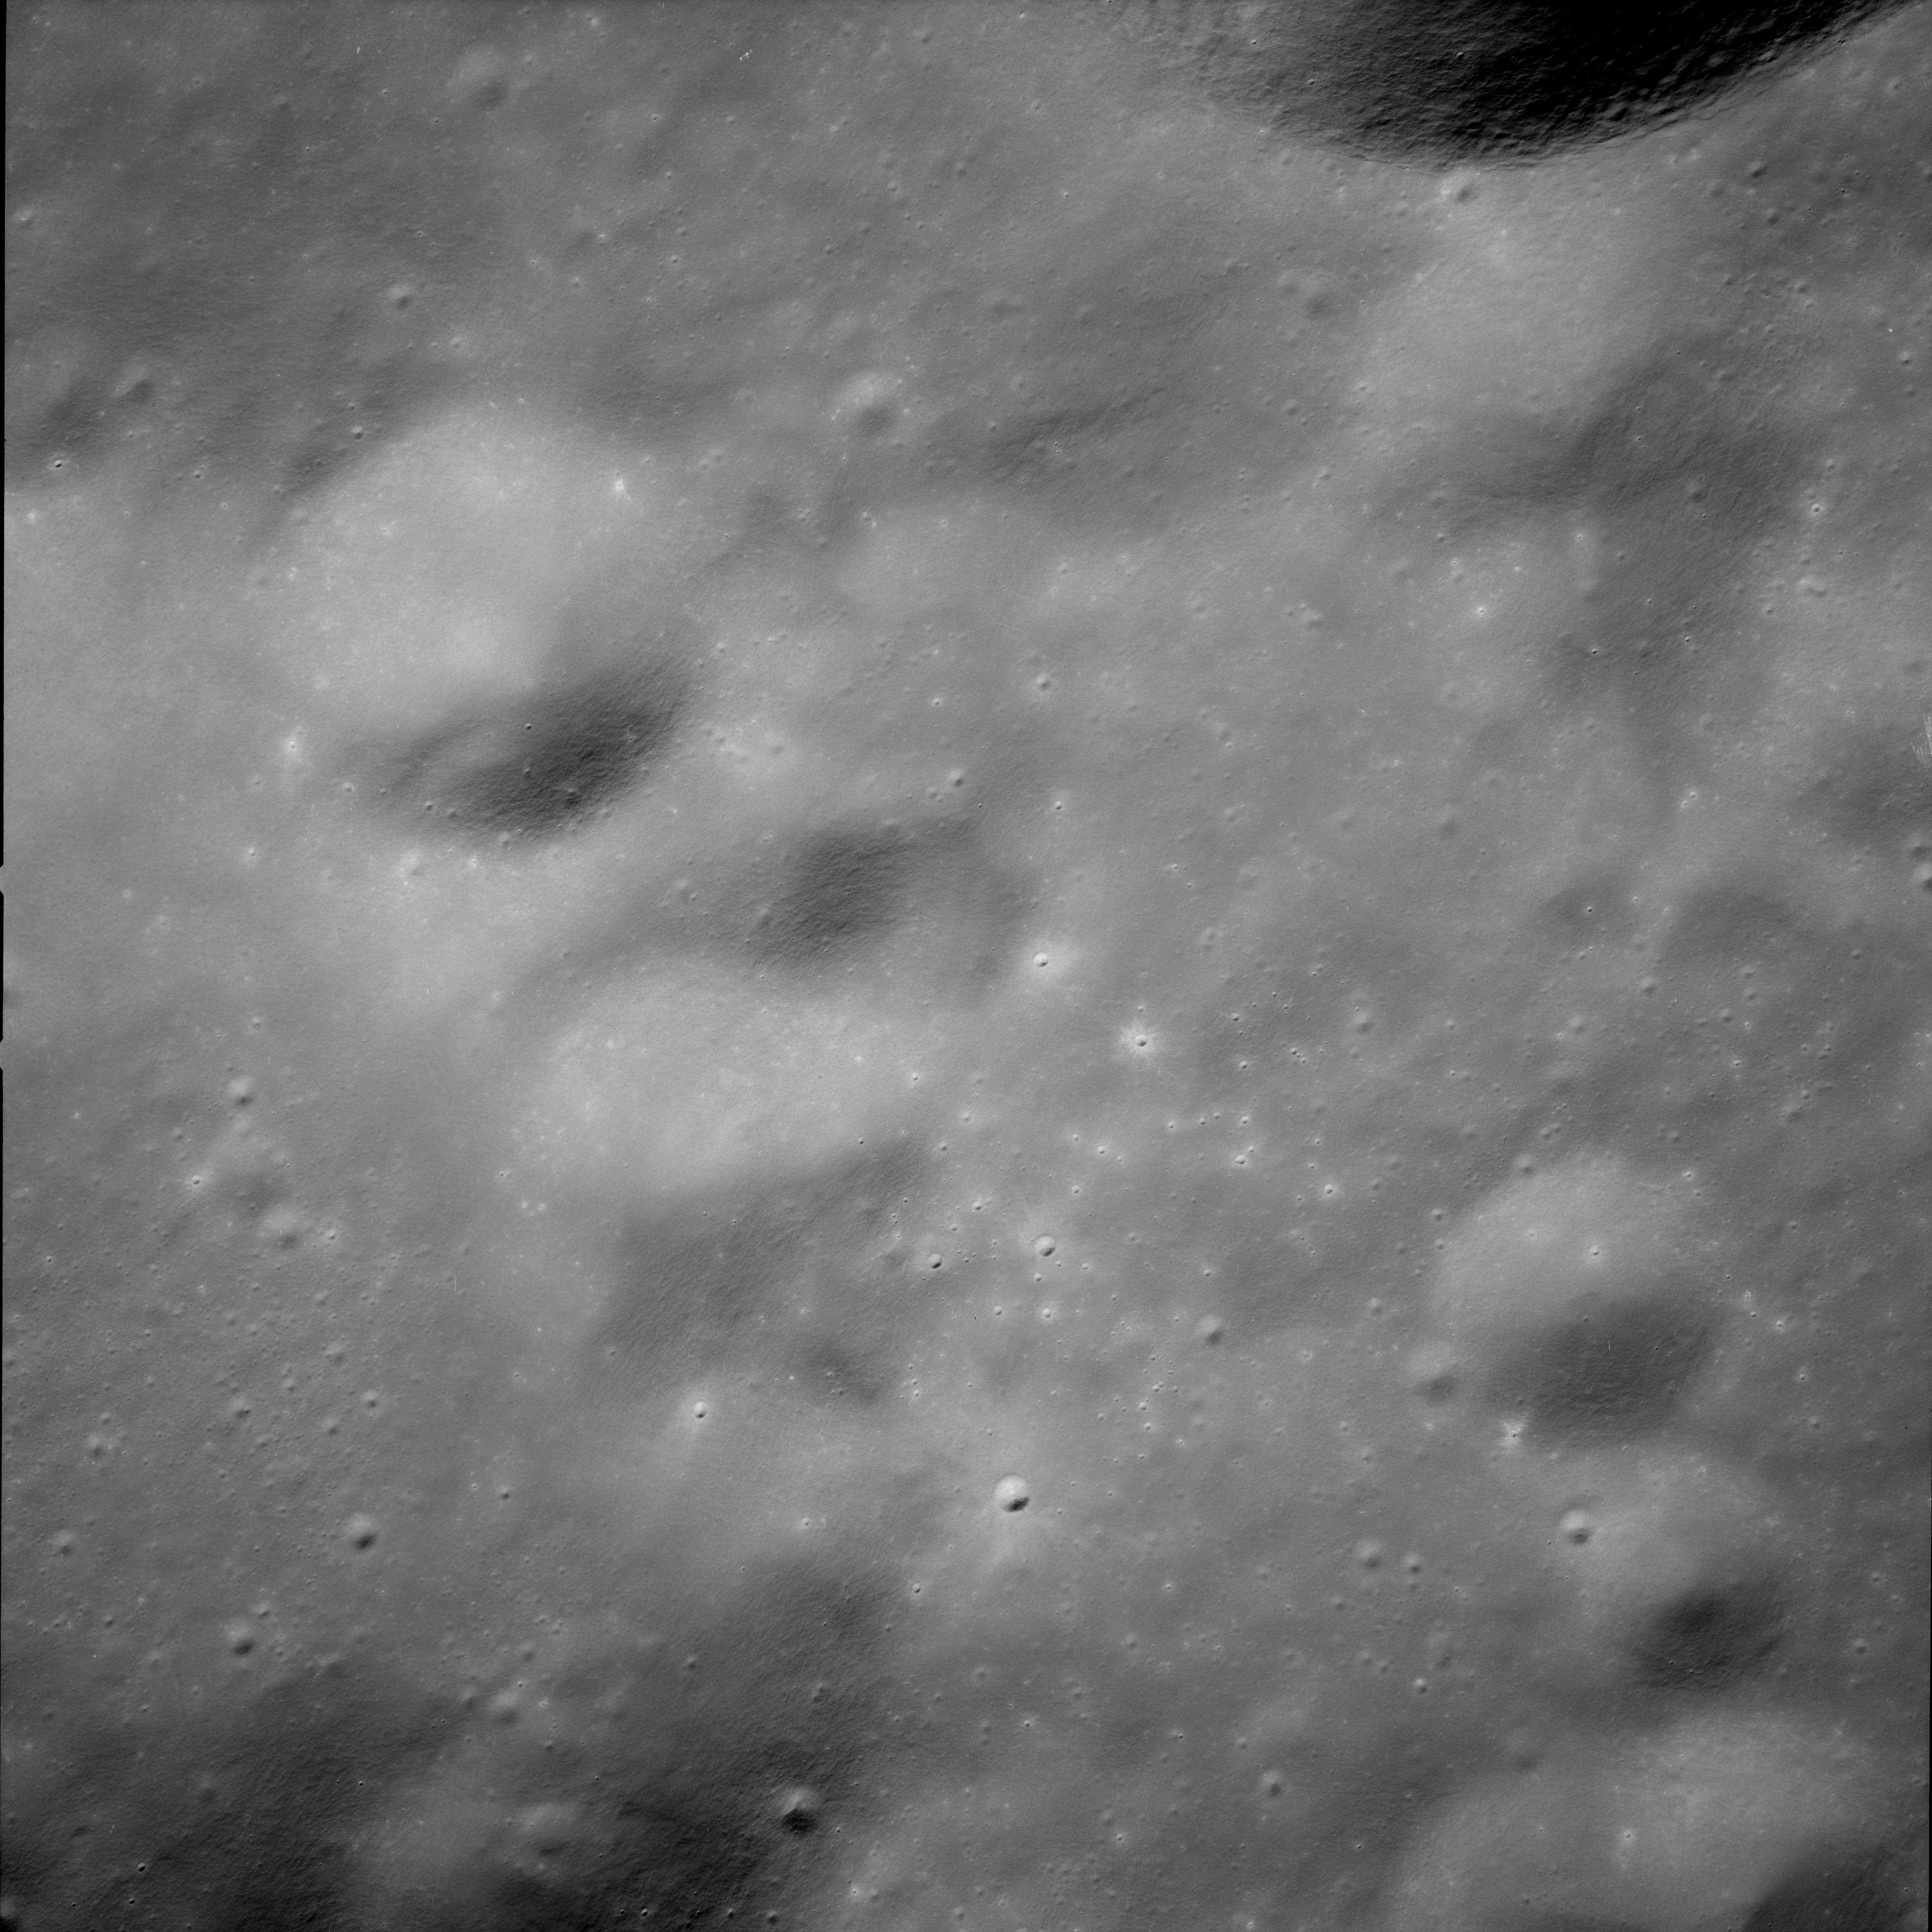
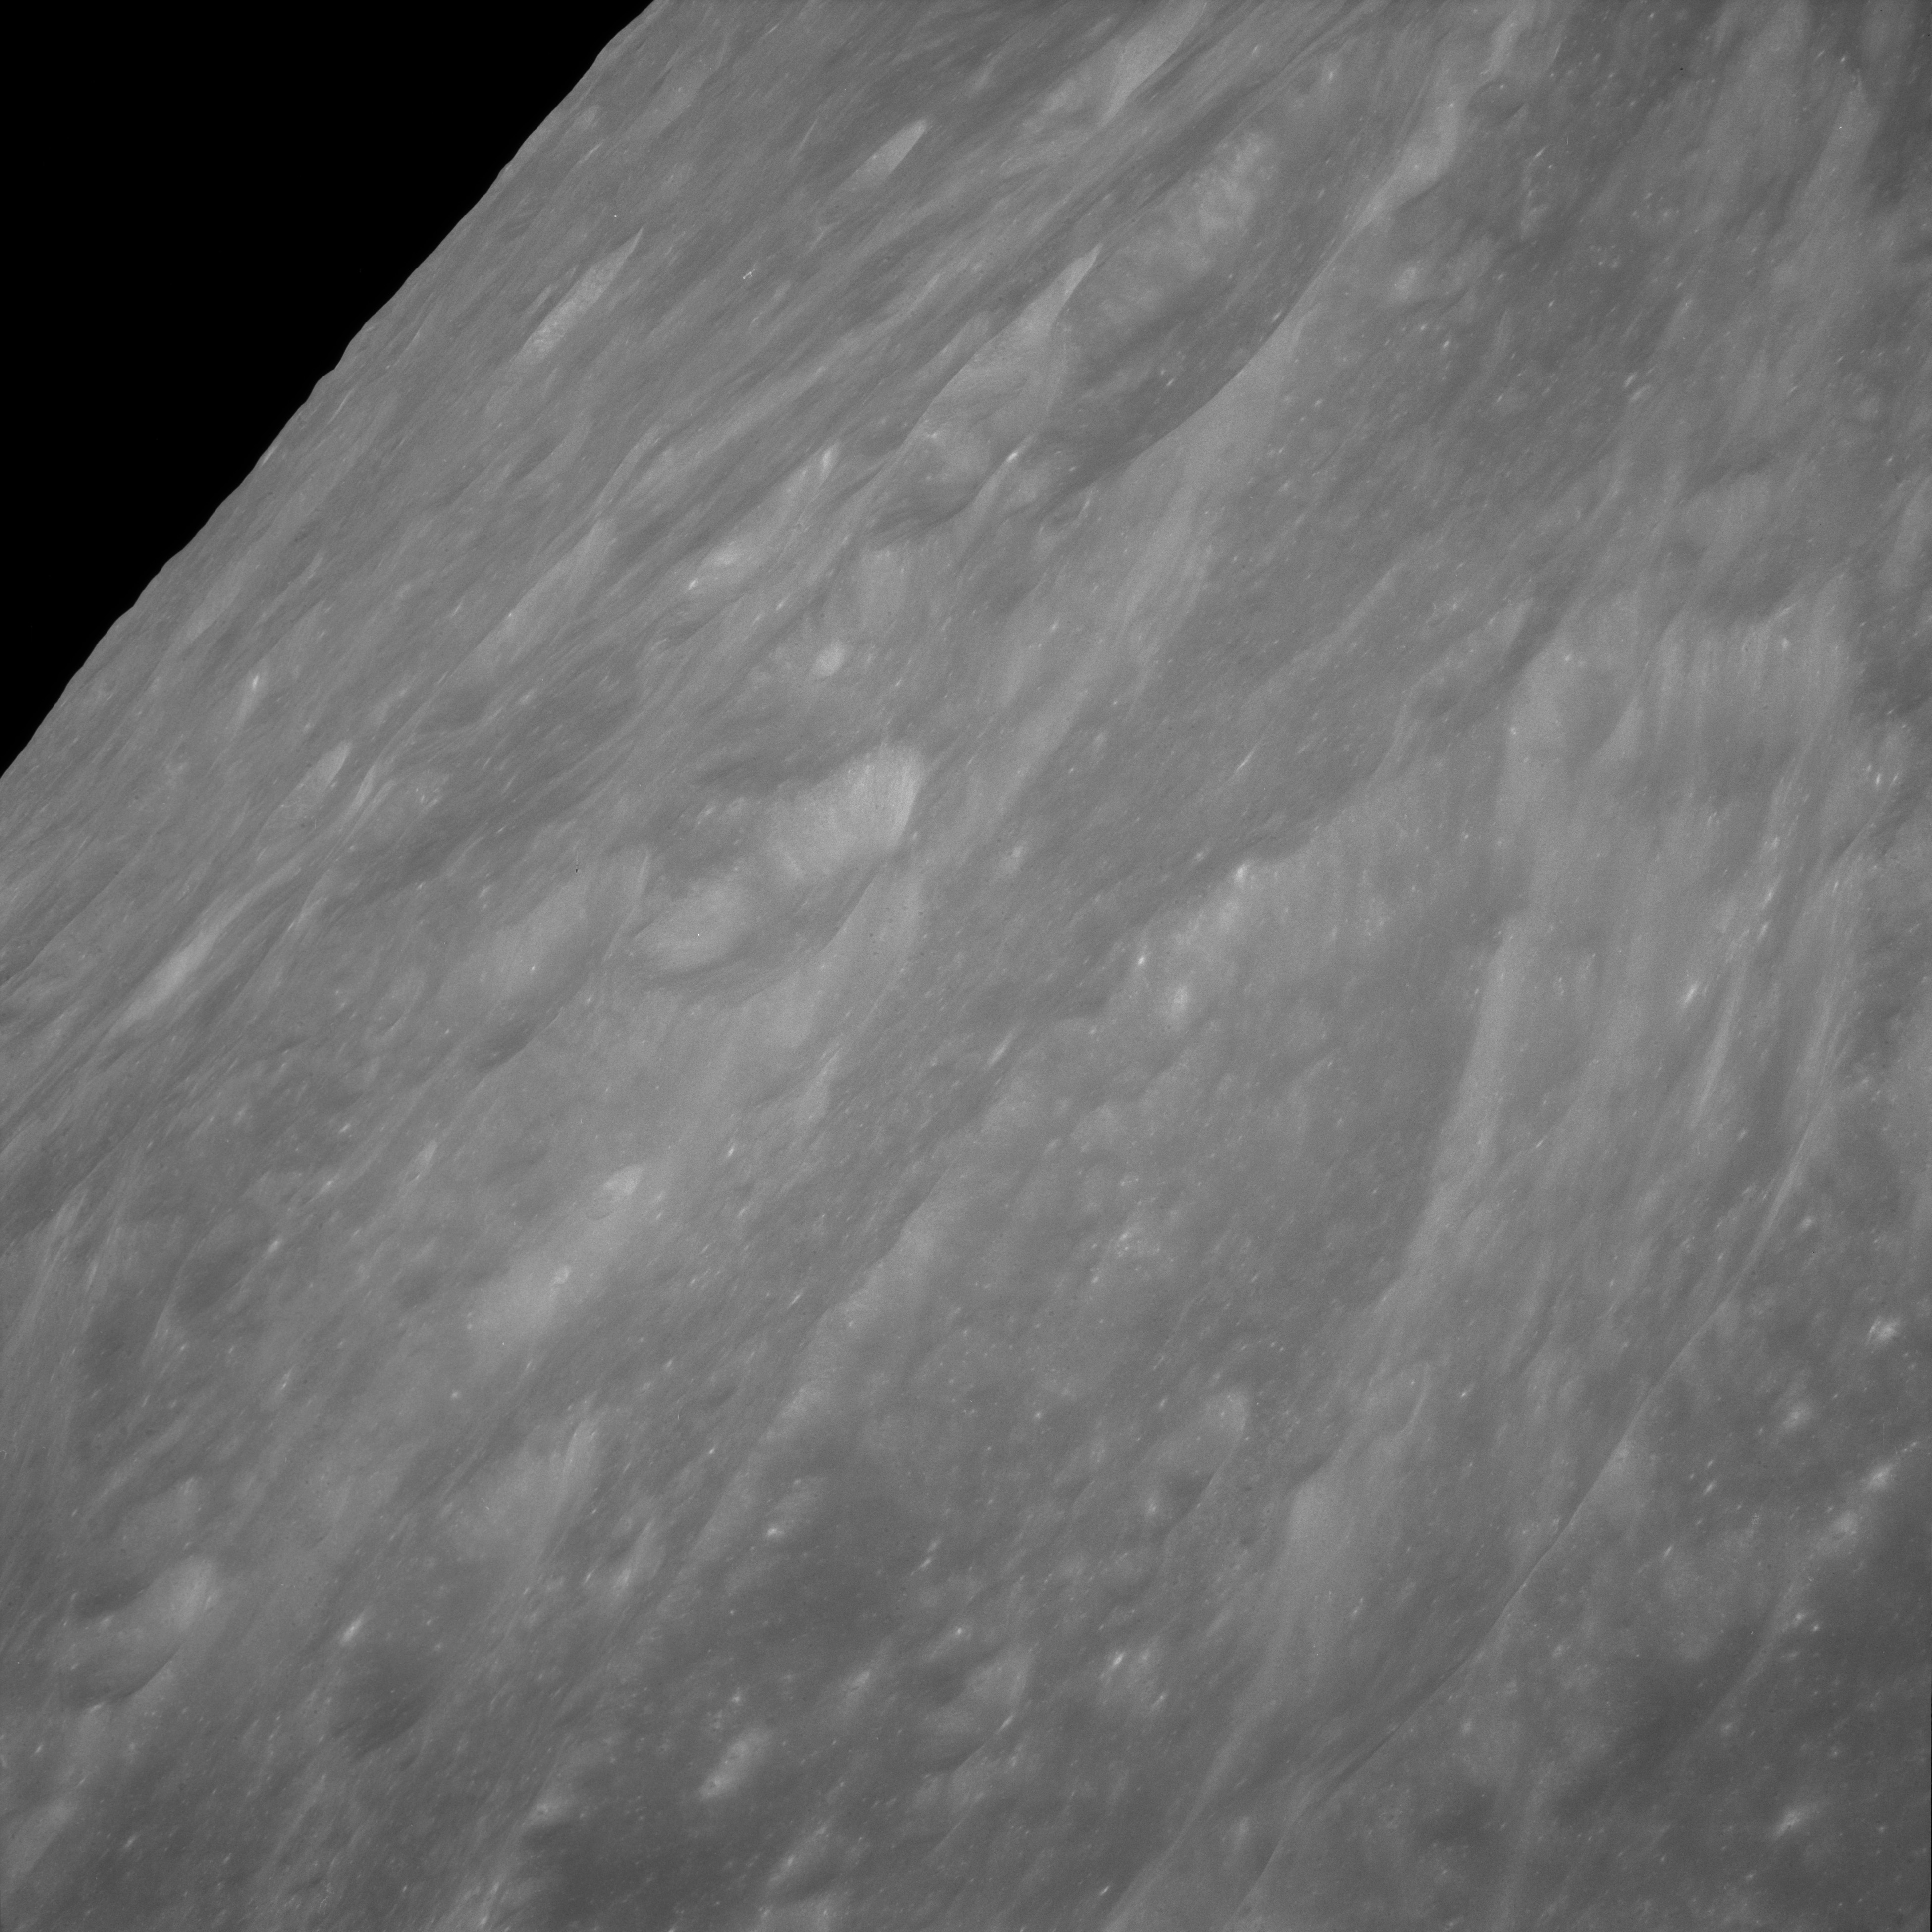
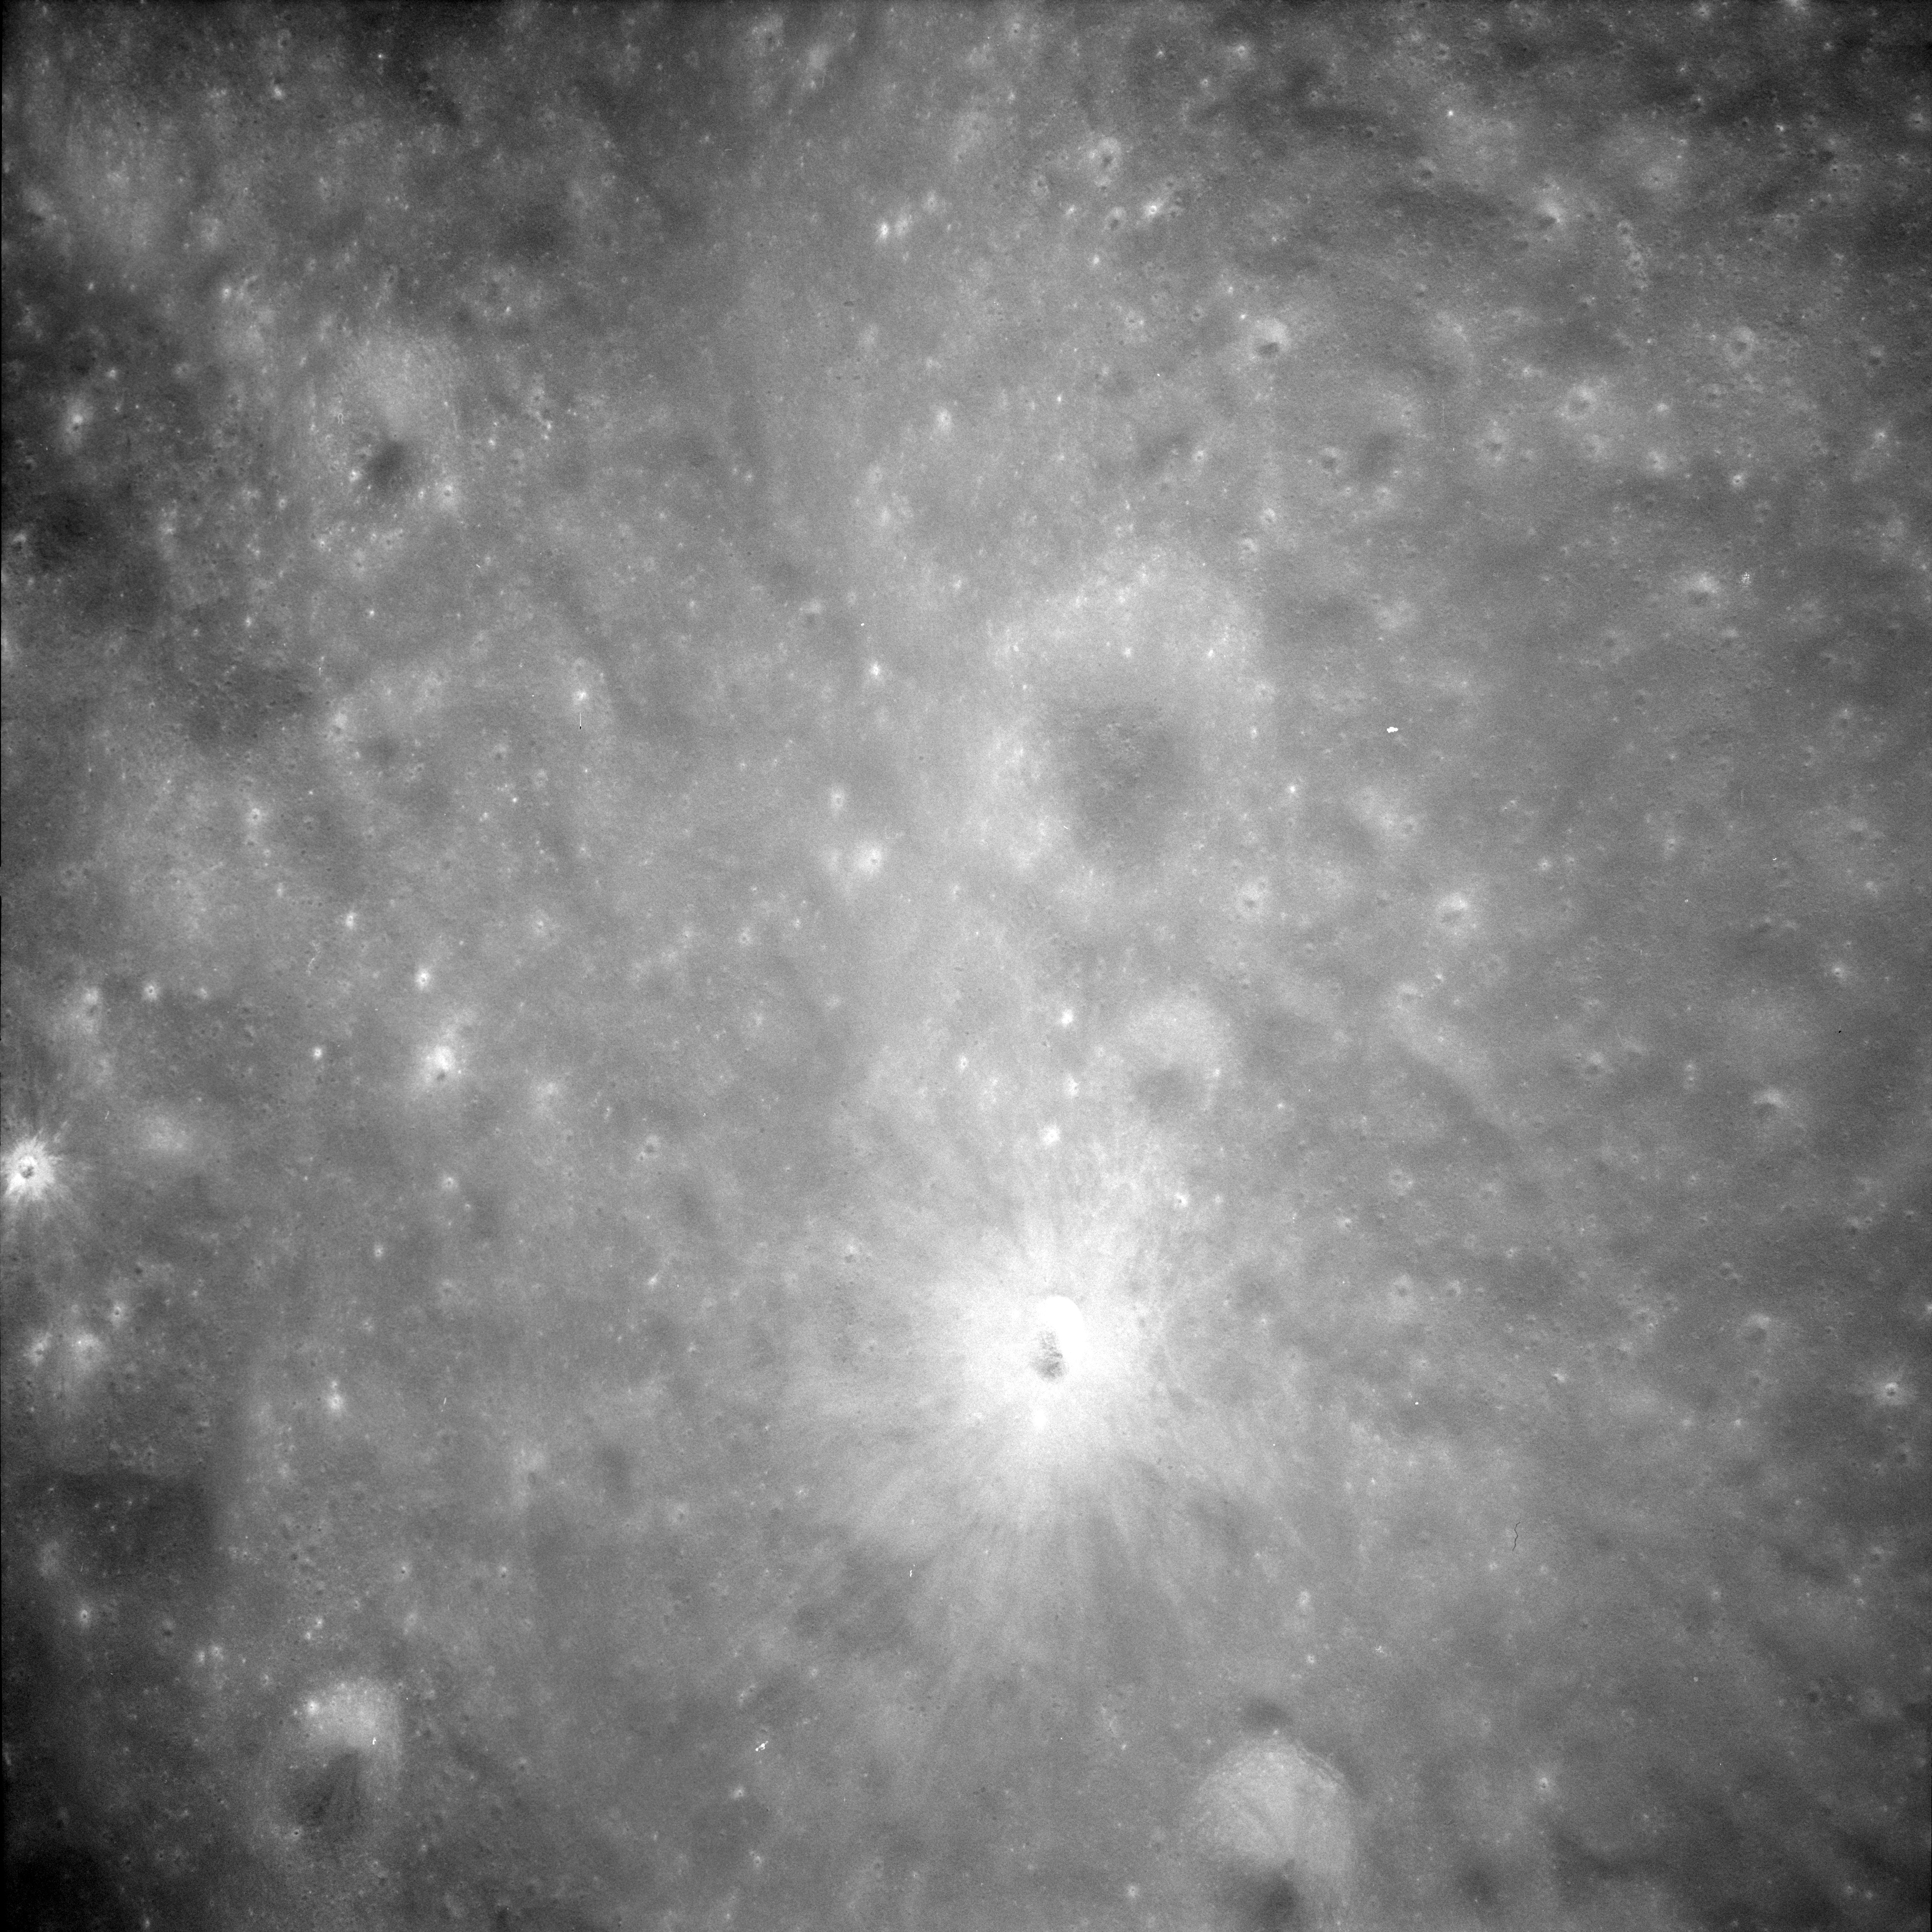
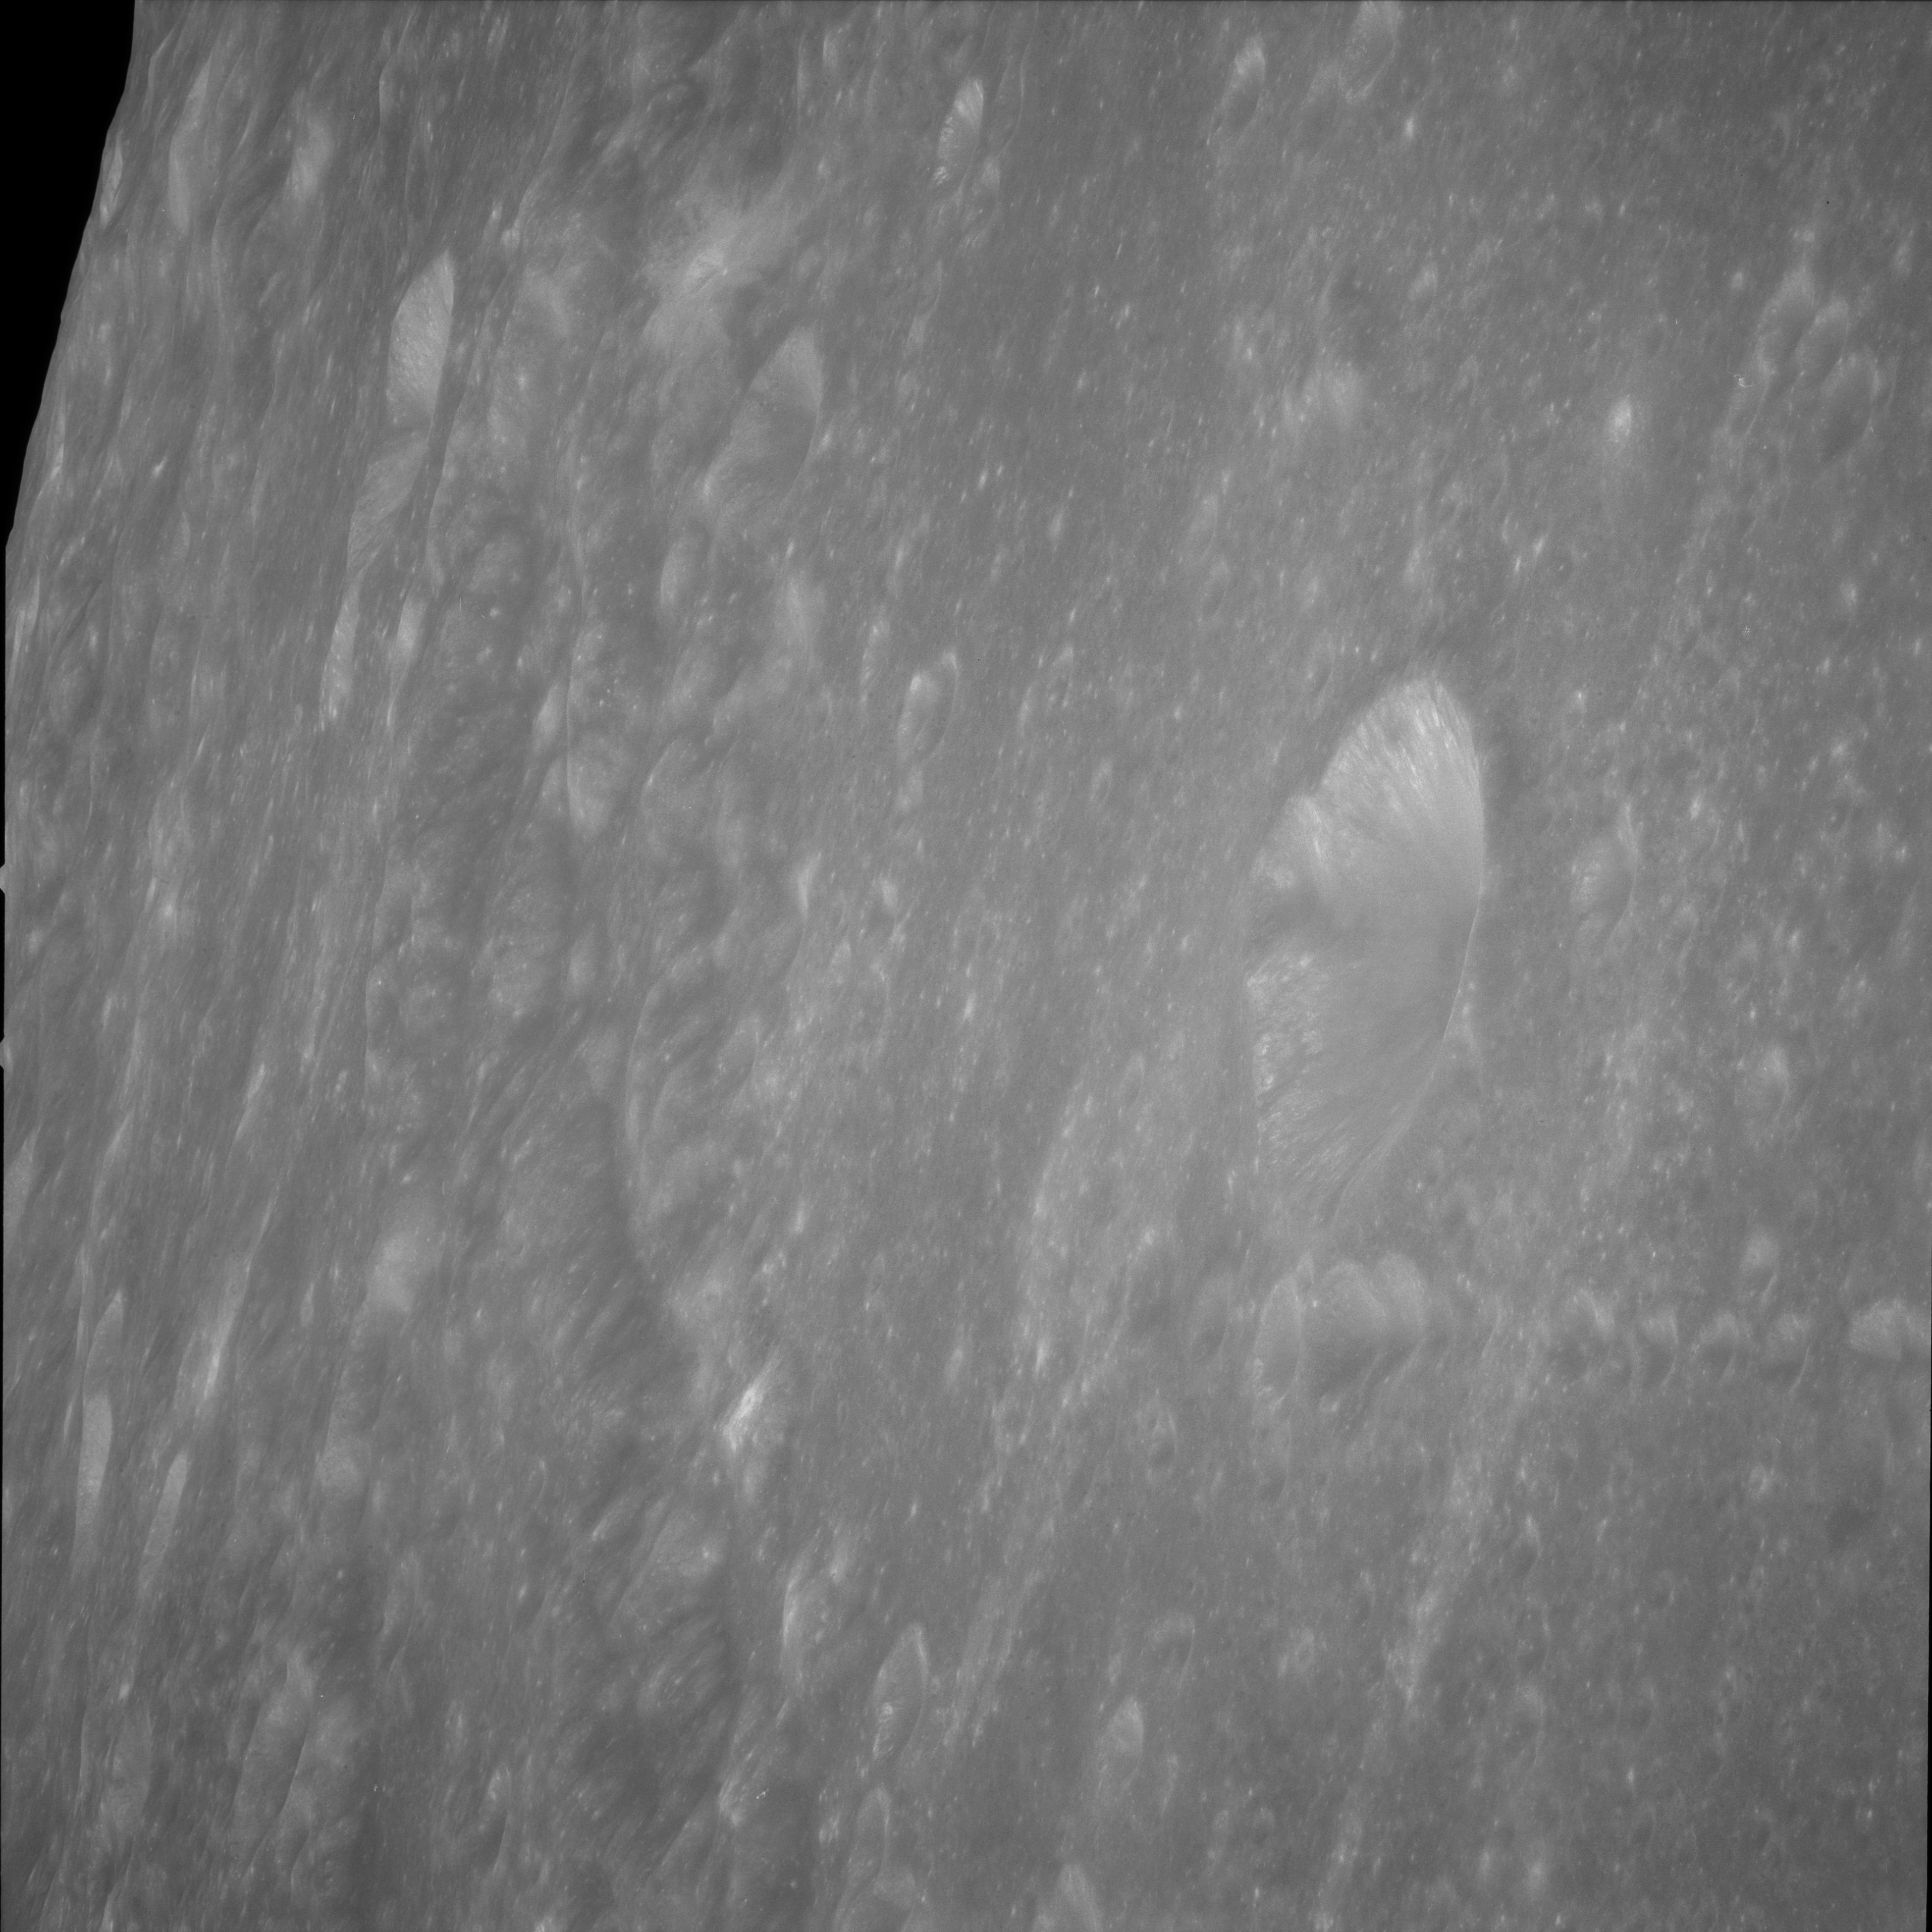
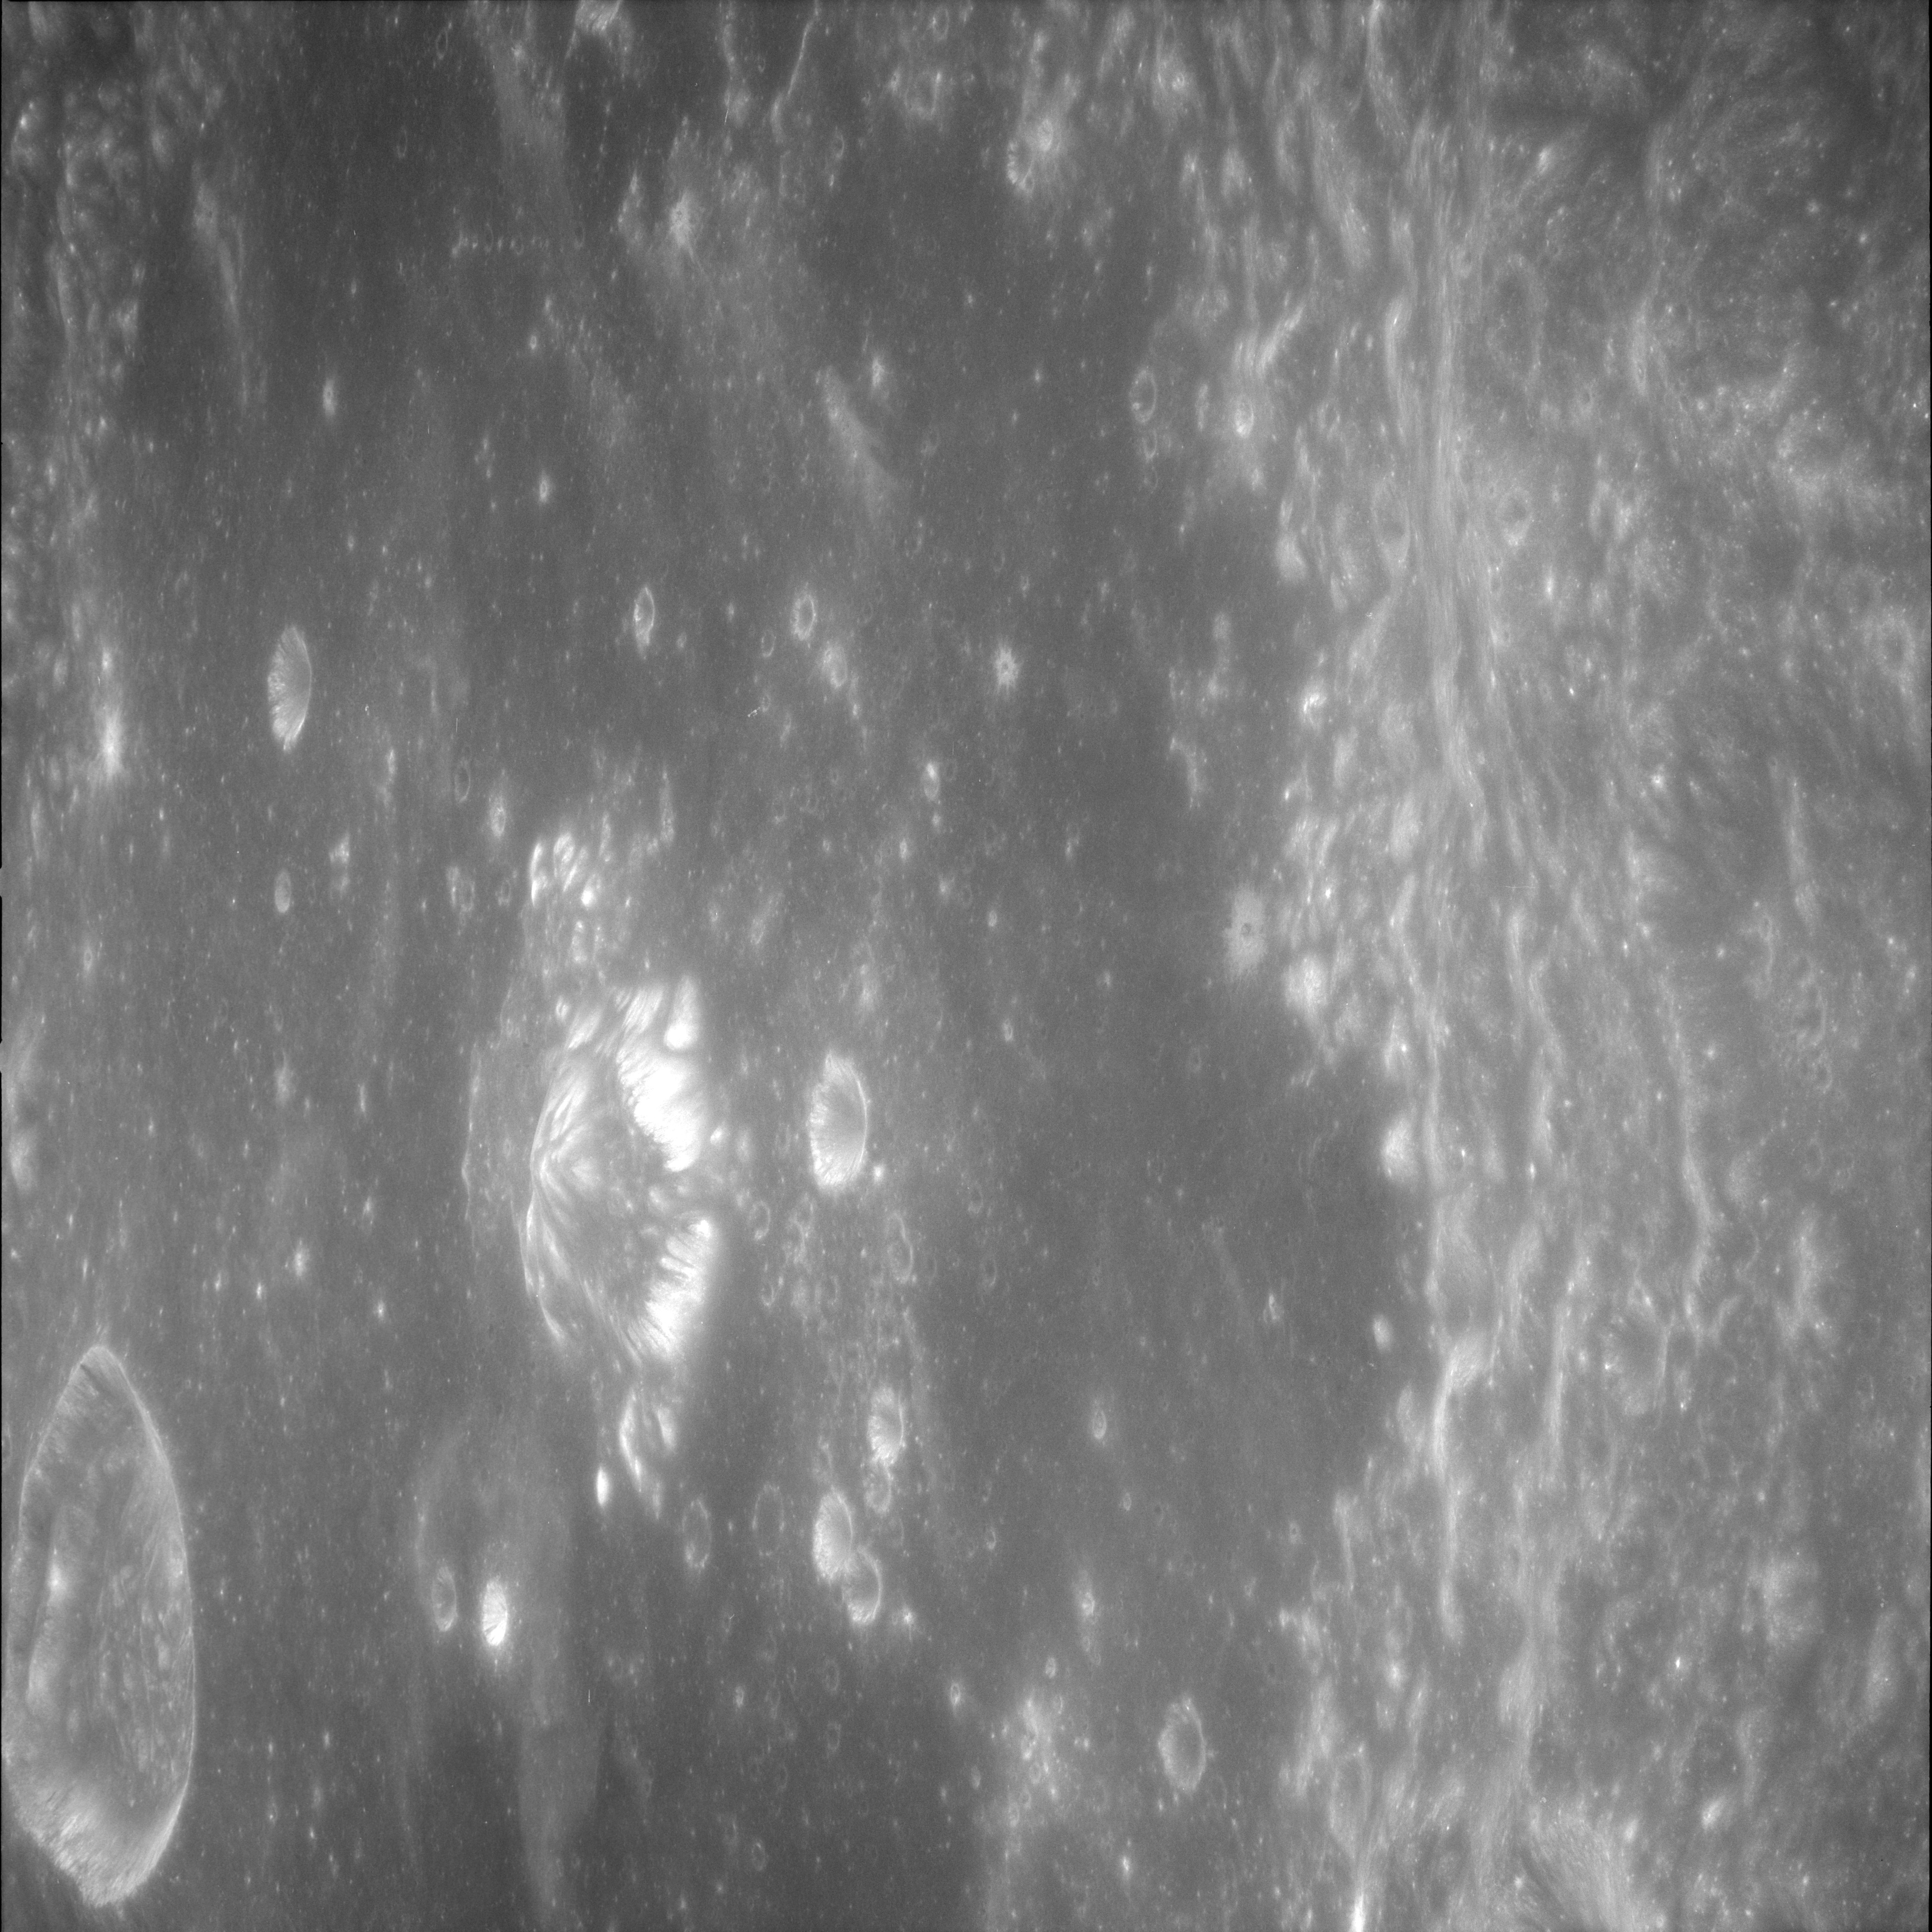
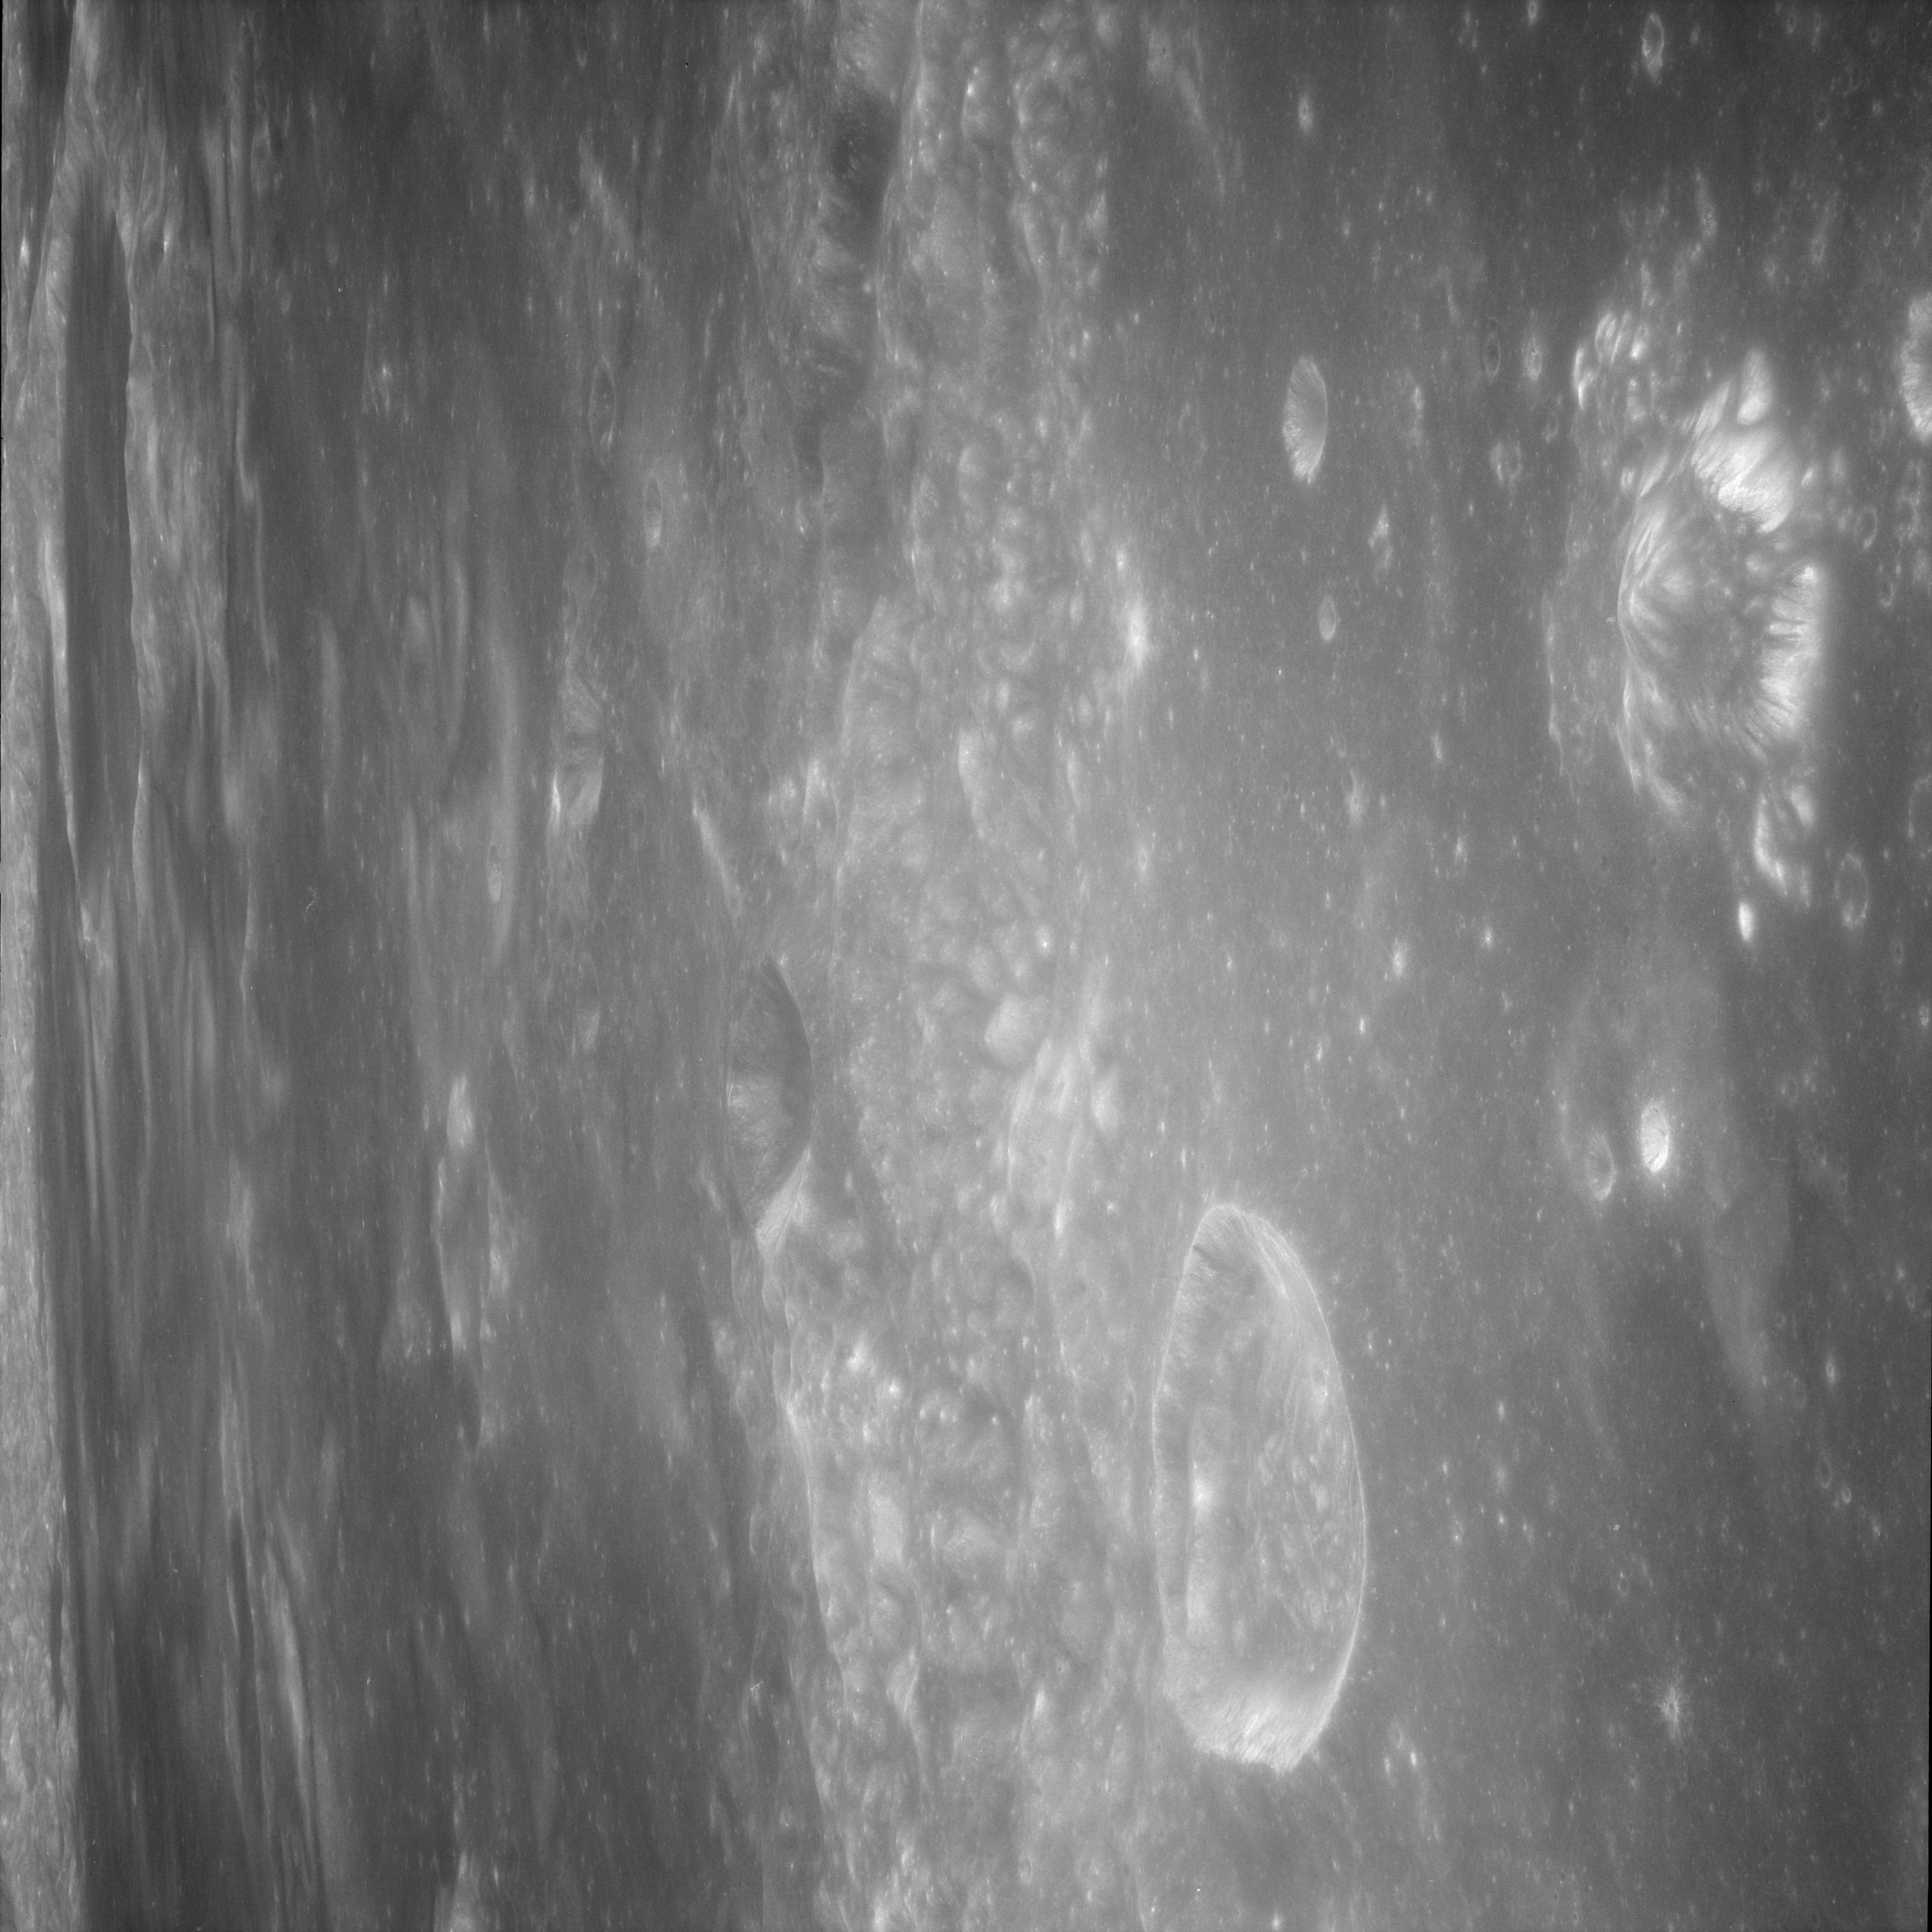
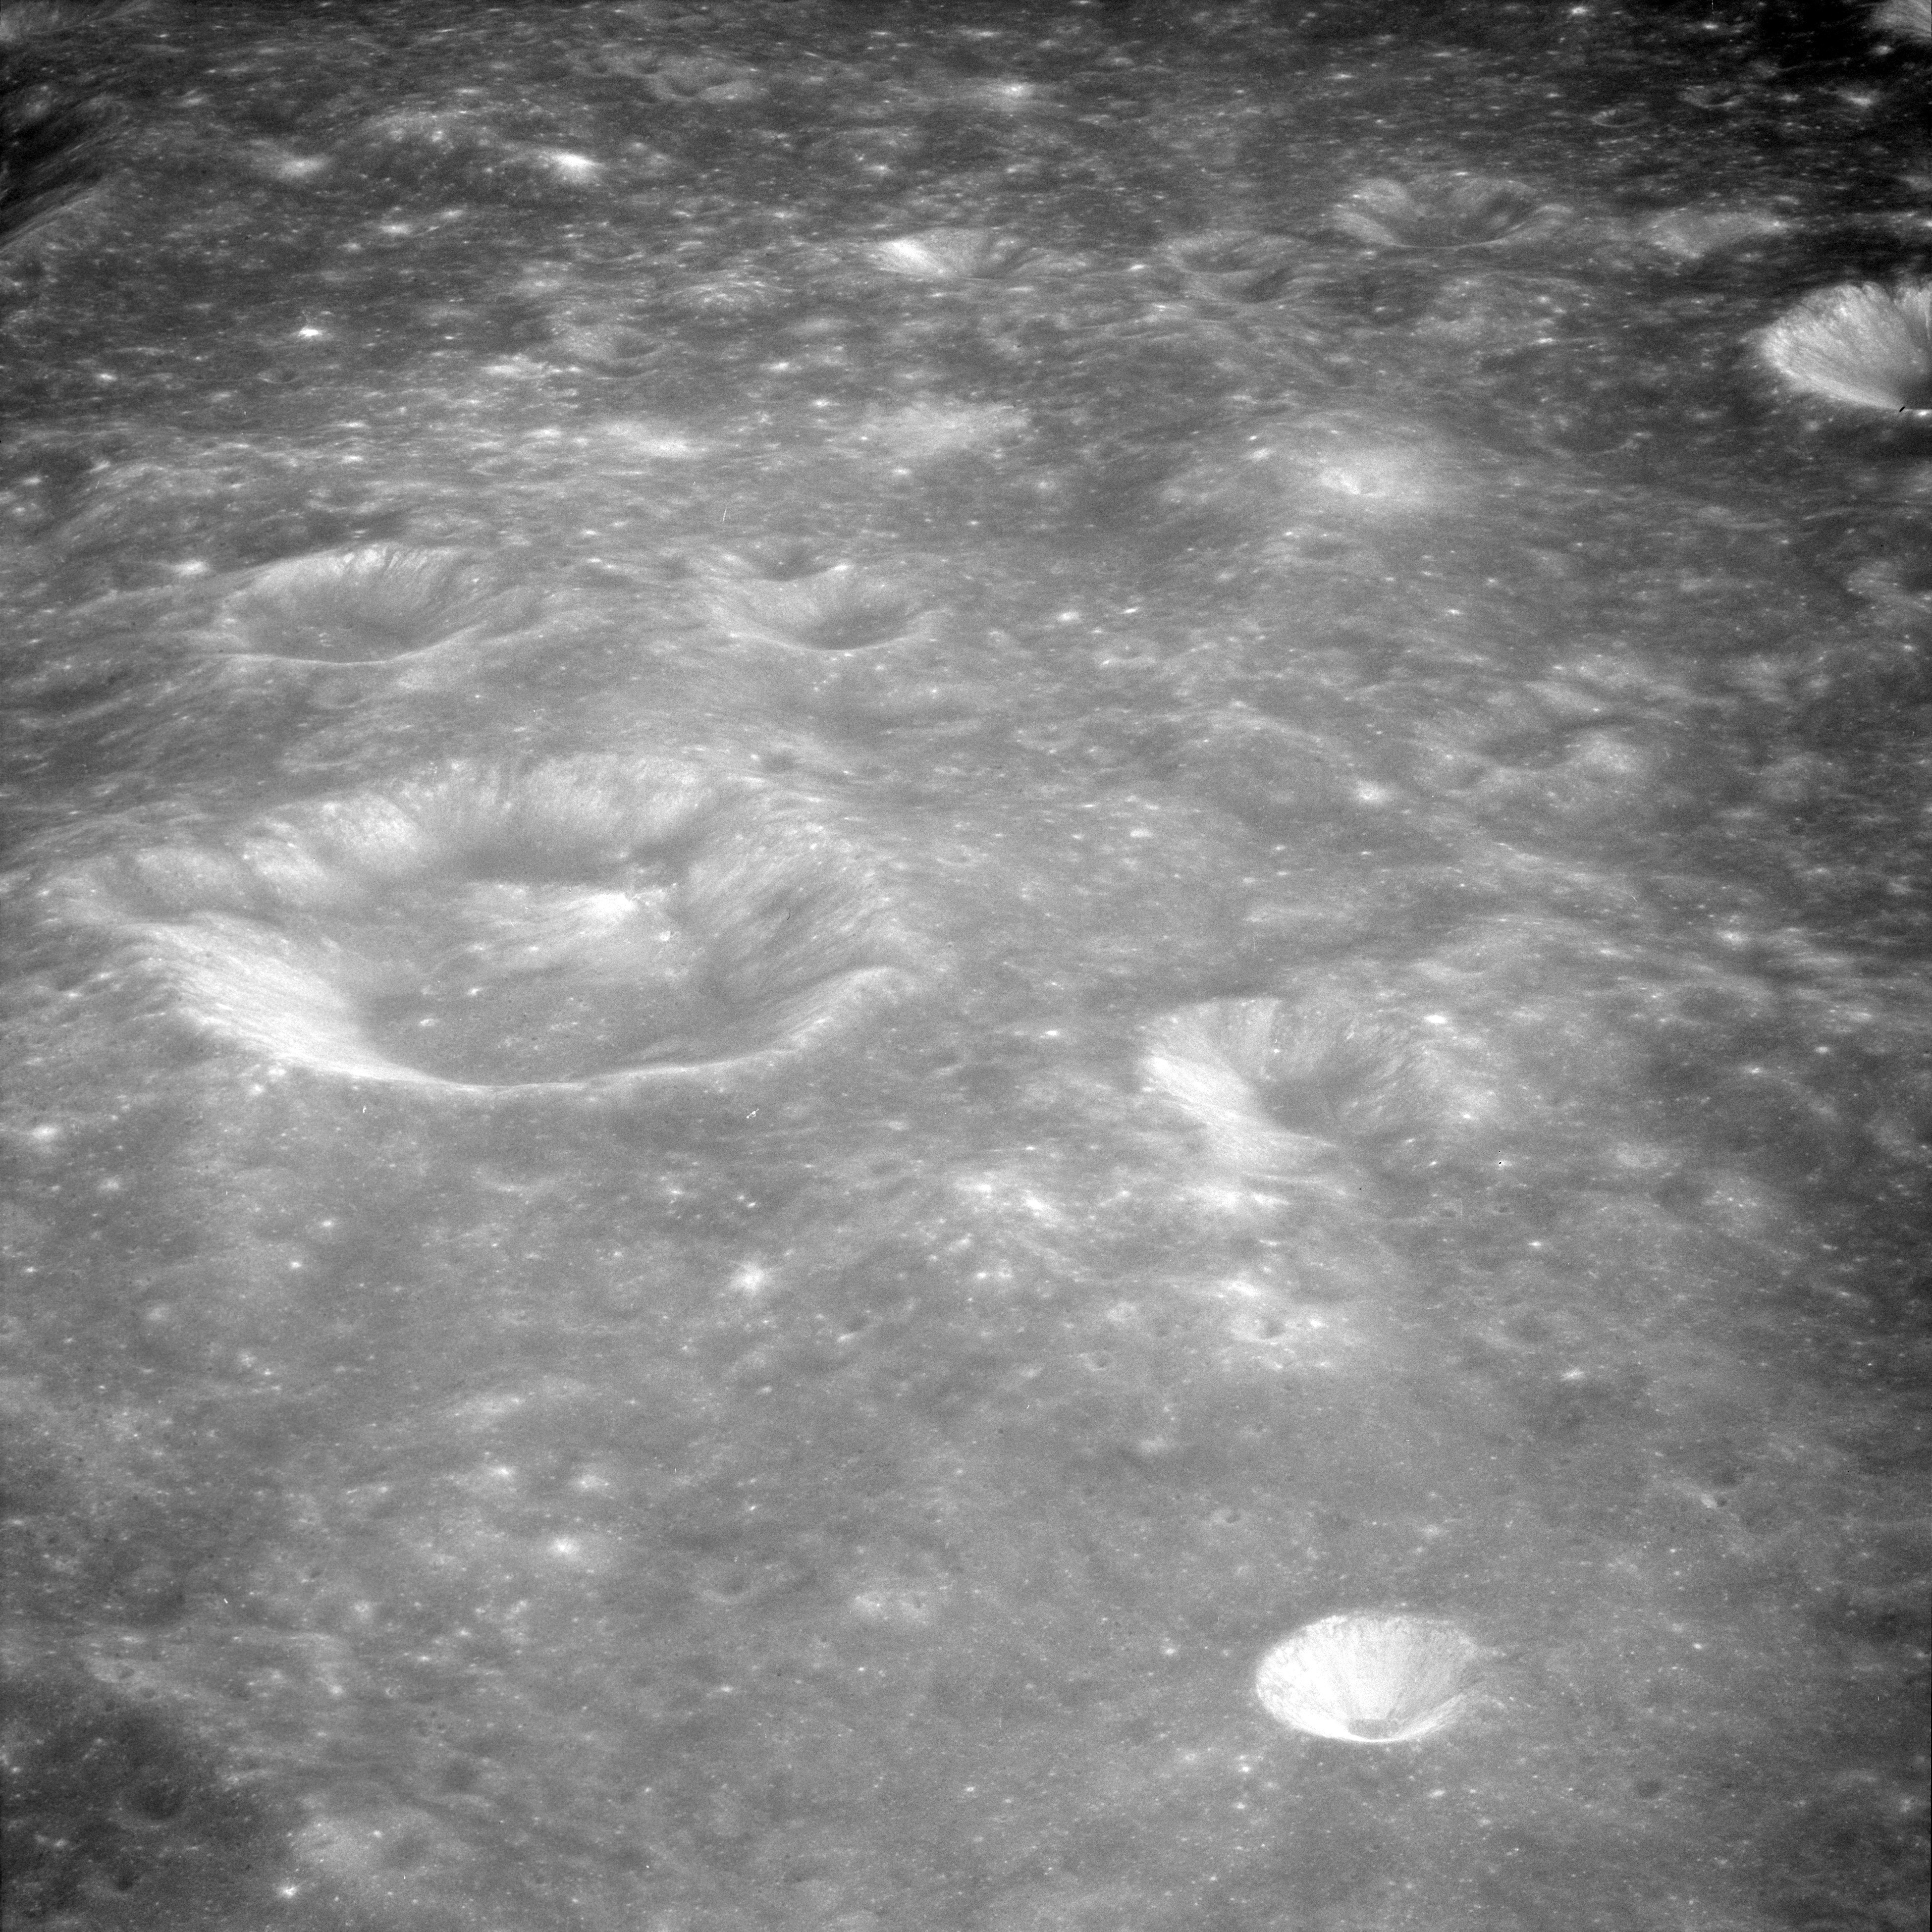
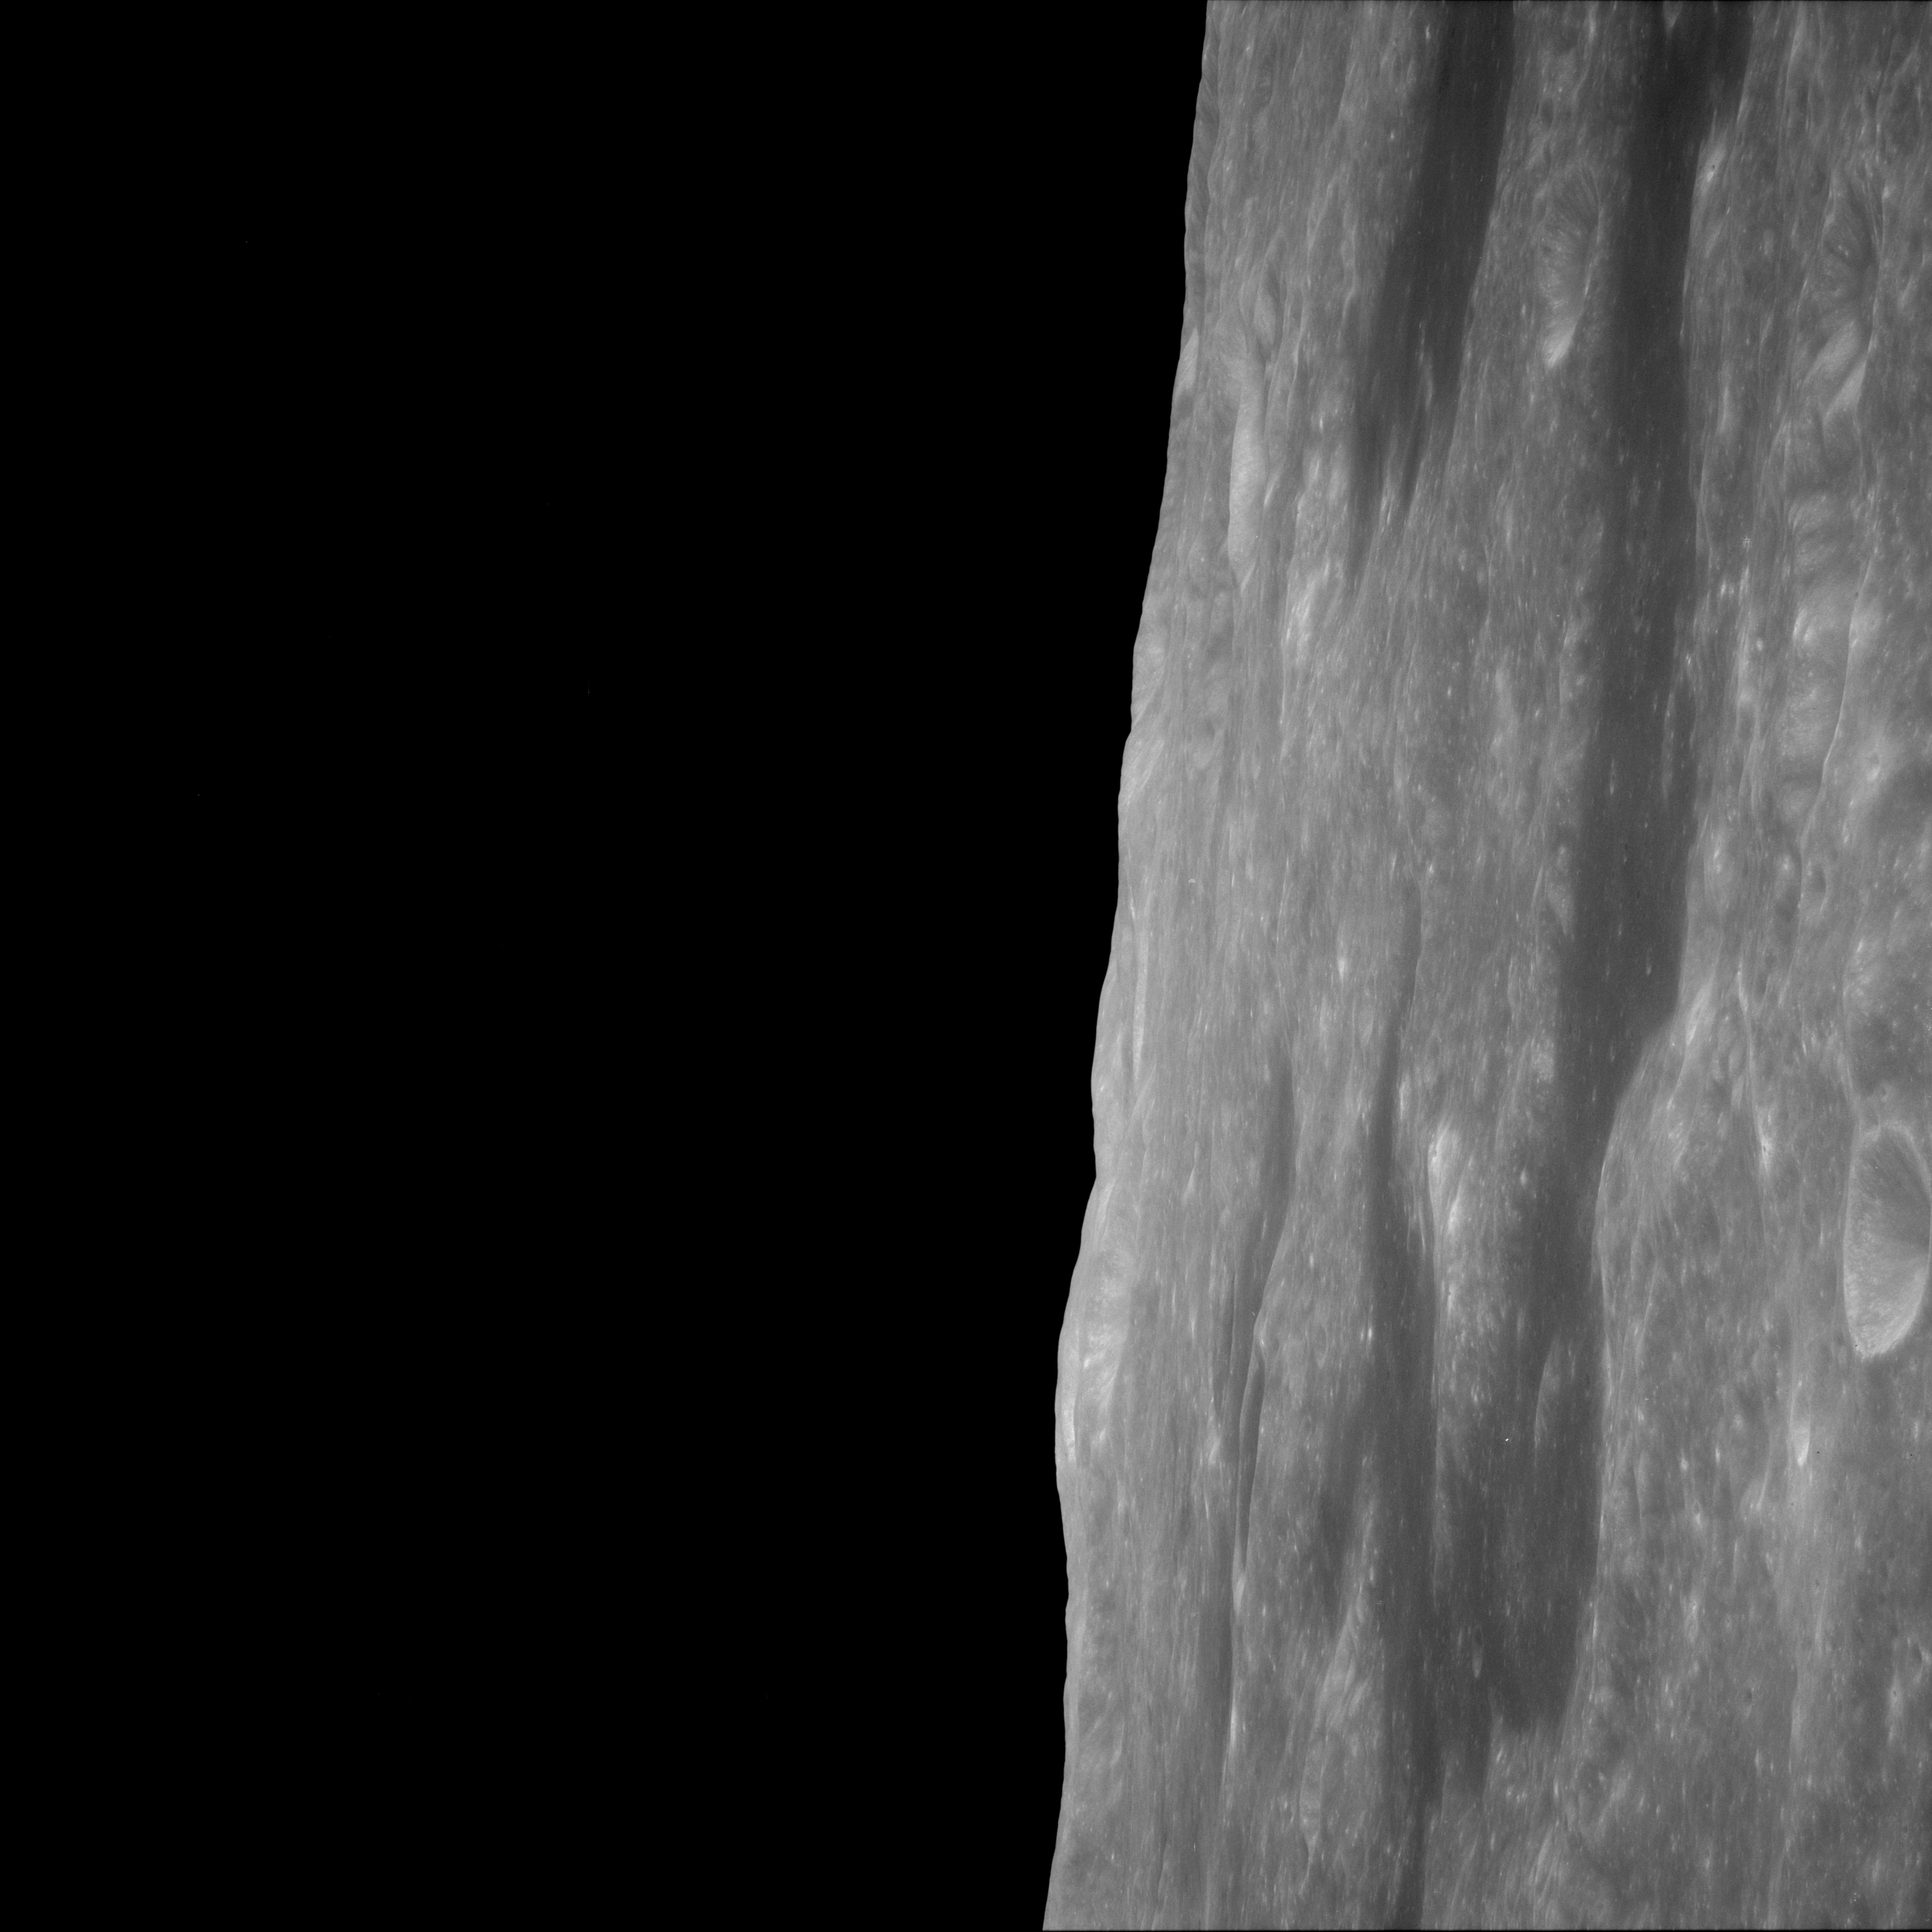
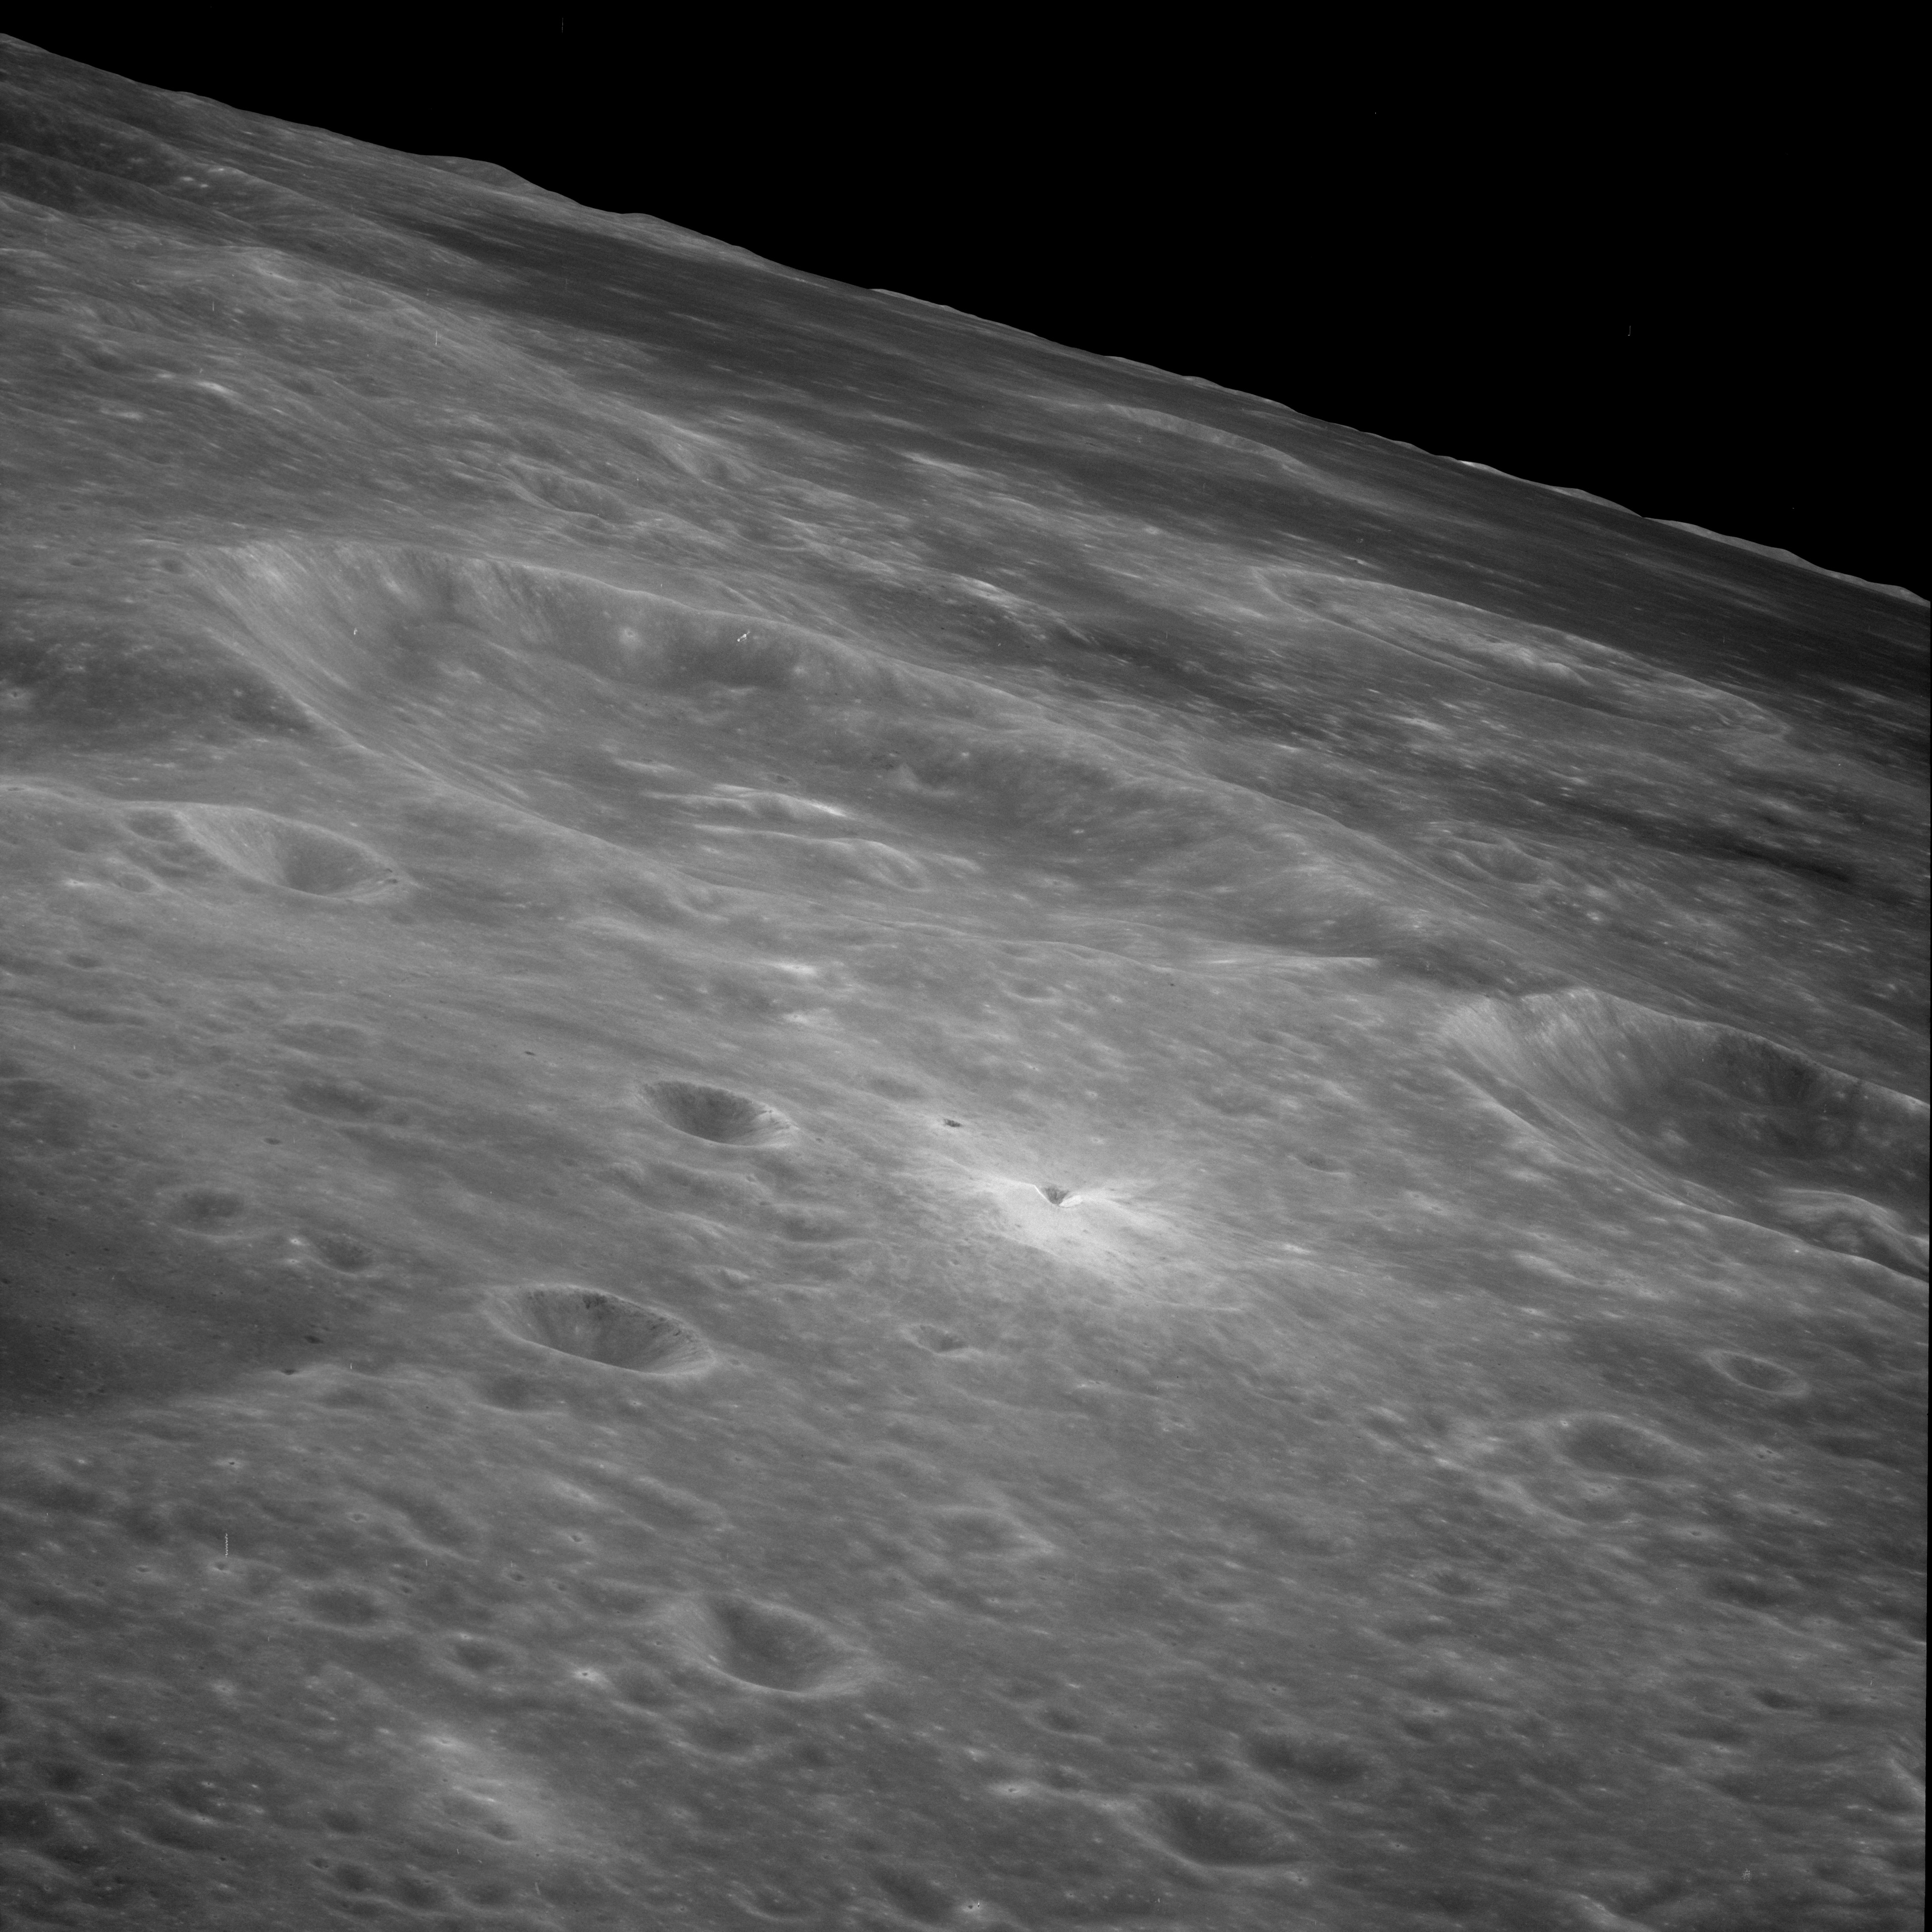
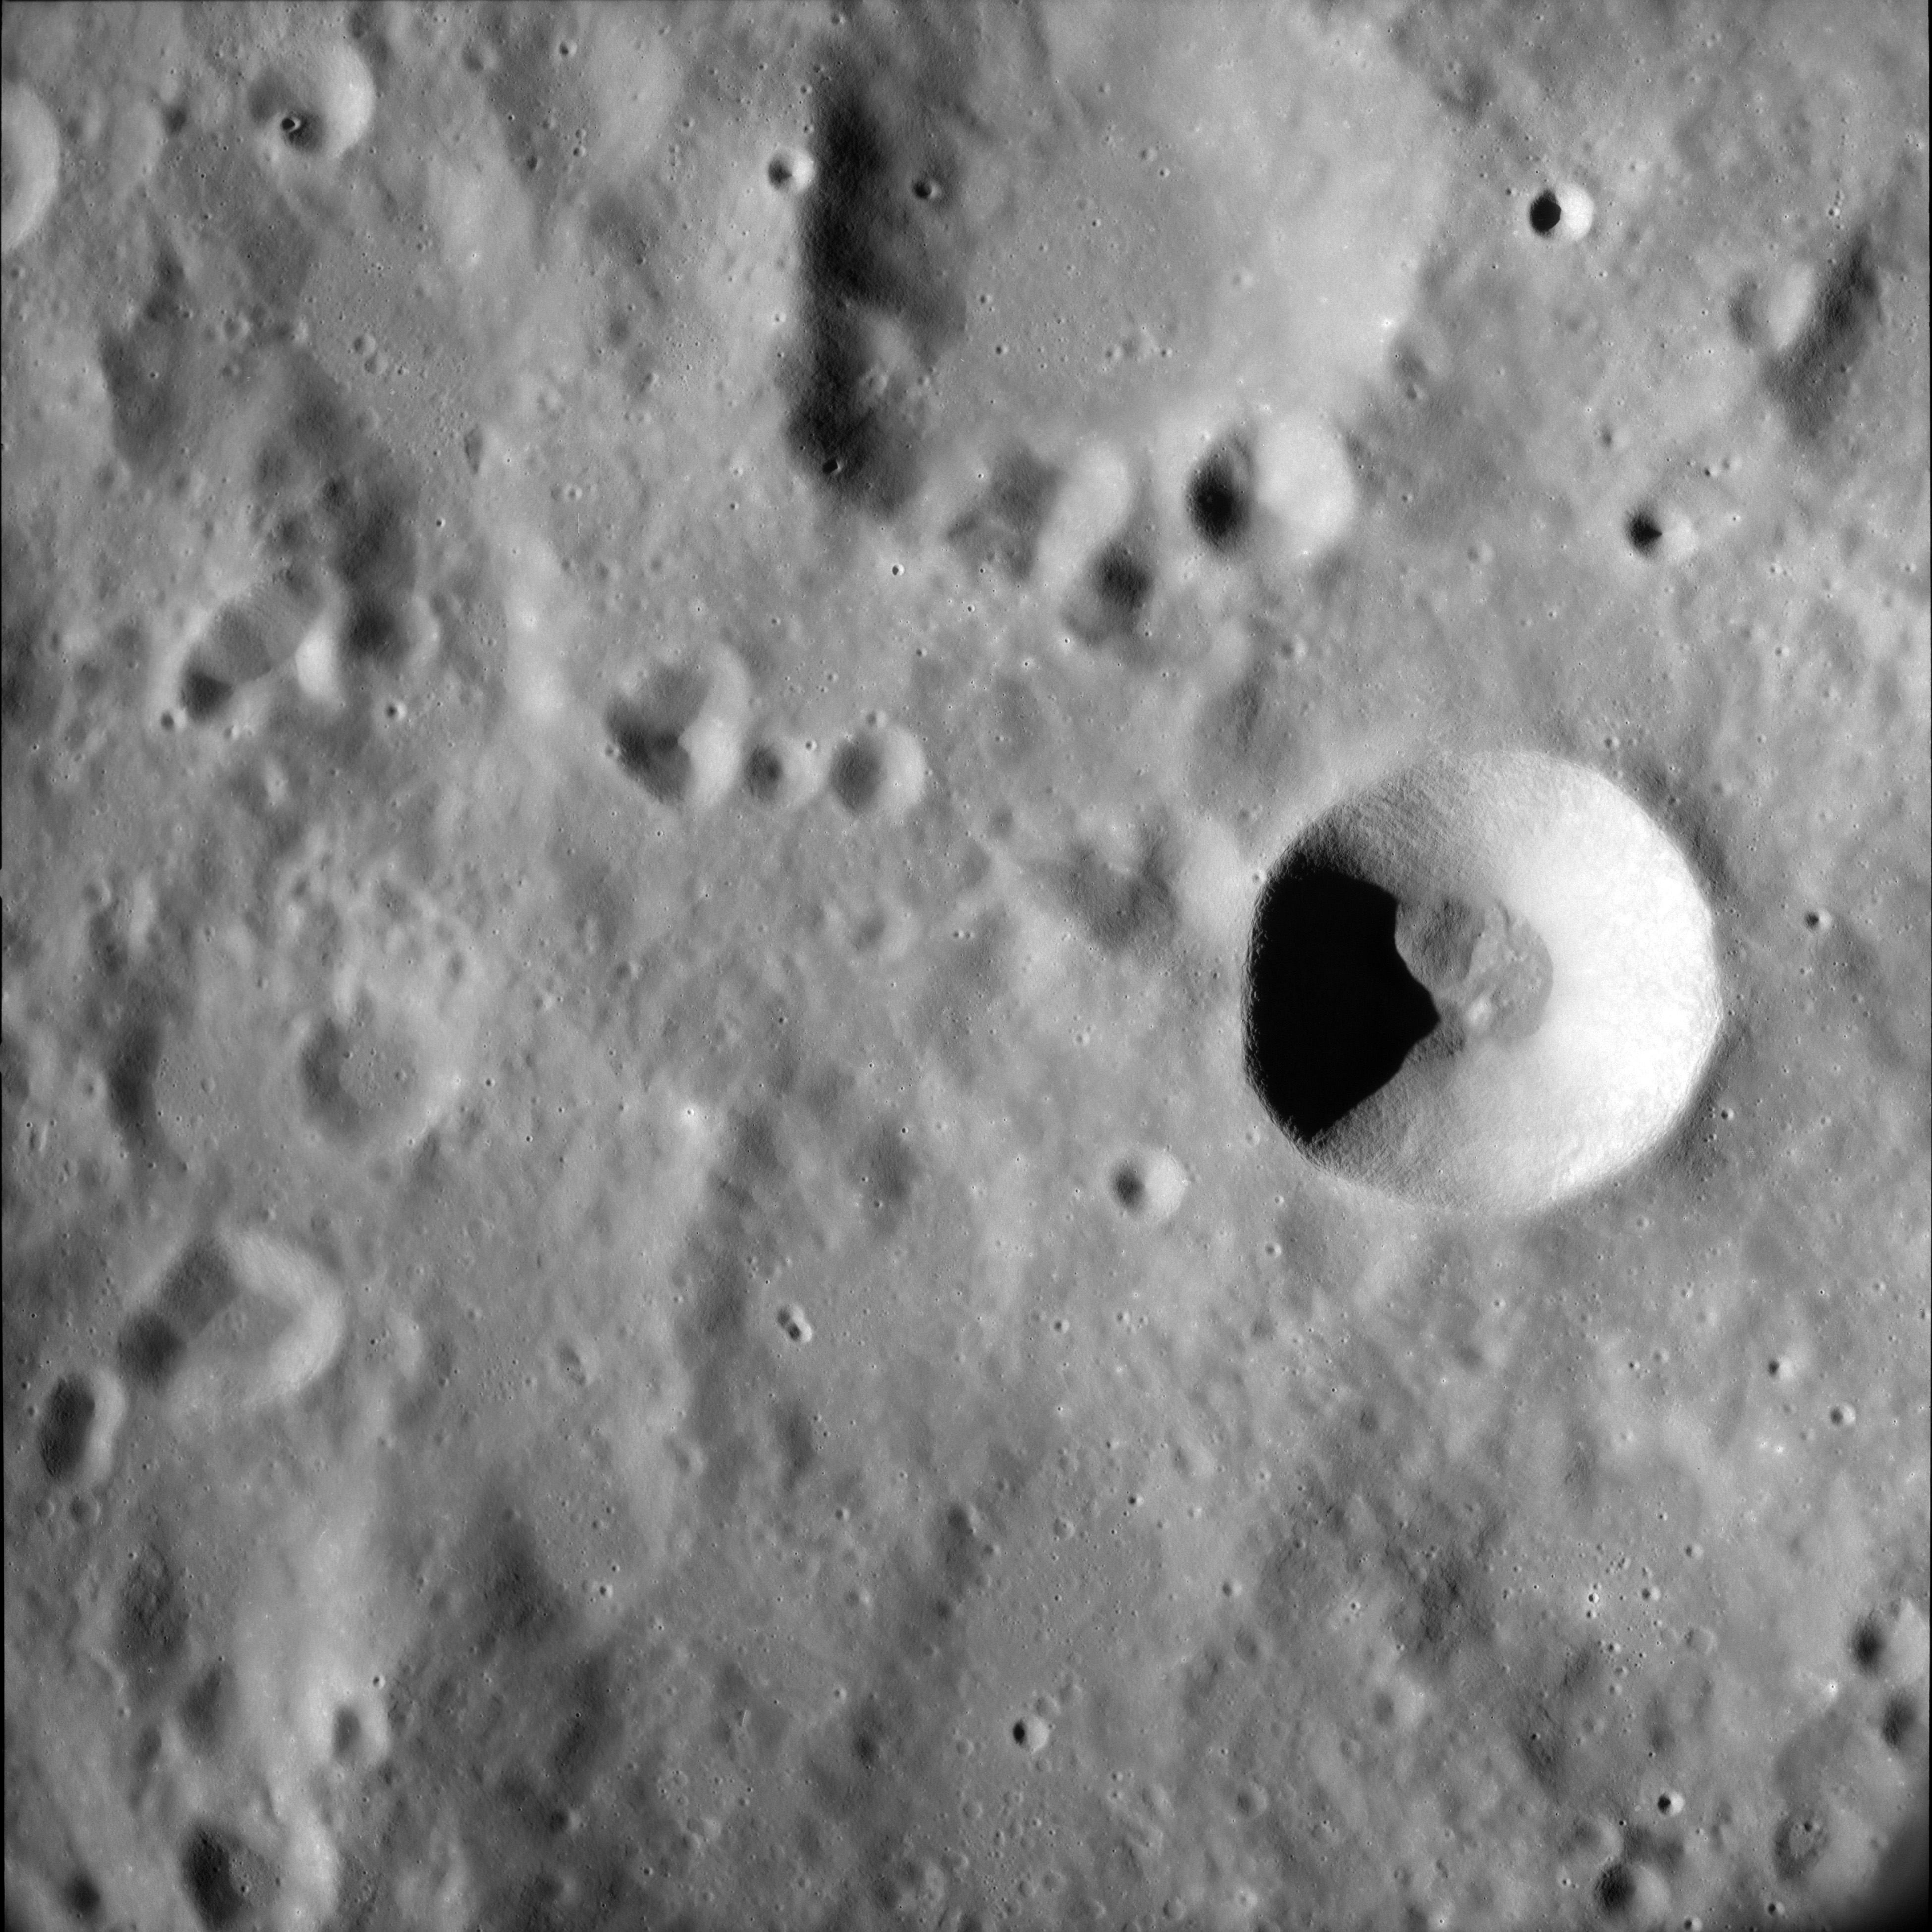
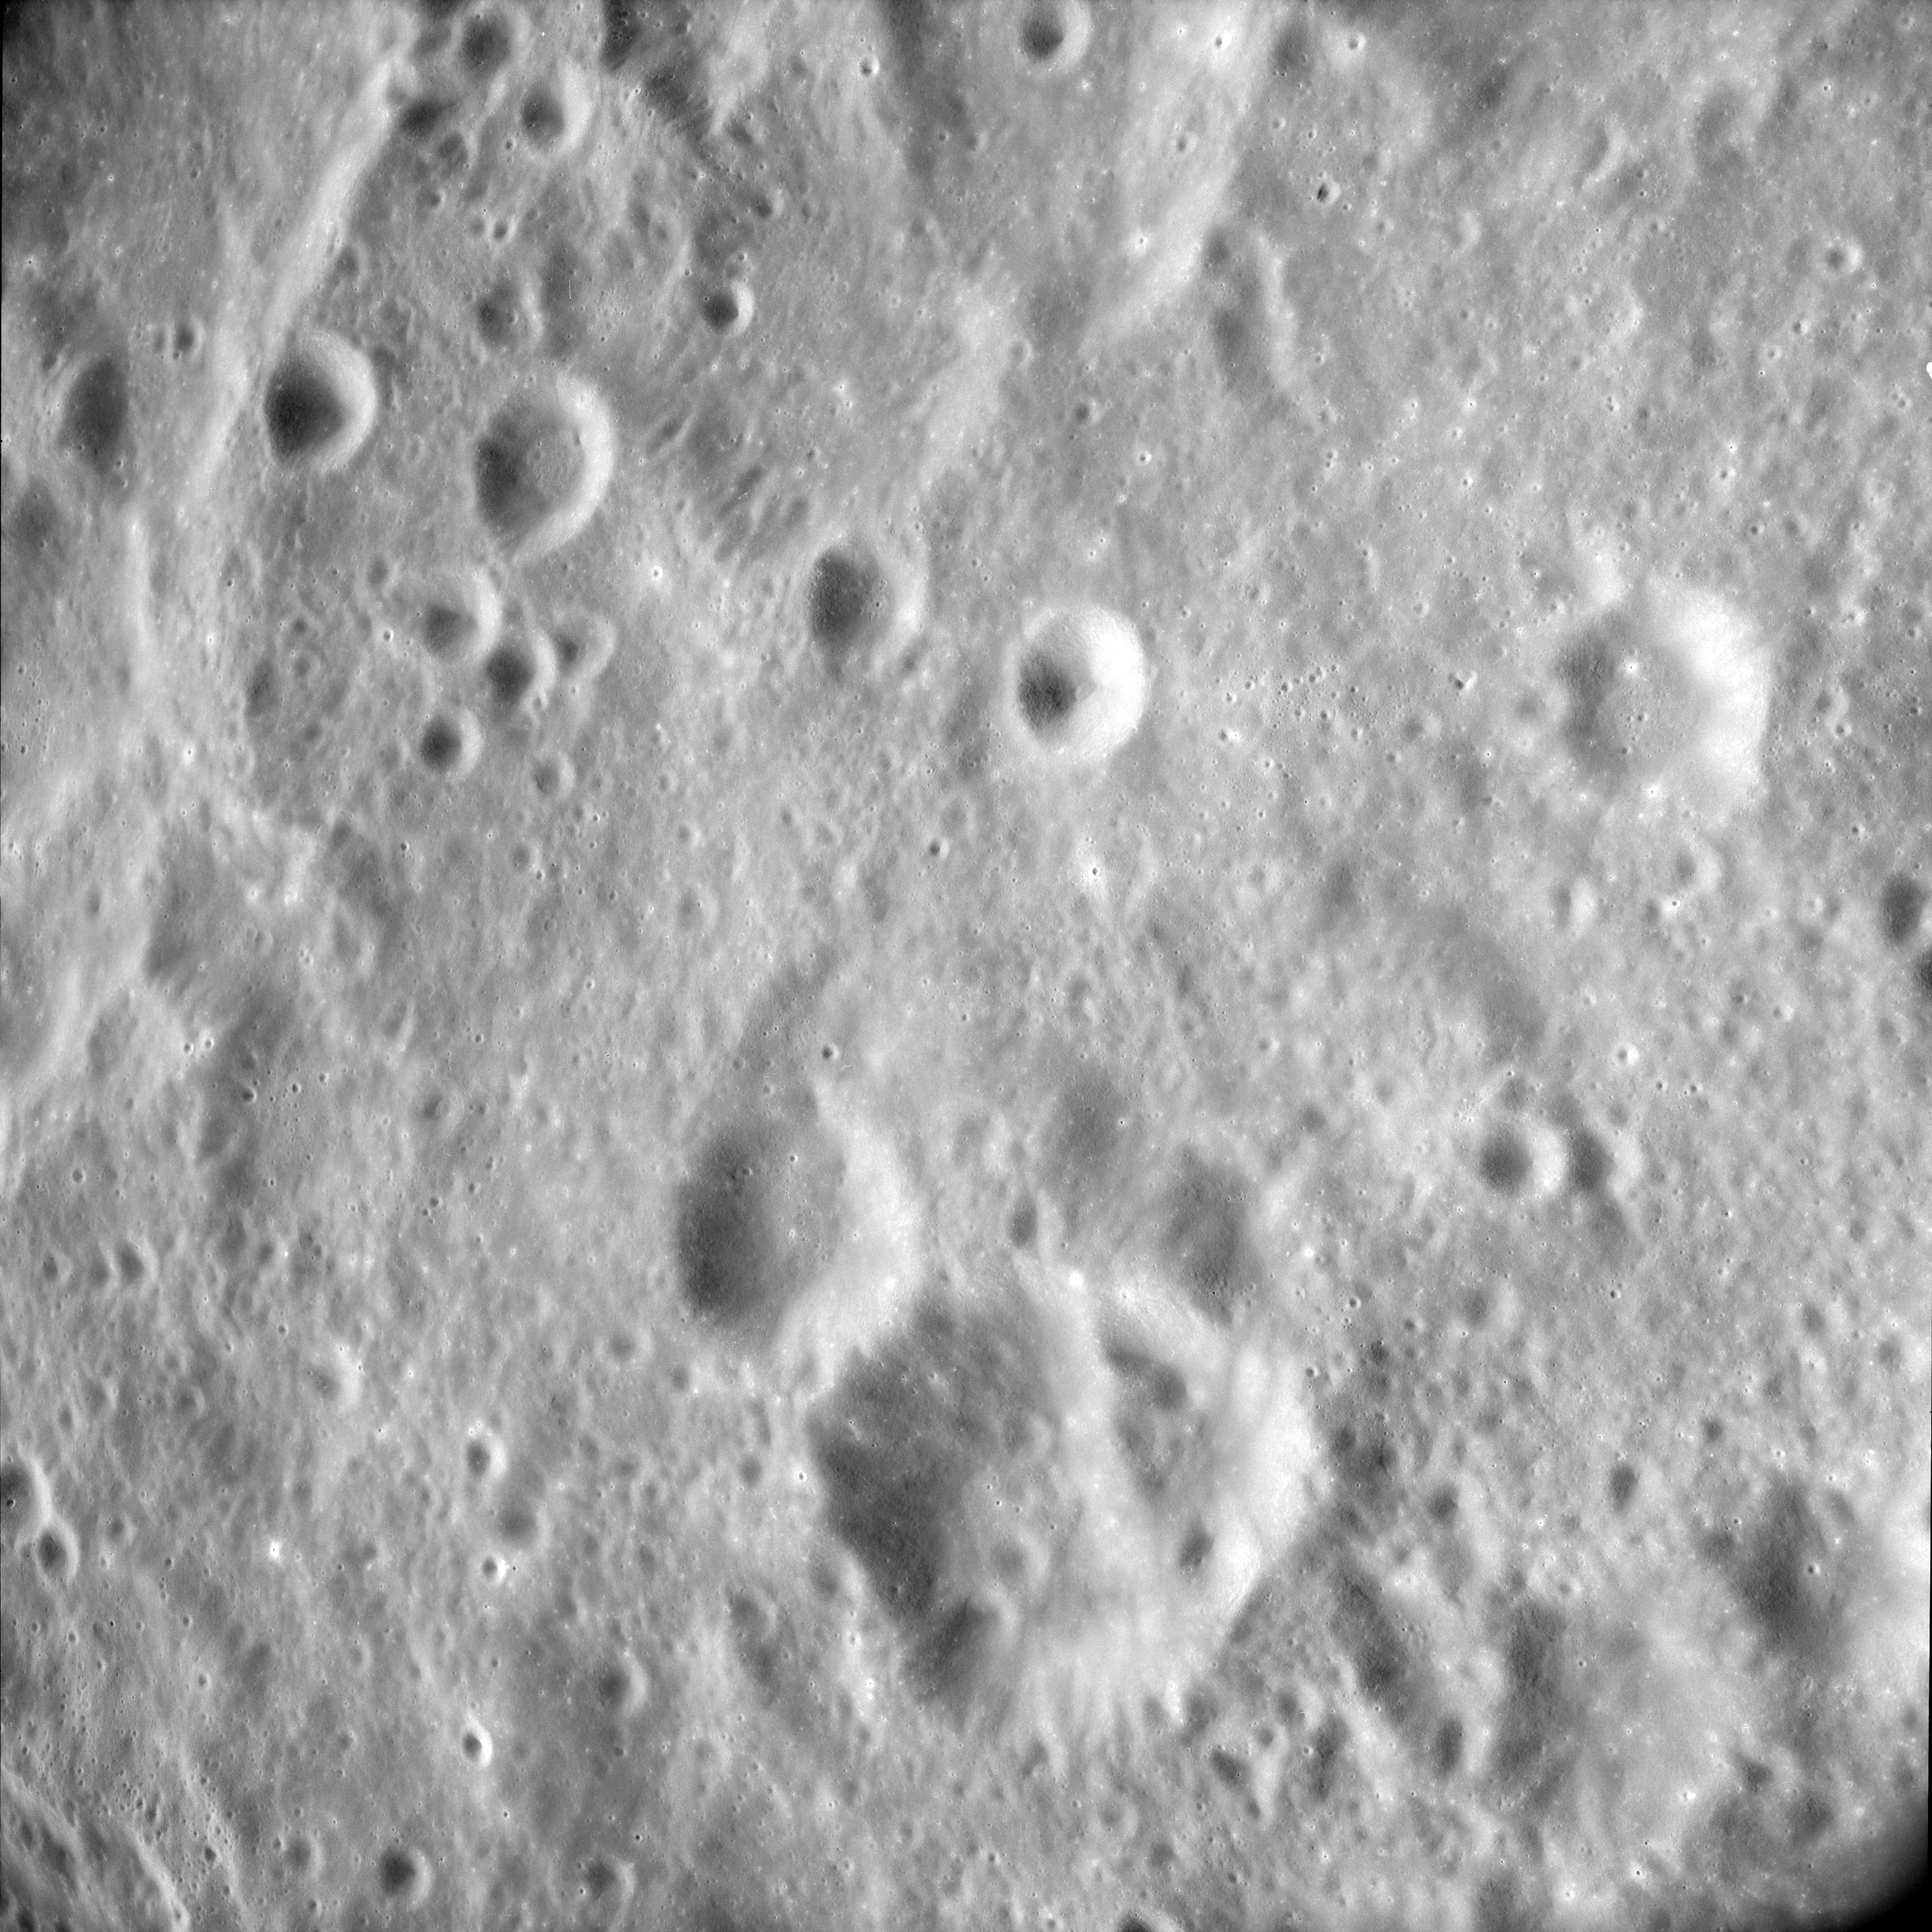
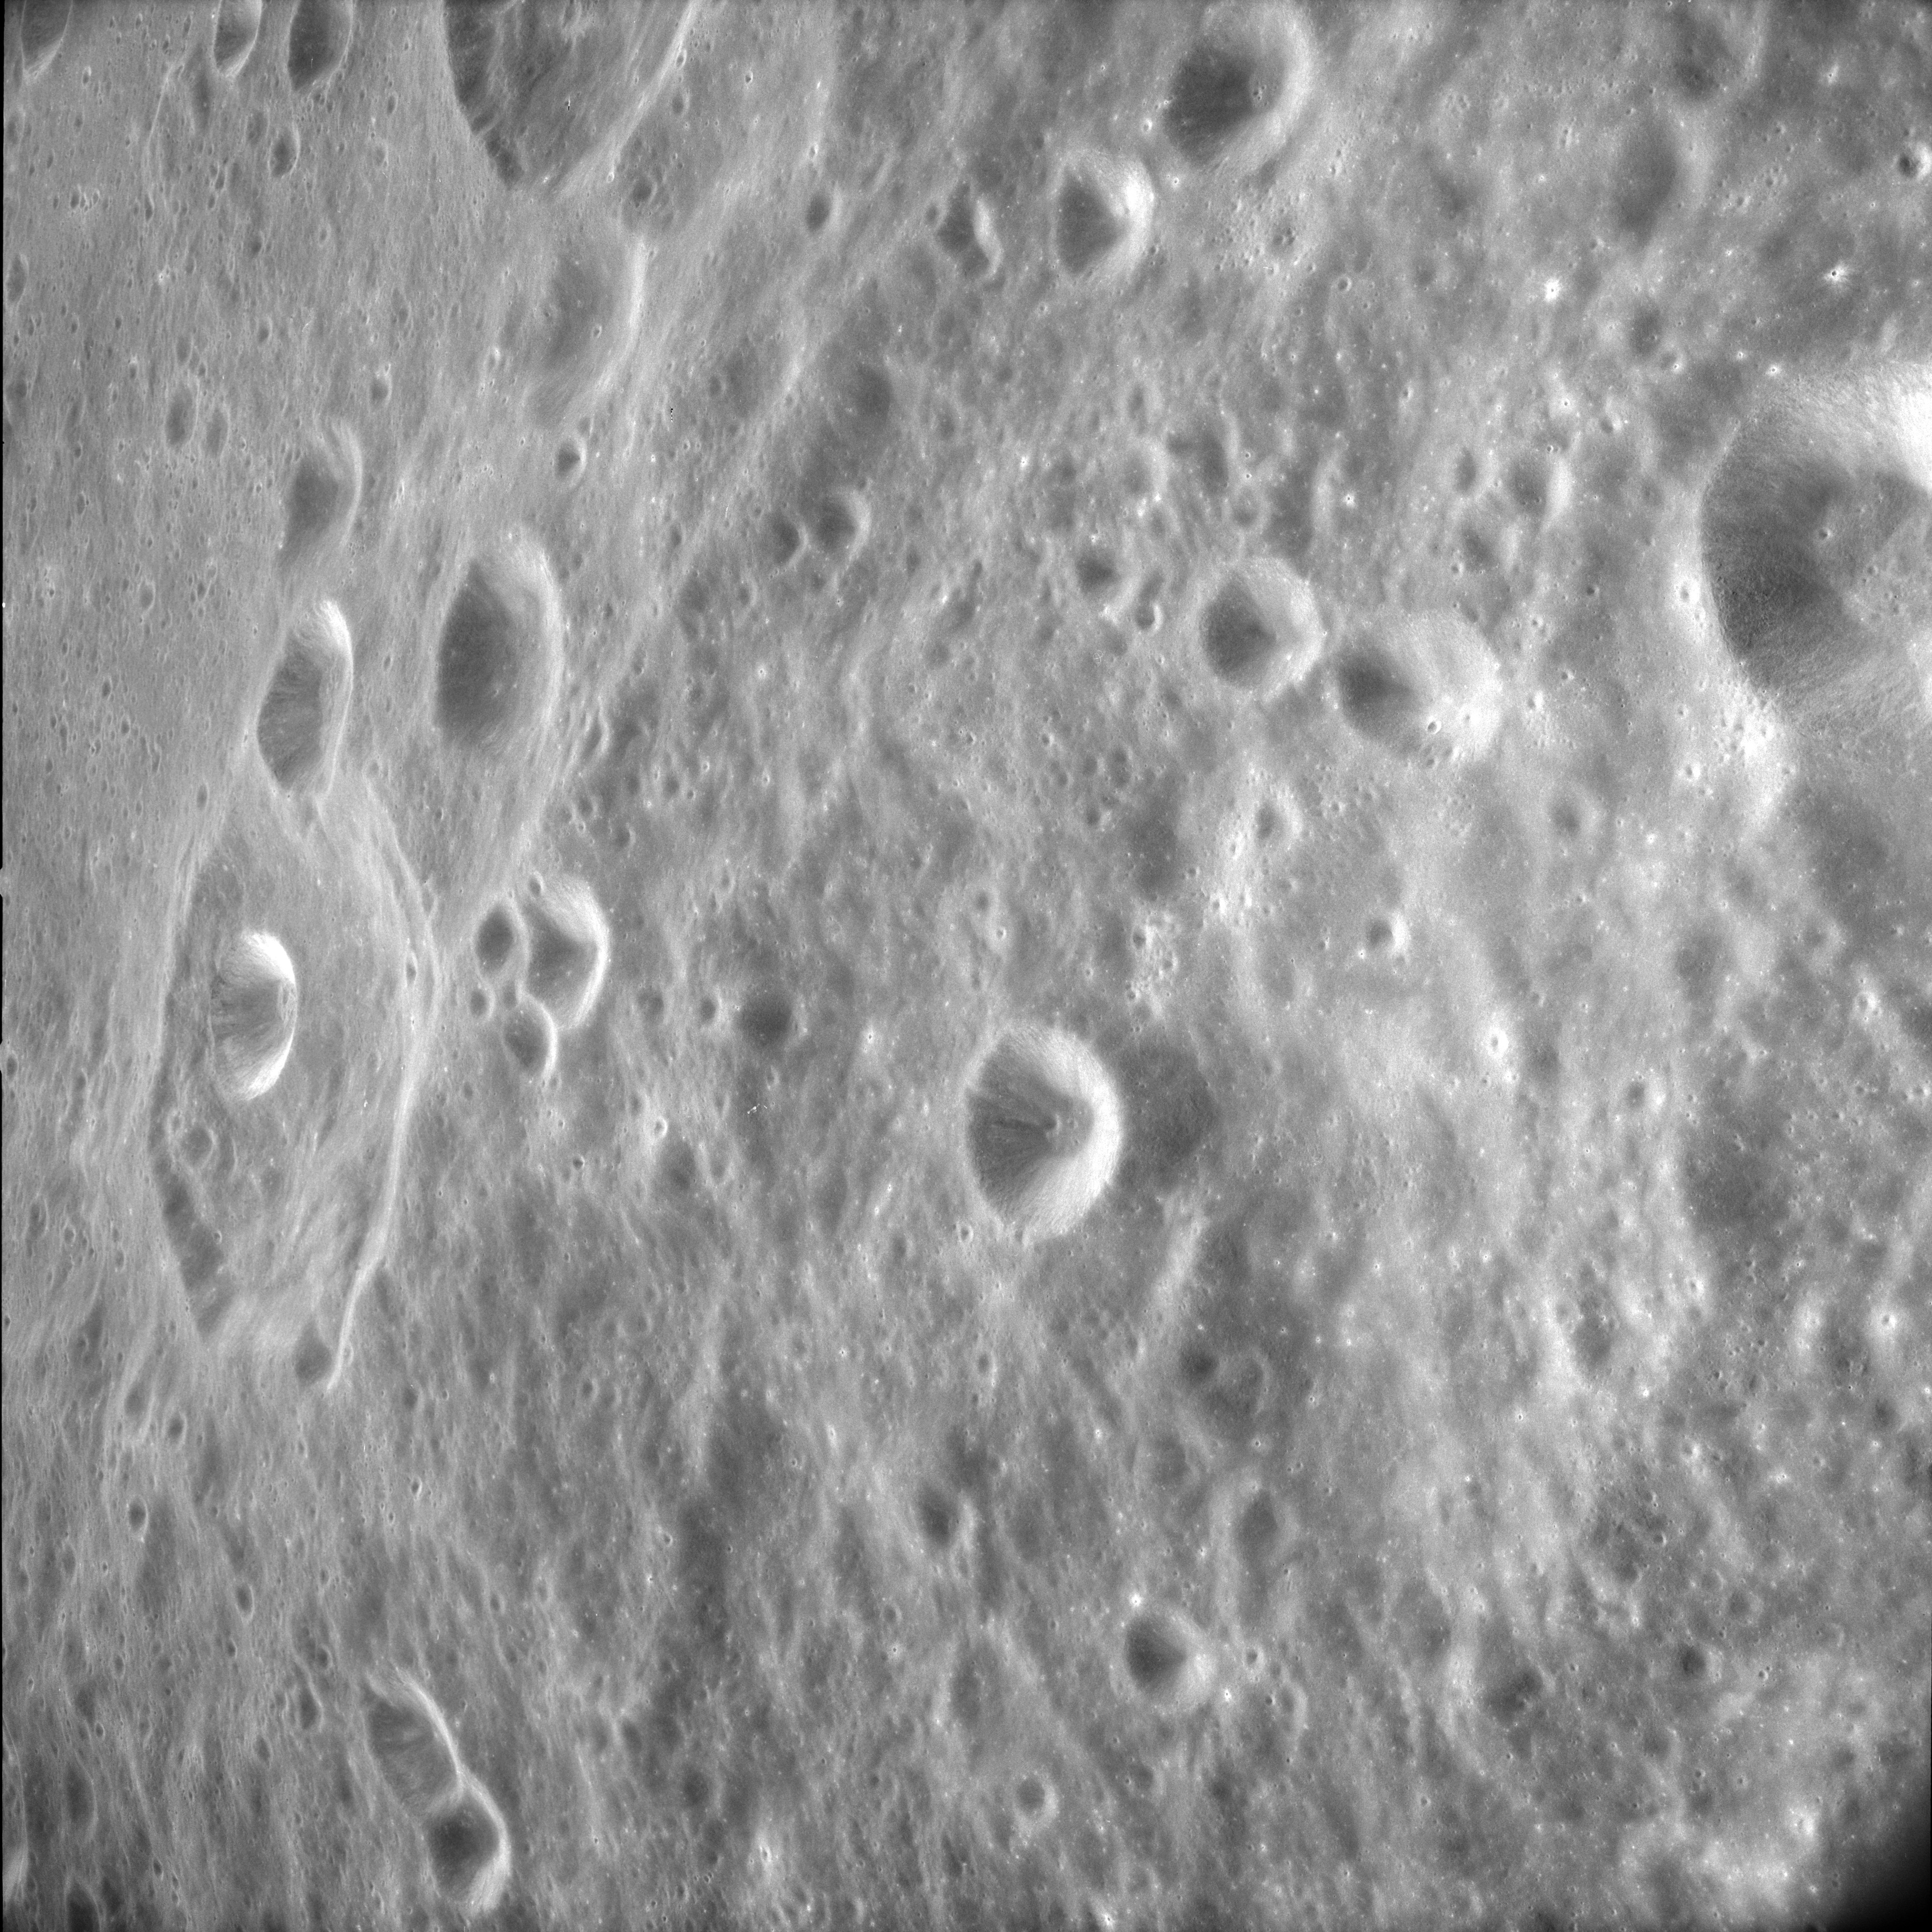
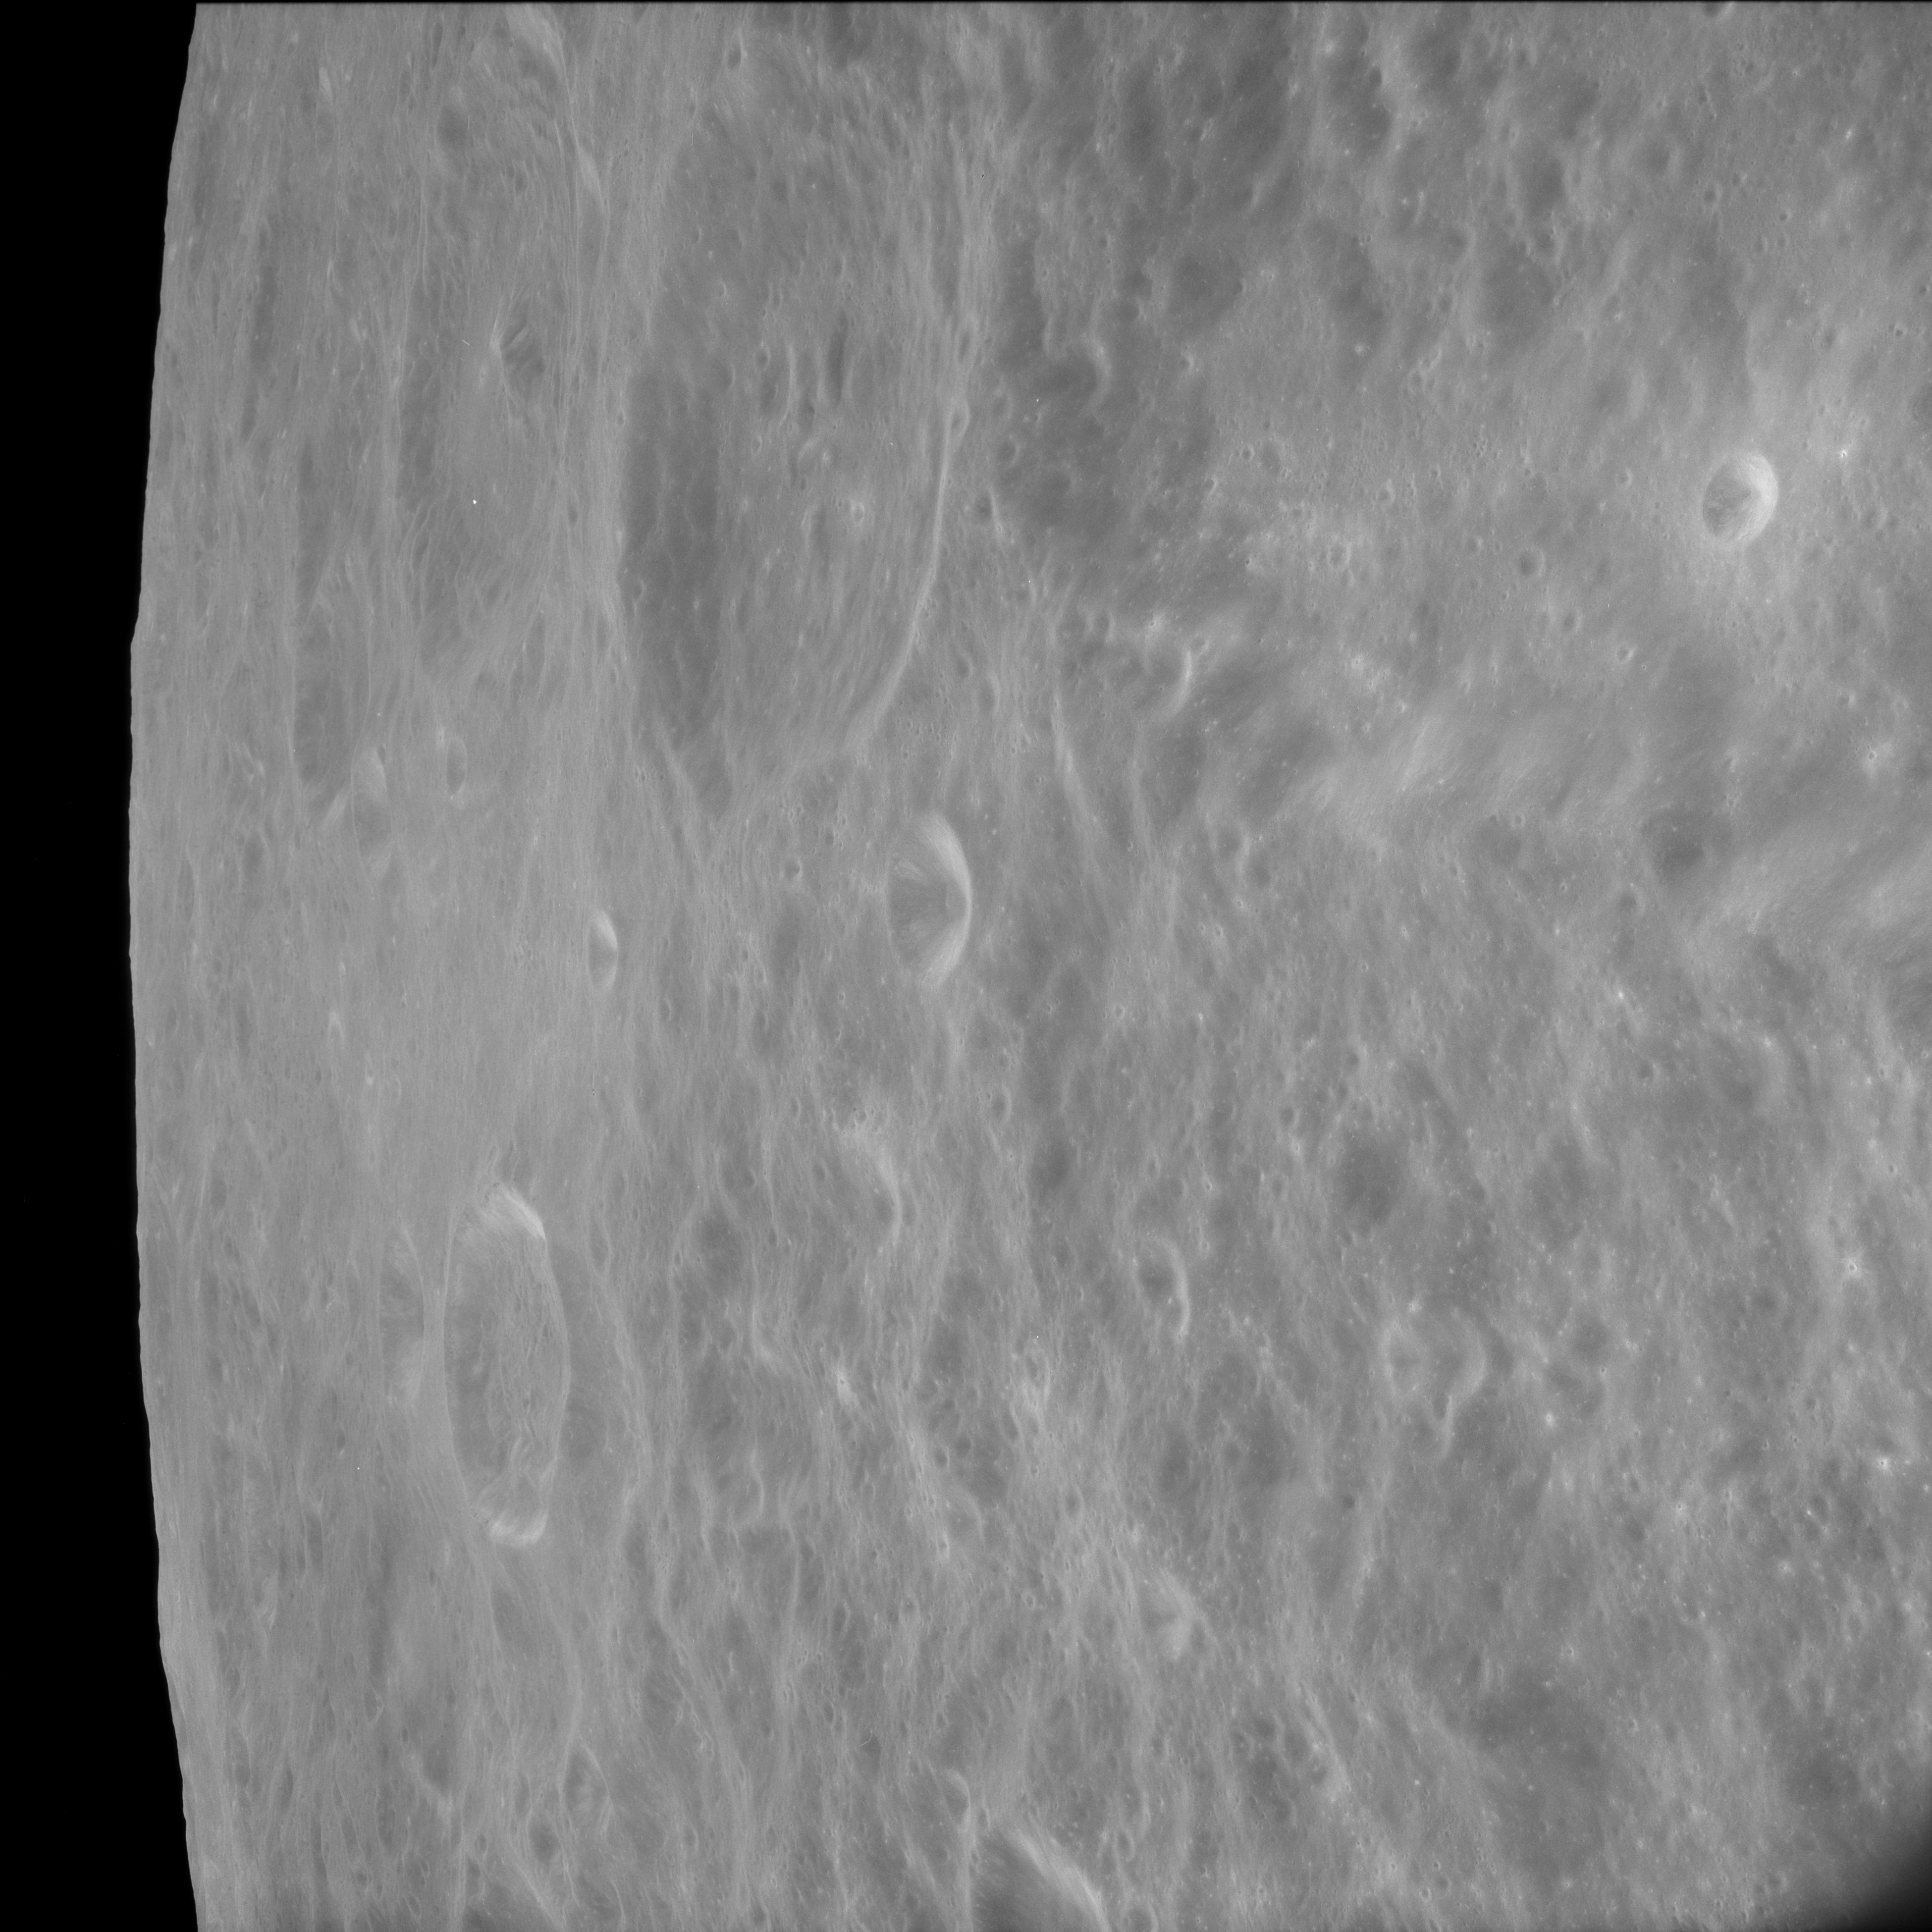
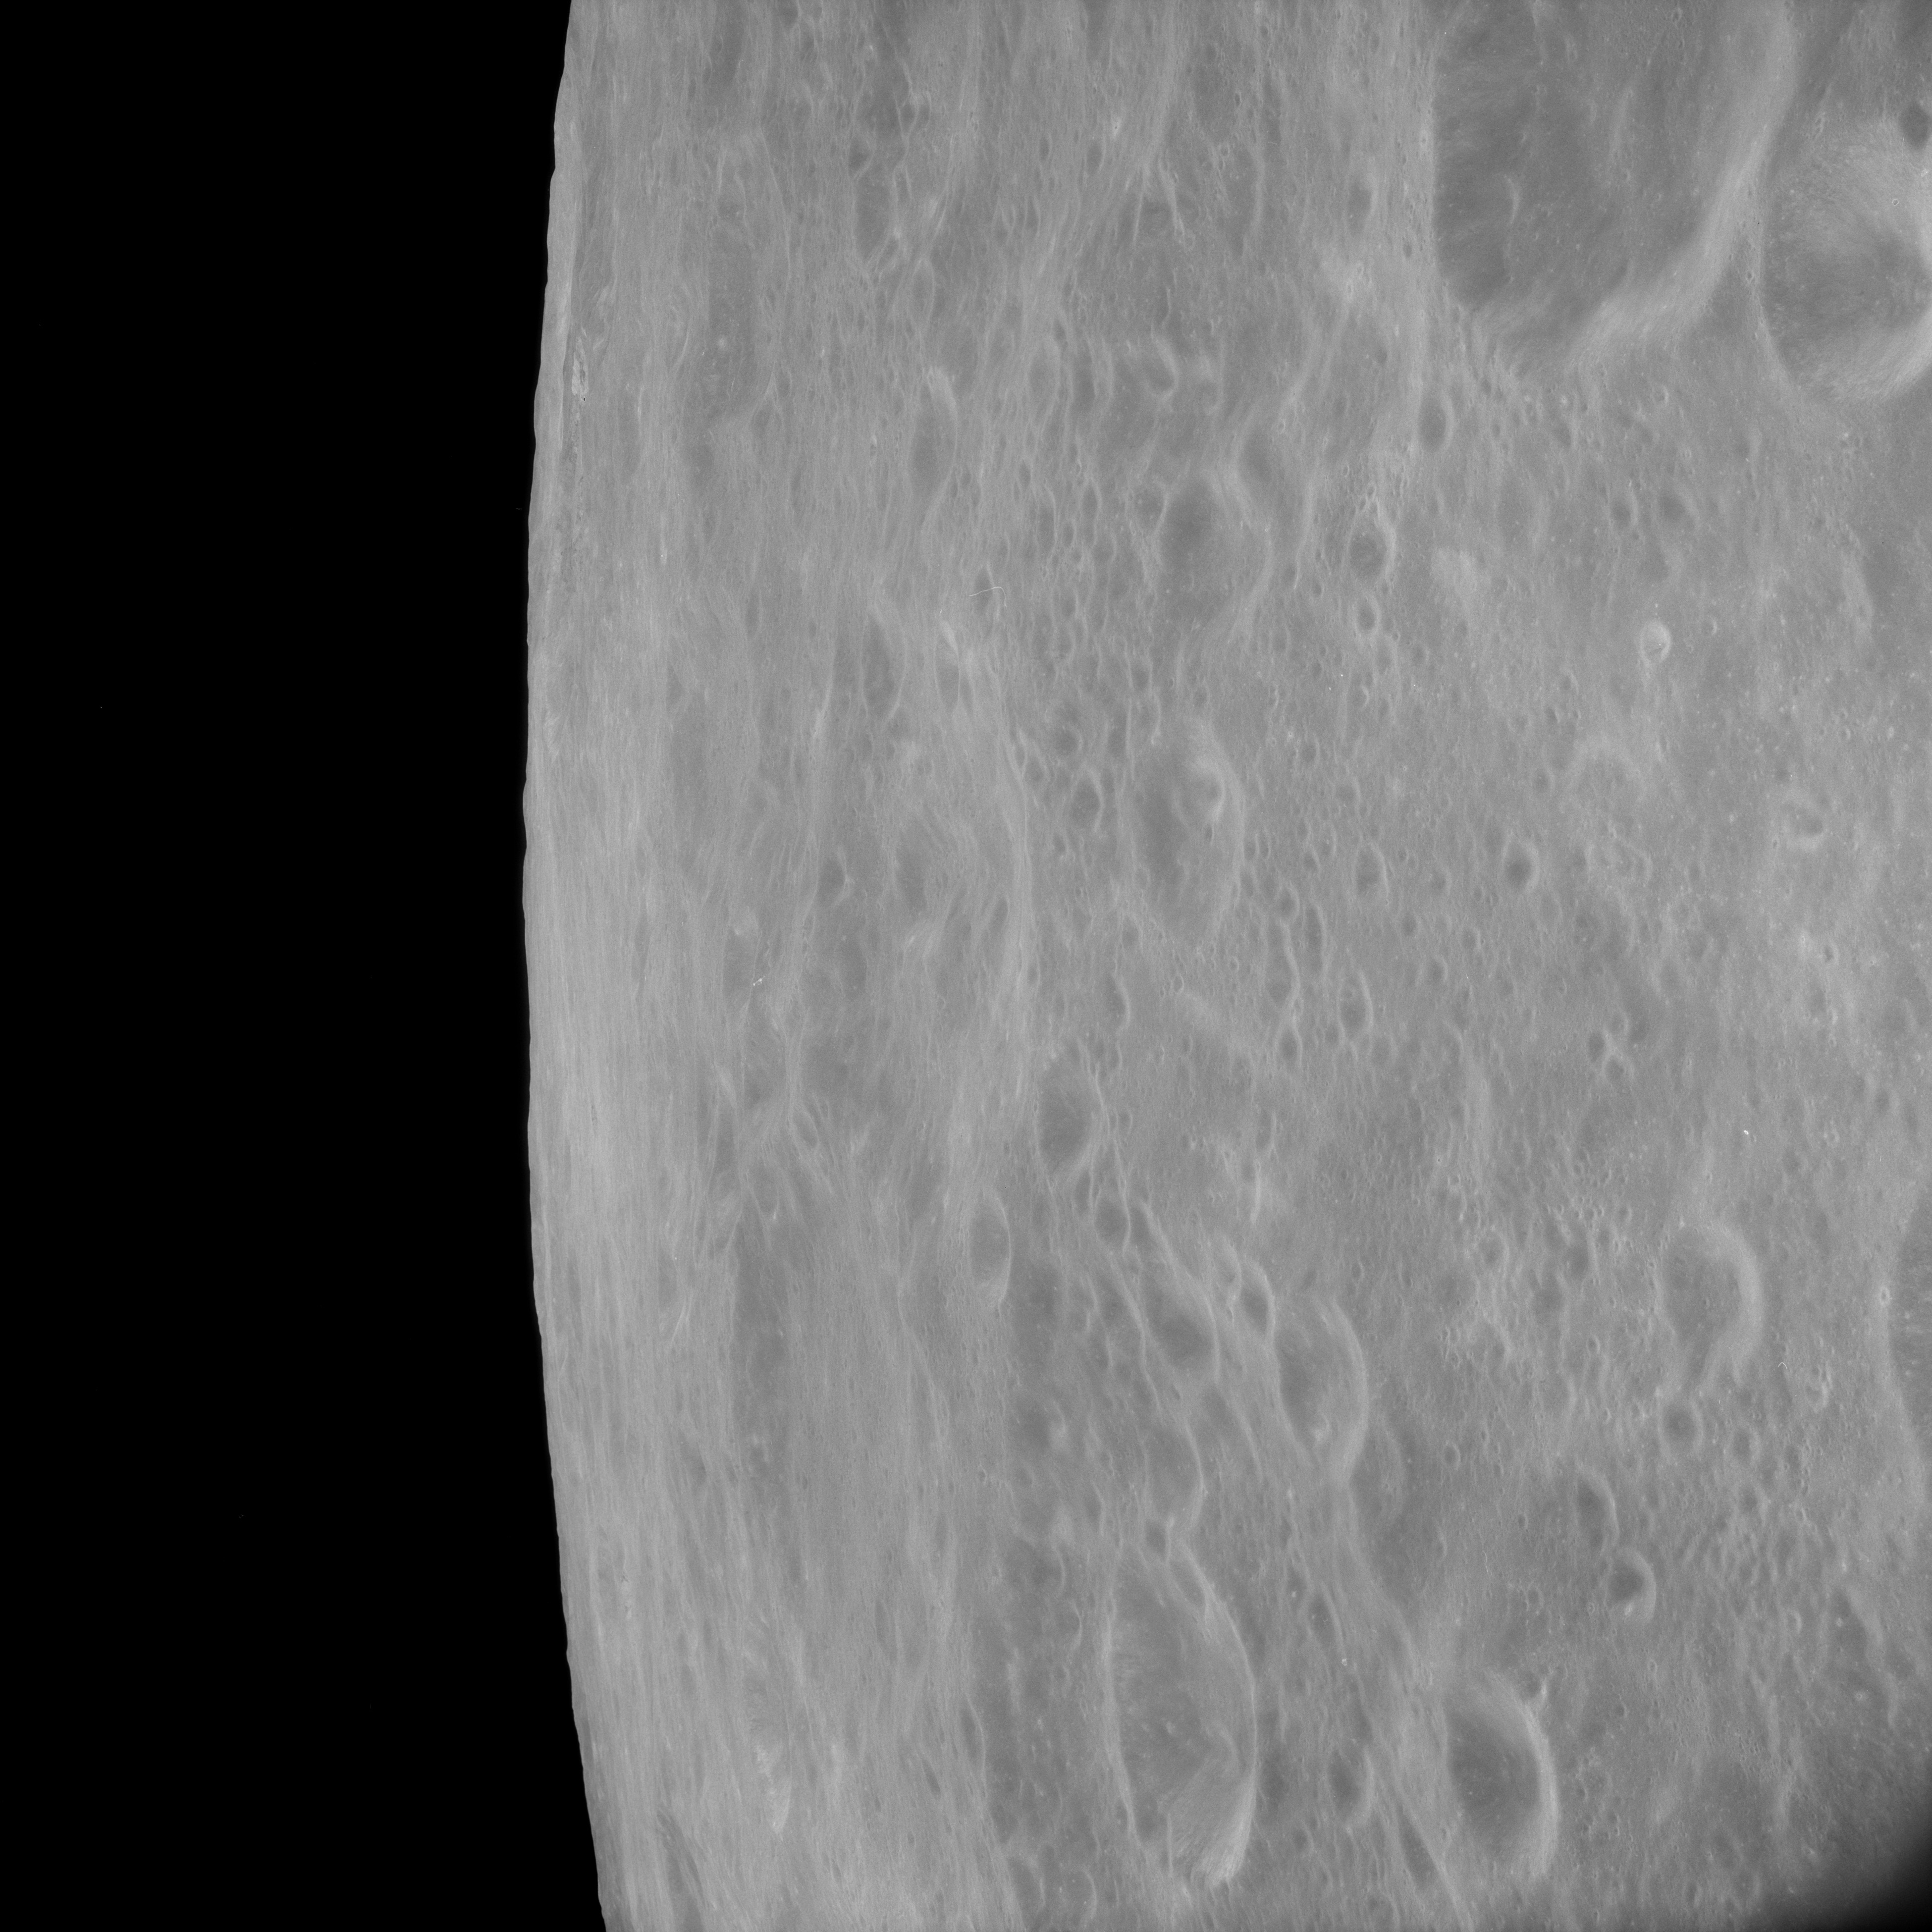
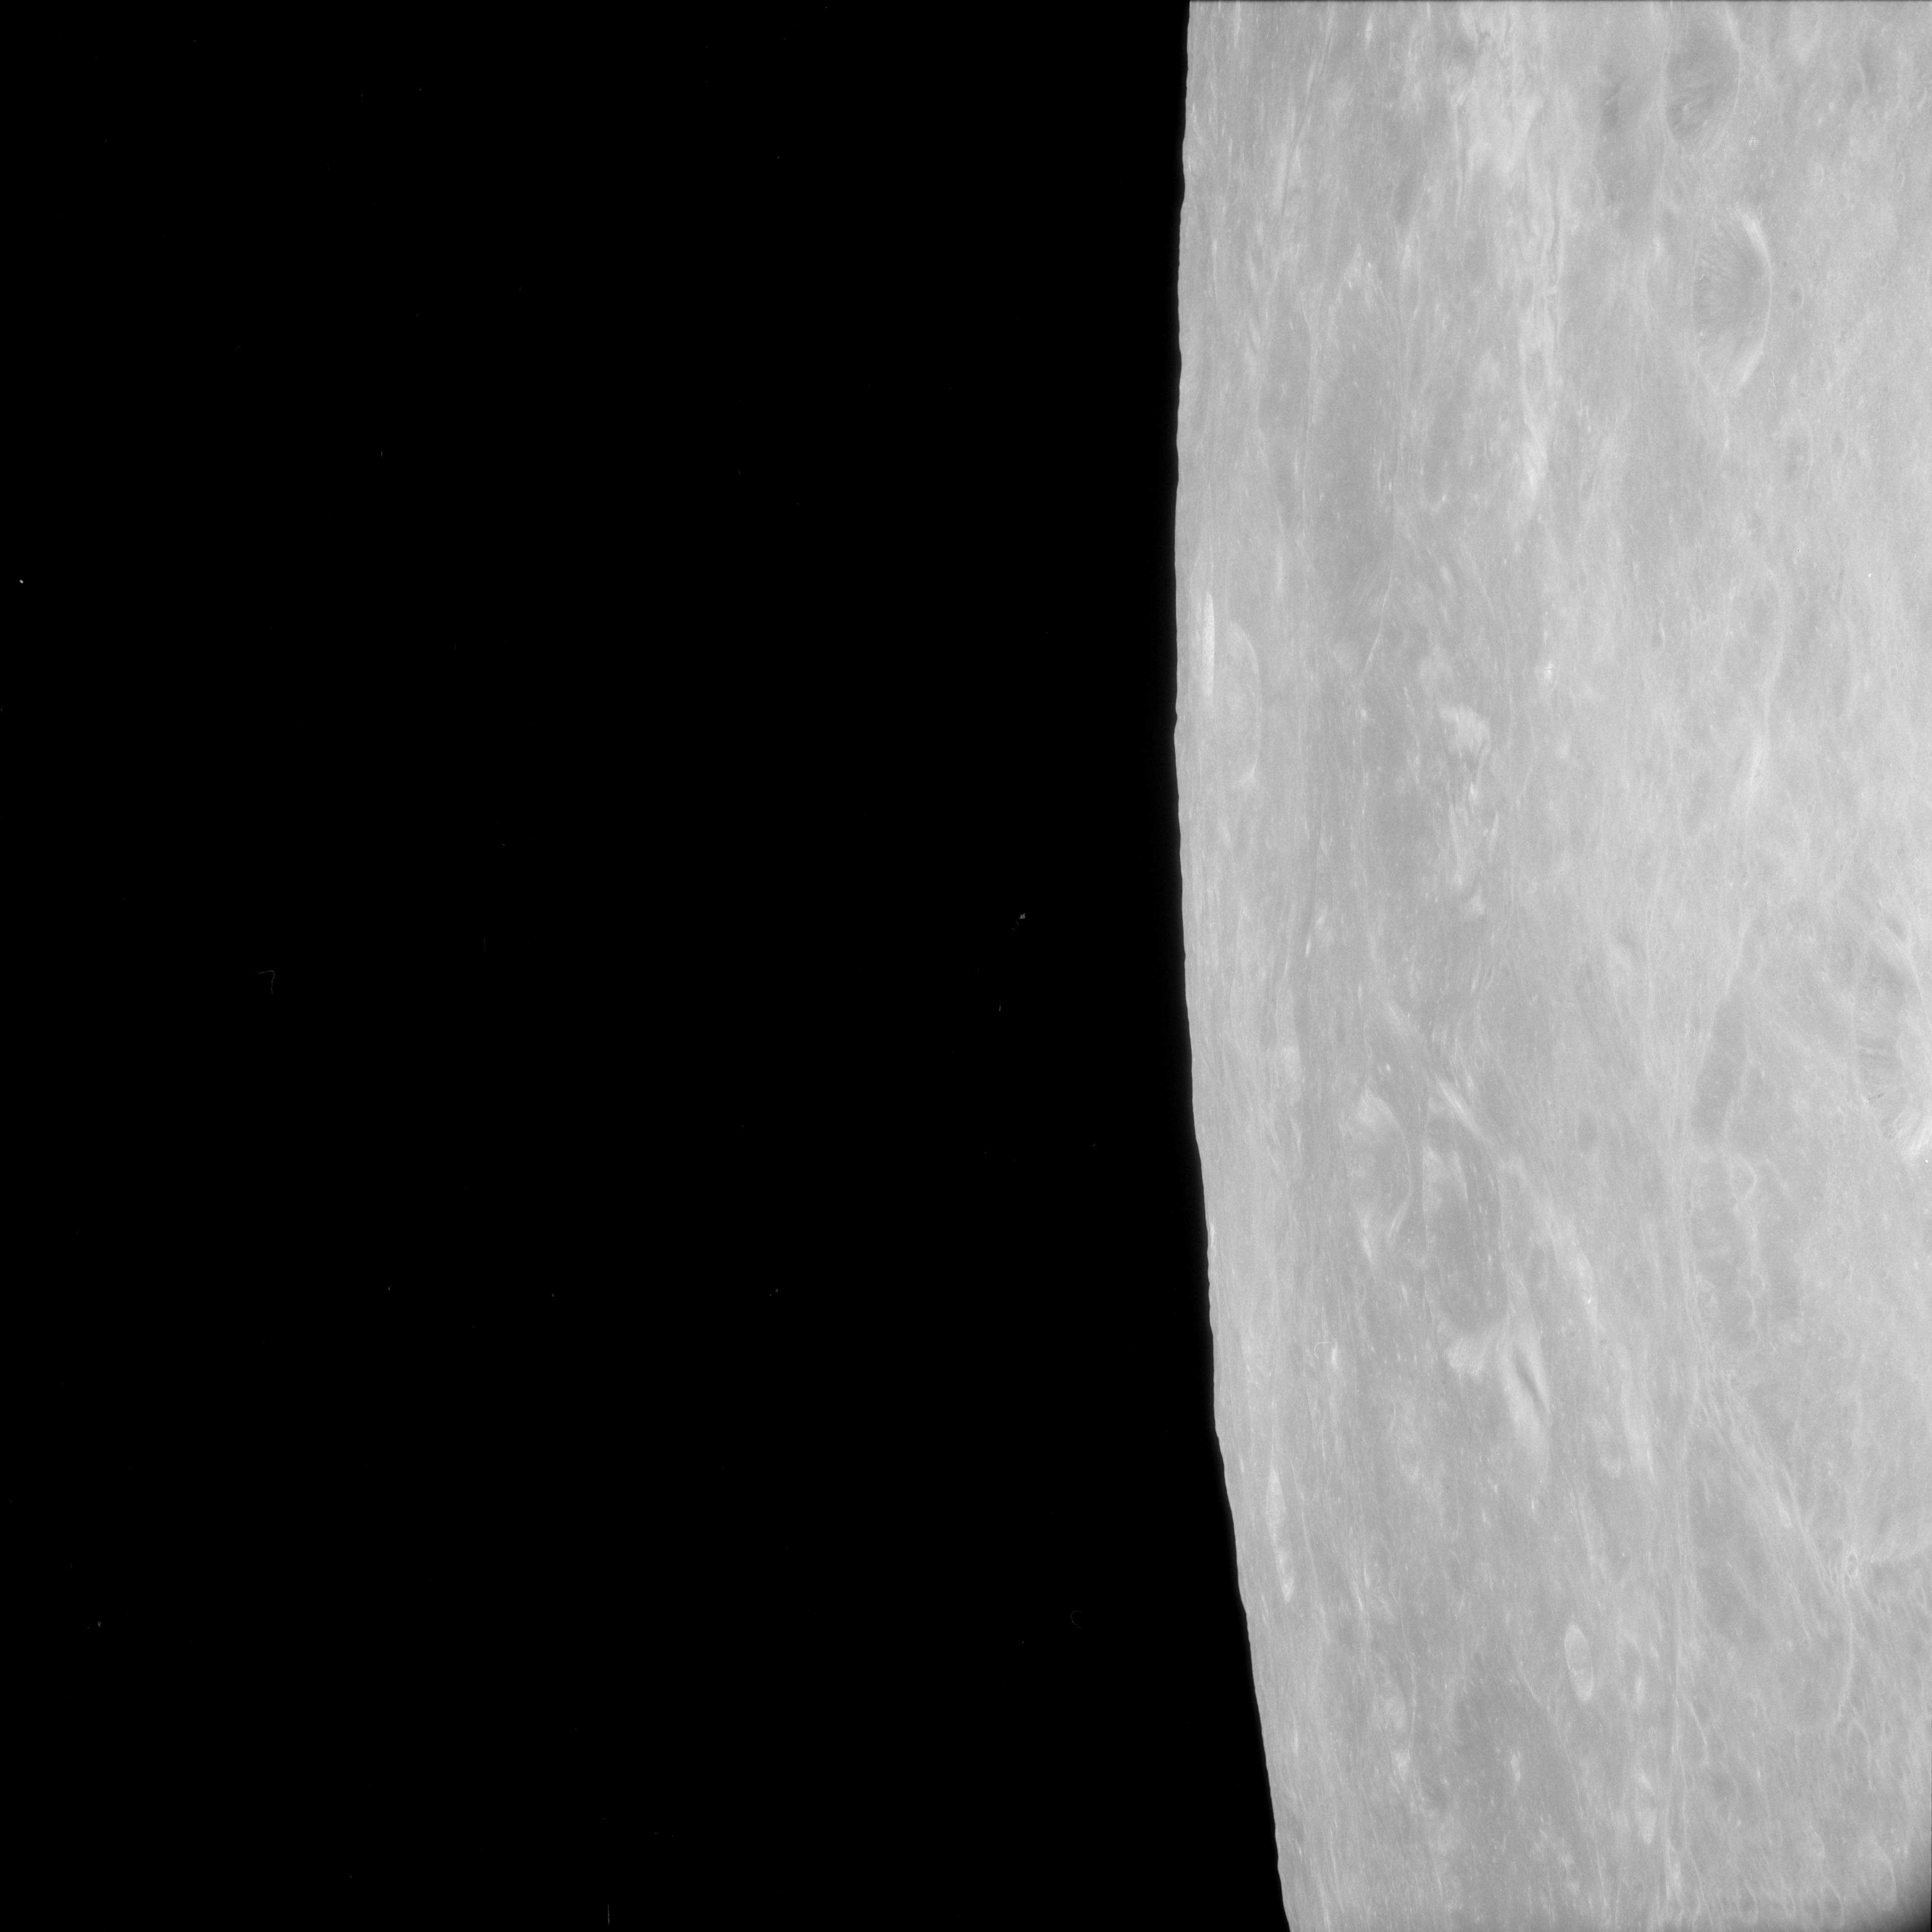
AS11-43-6352 Browse or print resolution. View northwest towards Mare Marginis. Bright crater in foreground is Erro T. Image credit: Image Science and Analysis Laboratory, NASA-Johnson Space Center. |
|
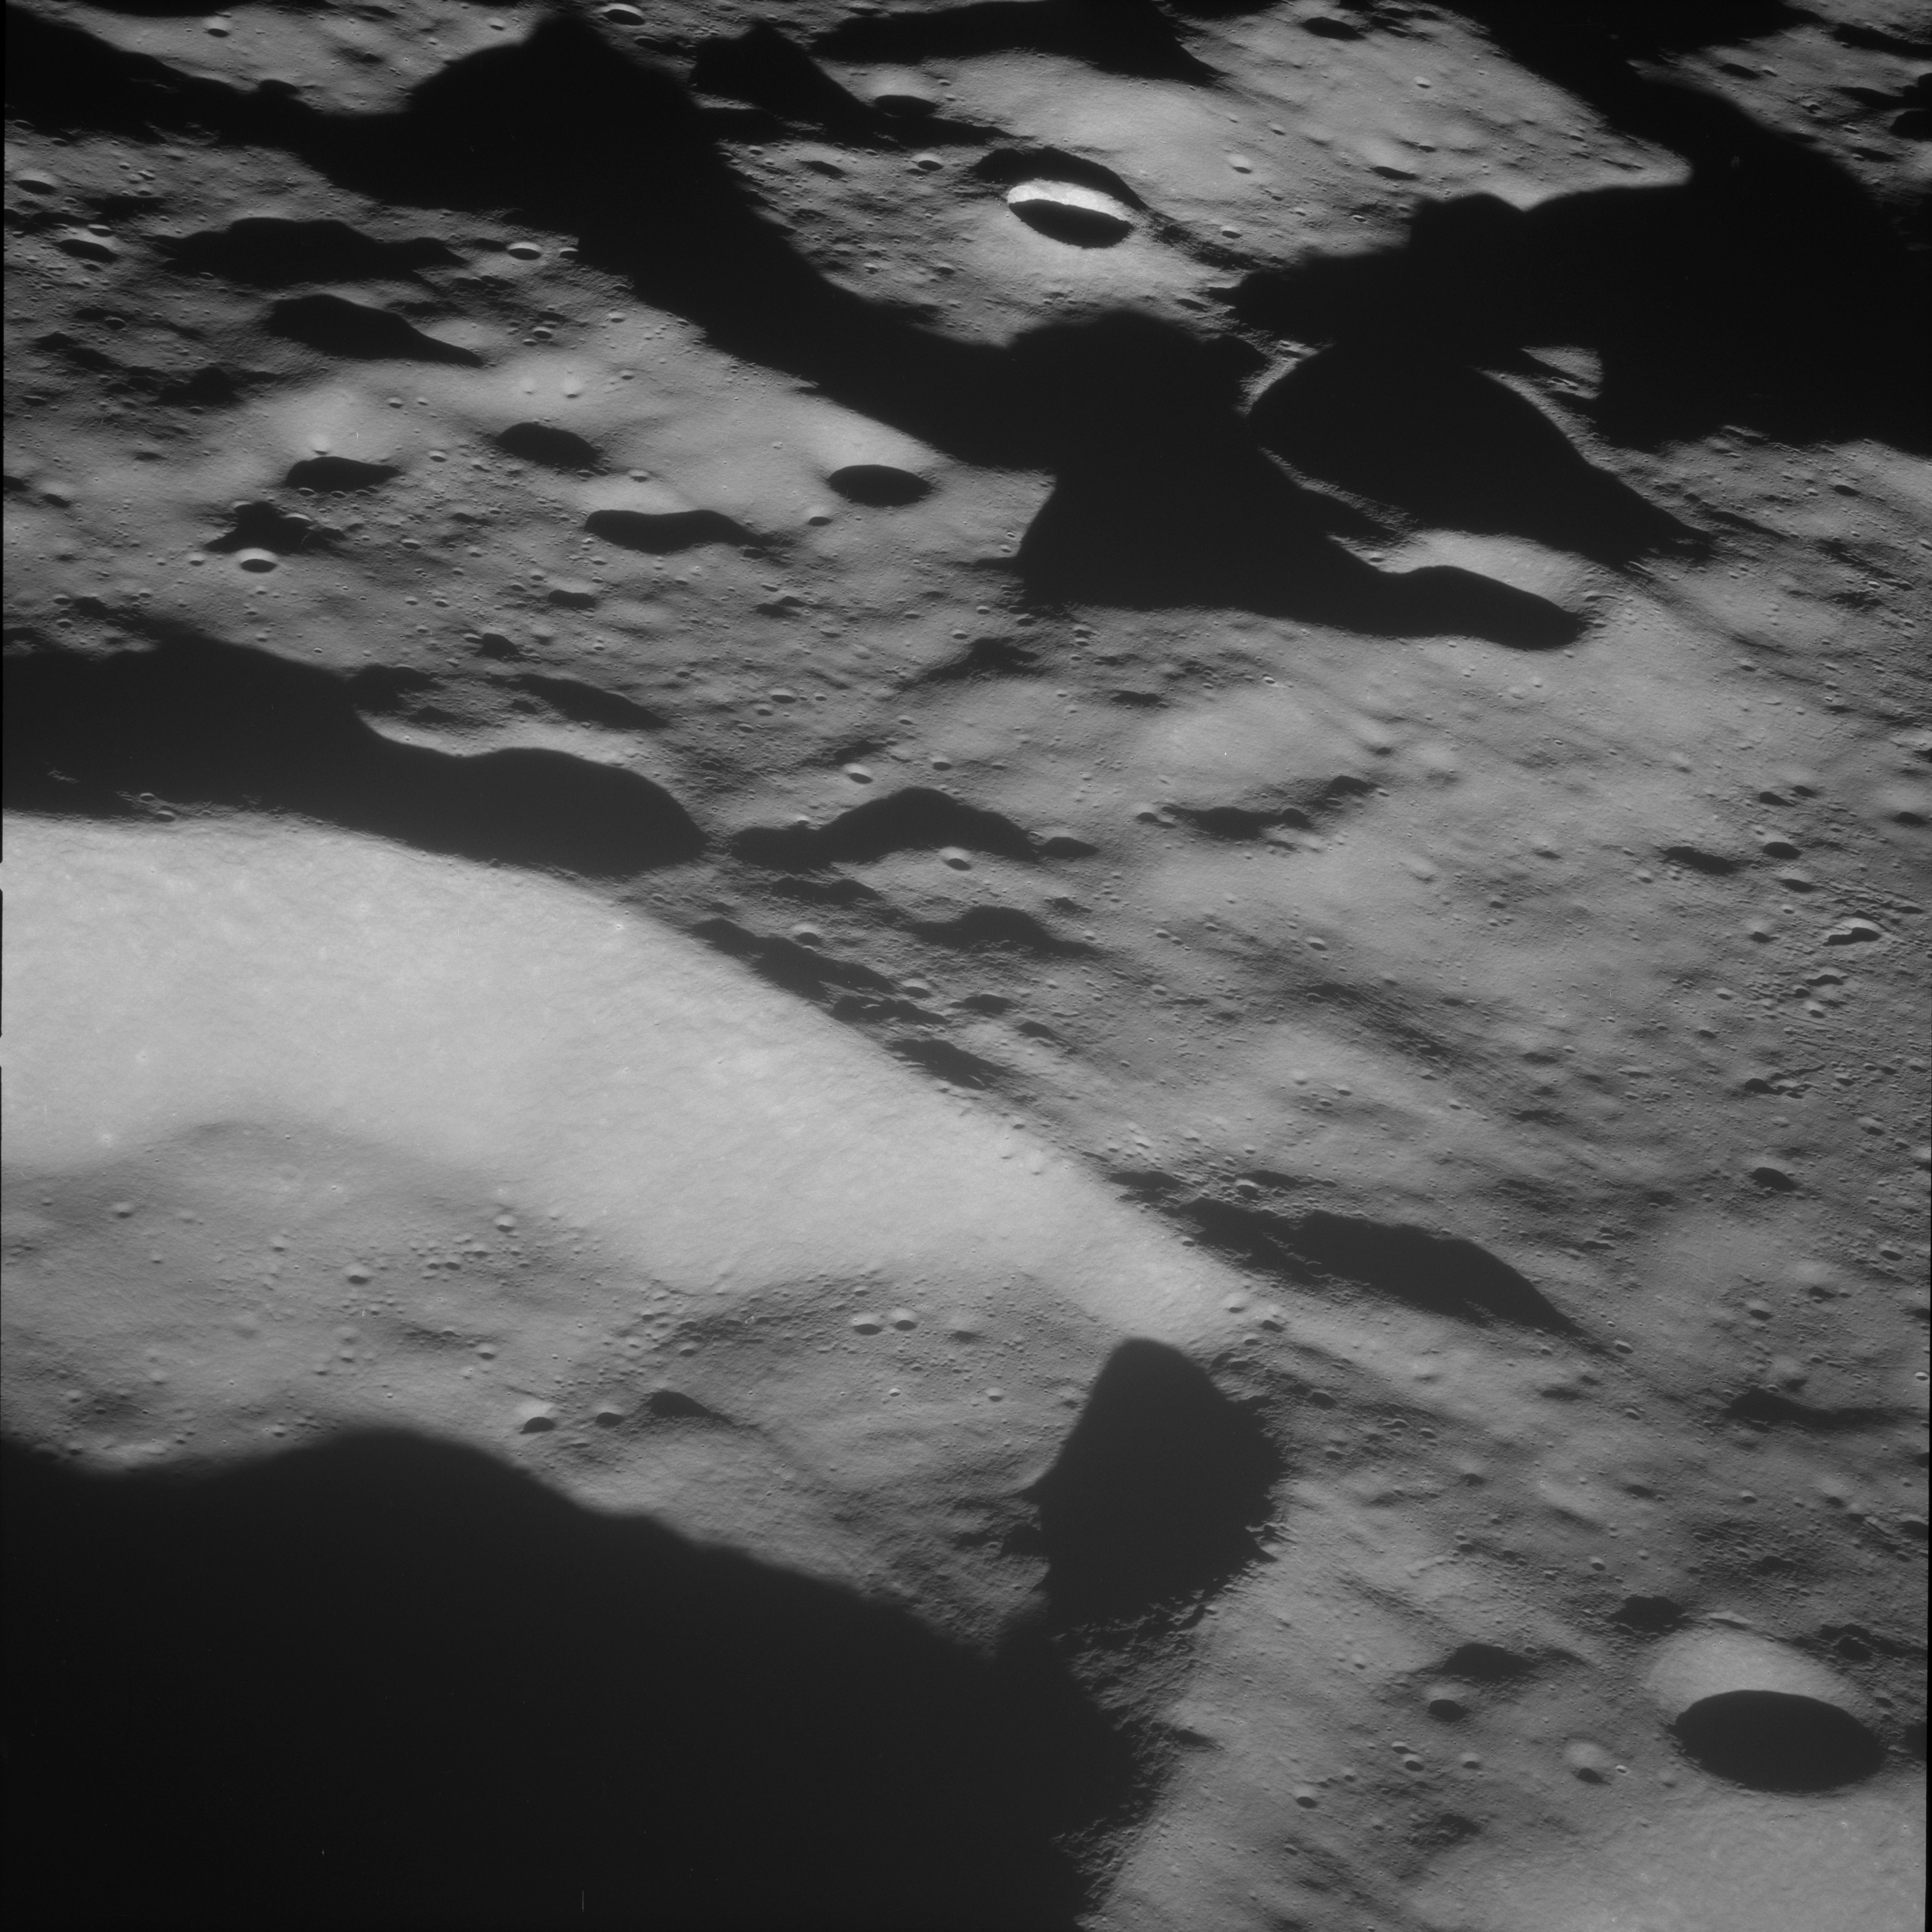
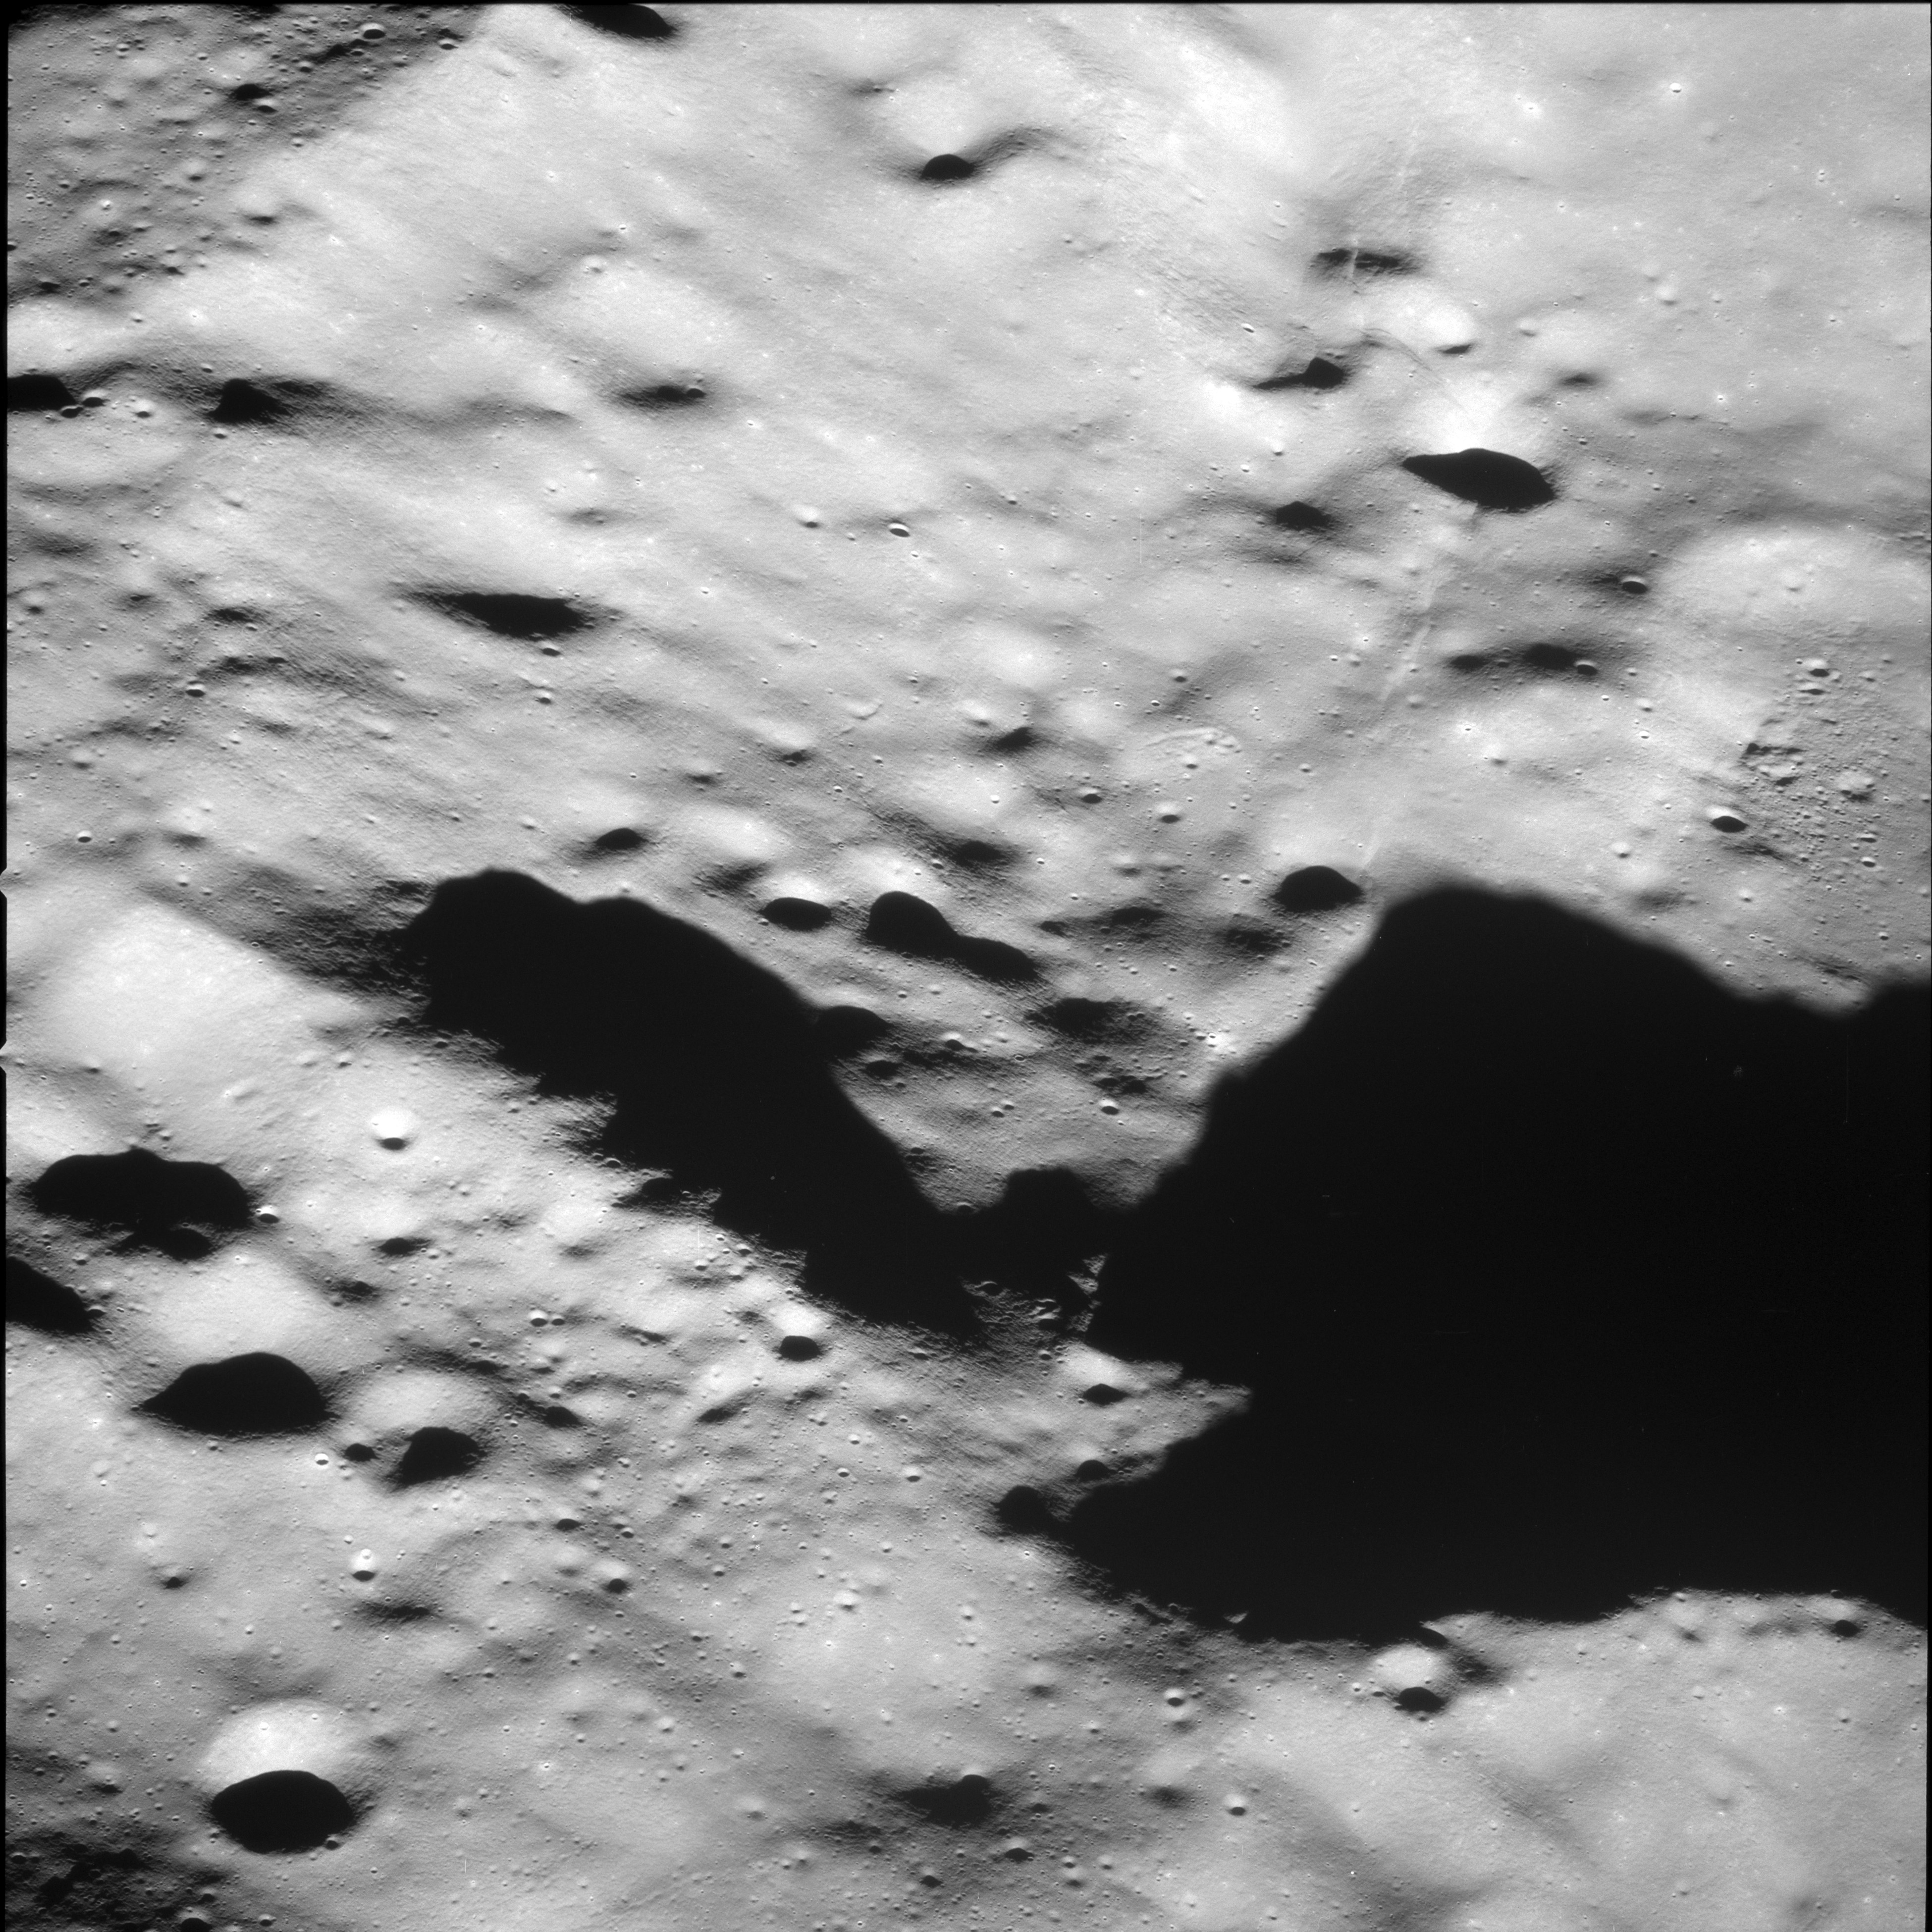
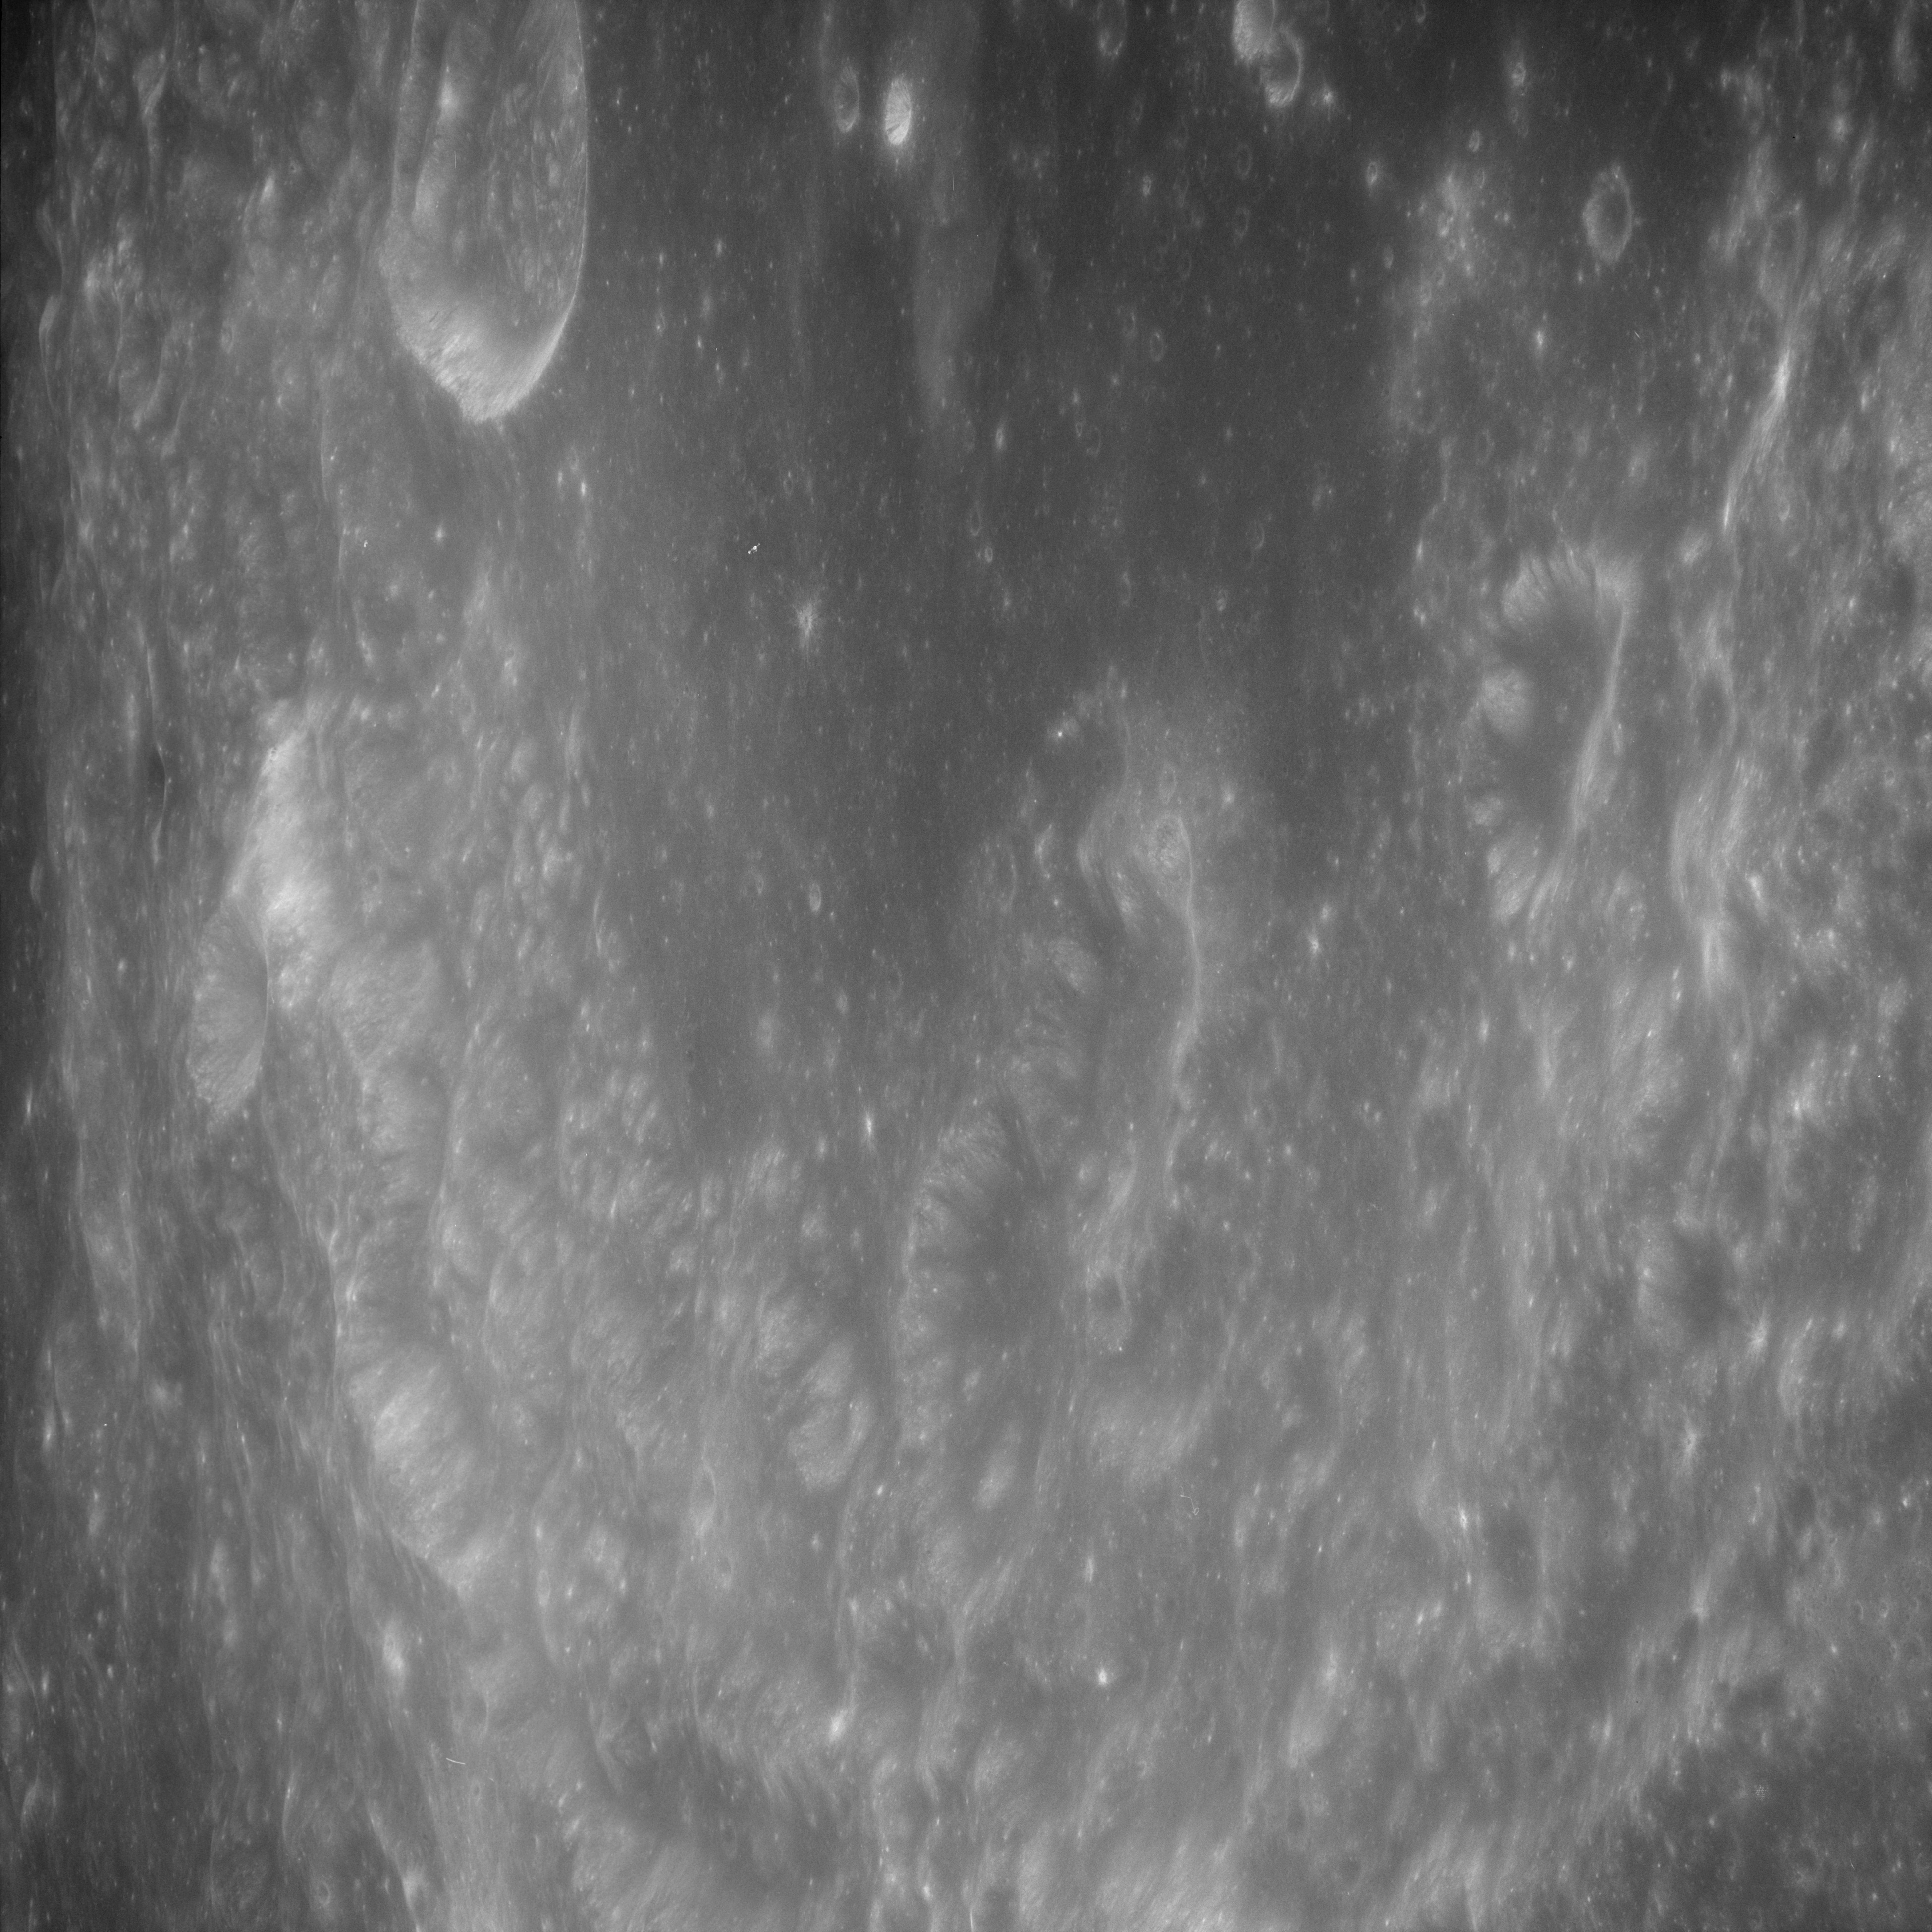
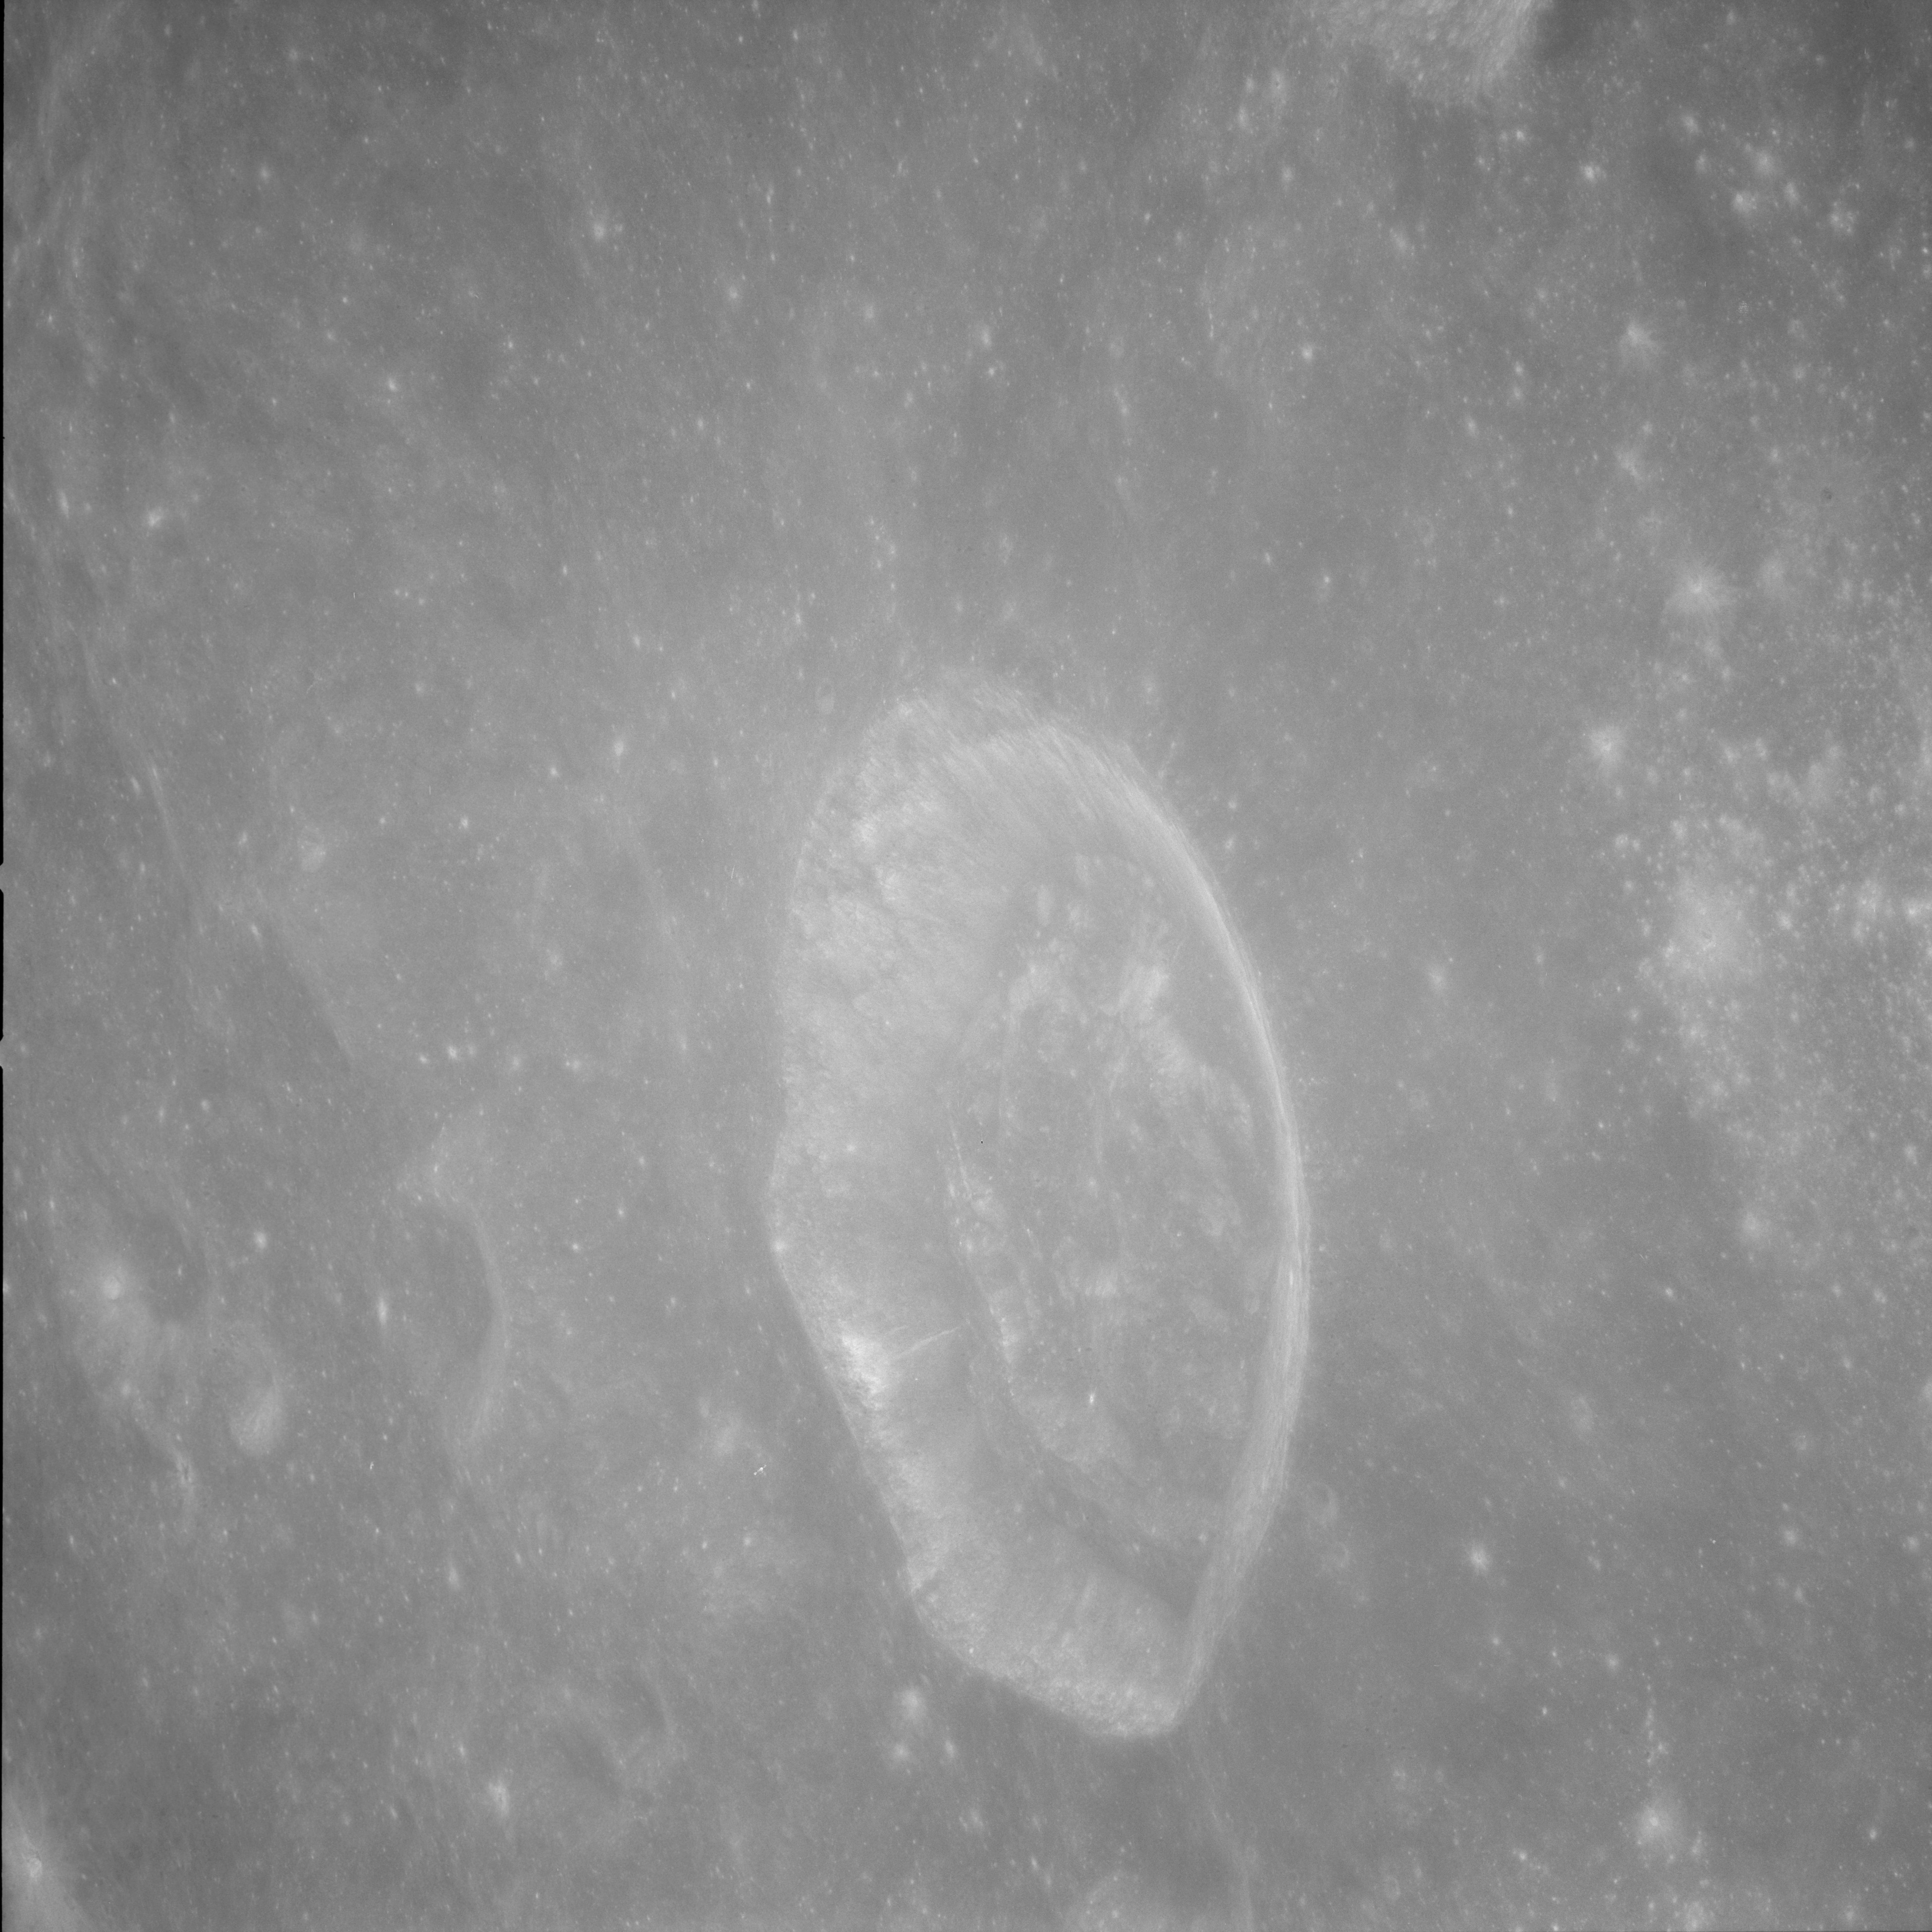
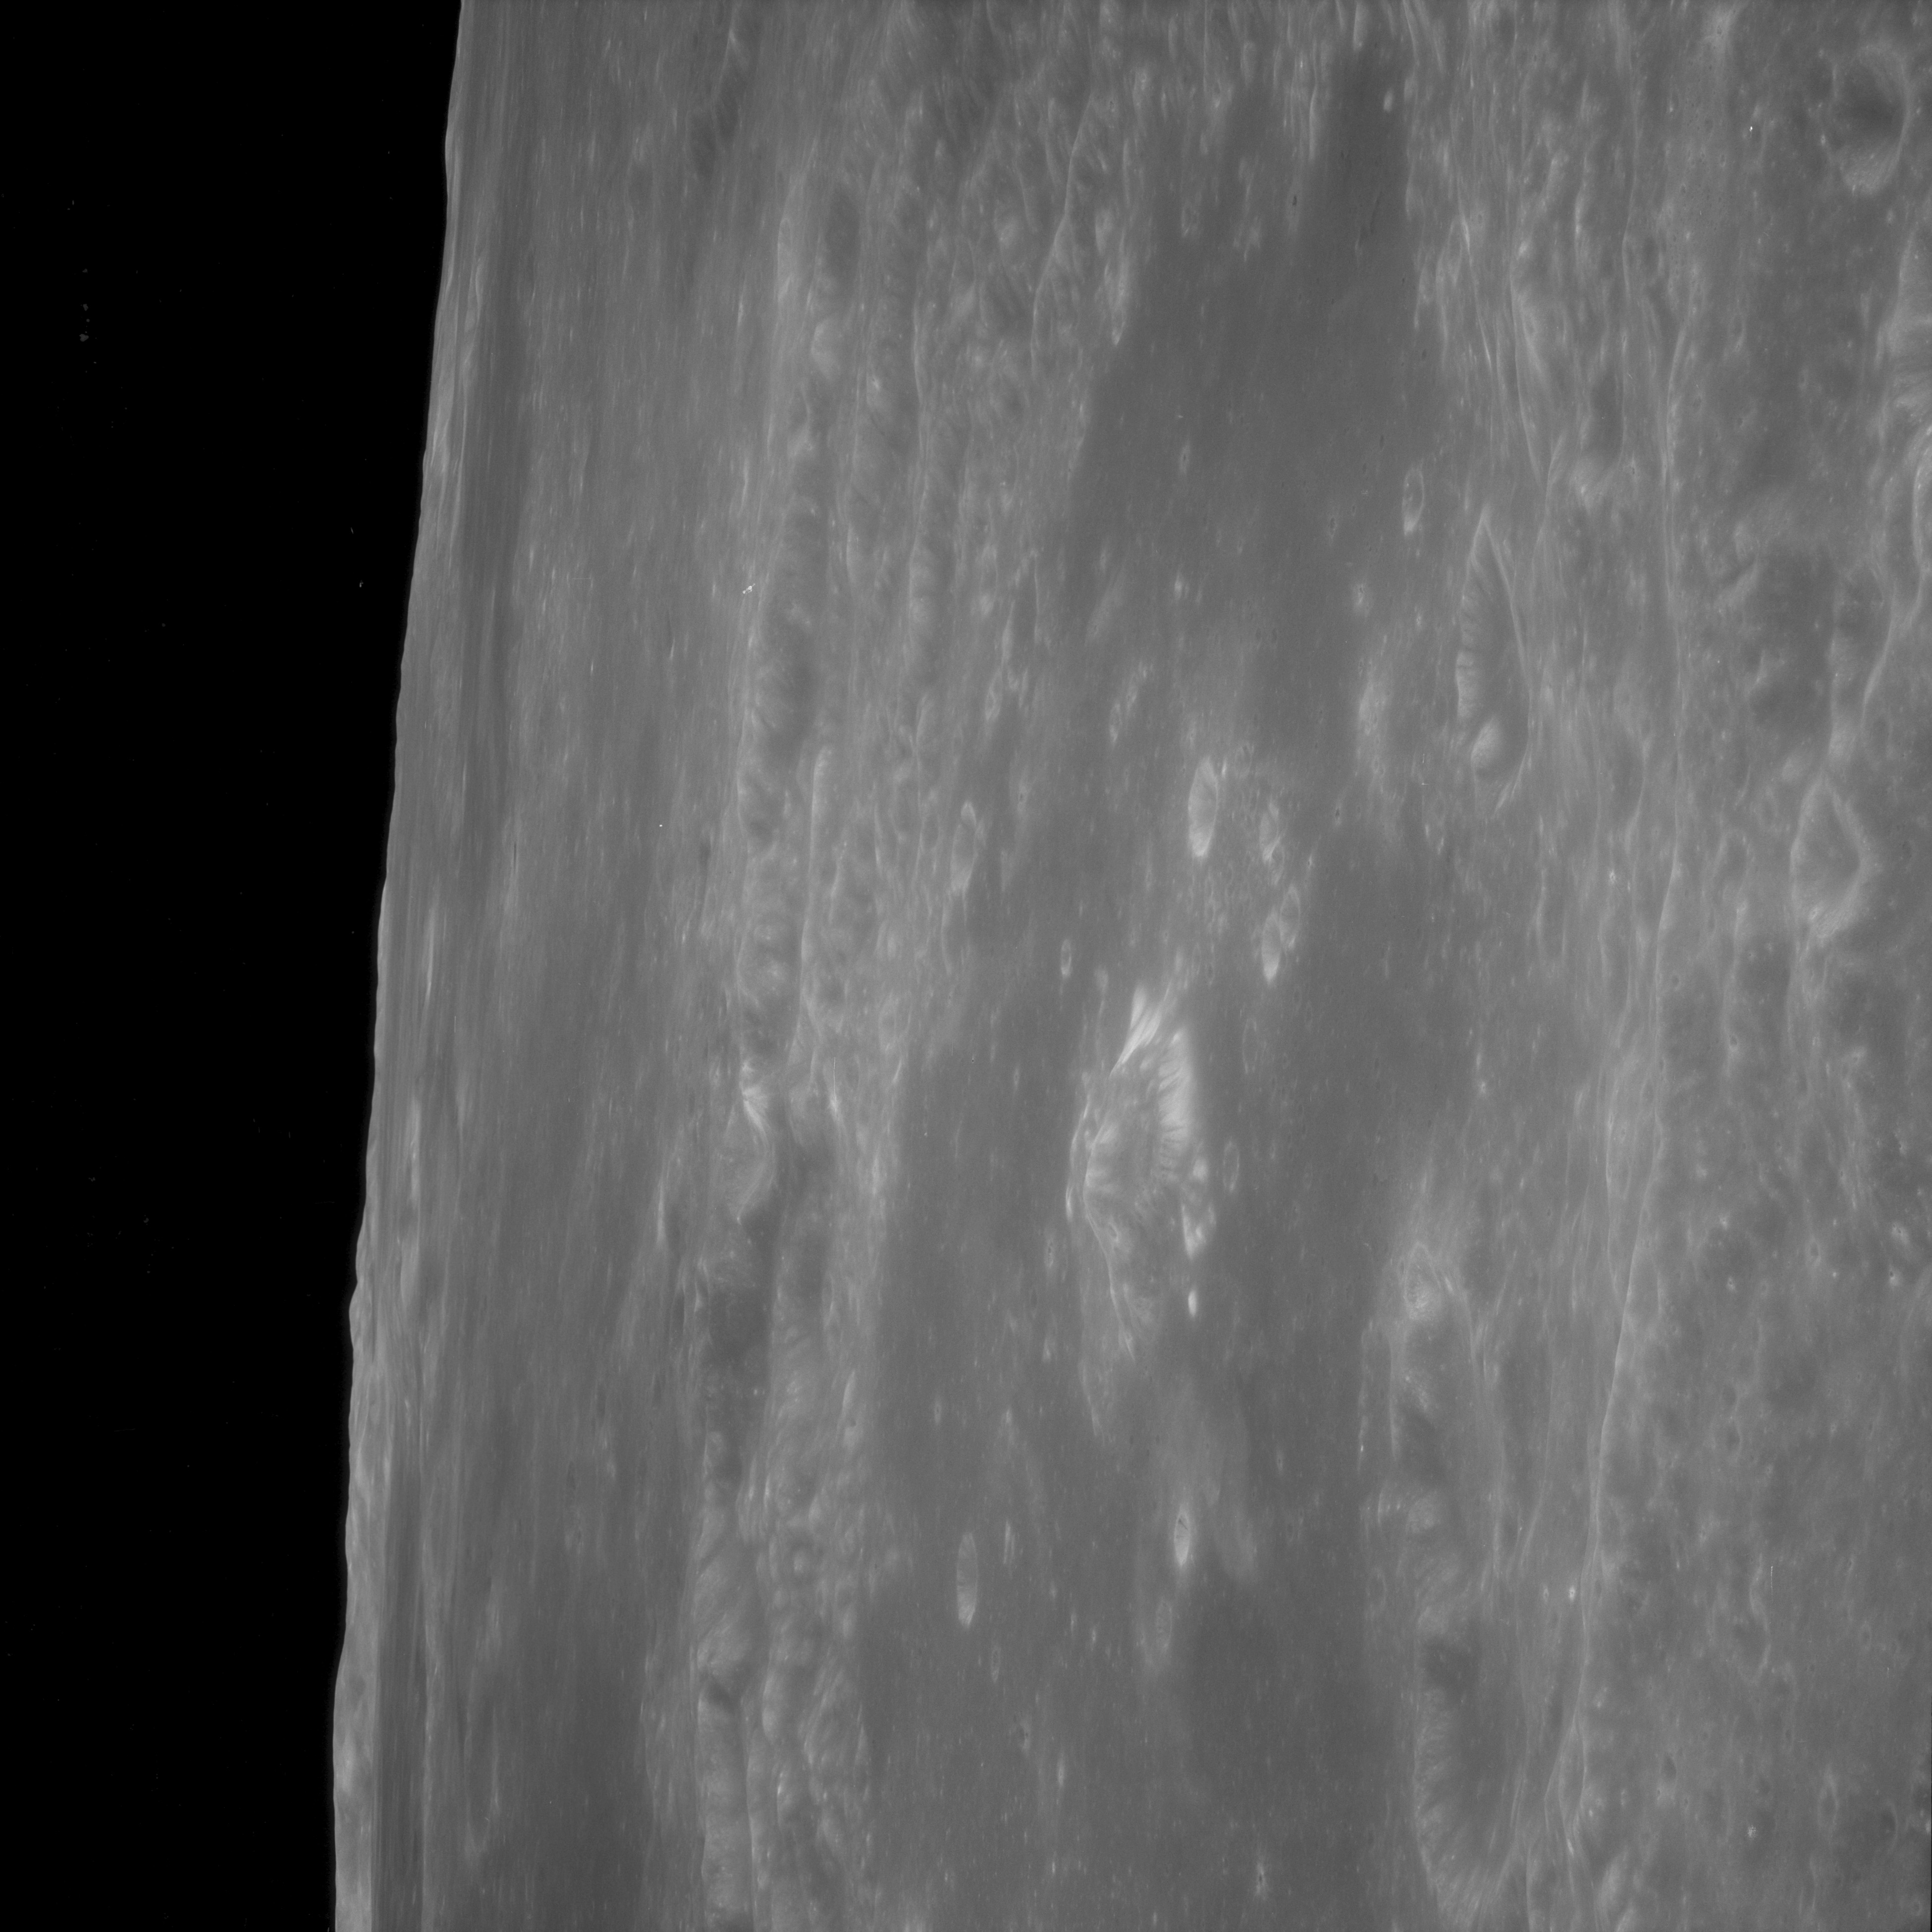
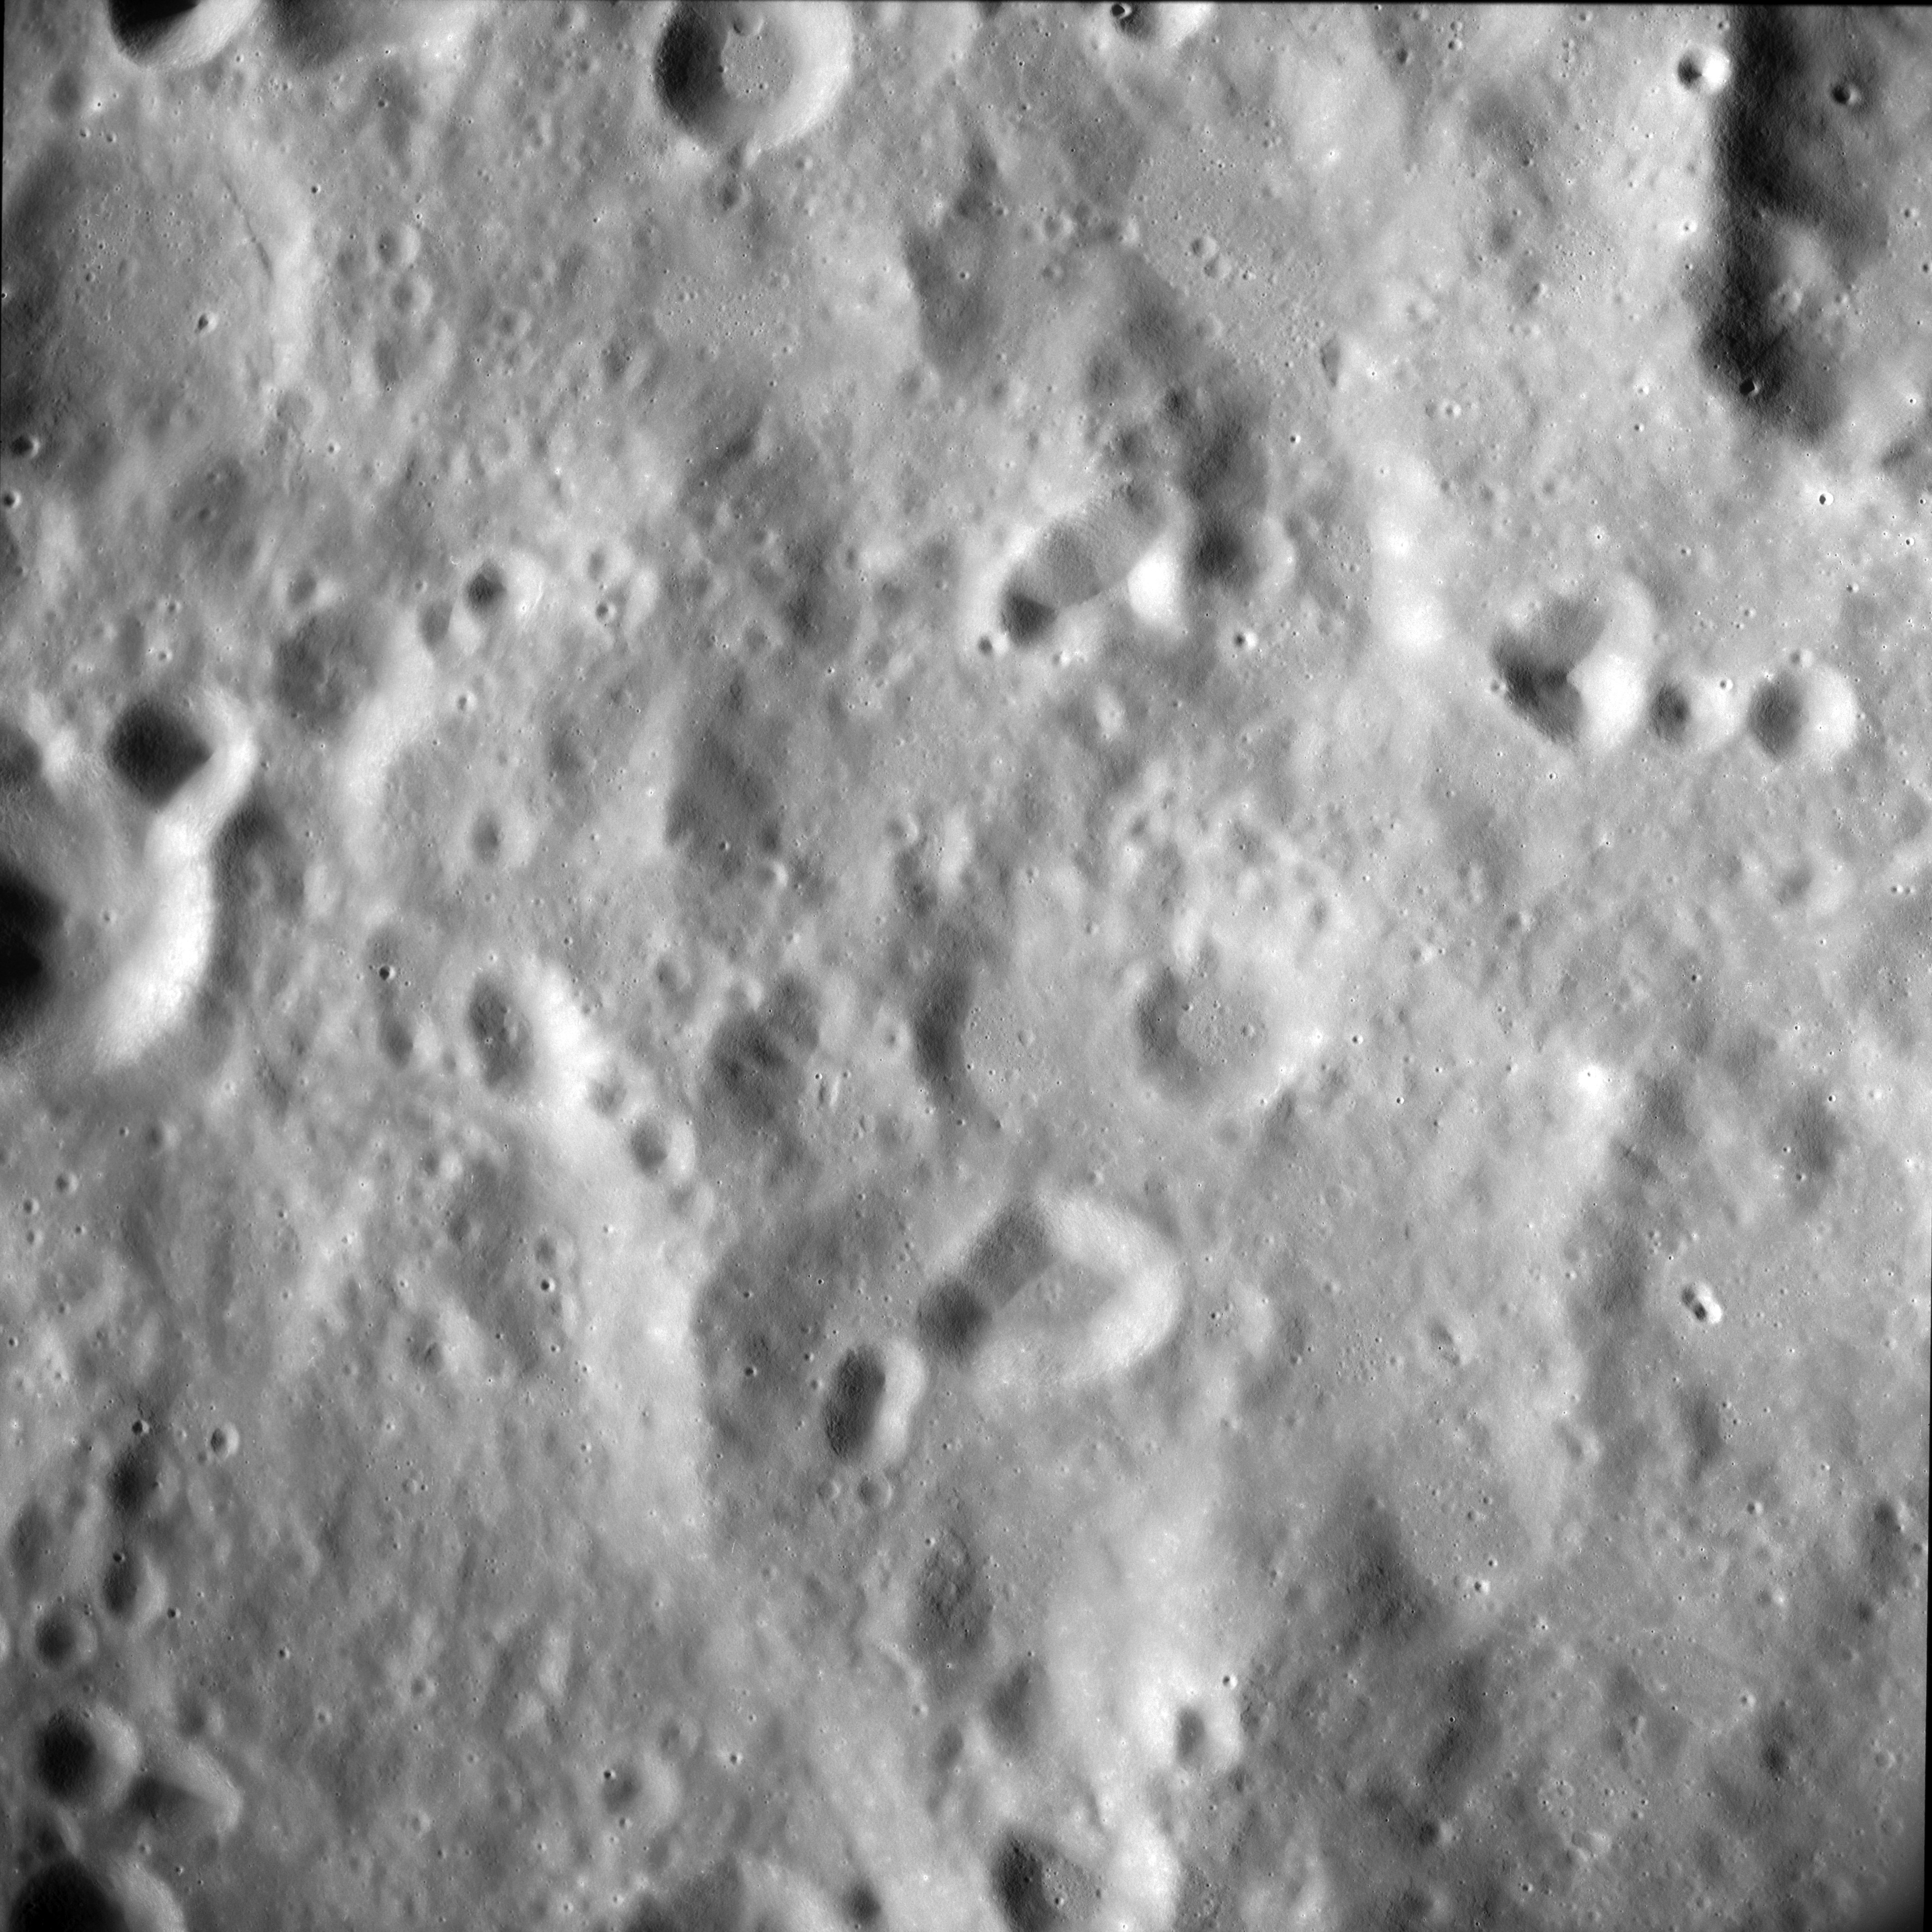
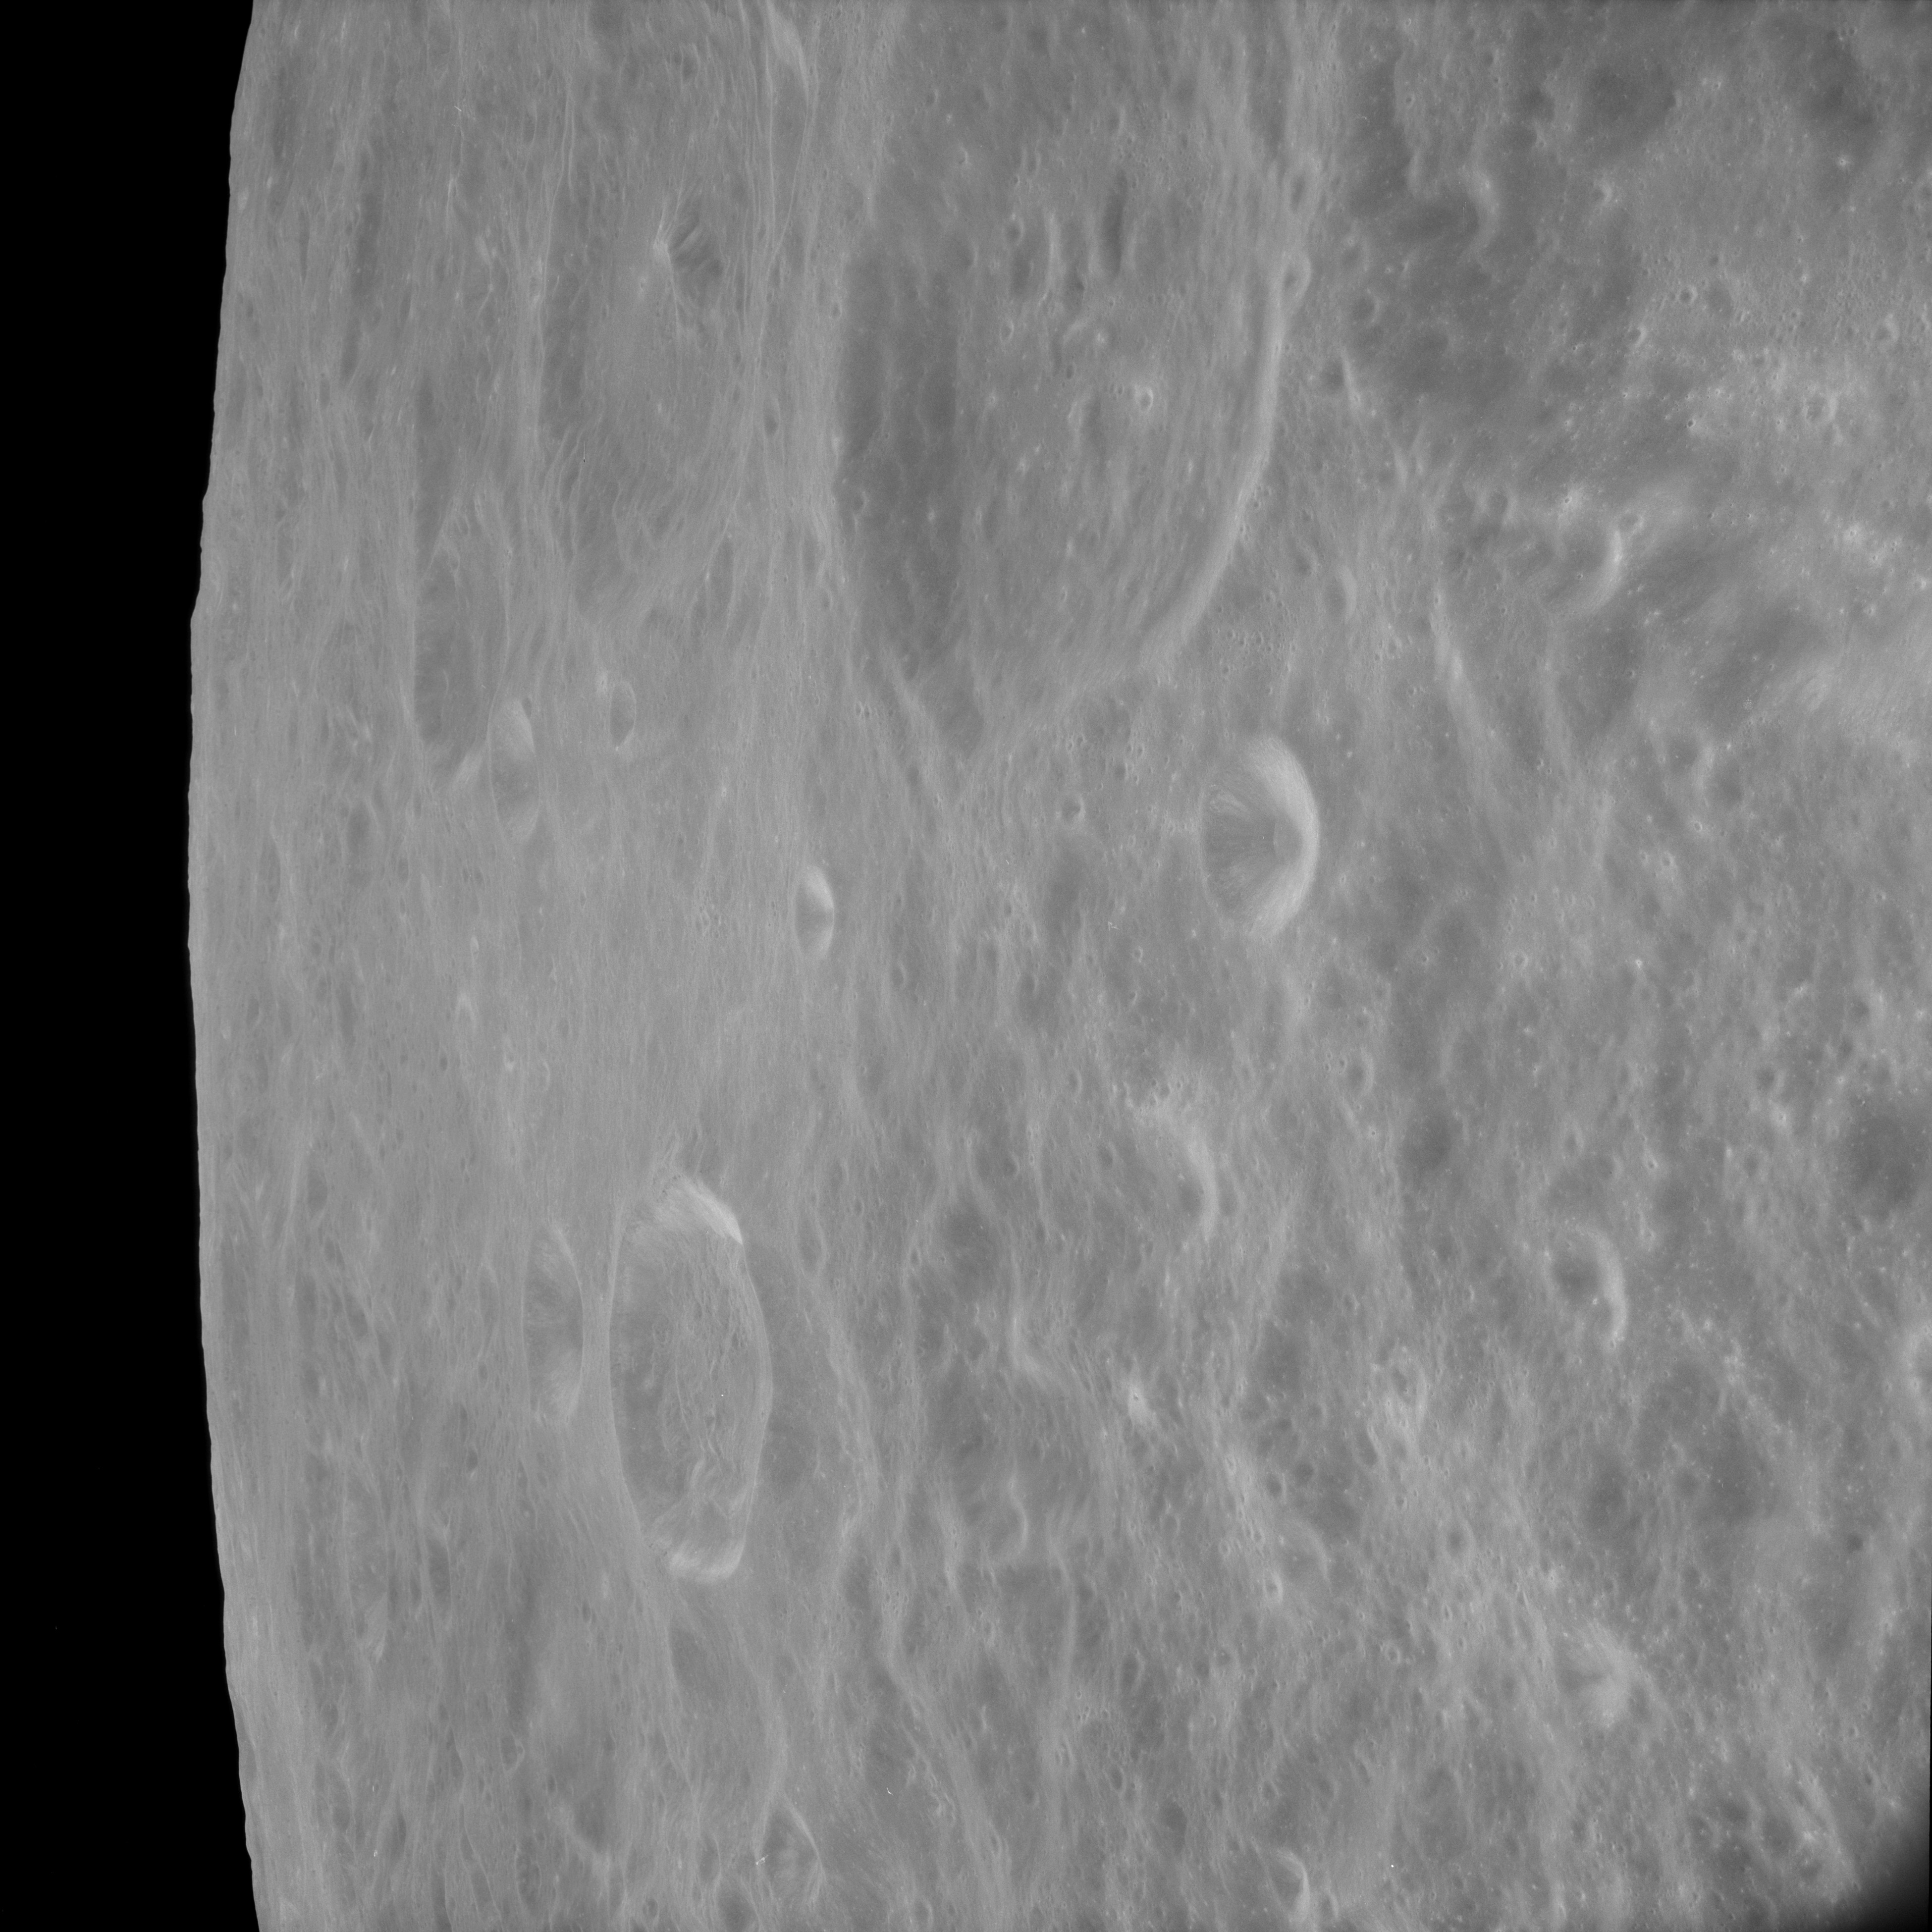
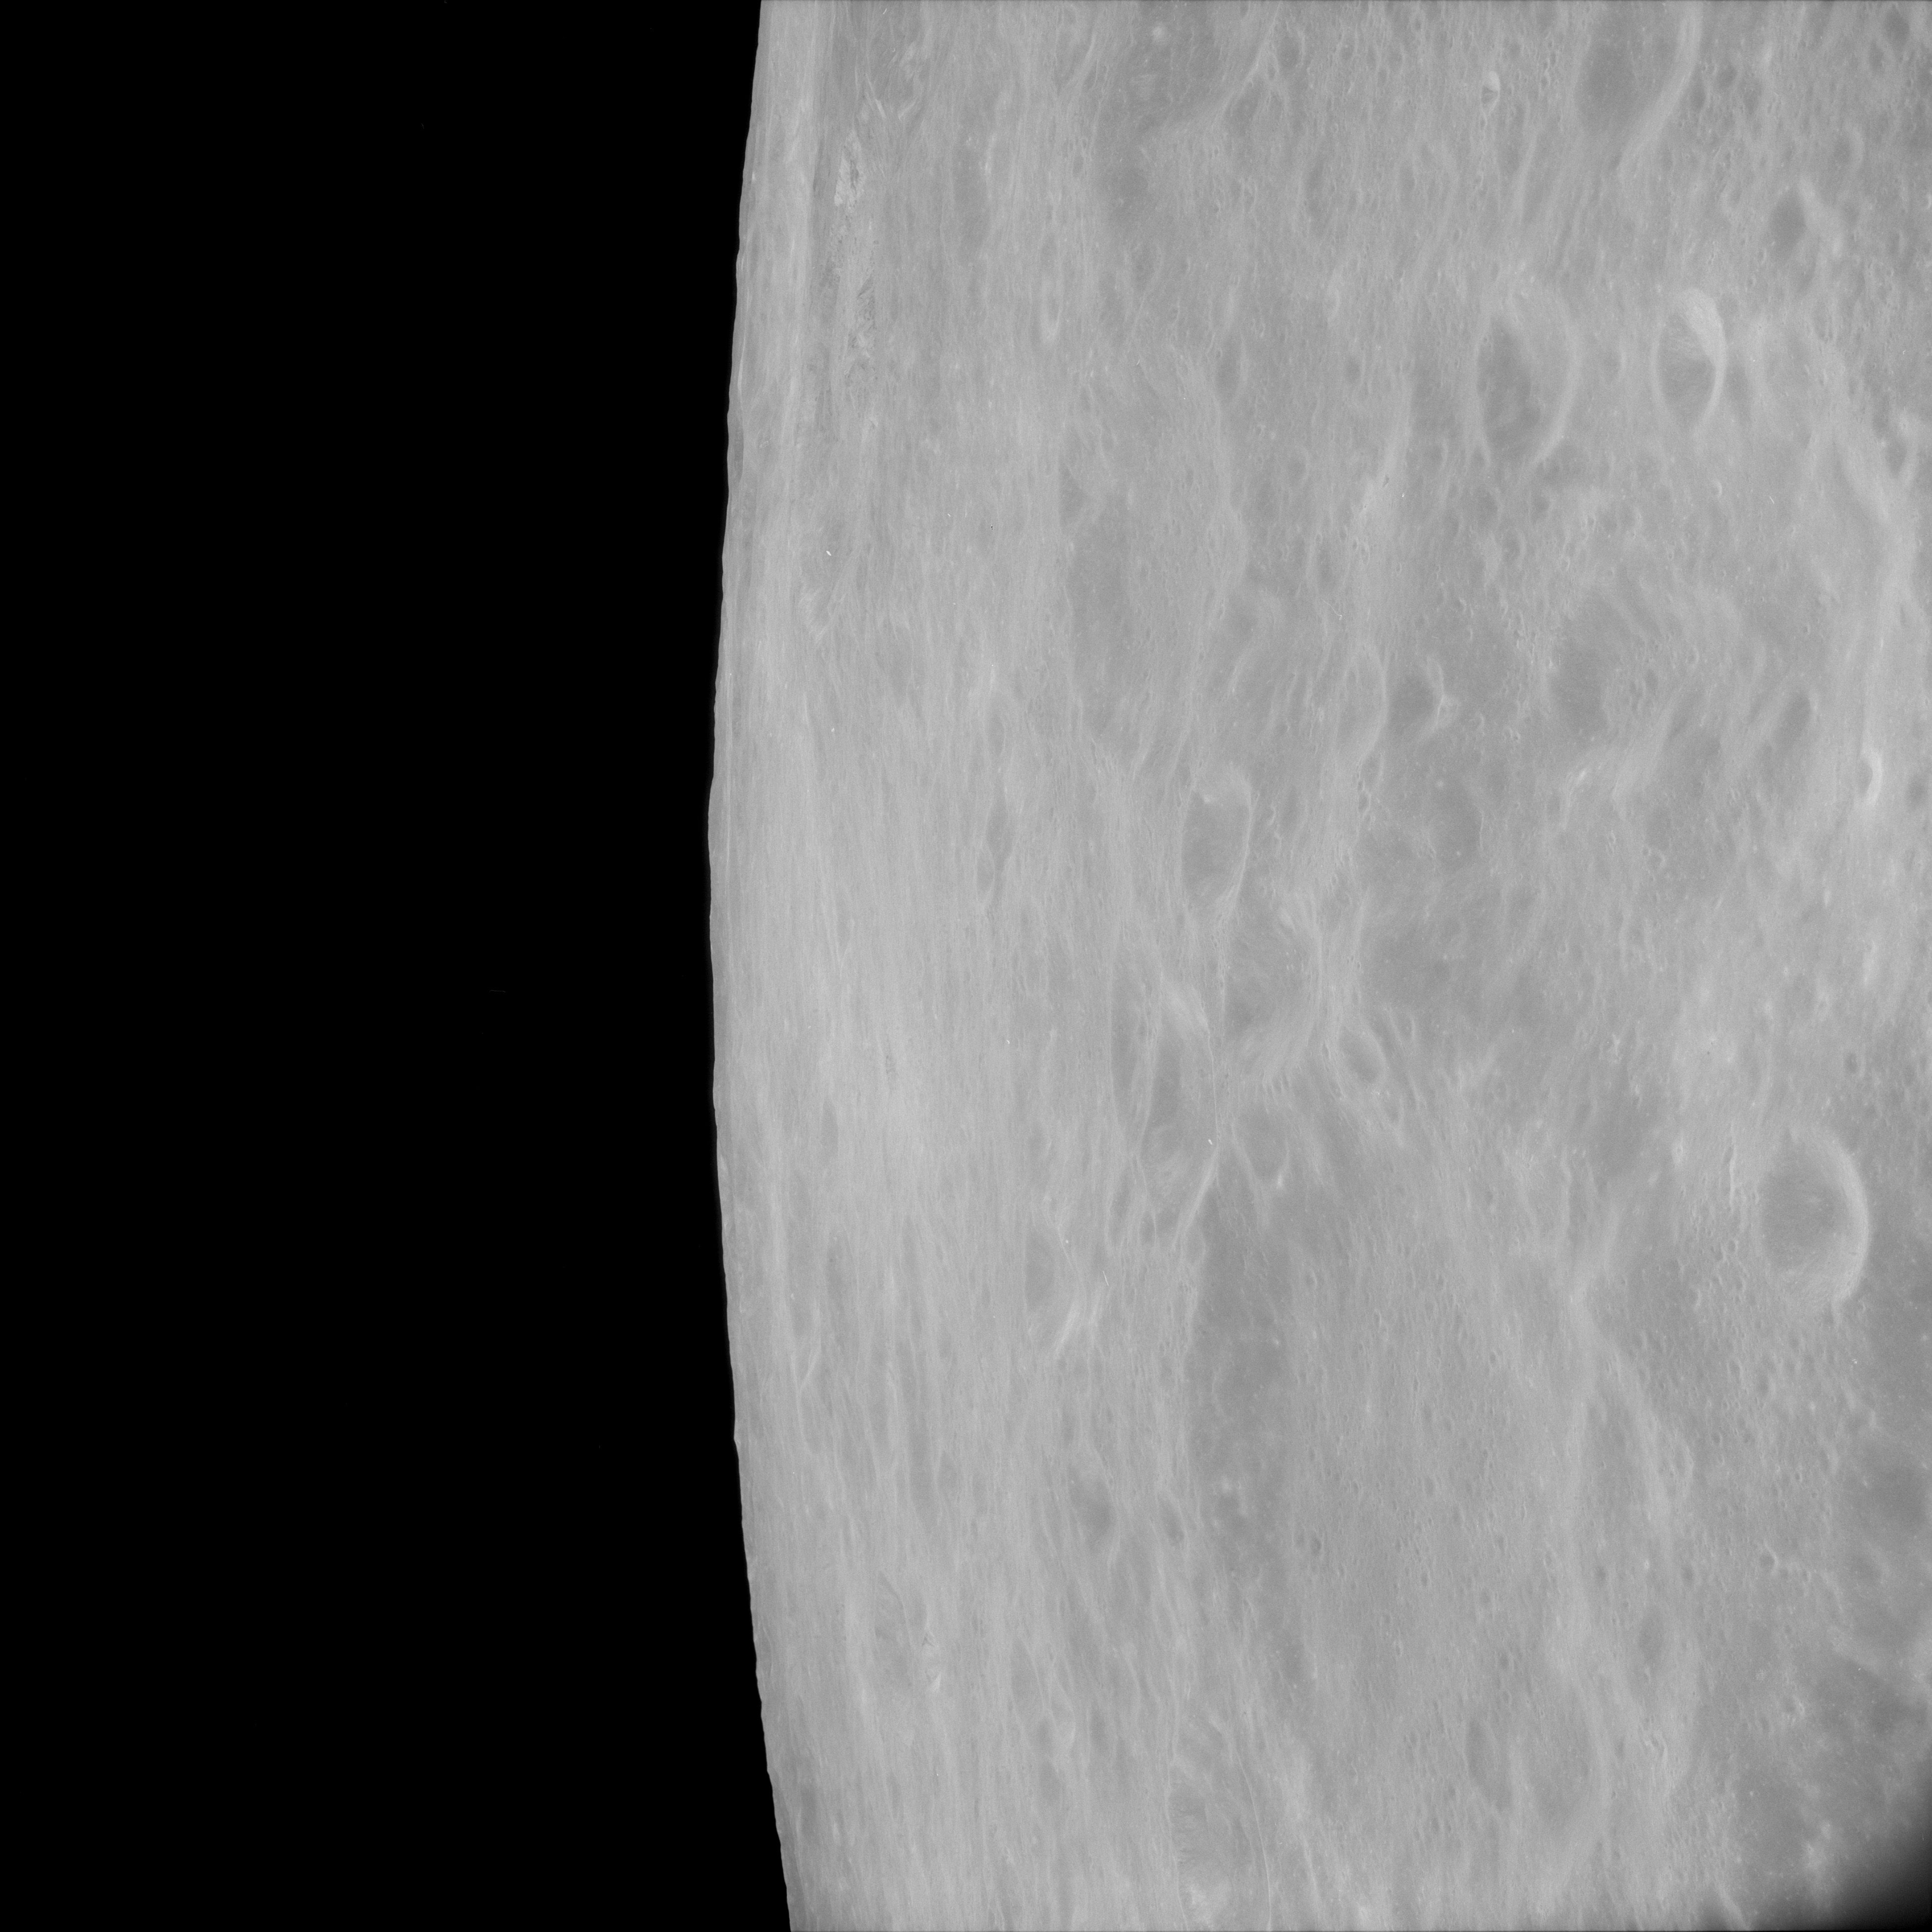
AS11-43-6353 Browse or print resolution. Crater Moiseev. Image credit: Image Science and Analysis Laboratory, NASA-Johnson Space Center. |
|
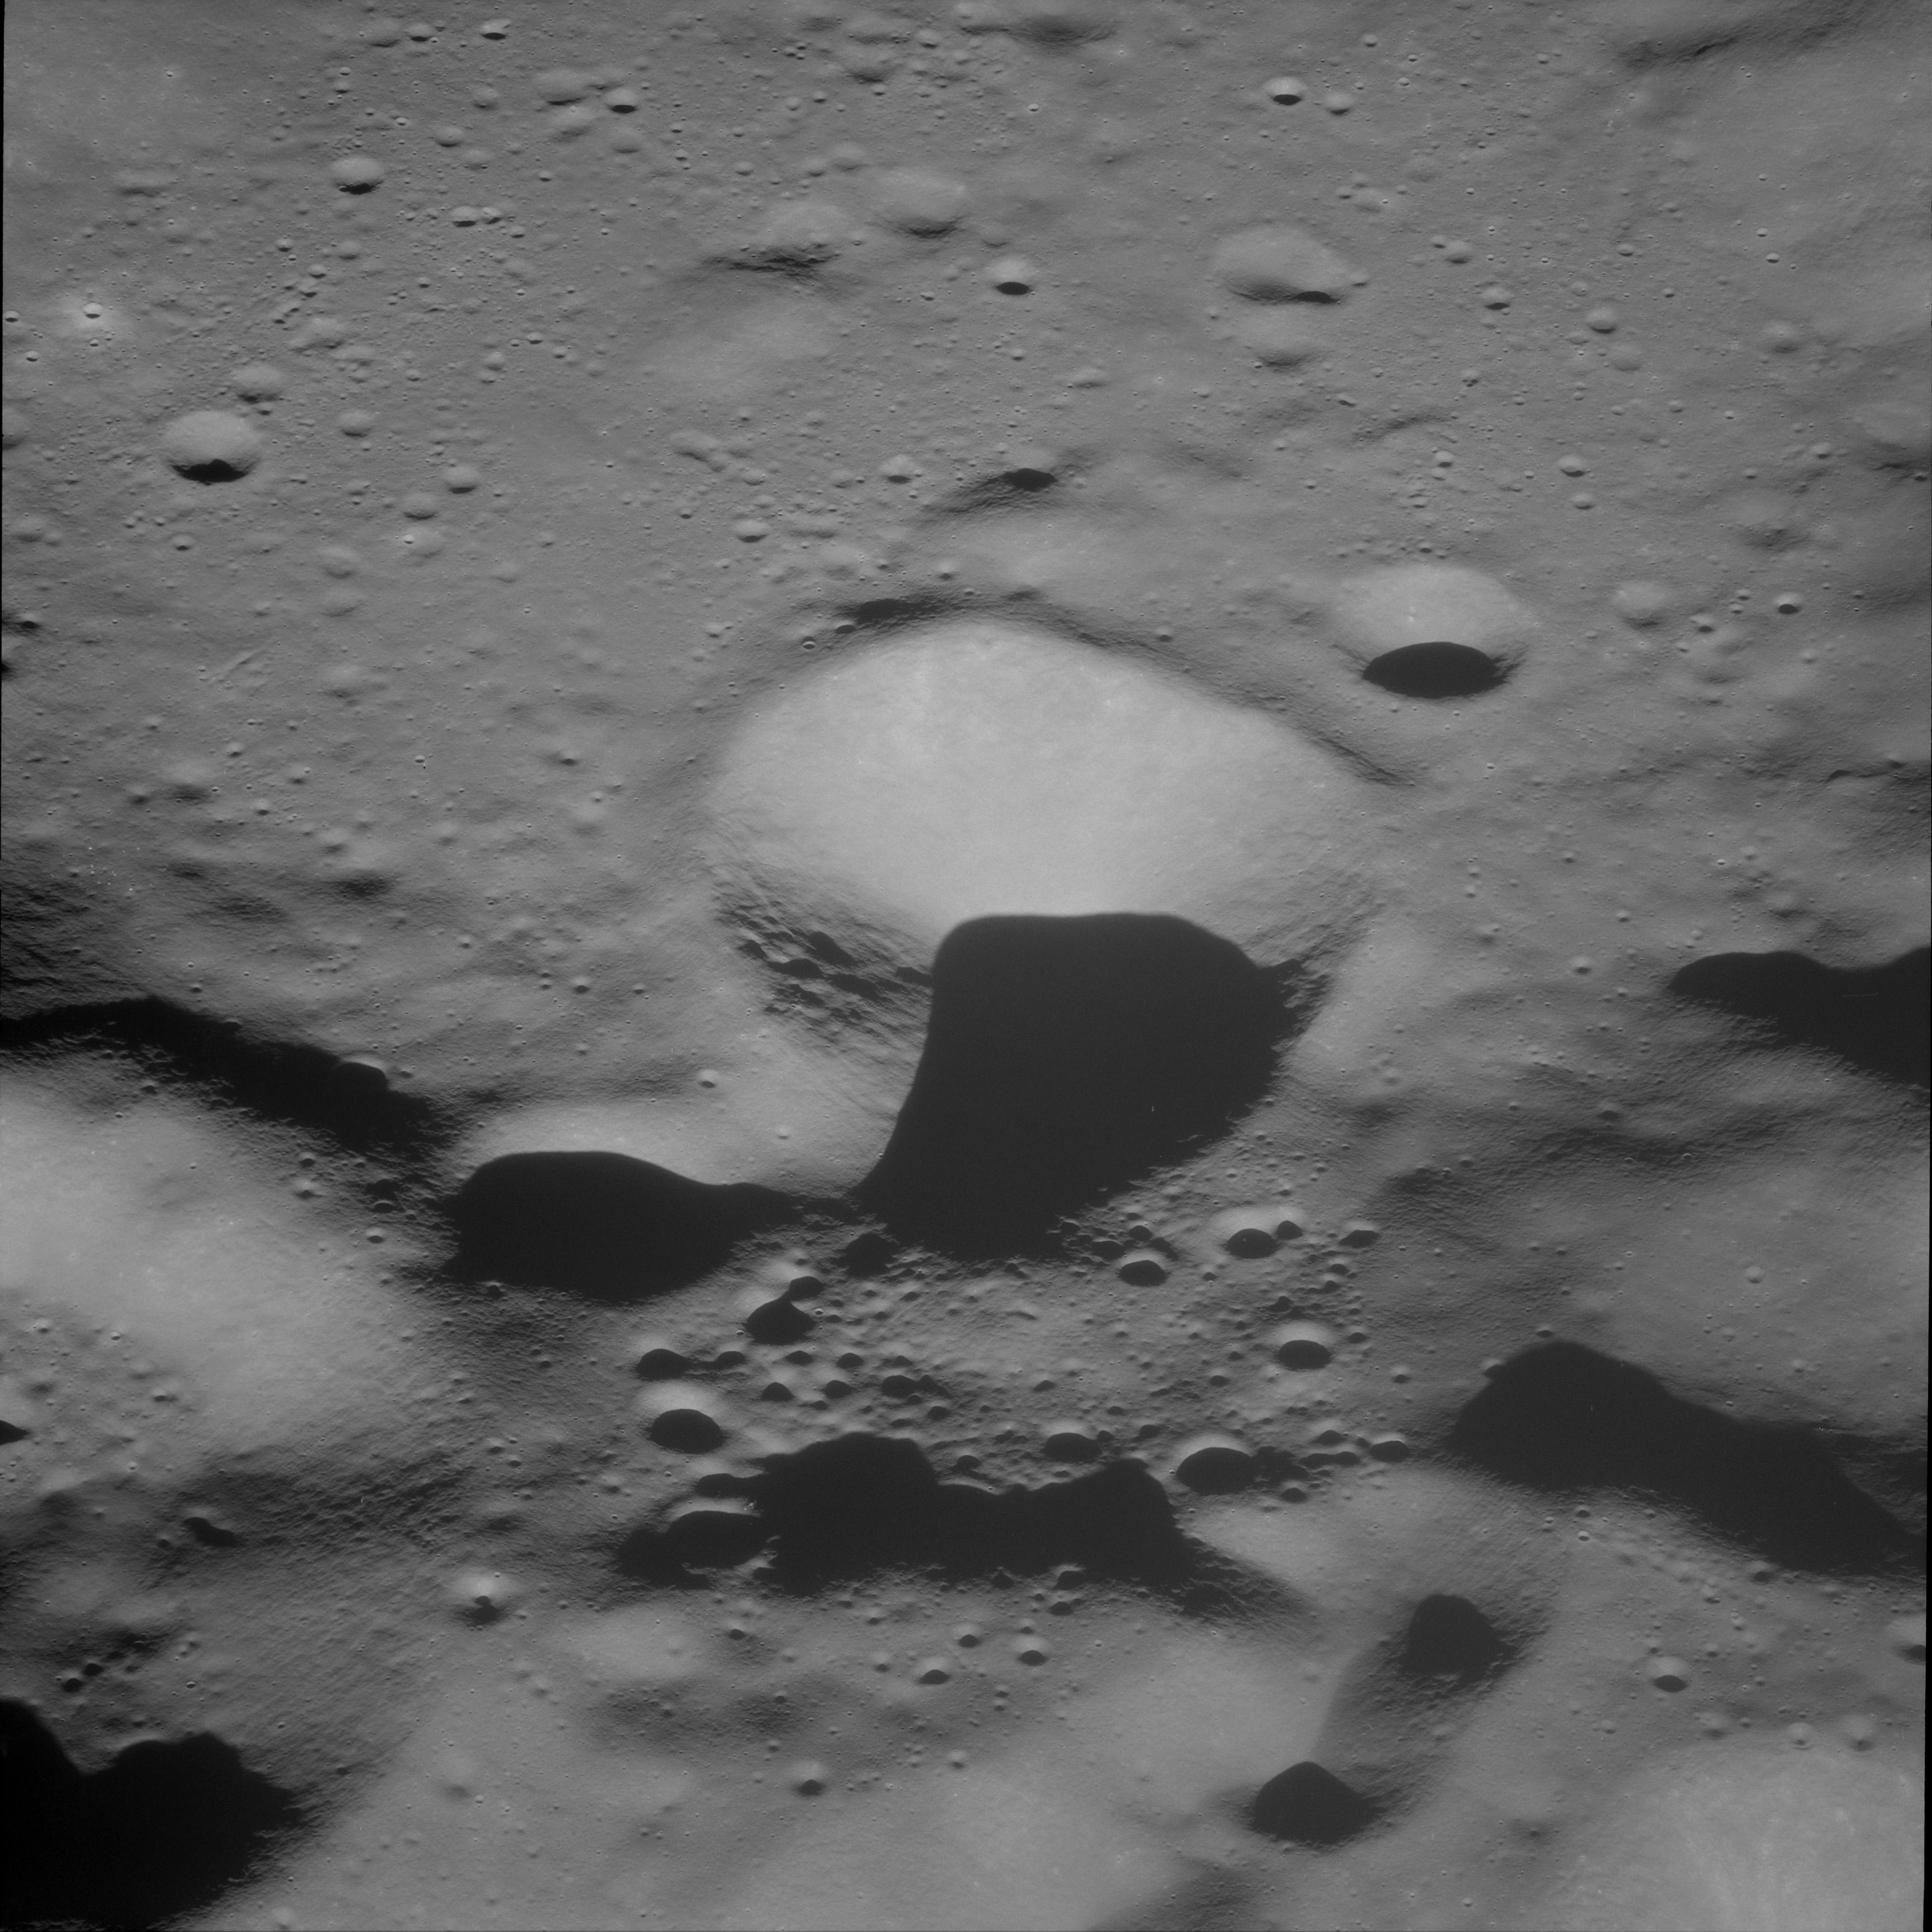
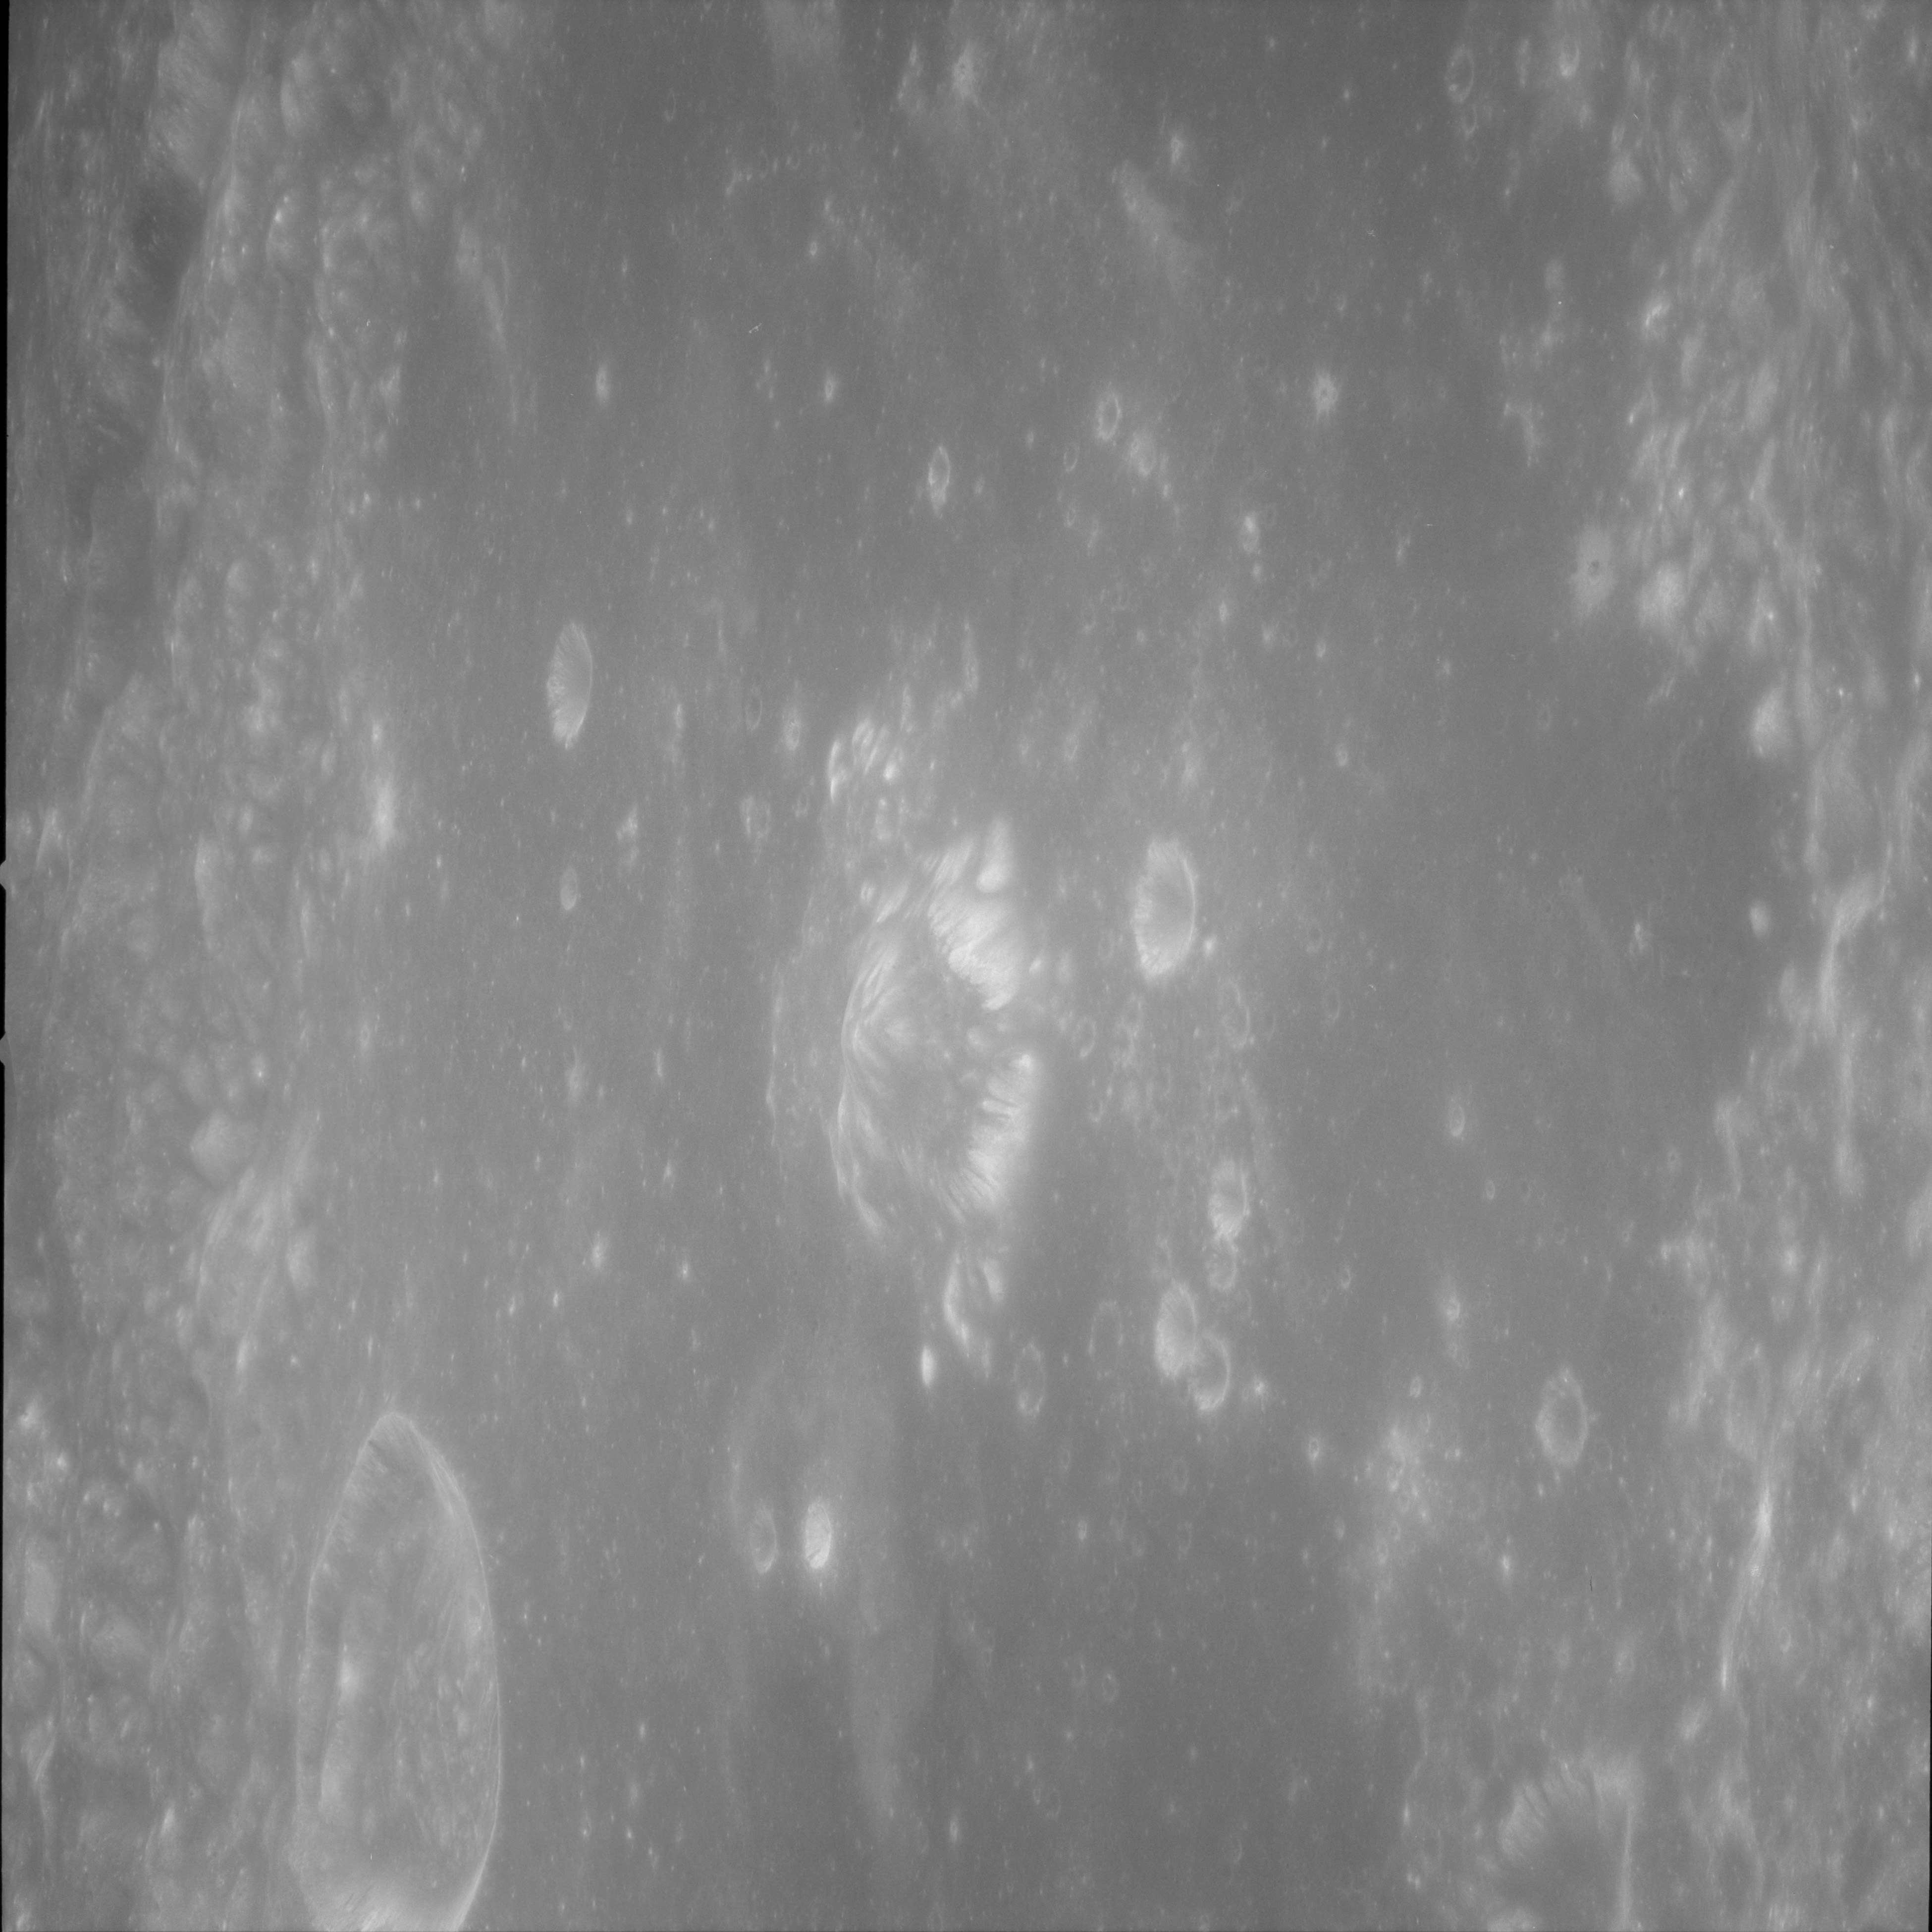
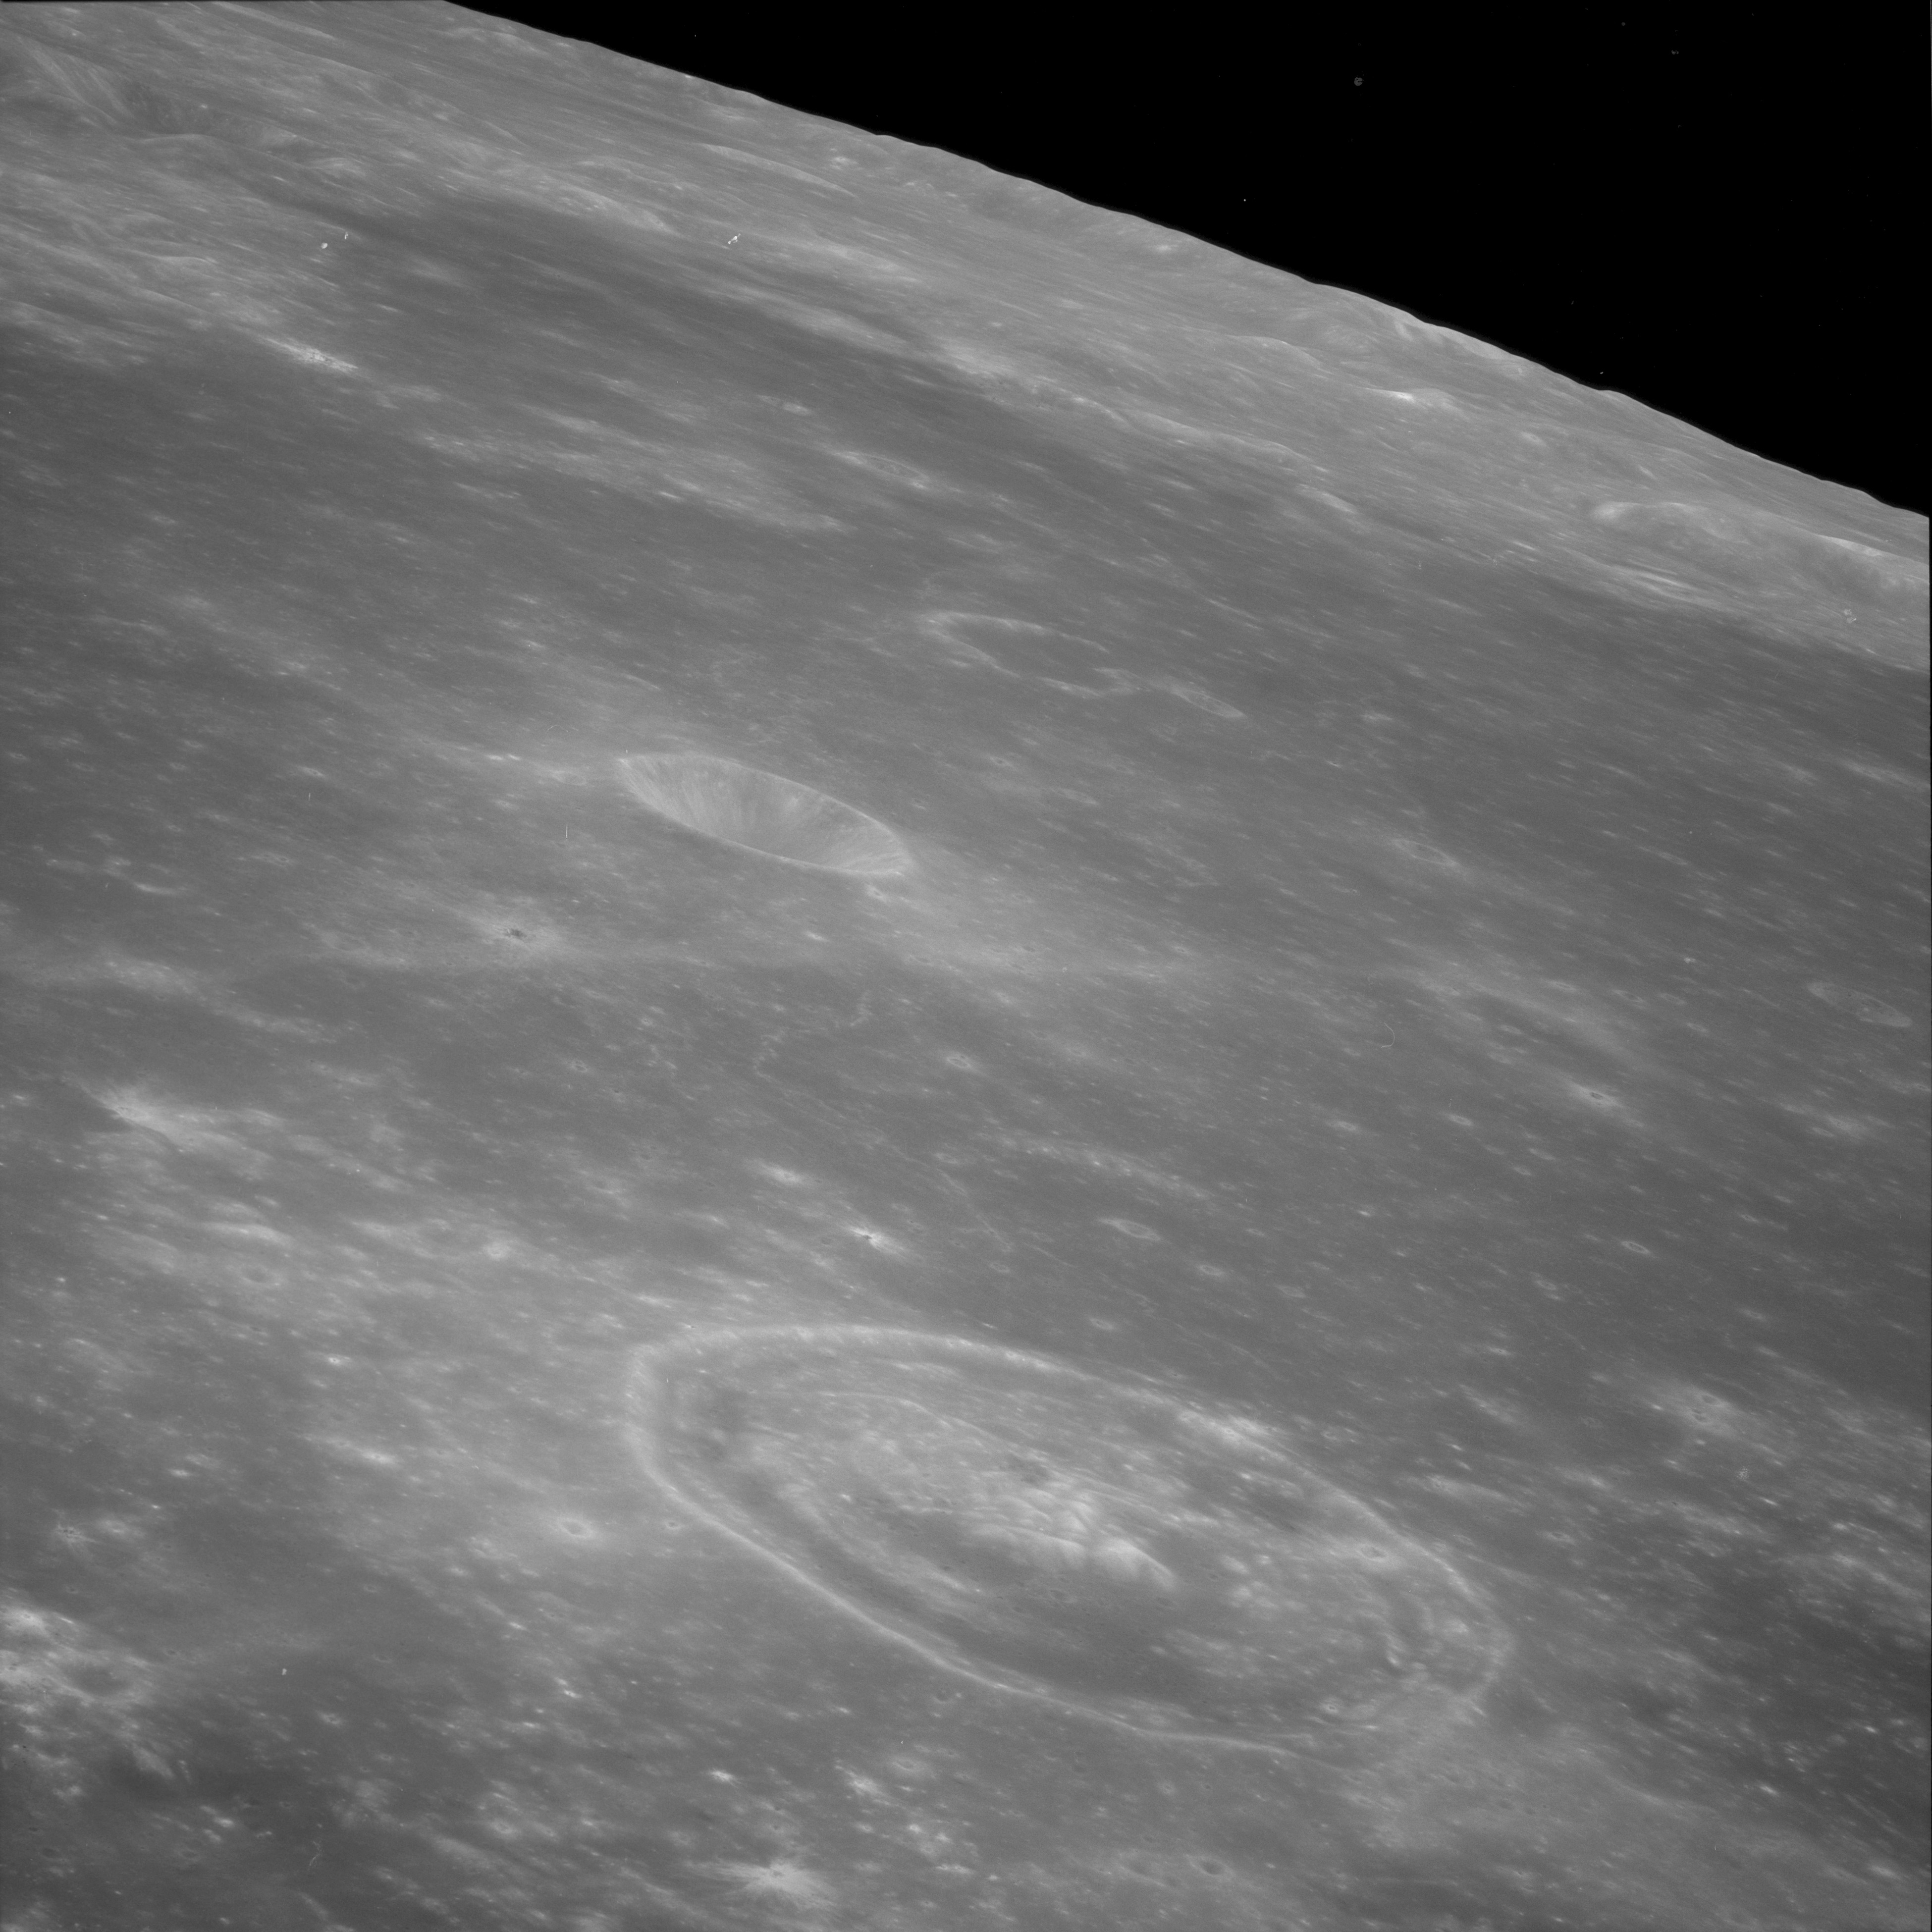
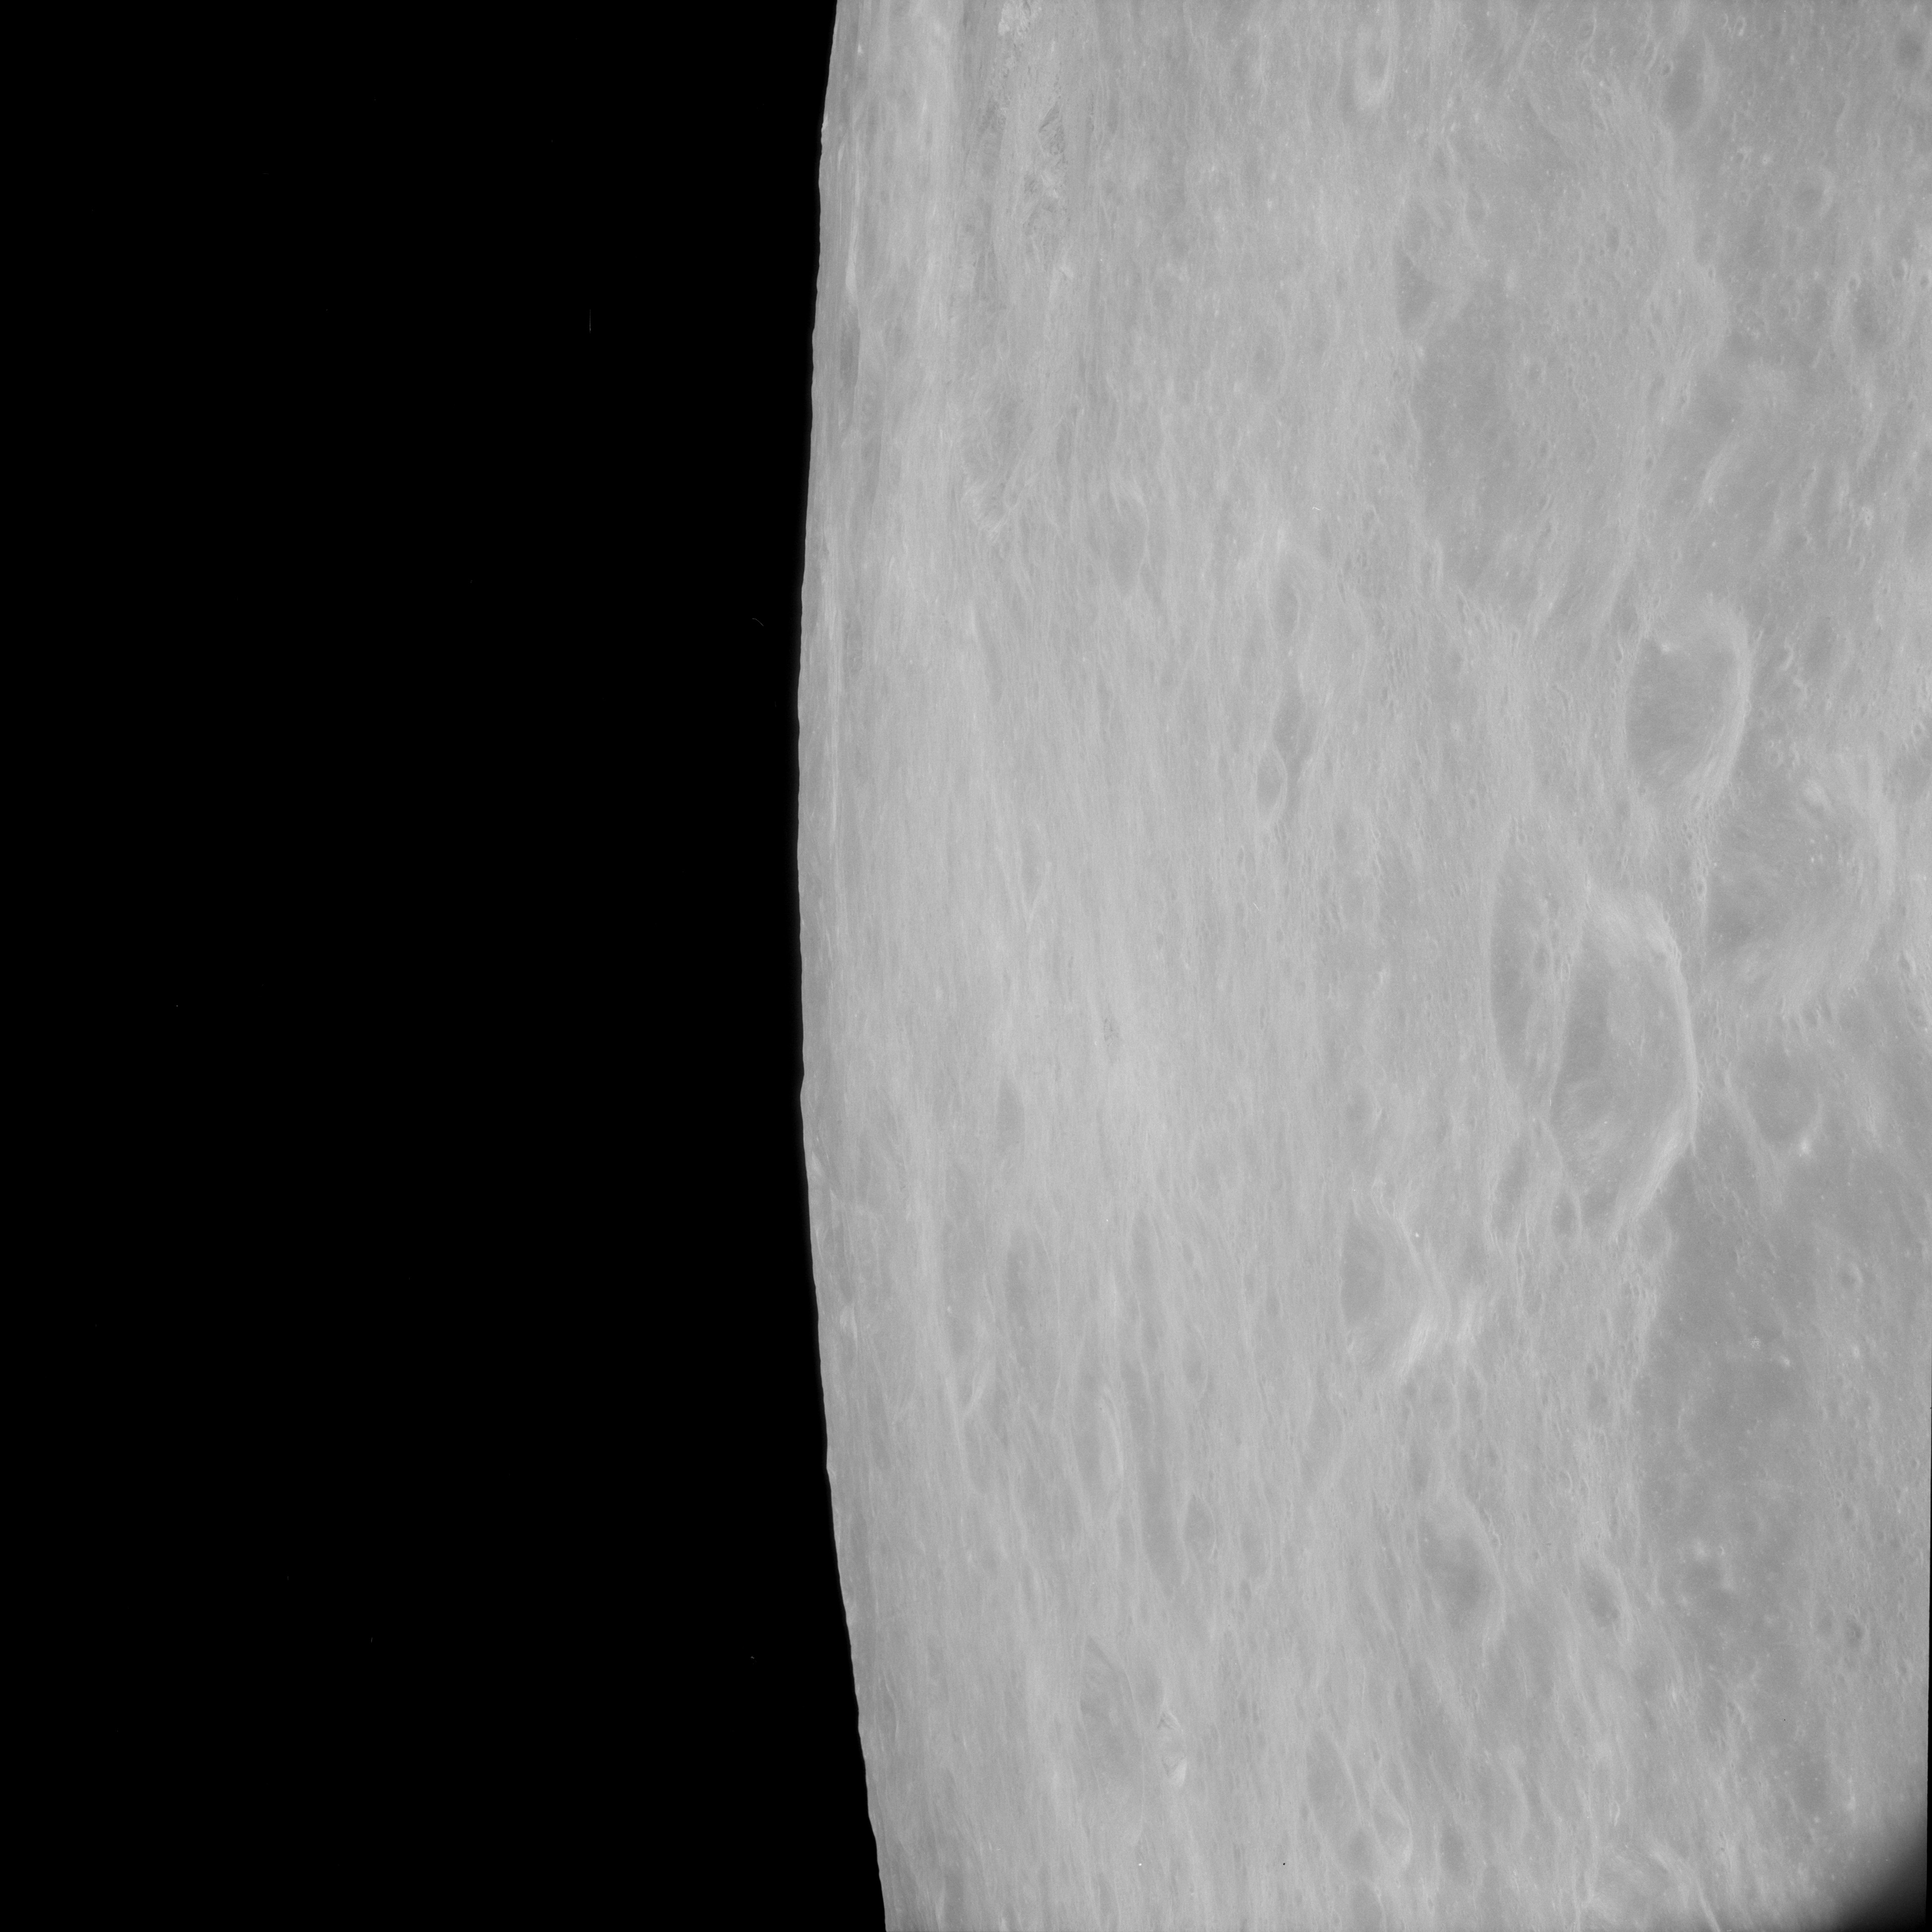
AS11-43-6354 Browse or print resolution. Crater Saenger C. Image credit: Image Science and Analysis Laboratory, NASA-Johnson Space Center. |
|
AS11-43-6355 Browse or print resolution. Landscape between Saenger X and C. Rim of Saenger D is upper right. Coordinates of small crater lower right of centre are 6.00N, 103.05E. Image credit: Image Science and Analysis Laboratory, NASA-Johnson Space Center. |

|
AS11-43-6356 Browse or print resolution. Crater Moiseev. Image credit: Image Science and Analysis Laboratory, NASA-Johnson Space Center. |

|
AS11-43-6357 Browse or print resolution. Crater Saenger D cut off upper left. Image credit: Image Science and Analysis Laboratory, NASA-Johnson Space Center. |

|
AS11-43-6358 Browse or print resolution. Partially obscured shot of crater Al-Khwarizmi K. Image credit: Image Science and Analysis Laboratory, NASA-Johnson Space Center. |

|
AS11-43-6359 Browse or print resolution. View towards northeast. Crater Fleming in the distance. Foreground landscape lies between Fleming and Al-Khwarizmi. Image credit: Image Science and Analysis Laboratory, NASA-Johnson Space Center. |

|
AS11-43-6360 Browse or print resolution. View north towards crater Möat;bius. Ginzel H (containing bright crater) and G are cut off bottom right. Image credit: Image Science and Analysis Laboratory, NASA-Johnson Space Center. |

|
AS11-43-6361 Browse or print resolution. View north towards crater Popov. Ginzel H (containing bright crater) and G are in foreground, upper right. Image credit: Image Science and Analysis Laboratory, NASA-Johnson Space Center. |

|
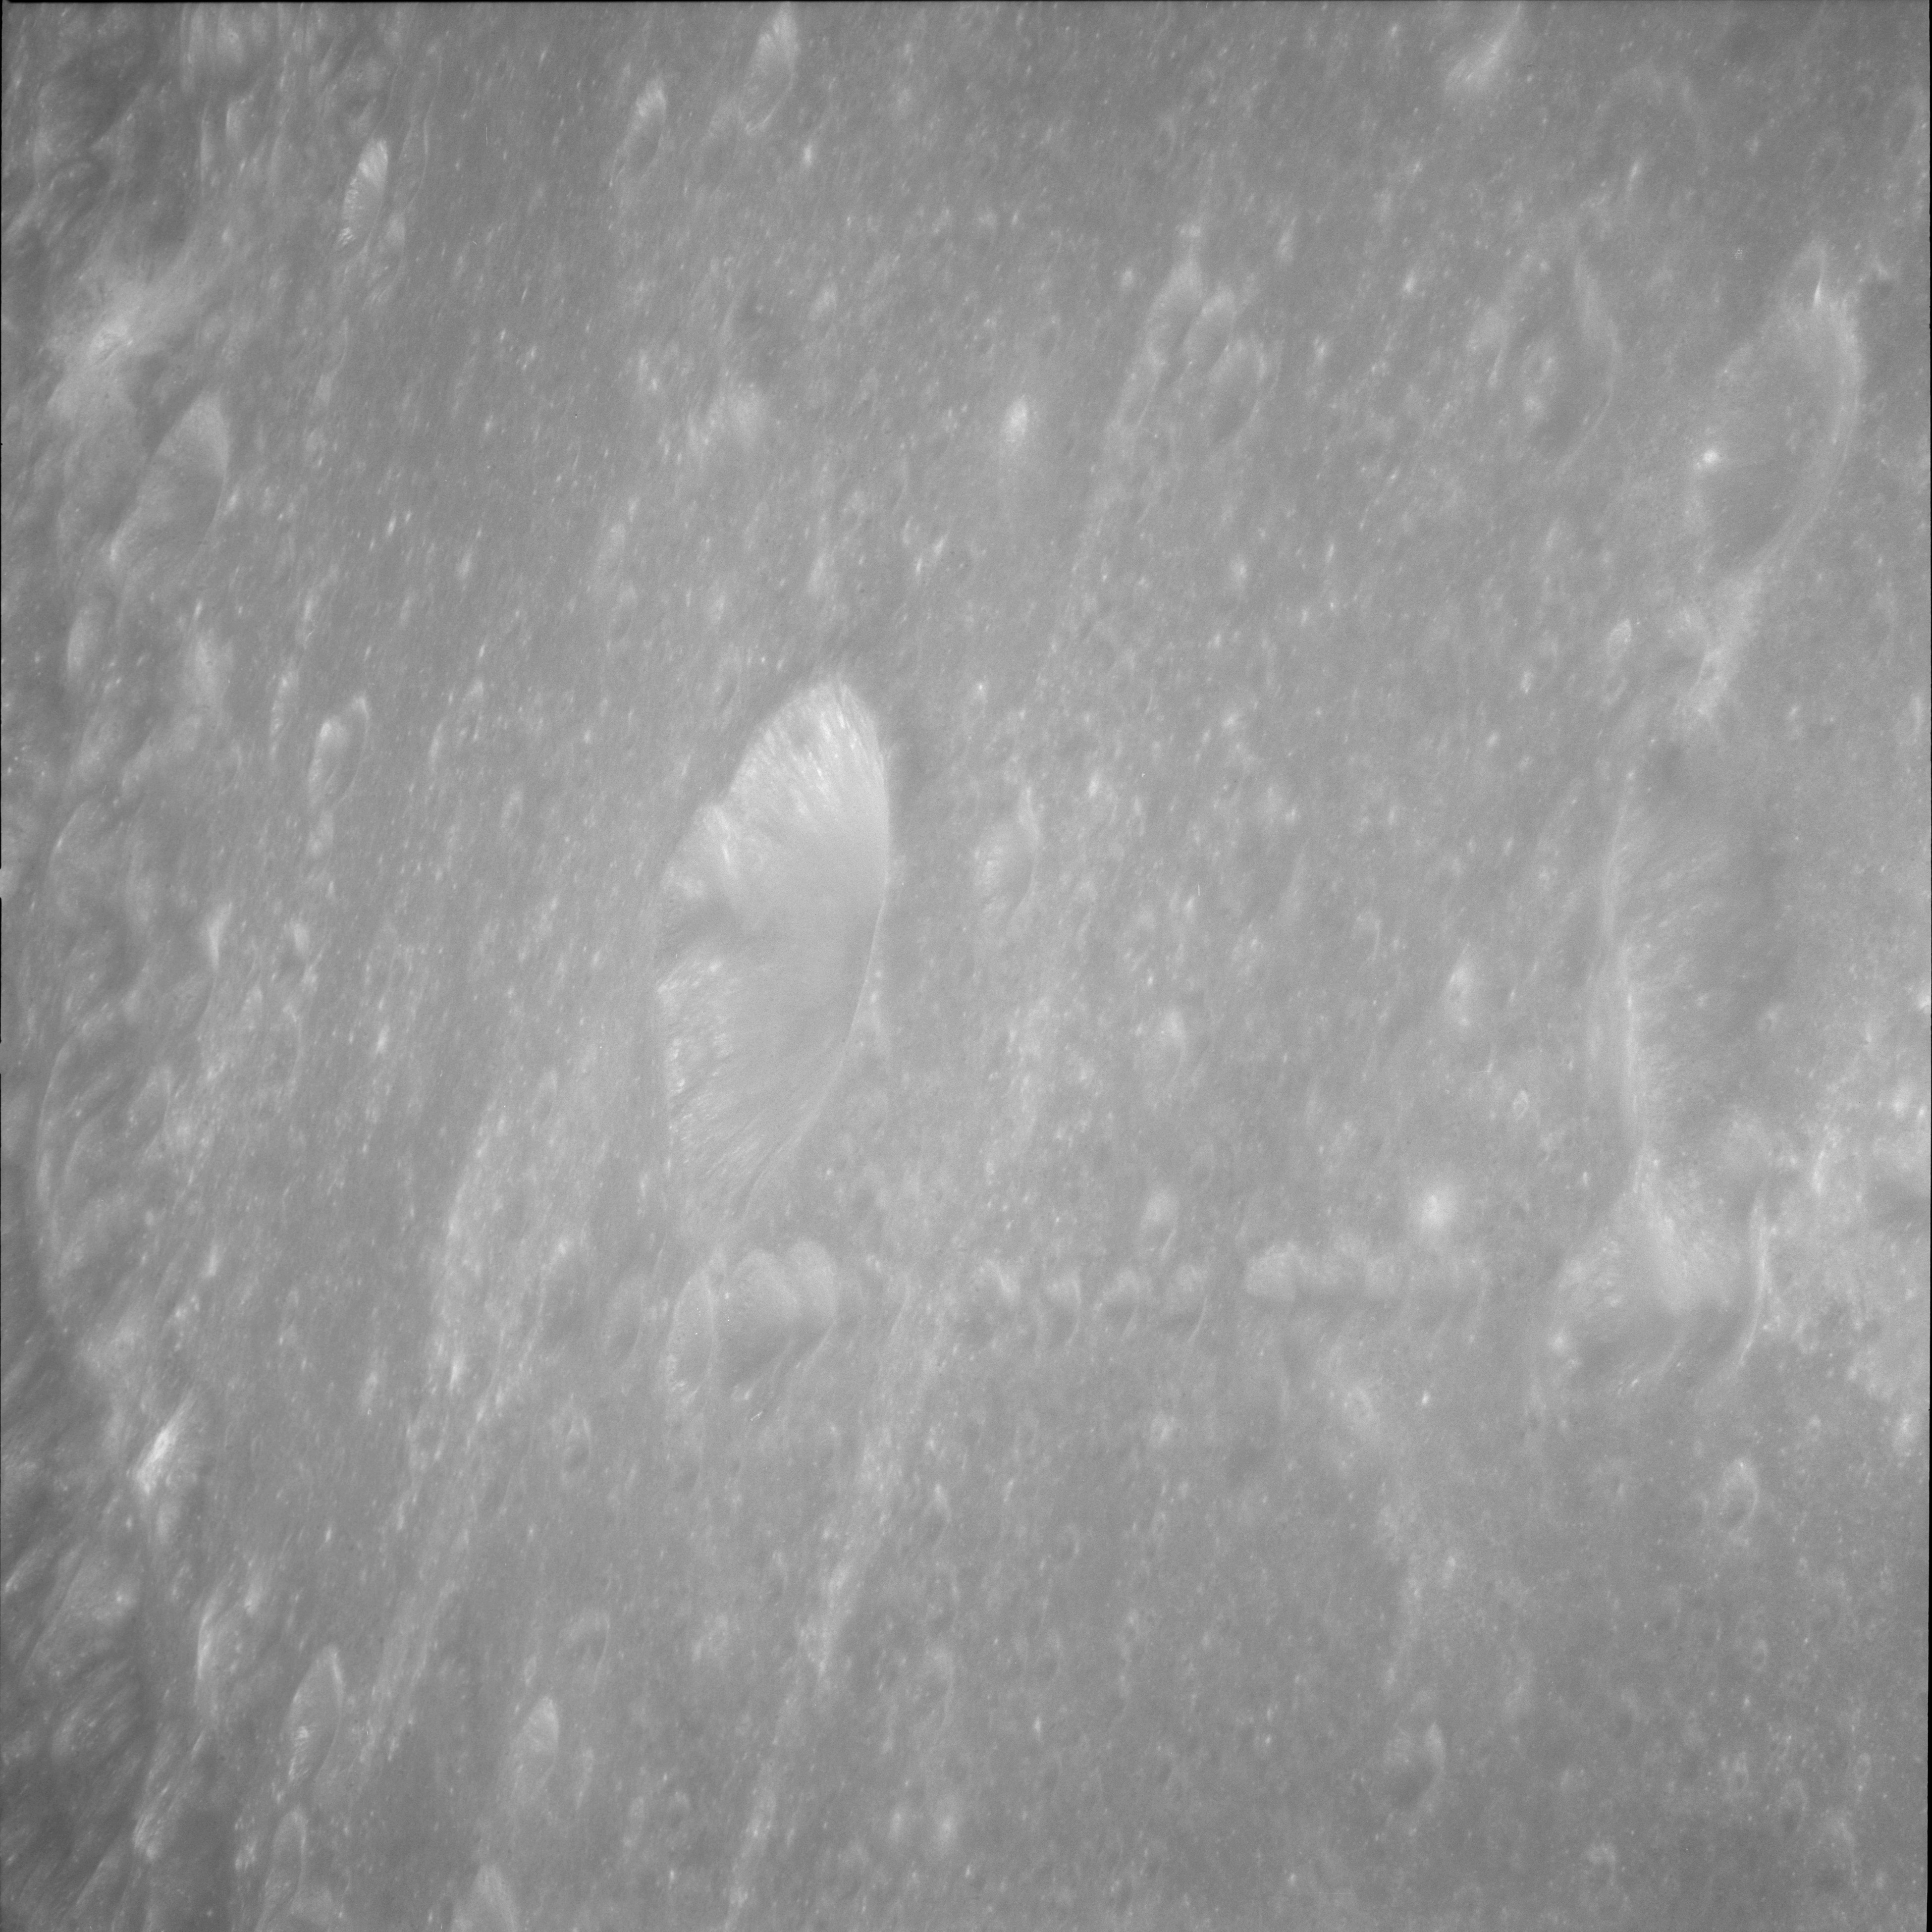
AS11-43-6362 Browse or print resolution. Small bright fresh rayed crater between Saenger and Erro. Coordinates of this crater are 4.57N, 101.10E. Image credit: Image Science and Analysis Laboratory, NASA-Johnson Space Center. |

|
AS11-43-6363 Browse or print resolution. Small bright fresh rayed crater between Saenger and Erro. Coordinates of this crater are 4.57N, 101.10E. LM RCS thrusters bottom right. Image credit: Image Science and Analysis Laboratory, NASA-Johnson Space Center. |

|
AS11-43-6364 Browse or print resolution. Sunlit rim of crater Korolev X in northern area of Korolev Basin. Image credit: Image Science and Analysis Laboratory, NASA-Johnson Space Center. |

|
AS11-43-6365 Browse or print resolution. Sunlit rim of crater Korolev W in northern area of Korolev Basin. Image credit: Image Science and Analysis Laboratory, NASA-Johnson Space Center. |

|
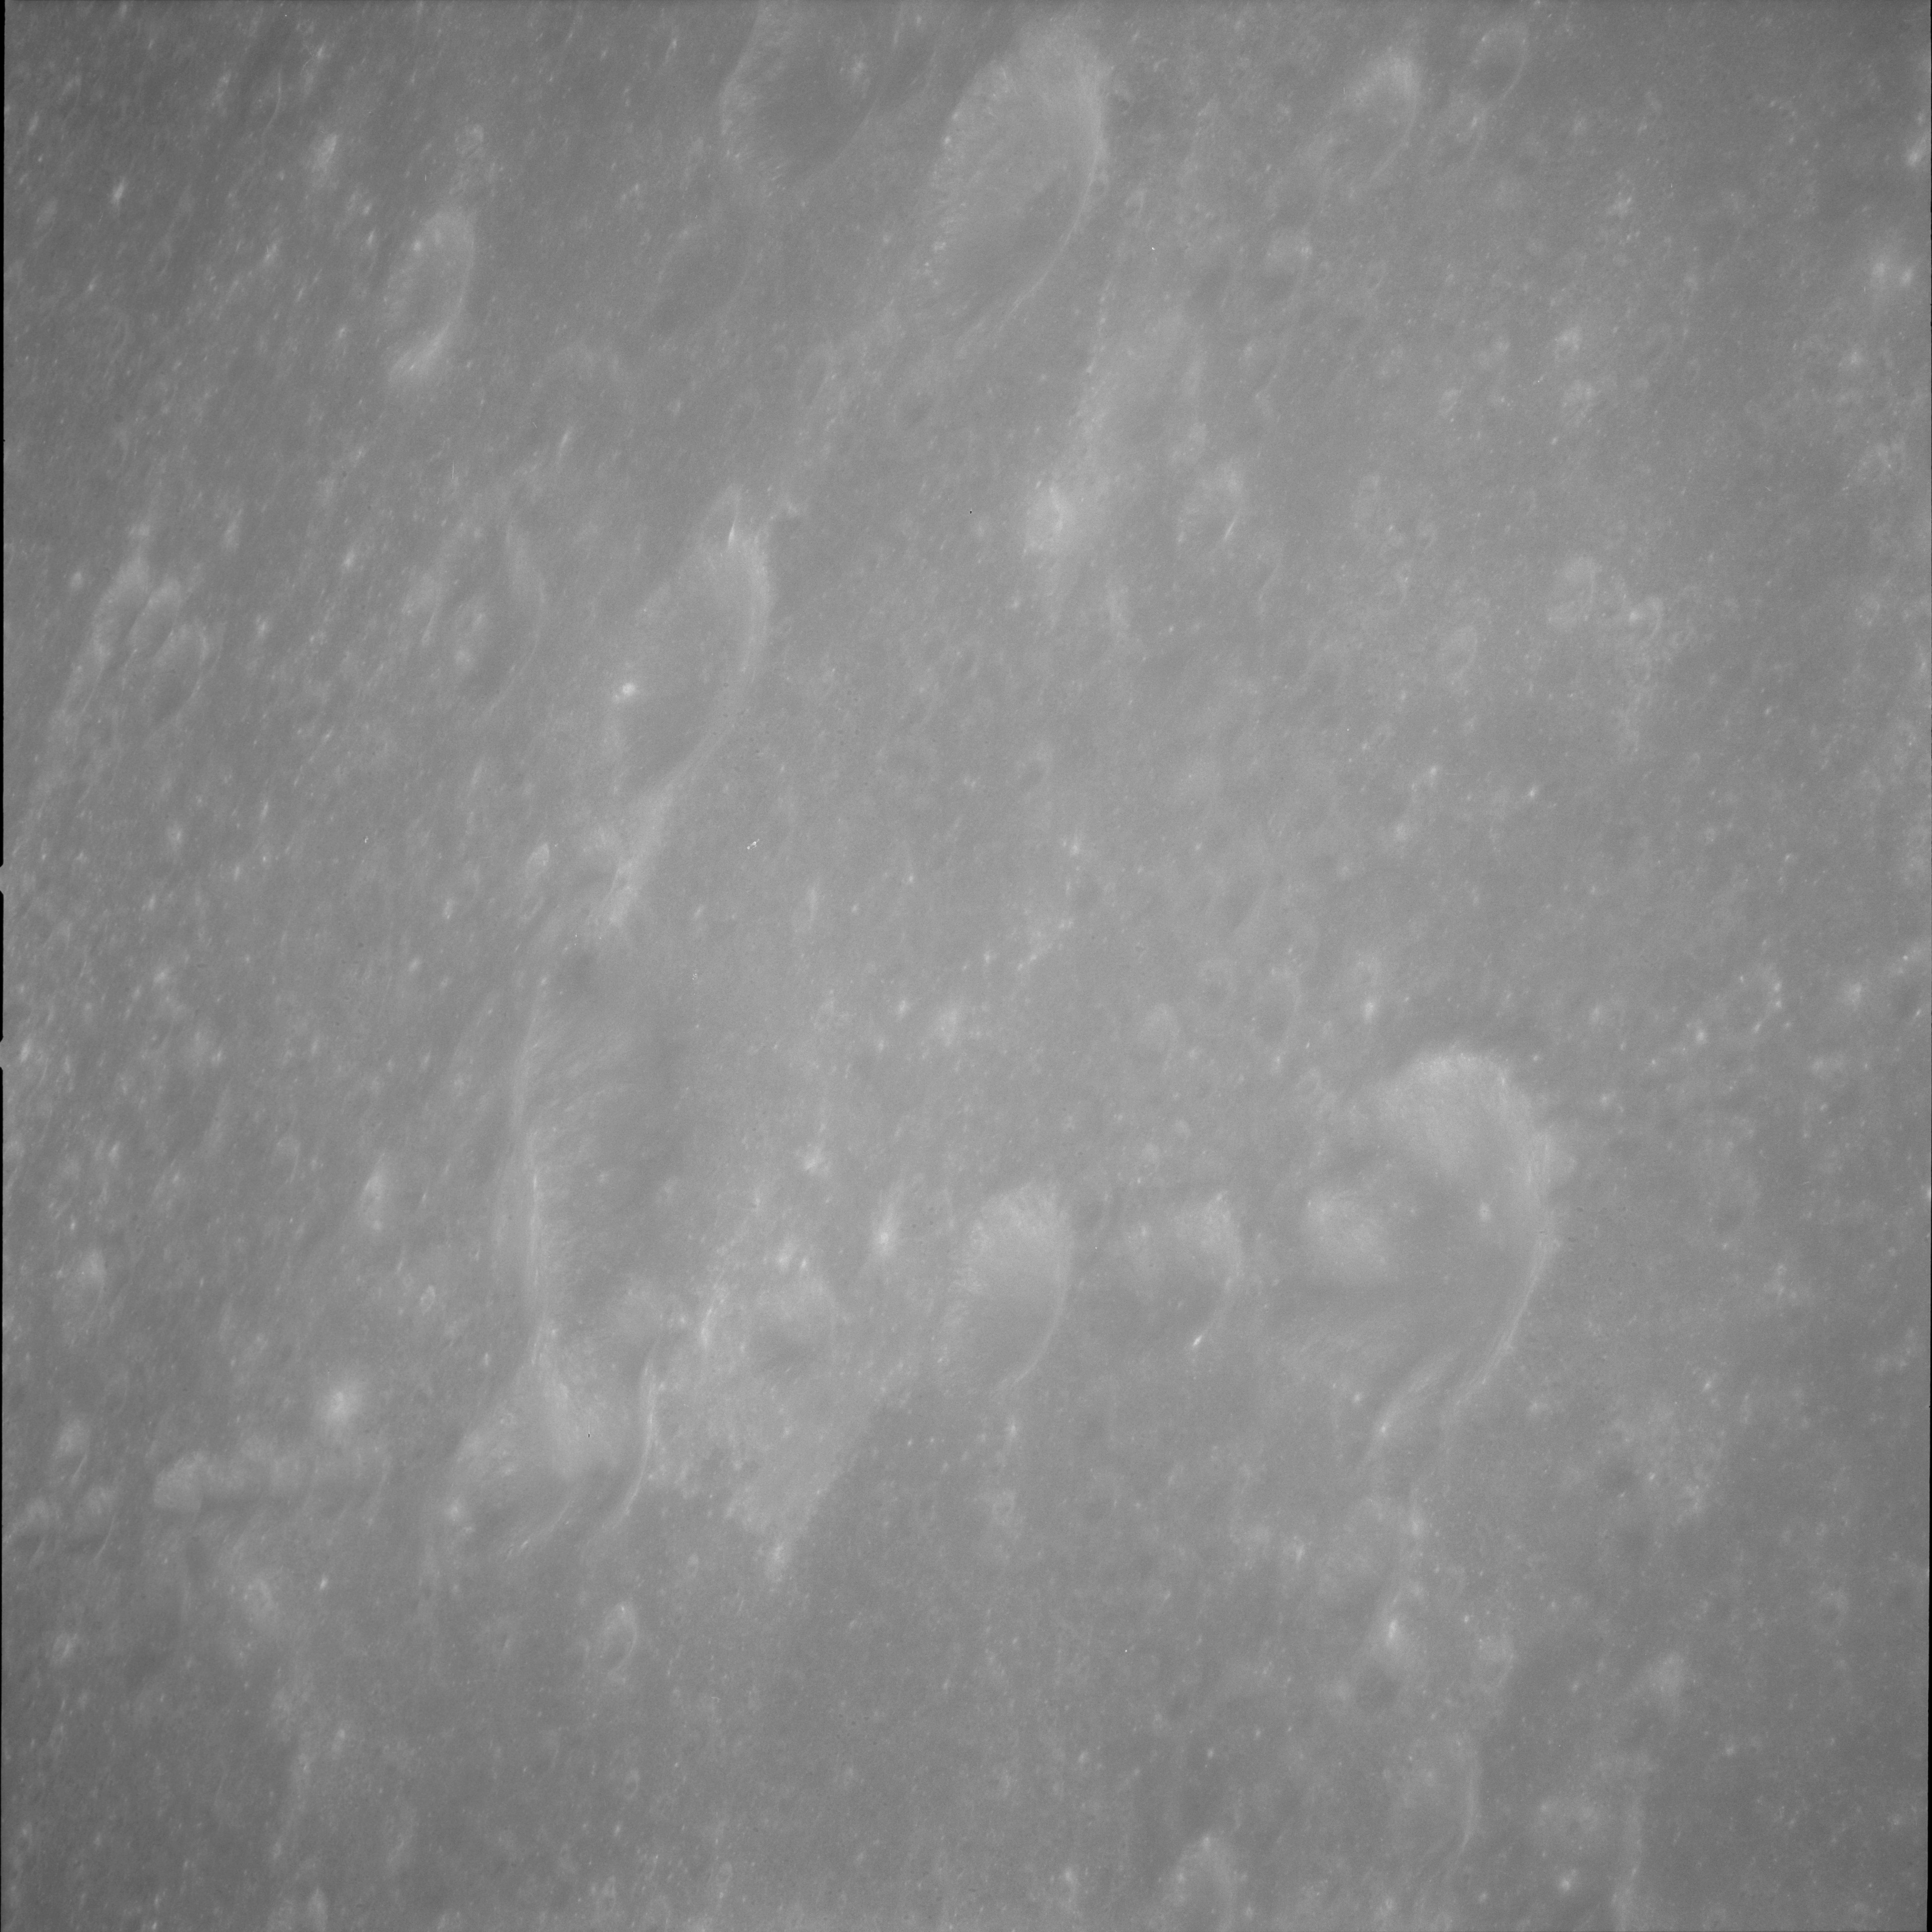
AS11-43-6366 Browse or print resolution. Unidentified landscape in northern area of Korolev Basin. Image credit: Image Science and Analysis Laboratory, NASA-Johnson Space Center. |
|
AS11-43-6367 Browse or print resolution. Unidentified landscape in northern area of Korolev Basin. Image credit: Image Science and Analysis Laboratory, NASA-Johnson Space Center. |

|
AS11-43-6368 Browse or print resolution. Unidentified landscape in northern area of Korolev Basin. Image credit: Image Science and Analysis Laboratory, NASA-Johnson Space Center. |

|
AS11-43-6369 Browse or print resolution. Sunlit rim of crater Korolev W lower middle. Korolev X beyond. Image credit: Image Science and Analysis Laboratory, NASA-Johnson Space Center. |
|
AS11-43-6370 Browse or print resolution. Northwest rim of Korolev Basin. Congreve G is cut off bottom right. Sunlit rim of Korolev V on extreme right and of Korolev W upper middle. Image credit: Image Science and Analysis Laboratory, NASA-Johnson Space Center. |

|
AS11-43-6371 Browse or print resolution. Congreve G (top right) on northwest rim of Korolev Basin. Rim of Congreve H bottom right. Image credit: Image Science and Analysis Laboratory, NASA-Johnson Space Center. |

|
AS11-43-6372 Browse or print resolution. Crater Congreve H cut off in foreground. Image credit: Image Science and Analysis Laboratory, NASA-Johnson Space Center. |
|
AS11-43-6373 Browse or print resolution. Crater Congreve H cut off bottom left. Image credit: Image Science and Analysis Laboratory, NASA-Johnson Space Center. |

|
AS11-43-6374 Browse or print resolution. Crater Congreve H cut off top left. Image credit: Image Science and Analysis Laboratory, NASA-Johnson Space Center. |

|
AS11-43-6375 Browse or print resolution. Crater Congreve H cut off at top. Image credit: Image Science and Analysis Laboratory, NASA-Johnson Space Center. |

|
AS11-43-6376 Browse or print resolution. Crater Congreve H cut off at top right. Rim of Congreve bottom left. Image credit: Image Science and Analysis Laboratory, NASA-Johnson Space Center. |
|
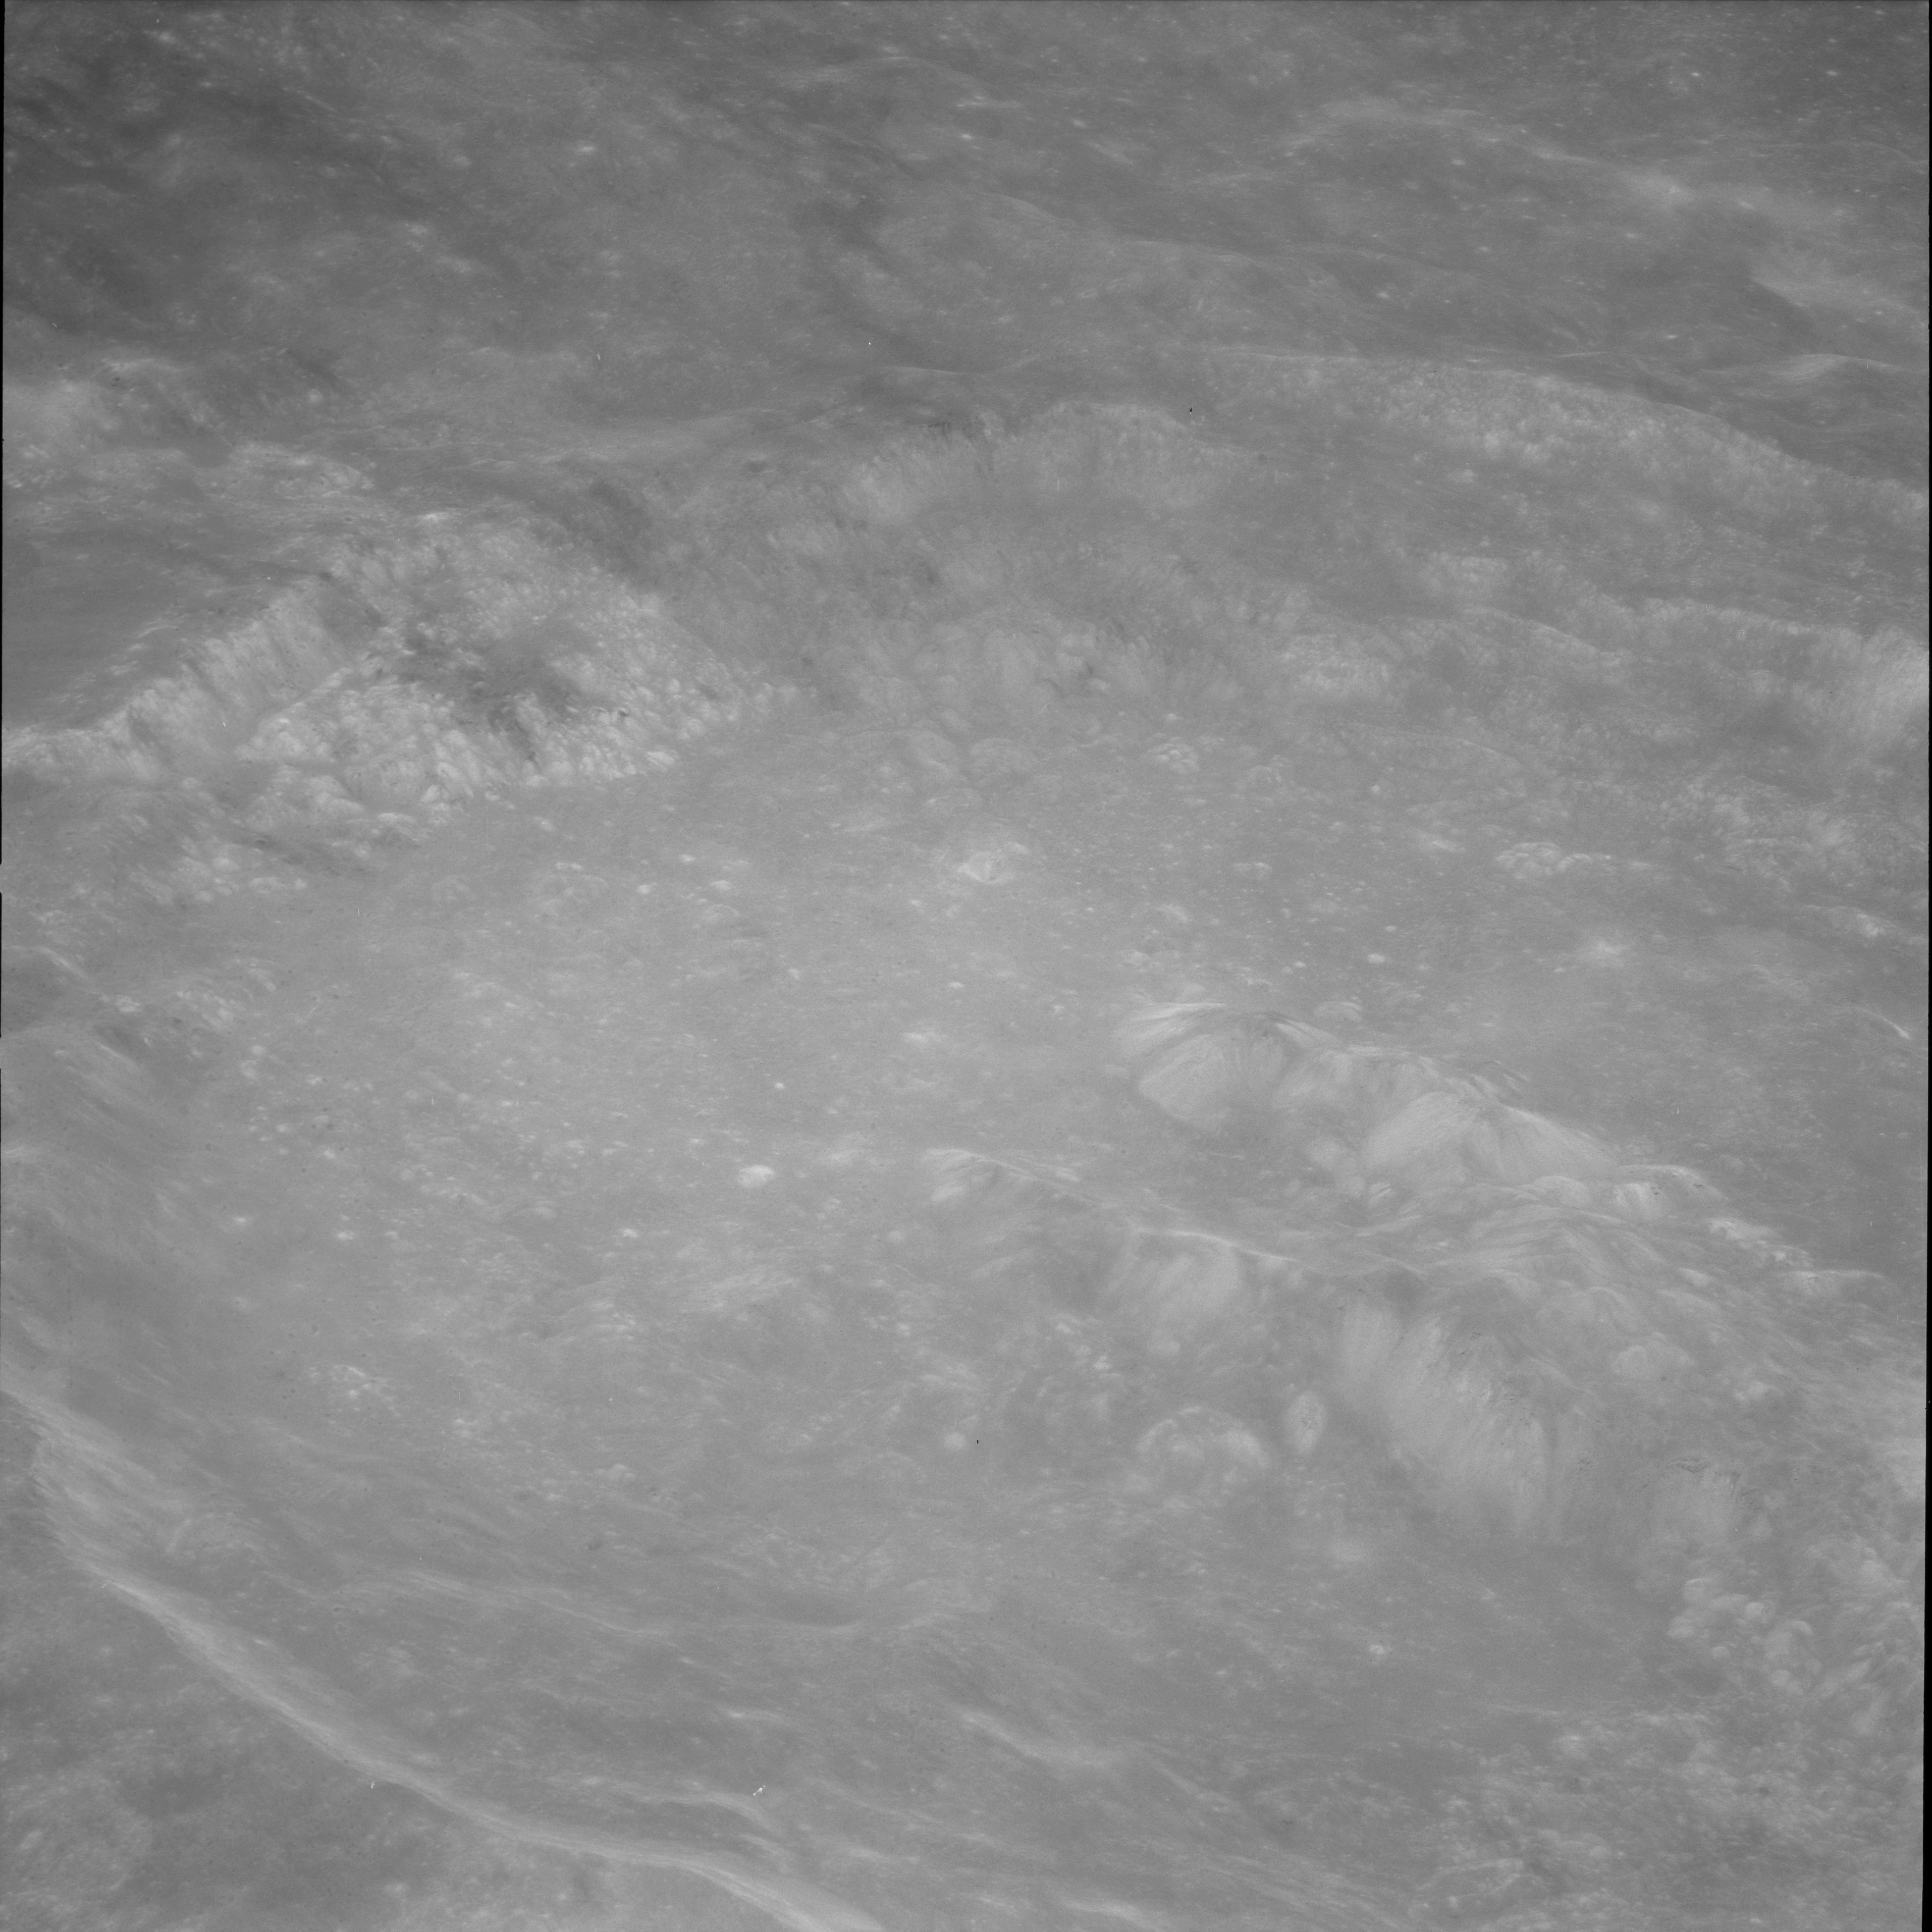
AS11-43-6377 Browse or print resolution. Interior of crater Congreve. Image credit: Image Science and Analysis Laboratory, NASA-Johnson Space Center. |
|
AS11-43-6378 Browse or print resolution. Unidentified landscape in northern area of Korolev Basin. Image credit: Image Science and Analysis Laboratory, NASA-Johnson Space Center. |

|
AS11-43-6379 Browse or print resolution. Interior of crater Congreve. Western rim at bottom of frame. Image credit: Image Science and Analysis Laboratory, NASA-Johnson Space Center. |

|
AS11-43-6380 Browse or print resolution. Interior of crater Congreve Q bottom two thirds. Image credit: Image Science and Analysis Laboratory, NASA-Johnson Space Center. |
|
AS11-43-6381 Browse or print resolution. Rim of crater Congreve Q across upper right of image. Image credit: Image Science and Analysis Laboratory, NASA-Johnson Space Center. |

|
AS11-43-6382 Browse or print resolution. Northern rim of crater Congreve Q. Congreve Q to right of image. Image credit: Image Science and Analysis Laboratory, NASA-Johnson Space Center. |

|
AS11-43-6383 Browse or print resolution. Probably landscape north of Icarus. Coordinates of sharp bright crater below centre suspected to be 1.84S, 172.26W. Image credit: Image Science and Analysis Laboratory, NASA-Johnson Space Center. |

|
AS11-43-6384 Browse or print resolution. View northeast between craters Congreve and Zhukovsky. Congreve and smaller crater within its interior are cut off just left of bottom centre. Coordinates of double crater just above left of centre are 2.6N, 167.4W. (Image research by Robin Wheeler and Syd Buxton.) Image credit: Image Science and Analysis Laboratory, NASA-Johnson Space Center. |
|
AS11-43-6385 Browse or print resolution. Crater within floor of Krasovsky L. Image credit: Image Science and Analysis Laboratory, NASA-Johnson Space Center. |

|
AS11-43-6386 Browse or print resolution. Crater within floor of Krasovsky L. Image credit: Image Science and Analysis Laboratory, NASA-Johnson Space Center. |
|
AS11-43-6387 Browse or print resolution. Crater in vicinity of Krasovsky L. Image credit: Image Science and Analysis Laboratory, NASA-Johnson Space Center. |
|
AS11-43-6388 Browse or print resolution. Crater Krasovsky N cut off on right. Image credit: Image Science and Analysis Laboratory, NASA-Johnson Space Center. |
|
AS11-43-6389 Browse or print resolution. Crater Krasovsky P cut off on bottom right. Krasovsky N cut off top right. Image credit: Image Science and Analysis Laboratory, NASA-Johnson Space Center. |

|
AS11-43-6390 Browse or print resolution. Crater Krasovsky P cut off top right. Coordinates of small crater below centre are 1.79N, 177.92W. Image credit: Image Science and Analysis Laboratory, NASA-Johnson Space Center. |
|
AS11-43-6391 Browse or print resolution. Crater Krasovsky P. Image credit: Image Science and Analysis Laboratory, NASA-Johnson Space Center. |
|
AS11-43-6392 Browse or print resolution. Crater Krasovsky P. Image credit: Image Science and Analysis Laboratory, NASA-Johnson Space Center. |

|
AS11-43-6393 Browse or print resolution. Crater Krasovsky P. Image credit: Image Science and Analysis Laboratory, NASA-Johnson Space Center. |
|
AS11-43-6394 Browse or print resolution. Crater Krasovsky cut off on extreme left. Krasovsky P on upper right. Image credit: Image Science and Analysis Laboratory, NASA-Johnson Space Center. |
|
AS11-43-6395 Browse or print resolution. Crater Krasovsky cut off at top. Image credit: Image Science and Analysis Laboratory, NASA-Johnson Space Center. |
|
AS11-43-6396 Browse or print resolution. Craters Stein K and Stien L in foreground. Image credit: Image Science and Analysis Laboratory, NASA-Johnson Space Center. |

|
AS11-43-6397 Browse or print resolution. Crater Krasovsky lower middle. Image credit: Image Science and Analysis Laboratory, NASA-Johnson Space Center. |

|
AS11-43-6398 Browse or print resolution. Crater east of Coriolis. Crater coordinates are 0.07S, 174.53E. Image credit: Image Science and Analysis Laboratory, NASA-Johnson Space Center. |

|
AS11-43-6399 Browse or print resolution. Small double crater east of Coriolis. Crater coordinates are 0.34S, 175.62E. Image credit: Image Science and Analysis Laboratory, NASA-Johnson Space Center. |

|
AS11-43-6400 Browse or print resolution. Crater Coriolis H. Crater coordinates are 0.62S, 174.06E. Image credit: Image Science and Analysis Laboratory, NASA-Johnson Space Center. |
|
AS11-43-6401 Browse or print resolution. Small crater on eastern rim of Coriolis. Crater coordinates are 0.13S, 172.72E. Image credit: Image Science and Analysis Laboratory, NASA-Johnson Space Center. |

|
AS11-43-6402 Browse or print resolution. Elongate craters on southern rim of Coriolis. Image credit: Image Science and Analysis Laboratory, NASA-Johnson Space Center. |
|
AS11-43-6403 Browse or print resolution. Crater complex northeast of Coriolis. Crater coordinates are 1.84N, 173.2E. Image credit: Image Science and Analysis Laboratory, NASA-Johnson Space Center. |

|
AS11-43-6404 Browse or print resolution. Crater complex northeast of Coriolis. Crater coordinates are 1.84N, 173.2E. Image credit: Image Science and Analysis Laboratory, NASA-Johnson Space Center. |
|
AS11-43-6405 Browse or print resolution. Crater west of Coriolis. Crater coordinates are 0.07N, 169.61E. Image credit: Image Science and Analysis Laboratory, NASA-Johnson Space Center. |
|
AS11-43-6406 Browse or print resolution. Landscape west of Coriolis. Centre coordinates are 0.55N, 169.15E. Image credit: Image Science and Analysis Laboratory, NASA-Johnson Space Center. |

|
AS11-43-6407 Browse or print resolution. Crater Coriolis W. Image credit: Image Science and Analysis Laboratory, NASA-Johnson Space Center. |
|
AS11-43-6408 Browse or print resolution. View northeast across crater Valier. Crater Tiselius beyond (cut off top of frame). Image credit: Image Science and Analysis Laboratory, NASA-Johnson Space Center. |

|
AS11-43-6409 Browse or print resolution. View northeast across crater Tiselius. Crater Valier cut off bottom right. Image credit: Image Science and Analysis Laboratory, NASA-Johnson Space Center. |
|
AS11-43-6410 Browse or print resolution. View east beyond Coriolis. Coordinates for distinct crater lower right are 0.16N, 176.95E. Image credit: Image Science and Analysis Laboratory, NASA-Johnson Space Center. |
|
AS11-43-6411 Browse or print resolution. Crater between Vening Meinesz and Dufay. Crater coordinates are 2.31N, 165.35E. Image credit: Image Science and Analysis Laboratory, NASA-Johnson Space Center. |

|
AS11-43-6412 Browse or print resolution. Crater Mandel'shtam G. Image credit: Image Science and Analysis Laboratory, NASA-Johnson Space Center. |

|
AS11-43-6413 Browse or print resolution. View northeast beyond crater Mandel'shtam G, which is far left. Image credit: Image Science and Analysis Laboratory, NASA-Johnson Space Center. |

|
AS11-43-6414 Browse or print resolution. Northeast rim of crater Vening Meinesz W. Image credit: Image Science and Analysis Laboratory, NASA-Johnson Space Center. |

|
AS11-43-6415 Browse or print resolution. Interior of crater Vening Meinesz W. Image credit: Image Science and Analysis Laboratory, NASA-Johnson Space Center. |

|
AS11-43-6416 Browse or print resolution. View northeast beyond crater Mandel'shtam G, which is lower left. Image credit: Image Science and Analysis Laboratory, NASA-Johnson Space Center. |

|
AS11-43-6417 Browse or print resolution. Crater Mandel'shtam Q. Image credit: Image Science and Analysis Laboratory, NASA-Johnson Space Center. |
|
AS11-43-6418 Browse or print resolution. Crater Mandel'shtam G covers lower right quadrant and cut off at bottom. Ray from Mandel'shtam G crosses top right to bottom centre. Image credit: Image Science and Analysis Laboratory, NASA-Johnson Space Center. |
|
AS11-43-6419 Browse or print resolution. Crater Mandel'shtam R covers lower right quadrant and cut off at bottom. Crater Mandel'shtam G is cut off top of frame. Image credit: Image Science and Analysis Laboratory, NASA-Johnson Space Center. |
|
AS11-43-6420 Browse or print resolution. Irregular crater north of crater Schliemann. Crater coordinates are 2.67N, 155.05E. Image credit: Image Science and Analysis Laboratory, NASA-Johnson Space Center. |

|
AS11-43-6421 Browse or print resolution. Irregular crater north of crater Schliemann. This crater is cut off at bottom centre and its coordinates are 2.67N, 155.05E. Image credit: Image Science and Analysis Laboratory, NASA-Johnson Space Center. |
|
AS11-43-6422 Browse or print resolution. Irregular crater north of crater Schliemann. Crater coordinates are 2.67N, 155.05E. Image credit: Image Science and Analysis Laboratory, NASA-Johnson Space Center. |
|
AS11-43-6423 Browse or print resolution. Fresh rayed crater southeast of crater Henderson. Crater coordinates are 2.76N, 153.45E. Image credit: Image Science and Analysis Laboratory, NASA-Johnson Space Center. |

|
AS11-43-6424 Browse or print resolution. Landscape south of crater Henderson. Coordinates of bright crater below centre are 2.18N, 152.08E. Image credit: Image Science and Analysis Laboratory, NASA-Johnson Space Center. |
|
AS11-43-6425 Browse or print resolution. View east past LM structure. Coordinates of image centre are 3N, 154E. Image credit: Image Science and Analysis Laboratory, NASA-Johnson Space Center. |

|
AS11-43-6426 Browse or print resolution. Landscape between craters Henderson and Schuster. Coordinates of image centre are 3.77N, 149.74E. Image credit: Image Science and Analysis Laboratory, NASA-Johnson Space Center. |
|
AS11-43-6427 Browse or print resolution. Simple crater within Schuster Q. Crater coordinates are 1.04N, 143.11E. Image credit: Image Science and Analysis Laboratory, NASA-Johnson Space Center. |

|
AS11-43-6428 Browse or print resolution. Two craters within interior of crater Mendeleev. Coordinates of brighter crater are 3.73N, 142.93E. Image credit: Image Science and Analysis Laboratory, NASA-Johnson Space Center. |

|
AS11-43-6429 Browse or print resolution. Crater Benedict. Image credit: Image Science and Analysis Laboratory, NASA-Johnson Space Center. |

|
AS11-43-6430 Browse or print resolution. Crater pair between craters Benedict and Harden. Coordinates of larger crater are 5.25N, 142.02E. Image credit: Image Science and Analysis Laboratory, NASA-Johnson Space Center. |

|
AS11-43-6431 Browse or print resolution. Crater Benedict. Image credit: Image Science and Analysis Laboratory, NASA-Johnson Space Center. |

|
AS11-43-6432 Browse or print resolution. Craters within interior of crater Mendeleev. Coordinates of bright crater are 3.73N, 142.93E. Image credit: Image Science and Analysis Laboratory, NASA-Johnson Space Center. |
|
AS11-43-6433 Browse or print resolution. Crater Benedict. Image credit: Image Science and Analysis Laboratory, NASA-Johnson Space Center. |

|
AS11-43-6434 Browse or print resolution. Small crater near southwest rim of crater Mendeleev. Crater coordinates are 1.73N, 138.41E. Image credit: Image Science and Analysis Laboratory, NASA-Johnson Space Center. |

|
AS11-43-6430 Browse or print resolution. Small crater near southwest rim of crater Hartmann. Crater coordinates are 1.39N, 136.07E. Image credit: Image Science and Analysis Laboratory, NASA-Johnson Space Center. |
|
AS11-43-6436 Browse or print resolution. Crater Richards and Catena Mendeleev. Image credit: Image Science and Analysis Laboratory, NASA-Johnson Space Center. |
|
AS11-43-6437 Browse or print resolution. Crater Richards and Catena Mendeleev. Image credit: Image Science and Analysis Laboratory, NASA-Johnson Space Center. |
|
AS11-43-6438 Browse or print resolution. Crater Richards and Catena Mendeleev. Image credit: Image Science and Analysis Laboratory, NASA-Johnson Space Center. |

|
AS11-43-6439 Browse or print resolution. Crater Richards and Catena Mendeleev. Image credit: Image Science and Analysis Laboratory, NASA-Johnson Space Center. |

|
AS11-43-6440 Browse or print resolution. Crater Richards and Catena Mendeleev. Image credit: Image Science and Analysis Laboratory, NASA-Johnson Space Center. |
|
AS11-43-6441 Browse or print resolution. Catena Mendeleev. Image credit: Image Science and Analysis Laboratory, NASA-Johnson Space Center. |

|
AS11-43-6442 Browse or print resolution. Catena Mendeleev. Image credit: Image Science and Analysis Laboratory, NASA-Johnson Space Center. |

|
AS11-43-6443 Browse or print resolution. Craters Benedict (foreground) and Harden (beyond). Image credit: Image Science and Analysis Laboratory, NASA-Johnson Space Center. |

|
AS11-43-6444 Browse or print resolution. Craters northwest of crater Green. Morozov E is cut off at bottom left. Image credit: Image Science and Analysis Laboratory, NASA-Johnson Space Center. |

|
AS11-43-6445 Browse or print resolution. North rim of crater Green M. Image credit: Image Science and Analysis Laboratory, NASA-Johnson Space Center. |

|
AS11-43-6446 Browse or print resolution. Crater Vetchinkin F at centre of frame. Image credit: Image Science and Analysis Laboratory, NASA-Johnson Space Center. |

|
AS11-43-6447 Browse or print resolution. Crater Morozov E. Image credit: Image Science and Analysis Laboratory, NASA-Johnson Space Center. |

|
AS11-43-6448 Browse or print resolution. North rim of crater King. Central peaks at bottom right. Image credit: Image Science and Analysis Laboratory, NASA-Johnson Space Center. |
|
AS11-43-6449 Browse or print resolution. Crater King. Image credit: Image Science and Analysis Laboratory, NASA-Johnson Space Center. |

|
AS11-43-6450 Browse or print resolution. Crater Lobachevsky. Image credit: Image Science and Analysis Laboratory, NASA-Johnson Space Center. |

|
AS11-43-6451 Browse or print resolution. Crater Jansky. Image credit: Image Science and Analysis Laboratory, NASA-Johnson Space Center. |

|
AS11-43-6452 Browse or print resolution. Northern shore of Mare Smythii. Coordinates of bright crater are 3.89N, 89.05E. Image credit: Image Science and Analysis Laboratory, NASA-Johnson Space Center. |
|
AS11-43-6453 Browse or print resolution. Interior of crater Neper. Crater on far side is Virchow. Image credit: Image Science and Analysis Laboratory, NASA-Johnson Space Center. |

|
AS11-43-6454 Browse or print resolution. Interior of crater Neper. Crater on far side is Virchow. Image credit: Image Science and Analysis Laboratory, NASA-Johnson Space Center. |
|
AS11-43-6455 Browse or print resolution. Interior of crater Neper. Crater on far side is Virchow. Image credit: Image Science and Analysis Laboratory, NASA-Johnson Space Center. |
|
AS11-43-6456 Browse or print resolution. Southwestern half of crater Neper. Virchow is cut off top left. Image credit: Image Science and Analysis Laboratory, NASA-Johnson Space Center. |
|
AS11-43-6457 Browse or print resolution. Interior of crater Neper. Crater Virchow is cut off bottom left. Image credit: Image Science and Analysis Laboratory, NASA-Johnson Space Center. |

|
AS11-43-6458 Browse or print resolution. Northwest rim of crater Neper. Crater Virchow in centre. Image credit: Image Science and Analysis Laboratory, NASA-Johnson Space Center. |

|
AS11-43-6459 Browse or print resolution. Western half of crater Neper. Virchow is cut off top left. Image credit: Image Science and Analysis Laboratory, NASA-Johnson Space Center. |
|
AS11-43-6460 Browse or print resolution. Interior of crater Neper. Virchow is cut off bottom left. Image credit: Image Science and Analysis Laboratory, NASA-Johnson Space Center. |

|
AS11-43-6461 Browse or print resolution. Eastern rim of crater Neper. Image credit: Image Science and Analysis Laboratory, NASA-Johnson Space Center. |
|
AS11-43-6462 Browse or print resolution. Northeastern rim of crater Neper. Image credit: Image Science and Analysis Laboratory, NASA-Johnson Space Center. |
|
AS11-43-6463 Browse or print resolution. Northern rim of crater Neper. Crater Virchow lower right. Image credit: Image Science and Analysis Laboratory, NASA-Johnson Space Center. |
|
AS11-43-6464 Browse or print resolution. Crater Banachiewicz B. Crater coordinates are 5.27N, 78.95E. Image credit: Image Science and Analysis Laboratory, NASA-Johnson Space Center. |
|
AS11-43-6465 Browse or print resolution. Crater Banachiewicz B. Crater coordinates are 5.27N, 78.95E. Image credit: Image Science and Analysis Laboratory, NASA-Johnson Space Center. |
|
AS11-43-6466 Browse or print resolution. Crater Banachiewicz C left of centre. Coordinates of bright crater bottom right are 6.28N, 76.65E. Image credit: Image Science and Analysis Laboratory, NASA-Johnson Space Center. |

|
AS11-43-6467 Browse or print resolution. Crater Banachiewicz B. Crater coordinates are 5.27N, 78.95E. Image credit: Image Science and Analysis Laboratory, NASA-Johnson Space Center. |

|
AS11-43-6468 Browse or print resolution. Bright crater near Banachiewicz C. Coordinates of crater are 6.28N, 76.65E. Image credit: Image Science and Analysis Laboratory, NASA-Johnson Space Center. |
|
AS11-43-6469 Browse or print resolution. Crater Neper. Image credit: Image Science and Analysis Laboratory, NASA-Johnson Space Center. |

|
AS11-43-6470 Browse or print resolution. Northern rim of crater Neper. Crater Virchow belowe centre. Image credit: Image Science and Analysis Laboratory, NASA-Johnson Space Center. |
|
AS11-43-6471 Browse or print resolution. Crater Schubert C on Mare Smythii. Crater Peek is beyond, left of centre. Image credit: Image Science and Analysis Laboratory, NASA-Johnson Space Center. |
|
AS11-43-6472 Browse or print resolution. Crater Condorcet with Mare Crisium beyond. Image credit: Image Science and Analysis Laboratory, NASA-Johnson Space Center. |

|
AS11-43-6473 Browse or print resolution. Crater Condorcet F. Image credit: Image Science and Analysis Laboratory, NASA-Johnson Space Center. |
|
AS11-43-6474 Browse or print resolution. Small crater south of Condorcet F (cut off upper right). Coordinates of crater are 6.48N, 73.00E. Image credit: Image Science and Analysis Laboratory, NASA-Johnson Space Center. |
|
AS11-43-6475 Browse or print resolution. Crater Banachiewicz B. Crater coordinates are 5.27N, 78.95E. Image credit: Image Science and Analysis Laboratory, NASA-Johnson Space Center. |
|
AS11-43-6476 Browse or print resolution. View northeast towards Mare Marginis. Image credit: Image Science and Analysis Laboratory, NASA-Johnson Space Center. |
|
AS11-43-6477 Browse or print resolution. Crater Condorcet cut off bottom right with Mare Crisium beyond. Image credit: Image Science and Analysis Laboratory, NASA-Johnson Space Center. |
|
AS11-43-6478 Browse or print resolution. Crater Schubert. Image credit: Image Science and Analysis Laboratory, NASA-Johnson Space Center. |

|
AS11-43-6479 Browse or print resolution. Landscape between craters Liouville and Schubert. Coordinates of small bright crater are 3.69N, 75.59E. Image credit: Image Science and Analysis Laboratory, NASA-Johnson Space Center. |
|
AS11-43-6480 Browse or print resolution. Landscape between craters Liouville and Schubert. Coordinates of small bright crater are 3.82N, 74.52E. Image credit: Image Science and Analysis Laboratory, NASA-Johnson Space Center. |

|
AS11-43-6481 Browse or print resolution. Crater Condorcet F. Image credit: Image Science and Analysis Laboratory, NASA-Johnson Space Center. |
|
AS11-43-6482 Browse or print resolution. Crater Schubert. Image credit: Image Science and Analysis Laboratory, NASA-Johnson Space Center. |
|
AS11-43-6483 Browse or print resolution. Crater Townley. Image credit: Image Science and Analysis Laboratory, NASA-Johnson Space Center. |

|
AS11-43-6484 Browse or print resolution. Southwestern shore of Mare Crisium. Image credit: Image Science and Analysis Laboratory, NASA-Johnson Space Center. |
|
AS11-43-6485 Browse or print resolution. Sequence photography. Western rim of crater Coriolis. Image credit: Image Science and Analysis Laboratory, NASA-Johnson Space Center. |
|
AS11-43-6486 Browse or print resolution. Sequence photography. West of crater Coriolis. Coordinates of crater on right are 0.06N, 169.62E. Image credit: Image Science and Analysis Laboratory, NASA-Johnson Space Center. |
|
AS11-43-6487 Browse or print resolution. Sequence photography. West of crater Coriolis. Coordinates of image centre are 0.26N, 167.92E. Image credit: Image Science and Analysis Laboratory, NASA-Johnson Space Center. |

|
AS11-43-6488 Browse or print resolution. Sequence photography. Landscape east of crater Vening Meinesz. Coordinates of largest crater are 0.33N, 166.55E. Image credit: Image Science and Analysis Laboratory, NASA-Johnson Space Center. |
|
AS11-43-6489 Browse or print resolution. Sequence photography. Landscape east of crater Vening Meinesz. Coordinates of crater on right are 0.33N, 166.55E. Image credit: Image Science and Analysis Laboratory, NASA-Johnson Space Center. |

|
AS11-43-6490 Browse or print resolution. Sequence photography. Eastern rim of crater Vening Meinesz. Image credit: Image Science and Analysis Laboratory, NASA-Johnson Space Center. |
|
AS11-43-6491 Browse or print resolution. Sequence photography. Crater Vening Meinesz. Image credit: Image Science and Analysis Laboratory, NASA-Johnson Space Center. |

|
AS11-43-6492 Browse or print resolution. Sequence photography. Western rim of crater Vening Meinesz. Image credit: Image Science and Analysis Laboratory, NASA-Johnson Space Center. |

|
AS11-43-6493 Browse or print resolution. Sequence photography. Western rim of crater Vening Meinesz. Image credit: Image Science and Analysis Laboratory, NASA-Johnson Space Center. |

|
AS11-43-6494 Browse or print resolution. Sequence photography. West of crater Vening Meinesz. Image credit: Image Science and Analysis Laboratory, NASA-Johnson Space Center. |
|
AS11-43-6495 Browse or print resolution. Sequence photography. Northeast of crater Schliemann. Image credit: Image Science and Analysis Laboratory, NASA-Johnson Space Center. |
|
AS11-43-6496 Browse or print resolution. Sequence photography. Northeast of crater Schliemann. Image credit: Image Science and Analysis Laboratory, NASA-Johnson Space Center. |

|
AS11-43-6497 Browse or print resolution. Sequence photography. North of crater Schliemann. Image credit: Image Science and Analysis Laboratory, NASA-Johnson Space Center. |

|
AS11-43-6498 Browse or print resolution. Sequence photography. North of crater Schliemann. Image credit: Image Science and Analysis Laboratory, NASA-Johnson Space Center. |
|
AS11-43-6499 Browse or print resolution. Sequence photography. Northwest of crater Schliemann. Image credit: Image Science and Analysis Laboratory, NASA-Johnson Space Center. |
|
AS11-43-6500 Browse or print resolution. Sequence photography. Northwest of crater Schliemann. Coordinates of most distinct crater are 0.22N, 152.36E. Image credit: Image Science and Analysis Laboratory, NASA-Johnson Space Center. |

|
AS11-43-6501 Browse or print resolution. Sequence photography. Northwest of crater Schliemann. Coordinates of most distinct crater are 0.22N, 152.36E. Image credit: Image Science and Analysis Laboratory, NASA-Johnson Space Center. |

|
AS11-43-6502 Browse or print resolution. Sequence photography. Between crater Schliemann and Schuster. Image credit: Image Science and Analysis Laboratory, NASA-Johnson Space Center. |
|
AS11-43-6503 Browse or print resolution. Sequence photography. Southeast of crater Schuster. Image credit: Image Science and Analysis Laboratory, NASA-Johnson Space Center. |

|
AS11-43-6504 Browse or print resolution. Sequence photography. Southeast of crater Schuster. Image credit: Image Science and Analysis Laboratory, NASA-Johnson Space Center. |

|
AS11-43-6505 Browse or print resolution. Sequence photography. South of crater Schuster. Coordinates of most distinct crater are 1.23N, 147.70E. Image credit: Image Science and Analysis Laboratory, NASA-Johnson Space Center. |
|
AS11-43-6506 Browse or print resolution. Sequence photography. South of crater Schuster. Coordinates of central crater are 0.53N, 146.11E. Image credit: Image Science and Analysis Laboratory, NASA-Johnson Space Center. |
|
AS11-43-6507 Browse or print resolution. Sequence photography. Southern rim of Mendeleev. Schuster Q is left of centre. Image credit: Image Science and Analysis Laboratory, NASA-Johnson Space Center. |

|
AS11-43-6508 Browse or print resolution. Sequence photography. Southern rim of Mendeleev. Schuster Q is centre. Image credit: Image Science and Analysis Laboratory, NASA-Johnson Space Center. |

|
AS11-43-6509 Browse or print resolution. Sequence photography. Southern rim of Mendeleev. Schuster Q is right of centre. Mendeleev P is upper left. Image credit: Image Science and Analysis Laboratory, NASA-Johnson Space Center. |

|
AS11-43-6510 Browse or print resolution. Sequence photography. Southern rim of Mendeleev. Schuster Q is cut off on right. Mendeleev P is upper left. Image credit: Image Science and Analysis Laboratory, NASA-Johnson Space Center. |

|
AS11-43-6511 Browse or print resolution. Sequence photography. Southern rim of Mendeleev. Mendeleev P is upper centre. Image credit: Image Science and Analysis Laboratory, NASA-Johnson Space Center. |

|
AS11-43-6512 Browse or print resolution. Sequence photography. Southwestern rim of Mendeleev. Mendeleev P is upper right. Image credit: Image Science and Analysis Laboratory, NASA-Johnson Space Center. |
|
AS11-43-6513 Browse or print resolution. Sequence photography. Southwestern rim of Mendeleev. Mendeleev P is cut off upper right. Hartmann is upper left. Green is beyond with prominent central peak. Image credit: Image Science and Analysis Laboratory, NASA-Johnson Space Center. |
|
AS11-43-6514 Browse or print resolution. Sequence photography. Crater Hartmann is upper left. Green is beyond with prominent central peak and Green M is lower left. Image credit: Image Science and Analysis Laboratory, NASA-Johnson Space Center. |
|
AS11-43-6515 Browse or print resolution. Sequence photography. Crater Hartmann is cut off upper centre. Green is beyond with prominent central peak and Green M is lower left. Image credit: Image Science and Analysis Laboratory, NASA-Johnson Space Center. |

|
AS11-43-6516 Browse or print resolution. Sequence photography. Crater Hartmann is cut off upper right. Green is cut off beyond with prominent central peak and Green M is lower centre. Image credit: Image Science and Analysis Laboratory, NASA-Johnson Space Center. |

|
AS11-43-6517 Browse or print resolution. Sequence photography. Crater Hartmann is cut off upper right. Green is cut off beyond with prominent central peak. Green M is lower centre with Green P beyond. Image credit: Image Science and Analysis Laboratory, NASA-Johnson Space Center. |
|
AS11-43-6518 Browse or print resolution. Sequence photography. Crater Green is cut off upper right. Green M is lower right with Green P beyond. Image credit: Image Science and Analysis Laboratory, NASA-Johnson Space Center. |

|
AS11-43-6519 Browse or print resolution. Sequence photography. Crater Green M is cut off lower right with Green P beyond. Crater Gregory is left of centre. Image credit: Image Science and Analysis Laboratory, NASA-Johnson Space Center. |
|
AS11-43-6520 Browse or print resolution. Sequence photography. Crater Gregory is left of centre. Image credit: Image Science and Analysis Laboratory, NASA-Johnson Space Center. |

|
AS11-43-6521 Browse or print resolution. Sequence photography. Crater Gregory is right of centre. Image credit: Image Science and Analysis Laboratory, NASA-Johnson Space Center. |

|
AS11-43-6522 Browse or print resolution. Sequence photography. Crater Gregory is right of centre and Zanstra is above centre. Image credit: Image Science and Analysis Laboratory, NASA-Johnson Space Center. |
|
AS11-43-6523 Browse or print resolution. Sequence photography. Crater Gregory is right of frame and Zanstra is above right of centre. Image credit: Image Science and Analysis Laboratory, NASA-Johnson Space Center. |

|
AS11-43-6524 Browse or print resolution. Sequence photography. Crater Gregory is cut off right of frame and Zanstra is upper right. Image credit: Image Science and Analysis Laboratory, NASA-Johnson Space Center. |
|
AS11-43-6525 Browse or print resolution. Sequence photography. Crater Zanstra is upper right. Image credit: Image Science and Analysis Laboratory, NASA-Johnson Space Center. |

|
AS11-43-6526 Browse or print resolution. Sequence photography. Crater Zanstra is cut off upper right. King is cut off upper centre. Image credit: Image Science and Analysis Laboratory, NASA-Johnson Space Center. |
|
AS11-43-6527 Browse or print resolution. Sequence photography. Crater King is cut off upper right. Image credit: Image Science and Analysis Laboratory, NASA-Johnson Space Center. |

|
AS11-43-6528 Browse or print resolution. Sequence photography. Crater Hero is lower right. Image credit: Image Science and Analysis Laboratory, NASA-Johnson Space Center. |

|
AS11-43-6529 Browse or print resolution. Sequence photography. Crater Hero is lower right. Ctesibius beyond and Abul Wafa beyond that. Image credit: Image Science and Analysis Laboratory, NASA-Johnson Space Center. |
|
AS11-43-6530 Browse or print resolution. Sequence photography. Crater Ctesibius is lower right and Abul Wafa beyond. Image credit: Image Science and Analysis Laboratory, NASA-Johnson Space Center. |
|
AS11-43-6531 Browse or print resolution. Sequence photography. Crater Abul Wafa is lower right. Image credit: Image Science and Analysis Laboratory, NASA-Johnson Space Center. |
|
AS11-43-6532 Browse or print resolution. Sequence photography. Crater Abul Wafa is cut off lower right. Image credit: Image Science and Analysis Laboratory, NASA-Johnson Space Center. |

|
AS11-43-6533 Browse or print resolution. Sequence photography. Crater Buisson Y is lower right and Buisson X is beyond. Image credit: Image Science and Analysis Laboratory, NASA-Johnson Space Center. |
|
AS11-43-6534 Browse or print resolution. Sequence photography. Crater Buisson Y is lower right and Buisson X is beyond. Image credit: Image Science and Analysis Laboratory, NASA-Johnson Space Center. |

|
AS11-43-6535 Browse or print resolution. Sequence photography. Crater Firsov Q is on extreme right of frame. Image credit: Image Science and Analysis Laboratory, NASA-Johnson Space Center. |

|
AS11-43-6536 Browse or print resolution. Sequence photography. Crater Al-Khwarizmi K is bright crater upper right. Image credit: Image Science and Analysis Laboratory, NASA-Johnson Space Center. |

|
AS11-43-6537 Browse or print resolution. Sequence photography. Crater Al-Khwarizmi K is bright crater upper right. Image credit: Image Science and Analysis Laboratory, NASA-Johnson Space Center. |

|
AS11-43-6538 Browse or print resolution. Sequence photography. Crater Al-Khwarizmi K is bright crater upper right. Image credit: Image Science and Analysis Laboratory, NASA-Johnson Space Center. |

|
AS11-43-6539 Browse or print resolution. Sequence photography. Crater Al-Khwarizmi K is bright crater extreme top right. Image credit: Image Science and Analysis Laboratory, NASA-Johnson Space Center. |
| 70-mm magazine U - AS11-42-6160 to 6348 |
Photography Index | 70-mm magazine V - AS11-44-6540 to 6696 |