
| 70-mm magazine S - AS11-40-5844 to 5970 |
Photography Index | 70-mm magazine U - AS11-42-6160 to 6348 |
No copyright is asserted for NASA photographs. If a recognizable person appears in a photo, use for commercial purposes may infringe a right of privacy or publicity. Photos may not be used to state or imply the endorsement by NASA or by any NASA employee of a commercial product, process or service, or used in any other manner that might mislead. Accordingly, it is requested that if a NASA photograph is used in advertising and other commercial promotion, layout and copy be submitted to NASA prior to release.
NASA photos reproduced from this archive should include photo credit to "NASA" or "National Aeronautics and Space Administration" and should include scanning credit to the appropriate individuals or agencies as noted in the captions.

|
AS11-41-5971 Browse or print resolution. First in a sequence of orbital horizon images from the lunar far side to the near-side terminator. Image credit: Image Science and Analysis Laboratory, NASA-Johnson Space Center. |

|
AS11-41-5972 Browse or print resolution. Part of orbital lunar horizon sequence. Bergman is top right. Image credit: Image Science and Analysis Laboratory, NASA-Johnson Space Center. |

|
AS11-41-5973 Browse or print resolution. Part of orbital lunar horizon sequence. Green (with central peak) is lower right. Moissan is top right and partially cut off. Image credit: Image Science and Analysis Laboratory, NASA-Johnson Space Center. |

|
AS11-41-5974 Browse or print resolution. Part of orbital lunar horizon sequence. Hartmann and Green (with central peak) in forground. Moissan is top right. Image credit: Image Science and Analysis Laboratory, NASA-Johnson Space Center. |

|
AS11-41-5975 Browse or print resolution. Part of orbital lunar horizon sequence. Hartmann and Green (with central peak) in forground. Image credit: Image Science and Analysis Laboratory, NASA-Johnson Space Center. |

|
AS11-41-5976 Browse or print resolution. Part of orbital lunar horizon sequence. Green (with central peak) in forground. Image credit: Image Science and Analysis Laboratory, NASA-Johnson Space Center. |

|
AS11-41-5977 Browse or print resolution. Part of orbital lunar horizon sequence. Green (with central peak) in forground. Image credit: Image Science and Analysis Laboratory, NASA-Johnson Space Center. |

|
AS11-41-5978 Browse or print resolution. Part of orbital lunar horizon sequence. Green (with central peak) in forground. Green Q and R just beyond. Image credit: Image Science and Analysis Laboratory, NASA-Johnson Space Center. |

|
AS11-41-5979 Browse or print resolution. Part of orbital lunar horizon sequence. Green R in foreground Image credit: Image Science and Analysis Laboratory, NASA-Johnson Space Center. |

|
AS11-41-5980 Browse or print resolution. Part of orbital lunar horizon sequence. Rim of Green R cut off in foreground. Gregory is beyond. Image credit: Image Science and Analysis Laboratory, NASA-Johnson Space Center. |

|
AS11-41-5981 Browse or print resolution. Part of orbital lunar horizon sequence. Crater Gregory. Image credit: Image Science and Analysis Laboratory, NASA-Johnson Space Center. |

|
AS11-41-5982 Browse or print resolution. Part of orbital lunar horizon sequence. Crater gregory Image credit: Image Science and Analysis Laboratory, NASA-Johnson Space Center. |

|
AS11-41-5983 Browse or print resolution. Part of orbital lunar horizon sequence. Gregory Q on lower right. Zanstra is centre-right. Image credit: Image Science and Analysis Laboratory, NASA-Johnson Space Center. |

|
AS11-41-5984 Browse or print resolution. Part of orbital lunar horizon sequence. Gregory Q on lower right. Zanstra is centre-right and Zanstra A is upper right. Image credit: Image Science and Analysis Laboratory, NASA-Johnson Space Center. |

|
AS11-41-5985 Browse or print resolution. Part of orbital lunar horizon sequence. Zanstra is upper right foreground. Crater King is at the upper horizon. Image credit: Image Science and Analysis Laboratory, NASA-Johnson Space Center. |

|
AS11-41-5986 Browse or print resolution. Part of orbital lunar horizon sequence. Lunar far-side between Soddy and King. Image credit: Image Science and Analysis Laboratory, NASA-Johnson Space Center. |

|
AS11-41-5987 Browse or print resolution. Part of orbital lunar horizon sequence. Landscape north of Soddy Image credit: Image Science and Analysis Laboratory, NASA-Johnson Space Center. |

|
AS11-41-5988 Browse or print resolution. Part of orbital lunar horizon sequence. Crater Hero. Image credit: Image Science and Analysis Laboratory, NASA-Johnson Space Center. |

|
AS11-41-5989 Browse or print resolution. Part of orbital lunar horizon sequence. Craters Hero and Ctesibius. Image credit: Image Science and Analysis Laboratory, NASA-Johnson Space Center. |

|
AS11-41-5990 Browse or print resolution. Part of orbital lunar horizon sequence. Craters Hero, Ctesibius and Abul Wafa. Image credit: Image Science and Analysis Laboratory, NASA-Johnson Space Center. |

|
AS11-41-5991 Browse or print resolution. Part of orbital lunar horizon sequence. Craters Ctesibius and Abul Wafa. Image credit: Image Science and Analysis Laboratory, NASA-Johnson Space Center. |

|
AS11-41-5992 Browse or print resolution. Part of orbital lunar horizon sequence. Crater Abul Wafa. Image credit: Image Science and Analysis Laboratory, NASA-Johnson Space Center. |

|
AS11-41-5993 Browse or print resolution. Part of orbital lunar horizon sequence. Craters Abul Wafa, Buisson Y and X. Image credit: Image Science and Analysis Laboratory, NASA-Johnson Space Center. |

|
AS11-41-5994 Browse or print resolution. Part of orbital lunar horizon sequence. Craters Buisson Y and X. Image credit: Image Science and Analysis Laboratory, NASA-Johnson Space Center. |

|
AS11-41-5995 Browse or print resolution. Part of orbital lunar horizon sequence. Craters Buisson Y and X. Image credit: Image Science and Analysis Laboratory, NASA-Johnson Space Center. |

|
AS11-41-5996 Browse or print resolution. Part of orbital lunar horizon sequence. Craters Buisson Y and X in forground. Image credit: Image Science and Analysis Laboratory, NASA-Johnson Space Center. |

|
AS11-41-5997 Browse or print resolution. Part of orbital lunar horizon sequence. Crater Saha D lower right. Light-coloured crater upper right is Al-Khwarizmi K. Image credit: Image Science and Analysis Laboratory, NASA-Johnson Space Center. |

|
AS11-41-5998 Browse or print resolution. Part of orbital lunar horizon sequence. Crater Buisson X in forground. Crater Saha D is light-coloured crater lower right. Light-coloured crater upper right is Al-Khwarizmi K. Image credit: Image Science and Analysis Laboratory, NASA-Johnson Space Center. |

|
AS11-41-5999 Browse or print resolution. Part of orbital lunar horizon sequence. Crater Saha D lower right. Light-coloured crater upper right is Al-Khwarizmi K. Image credit: Image Science and Analysis Laboratory, NASA-Johnson Space Center. |

|
AS11-41-6000 Browse or print resolution. Part of orbital lunar horizon sequence. Crater Saha D lower right. Light-coloured crater upper right is Al-Khwarizmi K. Image credit: Image Science and Analysis Laboratory, NASA-Johnson Space Center. |

|
AS11-41-6001 Browse or print resolution. Part of orbital lunar horizon sequence. Crater Saha D lower right. Image credit: Image Science and Analysis Laboratory, NASA-Johnson Space Center. |

|
AS11-41-6002 Browse or print resolution. Part of orbital lunar horizon sequence. Crater Firsov M is upper right. Saha D is cut off lower right. Image credit: Image Science and Analysis Laboratory, NASA-Johnson Space Center. |

|
AS11-41-6003 Browse or print resolution. Part of orbital lunar horizon sequence. Towards crater Saha B. Image credit: Image Science and Analysis Laboratory, NASA-Johnson Space Center. |

|
AS11-41-6004 Browse or print resolution. Part of orbital lunar horizon sequence. Saha B in foreground. Saenger is upper right. Image credit: Image Science and Analysis Laboratory, NASA-Johnson Space Center. |

|
AS11-41-6000 Browse or print resolution. Part of orbital lunar horizon sequence. Saenger is upper right. Saha W is lower right. Image credit: Image Science and Analysis Laboratory, NASA-Johnson Space Center. |

|
AS11-41-6006 Browse or print resolution. Part of orbital lunar horizon sequence. Saenger is upper right. Saha W is lower right. Image credit: Image Science and Analysis Laboratory, NASA-Johnson Space Center. |

|
AS11-41-6007 Browse or print resolution. Part of orbital lunar horizon sequence. Saenger P and Q are upper right. Saha W is lower right. Image credit: Image Science and Analysis Laboratory, NASA-Johnson Space Center. |

|
AS11-41-6008 Browse or print resolution. Part of orbital lunar horizon sequence. Crater Wyld is lower right. Fox and Fox A are centre right. Saenger R is light-coloured crater on upper right. Image credit: Image Science and Analysis Laboratory, NASA-Johnson Space Center. |

|
AS11-41-6009 Browse or print resolution. Part of orbital lunar horizon sequence. Crater Wyld is lower right. Fox and Fox A are centre right. Image credit: Image Science and Analysis Laboratory, NASA-Johnson Space Center. |

|
AS11-41-6010 Browse or print resolution. Part of orbital lunar horizon sequence. Fox and Fox A in foreground. Babcock and Mare Smythe on horizon. Image credit: Image Science and Analysis Laboratory, NASA-Johnson Space Center. |

|
AS11-41-6011 Browse or print resolution. Part of orbital lunar horizon sequence. Mare Smythe on horizon. Babcock and Zasyadko are upper right. Purkyne D is light-coloured grater lower right. Image credit: Image Science and Analysis Laboratory, NASA-Johnson Space Center. |

|
AS11-41-6012 Browse or print resolution. Part of orbital lunar horizon sequence. Mare Smythe on horizon. Babcock and Zasyadko are upper right. Image credit: Image Science and Analysis Laboratory, NASA-Johnson Space Center. |

|
AS11-41-6013 Browse or print resolution. Part of orbital lunar horizon sequence. Mare Smythe on horizon. Babcock and Zasyadko are upper right. Image credit: Image Science and Analysis Laboratory, NASA-Johnson Space Center. |

|
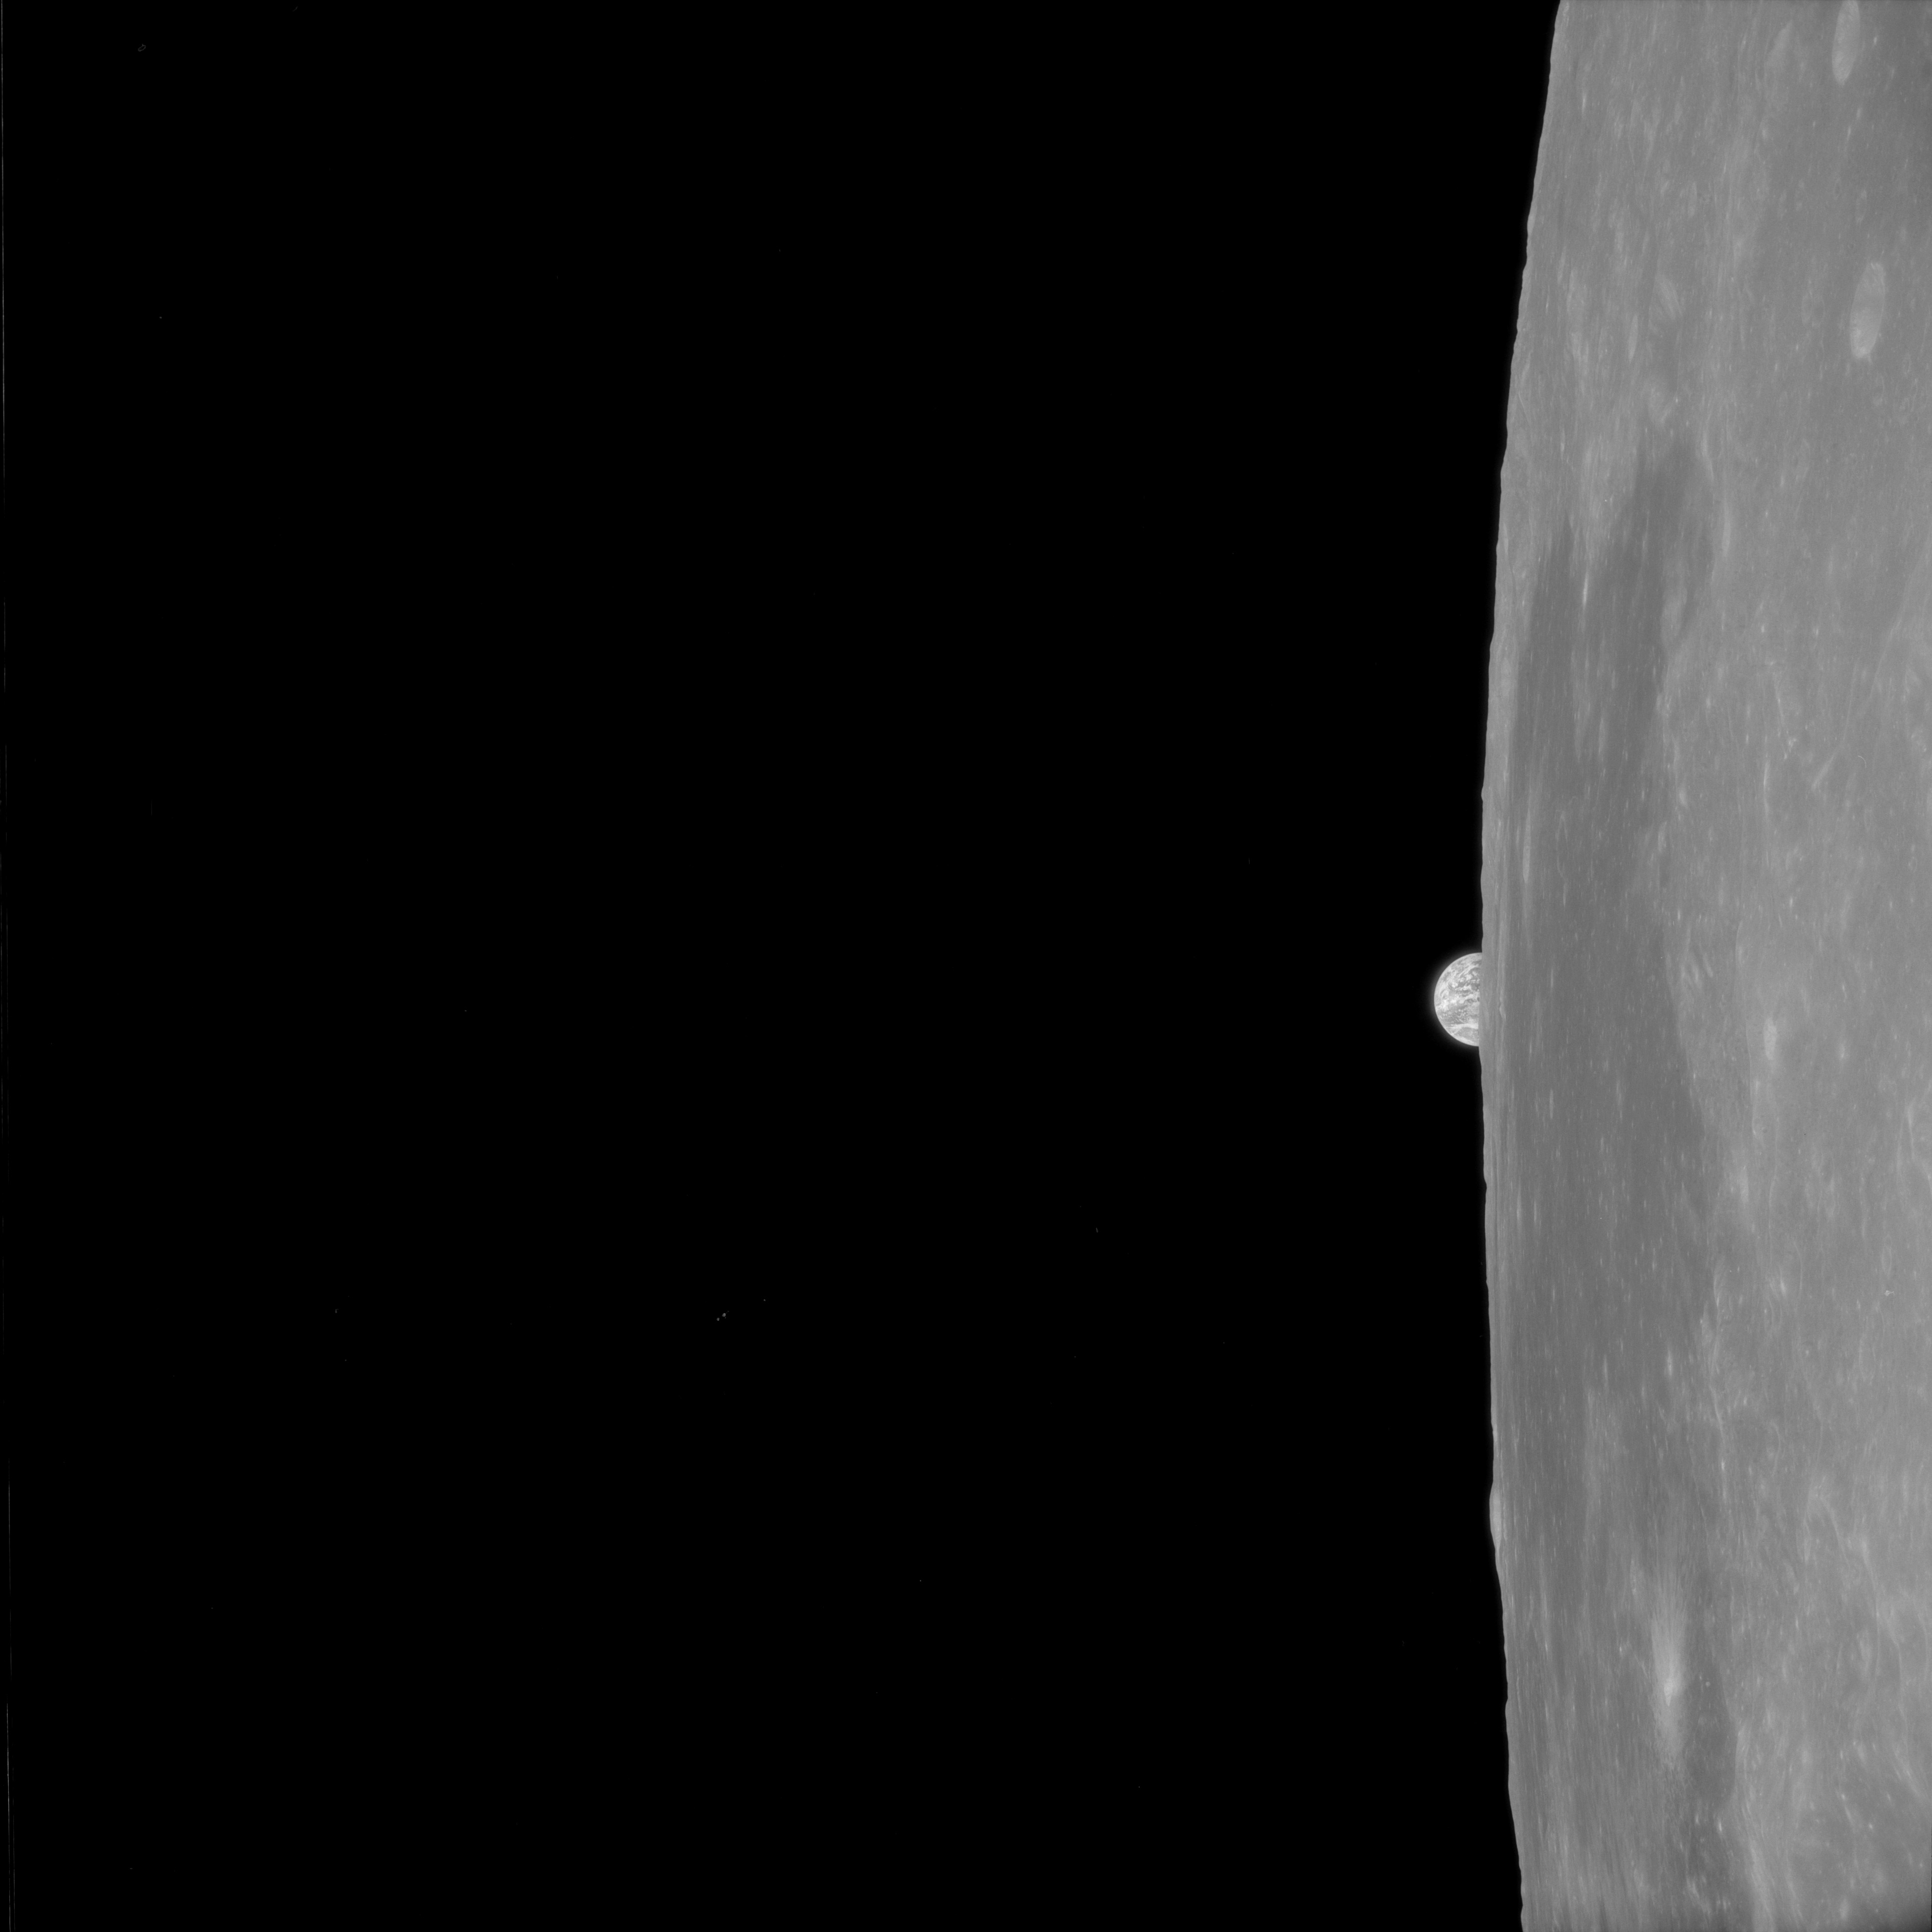
AS11-41-6014 Browse or print resolution. Part of orbital lunar horizon sequence. Mare Smythe. Babcock and Zasyadko are upper right. Includes Earthrise. Image credit: Image Science and Analysis Laboratory, NASA-Johnson Space Center. |

|
AS11-41-6015 Browse or print resolution. Part of orbital lunar horizon sequence. Mare Smythe. Babcock and Zasyadko are upper right. Includes Earthrise. Image credit: Image Science and Analysis Laboratory, NASA-Johnson Space Center. |

|
AS11-41-6016 Browse or print resolution. Part of orbital lunar horizon sequence. Mare Smythe. Babcock and Zasyadko are upper right. Includes Earthrise. Image credit: Image Science and Analysis Laboratory, NASA-Johnson Space Center. |

|
AS11-41-6017 Browse or print resolution. Part of orbital lunar horizon sequence. Mare Smythe. Babcock and Zasyadko are upper right. Includes Earthrise. Image credit: Image Science and Analysis Laboratory, NASA-Johnson Space Center. |
|
AS11-41-6018 Browse or print resolution. Part of orbital lunar horizon sequence. Mare Smythe. Babcock and Zasyadko are upper right. Includes Earthrise. Image credit: Image Science and Analysis Laboratory, NASA-Johnson Space Center. |

|
AS11-41-6019 Browse or print resolution. Part of orbital lunar horizon sequence. Mare Smythe. Babcock and Zasyadko are upper right. Includes Earthrise. Image credit: Image Science and Analysis Laboratory, NASA-Johnson Space Center. |

|
AS11-41-6020 Browse or print resolution. Part of orbital lunar horizon sequence. Mare Smythe. Babcock and Zasyadko are upper right. Includes Earthrise. Image credit: Image Science and Analysis Laboratory, NASA-Johnson Space Center. |

|
AS11-41-6021 Browse or print resolution. Part of orbital lunar horizon sequence with Mare Smythe. Includes Earthrise. Image credit: Image Science and Analysis Laboratory, NASA-Johnson Space Center. |

|
AS11-41-6020 Browse or print resolution. Part of orbital lunar horizon sequence with Mare Smythe. Includes Earthrise. Image credit: Image Science and Analysis Laboratory, NASA-Johnson Space Center. |

|
AS11-41-6023 Browse or print resolution. Part of orbital lunar horizon sequence with Mare Smythe. Includes Earthrise. Image credit: Image Science and Analysis Laboratory, NASA-Johnson Space Center. |

|
AS11-41-6024 Browse or print resolution. Part of orbital lunar horizon sequence with Mare Smythe. Includes Earthrise. Image credit: Image Science and Analysis Laboratory, NASA-Johnson Space Center. |

|
AS11-41-6025 Browse or print resolution. Part of orbital lunar horizon sequence with Mare Smythe. Includes Earthrise. Image credit: Image Science and Analysis Laboratory, NASA-Johnson Space Center. |

|
AS11-41-6026 Browse or print resolution. Part of orbital lunar horizon sequence with Mare Smythe and Crater Peek. Includes Earthrise. Image credit: Image Science and Analysis Laboratory, NASA-Johnson Space Center. |

|
AS11-41-6027 Browse or print resolution. Part of orbital lunar horizon sequence with Mare Smythe and Crater Peek. Includes Earthrise. Image credit: Image Science and Analysis Laboratory, NASA-Johnson Space Center. |

|
AS11-41-6028 Browse or print resolution. Part of orbital lunar horizon sequence with Mare Smythe and Crater Peek. Includes Earthrise. Image credit: Image Science and Analysis Laboratory, NASA-Johnson Space Center. |

|
AS11-41-6029 Browse or print resolution. Part of orbital lunar horizon sequence with Mare Smythe and Crater Peek in foreground. Schubert C beyond. Includes Earthrise. Image credit: Image Science and Analysis Laboratory, NASA-Johnson Space Center. |

|
AS11-41-6030 Browse or print resolution. Part of orbital lunar horizon sequence. Schubert C in foreground. Craters Back and Schubert beyond. Includes Earthrise. Image credit: Image Science and Analysis Laboratory, NASA-Johnson Space Center. |

|
AS11-41-6031 Browse or print resolution. Part of orbital lunar horizon sequence. Schubert C in foreground. Craters Back and Schubert beyond. Includes Earthrise. Image credit: Image Science and Analysis Laboratory, NASA-Johnson Space Center. |

|
AS11-41-6032 Browse or print resolution. Part of orbital lunar horizon sequence. Craters Back and Schubert. Includes Earthrise. Image credit: Image Science and Analysis Laboratory, NASA-Johnson Space Center. |

|
AS11-41-6033 Browse or print resolution. Part of orbital lunar horizon sequence. Craters Back and Schubert. Includes Earthrise. Image credit: Image Science and Analysis Laboratory, NASA-Johnson Space Center. |

|
AS11-41-6034 Browse or print resolution. Part of orbital lunar horizon sequence. Craters Back and Schubert. Includes Earthrise. Image credit: Image Science and Analysis Laboratory, NASA-Johnson Space Center. |

|
AS11-41-6035 Browse or print resolution. Part of orbital lunar horizon sequence. Craters Back and Schubert cut off in foreground. Includes Earthrise. Image credit: Image Science and Analysis Laboratory, NASA-Johnson Space Center. |

|
AS11-41-6036 Browse or print resolution. Part of orbital lunar horizon sequence. Crater Jenkins. Includes Earthrise. Image credit: Image Science and Analysis Laboratory, NASA-Johnson Space Center. |

|
AS11-41-6037 Browse or print resolution. Part of orbital lunar horizon sequence. Crater Jenkins and Nobih. Includes Earthrise. Image credit: Image Science and Analysis Laboratory, NASA-Johnson Space Center. |

|
AS11-41-6038 Browse or print resolution. Part of orbital lunar horizon sequence. Crater Nobih. Includes Earthrise. Image credit: Image Science and Analysis Laboratory, NASA-Johnson Space Center. |

|
AS11-41-6039 Browse or print resolution. Part of orbital lunar horizon sequence. Craters Nobih and Liouville. Includes Earth. Image credit: Image Science and Analysis Laboratory, NASA-Johnson Space Center. |

|
AS11-41-6040 Browse or print resolution. Part of orbital lunar horizon sequence. Craters Liouville and Respighi. Includes Earth. Image credit: Image Science and Analysis Laboratory, NASA-Johnson Space Center. |

|
AS11-41-6041 Browse or print resolution. Part of orbital lunar horizon sequence. Craters Liouville and Respighi. Includes Earth. Image credit: Image Science and Analysis Laboratory, NASA-Johnson Space Center. |

|
AS11-41-6042 Browse or print resolution. Part of orbital lunar horizon sequence. Craters Liouville and Respighi. Dubyago is upper right. Includes Earth. Image credit: Image Science and Analysis Laboratory, NASA-Johnson Space Center. |

|
AS11-41-6043 Browse or print resolution. Part of orbital lunar horizon sequence. Craters Respighi and Dubyago are upper right. Includes Earth. Image credit: Image Science and Analysis Laboratory, NASA-Johnson Space Center. |

|
AS11-41-6044 Browse or print resolution. Part of orbital lunar horizon sequence. Craters Respighi and Dubyago are upper right. Includes Earth. Image credit: Image Science and Analysis Laboratory, NASA-Johnson Space Center. |

|
AS11-41-6045 Browse or print resolution. Part of orbital lunar horizon sequence. Crater Dubyago is upper right. Mare Spumans on horizon. Petit is bright rayed crater. Includes Earth. Image credit: Image Science and Analysis Laboratory, NASA-Johnson Space Center. |

|
AS11-41-6046 Browse or print resolution. Part of orbital lunar horizon sequence. Mare Spumans and bright-rayed crater Petit. Includes Earth. Image credit: Image Science and Analysis Laboratory, NASA-Johnson Space Center. |

|
AS11-41-6047 Browse or print resolution. Part of orbital lunar horizon sequence. Mare Spumans and bright-rayed crater Petit. Pomortsev and Stewart are dark-floored craters this side of Mare Spumans. Includes Earth. Image credit: Image Science and Analysis Laboratory, NASA-Johnson Space Center. |

|
AS11-41-6048 Browse or print resolution. Part of orbital lunar horizon sequence. Mare Spumans and bright-rayed crater Petit. Pomortsev and Stewart are dark-floored craters this side of Mare Spumans. Includes Earth. Image credit: Image Science and Analysis Laboratory, NASA-Johnson Space Center. |

|
AS11-41-6049 Browse or print resolution. Part of orbital lunar horizon sequence. Mare Spumans and bright-rayed crater Petit. Pomortsev and Stewart are dark-floored craters this side of Mare Spumans. Includes Earth. Image credit: Image Science and Analysis Laboratory, NASA-Johnson Space Center. |

|
AS11-41-6050 Browse or print resolution. Part of orbital lunar horizon sequence. Mare Spumans and bright-rayed crater Petit. Pomortsev and Stewart are cut off in foreground. Includes Earth. Image credit: Image Science and Analysis Laboratory, NASA-Johnson Space Center. |

|
AS11-41-6051 Browse or print resolution. Part of orbital lunar horizon sequence. Mare Spumans and bright-rayed crater Petit. Beyond is Webb and Mare Fecunditatis. Image credit: Image Science and Analysis Laboratory, NASA-Johnson Space Center. |

|
AS11-41-6052 Browse or print resolution. Part of orbital lunar horizon sequence. Mare Spumans in foreground. Bright-rayed crater Petit and Townley above it. Beyond is Webb and Mare Fecunditatis. Image credit: Image Science and Analysis Laboratory, NASA-Johnson Space Center. |

|
AS11-41-6053 Browse or print resolution. Part of orbital lunar horizon sequence. Bright-rayed crater Petit and Townley above it. Apollonius is top right. Webb and Condon in middle distance. Mare Fecunditatis beyond. Image credit: Image Science and Analysis Laboratory, NASA-Johnson Space Center. |

|
AS11-41-6054 Browse or print resolution. Part of orbital lunar horizon sequence. Bright-rayed crater Petit and Townley are upper right. Webb and Condon in middle distance. Mare Fecunditatis beyond. Image credit: Image Science and Analysis Laboratory, NASA-Johnson Space Center. |

|
AS11-41-6055 Browse or print resolution. Part of orbital lunar horizon sequence. Webb and Condon with Mare Fecunditatis beyond. Image credit: Image Science and Analysis Laboratory, NASA-Johnson Space Center. |

|
AS11-41-6056 Browse or print resolution. Part of orbital lunar horizon sequence. Webb and Condon with Mare Fecunditatis beyond. Image credit: Image Science and Analysis Laboratory, NASA-Johnson Space Center. |

|
AS11-41-6057 Browse or print resolution. Part of orbital lunar horizon sequence. Webb and Condon in foreground with Mare Fecunditatis beyond. Image credit: Image Science and Analysis Laboratory, NASA-Johnson Space Center. |

|
AS11-41-6058 Browse or print resolution. Part of orbital lunar horizon sequence. Sinus Successus with Mare Fecunditatis beyond. Image credit: Image Science and Analysis Laboratory, NASA-Johnson Space Center. |

|
AS11-41-6059 Browse or print resolution. Part of orbital lunar horizon sequence. Sinus Successus with Mare Fecunditatis beyond. Image credit: Image Science and Analysis Laboratory, NASA-Johnson Space Center. |

|
AS11-41-6060 Browse or print resolution. Part of orbital lunar horizon sequence. Sinus Successus cut off in foreground with Mare Fecunditatis beyond. Smithson is more distant of two simple craters in mare upper right. Image credit: Image Science and Analysis Laboratory, NASA-Johnson Space Center. |

|
AS11-41-6061 Browse or print resolution. Part of orbital lunar horizon sequence. Mare Fecunditatis. Smithson is more distant of two simple craters in mare upper right. Anville is beyond above three bright craters. Image credit: Image Science and Analysis Laboratory, NASA-Johnson Space Center. |

|
AS11-41-6062 Browse or print resolution. Part of orbital lunar horizon sequence. Mare Fecunditatis. Smithson is more distant of two simple craters in mare upper right. Anville is beyond above three bright craters. Image credit: Image Science and Analysis Laboratory, NASA-Johnson Space Center. |

|
AS11-41-6063 Browse or print resolution. Part of orbital lunar horizon sequence. Mare Fecunditatis. Smithson is more distant of two simple craters in mare upper right. Anville is beyond above three bright craters. Messier and Messier A near horizon lower right. Image credit: Image Science and Analysis Laboratory, NASA-Johnson Space Center. |

|
AS11-41-6064 Browse or print resolution. Part of orbital lunar horizon sequence. Mare Fecunditatis. Smithson is more distant of two simple craters in mare upper right. Anville is beyond above three bright craters. Messier and Messier A near horizon lower right. Image credit: Image Science and Analysis Laboratory, NASA-Johnson Space Center. |

|
AS11-41-6065 Browse or print resolution. Part of orbital lunar horizon sequence. Mare Fecunditatis. Smithson is upper right. Anville is beyond above three bright craters. Messier and Messier A near horizon lower right. Image credit: Image Science and Analysis Laboratory, NASA-Johnson Space Center. |

|
AS11-41-6066 Browse or print resolution. Part of orbital lunar horizon sequence. Mare Fecunditatis. Anville is upper right. Messier and Messier A are lower right. Image credit: Image Science and Analysis Laboratory, NASA-Johnson Space Center. |

|
AS11-41-6067 Browse or print resolution. Part of orbital lunar horizon sequence. Mare Fecunditatis. Anville is upper right. Messier and Messier A are lower right. Image credit: Image Science and Analysis Laboratory, NASA-Johnson Space Center. |

|
AS11-41-6068 Browse or print resolution. Part of orbital lunar horizon sequence. Mare Fecunditatis. Anville is upper right. Messier and Messier A are lower right. Image credit: Image Science and Analysis Laboratory, NASA-Johnson Space Center. |

|
AS11-41-6069 Browse or print resolution. Part of orbital lunar horizon sequence. Mare Fecunditatis. Anville is upper right. Messier and Messier A are lower right. Image credit: Image Science and Analysis Laboratory, NASA-Johnson Space Center. |

|
AS11-41-6070 Browse or print resolution. Part of orbital lunar horizon sequence. Western Mare Fecunditatis. Messier and Messier A are extreme lower right. Mare Tranquillitatis on horizon at top. Image credit: Image Science and Analysis Laboratory, NASA-Johnson Space Center. |

|
AS11-41-6071 Browse or print resolution. Part of orbital lunar horizon sequence. Western Mare Fecunditatis. Mare Tranquillitatis on horizon at top. Image credit: Image Science and Analysis Laboratory, NASA-Johnson Space Center. |

|
AS11-41-6072 Browse or print resolution. Part of orbital lunar horizon sequence. Western Mare Fecunditatis. Mare Tranquillitatis on horizon at top. Montes Secchi and Crater Secchi between. Image credit: Image Science and Analysis Laboratory, NASA-Johnson Space Center. |

|
AS11-41-6073 Browse or print resolution. Part of orbital lunar horizon sequence. Western Mare Fecunditatis. Mare Tranquillitatis on horizon at top. Montes Secchi and Crater Secchi between. Image credit: Image Science and Analysis Laboratory, NASA-Johnson Space Center. |

|
AS11-41-6074 Browse or print resolution. Part of orbital lunar horizon sequence. Western Mare Fecunditatis. Mare Tranquillitatis on horizon at top. Montes Secchi and Crater Secchi between. Image credit: Image Science and Analysis Laboratory, NASA-Johnson Space Center. |

|
AS11-41-6075 Browse or print resolution. Part of orbital lunar horizon sequence. Mare Fecunditatis on lower right. Mare Tranquillitatis top of frame. Crater Secchi is top right. Image credit: Image Science and Analysis Laboratory, NASA-Johnson Space Center. |

|
AS11-41-6076 Browse or print resolution. Part of orbital lunar horizon sequence. Southern Mare Tranquillitatis. Montes Secchi in foreground. Mount Marilyn is triangular feature. Image credit: Image Science and Analysis Laboratory, NASA-Johnson Space Center. |

|
AS11-41-6077 Browse or print resolution. Part of orbital lunar horizon sequence. Southern Mare Tranquillitatis. Mount Marilyn is triangular feature in foreground. Image credit: Image Science and Analysis Laboratory, NASA-Johnson Space Center. |

|
AS11-41-6078 Browse or print resolution. Part of orbital lunar horizon sequence. Southern Mare Tranquillitatis. Mount Marilyn is triangular feature in foreground. Censorinus is bright-rayed crater in distance. Image credit: Image Science and Analysis Laboratory, NASA-Johnson Space Center. |

|
AS11-41-6079 Browse or print resolution. Part of orbital lunar horizon sequence. Southern Mare Tranquillitatis. Censorinus is bright-rayed crater in distance. Image credit: Image Science and Analysis Laboratory, NASA-Johnson Space Center. |

|
AS11-41-6080 Browse or print resolution. Part of orbital lunar horizon sequence. Southern Mare Tranquillitatis. Bright-rayed crater is Censorinus. Image credit: Image Science and Analysis Laboratory, NASA-Johnson Space Center. |

|
AS11-41-6081 Browse or print resolution. Part of orbital lunar horizon sequence. Southern Mare Tranquillitatis. Bright-rayed crater is Censorinus. Tranquillity Base on horizon. Image credit: Image Science and Analysis Laboratory, NASA-Johnson Space Center. |

|
AS11-41-6082 Browse or print resolution. Part of orbital lunar horizon sequence. Southern Mare Tranquillitatis. Bright-rayed crater is Censorinus. Tranquillity Base on horizon. Image credit: Image Science and Analysis Laboratory, NASA-Johnson Space Center. |

|
AS11-41-6083 Browse or print resolution. Part of orbital lunar horizon sequence. Southern Mare Tranquillitatis. Bright-rayed crater is Censorinus. Tranquillity Base on horizon. Crater Maskelyne to upper right. Image credit: Image Science and Analysis Laboratory, NASA-Johnson Space Center. |

|
AS11-41-6084 Browse or print resolution. Part of orbital lunar horizon sequence. Southern Mare Tranquillitatis. Bright-rayed crater is Censorinus. Tranquillity Base in distance. Boot Hill and Duke Island in mid-distance. Crater Maskelyne to upper right. Image credit: Image Science and Analysis Laboratory, NASA-Johnson Space Center. |

|
AS11-41-6085 Browse or print resolution. Part of orbital lunar horizon sequence. Southern Mare Tranquillitatis. Bright-rayed crater on extreme right is Censorinus. Tranquillity Base in distance. Crater Maskelyne to upper right with Boot Hill and Duke Island centre-right. Image credit: Image Science and Analysis Laboratory, NASA-Johnson Space Center. |

|
AS11-41-6086 Browse or print resolution. Part of orbital lunar horizon sequence. Southern Mare Tranquillitatis. Tranquillity Base in distance. Crater Maskelyne to upper right with Boot Hill and Duke Island centre-right. Image credit: Image Science and Analysis Laboratory, NASA-Johnson Space Center. |

|
AS11-41-6087 Browse or print resolution. Part of orbital lunar horizon sequence. Southern Mare Tranquillitatis. Tranquillity Base in distance. Crater Maskelyne to extreme upper right with Boot Hill and Duke Island extreme centre-right. Image credit: Image Science and Analysis Laboratory, NASA-Johnson Space Center. |

|
AS11-41-6088 Browse or print resolution. Part of orbital lunar horizon sequence. Southern Mare Tranquillitatis. Tranquillity Base in mid-distance. Crater Maskelyne B to extreme upper right. Torricelli C and K are bottom right. Moltke is lower centre-right. Image credit: Image Science and Analysis Laboratory, NASA-Johnson Space Center. |

|
AS11-41-6089 Browse or print resolution. Part of orbital lunar horizon sequence. Southern Mare Tranquillitatis. Tranquillity Base in mid-distance. Crater Torricelli C is extreme bottom right. Moltke is lower centre-right. Image credit: Image Science and Analysis Laboratory, NASA-Johnson Space Center. |

|
AS11-41-6090 Browse or print resolution. Part of orbital lunar horizon sequence. Southern Mare Tranquillitatis and Tranquillity Base. Crater Moltke is lower centre-right. Image credit: Image Science and Analysis Laboratory, NASA-Johnson Space Center. |

|
AS11-41-6091 Browse or print resolution. Part of orbital lunar horizon sequence. Southern Mare Tranquillitatis and Tranquillity Base. Crater Moltke is lower centre-right. Armstrong, Collins and Aldrin are visible just above centre-right. Image credit: Image Science and Analysis Laboratory, NASA-Johnson Space Center. |

|
AS11-41-6092 Browse or print resolution. Part of orbital lunar horizon sequence. Southern Mare Tranquillitatis. Tranquillity Base in foreground. Craters Collins and Aldrin are visible just above centre-right. Beyond are large craters Sabine, and beyond it, Ritter. Image credit: Image Science and Analysis Laboratory, NASA-Johnson Space Center. |

|
AS11-41-6093 Browse or print resolution. Part of orbital lunar horizon sequence. Southwestern Mare Tranquillitatis. Aldrin is small crater in foreground. Beyond are large craters Sabine, and beyond it, Ritter with Schmidt just below them. Image credit: Image Science and Analysis Laboratory, NASA-Johnson Space Center. |

|
AS11-41-6094 Browse or print resolution. Part of orbital lunar horizon sequence. Southwestern Mare Tranquillitatis. Craters Sabine, and beyond it, Ritter with Schmidt just below them. Image credit: Image Science and Analysis Laboratory, NASA-Johnson Space Center. |

|
AS11-41-6095 Browse or print resolution. Part of orbital lunar horizon sequence. Southwestern Mare Tranquillitatis and terminator. Craters Sabine, and beyond it, Ritter with Schmidt just below them and Dionysius. Delambre is lower right. Image credit: Image Science and Analysis Laboratory, NASA-Johnson Space Center. |

|
AS11-41-6096 Browse or print resolution. Part of orbital lunar horizon sequence. Sunrise terminator. Craters Ritter, Schmidt and Dionysius are upper right. Delambre is lower right. Image credit: Image Science and Analysis Laboratory, NASA-Johnson Space Center. |

|
AS11-41-6097 Browse or print resolution. Part of orbital lunar horizon sequence. Sunrise terminator. Craters Dionysius and Cayley are upper right. Delambre is cut off lower right. Image credit: Image Science and Analysis Laboratory, NASA-Johnson Space Center. |

|
AS11-41-6098 Browse or print resolution. Part of orbital lunar horizon sequence. Sunrise terminator. Craters Dionysius and Cayley are upper right. Theon Junior and Theon Senior are lower right. Image credit: Image Science and Analysis Laboratory, NASA-Johnson Space Center. |

|
AS11-41-6099 Browse or print resolution. Part of orbital lunar horizon sequence. Sunrise terminator. Crater Theon Senior in the foreground. Image credit: Image Science and Analysis Laboratory, NASA-Johnson Space Center. |

|
AS11-41-6100 Browse or print resolution. Part of orbital lunar horizon sequence. Sunrise terminator. Landscape west of crater Theon Senior. Image credit: Image Science and Analysis Laboratory, NASA-Johnson Space Center. |

|
AS11-41-6101 Browse or print resolution. Part of orbital lunar horizon sequence. Sunrise terminator. Landscape west of crater Theon Senior. Image credit: Image Science and Analysis Laboratory, NASA-Johnson Space Center. |

|
AS11-41-6102 Browse or print resolution. Part of orbital lunar horizon sequence. Sunrise terminator. Landscape west of crater Theon Senior. Image credit: Image Science and Analysis Laboratory, NASA-Johnson Space Center. |

|
AS11-41-6103 Browse or print resolution. Part of orbital lunar horizon sequence. Sunrise terminator. Landscape west of crater Theon Senior. Image credit: Image Science and Analysis Laboratory, NASA-Johnson Space Center. |

|
AS11-41-6104 Browse or print resolution. Part of orbital lunar horizon sequence. Sunrise terminator. Landscape west of crater Theon Senior. Image credit: Image Science and Analysis Laboratory, NASA-Johnson Space Center. |

|
AS11-41-6105 Browse or print resolution. Part of orbital lunar horizon sequence. Sunrise terminator. Landscape west of crater Theon Senior though frame is almost completely dark. Image credit: Image Science and Analysis Laboratory, NASA-Johnson Space Center. |

|
AS11-41-6106 Browse or print resolution. Part of orbital lunar horizon sequence. Completely dark frame. Image credit: Image Science and Analysis Laboratory, NASA-Johnson Space Center. |

|
AS11-41-6107 Browse or print resolution. Part of orbital lunar horizon sequence. Completely dark frame. Image credit: Image Science and Analysis Laboratory, NASA-Johnson Space Center. |

|
AS11-41-6108 Browse or print resolution. Part of orbital lunar horizon sequence. Completely dark frame. Image credit: Image Science and Analysis Laboratory, NASA-Johnson Space Center. |

|
AS11-41-6109 Browse or print resolution. First frame of orbital lunar horizon sequence across southwest Mare Tranquillitatis to terminator. Maskelyne at upper left. Image credit: Image Science and Analysis Laboratory, NASA-Johnson Space Center. |

|
AS11-41-6110 Browse or print resolution. Part of orbital lunar horizon sequence across southwest Mare Tranquillitatis. Maskelyne at upper left. Image credit: Image Science and Analysis Laboratory, NASA-Johnson Space Center. |

|
AS11-41-6111 Browse or print resolution. Part of orbital lunar horizon sequence across southwest Mare Tranquillitatis. Part of Maskelyne at top. Image credit: Image Science and Analysis Laboratory, NASA-Johnson Space Center. |

|
AS11-41-6112 Browse or print resolution. Part of orbital lunar horizon sequence across southwest Mare Tranquillitatis. Maskelyne B and part of Maskelyne at top, Boot Hill and Duke Island at bottom. Image credit: Image Science and Analysis Laboratory, NASA-Johnson Space Center. |

|
AS11-41-6113 Browse or print resolution. Part of orbital lunar horizon sequence across southwest Mare Tranquillitatis. Maskelyne B and part of Maskelyne at upper right, Boot Hill and Duke Island at lower left. Image credit: Image Science and Analysis Laboratory, NASA-Johnson Space Center. |

|
AS11-41-6114 Browse or print resolution. Part of orbital lunar horizon sequence across southwest Mare Tranquillitatis. Maskelyne B at upper right. Image credit: Image Science and Analysis Laboratory, NASA-Johnson Space Center. |

|
AS11-41-6115 Browse or print resolution. Part of orbital lunar horizon sequence across southwest Mare Tranquillitatis. Image credit: Image Science and Analysis Laboratory, NASA-Johnson Space Center. |

|
AS11-41-6116 Browse or print resolution. Part of orbital lunar horizon sequence across southwest Mare Tranquillitatis. Image credit: Image Science and Analysis Laboratory, NASA-Johnson Space Center. |

|
AS11-41-6117 Browse or print resolution. Part of orbital lunar horizon sequence across southwest Mare Tranquillitatis. Image credit: Image Science and Analysis Laboratory, NASA-Johnson Space Center. |

|
AS11-41-6118 Browse or print resolution. Part of orbital lunar horizon sequence across southwest Mare Tranquillitatis. Image credit: Image Science and Analysis Laboratory, NASA-Johnson Space Center. |

|
AS11-41-6119 Browse or print resolution. Part of orbital lunar horizon sequence across southwest Mare Tranquillitatis. Sabine and Ritter upper left. Image credit: Image Science and Analysis Laboratory, NASA-Johnson Space Center. |

|
AS11-41-6120 Browse or print resolution. Part of orbital lunar horizon sequence across southwest Mare Tranquillitatis. Sabine and Ritter at top. Image credit: Image Science and Analysis Laboratory, NASA-Johnson Space Center. |

|
AS11-41-6121 Browse or print resolution. Part of orbital lunar horizon sequence across southwest Mare Tranquillitatis. Sabine and Ritter at top. Image credit: Image Science and Analysis Laboratory, NASA-Johnson Space Center. |

|
AS11-41-6122 Browse or print resolution. Part of orbital lunar horizon sequence across southwest Mare Tranquillitatis. Sabine and Ritter at upper right. Schmidt is centre. Image credit: Image Science and Analysis Laboratory, NASA-Johnson Space Center. |

|
AS11-41-6123 Browse or print resolution. Part of orbital lunar horizon sequence west of Mare Tranquillitatis. Sabine and Ritter at upper right. Schmidt is centre. Image credit: Image Science and Analysis Laboratory, NASA-Johnson Space Center. |

|
AS11-41-6124 Browse or print resolution. Part of orbital lunar horizon sequence west of Mare Tranquillitatis. Ritter is upper right, Schmidt is to the right. Image credit: Image Science and Analysis Laboratory, NASA-Johnson Space Center. |

|
AS11-41-6125 Browse or print resolution. Part of orbital lunar horizon sequence west of Mare Tranquillitatis. Image credit: Image Science and Analysis Laboratory, NASA-Johnson Space Center. |

|
AS11-41-6126 Browse or print resolution. Part of orbital lunar horizon sequence west of Mare Tranquillitatis. Image credit: Image Science and Analysis Laboratory, NASA-Johnson Space Center. |

|
AS11-41-6127 Browse or print resolution. Part of orbital lunar horizon sequence west of Mare Tranquillitatis. Image credit: Image Science and Analysis Laboratory, NASA-Johnson Space Center. |

|
AS11-41-6128 Browse or print resolution. Part of orbital lunar horizon sequence west of Mare Tranquillitatis. Image credit: Image Science and Analysis Laboratory, NASA-Johnson Space Center. |

|
AS11-41-6129 Browse or print resolution. Part of orbital lunar horizon sequence west of Mare Tranquillitatis. Image credit: Image Science and Analysis Laboratory, NASA-Johnson Space Center. |

|
AS11-41-6130 Browse or print resolution. Part of orbital lunar horizon sequence west of Mare Tranquillitatis. Image credit: Image Science and Analysis Laboratory, NASA-Johnson Space Center. |

|
AS11-41-6131 Browse or print resolution. Part of orbital lunar horizon sequence west of Mare Tranquillitatis. Image credit: Image Science and Analysis Laboratory, NASA-Johnson Space Center. |

|
AS11-41-6132 Browse or print resolution. Part of orbital lunar horizon sequence west of Mare Tranquillitatis. Image credit: Image Science and Analysis Laboratory, NASA-Johnson Space Center. |

|
AS11-41-6133 Browse or print resolution. Part of orbital lunar horizon sequence west of Mare Tranquillitatis. Image credit: Image Science and Analysis Laboratory, NASA-Johnson Space Center. |

|
AS11-41-6134 Browse or print resolution. Part of orbital lunar horizon sequence. Essentially dark frame. Image credit: Image Science and Analysis Laboratory, NASA-Johnson Space Center. |

|
AS11-41-6135 Browse or print resolution. Part of orbital lunar horizon sequence. Completely dark frame. Image credit: Image Science and Analysis Laboratory, NASA-Johnson Space Center. |

|
AS11-41-6136 Browse or print resolution. No description. Image credit: Image Science and Analysis Laboratory, NASA-Johnson Space Center. |

|
AS11-41-6137 Browse or print resolution. No description. Image credit: Image Science and Analysis Laboratory, NASA-Johnson Space Center. |

|
AS11-41-6138 Browse or print resolution. Amici T. Image credit: Image Science and Analysis Laboratory, NASA-Johnson Space Center. |

|
AS11-41-6139 Browse or print resolution. Area west of Daedalus. Image credit: Image Science and Analysis Laboratory, NASA-Johnson Space Center. |

|
AS11-41-6140 Browse or print resolution. Probably Amici U. Image credit: Image Science and Analysis Laboratory, NASA-Johnson Space Center. |

|
AS11-41-6141 Browse or print resolution. Rim of Icarus V on the right. Image credit: Image Science and Analysis Laboratory, NASA-Johnson Space Center. |

|
AS11-41-6142 Browse or print resolution. Icarus V. Image credit: Image Science and Analysis Laboratory, NASA-Johnson Space Center. |

|
AS11-41-6143 Browse or print resolution. Icarus V. Image credit: Image Science and Analysis Laboratory, NASA-Johnson Space Center. |

|
AS11-41-6144 Browse or print resolution. Icarus V. Image credit: Image Science and Analysis Laboratory, NASA-Johnson Space Center. |

|
AS11-41-6145 Browse or print resolution. Area between Daedalus and Icarus. Image credit: Image Science and Analysis Laboratory, NASA-Johnson Space Center. |

|
AS11-41-6146 Browse or print resolution. Daedalus G. Image credit: Image Science and Analysis Laboratory, NASA-Johnson Space Center. |

|
AS11-41-6147 Browse or print resolution. Area east of Daedalus. Image credit: Image Science and Analysis Laboratory, NASA-Johnson Space Center. |

|
AS11-41-6148 Browse or print resolution. Area east of Lipsky. Image credit: Image Science and Analysis Laboratory, NASA-Johnson Space Center. |

|
AS11-41-6149 Browse or print resolution. Area east of Lipsky. Image credit: Image Science and Analysis Laboratory, NASA-Johnson Space Center. |

|
AS11-41-6150 Browse or print resolution. Daedalus B. Image credit: Image Science and Analysis Laboratory, NASA-Johnson Space Center. |

|
AS11-41-6151 Browse or print resolution. Interior of Daedalus and central peaks. Image credit: Image Science and Analysis Laboratory, NASA-Johnson Space Center. |

|
AS11-41-6152 Browse or print resolution. South rim of Daedalus. Daedalus M is sharp crater just beyond rim Image credit: Image Science and Analysis Laboratory, NASA-Johnson Space Center. |

|
AS11-41-6153 Browse or print resolution. Interior of Daedalus. Image credit: Image Science and Analysis Laboratory, NASA-Johnson Space Center. |

|
AS11-41-6154 Browse or print resolution. Rim of Daedalus W. Image credit: Image Science and Analysis Laboratory, NASA-Johnson Space Center. |

|
AS11-41-6155 Browse or print resolution. Daedalus S cut off in foreground. Image credit: Image Science and Analysis Laboratory, NASA-Johnson Space Center. |

|
AS11-41-6156 Browse or print resolution. Daedalus R on left. Image credit: Image Science and Analysis Laboratory, NASA-Johnson Space Center. |

|
AS11-41-6157 Browse or print resolution. Daedalus S. Image credit: Image Science and Analysis Laboratory, NASA-Johnson Space Center. |

|
AS11-41-6158 Browse or print resolution. Terrain south of Coriolis L and M. Image credit: Image Science and Analysis Laboratory, NASA-Johnson Space Center. |

|
AS11-41-6159 Browse or print resolution. West of far-side crater Daedalus. Image credit: Image Science and Analysis Laboratory, NASA-Johnson Space Center. |
| 70-mm magazine S - AS11-40-5844 to 5970 |
Photography Index | 70-mm magazine U - AS11-42-6160 to 6348 |